
Related Manuals for FujiFilm CR-IR341


Summary of Contents for FujiFilm CR-IR341
- Page 1 FUJI COMPUTED RADIOGRAPHY CR-IR341 (FCR 5000) CR-IR341P (FCR 5000plus) Service Manual Document No. 009-051-07 1 st Edition - June 20, 1998 Revised Edition - Aug. 30, 2001 Fuji Photo Film Co., Ltd. Printed in Japan...
- Page 2 All rights reserved. No part of this publication may be reproduced, stored in a retrieval system, or transmitted in any form or by means, electronic, mechanical, photocopying, recording or otherwise, without the prior written permission of Fuji Photo Film Co., Ltd. Miyanodai Technology Development Center. 009-051-05 CR-IR341 Service Manual 04.20.2001 FM3006...
- Page 3 Getting Started Scope This Service Manual is applicable to Fuji Computed Radiography CR-IR341 and CR-IR341P. The machine is categorized as Class 1 according to IEC classification. For the console (hereinafter abbreviated as CSL), reference should be made to the Service Manual for ID-T741 or CR-IR348CL.
- Page 4 Inspection/calibration manual No. Calibration Name Inspection Dosimeter – Steel rule (150mm) – – Steel rule (300mm) ECN No. FCR-A014 Digital tester – Calipers Push-pull gauge : A block gauge for use in inspection requires calibration. TR1H0001.EPS 009-051-07 CR-IR341 Service Manual 08.30.2001 FM3115...
- Page 5 Do not make any alternation or modification that may impair their functionality. Fixing Adjustable Foot As anti-vibration measures for the machine, fix its adjustable feet onto the floor in place. 009-051-07 CR-IR341 Service Manual 0.3_1 08.30.2001 FM3115...
- Page 6 • Upon completion of the servicing procedures, put the protective housings, retaining screws, and cover grounding back exactly where they were, and secure them in place. 009-051-07 CR-IR341 Service Manual 0.3_2 08.30.2001 FM3115...
- Page 7 Labels and Protective Housings for Laser Safty “Safety Labels page 0.36” “Protective Housings Against Laser Exposure page 0.40” 009-051-07 CR-IR341 Service Manual 0.3_3 08.30.2001 FM3115...
- Page 8 0.3_4 Safety Precaution BLANK PAGE 009-051-07 CR-IR341 Service Manual 0.3_4 08.30.2001 FM3115...
- Page 9 BLANK PAGE CR-IR341 Service Manual 009-051-07 08.30.2001 FM3115...
- Page 10 BLANK PAGE 009-051-07 CR-IR341 Service Manual 08.30.2001 FM3115...
-
Page 11: Table Of Contents
Contents Maintenance Machine Description CR-IR341 Service Manual – Contents Maintenance (M) Machine Description (MD) Overall Configuration and Nomenclature of Machine ........... MD - 2 1.1 External View of Machine ................MD - 2 1.2 Configuration of Machine................MD - 3 Features of Machine .................... - Page 12 3. Machine Operation During Secondary Erasure ......... MD - 104 3.1 Summary of Operation ................. MD - 104 3.2 Side-Positioning (Secondary Erasure) ..........MD - 105 3.3 Reading (Secondary Erasure).............. MD - 105 3.4 Erasure Conveyance ................MD - 108 009-051-04 CR-IR341 Service Manual 05.31.99 FM2460...
- Page 13 MD - 166 8.1 Timer Settings ..................MD - 166 8.2 Retry Count Settings ................MD - 171 8.3 Erasure Conveyance Table ..............MD - 172 8.4 Pulse Motor Parameters ............... MD - 174 CR-IR341 Service Manual 009-051-04 05.31.99 FM2460...
- Page 14 9.6 Data on Grip Springs ................MD - 186 10. Information on Board LEDs ................. MD - 188 11. Interlock ......................MD - 190 12. Description of Initialization Self-Diagnostic Steps and Shutdown Operation ................MD - 192 009-051-04 CR-IR341 Service Manual 05.31.99 FM2460...
- Page 15 Switchback Conveyance Error ............MT - 112 03D3 Before-Erasure Conveyance Error ..........MT - 114 03D4 Branch Path Changeover Guide Operation Error ......MT - 116 03D5 Erasure Conveyance Error............. MT - 118 CR-IR341 Service Manual 0.10 009-051-04 05.31.99 FM2460...
- Page 16 Machine Circuit Diagram ..................MT - 198 Power Supply Circuit Diagram................MT - 217 Appendix 1. Supplementary Information ................MT_A1-1 Appendix 1.1 Setting of Error Code to be Captured for IO Trace..... MT_A1-1 009-051-06 009-051-04 CR-IR341 Service Manual 0.11 04.20.2001 FM3006 05.31.99 FM2460...
- Page 17 5.7 Replacing IP Leak Valve (SVB1) ..............MC - 70 5.8 Replacing Suction Cups.................. MC - 71 5.9 Replacing Suction Cup Drive Motor (MB1)............ MC - 73 5.10 Replacing IP Transport Motor (MB2)............MC - 75 CR-IR341 Service Manual 0.12 009-051-04 05.31.99 FM2460...
- Page 18 8.12 Checking, Replacing, and Adjusting Side-Positioning Conveyor IP Conveyance Timing Belt ................. MC - 127 8.13 Replacing Side-Positioning Conveyor Rubber Rollers ......MC - 130 8.14 Checking and Replacing Shock Absorbers of Side-Positioning Conveyor..............MC - 131 009-051-04 CR-IR341 Service Manual 0.13 05.31.99 FM2460...
- Page 19 11.3 Replacing Grip Release Motor (ME1) ............MC - 215 11.4 Replacing IP Transport Motor (ME2) ............MC - 216 11.5 Checking and Replacing Shock Absorber of After-Reading Conveyor .. MC - 217 CR-IR341 Service Manual 0.14 009-051-05 11.20.99 FM2638...
- Page 20 15.1 Standard Tools ....................MC - 264 15.2 Special Tools and Measuring Instruments ..........MC - 268 15.3 Special Consumables .................. MC - 269 15.4 Semi-Standard Tools ................... MC - 270 009-051-04 009-051-04 CR-IR341 Service Manual 0.15 05.31.99 FM2460 (2) 05.31.99 FM2460...
- Page 21 16.11 DRV08A Board ..................... MC - 284 16.12 SNS08A Board....................MC - 285 16.13 Other Boards ....................MC - 286 16.14 How to Check the Fuse on the Board ............MC - 287 009-051-07 CR-IR341 Service Manual 0.16 08.30.2001 FM3115...
- Page 22 0.17 Contents Maintenance Checks, Replacement and Adjustment of Parts BLANK PAGE 009-051-06 009-051-04 CR-IR341 Service Manual 0.17 04.20.2001 FM3006 05.31.99 FM2460...
- Page 23 MU - 55 7.8 NETWORK HOST INTERFACE (DEVICE) ............. MU - 56 7.9 HOSTS ADDRESS (HOSTS) ................MU - 58 7.10 DISTRIBUTION (CODEDSTB) ................ MU - 60 7.11 ROUTING (ROUTE) ..................MU - 61 009-051-07 CR-IR341 Service Manual 0.18 08.30.2001 FM3115...
- Page 24 11.6 5. UNIT: 2. UP-DOWN UNIT: Operation Tests on Elevation Unit ..... MU - 100 11.7 5. UNIT: 3. SIDE-POSITIONING GRIP: Operation Tests on Side-Positioning Mechanism Grip ............MU - 101 009-051-05 009-051-06 CR-IR341 Service Manual 0.19 11.20.99 FM2638 04.20.2001 FM3006...
- Page 25 16.3 Installing “Menu Default FD for USA” Setup File (Only for Use in USA/CSL Type) ..............MU - 160 List of Software Files ....................MU - 162 17.1 SYSTEM ......................MU - 162 17.2 LOG ....................... MU - 169 009-051-05 CR-IR341 Service Manual 0.20 11.20.99 FM2638...
- Page 26 0.21 Contents Maintenance Maintenance Utility BLANK PAGE 009-051-05 009-051-06 CR-IR341 Service Manual 0.21 11.20.99 FM2638 04.20.2001 FM3006...
- Page 27 INDEX 08B ERASURE CONVEYOR 2 .................. SP - 70 INDEX 08C ERASURE CONVEYOR 3 .................. SP - 72 INDEX 08D ERASURE CONVEYOR 4 .................. SP - 74 INDEX 09 LAMP UNIT ......................SP - 76 CR-IR341 Service Manual 0.22 009-051-05 11.20.99 FM2638 (1)
- Page 28 INDEX 16 PARTS NOS. SEARCH TABLE ................SP - 106 INDEX 17 TABLE OF SCREWS / WASHERS INDICATION SYMBOLS ......SP - 116 INDEX 18 LIST OF QUICK WEARING PARTS ..............SP - 117 009-051-05 CR-IR341 Service Manual 0.23 11.20.99 FM2638...
- Page 29 3.29 Pushing in Scanner Unit ................. PM - 75 3.30 Cleaning Rubber Rollers ................PM - 77 3.31 Reinstalling and Cleaning Covers ..............PM - 79 3.32 Setting Date and Time ................... PM - 82 009-051-05 CR-IR341 Service Manual 0.24 11.20.99 FM2638...
- Page 30 3.33 Clearing Error Log ................... PM - 84 3.34 Turning ON High-Voltage Switch (Software Switch) ........PM - 85 3.35 Checking Image ....................PM - 86 Maintenance to Be Performed in 6 Years..............PM - 88 009-051-04 CR-IR341 Service Manual 0.25 05.31.99 FM2460...
- Page 31 Determination of System Configuration ..............IN - 8 2.1 Connectable Peripherals and Software Versions .......... IN - 8 2.2 Information on Optional Boards for CR-IR341 ..........IN - 10 2.3 Basic Pattern of System Configuration ............IN - 11 2.3.1 Pattern Where IDT-IV Is Connected to CPU90E ......
- Page 32 6.6 Turning ON the Power .................. IN - 134 6.7 Measuring and Adjusting Voltage ............... IN - 137 6.8 Clearing Backup Memory ................IN - 138 6.9 Setting Date and Time .................. IN - 140 009-051-07 CR-IR341 Service Manual 0.27 08.30.2001 FM3115...
- Page 33 8.7 Checking and Deleting Error Logs That Occur during Setup ....IN - 168 8.8 Checking Machine Shutdown ..............IN - 169 8.9 Cleaning Covers.................... IN - 170 8.10 Attachment of Labels ................... IN - 171 009-051-05 CR-IR341 Service Manual 0.28 11.20.99 FM2638...
- Page 34 Appendix 7.2 *** ................... IN_A7 - 19 Appendix 8. Menu Editor Settings ..................IN_A8 - 1 Appendix 9. Procedures for Connecting with CR Console (CR-IR348CL) ..... IN_A9 - 1 009-051-07 009-051-07 CR-IR341 Service Manual 0.29 08.30.2001 FM3115 08.30.2001 FM3115 (1)
- Page 35 If the version of Acrobat Reader is older than 3.0, the electronic manual cannot be viewed or, if it can be viewed, its specific features may not be guaranteed. Refer- ring to the “Read Me” file, install a proper version of Acrobat Reader. CR-IR341 Service Manual 0.30 009-051-04...
- Page 36 On the electronic version of the manual, you can skip pages with reference to the “chapter icon” to access your desired section quickly. Supplementary Note about Machine Name It should be understood in the Service Manual that the “CR-IR341” is the same as the “FCR5000”. 009-051-04 CR-IR341 Service Manual 0.31...
- Page 37 0.32 How Service Manual Is Organized Organizational Differences from Preceding Manuals The CR-IR341 service manual substantially differs from the preceding (9000 Series and other) manuals in organizational structure. Structural changes have been made for the following three purposes. • To provide increased compactness.
- Page 38 5. Machine Circuit Diagram Compiled as one Description of 6. Power Supply Circuit Diagram Appendix 4 Descriptions of Mechanism Machine article. Electrical system Operations and scanner operations are also covered. Appendix 5 Problems and Remedies TR1B1014.EPS 009-051-04 CR-IR341 Service Manual 0.33 05.31.99 FM2460...
- Page 39 “Troubleshooting Flows,” report the employed procedures, progress, and results to the Service Headquarters. Such reports will be utilized for future service manual improvement and machine serviceability enhancement. CR-IR341 Service Manual 0.34 009-051-04 05.31.99 FM2460...
- Page 40 Maintenance Space When performing maintenance procedures, secure sufficient space for that purpose. Height: 1900 or more 700 or more Rear Machine 600 or more 700 or more Front 700 or more Unit: mm FR1H4029.EPS 009-051-04 CR-IR341 Service Manual 0.35 05.31.99 FM2460...
- Page 41 Identification Label HHS Label #1 EN 60825-1: 1996 Class 3B Panel Label HHS Label #1 EN 60825-1: 1996 EN 60825-1: 1996 Class 3B Panel Label Class 1 Product Label HHS Label #2 FR1B1068.EPS CR-IR341 Service Manual 0.36 009-051-04 05.31.99 FM2460...
- Page 42 HHS Label #2 DANGER DANGER Laser radiation when open external cover Laser radiation when open AVOID DIRECT EXPOSURE TO BEAM AVOID DIRECT EXPOSURE TO BEAM FR1B1046.EPS FR1B1045.EPS EN 60825-1: 1996 Class 1 Product Label FR1B1044.EPS 009-051-07 CR-IR341 Service Manual 0.37 08.30.2001 FM3115...
- Page 43 0.38 Safety Labels EN 60825-1: 1996 Class 3B Panel Label FR1B1047.EPS Labels Label Attachment Locations Left-hand side Ratings Indication Label Manufacturer Label Acceptance Electric Shock Label Warning Label FR1B1035.EPS 009-051-07 CR-IR341 Service Manual 0.38 08.30.2001 FM3115...
- Page 44 TOKYO 106-8620, JAPAN TOKYO 106-8620, JAPAN FUJI COMPUTED RADIOGRAPHY FUJI COMPUTED RADIOGRAPHY CR—IR341 MODEL 50-60Hz 120-240V~ 6.7-3.3A 405N 2313A FR1B1142.EPS Manufacturer Label Acceptance Label EXAMINED GOOD F U J I K I K I FR1B1038.EPS 009-051-07 CR-IR341 Service Manual 0.39 08.30.2001 FM3115...
- Page 45 Upper rear cover Upper left-hand side cover Lower rear cover Lower left-hand side cover Upper front cover Upper right-hand side cover Lower right-hand side cover Lower inner front cover Lower front cover FR1B1048.EPS 009-051-04 CR-IR341 Service Manual 0.40 05.31.99 FM2460...
- Page 46 The removable protective housing for the scanning optics unit is illustrated below. Note that the single piece marked by in the illustration below represents a protective housing against laser exposure. Top cover FR1B1049.EPS 009-051-04 CR-IR341 Service Manual 0.41 05.31.99 FM2460...
-
Page 47: Maintenance (M)
CR-IR341/CR-IR341P Service Manual Maintenance (M) Machine Description (MD) Troubleshooting (MT) Checks, Replacement and Adjustment of Parts (MC) Maintenance Utility (MU) - Page 48 BLANK PAGE 009-051-04 CR-IR341 Service Manual 05.31.99 FM2460...
- Page 49 Maintenance - 0.1 Contents Maintenance Machine Description CR-IR341 Service Manual – Contents Maintenance (M) Machine Description (MD) Overall Configuration and Nomenclature of Machine ........... MD - 2 1.1 External View of Machine ................MD - 2 1.2 Configuration of Machine................
- Page 50 MD - 104 3.1 Summary of Operation ................. MD - 104 3.2 Side-Positioning (Secondary Erasure) ..........MD - 105 3.3 Reading (Secondary Erasure).............. MD - 105 3.4 Erasure Conveyance ................MD - 108 CR-IR341 Service Manual Maintenance - 0.2 009-051-04 05.31.99 FM2460...
- Page 51 8.1 Timer Settings ..................MD - 166 8.2 Retry Count Settings ................MD - 171 8.3 Erasure Conveyance Table ..............MD - 172 8.4 Pulse Motor Parameters ............... MD - 174 009-051-04 CR-IR341 Service Manual Maintenance - 0.3 05.31.99 FM2460...
- Page 52 MD - 186 10. Information on Board LEDs ................. MD - 188 11. Interlock ......................MD - 190 12. Description of Initialization Self-Diagnostic Steps and Shutdown Operation ................MD - 192 CR-IR341 Service Manual Maintenance - 0.4 009-051-04 05.31.99 FM2460...
- Page 53 Switchback Conveyance Error ............MT - 112 03D3 Before-Erasure Conveyance Error ..........MT - 114 03D4 Branch Path Changeover Guide Operation Error ......MT - 116 03D5 Erasure Conveyance Error ............. MT - 118 009-051-04 CR-IR341 Service Manual Maintenance - 0.5 05.31.99 FM2460...
- Page 54 MT - 198 Power Supply Circuit Diagram ................MT - 217 Appendix 1. Supplementary Information ................MT_A1-1 Appendix 1.1 Setting of Error Code to be Captured for IO Trace..... MT_A1-1 009-051-06 CR-IR341 Service Manual Maintenance - 0.6 009-051-04 04.20.2001 FM3006 05.31.99 FM2460...
- Page 55 5.7 Replacing IP Leak Valve (SVB1) ..............MC - 70 5.8 Replacing Suction Cups.................. MC - 71 5.9 Replacing Suction Cup Drive Motor (MB1)............ MC - 73 5.10 Replacing IP Transport Motor (MB2)............MC - 75 009-051-04 CR-IR341 Service Manual Maintenance - 0.7 05.31.99 FM2460...
- Page 56 8.12 Checking, Replacing, and Adjusting Side-Positioning Conveyor IP Conveyance Timing Belt ................. MC - 127 8.13 Replacing Side-Positioning Conveyor Rubber Rollers ......MC - 130 8.14 Checking and Replacing Shock Absorbers of Side-Positioning Conveyor..............MC - 131 CR-IR341 Service Manual Maintenance - 0.8 009-051-04 05.31.99 FM2460...
- Page 57 11.3 Replacing Grip Release Motor (ME1) ............MC - 215 11.4 Replacing IP Transport Motor (ME2) ............MC - 216 11.5 Checking and Replacing Shock Absorber of After-Reading Conveyor.. MC - 217 009-051-05 CR-IR341 Service Manual Maintenance - 0.9 11.20.99 FM2638...
- Page 58 MC - 264 15.2 Special Tools and Measuring Instruments ..........MC - 268 15.3 Special Consumables ..................MC - 269 15.4 Semi-Standard Tools ..................MC - 270 009-051-04 CR-IR341 Service Manual Maintenance - 0.10 009-051-04 05.31.99 FM2460 (2) 05.31.99 FM2460...
- Page 59 16.11 DRV08A Board ..................... MC - 284 16.12 SNS08A Board....................MC - 285 16.13 Other Boards ....................MC - 286 16.14 How to Check the Fuse on the Board ............MC - 287 009-051-07 CR-IR341 Service Manual Maintenance - 0.11 08.30.2001 FM3115...
- Page 60 7.8 NETWORK HOST INTERFACE (DEVICE) ............. MU - 56 7.9 HOSTS ADDRESS (HOSTS) ................MU - 58 7.10 DISTRIBUTION (CODEDSTB) ................ MU - 60 7.11 ROUTING (ROUTE) ..................MU - 61 009-051-07 CR-IR341 Service Manual Maintenance - 0.12 08.30.2001 FM3115...
- Page 61 11.6 5. UNIT: 2. UP-DOWN UNIT: Operation Tests on Elevation Unit ..... MU - 100 11.7 5. UNIT: 3. SIDE-POSITIONING GRIP: Operation Tests on Side-Positioning Mechanism Grip ............MU - 101 009-051-05 009-051-06 CR-IR341 Service Manual Maintenance - 0.13 11.20.99 FM2638 04.20.2001 FM3006...
- Page 62 16.3 Installing “Menu Default FD for USA” Setup File (Only for Use in USA/CSL Type) ..............MU - 160 List of Software Files ....................MU - 162 17.1 SYSTEM ......................MU - 162 17.2 LOG ....................... MU - 169 009-051-05 CR-IR341 Service Manual Maintenance - 0.14 11.20.99 FM2638...
-
Page 63: Machine Description (Md)
CR-IR341/CR-IR341P Service Manual Machine Description (MD) - Page 64 (FM2460) 04/20/2001 Corrections (FM3006) MD-12, 14, 34, 36, 53, 61, 102, 124, 128, 129, 136, 140, 164, 165, 172–175, 175.1, 175.2 08/30/2001 Additional information for LAN board MD-12, 34, 36 (FM3115) 009-051-07 CR-IR341 Service Manual MD - 1 08.30.2001 FM3115...
-
Page 65: Overall Configuration And Nomenclature Of Machine
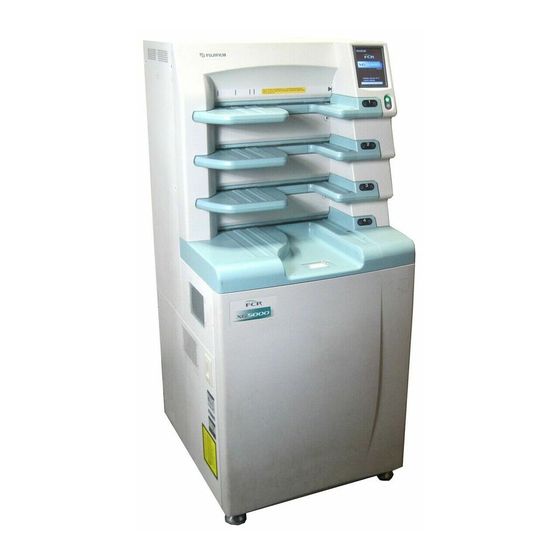
MD - 2 ONTENTS Overall Configuration and Nomenclature of Machine External View of Machine FR1H1221.EPS CR-IR341 Service Manual MD - 2 009-051-04 05.31.99 FM2460... -
Page 66: Configuration Of Machine
Erasure conveyor (F) Power supply unit Light-collecting guide assembly Scanning optics unit Side-positioning conveyor (D) Subscanning unit After-reading conveyor (E) Housing (G) NOTE: An alphabet in parentheses denotes a unit symbol. FR1H1222.EPS 009-051-04 CR-IR341 Service Manual MD - 3 05.31.99 FM2460... -
Page 67: Features Of Machine
High-output LD for enhanced image quality Because a high-output LD is used to achieve enhanced image quality. The CR-IR341 with standard specifications retains image quality equivalent to the high-resolution mode of the FCR9000 series. -
Page 68: Image Network I/F Option
ONTENTS MD - 5 Image Network I/F Option The CR-IR341 comes standard with an Ethernet interface for an ID network. In addition, a high-speed image network interface option for an image network may be installed. Hardware Specs • IEEE802.3 (10Base-TX) •... -
Page 69: New Parts With Better Serviceability
MD - 6 New Parts with Better Serviceability The CR-IR341 employs new parts with better serviceability. They should be handled in a different manner than with conventional parts. When servicing the CR-IR341 for the first time, check the mechanisms of such new parts and their locations. -
Page 70: Snap-Fit Pinion Gears Employed
Shaft Pinion gear Pinion gear Shaft Latch Latch FR1H1494.EPS FRONT IP removal unit Snap-fit pinion gear Latch Vertical conveyor : Location employed Before-side- positioning conveyor Erasure conveyor FR1H1223.EPS 009-051-04 CR-IR341 Service Manual MD - 7 05.31.99 FM2460... -
Page 71: Simple Bearing Employed
As a bearing for a shaft onto which relatively less load is applied, a plastic bearing that is easy to install and remove is employed. Bearing Before-side- FRONT positioning conveyor : Location employed Erasure conveyor FR1H1224.EPS CR-IR341 Service Manual 009-051-04 MD - 8 05.31.99 FM2460... -
Page 72: Tensioner Not Requiring Tension Adjustment
(3) Remove the timing belt. Vertical conveyor Timing belt Loosen Tensioner screw Before-side- positioning conveyor FRONT Timing belt Tensioner Vertical conveyor Loosen screw Before-side- Erasure conveyor positioning conveyor Before-side- Erasure conveyor positioning conveyor FR1H1226.EPS 009-051-04 CR-IR341 Service Manual MD - 9 05.31.99 FM2460... - Page 73 (3) Secure the tensioner in place by tightening the screw. Vertical conveyor Timing belt Tighten screw Tensioner Before-side- positioning conveyor FRONT Timing belt Tensioner Vertical conveyor Tighten screw Erasure conveyor Before-side- positioning conveyor Before-side- Erasure conveyor positioning conveyor FR1H1225.EPS CR-IR341 Service Manual 009-051-04 MD - 10 05.31.99 FM2460...
-
Page 74: Sensor Not Requiring Adjustment Of Its Mounting Position
150-mm rule as illustrated below. CAUTION Mount the sensor exercising care not to bend its claws. Sensor Steel rule Latch FR1H1227.EPS 009-051-04 CR-IR341 Service Manual MD - 11 05.31.99 FM2460... -
Page 75: System Block Diagram
Panel unit DRV08A JPS1 IDT type Bar Code Reader AC100/200V Serial line & power supply remote Fuse LED08B*4 Erasure unit Unlit lamp sensor signal Erasure driver Instant-OFF thermo switch FR1H1134.EPS 009-051-07 CR-IR341 Service Manual MD - 12 08.30.2001 FM3115... - Page 76 ONTENTS MD - 13 BLANK PAGE 009-051-04 CR-IR341 Service Manual MD - 13 05.31.99 FM2460...
-
Page 77: I/O Locations And Functional Descriptions
Unit symbol (A–G, T, Z) Example) D: Side-positioning conveyor The unit symbol may sometimes be omitted. I/O type Sensor Motor TSW: Thermal switch FAN: Fan Solenoid valve and more FR1H1135.EPS 009-051-05 CR-IR341 Service Manual 009-051-04 MD - 14 04.20.2001 FM3006 05.31.99 FM2460... -
Page 78: I/O List (Sensor)
19mm Type I SB2, SC1, 2, SD3, SF1, 2, 3 113Y1395 Reflective type 128S0392 Suction sensor MPL-503(MPL) 128Y0241A SS-01GL111 SA2, 6, 8, 10 128Y0258B SS-01GL2-F + mount SA4, 8, 12, 16 TR1H1150.EPS 009-051-04 CR-IR341 Service Manual MD - 15 05.31.99 FM2460... -
Page 79: Description Of Sensor On/Off
2 : 0 0 SD1 - 3 : 1 1 0 SF1 - 4 : 0 0 0 0 SZ2 - 3 : 1 0 0:QUIT “0” and “1” denote “Open” and “Close”, respectively. CR-IR341 Service Manual 009-051-04 MD - 16 05.31.99 FM2460... -
Page 80: I/O List (Actuator)
Cools down the DRV08A board. FANG3 Board cooling DC fan Cools down the DRV08A board. FANG4 Board cooling DC fan Cools down the MTH. FANG5 Board cooling DC fan Cools down the MTH. TR1H1004.EPS 009-051-04 CR-IR341 Service Manual MD - 17 05.31.99 FM2460... - Page 81 2500ms 5000ms 7500ms 10000ms 12500ms SA10 SA11 SA12 SA13 SA14 SA15 SA16 SA17 SOLA1 SOLA2 SOLA3 SOLA4 SVB1 SOLC1 SOLF1 FFM(MZ1) BCR_S BCR_R 2500ms 5000ms 7500ms 10000ms 12500ms...
- Page 82 ONTENTS MD - 19 BLANK PAGE 009-051-04 CR-IR341 Service Manual MD - 19 05.31.99 FM2460...
- Page 83 The cassette set unit has an actuator installed for each shelf, so the shelf position is deter- mined by SB sensor detection (OPEN CLOSE). Actuator Hole FR1H0202.EPS CR-IR341 Service Manual MD - 20 009-051-04 05.31.99 FM2460...
- Page 84 1 sec, it is judged as IP suction failure. The suction cup moves from HP to feed suction. Atmospheric pressure Suction pump SVB 1 PB 1 CLOSE Suction sensor Suction sensor FR1H0204.EPS FR1H0205.EPS 009-051-04 CR-IR341 Service Manual MD - 21 05.31.99 FM2460...
- Page 85 The IP loaded is sucked Atmospheric by the suction cup. pressure Suction pump SVB 1 PB 1 18.97 CLOSE Suction sensor 0.55-5.26 IP trailing-edge stop position Suction sensor Unit: mm FR1H0208.EPS FR1H0209.EPS CR-IR341 Service Manual MD - 22 009-051-04 05.31.99 FM2460...
- Page 86 Cassette inner frame when the cover is closed OPEN Unit: mm 23.83 IP accommodation position During IP leak (trailing edge when IP is placed at the bottom of the cassette) FR1H0211.EPS FR1H0210.EPS 009-051-04 CR-IR341 Service Manual MD - 23 05.31.99 FM2460...
- Page 87 18cm x 24cm HR 178 x 238 —0.57 OPEN CLOSE 24cm x 30cm HR 238 x 298 —0.57 CLOSE CLOSE TR1H0001.EPS Guide Guide SOLC1 SOLC1 SOLC1 IP path Before-side- positioning conveyor IP path FR1H0212.EPS CR-IR341 Service Manual MD - 24 009-051-04 05.31.99 FM2460...
- Page 88 A spring is attached to SOLC1, so that upon deenergization, the spring force (tension) causes the guide to be forcefully returned to its original position. Guide SOLC1 SOLC1 Before-side- positioning conveyor IP path FR1H0214.EPS 009-051-04 CR-IR341 Service Manual MD - 25 05.31.99 FM2460...
- Page 89 Latch assembly Side-positioning top stopper (UP condition) Guide of side-positioning top stopper Guide plate FRONT Guide plate Shaft Side-positioning top stopper Side-positioning top stopper DOWN condition (as seen from right) FR1H0216.EPS CR-IR341 Service Manual MD - 26 009-051-04 05.31.99 FM2460...
- Page 90 IP. Subsequently, the latch assembly initiates its operation to push the IP against the side guide, so that the IP is moved away from the side plate by 3 mm. FRONT Side guide FR1H0218.EPS 009-051-04 CR-IR341 Service Manual MD - 27 05.31.99 FM2460...
- Page 91 Subsequently, the latch assembly moves to its home position and the IP stopper moves down. MD2 is also activated to rotate the cam, so that the roller grips the IP and the side guide is accommodated, thereby conveying the IP to the scanner unit. CR-IR341 Service Manual MD - 28 009-051-04...
- Page 92 IP to the IP leading-edge sensor (SZ1). FFM (MZ1) CCW: reading conveyance After-reading conveyor side Conveyance direction Side-positioning conveyor side Sensor arm Sensor arm for SZ3 for SZ2 FR1H0221.EPS 009-051-04 CR-IR341 Service Manual MD - 29 05.31.99 FM2460...
- Page 93 By use of the steel belt, belt elongation and so forth is prevented, while transferring the reading speed from FFM (MZ1) accurately. Furthermore, by gripping the IP conveyed, the IP can be read accurately while maintaining the reading speed constant. Steel belt FR1H0223.EPS MD - 30 009-051-04 CR-IR341 Service Manual 05.31.99 FM2460...
- Page 94 The grip operation is terminated as the sensor SE1 becomes CLOSE from the OPEN status, so that the IP is conveyed by ME2 to the erasure conveyor. REAR Sensor arm (for grip open/close) FR1H0224.EPS 009-051-04 CR-IR341 Service Manual MD - 31 05.31.99 FM2460...
- Page 95 For IP path changeover, after the IP passes SF2 (CLOSE OPEN), SOLF1 is energized to activate the path changeover guide, thereby changing the IP conveyance direction toward the erasure conveyor. Guide SOLF1 IP path SOLF1 Guide FR1H0226.EPS MD - 32 009-051-04 CR-IR341 Service Manual 05.31.99 FM2460...
- Page 96 IP length measurement performed by the before-side-positioning conveyor, thereby making erasure preparation. Lamp FR1H0228EPS For the IP conveyed to the erasure unit, its image data is erased by the erasure lamps. 009-051-04 CR-IR341 Service Manual MD - 33 05.31.99 FM2460...
- Page 97 JPS1 IDT type Bar Code Reader AC100/200V Serial line & power supply remote Fuse LED08B*4 Erasure unit Unlit lamp sensor signal Erasure driver Instant-OFF thermo switch FR1H6519.EPS Electrical System Block Diagram MD - 34 009-051-07 CR-IR341 Service Manual 08.30.2001 FM3115...
- Page 98 LP. 5. As with step 3 above, the data for DMS output is loaded in the shared memory. 6. As with step 4 above, the output is provided to the DMS. 009-051-04 CR-IR341 Service Manual MD - 35 05.31.99 FM2460...
- Page 99 (FINP), the data is block-transferred from the HDD to the shared memory for each distribution destination. 10. For each distribution destination, the image is transferred from the shared memory on a block-by-block basis and sent to the LAN. MD - 36 009-051-07 CR-IR341 Service Manual 08.30.2001 FM3115...
- Page 100 With VRAM (4M bits, x3), an image plane is displayed with 640 x 480 pixels (12 bits), while a text plane is displayed with 640 x 480 pixels (4 bits). When an image is displayed on the CR-IR341’s monitor, gamma correction is performed. Thus, in order to achieve gamma correction quickly, the monitor screen goes blank, and an image is then displayed after gamma correction.
- Page 101 ONTENTS MD - 38 FR1H0232.EPS CPU90E Block Diagram MD - 38 009-051-04 CR-IR341 Service Manual 05.31.99 FM2460...
- Page 102 On this board, eight software control LEDs and six LAN communication status indication LEDs are located. Of them, the LAN communication status indication LEDs and their block diagram are illus- trated below. FR1H0233.EPS CPU90F Block Diagram 009-051-04 CR-IR341 Service Manual MD - 39 05.31.99 FM2460...
- Page 103 Input Output HOST i/f HOST i/f register register register register circuit circuit Image data Image data input output BUSCON (output) BUSCON (input) To motherboard FR1H0234.EPS IMG08A Block Diagram CR-IR341 Service Manual MD - 40 009-051-04 05.31.99 FM2460...
- Page 104 Input Output HOST i/f register register register register circuit Image data Image data input output BUSCON (output) BUSCON (input) To motherboard FR1H0235.EPS DMC08A Block Diagram 009-051-04 009-051-04 CR-IR341 Service Manual MD - 41 05.31.99 FM2460 (1) 05.31.99 FM2460...
- Page 105 JPEG-compliant compression with compression ratios of 1/2, 1/5, 1/10, and 1/20 is sup- ported. CPU bus Input image bus Input data REG Image output register Output data multiplexer Output image bus Arithmetic Compression/ FIFO discompression gate array HCP010 FR1H0236.EPS HCP08A Block Diagram CR-IR341 Service Manual MD - 42 009-051-04 05.31.99 FM2460...
- Page 106 To LED08A board LED board To FFM board To LED08B board I/F circuit control circuit Erasure inverter To erasure inverter I/F circuit FR1H0237.EPS SNS08A Block Diagram 009-051-04 CR-IR341 Service Manual MD - 43 05.31.99 FM2460...
- Page 107 MP4504) Pump drive circuit x1 To pump Drive signal (power transistor: MP4504) To each DC motor Drive signal DC motor drive circuit x3 +5 VDC generation circuit FR1H0238.EPS DRV08A Block Diagram CR-IR341 Service Manual MD - 44 009-051-04 05.31.99 FM2460...
- Page 108 0.6A +15V – 5% – 10% 0.1A 2.15A 3.0A -15V – 5% – 10% 0.1A 0.95A 3.0A DCOUT7 – 5% 0.1A 0.1A Fixed +15V – 5% – 10% 0.4A 2.0A TR1H0004.EPS 009-051-04 CR-IR341 Service Manual MD - 45 05.31.99 FM2460...
- Page 109 Sync signal generation Leading-edge detection signal Control bus signal Control bus I/F To each I/O Analog –15V Power Analog –5V supply Digital +5V unit Power system +24V FR1H0239.EPS Scanning Optics/Scanner Unit Block Diagram CR-IR341 Service Manual MD - 46 009-051-04 05.31.99 FM2460...
- Page 110 Select 7. FILE UTILITY, 4. RESTORE, and 1. SCANNER DATA in sequence. For more detail, see “4. Maintenance Utility, 4.10 Scanner Diagnostics and Setting: 5. SCANNER UTILITY, and 4.12 File Operation: 7. FILE UTILITY.” 009-051-04 CR-IR341 Service Manual MD - 47 05.31.99 FM2460...
- Page 111 PMT output signal in main-scan direction FR1H0240.EPS Image Signal Acquisition Block Diagram Image acquisition timing is shown below. OFCLKL OLCLKL OLCLKL Enlarged view OPCLK Image data [10 : 0] FR1H0241.EPS CR-IR341 Service Manual MD - 48 009-051-04 009-051-04 05.31.99 FM2460 (1) 05.31.99 FM2460...
- Page 112 Shading correction compensates for differences in beam-collecting efficiency of the light- collecting/scanning optics system in the main-scan direction. Filtering The image signal response is adjusted to achieve sharpness balance between main scan- ning and subscanning. 009-051-04 009-051-04 CR-IR341 Service Manual MD - 49 05.31.99 FM2460 (1) 05.31.99 FM2460...
- Page 113 Shading correction signal shift Digital Latch Erasure comparator ZLCLKL signal level data HSYNCL generation latch FCLKL P>Q decoder ERASENAL Erasure level data (Erasure level detection enable) Buffer FR1H0244.EPS Erasure Level Detection Block Circuit CR-IR341 Service Manual MD - 50 009-051-04 05.31.99 FM2460...
- Page 114 DAC 8-bit Latch Multiplied by 2.5 - 2.5V Multiplied PMT08 Soft ON/OFF by -1 LPF HV decoder HVON : 2.5 — 10V HVOFF : 0V Hard ON/OFF FR1H0245.EPS HV Control Block Diagram 009-051-04 CR-IR341 Service Manual MD - 51 05.31.99 FM2460...
- Page 115 The output voltage and noise of the high-voltage power supply provided to the PMT is monitored. It is checked if the power supply to the PMT08A board is normal. PMT analog power supply TR1H0003.EPS CR-IR341 Service Manual MD - 52 009-051-04 05.31.99 FM2460...
- Page 116 LD1OK (first laser check LED) When this LED is ON, the laser is normal. If it is OFF, it is necessary to check the first or second laser. FR1H4031.EPS 009-051-05 009-051-04 CR-IR341 Service Manual MD - 53 05.31.99 FM2460 04.20.2001 FM3006...
- Page 117 IP surface under the scanning optics unit. fθ lenses Main-scan direction Light-collecting mirror IP surface Light-collecting guide FR1H0248.EPS Laser Irradiation onto IP CR-IR341 Service Manual MD - 54 009-051-04 05.31.99 FM2460...
- Page 118 The dust-shield guide prevents dust deposits onto an area between the light-collecting guide/mirror section and scanning optics unit. Laser light Light-collecting guide Light-collecting mirror IP surface Accelerated phosphorescence light FR1H0249.EPS Accelerated Phosphorescence Light 009-051-04 CR-IR341 Service Manual MD - 55 05.31.99 FM2460...
- Page 119 Unit number (B through F) TA11 : Timer value or timeout value Number (serial number) Unit number (A through D, F, Z) NA11 : Retry value Number (serial number) Unit number (A, B, D) FR1H0300.EPS 009-051-04 CR-IR341 Service Manual MD - 56 05.31.99 FM2460...
- Page 120 Cassette set unit In this sequence, the hold on the cassette into which the IP has Cassette ejection been loaded is released, so that the cassette See 2.11 FR1H0301.EPS 009-051-04 CR-IR341 Service Manual MD - 57 05.31.99 FM2460...
- Page 121 FR1H0302.EPS (3) IP Conveyance Paths Cassetteset unit Up-down IP removal unit Before-side- positioning Power supply unit conveyor Erasure conveyor Subscanning unit Side- After-reading positioning conveyor conveyor SZ1 SD3 FR1H0303.EPS 009-051-04 CR-IR341 Service Manual MD - 58 05.31.99 FM2460...
- Page 122 Retry release cassette upon Fig. 2.2.2 setting error Message display cassette "Reload cassette." hold DELAY TA15 failure Cassette ejection A message, "Unload cassette," Fig. 2.11.1 is not issued. FR1H0304.EPS 009-051-04 CR-IR341 Service Manual MD - 59 05.31.99 FM2460...
- Page 123 Topmost stage 2nd stage SOLA1 3rd stage Cassette that has been SOLA2 set in the 3rd stage 4th stage SOLA3 SOLA4 Hold pin Cassette loading direction OFF:CLOSE ON :OPEN SOLA1 FR1H0306.EPS 009-051-04 CR-IR341 Service Manual MD - 60 05.31.99 FM2460...
- Page 124 TA12 2 sec Wait for hold release retry position position position position NA11 Hold release retry 5 times SA11 SA15 TR1H0012.EPS SOLA1 SOLA1 SOLA2 SOLA3 SOLA4 TR1H0013.EPS 009-051-05 009-051-04 CR-IR341 Service Manual MD - 61 04.20.2001 FM3006 05.31.99 FM2460...
- Page 125 PB141 Condition as seen from Condition as seen from the right-hand side the cassette loading side 4th stage 2nd stage 6,922 PB142 (front) 4th stage 3rd stage 3,462 PB143 FR1H0309.EPS TR1H0015.EPS 009-051-04 CR-IR341 Service Manual MD - 62 05.31.99 FM2460...
- Page 126 Suction cup driving stop preparation Suction cup driving stop DRIVE (MB1/OFF) (Soft) of suction cup DRIVE (MB1/OFF) HP detection Level 2 error (Soft) 23E6 Suction cup HP detection preparation retry DELAY TB51 FR1H0310.EPS 009-051-04 CR-IR341 Service Manual MD - 63 05.31.99 FM2460...
- Page 127 The suction cups are fed from the edge by a specified Suction cup amount, and the positioning operation is stopped. Suction cup HP positioning condition If normal, this stop point represents the home position. FR1H0312.EPS 009-051-04 CR-IR341 Service Manual MD - 64 05.31.99 FM2460...
- Page 128 Elevation unit movement DOWN DRIVE (MB3/PB102) Is SA17 opened within TB102? Elevation unit movement stop Elevation unit movement stop DRIVE (MB3/OFF) (Soft) DRIVE (MB3/OFF) (Soft) Level 0 error 03DD Elevation HP movement error FR1H0313.EPS 009-051-04 CR-IR341 Service Manual MD - 65 05.31.99 FM2460...
- Page 129 Is SB3 closed? Level 2 error 23DE Elevation shelf movement failure retray Is the number of retries made greater than the retry count (NB100)? Level 0 error 03DE Elevation shelf movement error FR1H0314.EPS 009-051-04 CR-IR341 Service Manual MD - 66 05.31.99 FM2460...
- Page 130 IP removal unit. Fig. 2.4.3 The IP gripped by the grip rollers is Feed gripping and conveying conveyed. Fig. 2.4.4 FR1H0315.EPS Conveyance Path and IP Driving SZ1SD3 FR1H0316.EPS 009-051-04 CR-IR341 Service Manual MD - 67 05.31.99 FM2460...
- Page 131 TB11 1 sec Wait for feed suction TB12 0 sec Wait for next operation TB17 0.1 sec Feed suction retry NB11 3 times TR1H0018.EPS Suction cup movement (HP feed suction) FR1H0320.EPS 009-051-04 CR-IR341 Service Manual MD - 68 05.31.99 FM2460...
- Page 132 Operation of Suction Cup Movement (Feed Suction Feed Leak) Pump/Suction Cup Operation Atmospheric pressure SVB 1 PB 1 OPEN Suction cup movement (feed suction feed leak) FR1H0323.EPS During IP leak FR1H0322.EPS 009-051-04 CR-IR341 Service Manual MD - 69 05.31.99 FM2460...
- Page 133 Level 1 error 13E3 IP grip failure Operation of Suction Cup Movement (Feed Leak Feed Standby) Error handling Cassette ejection 2 Fig. 6.2.1 FR1H0324.EPS Suction cup movement (feed leak load standby) FR1H0325.EPS 009-051-04 CR-IR341 Service Manual MD - 70 05.31.99 FM2460...
- Page 134 OPEN), the solenoid is turned OFF to reset it to its original state. Guide Guide when SOLC1 when SOLC1 is OFF is ON SOLC1 IP path Before-side-positioning conveyor IP path FR1H0328.EPS 009-051-04 CR-IR341 Service Manual MD - 71 05.31.99 FM2460...
- Page 135 Level 0 error 03B1 DRIVE (MD2/OFF) (Soft) Conveyance error FR1H0329.EPS Table 2.5.2 Operation Parameters Symbol Description Value TC11 Feed conveyance timeout 3.5 sec TC12 IP length measurement timeout 2.9 sec TR1H0022.EPS 009-051-04 CR-IR341 Service Manual MD - 72 05.31.99 FM2460...
- Page 136 303x252 10x12 I CLOSE OPEN 201x252 8x10 I CLOSE OPEN 18x24 ST 178x238 OPEN OPEN 298x238 24x30 ST OPEN OPEN 178x238 18x24 HR OPEN CLOSE 238x298 24x30 HR CLOSE CLOSE TR1H0023.EPS 009-051-04 CR-IR341 Service Manual MD - 73 05.31.99 FM2460...
- Page 137 IP. Fig.2.6.3 IP side-positioning is performed. Side-positioning Fig.2.6.4 CSL/IDT information check Fig.2.6.6 FR1H0331.EPS Relationship between Conveyance Path and IP Driving SZ1SD3 SZ1SD3 During barcode reading Upon completion of side-positioning conveyance FR1H0332.EPS 009-051-04 CR-IR341 Service Manual MD - 74 05.31.99 FM2460...
- Page 138 Table 2.6.2 Operation Parameters Symbol Description Value PD23 Conveyance grip (HP return) 400 p PD32 Conveyance (BCR) -972 p ND31 BCR retry 3 times TR1H0024.EPS REAR Side-positioning mechanism Side-positioning conveyor FR1H0334.EPS 009-051-04 CR-IR341 Service Manual MD - 75 05.31.99 FM2460...
- Page 139 Shaft (Soft) Conveyance stop MD3 excitation OFF DRIVE (MD3/OFF) (Hard) Level 0 error Side-positioning stopper Side-positioning 03B3 Side-positioning stopper conveyance inlet Conveyance error DOWN condition (as seen from right) FR1H0335.EPS FR1H0336.EPS 009-051-04 CR-IR341 Service Manual MD - 76 05.31.99 FM2460...
- Page 140 -68 p -68 p -68 p -34 p -34 p PD15 Side-positioning (side-positioning 2 162 p 162 p 842 p 842 p 936 p 936 p 904 p 504 p TR1H0028.EPS 009-051-04 CR-IR341 Service Manual MD - 77 05.31.99 FM2460...
- Page 141 Side-positioning driving stop (Soft) DRIVE (MD1/OFF) Level 2 error (Soft) Side-positioning 23BB HP detection DELAY TD51 preparation retry FR1H0340.EPS Sensor SD1 and Its Actuator Sensor arm for SD1 Latch assembly Belt FR1H0341.EPS 009-051-04 CR-IR341 Service Manual MD - 78 05.31.99 FM2460...
- Page 142 1 sec TD53 Side-positioning HP detection timeout 8 sec TD54 Side-positioning HP 1-pulse driving timeout 10 sec ND51 Side-positioning HP retry 3 times TR1H0029.EPS Belt Side-positioning mechanism (view seen from above) FR1H0343.EPS 009-051-04 CR-IR341 Service Manual MD - 79 05.31.99 FM2460...
- Page 143 ID information IDT line error Recovered IP load not registered Fig.6.3.1 Fig.6.8.1 Fig.6.7.1 IP determination check Fig.2.6.7 FR1H0344.EPS Table 2.6.6 Operation Parameters Symbol Description Value TD33 IDT response timeout 120 sec TR1H0030.EPS 009-051-04 CR-IR341 Service Manual MD - 80 05.31.99 FM2460...
- Page 144 BC information BC information Updated to Updated to Level 1 error 13A8 IP size = 1824ST IP size = 1824HR Out-of-spec IP size Error handling Recovered IP load Fig. 6.3.1 FR1H0345.EPS 009-051-04 CR-IR341 Service Manual MD - 81 05.31.99 FM2460...
- Page 145 The IP conveyed is scanned. unit (feed) permitted Fig.2.7.3 Fig.2.3.1 CSL/IDT information check 2 Fig.2.7.7 FR1H0346.EPS Relationship between Conveyance Path and IP Operation SZ1 SD3 SZ1 SD3 During reading During reading preparation and start FR1H0347.EPS 009-051-04 CR-IR341 Service Manual MD - 82 05.31.99 FM2460...
- Page 146 Sensor arm for SZ3 for SZ2 for SZ3 FRH0349.EPS Sensor arm for SZ2 Grip (solid line): SZ2 (OPEN) Grip (solid line): SZ3 (CLOSE) Grip release (dotted line):SZ2 (CLOSE) Grip release (dotted line):SZ3 (OPEN) FR1H0350.EPS 009-051-04 CR-IR341 Service Manual MD - 83 05.31.99 FM2460...
- Page 147 Level 2 error Level 2 error 23C6 23C7 Driven shaft grip release Driving shaft grip operation error operation error NOTE: It is affected by the designation of reading mode (HR/ST). FR1H0351.EPS 009-051-04 CR-IR341 Service Manual MD - 84 05.31.99 FM2460...
- Page 148 — — — 14x14 top — — 0 sec — — — — — 10x8 upper right — — 0.5 sec — — — — — Pantomo portrait right center TR1H0033.EPS 009-051-04 CR-IR341 Service Manual MD - 85 05.31.99 FM2460...
- Page 149 Sensor arm for SZ3 for SZ2 FR1H0354.EPS Sensor arm for SZ2 Grip (solid line): SZ2 (OPEN) Grip (solid line): SZ3 (CLOSE) Grip release (dotted line):SZ2 (CLOSE) Grip release (dotted line):SZ3 (OPEN) FR1H0355.EPS CR-IR341 Service Manual 009-051-04 MD - 86 05.31.99 FM2460...
- Page 150 Grip driving stop detection DRIVE (ME1/OFF) Grip driving stop preparation (soft) DRIVE (ME1/OFF) Sensor arm (soft) Level 2 error After-reading conveyance 23DB grip HP detection CLOSE DELAY TD61 preparation retry FR1H0357.EPS FR1H0356.EPS 009-051-04 CR-IR341 Service Manual MD - 87 05.31.99 FM2460...
- Page 151 1.2 sec TD63 Side-positioning grip HP detection timeout 13.3 sec TD64 Side-positioning HP 1-pulse driving timeout 10 sec ND61 Conveyance grip HP retry 3 times TR1H0034.EPS After-reading conveyance grip mechanism FR1H0359.EPS CR-IR341 Service Manual 009-051-04 MD - 88 05.31.99 FM2460...
- Page 152 HP Grip driving stop detection DRIVE (MD2/OFF) preparation Grip driving stop CLOSE (soft) DRIVE (MD2/OFF) (soft) Level 2 error FR1H0361.EPS Side-positioning 23BE conveyance DELAY TD61 grip HP detection preparation retry FR1H0360.EPS 009-051-04 CR-IR341 Service Manual MD - 89 05.31.99 FM2460...
- Page 153 Side-positioning grip HP detection timeout TD63 13.3 sec Side-positioning HP 1-pulse driving timeout TD64 10 sec Conveyance grip HP retry ND61 3 times TR1H0035.EPS Side-positioning conveyance grip mechanism FR1H0363.EPS CR-IR341 Service Manual 009-051-04 MD - 90 05.31.99 FM2460...
- Page 154 24x30 ST 18x24 HR 24x30 HR Symbol Description After-reading conveyance IP trailing-edge detection timeout 3.17 sec 3.01 sec 2.9 sec 2.68 sec 2.63 sec 2.89 sec 2.63 sec 2.76 sec TF12 TR1H0037.EPS 009-051-04 CR-IR341 Service Manual MD - 91 05.31.99 FM2460...
- Page 155 Config Setting. IDT or CSL: Logical reading or high-sensitivity reading is enabled in Config Setting. Wait for ID information registration? Wait for Wait for ID information CSL input registration from IDT FR1H0365.EPS CR-IR341 Service Manual 009-051-04 MD - 92 05.31.99 FM2460...
- Page 156 PB141 10,392 TB17 0.1 sec Wait for next operation 4th stage 2nd stage PB142 6,922 NB101 2 times Elevation movement retry 4th stage 3rd stage PB143 3,462 TR1H0038.EPS TR1H0039.EPS 009-051-04 CR-IR341 Service Manual MD - 93 05.31.99 FM2460...
- Page 157 Two IPs Erasure lamp One IP turn-off Erasure lamp turn-off and preheating DRIVE (LAMP1-5/preheating) FR1H0367.EPS Relationship between Conveyance Path and IP Operation SZ1SD3 SZ1SD3 During before-erasure conveyance During after-erasure conveyance FR1H0368 EPS CR-IR341 Service Manual 009-051-04 MD - 94 05.31.99 FM2460...
- Page 158 FR1H0369.EPS Inverting Stocker IP inverting stocker (located under the top frame) Path Changeover Mechanism IP path Guide Guide SOLF1 SOLF1 FRONT FR1H0371.EPS IP path SOLF1 IP path Guide FR1H0370.EPS 009-051-04 CR-IR341 Service Manual MD - 95 05.31.99 FM2460...
- Page 159 + infinite p Erasure lamp PF14 Conveyance (erasure 2) 15,992 p TF15 Erasure conveyance IPtrailing-edge Variable detection timeout depending on exposure IP path FRONT TR1H0041.EPS Path changeover mechanism Erasure conveyor FR1H0373.EPS CR-IR341 Service Manual 009-051-04 MD - 96 05.31.99 FM2460...
- Page 160 Conveyance (after-erasure conveyance) + infinite p TB21 After-erasure conveyance timeout 3.6 sec TF17 After-erasure conveyance IP trailing-edge detection timeout 1 2.2 sec TF18 After-erasure conveyance IP trailing-edge detection timeout 2 2.8 sec TR1H0042.EPS 009-051-04 CR-IR341 Service Manual MD - 97 05.31.99 FM2460...
- Page 161 To the sequence initiation requirement in Fig. 2.9.1 FR1H0375.EPS Relationship between Conveyance Path and IP Driving SZ1SD3 SZ1SD3 At the start of IP load conveyance At the end of IP load conveyance FR1H0376.EPS CR-IR341 Service Manual 009-051-04 MD - 98 05.31.99 FM2460...
- Page 162 OPEN), the solenoid is turned OFF to reset it to its original state. Guide Guide when SOLC1 when SOLC1 is OFF is ON SOLC1 IP path Before-side-positioning conveyor IP path FR1H0378.EPS 009-051-04 CR-IR341 Service Manual MD - 99 05.31.99 FM2460...
- Page 163 Pump/Suction Cup Operation Atmospheric pressure SVB 1 PB 1 18.97 CLOSE 0.55 — 5.26 IP trailing-edge stop position Unit: mm During IP suction Suction cup movement (load standby load suction) FR1H0380.EPS FR1H0381.EPS CR-IR341 Service Manual 009-051-04 MD - 100 05.31.99 FM2460...
- Page 164 23.83 IP accommodation position (trailing edge at the time when IP is placed at the bottom of the cassette) During IP leak Suction cup movement (load suction load leak) FR1H0383.EPS FR1H0384.EPS 009-051-04 CR-IR341 Service Manual MD - 101 05.31.99 FM2460...
- Page 165 Level 1 error 13AA Erasure lamp failure Error handling Erasure lamp Fig.6.5.1 Is an overexposed IP indicated? Level 1 error 13AB Overexposed IP unerased Error handling Overexposed IP Fig.6.4.1 FR1H0385.EPS 009-051-05 CR-IR341 Service Manual 009-051-04 MD - 102 04.20.2001 FM3006 05.31.99 FM2460...
- Page 166 4th shelf 2nd shelf shelf I/O name position position position position SA13 SA10 SA14 SA11 SA15 SOLA3 SOLA4 SOLA1 SOLA1 SOLA2 LEDT1 LEDT1 LEDT3 LEDT5 LEDT7 LEDT2 LEDT2 LEDT6 LEDT8 LEDT4 TR1H0047.EPS 009-051-04 CR-IR341 Service Manual MD - 103 05.31.99 FM2460...
- Page 167 Same as in the routine IP load Before-side-positioning conveyor See 2.10 up-down IP removal unit Same as in the routine Cassette ejection Cassette set unit See 2.11 FR1H0388.EPS 009-051-05 CR-IR341 Service Manual 009-051-04 MD - 104 04.20.2001 FM3006 05.31.99 FM2460...
- Page 168 Reading preparation Preparation prior to IP reading Fig.3.3.2 Different than in the routine Reading The IP conveyed is scanned. Fig.3.3.3 CSL/IDT information Same as in the routine check 2 Fig.2.7.7 FR1H0390.EPS 009-051-04 CR-IR341 Service Manual MD - 105 05.31.99 FM2460...
- Page 169 Lower limit for driving shaft grip spec (ST/HR) TZ22 1.6 / 3.3 sec Upper limit for driving shaft grip spec (ST/HR) TZ23 2.8 / 6 sec TZ34 Driven shaft grip timeout (fast/slow) 2 / 10 sec TR1H0048.EPS CR-IR341 Service Manual 009-051-04 MD - 106 05.31.99 FM2460...
- Page 170 Timer STOP grip release (ST) Timer > TZ33 or Timer <TZ32 Error log (detailed information) Timer data recording Level 2 error Driven shaft grip 23C7 release operation error FR1H0392.EPS 009-051-04 CR-IR341 Service Manual MD - 107 05.31.99 FM2460...
- Page 171 MD - 108 Erasure Conveyance The sequence is the same as in the routine (single-IP conveyance), except that the convey- ance speed is different. Note, however, that 2-phase excitation is used. CR-IR341 Service Manual 009-051-04 MD - 108 05.31.99 FM2460...
- Page 172 Fig. 4.2.1 Feed/Load Step Operation START Feed step operation Fig. 4.2.2 Wait for step input IP positioning Wait for step input Load step operation Fig. 4.2.3 FR1H0393.EPS 009-051-04 CR-IR341 Service Manual MD - 109 05.31.99 FM2460...
- Page 173 IP, so it is Leak valve suction condition judged that DRIVE (SVB1/OFF) there is no IP left in the Error handling cassette. Cassette ejection 1 Fig.6.1.1 FR1H0394.EPS CR-IR341 Service Manual 009-051-04 MD - 110 05.31.99 FM2460...
- Page 174 After the suction HP positioning cup HP positioning is performed, it is Fig. 2.3.2 retreated by 12p, Suction cup movement and feed leak occurs. feed leak) DRIVE (MB1/PB19) DELAY TB13 FR1H0395.EPS 009-051-04 CR-IR341 Service Manual MD - 111 05.31.99 FM2460...
- Page 175 Wait for feed suction 0 sec TB13 Wait for feed leak 0.1 sec TB14 Grip timeout 1 sec TB17 Wait for next operation 0.1 sec TB18 Wait for feed 0.05 sec TR1H0052.EPS CR-IR341 Service Manual 009-051-04 MD - 112 05.31.99 FM2460...
- Page 176 Wait for cassette OUT 1 sec TB11 Feed suction timeout TB15 Wait for load suction 0 sec TB16 0.1 sec Wait for load leak 0.1 sec TB17 Wait for next operation TR1H0053.EPS 009-051-04 CR-IR341 Service Manual MD - 113 05.31.99 FM2460...
- Page 177 Suction pump OFF DRIVE (PB1/OFF) DELAY TB16 Is SB1 closed? Level 2 error Suction HP 23E8 Suction cup HP return failure check 2 Suction cup HP positioning Fig.2.3.2 Leak disabled DRIVE (SB1/OFF) FR1H0398.EPS CR-IR341 Service Manual 009-051-04 MD - 114 05.31.99 FM2460...
- Page 178 Wait for cassette OUT TR1H0055.EPS 1 sec TB11 Feed suction timeout TB15 Wait for load suction 0 sec TB16 0.1 sec Wait for load leak 0.1 sec TB17 Wait for next operation TR1H0053.EPS 009-051-04 CR-IR341 Service Manual MD - 115 05.31.99 FM2460...
- Page 179 -68 p -34 p -34 p PD14 Side-positioning (back side-positioning 2) Side-positioning (side-positioning 2 162 p 162 p 842 p 842 p 936 p 936 p 904 p 504 p PD15 TR1H0057.EPS CR-IR341 Service Manual 009-051-04 MD - 116 05.31.99 FM2460...
- Page 180 It is not until the remaining IP is ejected or it is checked to see that there is no remaining IP left in the machine that the initialization self-diagnostics are completed. This section only addresses sequences that are different than in the routine operation (single-IP conveyance). 009-051-04 CR-IR341 Service Manual MD - 117 05.31.99 FM2460...
- Page 181 Processing of load standby IP Fig. 5.8.1 Subscanning grip Lamp initialization HP positioning Fig. 5.9.1 Lamp turn-on process only Mechanical initialization Empty cassette ejection (third stage) Fig. 5.10.1 Cassette hold release operation Fig. 5.11.1 FR1H0401.EPS CR-IR341 Service Manual 009-051-04 MD - 118 05.31.99 FM2460...
- Page 182 Driven shaft grip stop Driven DRIVE (MZ3/OFF) shaft (soft) Driven shaft grip driving (fast) Fig. 5.9.5 Driven shaft grip stop Level 0 error 03C9 DRIVE (MZ3/OFF) Driven shaft grip error (hard) FR1H0402.EPS 009-051-04 CR-IR341 Service Manual MD - 119 05.31.99 FM2460...
- Page 183 (SF1 | SF2 CLOSE) SF1 & SF2 & SF3 CLOSE To Fig. 5.3.1 (3/3) To Fig. 5.3.1 (2/3) Processing of before-reading conveyance remaining IP Processing of after-reading conveyance remaining IP FR1H0403.EPS CR-IR341 Service Manual 009-051-04 MD - 120 05.31.99 FM2460...
- Page 184 IP IP found CLOSE Positioning of load standby IP OTHERS Fig. 5.3.11 No IP Load standby IP found To Fig. 5.3.1 (3/3) Processing of before-reading conveyance remaining IP FR1H0404.EPS 009-051-04 CR-IR341 Service Manual MD - 121 05.31.99 FM2460...
- Page 185 Is there any after-reading standby IP? Fig. 5.3.1 (2/3) A. Search for after-reading conveyance remaining IP Processing of Fig. 5.3.15 after-reading conveyance remaining IP SF1 OPEN SF1 CLOSE After-reading No IP standby IP found FR1H0405.EPS CR-IR341 Service Manual 009-051-04 MD - 122 05.31.99 FM2460...
- Page 186 TB16 Wait for load leak 0.1 sec TR1H0059.EPS Level 2 error 23E8 Suction cup Suction cup HP return error HP check Suction cup HP positioning Fig. 2.3.2 Leak released DRIVE(SB1/OFF) FR1H0406.EPS 009-051-04 CR-IR341 Service Manual MD - 123 05.31.99 FM2460...
- Page 187 - infinite p TB72 Feed/load conveyance remaining IP ejection timeout 7.6 sec TB79 Feed/load conveyance remaining IP movement timeout 2 10.7 sec TF13 Wait for switchback 0.2 sec TR1H0060.EPS CR-IR341 Service Manual 009-051-04 MD - 124 009-051-05 05.31.99 FM2460 04.20.2001 FM3006...
- Page 188 Is SB2 closed within TB71? Feed conveyance UP direction stop Feed conveyance UP direction stop DRIVE (MB2/OFF) (soft) DRIVE (MB2/OFF) (soft) DRIVE (MC1/OFF) (soft) DRIVE (MC1/OFF) (soft) Feed/load conveyance IP found No IP FR1H0409.EPS 009-051-04 CR-IR341 Service Manual MD - 125 05.31.99 FM2460...
- Page 189 DRIVE (SOLC1/OFF) (soft) DRIVE(MC1/OFF) (soft) DRIVE (MB2/OFF) (soft) DRIVE(MF1/OFF) (soft) DRIVE (MC1/OFF) (soft) DRIVE (MF1/OFF) (soft) Level 0 error 03B6 Feed/load conveyance Feed/load conveyance remaining IP ejection error IP found FR1H0411.EPS CR-IR341 Service Manual 009-051-04 MD - 126 05.31.99 FM2460...
- Page 190 FR1H0412.EPS Table 5.3.8 Operation Parameters Description Symbol Value Initialization conveyance (erasure conveyance direction) + infinite p PF72 Wait for switchback 0.2sec TF13 Erasure conveyance remaining IP search timeout 4.9sec TF73 TR1H0065.EPS 009-051-04 CR-IR341 Service Manual MD - 127 05.31.99 FM2460...
- Page 191 + infinite p PF72 TF13 Wait for switchback 0.2 sec After-reading conveyance remaining IP ejection timeout 7.6 sec TF71 Erasure conveyance remaining IP ejection timeout 6.8 sec TF72 TR1H0066.EPS 009-051-05 CR-IR341 Service Manual 009-051-04 MD - 128 04.20.2001 FM3006 05.31.99 FM2460...
- Page 192 Branch path changeover 03D9 03D4 remaining ejection error guide operation error Positioning of load standby IP SF1: After-reading conveyance Fig. 5.3.11 standby IP detection SF3: Load standby IP detection FR1H0414.EPS 009-051-05 009-051-04 CR-IR341 Service Manual MD - 129 05.31.99 FM2460 04.20.2001 FM3006...
- Page 193 After-reading conveyance direction stop DRIVE (MF1/OFF) (soft) After-reading conveyance direction stop DRIVE (MF1/OFF) (soft) After-reading conveyance direction DRIVE (MF1/PF73) Level 0 error 03D9 Erasure conveyance remaining IP ejection error Load standby IP found FR1H0415.EPS CR-IR341 Service Manual 009-051-04 MD - 130 05.31.99 FM2460...
- Page 194 Initialization conveyance (side-positioning conveyance reverse direction) PD73 - infinite p TD72 Side-positioning conveyance remaining IP ejection timeout 2 5.9 sec Wait for side-positioning switchback TD74 0.5 sec Initialization side-positioning timeout TD75 5.8 sec TR1H0069.EPS 009-051-04 CR-IR341 Service Manual MD - 131 05.31.99 FM2460...
- Page 195 + infinite p PD72 Initialization conveyance (UP direction) - infinite p TD73 Side-positioning conveyance remaining IP search timeout 5.8 sec TD74 Wait for side-positioning switchback 0.5 sec TD75 Initialization side-positioning 5.8 sec TR1H0070.EPS CR-IR341 Service Manual 009-051-04 MD - 132 05.31.99 FM2460...
- Page 196 Initialization conveyance (DOWN direction) + infinite p PC71 Initialization conveyance (DOWN direction) PD71 + infinite p Side-positioning conveyance remaining IP ejection timeout 1 7.6sec TD71 Initialization side-positioning timeout 5.8sec TD75 TR1H0071.EPS 009-051-04 CR-IR341 Service Manual MD - 133 05.31.99 FM2460...
- Page 197 After-reading standby IP found No IP FR1H0419.EPS Table 5.3.15 Operation Parameters Symbol Description Value PE73 Initialization conveyance (Reading conveyance direction) + infinite p TF76 Reading conveyance remaining IP search timeout 5.8 sec TR1H0072.EPS CR-IR341 Service Manual 009-051-04 MD - 134 05.31.99 FM2460...
- Page 198 DRIVE (MF1/OFF) (soft) Level 0 error 03B6 Feed/load conveyance remaining IP ejection error Load suction Fig.2.10.3 Load suction conveyance Fig.2.10.4 Cassette can be inserted. Cassette ejection LED remains OFF. Fig.2.11.1 FR1H0420.EPS 009-051-04 CR-IR341 Service Manual MD - 135 05.31.99 FM2460...
- Page 199 (before search/during search) Remaining IP (after search) Level 0 error Message output Feed/load conveyance 03B0 "Load largest empty remaining ejection error cassette". Remaining ejected cassette IN Fig. 5.4.3 FR1H0421.EPS 009-051-05 CR-IR341 Service Manual 009-051-04 MD - 136 05.31.99 FM2460 04.20.2001 FM3006...
- Page 200 Fig.2.11.1 Detection of A message ""Unload cassette" instant removal Is SA2 closed? is not issued. of cassette and its remedy are performed. Cassette hold release Fig.2.2.2 LEDT1 is turned off FR1H0422.EPS 009-051-04 CR-IR341 Service Manual MD - 137 05.31.99 FM2460...
- Page 201 Processing of cassette CS#." for cassette hold release hold release failure DELAY TA12 failure Degeneration for relevant shelf Degeneration for all shelves? Level 0 error 03A3 Degeneration for all shelves FR1H0423.EPS CR-IR341 Service Manual 009-051-04 MD - 138 05.31.99 FM2460...
- Page 202 Wait for hold retry SA13 0.5 sec TA51 Wait for initialization hold SA11 SA15 5 times NA11 Hold release retry SOLA1 SOLA1 SOLA2 SOLA3 SOLA4 5 times NA12 Hold retry TR1H0077.EPS TR1H0076.EPS 009-051-04 CR-IR341 Service Manual MD - 139 05.31.99 FM2460...
- Page 203 It is checked that it is out of spec, level 0 metric size. Fig.2.5.2 for lateral (width) inch size. error occurs. Side-positioning conveyance Fig.2.6.3 Suction cup movement is Side-positioning not executed. Fig.2.6.4 FR1H0425.EPS CR-IR341 Service Manual 009-051-04 MD - 140 009-051-05 05.31.99 FM2460 04.20.2001 FM3006...
- Page 204 Load remaining IP ejection timeout 7.6 sec TB74 Before-reading standby remaining IP ejection timeout 14.5 sec TB75 Wait for side-positioning detection 0.5 sec TB76 Wait for feed switchback 0.5 sec TB77 TR1H0078.EPS 009-051-04 CR-IR341 Service Manual MD - 141 05.31.99 FM2460...
- Page 205 Is the cassette located in the shelf of interest? Cassette setting check Message output "Load empty cassette in following size [10x12] " Remaining ejected cassette IN Fig. 5.4.3 IP found FR1H0427.EPS CR-IR341 Service Manual 009-051-04 MD - 142 05.31.99 FM2460...
- Page 206 PC74 Initialization conveyance (load conveyance) + infinite p PF74 Initialization conveyance (load conveyance) 11.6 sec TB73 Load standby remaining IP ejection timeout 7.6 sec TB74 Load remaining IP ejection timeout TR1H0079.EPS 009-051-04 CR-IR341 Service Manual MD - 143 05.31.99 FM2460...
- Page 207 Steps "after-reading conveyance " to "IP load" in reading sequence of routine are executed (including erasure lamp turn-off and movement of elevation unit) Fig.2.1.1 Cassette can be inserted. Cassette ejection LED remains OFF. Fig.2.11.1 FR1H0429.EPS CR-IR341 Service Manual 009-051-04 MD - 144 05.31.99 FM2460...
- Page 208 Fig. 5.9.7 DELAY TZ51 Driving shaft grip release (fast) Idle Fig. 5.9.2 positioning DELAY TZ51 FR1H0430.EPS Table 5.9.1 Operation Parameters Description Symbol Value TZ51 Wait for initialization grip operation 0.5 sec TR1H0080.EPS 009-051-04 CR-IR341 Service Manual MD - 145 05.31.99 FM2460...
- Page 209 Timer > TZ23 or Timer <TZ22 Error log (detailed information) Timer data recording Level 2 error 23C6 Driving shaft grip operation error NOTE: It is subject to selection of reading mode (HR/ST). FR1H0432.EPS CR-IR341 Service Manual 009-051-04 MD - 146 05.31.99 FM2460...
- Page 210 Is SZ3 closed within TZ34? Driven shaft grip stop DRIVE (MZ3/OFF) (soft) Driven shaft grip stop DRIVE (MZ3/OFF) (hard) Level 0 error 03C9 Driven shaft grip error NOTE: Slow is used only for self-diagnostics. FR1H0434.EPS 009-051-04 CR-IR341 Service Manual MD - 147 05.31.99 FM2460...
- Page 211 Lower limit for driven shaft grip release spec (self-diagnostics) TZ36 1.7 sec Upper limit for driven shaft grip release spec (self-diagnostics) TZ37 2.0 sec Wait for initialization grip operation TZ51 0.5 sec TR1H0085.EPS CR-IR341 Service Manual 009-051-04 MD - 148 05.31.99 FM2460...
- Page 212 2.2 sec Lower limit for driven shaft grip spec (self-diagnostics) TZ26 Upper limit for driven shaft grip spec (self-diagnostics) 2.4 sec TZ27 Wait for initialization grip operation 0.5 sec TZ51 TR1H0086.EPS 009-051-04 CR-IR341 Service Manual MD - 149 05.31.99 FM2460...
- Page 213 Dmax Dmin 4.30 73 H 1.43 36 H 255 H 8.60 2.87 147 H 1.86 TZ36 TZ37 36 H 255 H 10.00 3.30 170 H Fast 255 H 36 H TR1H0087.EPS CR-IR341 Service Manual 009-051-04 MD - 150 05.31.99 FM2460...
- Page 214 TA13 I/O name 2nd shelf 3rd shelf 4th shelf shelf in flow position position position TR1H0089.EPS position SA13 SA10 SA14 LEDT1 LEDT1 LEDT3 LEDT5 LEDT7 LEDT2 LEDT4 LEDT6 LEDT2 LEDT8 TR1H0088.EPS 009-051-04 CR-IR341 Service Manual MD - 151 05.31.99 FM2460...
- Page 215 Degeneration for all shelves Released for all shelves? If the shelf intended for ejection is degenerated due to initialization, another empty cassette is put into another shelf so that the process resumes. FR1H0439.EPS CR-IR341 Service Manual 009-051-04 MD - 152 05.31.99 FM2460...
- Page 216 Instant return of Is SA2 opened? cassette is supported. LEDT2 is turned off The ready condition LEDT1 is turned on is indicated. Return to normal routine FR1H0440.EPS 009-051-04 CR-IR341 Service Manual MD - 153 05.31.99 FM2460...
- Page 217 Elevation permission If there is another IP in is issued the machine,up-down load load. If there is any unprocessed cassette, up-down feed feed. Return to normal routine FR1H0441.EPS CR-IR341 Service Manual 009-051-04 MD - 154 05.31.99 FM2460...
- Page 218 4th shelf shelf TA12 Wait for hold release retry 2 sec in flow position position position position NA11 Hold release retry 5 times SA11 SA15 TR1H0096.EPS SOLA1 SOLA1 SOLA2 SOLA3 SOLA4 TR1H0097.EPS 009-051-04 CR-IR341 Service Manual MD - 155 05.31.99 FM2460...
- Page 219 Instant return of cassette relevant shelf. Is SA2 opened? is supported. LEDT2 is turned off The ready condition is LEDT1 is turned on indicated. Return to normal routine FR1H0443.EPS CR-IR341 Service Manual 009-051-04 MD - 156 05.31.99 FM2460...
- Page 220 + infinite p PD23 Conveyance grip (HP return) 400 p PD81 Recovery conveyance (fast load conveyance) + infinite p TB22 Load timeout 2.9 sec TB81 Recovery load timeout 5.1 sec TR1H0100.EPS 009-051-04 CR-IR341 Service Manual MD - 157 05.31.99 FM2460...
- Page 221 IP is notified to Cassette removed the user. Subsequently, degeneration is performed for the lamp and the IP is left unerased ***. Process continued FR1H0446.EPS CR-IR341 Service Manual 009-051-04 MD - 158 05.31.99 FM2460...
- Page 222 IP Alarm disabled in the queue. At the same time, removal of the cassette Cassette removed for the error IP is notified to the user. Process continued FR1H0447.EPS 009-051-04 CR-IR341 Service Manual MD - 159 05.31.99 FM2460...
- Page 223 Instant return of cassette is supported. relevant shelf. Is SA2 opened? LEDT2 is turned off The ready condition is indicated. LEDT1 is turned on Return to normal routine FR1H0448.EPS 009-051-04 CR-IR341 Service Manual MD - 160 05.31.99 FM2460...
- Page 224 Is SA2 opened? LEDT2 is turned off LEDT1 is turned on The ready condition is indicated. Return to normal routine If continued without registration, the IDT waits for IP registration after reading. FR1H0449.EPS 009-051-04 CR-IR341 Service Manual MD - 161 05.31.99 FM2460...
- Page 225 Cassette ejection is Reverse conveyance load not executed. After reboot, the process Fig.6.3.2 is started. FR1H0450.EPS Table 6.9.1 Operation Parameters Symbol Description Value PB14 Suction cup movement (HP load standby) TR1H0105.EPS 009-051-04 CR-IR341 Service Manual MD - 162 05.31.99 FM2460...
- Page 226 18x24 ST 24x30 ST 18x24 HR 24x30 HR Symbol Description 204 p 1752 p 2792 p 4870 p 5338 p 2894 p 5338 p 4116 p PD33 Conveyance (BCR return) TR1H0107.EPS 009-051-04 CR-IR341 Service Manual MD - 163 05.31.99 FM2460...
- Page 227 ONTENTS MD - 164 Error Code Index Table 7.1.1 CR-IR341 Error Code Index (1/2) The figure in parentheses indicates the relevant page. Code Error name Chart No. 03A2 Fig. 6.2.2 (MD-155) Cassette hold release error Fig. 2.2.2 (MD-61), Fig. 5.5.1 (MD-138/139), Fig. 5.11.1 (MD-152)
- Page 228 ONTENTS MD - 165 Table 7.1.1 CR-IR341 Error Code Index (2/2) Code Error name Chart No. The figure in parentheses indicates the relevant page. Cassette hold failure retry 23A1 Fig. 2.1.1 (MD-59), Fig. 5.4.3 (MD-137), Fig. 5.5.1 (MD-139) 23A2 Cassette hold release failure retry Fig.
- Page 229 Elevation reference seek timeout 1 13.5 TB102 Elevation reference seek timeout 2 TB103 Elevation topmost shelf seek timeout 1 TB104 Elevation topmost shelf seek timeout 2 TB105 Elevation HP 1-pulse driving timeout TR1H1153.EPS 009-051-04 CR-IR341 Service Manual MD - 166 05.31.99 FM2460...
- Page 230 2430 HR TD35 Normal reading IP trailing-edge detection timeout 19.1 14x17 inch 15.0 14x14 inch 12.4 10x12 inch 8x10 inch 1824 ST 12.1 2430 ST 10.5 1824 HR 16.8 2430 HR TR1H1154.EPS 009-051-04 CR-IR341 Service Manual MD - 167 05.31.99 FM2460...
- Page 231 Initialization side-positioning timeout TD91 SPR after-reading conveyance timeout TD92 Wait for SPR after-reading trailing-edge detection 2.57 2.07 1.74 1.06 0.91 0.91 1.31 TF11 After-reading conveyance IP leading-edge detection 1.51 timeout TR1H1155.EPS 009-051-04 CR-IR341 Service Manual MD - 168 05.31.99 FM2460...
- Page 232 SPR after-erasure conveyance timeout TQ22 SPR load timeout TR11 SPR before-erasure conveyance timeout 0.42 0.59 0.69 0.91 0.96 0.96 0.83 TR12 SPR erasure conveyance IP trailing-edge detection timeout TR1H1156.EPS 009-051-04 009-051-04 CR-IR341 Service Manual MD - 169 05.31.99 FM2460 (1) 05.31.99 FM2460...
- Page 233 Driving shaft grip release timeout Fast TZ25 Driving shaft grip timeout (self-diagnostics) Self-diagnostics TZ26 Lower limit for driving shaft grip spec (self-diagnostics) Self-diagnostics TZ27 Upper limit for driving shaft grip spec (self-diagnostics) Self-diagnostics TR1H1157.EPS 009-051-04 CR-IR341 Service Manual MD - 170 05.31.99 FM2460...
- Page 234 Feed suction retry NB12 Load suction retry NB51 Suction HP retry NB100 Elevation HP retry NB101 Elevation movement retry ND31 BCR retry ND51 Side-positioning HP retry ND61 Conveyance grip HP retry TR1H1158.EPS 009-051-04 CR-IR341 Service Manual MD - 171 05.31.99 FM2460...
- Page 235 21.46 1093 27.7 5000 6000 18.38 32.3 6000 7000 15.72 37.8 7000 8000 13.49 44.1 8000 8.40 70.7 PF13/PF14 conveyance speed (pps): Equivalent to 2W1-2 phase TR1H1165.EPS 009-051-04 009-051-04 CR-IR341 Service Manual MD - 172 05.31.99 FM2460 (1) 05.31.99 FM2460...
- Page 236 Remarks X-ray dosage (mR) speed table No. (sec) (mm/sec) (pps) Greater Less than than 471.20 3000 No limitation PF13/PF14 conveyance speed (pps): Equivalent to 2W1-2 phase TR1H1167.EPS 009-051-04 009-051-04 CR-IR341 Service Manual MD - 173 05.31.99 FM2460 (1) 05.31.99 FM2460...
- Page 237 High power Unenergized condition Not provided Low power Energized condition Provided Low power Energized condition Not provided Low power Unenergized condition Provided Low power Unenergized condition Not provided TR1H1320**.EPS 009-051-04 009-051-05 CR-IR341 Service Manual MD - 174 05.31.99 FM2460 04.20.2001 FM3006...
- Page 238 Conveyance (after-erasure conveyance) PC71 Initialization conveyance (down direction) 0xFFFFFF 600.0141355 600.0141355 PC72 Initialization conveyance (up direction) 0x7FFFFF 600.0141355 600.0141355 PC74 Initialization conveyance (load conveyance) 0x7FFFFF 3000.070677 600.0141355 TR1H1159.EPS 009-051-05 009-051-04 CR-IR341 Service Manual MD - 175 04.20.2001 FM3006 05.31.99 FM2460...
- Page 239 Initialization conveyance (after-reading conveyance direction) PF72 0x7FFFFF 600.0141355 600.0141355 Initialization conveyance (erasure conveyance direction) PF73 Initialization conveyance (load standby positioning) 600.0141355 600.0141355 PF74 0x7FFFFF 600.0141355 600.0141355 Initialization conveyance (load conveyance) TR1H1160.EPS 009-051-05 CR-IR341 Service Manual MD - 175.1 04.20.2001 FM3006...
- Page 240 ONTENTS MD - 175.2 BLANK PAGE 009-051-05 CR-IR341 Service Manual MD - 175.2 04.20.2001 FM3006...
- Page 241 0.5 mm or less T SW Side plate of side-positioning conveyor FR1H1700.EPS Erasure Conveyor and After-Reading Conveyor Rear view Side plate of erasure conveyor 0.5 mm or less Side plate of after-reading conveyor FR1H1701.EPS 009-051-04 CR-IR341 Service Manual MD - 176 05.31.99 FM2460...
- Page 242 Right-hand side plate of cassette set unit (machine-specific label side) Cassette set unit tray 105.5 – 0.5mm Scale Cassette set unit tray Top view Positioning bracket One-plane Two-plane alignment alignment 1 mm or less FR1H1611.EPS 009-051-04 CR-IR341 Service Manual MD - 177 05.31.99 FM2460...
- Page 243 Side plate of T SW Side plate of Side plate of subscanning unit subscanning unit side-positioning conveyor Side-positioning conveyor A - B = 0.5 mm or less FR1H1617.EPS 009-051-05 009-051-04 CR-IR341 Service Manual MD - 178 04.20.2001 FM3006 05.31.99 FM2460...
- Page 244 Loosen two screws FR1H1615.EPS After-Reading Conveyor Side plate of Side plate of Side plate of subscanning unit subscanning unit after-reading conveyor After-reading conveyor A - B = 0.5 mm or less FR1H1616.EPS 009-051-04 CR-IR341 Service Manual MD - 179 05.31.99 FM2460...
- Page 245 Power supply unit Light-collecting guide assembly Scanning optics unit Side-positioning conveyor (D) Subscanning unit After-reading conveyor (E) NOTES: ¥ denotes a rubber roller. ¥ An alphabet in parentheses denotes a unit symbol. FR1H1046.EPS 009-051-04 CR-IR341 Service Manual MD - 180 05.31.99 FM2460...
- Page 246 ONTENTS MD - 181 IP Conveyance Locations Side plate of vertical Vertical conveyor conveyor 3–2mm Measure between them T SW FR1H1606.EPS 009-051-04 CR-IR341 Service Manual MD - 181 05.31.99 FM2460...
- Page 247 IP removal unit Check at the topmost stage Bracket Bracket 10–1mm Shock absorber IP removal unit Up-down IP removal unit Left-hand side plate Timing belt Shaft wheel Bearing flange 86.5–1mm Actuator FR1H4028.EPS 009-051-04 CR-IR341 Service Manual MD - 182 05.31.99 FM2460...
- Page 248 MD - 183 Cassette set unit and IP removal unit Cassette set unit Actuator SA17 Hole IP removal unit Actuator Hole FR1H1607.EPS Side-positioning conveyor Actuator CLOSE condition Actuator CLOSE condition FR1H1609.EPS 009-051-04 CR-IR341 Service Manual MD - 183 05.31.99 FM2460...
- Page 249 ONTENTS MD - 184 Subscanning unit Subscanning unit CLOSE condition OPEN condition Light-blocking Light-blocking plate for SZ2 plate for SZ3 FR1H1608.EPS After-Reading Conveyor Actuator After-reading conveyor CLOSE condition FR1H1610.EPS 009-051-04 CR-IR341 Service Manual MD - 184 05.31.99 FM2460...
- Page 250 Guide plate 29.5 40.6 129.3 Guide plate Guide plate 128.2 155.4 Subscanning unit 79.6 Guide plate After-reading conveyor 136.7 Side-positioning conveyor 37.4 39.6 101.4 118.1 Guide plate Guide plate 157.1 FR1H1495.EPS 009-051-04 CR-IR341 Service Manual MD - 185 05.31.99 FM2460...
- Page 251 Data on Grip Springs Controller FRONT Cassette set unit IP removal unit Vertical conveyor Power supply Erasure conveyor Before-side-positioning conveyor 388N2395 388N2395 Scanning optics unit Subscanning unit After-reading conveyor Side-positioning conveyor 388N2395 388N2396 FR1H4035.EPS 009-051-04 CR-IR341 Service Manual MD - 186 05.31.99 FM2460...
- Page 252 Right side (reference plane) 388N2395 x2 121.0 Left side 388N2396 118.8 Right side (reference plane) 388N2395 x2 121.0 Left side 388N2395 Right side (reference plane) 388N2384 78.4 388N2385 91.9 Left side TR1H1050.EPS 009-051-04 CR-IR341 Service Manual MD - 187 05.31.99 FM2460...
- Page 253 The two LEDs represent two bits of the process line number. The DSP detects an error: The two LEDs are all turned ON and OFF twice (at intervals of 0.5 sec). 009-051-04 CR-IR341 Service Manual MD - 188 05.31.99 FM2460...
- Page 254 ONTENTS MD - 189 BLANK PAGE 009-051-04 CR-IR341 Service Manual MD - 189 05.31.99 FM2460...
- Page 255 The interlock requirements for machine protection provide that the up-down drive motor (MB3) must not operate while the suction cup home position sensor (SB1) is OPEN. Up-down IP removal assembly IP removal arm Actuator FR1B1087.EPS 009-051-04 CR-IR341 Service Manual MD - 190 05.31.99 FM2460...
- Page 256 ONTENTS MD - 191 BLANK PAGE 009-051-04 CR-IR341 Service Manual MD - 191 05.31.99 FM2460...
- Page 257 Information required by each subsystem when power is turned ON next time is written to the backup memory or HD. Control of the remote power supply unit is also executed as needed. 009-051-04 CR-IR341 Service Manual MD - 192 05.31.99 FM2460...
- Page 258 ONTENTS MD - 193 BLANK PAGE 009-051-04 CR-IR341 Service Manual MD - 193 05.31.99 FM2460...
- Page 259 CR-IR341/CR-IR341P Service Manual Troubleshooting (MT)
- Page 260 51.2, 57–60, 60.1, 60.2, 67.1, 67.2, 146, 195, 198–216 08/30/2001 Support for “plus” MT-26, 28, 44, 46, 52, 60, 60.1, (support for software version A14) 60.2, 61–63, 70, 72, 179, 198–216 (FM3115) 009-051-07 CR-IR341 Service Manual MT - 1 08.30.2001 FM3115...
- Page 261 • "4.4 Remedy When System Goes • "2.6 Check for IP Conveyance" Down Unexpectedly during Operation" • "4.5 Main Numerical Values Used for Troubleshooting" Trouble Not Fixed See “Machine Description 8. Mechanical Control Flows.” FR1H4040.EPS 009-051-04 CR-IR341 Service Manual MT - 2 05.31.99 FM2460...
- Page 262 5: Scanner control F: Other (software install, version update, etc.) 6: Image processing related (printer) 7: IDT interface control ZZ: Reference number Managed according to the error classification FR1H1316.EPS 009-051-04 009-051-06 CR-IR341 Service Manual MT - 3 04.20.2001 FM3006 05.31.99 FM2460...
- Page 263 An attempt to read a file fails. (netmasks) HD failure File read error 0122 File close error An attempt to close a file fails. (netmasks) HD failure TR1H1218.EPS 009-051-04 009-051-06 CR-IR341 Service Manual MT - 4 04.20.2001 FM3006 05.31.99 FM2460...
- Page 264 • Failure to update boot line for its own information • Router description (host name/IP address) error in the route file 0141 Failure to register OS for routing information Routing information-related error • OS network environment error TR1H1219.EPS 009-051-04 CR-IR341 Service Manual MT - 5 05.31.99 FM2460...
- Page 265 13E1-13E5, but SA3, 7, 11, and 15 do not turn Cassette hold release error MT - 74 OFF so that the cassette cannot be released. TR1H1220.EPS 009-051-06 009-051-04 CR-IR341 Service Manual MT - 6 04.20.2001 FM3006 05.31.99 FM2460...
- Page 266 Because SC1 is turned ON during initialization, conveyance 03B7 IP ejection error 133, MT - 90 operation is performed, but SC1 does not turn OFF. 03B8 MT - 92 IP position information error TR1H1221.EPS 009-051-04 009-051-06 CR-IR341 Service Manual MT - 7 04.20.2001 FM3006 05.31.99 FM2460...
- Page 267 MD - 148, 03CB MZ3 is driven during initialization, but SZ3 does not turn OFF. Load standby remaining IP ejection error MT - 108 03CC Mirror operation error TR1H1222.EPS 009-051-04 009-051-06 CR-IR341 Service Manual MT - 8 05.31.99 FM2460 04.20.2001 FM3006...
- Page 268 SB3 does not turn ON during movement of the elevation unit. MT - 132 MD - 64, 03E8 SB1 does not turn ON during suction cup HP detection. Suction cup movement error MT - 134 TR1H1223.EPS 009-051-04 009-051-06 CR-IR341 Service Manual MT - 9 04.20.2001 FM3006 05.31.99 FM2460...
- Page 269 The IMG07B board or MTH08A board is faulty. DSP4 self-diagnostics error an error. 0420 DSP4 memory write error A write to the DSP4 memory results in an error. The IMG07B board or MTH08A board is faulty. TR1H1224.EPS 009-051-04 CR-IR341 Service Manual MT - 10 05.31.99 FM2460...
- Page 270 During reoutput, an attempt to update the ID information fails. Faulty HDD, MTH board, etc. ID information update error 0468 Faulty HDD, MTH board, etc. Monitor image read error During reoutput, an attempt to read the monitor image fails. TR1H1225.EPS 009-051-04 009-051-06 CR-IR341 Service Manual MT - 11 04.20.2001 FM3006 05.31.99 FM2460...
- Page 271 • A host name for the IDT is not described in equip. 0704 A valid IDT is not set (equip/hosts). No valid IDT • A host address for the IDT is not set. TR1H1226..EPS 009-051-06 009-051-04 CR-IR341 Service Manual MT - 12 04.20.2001 FM3006 05.31.99 FM2460...
- Page 272 Register the DSP µ in the HD again. 0811 DSP10 µ load error 0812 DSP10 memory write error Write to the DSP device cannot be done. Check the IMG08A board. TR1H1227.EPS 009-051-04 CR-IR341 Service Manual MT - 13 05.31.99 FM2460...
- Page 273 Register the DSP µ in the HD again. DSP20 µ load error 081F 0820 DSP20 memory write error Write to the DSP device cannot be done. Check the IMG08B board. TR1H1228 .EPS 009-051-04 CR-IR341 Service Manual MT - 14 05.31.99 FM2460...
- Page 274 Write to the DSP device cannot be done. Check the IMG08B board. DSP22 memory write error 082F DSP22 memory read error Read from the DSP device cannot be done. Check the IMG08B board. TR1H1229 .EPS 009-051-04 CR-IR341 Service Manual MT - 15 05.31.99 FM2460...
- Page 275 Read from the DSP device cannot be done. Check the IMG08C board. • Check the IMG08C board. DSP µ checksum error 083E DSP31 checksum error • Register the DSP µ in the HD again. TR1H1230 .EPS 009-051-04 CR-IR341 Service Manual MT - 16 05.31.99 FM2460...
- Page 276 An error occurs during execution of DSP application. DMC08A board failure. DSP0 image processing error 2 0936 An attempt to cancel the DSP command fails. DMC08A board failure. DSP0 image processing error 3 TR1H1231.EPS 009-051-04 CR-IR341 Service Manual MT - 17 05.31.99 FM2460...
- Page 277 An attempt to open the output DMA device descriptor fails. 0983 Input DMA device open error An attempt to open the input DMA device descriptor fails. DMC08A board failure. 0984 – – – DSP device open error TR1H1232.EPS 009-051-04 CR-IR341 Service Manual MT - 18 05.31.99 FM2460...
- Page 278 Both the type A online connection option and type B online 0A04 Online connection option setup error and type B online connection option soft-key file are connection option are valid (option setups are inconsistent). both present in the hard disk. TR1H1233.EPS 009-051-04 CR-IR341 Service Manual MT - 19 05.31.99 FM2460...
- Page 279 The HCP board is faulty. 0B14 DSPH memory write fails. The HCP board is faulty. DSPH memory write error 0B15 DSPH memory read error DSPH memory read fails. The HCP board is faulty. TR1H1234 .EPS 009-051-04 CR-IR341 Service Manual MT - 20 05.31.99 FM2460...
- Page 280 An attempt to close after reading the image data from the HD 0C12 HD failure. Image data read close error to the memory fails. *: A06 or later TR1H1235 .EPS 009-051-04 CR-IR341 Service Manual MT - 21 05.31.99 FM2460...
- Page 281 An attempt to read the EDR data fails. • HD failure 0D15 An attempt to close the EDR data fails. HD failure EDR data close error *: A06 or later TR1H1236.EPS 009-051-06 009-051-04 CR-IR341 Service Manual MT - 22 04.20.2001 FM3006 05.31.99 FM2460...
- Page 282 An error occurs with the format data in the HD image area. HD image area uninitialized • The format data in the image area of the HD is corrupted. TR1H1237.EPS 009-051-06 009-051-04 CR-IR341 Service Manual MT - 23 04.20.2001 FM3006 05.31.99 FM2460...
- Page 283 IP with improper generation/type detected MT - 150 MD - 80, 13AE No relevant MPM code MT - 152 MD - 80, 13AF IDT line error MT - 154 TR1H1238.EPS 009-051-06 009-051-04 CR-IR341 Service Manual MT - 24 04.20.2001 FM3006 05.31.99 FM2460...
- Page 284 • The network environment is faulty. request, a timeout occurs. • A line failure occurs. 1722 ID unregistration received The ID information is not yet registered. Register the ID information. TR1H1239.EPS 009-051-06 009-051-04 CR-IR341 Service Manual MT - 25 04.20.2001 FM3006 05.31.99 FM2460...
- Page 285 An ISC message with an unknown destination is 1FF0 ISC message error Error log for ISC unknown receiver analysis queued. 1FFF Null transmission to ISC Null data is sent during ISC message transmission. Software failure TR1H1240.EPS 009-051-07 CR-IR341 Service Manual MT - 26 08.30.2001 FM3115...
- Page 286 The amount of shared memory required for a requested • The shared memory is insufficient. 2043 Insufficient shared memory option is not installed. • There are too many mounted boards. TR1H1241.EPS 009-051-04 CR-IR341 Service Manual MT - 27 05.31.99 FM2460...
- Page 287 A timeout occurs during image file access. The number of retries for image file access due to 204A 204C Image file access retry over Faulty HDD, MTH board, etc. exceeds the specified limit. TR1H1242.EPS 009-051-07 CR-IR341 Service Manual MT - 28 08.30.2001 FM3115...
- Page 288 Comment text update error • Software bug the comment text is abandoned. This error occurs due to • Replace the HD. insufficient memory, file error, too many configurations, etc. TR1H1243.EPS 009-051-06 009-051-04 CR-IR341 Service Manual MT - 29 04.20.2001 FM3006 05.31.99 FM2460...
- Page 289 When the SELECTU.PRM/HPGU.PRM file is created during • The file in the HDD is corrupted. 208B File write error version update, the file cannot be written to the HDD. • The HDD itself is faulty. TR1H1313.EPS 009-051-06 CR-IR341 Service Manual MT - 29.1 04.20.2001 FM3006...
- Page 290 An error is detected during bus check. The HCP board is faulty. HCP board error An error is detected during bus check due to shading memory 2164 The SCN board is faulty. SCN board error access. TR1H1314.EPS 009-051-06 CR-IR341 Service Manual MT - 29.2 04.20.2001 FM3006...
- Page 291 An attempt to open a file fails. Faulty HDD, MTH board, etc. 21F1 File read error An attempt to read a file fails. Faulty HDD, MTH board, etc. TR1H1244.EPS 009-051-06 009-051-04 CR-IR341 Service Manual MT - 30 04.20.2001 FM3006 05.31.99 FM2460...
- Page 292 23BF MD - 85 Side-positioning grip operation error 23C5 MD - 86 FFM drive W.F. disorder MD - 84, 106, 23C6 Driving shaft grip operation error TR1H1245.EPS 009-051-06 009-051-04 CR-IR341 Service Manual MT - 31 04.20.2001 FM3006 05.31.99 FM2460...
- Page 293 23E2* Feed IP drop retry 23E3* Feed IP grip retry 23E4 Load IP suction failure retry MD - 100 , 113 23E5* Load IP drop retry *: A07 or later TR1H1246.EPS 009-051-05 CR-IR341 Service Manual MT - 32 11.20.99 FM2638...
- Page 294 1 is written to the port on the SNS board, but it is 0 23F9 NFB trip detection during reading. TR1H1247.EPS 009-051-05 009-051-06 CR-IR341 Service Manual MT - 33 04.20.2001 FM3006 11.20.99 FM2638...
- Page 295 2490 Menu replacement error Check if the menu code has been registered. it is replaced with a default menu code. TR1H1320.EPS 009-051-06 CR-IR341 Service Manual MT - 33.1 04.20.2001 FM3006...
- Page 296 ONTENTS MT - 33.2 BLANK PAGE 009-051-06 CR-IR341 Service Manual MT - 33.2 04.20.2001 FM3006...
- Page 297 Faulty SCN board, scanner hardware, etc. detected. With status check during system shutdown after reading 2573 Insufficient laser power error 3 Faulty SCN board, scanner hardware, etc. error, an error is detected. TR1H1248.EPS 009-051-05 009-051-06 CR-IR341 Service Manual MT - 34 04.20.2001 FM3006 11.20.99 FM2638...
- Page 298 • HD failure 2752 File format error File format check error File description is improper. 2753 An attempt to write a file fails. HD failure File write error TR1H1249.EPS 009-051-04 009-051-06 CR-IR341 Service Manual MT - 35 04.20.2001 FM3006 05.31.99 FM2460...
- Page 299 IMG08B board is not installed. board The PEM image parameter is inputted, but the IMG08B board Check the image parameter, or install the IMG08B 2807 PEM image processing ignored is not installed. board. TR1H1250.EPS 009-051-04 CR-IR341 Service Manual MT - 36 05.31.99 FM2460...
- Page 300 Check the IMG08B board. DSP20 self-diagnostics error 2824 DSP image parameter error (minor). Check the image parameter. DSP20 image processing error 2829 DSP21 checksum error DSP checksum error (minor). Check the IMG08B board. TR1H1251.EPS 009-051-04 CR-IR341 Service Manual MT - 37 05.31.99 FM2460...
- Page 301 • A failure occurs on the DMS. An undefined command is received while the operation is 2922 Unexpected command received • The SMCU driver is faulty. stopped. TR1H1252.EPS 009-051-04 CR-IR341 Service Manual MT - 38 05.31.99 FM2460...
- Page 302 Image data output error The DMC08A board is faulty. a timeout occurs. While waiting for an image output completion response, 294B Image data output error The DMC08A board is faulty. a timeout occurs. TR1H1253.EPS 009-051-04 CR-IR341 Service Manual MT - 39 05.31.99 FM2460...
- Page 303 • Break state on the source end While waiting for an image data transfer preparation request, 2964 Image data input error The DMC08A board is faulty. a timeout occurs. *: A06 or later TR1H1254.EPS 009-051-04 CR-IR341 Service Manual MT - 40 05.31.99 FM2460...
- Page 304 During reoutput, an attempt to update the ID information fails. Faulty HDD, MTH board, etc. ID information update error 0468 Faulty HDD, MTH board, etc. Monitor image read error During reoutput, an attempt to read the monitor image fails. TR1H1225.EPS 009-051-04 CR-IR341 Service Manual MT - 41 05.31.99 FM2460...
- Page 305 The magnetic card reader is inoperative with the machine 2A10 Magnetic card reader inoperative SNS08A board, magnetic card reader configuration that uses the magnetic card reader. *: A06 or later TR1H1256.EPS 009-051-04 CR-IR341 Service Manual MT - 42 05.31.99 FM2460...
- Page 306 The card read by the magnetic card reader does not contain Inconsistency between the magnetic card and search Card without relevant search key data 2A32 search key data specified by the user. key type selection (operation error) item TR1H1257.EPS 009-051-04 CR-IR341 Service Manual MT - 43 05.31.99 FM2460...
- Page 307 The HCP board is not a version that supports 11bit output 2D06 Older version of HCP board Replace the HCP board with its version G or later. (QA-WS output is 11bit). TR1H1259.EPS 009-051-07 CR-IR341 Service Manual MT - 44 08.30.2001 FM3115...
- Page 308 • A failure occurs on the IDT. 371B SMCU transmission error occurs. • The SMCU driver is faulty. *: “PDC” = DMA controller on the CPU90F board (PCI DMA controller) TR1H1260.EPS 009-051-06 009-051-04 CR-IR341 Service Manual MT - 45 04.20.2001 FM3006 05.31.99 FM2460...
- Page 309 I-12 No FINP ID Check the ID information. (group/element) does not exist. The IMG08M board (for 5000MA) is inserted inadvertently 3806 Board insertion error Board insertion mistake into the machine. TR1H1261.EPS 009-051-07 CR-IR341 Service Manual MT - 46 08.30.2001 FM3115...
- Page 310 • A failure occurs on the DMS. • Command wait timeout • Break state on the target end 3923 SMCU receive error A command reception from the DMS fails. • Break state on the source end TR1H1262.EPS 009-051-04 CR-IR341 Service Manual MT - 47 05.31.99 FM2460...
- Page 311 An error occurs with the socket acquisition function Information for LAN task analysis 3C60 Socket acquisition function error (js_socket). 3C61 Connect function error An error occurs with the connect function (js_connect). Information for LAN task analysis TR1H1263.EPS 009-051-04 CR-IR341 Service Manual MT - 48 05.31.99 FM2460...
- Page 312 An error occurs with the socket acquisition function 3CE0 Information for LAN task analysis Socket acquisition function error (js_socket). 3CE1 Connect function error An error occurs with the connect function (js_connect). Information for LAN task analysis TR1H1264.EPS 009-051-05 CR-IR341 Service Manual MT - 49 11.20.99 FM2638...
- Page 313 • The Ethernet cable is faulty. 3D40 Line error The TCP/IP connection is disconnected. • The CPU90F board is faulty. • Check the power supply of the output designation host. TR1H1265.EPS 009-051-04 CR-IR341 Service Manual MT - 50 05.31.99 FM2460...
- Page 314 “_ _ _ _” is used if there is no FCR image ID. FCR image ID length (4 characters) Hexadecimal dump “_ _” is used if the data length is 0. F–F Original data of variable length TR1H1201.EPS 009-051-05 009-051-06 CR-IR341 Service Manual MT - 51 11.20.99 FM2638 04.20.2001 FM3006...
- Page 315 Four hexadecimal digits Error code BBBB Four hexadecimal digits Data start position AAAA.BBBB.C–C Hexadecimal dump C–C “_ _” is used if the data length is 0. Original data of variable length TR1H1315.EPS 009-051-06 CR-IR341 Service Manual MT - 51.1 04.20.2001 FM3006...
- Page 316 Original data of variable length Four hexadecimal digits Error code AAAA AAAA.BBBB. Four hexadecimal digits MPM code BBBB Four hexadecimal digits Error code AAAA AAAA.B. One hexadecimal digit Slot number TR1H1316.EPS 009-051-06 CR-IR341 Service Manual MT - 51.2 04.20.2001 FM3006...
- Page 317 Four hexadecimal digits Error code AAAA.BB Two hexadecimal digits Status AAAA Four hexadecimal digits Error code AAAA.BBBB BBBB Four hexadecimal digits Image UID Unique number for image control purposes. TR1H1202 .EPS 009-051-07 CR-IR341 Service Manual MT - 52 08.30.2001 FM3115...
- Page 318 5: X-ray dosage (ST 85-120 mR) One hexadecimal digit Erasure speed table number (HR 1700-2400 mR) 6: X-ray dosage (ST 120-200 mR) (HR 2400-4000 mR) 7: X-ray dosage (ST 200-250 mR) (HR 4000-5000 mR) TR1H1203.EPS 009-051-05 CR-IR341 Service Manual MT - 53 11.20.99 FM2638...
- Page 319 Four decimal digits Driven shaft grip release operation time Subscanning motor failure timing Timing from the start of reading to the occurrence MMMM Four decimal digits of failure (in 10 msec). TR1H1204.EPS 009-051-04 CR-IR341 Service Manual MT - 54 05.31.99 FM2460...
- Page 320 Four hexadecimal digits End status JJJJJJ.KKKKKK DDDDDD Six hexadecimal digits DSP internal detail code "_ _ _ _" is used if it cannot be obtained. —KKKKKK TR1H1205.EPS 009-051-04 009-051-04 CR-IR341 Service Manual MT - 55 05.31.99 FM2460 (1) 05.31.99 FM2460...
- Page 321 Four hexadecimal digits Error code AAAA.BBBB BBBB Four hexadecimal digits Menu code AAAA Four hexadecimal digits Error code AAAA.BB NOTE) BB: Added for A08 or later Two hexadecimal digits Dosage (AD value) TR1H1206.EPS 009-051-05 CR-IR341 Service Manual MT - 56 11.20.99 FM2638...
- Page 322 Four hexadecimal digits Number of requests to IMM HHHH I/O task AAAA Four hexadecimal digits Error code AAAA.BB—BB Character string of Error event function/trace BBBB variable length information, etc. TR1H1207.EPS 009-051-06 009-051-04 CR-IR341 Service Manual MT - 57 04.20.2001 FM3006 05.31.99 FM2460...
- Page 323 Four hexadecimal digits Error code BBBB Four hexadecimal digits Image UID AAAA.BBBB.CCCCCCCC.DDDDDDDD CCCCCCCC Eight hexadecimal digits Execution result for LAN Execution result for Base on DDDDDDDD Eight hexadecimal digits DICOM common software TR1H1317.EPS 009-051-04 CR-IR341 Service Manual MT - 58 05.31.99 FM2460...
- Page 324 Four hexadecimal digits Error code AAAA.BBBB.CC BBBB Four hexadecimal digits Image UID Two hexadecimal digits File Discripter AAAA Four hexadecimal digits Error code AAAA.BBBB BBBB Four hexadecimal digits Format number TR1H1208.EPS 009-051-06 009-051-04 CR-IR341 Service Manual MT - 59 04.20.2001 FM3006 05.31.99 FM2460...
- Page 325 0D: Standard density 35cm x 43cm 1E: High density 30cm x 15cm 0E: Standard density 30cm x 15cm 1F: High density 24cm x 24cm 0F: Standard density 24cm x 24cm TR1H1209.EPS 009-051-07 CR-IR341 Service Manual MT - 60 08.30.2001 FM3115...
- Page 326 04: Changed (correspond to FC4 of FilmFmt.Cfg) 05: Changed (correspond to FC5 of FilmFmt.Cfg) 06: Changed (correspond to FC6 of FilmFmt.Cfg) 00: Image area Two hexadecimal digits Area type 01: Film character area TR1H1210.EPS 009-051-07 CR-IR341 Service Manual MT - 60.1 08.30.2001 FM3115...
- Page 327 Two hexadecimal digits LR flag 04: SS (two-image output, with same size and same image number) 05: ABCD (four-image) For LR, a detail determination is made to discriminate between LR and L-R. TR1H1312.EPS 009-051-07 CR-IR341 Service Manual MT - 60.2 08.30.2001 FM3115...
- Page 328 4: 14"x17" or 8"x10", with ABCD image character 5: Other than 14"x17" or 8"x10", with ABCD image character 6: 100% magnification 18cm-x-24cm AB image character Fifth digit: Film background 0: Transparent 1: Black TR1H1211.EPS 009-051-07 CR-IR341 Service Manual MT - 61 08.30.2001 FM3115...
- Page 329 17: Two-image special for 14"x17" For B4/14"x14"/8"x10" film Image number 01_08 Two hexadecimal digits (Detail number within format For 14"x17" film classification code) 01_08: 14"x17" area is used. 08_10: B4 area is used. TR1H1212.EPS 009-051-07 CR-IR341 Service Manual MT - 62 08.30.2001 FM3115...
- Page 330 DSP memory error area JJJJJJ Six hexadecimal digits DSP memory error area KKKKKK Six hexadecimal digits DSP memory error area AAAA Four hexadecimal digits Error code AAAA.BB Two hexadecimal digits SMCU receive command TR1H1213.EPS 009-051-07 CR-IR341 Service Manual MT - 63 08.30.2001 FM3115...
- Page 331 One hexadecimal digit Film used face number 0: One face, 1: Two faces 0: First frame 1: Second frame One hexadecimal digit Used frame number 2: Third frame 4: Fourth frame TR1H1214.EPS 009-051-05 CR-IR341 Service Manual MT - 64 11.20.99 FM2638...
- Page 332 BBBB Four hexadecimal digits End status AAAA Four hexadecimal digits Error code 0001: Patient ID number AAAA.BBBB BBBB Four hexadecimal digits Search key type 0002: Receipt number 0003: Examination number TR1H1215.EPS 009-051-04 CR-IR341 Service Manual MT - 65 05.31.99 FM2460...
- Page 333 AAAA Four hexadecimal digits Error code AAAA.B.CCCC One hexadecimal digit Channel number Channel number used for DMA transfer Four hexadecimal digits End status End status for function or message CCCC TR1H1216.EPS 009-051-04 CR-IR341 Service Manual MT - 66 05.31.99 FM2460...
- Page 334 Barcode number DDDDDDDDDD.EEEEEEE digits Character string of 10 DDDDDDDDDD Patient ID digits IP address of the device connected to the machine EEEEEEEE Eight hexadecimal digits Destination IP address over the network TR1H1217.EPS 009-051-04 CR-IR341 Service Manual MT - 67 05.31.99 FM2460...
- Page 335 Eight hexadecimal digits Error number AAAA Four hexadecimal digits Error code AAAA.BBBBBBBB B—B Eight hexadecimal digits Socket number AAAA Four hexadecimal digits Error code AAAA.BBBBBBBB Eight hexadecimal digits Command number B—B TR1H1318.EPS 009-051-06 CR-IR341 Service Manual MT - 67.1 04.20.2001 FM3006...
- Page 336 Line number “_ _ _ _” if a line number does not exist. AAAA Four hexadecimal digits Error code AAAA.BB-BB. Character string of KEY name in Configuration BBBB variable length Setting TR1H1319.EPS 009-051-06 CR-IR341 Service Manual MT - 67.2 04.20.2001 FM3006...
- Page 337 SA17 SA13 SA14 SA10 SA15 NOTE: 35* SZ4 is not used with the CR-IR341. The sensor information always reads 0 (OPEN). TR1H1300.EPS Motor Number Correspondence Table (Applicable to Type: “D-5”, Format Symbols “G”, “H”, and “I”) Motor name Motor name TR1H1301.EPS...
- Page 338 Failure to reserve memory Insufficient main memory TR1H1302.EPS Remedy (1) Write down the top three liens of the message displayed, and notify them to the Service Headquarters. (2) Reset the machine. 009-051-04 CR-IR341 Service Manual MT - 69 05.31.99 FM2460...
- Page 339 Subscanning unit: CNZ3, SZ3 DRV08A: CN15 03DC After-reading conveyor: CNME1, SE1 Subscanning unit: CNZ10 DRV08A: CN6 SNS08A: CN6 03DD Cassette set unit: SA17, CAN2 Up-down IP removal unit: CNMB3, CNB4 TR1H1304.EPS 009-051-07 CR-IR341 Service Manual MT - 70 08.30.2001 FM3115...
- Page 340 0536 PMT08A: CN1 SCN08A: CN2 SCN08A: NFB6, NFB7 0537 Scanning optics unit SYN08A: CN1 NFB9, NFB10 0537/0538 Power supply fuse: F6 SCN08A: CN4 SCN08A: NFB8 0538 Subscanning unit: SZ1, CNZ11 TR1H1305.EPS 009-051-05 CR-IR341 Service Manual MT - 71 11.20.99 FM2638...
- Page 341 Erasure conveyor: SF2, CNMF1, CNF2 DRV08A: CN11 03D4 Erasure conveyor: CNSOLF1 Erasure conveyor: SF3 03D5 Erasure/before-side-positioning 03D6 belt dislocated MTH08A: NFB3 SNS08A: CN8 0422 Power supply fuse: F3,F4 MTH08A: CN21 TR1H1306.EPS 009-051-07 CR-IR341 Service Manual MT - 72 08.30.2001 FM3115...
- Page 342 ONTENTS MT - 73 BLANK PAGE 009-051-04 CR-IR341 Service Manual MT - 73 05.31.99 FM2460...
- Page 343 SOLA3 SOLA4 FR1H0001.EPS SOLF1 Error-related system block diagram SNS08A CNA2 AC IN CN13 SA3/7/11/15 DC OUT2 CNSOLA1 DRV03D SOLA1 JPS-1 CNA3 SOLA2 CNSOLA2 DRV08A SOLA3 DC OUT3 CNSOLA3 SOLA4 CNSOLA4 FR1H0002.EPS CR-IR341 Service Manual 009-051-04 MT - 74 05.31.99 FM2460...
- Page 344 Check the error-related system block SA3, 7, 11 and 15 diagram and connect the connectors to SNS08A board as appropriate. normal? Replace the Restart the machine SNS08A board. and check its status. FR1H0003.EPS 009-051-04 CR-IR341 Service Manual MT - 75 05.31.99 FM2460...
- Page 345 SC1 Before-BCR IP sensor FR1H0004.EPS Error-related system block diagram CNA1 SNS08A CNF1 AC IN CN13 CNC1 SA12 SA12 DC OUT2 DRV03D SA16 SA16 JPS-1 CNZ7 CNMD3 DRV08A CNC2 DC OUT3 CNMC1 FR1H0005.EPS CR-IR341 Service Manual 009-051-04 MT - 76 05.31.99 FM2460...
- Page 346 Is SC1 normal? and connect the connectors as appropriate. Replace the following parts in order named. Restart the machine SNS08A board and check its status. FR1H0006.EPS 009-051-04 CR-IR341 Service Manual MT - 77 05.31.99 FM2460...
- Page 347 MD3 IP transport motor IP transport motor Before-BCR IP sensor FR1H0007.EPS Error-related system block diagram SNS08A CNF1 AC IN CN13 CNC1 DC OUT2 DRV03D JPS-1 CNZ7 CNMD3 DRV08A CNC2 DC OUT3 CNMC1 FR1H0008.EPS CR-IR341 Service Manual 009-051-04 MT - 78 05.31.99 FM2460...
- Page 348 SC1 to SNS08A board normal? Check the error-related Replace the following Restart the machine system diagram and parts in order named. and check its status. connect the connector as appropriate. SNS08A board FR1H0010.EPS 009-051-04 CR-IR341 Service Manual MT - 79 05.31.99 FM2460...
- Page 349 IP transport motor Cassette inlet IP sensor IP transport motor FR1H0011.EPS Error-related system block diagram SNS08A CNB1 AC IN CN13 CNB2 DC OUT2 DRV03D CNMB2 JPS-1 CNB3 CNC2 CNMC1 DRV08A DC OUT3 FR1H0012.EPS CR-IR341 Service Manual 009-051-04 MT - 80 05.31.99 FM2460...
- Page 350 SNS08A board normal? connectors as appropriate. monitoring. Is SB2 normal? Replace the following parts in order named. Restart the machine SNS08A board and check its status. FR1H0013.EPS 009-051-04 CR-IR341 Service Manual MT - 81 05.31.99 FM2460...
- Page 351 MD3 IP transport motor Side-positioning IP sensor Before-BCR IP sensor FR1H0014.EPS Error-related system block diagram SNS08A CNZ2 AC IN CN13 CND1 DC OUT2 DRV03D JPS-1 CNZ7 CN13 CNMD3 DRV08A DC OUT3 FR1H0015.EPS CR-IR341 Service Manual 009-051-04 MT - 82 05.31.99 FM2460...
- Page 352 SD3 to SNS08A board block diagram and connect the normal? connectors as appropriate. Replace the following parts Restart the machine in order named. and check its status. SNS08A board FR1H0016.EPS 009-051-04 CR-IR341 Service Manual MT - 83 05.31.99 FM2460...
- Page 353 IP transport motor Cassette inlet IP sensor IP transport motor FR1H0017.EPS Error-related system block diagram SNS08A CNB1 AC IN CN13 CNB2 DC OUT2 DRV03D CNMB2 JPS-1 CNB3 DRV08A DC OUT3 FR1H0018.EPS CR-IR341 Service Manual 009-051-04 MT - 84 05.31.99 FM2460...
- Page 354 SB2 to SNS08A board system block diagram and normal? connect the connectors as appropriate. Replace the following parts in order named. Restart the machine and check its status. SNS08A board FR1H0019.EPS 009-051-04 CR-IR341 Service Manual MT - 85 05.31.99 FM2460...
- Page 355 IP transport motor Cassette inlet IP sensor IP transport motor FR1H0020.EPS Error-related system block diagram SNS08A CNB1 AC IN CN13 CNB2 DC OUT2 DRV03D CNMB2 JPS-1 CNB3 CNC2 CNMC1 DRV08A DC OUT3 FR1H0021.EPS CR-IR341 Service Manual 009-051-04 MT - 86 05.31.99 FM2460...
- Page 356 SB2 to SNS08A board system block diagram and normal? connect the connectors as appropriate. Replace the following parts in order named. Restart the machine and check its status. SNS08A board FR1H0022.EPS 009-051-04 CR-IR341 Service Manual MT - 87 05.31.99 FM2460...
- Page 357 IP transport motor IP transport motor Cassette inlet IP sensor FR1H0023.EPS Error-related system block diagram SNS08A CNB1 AC IN CN13 CNB2 DC OUT2 DRV03D CNMB2 JPS-1 CNB3 CNC2 CNMC1 DRV08A DC OUT3 FR1H0024.EPS CR-IR341 Service Manual 009-051-04 MT - 88 05.31.99 FM2460...
- Page 358 SNS08A board normal? connectors as appropriate. monitoring. Is SB2 normal? Replace the following parts in order named. Restart the machine SNS08A board and check its status. FR1H0025.EPS 009-051-04 CR-IR341 Service Manual MT - 89 05.31.99 FM2460...
- Page 359 Before-BCR IP sensor FR1H0026.EPS Error-related system block diagram SNS08A CNF1 AC IN CN13 CNC1 DC OUT2 DRV03D CNZ2 CND1 JPS-1 CNZ7 CN13 CNMD3 DRV08A DC OUT3 CN14 CNZ4 DC OUT7 FR1H0027.EPS CR-IR341 Service Manual 009-051-04 MT - 90 05.31.99 FM2460...
- Page 360 Replace the following parts Restart the machine in order named. and check its status. SD3/SC1 (faulty sensor only) SNS08A board FR1H0028.EPS 009-051-04 CR-IR341 Service Manual MT - 91 05.31.99 FM2460...
- Page 361 If the IP is manually removed, clear the backup memory through “8. BACK UP MEMORY” of M-Utility. Note, however, that when backup memory is cleared, all the error codes stored are also cleared as well. CR-IR341 Service Manual 009-051-04 MT - 92...
- Page 362 Manually eject the IP left in the machine. initialization self-diagnostics? Power ON and clear "8. BACK UP MEMORY" of M-Utility. Restart the machine again and check its status. Restart the machine and check its status. FR1H0029.EPS 009-051-04 CR-IR341 Service Manual MT - 93 05.31.99 FM2460...
- Page 363 Cassette inlet IP sensor IP transport motor FR1H0030.EPS Error-related system block diagram CNB1 SNS08A AC IN CN13 CNB2 DC OUT2 DRV03D CNF1 JPS-1 CNMB2 CNB3 CNC2 CNMC1 DRV08A DC OUT3 CNF2 FR1H0031.EPS CR-IR341 Service Manual 009-051-04 MT - 94 05.31.99 FM2460...
- Page 364 SB2 to SNS08A board system block diagram and normal? connect the connectors as appropriate. Restart the machine Replace the following parts and check its status. in order named. SNS08A board FR1H0033.EPS 009-051-04 CR-IR341 Service Manual MT - 95 05.31.99 FM2460...
- Page 365 Actuator mechanism HP for SD1 sensor MD1 side-positioning motor FR1H0034.EPS Error-related system block diagram SNS08A CNZ2 AC IN CN13 CND1 DC OUT2 DRV03D JPS-1 CNZ6 CN12 CNMD1 DRV08A DC OUT3 FR1H0035.EPS CR-IR341 Service Manual 009-051-04 MT - 96 05.31.99 FM2460...
- Page 366 Check the error-related system block diagram and connect the connectors as appropriate. Replace the following parts in order named. Restart the machine and check its status. SNS08A board FR1H0037.EPS 009-051-04 CR-IR341 Service Manual MT - 97 05.31.99 FM2460...
- Page 367 Error-related I/O locations SOLA4 Grip release HP sensor Grip release motor FR1H0038.EPS Error-related system block diagram SNS08A CNZ2 AC IN CN13 CND1 DC OUT2 DRV03D JPS-1 CNZ6 CN12 CNMD2 DRV08A DC OUT3 FR1H0039.EPS CR-IR341 Service Manual 009-051-04 MT - 98 05.31.99 FM2460...
- Page 368 SD2 to SNS08A connectors as appropriate. board normal? Replace the following parts Restart the machine in order named. and check its status. SNS08A board FR1H0041.EPS 009-051-04 CR-IR341 Service Manual MT - 99 05.31.99 FM2460...
- Page 369 MD3 IP transport motor SD3 Side-positioning IP sensor IP leading edge sensor FR1H0042.EPS Error-related system block diagram SNS08A CNZ2 AC IN CN13 CND1 DC OUT2 DRV03D CNZ11 JPS-1 CNZ7 CNMD3 DRV08A DC OUT3 FR1H0043.EPS CR-IR341 Service Manual 009-051-04 MT - 100 05.31.99 FM2460...
- Page 370 Check all the IPs as needed. Power OFF Does the initialization self-diagnostics Troubleshoot it based on a new error code displayed. end normally? Replace the SCN08A board. FR1H0044.EPS 009-051-04 CR-IR341 Service Manual MT - 101 05.31.99 FM2460...
- Page 371 MD3 IP transport motor SD3 Side-positioning IP sensor FR1H0045.EPS Error-related system block diagram SNS08A CNZ2 AC IN CN13 CND1 DC OUT2 DRV03D JPS-1 CNZ7 CNMD3 DRV08A DC OUT3 CN14 CNZ4 FR1H0046.EPS 009-051-04 CR-IR341 Service Manual MT - 102 05.31.99 FM2460...
- Page 372 SD3 to SNS08A board normal? system block diagram and connect the connectors as appropriate. Replace the following parts in order named. Restart the machine and check its status. SNS08A board DRV08A board FR1H0048.EPS 009-051-04 CR-IR341 Service Manual MT - 103 05.31.99 FM2460...
- Page 373 ON: Close, OFF: Open Error-related I/O locations SOLA4 Subscanning motor IP leading edge sensor FR1H0049.EPS Error-related system block diagram CNZ11 AC IN DC OUT6 SCN08A DRV03D JPS-1 CN14 DRV08A CNZ4 DC OUT3 FR1H0050.EPS 009-051-04 CR-IR341 Service Manual MT - 104 05.31.99 FM2460...
- Page 374 Section 6.10.10 of Chapter 6. Is SZ1 normal? Replace the following parts in order named. SED08A board SCN08A board Restart the machine Laser assembly and check its status. FR1H0052.EPS 009-051-04 CR-IR341 Service Manual MT - 105 05.31.99 FM2460...
- Page 375 SZ2 Driving-side grip release Driving shaft grip HP sensor FR1H0053.EPS Error-related system block diagram CNZ2 SNS08A AC IN CN13 CNZ3 DC OUT2 DRV03D JPS-1 CNZ8 CN14 CNZ9 DRV08A DC OUT3 FR1H0054.EPS 009-051-04 CR-IR341 Service Manual MT - 106 05.31.99 FM2460...
- Page 376 SZ2 to SNS08A board Restart the machine normal? and check its status. Replace the following Check the error-related parts in order named. system block diagram and connect the SNS08A board connectors as appropriate. FR1H0056.EPS 009-051-04 CR-IR341 Service Manual MT - 107 05.31.99 FM2460...
- Page 377 MZ3 Driven shaft grip SZ3 Driven-side grip release HP sensor FR1H0057.EPS Error-related system block diagram CNZ2 SNS08A AC IN CN13 CNZ3 DC OUT2 DRV03D JPS-1 CNZ8 CN14 CNZ9 DRV08A DC OUT3 FR1H0058.EPS 009-051-04 CR-IR341 Service Manual MT - 108 05.31.99 FM2460...
- Page 378 SZ3 to SNS08A board Restart the machine normal? and check its status. Replace the following Check the error-related parts in order named. system block diagram and connect the SNS08A board connectors as appropriate. FR1H0060.EPS 009-051-04 CR-IR341 Service Manual MT - 109 05.31.99 FM2460...
- Page 379 Error-related I/O locations SOLA4 After-reading conveyance standby IP sensor IP transport motor FR1H0061.EPS Error-related system block diagram CNF1 SNS08A AC IN CN13 DC OUT2 DRV03D JPS-1 CNZ10 CN15 CNME2 DRV08A DC OUT3 FR1H0062.EPS 009-051-04 CR-IR341 Service Manual MT - 110 05.31.99 FM2460...
- Page 380 Check the error-related system SF1 to SNS08A board normal? block diagram and connect the connectors as appropriate. Replace the following parts in order named. Restart the machine SNS08A board and check its status. FR1H0063.EPS 009-051-04 CR-IR341 Service Manual MT - 111 05.31.99 FM2460...
- Page 381 IP transport motor Changeover IP sensor After-reading conveyance standby IP sensor FR1H0064.EPS Error-related system block diagram CNF1 SNS08A AC IN CN13 DC OUT2 DRV03D JPS-1 CNF2 CNMF1 DRV08A DC OUT3 FR1H0065.EPS 009-051-04 CR-IR341 Service Manual MT - 112 05.31.99 FM2460...
- Page 382 SF2 to SNS08A board block diagram and connect the normal? connectors as appropriate. Replace the following parts Restart the machine in order named. and check its status. SNS08A board FR1H0067.EPS 009-051-04 CR-IR341 Service Manual MT - 113 05.31.99 FM2460...
- Page 383 SOLA4 IP transport motor Overrun IP sensor Changeover IP sensor FR1H0068.EPS Error-related system block diagram SNS08A CNF1 AC IN CN13 DC OUT2 DRV03D JPS-1 CNF2 CN10 CNMF1 DRV08A DC OUT3 FR1H0069.EPS 009-051-04 CR-IR341 Service Manual MT - 114 05.31.99 FM2460...
- Page 384 SF2 to SNS08A board block diagram and connect the normal? connectors as appropriate. Replace the following parts in order named. Restart the machine and check its status. SNS08A board FR1H0070.EPS 009-051-04 CR-IR341 Service Manual MT - 115 05.31.99 FM2460...
- Page 385 SOLF1 Branch path changeover guide drive After-reading conveyance standby IP sensor FR1H0071.EPS Error-related system block diagram SNS08A CNF1 AC IN CN13 DC OUT2 DRV03D JPS-1 CNSOLF1 SOLF1 CN11 DRV08A DC OUT3 FR1H0072.EPS 009-051-04 CR-IR341 Service Manual MT - 116 05.31.99 FM2460...
- Page 386 DRV08A board as appropriate. normal? and connect the connectors as appropriate. Replace the following parts in order named. Restart the machine SNS08A board and check its status. FR1H0073.EPS SOLF1 spring FR1H0074.EPS 009-051-04 CR-IR341 Service Manual MT - 117 05.31.99 FM2460...
- Page 387 IP transport motor SF3 Load standby IP sensor Changeover IP sensor FR1H0075.EPS Error-related system block diagram SNS08A CNF1 AC IN CN13 DC OUT2 DRV03D JPS-1 CNF2 CN10 CNMF1 DRV08A DC OUT3 FR1H0076.EPS 009-051-04 CR-IR341 Service Manual MT - 118 05.31.99 FM2460...
- Page 388 SF2/SF3 to SNS08A system block diagram and board normal? connect the connectors as appropriate. Replace the following parts Restart the machine in order named. SF3/SF2 and check its status. SNS08A board FR1H0077.EPS 009-051-04 CR-IR341 Service Manual MT - 119 05.31.99 FM2460...
- Page 389 FR1H0078.EPS Error-related system block diagram CNB1 SNS08A AC IN CN13 CNB2 DC OUT2 DRV03D CNF1 SOLC1 JPS-1 CNMB2 CNB3 CNSOLC1 CN3 CN9 CNC2 CNMC1 DRV08A DC OUT3 CNF2 FR1H0079.EPS 009-051-04 CR-IR341 Service Manual MT - 120 05.31.99 FM2460...
- Page 390 SB2/SF3 to SNS08A connectors as appropriate. board normal? Restart the machine Replace the following and check its status. parts in order named. SB2/SF3 SNS08A board FR1H0080.EPS 009-051-04 CR-IR341 Service Manual MT - 121 05.31.99 FM2460...
- Page 391 SOLC1 Convergence path changeover guide drive Convergence standby IP sensor FR1H0081.EPS Error-related system block diagram SNS08A CNF1 AC IN CN13 CNC1 DC OUT2 DRV03D JPS-1 CNSOLC1 SOLC1 DRV08A DC OUT3 FR1H0082.EPS 009-051-04 CR-IR341 Service Manual MT - 122 05.31.99 FM2460...
- Page 392 SC2 to SNS08A system block diagram board normal? and connect the connectors as appropriate. Replace the following parts in order named. Restart the machine SNS08A board and check its status. FR1H0084.EPS 009-051-04 CR-IR341 Service Manual MT - 123 05.31.99 FM2460...
- Page 393 SF2 Changeover IP sensor SF1 After-reading conveyance standby IP sensor ME1 Grip release motor FR1H0085.EPS Error-related system block diagram CNF1 SNS08A AC IN CN13 DC OUT2 DRV03D JPS-1 CNF2 CNMF1 DRV08A DC OUT3 FR1H0086.EPS 009-051-04 CR-IR341 Service Manual MT - 124 05.31.99 FM2460...
- Page 394 Replace the following parts in order named. Restart the machine SF4/SF2 (faulty sensor) and check its status. SNS08A board FR1H0087.EPS 009-051-04 CR-IR341 Service Manual MT - 125 05.31.99 FM2460...
- Page 395 IP transport motor Load standby IP sensor Changeover IP sensor FR1H0088.EPS Error-related system block diagram SNS08A CNF1 AC IN CN13 DC OUT2 DRV03D JPS-1 CNF2 CN10 CNMF1 DRV08A DC OUT3 FR1H0089.EPS 009-051-04 CR-IR341 Service Manual MT - 126 05.31.99 FM2460...
- Page 396 SF2/SF3 to DRV08A system block diagram and board normal? connect the connectors as appropriate. Replace the following parts in order named. Restart the machine SF3/SF2 and check its status. DRV08A board FR1H0090.EPS 009-051-04 CR-IR341 Service Manual MT - 127 05.31.99 FM2460...
- Page 397 Error-related I/O locations SOLA4 Grip release motor Grip release HP sensor FR1H0091.EPS Error-related system block diagram CNZ2 SNS08A AC IN CN13 DC OUT2 DRV03D JPS-1 CNZ10 CN15 CNME1 DRV08A DC OUT3 FR1H0092.EPS 009-051-04 CR-IR341 Service Manual MT - 128 05.31.99 FM2460...
- Page 398 SE1 to SNS08A connectors as appropriate. board normal? Restart the machine and check its status. Replace the following parts in order named. SNS08A board FR1H0094.EPS 009-051-04 CR-IR341 Service Manual MT - 129 05.31.99 FM2460...
- Page 399 Up-down drive motor Each shelf position sensor SA17 Elevation HP sensor FR1H0095.EPS Error-related system block diagram SNS08A AC IN CN13 DC OUT2 DRV03D CNA2 JPS-1 CNB4 CNMD3 DRV08A DC OUT3 FR1H0096.EPS 009-051-04 CR-IR341 Service Manual MT - 130 05.31.99 FM2460...
- Page 400 Is SA17 normal? Replace the following parts in order named. SA17 SNS08A board Restart the machine and check its status. FR1H0097.EPS 009-051-04 CR-IR341 Service Manual MT - 131 05.31.99 FM2460...
- Page 401 Up-down drive motor Each shelf position sensor SA17 Elevation HP sensor FR1H0098.EPS Error-related system block diagram SNS08A CNB1 AC IN CN13 CNB2 DC OUT2 DRV03D JPS-1 CNB4 CNMD3 DRV08A DC OUT3 FR1H0099.EPS 009-051-04 CR-IR341 Service Manual MT - 132 05.31.99 FM2460...
- Page 402 Is SB3 normal? Replace the following parts in order named. SNS08A board Restart the machine and check its status. FR1H0100.EPS 009-051-04 CR-IR341 Service Manual MT - 133 05.31.99 FM2460...
- Page 403 Error-related I/O locations MB1 Suction cup driving motor Suction cup HP sensor FR1H0101.EPS Error-related system block diagram SNS08A CNB1 AC IN CN13 CNB2 DC OUT2 DRV03D JPS-1 CNB3 CNMB1 DRV08A DC OUT3 FR1H0102.EPS 009-051-04 CR-IR341 Service Manual MT - 134 05.31.99 FM2460...
- Page 404 SB1 to SNS08A connect the connectors as board normal? appropriate. Replace the following Restart the machine parts in order named. and check its status. SNS08A board FR1H0103.EPS 009-051-04 CR-IR341 Service Manual MT - 135 05.31.99 FM2460...
- Page 405 SOLA1 SOLA2 Cassette hold solenoid SOLA3 SOLA4 FR1H0104.EPS SOLF1 Error-related system block diagram SNS08A CNA2 AC IN CN13 DC OUT2 DRV03D SOLA1 JPS-1 CNA3 SOLA2 DRV08A SOLA3 DC OUT3 SOLA4 FR1H0105.EPS 009-051-04 CR-IR341 Service Manual MT - 136 05.31.99 FM2460...
- Page 406 SNS08A board connect the connectors normal? as appropriate. Restart the machine Replace the following and check its status. parts in order named. FR1H0106.EPS SA3, 7, 11, 15 (relevant shelf) SNS08A board 009-051-04 CR-IR341 Service Manual MT - 137 05.31.99 FM2460...
- Page 407 SOLA1 SOLA2 Cassette hold solenoid SOLA3 SOLA4 FR1H0107.EPS SOLF1 Error-related system block diagram SNS08A CNA2 AC IN CN13 DC OUT2 DRV03D SOLA1 JPS-1 CNA3 SOLA2 DRV08A SOLA3 DC OUT3 SOLA4 FR1H0108.EPS 009-051-04 CR-IR341 Service Manual MT - 138 05.31.99 FM2460...
- Page 408 SA3, 7, 11, and 15 connectors as appropriate. to SNS08A board normal? Replace the SNS08A board. Restart the machine and check its status. FR1H0109.EPS 009-051-04 CR-IR341 Service Manual MT - 139 05.31.99 FM2460...
- Page 409 SOLA1—4 OFF :SA3, 7, 11, 15 CLOSE SOLA2 Cassette hold solenoid SOLA3 SOLA4 FR1H0110.EPS SOLF1 Error-related system block diagram SNS08A CNA2 AC IN CN13 DC OUT2 DRV03D SOLA1 JPS-1 CNA3 SOLA2 DRV08A SOLA3 DC OUT3 SOLA4 FR1H0111.EPS 009-051-04 CR-IR341 Service Manual MT - 140 05.31.99 FM2460...
- Page 410 SNS08A board connect the connectors normal? as appropriate. Restart the machine Replace the following and check its status. parts in order named. SA3, 7, 11, 15 (relevant shelf) SNS08A board FR1H0112.EPS 009-051-04 CR-IR341 Service Manual MT - 141 05.31.99 FM2460...
- Page 411 This error occurs when the barcode of the IP cannot be read during the above opera- tion. Error-related I/O locations BCR barcode reader FR1H0113.EPS Error-related system block diagram SNS08A AC IN CN13 CNZ1 DC OUT2 CN22 DRV03D JPS-1 FR1H0114.EPS 009-051-04 CR-IR341 Service Manual MT - 142 05.31.99 FM2460...
- Page 412 SNS08A board normal? connect the connectors as appropriate. Replace the following parts in order named. Restart the machine SNS08A board and check its status. FR1H0115.EPS 009-051-04 CR-IR341 Service Manual MT - 143 05.31.99 FM2460...
- Page 413 This error occurs when the unlit condition or blinking condition of any one of the fluorescent lamps is detected during the above operation. Error-related I/O locations SOLA4 LAMP1—5 FR1H0116.EPS Error-related system block diagram AC IN LAMP JPS-1 1—5 ACOUT2 FR1H0117.EPS 009-051-04 CR-IR341 Service Manual MT - 144 05.31.99 FM2460...
- Page 414 Make sure that the erasure lamp as appropriate. is not blinking or unlit. Replace the following parts in order named. Failed lamp (LAMP1-5) Power supply unit (JPS-1) Restart the machine and check its status. FR1H0118.EPS 009-051-04 CR-IR341 Service Manual MT - 145 05.31.99 FM2460...
- Page 415 While the IP is read by the subscanning unit, its IP dosage is also checked. The exposed IP is erased by the erasure conveyor. This error occurs when an IP dosage of 400 mR or greater is detected during the above operation. 009-051-06 009-051-04 CR-IR341 Service Manual MT - 146 04.20.2001 FM3006 05.31.99 FM2460...
- Page 416 Is the sensitivity setting proper? From M-Utility, select "2. CONFIGURATION SETTING" and "1. SYSTEM" in sequence to change the sensitivity setting (SFC/SFD). Replace the following parts in order named. PMT board SCN board FR1H0119.EPS 009-051-04 CR-IR341 Service Manual MT - 147 05.31.99 FM2460...
- Page 417 ID information read by the ID terminal for confirmation. This error occurs when the patient’s ID has not yet registered in the IDT during the above operation. 009-051-04 CR-IR341 Service Manual MT - 148 05.31.99 FM2460...
- Page 418 Power OFF Is the BCR reading face normal? Clean the BCR reading face. Make sure that the BCR reading face is free of soil. Restart the machine and check its status. FR1H0120.EPS 009-051-04 CR-IR341 Service Manual MT - 149 05.31.99 FM2460...
- Page 419 The IP type supported shall be type V. This error occurs when an IP type other than type V is detected during the above operation. Error-related I/O locations BCR barcode reader FR1H0121.EPS 009-051-04 CR-IR341 Service Manual MT - 150 05.31.99 FM2460...
- Page 420 Power OFF Is the BCR reading face normal? Clean the BCR reading face. Make sure that the BCR reading face is free of soil. Restart the machine and check its status. FR1H0122.EPS 009-051-04 CR-IR341 Service Manual MT - 151 05.31.99 FM2460...
- Page 421 This error occurs when image processing corresponding to the exposure information of the patient is not found. 009-051-04 CR-IR341 Service Manual MT - 152 05.31.99 FM2460...
- Page 422 Power OFF Is the BCR reading face normal? Clean the BCR reading face. Make sure that the BCR reading face is free of soil. Restart the machine and check its status. FR1H0123.EPS 009-051-04 CR-IR341 Service Manual MT - 153 05.31.99 FM2460...
- Page 423 ID information read by the ID terminal for confirmation. This error occurs when there is no response from the IDT when the IDT is inquired about the patient’s ID during the above operation. 009-051-04 CR-IR341 Service Manual MT - 154 05.31.99 FM2460...
- Page 424 Is the cable connecting between Replace the connection cable. the machine and IDT normal? Make sure that the cable is free of defect. Restart the machine and check its status. FR1H0124.EPS 009-051-04 CR-IR341 Service Manual MT - 155 05.31.99 FM2460...
- Page 425 ON: Close, OFF: Open Error-related I/O locations Suction sensor IP suction FR1H0125.EPS Error-related system block diagram SNS08A CNB1 AC IN CN13 CNB2 DC OUT2 DRV03D JPS-1 CNB4 CNPB1 DRV08A DC OUT3 FR1H0126.EPS 009-051-04 CR-IR341 Service Manual MT - 156 05.31.99 FM2460...
- Page 426 SB5 to SNS08A board block diagram and connect normal? the connectors as appropriate. Restart the machine and check its status. Replace the following parts in order named. FR1H0127.EPS SNS08A board 009-051-04 CR-IR341 Service Manual MT - 157 05.31.99 FM2460...
- Page 427 Sensor related ON: Close, OFF: Open Error-related I/O locations Suction sensor FR1H0128.EPS Error-related system block diagram SNS08A CNB1 AC IN CN13 CNB2 DC OUT2 DRV03D JPS-1 FR1H0129.EPS 009-051-04 CR-IR341 Service Manual MT - 158 05.31.99 FM2460...
- Page 428 Check the error-related system block from SB5 to SNS08A board diagram and connect the connectors normal? as appropriate. Replace the following parts Restart the machine in order named. and check its status. FR1H0130.EPS SNS08A board 009-051-04 CR-IR341 Service Manual MT - 159 05.31.99 FM2460...
- Page 429 Error-related I/O locations IP transport motor Cassette inlet IP sensor FR1H0131.EPS Error-related system block diagram SNS08A CNB1 AC IN CN13 CNB2 DC OUT2 DRV03D CNMB2 JPS-1 CNB3 DRV08A DC OUT3 FR1H0132.EPS 009-051-04 CR-IR341 Service Manual MT - 160 05.31.99 FM2460...
- Page 430 ON again to execute and connect the connectors sensor monitoring. as appropriate. Is SB2 normal? Replace the following parts in order named. SNS08A board Restart the machine and check its status. FR1H0133.EPS 009-051-04 CR-IR341 Service Manual MT - 161 05.31.99 FM2460...
- Page 431 ON: Close, OFF: Open Error-related I/O locations Suction sensor IP suction FR1H0134.EPS Error-related system block diagram SNS08A CNB1 AC IN CN13 CNB2 DC OUT2 DRV03D JPS-1 CNB4 CNPB1 DRV08A DC OUT3 FR1H0135.EPS 009-051-04 CR-IR341 Service Manual MT - 162 05.31.99 FM2460...
- Page 432 SB5 to SNS08A board system block diagram normal? and connect the connectors as appropriate. Restart the machine Replace the following parts and check its status. in order named. FR1H0136.EPS SNS08A board 009-051-04 CR-IR341 Service Manual MT - 163 05.31.99 FM2460...
- Page 433 Remove the IP in accordance with the remedies (1 through 10) set forth in section 5.3.2, Detailed IP Removal Procedures. (5) Restore the machine to normal. (6) Check for improper IP conveyance. “2.6 Checking for Improper IP Conveyance” CR-IR341 Service Manual 009-051-04 MT - 164 05.31.99 FM2460...
- Page 434 Remedy 1/2/3/4 03DE 03E8 Remedy 1/2/3/4 Suction cup movement error 0538 Leading-edge detection error 1 Remedy 1/2/3/4 Cassette hold release error Remedy 1/2/3/4 13A2 13A3 Cassette shelf error Remedy 1/2/3/4 TR1H1019.EPS 009-051-04 CR-IR341 Service Manual MT - 165 05.31.99 FM2460...
- Page 435 Load IP suction failure retry Remedy 1/2/3/4 23E4 Remedy 1/2/3/4 Suction cup HP detection preparation retry 23E6 Suction cup HP detection retry Remedy 1/2/3/4 23E7 Remedy 1/2/3/4 Suction cup HP return error 23E8 TR1H1020.EPS CR-IR341 Service Manual 009-051-04 MT - 166 05.31.99 FM2460...
- Page 436 Remedy 3 Remedy 8 Cassette set unit Remedy 4 Remedy 7 Remedy 9 Remedy 10 Erasure conveyor Before-side-positioning conveyor Side-positioning conveyor Subscanning unit After-reading conveyor Remedy 5 Remedy 6 FR1H1391.EPS 009-051-04 CR-IR341 Service Manual MT - 167 05.31.99 FM2460...
- Page 437 ”4.2 Removing and Reinstalling Cassette Set Unit” (2) Pull out the tray of cassette set unit and remove the IP. ”4.1 Pulling Out and Pushing In Tray of Cassette Set Unit” CR-IR341 Service Manual 009-051-04 MT - 168 05.31.99 FM2460...
- Page 438 (2) Pull out the tray of cassette set unit. ”4.1 Pulling Out and Pushing In Tray of Cassette Set Unit” (3) Remove the up-down conveyance guide of the up-down IP removal unit to take out the IP. 009-051-04 CR-IR341 Service Manual MT - 169 05.31.99 FM2460...
- Page 439 Gain access from the rear or right-hand side of the machine (1) Remove the rear cover from the machine. (2) Remove the rear guide from the before-side-positioning conveyor. (3) Rotate the before-side-positioning conveyor rollers by hand to remove the IP. CR-IR341 Service Manual 009-051-04 MT - 170 05.31.99 FM2460...
- Page 440 (1) Remove the rear cover. (2) Remove the rear guide from the before-side-positioning conveyor. (3) Release the side-positioning conveyor grip. (4) Rotate the before-side-positioning conveyor rollers by hand to remove the IP. 009-051-04 CR-IR341 Service Manual MT - 171 05.31.99 FM2460...
- Page 441 (2) Pull out the scanner unit and then remove the IP. If the IP in the subscanning unit cannot directly be accessed, first remove the light- collecting guide and then the IP. CR-IR341 Service Manual 009-051-04 MT - 172 05.31.99 FM2460...
- Page 442 The same recovery procedure is to be performed no matter whether the IP status is a or b. (1) Remove the front guide from the erasure conveyor. (2) Remove the IP by pulling it forward until it comes of the machine. 009-051-04 CR-IR341 Service Manual MT - 173 05.31.99 FM2460...
- Page 443 (2) Pull out the up-down IP removal unit. ”4.2 Removing and Reinstalling Tray of Cassette Set Unit” (3) Rotate the before-side-positioning conveyor rollers by hand and remove the IP from the top of the before-side-positioning conveyor. CR-IR341 Service Manual 009-051-04 MT - 174 05.31.99 FM2460...
- Page 444 10. MENU SETTING NOTES: ¥ For the IDT type, the "menu selecting icon" does not appear. ¥ For the initial setting, the "Multiframe forced output" button will not appear. Caps FR1B1086.EPS 009-051-04 CR-IR341 Service Manual MT - 175 05.31.99 FM2460...
- Page 445 9. HV OFF 10. MENU SETTING > 3 0.QUIT 1.ROUTINE 2.AUTO MODE TM > 2 0.QUIT 1.READING & ERASURE 2.PRIMARY ERASURE 3.SECONDARY ERASURE TM:AM > 2 Caps 0 - 99999 : 10 FR1H1822.EPS CR-IR341 Service Manual 009-051-04 MT - 176 05.31.99 FM2460...
- Page 446 The machine comes to an automatic stop when it repeats the IP conveyance sequence 10 times. (11) Remove the cassettes. (12) Press the reset button. The machine restarts and becomes ready for normal use. 009-051-04 CR-IR341 Service Manual MT - 177 05.31.99 FM2460...
- Page 447 NOTE An error for the scanner subscanning mechanism that does not accompany any abnormal image need not be analyzed or troubleshot, and thus be ignored. CR-IR341 Service Manual 009-051-04 MT - 178 05.31.99 FM2460...
- Page 448 “LOG AMP”, and “SCN08 INPUT”. in the image signal lines after image • Image-related boards after SCN08 (IMG board, signal input for the SCN board. etc.) • Cables to such boards TR1H1303.EPS 009-051-07 CR-IR341 Service Manual MT - 179 08.30.2001 FM3115...
- Page 449 • Banding-like streaks are developed such that guide assembly, etc.) intermittent thin horizontal streaks appear with a gradual inclination to the main-scan direction (from upper left to lower right). <Check and Reference> FR1H1851.EPS CR-IR341 Service Manual 009-051-04 MT - 180 05.31.99 FM2460...
- Page 450 • A horizontal streak is developed about 60 mm from the top edge. <Check and Reference> • Check for interference between the subscanning turn guide plate and the center guide plate. Unit: mm FR1H1853.EPS 009-051-04 CR-IR341 Service Manual MT - 181 05.31.99 FM2460...
- Page 451 0.6 mm. <Check and Reference> • Perform shading correction properly. • Set “3. SHADING/POLYGON CORRECTION” to ON. • Replace the polygonal mirror. “9.5 Checking and Replacing Polygon Assembly” FR1H1855.EPS CR-IR341 Service Manual 009-051-04 MT - 182 05.31.99 FM2460...
- Page 452 • A uniformly exposed image with midtone density (gray) is generated. <Check and Reference> • Connect the unplugged connector to the PMT08A board or SCN08A board. • Cancel the quasi-reading mode. FR1H1857.EPS 009-051-04 CR-IR341 Service Manual MT - 183 05.31.99 FM2460...
- Page 453 "Replacing SYN08A Assembly" • If the error (polygon error 2: 2542) occurred simultaneously, check and replace the polygonal mirror assembly. FR1H1859.EPS CR-IR341 Service Manual 009-051-04 MT - 184 05.31.99 FM2460...
- Page 454 • Reset the machine, or power OFF the machine and then back ON again, to perform self- diagnostics during machine initialization. If the results of the self-diagnostics indicate an error, replace the relevant board. FR1H1861.EPS 009-051-04 CR-IR341 Service Manual MT - 185 05.31.99 FM2460...
- Page 455 • Reset the machine, or power OFF the machine and then back ON again, to perform self- diagnostics during machine initialization. If the results of the self-diagnostics indicate an error, replace the relevant board. FR1H1863.EPS CR-IR341 Service Manual 009-051-04 MT - 186 05.31.99 FM2460...
- Page 456 ON again, to perform self- diagnostics during machine initialization. If the results of the self-diagnostics indicate an error, replace the relevant board. “Replacing and Adjusting CPU90E Board” FR1H1865.EPS 009-051-04 CR-IR341 Service Manual MT - 187 05.31.99 FM2460...
- Page 457 • Reset the machine, or power OFF the machine and then back ON again, to perform self- diagnostics during machine initialization. If the results of the self-diagnostics indicate an error, replace the relevant board and cable. “SCN08A Board” FR1H1867.EPS CR-IR341 Service Manual 009-051-04 MT - 188 05.31.99 FM2460...
- Page 458 • Black spots or speckles are developed randomly over the entire image. The black spots come in various sizes, such as those extending over several vertical lines, or as small as one line. <Check and Reference> FR1H1869.EPS 009-051-04 CR-IR341 Service Manual MT - 189 05.31.99 FM2460...
- Page 459 • The IP leading-edge sensor (SZ1) is faulty. • The rpm of the FFM (MZ1) is improper. • The irradiation field is improper. • The bottom or top edge of the image is missing. <Check and Reference> FR1H1871.EPS CR-IR341 Service Manual 009-051-04 MT - 190 05.31.99 FM2460...
- Page 460 • The subscanning unit and side-positioning unit are misaligned. • The subscanning grip is unbalanced. • The right or left edge of the image is aslant. • The side-positioning conveyance grip is unbalanced. <Check and Reference> FR1H1872.EPS 009-051-04 CR-IR341 Service Manual MT - 191 05.31.99 FM2460...
- Page 461 FR1H0137.EPS 009-051-04 CR-IR341 Service Manual MT - 192 05.31.99 FM2460...
- Page 462 Are systems other than 100V Replace JPS-1. and 24V normal? Then, restart the machine and check its status. + 5V, + 12V, + 15V, and – 15V systems FR1H0138.EPS 009-051-04 CR-IR341 Service Manual MT - 193 05.31.99 FM2460...
- Page 463 See Chapter Z to check the wiring. To check for harness continuity, the machine should be powered OFF beforehand. Replace the following parts in order named. DRV08A board LEDA1 — 4 FR1H0139.EPS 009-051-04 CR-IR341 Service Manual MT - 194 05.31.99 FM2460...
- Page 464 CPU90E board correctly? and check its status. Replace the following boards. MTH08A CPU90E CPU90F + ETH90F DMC80A/HCP08A IMG08A + IMG08B + IMG08C + IMG07B SNS08A DRV08A SCN08A JPS-1 FR1H0140.EPS 009-051-06 009-051-04 CR-IR341 Service Manual MT - 195 04.20.2001 FM3006 05.31.99 FM2460...
- Page 465 22.60 24.96 18.69 Reading time 189.39 189.39 189.39 189.39 189.39 189.39 189.39 189.39 189.39 Main scan frequency Sampling time bit/pixel For scanner reading Gray level Output after image bit/pixel processing TR1H1151.EPS 009-051-04 CR-IR341 Service Manual MT - 196 05.31.99 FM2460...
- Page 466 ONTENTS MT - 197 BLANK PAGE 009-051-04 CR-IR341 Service Manual MT - 197 05.31.99 FM2460...
- Page 486 ONTENTS MT - 217 Power Supply Circuit Diagram {Being prepared} 009-051-04 CR-IR341 Service Manual MT - 217 05.31.99 FM2460...
- Page 487 The following files are copied to the HDD of the machine. • IRSET.CFG • FILMFMT.CFG • IRSTATUS.CFG (8) Remove the floppy disk from the machine. (9) Press the RESET button to reboot the machine. CR-IR341 Service Manual MT_A1 - 1 009-051-06 04.20.2001 FM3006...
- Page 488 MT_A1 - 2 BLANK PAGE 009-051-06 CR-IR341 Service Manual MT_A1 - 2 04.20.2001 FM3006...
- Page 489 MT_A1 - 3 BLANK PAGE CR-IR341 Service Manual MT_A1 - 3 009-051-06 04.20.2001 FM3006...
- Page 490 MT_A1 - 4 BLANK PAGE 009-051-06 CR-IR341 Service Manual MT_A1 - 4 04.20.2001 FM3006...
- Page 491 CR-IR341/CR-IR341P Service Manual Checks, Replacement and Adjustment of Parts (MC)
- Page 492 MC-7, 24, 25, 37, 140, 141, 143, 146, 152, 154, 157, 162, 164, 174, 179, 184, 185, 202, 205, 255, 262, 263, 273, 275, 282–287 08/30/2001 Design changes (FM3115) MC-255, 255.1–255.4, 256, 264, 266–268, 272, 283 009-051-07 CR-IR341 Service Manual MC - 1 08.30.2001 FM3115...
- Page 493 Replacing FDD and Checking Boards Setting 10.15 Replacing Guide Plate of Subscanning Unit 13.5 Replacing the Monitor 10.16 Replacing Lower Rubber Rollers of Subscanning Unit 13.6 Cleaning Monitor Screen 10.17 Replacing and Adjusting Shock-Absorbing Rubbers FR1H1319.EPS 009-051-05 CR-IR341 Service Manual MC - 2 11.20.99 FM2638...
- Page 494 ONTENTS MC - 3 BLANK PAGE 009-051-04 CR-IR341 Service Manual MC - 3 05.31.99 FM2460...
- Page 495 7. FILE UTILITY Display in Display in 8. BACKUP MEMORY 8. BACKUP MEMORY OFF status ON status 9. HV ON 9. HV OFF 10. MENU SETTING 10. MENU SETTING > > FR1H1417.EPS 009-051-04 CR-IR341 Service Manual MC - 4 05.31.99 FM2460...
- Page 496 7. FILE UTILITY Display in Display in 8. BACKUP MEMORY 8. BACKUP MEMORY ON status OFF status 9. HV OFF 9. HV ON 10. MENU SETTING 10. MENU SETTING > > FR1H1416.EPS 009-051-04 CR-IR341 Service Manual MC - 5 05.31.99 FM2460...
- Page 497 (11) Select “0. QUIT”. The screen switches back to “6. MECHANICAL UTILITY” menus. (12) Select “0. QUIT”. The screen returns to the main menu. (13) Select “0. QUIT”. M-Utility is exited. CR-IR341 Service Manual 009-051-05 MC - 6 11.20.99 FM2638...
- Page 498 Unit symbol (A–G, T, Z) Example) D: Side-positioning conveyor The unit symbol may sometimes be omitted. I/O type Sensor Motor TSW: Thermal switch FAN: Fan Solenoid valve and more FR1H1912.EPS 009-051-06 009-051-04 CR-IR341 Service Manual MC - 7 04.20.2001 FM3006 05.31.99 FM2460...
- Page 499 19mm Type I SB2, SC1, 2, SD3, SF1, 2, 3 113Y1395 Reflective type 128S0392 Suction sensor MPL-503(MPL) 128Y0241A SS-01GL111 SA2, 6, 8, 10 128Y0258B SS-01GL2-F + mount SA4, 8, 12, 16 TR1H1150.EPS 009-051-04 CR-IR341 Service Manual MC - 8 05.31.99 FM2460...
- Page 500 2 : 0 0 SD1 - 3 : 1 1 0 SF1 - 4 : 0 0 0 0 SZ2 - 3 : 1 0 0:QUIT “0” and “1” denote “Open” and “Close”, respectively. 009-051-04 CR-IR341 Service Manual MC - 9 05.31.99 FM2460...
- Page 501 : 0 0 0 0 SZ2-3 : 1 0 0:QUIT SA1 ----> Close SA2 ----> Open SA2 ----> Close SA1 ----> Open 0.QUIT 1.NUMBER 2.MONITOR 3.MONITOR ALL MU:SEN > Caps FR1H1514.EPS 009-051-04 CR-IR341 Service Manual MC - 10 05.31.99 FM2460...
- Page 502 32:SF4 33:SZ2 34:SZ3 INPUT THE NUMBER OF SENSOR 1 - 34 : 4 SA4 ----> Close SA4 ----> Open SA4 ----> Close 0.QUIT 1.NUMBER 2.MONITOR 3.MONITOR ALL MU:SEN > Caps FR1H1235.EPS 009-051-04 CR-IR341 Service Manual MC - 11 05.31.99 FM2460...
- Page 503 Cools down the DRV08A board. FANG3 Board cooling DC fan Cools down the DRV08A board. FANG4 Board cooling DC fan Cools down the MTH. FANG5 Board cooling DC fan Cools down the MTH. TR1H1004.EPS 009-051-04 CR-IR341 Service Manual MC - 12 05.31.99 FM2460...
- Page 504 1:SOLA1 2:SOLA2 3:SOLA3 4:SOLA4 5:PB1 6:SVB1 7:SOLF1 8:SOLC1 9:LAMP STB 10:LAMP ON 11:FFM INPUT THE NUMBER OF SENSOR 1 - 11 : 1 0.QUIT 1.NUMBER 2.DRIVE 3.STOP MU:AUT > Caps FR1H1758.EPS 009-051-04 CR-IR341 Service Manual MC - 13 05.31.99 FM2460...
- Page 505 Meaning: Enter the rotation speed. X represent the rotation speed (1: Standard subscanning; 2: Fast subscanning; 3: Eject) that is currently set. (5) Enter the rotation speed. The FFM is driven. 009-051-04 CR-IR341 Service Manual MC - 14 05.31.99 FM2460...
- Page 506 1:SOLA1 2:SOLA2 3:SOLA3 4:SOLA4 5:PB1 6:SVB1 7:SOLF1 8:SOLC1 9:LAMP STB 10:LAMP ON 11:FFM INPUT THE NUMBER OF SENSOR 1 - 11 : 11 0.QUIT 1.NUMBER 2.DRIVE 3.STOP MU:AUT > Caps FR1H1759.EPS 009-051-04 CR-IR341 Service Manual MC - 15 05.31.99 FM2460...
- Page 507 Meaning: Are you sure to initialize (clear) the backup memory? (5) Select “1”. The backup memory is initialized, with the following message displayed. BACKUP MEMORIES ARE CLEARED. Meaning: The backup memory has been initialized. 009-051-04 CR-IR341 Service Manual MC - 16 05.31.99 FM2460...
- Page 508 BKM > 1 ARE YOU SURE TO CLEAR THE ALL BACKUP MEMORIES? 1.YES 2.NO (DEFAULT=2) : 1 BACKUP MEMORIES ARE CLEARED. Caps FR1H1237.EPS (6) Select “0. QUIT” repeatedly. M-Utility is exited. 009-051-04 CR-IR341 Service Manual MC - 17 05.31.99 FM2460...
-
Page 509: Setting Date And Time
Printer selection Click sound parallax correction CRT test pattern Multiframe forced FD operation display output Utility Return NOTE: For the initial setting, the "Multiframe forced output" button will not appear. FR1H1487.EPS 009-051-04 CR-IR341 Service Manual MC - 18 05.31.99 FM2460... - Page 510 Date and Time (military time) Ex)February 25, 1998.10:15 AM Input 98022511015 9 8 0 2 2 5 1 0 1 5 SET DATE/TIME QUIT FR1H1489.EPS (5) Touch the RETURN button. The screen returns to U-Utility. 009-051-04 CR-IR341 Service Manual MC - 19 05.31.99 FM2460...
- Page 511 Because the three screws on the front of the machine are truss M4x6, while the six screws on the rear of the machine are truss M4x12, use care not to confuse these screws during installation. 009-051-04 CR-IR341 Service Manual MC - 20 05.31.99 FM2460...
- Page 512 FR1B1172.EPS (13) Multi-stage cassette loading cover (BR M4x8, x7) Disconnect the connector (CNT1), and then pull the cover toward yourself and out. CNT1 Multi-stage cassette loading cover BR M4x8, x6 FR1H1419.EPS 009-051-04 CR-IR341 Service Manual MC - 21 05.31.99 FM2460...
- Page 513 Lower left-hand side cover Upper front cover Upper right-hand side cover (13) Lower right-hand side cover Screw cover (10) Stack table (12) (11) SCN08A board Lower front inner cover Lower front cover FR1H1200.EPS 009-051-04 CR-IR341 Service Manual MC - 22 05.31.99 FM2460...
- Page 514 (1) Mount the multi-stage cassette loading cover on the machine main body, and loosely retain the four lower screws. Multi-stage cassette loading cover Loosely retain BR M4x8, x4 FR1H1484.EPS 009-051-04 CR-IR341 Service Manual MC - 23 05.31.99 FM2460...
-
Page 515: Cassette Set Unit
Manual release lever Top view Cassette set unit entry reference guide 0.5 - 1mm (white plastic) Scale 0.5 - 1mm Lower most shelf Scale Multi-stage cassette loading cover FR1H1485.EPS 009-051-04 CR-IR341 Service Manual MC - 24 009-051-06 04.20.2001 FM3006 05.31.99 FM2460... - Page 516 Reinstall the covers in the reverse order of removal. “ Removal” (8) Make sure that the covers have been installed securely and there is no missing cover screw. 009-051-06 009-051-04 CR-IR341 Service Manual MC - 25 04.20.2001 FM3006 05.31.99 FM2460...
- Page 517 Up-down IP removal unit CNB4 CNB3 CNB1 Tray of the cassette set unit Vertical conveyor BR M4x8, x2 (3), (4) Cassette set unit Timing belt CNA3 BR M4x8 Tensioner CNA1 CNA2 FR1H1760.EPS CR-IR341 Service Manual 009-051-04 MC - 26 05.31.99 FM2460...
- Page 518 Up-down IP removal unit CNB4 CNB3 CNB1 Tray of the cassette set unit Vertical conveyance unit BR M4x8, x2 (4), (5) Cassette set unit Timing belt CNA3 BR M4x8 CNA1 Tensioner CNA2 FR1H1621.EPS 009-051-04 CR-IR341 Service Manual MC - 27 05.31.99 FM2460...
- Page 519 If the cassette set unit is pulled out from any other position, it may be damaged. • When pulling out the cassette set unit, place the IP removal arm in the home posi- tion. Cassette set unit BR M4x8, x6 FR1H1422.EPS CR-IR341 Service Manual 009-051-04 MC - 28 05.31.99 FM2460...
- Page 520 Positioning bracket Cassette set unit Top stay of up-down IP removal unit Cassette set unit Push top stay BR M4x8, x6 Cassette set unit of up-down IP removal unit FR1H1422.EPS FR1H1051.EPS 009-051-04 CR-IR341 Service Manual MC - 29 05.31.99 FM2460...
-
Page 521: Removing And Reinstalling Shutter Assembly
“4.1 Pulling Out and Pushing In Tray of Cassette Set Unit”, “4.2 Removing and Reinstalling Cassette Set Unit” (2) Remove the shutter assembly. Cassette set unit Cover Shutter assembly BR M4x8, x5 FR1H1208.EPS CR-IR341 Service Manual 009-051-04 MC - 30 05.31.99 FM2460... - Page 522 For reinstallation, check the following points before screwing it down. • The shutter assembly is pushed against both right and left side plates of the cassette set unit. • The cover of the shutter assembly opens and closes smoothly. 009-051-04 CR-IR341 Service Manual MC - 31 05.31.99 FM2460...
- Page 523 If anything abnormal is found, such as no message displayed, then replace the sensor checked, and then check it again. (5) Select “0. QUIT”. The monitoring is exited to return to “3. SENSOR” menu. CR-IR341 Service Manual 009-051-04 MC - 32 05.31.99 FM2460...
- Page 524 (6) Reinstall the shutter assembly. “4.3 Removing and Reinstalling Shutter Assembly” (7) Reinstall the cassette set unit. “4.2 Removing and Reinstalling Cassette Set Unit” (8) Check the sensor replaced. “ Checks” 009-051-04 CR-IR341 Service Manual MC - 33 05.31.99 FM2460...
-
Page 525: Checking, Replacing, And Adjusting Cassette In Sensors
If anything abnormal is found, such as no message displayed, then replace the sensor checked, and then check it again. (5) Select “0. QUIT”. The monitoring is exited to return to “3. SENSOR” menu. CR-IR341 Service Manual 009-051-04 MC - 34 05.31.99 FM2460... - Page 526 FR1H1057.EPS (5) Install new SA2, 6, 10, and 14. (6) Connect the connectors. (7) Restore the cable tie that was cut at step (2). (8) Adjust the sensors replaced. “ Adjustment” 009-051-04 CR-IR341 Service Manual MC - 35 05.31.99 FM2460...
- Page 527 (Axx) appears on the operation panel. (5) Select “5. MECHANICAL UTILITY” and “1. INITIALIZE” in sequence. (6) Select “4. SENSOR” and “2. MONITOR”. A list of sensor Nos. is displayed. CR-IR341 Service Manual 009-051-04 MC - 36 05.31.99 FM2460...
- Page 528 The screen switches back to “5. MECHANICAL UTILITY” menu. (16) Select “0. QUIT”. The screen returns to the main menu. (17) Power OFF the machine. (18) Check the sensor adjusted. “ Checks” 009-051-06 009-051-04 CR-IR341 Service Manual MC - 37 04.20.2001 FM3006 05.31.99 FM2460...
- Page 529 (8) Enter the number of the solenoid activated at step (2). The solenoid is activated so that it is in the cassette hold release mode (the sensor is OPEN). (9) Repeatedly select “0. QUIT”. M-Utility is exited. CR-IR341 Service Manual 009-051-04 MC - 38 05.31.99 FM2460...
- Page 530 “3.5 Sensors Not Requiring Adjustment of Its Mounting Position” in Machine Description (5) Connect the connectors (SA3, 7, 11, 15). (6) Attach the mounting bracket. Screw down the mounting bracket while pushing it upward. (7) Check the sensor replaced. “ Checks” 009-051-04 CR-IR341 Service Manual MC - 39 05.31.99 FM2460...
- Page 531 If anything abnormal is found, such as no message displayed, then replace SA4, 8, 12, 16, and then check it again. (7) Enter “0 (zero)”. The monitoring is exited to return to “3. SENSOR” menu. CR-IR341 Service Manual 009-051-04 MC - 40 05.31.99 FM2460...
- Page 532 • Ensure that the cables do not protrude beyond the side plates. • Retain the cables at proper positions so that they will not be caught by rotating rollers. (7) Check the sensor replaced. “ Checks” 009-051-04 CR-IR341 Service Manual MC - 41 05.31.99 FM2460...
-
Page 533: Checking, Replacing, And Adjusting Cassette Hold Solenoids
(1) Place the machine in a cassette hold solenoid (SOLA1-4) operation enabled state. “2.2 Checking Various Sensors” (2) Set a cassette in the shelf. SOLA1 Cassette SOLA2 SOLA3 Cassette set unit SOLA4 FR1H4048.EPS CR-IR341 Service Manual 009-051-04 MC - 42 05.31.99 FM2460... - Page 534 1:SOLA1 2:SOLA2 3:SOLA3 4:SOLA4 5:PB1 6:SVB1 7:SOLF1 8:SOLC1 9:LAMP STB 10:LAMP ON 11:FFM INPUT THE NUMBER OF SENSOR 1 - 11 : 1 0.QUIT 1.NUMBER 2.DRIVE 3.STOP MU:AUT > Caps FR1H1762.EPS 009-051-04 CR-IR341 Service Manual MC - 43 05.31.99 FM2460...
- Page 535 (10) Repeat steps (2) through (9) several times to ensure that there is nothing abnormal. If anything abnormal is found with a solenoid, replace it and then check it again. (11) Select “0. QUIT”. The operation is exited to return to “2. ACTUATOR” menu. CR-IR341 Service Manual 009-051-04 MC - 44 05.31.99 FM2460...
- Page 536 SOLA1, 2, 3, 4 Sems M3x6, x3 SOLA1 SOLA2 SOLA3 SOLA4 Connector FR1H1210.EPS (4) Install new solenoid. (5) Connect the connector to the side plate. (6) Adjust the solenoid replaced. “ Adjustment” 009-051-04 CR-IR341 Service Manual MC - 45 05.31.99 FM2460...
- Page 537 (8) Push down the iron core of the solenoid by hand. Make sure that the cassette hold pin is located below the guide plate of the cassette set unit. (9) Reinstall the spring. (10) Check the solenoid adjusted. “ Checks” CR-IR341 Service Manual 009-051-04 MC - 46 05.31.99 FM2460...
- Page 538 From the hole in the side plate of the IP removal unit, visually check the actuator and SA17. When the light path is no longer blocked, a message indicative of the sensor OPEN status appears on the operation panel. Timing belt Actuator SA17 Hole 009-051-04 CR-IR341 Service Manual MC - 47 05.31.99 FM2460...
- Page 539 “3.5 Sensors Not Requiring Adjustment of Its Mounting Position” in Machine Description Bracket Bracket Latch SA17 Connector FR1H1061.EPS (3) Install a new sensor. (4) Connect the connector (SA17). (5) Check SA17. “ Checks” CR-IR341 Service Manual 009-051-04 MC - 48 05.31.99 FM2460...
-
Page 540: Replacing Inch/Metric Guides
Metric-system guide (brown guide) Hex socket head bolt M3x12, x2 Cap M3x10 Cassette set unit FR1H1320.EPS (4) Remove the inch/metric guides. (5) For installation of a new inch/metric guide, reverse the removal steps. 009-051-04 CR-IR341 Service Manual MC - 49 05.31.99 FM2460... - Page 541 (M4x8) and one BR screw (M4x8). SUPPLEMENTARY NOTE For widthwise adjustment of the 24x30 mammo movable roll, use the 24x30 mammo cassette and perform similar procedures as for the inch/metric movable roll. CR-IR341 Service Manual 009-051-04 MC - 50 05.31.99 FM2460...
- Page 542 (2), (6) 24x30 mammo Hex socket head bolt M4x8, x2 (yellow screw) movable roll assembly retaining bracket FR1H1380.EPS (7) Adjust the rearward toppling prevention bracket. “ Adjusting Rearward Toppling Prevention Bracket” 009-051-04 CR-IR341 Service Manual MC - 51 05.31.99 FM2460...
- Page 543 The descent is decreased. FR1H1763.EPS Side view Slightly push the trailing edge of the movable roll. Movable roll Movable roll Ensure that it is 1 mm or less. Movable roll support guide FR1H1766.EPS CR-IR341 Service Manual 009-051-04 MC - 52 05.31.99 FM2460...
- Page 544 M4x10 FR1H1764.EPS Side view Slightly push the trailing edge of the movable roll. Movable roll Movable roll Ensure that it is 1 mm or less. Movable roll support guide FR1H1766.EPS 009-051-04 CR-IR341 Service Manual MC - 53 05.31.99 FM2460...
- Page 545 (8) Reinstall the cassette set unit. “4.2 Removing the Reinstalling Cassette Set Unit” (9) Push in the tray of the cassette set unit. “4.1 Pulling Out and Pushing In Tray of Cassette Set Unit” CR-IR341 Service Manual 009-051-04 MC - 54 05.31.99 FM2460...
- Page 546 (3) Remove the two bearings and two housings. (4) Replace the rubber roller. Grip spring Housing Bearing Cassette set unit Rubber roller Bearing Housing Grip spring FR1H1755.EPS (5) For reinstallation, reverse the removal steps. 009-051-04 CR-IR341 Service Manual MC - 55 05.31.99 FM2460...
- Page 547 (4) Remove the two bearings and two housings. (5) Remove the rubber roller. Grip spring Housing Bearing Cassette set unit Rubber roller Bearing Housing Grip spring FR1H1756.EPS CR-IR341 Service Manual 009-051-04 MC - 56 05.31.99 FM2460...
- Page 548 BR M4x8, x2 Right side view Bracket Remove screw BR M4x8 BR M4x8, x2 Spring Manual release lever Cassette set unit Front view Remove screw Hex socket head bolt M4x12, x2 FR1H1602.EPS 009-051-04 CR-IR341 Service Manual MC - 57 05.31.99 FM2460...
- Page 549 2 mm to avoid the half punches, lift up the inner side of the guide plate. (13) While lifting up the left front side of the guide plate, remove the guide plate from the inner side of the cassette set unit. CR-IR341 Service Manual 009-051-04 MC - 58...
- Page 550 • The guide plate should not interfere with the actuators of the cassette IN sensors (SA4, 8, 12, 16). • Bracket mounting location. Inch/metric guide Bracket of inch Bracket Guide plate /metric guide Bracket Bracket of inch/metric guide FR1H1757.EPS 009-051-04 CR-IR341 Service Manual MC - 59 05.31.99 FM2460...
- Page 551 (8) Rotate the timing belt wheel by hand until the actuator does not block the SB1 light path. A message indicating that the sensor is OPEN appears on the operation panel. CR-IR341 Service Manual 009-051-04 MC - 60 05.31.99 FM2460...
- Page 552 (4) Remove the suction cup HP sensor (SB1). “3.5 Sensors Not Requiring Adjustment of Its Mounting Position” in Machine Description (5) Install a new sensor. (6) Connect the connector (SB1). (7) Check SB1. “ Checks” 009-051-04 CR-IR341 Service Manual MC - 61 05.31.99 FM2460...
- Page 553 (8) Repeat steps (6) and (7) several times. If anything abnormal is found, such as no message displayed, then replace the sensor. (6), (7) IP removal unit Slip of paper FR1H1293.EPS CR-IR341 Service Manual 009-051-04 MC - 62 05.31.99 FM2460...
- Page 554 Pan-head M3x8, x2 Connector Loosen screw Sems M3x6, x2 Connector bracket BR M4x8 Protective bracket Window Sems M3x6 FR1H1064.EPS (6) For reinstallation, reverse the removal steps. (7) Check SB2. “ Checks” 009-051-04 CR-IR341 Service Manual MC - 63 05.31.99 FM2460...
- Page 555 Visually check the actuator and SB3 through the hole located on the side plate of the up-down IP removal assembly. A message indicating that the sensor is OPEN appears on the operation panel. Timing belt Actuator Hole FR1H1241.EPS CR-IR341 Service Manual 009-051-04 MC - 64 05.31.99 FM2460...
- Page 556 IP removal unit and the bottom of SB3 is 99.5 to 100.0 mm. Bottom of SB3 99.5 — 100.0mm FR1H1768.EPS (3) Check SB3. “ Checks” 009-051-05 CR-IR341 Service Manual MC - 65 11.20.99 FM2638...
- Page 557 Bracket Flush FR1H4015.EPS • When mounting the bracket in the up-down IP removal unit, screw it down while pressing it downward. (5) Check SB4. “ Checks” 009-051-04 CR-IR341 Service Manual 009-051-04 MC - 66 05.31.99 FM2460 (1) 05.31.99 FM2460...
- Page 558 IP removal unit Timing belt Up-down IP removal unit Pump assembly Screw x2 FAST-ON terminal Bracket Sems M3x6 Hose FR1H1008.EPS (4) For reinstallation, reverse the removal steps. (5) Check SB5. “ Checks” 009-051-04 CR-IR341 Service Manual MC - 67 05.31.99 FM2460...
- Page 559 PB1 removal. (2) Cut the cable clamp. (3) Remove the bracket. Timing belt Bracket BR M4x8, x2 Cable clamp IP removal unit FR1H1767.EPS CR-IR341 Service Manual 009-051-04 MC - 68 05.31.99 FM2460...
- Page 560 PB1. Suction nozzle Hose FR1H1496.EPS (11) Connect the connector (CNPB1). (12) Attach the bracket that was removed at step (3). (13) Restore the cable clamp that was cut at step (2). 009-051-04 CR-IR341 Service Manual MC - 69 05.31.99 FM2460...
- Page 561 Remove the two SVB1 retaining screws behind the machine, and take out SVB1. IP removal unit Timing belt Up-down IP removal unit Cut cable tie, x2 CNSVB1 Hose SVB1 BR M4x8, x2 FR1H1007.EPS (6) For reinstallation, reverse the removal steps. CR-IR341 Service Manual 009-051-04 MC - 70 05.31.99 FM2460...
-
Page 562: Replacing Suction Cups
When pulling out the IP removal arm, do not grasp its center. If its center is grasped, the IP removal arm may be bent. Up-down IP removal unit IP removal arm FR1H1032.EPS 009-051-04 CR-IR341 Service Manual MC - 71 05.31.99 FM2460... - Page 563 • Exercise care to avoid hose disconnection. Guide IP removal Bracket Sems M3x6 Suction face view Retaining Packing screw Pipe joint Hose Packing Suction cup FR1H1031.EPS (4) Put the IP removal arm back to the rear side. CR-IR341 Service Manual 009-051-04 MC - 72 05.31.99 FM2460...
- Page 564 (7) Remove the timing belt from the MB1 so removed, and attach it to a new MB1. Hex socket head bolts M4x12, x3 CNMB1 Timing belt wheel E-ring Timing belt FR1H1067.EPS 009-051-04 CR-IR341 Service Manual MC - 73 05.31.99 FM2460...
- Page 565 After putting the cable clamp back where it was, make sure that the motor cable does not interfere with the vertical conveyor and so forth by allowing the IP removal unit to move up and down. CR-IR341 Service Manual 009-051-04 MC - 74...
- Page 566 At this time, put the timing belt onto the timing belt wheel, and fit the protruding portion of the motor into the hole of the bracket. (7) Connect the connector (CNMB2). (8) Put the cable clamp back where it was. 009-051-04 CR-IR341 Service Manual MC - 75 05.31.99 FM2460...
- Page 567 At this time, put the timing belt onto the timing belt wheel. (8) Put the cable clamp back where it was. (9) Connect the connector (CNMB3). (10) Cut the cable tie that retains the IP removal unit in place. CR-IR341 Service Manual 009-051-04 MC - 76 05.31.99 FM2460...
-
Page 568: Replacing Elevation Timing Belt
(8) From the rear of the machine, secure MB3 in place with two screws. (9) Put the cable clamp back where it was. (10) Connect the connector (CNMB3). (11) Cut the cable tie that retains the IP removal unit in place. 009-051-04 CR-IR341 Service Manual MC - 77 05.31.99 FM2460... -
Page 569: Checking And Replacing Shock Absorbers Of Ip Removal Unit
(7) Pull out the IP removal arm toward the front. NOTE When pulling out the IP removal arm, do not grasp its center. If the center is grasped, the IP removal arm may be bent. CR-IR341 Service Manual 009-051-04 MC - 78 05.31.99 FM2460... - Page 570 (12) Reinstall the roller assembly removed at steps (5) and (6). (13) Hook the wire removed at step (4) into the groove of the roller. (14) Attach the spring removed at step (3) to the wire. 009-051-04 CR-IR341 Service Manual MC - 79 05.31.99 FM2460...
- Page 571 IP removal unit Side view Shaft Pull (2), (3) Lower portion of IP removal unit Groove Shaft Shock absorber-attached guide FR1H1428.EPS CR-IR341 Service Manual 009-051-04 MC - 80 05.31.99 FM2460...
- Page 572 If it is peeled or frayed, replace the whole guide to which the shock absorber is at- tached. (5) Reinstall the shock absorber-attached guide plate. For reinstallation, reverse the removal steps. 009-051-04 CR-IR341 Service Manual MC - 81 05.31.99 FM2460...
-
Page 573: Checking And Replacing Elevation Changeover Guide
Vertical conveyor Shock absorber-attached up-down changeover guide Right side view of machine Left side view of machine Slide bearing Slide bearing E-ring E-ring Sems M3x10 for retaining up-down changeover guide Spring FR1H1424.EPS CR-IR341 Service Manual 009-051-04 MC - 82 05.31.99 FM2460... - Page 574 (11) Reinstall the arm removed at step (4). (12) Secure the elevation changeover guide to the arm in place with the single screw removed at step (3). (13) Reinstall the spring removed at step (2). 009-051-04 CR-IR341 Service Manual MC - 83 05.31.99 FM2460...
-
Page 575: Replacing Vertical Conveyor Guide
Do not remove the housing and bearing located at the bottom. Timing belt Free length: 80 mm grip spring, x3 Bearing Vertical conveyor guide Housing Idler gear Free length: 93 mm grip spring, x3 (3) Gear FR1H1075.EPS CR-IR341 Service Manual 009-051-04 MC - 84 05.31.99 FM2460... - Page 576 Vertical conveyor guide BR M4x8, x2 Elevation changeover guide Rubber roller x4 FR1H1076.EPS (8) For reinstallation, reverse the removal steps. To install the vertical conveyor guide, tighten screws while pushing down the guide. 009-051-04 CR-IR341 Service Manual MC - 85 05.31.99 FM2460...
-
Page 577: Removing And Reinstalling Before-Side-Positioning Conveyor
Up-down IP removal Timing belt Tensioner Timing belt BR M4x8 CNC1 BR M4x8 Before-side- Before-side- Erasure conveyor Tensioner positioning conveyor positioning conveyor Before-side- positioning conveyor BR M4x8, x2 CNC1 CNC2 CNSOLC1 FR1H1109.EPS CR-IR341 Service Manual 009-051-04 MC - 86 05.31.99 FM2460... - Page 578 Screw down the tensioner in place where a proper tension is attained. “3.4 Tensioner Not Requiring Tension Adjustment” in Machine Description 009-051-04 CR-IR341 Service Manual MC - 87 05.31.99 FM2460...
- Page 579 (4) Remove the cardboard or the like that has blocked the SC1 light path. A message indicating that the sensor is OPEN appears on the operation panel. (5) Repeat steps (3) and (4) several times. (6) Power OFF the machine. (7) Reinstall the SC1. CR-IR341 Service Manual 009-051-04 MC - 88 05.31.99 FM2460...
- Page 580 MC - 89 Replacement (1) Disconnect the connector (SC1). (2) Remove SC1. Before-side- positioning conveyor Pan-head M3x10, x2 Connector Spacer (with taper) FR1H1112.EPS (3) Install a new SC1. (4) Connect the connector (SC1). 009-051-04 CR-IR341 Service Manual MC - 89 05.31.99 FM2460...
-
Page 581: Checking And Replacing Convergence Standby Ip Sensor (Sc2)
(4) Remove the cardboard or the like that has blocked the SC2 light path. A message indicating that the sensor is OPEN appears on the operation panel. (5) Repeat steps (3) and (4) several times. (6) Power OFF the machine. (7) Reinstall the SC2. CR-IR341 Service Manual 009-051-04 MC - 90 05.31.99 FM2460... - Page 582 (2) Remove SC2. Before-side- positioning conveyor Pan-head M3x10, x2 Connector Spacer FR1H1113.EPS (3) Install a new SC2. (4) Connect the connector (SC2). (5) Attach a cable clamp. (6) Check SC2. “ Checks” 009-051-04 CR-IR341 Service Manual MC - 91 05.31.99 FM2460...
-
Page 583: Drive Solenoid (Solc1)
If it is not driven even after that, replace SOLC1. SOLC1 Before-side- positioning conveyor FR1H1114.EPS (7) Repeatedly select “0. QUIT” to exit M-Utility. A message prompting you to reset the machine is displayed. (8) Press the RESET button. CR-IR341 Service Manual 009-051-04 MC - 92 05.31.99 FM2460... - Page 584 (SOLC1) so that the distance between the side face of the before-side-positioning changeover guide and the back of the guide plate is 1 mm or less. Guide plate (363N1758B) 1 mm or less Before-side-positioning changeover guide FR1H1547.EPS 009-051-04 CR-IR341 Service Manual MC - 93 05.31.99 FM2460...
-
Page 585: Timing Belt
While putting the timing belt onto the pulley, install MC1 with three screws. (6) Attach the connector (CNMC1) to the bracket. (7) Connect the connector (CNMC1). (8) Install the before-side-positioning conveyor. “6.1 Removing and Reinstalling Before-Side-Positioning Conveyor” CR-IR341 Service Manual 009-051-04 MC - 94 05.31.99 FM2460... - Page 586 Adjust the position of the tensioner until a proper tension is attained, and then tighten the screw to secure the tensioner in place. The tension is as follows. 500g, 6 ± 1mm 500g Timing belt 6–1mm FRONT Tensioner Loosen screw Before-side- positioning conveyor FR1H1251.EPS 009-051-04 CR-IR341 Service Manual MC - 95 05.31.99 FM2460...
- Page 587 The tension is as follows. 500g, 6 ± 1mm FRONT 500g 6–1mm (1), (2) Tensioner Loosen screw Timing belt Before-side- positioning conveyor FR1H1252.EPS CR-IR341 Service Manual 009-051-04 MC - 96 05.31.99 FM2460...
- Page 588 Loosen the four screws located on right and left sides of the cleaning roller assembly and remove the bracket. (4) Remove the cleaning roller. Bracket Cleaning roller Loosen sems M3x6, x4 FR1H1441.EPS (5) Clean dust deposited within the cleaning roller assembly. 009-051-04 CR-IR341 Service Manual MC - 97 05.31.99 FM2460...
- Page 589 (7) Install the spur gear, two spacers, two slide bearings, and E-ring removed at step (6) to a new cleaning roller. (8) Reinstall the cleaning roller to the cleaning roller assembly. (9) Reinstall the cleaning roller assembly in reverse order of removal. CR-IR341 Service Manual 009-051-04 MC - 98 05.31.99 FM2460...
- Page 590 Flat machined surface Bearing 20 mm diameter roller Bearing FR1H4013.EPS • When installing the grip spring, exercise care not to erroneously orient it because its left-hand portion is longer than the right-hand portion. 009-051-04 CR-IR341 Service Manual MC - 99 05.31.99 FM2460...
- Page 591 (4), (7) Shock absorber-attached guide plate (A) Sems M3x6, x4 Loosen screw BR M4x8 Bracket Before-side-positioning conveyor Cleaning roller assembly (6),(7) BR M4x8 Shock absorber-attached guide plate (B) Sems M3x6, x2 FR1H1549.EPS CR-IR341 Service Manual 009-051-04 MC - 100 05.31.99 FM2460...
- Page 592 (8) Install the guide plate. (9) Tighten the screw loosened at step (3). (10) Reinstall the cover removed at step (2). (11) Reinstall the before-side-positioning conveyor. “6.1 Removing and Reinstalling Before-Side-Positioning Conveyor” 009-051-04 CR-IR341 Service Manual MC - 101 05.31.99 FM2460...
- Page 593 (5) Remove the arm. (6) Remove the bearing. (7) Remove the shock absorber-attached before-side-positioning changeover guide. Sems M3x10 Bearing BR M4x12, x2 Spring Shock absorber-attached before-side- positioning changeover guide Before-side-positioning conveyor FR1H1551.EPS CR-IR341 Service Manual 009-051-04 MC - 102 05.31.99 FM2460...
- Page 594 (SOLC1) so that the distance between the side face of the before-side-positioning changeover guide and the back of the guide plate is 1 mm or less. Guide plate (363N1758B) 1 mm or less Before-side-positioning changeover guide FR1H1547.EPS 009-051-04 CR-IR341 Service Manual MC - 103 05.31.99 FM2460...
- Page 595 Groove (12) Shock absorber-attached before-side-positioning retention guide FR1H1554.EPS (14) Reinstall the guide plate removed at step (2). (15) Reinstall the before-side-positioning conveyor. “6.1 Removing and Reinstalling Before-Side-Positioning Conveyor” CR-IR341 Service Manual 009-051-04 MC - 104 05.31.99 FM2460...
- Page 596 ONTENTS MC - 105 BLANK PAGE 009-051-04 CR-IR341 Service Manual MC - 105 05.31.99 FM2460...
- Page 597 (2) Disconnect the connectors (CN7-9, CNZ6-8, 10 on the SCN08A board, and CN1, 2, 4, 5 on the subscanning unit). Subscanning unit SCN08A board CNZ4 Remove screw CNZ5 (BR M4x8, x2) CNZ2 CNZ1 CNZ6 CNZ7 CNZ8 CNZ10 Scanner unit FR1H1555.EPS 009-051-04 CR-IR341 Service Manual MC - 106 05.31.99 FM2460...
- Page 598 NOTE When pulling out the scanner unit, use care so that it is not caught by the disconnected connectors and cables. Scanner unit Bracket BR M4x8, x2 BR M4x8, x2 FR1H1557.EPS 009-051-04 CR-IR341 Service Manual MC - 107 05.31.99 FM2460...
- Page 599 NOTE When putting the scanner unit back where it was, use care so that it is not caught by the connectors and cables disconnected. Scanner unit Stopper Stopper FR1H1558.EPS 009-051-04 CR-IR341 Service Manual MC - 108 05.31.99 FM2460...
- Page 600 (5) Connect the connectors (CN7-9, CNZ6-8, 10 on the SCN08A board; CNZ1, 2, 4, 5 on the subscanning unit). Subscanning unit CNZ4 SCN08A board Bracket CNZ5 BR M4x8, x2 CNZ2 CNZ1 CNZ6 CNZ7 CNZ8 CNZ10 Scanner unit BR M4x8, x2 FR1H1771.EPS 009-051-04 CR-IR341 Service Manual MC - 109 05.31.99 FM2460...
-
Page 601: Removing And Reinstalling Side-Positioning Conveyor
Positioning screw (should not be removed) CNMD3 Positioning screw (should not be removed) CNMD1, CNMD2 CND1 BCRCN1 Side-positioning conveyor BR M4x8, x5 FR1H1772.EPS CR-IR341 Service Manual 009-051-04 MC - 110 05.31.99 FM2460... - Page 602 Side-positioning conveyor CNMD3 CNMD3 Block section Bracket CNMD1, CNMD2 Side-positioning conveyor CND1 BR M4x8, x5 (2) BCRCN1 FR1H1773.EPS (3) Push in the scanner unit. “7. Pulling Out and Pushing in Scanner Unit” 009-051-04 CR-IR341 Service Manual MC - 111 05.31.99 FM2460...
-
Page 603: Checking And Replacing Side-Positioning Mechanism Hp Sensor
If no message is displayed, it is likely that the sensor is faulty. So, replace the sensor. Actuator FR1H1165.EPS (7) Enter “0 (zero)”. The monitoring is quitted, and the screen returns to the “3. SENSOR” menu. (8) Press the RESET button. CR-IR341 Service Manual 009-051-04 MC - 112 05.31.99 FM2460... - Page 604 Sems M3x6, x2 Connector Side-positioning conveyor FR1H1301.EPS (5) Attach a new SD1 to the bracket. (6) Connect the CNSD1. (7) Install the SD1 together with the bracket to the side-positioning conveyor. 009-051-04 CR-IR341 Service Manual MC - 113 05.31.99 FM2460...
- Page 605 If no message is displayed, it is likely that the sensor is faulty. So, replace the sensor. (7) Enter “0 (zero)”. The monitoring is quitted, and the screen returns to the “3. SENSOR” menu. (8) Press the RESET button. CR-IR341 Service Manual 009-051-04 MC - 114 05.31.99 FM2460...
- Page 606 Connector Bracket Sems M3x6, x2 FR1H1300.EPS (6) Attach a new SD2 to the bracket. (7) Connect the CNSD12 (8) Install the SD2 together with the bracket to the side-positioning conveyor. 009-051-04 CR-IR341 Service Manual MC - 115 05.31.99 FM2460...
- Page 607 (9) Repeat steps (7) and (8) several times. If anything abnormal is found, such as no message displayed, then replace the sensor. CND1 Spacer Pan-head M3x10, x2 CNSD3 Side-positioning conveyor FR1H1778.EPS CR-IR341 Service Manual 009-051-04 MC - 116 05.31.99 FM2460...
- Page 608 M3x10, x2 CNSD3 Side-positioning conveyor FR1H1779.EPS (4) Attach a new SD3 and the spacer removed at step (2). (5) Connect CNSD3. (6) Reinstall the side-positioning conveyor. “8.1 Removing and Reinstalling Side-Positioning Conveyor” 009-051-04 CR-IR341 Service Manual MC - 117 05.31.99 FM2460...
- Page 609 (7) Install to a new MD1 the timing belt wheel that was removed at step (6). (8) For reinstallation, reverse the removal steps. Put the timing belt onto the timing belt wheel of MD1 and then secure MD1 in place. CR-IR341 Service Manual 009-051-04 MC - 118...
- Page 610 (7) Install to a new MD2 the timing belt wheel that was removed at step (6). (8) For reinstallation, reverse the removal steps. Put the timing belt onto the timing belt wheel of MD2 and then secure MD2 in place. 009-051-04 CR-IR341 Service Manual MC - 119 05.31.99 FM2460...
- Page 611 (7) Install to a new MD3 the timing belt wheel that was removed at step (6). (8) For reinstallation, reverse the removal steps. Put the timing belt onto the timing belt wheel of MD3 and then secure MD3 in place. CR-IR341 Service Manual 009-051-04 MC - 120...
- Page 612 (5) Remove the four screws and take out the bracket. Barcode reader Screw x4 Bracket Sems M3x6, x4 BCRCN2 Side-positioning conveyor FR1H1108*.EPS (6) Reverse the removal steps to reinstall a new barcode reader. 009-051-04 CR-IR341 Service Manual MC - 121 05.31.99 FM2460...
-
Page 613: Checking And Replacing Side-Positioning Conveyor Grip Mechanism
“2.2 Checking Various Sensors” (4) Make sure that “1” is indicated for SD2 (CLOSE status). (5) Make sure that the rubber roller is gripped. (6) Repeatedly select “0. QUIT”. M-Utility is exited. CR-IR341 Service Manual 009-051-04 MC - 122 05.31.99 FM2460... - Page 614 (6) Reinstall the triangular-shaped cam to the shaft. (7) Reinstall the E-ring. (8) Reinstall the side-positioning conveyor. “8.1 Removing and Reinstalling Side-Positioning Conveyor” (9) Check the grip mechanism of the side-positioning conveyor. “ Checks” 009-051-04 CR-IR341 Service Manual MC - 123 05.31.99 FM2460...
-
Page 615: Checking And Replacing Side-Positioning Top Stopper
(3) Make sure that the distance from the guide plate to the tip of the stopper is 6 ± 1 mm. Side-positioning mechanism Side-positioning conveyor Stopper Side view Guide plate 6–1mm Stopper FR1H1786.EPS (4) Reinstall the side-positioning conveyor. “8.1 Removing and Reinstalling Side-Positioning Conveyor” CR-IR341 Service Manual 009-051-04 MC - 124 05.31.99 FM2460... - Page 616 Slide bearing Shaft Stopper Shaft E-ring Sems M3x6 Spring Stopper Sems M3x6, x4 FR1H1787.EPS (7) Install a new stopper in reverse order of removal. (8) Check the stopper. “ Checks” 009-051-04 CR-IR341 Service Manual MC - 125 05.31.99 FM2460...
-
Page 617: Replacing Side-Positioning Conveyor Grip Release Timing Belt
Bearing Spring washer Bushing Bushing Timing belt wheel Spring washer Hex socket head bolt M4x12 Timing belt (6) Shaft FR1H1789.EPS (8) Install a new timing belt in reverse order of removal. CR-IR341 Service Manual 009-051-04 MC - 126 05.31.99 FM2460... -
Page 618: Checking, Replacing, And Adjusting Side-Positioning Conveyor
Timing belt A - B = 9–1(mm) FR1H1790.EPS (5) Make sure that the deflection (A - B) is 9±1 mm. (6) Reinstall the side-positioning conveyor. “8.1 Removing and Reinstalling Side-Positioning Conveyor” 009-051-04 CR-IR341 Service Manual MC - 127 05.31.99 FM2460... - Page 619 Timing belt FR1H1791.EPS (5) Install a new timing belt. (6) Reinstall the retainer to the timing belt. (7) Reinstall MD1. “8.5 Replacing Side-Positioning Motor (MD1)” (8) Adjust the timing belt. “ Adjustment” CR-IR341 Service Manual 009-051-04 MC - 128 05.31.99 FM2460...
- Page 620 Screw down the tension roller in place where an appropriate tension is attained. The tension value is as follow. 500 ± 50g, 9 ± 1 mm Tension roller Timing belt Push-pull gauge Tension roller 500–50g Timing belt A - B = 9–1(mm) FR1H1790.EPS 009-051-04 CR-IR341 Service Manual MC - 129 05.31.99 FM2460...
-
Page 621: Replacing Side-Positioning Conveyor Rubber Rollers
(2) Remove the bearing, grip spring, housing, belt wheel, and timing belt wheel for the rubber roller to be removed. (3) Replace the six side-positioning conveyor rubber rollers. Rubber roller Guide plate FR1H1793.EPS (4) Reinstall the side-positioning conveyor. “8.1 Removing and Reinstalling Side-Positioning Conveyor” CR-IR341 Service Manual 009-051-04 MC - 130 05.31.99 FM2460... - Page 622 Sems M3x6, x4 Shock absorber-attached guide plate Sems M3x6, x3 Side-positioning conveyor FR1H1794.EPS (4) Reinstall the shock absorber-attached guide plates. (5) Reinstall the side-positioning conveyor. “8.1 Removing and Reinstalling Side-Positioning Conveyor” 009-051-04 CR-IR341 Service Manual MC - 131 05.31.99 FM2460...
- Page 623 (3) Touch the upper left and upper right corners of the operation panel in sequence. M-Utility is activated. How to exit M-Utility Repeatedly select “0. QUIT” to exit M-Utility. M-Utility is exited. 009-051-05 CR-IR341 Service Manual MC - 132 11.20.99 FM2638...
- Page 624 (1) Activate M-Utility. “ Activating and Exiting M-Utility” (2) Select “5. SCANNER UTILITY”, “6. FORMAT”, “1. DEFAULT” and “1. PIXEL AND FREQ” in sequence. The format set data is initialized. 009-051-05 CR-IR341 Service Manual MC - 133 11.20.99 FM2638...
- Page 625 (3) Measure the white blank portion of the output film, in steps of 2 mm, from the outer- most corner of the image frame. For measurement, use the steel rule or graduated loupe. 2mm or less Image frame White blank FR1H1102.EPS 009-051-05 CR-IR341 Service Manual MC - 134 11.20.99 FM2638...
- Page 626 (12) Turn OFF the circuit breaker. (13) Make sure that the high-voltage switch of the SCN08A board is in the ON position. (14) Reinstall all the covers of the machine. (15) Turn ON the circuit breaker. 009-051-05 CR-IR341 Service Manual MC - 135 11.20.99 FM2638...
- Page 627 • To increment the current read width by N% (0 < N ≤ 5) (to enlarge the image) • To decrement the current read width by N% (-5 < N ≤ 0) (to reduce the image) 009-051-05 CR-IR341 Service Manual MC - 136 11.20.99 FM2638...
- Page 628 If an out-of-range value is set, an error results. If an error occurs, check to see that the procedures have been performed as instructed, and check if each of the parts is connected properly. 009-051-05 CR-IR341 Service Manual MC - 137 11.20.99 FM2638...
- Page 629 (2) Determine the correction dosage value. Round off the measured dosage value in mR to the second decimal place, and write down the resulting value on your notepad. 009-051-05 CR-IR341 Service Manual MC - 138 11.20.99 FM2638...
- Page 630 While in Routine Mode, touch the CHANGE key to select Primary Erasure. (2) Set in the machine the cassette containing the uniformly exposed IP. Primary erasure (reading and erasing without image output) is performed. 009-051-04 CR-IR341 Service Manual MC - 139 05.31.99 FM2460...
- Page 631 • If only sensitivity is to be calculated 6. SENSITIVITY ONLY (4) For either 1, 2, or 6, enter the corrected dosage value. Otherwise, proceed to the next step. 009-051-06 009-051-05 CR-IR341 Service Manual MC - 140 04.20.2001 FM3006 11.20.99 FM2638...
- Page 632 If anything abnormal is found on the output film, or it is desired to correct sensitivity with greater accuracy, take the steps described in “[6] Set Sensitivity Correction” below. 009-051-06 009-051-04 CR-IR341 Service Manual MC - 141 04.20.2001 FM3006 05.31.99 FM2460...
- Page 633 (6) Generate film output and confirm the correction result. (7) Select “5. SCANNER UTILITY”, “8. DATA MANAGEMENT” and “2. SAVE SENSITIVITY DATA” in sequence. The sensitivity data after correction is saved to the hard disk. (8) Exit M-Utility. 009-051-05 CR-IR341 Service Manual MC - 142 11.20.99 FM2638...
- Page 634 The scanning optics unit of the service parts does not contain the LD assembly. When replacing the scanning optics unit, reattach the existing LD assembly to a new scan- ning optics unit. “9.4 Checking and Replacing LD Assembly” 009-051-06 009-051-05 CR-IR341 Service Manual MC - 143 04.20.2001 FM3006 11.20.99 FM2638...
- Page 635 Uniformly expose IPs of each size at about 1 mR. Then, check the film image recorded under SENSITIVITY from the Test Menu for scanner control failures, such as format misalignment and shading, which may cause diagnostic problems. 009-051-05 CR-IR341 Service Manual MC - 144 11.20.99 FM2638...
- Page 636 If not, static electricity built on the human body may cause damage to electric parts mounted on the board. (1) Power OFF the machine. (2) Make sure that the high-voltage switch (S1) is in the OFF position. SCN08A board OFF state NFB3 NFB1 FR1H1275.EPS 009-051-04 CR-IR341 Service Manual MC - 145 05.31.99 FM2460...
- Page 637 Push the no-fuse breaker button several times to place the breaker in its shorted condition. NOTE With board version J or later, the no-fuse breaker (NFB) is replaced with the fuse. Thus, make sure that the fuse has not been blown. 009-051-04 009-051-06 CR-IR341 Service Manual MC - 146 04.20.2001 FM3006 05.31.99 FM2460...
- Page 638 • When ended normally: If the machine starts up normally, the LDD08A board is normal. • When ended in error (LD down error or LD warning error occurs): Replace the LDD08A board. 009-051-04 CR-IR341 Service Manual MC - 147 05.31.99 FM2460...
- Page 639 (4) Remove the top cover from the scanning optics unit. (5) Remove the ground wire. (6) Replace the LD assembly. Top cover Screw x7 Ground cable Screw LD assembly Screw x3 FR1H1168.EPS 009-051-04 CR-IR341 Service Manual MC - 148 05.31.99 FM2460...
- Page 640 When installing the LD assembly, align the LD assembly against the three positioning brackets for proper positioning. Top view Positioning bracket Scanning optics unit LD assembly Scanning optics unit FR1H1169.EPS (8) Take the steps described in “Check after LD Assembly Replacement” below. 009-051-04 CR-IR341 Service Manual MC - 149 05.31.99 FM2460...
- Page 641 M-Utility is activated. 3. Select “5. SCANNER UTILITY”, “3. LASER”, and “2. ON” in sequence. Verify that no error occurs. (2) Check image performance. “3.2 Checking Image” in Preventive Maintenance Volume 009-051-04 CR-IR341 Service Manual MC - 150 05.31.99 FM2460...
- Page 642 Scan the image and check for any image anomaly. Scan the IP with a rule exposed, and check to see that there is no image anomaly, such as jitters, fluctuations, or ununiformity. 009-051-04 CR-IR341 Service Manual MC - 151 05.31.99 FM2460...
- Page 643 (8) Touch the upper left and upper right corners of the operation panel in sequence. M-Utility is activated. (9) Select “5. SCANNER UTILITY”, “2. POLYGON” and “2. ON” in sequence. 009-051-04 CR-IR341 Service Manual MC - 152 009-051-06 05.31.99 FM2460...
- Page 644 So, replace the polygonal mirror assembly. • When D13 is not lit: It is conceivable that the polygonal mirror assembly may be faulty. So, replace the polygonal mirror assembly. SCN08A board FR1H1277.EPS 009-051-04 CR-IR341 Service Manual MC - 153 05.31.99 FM2460...
- Page 645 (10) Polygonal mirror assembly (Pay attention to its Filter mounting direction.) Screw x4 Polygon mirror face Filter Clamp BR M4x8 Polygon driver Screw x2 (7) LDD08A CN1 FR1H1170.EPS 009-051-04 009-051-06 CR-IR341 Service Manual MC - 154 04.20.2001 FM3006 05.31.99 FM2460...
- Page 646 If anything abnormal is found, make the following adjustment. (6) Adjust the read start position and read width. “9.1 Adjusting Read Start Position and Read Width, [6] Fine Adjustment of Read Width and Read Start Position” 009-051-05 009-051-06 CR-IR341 Service Manual MC - 155 04.20.2001 FM3006 11.20.99 FM2638...
- Page 647 (5) Power OFF the machine. (6) Pull out the scanner unit. “7. Pulling Out and Pushing In Scanner Unit” (7) Place the high-voltage switch (S1) of the SCN08A board in the OFF position. 009-051-04 CR-IR341 Service Manual MC - 156 05.31.99 FM2460...
- Page 648 With board version J or later, the no-fuse breaker (NFB) is replaced with the fuse. Thus, make sure that the fuse has not been blown. (16) Power ON the machine. Make sure that “HV-OFF” is displayed on the operation panel. 009-051-06 009-051-04 CR-IR341 Service Manual MC - 157 04.20.2001 FM3006 05.31.99 FM2460...
- Page 649 If the machine does not start up normally, replace the SYN08A board. • If it is not lit or is blinking (blinking but not quickly), replace the SYN08A board. SCN08A board FR101105.EPS 009-051-04 CR-IR341 Service Manual MC - 158 05.31.99 FM2460...
- Page 650 (4) Remove the top cover from the scanning optics unit. (5) Disconnect the connector (CN1) of the SYN08A board. (6) Replace the SYN08A assembly. Top cover Screw x7 SYN08A assembly BR M4x8 Spacer LDD08A CN1 Scanning optics unit FR1H1176.EPS 009-051-04 CR-IR341 Service Manual MC - 159 05.31.99 FM2460...
- Page 651 • Fit the cable into the cable guide. Scanning optics unit Top view SYN08A assembly Mounting bracket Reference face FR1H1177.EPS (8) Perform the procedures described in “Check after SYN08A Assembly Replacement.” 009-051-04 CR-IR341 Service Manual MC - 160 05.31.99 FM2460...
- Page 652 If anything abnormal is found, make the following adjustments. (4) Adjust the invalid pixels “9.1 Adjusting Read Start Position and Read Width, [6] Fine Adjustment of Read Width and Read Start Position” (4) Check the SYN08A board. “ Checks” 009-051-05 CR-IR341 Service Manual MC - 161 11.20.99 FM2638...
- Page 653 With board version J or later, the no-fuse breaker (NFB) is replaced with the fuse. Thus, make sure that the fuse has not been blown. NFB5 NFB8 NFB7 NFB10 OFF state NFB6 NFB9 NFB3 NFB1 NFB4 SCN08A board NFB2 FR1H1193.EPS 009-051-04 CR-IR341 Service Manual MC - 162 009-051-06 05.31.99 FM2460 04.20.2001 FM3006...
- Page 654 • TP8 (- 5AS) - TP28 (ASG): - 5V ± 0.25V • TP3 (- 5AS2) - TP28 (ASG): If the voltage measured is outside the above reference value range, replace the SCN board. 009-051-04 CR-IR341 Service Manual MC - 163 05.31.99 FM2460...
- Page 655 NFB3 NFB1 SCN08A board NFB4 NFB2 FR1H1531.EPS (10) Reinstall all the covers. (11) Power ON the machine. (12) Check image performance. “3.2 Checking Image” in Preventive Maintenance Volume 009-051-06 009-051-04 CR-IR341 Service Manual MC - 164 04.20.2001 FM3006 05.31.99 FM2460...
- Page 656 • Carefully handle the light-collecting guide to avoid damage to it due to contact with surround- ing objects. • Wear a mask to prevent saliva from sputtering around on the light-collecting guide. Light- collecting guide Light-receiving face FR1H1171.EPS 009-051-04 CR-IR341 Service Manual MC - 165 05.31.99 FM2460...
- Page 657 • Wear a mask to prevent saliva from sputtering around on the light-collecting guide. Light-collecting guide assembly PMT08A board Brace BR M4x12 Light-collecting guide Light-receiving assembly retaining face bracket Scanner unit BR M4x8 FR1H1795.EPS 009-051-04 CR-IR341 Service Manual MC - 166 05.31.99 FM2460...
- Page 658 FR1H1796.EPS 009-051-04 CR-IR341 Service Manual MC - 167 05.31.99 FM2460...
- Page 659 Light-collecting guide assembly Brace Stopper BR M4x12 Light-collecting guide assembly retaining bracket BR M4x8 Push FR1H1797.EPS 009-051-04 CR-IR341 Service Manual MC - 168 05.31.99 FM2460...
- Page 660 (5) Connect the connectors (CN1, 2 to the PMT08A board). Light-collecting assembly PMT08A board Scanner unit FR1H1799.EPS (6) Push in the scanner unit. “7. Pulling Out and Pushing In Scanner Unit” 009-051-04 CR-IR341 Service Manual MC - 169 05.31.99 FM2460...
- Page 661 • If ununiformity is observed on the image due to scratches “ Replacement” Replacement (1) Remove the light-collecting guide assembly. “ Removal” (2) Take out the light-collecting guide from the PMT08A board assembly. PMT08A board assembly Light-collecting guide FR1H1800.EPS 009-051-04 CR-IR341 Service Manual MC - 170 05.31.99 FM2460...
- Page 662 SENSITIVITY from the Test Menu for scanner control failures, such as format misalignment and shading, which may cause diagnostic problems. If anything abnormal is found, make the following adjustments. (4) Perform shading/sensitivity correction. “9.2 Shading/Sensitivity Correction” 009-051-04 CR-IR341 Service Manual MC - 171 05.31.99 FM2460...
- Page 663 (3) Fold five new sheets of lens cleaning paper by half, and wipe the light-collecting guide dry. After wiping it dry, make sure that it has been cleaned uniformly. 5 mm approx. (2), (3) Cleaning range PMT08A board Socket section Photomultiplier bonding surface FR1H1801.EPS 009-051-04 CR-IR341 Service Manual MC - 172 05.31.99 FM2460...
- Page 664 • Wear a mask to prevent saliva from sputtering around on the light-collecting guide. Parallel Not parallel Light-collecting guide assembly Socket PMT08A board FR1H1798.EPS (5) Reinstall the light-collecting guide assembly. “ Reinstallation” 009-051-04 CR-IR341 Service Manual MC - 173 05.31.99 FM2460...
- Page 665 With board version J or later, the no-fuse breaker (NFB) is replaced with the fuse. Thus, make sure that the fuse has not been blown. SCN08A board NFB4 NFB2 FR1H1802.EPS 009-051-06 009-051-04 CR-IR341 Service Manual MC - 174 04.20.2001 FM3006 05.31.99 FM2460...
- Page 666 (8) Select “5. SCANNER UTILITY”, “10. VIRTUAL IMAGE”, and “2. LOG AMP” in se- quence. (9) Measure the voltage between the terminals of the PMT08A board. PMTH-PGND: -0.5 – +0.5V PMT08A board PGND HV135 Light-collecting PMTH guide assembly FR1H1804.EPS 009-051-04 CR-IR341 Service Manual MC - 175 05.31.99 FM2460...
- Page 667 Scanner unit SCN08A board FR1H1535.EPS (2) Remove the light-collecting guide assembly. “10.2 Servicing Light-Collecting Guide” (3) Take out the light-collecting guide from the PMT08A board assembly. PMT08A board assembly Light-collecting guide FR1H1800.EPS 009-051-04 CR-IR341 Service Manual MC - 176 05.31.99 FM2460...
- Page 668 ON, because high voltage is applied to the PMT08A board. (11) Measure the voltage between the terminals of the PMT08A board. HV135-PGND: -17.8 ± 2V (11) HV135(TP5) PMT08A board PGND FR1H1538.EPS 009-051-04 CR-IR341 Service Manual MC - 177 05.31.99 FM2460...
- Page 669 If it is put in a wrong orientation, an abnormal image (fine-grained pattern, etc.) may result. Light-collecting guide Screw x4 Spacer x3 PMT08A board Bracket Clip washer (Pay attention to its orientation.) PMT08A board FR1H1873.EPS 009-051-04 CR-IR341 Service Manual MC - 178 05.31.99 FM2460...
- Page 670 (6) Select “1. ERROR LOG Utility”, “1. LIST”, “1. ALL”, and “3. BOTH” in sequence. The error log is displayed. (7) Check if TN1 is normal. • HV voltage error occurred: TN1 abnormal • HV voltage error did not occurred: TN1 normal 009-051-06 009-051-04 CR-IR341 Service Manual MC - 179 04.20.2001 FM3006 05.31.99 FM2460...
- Page 671 Slide the dust cover to the right (right-hand side of the machine), thereby taking out the dust cover. (5), (6) Scanner optics unit BR M4x16, x4 Ground wire BR M4x8 CN1—3 Loosen screw BR M4x8 Dust cover Remove screw BR M4x8 FR1H1810.EPS 009-051-04 CR-IR341 Service Manual MC - 180 05.31.99 FM2460...
- Page 672 (10) Remove the light-collecting mirror. Grasp the take-out screws and remove the light-collecting mirror while using care to avoid contact with surrounding objects. (9), (10) Take-out screw Light-collecting mirror BR M4x8, x2 Reflection face FR1H1541.EPS 009-051-04 CR-IR341 Service Manual MC - 181 05.31.99 FM2460...
- Page 673 Generate image output and check to see that there is no ununiformity on the result- ing image due to the scratch. “ Adjustment” • If the ununiformity persists even after the shading/sensitivity correction: “ Replacement” 009-051-04 CR-IR341 Service Manual MC - 182 05.31.99 FM2460...
- Page 674 • If the lens cleaning paper becomes soiled, replace it with a new one. • Clean the light-collecting mirror until the lens cleaning paper is no longer soiled. Light-collecting mirror Reflection face FR1H1900.EPS (4) Attach the light-collecting mirror. “ Reinstallation” 009-051-04 CR-IR341 Service Manual MC - 183 05.31.99 FM2460...
- Page 675 (12) Touch the upper left and upper right corners of the operation panel in sequence. M-Utility is activated. (13) Select “5. SCANNER UTILITY”, “3. LASER”, and “2. ON” in sequence. The LD (laser) emits light. 009-051-06 CR-IR341 Service Manual 009-051-04 MC - 184 04.20.2001 FM3006 05.31.99 FM2460...
- Page 676 (8) Install a new SZ1 by reversing the removal steps. When installing SZ1, screw it down while pressing it against the front side. Screw x2 Subscanning unit Top view Positioning direction FR1H1313.EPS 009-051-06 009-051-04 CR-IR341 Service Manual MC - 185 04.20.2001 FM3006 05.31.99 FM2460...
- Page 677 (6) Take out SZ2 from the bracket. Left side of subscanning unit Rear side plate Subscanning unit Bracket Sems M3x6 Connector FR1H1287.EPS (7) Reverse the removal steps to reinstall a new SZ2. (8) Check SZ2. “ Checks” CR-IR341 Service Manual 009-051-04 MC - 186 05.31.99 FM2460...
- Page 678 (6) Take out SZ3 from the bracket. Left side of Subscanning unit subscanning unit Rear side plate Bracket Connector Sems M3x6 FR1H1288.EPS (7) Reverse the removal steps to reinstall a new SZ3. (8) Check SZ3. “ Checks” 009-051-04 CR-IR341 Service Manual MC - 187 05.31.99 FM2460...
- Page 679 MZ1 is less than 1 V, then the check is completed. If MZ1 does not rotate or the voltage between OK and 5G on MZ1 is greater than 1 V for any of the operation parameters, then check the SLC08A board. CR-IR341 Service Manual 009-051-04 MC - 188...
- Page 680 (1) Power ON the machine. Make sure that the machine starts up normally. (2) Check MZ1 again to ensure that the motor operates normally. (3) Check image performance. “3.2 Checking Image” in Preventive Maintenance Volume 009-051-04 CR-IR341 Service Manual MC - 189 05.31.99 FM2460...
- Page 681 FAST-ON terminal (+) FAST-ON terminal (-) FR1H1020.EPS (8) Reverse the removal steps to reinstall a new MZ2. When installing the MZ2 bracket, screw it down while pressing it against the position- ing bracket. CR-IR341 Service Manual 009-051-04 MC - 190 05.31.99 FM2460...
- Page 682 Ring Hex socket head setscrew M3x6 FR1H1021.EPS (8) Reverse the removal steps to reinstall MZ3. When installing the MZ3 bracket, screw it down while pressing it against the position- ing bracket. 009-051-04 CR-IR341 Service Manual MC - 191 05.31.99 FM2460...
- Page 683 • If any flaw is found, replace the SUS belt or rubber belt. Tensioner SUS belt Rubber belt Drive Pulley shaft Subscanning unit Subscanning Right-hand side transparent cover unit BR M4x8, x2 FR1H1189.EPS (4) Reinstall the right-hand side trsnsparent cover. CR-IR341 Service Manual 009-051-04 MC - 192 05.31.99 FM2460...
- Page 684 • After replacing the SUS or rubber belt, check MZ1. “10.8 Checking and Replacing Subscanning Motor (MZ1)” (6) Reinstall the right-hand side transparent cover. (7) Check image performance. “3.2 Checking Image” in Preventive Maintenance Volume 009-051-04 CR-IR341 Service Manual MC - 193 05.31.99 FM2460...
- Page 685 (7) Power ON the machine. (8) Check MZ1. Make sure that the motor rotates normally. “10.8 Checking and Replacing Subscanning Motor (MZ1)” (9) Check image performance. “3.2 Checking Image” in Preventive Maintenance Volume CR-IR341 Service Manual 009-051-04 MC - 194 05.31.99 FM2460...
- Page 686 (5) Power ON the machine. (6) Check MZ1. Make sure that the motor rotates normally. “10.8 Checking and Replacing Subscanning Motor (MZ1)” (7) Check image performance. “3.2 Checking Image” in Preventive Maintenance Volume 009-051-04 CR-IR341 Service Manual MC - 195 05.31.99 FM2460...
- Page 687 (6) Power ON the machine. (7) Check MZ1. Make sure that the motor rotates normally. “10.8 Checking and Replacing Subscanning Motor (MZ1)” (8) Check image performance. “3.2 Checking Image” in Preventive Maintenance Volume CR-IR341 Service Manual 009-051-04 MC - 196 05.31.99 FM2460...
- Page 688 (7) Power ON the machine. (8) Check MZ1. Make sure that the motor rotates normally. “10.8 Checking and Replacing Subscanning Motor (MZ1)” (9) Check image performance. “3.2 Checking Image” in Preventive Maintenance Volume 009-051-04 CR-IR341 Service Manual MC - 197 05.31.99 FM2460...
- Page 689 (10) Power ON the machine. (11) Check MZ1. Make sure that the motor rotates normally. “10.8 Checking and Replacing Subscanning Motor (MZ1)” (12) Check image performance. “3.2 Checking Image” in Preventive Maintenance Volume CR-IR341 Service Manual 009-051-04 MC - 198 05.31.99 FM2460...
- Page 690 (7) Install the shaft, bearings, E-rings, and caps removed at step (6) to a new rubber roller, and reinstall the rubber roller to the subscanning unit. E-ring Bearing Rubber roller Bearing Shaft E-ring FR1H1528.EPS 009-051-04 CR-IR341 Service Manual MC - 199 05.31.99 FM2460...
- Page 691 Brace Rubber roller E-ring Spring FR1H1527.EPS CR-IR341 Service Manual 009-051-04 MC - 200 05.31.99 FM2460...
- Page 692 “10.8 Checking and Replacing Subscanning Motor (MZ1)” (14) Reinstall the light-collecting mirror. “10.4 Servicing Light-Collecting Mirror” (15) Reinstall the rubber roller located above the subscanning unit. “10.13 Replacing Rubber Roller Located Above Subscanning Unit” 009-051-04 CR-IR341 Service Manual MC - 201 05.31.99 FM2460...
- Page 693 (4) Remove the two screws that retain the grip arm located on the right-hand side of the machine. Grip arm retaining screw BR M3x6, x2 Grip arm Subscanning unit Subscanning unit Right-hand side transparent cover BR M4x8, x2 FR1H1529.EPS CR-IR341 Service Manual 009-051-06 009-051-04 MC - 202 04.20.2001 FM3006 05.31.99 FM2460...
- Page 694 (at six locations). Subscanning unit guide plate Lower rubber roller Drive shaft Scale FR1H4018.EPS (8) Power ON the machine. (9) Check image performance. “3.2 Checking Image” in Preventive Maintenance Volume 009-051-04 CR-IR341 Service Manual MC - 203 05.31.99 FM2460...
- Page 695 (5) Remove the two bearings and two wave washers. (6) Attach to a new rubber roller the two bearings and two wave washers removed at step (5). (7) Reinstall the rubber roller in reverse order of removal. CR-IR341 Service Manual 009-051-04 MC - 204 05.31.99 FM2460...
- Page 696 BR M6x12, x3 Spacer x2 Scanner unit FR1H1820.EPS (4) Reinstall the shock-absorbing rubber in reverse order of removal. (5) Make adjustment after replacement of the shock-absorbing rubber. “ Adjustment” 009-051-05 009-051-06 CR-IR341 Service Manual MC - 205 04.20.2001 FM3006 11.20.99 FM2638...
- Page 697 (4) Check again the distances from the subscanning unit to the tray. If the adjustment values (A, B, and C) are out of range, repeat steps (1) through (3) all over again. CR-IR341 Service Manual 009-051-04 MC - 206 05.31.99 FM2460...
- Page 698 ONTENTS MC - 207 BLANK PAGE 009-051-04 CR-IR341 Service Manual MC - 207 05.31.99 FM2460...
- Page 699 There are two types of the after-reading conveyor: old and new types. Removal and reinstallation procedures for each specific type should be employed. Old type New type Two screw retaining brackets are added. A screw retaining stay is added. FR1H1563.EPS CR-IR341 Service Manual MC - 208 009-051-04 05.31.99 FM2460...
- Page 700 <New type> CNME2 CNME1 Scanner unit (2)CNSE1 After-reading conveyor BR M4x8, x5 <Old type> CNME2 CNME1 CNSE1 Scanner unit After-reading conveyor BR M4x8, x4 FR1H1289.EPS 009-051-04 CR-IR341 Service Manual MC - 209 05.31.99 FM2460...
- Page 701 Bumps (Both of one of them Block section them should be should be contacted.) contacted.) New after-reading conveyor Bracket Bracket (2)-1 BR M4x8 (2)-2 BR M4x8 After-reading conveyor Block section FR1H1564.EPS Subscanning unit CR-IR341 Service Manual MC - 210 009-051-04 05.31.99 FM2460...
- Page 702 If the bumps are detached from the block section of the subscanning unit, loosen the three screws and repeat step (4) all over again. (5) Connect the connectors (CNSE1, CNME1, CNME2). (6) Reinstall the light-collecting guide assembly. “10.2 Servicing Light-Collecting Guide” 009-051-04 CR-IR341 Service Manual MC - 211 05.31.99 FM2460...
- Page 703 (2) Connect the connectors (CNSE1, CNME1, CNME2). After-reading conveyor Block section CNME2 CNME1 CNSE1 Bracket Scanner unit After-reading conveyor BR M4x8, x4 FR1H1127.EPS (3) Reinstall the light-collecting guide assembly. “10.2 Servicing Light-Collecting Guide” CR-IR341 Service Manual MC - 212 009-051-04 05.31.99 FM2460...
- Page 704 If no message appears, it is likely that the sensor is faulty. So, replace the sensor. After-reading conveyor After-reading conveyor FR1H1292.EPS (10) Repeatedly select “0. QUIT” to exit M-Utility. A message prompting you to reset the machine is displayed. (11) Press the RESET button. 009-051-04 CR-IR341 Service Manual MC - 213 05.31.99 FM2460...
- Page 705 “3.5 Sensors Not Requiring Adjustment of Its Mounting Position” in Machine Description (5) Connect the connector (SE1). (6) Attach the mounting bracket. (7) Check SE1. “ Checks” After-reading conveyor Connector Bracket Sems M3x6 x2 FR1H1291.EPS CR-IR341 Service Manual MC - 214 009-051-04 05.31.99 FM2460...
- Page 706 (4) Remove the stay and timing belt wheel from ME1. After-reading conveyor BR M4x8 CNME1 Stay Pan M4x10 Timing belt wheel Pan M4x10 x2 FR1H1128.EPS (5) Reverse the removal steps to reinstall a new ME1. 009-051-04 CR-IR341 Service Manual MC - 215 05.31.99 FM2460...
- Page 707 (3) Remove ME2. (4) Remove the timing belt wheel from ME2. After-reading conveyor Timing belt wheel CNME2 Pan M4x10 x3 CNME2 FR1H1290.EPS (5) Install a new ME2 by reversing the removal steps. CR-IR341 Service Manual MC - 216 009-051-04 05.31.99 FM2460...
- Page 708 (2), (3) Shock absorber-attached guide plate Sems M3x6, x3 After-reading conveyor FR1H1605.EPS (4) Reinstall the shock absorber-attached guide plate. (5) Reinstall the after-reading conveyor. “11.1 Removing and Reinstalling After-Reading Conveyor” 009-051-04 CR-IR341 Service Manual MC - 217 05.31.99 FM2460...
- Page 709 Carefully handle the erasure lamp. If it is hit, the erasure lamp may be broken, so you may get injured. Power supply DCOUT5 DCOUT4 ACOUT2 ACOUT1 Erasure lamp assembly Erasure conveyor BR M4x8 FR1H1180.EPS CR-IR341 Service Manual 009-051-04 MC - 218 05.31.99 FM2460...
- Page 710 (2) Connect the connectors (DCOUT 4, 5; ACOUT 1, 2). Power supply DCOUT5 DCOUT4 ACOUT1 ACOUT2 Erasure lamp assembly BR M4x8 Erasure conveyor FR1H1515.EPS 009-051-04 CR-IR341 Service Manual MC - 219 05.31.99 FM2460...
- Page 711 (5) Remove the two screws that retain the erasure conveyor, and take out the erasure conveyor horizontally. CNF1 Timing belt CNSOLF1 CNF2 Tensioner BR M4x8 CNC1 Erasure conveyor Before-side-positioning Conveyor Erasure conveyor Spacer x2 BR M4x8 x2 FR1H1703.EPS CR-IR341 Service Manual 009-051-04 MC - 220 05.31.99 FM2460...
- Page 712 Spacer x2 BR M4x8, x2 FR1H1704.EPS (4) Connect the connectors (CNF1, 2, CNSOLF1 to the erasure conveyor; CNC1 to the before-side-positioning conveyor). CNF1 CNSOLF1 CNF2 CNC1 Erasure conveyor Before-side-positioning conveyor FR1H1518.EPS 009-051-04 CR-IR341 Service Manual MC - 221 05.31.99 FM2460...
- Page 713 (9) Repeat steps (7) and (8) several times. If anything abnormal is found, such as no message displayed, then replace the sensor. Erasure conveyor FR1H1259.EPS (10) Repeatedly select “0. QUIT”. M-Utility is exited. CR-IR341 Service Manual 009-051-04 MC - 222 05.31.99 FM2460...
- Page 714 (1) Disconnect the connector (SF1). (2) Remove SF1. (3) Install a new SF1. (4) Connect the connector (SF1). (5) Check SF1. “ Checks” Erasure conveyor Spacer Pan-head M3x10, x2 Connector FR1H1260.EPS 009-051-04 CR-IR341 Service Manual MC - 223 05.31.99 FM2460...
- Page 715 (9) Repeat steps (7) and (8) several times. If anything abnormal is found, such as no message displayed, then replace the sensor. Erasure conveyor FR1H1261.EPS (10) Repeatedly select “0. QUIT”. M-Utility is exited. CR-IR341 Service Manual 009-051-04 MC - 224 05.31.99 FM2460...
- Page 716 (1) Remove SF2. (2) Disconnect the connector (SF2). (3) Install a new SF2. (4) Connect the connector (SF2). (5) Check SF2. “ Checks” Spacer Pan-head M3x10, x2 Connector Erasure conveyor FR1H1262.EPS 009-051-04 CR-IR341 Service Manual MC - 225 05.31.99 FM2460...
- Page 717 If anything abnormal is found, such as no message displayed, then replace the sensor. Erasure converyor FR1H1263.EPS (11) Repeatedly select “0. QUIT”. M-Utility is exited. (12) Power OFF the machine. (13) Install SF3. CR-IR341 Service Manual 009-051-04 MC - 226 05.31.99 FM2460...
- Page 718 (1) Disconnect the connector (SF3) (2) Remove SF3. (3) Install a new SF3. (4) Connect the connector (SF3). (5) Check SF3. “ Checks” Spacer (2) Pan-head M3x10, x2 Connector Erasure conveyor FR1H1264.EPS 009-051-04 CR-IR341 Service Manual MC - 227 05.31.99 FM2460...
- Page 719 (10) Repeat steps (8) and (9) several times. If anything abnormal is found, such as no message displayed, then replace the sensor. Erasure conveyor FR1H1132.EPS (11) Repeatedly select “0. QUIT”. M-Utility is exited. CR-IR341 Service Manual 009-051-04 MC - 228 05.31.99 FM2460...
- Page 720 (5) Remove SF4 (both on the light emitting and light receiving sides). (6) Reverse the removal steps to reinstall a new SF4. (7) Check SF4. “ Checks” Sems M3x6 x (1), (4) Cut cable tie Connector Bracket BR M4x8 Erasure conveyor FR1H1265.EPS 009-051-04 CR-IR341 Service Manual MC - 229 05.31.99 FM2460...
- Page 721 Timing belt Connector Bracket BR M4x8 x3 E-ring Timing belt wheel Pan M4x10 x4 Wheel Hex socket head setscrew FR1H1144.EPS M4x4 (8) Reverse the removal steps to reinstall a new MF1. CR-IR341 Service Manual 009-051-04 MC - 230 05.31.99 FM2460...
- Page 722 Sems M3x6 x2 Reflection face FR1H1266.EPS (5) Install five new erasure lamps. (6) Attach the bracket. (7) Reinstall the erasure lamp assembly. “12.2 Removing and Reinstalling Erasure Conveyor” 009-051-04 009-051-04 CR-IR341 Service Manual MC - 231 05.31.99 FM2460 (1) 05.31.99 FM2460...
- Page 723 (3) Remove the FAST-ON terminals (TSW1COM, TSW1NO). (4) Replace TSW1. (5) For reinstallation, reverse the removal steps. Bracket BR M4x8 x2 TSW1COM TSW1NO TSW1 Pan M3x6 x2 Erasure lamp assembly FR1H1267.EPS CR-IR341 Service Manual 009-051-04 MC - 232 05.31.99 FM2460...
- Page 724 (5) Remove the FAST-ON terminals (TSW2COM, TSW2NO). (6) Remove TSW2. (7) For reinstallation, reverse the removal steps. Erasure lamp x5 Bracket BR M4x8, x2 TSW2 Leaf spring M3x4, x2 Sems M3x6, x2 TSW2NO TSW2COM FR1H1268.EPS 009-051-04 CR-IR341 Service Manual MC - 233 05.31.99 FM2460...
- Page 725 (6) Remove the four screws that retain the fan assembly. (7) Replace the FANF1. Bracket BR M4x8, x2 CNFANF1 Cable clamp BR M4x8 CNFANF1 Sems M3x45, x4 Erasure lamp assembly FANF1 FR1H1520.EPS (8) For reinstallation, reverse the removal steps. CR-IR341 Service Manual 009-051-04 MC - 234 05.31.99 FM2460...
- Page 726 Air filter Velcro tape Lower front cover FR1H1270.EPS (4) Attach a new air filter. Attach the air filter so as to cover the Velcro tape located on the lower right-hand side cover. 009-051-04 CR-IR341 Service Manual MC - 235 05.31.99 FM2460...
- Page 727 (3) Measure the tension value for the erasure unit IP conveyance timing belt. With a load of 300 ± 50g applied, the deflection should be 11 ± 1mm. Timing belt FRONT Tensioner 300g ± 50g 11 ± 1mm Erasure conveyor FR1H1188.EPS CR-IR341 Service Manual 009-051-04 MC - 236 05.31.99 FM2460...
- Page 728 (3) Remove the timing belt. (4) Attach a new erasure unit IP conveyance timing belt. (5) Adjust the tension. “ Adjustment” Erasure conveyor Timing belt wheel Hex socket head bolt M4x20 Spacer Timing belt FR1H1271.EPS 009-051-04 CR-IR341 Service Manual MC - 237 05.31.99 FM2460...
- Page 729 (2) Shift the tensioner position to adjust the tension of the timing belt until the specification is met. Timing belt FRONT Tensioner 300g – 50g 11 – 1mm Erasure conveyor FR1H1273.EPS CR-IR341 Service Manual 009-051-04 MC - 238 05.31.99 FM2460...
- Page 730 (4) Remove the simple bearing. “3.3 Simple Bearing Employed” in Machine Description (5) Replace the erasure conveyor rubber roller. Side view : Rubber roller Erasure conveyor FR1H1272.EPS (6) Accomplish reassembly by reversing the removal steps. 009-051-04 CR-IR341 Service Manual MC - 239 05.31.99 FM2460...
- Page 731 If it is not driven after that, replace SOLF1. Branch path changeover guide Changeover guide drive solenoid Erasure conveyor FR1H1258.EPS (6) Repeatedly select “0. QUIT”. M-Utility is exited. CR-IR341 Service Manual 009-051-04 MC - 240 009-051-04 05.31.99 FM2460 05.31.99 FM2460 (1)
- Page 732 (1) Remove the spring. (2) Disconnect the connector (CNSOLF1). (3) Remove the changeover guide drive solenoid assembly (SOLF1). CNSOLF1 Spring Erasure conveyor Changeover guide drive solenoid assembly BR M4x8 x3 FR1H1257.EPS 009-051-04 CR-IR341 Service Manual MC - 241 05.31.99 FM2460...
- Page 733 (9) Screw down the positioning bracket while pressing it against the changeover guide drive solenoid assembly. (4), (9) (5), (8) Changeover guide Positioning bracket drive solenoid Guide Spring pin Spring Branch path changeover Stopper support guide assembly FR1H1413.EPS CR-IR341 Service Manual 009-051-04 MC - 242 05.31.99 FM2460...
- Page 734 If it is peeled or frayed, replace the whole guide plate to which the shock absorber is attached. (2), (3) Shock absorber-attached guide plate Sems M3x6, x4 Nut, x4 Erasure conveyor FR1H1623.EPS (4) Reinstall the guide plate in reverse order of removal. 009-051-04 CR-IR341 Service Manual MC - 243 05.31.99 FM2460...
- Page 735 BR M4x8, x4 Shock absorber Erasure conveyor Only one shorter screw is used. Shock absorber-attached filter Sems M4x6 Spacer x5 BR M4x8, x5 FR1H1625.EPS (7) Attach a new shock absorber-attached filter. CR-IR341 Service Manual 009-051-04 MC - 244 05.31.99 FM2460...
- Page 736 ONTENTS MC - 245 (8) Reinstall the lamp assembly. (9) Attach the bracket removed at step (2). (10) Attach the grip spring removed at step (1). 009-051-04 CR-IR341 Service Manual MC - 245 05.31.99 FM2460...
- Page 737 (3) Remove SF4 together with the bracket. (4) Disconnect the connector (CNSF2). (5) Remove SF2 together with the spacer. Spacer Pan head screw M3x10, x2 CNSF2 CNSF4 Bracket BR M4x8, x2 Erasure conveyor FR1H1626.EPS CR-IR341 Service Manual 009-051-04 MC - 246 05.31.99 FM2460...
- Page 738 (8) Reinstall the shock absorber-attached guide plate. (9) Reinstall the SF2 together with the spacer. (10) Connect the connector (CNSF2). (11) Reinstall the SF4 together with the bracket. (12) Connect the connector (CNSF4). 009-051-04 CR-IR341 Service Manual MC - 247 05.31.99 FM2460...
- Page 739 (5) Remove the two screws that retain the stopper support, and remove the stopper support. (6) Remove SF1 without disconnecting the connector. Pan head screw Spring M3x10, x2 Branch path changeover Stopper support guide assembly BR M4x8, x2 FR1H1629.EPS CR-IR341 Service Manual 009-051-04 MC - 248 05.31.99 FM2460...
- Page 740 • Make sure that the stopper support is in contact with the arm. Also, verify that the spring pin or arm does not move. End surface of the square hole Spring pin Stopper support FR1H1821.EPS 009-051-04 CR-IR341 Service Manual MC - 249 05.31.99 FM2460...
- Page 741 Spring pin (14) End surface of square hole (15) Branch path changeover (14) guide assembly Bearing Stopper support BR M4x8, x2 FR1H1631.EPS (17) Attach the guide plate removed at step (2). CR-IR341 Service Manual 009-051-04 MC - 250 05.31.99 FM2460...
- Page 742 ONTENTS MC - 251 BLANK PAGE 009-051-04 CR-IR341 Service Manual MC - 251 05.31.99 FM2460...
- Page 743 DC OUT4 RESET SW Remote DC OUT5 Local AC OUT1 AC OUT2 FR1H1248.EPS (5) Install a new power supply unit. (6) Connect the connectors (AC OUT1, 2, DCOUT1-7, TB1, 2, CN1-5). CR-IR341 Service Manual MC - 252 009-051-04 05.31.99 FM2460...
- Page 744 (1) Remove the power supply unit horizontally. “13.1 Replacing Power Supply Unit” (2) Remove the six screws and take out the cover of the power supply unit. Cover Screw x6 Power supply unit FR1H1523.EPS 009-051-04 CR-IR341 Service Manual MC - 253 05.31.99 FM2460...
- Page 745 MC - 254 (3) Replace the fuse. Top view FRONT ot e R em Power supply unit FR1H1524.EPS (4) Attach the cover of the power supply unit. (5) Reinstall the power supply unit. CR-IR341 Service Manual MC - 254 009-051-04 05.31.99 FM2460...
- Page 746 QM32100SE-S (1) CNJ1 (1) CNJ2 Screw x4 Bracket 850S0080: Western Digital WDE4550 Loosen screw 850S0085: Western Digital BR M4x8, x2 WDE9100 850Y0112: Seagate (1) CNJ1 ST318416N (1) CNJ2 4-6-32UNC Bracket FR1H1245.EPS 009-051-07 CR-IR341 Service Manual MC - 255 08.30.2001 FM3115...
- Page 747 Do not attach the light-blue film face of the sheet to the parts-mounted surface of the HDD. If it is attached, a short-circuit may occur. Sheet Aluminum sheet side Dark-blue film Parts-mounted surface Bump (x4) FR1H6522.EPS CR-IR341 Service Manual MC - 255.1 009-051-07 08.30.2001 FM3115...
- Page 748 Align the sheet retaining plate to the side of the HDD. Sheet retaining plate Align the sheet retaining plate to the edge of the sheet. FR1H6525.EPS Sheet retaining plate Light-blue film Sheet FR1H6523.EPS 009-051-07 CR-IR341 Service Manual MC - 255.2 08.30.2001 FM3115...
- Page 749 • Secure the HDD in place such that the sheet retaining plate of the HDD is in contact with the bracket. [Attach] Sems M3x6 (x4) Adhesive-coated surface DETAIL A Bracket Sheet retaining plate FR1H6524.EPS CR-IR341 Service Manual MC - 255.3 009-051-07 08.30.2001 FM3115...
- Page 750 ONTENTS MC - 255.4 (6) Install the HDD together with the bracket. (7) Connect the connectors (CNJ1, 2). (8) Format the HDD. (9) Install the software. 009-051-07 CR-IR341 Service Manual MC - 255.4 08.30.2001 FM3115...
- Page 751 27 25 23 21 19 17 15 13 11 9 7 5 3 FRONT <For 850Y0112> HDD bottom 19 17 15 13 11 9 7 5 3 1 FRONT 20 18 16 14 12 10 8 6 4 2 FR1H6089.EPS 009-051-07 CR-IR341 Service Manual MC - 256 08.30.2001 FM3115...
- Page 752 (2) Disconnect the connectors (CN1, 2 from the VOL08A board; CNJ1, 2 from the FDD). (3) Remove the FDD together with the bracket. CNJ2 CNJ1 Bracket BR M4x8, 4 FR1H1525.EPS (4) Remove the FDD from the bracket. Sems M3x6, 4 FR1H1247.EPS 009-051-04 CR-IR341 Service Manual MC - 257 05.31.99 FM2460...
- Page 753 (8) Connect the connectors (CN1, 2 from the VOL08A board; CNJ1, 2 from the FDD). Initial setting of short-plug (factory default) For YD-702D-6539D-021051 (Part No. 850S0086) For YD-702D-6539D-021051C (Part No. 850S0087) : Short-plug CNJ2 CNJ1 Bracket BR M4x8, x4 FR1B1238.EPS CR-IR341 Service Manual MC - 258 009-051-04 05.31.99 FM2460...
- Page 754 Even when the power switch cover is removed, the connectors are still connected. (2) Disconnect connectors LED08A CN1 and CN2. (3) Open the bracket after removing two screws. Bracket BR M4x8, x2 LED08A CN1, 2 Power switch cover BR M4x8, x2 FR1H4020.EPS 009-051-04 CR-IR341 Service Manual MC - 259 05.31.99 FM2460...
- Page 755 (6) Separate the two mounting brackets from the monitor. Bracket BR M4x8, x2 Monitor BR M4x8, x4 Bracket BR M4x8, x2 FR1H4021.EPS (7) Accomplish monitor installation by reversing the removal steps. CR-IR341 Service Manual MC - 260 009-051-04 05.31.99 FM2460...
- Page 756 Do not use alcohol. Alcohol is strongly permeative, so that if there is any small scratch or crack in the acrylic plate, it may accelerate such a scratch or crack. (2) Clean the monitor screen with a dry cloth. Monitor screen FR1H1501.EPS 009-051-04 CR-IR341 Service Manual MC - 261 05.31.99 FM2460...
- Page 757 (9) Make sure that there is no offensive noise or odor from the machine during IP conveyance. (10) After the IP conveyance, take out the cassette and verify that the IPs are free of scratch or other damage. 009-051-06 009-051-04 CR-IR341 Service Manual MC - 262 04.20.2001 FM3006 05.31.99 FM2460...
- Page 758 (12) Touch the upper left corner and upper right corner of the operation panel in sequence. M-Utility is activated. (13) Select “3. TEST MODE” and “1. ROUTINE MODE” in sequence. (14) Repeatedly select “0. QUIT” to exit M-Utility. 009-051-06 009-051-04 CR-IR341 Service Manual MC - 263 04.20.2001 FM3006 05.31.99 FM2460...
- Page 759 Manufacturer: HOZAN Manufacturer: HOZAN Qty.: Qty.: Remarks: Remarks: FR1H1709.EPS FR1H1710.EPS Phillips screwdriver No. 2 Phillips screwdriver No. 1 Type: NO.6300-2 Type: NO.6300-1 Manufacturer: VESSEL Manufacturer: VESSEL Qty.: Qty.: Remarks: Remarks: FR1H1711.EPS FR1H1712.EPS 009-051-07 CR-IR341 Service Manual MC - 264 08.30.2001 FM3115...
- Page 760 Manufacturer: KTC Manufacturer: KTC Qty.: Qty.: Remarks: Remarks: FR1H1719.EPS FR1H1720.EPS Combination box-open-end wrench (13mm) Combination box-open-end wrench (10mm) Type: M41-13 Type: M41-10 Manufacturer: KTC Manufacturer: KTC Qty.: Qty.: Remarks: Remarks: FR1H1721.EPS FR1H1722.EPS 009-051-04 CR-IR341 Service Manual MC - 265 05.31.99 FM2460...
- Page 761 FR1H1729.EPS FR1H1730.EPS Steel rule (150mm) Steel rule (300mm) Type: Type C Type: Type C Manufacturer: YAMAYO Manufacturer: YAMAYO Qty.: Qty.: Remarks: Remarks: Inspection required Inspection required FR1H1731.EPS FR1H1732.EPS 009-051-07 CR-IR341 Service Manual MC - 266 08.30.2001 FM3115...
- Page 762 MATSUSHITA ELECTRIC Qty.: Qty.: Remarks: Remarks: FR1H1738.EPS FR1H1737.EPS Loupe Blower Type: Type: JUMBO Manufacturer: PEAK Manufacturer: HURRICANE Qty.: Qty.: Remarks: Remarks: FR1H1739.EPS FR1H1740.EPS Cloth Type: — Manufacturer: — Qty.: Remarks: FR1H1741.EPS 009-051-07 CR-IR341 Service Manual MC - 267 08.30.2001 FM3115...
- Page 763 Kim Wipe (dustless paper) Type: — Type: S-200 Manufacturer: — Manufacturer: Jujo kimberley Qty.: Qty.: For 1kg. Remarks: Remarks: Inspection and calibration required FR1H1744.EPS FR1H1830.EPS Dosimeter Type: Manufacturer: Qty.: Remarks: Calibration required FR1H1875.EPS 009-051-07 CR-IR341 Service Manual MC - 268 08.30.2001 FM3115...
- Page 764 Qty.: Remarks: Remarks: FR1H1745.EPS FR1H1746.EPS Cable tie Cable tie Type: PLT1.5S Type: PLT2M Manufacturer: Manufacturer: KITAGAWA KITAGAWA KOGYO KOGYO Qty.: Qty.: Remarks: Remarks: FR1H1747.EPS FR1H1748.EPS Loktite Type: Manufacturer: Qty.: Remarks: FR1H1749.EPS 009-051-04 CR-IR341 Service Manual MC - 269 05.31.99 FM2460...
- Page 765 Type: D-50 (2757) Manufacturer: HOZAN Manufacturer: HOZAN Qty.: Qty.: Remarks: Remarks: FR1H1750.EPS FR1H1751.EPS IC clip IC clip Type: Type: TC-16 TC-24 Manufacturer: 3M Manufacturer: 3M Qty.: Qty.: Remarks: Remarks: FR1H1753.EPS FR1H1752.EPS CR-IR341 Service Manual MC - 270 009-051-04 05.31.99 FM2460...
- Page 766 ONTENTS MC - 271 BLANK PAGE 009-051-04 CR-IR341 Service Manual MC - 271 05.31.99 FM2460...
- Page 767 The boards and HDD in the machine are laid out as illustrated below. LED08A VOL08A LED08B LDD08A SYN08A SCN08A PMT08A DRV08A SNS08A CPU90F/ LAN90B DMC08A MTH08A HCP08A IMG08B/H IMG08A BCR08A IMG07B MMC90A MMD90A CPU90E FR1H1352.EPS 009-051-07 CR-IR341 Service Manual MC - 272 08.30.2001 FM3115...
- Page 768 FR1H1353.EPS For directly-mounted fuse With board version D or later, the no-fuse breaker (NFB) is replaced with the fuse. “16.14 How to Check the Fuse on the Board” 009-051-06 009-051-04 CR-IR341 Service Manual MC - 273 04.20.2001 FM3006 05.31.99 FM2460...
- Page 769 Fuji. Setting CPU90E Board OFF position OFF position OFF position ON position ON position ON position NFB4 NFB3 NFB2 NFB1 RS-232C STRAIGHT CROSS RS-422 position position position position FR1B1149.EPS CR-IR341 Service Manual MC - 274 009-051-04 05.31.99 FM2460...
- Page 770 FR1H1353.EPS For directly-mounted fuse With board version G or later, the no-fuse breaker (NFB) is replaced with the fuse. “16.14 How to Check the Fuse on the Board” 009-051-06 009-051-04 CR-IR341 Service Manual MC - 275 04.20.2001 FM3006 05.31.99 FM2460...
- Page 771 If not, static electricity built on the human body may cause damage to electric parts mounted on the board. Setting IMG07B Board Make sure that the switch (S1) on the IMG07B board is set to “4”. FR1B1195.EPS Set to "4" CR-IR341 Service Manual MC - 276 009-051-04 05.31.99 FM2460...
- Page 772 If not, static electricity built on the human body may cause damage to electric parts mounted on the board. Setting IMG08A Board Make sure that the switch (S1) on the IMG08A board is set to “1”. Set to "1" FR1B1196.EPS 009-051-04 CR-IR341 Service Manual MC - 277 05.31.99 FM2460...
- Page 773 If not, static electricity built on the human body may cause damage to electric parts mounted on the board. Setting IMG08B Board Make sure that the switch (S1) on the IMG08B board is set to “2”. CR-IR341 Service Manual MC - 278 009-051-04 05.31.99 FM2460...
- Page 774 If not, static electricity built on the human body may cause damage to electric parts mounted on the board. Setting IMG08C Board Make sure that the switch (S1) on the IMG08C board is set to “3”. 009-051-04 CR-IR341 Service Manual MC - 279 05.31.99 FM2460...
- Page 775 If not, static electricity built on the human body may cause damage to electric parts mounted on the board. Setting DMC08A Board Make sure that the switch (S1) on the DMC08A board is set to “0”. Set to "0" FR1B1107.EPS CR-IR341 Service Manual MC - 280 009-051-04 05.31.99 FM2460...
- Page 776 If not, static electricity built on the human body may cause damage to electric parts mounted on the board. Setting HCP08A Board Make sure that the switch (SW1) on the HCP08A board is set to “5”. JP1 JP2 Set to "5" FR1B1105.EPS 009-051-04 CR-IR341 Service Manual MC - 281 05.31.99 FM2460...
- Page 777 SW1: “6” CNSI0 T1,2 Short pin No short pin (OPEN) NFB1 ETH90F board NFB2 DIS1 DIS2 OFF position OFF position Set to "6" ON position ON position FR1B1136.EPS 009-051-06 CR-IR341 Service Manual MC - 282 009-051-04 04.20.2001 FM3006 05.31.99 FM2460...
- Page 778 Set to “6” Switch for resetting the LAN90B board S2 setting Description Setting 1-3, 5, 6 To be determined Always OFF ON: Function test (FT) Always OFF OFF: OS boot (NORMAL) FR1B1265.EPS 009-051-07 CR-IR341 Service Manual MC - 283 08.30.2001 FM3115...
- Page 779 FR1H1353.EPS For directly-mounted fuse With board version K or later, the no-fuse breaker (NFB) is replaced with the fuse. “16.14 How to Check the Fuse on the Board” 009-051-06 CR-IR341 Service Manual MC - 284 009-051-04 04.20.2001 FM3006 05.31.99 FM2460...
- Page 780 FR1H1353.EPS For directly-mounted fuse With board version E or later, the no-fuse breaker (NFB) is replaced with the fuse. “16.14 How to Check the Fuse on the Board” 009-051-06 009-051-04 CR-IR341 Service Manual MC - 285 04.20.2001 FM3006 05.31.99 FM2460...
- Page 781 No setup procedures need be performed for the following boards at the time of machine installation or board replacement. • BCR08A board • LED08A board • LED08B board • VGA90E board • VOL08A board CR-IR341 Service Manual MC - 286 009-051-06 009-051-04 04.20.2001 FM3006 05.31.99 FM2460...
- Page 782 • For the tester, measure its probe resistance (resistance value observed when the probes are shorted) before measurement, and make compensation as appropriate for the measurement value of the fuse. Action to be Taken When Fuse is Blown Replace the board. 009-051-06 009-051-04 CR-IR341 Service Manual MC - 287 04.20.2001 FM3006 05.31.99 FM2460...
- Page 783 CR-IR341/CR-IR341P Service Manual Maintenance Utility (MU)
- Page 784 MU-7, 20, 33, 35, 38, 40, 41, (support for software version A14) 41.1, 41.2, 41.4–41.8, 42, 44, 45, (FM3115) 53, 54, 57, 59, 60, 62, 63, 66, 70, 71, 75, 76, 119, 121, 122, 154 009-051-07 CR-IR341 Service Manual MU - 1 08.30.2001 FM3115...
- Page 785 PC, for example. CR-IR341 Online PC • Maintenance Utility • Image Processing Parameter Adjustment 3.5-inch FD 1.44MB DOS formatted Online PC • Configuration Setting FR1H1136.EPS 009-051-04 CR-IR341 Service Manual MU - 2 05.31.99 FM2460...
- Page 786 ONTENTS MU - 3 BLANK PAGE 009-051-04 CR-IR341 Service Manual MU - 3 05.31.99 FM2460...
- Page 787 The "QUIT" command works when the mode is switched from the utility mode to the maintenance utility mode. If the mode is switched from the version display mode, the system does not transition to the utility mode. FR1H1399.EPS 009-051-04 CR-IR341 Service Manual MU - 4 05.31.99 FM2460...
- Page 788 NOTE 1: When a line failure occurs in the IDT utility mode, the system simply switches to the routine process mode. FR1H1400.EPS NOTE 2: When "system shutdown" is selected upon the occurrence of an IP search abnormality 009-051-04 CR-IR341 Service Manual MU - 5 05.31.99 FM2460...
- Page 789 C R - I R 3 4 1 Copyright (c) 1998 Fuji Photo Film Co.,Ltd Software ID : 114Y5431003 Software Version : A07 Software version number : Location to be touched FR1H1392.EPS 009-051-04 CR-IR341 Service Manual MU - 6 05.31.99 FM2460...
- Page 790 NOTES: • For the IDT type, the "menu selecting icon" does not appear. • For the initial setting, the "Multiframe forced output" button will not appear. Caps • The IDT type includes CR-IR348CL connection. 009-051-07 CR-IR341 Service Manual MU - 7 08.30.2001 FM3115...
- Page 791 Touch the upper left-hand corner of the operation panel, and then, within two seconds, touch the upper right-hand corner. Call maintenance personnel. 03D2 Switchback conveyance error. Stop alarm System down : Area to be touched FR1B1137.EPS 009-051-04 CR-IR341 Service Manual MU - 8 05.31.99 FM2460...
- Page 792 (2) Press the reset button. The reset button should basically be pressed. You may touch the “Return” button only in cases where the automatic transport mode setup would be invalidated by a reset. 009-051-04 CR-IR341 Service Manual MU - 9 05.31.99 FM2460...
- Page 793 32:SF4 33:SZ2 34:SZ3 INPUT THE NUMBER OF SENSOR 1 - 34 : 4 SA4 ----> Close SA4 ----> Open SA4 ----> Close 0.QUIT 1.NUMBER 2.MONITOR 3.MONITOR ALL MU:SEN > Caps FR1H1235.EPS 009-051-04 CR-IR341 Service Manual MU - 10 05.31.99 FM2460...
- Page 794 1:SOLA1 2:SOLA2 3:SOLA3 4:SOLA4 5:PB1 6:SVB1 7:SOLF1 8:SOLC1 9:LAMP STB 10:LAMP ON 11:FFM INPUT THE NUMBER OF SENSOR 1 - 11 : 11 0.QUIT 1.NUMBER 2.DRIVE 3.STOP MU:AUT > Caps FR1H1759.EPS 009-051-04 CR-IR341 Service Manual MU - 11 05.31.99 FM2460...
- Page 795 Example) Changing the numerical entry from 1244 to 1134 1) Touch the operation panel to position the cursor under “4”. 2) Touch the [BS] key twice to delete “24”. 3) Touch 1 and then 3. 009-051-05 CR-IR341 Service Manual MU - 12 11.20.99 FM2638...
- Page 796 ONTENTS MU - 13 BLANK PAGE 009-051-04 CR-IR341 Service Manual MU - 13 05.31.99 FM2460...
- Page 797 [6.4] 0.QUIT 1.ERROR LOG : Copies ERROR messages to the error0.log file and WARNING messages to the ERRORX.LOG file. NOTE: Numerals in brackets denote a relevant chapter in this manual. FR1H1383.EPS 009-051-05 CR-IR341 Service Manual MU - 14 11.20.99 FM2638...
- Page 798 3.SECONDARY ERASURE : Performs an automatic conveyance sequence a designated number of times to execute the erasure process only. NOTE: Numerals in brackets denote a relevant chapter in this manual. FR1H1384.EPS 009-051-05 CR-IR341 Service Manual MU - 15 11.20.99 FM2638...
- Page 799 1.WRITE-READ VERIFY : Writes 1 Kbytes of monotonously increasing data onto a floppy disk, and reads it back to verify that the written data and read data agree with each other. NOTE: Numerals in brackets denote a relevant chapter in this manual. FR1H1385.EPS 009-051-07 CR-IR341 Service Manual MU - 16 08.30.2001 FM3115...
- Page 800 2.SHADING, POLYGON AND SENSITIVITY FOR BAD CONDITION 3.SHADING AND POLYGON 4.SHADING AND POLYGON FOR BAD CONDITION 5.POLYGON ONLY 6.SENSITIVITY ONLY NOTE: Numerals in brackets denote a relevant chapter in this manual. FR1H1386.EPS 009-051-05 CR-IR341 Service Manual MU - 17 11.20.99 FM2638...
- Page 801 IP sensitivity during sensitivity adjustment RCNT: Reference frequency division value Erasure level dosage NCNT: Oscillation frequency setup value Erasure level QL value HVCNT: Center-sensitivity HV value SMD: SHD/polygon correction mode default value FR1H1387.EPS 009-051-05 CR-IR341 Service Manual MU - 18 11.20.99 FM2638...
- Page 802 Displays a message if any abnormality [11.9] is encountered.˚ 0.QUIT 1.HOME POSITION 2.GRIP 3.RELEASE NOTE: Numerals in brackets denote a relevant chapter in this manual. FR1H1388.EPS 009-051-05 009-051-06 CR-IR341 Service Manual MU - 19 04.20.2001 FM3006 11.20.99 FM2638...
- Page 803 0.QUIT 1.GRIP 2.RELEASE 3.D/A DATA 8.MIRROR UP/DOWN : Not functional with CR-IR341. [11.12] 7.FILE UTILITY : Performs file-related operations such as saving parameter files to and reading data from floppy disks. Used when the configuration data is edited on a personal computer or when optional software is installed.
- Page 804 4.EDIT : Edits the menu name and various parameters. 5.COPY : Copies menus. [15.5] 6.DELETE : Deletes menus. [15.6] 7.FILMMARK : Edits film marks. [15.7] NOTE: Numerals in brackets denote a relevant chapter in this manual. FR1H4032.EPS 009-051-05 CR-IR341 Service Manual MU - 21 11.20.99 FM2638...
- Page 805 1.ERROR LOG UTILITY 2.CONFIGURATION SETTING 3.ELECTRICAL UTILITY 4.SCANNER UTILITY 5.MECHANICAL UTILITY 0.QUIT 1.INITIALIZE : Loads and initializes the conveyance parameter. [11.1] 2.MOTOR 3.ACTUATOR 4.SENSOR 5.UNIT 6.FILE UTILITY 7.BACKUP MEMORY 8.MENU SETTING FR1H1397.EPS 009-051-05 CR-IR341 Service Manual MU - 22 11.20.99 FM2638...
- Page 806 ONTENTS MU - 23 BLANK PAGE 009-051-05 CR-IR341 Service Manual MU - 23 11.20.99 FM2638...
- Page 807 (Error level 0 to 3) 3.BOTH Page flip Type in one of the following numbers and press the [ENT] key. (Exit the display function.) 0.END (Display the next page.) 1.NEXT (Display the previous page.) 2.BEFORE 009-051-05 CR-IR341 Service Manual MU - 24 11.20.99 FM2638...
- Page 808 (Error level 0 to 3) 3.BOTH Page flip Type in one of the following numbers and press the [ENT] key. (Exit the display function.) 0.END (Display the next page.) 1.NEXT (Display the previous page.) 2.BEFORE 009-051-05 CR-IR341 Service Manual MU - 25 11.20.99 FM2638...
- Page 809 (2) Select “1. YES”. The following message appears, with all the error logs cleared. ERROR LOGS ARE CLEARED. When “2. NO” is selected, the menu display reverts back without clearing the error log. 009-051-05 CR-IR341 Service Manual MU - 26 11.20.99 FM2638...
- Page 810 Additionally, type in one of the following numbers and press the [ENT] key. 1.CONTINUE Continue to write the error log file to the floppy disk. Stop writing the error log file to the floppy disk. 2.CANCEL 009-051-05 CR-IR341 Service Manual MU - 27 11.20.99 FM2638...
- Page 811 While a file is being saved, never power OFF the machine because the hard disk may be damaged. (2) Select “1. YES”. Then, the following message appears. XXXXXXXXXX IS SAVED. (XXXXXXXXXX represents the file name.) 009-051-05 CR-IR341 Service Manual MU - 28 11.20.99 FM2638...
- Page 812 ONTENTS MU - 29 BLANK PAGE 009-051-05 CR-IR341 Service Manual MU - 29 11.20.99 FM2638...
- Page 813 [7.12] 11.DICOM (DICOM) : Base on DICOM. NOTE 1: Titles in parentheses denote file names to be edited. NOTE 2: Numerals in brackets denote a relevant chapter in this manual. FR1H1502.EPS 009-051-05 CR-IR341 Service Manual MU - 30 11.20.99 FM2638...
- Page 814 # 5:ITA / 6:SWE / 7:FIN / 8:DEN / 9:NOR / # 10:KOR # 7:Not Available # 10:114Y5431030(Korean Option) is necessary. IPS="172.16.0.1 " #3.IP Address(CPU90E) (Length=15) /sb0/SYSTEM/ETC/IRSET.CFG SAVE CANCEL Caps FR1B1208.EPS 009-051-05 CR-IR341 Service Manual MU - 31 11.20.99 FM2638...
- Page 815 SUPPLEMENTARY NOTE If there is any other configuration item to be set up, do not press the RESET button. The RESET button should be pressed after all the setups are finished. 009-051-05 CR-IR341 Service Manual MU - 32 11.20.99 FM2638...
- Page 816 79.MON: Display type on CRT Monitor (FOR OEM) 80.BCR: BCR TYPE 43.ID_AP: Image Reversal Mode Variation 81.LIM810: 8*10/18*24 single format output film (CSL Type) 82.FLMW: Film size confirm window open FR1B1204.EPS 009-051-07 CR-IR341 Service Manual MU - 33 08.30.2001 FM3115...
- Page 817 LENGTH is used, the setup results in error, so that the machine may not operate prop- erly. • 3.IPS: IP Address (CPU90E) (Length=15) • 4.IPI: IP Address (CPU90F) (Length=15) • 40.EBA: EDR Backup Server Address (Length=15) • 41.EM1,2,3,4,5: EDR Backup Menu Code (Length=4) 009-051-06 009-051-05 CR-IR341 Service Manual MU - 34 04.20.2001 FM3006 11.20.99 FM2638...
- Page 818 (to implement logical reading). 0: LOG & MESSAGE Caution: 1: LOG ONLY Overexposure handling Change 2: NONE TR1B1105.EPS : If “SFC” or “LGR” is ON, ID/Menu cannot be inputted after screen preview. 009-051-07 CR-IR341 Service Manual MU - 35 08.30.2001 FM3115...
- Page 819 1: Pad with zero to the head (Ex."0001234567") Setting of ID number padding 2: Pad with space to the tail PADDING scheme (Ex."1234567 ") 3: Pad with zero to the tail (Ex."1234567000") TR1B1106.EPS 009-051-06 009-051-05 CR-IR341 Service Manual MU - 36 04.20.2001 FM3006 11.20.99 FM2638...
- Page 820 EXAM_ Setting of examination number 2 : Pad with space to the tail PADDING padding scheme (Ex."1234567 ") 3 : Pad with zero to the tail (Ex."1234567000") TR1B1104.EPS 009-051-06 009-051-05 CR-IR341 Service Manual MU - 37 04.20.2001 FM3006 11.20.99 FM2638...
- Page 821 If the number of digits The transmission port is fixed is less than 15, space should be at 90E. added to the end to meet the 15-digit requirement. TR1B1008.EPS 009-051-07 CR-IR341 Service Manual MU - 38 08.30.2001 FM3115...
- Page 822 Exposure menu name and FILM d: Examination number output. e: Department name (alphanumeric) f-l: Reserved (default: left justified) m-p: Reserved (default: right justified) TR1B1009.EPS 009-051-06 009-051-05 CR-IR341 Service Manual MU - 39 04.20.2001 FM3006 11.20.99 FM2638...
- Page 823 Study/Series information <IDT type> numbering setting 0: Study/Series information is not numbered on the IDT side. 1: Study/Series information is numbered on the IDT side. TR1B1107.EPS 009-051-07 CR-IR341 Service Manual MU - 40 08.30.2001 FM3115...
- Page 824 P: Prefix in FINP) S: Suffix F: Family name G: Given name Setting of patient name "FG" M: Middle name components (for two components FCS2 P: Prefix in FINP) S: Suffix TR1B1108.EPS 009-051-07 CR-IR341 Service Manual MU - 41 08.30.2001 FM3115...
- Page 825 0: No (output instruction is reserved without display a window that requests the FLMW displaying a window) user to replace the film tray, 1: Yes (window displayed) when DRY PIX is used TR1B1109.EPS 009-051-07 CR-IR341 Service Manual MU - 41.1 08.30.2001 FM3115...
- Page 826 ” is set as its initial value ( denotes half-width space). When the CR-IR341 is connected to a network for operation, it is necessary to determine a unique (non-duplicate) IP address over the single network and change it to that address.
- Page 827 By default, the first five digits are “00010”. Thus, “a” (patient ID), “b” (patient name), and “c” (exposure menu name) are left justified; “d” (examination number) is right justified; and “e” (department name) is left justified. 009-051-06 CR-IR341 Service Manual MU - 41.3 04.20.2001 FM3006...
- Page 828 • “1 (default value)”: Numbering is performed on the machine (according to the format that is set in “45. UID_STI”). If numbering is performed on the IDT, the Study/Series information numbered on the IDT is effective anyway. 009-051-07 CR-IR341 Service Manual MU - 41.4 08.30.2001 FM3115...
- Page 829 “Smith John M” is entered, “Smith” is interpreted as Family name, “John” as Given name, and “M” as Middle name (when the delimiter is a half- width space). 009-051-07 009-051-07 CR-IR341 Service Manual MU - 41.5 08.30.2001 FM3115 (1) 08.30.2001 FM3115...
- Page 830 It defines the delimiter for the patient name when DICOM output is generated. • PN_DD=“FGMPS” [change prohibited] It defines the arrangement of the components of the patient name when DICOM output is generated. 009-051-07 CR-IR341 Service Manual MU - 41.6 08.30.2001 FM3115...
- Page 831 MU - 41.7 7.2.2 For Installation by Copying Configuration Files If several CR-IR341 machines are installed within the same network, installation can be done by copying the setup contents of one machine to another. Note, however, that the settings should be changed as appropriate for the following three items of SYSTEM.
- Page 832 ONTENTS MU - 41.8 BLANK PAGE 009-051-07 CR-IR341 Service Manual MU - 41.8 08.30.2001 FM3115...
- Page 833 LENGTH is used, the setup results in error, so that the machine may not operate properly. • 6.HN: Institution name (Max Length=60) • 7.HP: 2 byte code character (Japanese, Korean) Institution name (Max Length=30) 009-051-07 CR-IR341 Service Manual MU - 42 08.30.2001 FM3115...
- Page 834 2: ANSI SHORT DATE (1998.04.01) 3: AMERICAN LONG DATE Date display type (APR.01.1998) 4: AMERICAN SHORT DATE (04.01.1998) 5: EUROPEAN LONG DATE (01.APR.1998) 6: EUROPEAN SHORT DATE (01.04.1998) TR1B1010.EPS 009-051-06 009-051-05 CR-IR341 Service Manual MU - 43 04.20.2001 FM3006 11.20.99 FM2638...
- Page 835 Vertical size for large size area 0 2 - 268 (0.1mm) CLX1 Horizontal size for large size area 1 2 - 668 (0.1mm) CLY1 Vertical size for large size area 1 2 - 180 (0.1mm) TR1B1011.EPS 009-051-07 CR-IR341 Service Manual MU - 44 08.30.2001 FM3115...
- Page 836 XXXX XXXX Setting of MPM code for output Up to eight four-digit MPM codes A wildcard FRSC XXXX XXXX with frame/without ruler may be used. are set. XXXX XXXX XXXX XXXX TR1B1012.EPS 009-051-07 CR-IR341 Service Manual MU - 45 08.30.2001 FM3115...
- Page 837 “22. SG” (14x17/14x14 LP magnification mode) Used to switch whether the output is magnified to 14"x17"/14"x14" LP before output. Permission from the Service Headquarters is required before changing this parameter. 009-051-06 009-051-05 CR-IR341 Service Manual MU - 46 04.20.2001 FM3006 11.20.99 FM2638...
- Page 838 With all the MPM codes, the film output is “with frame/without ruler”. Setup example 3) FRSC= “020? XXXX XXXX XXXX XXXX XXXX” With MPM codes of 0200-020F only, the film output is “with frame/without ruler”. 009-051-06 009-051-05 CR-IR341 Service Manual MU - 47 04.20.2001 FM3006 11.20.99 FM2638...
- Page 839 0200 1. 0G#1. 6-0. 20 4R0. 5 3V1. 0 1D-USM 2. 0 20000 *1. 0*1. 0 Correction term 80KV10mAs XX: 22 System sensitivity Data compression code Exposure table information Latitude FR1B1244.EPS CR-IR341 Service Manual 009-051-05 MU - 48 11.20.99 FM2638...
- Page 840 The definition of area position and rotation is as follows. Position Position rotation Film area of one frame Film area of one frame Position Position Definition of position Definition of rotation FR1B1241.EPS 009-051-05 CR-IR341 Service Manual MU - 49 11.20.99 FM2638...
- Page 841 FR1B1242.EPS Setup example) FC1=0031:0123 1234 2345 3456 4567 5678 6789 789A Area 0 Area 0 = position (0), rotation disabled (0) Area 1 = position (3), 90¡ rotation enabled (1) FR1B1247.EPS CR-IR341 Service Manual 009-051-05 MU - 50 11.20.99 FM2638...
- Page 842 When a network connection is to be made, the following configuration utility setup data must be entered. 2.CONFIGURATION SETTING 0.QUIT 1.SYSTEM 2.PRINT 3.REMOTE SWITCH 4.EQUIPMENT 5.LOCAL INTERFACE 6.NETWORK HOST INTERFACE 7.HOSTS ADDRESS 8.DISTRIBUTION 9.ROUTING 10.NETMASKS 11.DICOM (Base on DICOM) FR1H1407.EPS 009-051-05 CR-IR341 Service Manual MU - 51 11.20.99 FM2638...
- Page 843 “ ” denotes a space. Setup Example REMOTE SWITCH is set to ON. An example of description (bold faced) for the above setup is presented below. #RMT_SW.CFG [ON] #172.16.0.128,root,”NOPK 1000" [OFF] #172.16.0.128,root,”NOPK 0000" 172.16.0.128,root,”NOPK 1000" CR-IR341 Service Manual 009-051-05 MU - 52 11.20.99 FM2638...
- Page 844 If multiple units are connected with “PRINT”, “OD_FILE”, and “DISPLAY”, the output designa- tion can be designated by user setting. With the CR-IR341, the number of hosts that may be set for one function is restricted as follows. • IDT Up to five IDTs •...
- Page 845 A setup example is presented below. # EQUIP # Function Host Name [Host Name]... # Function = OD_FILE or DISPLAY or PRINT or IDT iip-1, iip-2 DISPLAY iip-1 009-051-07 CR-IR341 Service Manual MU - 54 08.30.2001 FM3115...
- Page 846 No change is necessary because the initial value is used as is. NOTE Only when CR-LP414N/FL-IM2636N or FL-IM3543N is connected to CR-IR341 (A07 or later) (including cases where it is connected as a backup printer), the setup value for “N1” in the “2.
- Page 847 It is set in two hexadecimal digits. It may be omitted by entering “,”. Speed (transfer speed) It is set in decimal notation. It may be omitted by entering “,”. When it is omitted, it is set to “8”. CR-IR341 Service Manual 009-051-05 MU - 56 009-051-06 11.20.99 FM2638...
- Page 848 = PRINT or HD_FILE or DISPLAY or OD_FILE # Protocol ID = 0100(FINP) or 0110(FINP) or 0200(DICOM) # System code = Hex 2 figures # Speed = Dec [Kbytes/sec] (default 8Kbytes/sec) iip: DISPLAY|HD_FILE,0200,, 009-051-07 CR-IR341 Service Manual MU - 57 08.30.2001 FM3115...
- Page 849 An IP address is set in the form of “xxx.xxx.xxx.xxx”, using numerals ranging from 0 to 255. “xxx” denotes 0 through 255. NOTES • To one CR-IR341 machine, be sure to assign both a standard LAN IP address (CPU90E) and a LAN board IP address (CPU90F). Example) 172.16.0.1 fcr5000a ...
- Page 850 CR-IR348CL. A setup example is presented below. # HOSTS # Host Name = Max 10 characters #(Available Character:’a’-’z’ ‘0’-’9' ‘-’[37chars]) # IP Addr Host Name 172.16.0.1 fcr5000 172.16.0.2 fcr5000-n 172.16.1.20 009-051-07 CR-IR341 Service Manual MU - 59 08.30.2001 FM3115...
- Page 851 When connected as the CR-IR341P to the CR-IR348CL, DISTRIBUTION is used in a differ- ent manner than with the CR-IR341 system (setting of distribution for network connection). With the CR-IR341P, DISTRIBUTION is set only if multiple CR-IR348CL units are connected to the CR-IR341P.
- Page 852 Either the destination IP address or the destination network IP address is set. Router-Name | Router-Addr (router name or router IP address) Either the “Host Name” of the router or the IP address of the router is set. 009-051-06 009-051-05 CR-IR341 Service Manual MU - 61 04.20.2001 FM3006 11.20.99 FM2638...
- Page 853 “ ” denotes a space. Network (network number) It sets a network number of the network to which the CR-IR341 is connected. netmask (subnet mask) It specifies a range the network number portion represents in the IP address. It is set in the form of “xxx.xxx.xxx.xxx” (where “xxx denotes a decimal numeral ranging from 0 to 255), and the bit of the portion handled as the network number is set to “1”, while the bit...
- Page 854 NOTES: • For the IDT type, the "menu selecting icon" does not appear. • For the initial setting, the "Multiframe forced output" button will not appear. Caps • The IDT type includes CR-IR348CL connection. FR2B4028.EPS 009-051-07 CR-IR341 Service Manual MU - 63 08.30.2001 FM3115...
- Page 855 The menu parameters saved in the floppy disk also contain the language setting for the machine. Thus, if the language setting differs during RESTORE and during BACK UP, the file cannot be read during RESTORE. CR-IR341 Service Manual 009-051-05 MU - 64...
- Page 856 Thus, if the language setting differs during RESTORE and during BACK UP, the file cannot be read during RESTORE. (7) Select “0. QUIT” repeatedly. The screen returns to the U-Utility mode. 009-051-05 CR-IR341 Service Manual MU - 65 11.20.99 FM2638...
- Page 857 • The machine and FL-IMD are connected via the E-i/f (IMG08A). • The host is temporarily connected (including virtual equipment). The “Hostname” of each CR unit installed at a hospital, including the CR-IR341 itself, should be registered so that the configuration file can easily copied and restored to other units.
- Page 858 172.16.0.2 fcr5000a-1 172.16.0.11 fcr5000b 172.16.0.12 fcr5000b-1 172.16.0.21 fcridt4-1 172.16.0.22 fcridt4-2 172.16.0.101 hic654 172.16.0.102 odf624 172.16.0.103 fn-ps551 DISTRIBUTION (CODEDSTB) # Codedstb # Code Host Name [HostName]... AA0123?? hic654 009-051-06 009-051-05 CR-IR341 Service Manual MU - 67 04.20.2001 FM3006 11.20.99 FM2638...
- Page 859 ONTENTS MU - 68 NETMASKS (NETMASKS) # Network masks database # only non-default subnet masks need to be defined here # Network netmask 172.16.0.0 255.255.255.0 CR-IR341 Service Manual 009-051-05 MU - 68 11.20.99 FM2638...
- Page 860 If the transfer destination 5000 Series image reader is not within the same network, set the IP address of the router that serves as the exit of the local network. If the destination image reader is within the same network, this setting is not required. 009-051-05 CR-IR341 Service Manual MU - 69 11.20.99 FM2638...
- Page 861 The following example (bolded entry portion) shows how to enter the above settings. # DICOM # HostName,ServiceName:AEName, [PortNo.],[SOPType], [CompType],[Timeout1],[Timeout2], [DensityType] # ServiceName = STORAGE_U | STORAGE_P | QR_U | QR_P | PRINT_U | PRINT_P fcr5000n-1,STORAGE_U :5000_DICOM,,1,1,100,600,1 qa-ws1,STORAGE_P :hic655qa-scp,5045,1,1,100,600,1 009-051-07 CR-IR341 Service Manual MU - 70 08.30.2001 FM3115...
- Page 862 QA-WS is within the same network, there is no need to make this entry again. Setup Example 4: CR-IR348CL Connection “Appendix 9 Procedures for Connecting with CR Console (CR-IR348CL)” in “Installation volume” 009-051-07 CR-IR341 Service Manual MU - 71 08.30.2001 FM3115...
- Page 863 The IP is conveyed through the reading unit without reading the image, and its erasure is performed quickly regardless of the dosage on the IP. This mode is used to merely check the mechanism of the IP conveyance function. CR-IR341 Service Manual 009-051-05 MU - 72...
- Page 864 (6) Touch the “RETURN” button. The mode returns to the routine screen. (7) Put the cassette into the machine. IPs are conveyed the number of times that was set in step (4). 009-051-06 009-051-05 CR-IR341 Service Manual MU - 73 04.20.2001 FM3006 11.20.99 FM2638...
- Page 865 /dsp/pm1, /dsp/pm2, /dsp/dms, /dsp/scn, /dsp/hcp : IMG08A lp1,lp2 : IMG08B hy1,hy2,hy3 : IMG08C pm1,pm2 : DMC08A : IMG07B : HCP08A Diagnostic result OK: Normal ERROR (ZZZZZZ): Abnormal NO EXISTENCE: DSP (board) is not available. CR-IR341 Service Manual 009-051-05 MU - 74 11.20.99 FM2638...
- Page 866 (3) Type in either “1” or “2”. A ping test is initiated, with the following message displayed. PING TEST IS IN PROGRESS. RESULT - OK (or RESULT - ERROR) Meaning: A ping test is now being performed. 009-051-07 CR-IR341 Service Manual MU - 75 08.30.2001 FM3115...
- Page 867 ONTENTS MU - 76 3. CPU90F DMA This menu should not be used. 009-051-07 CR-IR341 Service Manual MU - 76 08.30.2001 FM3115...
- Page 868 Meaning: FDD WRITE-READ VERIFY is now being executed. If anything abnormal is found during FDD device initialization, the process is inter- rupted, with the following message displayed. FILE I/O ERROR. (FILE=XXXXXXXXXX) XXXXXXXXXX represents the file name. 009-051-05 CR-IR341 Service Manual MU - 77 11.20.99 FM2638...
- Page 869 If anything abnormal is found during execution, either of the following messages appears. RESULT - LASER POWER INSUFFICIENT Meaning: The laser power is insufficient. RESULT - LASER POWER ERROR Meaning: The laser power is faulty. CR-IR341 Service Manual 009-051-05 009-051-05 MU - 78 11.20.99 FM2638 11.20.99 FM2638 (1)
- Page 870 Once a value within the range from 250 to 1000 is set, the following message appears, with HV turned ON. SETTING INPUTED HV VALUE IS IN PROGRESS. Meaning: HV value setting is now being performed. 009-051-05 CR-IR341 Service Manual MU - 79 11.20.99 FM2638...
- Page 871 1. Execute “1. PIXEL AND FREQ”, “2. PIXEL ONLY”, or “3. FREQ ONLY”. When it is executed normally, the following message appears. FORMAT DATA IS SET TO THE DEFAULT VALUE. Meaning: The format data is set to the default value. CR-IR341 Service Manual 009-051-05 MU - 80 11.20.99 FM2638...
- Page 872 2 mm on the IP because the reduction ratio is 1/2. Thus, enter “-20”. The result is displayed. RESULT - XXXXXXXXXX XXXXXXXXXX represents the result (OK: normal, ERROR: error). 009-051-05 CR-IR341 Service Manual MU - 81 11.20.99 FM2638...
- Page 873 The calculation of the correction data is initiated, with the following message dis- played. CALCULATION IS IN PROGRESS. RESULT - OK (or RESULT - ERROR) Meaning: Correction data calculation is now being performed. CR-IR341 Service Manual 009-051-05 MU - 82 11.20.99 FM2638...
- Page 874 (3) Enter the desired S value within a range from 0 to 999. The calculation of set sensitivity correction value is initiated, with the following mes- sage displayed. INPUTTED S VALUE IS SET. 009-051-05 CR-IR341 Service Manual MU - 83 11.20.99 FM2638...
- Page 875 Once it is executed normally, the following message appears. XXXXXXXXXX IS SAVED. Meaning: The file XXXXXXXXXX is saved. If it ends in error, the following message appears. FILE I/O ERROR. (FILE=XXXXXXXXXX) XXXXXXXXXX represents the file name. CR-IR341 Service Manual 009-051-05 MU - 84 11.20.99 FM2638...
- Page 876 Center-sensitivity HV value HVCNT: HVDATA: Reading HV value PMT sensitivity coefficient PMTK: IP sensitivity during sensitivity adjustment SAIP: Erasure level dosage value Erasure level QL value Correction mode default value SMD: 009-051-05 CR-IR341 Service Manual MU - 85 11.20.99 FM2638...
- Page 877 Once the file is saved to the floppy disk, the following message appears. XXXXXXXXXX IS LOADED. If the process ends in error, the following message appears. FILE I/O ERROR.(FILE=XXXXXXXXXX) XXXXXXXXXX represents the file name. CR-IR341 Service Manual 009-051-05 MU - 86 11.20.99 FM2638...
- Page 878 HV ERROR failure Meaning: Analog power supply failure ANALOG POWER SUPPLY ERROR Meaning: Polygon failure POLYGON MIRROR ERROR Meaning: Laser power failure LASER POWER ERROR Meaning: Insufficient laser power LASER POWER INSUFFICIENT 009-051-05 CR-IR341 Service Manual MU - 87 11.20.99 FM2638...
- Page 879 2. LOG AMP: Virtual Image for Inputting Fixed Current into PMT Board (VH OFF on PMT) Select “2. LOG AMP”. The following message appears. THE SPECIAL MODE FOR VIRTUAL IMAGE IS SET. Meaning: The quasi-reading mode is now set. CR-IR341 Service Manual 009-051-05 MU - 88 11.20.99 FM2638...
- Page 880 4. ROUTINE: To Cancel Virtual Generation Mode for Image Signal Select “4. ROUTINE”. The following message appears. THE NORMAL MODE WITHOUT VIRTUAL IMAGE IS SET. Meaning: The quasi-reading mode is now canceled. 009-051-05 CR-IR341 Service Manual MU - 89 11.20.99 FM2638...
- Page 881 “1. INITIALIZE”. If it is not executed, tests cannot be performed because the motors, actuators, and sensors have not been initialized. 1. Execute “1. INITIALIZE”. The motors, actuators, and sensors are initialized, so that tests can be performed. CR-IR341 Service Manual 009-051-05 MU - 90 11.20.99 FM2638...
- Page 882 (4) Type in the total number of pulses. The following message appears. INPUT THE HI-SPEED. 16 - 7200 (FIXED=XXXX) : Meaning: Enter the high-speed value. “XXXX” denotes the high-speed value that is currently set. 009-051-05 CR-IR341 Service Manual MU - 91 11.20.99 FM2638...
- Page 883 1 - 4(FIXED=X) : Meaning: Enter the magnetic phase. “X” denotes the value of magnetic phase (1: 2-phase magnetization, 2: 1-2-phase magnetization, 3: W-1-2-phase magnetization, 4: 2W-1-2-phase magnetization) that is currently set. 009-051-05 CR-IR341 Service Manual MU - 92 11.20.99 FM2638...
- Page 884 INPUT THE STOP MODE. 1. HALT 2.LIMIT 1 - 2(FIXED=X) : Meaning: Enter the stop mode. “X” denotes the stop mode (1: HALT stop, 2: LIMIT stop) that is currently set. 009-051-06 009-051-05 CR-IR341 Service Manual MU - 93 04.20.2001 FM3006 11.20.99 FM2638...
- Page 885 6:MD2 7:MD3 8:ME1 9:ME2 10:MF1 INPUT THE NUMBER OF MOTOR. 1 - 10 : Meaning: Enter the number of motor. (2) Type in the number of motor. The motor is stopped. 009-051-05 CR-IR341 Service Manual MU - 94 11.20.99 FM2638...
- Page 886 Meaning: Enter the rotation speed. “X” denotes the rotation speed (1: standard subscanning, 2: fast subscanning, 3: ejection) that is currently set. (4) Type in the rotation speed. FFM is driven. 009-051-05 CR-IR341 Service Manual MU - 95 11.20.99 FM2638...
- Page 887 10:LAMP ON 11:FFM INPUT THE NUMBER OF ACTUATOR. 1 - 11 : Meaning: Enter the number of actuator. (2) Type in the number of actuator. The actuator is stopped. 009-051-06 009-051-05 CR-IR341 Service Manual MU - 96 04.20.2001 FM3006 11.20.99 FM2638...
- Page 888 (2) Type in the number of sensor. Sensor monitoring is initiated, and, when the sensor status changes, the following message appears. XXXXX ----> Open XXXXX ----> Close Meaning: Sensor XXXXX becomes OPEN. Sensor XXXXX becomes CLOSE. 009-051-05 CR-IR341 Service Manual MU - 97 11.20.99 FM2638...
- Page 889 When the sensor status changes, the following message appears. XXXXX ----> Open XXXXX ----> Close Meaning: Sensor XXXXX becomes OPEN. Sensor XXXXX becomes CLOSE. (2) Select “0. QUIT”. The sensor monitoring is exited. 009-051-05 CR-IR341 Service Manual MU - 98 11.20.99 FM2638...
- Page 890 Hit the ENT key to proceed to the next step (there are six steps). (4) When the operation is completed, pull out the cassette. The following message appears. RESULT - OK If it ends in error, “ERROR (XXXX)” appears. “XXXX” denotes an error code. 009-051-05 CR-IR341 Service Manual MU - 99 11.20.99 FM2638...
- Page 891 Meaning: Enter the unit position. (2) Type in the unit position. The following message appears. MOVED-UP/DOWN IS IN PROGRESS. RESULT - OK (or RESULT - ERROR) Meaning: The elevation unit is now being moved. 009-051-05 CR-IR341 Service Manual MU - 100 11.20.99 FM2638...
- Page 892 The following message appears. MOVED TOWARD THE NON-NIPPING POSITION IS IN PROGRESS. RESULT - OK (or RESULT - ERROR) Meaning: Grip release operation of the side-positioning mechanism is now being performed. 009-051-05 CR-IR341 Service Manual MU - 101 11.20.99 FM2638...
- Page 893 Hit the ENT key to proceed to the next step (there are four steps). When the operation is completed, the following message appears. RESULT - OK If it ends in error, “ERROR (XXXX)” is displayed. “XXXX” denotes an error code. 009-051-05 CR-IR341 Service Manual MU - 102 11.20.99 FM2638...
- Page 894 MOVED TOWARD THE NON-NIPPING POSITION IS IN PROGRESS. RESULT - OK Meaning: Grip release operation of the after-reading conveyor mechanism is now being performed. If it ends in error, “ERROR (XXXX)” appears. “XXXX” denotes an error code. 009-051-05 CR-IR341 Service Manual MU - 103 11.20.99 FM2638...
- Page 895 Meaning: Grip operation of the driving shaft is now being performed. DRIVE TIME is displayed in units of 10 msec. If it ends in error, “ERROR (XXXX)” appears. “XXXX” denotes an error code. 009-051-05 CR-IR341 Service Manual MU - 104 11.20.99 FM2638...
- Page 896 The following message appears. DRIVING GRIP D/A DATA DEFAULT CURRENT RELEASE HIGH xxxx xxxx xxxx xxxx GRIP xxxx xxxx xxxx xxxx Each item of the data is indicated in four decimal digits (xxxx). 009-051-05 CR-IR341 Service Manual MU - 105 11.20.99 FM2638...
- Page 897 Meaning: Grip release operation of the driven shaft is now being performed. DRIVE TIME is displayed in units of 10 msec. If it ends in error, “ERROR (XXXX)” appears. “XXXX” denotes an error code. 009-051-05 CR-IR341 Service Manual MU - 106 11.20.99 FM2638...
- Page 898 Each item of the data is indicated in four decimal digits (xxxx). 11.12 5. UNIT : 8. MIRROR UP/DOWN: Operation Tests on Light- Collecting Mirror This command does not function with the CR-IR341. 009-051-05 CR-IR341 Service Manual MU - 107...
- Page 899 FORMATTING THE FD IS COMPLETED. Meaning: The floppy disk has been completely formatted. If the formatting ends in error, the following message appears. FORMATTING THE FD IS INCOMPLETED. Meaning: The floppy disk formatting failed. 009-051-05 CR-IR341 Service Manual MU - 108 11.20.99 FM2638...
- Page 900 Meaning: The image storage partition of the hard disk has been completely formatted. If the formatting ends in error, the following message appears. FORMATTING THE IMAGE PARTITION IS INCOMPLETED. Meaning: The HD image storage partition formatting failed. 009-051-05 CR-IR341 Service Manual MU - 109 11.20.99 FM2638...
- Page 901 FILE I/O ERROR. (FILE=XXXXXXXXXX) XXXXXXXXXX denotes the file name. The following files are saved to the floppy disk. • SCN_ELVL.DAT • SCN_IFMT.DAT • SCN_INT.DAT • SCN_MAIN.DAT • SCN_POLY.DAT • SCN_ISEN.DAT • SCN_SHDG.DAT 009-051-05 CR-IR341 Service Manual MU - 110 11.20.99 FM2638...
- Page 902 For any file that cannot be written to the floppy disk, the following message appears. FILE I/O ERROR. (FILE=XXXXXXXXXX) XXXXXXXXXX denotes the file name. The following files are saved to the floppy disk. • IRSET.CFG • IRSET.ORG • FILMFMT.CFG • FILMFMT.ORG • IRSTATUS.CFG • IRSTATUS.ORG 009-051-05 CR-IR341 Service Manual MU - 111 11.20.99 FM2638...
- Page 903 FILE I/O ERROR. (FILE=XXXXXXXXXX) XXXXXXXXXX denotes the file name. The following files are saved to the floppy disk. • RMT_SW.CFG • EQUIP • DVICE • HOSTS • CODEDSTB • ROUTE • NETMASKS • DICOM 009-051-05 CR-IR341 Service Manual MU - 112 11.20.99 FM2638...
- Page 904 • HIPUMN.PRM • HIPMNRL.PRM • HP.PRM • HIPOP.PRM • HPT.PRM • HIPOPT.PRM • HPTU.PRM • HIPOPTU.PRM • HPU.PRM • HIPOPU.PRM • PEM.PRM • HIPSTD.PRM • PEMT.PRM • HIPSTDU.PRM • PEMTU.PRM • PEMU.PRM 009-051-05 CR-IR341 Service Manual MU - 113 11.20.99 FM2638...
- Page 905 For any file that cannot be written to the floppy disk, the following message appears. FILE I/O ERROR. (FILE=XXXXXXXXXX) XXXXXXXXXX denotes the file name. The following files are saved to the floppy disk. • MPM_DEF.PRM • FILMMARK.PRM • CDFORM.DAT • BODYDISP.CFG • MENUDISP.CFG • RTN_DISP.CFG 009-051-05 CR-IR341 Service Manual MU - 114 11.20.99 FM2638...
- Page 906 For any file that cannot be written to the floppy disk, the following message appears. FILE I/O ERROR. (FILE=XXXXXXXXXX) XXXXXXXXXX denotes the file name. The following files are saved to the floppy disk. • IRMUMN.PRM • MPMUMN.PRM • NNUMN.PRM • EDR.ABS 009-051-05 CR-IR341 Service Manual MU - 115 11.20.99 FM2638...
- Page 907 FILE I/O ERROR. (FILE=XXXXXXXXXX) XXXXXXXXXX denotes the file name. The following files are read from the floppy disk to the hard disk. • SCN_IFMT.DAT • SCN_INIT.DAT • SCN_POLY.POL • SCN_ISEN.DAT • SCN_SHDG.SHD 009-051-05 CR-IR341 Service Manual MU - 116 11.20.99 FM2638...
- Page 908 If the coping ends in error, the following message is displayed. FILE I/O ERROR. (FILE=XXXXXXXXXX) XXXXXXXXXX denotes the file name. The following files are read from the floppy disk to the hard disk. • IRSET.CFG • FILMFMT.CFG • IRSTATUS.CFG 009-051-05 CR-IR341 Service Manual MU - 117 11.20.99 FM2638...
- Page 909 XXXXXXXXXX denotes the file name. The following files are read from the floppy disk to the hard disk. • RMT_SW.CFG • EQUIP • DVICE • HOSTS • CODEDSTB • ROUTE • NETMASKS • DICOM 009-051-05 CR-IR341 Service Manual MU - 118 11.20.99 FM2638...
- Page 910 • HIPUMN.PRM • HIPMNRL.PRM • HP.PRM • HIPOP.PRM • HPT.PRM • HIPOPT.PRM • HPTU.PRM • HIPOPTU.PRM • HPU.PRM • HIPOPU.PRM • PEM.PRM • HIPSTD.PRM • PEMT.PRM • HIPSTDU.PRM • PEMTU.PRM • PEMU.PRM 009-051-07 CR-IR341 Service Manual MU - 119 08.30.2001 FM3115...
- Page 911 If the coping ends in error, the following message is displayed. FILE I/O ERROR. (FILE=XXXXXXXXXX) XXXXXXXXXX denotes the file name. The following files are read from the floppy disk to the hard disk. • IRMUMN.PRM • MPMUMN.PRM • NNUMN.PRM • EDR.ABS 009-051-05 CR-IR341 Service Manual MU - 120 11.20.99 FM2638...
- Page 912 Once the data is copied to the floppy disk, the following message appears. XXXXXXXXXX IS COPIED. Meaning: XXXXXXXXXX is copied. If the coping ends in error, the following message is displayed. FILE I/O ERROR. (FILE=XXXXXXXXXX) XXXXXXXXXX denotes the file name. 009-051-07 CR-IR341 Service Manual MU - 121 08.30.2001 FM3115...
- Page 913 Once the data is copied to the floppy disk, the following message appears. XXXXXXXXXX IS COPIED. Meaning: XXXXXXXXXX is copied. If the coping ends in error, the following message is displayed. FILE I/O ERROR. (FILE=XXXXXXXXXX) XXXXXXXXXX denotes the file name. 009-051-07 CR-IR341 Service Manual MU - 122 08.30.2001 FM3115...
- Page 914 Once the system software reverts back to its immediately preceding version, the following message appears. PREVIOUS VERSION SOFTWARE IS INSTALLED. Meaning: The system software reverts back to its previous version. (3) Reset the machine. 009-051-05 CR-IR341 Service Manual MU - 123 11.20.99 FM2638...
- Page 915 Once the file is executed, the following message appears. XXXXXXXXXX IS EXECUTED. Meaning: XXXXXXXXXX is executed. If the execution ends in error, the following message is displayed. FILE I/O ERROR. (FILE=XXXXXXXXXX) XXXXXXXXXX denotes the file name. 009-051-05 CR-IR341 Service Manual MU - 124 11.20.99 FM2638...
- Page 916 ONTENTS MU - 125 BLANK PAGE 009-051-05 CR-IR341 Service Manual MU - 125 11.20.99 FM2638...
- Page 917 • JNL Error log information • LIF Format frequency information • MFC Setup options information • CSL (for CSL specification only) Multiframe-related information, set processing-related information, menu selection information 009-051-06 009-051-05 CR-IR341 Service Manual MU - 126 04.20.2001 FM3006 11.20.99 FM2638...
- Page 918 ONTENTS MU - 127 BLANK PAGE 009-051-05 CR-IR341 Service Manual MU - 127 11.20.99 FM2638...
- Page 919 > (1) Select “9. HV OFF”. The high-voltage switch is set to OFF, with the following message displayed. THE HV IS TURNED OFF. (2) Select “0. QUIT”. 009-051-05 CR-IR341 Service Manual MU - 128 009-051-05 11.20.99 FM2638 (1) 11.20.99 FM2638...
- Page 920 If any error occurs, either of the following messages is displayed. Meaning: High-voltage power supply failure HV ERROR Meaning: Analog power supply failure ANALOG POWER SUPPLY ERROR Meaning: HV switch OFF HV OFF (2) Select “0. QUIT”. 009-051-05 009-051-05 CR-IR341 Service Manual MU - 129 11.20.99 FM2638 (1) 11.20.99 FM2638...
- Page 921 Anatomical region selection screen (Example: 1st page) FUJI TAR AR O *** O *** FUJI A001 A001 ID#1234564756 ID#1234564756 The display locations of the icons on the anatomical region selection screen are changed. ROUTINE FR1H1506.EPS CR-IR341 Service Manual 009-051-05 MU - 130 11.20.99 FM2638...
- Page 922 Display location 3 ORBIT Display location 4 HEAD, SOFT TISSUE Display location 5 Page number 03 Page number 02 ANATOMICAL REGION Page number 01 FR1H1507.EPS Example: The mandible is denoted by “013: MANDIBLE”. 009-051-05 CR-IR341 Service Manual MU - 131 11.20.99 FM2638...
- Page 923 Fuji Standard image processing parameter User-defined image processing parameter DELETE BODYDISP.CFG MENUDISP.CFG MPM_DEF.PRM Fuji Standard image processing parameter User-defined image processing parameter FILM MARK FILMMARK Film mark and display location information TR1H1200.EPS CR-IR341 Service Manual 009-051-05 MU - 132 11.20.99 FM2638...
- Page 924 Meaning: Display menu of the first page. 021:SCAPULA 022:STERNUM 023:CHEST,PEDIATRICS 024:THORA.SPINE,LAT 025:CHEST,SOFT TISSUE Meaning: Display menu of the second page. 031:SHOULDER JNT,FRN 032:SHOULDER JNT,AXL 033:WHOLE SPINE 034:CHEST,GENERAL-2 035:CHEST,PORTABLE Meaning: Display menu of the third page. 009-051-05 CR-IR341 Service Manual MU - 133 11.20.99 FM2638...
- Page 925 When the ENT key is touched with a message displayed, its subsequent message that is not displayed, if any, is displayed. When the ENT key is touched with the entire message dis- played, the LIST command is quitted, with a prompt displayed. CR-IR341 Service Manual 009-051-05 MU - 134...
- Page 926 The following message appears. 011:CERVICAL,GENERAL 012:CERVICAL SPINE 013:PHARYNX/LARYNX 014:CERVIC.PEDIATRICS 015:LARYNX(<35KV) Meaning: Display menu of the first page. *1:OPEN MOUTH *2:CERVIC.,PED.-1 *3:CERVIC.BL.VESSEL:C *4:PHARYNX/LARYNX:C *5:CERVIC.ESOPHAGUS:C *6:CERVICAL,MYELO.:C *7:CERVICAL,LYMPHA:C *8:THORA C.,MYELO:C *9:CERVICAL SPINE:T *10:PHARYNX/LARYNX:T *11:CERVIC.,MAG:M Meaning: Non-display menu 009-051-05 CR-IR341 Service Manual MU - 135 11.20.99 FM2638...
- Page 927 With similar procedures, the display menu may be moved within the same page (its display location may be changed), a display menu may be moved (changed) to a non-display menu, and so forth. CR-IR341 Service Manual 009-051-05 MU - 136...
- Page 928 TYPE POSITION NUMBER OR * TO MOVE POSITIONS MOVE> Meaning: Select the number of the anatomical region to be changed. To change the display location of the icon on the anatomical region selection screen, type in “*”. 009-051-05 CR-IR341 Service Manual MU - 137 11.20.99 FM2638...
- Page 929 (4) Select “21:- - - - - - - - - -”. MOVE>21 After quitting the menu and restarting, the HEAD icon on the first page is moved to the left position on the top of the second page. CR-IR341 Service Manual 009-051-05 MU - 138 11.20.99 FM2638...
- Page 930 (P01) ROUTINE> Meaning: Select the menu to be registered. To display the menu, type in “P + page number”. Example: To display the menu on the first page, type in “P01”. 009-051-05 CR-IR341 Service Manual MU - 139 11.20.99 FM2638...
- Page 931 (4) Type in “034” and touch ENT. ROUTINE>034 After quitting the menu and restarting, the routine menu of “011: CERVICAL, GEN- ERAL” is registered in the fourth position on the third page. CR-IR341 Service Manual 009-051-05 MU - 140 11.20.99 FM2638...
- Page 932 Meaning: Select the routine menu to be deleted (disselected). To display the menu, type in “P + page number”. Example: To display the menu on the first page, type in “P01”. 009-051-05 CR-IR341 Service Manual MU - 141 11.20.99 FM2638...
- Page 933 Example: To display the menu on the first page, type in “P01”. (4) Type in “*” and touch ENT. ROUTINE>* After quitting the menu and restarting, the routine menu of 034 is deleted (disselected). CR-IR341 Service Manual 009-051-05 MU - 142 11.20.99 FM2638...
- Page 934 (P01) EDIT> Meaning: Select the menu to be edited. (3) Select “011: CERVICAL, GENERAL”. EDIT>011 The current setup values appear. [00]EDR=0 [01]IP=0 [02]PICTURE=0 [03]FRAME=1 [04]U/D=0 [05]SPOT=0 [06]FILING=0 [07]L/R=0 [08]FILM2= [09]D-CODE= [10]E-CODE= 009-051-05 CR-IR341 Service Manual MU - 143 11.20.99 FM2638...
- Page 935 “*”. To display the item numbers on a page-by-page basis, type in “P + page number”. Example: To display the menu on the first page, type in “P01”. To quit EDIT, type in “E/Q”. CR-IR341 Service Manual 009-051-05 MU - 144 11.20.99 FM2638...
- Page 936 For example, if the ENT key is touched without typing in “2” at step (5) above, then item “[02] PICTURE” subsequent to “[01] IP” can be edited. (6) Type in “E/Q”. EDIT>E/Q “4. EDIT” is exited. 009-051-05 CR-IR341 Service Manual MU - 145 11.20.99 FM2638...
- Page 937 TYPE LOCATION NUMBER OR PAGE NUMBER (P01) COPY> Meaning: Select the copy source. To display the menu, type in “P + page number”. Example: To display the menu on the first page, type in “P01”. CR-IR341 Service Manual 009-051-05 MU - 146 11.20.99 FM2638...
- Page 938 Example: To display the menu on the first page, type in “P01”. (4) Type in “021”. COPY>021 After quitting the menu and restarting, “011: CERVICAL, GENERAL” is copied to the first position on the second page. 009-051-05 CR-IR341 Service Manual MU - 147 11.20.99 FM2638...
- Page 939 025: - - - - - - - - - - - - - - - - *1:OPEN MOUTH *2:CERVIC.,PED.-1 *3:CERVIC.BL.VESSEL:C *4:PHARYNX/LARYNX:C *5:CERVIC.ESOPHAGUS:C *6:CERVICAL,MYELO.:C *7:CERVICAL,LYMPHA:C *8:THORA C.,MYELO:C *9:CERVICAL SPINE:T *10:PHARYNX/LARYNX:T *11:CERVIC.,MAG:M TYPE LOCATION NUMBER OR PAGE NUMBER (P01) DELETE> Meaning: Select the menu to be deleted. CR-IR341 Service Manual 009-051-05 MU - 148 11.20.99 FM2638...
- Page 940 NECK-021"CERVICAL,GENERAL “ (Y/N) DELETE> Meaning: Are you sure to delete the menu selected? (4) Type in “Y”. DELETE>Y After quitting the menu and restarting, the menu “021: CERVICAL, GENERAL” is deleted. 009-051-05 CR-IR341 Service Manual MU - 149 11.20.99 FM2638...
- Page 941 The following message appears. TYPE NEW MARK STRING(MAX10CHAR) FILMMARK> Meaning: Type in a new film mark name within 10 half-width alphanumeric characters. (4) Type in “ABC”. FILMMARK>ABC “ABC” is registered in “24:”. CR-IR341 Service Manual 009-051-05 MU - 150 11.20.99 FM2638...
- Page 942 “24: - - - - - - - - - -”, while the “26: - - - - - - - - - -” selected at step (3) is displayed as “26: ABC”. 009-051-05 CR-IR341 Service Manual MU - 151 11.20.99 FM2638...
- Page 943 TYPE NEW MARK STRING(MAX10CHAR) FILMMARK> Meaning: Type in a new film mark name within 10 half-width alphanumeric characters. (4) Type in “DEF”. FILMMARK>DEF After quitting the menu and restarting, “ABC” is changed to “DEF”. CR-IR341 Service Manual 009-051-05 MU - 152 11.20.99 FM2638...
- Page 944 DELETE 26"DEF “ (Y/N) FILMMARK> Meaning: Are you sure to delete the menu selected? (4) Type in “Y”. FILMMARK>Y After quitting the menu and restarting, the menu “26: DEF” is deleted. 009-051-05 CR-IR341 Service Manual MU - 153 11.20.99 FM2638...
- Page 945 For application software the software version.) Software for editing the image processing One set (This number varies with PC MENU EDITOR 114Y5431010A parameters and CSL type the software version.) menu settings TR1B1001.EPS 009-051-07 CR-IR341 Service Manual MU - 154 08.30.2001 FM3115...
- Page 946 The following messages appear and the software installation process starts. -> Install utility. Version A00. Attaching to <floppy> device...done. Attaching to <SCSI> device...done. Upon completion of SCSI device initialization, the following message appears. Insert data floppy disk. 009-051-05 CR-IR341 Service Manual MU - 155 11.20.99 FM2638...
- Page 947 Create </sd0/LOG/IOT.001> Create </sd0/LOG/TCB.001> Create </sd0/LOG/ISC.001> .... Upon completion of log file initialization, the following message appears to indicate the end of installation. Install is complete. 009-051-05 009-051-05 CR-IR341 Service Manual MU - 156 11.20.99 FM2638 (1) 11.20.99 FM2638...
- Page 948 The floppy disk or SCSI hard disk drive is faulty. error rename directory: status= <********> The directory name could not be changed (the “********” portion is a detail code). The SCSI hard disk drive is faulty. 009-051-05 009-051-05 CR-IR341 Service Manual MU - 157 11.20.99 FM2638 (1) 11.20.99 FM2638...
- Page 949 The file could not be generated (the “********” portion is a detail code). The SCSI hard disk drive is faulty. error file size. The file size is illegal. The floppy disk is faulty. 009-051-05 CR-IR341 Service Manual MU - 158 11.20.99 FM2638...
- Page 950 “FORMAT” disk from the floppy disk drive before doing anything. If you power ON the machine with the “FORMAT” disk inserted into the floppy disk drive, the system automatically initiates the hard disk formatting sequence without asking for the user’s confirmation. 009-051-05 CR-IR341 Service Manual MU - 159 11.20.99 FM2638...
- Page 951 # 0:JPN / 1:ENG / 2:GER / 3:FRN / 4:ESP / # 5:ITA / 6:SWE / 7:FIN / 8:DEN / 9:NOR / # 10:KOR # (7,10:Not Available) FR1BA008.EPS (6) Touch the [SAVE] key. The edited content is saved to the HD. 009-051-05 CR-IR341 Service Manual MU - 160 11.20.99 FM2638...
- Page 952 (9) Select “0. QUIT” repeatedly. The screen returns to the U-Utility mode. (10) Press the RESET button. The machine is reset so that the setting of the file installed becomes effective. 009-051-05 CR-IR341 Service Manual MU - 161 11.20.99 FM2638...
- Page 953 CodePage850 (24 dots) FFANK8.FNT JIS X0201 (half-width 8 dots) FFANK16.FNT JIS X0201 (half-width 16 dots) FFANK24.FNT JIS X0201 (half-width 24 dots) FFKNJ16.FNT JIS X0208 (Kanji 16 dots) FFKNJ24.FNT JIS X0208 (Kanji 24 dots) 009-051-05 CR-IR341 Service Manual MU - 162 11.20.99 FM2638...
- Page 954 Remote commands for the host applicable to remote power control are described. DICOM “Base on DICOM” connection information file Connection requirements for the host applicable to “Base on DICOM” connection are described. 009-051-05 CR-IR341 Service Manual MU - 163 11.20.99 FM2638...
- Page 955 Fuji standard table PEMU.PRM PEM processing parameter file Institution-specific table PEMT.PRM PEM unsharp mask data table Fuji standard table (PEM processing table) PEMTU.PRM PEM unsharp mask data table Institution-specific table (PEM processing table) 009-051-05 CR-IR341 Service Manual MU - 164 11.20.99 FM2638...
- Page 956 Message data indicated on the display (Danish) MESSAGES.NOR Display message definition file Message data indicated on the display (Norwegian) ICONS.PNL Integration file for icons used on PNL Multiple icon files are integrated into a single file. 009-051-05 CR-IR341 Service Manual MU - 165 11.20.99 FM2638...
- Page 957 EDR user parameter Histogram parameter definition for specific institution NNPRM.PRM Standard neuro parameter Standard parameter for neuro analysis NNUMN.PRM Specific neuro parameter Specific parameter for neuro analysis EDR.ABS EDR program EDR software program 009-051-05 CR-IR341 Service Manual MU - 166 11.20.99 FM2638...
- Page 958 “Polygon correction result (factory-default original, file name written to the FD with UTL)” SCN_ELVL.DAT Erasure level detection data file Table for erasure dose detection • MICRO Image processing µ-program DSP4M1J.S24 Image processing µ-program DSP4M2J.S24 009-051-05 CR-IR341 Service Manual MU - 167 11.20.99 FM2638...
- Page 959 Image processing µ-program DSP0M1J.S24 Image processing µ-program DSP0M2J.S24 SIOSETUP.IDT Data link layer setup parameter definition file Data link layer setup parameter for IDT (serial) connection • MICRO DSPHM1J.S24 LANCONT.ABS LAN board control program 009-051-05 CR-IR341 Service Manual MU - 168 11.20.99 FM2638...
- Page 960 SED log journal IOT.000 IOT data IOT data journal SMCU_LIF.000 External unit communication log (serial LP) External unit communication log journal SMCU_DIF.000 External unit communication log (serial DMS) External unit communication log journal 009-051-05 CR-IR341 Service Manual MU - 169 11.20.99 FM2638...
- Page 961 External unit communication log journal GD_IMM.000 Image management system data External unit communication log journal (history information, etc.) GD_QUM.000 Queue management system data External unit communication log journal (history information, etc.) CORE.DMP Core dump 009-051-05 CR-IR341 Service Manual MU - 170 11.20.99 FM2638...
- Page 962 ONTENTS MU - 171 BLANK PAGE 009-051-05 CR-IR341 Service Manual MU - 171 11.20.99 FM2638...
- Page 963 CR-IR341/CR-IR341P Service Manual Service Parts List (SP)
- Page 964 Contents Service Parts List CR-IR341 Service Manual – Contents Service Parts List (SP) 1. How to Use Service Parts List ................... SP - 2 INDEX 01A COVER 1 ......................... SP - 8 INDEX 01B COVER 2 ....................... SP - 12 INDEX 01C COVER 3 .......................
- Page 965 INDEX 16 PARTS NOS. SEARCH TABLE ................SP - 106 INDEX 17 TABLE OF SCREWS / WASHERS INDICATION SYMBOLS ......SP - 116 INDEX 18 LIST OF QUICK WEARING PARTS ..............SP - 117 CR-IR341 Service Manual 009-051-05 11.20.99 FM2638...
- Page 966 08/30/2001 Design changes (FM3115) SP-8–10, 13, 20–23, 25, 27, 30, 31, 33, 41, 47, 52–55, 58, 59, 63, 65, 73, 75–77, 82–85, 87, 88, 89, 89.1–89.4, 92, 93, 94, 96–104, 106–114 009-051-07 CR-IR341 Service Manual SP - 1 08.30.2001 FM3115...
- Page 967 RANK column. REF.NO. REF. NO. is a parts number indicated in the Service Parts Exploded Views. For parts having different functions, they are clearly distinguished in the REMARKS and SERIAL NUMBER columns. 009-051-05 CR-IR341 Service Manual SP - 2 11.20.99 FM2638...
- Page 968 The use of different packing materials or packing methods may incur damage to packed component during transit. 009-051-05 CR-IR341 Service Manual SP - 3 11.20.99 FM2638...
- Page 969 CASSETTE SET UNIT 2 CASSETTE SET UNIT 3 UP-DOWN IP REMOVAL UNIT 1 INDEX INDEX INDEX UP-DOWN IP REMOVAL UNIT 2 UP-DOWN IP REMOVAL UNIT 3 UP-DOWN IP REMOVAL UNIT 4 FR1Z0001.EPS 009-051-05 CR-IR341 Service Manual SP - 4 11.20.99 FM2638...
- Page 970 CONVEYOR 1 CONVEYOR 2 CONVEYOR 3 INDEX INDEX INDEX BEFORE-SIDE-POSITIONING BEFORE-SIDE-POSITIONING SIDE-POSITIONING CONVEYOR 4 CONVEYOR 5 CONVEYOR 1 INDEX INDEX INDEX SIDE-POSITIONING SIDE-POSITIONING SIDE-POSITIONING CONVEYOR 3 CONVEYOR 4 CONVEYOR 2 FR1Z0002.EPS 009-051-05 CR-IR341 Service Manual SP - 5 11.20.99 FM2638...
- Page 971 ERASURE CONVEYOR 1 ERASURE CONVEYOR 2 INDEX INDEX INDEX ERASURE CONVEYOR 3 ERASURE CONVEYOR 4 LAMP UNIT INDEX INDEX INDEX SUB SCANNING UNIT 2 SUB SCANNING UNIT 3 SUB SCANNING UNIT 1 FR1Z0003.EPS 009-051-05 CR-IR341 Service Manual SP - 6 11.20.99 FM2638...
- Page 972 TABLE OF SCREWS / LIST OF QUICK WEARING WASHERS INDICATION PARTS SYMBOLS The number in the shaded area in each unit that comes after INDEX indicates the parts list section number. FR1Z0004.EPS 009-051-05 CR-IR341 Service Manual SP - 7 11.20.99 FM2638...
- Page 973 COVER 1 FR1Z0005.EPS 2-B3X6 DETAIL B 2-W3 2-S3x 6 DETAIL A FR1Z0006.EPS 009-051-05 CR-IR341 Service Manual 009-051-07 SP - 8 11.20.99 FM2638 08.30.2001 FM3115...
- Page 974 Lower Right-Hand Side Cover Assembly For SIEMENS 18.1 350N2002H Lower Right-Hand Side Cover For PHILIPS 18.2 350Y1320 Lower Right-Hand Side Cover For SIEMENS 18.3 350Y1338 Lower Right-Hand Side Cover TR1Z0005.EPS 009-051-05 CR-IR341 Service Manual 009-051-07 SP - 9 11.20.99 FM2638 08.30.2001 FM3115...
- Page 975 37.3 350Y1381 Cover For SIEMENS 345N1236B Louver 388N5244A Flat Spring 40.1 350N2037B Cover 40.2 350Y1347 Cover For PHILIPS 40.3 350Y1348 Cover For SIEMENS 382Y1486 Sponge Tape T3xW10xL160 TR1Z0060.EPS 009-051-05 CR-IR341 Service Manual 009-051-07 SP - 10 11.20.99 FM2638 08.30.2001 FM3115...
- Page 976 BLANK PAGE 009-051-05 CR-IR341 Service Manual SP - 11 11.20.99 FM2638...
- Page 977 COVER 2 FR1Z0007.EPS 4-S3x6 2-BR4x8 2-BR4x8 3-BR4x8 2-Q4x6 DETAIL A #2041~ 2-T4x8 8-BR4x8 FR1Z0008.EPS 009-051-05 CR-IR341 Service Manual SP - 12 11.20.99 FM2638...
- Page 978 TL-231No.1 (1677) 29.1 350Y1205C FDD Cover For PHILIPS 29.2 350Y1313A FDD Cover For SIEMENS 29.3 350Y1331A FDD Cover 30.1 345Y0172 Light Protect Plate 30.2 345Y0174 Light Protect Plate TR1Z0006.EPS 009-051-05 CR-IR341 Service Manual 009-051-07 SP - 13 11.20.99 FM2638 08.30.2001 FM3115...
- Page 979 Lower Left-Hand Side Cover For PHILIPS 38.3 350Y1361 Lower Left-Hand Side Cover For SIEMENS 382N1159 Tape W19xL230 40.1 405N2314A Label 40.2 405N2462 Label For PHILIPS 40.3 405N2551 Label For SIEMENS TR1ZOO61.EPS 009-051-05 CR-IR341 Service Manual SP - 14 11.20.99 FM2638...
- Page 980 BLANK PAGE 009-051-05 CR-IR341 Service Manual SP - 15 11.20.99 FM2638...
- Page 981 COVER 3 4-BR4x8 FR1Z0009.EPS 3-BR4x8 5-BR4x12 2-BR4x8 5-BR4x12 4-T4x6 2-B3x6 2-B3x6 2-BR4x12 9-M3x6 FR1Z0010.EPS 009-051-05 CR-IR341 Service Manual SP - 16 11.20.99 FM2638...
- Page 982 Guide 363N7116B Guide 113Y7046A Board Assembly 356N5841A Bracket 322N0022A Sliding Tape W20xL510 322N0023A Sliding Tape W20xL565 322N0024A Sliding Tape W20xL630 357N1114D Base 346N0975A Sub Plate 317N1049A 357N7028A Base 332N0460C Stopper TR1Z0007.EPS 009-051-05 CR-IR341 Service Manual SP - 17 11.20.99 FM2638...
- Page 983 2-T4x6 (3B) 2-T4x6 (3B) 3-BR4x8 2-BR4x8 2-BR4x8 2-BR4x8 3-BR4x8 4-T4x6 (3B) 2-BRx8 6-BR4x12 6-BR4x12 2-BR4x8 2-T4x6 (3B) 4-BR4x8 4-T4x6 (3B) BR4x8 2-T4x6 (3B) 4x4-BR 6x12 #2041~ 2-T4x6 (3B) T4x8 2-BR4x8 FR1Z0012.EPS 009-051-05 CR-IR341 Service Manual SP - 18 11.20.99 FM2638...
- Page 984 356N5929A Bracket 356N5924D Bracket 356N5969A Bracket 308S1422610 Sems Screw M2.6x10 20.1 356N5970 Bracket ~#2040 20.2 356N6219 Bracket #2041~ 356N6216 Bracket #2041~ 356N6218 Bracket #2041~ 382N1156 Sponge Tape 382N1155 Sponge Tape TR1Z0008.EPS 009-051-05 CR-IR341 Service Manual SP - 19 11.20.99 FM2638...
- Page 985 3-BR4x8 5-TR4x6 DETAIL A 2-BR4x8 2-BR4x8 5-TR4x6 5-T4x6 2-BR4x8 2-BR4x8 2-BR4x8 2-BR4x8 3-BR4x8 BR4x8 BR4x8 4-BR4x8 5-TR4x6 2-BR4x8 2-BR4x8 DETAIL B DETAIL C DETAIL D 2-BR4x8 2-BR4x8 FR1Z0014.EPS 009-051-05 CR-IR341 Service Manual 009-051-07 SP - 20 11.20.99 FM2638 08.30.2001 FM3115...
- Page 986 Fuse F2, F3, F9~12 137S1193 Fuse 250V0.5A 137S1077 Fuse F4, F5 137S1194 Fuse 250V2A 137S1079 Fuse 137S1195 Fuse 250V5A 137S1080 Fuse F1, F7, F8, F13 356N8850 Bracket TR1Z0009.EPS 009-051-05 CR-IR341 Service Manual 009-051-07 SP - 21 11.20.99 FM2638 08.30.2001 FM3115...
- Page 987 CASSETTE SET UNIT 1 FR1Z0015.EPS B3x6 BQ4x10 4x3-B3x6 4-BR4x30 4-Na4 4-B3x6 4-B3x10 3-BR4x8 2-B3x6 2-BR4x8 5-BR4x8 FR1Z0016.EPS 009-051-05 CR-IR341 Service Manual 009-051-07 SP - 22 11.20.99 FM2638 08.30.2001 FM3115...
- Page 988 Sems Screw M2.6x10 356N5913A Bracket 356N5896A Bracket 356N5947 Bracket 356N5907B Bracket 388N3075A Torsion Coil Spring 322SY064 Plain Bearing 80F-0610 398N0057D Shutter 322SY054 Plain Bearing 80F-0605 356N5908 Bracket TR1Z0010.EPS 009-051-05 CR-IR341 Service Manual 009-051-07 SP - 23 11.20.99 FM2638 08.30.2001 FM3115...
- Page 989 BR4x8 Q3x12 Q3x12 2-Q4x8 S3x10 BR4x8 BR4x8 BR4x8 2-Q4x8 BQ4x10 BR4x8 BR4x8 2-B3x10 Q4x12 BR4x8 Q4x12 B3x10 Q4x12 BR4x8 BR4x8 Q4x12 B3x10 B3x6 BR4x8 2-Q4x12 BR4x8 2-Q4x12 2-Q4x12 2-Q4x12 2-BR4x8 FR1Z0018.EPS 009-051-05 CR-IR341 Service Manual SP - 24 11.20.99 FM2638...
- Page 990 Guide 332N3463A Stopper 363N1786A Guide 332N3462A Stopper 363Y0289 Guide Assembly 388N1142 Compression Coil Spring 356N5904C/6414B Bracket 104N0043 Photo Sensor SA1, 5, 9, 13 356N5912B/C Bracket 356N6201 Bracket TR1Z0011.EPS 009-051-05 CR-IR341 Service Manual 009-051-07 SP - 25 11.20.99 FM2638 08.30.2001 FM3115...
- Page 991 CASSETTE SET UNIT 3 FR1Z0019.EPS BR4x8 BR4x8 B3x6 DETAIL A (4 Places) 4-BR4x12 BR4x8 B3x6 B3x6 4-BR4x12 B3x6 (4 Places) FR1Z0020.EPS 009-051-05 CR-IR341 Service Manual SP - 26 11.20.99 FM2638...
- Page 992 308S3420210 Double Sems Screw M2x10 128Y0241A Micro Switch SA2, 6, 10, 14 356N5903A Bracket 128Y0258B Micro Switch Assembly SA4, 8, 12, 16 356N5910C Bracket 388N5214 Leaf Spring TR1Z0012.EPS 009-051-05 CR-IR341 Service Manual 009-051-07 SP - 27 11.20.99 FM2638 08.30.2001 FM3115...
- Page 993 2-BR4x8 2-BR4x16 2-B3x6 BR4x30 S3x6 (3B) S3x8 2-BR4x8 Q4x12 BR4x8 3-B3x10 B3x6 B3x6 4-BQ4x10 B3x6 BR4x8 BR4x8 BR4x30 2-B3x6 B3x12 B3x10 B3x6 2-BR4x8 B3x6 B3x10 B3x10 B3x6 B3x10 2-BR4x8 2-BR4x8 FR1Z0022.EPS 009-051-05 CR-IR341 Service Manual SP - 28 11.20.99 FM2638...
- Page 994 φ4x6.5 318N1042A Bushing 319N3338A Shaft 327N4201R04A Gear 318N1057 Bushing 322SF069 Bearing 6900ZZNR 356N5819B Bracket 356N6364 Bracket 118YX165 Stepping Motor 324N3093A Timing Belt Wheel 356N5818A Bracket 401N0741 Counter Plate 356N5824B Bracket TR1Z0013.EPS 009-051-05 CR-IR341 Service Manual SP - 29 11.20.99 FM2638...
- Page 995 BR4x8 FR1Z0023.EPS BR3x6 4-BR4x8 BR3x6 2-BR4x8 BR4x8 16.1 2-B3x10 2-WP4x8 B3x6 (3B) B3x10 2-Q4x12 2-SW4 42.1 42.2 3-Q4x12 3-SW4 B3x6 2-BR4x8 #XXXX~ BR4x8 B3x6 B3x6 2-B3x10 16.2 FR1Z0024.EPS 009-051-05 CR-IR341 Service Manual 009-051-07 SP - 30 11.20.99 FM2638 08.30.2001 FM3115...
- Page 996 Bearing FLWA674ZZA 104N0044 Photo Sensor 356N5821A Bracket φ4x7.5 347N0734 Spacer 341N0865A φ8x13 347N0831 Spacer 319N3337B Shaft 104N0043 Photo Sensor 356N5813A/B Bracket 42.1 356N6706 Bracket 42.2 356N6707 Bracket TR1Z0014.EPS 009-051-05 CR-IR341 Service Manual 009-051-07 SP - 31 11.20.99 FM2638 08.30.2001 FM3115...
- Page 997 UP-DOWN IP REMOVAL UNIT 3 FR1Z0025.EPS B3x6 B3x6 B3x6 B3x6 2-B3x10 B3x6 B3x6 2-B3x6 2-B3x6 Q3x12 2-B3x6 FR1Z0026.EPS 009-051-05 CR-IR341 Service Manual SP - 32 11.20.99 FM2638...
- Page 998 Hose 347N1490A Spacer 362N0474B Support TR1Z0015.EPS * The plain bearing that corresponds to REF 20.2 should always be REF 8.2 REF 20.1 and REF 8.1 should be paired. 009-051-05 CR-IR341 Service Manual 009-051-07 SP - 33 11.20.99 FM2638 08.30.2001 FM3115...
- Page 999 UP-DOWN IP REMOVAL UNIT 4 FR1Z0027.EPS 2-BR4x8 B3x6 B3x6 B3x6 2-B3x6 2-A3x8 BR4x8 2-B3x6 2-B4x8 2-A3x8 WP (3B) BR4x30 2-A4x10 FR1Z0028.EPS 009-051-05 CR-IR341 Service Manual SP - 34 11.20.99 FM2638...
- Page 1000 Stepping Motor 388N2391 Extension Spring 319N2940 Shaft 322SF017 Bearing WA676ZZA 324N3098A Timing Belt Wheel 324N3041E Timing Belt Wheel 323S3287 Timing Belt UNITTA 291-3M-9 324N3125 Timing Belt Wheel 324N3038C Timing Belt Wheel TR1Z0016.EPS 009-051-05 CR-IR341 Service Manual SP - 35 11.20.99 FM2638...
- Page 1001 UP-DOWN IP REMOVAL UNIT 5 FR1Z0029.EPS BR4x8 4-BR4x30 DETAIL "A" FR1Z0030.EPS 009-051-05 CR-IR341 Service Manual SP - 36 11.20.99 FM2638...
- Page 1002 319N2940 Shaft 324N3125 Timing Belt Wheel φ8x4 347N0636 Spacer 322SF061 Bearing SC866ZZNRCS09/1KG1 324N1026A Flat Belt Wheel φ8x16 347N0834 Spacer 323S3281 Timing Belt UNITTA 177-3M-9 327N1121608A Spur Gear 388N2385 Extension Spring TR1Z0017.EPS 009-051-05 CR-IR341 Service Manual SP - 37 11.20.99 FM2638...
- Page 1003 UP-DOWN IP REMOVAL UNIT 6 2-BR4x8 2-BR4x8 FR1Z0031.EPS 2-BR4x8 4-Q3x12 4-Na3 4-BR4x8 4-B3x10 4-E4 4-S3x8 (3B) FR1Z0032.EPS 009-051-05 CR-IR341 Service Manual SP - 38 11.20.99 FM2638...
- Page 1004 322SY097 Plain Bearing 80F0603 341N0863A 363N1765B Guide Plate 334N3463A Rubber Roller 334N3465A Rubber Roller 334N3464A Rubber Roller 363N1800A Guide 363Y0311 Guide *REF.2 shall be replaced as a pair with REF.3 TR1Z0018.EPS 009-051-05 CR-IR341 Service Manual SP - 39 11.20.99 FM2638...
- Page 1005 UP-DOWN IP REMOVAL UNIT 7 FR1Z0033.EPS BR4x16 2-BR4x8 BR4x8 BR4x8 BR4x16 BR4x16 3-BR4x8 3-T4x6 (3B) 3-T4x6 (3B) 4-BR4x20 6-BR4x8 S3x8 3-B4x6 5-BQ4x10 BR4x8 BR4x16 2-BR4x8 2-BR4x8 2-BR4x8 BR4x8 2-BR4x8 2-B3x10 2-B3x6 BR4x8 FR1Z0034.EPS 009-051-05 CR-IR341 Service Manual SP - 40 11.20.99 FM2638...
- Page 1006 401N0741 Counter Plate 356N5826A Bracket 356N5831B Bracket 356N5827B Bracket 308S1422610 Sems Screw M2.6x10 401N0740 Counter Plate 356N6362 Bracket 356N6361 Bracket 388N2421 Extension Spring 356N5823A Bracket 313N1032 Stay TR1Z0019.EPS 009-051-05 CR-IR341 Service Manual 009-051-07 SP - 41 11.20.99 FM2638 08.30.2001 FM3115...
- Page 1007 BEFORE-SIDE-POSITIONING CONVEYOR 1 FR1Z0035.EPS 2-BR4x8 BR4x8 B3x6 14 15 2-BR4x8 BR4x8 2-BR4x8 2-B3x6 B3x6 2-BR4x8 2-BR4x12 B3x10 2-BR4x8 3-B3x6 2-A3x10 2-B3x6 2-A3x10 FR1Z0036.EPS 009-051-05 CR-IR341 Service Manual SP - 42 11.20.99 FM2638...
- Page 1008 341N0857B 323S3066 Timing Belt UNITTA 207-3M-9 356N5805B Bracket 388N2388 Extension Spring 341N0867 356N5803 Bracket 107Y0163B Solenoid SOLC1 113Y1038 Board Assembly SC1, 2 347N1196A Spacer 356N5806A Bracket 347N1174 Spacer 322N0020A Bearing TR1Z0020.EPS 009-051-05 CR-IR341 Service Manual SP - 43 11.20.99 FM2638...
- Page 1009 BEFORE-SIDE-POSITIONING CONVEYOR 2 FR1Z0037.EPS BR4x30 BR4x30 BR4x30 2-B3x6 DETAIL A Q4x12 3-A4x10 12 11 FR1Z0038.EPS 009-051-05 CR-IR341 Service Manual SP - 44 11.20.99 FM2638...
- Page 1010 Bracket 388N2387 Extension Spring 323S3082 Timing Belt UNITTA 420-3M-9 118YX165 Stepping Motor 324N3041E Timing Belt Wheel 323S3072 Timing Belt UNITTA 192-3M-9 324N3121 Timing Belt Wheel φ4x6.5 318N1042A Bushing 319N3326A Shaft TR1Z0021.EPS 009-051-05 CR-IR341 Service Manual SP - 45 11.20.99 FM2638...
- Page 1011 BEFORE-SIDE-POSITIONING CONVEYOR 3 FR1Z0039.EPS 2-B3x6 4-BR4x8 2-B3x6 4-B3x6 3-WP4x8 6-B3x6 FR1Z0040.EPS 009-051-05 CR-IR341 Service Manual SP - 46 11.20.99 FM2638...
- Page 1012 REMARKS SERIAL NO. 350N2021A Cover 363Y0285B Guide Plate 334N3457A Rubber Roller 363N1758C Guide Plate 334N3456A Rubber Roller 363N1751C Guide Plate 334N3556 Rubber Roller 338N0219A Ring 319N3321B Shaft TR1Z0022.EPS 009-051-05 CR-IR341 Service Manual 009-051-07 SP - 47 11.20.99 FM2638 08.30.2001 FM3115...
- Page 1013 BEFORE-SIDE-POSITIONING CONVEYOR 4 FR1Z0041.EPS 4-BR3x6 B3x10 B3x10 BR4x8 B3x10 BR4x8 B3x10 BR4x8 BR4x8 FR1Z0042.EPS 009-051-05 CR-IR341 Service Manual SP - 48 11.20.99 FM2638...
- Page 1014 SERIAL NO. 322SY121 Plain Bearing 80F-0805 334N3457A Rubber Roller 334N3456A Rubber Roller φ3x3.5 347N0580 Spacer 313N0952C Stay 363Y0284A Guide 319N3328B Shaft 322SY054 Plain Bearing 80F-0605 363Y0283B Guide 363N1757B Guide Plate TR1Z0023.EPS 009-051-05 CR-IR341 Service Manual SP - 49 11.20.99 FM2638...
- Page 1015 BEFORE-SIDE-POSITIONING CONVEYOR 5 FR1Z0043.EPS 2-B3x6 2-B3x6 4-B3x6 4-B3x6 B3x10 BR4x8 B3x6 2-B3x6 2-B3x6 FR1Z0044.EPS 009-051-05 CR-IR341 Service Manual SP - 50 11.20.99 FM2638...
- Page 1016 Brush Roller φ8x8 347N0821 Spacer 327N1124001A Spur Gear 350N1991C Cover 356N5804A Bracket 327N0035C Spur Gear 363Y0286B Guide Plate 363N1755D Guide Plate 356N6060 Bracket 356N6059 Bracket 387N7006 Antistatic Brush 387N0113 Antistatic Brush TR1Z0024.EPS 009-051-05 CR-IR341 Service Manual SP - 51 11.20.99 FM2638...
- Page 1017 4-B3x6 B3x10 S3x8 B3x10 BR4x8 B3x10 T3x6 BR4x8 3-B3x6 S3x8 T3x6 T3x6 2-A3x10 11 12 BR4x25 BQ4x10 2-BR4x8 2-B3x6 BR4x8 B3x10 2-B3x6 B3x12 BR4x8 BR4x8 DETAIL A FR1Z0046.EPS 009-051-05 CR-IR341 Service Manual 009-051-07 SP - 52 11.20.99 FM2638 08.30.2001 FM3115...
- Page 1018 Spacer SA7M4-30-F 383Y0063 Wire 383Y0064 Wire 341N7047B 313N1038 Stay 319N7112B Shaft 356N7347A Bracket φ3x5 347N0404 Spacer 388N2729 Extension Spring 388N2721A Extension Spring φ3x2.5 347N0704 Spacer 328N7003B Claw TR1Z0025.EPS 009-051-05 CR-IR341 Service Manual 009-051-07 SP - 53 11.20.99 FM2638 08.30.2001 FM3115...
- Page 1019 SIDE-POSITIONING CONVEYOR 2 #XXXX~ FR1Z0047.EPS S3x8 B3x10 S3x8 2-BR4x8 B3x10 B3x10 T3x6 3-B3x6 S3x8 T3x6 Q4x6 T3x6 BR4x20 BR4x20 A4x10 BR4x20 3-B3x10 3-BR4x8 2-B3x10 3-A4x10 DETAIL A DETAIL B FR1Z0048.EPS 009-051-05 CR-IR341 Service Manual 009-051-07 SP - 54 11.20.99 FM2638 08.30.2001 FM3115...
Need help?
Do you have a question about the CR-IR341 and is the answer not in the manual?
Questions and answers