FujiFilm Sonosite PX Service Manual
Hide thumbs
Also See for Sonosite PX:
- Installation manual (15 pages) ,
- Assembly instructions manual (14 pages) ,
- Assembly instructions (2 pages)
Table of Contents
Advertisement
Advertisement
Table of Contents

Related Manuals for FujiFilm Sonosite PX


Summary of Contents for FujiFilm Sonosite PX
- Page 1 Sonosite PX Ultrasound System Service Manual...
- Page 3 SonoMB, Sonosite, Steep Needle Profiling, and the Sonosite logo are registered (in some jurisdictions) and unregistered trademarks owned by FUJIFILM Sonosite, Inc. in various jurisdictions. FUFIFILM is a registered trademark of FUJIFILM Corporation. Value from Innovation is a trademark of FUJIFILM Holdings America Corporation.
-
Page 5: Table Of Contents
Sonosite PX Overview ........ - Page 6 I/O PCBA Assemblies..........36 Clinical Display .
- Page 7 Install Power in Aux Board PCBA........60 Main PCBA Replacement .
- Page 8 Service Event Report Instructions ........97 Returning Products to Fujifilm Sonosite........98 Shipping Instructions .
-
Page 9: Introduction
Chapter 1: Introduction Before servicing the Sonosite PX Ultrasound System, please read this manual. The ultrasound system has multiple configurations and feature sets. All are described in this service manual but not every option may apply to your system. System features depend on your system configuration, transducer, and exam type. -
Page 10: Terms And Symbols
Terms and symbols The service manual follows these conventions: • A WARNING describes precautions necessary to prevent injury or loss of life. • A Caution describes precautions necessary to protect the products. • Numbered steps in procedures must be performed in order. •... - Page 11 Table 1: Labeling Symbols (Continued) Symbol Definition Canadian Standards Association component certification mark Catalog number BS EN 50419:2016 Marking of Electrical and Electronic Equipment in accordance with Directive 2012/19/EU for electrical and electronic equipment (WEEE) and 2006/66/EC for Batteries (WEEE) Corrugated recycle Dangerous voltage Date of manufacture...
- Page 12 Table 1: Labeling Symbols (Continued) Symbol Definition Caution Hot Device emits a static (DC) magnetic field Non-ionizing radiation Paper recycle Serial number type of control number Temperature limitation Atmospheric pressure limitation Humidity limitation Submersible. Protected against the effects of temporary immersion in water Protection against solid foreign objects Handle transducer with care...
- Page 13 European community authorized representative Maximum weight load. Indicates total weight of the equipment, including the safe working load WARNING: Connect Only Accessories and Peripherals Recommended by WARNING: Connect Only Fujifilm Sonosite Accessories and Peripherals Recommended by Sonosite Chapter 1: Introduction...
- Page 14 Chapter 1: Introduction...
-
Page 15: Specifications
Chapter 2: Specifications This chapter contains information regarding system specifications and accessory compatibility. The information applies to the ultrasound system, transducers, accessories, and peripherals. Specifications Dimensions System: • Length: 15.45 in. (39.25 cm) • Width: 13.32 in. (33.84 cm) • Height: 14.60 in. -
Page 16: Environmental Limits
500hPa to 1060hPa (0.5 to 1.05 ATM) Battery specifications The Sonosite PX system uses two lithium-ion batteries that are charged and controlled by the system. Run time is up to one hour depending on imaging mode and display brightness. This chapter contains electrical and clinical safety information required by regulatory agencies. - Page 17 Use only accessories and peripherals recommended by Fujifilm Sonosite, including the power supply. Connection of accessories and peripherals not recommended by Fujifilm Sonosite could result in electrical shock and system malfunction. Contact Fujifilm Sonosite or your local representative for a list of accessories and peripherals available from or recommended by Fujifilm Sonosite.
- Page 18 Chapter 2: Specifications...
-
Page 19: Safety
Chapter 3: Safety This chapter contains electrical and clinical safety information required by regulatory agencies. The information applies to the ultrasound system, transducers, accessories, and peripherals. Electrical safety This system meets EN60601-1, Class I/internally-powered equipment requirements and Type BF (transducers) isolated patient-applied parts safety requirements. This system complies with the applicable medical equipment requirements published in the Canadian Standards Association (CSA), European Norm Harmonized Standards, and Underwriters Laboratories (UL) safety standards. - Page 20 Do not use the system if an error message appears on the display monitor: Caution: note the error code; call Fujifilm Sonosite or your local representative; turn off the system by pressing and holding the power key until the system powers down.
-
Page 21: Electrical Safety Classification
Improper cleaning or disinfecting of any part of the system can cause Caution: permanent damage. For cleaning and disinfecting instructions, see the “Cleaning and Disinfecting” chapter in the Sonosite PX user guide. Caution: Do not submerge the transducer connector in solution. The cable is not liquid-tight beyond the transducer connector/cable interface. -
Page 22: Battery Safety
Do not continue recharging the battery if it does not recharge after two successive six hour charging cycles. Replace the battery. WARNING: Do not ship a damaged battery without instructions from Fujifilm Sonosite Technical Support. (See “Introduction” on page WARNING: If the battery leaks or emits an odor, remove it from all possible flammable sources. - Page 23 • If the battery emits an odor or heat, is deformed or discolored, or in any way appears abnormal during use, recharging or storage, immediately remove it and stop using it. If you have any questions about the battery, consult Fujifilm Sonosite or your local representative.
-
Page 24: Clinical Safety
MI and TI. WARNING: Fujifilm Sonosite does not currently recommend a specific brand of acoustic standoff. If an acoustic standoff is used, it must have a minimum attenuation of .3dB/cm/MHz. -
Page 25: Hazardous Materials
Hazardous materials WARNING: Products and accessories may contain hazardous materials. Ensure that products and accessories are disposed of in an environmentally responsible manner and meet federal and local regulations for disposing hazardous materials. Electromagnetic compatibility The ultrasound system has been tested and found to comply with the electromagnetic compatibility (EMC) limits for medical devices to IEC 60601-1-2:2014 (Edition 4). -
Page 26: Wireless Transmission
EMC performance. Wireless transmission The Sonosite PX ultrasound system contains an internal IEEE 802.11 transmitter that uses the Industrial, Scientific, and Medical (ISM) frequency bands from 2.412 to 2.484 GHz and/or 5.15 to 5.825 GHz. The transmitter supports the 802.11 a/b/g/n/ac wireless communication protocol (five different methods of... - Page 27 transmission): • IEEE 802.11a (5.150 to 5.850GHz) with Orthogonal Frequency Division Multiplexing (OFDM) at 13 dBm +/- 2 dBm @ 54 Mbps • IEEE 802.11ac (5.150 to 5.850GHz) with Orthogonal Frequency Division Multiplexing (OFDM) at 17 dBm +/- 2 dBm @ MCS 0 •...
-
Page 28: Electrostatic Discharge
WARNING:Portable RF communications equipment (including peripherals, such as antenna cables and external antennas) should be used no closer than 30 cm (12 inches) to any part of the Sonosite PX ultrasound system, including cables specified by the manufacturer. Otherwise, degradation of the performance of this equipment could result. - Page 29 For maximum performance, ensure that the system is used in the environments described in these tables. Guidance and Manufacturer’s Declaration - Electromagnetic Emissions per IEC 60601-1-2:2014 The Sonosite PX ultrasound system is intended for use in the electromagnetic environment specified below. Electromagnetic Environment...
- Page 30 Guidance and Manufacturer’s Declaration - Electromagnetic Immunity per IEC 60601-1-1-2:2014 The Sonosite PX ultrasound system is intended for use in the electromagnetic environment specified below. Immunity IEC 60601 Test Compliance Electromagnetic Test Level Level Environment Voltage dips, 0% U ) for 0.5 cycle 0% U ) for 0.5...
- Page 31 Guidance and Manufacturer’s Declaration - Electromagnetic Immunity per IEC 60601-1-1-2:2014 The Sonosite PX ultrasound system is intended for use in the electromagnetic environment specified below. Immunity IEC 60601 Test Compliance Electromagnetic Test Level Level Environment Radiated RF 3 V/m 3 V/m d = 1.2...
-
Page 32: Essential Performance Requirements
To assess the electromagnetic environment due to fixed RF transmitters, an electromagnetic site survey should be considered. If the measured field strength in the location in which the Fujifilm Sonosite ultrasound system is used exceeds the applicable RF compliance level above, the Fujifilm Sonosite ultrasound system should be observed to verify normal operation. -
Page 33: Emc Standards Classification
DICOM standard Digital Imaging and Communications in Medicine (DICOM), Version 3.1, 2007 (NEMA). The system conforms to the DICOM standard as specified in the Sonosite PX DICOM Conformance Statement, available at www.sonosite.com. This statement provides information about the purpose, characteristics, configuration, and specifications of the network connections supported by the system. -
Page 34: Managing Users On The System
• Audit Controls: Each user action associated with patient data will be tracked through ePHI audit logs, which are accessible to and should be routinely audited by the administrator. • De-identification: Use a de-identification option before exporting patient data to removable media used for system troubleshooting or repair. - Page 35 In the Remote server field, type the IP address of the remote server. In the Port field, type the port number of the directory. (Optional) If you want to encrypt the communication between the ultrasound system and the directory server, tap the checkbox next to Secured.
- Page 36 Chapter 3: Safety...
-
Page 37: System Overview
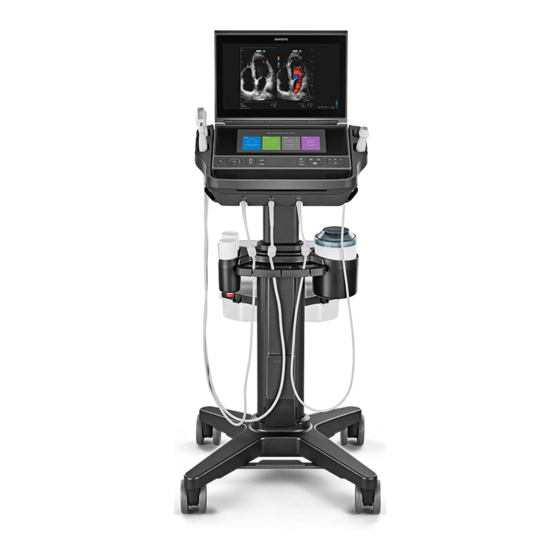
Chapter 4: System Overview About the System The Sonosite PX high-resolution ultrasound system is a portable, full featured, general purpose, software controlled, diagnostic ultrasound system using all digital architecture. The system is used to acquire and display high-resolution, real-time ultrasound data in 2D, M Mode, Pulsed Wave (PW) Doppler, Continuous Wave (CW) Doppler, Color Power Doppler (CPD), and color Doppler (Color) or in a combination of these modes. -
Page 38: Description Of Operating Modes
The Transducer elements convert the pulser voltage to acoustic energy during the transmit portion of the ultrasound acquisition cycle. The elements convert the acoustic echo to voltage in the receive portion of the acquisition. The voltage developed on the transducer elements is sensed by the acquisition subsystem. The system transducers have 64 to 256 elements. - Page 39 Color In color Doppler, a real-time, two-dimensional cross-section of blood flow is displayed. Doppler The 2D cross-section may be presented as a rectangle, parallelogram, trapezoid, (Color) sector, or a full circle, depending on the particular transducer used. The 2D cross-section is presented as a full color display, with various colors being used to represent the velocity, both positive and negative, of the blood flow echoes.
-
Page 40: Additional System Feature Performances
Pulsed Wave PW provides a real-time representation of blood flow and is displayed as a (PW) velocity-versus-time sweeping output. Velocity (or frequency) is presented as the Doppler vertical axis with time along the horizontal axis. The magnitude of the detected signal is represented as different gray scale values. -
Page 41: Front End Overview
Continuous Wave The system provides for audio output of the CW velocity information. This can Doppler Audio be presented as stereo information, with flow moving towards the transducer Output on one channel and flow away on the other, or as a mono output with the single audio output representing the summation of the flow directions. -
Page 42: Sonosite Px Overview
Main PCBA. A frequent reason for service returns in legacy systems is I/O port damage; in the Sonosite PX, these returns will be repairable by replacing a smaller, less expensive secondary board instead of the Main PCBA. -
Page 43: Main Pcba
PCBAs also eliminates the concern of tolerance stack between connectors. The Sonosite PX Portable System, is the main functional module of the Sonosite PX System, and contains the necessary hardware to produce an ultrasound image, which is shown on the Clinical Display. The Clinical Display is hinged to allow repositioning for easy viewing. -
Page 44: Power Supply Pcba
Audio Amplifier and output on two connectors to drive stereo speakers. A USB headphone will be used in the Sonosite PX system. When headphones are plugged in the operating system should disable the speaker output and enable the headphone output. -
Page 45: Clinical Display
Power Supply and Control The Sonosite PX ultrasound system utilizes one of two types of power supply arrangements depending on the mode used, which can be Desktop or Stand. The Desktop system uses a separate external power supply (EPS) unit. - Page 46 Chapter 4: System Overview...
-
Page 47: Troubleshooting
Note: If the system requires repair, certain steps must be taken to remove patient data from the system prior to return to Fujifilm Sonosite. To accomplish this, the patient data needs to be wiped from the system whenever possible (certain conditions may prevent this, such as a system that fails to power on). If unable to power on, the Patient Data Drive can be removed as shown in Figure 6.2 on page... -
Page 48: System And Subsystem Diagnosis
Test equipment is not required for this troubleshooting section. Assert(Failure) Codes The Sonosite PX system is capable of displaying an “assert screen-call for help” instructing the user to contact Sonosite Technical Support for hardware and software issues related to failures. PCB failures typically result in “assert codes”... -
Page 49: Verifying A System Assert Code
If an assert screen appears, note the assert code information and contact Fujifilm Sonosite Technical Support to clarify the fault or failure. Refer to Figure 5.1 for how this assert screen will be displayed and the information Technical Support will be asking for from this screen. -
Page 50: Dicom
21196 Main PCBA Replace Main PCBA ComE failure Replace ComE Note: Assert Code Table will be updated in future Sonosite PX Service Manual revisions DICOM Table 5.3: DICOM Troubleshooting Error Message Tiller Error Code Possible Cause Troubleshooting... -
Page 51: Clinical Display
Image settings. failed E.g., Color (RGB) or Grayscale (Monochrome) DICOM TDNETWORK_OPEN_FAILU Device does not Verify that Sonosite PX AE Title network recognize or IP address is correctly communication Sonosite PX, configured on the failed rejects Printer/Archiver. -
Page 52: Battery
Battery Table 5.5: Battery Charging Top Blue LED on User Interface Normal Operation Conditions back of Display Blue LED Connected to AC, no batteries same Connected to AC, system off, batteries see below see below charging Connected to AC, batteries fully charged same Connected to AC, batteries up to 25% one long flash... -
Page 53: No Power
Table 5.7: User Interface Troubleshooting Symptom Possible Causes User Interface is black or not functional Check the connections between the User Interface and Main PCBA. If the connections are good, the issue could be the User Interface or the ComE. Persistent Controls not functional Check the connections to the Main PCBA. - Page 54 Chapter 5: Troubleshooting...
-
Page 55: Replacement Procedures
• Wrist grounding strap Remove Batteries Remove the batteries and disconnect DC power before servicing the Sonosite PX. Any action taken in this chapter assumes this as the first step. Place the system on its top so the serial number label is facing up. -
Page 56: Patient Data Drive Removal
User Interface Replacement Required Parts • P24503-XX Service Assembly, User Interface, Sonosite PX • P29064-01N Service Assembly, User Interface, Sonosite PX, International Remove User Interface Place the system on its top so the serial number label is facing up. Use a T10 bit to remove the 14 screws indicated. Refer to Figure 6.3 on page 49... - Page 57 Figure 6.3 System Bottom View Figure 6.4 System Top View Remove the Front Panel Enclosure by lifting slightly on the front edge of the user interface. The Front Panel Enclosure will come out easily. Refer to Figure 6.5 on page 50 Chapter 6: Replacement Procedures...
- Page 58 Figure 6.5 Front Panel Enclosure Lift the User Interface from the system as shown in Figure 6.6 on page 50 Caution:Do not lift the User Interface from the front. Two tabs on the back of the UI sit in recesses in the Bottom Enclosure and this may break the tabs on the UI.
-
Page 59: Install User Interface
Figure on page Clinical Display Replacement Required Parts • P24504-XX Service Assembly, Clinical Display, Sonosite PX Remove Clinical Display Remove the User Interface as shown above. Place the system upright with the back facing toward you. Remove the WiFi Dongle by pressing on the right side to release. - Page 60 Remove Rear Enclosure by gently prying with a small screwdriver or equivalent at the two locations indicated in Figure 6.8 on page 52. Apply pressure to move the Rear Enclosure in a downward direction. This will free it from being retained by the Display hinges. Once the two locations are free.
- Page 61 Wifi Dongle cable and EMI Shield Display Cable and EMI shield Figure 6.9 Rear EMI Shields Remove 2 screws from each hinge Clinical Display Cable Figure 6.10 Clinical Display Removal Chapter 6: Replacement Procedures...
-
Page 62: Install Clinical Display
Center Hinge Tube Right Hinge Tube Left Hinge Tube Figure 6.11 Display Hinge Tubes Install Clinical Display Install the left and right Hinge Tubes on new Clinical Display per Figure 6.11 on page Install the center Hinge Tube. Carefully feed the Clinical Display cable through the Bottom Enclosure shown in Figure 6.9 on page Place the Clinical Display on top of Bottom Enclosure and line the hinges up with the screw holes per Figure 6.10 on page... -
Page 63: Main System Disassembly For Repair And/Or Replacement
• Torx bits, T6, T8, T10, T20 and T30 • Torque screwdriver, 1.0-10.0 inch pounds (0.23-1.1 Newton meter) • Torque screwdriver, 10.0-25.0 inch pounds (1.1-2.8 Newton meter) • Tool, Power in, Sonosite PX (only required for Power in Aux PCBA) • Small regular screwdriver • #2 Phillips screwdriver •... - Page 64 Power Button USB Aux Board with ECG PCBA Rear (Large) fan bank Power SHIF PCBA PCBA wire bundle Patient data drive location Right Speaker Left Wire Speaker Wire Front (Small) fan bank Not shown: Power Supply PCBA, Main PCBA Dock Interface PCBA and Scanhead Interface (SHIF) PCBA, ComE PCBA Figure 6.12 System Components...
-
Page 65: Install Speaker
Speaker with Gasket Figure 6.14 Speaker Installation USB Aux Board Replacement Required Part • P24915-XX Service Assembly, USB AUX Board PCBA, Sonosite PX Remove USB Aux Board Disconnect USB Aux Board from Main PCBA per Figure 6.15 on page 58 Use a T10 bit to remove the two screws securing the USB Aux Board. -
Page 66: Power Button With Ecg Pcba Replacement
Figure 6.15 USB AUX Board Power Button with ECG PCBA Replacement Required Part • P27479-XX Service Assembly, Power Button with ECG PCBA, Sonosite PX Remove Power Button with ECG PCBA Remove screw from the ECG Flex Interconnect Cable using a T8 bit per Figure 6.16 on page 58... -
Page 67: Install Power Button With Ecg Pcba
Power In Aux Board PCBA Replacement Required Part • P24915-XX Service Assembly, Power In Aux Board PCBA, Sonosite PX Remove Power In Aux Board PCBA Remove the ECG Flex Interconnect Cable from the system as shown in previous section per Figure 6.16 on page... -
Page 68: Install Power In Aux Board Pcba
Install screw and tighten with a T8 bit to 5.5 inch pounds. Main PCBA Replacement Required Part • P26956-XX Service Assembly, Main PCBA, Sonosite PX Remove Main PCBA Note: This procedure will also remove the ComE PCBA and Power Supply PCBA. Their removal will be a part of this process. -
Page 69: Power Supply Pcba Replacement
WiFi Dongle USB Aux AB Cable connector Cable SHIF to Main Board Power Cable SHIF to Dock to Main Board Main Connectors Board Cable Right Speaker Left Connector Speaker Connect This location does not Fan Connectors x10 include a Spring Clip Screw Locations x10 Figure 6.19 Main PCBA Removal 11 The Main PCBA is now free for removal. -
Page 70: Install Power Supply Pcba
Remove 7 Screws Figure 6.20 Power Supply PCBA Install Power Supply PCBA Place Power Supply PCBA onto Main PCBA. Make sure connectors are aligned and press into place Figure 6.21 on page Use a T10 bit to install 7 screws and tighten to 5.5. inch pounds. Ensure connectors align properly... -
Page 71: Required Part
Required Part • P27411-XX Service Assembly, ComE PCBA Remove ComE PCBA Use a T8 bit to remove the 4 screws securing the ComE PCBA to the Main PCBA Gently lift the ComE PCBA using a slight “rocking motion” to release the connections Remove 4 screws Figure 6.22 ComE PCBA removal Install ComE PCBA... -
Page 72: Install Main Pcba
Install Main PCBA Install the Main PCBA into the Bottom Enclosure. Align the cut-outs over the grommets on the mounting stand-offs and lower into place. It will be necessary to move wires and cabling to keep them out of the way as the board assembly is put into place. -
Page 73: Remove Dock Pcba
Remove Dock PCBA Remove the Main PCBA per “Main PCBA Replacement” on page 60. Use a T30 bit to remove the 2 Dock Alignment pins per Figure 6.25 on page 65 Use a T8 bit to remove the 7 screws. The Dock PCBA is free to remove. -
Page 74: Install Shif Pcba
Pull up on the Ferrite and remove it from the SHIF connectors by feeding them through one by one per Figure 6.26 on page Use a T8 bit to remove the two screws securing the SHIF Cable Retainer. Turn the system over with the bottom facing up. Use a T10 bit to remove the 4 screws securing the Interposer Assembly. -
Page 75: Nest Frame Replacement
Nest Frame Replacement Required Part • P21601 Interposer Assembly Remove Interposer Assembly Place the system top down with the bottom facing up Use a T8 bit to remove the 4 screws securing the Interposer Assembly per Figure 6.26 on page Remove the Interposer Assembly. -
Page 76: Stand Head Replacement
Figure 6.27 Fan Assembly Stand Head Replacement Remove Stand Head Remove the Sonosite PX from the Stand Head. Remove the stand power supply connection from the back of the Stand Head per Figure 6.28 on page 69 Use a #1 Phillips screwdriver to remove two screws from the column cover and remove. It will still be connected to the power cable. -
Page 77: Optional Equipment - Stand System
The Sony UP-X898MD thermal printer is a monochrome black and white printer which uses the USB 2.0 port to integrate with the Sonosite PX Stand. This is an optional device. The following instructions are for any replacement needs if the Sony UP-X898MD has to be replaced. -
Page 78: Install Printer
Install Printer Install the Printer by following the prior removal steps 1-5 in reverse order. Figure 6.29 Printer Replacement Chapter 6: Replacement Procedures... - Page 79 Chapter 6: Replacement Procedures...
- Page 80 Chapter 6: Replacement Procedures...
-
Page 81: Maintenance
Please refer to Warnings, Cautions, and Step by Step procedures outlined in the “Cleaning and Disinfecting chapter” in the Sonosite PX user guide (P21894). For a current list of compatible cleaners and disinfectants, visit the cleaners and disinfectants tool on www.sonosite.com... - Page 82 Chapter 7: Maintenance...
-
Page 83: Performance Testing
To obtain 2D images, Fujifilm Sonosite recommends using the Gammex 403GS Soft Tissue Phantom or the Gammex 413A Multipurpose Phantom. A .7db/cm phantom is recommend but not required. -
Page 84: Basic Operational Tests
Basic Operational Tests Basic System Verify that the correct transducer name appears in the upper right corner of the system Operation display. Tests Verify proper date and time. Verify that the scan plane orientation mark in the image located near the skinline corresponds to element #1 on the transducer. -
Page 85: Axial Measurement Accuracy
Axial Measurement Accuracy Note: Measurements must be performed while the image is frozen. Set Up Axial Acquire the image. Measurement Press the Freeze button. Accuracy Press the Caliper button. The caliper appears on the image display. (See the Sonosite PX Ultrasound System User Guide, if necessary, for caliper operation.) Use the touchpad to position one of the calipers. -
Page 86: Penetration
Penetration The penetration measurement is an integral part of the quality assurance program. Penetration is defined as the deepest depth at which an ultrasound system can provide adequate image quality of small anatomical structures. Penetration measurements should be performed and the results retained for comparison to future measurements. -
Page 87: Color Power Doppler (Cpd)
Color Power Doppler (CPD) Test CPD Connect any transducer. Press the Color button. A Region of Interest (ROI) box is displayed on top of the grayscale image. Press the Color type softkey to switch to CPD. “CPD” should be annotated in the lower right corner of the display. -
Page 88: Pulsed Wave (Pw) Doppler Imaging
Pulsed Wave (PW) Doppler Imaging Test PW Attach the P5-1 transducer. Doppler Press the Doppler button for the Doppler sample gate. Imaging Press the Doppler button again for the Doppler spectral trace. Place a large drop of ultrasound gel on the transducer lens. Adjust the Gain control as necessary and then gently tap the top of the gel and observe a reflection on the spectral trace and the sound from the speakers. -
Page 89: Printer
Printer The printer test is an optional test that requires the Sony UP-X898MD USB Black & White Printer (P20006) to be connected to the system under test. Skip this test if a printer is not available. Test Printer Press the print button and verify that the printer begins to print an image. Operation Verify the proper content of the printed image. - Page 90 Chapter 8: Performance Testing...
-
Page 91: Replacement Parts
Appendix A: Replacement Parts The following tables contain all the field-replaceable parts for the Sonosite PX ultrasound system. Quantities are one unless otherwise noted. Please refer to Figure A.1 on page 83 to identify the major components of the Sonosite PX. -
Page 92: Clinical Monitor
Clinical Monitor Figure A.2 Clinical Monitor Display Table A.1: Clinical Monitor Display Part Number Description P24504-XX Service Assembly, Display, Sonosite PX Table A.2: Clinical Monitor Display Associated Hardware Part Number Quantity Description P16667 SCREW,FLAT,6 LOBE,M4-0.7X10MM Appendix A: Replacement Parts... -
Page 93: User Interface
Figure A.3 User Interface Table A.3: User Interface Part Number Description P24503-XX Service Assembly, User Interface, Sonosite PX P29064-XX Service Assembly, User Interface, Sonosite PX, International Table A.4: User Interface Associated Hardware Part Number Quantity Description P24931 Main to Persistent Control Flex Cable... -
Page 94: Persistent Controls
Persistent Controls “ Figure A.4 Persistent Controls Table A.5: Persistent Controls Part Number Description P23160-XX Service Assembly, Persistent Controls Assembly, Sonosite PX P27041-XX Service Assembly, Persistent Controls Assembly, Sonosite PX, International Table A.6: Persistent Controls Associated Hardware Part Number Quantity... -
Page 95: Main Pcba
Main PCBA Figure A.5 Main PCBA Table A.7: Main PCBA Part Number Description P26956-XX Service Assembly, Main PCBA, Sonosite PX Table A.8: Main PCBA Associated Hardware Part Number Quantity Description P26599 Screw, 6 Lobe, M2.5-0.45x5MM P24968 Spring Clip P24967 Flat Washer... -
Page 96: Come
ComE Figure A.6 ComE Table A.9: ComE Part Number Description P27411-XX Service Assembly, ComE, I5 With Heat Spreader, Sonosite PX Table A.10: ComE Associated Hardware Part Number Quantity Description P24945 SCREW,PAN,6 LOBE,M2.5-0.45X5MM Appendix A: Replacement Parts... -
Page 97: Power Supply Pcba
Power Supply PCBA Figure A.7 Power Supply PCBA Table A.11: Power Supply PCBA Part Number Description P24174-XX Service Assembly, Power Supply, Sonosite PX Table A.12: Power Supply PCBA Associated Hardware Part Number Quantity Description P25951 SCREW,TRUSS,6 LOBE,M3-0.5X18MM Appendix A: Replacement Parts... -
Page 98: Power In Aux Board Pcba
Figure A.8 Power In Aux Board PCBA Table A.13: Power In Aux Board PCBA Part Number Description P24915-XX Service Assembly, Power in Aux Board PCBA, Sonosite PX Table A.14: Power In Aux PCBA Associated Hardware Part Number Quantity Description P27078... -
Page 99: Usb Aux Board Pcba
USB Aux Board PCBA Figure A.10 USB Aux Board PCBA Table A.17: USB Aux Board PCBA Part Number Description P24939-XX Service Assembly, USB Aux Board PCBA, Sonosite PX Table A.18: USB Aux Board PCBA Associated Hardware Part Number Quantity Description P25992 SCREW,FLAT,6 LOBE,M3-0.5X6MM... -
Page 100: System Dock Pcba
SHIF PCBA, Sonosite PX System Dock PCBA Figure A.12 System Dock PCBA Table A.20: System Dock PCBA Part Number Description P25394-XX Service Assembly, System Dock PCBA, Sonosite PX Table A.21: System Dock PCBA Associated Hardware Part Number Quantity Description P25945 SCREW,PAN,6 LOBE,M2.5-0.45X5MM Optional Equipment Sony UP-X898MD B&W Printer... -
Page 101: Ordering Replacement Parts
Sony UP-X898MD B&W Hybrid Graphic Printer P27276 Screw, Hex, M6-1.0X12MM, Steel (x4) P27577 Cable, USB A to B P27599 Cable, AC Power Ordering Replacement Parts To order parts, contact Fujifilm Sonosite Technical Support as indicated in “Contact Information” on page Appendix A: Replacement Parts... - Page 102 Appendix A: Replacement Parts...
-
Page 103: Service Event Reporting
The Service Event Report provides information about product failures to the manufacturer and to authorized service facilities, which provide approved warranty services for Fujifilm Sonosite products. For all repairs completed, complete the form and email a copy of it to ffss-service@fujifilm.com or mail to the following address: Fujifilm Sonosite, Inc. -
Page 104: Service Event Report Form
Service Event Report Form Service Event Report Choose a Service Type Choose a Part Status Instructions on reverse Service Type Parts Status For SonoSite Use O (check one) (check one) No parts necessary for this repair. Service Out of Box Failure Service Request Event Report for your information. -
Page 105: Service Event Report Instructions
Service Event Report Instructions Instructions for completing the Service Event Report Sections highlighted in yellow must be completed for SonoSite to accept the Service Event Report. If additional information is required for certain circumstances you will be advised. Forward the completed form to: Email: service@sonosite.com Fax: +1-425-951-6700 Service Type... -
Page 106: Returning Products To Fujifilm Sonosite
• Serial number • Description of the problem Shipping Instructions Please contact Fujifilm Sonosite to get a return material authorization number (RMA). Contact Fujifilm Sonosite before returning any product. The shipping address for all returned products is: Fujifilm Sonosite, Inc. - Page 107 INDEX Numerics 2D performance tests axial measurement accuracy image quality lateral measurement accuracy penetration Accessories assert code assistance, customer Axial battery safety specifications Battery removal Battery Troubleshooting cautions, definition Clinical safety Contact Information Create user account DICOM Troubleshooting electrical safety specifications Electrical Specifications electromagnetic compatibility...
- Page 108 Patient Data Drive Removal Patient Data Wipe performance tests M-Mode overview printer Velocity Color periodic maintenance pressure limits printer test Product Failures replacement parts list ordering Return Material Authorization number (RMA) Returning Products safety electrical electromagnetic compatibility equipment Security and privacy Service Event Report Shipping Instructions shipping specifications...
- Page 110 P25393-01 *P25393-01*...
Need help?
Do you have a question about the Sonosite PX and is the answer not in the manual?
Questions and answers