Chapters
Troubleshooting

Related Manuals for FujiFilm EB-530US


Summary of Contents for FujiFilm EB-530US
- Page 1 English フジノン和文 Ultrasonic Endoscope EB-530US OPERATION MANUAL (Preparation and Operation) Thank you for purchasing our product. Read this manual carefully before use to avoid unexpected accidents, and take full advantage of the product's capabilities.
-
Page 2: Important Safety Information
Important Safety Information Important Safety Information For the USA Market - CAUTION: Federal law restricts this device to sale by or on the order of a physician. 1. Intended Use This product is a medical Ultrasonic Endoscope to be used under the control of doctors in medical facilities for the observation, diagnosis and medical treatment of tracheae and bronchi, as well as the inspection of tracheae, bronchi and adjacent organs, using ultrasonic imaging. - Page 3 Important Safety Information 6. Treatment with Electrosurgical Instruments This product cannot be used with an electrosurgical instrument for treatment. 7. About Latex Allergy This product is used with a product that contains natural rubber as a material. Natural rubber may rarely cause allergy symptoms, such as itching, reddening, hives, swelling, fever, dyspnea, asthma-like symptoms, drop of blood pressure and shock.
-
Page 4: Table Of Contents
Contents Contents (Preparation and Operation) Important Safety Information ..................2 Preface .........................6 Conventions Used in This Manual ................6 Chapter 1 Safety ....................1-1 Chapter 2 Composition of Set and System Configuration ........2-1 2.1 Composition of Set ..............2-2 2.2 System Configuration ..............2-4 Chapter 3 Names and Functions of Parts ............. - Page 5 Contents Chapter 6 Method of Use ..................6-1 6.1 Preparation.................. 6-2 6.2 Insertion and Observation ............6-3 6.3 How to Use Balloon ..............6-8 6.4 Biopsy ..................6-9 6.5 Puncture ..................6-12 6.6 Pulling Out Ultrasonic Endoscope ........... 6-16 6.7 Pre-Cleaning (performed at bedside immediately after use of Ultrasonic Endoscope) .............
-
Page 6: Preface
Preface Preface This manual describes how to use EB-530US. Conventions Used in This Manual This manual uses the following conventions to make it easy to understand operations. General Conventions Convention Meaning Indicates a potential danger that may cause harm to people. -
Page 7: Chapter 1 Safety
Chapter 1 Safety This chapter summarizes the information necessary for safe use of Ultrasonic Endoscope. - Page 8 Chapter 1 Safety Chapter 1 Safety 1. Precautions in Using Ultrasonic Endoscope 1) Applicable processor and light source This product may be used in the following combinations: • Processor VP-4450HD, light source XL-4450 and ultrasonic processor SU-8000 • Processor VP-4400, light source XL-4400 and ultrasonic processor SU-8000 •...
- Page 9 Chapter 1 Safety 6) Preparation for operation Use a high-frequency surgical instrument and an Endoscope which can be used with a high-frequency surgical instrument to provide proper emergency treatment, in cases of bleeding. 7) Abnormality in use If any abnormality is noticed during use, carry out safety checks and discontinue use immediately.
- Page 10 Chapter 1 Safety 12) Temperature at distal end When the Ultrasonic Endoscope projects light at high brightness and transmission of ultrasonic waves for a long time, the temperature may exceed 41°C at the distal end. Turn off the lamp and stop transmission of ultrasonic waves (Freeze the ultrasonic processor) when you hang the Ultrasonic Endoscope on the cart hanger.
- Page 11 Chapter 1 Safety 3. Disposal This product has heavy metal parts. When disposing of this product, comply with local laws and regulations in your area. Determine whether or not the product is to be treated as infective waste, depending on the usage state. 4.
- Page 12 Chapter 1 Safety 5.8 Inspection of Puncture Needle Do not use the puncture needle with an abnormally bent or deformed needle. There is a risk of bleeding or wrong puncturing. Chapter 6 Method of Use Do not use force during insertion or withdrawal of the Ultrasonic Endoscope. Slowly advance the instrument under direct visualization.
- Page 13 Chapter 1 Safety 6.4 Biopsy Do not press forceps against the trachea or broncho wall with undue force. It may cause perforation or bleeding. Do not insert the forceps if you cannot obtain a endoscopic image. Do not insert the forceps into the Ultrasonic Endoscope if you cannot see the forceps outlet on the endoscopic image.
- Page 14 Chapter 1 Safety Chapter 8 Chemical Disinfection 8.1 Methods of Chemical Disinfection Be sure to clean and disinfect or otherwise sterilize all the channels after every case, regardless of whether used or not. Remove the balloon before cleaning, disinfecting or sterilizing the Ultrasonic Endoscope.
-
Page 15: Chapter 2 Composition Of Set And System Configuration
Chapter 2 Composition of Set and System Configuration This chapter describes the composition of Ultrasonic Endoscope set and system configuration. 2.1 Composition of Set ............2-2 2.2 System Configuration ...........2-4 2.2.1 Combination with VP-4450HD or VP-4400 and SU-8000 ............2-4 2.2.2 Combination with VP-4400 and SU-7000 ..2-6 2.2.3 Combination with EPX-2500 system and SU-8000 ............2-8 2.2.4 Combination with EPX-2500 system and... -
Page 16: Composition Of Set
Chapter 2 Composition of Set and System Configuration Chapter 2 Composition of Set and System Configuration Composition of Set The Ultrasonic Endoscope set is provided in a carrying case. The set consists of the following items. [Note] Figures in parentheses indicate quantities. Ventilation Adapter AD-7 (1) Carrying Case (1) - Page 17 Chapter 2 Composition of Set and System Configuration Operation Manual Cleaning Brush (for Valve) Preparation and Operation (1) WB11002FW2 (1) Cleaning, Disinfection and Storage (1) Ultrasonic Endoscope (1) Suction Button SB-500B/D (20) Forceps Inlet Cleaning Adapter (with a Cap) US Waterproof Cap WA-003 (1) WA-7000 (1) Tube for Suction Channel...
-
Page 18: System Configuration
Chapter 2 Composition of Set and System Configuration System Configuration You may use the EB-530US with various peripherals attached to it. These peripherals are available separately. Extension makes the following possible. • Recording of video images • Printer output 2.2.1... - Page 19 Chapter 2 Composition of Set and System Configuration [Note] For details on the connections of peripherals other than those listed here, please contact your local dealer. Monitor CDL1576A CDL1909A RADIANCE24 (NDS) Keyboard CP-8000 Foot Switch Monitor CDL1576A CDL1909A [Note] RADIANCE24 (NDS) [Note] Only when using the VP-4450HD Printer UP-51MD (SONY)
- Page 20 Chapter 2 Composition of Set and System Configuration 2.2.2 Combination with VP-4400 and SU-7000 Ultrasonic Processor SU-7000 Ultrasonic Endoscope EB-530US Light Source XL-4400 Processor VP-4400 Balloon Foot Switch Endoscopic Accessory Data Keyboard DK-4400E Airtightness Tester LT-7 Cart...
- Page 21 Chapter 2 Composition of Set and System Configuration [Note] For details on the connections of peripherals other than those listed here, please contact your local dealer. Monitor CDL1576A Keyboard CP-7000 Foot Switch Monitor CDL1576A CDL1909A Printer UP-51MD (SONY) UP-55MD (SONY) UP-21MD (SONY) CP900UM(120W) (MITSUBISHI) CP900DW (MITSUBISHI)
- Page 22 Chapter 2 Composition of Set and System Configuration 2.2.3 Combination with EPX-2500 system and SU-8000 Ultrasonic Processor SU-8000 Ultrasonic Endoscope EB-530US Processor EPX-2500 Balloon Foot Switch Endoscopic Accessory Data Keyboard DK-2500 Cart Airtightness Tester LT-7...
- Page 23 Chapter 2 Composition of Set and System Configuration [Note] For details on the connections of peripherals other than those listed here, please contact your local dealer. Monitor CDL1576A CDL1909A RADIANCE24 (NDS) Keyboard CP-8000 Foot Switch Monitor CDL1576A CDL1909A Video Printer UP-21MD (SONY) UP-55MD (SONY) CP900UM (MITSUBISHI)
- Page 24 Chapter 2 Composition of Set and System Configuration 2.2.4 Combination with EPX-2500 system and SU-7000 Ultrasonic Processor SU-7000 Ultrasonic Endoscope EB-530US Processor EPX-2500 Balloon Foot Switch Endoscopic Accessory Data Keyboard DK-2500 Cart Airtightness Tester LT-7 2-10...
- Page 25 Chapter 2 Composition of Set and System Configuration [Note] For details on the connections of peripherals other than those listed here, please contact your local dealer. Monitor CDL1576A Keyboard CP-7000 Foot Switch Monitor CDL1576A CDL1909A Video Printer UP-21MD (SONY) UP-55MD (SONY) CP900UM (MITSUBISHI) 2-11...
- Page 26 Chapter 2 Composition of Set and System Configuration 2-12...
- Page 27 Chapter 3 Names and Functions of Parts This chapter describes the names and functions of Ultrasonic Endoscope parts as well as the composition of the main body. 3.1 Ultrasonic Endoscope ...........3-2 3.2 Distal End of Ultrasonic Endoscope ......3-5 3.3 Ultrasonic Image ............3-6 3.4 Balloon Installation Tool ..........3-6...
-
Page 28: Chapter 3 Names And Functions Of Parts
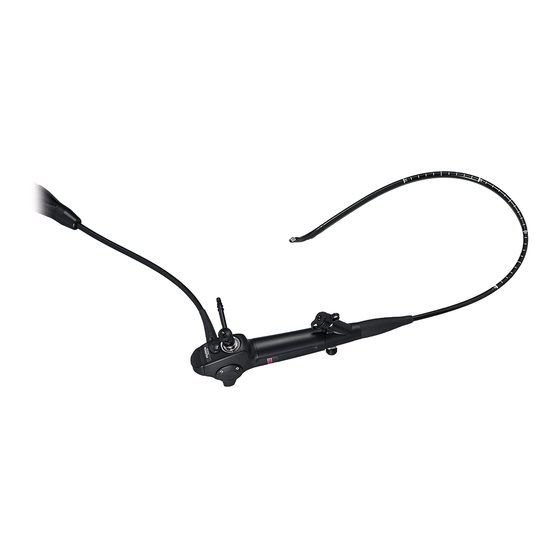
Chapter 3 Names and Functions of Parts Chapter 3 Names and Functions of Parts Ultrasonic Endoscope The EB-530US consists of the following parts. LG flexible portion Contains light guide and cables. Suction button Allows suction through forceps outlet in distal end of Ultrasonic Endoscope. - Page 29 Chapter 3 Names and Functions of Parts Waterproof cap Prevent water from remaining on electric contact. EVE connector This connector connects to the EVE connector socket on the processor. LG connector This connector connects to the scope socket on the light source. Lock handle Label Locks the connection...
- Page 30 Chapter 3 Names and Functions of Parts <Indication Marks> Symbols Location Meanings LG connector Type BF applied part US connector LG connector Date of manufacture LG connector Serial number LG connector CE marking LG connector WEEE marking US connector Consult accompanying documents US connector Degree of waterproof LG connector...
-
Page 31: Distal End Of Ultrasonic Endoscope
Chapter 3 Names and Functions of Parts Distal End of Ultrasonic Endoscope The distal end of EB-530US consists of the following parts. Objective lens This lens forms an endoscopic image on the CCD. Forceps outlet The forceps, puncture needle and treatment equipment emerge from here. -
Page 32: Ultrasonic Image
Chapter 3 Names and Functions of Parts Ultrasonic Image This section describes the functions specific to this Ultrasonic Endoscope. The figure below shows a rough image of an ultrasonic image. Puncture guiding line The needle mark is used as a guide for the direction of insertion of the puncture needle. - Page 33 Chapter 4 Control Portion The control portion contains the angle lever for operating the bending mechanism and suction value, etc. This chapter describes the operations and functions of these parts. 4.1 How to Operate Bending Mechanism ......4-2 4.2 Suction Valve, Forceps Inlet and Water Feed Inlet ..4-3 4.3 Remote Operating Switches .........4-4 4.4 Forceps Valve ...............4-5 4.5 Suction Button ..............4-6...
-
Page 34: Chapter 4 Control Portion
Chapter 4 Control Portion Chapter 4 Control Portion How to Operate Bending Mechanism Angle lever To bend the bending portion upward and downward. When the angle lever is slanted toward A side, the bending portion is bent upward (A direction). When the angle lever is slanted toward B side, the bending portion is bent downward (B direction). -
Page 35: Suction Valve, Forceps Inlet And Water Feed Inlet
Chapter 4 Control Portion Suction Valve, Forceps Inlet and Water Feed Inlet Suction Valve Suction button is attached. Forceps Inlet Opening for passing through endoscopic accessory. Normally, the forceps valve is attached. Balloon Water Feed Inlet Feeds/discharges water to/from a balloon when the balloon is attached. -
Page 36: Remote Operating Switches
Chapter 4 Control Portion Remote Operating Switches Recording Switch This is the remote switch for capturing image for a video printer. This switch can be manipulated to capture images even while freezing an image with the freeze switch activated. Freeze Switch This is the remote switch for still image and the capture. -
Page 37: 4.4 Forceps Valve
Chapter 4 Control Portion 4.4 Forceps Valve The forceps valve consists of a valve body and a lid. It performs the function of preventing the leak or flowback of air. Valve Body The valve body is a part that reduces the leakage or backflow of air when an accessory is used. -
Page 38: Suction Button
Chapter 4 Control Portion Suction Button Suction button is attached in the suction valve. Allows suction through forceps outlet in distal end of Ultrasonic Endoscope. Suction button SB-500B/D has not been sterilized. When using the suction button SB-500B/D, carry out cleaning and sterilization. Suction Button Suction is activated while this button is depressed. - Page 39 Chapter 5 Preparation for Use of Ultrasonic Endoscope This chapter describes the system necessary for endoscopy. 5.1 Preparing Equipment ............5-2 5.2 Preparing Suction Button ..........5-4 5.3 Preparing Forceps Valve ..........5-5 5.3.1 Method of Cleaning, Disinfecting and Sterilizing Forceps Valve ...........5-5 5.4 Connecting Ultrasonic Endoscope (Installation) ..5-7 5.5 Inspection of Ultrasonic Endoscope ......5-11 5.5.1 Inspecting Insertion Portion ......5-11...
-
Page 40: Chapter 5 Preparation For Use Of Ultrasonic Endoscope
Chapter 5 Preparation for Use of Ultrasonic Endoscope Chapter 5 Preparation for Use of Ultrasonic Endoscope CAUTION Do not use the abnormal equipment. The use of abnormal equipment will cause wrong diagnosis or injury. Preparing Equipment (1) Move the cart with the processor to the place where the Ultrasonic Endoscope is to be used. - Page 41 Chapter 5 Preparation for Use of Ultrasonic Endoscope (3) Mount the suction bottle on the suction unit. (4) Prepare an electrosurgical instrument and the applicable Endoscope for unexpected bleeding.
-
Page 42: Preparing Suction Button
Chapter 5 Preparation for Use of Ultrasonic Endoscope Preparing Suction Button The suction button is a single-use product. Prepare a new suction button before use. The suction button SB-500B/D has not been sterilized. Perform cleaning and sterilization before use according to the following procedure. For operational methods of the ultrasonic cleaning unit/autoclaving unit, please follow the instructions described in each operation manual for the respective unit. -
Page 43: Preparing Forceps Valve
Chapter 5 Preparation for Use of Ultrasonic Endoscope Preparing Forceps Valve The forceps valve is a single-use product. Prepare a new forceps valve before use. The forceps valve has not been sterilized. Perform cleaning and disinfection or sterilization before use according to the following procedure. For operational methods of the ultrasonic cleaning unit/autoclaving unit, please follow the instructions described in each operation manual for the respective units. - Page 44 Chapter 5 Preparation for Use of Ultrasonic Endoscope <Chemical disinfection> (1) Immerse the forceps valve in disinfectant and disinfect. [Note] When performing disinfection using chemicals, follow the conditions indicated in Appendix “Chemicals and Conditions” attached to the cleaning, disinfection and storage section.
-
Page 45: Connecting Ultrasonic Endoscope (Installation)
Chapter 5 Preparation for Use of Ultrasonic Endoscope Connecting Ultrasonic Endoscope (Installation) CAUTION Do not touch the LG connector tip until it cools down (approximately 5 minutes). Touching the LG connector with hands immediately after use of the Endoscope may cause a burn injury. <Combination with the VP-4400 and XL-4400 or VP-4450HD and XL-4450>... - Page 46 Chapter 5 Preparation for Use of Ultrasonic Endoscope (4) Attach the forceps valve and the suction button. Use the level of disinfection or sterilization suitable to the application before using the forceps valve and suction button. Set the direction of the suction connector at the “ ”...
- Page 47 Chapter 5 Preparation for Use of Ultrasonic Endoscope (7) Connect the US connector to the Ultrasonic Endoscope connector of the ultrasonic processor. Turn the lock handle of the US connector clockwise to lock the connector. <Combination with the EPX-2500 system> (1) Insert the LG connector of the Ultrasonic Endoscope into the Endoscope socket on the processor.
- Page 48 Chapter 5 Preparation for Use of Ultrasonic Endoscope (4) Connect the suction tube between the suction unit and suction connector portion of the Ultrasonic Endoscope. [Note] Firmly connect the suction connector portion with the suction tube to prevent any leaking. CAUTION Set a suction pressure at 53kPa or less.
-
Page 49: Inspection Of Ultrasonic Endoscope
Chapter 5 Preparation for Use of Ultrasonic Endoscope Inspection of Ultrasonic Endoscope 5.5.1 Inspecting Insertion Portion (1) Visually check the insertion portion (distal end, bending portion and flexible portion) for abnormalities such as flaws or dents and for sharp edges on protrusions that may injure the patient. -
Page 50: Inspecting Bending Mechanism
Chapter 5 Preparation for Use of Ultrasonic Endoscope 5.5.2 Inspecting Bending Mechanism (1) Turn the angle lever upward and downward until it stops. Check that the bending portion moves smoothly. (2) Check that when the angle lever is released in bent state, the bending portion unbends a little. -
Page 51: Inspecting Suction, Water Feed And Forceps
Chapter 5 Preparation for Use of Ultrasonic Endoscope 5.5.3 Inspecting Suction, Water Feed and Forceps Channel WARNING Firmly attach the forceps valve to the forceps inlet of the Ultrasonic Endoscope. There is a risk of infection. (1) Switch on the power to the suction unit, cart and processor and light source. - Page 52 Chapter 5 Preparation for Use of Ultrasonic Endoscope (4) Insert the forceps from the forceps inlet and check that their tips come smoothly out of the forceps outlet in the distal end of Ultrasonic Endoscope. (5) Use the syringe to feed water from the balloon water feed inlet, and then check if water is discharged from the balloon water feed outlet at the distal end of Ultrasonic Endoscope.
-
Page 53: Inspection Of Distal End Of Ultrasonic Endoscope
Chapter 5 Preparation for Use of Ultrasonic Endoscope 5.5.4 Inspection of Distal End of Ultrasonic Endoscope, US Connector and Cable (1) Turn the power on by pressing the standby switch on the ultrasonic processor or on the keyboard. Turn the power on by pressing the STANDBY switch on the front side of the ultrasonic processor or STANDBY key on the left hand side of the keyboard. -
Page 54: Inspecting Objective Lens And Light Guide
Chapter 5 Preparation for Use of Ultrasonic Endoscope 5.5.5 Inspecting Objective Lens and Light Guide CAUTION Turn off the light before inspecting the lens. Viewing the light of light guide directly may damage your eyes. CAUTION Do not apply lens cleaner to the transducer. Wipe off lens cleaner immediately if any adheres to the transducer. -
Page 55: Inspecting Ultrasonic Image
Chapter 5 Preparation for Use of Ultrasonic Endoscope (3) Switch on the lamp and observe the endoscopic image on the monitor. By observing your palm or something else, check whether the lamp lights normally and the luminous energy is sufficient. Check that the image is free of cloudiness or blurs. -
Page 56: Removing Ultrasonic Endoscope
Chapter 5 Preparation for Use of Ultrasonic Endoscope Removing Ultrasonic Endoscope CAUTION Freeze the ultrasonic image before removing the Ultrasonic Endoscope. The Ultrasonic Endoscope may be damaged. <Combination with the VP-4400 and XL-4400 or VP-4450HD and XL-4450> (1) Press the key on the keyboard of the ultrasonic processor to freeze the ultrasonic image. - Page 57 Chapter 5 Preparation for Use of Ultrasonic Endoscope (4) Remove the EVE connector from the processor. Remove the LG connector from the light source. (6) Turn off the power supply of the ultrasonic processor. Loosen the lock handle and dismount the US connector from the ultrasonic processor.
- Page 58 Chapter 5 Preparation for Use of Ultrasonic Endoscope (3) Remove the suction tube from the suction connector portion of the Ultrasonic Endoscope. (4) Remove the EVE connector from the processor. Remove the LG connector from the processor. (6) Turn off the power supply of the ultrasonic processor. Loosen the lock handle and dismount the US connector from the ultrasonic processor.
-
Page 59: Attachment And Inspection Of Balloon
Chapter 5 Preparation for Use of Ultrasonic Endoscope Attachment and Inspection of Balloon WARNING Use a disinfected and sterilized balloon installation tool. There is a risk of infection. Do not use a balloon on patients allergic to latex. It may cause an anaphylactic reaction. (1) Feed sterile water from the balloon water feed inlet using a syringe and purge air from the balloon tubes. - Page 60 Chapter 5 Preparation for Use of Ultrasonic Endoscope (3) Hold handle 1 of the balloon installation tool and pinch the balloon at a position of 3 mm from the balloon ring (Big). 3 mm (4) Turn over the balloon ring (Big) and hang it on the balloon installation tool.
- Page 61 Chapter 5 Preparation for Use of Ultrasonic Endoscope (7) Remove the balloon ring (Big) slowly with your fingers and attach it into the balloon installation groove of the Ultrasonic Endoscope. (8) Check that the balloon ring (Big) is attached into the balloon installation groove.
- Page 62 Chapter 5 Preparation for Use of Ultrasonic Endoscope (11) Feed 1 mL of sterile water into the balloon from the balloon water feed channel, and check that the balloon is inflated. Also, check that there is no leakage of sterile water, air entering into the balloon, or distortion of the balloon.
-
Page 63: Inspection Of Puncture Needle
Chapter 5 Preparation for Use of Ultrasonic Endoscope Inspection of Puncture Needle WARNING Do not use the puncture needle with an abnormally bent or deformed needle. There is a risk of bleeding or wrong puncturing. (1) Check to confirm the expiry date of the puncture needle. Do not use any expired puncture needle. -
Page 64: Inspection Of Forceps
Chapter 5 Preparation for Use of Ultrasonic Endoscope Inspection of Forceps CAUTION Do not bend forceps with a curvature radius of 10 mm or less. Bending forceps with a small curvature may break it. (1) Inspect the operation of the forceps. Visually check the forceps for breakage or significant bends, and for sharp edges on protrusions that may injure the patient. -
Page 65: Chapter 6 Method Of Use
Chapter 6 Method of Use This chapter outlines how to operate the equipment, according to the general procedures. Regarding clinical procedures, use proper clinical judgment. 6.1 Preparation..............6-2 6.1.1 Preparing Necessary Equipment .......6-2 6.1.2 Pretreatment of Patient ........6-2 6.2 Insertion and Observation ..........6-3 6.3 How to Use Balloon .............6-8 6.4 Biopsy ................6-9 6.5 Puncture ..............6-12... -
Page 66: Preparation
Chapter 6 Method of Use Chapter 6 Method of Use CAUTION Do not use force during insertion or withdrawal of the Ultrasonic Endoscope. Slowly advance the instrument under direct visualization. Since this product is a precision instrument, excessive force or impact on the insertion portion, flexible portion, or distal end may cause patient injury as well as damage to the instrument. -
Page 67: Insertion And Observation
Chapter 6 Method of Use Insertion and Observation WARNING When a balloon is not used, fit the cap on the balloon water feed inlet. There is a risk of infection. Do not sharply twist or bend during operation. It may cause damage inside body cavities. Before attempting to clinically use this Ultrasonic Endoscope with an endotracheal tube, select an appropriate size tube whose inner diameter has sufficient clearance between the endotracheal tube and... - Page 68 Chapter 6 Method of Use CAUTION Do not directly apply Xylocaine spray to the insertion portion. Do not use olive oil as a lubricant for insertion. It may cause deterioration of the outer surface. When attempting to use the Ultrasonic Endoscope with an endotracheal tube, before applying lubricant ensure that the endotracheal tube slides smoothly over the Ultrasonic Endoscope without resistance.
- Page 69 Chapter 6 Method of Use (2) Turn on the power to the processor and light source, and light on the lamp by pressing lamp ON/OFF button. In the case of EPX-4400 System In the case of EPX-2500 System (3) Apply clean lubricant (Xylocaine jelly or the like) to the insertion portion as required.
- Page 70 Chapter 6 Method of Use [Note] Do not forcibly twist or bend too sharply the bending portion by hand. It may cause a failure. (4) Insert the distal end of the Ultrasonic Endoscope from the oral cavity to the pharynx, while observing the process. Adjust the brightness by operating the brightness control button on the light source unit.
- Page 71 Chapter 6 Method of Use <To suck phlegm, mucus, blood, etc.> Bring the distal end of the Ultrasonic Endoscope close to the objects to be sucked, and suck them by pressing the suction button. [Note] Do not suck in solid or viscous materials with the Ultrasonic Endoscope.
-
Page 72: How To Use Balloon
Chapter 6 Method of Use How to Use Balloon WARNING Do not use a balloon on patients allergic to latex. It may cause an anaphylactic reaction. Do not feed more than 1 mL of water into the balloon. There is a risk of suffocation. [Note] If the balloon is inflated while it is in patient’s air passage, the air flow may become blocked. -
Page 73: Biopsy
Chapter 6 Method of Use Biopsy WARNING Do not press forceps against the trachea or broncho wall with undue force. It may cause perforation or bleeding. Do not insert the forceps if you cannot obtain a endoscopic image. Do not insert the forceps into the Ultrasonic Endoscope if you cannot see the forceps outlet on the endoscopic image. - Page 74 Chapter 6 Method of Use (1) Direct the distal end of the Ultrasonic Endoscope to the biopsy site. (2) Check the opening and closing of the forceps. Insert the forceps from the forceps inlet by observing the image. [Note] When inserting forceps, be sure to slowly insert it straight into the slit of the forceps valve.
- Page 75 Chapter 6 Method of Use (4) Bring the forceps closer to the biopsy site slowly. (5) Take a biopsy specimen by manipulating the angle lever and letting the forceps in and out. (6) Pull out the forceps slowly and take out the biopsy specimen.
-
Page 76: Puncture
Chapter 6 Method of Use Puncture WARNING Wear protective gear. There is a risk of infection. Do not insert the puncture needle into the Ultrasonic Endoscope if you cannot see the forceps outlet on the endoscopic image. Do not perform puncture if you cannot see the puncture needle on the endoscopic image. - Page 77 Chapter 6 Method of Use (1) Check to confirm the site to be punctured using the Ultrasonic Endoscope. (2) Contact the transducer at the distal end of Ultrasonic Endoscope near the puncturing point. (3) If a balloon is used, contract it until it is small but not touching the puncture needle, by observing the endoscope image.
- Page 78 Chapter 6 Method of Use (5) Determine the puncturing point by confirming that there are no nearby blood vessels on the ultrasonic image. [Note] The puncture needle may be mistakingly inserted outside of the ultrasonography area or the puncture guiding line. For puncturing, confirm that there are no blood vessels nearby.
- Page 79 Chapter 6 Method of Use (9) Bring the puncture needle close to the target part slowly. (10) Carry out puncturing. [Note] The puncture guiding line is only meant as a guide. Check the actual part to be punctured on the ultrasonic image. (11) After completing the puncture, store the needle in the sheath and pull out the puncture needle.
-
Page 80: Pulling Out Ultrasonic Endoscope
Chapter 6 Method of Use Pulling Out Ultrasonic Endoscope (1) If a balloon is used, contract it fully. (2) Unbend the bending portion until it is almost straight by operating the angle lever. (3) Pull the Ultrasonic Endoscope out slowly. 6-16... -
Page 81: Pre-Cleaning (Performed At Bedside Immediately After Use Of Ultrasonic Endoscope)
Chapter 6 Method of Use Pre-Cleaning (performed at bedside immediately after use of Ultrasonic Endoscope) The pre-cleaning (the first cleaning) is performed at the bedside immediately after the use of the ultrasonic endoscope. 6.7.1 Wiping Wipe contamination off the outside of insertion portion of Ultrasonic Endoscope with gauze or paper towel. - Page 82 Chapter 6 Method of Use 6.7.3 Removing Ultrasonic Endoscope from Processor CAUTION Do not touch the LG connector tip until it cools down (approximately 5 minutes). Touching the LG connector with hands immediately after use of the Endoscope may cause a burn injury. <Combination with the VP-4400 and XL-4400 or VP-4450HD and XL-4450>...
- Page 83 Chapter 6 Method of Use (3) Remove the EVE connector from the processor. Remove the LG connector from the light source. (5) Turn off the power supply of the diagnostic ultrasound system. Loosen the lock handle and dismount the US connector from the diagnostic ultrasound system.
-
Page 84: Removing Balloon
Chapter 6 Method of Use (3) Remove the EVE connector from the processor. Remove the LG connector from the processor. (5) Turn off the power supply of the diagnostic ultrasound system. Loosen the lock handle and dismount the US connector from the diagnostic ultrasound system. -
Page 85: Waterproofing Eve Connector
Chapter 6 Method of Use 6.7.5 Waterproofing EVE Connector If the EVE connector with water on the electrical contacts is used, it will cause a malfunction. Before cleaning, attach the waterproof cap to the EVE connector so that water do not reach the contacts. 6.7.6 Waterproofing US Connector (1) Mount the US waterproof cap to the US connector. - Page 86 Chapter 6 Method of Use 6-22...
- Page 87 Appendix Main Specification ..........Appendix-2 Troubleshooting (Combination with EPX-4400 system) ....Appendix-8 Troubleshooting (Combination with EPX-2500 system) ....Appendix-12 After-Sales Service ..........Appendix-16 Disposal of Electric and Electronic Equipment ...Appendix-17 Index ..............Appendix-18 Service Centers .............Appendix-19 Appendix-1...
-
Page 88: Appendix
Appendix Main Specification <Classification of Medical Electrical Equipment> 1. Type of protection against electric shock : Class I equipment (power supply: protective earth plug) 2. Degree of protection against electric shock : Type BF applied part 3. Degree of water proof : IEC 60529 IPX7 (when the US waterproof cap is attached) [Note] Use in combination with one of the following:... - Page 89 Appendix <Operating Environment> Temperature +10 to +40°C Relative humidity 30 to 85% [Note] Atmospheric pressure 70 to 106 kPa [Note] Except when there is condensation <Storage Environment> Temperature +10 to +40°C Relative humidity 30 to 85% [Note] Atmospheric pressure 70 to 106 kPa [Note] Except when there is condensation <Term of Validity, Period for Use (durability)>...
- Page 90 European Directive 93/42/EEC. Classification : Class II a <Electromagnetic compatibility (EMC) information> EB-530US is intended for use in the electromagnetic environments specified below. The customer or the user of this product should assure that it is used in such an environment. Appendix-4...
- Page 91 Appendix Electromagnetic emission compliance information and guidance Emission standard Compliance Guidance This product uses RF (Radio Frequency) energy RF emissions only for its internal function. Therefore, its RF Group I emissions are very low and are not likely to cause CISPR 11 any interference in nearby electric equipment.
- Page 92 Appendix Electromagnetic immunity compliance information and guidance Compliance EN 60601-1-2 Immunity test Guidance Test level level Floors should be wood, concrete, or Electrostatic discharge (ESD) ± 6kV: contact ceramic tile. If floors are covered with Same as left EN 61000-4-2 ±...
- Page 93 Appendix Electromagnetic immunity compliance information and guidance Compliance EN 60601-1-2 Immunity test Guidance Test level level Portable and mobile RF communications equipment should be used no closer to any part of this product, including cables, than the recommended separation distance calculated from the equation applicable to the frequency of the transmitter.
-
Page 94: Troubleshooting (Combination With Epx-4400 System)
Appendix Troubleshooting (Combination with EPX-4400 system) If the Ultrasonic Endoscope should fail during use, follow these instructions to troubleshoot it. Problem Cause Remedy No images come out 1) The cart, monitor or processor is unplugged Plug the cart, monitor or processor into the from the main outlet. - Page 95 Appendix Problem Cause Remedy [Note] An image is suddenly 1) The system has malfunctioned due to such Reset the processor and the light source. discolored during as static charges. If the image is not recovered and it is examination. 2) The video signal cable has burnt out or impossible to continue the examination, turn shorting.
- Page 96 Appendix Problem Cause Remedy Treatment equipment 1) The treatment equipment is left open (such Close the treatment equipment and pull it out. cannot be pulled out. as biopsy forceps). 2) The handle of the treatment equipment is Loosen the grip and pull out the treatment held firmly (such as biopsy forceps).
- Page 97 Appendix Problem Cause Remedy Sterile water cannot Foreign matter has adhered to the balloon water Remove foreign matter. be fed from the feed channel or balloon water outlet. balloon water outlet No ultrasonic image 1) The power cord of the cart, the monitor or Plug in the devices.
-
Page 98: Troubleshooting (Combination With Epx-2500 System)
Appendix Troubleshooting (Combination with EPX-2500 system) If the Ultrasonic Endoscope should fail during use, follow these instructions to troubleshoot it. Problem Cause Remedy No images come out 1) The cart, monitor or processor is unplugged Plug the cart, monitor or processor into the from the main outlet. - Page 99 Appendix Problem Cause Remedy [Note] An image is suddenly 1) The system has malfunctioned due to such Reset the processor. If the image is not discolored during as static charges. recovered and it is impossible to continue the examination. 2) The video signal cable has burnt out or examination, turn the processor off, and then shorting.
- Page 100 Appendix Problem Cause Remedy Treatment equipment 1) The treatment equipment is left open (such Close the treatment equipment and pull it out. cannot be pulled out. as biopsy forceps). 2) The handle of the treatment equipment is Loosen the grip and pull out the treatment held firmly (such as biopsy forceps).
- Page 101 Appendix Problem Cause Remedy Sterile water cannot Foreign matter has adhered to the balloon Remove foreign matter. be fed from the water feed channel or balloon water outlet. balloon water outlet No ultrasonic image 1) The power cord of the cart, the monitor or Plug in the devices.
-
Page 102: After-Sales Service
We will make a paid repair at your request if the equipment is found possible to restore the normal function by repair. When contacting your local dealer, provide the following information. Model name : EB-530US Serial number Description of failure : as detailed as possible Date of purchase... -
Page 103: Disposal Of Electric And Electronic Equipment
Appendix Disposal of Electric and Electronic Equipment Disposal of Used Electrical and Electronic Equipment (Applicable in the European Union and other European countries with separate collection systems) This symbol on the product, or in the manual and/or on this packaging, indicates that this product shall not be treated as household waste. -
Page 104: Index
Appendix Index <A> <M> Angle lever ............4-2 Maintenance ............1-3 Aeration ............... 9-6 Monitor ............2-5, 2-7 Mouthpiece ............6-4 <B> Bending mechanism ..........4-2 <O> Bending portion ........... 3-3 Operating environment ......Appendix-3 <C> <P> Cart ............... 2-4, 2-6 Preparations ............ -
Page 105: Service Centers
Contact our regional representative below or the distributor from which you purchased the product. <Europe> FUJIFILM Europe GmbH http://www.fujifilm.eu/eu/ See our website to locate our representative in your country. <USA> FUJIFILM Medical Systems U.S.A., Inc. http://www.fujifilmendoscopy.com/ (800) 385-4666 <Australia> FUJIFILM Australia Pty Ltd. http://www.fujifilm.com.au/ 1800 060 209 <Asia>... - Page 106 Appendix Appendix-20...
- Page 107 Appendix Appendix-21...
- Page 108 FUJIFILM Corporation 26-30, Nishiazabu 2-chome, Minato-ku, Tokyo 106-8620, Japan FUJIFILM Europe GmbH Heesenstrasse 31, 40549 Duesseldorf, Germany 202B1237458F 131225- 7.0 - DT - E2 YA912A Printed in Japan...
Need help?
Do you have a question about the EB-530US and is the answer not in the manual?
Questions and answers