Table of Contents
Advertisement
Quick Links
Advertisement
Chapters
Table of Contents
Troubleshooting

Related Manuals for Manitowoc Grove GMK6300L


Summary of Contents for Manitowoc Grove GMK6300L
- Page 1 Operating Manual Part 1 – Driving 3 302 597 en 05.04.2017...
- Page 2 Important note Any type of duplication or excerpt from this document, even in electronic form, is not subject to the revision service of Manitowoc Crane Group Germany GmbH. © Copyright reserved by Manitowoc Crane Group Germany GmbH Industriegelände West D-26389 Wilhelmshaven, Germany...
- Page 3 Correction sheet Possible reeving methods on the main boom Contrary to the information specified in the operating manual, there are corrected hoist rope reevings on the main boom for the GMK6300L/GMK6300L-1 truck crane. Only reeve the hoist rope as described/illustrated in this correction sheet. It is important that you still observe all notes and safety instructions regarding rigging work on the main boom in the operating manual supplied.
- Page 4 7 sheave hook block Reeving 3 302 803 en Correction sheet GMK6300L/6300L-1...
- Page 5 5 sheave hook block Reeving Correction sheet GMK6300L/6300L-1 3 302 803 en...
- Page 6 3 sheave hook block Reeving 1 sheave hook block Reeving 3 302 803 en Correction sheet GMK6300L/6300L-1...
- Page 7 Hook tackle Reeving With 10 head sheaves 9 sheave hook block Reeving Correction sheet GMK6300L/6300L-1 3 302 803 en...
- Page 8 7 sheave hook block Reeving 3 302 803 en Correction sheet GMK6300L/6300L-1...
- Page 9 5 sheave hook block Reeving Correction sheet GMK6300L/6300L-1 3 302 803 en...
- Page 10 3 sheave hook block Reeving 1 sheave hook block Reeving 3 302 803 en Correction sheet GMK6300L/6300L-1...
- Page 11 Hook tackle Reeving Correction sheet GMK6300L/6300L-1 3 302 803 en...
- Page 12 Blank page 3 302 803 en Correction sheet GMK6300L/6300L-1...
- Page 13 Counterweight version B Information on weight specifications In the supplied documentation, for plates a weight of 4.75 t is presumed and in illustrations the plates are labelled as 4.75 t. – The originally supplied plate may also be labelled as 4.5 t or 4.7 t depending on the version.
- Page 14 Blank page 3 302 676 en GMK6300L...
- Page 15 Hydraulic emergency operation Additional switches required Contrary to the specifications in the operating manual supplied, the valve 7, if present, can also be closed for the crane movements Lifting and Lowering . This increases the hoist speed. Always close the valve 7 in addition to all other switches that are specified in the operating manual supplied for the movements Lifting and Lowering .
- Page 16 Blank page 3 302 838 en Correction sheet GMK6300L/GMK6300L-1...
- Page 17 This operating manual is divided into two parts: Part 1 – Driving Part 2 – Crane operation Content overview of Part 1: 1 Overview 2 Basic safety instructions 3 Operating elements for driving 4 Starting the engine for driving / switching it off 5 Driving 6 Driving modes 7 Malfunctions in driving mode...
- Page 18 Blank page 3 112 xxx en Operating Manual GMK6300L...
-
Page 19: Table Of Contents
Manitowoc Crane Care ........ - Page 20 3 112 xxx en Operating Manual GMK6300L...
-
Page 21: Overview
Accidents In the event of an accident, contact the relevant branch office of Manitowoc Crane Care in the country in which you are working and specify your crane type and serial number. Adhere to the requirements regarding the obligation to report accidents prevalent in the country in which you are working and inform the supervi- sory authorities responsible for that particular type of accident (e.g. - Page 22 Overview 1.1 Accidents Blank page 1 - 2 3 112 xxx en Operating Manual GMK6300L...
-
Page 23: Branch Offices
Branch offices 1.2.1 Manitowoc Crane Care If you need help or support with the operation on your truck crane, you can contact our branches at the following addresses Manitowoc Crane Care: http://www.manitowoccranes.com 1.2.2 Dealer list Visit the following address for a global list of dealers: http://www.manitowoccranes.com... -
Page 24: Terms Used
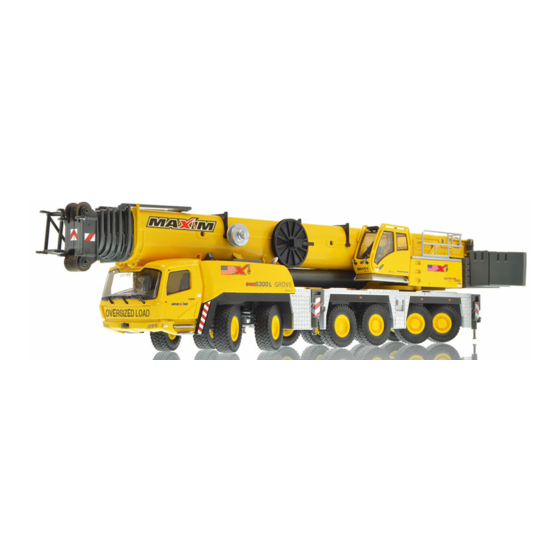
Overview 1.4 Terms used Terms used 1 - 4 3 112 xxx en Operating Manual GMK6300L... - Page 25 Overview 1.4 Terms used (A) – Carrier 1 Driver's cab 2 Boom rests 3 Counterweight platform 4 Axle lines 5 Outrigger beams 6 Outrigger cylinders 7 Outrigger pads (B) – Superstructure 8 Slewing gear 9 Crane cab 10 Main boom with telescoping mechanism 11 Telescopic sections 12 Hook block 13 Derricking cylinder, derricking gear...
- Page 26 Overview 1.4 Terms used Blank page 1 - 6 3 112 xxx en Operating Manual GMK6300L...
-
Page 27: Technical Data
Overview 1.5 Technical data Technical data GROVE crane GMK6300L Permissible temperature range: -25 °C to +40 °C (-13 °F to +104 °F) Crane designation: Truck crane as per DIN 15 001, Part 1 Crane application: Service crane as per DIN 15 001, Part 2 Crane classification: Hoist class H1 to DIN 15 018, Part 1 Crane class A1 to ISO 4301, Part 2... -
Page 28: Dimensions And Weights Of The Truck Crane, Axle Loads
Overview 1.5 Technical data 1.5.3 Dimensions and weights of the truck crane, axle loads All dimensions in the illustration are in mm. 1 - 8 3 112 xxx en Operating Manual GMK6300L... - Page 29 Overview 1.5 Technical data à Driving modes , p. 6 - 1. Dimensions All dimensions relate to on-road mode; Length without auxiliary 17.58 m (57.7 ft) hoist: Height: At on-road level: – 385/95 R25 3.95 m (13 ft) – 445/95 R25/525/80 R25 4.00 m (13.1 ft) Max.
-
Page 30: Dimensions And Weights Of Removable Parts
Overview 1.5 Technical data 1.5.4 Dimensions and weights of removable parts This section contains the dimensions and weights of the parts that can be à Driving modes , p. 6 - 1. removed for on-road driving; Spare wheel Length x width x height Weight in kg Name in m (ft) - Page 31 Overview 1.5 Technical data Driver's safety guard Name Length x width x Weight in kg (lbs) height in m (ft) Rear bumper for versions 3.0 x 0.4 x 1.2 with ROB (9.8 x 1.31 x 3.9) (265) Additional equipment Hose drum Name Diameter x width Weight in kg (lbs)
- Page 32 Overview 1.5 Technical data Auxiliary hoist Length x width x height Weight Name in m (ft) in kg (lbs) Complete auxiliary hoist 1.15 x 1.90 x 0.80 2,000 (4,410) (3.77 x 6.23 x 2.62) Rigging frame 1.43 x 2.17 x 0.55 (776) (4.69 x 7.12 x 1.80) Main boom...
-
Page 33: Carrier
Overview 1.5 Technical data 1.5.5 Carrier Engine Mercedes-Benz: OM 473 LA Engine emission: 97/68/EG Level 4 (TIER 4 Final/Euromot 4) Power 430 kW (585 PS) at 1,700 rpm (ECE R 120) DEF tank: approx. 40 l (10.6 gal) Fuel tank: approx. - Page 34 Overview 1.5 Technical data Steering Dual-circuit hydraulic steering with engine-independent emergency steering pump Tyres 12 x 385/95 R 25 on disc wheels 9.50-25/1.7 12 x 445/95 R 25 on disc wheels 11.00-25/1.7 12 x 525/80 R 25 on disc wheels 17.00-25/1.7 Additional equipment Torque for wheel nuts: 650 Nm (480 lbf ft).
- Page 35 Overview 1.5 Technical data Auxiliary supports Control system: Right rear as viewed from the carrier Outrigger pads Diameter: 400 mm (15.8 in) Surface: 1,257 cm (195 in Stroke of support cylinders 500 mm (19.7 in) Electrical system Alternator: 28 V/100 A Batteries: 2, each of 12 V/170 Ah Voltage:...
- Page 36 Overview 1.5 Technical data Turning radii All dimensions in the illustration are in mm. = values for normal steering mode = values for all-wheel steering See also engine data card 1 - 16 3 112 xxx en Operating Manual GMK6300L...
-
Page 37: Superstructure
Overview 1.5 Technical data 1.5.6 Superstructure Engine Mercedes-Benz: OM 936 LA Engine emission: 97/68/EG Level 4 (TIER 4 Final/Euromot 4) Power 210 kW (282 PS) at 2,200 rpm (ECE R120) DEF tank: approx. 40 l (10.6 gal) Fuel tank: 220 l (58 gal) See also engine data card Main hoist Drum diameter:... - Page 38 Overview 1.5 Technical data Slewing gears Make: Siebenhaar Type: 01 DD Power unit group M2 (to ISO 4301 - 2) Derricking gear Cylinder: Differential cylinder Adjusting angle -1.5° to + 83° from horizontal position (main boom): Power unit group M2 (to ISO 4301 - 2) Main boom Main boom lengths: 15.4 m to 80.0 m (50.5 ft to 262.5 ft)
- Page 39 Overview 1.5 Technical data Operating speeds The specified operating speeds only apply to an engine speed of about 2,000 rpm without load. Main hoist: Rope speed when lifting and lowering Normal speed: maximum 63 m/min (207 ft/min) High-speed maximum 126 m/min (413 ft/min) mode: Auxiliary hoist: Rope speed when lifting and lowering...
- Page 40 Overview 1.5 Technical data Blank page 1 - 20 3 112 xxx en Operating Manual GMK6300L...
-
Page 41: Documentation Supplied
– Documents from other manufacturers Original documentation for parts not manufactured by Manitowoc Crane Group Germany GmbH, such as the engine and central lubrication system, as well as the tachograph, auxiliary heaters, radio and, where appropriate, other additional equipment. -
Page 42: Questions On Documentation
Dealer list , p. 1 - 3. You can find your responsible dealer here: You can also send questions in either German or English directly to: e-mail: whv-techpublications@manitowoc.com For repeat orders for documentation, please contact our EMEA service. 1 - 22... -
Page 43: Notes On The Operating Manual
Overview 1.7 Notes on the operating manual Notes on the operating manual This operating manual is not a training manual for prospective crane oper- ators! All descriptions have been written explicitly for crane operators who have been trained to operate truck cranes! This operating manual is designed as a reference manual. - Page 44 Overview 1.7 Notes on the operating manual This symbol indicates dangers which represent a hazard to objects, e.g. damage to the truck crane or other parts which are located within the working range. This symbol warns you about situations where there is a danger of electric shock.
-
Page 45: How Is The Operating Manual Structured
Overview 1.7 Notes on the operating manual 1.7.2 How is the operating manual structured? Division The operating manual is divided into two parts. – Part 1 with chapters 1 to 8 contains a description of how to drive the truck crane. - Page 46 Overview 1.7 Notes on the operating manual Structure of Each page in the operating manual is divided into a wide text column and the pages a narrow column. The narrow column contains various pieces of information: – Chapter and section numbers, –...
-
Page 47: How Do I Find The Information I Need
Overview 1.7 Notes on the operating manual 1.7.3 How do I find the information I need? The operating manual contains the following guides for orientation. – The Contents at the front in sections 1 and 2 list all the chapters in the section. - Page 48 Overview 1.7 Notes on the operating manual Cross-references The illustrations and texts in this section are only an example and may differ example from the conditions on your truck crane. 1 - 28 3 112 xxx en Operating Manual GMK6300L...
- Page 49 Overview 1.7 Notes on the operating manual The parking brake is used as an example to show how the cross-references guide you through the operating manual. A In this example, the general overview is shown on page 3 - 2. The driver's cab is labelled as number 1.
-
Page 50: What Information Is Available For Operations Planning
Overview 1.7 Notes on the operating manual 1.7.4 What information is available for operations planning? Extensive information is required for operations planning in order to guarantee safe, smooth and efficient operation of the truck crane: The operating manual contains à –... -
Page 51: Conversion Table For Us Measuring Units
Overview 1.8 Conversion table for US measuring units Conversion table for US measuring units The following conversion factors will help you convert from metric to US units when the truck crane is used in countries that use US units of meas- urement and vice versa. - Page 52 Overview 1.8 Conversion table for US measuring units Blank page 1 - 32 3 112 xxx en Operating Manual GMK6300L...
-
Page 53: Training - Information
Overview 1.9 Training – Information Training – Information For the EMEA (Europe, Middle East, Africa) area, Manitowoc Crane Group Germany GmbH offers comprehensive training for crane types GMK and GTK. Our training centre is located in a maritime environment, on Germany's North Sea coast in Wilhelmshaven. -
Page 54: Identification
Overview 1.10 Identification 1.10 Identification 1 - 34 3 112 xxx en Operating Manual GMK6300L... - Page 55 Overview 1.10 Identification The following plates and numbers are attached to the truck crane for identification purposes: 1 Serial number and crane type 2 The CE mark, only with truck cranes that are delivered to member countries of the EU. 3 The serial number of the driver's cab 4 The chassis number and crane type 5 The chassis number in front of the first axle line in the frame.
-
Page 56: Ec Declaration Of Conformity
Overview 1.11 EC Declaration of Conformity 1.11 EC Declaration of Conformity On initial delivery, operators of truck cranes receive a Declaration of Conformity as a sup- plement to the delivery protocol. An illustra- tion of the Declaration of Conformity is shown below. - Page 57 Basic safety instructions Intended use ............2 - 2.1.1 Improper use .
- Page 58 3 112 xxx en Operating Manual GMK6300L...
-
Page 59: Basic Safety Instructions
The GMK6300L may only be operated with parts of equipment which are permitted by Manitowoc Crane Group Germany GmbH and which are labelled with the serial number of the GMK6300L. The manufacturer is not liable for any damage caused by improper or unau- thorized use of the GMK6300L truck crane. -
Page 60: Improper Use
Basic safety instructions 2.1 Intended use 2.1.1 Improper use Manitowoc Crane Group Germany GmbH is not liable for damage resulting from improper or unauthorized use of the GMK6300L truck crane. The user alone bears the risk. Improper use includes: – Transporting loads on the carrier, –... -
Page 61: Organisational Measures
Basic safety instructions 2.2 Organisational measures Organisational measures The operating manual and the lifting capacity table should be kept in the truck crane for immediate access at all times, and must not be removed from the truck crane. You must have read and understood the operation and safety instructions in this operating manual and comply with them when working. - Page 62 Manitowoc Crane Group Germany GmbH. To avoid damage, especially to electronic parts, there are certain measures you must take before doing any welding work. You should therefore always consult Manitowoc Crane Care before any welding work. 2 - 4 3 112 xxx en...
- Page 63 Basic safety instructions 2.2 Organisational measures Make sure that the prescribed intervals and the intervals specified in the operation and maintenance manual for periodic inspections, tests and maintenance work are adhered to. Replace the hydraulic hose lines, or have them replaced, at the prescribed intervals, even if no safety defects are noticeable.
-
Page 64: Personnel Qualifications
Only trained personnel with special knowledge and experience in the fields of hydraulics, pneumatics and electrical equipment and electronics may carry out maintenance work on the truck crane. Manitowoc Crane Group Germany GmbH conducts general and type-spe- cific crane operator courses and technical courses. 2 - 6... -
Page 65: Safety Instructions For Driving The Truck Crane
This also applies to protective caps and bridging plugs. After a lightning strike, always have Manitowoc Crane Care check the truck crane before you drive the truck crane – even if you do not notice any impairment to its function. - Page 66 Basic safety instructions 2.4 Safety instructions for driving the truck crane Blank page 2 - 8 3 112 xxx en Operating Manual GMK6300L...
-
Page 67: Safety Instructions For Crane Operation
Basic safety instructions 2.5 Safety instructions for crane operation Safety instructions for crane operation Carefully select a safe site for the truck crane, where you can work safely. Walk around the truck crane and inspect it before beginning crane opera- tion. - Page 68 Basic safety instructions 2.5 Safety instructions for crane operation Always use a ladder for work above head height. Keep all handles, steps, step treads and ladders free of dirt, snow and ice. Keep all electric and hydraulic connections free of dirt. Check the connecting points for dust, foreign bodies and moisture before installation.
- Page 69 Whenever you leave the truck crane, secure it against unauthorised use. After a lightning strike, always have Manitowoc Crane Care check the truck crane before you operate the truck crane – even if you do not notice any impairment to its function.
- Page 70 Basic safety instructions 2.5 Safety instructions for crane operation Blank page 2 - 12 3 112 xxx en Operating Manual GMK6300L...
-
Page 71: Instructions On Transporting Persons
Basic safety instructions 2.6 Instructions on transporting persons Instructions on transporting persons The truck crane is intended for lifting loads. Transporting persons is consid- ered improper use of the truck crane. It is prohibited to: – Transport persons in any way with the lifting tackle or on the load. –... - Page 72 Basic safety instructions 2.6 Instructions on transporting persons Personnel Only authorised and properly qualified personnel are permitted to transport persons. The crane operator must comply with the specifications of the manufacturer and the restrictions with regard to the lifting accessories (hooks, lifting gear, equipment for lifting persons, etc.).
- Page 73 Basic safety instructions 2.6 Instructions on transporting persons The number of reeved rope lines must be selected such that the load on the hoist rope does not exceed 50% of the rope pull. At the same time, the total weight of the lifted load must be considered, consisting of the weights of the hook block, the lifting gear and the equipment for lifting persons including the maximum payload.
- Page 74 Basic safety instructions 2.6 Instructions on transporting persons Blank page 2 - 16 3 112 xxx en Operating Manual GMK6300L...
- Page 75 Operating elements for driving Overview of the operating elements ........3 - 3.1.1 On the outside of the truck crane .
- Page 76 3 112 xxx en Operating Manual GMK6300L...
-
Page 77: Operating Elements For Driving
Operating elements for driving 3.1 Overview of the operating elements Operating elements for driving All operating elements for crane operation are described in Chapter 9. Overview of the operating elements This section shows the position and designation of the operating elements for driving. -
Page 78: On The Outside Of The Truck Crane
Operating elements for driving 3.1 Overview of the operating elements 3.1.1 On the outside of the truck crane 3 - 2 3 112 xxx en Operating Manual GMK6300L... - Page 79 Operating elements for driving 3.1 Overview of the operating elements à 1 Front flap p. 3 - 72 à 2 Driver's cab p. 3 - 6 à 3 External starting socket p. 7 - 10 à 4 Installing/removing the hose drum p.
- Page 80 Operating elements for driving 3.1 Overview of the operating elements Additional equipment 3 - 4 3 112 xxx en Operating Manual GMK6300L...
- Page 81 Operating elements for driving 3.1 Overview of the operating elements 15 Outriggers: à – Outrigger control units p. 9 - 52 à – Control units for raising the axles p. 9 - 52 à – Emergency stop switch p. 4 - 24 à...
-
Page 82: Driver's Cab
Operating elements for driving 3.1 Overview of the operating elements 3.1.2 Driver's cab Front overview 3 - 6 3 112 xxx en Operating Manual GMK6300L... - Page 83 Operating elements for driving 3.1 Overview of the operating elements à 1 Passenger's seat p. 5 - 14 2 Storage space or 2nd passenger seat 1), 3) 3 Fire extinguisher à 4 Instrument panel, left/right p. 3 - 12 à 5 Parking brake p.
- Page 84 Operating elements for driving 3.1 Overview of the operating elements 3 - 8 3 112 xxx en Operating Manual GMK6300L...
- Page 85 Operating elements for driving 3.1 Overview of the operating elements à 17 – Adjusting the mirrors p. 5 - 8 à – Mirror heating p. 5 - 8 à 18 Adjusting the air vents p. 5 - 76 à 19 Tachograph, time correction p.
- Page 86 Operating elements for driving 3.1 Overview of the operating elements Behind the cover à 1 Fuses p. 7 - 19 3 - 10 3 112 xxx en Operating Manual GMK6300L...
- Page 87 Operating elements for driving 3.1 Overview of the operating elements Rear overview 1 Rest 2 Storage compartment (e.g. for hand-held control, battery charger) à 3 – Folding berth p. 5 - 57 – Storage (spare key etc. (on delivery)) Additional equipment Operating Manual GMK6300L 3 112 xxx en 3 - 11...
-
Page 88: Instrument Panel
Operating elements for driving 3.1 Overview of the operating elements 3.1.3 Instrument panel Left/right à 1 Lighting on/off p. 3 - 61 à 2 Heating/Air-conditioning system p. 3 - 30 à 3 Spotlights on the rear of the carrier p. 3 - 63 à... - Page 89 Operating elements for driving 3.1 Overview of the operating elements Middle à 1 CAN BUS system malfunction p. 5 - 51 à 2 Torque reduction indicator lamp p. 5 - 53 3 Brake wear indicator à 4 Headlight – full beam indicator lamp p.
- Page 90 Operating elements for driving 3.1 Overview of the operating elements à 12 Additional brake indicator lamp p. 3 - 55 à 13 Engine warning lamp p. 3 - 39 à 14 Engine oil pressure p. 3 - 39 15 Fuel filter inspection lamp à...
-
Page 91: 28 Display, Driving Mode
Operating elements for driving 3.1 Overview of the operating elements 24 Transmission malfunction à 25 Fog light indicator lamp p. 3 - 60 à 26 Speedometer p. 3 - 67 à 27 Tachograph malfunction warning p. 5 - 19 à 28 Display, driving mode p. - Page 92 Operating elements for driving 3.1 Overview of the operating elements 3.1.4 Display, driving mode à 1 Transmission display p. 3 - 47 à 2 Torque reduction display override p. 5 - 53 à 3 Outside air temperature display p. 5 - 26 à...
-
Page 93: Steering Column/Steering Wheel
Operating elements for driving 3.1 Overview of the operating elements 3.1.5 Steering column/steering wheel à 1 Horn/headlight flasher/headlight – full beam p. 3 - 60 à Turn signal indicator/wiper-washing system p. 3 - 60 à 2 – Set idling speed p. -
Page 94: Transmission Operating Elements
Operating elements for driving 3.1 Overview of the operating elements 3.1.6 Transmission operating elements à 1 Transmission display p. 3 - 47 à 2 Transmission mode R p. 3 - 49 à Reverse camera on p. 3 - 51 à 3 Changing the driving mode p. -
Page 95: Tachograph, Time Correction
Operating elements for driving 3.1 Overview of the operating elements 3.1.7 Tachograph, time correction à p. 5 - 19 Tachograph à 1 Display p. 5 - 22 à 2 Time correction -: p. 3 - 67 à 3 Time correction +: p. -
Page 96: Ecos Control Unit
Operating elements for driving 3.1 Overview of the operating elements 3.1.8 ECOS control unit 3 - 20 3 112 xxx en Operating Manual GMK6300L... - Page 97 Operating elements for driving 3.1 Overview of the operating elements à 1 ECOS display p. 3 - 46 à Main menu overview p. 3 - 22 à Reverse camera display p. 3 - 51 à 2 Sensor for brightness p. 3 - 46 à...
-
Page 98: Ecos Display - Main Menu
Operating elements for driving 3.1 Overview of the operating elements 3.1.9 ECOS display – main menu 3 - 22 3 112 xxx en Operating Manual GMK6300L... - Page 99 Operating elements for driving 3.1 Overview of the operating elements à 1 Transfer case for off-road gear on/off p. 3 - 52 à Transfer case display p. 3 - 52 à 2 Displaying vehicle height p. 5 - 9 à 3 Suspension display p.
-
Page 100: Ecos Display - Submenus
Operating elements for driving 3.1 Overview of the operating elements 3.1.10 ECOS display – submenus Level adjustment system submenu 3 - 24 3 112 xxx en Operating Manual GMK6300L... - Page 101 Operating elements for driving 3.1 Overview of the operating elements à 1 Switch measuring range p. 3 - 65 à 2 Current inclination display p. 3 - 65 à 3 Overall level pre-selection p. 3 - 64 à 4 Front level pre-selection p.
- Page 102 Operating elements for driving 3.1 Overview of the operating elements Settings submenu à 1 Neutral position transfer case on p. 3 - 52 à Transfer case display p. 3 - 52 à 2 Lamp test p. 4 - 12 à 3 Operating hours submenu p.
- Page 103 Operating elements for driving 3.1 Overview of the operating elements Monitoring submenu à 1 Hydraulic oil temperature display p. 4 - 21 à 1), 2) 2 Carbamide supply display p. 4 - 21 à 3 Voltage monitoring display p. 4 - 21 à...
- Page 104 Operating elements for driving 3.1 Overview of the operating elements à Displaying the operating hours , p. 5 - 25. Operating hours Description of the displays; submenu 1 ECOS superstructure 2 Auxiliary drive gears 3 Telescoping mechanism 4 Engine for crane operation 5 Derricking gear 6 Locking system 7 Main hoist...
- Page 105 Operating elements for driving 3.1 Overview of the operating elements Error submenu à 1 Display of error/total errors p. 7 - 36 à 2 Next error p. 7 - 36 à 3 Previous error p. 7 - 36 à 4 Error display p.
-
Page 106: Heating/Air-Conditioning System
Operating elements for driving 3.1 Overview of the operating elements 3.1.11 Heating/Air-conditioning system Standard heating system à 1 Setting the blower/fresh air/recirculated air p. 5 - 75 à 2 Air distribution p. 5 - 76 à 3 Setting the temperature p. - Page 107 Operating elements for driving 3.1 Overview of the operating elements Auxiliary water heating system à 1 Heating display p. 5 - 82 à 2 Setting time and weekday p. 5 - 82 à 3 – Saving automatic heating start p. 5 - 83 à...
-
Page 108: Outrigger Control Units
Operating elements for driving 3.1 Overview of the operating elements 3.1.12 Outrigger control units à Outrigger control units , Contain operating elements for crane operation; p. 9 - 52. 3 - 32 3 112 xxx en Operating Manual GMK6300L... -
Page 109: Rear Supporting Box Control Unit
Operating elements for driving 3.1 Overview of the operating elements 3.1.13 Rear supporting box control unit à 1 Left auxiliary support control p. 3 - 68 à 2 Right auxiliary support control p. 3 - 68 à 3 Extending/Retracting the pre-selection p. - Page 110 Operating elements for driving 3.1 Overview of the operating elements Blank page 3 - 34 3 112 xxx en Operating Manual GMK6300L...
-
Page 111: Short Description Of The Operating Elements
This section does not contain all the requirements that must be fulfilled for several operating elements to be active. If some operating elements do not work, first read the following chapters which are referred to at the respective places before contacting Manitowoc Crane Care. 3.2.1 Definition of direction information Basic rule Direction information always depends on whether the carrier or the super- structure is being operated. -
Page 112: General Notes On The Operating Elements
Operating elements for driving 3.2 Short description of the operating elements Switches and For switches and buttons, the terms down and up are used. buttons Regardless of the fitting position (vertical, horizontal, diagonal, perpendicular or turned), the following always applies: –... -
Page 113: General Rules For Buttons And Symbols On The Display
Operating elements for driving 3.2 Short description of the operating elements 3.2.3 General rules for buttons and symbols on the display The symbols shown as an example are not present on all crane types. The following rules apply in all menus: –... -
Page 114: Engine
Operating elements for driving 3.2 Short description of the operating elements 3.2.4 Engine Steering column Ignition lock 0 Ignition off, engine off, key can be removed 1 Power supply on for: Heating system, engine/transmission diagnostics, radio/telephone, enabling of steering lock 2 Ignition on, driving position 3 Starting position à... - Page 115 Operating elements for driving 3.2 Short description of the operating elements Instrument panel Tachometer à Display, engine speed in rpm; p. 4 - 20 Flame start system monitoring – On: Engine not ready to start – is being warmed up –...
- Page 116 Operating elements for driving 3.2 Short description of the operating elements Superstructure ignition indicator lamp – On: Ignition in the crane cab on, engine for driving cannot be started – Off: Ignition in the crane cab off, engine for driving can be started à...
-
Page 117: Carbamide System
Operating elements for driving 3.2 Short description of the operating elements 3.2.5 Carbamide system If the GMK6300L truck crane complies with TIER 4i and Euromot 3B exhaust gas emissions, there are additional display and operating elements in the driver's cab. Instrument panel Carbamide warning –... - Page 118 Operating elements for driving 3.2 Short description of the operating elements Display, driving Torque reduction display override mode The ignition is switched on or the engine is running. – Off: Torque reduction not overridden – On: Torque reduction overridden à p.
-
Page 119: Electrical System
Operating elements for driving 3.2 Short description of the operating elements 3.2.6 Electrical system Sockets 12 V/24 V 1 Socket 24 V/max. 15 A 2 Socket 12 V/max. 15 A Only connect electrical devices with the matching specification to the sockets. Reading lamp 12 V As additional equipment, the truck crane is equipped with a reading lamp. -
Page 120: Ecos Crane Control
Operating elements for driving 3.2 Short description of the operating elements 3.2.7 ECOS crane control The truck crane GMK6300L is equipped with the ECOS electronic crane con- trol (Electronic Crane Operating System). ECOS includes a control unit in the crane cab, a control unit in the driver's cab and several control units (ESX0, ESX1, ESX2 etc.) and I/O circuit boards (I/O 0, I/O 1 etc.), which are distributed on the superstructure and carrier. - Page 121 Operating elements for driving 3.2 Short description of the operating elements Error/warning message – Flashing: New warning message or error has occurred – On: Error acknowledged – but still present – Off: No warning message or error present à p. 11 - 114 Opening the Error submenu The lamp (1) lights up or flashes.
- Page 122 Operating elements for driving 3.2 Short description of the operating elements Sensor for brightness Registers the brightness of the operating environment. The brightness of all displays is automatically adjusted. à Manual input; p. 4 - 14. ECOS display The main menu appears after switching on the ignition.
-
Page 123: Transmission
Operating elements for driving 3.2 Short description of the operating elements 3.2.8 Transmission à Operating the transmission , p. 5 - 27. Instrument panel, middle Transmission malfunction à Switching on diagnostics/oil-level gauge; p. 3 - 50 Display, driving mode Transmission display 1 Neutral position switched on 2 Currently engaged gear –... - Page 124 Operating elements for driving 3.2 Short description of the operating elements – Gear position D switched on 1 Currently selected gear 2 Highest possible gear, 1 to 6 possible – Number flashing – motor off – For diagnostics and oil-level gauge 1 Continuous character string for error/oil level –...
- Page 125 Operating elements for driving 3.2 Short description of the operating elements Transmission mode R Press once – At a standstill: Select reverse starting gear – For driving in Suitable gear selected – clutch engages, reverse: reverse camera on – For driving forwards: at first no gear change, just before standstill –...
- Page 126 Operating elements for driving 3.2 Short description of the operating elements Selecting a gear – The truck crane is stationary – starting gear engaged 1 Starting gear 2 Highest possible gear 3 Press the button Highest possible gear +1 once: If starting gear = highest possible gear, depending on driving mode –...
-
Page 127: Reverse Camera
Operating elements for driving 3.2 Short description of the operating elements 3.2.9 Reverse camera The truck crane GMK6300L is equipped with a reverse camera. The reverse camera is on the rear of the carrier of the truck crane. The reverse camera displays the area behind the truck crane on the ECOS display in the driver's cab when the reverse gear is engaged. -
Page 128: Transfer Case
Operating elements for driving 3.2 Short description of the operating elements 3.2.10 Transfer case In the main menu Transfer case for off-road gear on/off – To switch on: Press button once – dot (1) green – To switch off: Press button once – dot (1) black, switching to neutral position à... -
Page 129: Final Drive
Operating elements for driving 3.2 Short description of the operating elements 3.2.11 Final drive à Longitudinal and transverse differential locks , p. 5 - 62 Transverse differential locks on/off – To switch on: Press button once – dot (1) green, maximum 20 km/h (12 mph) –... -
Page 130: Brakes
Operating elements for driving 3.2 Short description of the operating elements 3.2.12 Brakes Service brake Display – supply pressure in brake circuits 1 Current supply pressure in brake circuit 1 2 Current supply pressure in brake circuit 2 3 Red – supply pressure insufficient White –... - Page 131 Operating elements for driving 3.2 Short description of the operating elements Instrument panel Additional brake indicator lamp – On: Engine retarder/transmission retarder on – Off: Engine retarder/transmission retarder off Parking brake 1 To engage the Pull the lever down until it locks into place parking brake: 2 To release the Lift the lever and push it up until it latches into...
-
Page 132: Steering/Separate Steering
Operating elements for driving 3.2 Short description of the operating elements 3.2.13 Steering/separate steering à Separate steering , p. 5 - 71 Instrument panel Steering circuit 1 and 2 warning lamp – On: Engine off – ignition on Engine on – malfunction, stop – check oil loss –... - Page 133 Operating elements for driving 3.2 Short description of the operating elements Steering system warning – On: Steering system defective – stop immediately, Display symbol (1) – 5th and 6th axle cannot be steered; if it is possible, it can only be steered in straight running position –...
- Page 134 Operating elements for driving 3.2 Short description of the operating elements Manual separate steering on/off – To switch on: Press button once – dot (1) green, maximum 5 km/h (3 mph) – Steering wheel steers 1st and 2nd axle lines –...
-
Page 135: Suspension
Operating elements for driving 3.2 Short description of the operating elements 3.2.14 Suspension à Switching the suspension on/off , p. 5 - 17. Suspension on/off – To switch on: Press button once – dot green – To switch off: Press button once – dot black à... -
Page 136: Lighting/Windscreen Wipers/Horn
Operating elements for driving 3.2 Short description of the operating elements 3.2.15 Lighting/windscreen wipers/horn Steering column Multipurpose switch Horn/headlight flasher/headlight – full beam 1 Horn: Press the button 2 Flash the headlights: Upwards The parking light/headlight must be switched on: 3 Parking light/headlight: Middle position 4 Headlight –... - Page 137 Operating elements for driving 3.2 Short description of the operating elements Fog tail light indicator lamp – On: Fog tail light on – Off: Fog tail light off Indicator lamp for turn signal indicator 1 – Flashing: Turn signal indicator on –...
- Page 138 Operating elements for driving 3.2 Short description of the operating elements Headlight indicator lamp – On: Headlight on – Off: Headlight off The headlight or parking light is switched on. 4 Fog light on 5 Fog tail light on – on Rotating beacon on/off –...
- Page 139 Operating elements for driving 3.2 Short description of the operating elements Spotlights on rear of carrier on/off – To switch on: Push down – To switch off: Press in at top – position for driving on road Roof The lamps on the driver and passenger sides are identical. Cab lighting 1 Always on 2 Always off...
-
Page 140: Level Adjustment System
Operating elements for driving 3.2 Short description of the operating elements 3.2.16 Level adjustment system à Operating the level adjustment system , p. 5 - 64. Level adjustment system submenu – To open: Press button once – submenu opens Overall level pre-selection –... - Page 141 Operating elements for driving 3.2 Short description of the operating elements Vehicle level display The current status is shown using different symbols: 1 Green – on-road level 2 White – no on-road driving level 3 Yellow – level change 4 Violet – error à...
- Page 142 Operating elements for driving 3.2 Short description of the operating elements This function is only available with additional equipment. Adjusting axle pressure for trailer (dolly) operation 1 Press button once – point (3) green – pre-selection on for left axle pair 2 Press button once –...
-
Page 143: Tachograph/Speedometer
Operating elements for driving 3.2 Short description of the operating elements 3.2.17 Tachograph/speedometer à Setting the tachograph , p. 5 - 19. Tachograph Correction of time 1 Open the time menu: Press the button – the time correction menu opens 2 Time correction +: Press the button –... -
Page 144: Rear Supporting Box Control Unit
Operating elements for driving 3.2 Short description of the operating elements 3.2.18 Rear supporting box control unit à Installing/removing the supporting box , p. 6 - 65 Locking pin pre-selection – Press in to the left: Locking pin pre-selection à p. -
Page 145: Diagnostics
OK, STOP or the service symbol (spanner) is displayed, depending on the severity of the error 2 Diagnostics submenu If there is a malfunction, press button (2) once, read the values in the submenu and report to Manitowoc Crane Care. Operating Manual GMK6300L 3 112 xxx en 3 - 69... -
Page 146: Windows, Doors, Keys
Operating elements for driving 3.2 Short description of the operating elements 3.2.20 Windows, doors, keys Window winder Risk of crushing when closing the windows! If the window winders encounter resistance, they do not stop but keep on moving at reduced power. Button assignment A Window winder, driver's door B Window winder, passenger door... - Page 147 Operating elements for driving 3.2 Short description of the operating elements Doors The same key is used for the driver's and passenger's door. Always take the ignition key with you before closing the door from outside with the handle pressed in (2). Once closed in this manner, the door can only be opened again using the ignition key.
-
Page 148: Front Flap
Operating elements for driving 3.2 Short description of the operating elements 3.2.21 Front flap Opening • Move the front flap (1) up as far as it will go, holding it by the lower edge. The front flap is held in the open position. Closing •... - Page 149 Starting the engine for driving / switching it off Starting the engine from the driver's cab ....... . 4 - 4.1.1 CHECKLIST: Starting the engine .
- Page 150 3 112 xxx en Operating Manual GMK6300L...
-
Page 151: Starting The Engine For Driving / Switching It Off
Starting the engine for driving / switching it off 4.1 Starting the engine from the driver's cab Starting the engine for driving / switching it off Starting the engine from the driver's cab This section describes how to start the engine from within the driver's cab. à... - Page 152 Starting the engine for driving / switching it off 4.1 Starting the engine from the driver's cab à 4. Switch on the battery master switch; p. 4 - 10. 5. Check that – The bridging plugs are inserted in the sockets for hand-held control; à...
- Page 153 Starting the engine for driving / switching it off 4.1 Starting the engine from the driver's cab à 10. Check the fuel level and carbamide level if necessary; p. 4 - 7. à 11. Shift the transmission to the neutral position; p.
-
Page 154: Checklist: At Low Temperatures
Starting the engine for driving / switching it off 4.1 Starting the engine from the driver's cab 4.1.2 CHECKLIST: At low temperatures You must also observe the following points when operating the truck crane at low outside temperatures: 1. The fuel and engine oil must be suited for use in the outside tempera- à... - Page 155 Starting the engine for driving / switching it off 4.1 Starting the engine from the driver's cab Left side – When the crane cab door is open, you can reach the handle (1). – The handle (3) is located on the outside of the crane cab.
- Page 156 Starting the engine for driving / switching it off 4.1 Starting the engine from the driver's cab Risk posed by ladders falling down! Always secure the ladders before driving. The prevents the ladders from falling down while driving and endangering other vehicles. Folding out •...
-
Page 157: Refuel
Starting the engine for driving / switching it off 4.1 Starting the engine from the driver's cab 4.1.4 Refuel à Separate engine operating instructions, Only use permissible consumables; provided by the manufacturer . Danger of fire due to inflammable gases! Switch off the engine, the heater and all additional heaters before refuelling. - Page 158 Starting the engine for driving / switching it off 4.1 Starting the engine from the driver's cab Carbamide • ö If necessary, open the main menu and press the button (1) once. This opens the Monitoring submenu. The display (1) indicates the current level in percent.
- Page 159 Starting the engine for driving / switching it off 4.1 Starting the engine from the driver's cab • Refill the carbamide tank (1) in good time and close it using the cap. In order to comply with exhaust emission regulations, the truck crane may only be driven with carbamide.
-
Page 160: Checks Before Starting The Engine
Starting the engine for driving / switching it off 4.1 Starting the engine from the driver's cab 4.1.5 Checks before starting the engine At the hydraulic Before you start the engine, all valves on the hydraulic tank must be open. tank Risk of damage to the hydraulic pumps! You may only start the engine when all the valves on the hydraulic tank are... -
Page 161: Switch On The Ignition
Starting the engine for driving / switching it off 4.1 Starting the engine from the driver's cab Checking the Check that the hand-held control has been removed, and that bridging plugs à hand-held control for the hand-held control are inserted into all sockets; p. -
Page 162: Lamp Test/Equalisation Of The Switching States
Check that the lamps (1) go on for approx. 2 seconds after switching on the ignition: If one or more lamps do not light up, refer to Manitowoc Crane Care. If you could not check all the lamps in the specified time, you can conduct the lamp test again as follows. - Page 163 Starting the engine for driving / switching it off 4.1 Starting the engine from the driver's cab Conducting the lamp test • ö If necessary, open the main menu and press the button (1) once. This opens the Settings submenu. •...
-
Page 164: Display - Setting The Brightness
Starting the engine for driving / switching it off 4.1 Starting the engine from the driver's cab 4.1.8 Display – setting the brightness The brightness of the displays is regulated automatically by the ECOS , depending on the ambient brightness. You can set a minimum degree of brightness manually, which is always observed when the brightness is regulated. -
Page 165: Starting The Engine
Starting the engine for driving / switching it off 4.1 Starting the engine from the driver's cab 4.1.9 Starting the engine This section describes only how to start the engine from the driver's cab. à You can also start the engine from the outrigger control units; p. - Page 166 Starting the engine for driving / switching it off 4.1 Starting the engine from the driver's cab à With flame start If the engine is equipped with a flame start system; system , p. 4 - 16. Without flame This section pertains to starting a warm and cold engine. start system Danger of explosion when using starter fuel! The engine may never be started with the aid of starter fuel.
- Page 167 Starting the engine for driving / switching it off 4.1 Starting the engine from the driver's cab If the lamp (1) does not go out, there is a malfunction in the flame start à system; p. 7 - 27. • Wait until the lamp (1) goes out.
-
Page 168: Checks After Starting The Engine
Starting the engine for driving / switching it off 4.1 Starting the engine from the driver's cab 4.1.10 Checks after starting the engine Checking in the main menu Risk of damage to the engine! If symbol (1) lights up or the STOP lamp comes on and the warning buzzer sounds, switch the engine off immediately. - Page 169 If the lamp (1) is lit, the symbol (2) is shown. The steering system has failed. You must not under any circumstances drive the truck crane. Contact Manitowoc Crane Care and arrange for the error to be rectified. Risk of accidents because the truck crane cannot be steered! Under no circumstances may you drive the truck crane when the red lamp (1) is lit.
-
Page 170: Monitoring Elements
Starting the engine for driving / switching it off 4.1 Starting the engine from the driver's cab 4.1.11 Monitoring elements Instrument panel Tachometer 1 Green: Economic consumption 2 Yellow: Engine brake active 3 Red: Engine speed too high – danger; à... -
Page 171: Monitoring Submenu
Starting the engine for driving / switching it off 4.1 Starting the engine from the driver's cab 4.1.12 Monitoring submenu The Monitoring submenu provides an overview of the most important measured values. • ö If necessary, open the main menu and press the button (1) once. -
Page 172: Setting Idling Speed
Starting the engine for driving / switching it off 4.1 Starting the engine from the driver's cab 4.1.13 Setting idling speed After the engine is started, the idling speed is regulated automatically. If necessary, you can adjust the idling speed manually using the multipur- pose switch. -
Page 173: Switch The Engine Off
Starting the engine for driving / switching it off 4.2 Switch the engine off Switch the engine off 4.2.1 At the ignition lock and with the outrigger control units Risk of accidents because the truck crane cannot be steered! Switch the engine off only once the truck crane has come to a standstill. If you remove the ignition key, the steering will lock and you will lose control of the moving truck crane. -
Page 174: Using The Emergency Stop Switches
Starting the engine for driving / switching it off 4.2 Switch the engine off 4.2.2 Using the emergency stop switches Emergency stop switch Four emergency stop switches are provided for emergencies: 1 On the carrier 2 On the hand-held control 3 In the crane cab •... -
Page 175: Air Intake Inhibitor
Starting the engine for driving / switching it off 4.3 Air intake inhibitor Air intake inhibitor If the air intake inhibitor is triggered, a flap in the air intake line will close and the engine will stop running. The air intake inhibitor is triggered, –... - Page 176 Starting the engine for driving / switching it off 4.3 Air intake inhibitor Blank page 4 - 26 3 112 xxx en Operating Manual GMK6300L...
- Page 177 Driving Before driving ............5 - 5.1.1 CHECKLIST: Checks before on-road driving.
- Page 178 Separate steering ..........5 - 71 5.5.1 Switching to separate steering .
-
Page 179: Driving
Driving 5.1 Before driving Driving Before driving 5.1.1 CHECKLIST: Checks before on-road driving This checklist is not a complete operating manual. There are accompanying instructions, which are indicated by cross-references. Observe the warnings and safety instructions there! 1. If the boom is on the boom rest –... - Page 180 Driving 5.1 Before driving 3. On the outriggers – All outrigger beams must be fully retracted and secured to prevent à extension; p. 12 - 32. à – The outrigger pads must be in the driving position; p. 12 - 39. In the case of additional equipment with removable support box: à...
- Page 181 Driving 5.1 Before driving 8. Check the tyres: à – Tyre pressure when tyres are cold in on-road mode; p. 1 - 14. à Maintenance Manual . – Other checks; à 9. Windscreen washing system – check level; p. 5 - 7. 10.
- Page 182 Driving 5.1 Before driving à 13. The fold-up berth must be folded up and secured; p. 5 - 57. 14. All additional parts which may be transported must be secured against falling down. 15. Carry out all activities and inspections required for starting the engine; à...
- Page 183 Driving 5.1 Before driving à 19. Adjust the mirrors; p. 5 - 8. à 20. Adjust the reverse camera if necessary; p. 5 - 8. à 21. Set the tachograph, insert the diagram sheet; p. 5 - 19. à Checks after starting the 22.
- Page 184 Driving 5.1 Before driving à 24. Check the fuel level and carbamide level if necessary; p. 4 - 7. à 25. Check the compressed-air system and the brakes; p. 5 - 10. 26. Check that all switching states for on-road driving are set, and that the corresponding symbols are shown: à...
-
Page 185: Checking The Condition Of The Truck Crane
Driving 5.1 Before driving 5.1.2 Checking the condition of the truck crane Windscreen Use a windscreen washing agent and, at low temperatures, an appropriate washing system antifreeze. à • Open the front flap (1); p. 3 - 72. • Check the level in the tank (2). •... - Page 186 Driving 5.1 Before driving Adjusting Adjust all the mirrors to suit your sitting position. the mirrors Manual adjustment • Manually adjust the mirrors (1), (3) and (4). The mirrors (2) are adjusted electrically on both sides. Electrical adjustment • Turn the button to position A Neutral position B Mirror on the driver's side or C Mirror on the passenger side.
- Page 187 Driving 5.1 Before driving Warning plates for Depending on the vehicle width, fold-up warning plates are fitted below the vehicle width driver's cab. The warning plates (1) must be folded down to indicate the vehicle width during on-road driving. For off-road driving, the warning plates can be folded up and fastened with the spring latch (2).
- Page 188 Driving 5.1 Before driving Supply pressure The brake system and some consumers (e.g. differential locks, driver's seat, etc.) require sufficient supply pressure in order function properly. • Check that the supply pressure is approx. 8 bar (116 psi). If the supply pressure is too low, such as after repairs, you can build it up as follows.
- Page 189 Driving 5.1 Before driving Parking brake Check the function of the parking brake. • Activate the service brake. Risk of accidents by truck crane moving unintentionally! Always apply the service brake before releasing the parking brake. This prevents the truck crane from rolling in an uncontrolled manner when the parking brake is released.
- Page 190 Driving 5.1 Before driving Blank page 5 - 12 3 112 xxx en Operating Manual GMK6300L...
-
Page 191: Adjusting The Seats And Steering Column
Driving 5.1 Before driving 5.1.3 Adjusting the seats and steering column Driver's seat The seat height and lumbar support (version 1) are adjusted pneumatically. You can only make these adjustments when: – Sufficient air pressure is available in the secondary consumer circuit. à... - Page 192 Driving 5.1 Before driving Version 2 1 Seat heating on/off 2 Back rest 3 Back rest – angle 4 Seat display – height 5 Seat – longitudinal adjustment 6 Seat cushion – longitudinal adjustment 7 Seat – height 8 Adjust suspension stiffness to body weight 9 Seat cushion –...
- Page 193 Driving 5.1 Before driving Passenger's seat The passenger's seat is adjusted mechanically. Version 1 1 Back rest – angle 2 Seat cushion – angle 3 Seat cushion – longitudinal adjustment 4 Seat – longitudinal adjustment Version 2 1 Seat heating on/off 2 Lumbar area support 3 Back rest –...
- Page 194 Driving 5.1 Before driving Adjusting the The steering column is unlocked pneumatically. steering column Risk of accidents by unlocked steering column! Always stop the truck crane before you unlock the steering column. Once the steering column is unlocked you can no longer steer safely. The steering column is only unlocked when sufficient supply pressure is à...
-
Page 195: Switching The Suspension On/Off
Driving 5.1 Before driving 5.1.4 Switching the suspension on/off The suspension is switched off whenever the ignition is switched off. The suspension must be switched on for on-road driving. The current switching state of the suspension is shown in the displays (1) in the main menu and in the Suspension submenu. - Page 196 Driving 5.1 Before driving Switching the The suspension cylinders are enabled when the suspension is switched on. suspension on This state must be established for on-road driving. Danger of overturning when switching on the suspension! Do not switch the suspension on unless the truck crane has been rigged for on-road driving and the main boom has been set down.
-
Page 197: Setting The Tachograph
Driving 5.1 Before driving 5.1.5 Setting the tachograph Diagram sheets (24-hour discs) can be inserted into the tachograph for two drivers simultaneously. As a crane operator, you are obligated to set each activity on the tachograph. This section only describes the basic operation of the tachograph (inserting diagram sheets, setting time groups, operating errors). - Page 198 Driving 5.1 Before driving Setting the To set the tachograph, you must first open the drawer and check the time tachograph setting. You can then insert the diagram sheets and set the time groups. Opening the drawer • Press the button (6) once. First the symbol (5) and the running bar (4) appear, then the drawer (3) opens.
- Page 199 Driving 5.1 Before driving Inserting diagram sheets Only insert diagram sheets that are properly marked. The diagram sheets are always inserted with the front facing upwards. Risk of malfunctions in the electronics! If a diagram sheet has been damaged by being marked several times, this might cause malfunctions in the electronics.
- Page 200 Driving 5.1 Before driving Display If no malfunction has occurred, the tachograph display now shows the basic display: – Date (4) and time (5) – Driver 1 time group (1.1) – Driver 1 diagram sheet inserted (1.2) – Total kilometres of the truck crane (3) –...
- Page 201 Driving 5.1 Before driving The different time groups are shown with the following symbols: Driving times: As soon as the vehicle starts to move, the tachograph auto- matically switches to the symbol for driver 1 driving time. If there are two diagram sheets inserted, the tachograph automatically switches to stand-by time for two-drivers operation.
- Page 202 Driving 5.1 Before driving Blank page 5 - 24 3 112 xxx en Operating Manual GMK6300L...
-
Page 203: Displaying The Operating Hours
Driving 5.1 Before driving 5.1.6 Displaying the operating hours You can view the operating hours for all power units in the Operating hours submenu. • If necessary, open the main menu and press the button (1) once. The Settings submenu opens. •... -
Page 204: Settings/Indications On The Driving Display
Driving 5.1 Before driving 5.1.7 Settings/indications on the driving display You can enter settings, e.g. the time and date, and have information dis- played, e.g. the outside temperature. The ignition must be switched on. Kilometre counter 1 Daily kilometre counter – position after the decimal point: 1 = 100 m (33 ft) 2 Overall route in kilometres 3 Reset daily kilometre counter... -
Page 205: Operating The Transmission
Driving 5.2 Operating the transmission Operating the transmission The transmission automatically controls all gear changes. However, gears can be changed manually at any time. 5.2.1 Switching on Risk posed by unexpected rolling! When the ignition is switched on, the transmission switches to the neutral position N. -
Page 206: Switching The Transmission To The Neutral Position
Driving 5.2 Operating the transmission 5.2.2 Switching the transmission to the neutral position The neutral position can be switched on at any time. You should only switch to neutral position at standstill. You can only start the motor when the transmission is in the neutral posi- tion. -
Page 207: Changing The Driving Mode
Driving 5.2 Operating the transmission 5.2.3 Changing the driving mode You may switch between two driving modes: – The E (Economy) driving mode is designed mostly for level driving condi- tions. A higher gear is selected at a low engine speed to save on fuel consumption. -
Page 208: Selecting The Driving Direction
Driving 5.2 Operating the transmission 5.2.4 Selecting the driving direction The following conditions must be met: – The vehicle engine is running at idling speed, – The accelerator is not being operated – The parking brake or holding brake is applied to secure the truck crane. Risk of accidents from unexpected movement! If the engine speed is too high when selecting the driving direction, then no gear will be engaged. - Page 209 Driving 5.2 Operating the transmission For reverse travel • Press the button (2) once. The reverse gear (1) is selected and displayed. The reverse camera is switched on. The display (3) shows the area behind the truck crane. Switching off the reverse camera •...
-
Page 210: Changing Highest Gear/Starting Gear
Driving 5.2 Operating the transmission 5.2.5 Changing highest gear/starting gear The highest gear (2), which is selected during driving, and the engaged starting gear (1) are displayed. Changing the highest gear • Press button (3) or (4) until the required highest gear (2) is displayed. Selecting a lower starting gear •... -
Page 211: Driving And Changing Gears
Driving 5.2 Operating the transmission 5.2.7 Driving and changing gears While driving, the transmission changes to the gear suitable for the current load, engine speed and position of the accelerator. When the gear oil temperature falls below approx. -7 °C (20 °F), only gears 1 and 2 are used in gear position D. -
Page 212: Changing The Driving Direction
Driving 5.2 Operating the transmission Manual downshifting • Select a gear that is smaller than the current gear ( ) as the highest gear (2) by using the button (1). If it is permissible for the current driving mode, then transmission shifts down. -
Page 213: Stopping
Driving 5.2 Operating the transmission 5.2.9 Stopping • In order to stop, take your foot off the accelerator and depress the brake pedal. Stopping for In order to stop for a longer time with the engine running, you must: longer periods –... -
Page 214: Oil Level Gauge
Driving 5.2 Operating the transmission 5.2.11 Oil level gauge You can call up information on the current oil level in the transmission. If in doubt about the accuracy of the oil-level reading, you can always check the oil level using the dipstick when the gear oil is warm; à... - Page 215 Driving 5.2 Operating the transmission Displays for errors 1 Resting time is elapsing, X = counters 8 to 1 2 Engine speed too low 3 Engine speed too high 4 No neutral position 5 Transmission oil too cold 6 Transmission oil too hot 7 No standstill 8 Error on the sensor •...
- Page 216 Driving 5.2 Operating the transmission Blank page 5 - 38 3 112 xxx en Operating Manual GMK6300L...
-
Page 217: Driving The Truck Crane And Switching It Off
• Stop the vehicle as soon as possible. Briefly switch the ignition off then on again. If the lamp is still lit, contact Manitowoc Crane Care. Operating Manual GMK6300L 3 112 xxx en 5 - 39... - Page 218 2 minutes. If oil has escaped • Warn any vehicles on the road behind you. • Do not continue driving. Contact Manitowoc Crane Care. If no oil has escaped • Start the engine. – If all 3 lamps (1) light up: •...
- Page 219 Driving 5.3 Driving the truck crane and switching it off • While driving Observe all warning messages. Risk of damage if warning messages are disregarded! After a warning message appears (on the ECOS display or combination instrument display), always promptly observe all information in the section titled Warning submenu , and take the appropriate corrective measures.
-
Page 220: Cruise Control
Driving 5.3 Driving the truck crane and switching it off 5.3.2 Cruise control Cruise control enables you to drive at a constant speed without pressing the accelerator. Risk of accidents due to carelessness! Be ready to brake at all times when cruise control is switched on! Switch cruise control on only if the traffic situation permits a constant speed. -
Page 221: Temposet
Driving 5.3 Driving the truck crane and switching it off 5.3.3 Temposet You can use Temposet to limit the maximum speed. Switching on You can switch on Temposet only at speeds greater than 15 km/h (9 mph). • Press the button (1) once. Temposet is now switched on. -
Page 222: Driving Downhill
Driving 5.3 Driving the truck crane and switching it off 5.3.4 Driving downhill Risk of accidents when driving in neutral position! Never switch into neutral position whilst driving. In neutral position, the truck crane may accelerate and the engine retarder is ineffective. - Page 223 Driving 5.3 Driving the truck crane and switching it off Risk of damage from resonance vibrations! Always maintain a speed below 85 km/h (53 mph). Stop the truck crane promptly. When driving downhill, you can also slow down the truck crane as follows, in addition to using the service brake: à...
- Page 224 Driving 5.3 Driving the truck crane and switching it off Additional brakes Engine retarder The truck crane has an engine flap brake which it uses as an engine retarder. The engine retarder only becomes effective at an engine speed of 900 rpm and can be used up to a maximum speed of 2,300 rpm.
-
Page 225: Driving Uphill
Driving 5.3 Driving the truck crane and switching it off 5.3.5 Driving uphill Starting The engine must be running. • To start moving and to drive on steep uphill roads, switch to the P (1) driving mode. To start moving, you have to: –... -
Page 226: Warning Submenu
Driving 5.3 Driving the truck crane and switching it off 5.3.6 Warning submenu ECOS differentiates between warning messages and error messages (error à Error submenu , p. 5 - 54). A warning message indicates that messages; certain values do not correspond to a target value. Further warning messages can be displayed on the instrument panel;... - Page 227 Driving 5.3 Driving the truck crane and switching it off Hydraulic oil too hot The hydraulic oil temperature is higher than 80 °C (176 °F). à Current temperature display; p. 4 - 20. à Possible cause and solution; p. 7 - 33. Danger of overheating! There is a fault if the hydraulic oil temperature exceeds 80 °C (176 °F).
- Page 228 Driving 5.3 Driving the truck crane and switching it off Coolant level too low Immediately top up the coolant so that the engine does not overheat; à Maintenance Manual . Transmission retarder too hot The retarder in the transmission is not working. When the transmission retarder has cooled down, the symbol reverts to grey and the transmission retarder is ready to function again.
-
Page 229: Warning Or Malfunction Messages On The Instrument Panel
CAN BUS system interrupted If the lamp continues to light up, switch off the ignition and switch it back on after 15 seconds; notify Manitowoc Crane Care. Battery charge indicator warning The voltage in the carrier electrical system is too high or too low. - Page 230 Driving 5.3 Driving the truck crane and switching it off Oil pressure too low A warning buzzer sounds at the same time. • Stop the truck crane as quickly as possible while observing the traffic sit- uation and switch off the engine. à...
-
Page 231: Override Torque Reduction
Driving 5.3 Driving the truck crane and switching it off 5.3.8 Override torque reduction When the carbamide supply is empty, the torque reduction is activated via the engine control system. You can override torque reduction up to 3 times. – If the carbamide level drops to the reserve level, the lamp (1) lights up. –... -
Page 232: Error Submenu
Driving 5.3 Driving the truck crane and switching it off 5.3.9 Error submenu ECOS differentiates between error messages and warning messages à Warning submenu , p. 5 - 48). (warning messages In the event of an error message, the lamps (1) and (2) flash. à... - Page 233 Driving 5.3 Driving the truck crane and switching it off Transport at the rear of the carrier • Push the chock (2) behind the bracket (3) and hang it on the holder (1). (A) – Folding out • Push the latch (4) through the hole (5). The chock unfolds by spring force.
- Page 234 Driving 5.3 Driving the truck crane and switching it off Securing the truck crane against unauthorised use • Secure the truck crane against unauthorised use by: – Stowing away the hand-held control in the crane cab or in the driver's cab, –...
-
Page 235: Folding Berth
Driving 5.3 Driving the truck crane and switching it off 5.3.11 Folding berth The berth must always be folded up for driving. Risk of accidents due to the berth folding down! Check that the locking bar has engaged and put up the back rest of the seats before driving. - Page 236 Driving 5.3 Driving the truck crane and switching it off Blank page 5 - 58 3 112 xxx en Operating Manual GMK6300L...
-
Page 237: Off-Road Driving
Driving 5.4 Off-road driving Off-road driving This section describes adjustments, connections and procedures for adapt- ing the vehicle handling to off-road conditions. Adjustments to If you drive continuously for short periods of time with different loads or on the transmission a slippery surface, the transmission may switch gears too late or too early. -
Page 238: Transfer Case - Switching The Off-Road Gear On/Off
• Open the main menu, if necessary (1). • Select neutral position on the transmission. If the error symbol is shown during the following gear changes, contact Manitowoc Crane Care. 5 - 60 3 112 xxx en Operating Manual GMK6300L... - Page 239 Driving 5.4 Off-road driving Switching on • Press the button (1) repeatedly until the dot turns green. The off-road gear is switched on when the symbol (2) is shown. If another symbol is shown: • < > Briefly shift up the transmission to and back to •...
-
Page 240: Longitudinal And Transverse Differential Locks
Start moving slowly – display: – The symbol (3) first turns yellow, – Then symbol (2) turns red, differential locks on. If the error symbol is displayed, contact Manitowoc Crane Care. 5 - 62 3 112 xxx en Operating Manual GMK6300L... - Page 241 Driving 5.4 Off-road driving Switching off • Press button (1) once for: – Central differential locks (A) or – Transverse differential locks (B), The dot turns black. Display: – The symbol (3) first turns yellow, – Then symbol (2) turns green, differential locks off.
-
Page 242: Operating The Level Adjustment System
– Set the on-road driving level, – Pre-select the suspension struts and change the vehicle level. If the error symbol (1) is shown during level adjustment, contact Manitowoc Crane Care. 5 - 64 3 112 xxx en Operating Manual GMK6300L... - Page 243 Driving 5.4 Off-road driving Setting the For on-road driving, you must always set the on-road level in order to on-road level adhere to the specified overall height. • Park the truck crane on a level surface. • Straighten the steering. •...
- Page 244 Driving 5.4 Off-road driving Changing the You can extend or retract the pre-selected suspension struts to change the vehicle level vehicle level. Risk of accidents by exceeding total permissible height! Always bring the truck crane to on-road level before driving on roads after changing the level.
- Page 245 Driving 5.4 Off-road driving (A) – When the truck crane is level, only the lamp (1) in the middle lights up. The other lamps show the sides of the truck crane which are higher. The assignment to the carrier is given by the directional indicator (2).
-
Page 246: Freeing Truck Crane Stuck In Terrain
Driving 5.4 Off-road driving 5.4.4 Freeing truck crane stuck in terrain Rocking the truck If the truck crane is stuck in terrain, you can try to free it by driving back and crane free forth (rocking it free): When rocking free, you should –... - Page 247 Driving 5.4 Off-road driving • Towing free to Fasten a steel rope to the front towbar coupling. the front Risk of damage to the chassis! Only tow the truck crane free while observing the procedure given for the pulling direction. Jerking the truck crane or pulling it at an angle can cause damage to the chassis.
- Page 248 Driving 5.4 Off-road driving Blank page 5 - 70 3 112 xxx en Operating Manual GMK6300L...
-
Page 249: Separate Steering
Driving 5.5 Separate steering Separate steering There are two steering modes with separate steering. – Driving around corners: When the separate steering is switched on, the steering angle is larger than for normal steering mode – the turning circle is smaller. –... - Page 250 When separate steering is switched on, the speed is limited to approx. 20 km/h (12 mph). If the error symbol is displayed, contact Manitowoc Crane Care. • Manual Steer the 1st to 2nd axle line with the steering wheel.
- Page 251 Driving 5.5 Separate steering (A) – For driving around corners • Steer the 6th axle line in the opposite direc- tion to the 1st to 2nd axle line. The other axle lines are steered to suit the turning radius. (B) – For crab travel mode •...
- Page 252 – the 3rd and 4th axle lines always remain in the straight running posi- tion, – the 5th and 6th axle lines always steer to suit the turning radius. If the error symbol is displayed, contact Manitowoc Crane Care; à p. 7 - 32.
-
Page 253: Heating And Air-Conditioning System
Driving 5.6 Heating and air-conditioning system Heating and air-conditioning system 5.6.1 Standard heating system • Switching on Start the engine. The heating output is only provided when the engine is running. Heating You must set the blower and the temperature. Setting the blower/fresh air/recirculated air You can regulate the air volume with the switch (1) for: A Recirculated air –... - Page 254 Driving 5.6 Heating and air-conditioning system Air distribution You can direct the air to flow out of various air vents. • Turn the switch (5) to the position for the required air vents. A Air vents (1), (2) – front windscreen, side B Air vents (1) to (4) C Air vents (2), (3), (4) –...
- Page 255 Driving 5.6 Heating and air-conditioning system Examples This section only contains examples of the settings. Always adjust the setting to the current conditions (warm, cold, damp). (A) – Ventilating – Turn the switches to the positions shown. – If necessary, open the air vents for the side and centre.
-
Page 256: Air-Conditioning System
Driving 5.6 Heating and air-conditioning system 5.6.2 Air-conditioning system You can cool the driver's cab and dry the air using the air-conditioning system. Information Do not cool the air too much. The difference between the outside temperature and the inside temperature should be at the most 10 °C to 14 °C (18 °F to 25 °F). - Page 257 Driving 5.6 Heating and air-conditioning system Cooling The illustration shows only a sample setting. Always adjust the setting to the current conditions. • Switch the air conditioning on – the lamp (4) lights up. • Turn the switch (3) as far as it will go, to Cold . •...
-
Page 258: Auxiliary Water Heater
Driving 5.6 Heating and air-conditioning system 5.6.3 Auxiliary water heater The batteries will be drained if you operate the auxiliary heater with the engine switched off. You must recharge the batteries at shorter intervals if you use the auxiliary heater frequently! You can use the auxiliary water heater to: –... - Page 259 Driving 5.6 Heating and air-conditioning system Preheating the Adjust the heating system as follows if the driver's cab is to be preheated in driver's cab addition to the engine: • Switch (2) to position Warm . • Switch (1) on the recirculated air symbol, level 1.
- Page 260 Driving 5.6 Heating and air-conditioning system This section describes how to switch on the heater manually. The auxiliary à Saving automatic heating heater can also be switched on automatically; start , p. 5 - 83. à • Switch on the ignition , p. 4 - 11. Switch on the ignition;...
- Page 261 Driving 5.6 Heating and air-conditioning system • Set the current time on the flashing display – button (1) or (2), e.g. 14:00. • Wait for 5 seconds. The new time is saved and then the weekday flashes, e.g. MO for Monday. •...
- Page 262 Driving 5.6 Heating and air-conditioning system Wait for approx. 5 seconds until the weekday for the heating start flashes, e.g. MO for Monday. • Set the weekday for the desired heating start – button (1) or (2). Wait for approx. 5 seconds until the current time is displayed, e. g. 14.00. Now, the new heating start has been saved and switched on.
- Page 263 Driving 5.6 Heating and air-conditioning system Switching the To switch on an automatic heating start, you must retrieve the correspond- automatic heat- ing storage location. ing start on and off • To retrieve a storage location, press the button (1) once. The display field flashes for 5 seconds and a storage location is shown (e.g.
- Page 264 Driving 5.6 Heating and air-conditioning system Blank page 5 - 86 3 112 xxx en Operating Manual GMK6300L...
-
Page 265: Towing A Trailer
Driving 5.7 Towing a trailer Towing a trailer When towing a trailer, a towbar coupling is fitted to the back of the carrier. Please observe the permissible trailer load of your truck crane. Risk of accidents by trailer moving unintentionally! Before coupling or uncoupling the trailer, it must be secured with the trailer parking brake as well as with chocks to prevent it from rolling away. - Page 266 Driving 5.7 Towing a trailer Coupling the trailer Risk of injury when the automatic closing device is triggered! Do not put your hand into the coupling jaw when the towbar coupling is open. This may activate the automatic closing device, causing the cotter pin to move down with great force, seriously injuring your hand.
- Page 267 Driving 5.7 Towing a trailer Risk of accidents if the trailer is coupled improperly! If the pin is protruding from the guide bushing, the trailer is not coupled properly and could become disengaged from the towbar coupling while driving. Connecting the supply lines •...
- Page 268 Driving 5.7 Towing a trailer Removing supply lines Risk of accidents due to trailer moving unintentionally! Always first remove the hose from the supply line so that the trailer is braked. This prevents the trailer from moving when you remove the brake hose.
- Page 269 Driving 5.7 Towing a trailer Risk of injury when manually closing the towbar coupling! When closing, the lever moves down with great force in the direction of the coupling jaw. Start the closing process only by moving the lever briefly in the direction of the coupling jaw with the ball of your hand.
- Page 270 Driving 5.7 Towing a trailer Checking the When a trailer is coupled and connected, you can check whether the braking braking force force of the truck crane alone is sufficient for braking the truck crane and the trailer on uphill or downhill roads (e.g. when a brake hose has burst). To check this, you can release the parking brake of the trailer on its own.
- Page 271 Driving modes Driving modes ............6 - 6.1.1 Information on how to use the tables .
- Page 272 Installing/removing the supporting box ....... . 6 - 65 6.6.1 CHECKLIST: Removing the supporting box .
-
Page 273: Driving Modes
The GMK6300L truck crane is designed for driving with maximum axle the axle loads loads of 12 t (26,500 lbs). Manitowoc Crane Group Germany GmbH points out that if the truck crane is driven with axle loads greater than 12 t (26,500 lbs), the brake system may overheat and the braking deceleration required by the EU partial type-approval cannot be met. -
Page 274: Information On How To Use The Tables
Driving modes 6.1 Driving modes 6.1.1 Information on how to use the tables The tables consist of two parts: – The driving mode of your truck crane is specified in the top part, next to Equipment. Find out which driving mode applies to your truck crane. Each truck crane has one driving mode only. -
Page 275: Tables For A Maximum Axle Load Of 12 T (26,500 Lbs)
Driving modes 6.1 Driving modes 6.1.2 Tables for a maximum axle load of 12 t (26,500 lbs) The following applies to all driving modes: – The counterweight is completely unrigged. – The lattice extensions/hose drums have been removed. – The auxiliary hoist must be removed. For tyres Also be aware of the effects on the axle loads when towing a trailer;... - Page 276 Driving modes 6.1 Driving modes For tyres Also be aware of the effects on the axle loads when towing a trailer; à 445/95 R25 p. 5 - 87. Driving mode ✔ Aluminium rims ✔ Drive 12 x 6 x 12 Retarder Outrigger pads 1 -sheave hook block attached to...
- Page 277 Driving modes 6.1 Driving modes For tyres Also be aware of the effects on the axle loads when towing a trailer; à 525/80 R25 p. 5 - 87. Driving mode ✔ Aluminium rim ✔ Drive 12 x 6 x 12 Retarder Outrigger pads 1 -sheave hook block attached to...
-
Page 278: Maximum Permitted Speeds With An Axle Load Of Over 12 T (26,500 Lbs)
Driving modes 6.1 Driving modes 6.1.3 Maximum permitted speeds with an axle load of over 12 t (26,500 lbs) Should your national regulations allow driving with axle loads over 12 t (26,500 lbs), you may under no circumstances exceed the maximum permitted speed given here. -
Page 279: Weighing The Truck Crane
Driving modes 6.2 Weighing the truck crane Weighing the truck crane Weighing error The most precise method for determining the total weight of the GMK6300L is too use calibrated scales of appropriate capacity and a weighbridge on which all the wheels of the truck crane can stand at the same time. All other weighing procedures are subject to various factors which can lead to weighing errors. - Page 280 Driving modes 6.2 Weighing the truck crane – Determining the axle loads All the axle lines belonging to an axle group must always be weighed. In addition, all the wheels must be on the same level. If, for instance, only the axle group A1 is to be weighed, then the axle groups A2 and A3 must be equalised on a support plate U which has the same height as the scales W1 and W2.
- Page 281 Driving modes 6.2 Weighing the truck crane Weighing procedure Perform the weighing procedure only with the crane truck standing on solid and horizontal ground! All scales must be at the same height! • Position the scales W1 to W6 (or the necessary support plate) directly in front of the truck crane, so that the distances between the scales are exactly the same as the distances between the axle groups 1 to 3.
- Page 282 Driving modes 6.2 Weighing the truck crane Evaluation In the example shown you receive six weighing results. Assume you had made a note of the values listed here. Passenger side: W1 = 10 t, W3 = 10 t, W5 = 12 t Driver's side: W2 = 10 t, W4 = 10 t, W6 = 12 t These values allow you to determine the total weight of the truck crane and...
-
Page 283: Rigging Work For Driving With A Trailer
Driving modes 6.3 Rigging work for driving with a trailer Rigging work for driving with a trailer To reduce the axle loads to the specifications applicable in the country in which you are working, you can set the main boom on to a trailer (dolly) when driving. -
Page 284: Switching On The Slewing Gear Freewheel
Driving modes 6.3 Rigging work for driving with a trailer 6.3.1 Switching on the slewing gear freewheel When the main boom is set down on a trailer, the superstructure must be able to slew when driving around corners. You must switch on the slewing gear freewheel for this purpose. -
Page 285: Switching On The Boom Floating Position
Driving modes 6.3 Rigging work for driving with a trailer 6.3.2 Switching on the boom floating position If the main boom has been placed on a trailer, the boom floating position must be switched on so that the main boom can move up and down. Risk of accidents from the boom floating position being switched off! Always switch on the boom floating position when the main boom is on a trailer. -
Page 286: Switching On Boom Pre-Tensioning
Driving modes 6.3 Rigging work for driving with a trailer 6.3.3 Switching on boom pre-tensioning If the main boom has been set down on a trailer, you can change the axle loads on the rear axle lines by switching on the boom pre-tensioning. •... -
Page 287: Adjusting Axle Pressure
Driving modes 6.3 Rigging work for driving with a trailer 6.3.4 Adjusting axle pressure With additional equipment you can adjust the axle pressure of the 3rd and 4th axle lines for trailer operation. You can only open the submenu when the truck crane is stationary. •... - Page 288 Driving modes 6.3 Rigging work for driving with a trailer Adjusting axle pressure • Tap the button – (1) to increase the axle pressure, – (2) to reduce the axle pressure. The set axle pressure may not exceed 80 bar (1,160 psi). Driving with The truck crane may only be driven with changed axle pressures if the main changed axle...
-
Page 289: Switching The Superstructure Driving Lights On/Off
Driving modes 6.3 Rigging work for driving with a trailer 6.3.5 Switching the superstructure driving lights on/off The lighting for the superstructure includes lamps (2) and (3). With standard equipment, lamps (2) and (3) are always switched on and off together with the parking light and the headlights. - Page 290 Driving modes 6.3 Rigging work for driving with a trailer Blank page 6 - 18 3 112 xxx en Operating Manual GMK6300L...
-
Page 291: Main Boom, Removing/Installing
Only remove or install the main boom if the truck crane is equipped with the factory-installed pulling devices and with the necessary accessories. Without this factory-installed pulling device, the main boom may only be removed by Manitowoc Crane Care. Additional equip- In addition to the pulling devices, you also need the following accessories: ment required –... -
Page 292: Checklist: Removing The Main Boom
Driving modes 6.4 Main boom, removing/installing 6.4.1 CHECKLIST: Removing the main boom This checklist is not a complete operating manual. There are accompanying instructions, which are indicated by cross-references. Observe the warnings and safety instructions specified there! Prerequisites – The auxiliary hoist has been unrigged. –... - Page 293 Driving modes 6.4 Main boom, removing/installing à 4. Sling the main boom to an auxiliary crane; p. 6 - 26. à 5. Switch on the derricking cylinder pressure relief; p. 6 - 29. 6. On the derricking cylinder head: – Take the load off of the head pin, –...
- Page 294 Driving modes 6.4 Main boom, removing/installing 9. Put the main boom on the separate vehicle and secure for transport; à p. 6 - 41. à 10. Secure the derricking cylinder with a tightening belt; p. 6 - 40. 6 - 22 3 112 xxx en Operating Manual GMK6300L...
-
Page 295: Checklist: Mounting The Main Boom
Driving modes 6.4 Main boom, removing/installing 6.4.2 CHECKLIST: Mounting the main boom This checklist is not a complete operating manual. There are accompanying instructions, which are indicated by cross-references. Observe the warnings and safety instructions specified there! Prerequisites The truck crane is supported by an outrigger span of at least 8,70 x 2,71 m (28.5 x 8.9 ft). - Page 296 Driving modes 6.4 Main boom, removing/installing 5. On the boom pivot pin: – Switch the hydraulic circuit over, – Push in the pivot pin, à p. 6 - 33. 6. Set down the main boom in the boom rest with the auxiliary crane and remove the lifting gear.
- Page 297 Driving modes 6.4 Main boom, removing/installing 10. Remove the derricking cylinder support from the counterweight platform. 11. Place the main boom on the boom rest. à 12. Perform inspections with the main boom set down; p. 6 - 42. Operating Manual GMK6300L 3 112 xxx en 6 - 25...
-
Page 298: Slinging The Main Boom
Driving modes 6.4 Main boom, removing/installing 6.4.3 Slinging the main boom Slings are fitted to the main boom when rigging and it is lifted with an à auxiliary crane. Note the equipment necessary for this; p. 6 - 19. Risk of accidents due to incorrect procedure! Only use the lifting gear included in the delivery and proceed as described in the following section. - Page 299 Driving modes 6.4 Main boom, removing/installing • Insert the bracket (3) into the slinging point (1). Pull the pin (2). • Insert the bracket into the lifting gear (4). • Secure the bracket with the pin (2) and the retaining pin. •...
-
Page 300: Removing/Attaching The Clamps
Driving modes 6.4 Main boom, removing/installing 6.4.4 Removing/attaching the clamps Danger of hands and arms being crushed! Make sure that the boom pivot pin is bolted before making or removing or attaching the clamp. By this means you avoid a swinging main boom crushing your arms or hands on the turntable. -
Page 301: Switching The Pressure Relief On/Off
Driving modes 6.4 Main boom, removing/installing 6.4.5 Switching the pressure relief on/off Pressure relief prevents the derricking cylinder from extending when the engine runs, after the main boom has been removed. When removing • Switch the pressure relief on before pulling the derricking cylinder head axle. - Page 302 Driving modes 6.4 Main boom, removing/installing 6.4.6 Connecting/disconnecting the derricking cylinder from the boom The derricking cylinder head axle is retracted and fitted with a pulling device. Derricking Before retracting the head pin, the derricking cylinder support must be cylinder support erected.
- Page 303 Driving modes 6.4 Main boom, removing/installing Retracting the After you have pulled the head pin, you can no longer derrick the main derricking cylinder boom. head axle (A) – Releasing the head pin • Loosen the bolt (3) and remove the disc. (B) –...
- Page 304 Driving modes 6.4 Main boom, removing/installing • Fitting the Check to see if the tightening belt of the derricking cylinder is taken off. derricking cylinder head axle Aligning the derricking cylinder • (A) – Undo the bolt (1) and remove the disc. •...
-
Page 305: Extending/Retracting The Boom Pivot Pin
Driving modes 6.4 Main boom, removing/installing 6.4.7 Extending/retracting the boom pivot pin The boom pivot pin is pulled out and pushed in using a hydraulic pulling device. Before pulling Before pulling the boom pivot pin out, you must switch the hydraulic circuit it out over. - Page 306 Driving modes 6.4 Main boom, removing/installing Pulling out the You must pull out / push in the pivot pin on both sides of the main boom. pivot pin You can operate the pulling device from the crane cab. Risk of damage to the main boom! Before pulling it out, the main boom must be slung and all other lifting gear must be tightened.
- Page 307 Driving modes 6.4 Main boom, removing/installing Pushing the pivot pin in • (A) – The pivot pin (4) is pulled out and the pins (2) are inserted. • (B) – Press the button (1) down. The pivot pin (4) is pushed in. •...
-
Page 308: Disconnecting/Connecting Hydraulics/Electrical
Driving modes 6.4 Main boom, removing/installing 6.4.8 Disconnecting/connecting hydraulics/electrical Disconnecting The number of hoses/cables depends on how the truck crane is equipped. – The main boom must be raised. Risk of malfunction in the superstructure electronics! Always turn off the ignition in the crane cab before you establish or sepa- rate the electrical connection. - Page 309 Driving modes 6.4 Main boom, removing/installing Connecting The number of hoses/cables depends on how the truck crane is equipped. – The main boom must be raised. Risk of malfunction in the superstructure electronics! Always turn off the ignition in the crane cab before you establish or sepa- rate the electrical connection.
-
Page 310: Lifting The Main Boom Off/On The Turntable
Driving modes 6.4 Main boom, removing/installing 6.4.9 Lifting the main boom off/on the turntable à – The main boom is slung; p. 6 - 26. à – The hydraulic/electrical connections are disconnected; p. 6 - 36. à – The boom pivot pin is pulled out; p. - Page 311 Driving modes 6.4 Main boom, removing/installing Lifting on to the turntable • Lift the main boom backwards and down- wards on to the turntable. Make sure that: – The connection lines (3) do not hang loose, – The pivot point (1) is higher than the driver's cab, –...
-
Page 312: Aligning The Connecting Points
Driving modes 6.4 Main boom, removing/installing 6.4.10 Aligning the connecting points Risk of damage to the turntable and the connection lines! Make sure that the connection lines are located within the turntable and that the main boom does not swing when you raise it for insertion into the turntable. -
Page 313: Transporting The Main Boom
Driving modes 6.4 Main boom, removing/installing 6.4.12 Transporting the main boom Transport the main boom only on a separate vehicle which is of sufficient size and has sufficient lifting capacity. à Operating Manual . Transport dimensions and weight; Risk of damage to the main boom! Always place the main boom onto a suitable packing. -
Page 314: Inspections After Main Boom Mounting
Driving modes 6.4 Main boom, removing/installing 6.4.13 Inspections after main boom mounting • Check to see if the pressure relief is switched off and is secured with the à lock; p. 6 - 29. • Switch on the ignition. • Check if the RCL control unit (1) or ECOS (2) show an error message. -
Page 315: Installing/Removing The Hose Drum
Driving modes 6.4 Main boom, removing/installing 6.4.14 Installing/removing the hose drum Installing/Removing the hose drum requires using an auxiliary crane with à Dimensions and weights of removable parts , sufficient bearing capacity; p. 1 - 10. Installing For crane operation you must install the hose drum, if it is not already installed. - Page 316 Driving modes 6.4 Main boom, removing/installing • Connect the hoses (2) to the connections (1) (match the markings). • Hold the hoses. • Release the locking device (3). • Hang the hoses (4) at the slinging points (1) and (2) on the main boom. •...
- Page 317 Driving modes 6.4 Main boom, removing/installing • Engage the locking device (3). • Place the hoses (4) on the hose drum. • Remove the hoses (2) from the connec- tions (1). • Close the hoses and the connections (1) with the caps.
- Page 318 Driving modes 6.4 Main boom, removing/installing Blank page 6 - 46 3 112 xxx en Operating Manual GMK6300L...
-
Page 319: Installing/Removing Outrigger Beams
Driving modes 6.5 Installing/removing outrigger beams Installing/removing outrigger beams If the truck crane is fitted with a removable supporting box (ROB), you can only assemble/disassemble the front outrigger beams. à Installing/removing the supporting box , p. 6 - 65. To rig the outrigger beams, the outriggers must be fitted with hydraulic connections (1) which can be separated. -
Page 320: Checklist: Removing The Outrigger Beams
Driving modes 6.5 Installing/removing outrigger beams 6.5.1 CHECKLIST: Removing the outrigger beams This checklist is not a complete operating manual. There are accompanying instructions, which are indicated by cross-references. Observe the warnings and safety instructions there! 1. Prepare the truck crane – label the outrigger beams, retract, release and à... - Page 321 Driving modes 6.5 Installing/removing outrigger beams 6. Sling the outrigger beam and pull it out of the supporting box until it à reaches the centre of gravity; p. 6 - 59. 7. – Sling the outrigger beams in the centre of gravity and pull them out of the supporting box.
-
Page 322: Checklist: Installing The Outrigger Beams
Driving modes 6.5 Installing/removing outrigger beams 6.5.2 CHECKLIST: Installing the outrigger beams This checklist is not a complete operating manual. There are accompanying instructions, which are indicated by cross-references. Observe the warnings and safety instructions there! 1. Prepare the truck crane for the installation of the outrigger beams; à... - Page 323 Driving modes 6.5 Installing/removing outrigger beams à 6. Screw in the spacers; p. 6 - 57. à 7. If necessary put outrigger pads into position; p. 6 - 53. 8. Mount all necessary outrigger beams in the same way in accordance with this checklist.
-
Page 324: Preparing The Truck Crane
Driving modes 6.5 Installing/removing outrigger beams 6.5.3 Preparing the truck crane Prerequisites The following requirements must be met before mounting/removing the outrigger beams: – All rigging work which involves slewing the superstructure was com- pleted. – The parking brake is engaged. –... -
Page 325: Removing/Attaching Outrigger Pads
Driving modes 6.5 Installing/removing outrigger beams 6.5.4 Removing/attaching outrigger pads You only need remove the outrigger pads if the outrigger beams are to be transported lying on their side. For transportation in a suitable holding frame, the outrigger beams can be set down on the outrigger pad. - Page 326 Driving modes 6.5 Installing/removing outrigger beams Attaching After mounting the outrigger beam, you must attach the outrigger pad. outrigger pads • (A) – Remove the pin (1). • Extend the outrigger cylinder far enough so that the bearing surface (3) is below the guide (2).
-
Page 327: Disconnecting/Establishing The Hydraulic Connection
Driving modes 6.5 Installing/removing outrigger beams 6.5.5 Disconnecting/establishing the hydraulic connection There is a valve block on each outrigger beam. The position of the valve block may differ from the drawings, depending on the outrigger beam. Separating the connection Always disconnect all connections (4). •... -
Page 328: Disconnecting/Establishing The Electrical Connection
Driving modes 6.5 Installing/removing outrigger beams 6.5.6 Disconnecting/establishing the electrical connection The electrical connection is only present on truck cranes with an outrigger pressure indicator. Risk of malfunctions in the electronic system! Always turn off the ignition before you disconnect or establish the electrical connection. -
Page 329: Unscrewing/Screwing In The Spacers
Driving modes 6.5 Installing/removing outrigger beams 6.5.7 Unscrewing/screwing in the spacers There are two spacers for each outrigger beam – In the supporting box – In the outrigger beam on the opposite side. The illustrations show as an example the spacers for the outrigger beams on the front right hand side. - Page 330 Driving modes 6.5 Installing/removing outrigger beams Screwing in Before you retract/extend an outrigger beam after mounting, you must screw in the spacers. At the supporting box • Screw in the screws (1) as far as possible until the spacers (3) are touching the outrig- ger beam (4) at the top.
-
Page 331: Disconnecting/Establishing The Connections To The Supporting Box
Driving modes 6.5 Installing/removing outrigger beams 6.5.8 Disconnecting/establishing the connections to the supporting The illustrations show as an example the connecting points for the outrig- ger beam on the front left hand side. (A) – To disconnect • Undo the wheel nuts (3). •... - Page 332 Driving modes 6.5 Installing/removing outrigger beams • Using the auxiliary crane, sling the outrigger beam in the centre of gravity (2). • Remove the chain hoist and lifting gear. Fasten a guide rope (1). • Lift the outrigger beam slightly to ease the load.
- Page 333 Driving modes 6.5 Installing/removing outrigger beams • Inserting the Only insert the outrigger beam at the correct installation point. Note the outrigger beam information on the label. Risk of being crushed by the swinging outrigger beam! Do not guide the outrigger beam with your hands when inserting it. Always used guide ropes and keep a suitable distance.
- Page 334 Driving modes 6.5 Installing/removing outrigger beams • Lift the outrigger beam as far as possible into the supporting box. Correct the height so that it does not remain hanging on the edges (1). • Remove the lifting gear from the centre of gravity.
-
Page 335: Transporting The Outrigger Beams
Driving modes 6.5 Installing/removing outrigger beams 6.5.10 Transporting the outrigger beams • For transportation, be sure to use a separate vehicle with sufficient load à bearing capacity. Transport dimensions and weight; p. 1 - 10. • Load the separate vehicle in such a way that the weight is evenly distributed. - Page 336 Driving modes 6.5 Installing/removing outrigger beams Blank page 6 - 64 3 112 xxx en Operating Manual GMK6300L...
-
Page 337: Installing/Removing The Supporting Box
Driving modes 6.6 Installing/removing the supporting box Installing/removing the supporting box The rear support mechanism comes from the rear supporting box. When using additional equipment, this can be completely removed with support- ing cylinders and outrigger beams for driving on roads. Risk of overturning when slewing the superstructure! Support the truck crane with an outrigger span of 7.98 x 8.50/1.00 m (26.1 x 27.9/3.3 ft) and set the corresponding RCL code before slewing the... -
Page 338: Checklist: Removing The Supporting Box
Driving modes 6.6 Installing/removing the supporting box 6.6.1 CHECKLIST: Removing the supporting box This checklist is not a complete operating manual. There are accompanying instructions, which are indicated by cross-references. Observe the warnings and safety instructions specified there! 1. Rig the outrigger span 7.98 x 8.50/1.00 m (26.1 x 27.9/3.3 ft) and align à... - Page 339 Driving modes 6.6 Installing/removing the supporting box 6. Release the locking pin between the supporting box and carrier; à p. 6 - 83. à 7. – Disconnect hydraulic connections; p. 6 - 76. à – Disconnect the electrical connection; p. 6 - 75. 8.
- Page 340 Driving modes 6.6 Installing/removing the supporting box 11. If the main boom is to be set down on the boom rest: – With the RCL set accordingly, slew the superstructure to the front à After the removal , p. 6 - 81. and set down the main boom;...
-
Page 341: Checklist: Installing The Supporting Box
Driving modes 6.6 Installing/removing the supporting box 6.6.2 CHECKLIST: Installing the supporting box This checklist is not a complete operating manual. There are accompanying instructions, which are indicated by cross-references. Observe the warnings and safety instructions specified there! 1. Rig the outrigger span 7.98 x 8.50/1.00 m (26.1 x 27.9/3.3 ft) and align à... - Page 342 Driving modes 6.6 Installing/removing the supporting box à 6. – Establish the hydraulic connection; p. 6 - 76. à – Establish electrical connection; p. 6 - 75. à 7. Pin the supporting box to the carrier; p. 6 - 83. à...
-
Page 343: Rig The Outrigger Span 7.98 X 8.50/1.00 M (26.1 X 27.9/3.3 Ft)
Driving modes 6.6 Installing/removing the supporting box 6.6.3 Rig the outrigger span 7.98 x 8.50/1.00 m (26.1 x 27.9/3.3 ft) With this outrigger span, the truck crane is sta- bilised at the front to an outrigger width (2) 8.50 m (26.1 ft). The auxiliary supports must be extended at the rear. - Page 344 Driving modes 6.6 Installing/removing the supporting box Front outrigger • At the front outrigger, set the span to 8.50 m à Setting the outrigger spans , (26.1 ft); p. 12 - 32. • Extend the support cylinders until they make contact with the ground. Auxiliary supports Extend •...
- Page 345 Driving modes 6.6 Installing/removing the supporting box Retract • (A) – Left auxiliary support – Press and hold down the button (1) below. • Press in the button (3) at the right. • (B) – Right auxiliary support – Press and hold down the button (2) below.
-
Page 346: Establishing/Disconnecting The Pneumatic Connection
Driving modes 6.6 Installing/removing the supporting box 6.6.4 Establishing/disconnecting the pneumatic connection When additional equipment is in use, there is a pneumatic connection between the carrier and the supporting box. (A) – Establishing the connection • Open the connection (1). •... -
Page 347: Disconnecting/Establishing The Electrical Connection
Driving modes 6.6 Installing/removing the supporting box 6.6.5 Disconnecting/establishing the electrical connection Risk of malfunctions in the carrier electronics! Always turn off the ignition before you establish or break the electrical connection. This prevents malfunctions and error messages in the carrier electronics. -
Page 348: Disconnecting/Establishing The Hydraulic Connection
Driving modes 6.6 Installing/removing the supporting box 6.6.6 Disconnecting/establishing the hydraulic connection The hydraulic connection between the supporting box and carrier consists of two hoses with couplings. Always close off hoses or connections you do not need with appropriate caps. Separating the connection •... -
Page 349: Attaching/Raising The Supporting Box With The Truck Crane
Driving modes 6.6 Installing/removing the supporting box 6.6.7 Attaching/raising the supporting box with the truck crane Prerequisites: – The outrigger span 7.98 x 8.50/1.00 m (26.1 x 27.9/3.3 ft) has been estab- à lished and the truck crane is horizontally aligned; p. - Page 350 Driving modes 6.6 Installing/removing the supporting box • Lifting Raise the main boom until you are able lift the supporting box upwards in an upright position. If the supporting box is to be placed on a separate vehicle: • Move the separate vehicle up to the truck crane so that you can set down à...
- Page 351 Driving modes 6.6 Installing/removing the supporting box Hanging The supporting box is within one of the radii permitted by the RCL. The supports must be retracted before hanging the box. • Sling the supporting box. • Pull the locking pins (2). •...
-
Page 352: Installing The Reverse Camera
Driving modes 6.6 Installing/removing the supporting box 6.6.8 Installing the reverse camera Depending on the driving mode, you can install the reverse camera on the carrier or the supporting box. (A) – On the supporting box (B) – On the carrier •... -
Page 353: Crane Movements During Installation And Removal
Driving modes 6.6 Installing/removing the supporting box 6.6.9 Crane movements during installation and removal When the rear supporting box is removed, the setting down and raising of the main boom and the slewing of the superstructure is monitored by RCL. There are RCL codes for different working positions for an outrigger span of 7.98 x 8.50/1.00 m (26.1 x 27.9/3.3 ft). -
Page 354: Slinging Points On The Supporting Box
Driving modes 6.6 Installing/removing the supporting box 6.6.10 Slinging points on the supporting box Risk of accidents if used improperly! Attach the supporting box only to the designated points and only use lifting gear of sufficient lifting capacity. Weight of the supporting box à... -
Page 355: Locking/Unlocking The Supporting Box
Driving modes 6.6 Installing/removing the supporting box 6.6.11 Locking/unlocking the supporting box Risk of crushing when extending/retracting the pins! The pins on both sides are always moved at the same time from the Supporting box control unit. Make sure that no-one is in the vicinity of the carrier retainers on the other side of the vehicle when you extend or retract the pins. - Page 356 Driving modes 6.6 Installing/removing the supporting box Unlocking • Sling the supporting box before releasing the pins. • Pull the securing plugs (4) out of the two pins (3). • Press the button (2) on the left and the button (1) on the right. •...
-
Page 357: Transporting The Supporting Box On The Separate Vehicle
Driving modes 6.6 Installing/removing the supporting box 6.6.12 Transporting the supporting box on the separate vehicle Risk of damage to add-on parts on the supporting box and outrigger pads! Always secure the supporting box against slipping and overturning. This will prevent damage. Risk of accidents if used improperly! For transport, attach the supporting box to the provided lashing eyelets only and only use lifting gear of sufficient lifting capacity. -
Page 358: Installing / Removing The Rear Bumper
Driving modes 6.6 Installing/removing the supporting box 6.6.13 Installing / removing the rear bumper Prerequisites: – The outrigger span 7.98 x 8.50/1.00 m (26.1 x 27.9/3.3 ft) has been estab- à lished and the truck crane is horizontally aligned; p. 12 - 46. –... - Page 359 Driving modes 6.6 Installing/removing the supporting box Installing Therear bumper is within one of the radii permitted by the RCL. • (A) – Sling the rear bumper. • (B) – Lift the rear bumper vertically over the bracket (3). • Hang and align the rear bumber in the brack- ets (3) until the connecting points (2) line up.
- Page 360 Driving modes 6.6 Installing/removing the supporting box Blank page 6 - 88 3 112 xxx en Operating Manual GMK6300L...
-
Page 361: Rigging The Auxiliary Hoist
Driving modes 6.7 Rigging the auxiliary hoist Rigging the auxiliary hoist You need the following equipment: – suitable lifting gear and guide ropes with sufficient load bearing capacity; à Dimensions and weights of removable parts , p. 1 - 10, –... - Page 362 Driving modes 6.7 Rigging the auxiliary hoist 3. Slew the superstructure into the 0° to the rear position; à Slewing with rigged counterweight , p. 12 - 83, à The current slewing angle , p. 11 - 35. 4. Hang the ladder for rigging work on the counterweight; à...
-
Page 363: Checklist: Auxiliary Hoist, Removing
Driving modes 6.7 Rigging the auxiliary hoist 6.7.2 CHECKLIST: Auxiliary hoist, removing Prerequisites – The truck crane is supported with the required outrigger span as specified à in the Lifting capacity table ; p. 12 - 30. – The hoist rope on the auxiliary hoist must be unreeved and wound up. –... - Page 364 Driving modes 6.7 Rigging the auxiliary hoist à 5. – Disconnect the hydraulic connections; p. 6 - 96. à – Disconnect the electrical connections; p. 6 - 97. 6. Remove the ladder from the counterweight; à Ladder on the counterweight , p. 12 - 121. à...
-
Page 365: Slinging The Auxiliary Hoist
Driving modes 6.7 Rigging the auxiliary hoist 6.7.3 Slinging the auxiliary hoist Risk of damage to the auxiliary hoist and truck crane! Only sling the auxiliary hoist onto the slinging points provided. Always use lifting gear with a sufficient lifting capacity. •... -
Page 366: Installing/Removing The Rigging Frame
Driving modes 6.7 Rigging the auxiliary hoist 6.7.4 Installing/removing the rigging frame You need the rigging frame for the auxiliary hoist only when the counter- weight combination is a maximum of 26 t (57,320 lbs). Prerequisite – At least the 7 t (15,432 lbs) base plate lies on the counterweight platform. –... -
Page 367: Setting Down The Auxiliary Hoist
Driving modes 6.7 Rigging the auxiliary hoist 6.7.5 Setting down the auxiliary hoist • Hoist the auxiliary hoist onto the counter- weight combination or the rigging frame. The pins (1) must engage into the mount- ings (2). • Remove the lifting gear. Operating Manual GMK6300L 3 112 xxx en 6 - 95... -
Page 368: Making/Breaking The Hydraulic Connection
Driving modes 6.7 Rigging the auxiliary hoist 6.7.6 Making/breaking the hydraulic connection Risk of damage to hydraulic lines! Lay the hydraulic hoses so that they will not be damaged during rigging and crane operation. Establishing the connection The assignment is given by the size and colour designations. -
Page 369: Establishing/Disconnecting The Electrical Connection
Driving modes 6.7 Rigging the auxiliary hoist 6.7.7 Establishing/disconnecting the electrical connection Establishing the connection • Remove the plug (2) from the dummy socket (3) and insert it in the socket (1). • Close the dummy socket (3). • Insert the cable (4) for the hoist camera into the socket (5). -
Page 370: Creating The Connection To The Turntable
Driving modes 6.7 Rigging the auxiliary hoist 6.7.8 Creating the connection to the turntable Risk of being crushed when rigging the auxiliary hoist! Make sure that you or any helpers keep all parts of the body a sufficient distance away from the auxiliary hoist when rigging the auxiliary hoist. Remove all objects in the rigging range that could become jammed or crushed! The respective button combination required is shown in black. - Page 371 Driving modes 6.7 Rigging the auxiliary hoist Risk of accident when the safety valve is open! Always close the safety valve when the auxiliary hoist is locked to the turntable! This prevents the auxiliary hoist from falling down due to unintentional actuation of the locking cylinders.
- Page 372 Driving modes 6.7 Rigging the auxiliary hoist Separating the connection Lowering the lifting frame • Press the buttons (3) and (4). • Press the buttons (2) until the locking points (1) are relieved. Retracting the locking cylinders • Open the safety valve (3) – lever parallel with the line.
-
Page 373: Securing The Hoist Rope
Driving modes 6.7 Rigging the auxiliary hoist 6.7.9 Securing the hoist rope If you have wound up the hoist rope, you must secure it prior to removal. Risk of accident from damaged auxiliary hoist rope! Always secure the hoist rope prior to removal. This prevents the hoist rope from being damaged and being overloaded during crane operation. -
Page 374: Transporting The Auxiliary Hoist
Driving modes 6.7 Rigging the auxiliary hoist 6.7.10 Transporting the auxiliary hoist • For transportation, be sure to use a separate vehicle with sufficient load à Dimensions and weights of removable parts , p. 1 - 10. bearing capacity; • Load the separate vehicle in such a way that the weight is evenly distributed. -
Page 375: Check That The Auxiliary Hoist Is Functioning Properly
Check the function of the slewing indicator when applying the hoist rope. • You must feel a pulse on the slewing indicator (1) when the auxiliary hoist is rotating. • If no pulse is present, contacts Manitowoc Crane Care. Operating Manual GMK6300L 3 112 xxx en 6 - 103... - Page 376 Driving modes 6.7 Rigging the auxiliary hoist Blank page 6 - 104 3 112 xxx en Operating Manual GMK6300L...
- Page 377 Malfunctions in driving mode Emergency stop switch ..........7 - What to do when a malfunction occurs in road traffic .
- Page 378 3 112 xxx en Operating Manual GMK6300L...
-
Page 379: Malfunctions In Driving Mode
Malfunctions in driving mode 7.1 Emergency stop switch Malfunctions in driving mode Emergency stop switch Four emergency stop switches are provided for emergencies: 1 On the carrier 2 On the hand-held control 3 In the crane cab • Press an emergency stop switch (1), (2) or (3). The switch latches. - Page 380 Malfunctions in driving mode 7.1 Emergency stop switch Blank page 7 - 2 3 112 xxx en Operating Manual GMK6300L...
-
Page 381: What To Do When A Malfunction Occurs In Road Traffic
When in a hazard area, carry out only the repair work required to leave the danger area. If you are unable to repair the damage yourself, notify Manitowoc Crane Care à Towing the truck crane , p. 7 - 5. - Page 382 Malfunctions in driving mode 7.2 What to do when a malfunction occurs in road traffic Blank page 7 - 4 3 112 xxx en Operating Manual GMK6300L...
-
Page 383: Towing The Truck Crane
Malfunctions in driving mode 7.3 Towing the truck crane Towing the truck crane Observe the following when towing the truck crane: – The truck crane may only be towed away with a tow-rod. Attach the tow-rod to the tow-rod coupling on the front bumper. –... -
Page 384: Towing After Engine/Transmission Damage
Tow the truck crane at a maximum speed of 10 km/h (6 mph) and over a distance of max. 1 km (0,62 mi). Additional measures must be taken for longer distances, refer to Manitowoc Crane Care. Compressed-air If the engine fails, the truck crane must be supplied with compressed air by supply the tractor-vehicle so that the brake system is still operable. - Page 385 Malfunctions in driving mode 7.3 Towing the truck crane Electric power supply • Switch on the battery master switch. • Switch on the ignition. On the transmission • Switch the transmission to neutral position N. • Axle drives Switch off all differential locks. à...
- Page 386 , p. 5 - 10. If the lamp (1) fails to go out, the parking brake has been damaged, contact Manitowoc Crane Care. Risk of accidents due to faulty brakes! If the service brake system has been damaged, you may only tow the truck crane from the immediate danger area after consulting with Manitowoc Crane Care.
-
Page 387: Tow Starting
Tow the truck crane at a maximum speed of 10 km/h (6 mph) and over a dis- tance of max. 1 km (0,62 mi). Additional measures must be taken for longer distances, refer to Manitowoc Crane Care. 7.3.2 Tow starting It is not possible for the truck crane to start towing for transmission reasons. -
Page 388: External Starting Socket
Malfunctions in driving mode 7.3 Towing the truck crane 7.3.3 External starting socket The truck crane is equipped with a socket for external starting (1) on the à carrier and on the superstructure ( p. 14 - 79). If the batteries are discharged, the power supply (24 V) of an auxiliary vehi- cle or the socket (1) on the superstructure can be used for charging. -
Page 389: Battery Charger
Malfunctions in driving mode 7.3 Towing the truck crane 7.3.4 Battery charger Prerequisites – The engine must not be running and must be secured against unauthor- ised use, – An external 230 V mains power supply must be available at the location, –... - Page 390 Malfunctions in driving mode 7.3 Towing the truck crane Blank page 7 - 12 3 112 xxx en Operating Manual GMK6300L...
-
Page 391: Wheels And Tyres
Malfunctions in driving mode 7.4 Wheels and tyres Wheels and tyres This section contains all the information about changing a wheel and about using the tyre inflater connection. 7.4.1 Wheel change • If a puncture occurs while driving, stop the truck crane, taking the follow- ing traffic into account, and secure the truck crane as outlined in the appli- cable legal stipulations of the country in which you are working. - Page 392 Malfunctions in driving mode 7.4 Wheels and tyres à • Removing Switch off the suspension; p. 5 - 18. a damaged wheel • Raise the truck crane with the outriggers until the wheel to be changed just barely leaves the ground. Risk of accidents due to a wheel falling over! When unscrewing the final lug nuts, the wheel can slip off the hub and fall toward you.
- Page 393 Malfunctions in driving mode 7.4 Wheels and tyres Removing a wheel • Undo the wheel nuts (1). • Lift the spare wheel off the spare wheel holder. • Secure the spare wheel against falling over if you put it down temporarily. Mounting a wheel •...
- Page 394 Malfunctions in driving mode 7.4 Wheels and tyres • Tighten the wheel nuts (1) and (2) finger-tight to secure the wheel. • Tighten the remaining wheel nuts finger-tight. • Always tighten the wheel nuts in the order (1) to (12). –...
-
Page 395: Inflating The Tyres Yourself
Malfunctions in driving mode 7.4 Wheels and tyres 7.4.2 Inflating the tyres yourself In an emergency, if an appropriate filling hose is available you can inflate the tyres using the compressed air system of the truck crane. The tyres can be inflated up to a maximum pressure of about 8 bar (116 psi). This pressure might not correspond to the prescribed tyre pressure, à... - Page 396 Malfunctions in driving mode 7.4 Wheels and tyres Inflating the tyres The compressed air system's maximum operation pressure of 8 bar (116 psi) can only be reached with the engine running. à • Start the engine; p. 4 - 15. •...
-
Page 397: Fuses
Replace blown fuses only with new fuses of the same amperage. This pre- vent parts being overloaded and damaged or the fuse being immediately blown again. Notify Manitowoc Crane Care if a fuse with the same amperage fails again once the ignition is switched on. Risk of fire! Never repair a blown fuse with other electrically conductive materials. -
Page 398: Fuses In The Driver's Cab
Malfunctions in driving mode 7.5 Fuses 7.5.1 Fuses in the driver's cab • Remove the covers (1). 2 Fuse groups F1 to F10 3 Reserve fuses The following sections show the designa- tions of the individual fuses, including their amperage and functions. Group F1 The fuses are labelled with the numbers. - Page 399 Malfunctions in driving mode 7.5 Fuses Group F2 Designation Amperage (A) Function F2/1 Tachograph, radio, control unit ESX 3 F2/2 Warm water auxiliary heating F2/3 Ignition lock F2/4 Heater fan Automatic parking light F2/5 Power supply F2/6 Retarder , air-conditioning system F2/7 ABS trailer F2/8...
- Page 400 Malfunctions in driving mode 7.5 Fuses Group F4 Designation Amperage (A) Function Instrument lighting, trailer socket, engine F4/1 brake Battery heating F4/2 Particulate filter F4/3 Central lubrication F4/4 Power supply F4/5 Tachograph Engine electronic system, ECOS control F4/6 unit F4/7 diagnostics plug F4/8 TCM supply...
- Page 401 Malfunctions in driving mode 7.5 Fuses Group F6 Designation Amperage (A) Function Left-hand side marker lights and parking F6/1 light Right-hand side marker lights F6/2 parking light marker light and tail lamps, left-hand F6/3 instrument lighting F6/4 Right-hand marker light and tail lamps F6/5 Left full-beam headlight Right-hand full beam headlight, indicator...
- Page 402 Malfunctions in driving mode 7.5 Fuses Group F9 Designation Amperage (A) Function F9/1 Radio F9/2 Radio F9/3 Outrigger lighting F9/4 Cigarette lighter, ceiling light F9/5 Battery preheater F9/6 Battery preheater timer F9/7 Unassigned F9/8 Auxiliary heater timer Group F10 Designation Amperage (A) Function F10/1...
-
Page 403: Fuses In The Battery Box
Malfunctions in driving mode 7.5 Fuses 7.5.2 Fuses in the battery box Fuses F7 to F10 are contained in the battery box. Danger from lead and lead compounds on batteries! Battery poles, battery terminals and parts of the battery itself contain lead and lead compounds. - Page 404 Malfunctions in driving mode 7.5 Fuses Blank page 7 - 26 3 112 xxx en Operating Manual GMK6300L...
-
Page 405: Troubleshooting
Malfunctions in driving mode 7.6 Troubleshooting Troubleshooting This section does not include all malfunctions. – If a warning is shown in the display (1); à p. 5 - 48. – If the lamp on the instrument panel (2) à lights up; p. - Page 406 – the performance in order to drive on to the next will increase again place where it is possible to stop. Other malfunctions: Manitowoc Crane Care Report it 7 - 28 3 112 xxx en Operating Manual GMK6300L...
-
Page 407: Malfunctions In The Exhaust System
Have the exhaust – Error on the carbamide system checked by – Light up dosing unit Manitowoc Crane Care, – Carbamide lines blocked an authorised GROVE – Temperature sensor faulty retailer or an authorised – Cable breakage in the car- specialised repair shop. -
Page 408: Malfunctions In The Transmission
Malfunctions in driving mode 7.6 Troubleshooting 7.6.3 Malfunctions in the transmission Malfunction Cause Remedy à On the transmission , p. 7 - 7 Transmission only shifts up to Transmission oil too hot second gear Transmission oil colder than Wait until transmission oil approx. -
Page 409: Transfer Case Malfunctions
Malfunctions in driving mode 7.6 Troubleshooting 7.6.4 Transfer case malfunctions Malfunction Cause Remedy à Switching operations are not Pressure of 5.5 bar (80 psi) Building up supply pressure , conducted has not yet built up in the p. 5 - 10 reservoirs 7.6.5 Malfunctions of the service brake... -
Page 410: Malfunctions Of The Steering
7 - 20 Separate steering not work- ECOS malfunction Read out error messages à ing and the ECOS display p. 7 - 35) and notify shows an error message Manitowoc Crane Care 7 - 32 3 112 xxx en Operating Manual GMK6300L... -
Page 411: Differential Lock Malfunctions
5 - 62 Error symbol is displayed ECOS malfunction Read out error messages à p. 7 - 35) and notify Manitowoc Crane Care 7.6.8 Malfunctions in the hydraulic system/hydraulic oil cooler Malfunction Cause Remedy Hydraulic oil temperature... -
Page 412: Malfunctions On The Suspension
7 - 20 Error symbol is displayed ECOS malfunction Read out error messages à p. 7 - 35) and notify Manitowoc Crane Care 7.6.10 Malfunctions of the level adjustment system Malfunction Cause Remedy à Level adjustment system not... -
Page 413: Malfunctions On The Ecos Carrier
“error” display. ECOS programme Always note down the number of the program version after a malfunction version occurs before notifying Manitowoc Crane Care. • ö If required, open the main menu The display (1) shows the number of the current program version. - Page 414 Malfunctions in driving mode 7.6 Troubleshooting Error messages If ECOS detects an error, an error message is shown: – lamp (1) flashes and – lamp (2) flashes. Open the Errors submenu for more information. • Press the button (2) once. The button is only active when the lamp (1) flashes or lights up.
- Page 415 4 the error type The error code (5) consists of 4 digits, e. g. 2332. • Always note the error code before contacting Manitowoc Crane Care. You can exit the Errors submenu at any time Exiting the submenu • Press the button (1) once.
-
Page 416: Procedure In The Event Of Malfunctions
Malfunctions in driving mode 7.7 Procedure in the event of malfunctions Procedure in the event of malfunctions 7.7.1 Switching on emergency operation in coolant circuit The speed of the fan wheel for the engine is automatically controlled. You can switch on the emergency mode if this automatic system fails. The fan wheel then runs at maximum speed when the engine is switched on. -
Page 417: Procedure During Engine Malfunctions
Stop immediately and switch the engine off. à • If necessary, note the error messages ( p. 7 - 36) and contact Manitowoc Crane Care. Severe engine malfunction The STOP warning lamp (2) lights up. In addition the lamp (1) lights up. •... -
Page 418: Malfunctions In The Transmission
3 - 50 Check regularly whether error codes have been stored, e.g. during mainte- à nance work; p. 7 - 42. If necessary, inform Manitowoc Crane Care. This avoid situations where another small error could lead to transmission failure. Transmission... - Page 419 3 minutes, shut down the engine. Read the à error codes ( p. 7 - 42) and contact Manitowoc Crane Care. Risk of overheating damage to the transmission! If the transmission oil temperature is still too high after 2 to 3 minutes, shut down the engine.
- Page 420 Malfunctions in driving mode 7.7 Procedure in the event of malfunctions Reading out error You can display all the stored error codes one after the other. codes • Press buttons (1) and (2) simultaneously twice. The Transmission display shows the first stored error code. Each error code consists of four displays that are shown continuously in succession.
- Page 421 Index Operating Manual GMK6300L 3 112 xxx en...
- Page 422 3 112 xxx en Operating Manual GMK6300L...
- Page 423 Index Index To avoid making the index unnecessarily long and unclear, we have not included every single element from the instrument panel. Those elements, such as switches and buttons, lamps and displays are described and named in detail in the overviews of Chapter 3 and Chapter 9 Truck Crane Description .
- Page 424 Index Blank page 8 - 2 3 112 xxx en Operating Manual GMK6300L...
- Page 425 Index Access ladders on the carrier ......... . . 4 - 4 Adjusting axle pressure .
- Page 426 Index Cameras on the hoists ........... 12 - 117 on the main boom .
- Page 427 Index Short description of the operating elements ......9 - 74 Slewing with rigged counterweight ....... . . 12 - 83 Slinging points .
- Page 428 Index switching on ........... . 11 - 62 diagnostics plug .
- Page 429 Index What to do in the event of malfunctions ....... 7 - 3 with cruise control .
- Page 430 Index checks in the driver's cab ......... . . 5 - 7 display and operating elements in the crane cab .
- Page 431 Index Diagnostics ............3 - 69 Malfunctions .
- Page 432 Index Checking the position ..........11 - 6 positioning and reeving in .
- Page 433 Index Ladders and access ladders ..........4 - 4 Level adjustment system Changing the vehicle level .
- Page 434 Index lifting off/on the turntable ......... . 6 - 38 Removing/attaching the clamps for the hydraulic system .
- Page 435 Index Behind the cover ..........3 - 10 front .
- Page 436 Index Operating elements - driving ........3 - 1 parking brake Operating elements .
- Page 437 Index Rigging for on-road driving for driving with a trailer ..........6 - 11 switching on the boom floating position .
- Page 438 Index Seat, adjusting In the crane cab ..........11 - 7 in the driver's cab .
- Page 439 Index establishing/disconnecting the pneumatic connection ....6 - 74 hanging/lifting on the truck crane ........6 - 77 Making/breaking the hydraulic connection .
- Page 440 Index Total weight Weighing the truck crane ..........6 - 7 Tow starting .
- Page 441 Index Tyres see wheels and tyres Voltage monitoring Superstructure ..........9 - 110 Warning plates for vehicle width .
- Page 442 Index 8 - 20 3 112 xxx en Operating Manual GMK6300L...
- Page 445 Operating Manual Part 2 – Crane operation 3 302 597 en 05.04.2017...
- Page 446 Important note Any type of duplication or excerpt from this document, even in electronic form, is not subject to the revision service of Manitowoc Crane Group Germany GmbH. © Copyright reserved by Manitowoc Crane Group Germany GmbH Industriegelände West D-26389 Wilhelmshaven, Germany...
- Page 447 Correction sheet Possible reeving methods on the main boom Contrary to the information specified in the operating manual, there are corrected hoist rope reevings on the main boom for the GMK6300L/GMK6300L-1 truck crane. Only reeve the hoist rope as described/illustrated in this correction sheet. It is important that you still observe all notes and safety instructions regarding rigging work on the main boom in the operating manual supplied.
- Page 448 7 sheave hook block Reeving 3 302 803 en Correction sheet GMK6300L/6300L-1...
- Page 449 5 sheave hook block Reeving Correction sheet GMK6300L/6300L-1 3 302 803 en...
- Page 450 3 sheave hook block Reeving 1 sheave hook block Reeving 3 302 803 en Correction sheet GMK6300L/6300L-1...
- Page 451 Hook tackle Reeving With 10 head sheaves 9 sheave hook block Reeving Correction sheet GMK6300L/6300L-1 3 302 803 en...
- Page 452 7 sheave hook block Reeving 3 302 803 en Correction sheet GMK6300L/6300L-1...
- Page 453 5 sheave hook block Reeving Correction sheet GMK6300L/6300L-1 3 302 803 en...
- Page 454 3 sheave hook block Reeving 1 sheave hook block Reeving 3 302 803 en Correction sheet GMK6300L/6300L-1...
- Page 455 Hook tackle Reeving Correction sheet GMK6300L/6300L-1 3 302 803 en...
- Page 456 Blank page 3 302 803 en Correction sheet GMK6300L/6300L-1...
- Page 457 Counterweight version B Information on weight specifications In the supplied documentation, for plates a weight of 4.75 t is presumed and in illustrations the plates are labelled as 4.75 t. – The originally supplied plate may also be labelled as 4.5 t or 4.7 t depending on the version.
- Page 458 Blank page 3 302 676 en GMK6300L...
- Page 459 Hydraulic emergency operation Additional switches required Contrary to the specifications in the operating manual supplied, the valve 7, if present, can also be closed for the crane movements Lifting and Lowering . This increases the hoist speed. Always close the valve 7 in addition to all other switches that are specified in the operating manual supplied for the movements Lifting and Lowering .
- Page 460 Blank page 3 302 838 en Correction sheet GMK6300L/GMK6300L-1...
- Page 461 This operating manual is divided into two parts: Part 1 – Driving Part 2 – Crane operation Content overview of Part 2: 9 Operating elements for crane operation 10 Starting/switching off the engine – for crane operation 11 Crane operation 12 Rigging work 13 Driving with a rigged truck crane 14 Malfunctions during crane operation...
- Page 462 Blank page 3 112 xxx en Operating Manual GMK6300L...
- Page 463 Operating elements for crane operation Overview of the operating elements ........9 - 9.1.1 Exterior of the truck crane .
- Page 464 3 112 xxx en Operating Manual GMK6300L...
-
Page 465: Operating Elements For Crane Operation
Operating elements for crane operation 9.1 Overview of the operating elements Operating elements for crane operation All operating elements for driving are described in Chapter 3. Overview of the operating elements This section shows the position and designations of the operating elements for crane operation. -
Page 466: Exterior Of The Truck Crane
Operating elements for crane operation 9.1 Overview of the operating elements 9.1.1 Exterior of the truck crane 9 - 2 3 112 xxx en Operating Manual GMK6300L... - Page 467 Operating elements for crane operation 9.1 Overview of the operating elements à 1 – Camera on main boom1) p. 12 - 117 à – Camera, hoist p. 12 - 117 à 2 Lifting limit switch – function p. 11 - 60 à...
- Page 468 Operating elements for crane operation 9.1 Overview of the operating elements 9 - 4 3 112 xxx en Operating Manual GMK6300L...
- Page 469 Operating elements for crane operation 9.1 Overview of the operating elements à 19 Carbamide tank filler neck p. 10 - 6 à 20 Filler neck on fuel tank p. 10 - 4 21 Slewing gear à – Operation p. 11 - 96 à...
-
Page 470: Crane Cab
Operating elements for crane operation 9.1 Overview of the operating elements 9.1.2 Crane cab 9 - 6 3 112 xxx en Operating Manual GMK6300L... -
Page 471: Front Panel
Operating elements for crane operation 9.1 Overview of the operating elements à 1 Camera monitor p. 12 - 117 à 2 Side panel p. 9 - 9 à 3 Front panel p. 9 - 8 à 4 Standard heating system p. - Page 472 Operating elements for crane operation 9.1 Overview of the operating elements 9.1.3 Front panel à 1 Emergency stop switch p. 9 - 65 à 2 Control unit RCL (Rated-Capacity-Limiter) p. 9 - 40 Depending on the version: à – RCL override – symbol (A) p.
-
Page 473: Side Panel
Operating elements for crane operation 9.1 Overview of the operating elements 9.1.4 Side panel Bottom 1 Ashtray à 2 Standard heating system p. 9 - 13 à 3 Diagnostics (behind cover) p. 9 - 120 Operating Manual GMK6300L 3 112 xxx en 9 - 9... - Page 474 Operating elements for crane operation 9.1 Overview of the operating elements 9 - 10 3 112 xxx en Operating Manual GMK6300L...
- Page 475 Operating elements for crane operation 9.1 Overview of the operating elements à 1 Air vents p. 11 - 132 à 2 High speed monitoring for the hoists p. 9 - 79 à 3 Windscreen wiper on/off p. 9 - 113 à...
- Page 476 Operating elements for crane operation 9.1 Overview of the operating elements Console, rear 1 Configuration according to execution à 1) 2) 2 Battery heater p. 9 - 60 3 Socket (12 V) 1) 2) 4 Key-operated switch Additional equipment à Separate operating instructions 9 - 12 3 112 xxx en...
- Page 477 Operating elements for crane operation 9.1 Overview of the operating elements Standard heating system à 1 Air-conditioning system p. 11 - 133 à 2 Setting fresh air/recirculated air/mixed air p. 11 - 131 à 3 Setting the fan p. 11 - 131 à...
- Page 478 Operating elements for crane operation 9.1 Overview of the operating elements Auxiliary water heating system à 1 Heating display p. 11 - 137 à 2 Setting the day and time p. 11 - 138 à 3 – Storing the heating start p.
- Page 479 Operating elements for crane operation 9.1 Overview of the operating elements Auxiliary air heater à 1 Heating display p. 11 - 142 à 2 Temperature p. 11 - 143 à 3 Setting the time/day p. 11 - 143 à 4 – Storing the heating start p.
-
Page 480: Control Panels
Operating elements for crane operation 9.1 Overview of the operating elements 9.1.5 Control panels Left à 1 Left control lever (configuration according to p. 9 - 18 execution) à 2 Dead man's switch p. 9 - 62 3 Horn button à... - Page 481 Operating elements for crane operation 9.1 Overview of the operating elements Right à 1 Right control lever (configuration according to p. 9 - 18 execution) à 2 Dead man's switch p. 9 - 62 3 Horn button à 4 Hoist high-speed mode on/off p.
-
Page 482: Control Lever Configuration
Operating elements for crane operation 9.1 Overview of the operating elements 9.1.6 Control lever configuration The truck crane can be equipped with two different control lever configura- tions. The current configuration of the control levers is indicated by symbols on the control levers. In version 1, the left control lever is configured with the Telescope function. - Page 483 Operating elements for crane operation 9.1 Overview of the operating elements In version 2, the right control lever is assigned the Telescope function. Version 2 Left control lever Right control lever Slew to the left Raise/retract Slew to the right Lower/extend Lower auxiliary hoist Lower the main hoist...
-
Page 484: Ecos Control Unit
Operating elements for crane operation 9.1 Overview of the operating elements 9.1.7 ECOS control unit 9 - 20 3 112 xxx en Operating Manual GMK6300L... - Page 485 Operating elements for crane operation 9.1 Overview of the operating elements à 1 ECOS display p. 9 - 65 à Main menu overview p. 9 - 22 à 2 Sensor for brightness p. 9 - 65 à 3 Error/warning message p.
-
Page 486: Ecos Display - Main Menu
Operating elements for crane operation 9.1 Overview of the operating elements 9.1.8 ECOS display – main menu The main menu displays symbols for further submenus and symbols for current displays. 9 - 22 3 112 xxx en Operating Manual GMK6300L... - Page 487 Operating elements for crane operation 9.1 Overview of the operating elements à 1 Combined operation display p. 9 - 60 Combined operation on à 2 Current inclination display p. 9 - 70 à 3 Anemometer display p. 9 - 73 à...
-
Page 488: Ecos Display - Submenus
Operating elements for crane operation 9.1 Overview of the operating elements 9.1.9 ECOS display – submenus Counterweight submenu à 1 Display of slewing direction for automatic mode p. 9 - 74 à 2 Slewing gear display p. 9 - 77 à... - Page 489 Operating elements for crane operation 9.1 Overview of the operating elements Slewing gear/ houselock submenu à 1 Display of slewing direction to 0°/180° p. 9 - 83 à 2 Locking status displays p. 9 - 94 à 3 Slewing gear display p.
- Page 490 Operating elements for crane operation 9.1 Overview of the operating elements Outriggers submenu 9 - 26 3 112 xxx en Operating Manual GMK6300L...
- Page 491 Operating elements for crane operation 9.1 Overview of the operating elements à 1 All supporting cylinders p. 9 - 66 à 2 Front right-hand outrigger p. 9 - 66 à 2.1 Front right-hand outrigger pressure display p. 9 - 73 à...
- Page 492 Operating elements for crane operation 9.1 Overview of the operating elements Telescoping submenu 9 - 28 3 112 xxx en Operating Manual GMK6300L...
- Page 493 Operating elements for crane operation 9.1 Overview of the operating elements à 1 Unlock telescopic section selection p. 9 - 89 à 2 Lock selection p. 9 - 89 à 3 Unlock telescoping cylinder selection p. 9 - 88 à 4 Locking status display p.
- Page 494 Operating elements for crane operation 9.1 Overview of the operating elements Power unit speeds submenu à 1 Enter slewing gear speed p. 11 - 105 à 2 Enter telescoping mechanism speed p. 11 - 105 à 3 Enter speed – main hoist p.
- Page 495 Operating elements for crane operation 9.1 Overview of the operating elements Monitoring submenu à 1 Hydraulic oil temperature display p. 10 - 15 à 2 Fuel level display p. 10 - 15 à 3 Voltage monitoring display p. 10 - 15 à...
- Page 496 Operating elements for crane operation 9.1 Overview of the operating elements Settings submenu à 1 Outrigger control units on/off p. 9 - 67 à 2 Lamp test p. 10 - 9 à 3 Telescoping cylinder pressure display p. 9 - 93 à...
- Page 497 Operating elements for crane operation 9.1 Overview of the operating elements Operating hours submenu à 1 ECOS superstructure p. 11 - 109 à 2 Auxiliary drive gears p. 11 - 109 à 3 Telescoping mechanism p. 11 - 109 à 4 Engine for crane operation p.
- Page 498 Operating elements for crane operation 9.1 Overview of the operating elements Submenu Superstructure Warning Engine-related displays apply to the engine for crane operation. 9 - 34 3 112 xxx en Operating Manual GMK6300L...
- Page 499 Operating elements for crane operation 9.1 Overview of the operating elements à 1 Filling up p. 11 - 112 à 2 Air intake inhibitor triggered p. 11 - 113 à 3 Voltage monitoring p. 11 - 113 à 4 Replace air filter p.
- Page 500 Operating elements for crane operation 9.1 Overview of the operating elements Carrier Engine-related displays apply to the engine for driving. à 1 Filling up p. 11 - 112 à 2 Air intake inhibitor triggered p. 11 - 113 à 3 Voltage monitoring p.
- Page 501 Operating elements for crane operation 9.1 Overview of the operating elements Error submenu à 1 Current errors/total errors display p. 14 - 36 à 2 Next error p. 14 - 36 à 3 Previous error p. 14 - 36 à 4 Error display p.
- Page 502 Operating elements for crane operation 9.1 Overview of the operating elements Working range limiter submenu à 1 Working range limiter display p. 11 - 126 à 2 Input maximum overall height p. 11 - 118 à 2.1 Maximum overall height display p.
- Page 503 Operating elements for crane operation 9.1 Overview of the operating elements Enter slewing angle submenu 1 Limited slewing angle display 2 Select slewing angle A 2.1 Maximum/current slewing angle A display 3 Select slewing angle B 3.1 Maximum/current slewing angle B display 4 Manual input on/off à...
-
Page 504: Rcl Control Unit
Operating elements for crane operation 9.1 Overview of the operating elements 9.1.10 RCL control unit à 1 Display RCL p. 9 - 97 à Main menu overview p. 9 - 6 à 2 Sensor for brightness p. 9 - 96 à... -
Page 505: Rcl Display - Main Menu
Operating elements for crane operation 9.1 Overview of the operating elements 9.1.11 RCL display – main menu The main menu shows symbols for further submenus and symbols for current displays. à 1 Date/time display p. 9 - 97 à 2 Enter rigging mode submenu p. - Page 506 Operating elements for crane operation 9.1 Overview of the operating elements Blank page 9 - 42 3 112 xxx en Operating Manual GMK6300L...
-
Page 507: Display Rcl - Submenus
Operating elements for crane operation 9.1 Overview of the operating elements 9.1.12 Display RCL – submenus Enter rigging mode submenu à 1 Enter counterweight p. 9 - 99 à 2 Selection p. 9 - 98 à 3 Enter outrigger span p. - Page 508 Operating elements for crane operation 9.1 Overview of the operating elements Monitoring submenu 9 - 44 3 112 xxx en Operating Manual GMK6300L...
- Page 509 Operating elements for crane operation 9.1 Overview of the operating elements à 1 Current telescope status display p. 9 - 103 à 2 Lattice extension inclination display p. 9 - 104 à Angle of the lattice extension display p. 9 - 103 à...
- Page 510 Operating elements for crane operation 9.1 Overview of the operating elements Rigging mode monitoring submenu 1 Query – accept rigging mode? 2 Permissible lattice extension working range 3 RCL code 4 Length of lattice extension 5 Reeving 6 Permissible main boom working range 7 Hoists display 8 Counterweight 9 Permissible slewing range...
- Page 511 Operating elements for crane operation 9.1 Overview of the operating elements Lifting capacity table submenu à 1 Display RCL code p. 9 - 106 à 2 Reeving display p. 9 - 106 3 Selection à 4 Maximum load display p. 9 - 106 à...
- Page 512 Operating elements for crane operation 9.1 Overview of the operating elements Working range submenu à 1 Display RCL code p. 9 - 107 à 2 Reeving display p. 9 - 107 à 3 Maximum load display p. 9 - 107 à...
- Page 513 Operating elements for crane operation 9.1 Overview of the operating elements Error submenu à 1 Selection p. 14 - 29 à 2 Display error location p. 14 - 29 à 3 Current errors/total errors display p. 14 - 29 à 4 Error display p.
- Page 514 Operating elements for crane operation 9.1 Overview of the operating elements Settings submenu à 1 Entering the time/date p. 11 - 49 à 2 Enter time/date display p. 11 - 49 Buttons/displays (3) are only shown if a service device is connected. For this reason, these functions are not described in these operating instructions.
-
Page 515: Hand-Held Control
Operating elements for crane operation 9.1 Overview of the operating elements 9.1.13 Hand-held control à 1 Engine control panel p. 9 - 115 à 2 Pre-select emergency operation p. 9 - 116 à 3 Function buttons p. 9 - 116 4 No function 5 No function à... -
Page 516: Outrigger Control Units
Operating elements for crane operation 9.1 Overview of the operating elements 9.1.14 Outrigger control units Button 9 - 52 3 112 xxx en Operating Manual GMK6300L... - Page 517 Operating elements for crane operation 9.1 Overview of the operating elements Opposite means: on the side of the carrier opposite to the operator when looking at the control unit. Left and right mean: to the left or the right of the control unit. Outrigger button à...
- Page 518 Operating elements for crane operation 9.1 Overview of the operating elements Inclination and outrigger pressure display à 1 Left-hand outrigger pressure display, opposite p. 9 - 73 à 2 Right-hand outrigger pressure display, opposite p. 9 - 73 à 3 Left-hand outrigger pressure display p.
- Page 519 Operating elements for crane operation 9.1 Overview of the operating elements Raise axle display à 1 Axle line 1 p. 9 - 71 à 2 Axle line 2 p. 9 - 71 à 3 Axle line 3 p. 9 - 71 à...
- Page 520 Operating elements for crane operation 9.1 Overview of the operating elements Blank page 9 - 56 3 112 xxx en Operating Manual GMK6300L...
-
Page 521: Short Description Of The Operating Elements
This section does not contain all the requirements that must be fulfilled for several operating elements to be active. If some operating elements do not work, first read the following chapters which are referred to at the respective places before contacting Manitowoc Crane Care. 9.2.1 Definition of direction information Basic rule Direction information always depends on whether the carrier or the superstructure is being operated. -
Page 522: General Rules For Buttons And Symbols On The Display
Operating elements for crane operation 9.2 Short description of the operating elements 9.2.2 General rules for buttons and symbols on the display The symbols shown as an example are not present on all crane types. The following rules apply in all menus: –... -
Page 523: Engine For Crane Operation
Operating elements for crane operation 9.2 Short description of the operating elements 9.2.3 Engine for crane operation à Starting the engine , p. 10 - 12. Side panel Ignition lock – 0 Ignition off, engine off, key can be removed –... -
Page 524: Engine For Driving
Operating elements for crane operation 9.2 Short description of the operating elements Console, rear Battery heater on/off – Up: Heating system on – Down: Heating system off à Separate operating instructions . Further information on operation; ECOS display There is no short description of the displays in the submenus; à... - Page 525 Operating elements for crane operation 9.2 Short description of the operating elements Outriggers submenu Carrier ignition display – Red: Ignition off – engine start not possible – Green: Ignition on – engine start possible à p. 12 - 23 Display for engine for driving on/off 1 Red: Engine off 2 Green:...
-
Page 526: Seat Contact Switch And Dead Man's Switch
Operating elements for crane operation 9.2 Short description of the operating elements 9.2.5 Seat contact switch and dead man's switch The seat contact switch and the dead man's switch are safety devices for releasing crane functions. Releasing crane functions – Sit down – seat contact switch (2) on –... -
Page 527: Ecos Crane Control
Operating elements for crane operation 9.2 Short description of the operating elements 9.2.6 ECOS crane control The truck crane GMK6300L is equipped with the ECOS electronic crane con- trol (Electronic Crane Operating System). The ECOS includes a control unit in the crane cab, an operating unit in the driver's cab and several control units (ESX0, ESX1, ESX2 etc.) and I/O circuit boards (I/O 0, I/O 1 etc.) distributed on the superstructure and carrier. - Page 528 Operating elements for crane operation 9.2 Short description of the operating elements Opening the Warning submenu The lamp (1) lights up or flashes. This opens the Warning submenu for the carrier – Press the button once: à p. 11 - 110 Entering the keycode The lamps next to all three buttons are lit.
- Page 529 Operating elements for crane operation 9.2 Short description of the operating elements Sensor for brightness Registers the brightness of the operating environment. The brightness of all displays is automatically adjusted. à Manual input; p. 10 - 9. Emergency stop switch May only be used in an emergency.
-
Page 530: Outriggers
Operating elements for crane operation 9.2 Short description of the operating elements 9.2.7 Outriggers à Extending/retracting outrigger beams , p. 12 - 35 à Extending/retracting supporting cylinders , p. 12 - 41 à In the Outriggers All directional information refers to the carrier; p. - Page 531 Operating elements for crane operation 9.2 Short description of the operating elements Retract/extend outrigger beam/supporting cylinder Slewing gear is switched off – outrigger pre-selection on. 1 Retract: Press button – outrigger beam retracts 2 Extend: Press button – outrigger beam extends à...
- Page 532 Operating elements for crane operation 9.2 Short description of the operating elements à All directional information refers to the carrier; p. 9 - 57. On the outrigger control units The display fields in the Settings submenu need to be switched on to operate in crane mode.
- Page 533 Operating elements for crane operation 9.2 Short description of the operating elements Extending/retracting all supporting cylinders Button (3) or (4) is pressed. 1 Retract: Press button – all outrigger cylinders retract 2 Extend: Press button – all outrigger cylinders extend Movement stops after the button is released, and when an end position is à...
-
Page 534: Inclination Indicators
Operating elements for crane operation 9.2 Short description of the operating elements 9.2.8 Inclination indicators à Inclination indicators , p. 12 - 46 Current inclination display A On the outrigger control units B In the main menu C In the Outriggers submenu 1 Measuring range display 2 Inclination indicator 3 Directional indicator... -
Page 535: Raise Axle
Operating elements for crane operation 9.2 Short description of the operating elements 9.2.9 Raise axle When the suspension is switched off (blocked), the Raise axle function can be used to raise or lower axle lines or axle pairs, depending on the selection made. - Page 536 Operating elements for crane operation 9.2 Short description of the operating elements When you raise/lower the axles, the carrier's horn will sound once. Raising/lowering axles Raise: Press button (1) – the selected axles are raised and the truck crane is lowered Lower: Press button (2) –...
-
Page 537: Outrigger Pressure Displays
Operating elements for crane operation 9.2 Short description of the operating elements 9.2.10 Outrigger pressure displays Outriggers submenu Outrigger pressure display – Unit of measurement: Displayed depending on setting – t – tons or – klbs – kilopounds – (1 kilopound = 1,000 lbs) –... -
Page 538: Counterweight Submenu
Operating elements for crane operation 9.2 Short description of the operating elements 9.2.12 Counterweight submenu à Rigging/unrigging the counterweight , p. 12 - 53, Counterweight à Counterweight hoist unit , p. 12 - 75. submenu Counterweight submenu – To open: Press button once – submenu opens Rigging position display 1 White –... - Page 539 Operating elements for crane operation 9.2 Short description of the operating elements Automatic mode, rigging – Display Yellow: Recognition that the counterweight is rigged Flashing: Automatic mode on Grey Automatic mode cancelled or no recognition that the counterweight is rigged The superstructure is within the rigging range, the slewing gear is switched on and the lifting cylinders are retracted –...
- Page 540 Operating elements for crane operation 9.2 Short description of the operating elements Lifting cylinder position display The current position of the counterweight lift- ing cylinders is shown by different symbols: 1 Green – extended 2 Green – retracted 3 Yellow – intermediate position 4 Violet –...
- Page 541 Operating elements for crane operation 9.2 Short description of the operating elements Pre-tensioning pressure display – Green: Pre-tensioning pressure reached – Red: Pre-tensioning pressure too low – pre-tension counterweight à p. 12 - 77 Counterweight recognition The different states of the counterweight detection system are shown by three symbols.
-
Page 542: Main Hoist
Operating elements for crane operation 9.2 Short description of the operating elements 9.2.13 Main hoist à Main hoist , p. 11 - 54. Main hoist on/off There is a lamp in the button. – Press once: – Lamp bright – main hoist on –... - Page 543 Operating elements for crane operation 9.2 Short description of the operating elements Hoist high-speed mode on/off The parking brake must be applied. – Left: High-speed mode on, off when released – Once to the right: High-speed mode on – continuous operation –...
-
Page 544: Auxiliary Hoist
Operating elements for crane operation 9.2 Short description of the operating elements 9.2.14 Auxiliary hoist à Auxiliary hoist , p. 11 - 57. Auxiliary hoist on/off There is a lamp in the button. – Press once: – Lamp bright – auxiliary hoist on –... -
Page 545: Slewing Gear
Operating elements for crane operation 9.2 Short description of the operating elements 9.2.15 Slewing gear à Slewing gear , p. 11 - 96. Slewing gear on/off There is a lamp in the button. – Press once: – Lamp bright – slewing gear on, Slewing gear brake released –... - Page 546 Operating elements for crane operation 9.2 Short description of the operating elements Slewing gear freewheel With additional equipment there are two ways of switching on the slewing release: Slewing gear is switched on. – To switch on: Move control lever to zero position and press button – slewing gear brake released, lamp (1) goes out –...
- Page 547 Operating elements for crane operation 9.2 Short description of the operating elements Display of slewing direction to 0°/180° Current position ± 20° in front of the 0° or 180° superstructure position. – Both arrows: 0° or 180° superstructure position reached –...
-
Page 548: Derricking Gear
Operating elements for crane operation 9.2 Short description of the operating elements 9.2.16 Derricking gear à Derricking gear , p. 11 - 62. Derricking gear on/off There is a lamp in the button. – Press once: – Lamp bright – derricking gear on, Power units with the same control lever configuration –... - Page 549 Operating elements for crane operation 9.2 Short description of the operating elements Derricking gear/telescoping mechanism high-speed mode on/off The parking brake must be applied. – Left: High-speed mode on, off when released – Once to the right: High-speed mode on – continuous operation –...
-
Page 550: Telescoping Mechanism
Operating elements for crane operation 9.2 Short description of the operating elements 9.2.17 Telescoping mechanism à Telescoping mechanism , p. 11 - 66. Control panels Telescoping mechanism on/off There is a lamp in the button. – Press once: – Lamp bright – telescoping mechanism on, Power units with the same control lever configuration –... - Page 551 Operating elements for crane operation 9.2 Short description of the operating elements Submenu Telescoping submenu – To open: Press button once – submenu opens Display for telescoping mechanism on/off – Green: Telescoping mechanism on – Red: Telescoping mechanism off à p.
- Page 552 Operating elements for crane operation 9.2 Short description of the operating elements Telescope diagram display Current relation of the telescopic sections to each other – section of top view. Locking pin Display 1 and 2 1 On the telescopic section –...
- Page 553 Operating elements for crane operation 9.2 Short description of the operating elements Unlock telescopic section selection – Display Yellow: Telescopic section unlocked Grey: Telescopic section locked Flashing: Unlock selected (yellow/grey) – To select: Press button once – Telescoping cylinder locked: Unlock selected –...
- Page 554 Operating elements for crane operation 9.2 Short description of the operating elements Locking point display – Direction of travel to the locking point 1 Extend telescoping cylinder 2 Retract telescoping cylinder – Distance to the locking point 3 Yellow: approx. 1 m (3.3 ft) 4 Yellow Less than 1 m (3.3 ft) 5 Green:...
- Page 555 Operating elements for crane operation 9.2 Short description of the operating elements Teleautomation direction display Start teleautomation with Extending 1 On: Start teleautomation with Retracting 2 On: Flashing = control lever movement incorrect à p. 11 - 89 Teleautomation on/manual telescoping on 1 Teleautomation on à...
- Page 556 Operating elements for crane operation 9.2 Short description of the operating elements In the Settings submenu Telescoping emergency program access The right dead man's switch is pressed. – Press the button After entering the keycode, the emergency program Telescoping opens once: à...
-
Page 557: Hydraulic System
Operating elements for crane operation 9.2 Short description of the operating elements 9.2.18 Hydraulic system Inclining the crane cab – Press down: Incline back – Press up: Incline forward à p. 11 - 103 In the Settings submenu Current pressure in bar for movements of the 1 Telescoping mechanism 2 Slewing gear 3 –... -
Page 558: House Lock
Operating elements for crane operation 9.2 Short description of the operating elements 9.2.19 House lock à Switching the houselock on/off , p. 11 - 15. Slewing gear/Houselock submenu – To open: Press button once – submenu opens Locking status displays The current position of the locking pin is shown by different symbols: 1 and 5... -
Page 559: Rated Capacity Limiter (Rcl)
Operating elements for crane operation 9.2 Short description of the operating elements 9.2.20 Rated capacity limiter (RCL) Control unit This section contains the operating elements that are the same for all menus opened. Buttons F1 to F14 The function of buttons F1 to F14 is shown on the symbol next to or above the button. - Page 560 Operating elements for crane operation 9.2 Short description of the operating elements Input confirmation The lamp (1) lights up. Press button once – Rigging mode monitor- – In the Rigging mode submenu: ing submenu opens – In the Rigging mode Press button once –...
- Page 561 Operating elements for crane operation 9.2 Short description of the operating elements Entering values The input mode for the RCL code is switched on. – To the right: Next greater value – To the left: Next smaller value Slowly turning – changes the value gradually Quickly turning –...
- Page 562 Operating elements for crane operation 9.2 Short description of the operating elements à Enter rigging mode , p. 11 - 23 Submenu Rigging mode entry Selection In input mode 1 Press button once – display of next highest value 2 Press button once – display next lowest value Enter RCL code –...
- Page 563 Operating elements for crane operation 9.2 Short description of the operating elements Enter reeving – Input mode on: – For main hoist: Press button (4) until symbol (1) is green – For auxiliary hoist: Press button (4) until symbol (2) is green –...
- Page 564 Operating elements for crane operation 9.2 Short description of the operating elements Enter outrigger span – Input mode on Press button (1) once – symbol green – Input In input mode press button (3) once – on display (2) next outrigger span. A 8.70 x 8.50 m (28.5 x 27.9 ft) B 8.70 x 7.40 m (28.5 x 24.3 ft) C 8.70 x 6.30 m (28.5 x 20.4 ft)
- Page 565 Operating elements for crane operation 9.2 Short description of the operating elements Maximum load display à Short description with Monitoring submenu; p. 9 - 104. Boom system entry – Input mode on: – For boom system: Press button (3) until symbol (2) is green –...
- Page 566 Operating elements for crane operation 9.2 Short description of the operating elements à Checks before operating the crane , Monitoring Displays – depend on rigging mode; submenu p. 11 - 31. Display RCL code RCL code, four digits Reeving display 1 Required quantity of reeved ropes for displayed, maximum load (2) Counterweight display Required counterweight combination in tons (t) –...
- Page 567 Operating elements for crane operation 9.2 Short description of the operating elements Angle of the lattice extension display The inclinable lattice extension is connected. – Display: Angle between lattice extension and main boom in degrees (°) – for displayed RCL code à...
- Page 568 Operating elements for crane operation 9.2 Short description of the operating elements Maximum load display – Display: Maximum load in tons (t) or kilopounds (klbs) for the displayed RCL code – Symbol (1) is red – maximum load reduced by reeving Press button (3) once –...
- Page 569 Operating elements for crane operation 9.2 Short description of the operating elements Current slewing angle display Position 0° to the rear 0°: Position 180° to the front 180°: + 0.1 to +180.0°: Turned to the right from 0° - 0.1 to -179.9°: Turned to the left from 0°...
- Page 570 Operating elements for crane operation 9.2 Short description of the operating elements à Displaying the lifting capacity tables , p. 11 - 47 Submenu Lifting capacity table – To open: Press the button once – submenu opens, all crane movements are blocked, the lights ( ) light up Lifting capacity table display...
- Page 571 Operating elements for crane operation 9.2 Short description of the operating elements à Displaying the lifting capacity tables , p. 11 - 47 Working range submenu Permissible working range display Applies for displayed RCL code and displayed telescope status 1 Permissible working range – surface under the curve 2 Maximum possible load 3 Maximum possible working radius Current position display...
- Page 572 Operating elements for crane operation 9.2 Short description of the operating elements RCL override RCL override version A RCL override key-operated switch/lifting limit switch RCL shutdown overridden – – Turn to the right: crane functions released, no more monitoring; à p.
- Page 573 Operating elements for crane operation 9.2 Short description of the operating elements Raise button after shutdown Switch on function Only active if the current degree of utilisation is greater than 100% – crane movements blocked. 1 Press button up once Release the raise function to the permitted working range.
-
Page 574: Electrical System
Operating elements for crane operation 9.2 Short description of the operating elements 9.2.21 Electrical system Voltage monitoring warning – On: Engine off – ignition on Engine on – power failure – switch off engine – Off: Engine on – no malfunction à... -
Page 575: Lighting, Windscreen Wiper/Washing System
Operating elements for crane operation 9.2 Short description of the operating elements 9.2.22 Lighting, windscreen wiper/washing system Lighting Spotlight sockets on/off – To switch on: Press down – voltage on (both sockets) – To switch off: Press up – voltage off (both sockets) Air traffic control light/camera on/off –... - Page 576 Operating elements for crane operation 9.2 Short description of the operating elements Slewable spotlight on/off – To switch on: Push down – To switch off: Push up à p. 11 - 108 Swing the spotlight – Back: Push down – Forward: Push up à...
- Page 577 Operating elements for crane operation 9.2 Short description of the operating elements Windscreen wiper/washing system Windscreen wiper on/off – Off: Push up – wiper goes to end position – Interval: Middle position – Continuous Push down operation: Roof window wiper on/off –...
-
Page 578: Hand-Held Control
Operating elements for crane operation 9.2 Short description of the operating elements 9.2.23 Hand-held control Sockets for The following applies to all sockets: hand-held control – Pull plug: Engine off – ignition off – Insert plug: Switch the ignition on à... - Page 579 Operating elements for crane operation 9.2 Short description of the operating elements à Starting the engine – with the hand-held control , p. 10 - 19 Engine control panel 1 Voltage monitoring – On: Switch the ignition on – Off: Switch the ignition off 2 CAN monitoring –...
- Page 580 Operating elements for crane operation 9.2 Short description of the operating elements Pre-select emergency operation 1 Main hoist 2 Telescoping mechanism 3 Derrick lattice extension 4 Auxiliary hoist 5 Derricking gear 6 Slewing gear Lattice extension – luffable Actuation is the same for all buttons –...
- Page 581 Operating elements for crane operation 9.2 Short description of the operating elements Pre-selected power unit Telescoping Derricking Slewing Lattice Button Hoists mechanism gear gear extension combination from from None None Lower the cabin the cabin Retract Raise None Lift Raise Slew to None None...
-
Page 582: Windows, Doors, Keys
Operating elements for crane operation 9.2 Short description of the operating elements 9.2.24 Windows, doors, keys Windscreen Open window (A) • Turn both handles (1) inward. • Push the window forward. Close window (B) • Pull the window closed. • Turn both handles down –... - Page 583 Operating elements for crane operation 9.2 Short description of the operating elements Crane cab door From outside Unlock • Turn the key in direction A. Lock • Turn the key in direction B. Open/close • Pull the handle (1). • Slide the door.
-
Page 584: Diagnostics
Operating elements for crane operation 9.2 Short description of the operating elements Keys Different keys are supplied. 1 Crane cab door lock 2 Crane cab ignition lock 3 Urea tank 4 Distribution box 5 Key-operated override switch 6 Fuel tank 7 Boom floating position lock 8 Slewing gear freewheel lock 9 Covers, storage box... - Page 585 Starting/switching off the engine – for crane operation 10.1 Starting the engine – from the crane cab ....... 10 - 10.1.1 CHECKLIST: Starting the engine .
- Page 586 3 112 xxx en Operating Manual GMK6300L...
-
Page 587: Starting/Switching Off The Engine - For Crane Operation
Starting/switching off the engine – for crane operation 10.1 Starting the engine – from the crane cab Starting/switching off the engine – for crane operation 10.1 Starting the engine – from the crane cab This section describes only how to start the engine from the crane cab. à... - Page 588 Starting/switching off the engine – for crane operation 10.1 Starting the engine – from the crane cab à 4. Switch on the battery master switch; p. 10 - 7. 5. Remove the hand-held control and insert all bridging plugs; à p.
- Page 589 Starting/switching off the engine – for crane operation 10.1 Starting the engine – from the crane cab à 9. Check the fuel level and carbamide level if necessary; p. 10 - 4. 10. If the truck crane has a flame start system, wait until the lamp goes out; à...
-
Page 590: Checklist: At Low Temperatures
Starting/switching off the engine – for crane operation 10.1 Starting the engine – from the crane cab 10.1.2 CHECKLIST: At low temperatures You must also observe the following points when operating the truck crane at low outside temperatures: 1. The fuel and engine oil must be suited for use in the outside tempera- à... - Page 591 Starting/switching off the engine – for crane operation 10.1 Starting the engine – from the crane cab à Separate engine operating instructions, Only use permissible consumables; provided by the manufacturer . Danger of fire due to inflammable gases! Switch off the engine, the heater and all additional heaters before refuelling.
- Page 592 Starting/switching off the engine – for crane operation 10.1 Starting the engine – from the crane cab Carbamide The display (1) indicates the current level in percent. 100% corresponds to about 40 l (0.9 gal). The level indicator below the display changes colour depending on the level: Green: Over 10% –...
-
Page 593: Checks Before Starting The Engine
Starting/switching off the engine – for crane operation 10.1 Starting the engine – from the crane cab 10.1.4 Checks before starting the engine At the hydraulic The valve on the hydraulic tank must be open before starting the engine. tank Risk of damage to the hydraulic pumps! You may only start the engine when the valve on the hydraulic tank is open! •... -
Page 594: Switch On The Ignition
Starting/switching off the engine – for crane operation 10.1 Starting the engine – from the crane cab Checking the The hand-held control must be removed for crane operation from the crane hand-held control cab. • Check whether the bridging plugs (1) are à... -
Page 595: Lamp Test / Switching State Alignment
Check whether lamps (1) and (2) light up briefly. If one or more lamps do not light up, refer to Manitowoc Crane Care. If the specified time is insufficient, you can perform the lamp test again as follows. Operating Manual GMK6300L... - Page 596 Starting/switching off the engine – for crane operation 10.1 Starting the engine – from the crane cab Conducting the lamp test • ö If necessary, open the main menu and press the button (1) once. This opens the Settings submenu. •...
-
Page 597: Adjusting Display Brightness
Starting/switching off the engine – for crane operation 10.1 Starting the engine – from the crane cab 10.1.7 Adjusting display brightness The brightness of the displays is automatically regulated by the ECOS and the RCL displays and depends on the brightness of the operating environ- ment. -
Page 598: Starting The Engine
Starting/switching off the engine – for crane operation 10.1 Starting the engine – from the crane cab 10.1.8 Starting the engine Refer to the separate operating instructions provided by the engine manu- facturer for the operation of the engine. The engine can only be started if: –... - Page 599 If the lamp (1) does not go out, there is a fault in the flame start system; refer to Manitowoc Crane Care. • Wait until the lamp (1) goes out.
-
Page 600: Checks After Starting The Engine
Maintenance Manual . Check the oil level; • Add oil if necessary. If the error message persists, refer to Manitowoc Crane Care. à Warning submenu , If other symbols are displayed in red in this menu; p. 11 - 110. -
Page 601: Monitoring Submenu
Starting/switching off the engine – for crane operation 10.1 Starting the engine – from the crane cab 10.1.10 Monitoring submenu The Monitoring submenu shows the most important measured values. • ö If necessary, open the main menu and press the button (1) once. This opens the Monitoring submenu. -
Page 602: Setting Idling Speed
Starting/switching off the engine – for crane operation 10.1 Starting the engine – from the crane cab 10.1.11 Setting idling speed à • Start the engine; p. 10 - 12. The display (1) in the Monitoring submenu shows the current engine speed. -
Page 603: Override Torque Reduction
Starting/switching off the engine – for crane operation 10.1 Starting the engine – from the crane cab 10.1.12 Override torque reduction When the carbamide supply is empty, the torque reduction is activated via the engine control system. The monitoring elements are found in the Warning submenu. Further information can be found on the Warning submenu;... - Page 604 Starting/switching off the engine – for crane operation 10.1 Starting the engine – from the crane cab Blank page 10 - 18 3 112 xxx en Operating Manual GMK6300L...
-
Page 605: Starting The Engine - With The Hand-Held Control
Starting/switching off the engine – for crane operation 10.2 Starting the engine – with the hand-held control 10.2 Starting the engine – with the hand-held control Prerequisites You can only start the engine for crane operation if à – The bridging plug is inserted in all unneeded sockets; p. - Page 606 Starting/switching off the engine – for crane operation 10.2 Starting the engine – with the hand-held control Blank page 10 - 20 3 112 xxx en Operating Manual GMK6300L...
-
Page 607: Switching Off The Engine
Starting/switching off the engine – for crane operation 10.3 Switching off the engine 10.3 Switching off the engine 10.3.1 During normal operation, with the ignition lock/with the hand-held control Risk of accidents due to suspended loads! Never switch off the engine whilst a load is suspended. You must have the control levers at hand in order to intervene at any time. -
Page 608: In Emergencies, With The Emergency Stop Switches
Starting/switching off the engine – for crane operation 10.3 Switching off the engine 10.3.2 In emergencies, with the emergency stop switches Risk of overloading if used improperly! Use the emergency stop switches only in an emergency, i.e. if the crane functions no longer respond to the control levers. -
Page 609: Air Intake Inhibitor
Starting/switching off the engine – for crane operation 10.4 Air intake inhibitor 10.4 Air intake inhibitor If the air intake inhibitor is triggered, a flap in the air intake line will close and the engine will stop running. The air intake inhibitor is triggered, –... - Page 610 Starting/switching off the engine – for crane operation 10.4 Air intake inhibitor Blank page 10 - 24 3 112 xxx en Operating Manual GMK6300L...
- Page 611 Crane operation 11.1 Before operating the crane ......... . . 11 - 11.1.1 CHECKLIST: Checks before operating the crane .
- Page 612 11.4.6 Critical load control..........11 - 107 11.4.7 Using the pivoting spotlights.
-
Page 613: Crane Operation
Crane operation 11.1 Before operating the crane Crane operation 11.1 Before operating the crane 11.1.1 CHECKLIST: Checks before operating the crane This checklist is not a complete operating manual. There are accompanying instructions, which are indicated by cross-references. Observe the warnings and safety instructions there. This checklist only applies to working with a rigged truck crane (supported and rigged with counterweight). - Page 614 Crane operation 11.1 Before operating the crane 3. If necessary: à – Adjust the pivoting spotlights; p. 11 - 108, à – Adjust the cameras for crane operation; p. 12 - 123 à 4. Windscreen washing system – check filling level; p.
- Page 615 Crane operation 11.1 Before operating the crane 9. Check – RCL, – lifting limit switch, – seat contact switch and dead man's switch, – emergency stop switch, à for correct operation. Have faulty units repaired; p. 11 - 9. à 10.
- Page 616 Crane operation 11.1 Before operating the crane 16. – Switch off the slewing gear for 0° and 180° working positions – à symbol (1) is red; p. 11 - 100. – Switch off houselock for other working positions – symbol (2) is red; à...
-
Page 617: Checking The Condition Of The Truck Crane
Crane operation 11.1 Before operating the crane 11.1.2 Checking the condition of the truck crane Windscreen wash- Use a windscreen washing agent and, at low temperatures, an appropriate ing system – Tank antifreeze. • Check the level in the tank (1). •... - Page 618 Crane operation 11.1 Before operating the crane à Checking the The hoist mirrors need to be folded out; p. 12 - 123. position of the hoist ropes Risk of crushing due to turning rope drum! Keep away from the rope drum while it is turning. This will prevent your limbs from being drawn in and getting crushed.
-
Page 619: Adjusting The Crane Cab Seat And Front Control Panel
Crane operation 11.1 Before operating the crane 11.1.3 Adjusting the crane cab seat and front control panel Crane cab seat You can adjust the crane cab seat to your height. Version 1 1 Control panel right – height 2 Control panel left – height 3 Back rest –... - Page 620 Crane operation 11.1 Before operating the crane Front control You can adjust the height of the front control panel. panel • (A) – Hold the front control panel by the handle (2). • Fold the pedal (1) upwards. • (B) – Adjust the front control panel to the desired height.
-
Page 621: Checking The Safety Equipment
Risk of accidents when working with faulty safety devices! It is prohibited to operate the crane with safety devices that are faulty, overridden or out of service! Have faulty safety devices repaired immediately by Manitowoc Crane Care. • Rated capacity Switch on the rated capacity limiter, do all of the checks and enter the à... - Page 622 (1) and (2). If the emergency off switch is not working correctly, do not start work with the crane but notify Manitowoc Crane Care. Do not operate the emergency stop switch to switch the engine off in nor- mal operation. Only operate the emergency stop switch in an emergency situation.
- Page 623 With the control lever actuated, stand up and check whether the crane movement comes to a standstill within approx. 3 seconds. If the dead man's switch system is not working correctly, do not start work with the crane but notify Manitowoc Crane Care. Operating Manual GMK6300L 3 112 xxx en...
-
Page 624: Earthing The Load
Crane operation 11.1 Before operating the crane 11.1.5 Earthing the load à Even if the truck crane is already earthed ( p. 12 - 13), the load may become charged with static electricity. For example, if a hook block with synthetic sheaves or non-conducting sling gear is used. -
Page 625: Preheating The Hydraulic Oil
Crane operation 11.1 Before operating the crane 11.1.6 Preheating the hydraulic oil It may take some time for the solenoid valves to be switched or the power units may be started abruptly if the oil is cold. The current hydraulic oil temperature is displayed in the Monitoring sub- à... -
Page 626: Locking/Unlocking The Turntable
Crane operation 11.1 Before operating the crane 11.1.7 Locking/unlocking the turntable If the truck crane is equipped with a turntable lock then you can manually mechanically lock the turntable to the carrier. Locking points The locking points are at 0° and 180°. •... -
Page 627: Switching The Houselock On/Off
Crane operation 11.1 Before operating the crane 11.1.8 Switching the houselock on/off If the truck crane is equipped with a houselock, the turntable can be locked in the entire slewing range. For locking, a pin extends and blocks the slewing gear. •... - Page 628 Crane operation 11.1 Before operating the crane Switching on the houselock The slewing ring (2) will be displayed in the same colour as the displayed symbol (1) during the entire procedure. • Press in button (1) at the top until symbol (2) turns green.
- Page 629 Crane operation 11.1 Before operating the crane • Switching off the Check that the slewing gear is switched off, and switch if off if it is not; à Switching off the slewing gear , p. 11 - 15. houselock Risk of damage during slewing! Always switch off the slewing gear before you operate the houselock.
- Page 630 Crane operation 11.1 Before operating the crane Blank page 11 - 18 3 112 xxx en Operating Manual GMK6300L...
-
Page 631: Operation Of The Rated Capacity Limiter
Crane operation 11.2 Operation of the rated capacity limiter 11.2 Operation of the rated capacity limiter The rated capacity limiter is abbreviated to RCL (Rated-Capacity-Limiter) in these operating instructions. If the truck crane's current rigging mode is registered properly, the RCL will prevent the permissible lifting capacity from being exceeded and the truck crane from being overloaded. -
Page 632: Switch On The Rcl
Check whether you can hear a buzzer tone. Risk of accidents if the safety devices are faulty! If the lamps or buzzer fail, notify Manitowoc Crane Care and have the error corrected. In the meantime, pay particular attention to the lamps in the event of a fail- ure of the buzzer tone and vice versa. - Page 633 Crane operation 11.2 Operation of the rated capacity limiter After the test program: – the lamps (1) and (2) light up, – all power units are disabled. The current display depends on whether the RCL either: – was switched off for up to 48 hours, or –...
- Page 634 Crane operation 11.2 Operation of the rated capacity limiter After a standstill of more than 48 hours The Enter rigging mode submenu opens. Display (2) will show RCL code 1100 – the cor- responding rigging mode will be displayed. The display (1) shows the last reeving entered, e.g.
-
Page 635: Enter Rigging Mode
Crane operation 11.2 Operation of the rated capacity limiter 11.2.2 Enter rigging mode For a complete rigging mode input, you must enter, confirm and accept the rigging mode and the reeving. Opening the submenu • ö If necessary, open the main menu and press the button (1) once. - Page 636 Crane operation 11.2 Operation of the rated capacity limiter Entering With this type of input, select all the components of the rigging mode one individual after the other. components Danger of overturning due to incorrectly set rigging mode! Values which have already been set may change when entering individual components.
- Page 637 Crane operation 11.2 Operation of the rated capacity limiter Switching on input mode • Press one of buttons (1) to (4) for the desired component. The symbol turns green – input mode is switched on. Selecting values With the input mode switched on, you can select values that are permissible according to the Lifting capacity table .
- Page 638 Crane operation 11.2 Operation of the rated capacity limiter After the selection procedure, there are three options: – Switching off the input mode • Press button (1) once – symbol is grey. – Switching over the input mode • Press the button for the next component once, e.g. button (2) – symbol is green.
- Page 639 Crane operation 11.2 Operation of the rated capacity limiter Slewing range Symbol (1) is green. Press button (3) repeat- edly until the display (2) indicates the required slewing range, e.g. 360°. You can only confirm rigging states for slewing ranges other than 360° when the superstructure is in the entered slewing range.
- Page 640 Crane operation 11.2 Operation of the rated capacity limiter You must enter the RCL code for the rigging mode according to the Lifting Entering the RCL capacity table . code • Refer to the Lifting capacity table for the current rigging mode. The corre- sponding RCL code (1) is specified at the bottom of the table (e.g.
- Page 641 Crane operation 11.2 Operation of the rated capacity limiter Entering the Entering the reeving does not have an effect on any other component that reeving has already been entered. • Press button (5) repeatedly until the symbol for the hoist with which you want to lift the load has turned green.
- Page 642 Crane operation 11.2 Operation of the rated capacity limiter Accepting the rigging mode • Check whether the current rigging mode of the truck crane corresponds to the displayed rigging mode. Risk of accidents due to an incorrectly set RCL! If the current rigging mode varies from the displayed rigging mode, the maximum load displayed by the RCL will not correspond to the actually permissible lifting capacity according to the Lifting capacity table .
-
Page 643: Checks Before Operating The Crane
Crane operation 11.2 Operation of the rated capacity limiter 11.2.3 Checks before operating the crane Crane operation is only enabled when the Monitoring submenu is open. Opening the submenu After a standstill of less than 48 hours and after accepting a rigging mode, the Monitoring submenu will open automatically. - Page 644 Crane operation 11.2 Operation of the rated capacity limiter • Checks Check whether the current rigging mode of the truck crane corresponds to the displayed rigging mode. Risk of accidents due to an incorrectly set RCL! If the current rigging mode varies from the displayed rigging mode, the maximum load displayed by the RCL will not correspond to the actually permissible lifting capacity according to the Lifting capacity table .
- Page 645 Crane operation 11.2 Operation of the rated capacity limiter Example of how to switch over the display The load should be raised with the main hoist, for example. However, lamp II for the auxiliary hoist lights up and lamp I for the main hoist flashes. Switch over the display as follows: •...
-
Page 646: Displays During Crane Operation
Crane operation 11.2 Operation of the rated capacity limiter 11.2.4 Displays during crane operation The following information is constantly displayed in addition to the displays of the rigging mode: The current telescoping The displays (1) to (6) show the current tele- scoping of the telescopic sections I to IV in percent, e.g. - Page 647 Crane operation 11.2 Operation of the rated capacity limiter The current main boom angle Shows the current main boom angle in relation to the horizontal. Angles below the horizontal are displayed with a minus sign, e.g. – 3°. The current overall height Overall height = vertical distance between the lower edge of the outrigger pad and the highest point of the main boom or lattice extension.
- Page 648 Crane operation 11.2 Operation of the rated capacity limiter The currently raised load The display (1) shows the sum of the payload + lifting gear + hook block. The maximum load Display (2) shows the maximum load that can be lifted in the current rigging mode with the current working radius.
-
Page 649: Rcl Early Warning
Crane operation 11.2 Operation of the rated capacity limiter 11.2.5 RCL early warning If about 90% of the maximum permissible load is exceeded, an RCL early warning will be issued. – An intermittent buzzer tone will sound. After five seconds, you can switch off the buzzer tone using button (1). - Page 650 Crane operation 11.2 Operation of the rated capacity limiter – All crane movements which increase the load moment will be switched off. – A continuous buzzer tone will sound. After five seconds, you can switch off the buzzer tone using button (4). –...
-
Page 651: Display In The Event Of Errors
Crane operation 11.2 Operation of the rated capacity limiter 11.2.7 Display in the event of errors If an error occurs, it will be displayed as fol- lows. – Depending on the type of error, the buzzer tone sounds once or as a continuous buzzer tone. -
Page 652: Rcl Override
Crane operation 11.2 Operation of the rated capacity limiter 11.2.8 RCL override There are two types of RCL override, depending on the version. Risk of accidents due to overridden or faulty RCL! It is not permitted to work with an overridden or faulty RCL! Set down the load immediately and stop operating the crane if the RCL is faulty! You may override the RCL only if it becomes absolutely necessary to do so... - Page 653 Crane operation 11.2 Operation of the rated capacity limiter RCL override – symbol (A) The status display (1) is active. The following operating elements can be used to override the RCL: Key-operated RCL override switch Key-operated rigging switch Raise switch Status display The status display informs people in the danger area of the truck crane: –...
- Page 654 Crane operation 11.2 Operation of the rated capacity limiter The lamps of the status display light up or flash depending on the RCL degree of utilisation and operation of the switches. Degree of utilisation Switch pressed 0 – 90% approx. greater 90 –...
- Page 655 Crane operation 11.2 Operation of the rated capacity limiter Raising after RCL shutdown You can re-enable raising with the switch (1) in order to leave the shutdown range. The speed will then be reduced to 50%. Raise main boom • Push the button (1) up once.
- Page 656 Crane operation 11.2 Operation of the rated capacity limiter Overriding RCL or lifting limit switch for rigging work For rigging work, you can: – Override the lifting limit switch – Override the RCL and thus enable a degree of utilisation of up to 110%. For both overrides the speed of the movements which increase the load moment is reduced to 15%.
- Page 657 Crane operation 11.2 Operation of the rated capacity limiter Overriding the RCL in an emergency Risk of accidents due to overridden or faulty RCL! It is not permitted to work with an overridden or faulty RCL! Set down the load immediately and stop operating the crane if the RCL is faulty! You may override the RCL only if it becomes absolutely necessary to do so in the event of an emergency.
- Page 658 Crane operation 11.2 Operation of the rated capacity limiter Cancelling the override The override will be cancelled when you: – Switch off the ignition – Press the key-operated switch again. The override will automatically be cancelled 30 minutes after the key-oper- ated switch has been pressed.
-
Page 659: Displaying The Lifting Capacity Tables
Crane operation 11.2 Operation of the rated capacity limiter 11.2.9 Displaying the lifting capacity tables Opening the submenu • Stop all crane movements – control lever in initial position. • In the main menu or Monitoring or submenu, press button (1) once. The Lifting capacity table submenu will open The lamps (1) light up and all crane movements are blocked. - Page 660 Crane operation 11.2 Operation of the rated capacity limiter Curve (2) shows the permissible working range for the entered RCL code (9) and the tel- escope status (4). The working range ends at the maximum pos- sible working radius (3). Reduction of the working radius increases the enabled load along the curve (2) up to the maximum possi- ble load (1).
-
Page 661: Entering The Time/Date
Crane operation 11.2 Operation of the rated capacity limiter 11.2.10 Entering the time/date You can enter the time and date for the display (2). • Press the button (1) once. This opens the Settings submenu • Press button (1) repeatedly until the desired value flashes. - Page 662 Crane operation 11.2 Operation of the rated capacity limiter Blank page 11 - 50 3 112 xxx en Operating Manual GMK6300L...
-
Page 663: Crane Operation With Main Boom
Crane operation 11.3 Crane operation with main boom 11.3 Crane operation with main boom 11.3.1 Checks during crane operation Horizontal During crane operation, the truck crane may tilt if the ground gives way due alignment to varying loads. Risk of accidents if the truck crane is not level! The RCL calculates the working radius from the length and angle of the main boom. - Page 664 Crane operation 11.3 Crane operation with main boom Checking the Strong winds can result in the truck crane becoming overloaded. wind speed • Prior to and during crane operation, check whether the current wind speed is lower than the maximum permissible wind speed. Maximum permissible wind speed The maximum permissible wind speed (1) for the current rigging mode is specified at the bottom of the corresponding Lifting capacity table .
-
Page 665: Permissible Slewing Ranges And Working Positions
Crane operation 11.3 Crane operation with main boom 11.3.2 Permissible slewing ranges and working positions The following ranges are permissible for crane operation according to the Lifting capacity table . • 360° slewing Support the truck crane with the outrigger span required according to the Lifting capacity table . -
Page 666: Main Hoist
Crane operation 11.3 Crane operation with main boom 11.3.3 Main hoist You can reeve the hoist rope of the main hoist on the main boom or on the lattice extension. Risk of accidents from accidentally operating a hoist! Always switch off the hoist that is not in use! Never operate the hoist if the hook block is unreeled and the hoist rope is completely wound onto the drum. - Page 667 Crane operation 11.3 Crane operation with main boom Switching on the After the ignition is switched on, all of the power units will be switched off main hoist and the lamps in the corresponding buttons will light up only dimly. •...
- Page 668 Crane operation 11.3 Crane operation with main boom • Raise: Pull the control lever backwards. • Lowering: Push the control lever forwards. When the hoist drum is turning, you will notice a pulse on the slewing indi- cator (1). You can regulate the speed by moving the control lever and changing the engine speed with the accelerator.
-
Page 669: Auxiliary Hoist
Crane operation 11.3 Crane operation with main boom 11.3.4 Auxiliary hoist You can reeve the hoist rope of the main hoist on the main boom or on the lattice extension. Risk of accidents when operating the auxiliary hoist! Read and observe all of the safety instructions in the section titled Main hoist , p. - Page 670 Crane operation 11.3 Crane operation with main boom Switching on the After the ignition is switched on, all of the power units will be switched off auxiliary hoist and the lamps in the corresponding buttons will light up only dimly. •...
- Page 671 Crane operation 11.3 Crane operation with main boom Lifting and You can adjust the sensitivity of the control levers to the operating condi- à Setting the characteristic curves for the control levers , p. 11 - 106. lowering tions; Risk of accidents due to gaps in monitoring! Operation of the hoist will only be monitored fully if: à...
-
Page 672: Lifting Limit Switch And Lowering Limit Switch
Crane operation 11.3 Crane operation with main boom 11.3.5 Lifting limit switch and lowering limit switch à Lifting limit switch To install/remove the lifting limit switch; p. 12 - 106. The lifting limit switch (1) prevents the hook block from being lifted up to the main boom head and damaging it. - Page 673 Crane operation 11.3 Crane operation with main boom Lifting limit switch override When overriding, the shutdown of the lifting limit switch is cancelled and à the crane operation is no longer completely monitored; Overriding RCL or lifting limit switch for rigging work , p. 11 - 44. Risk of accidents if the lifting limit switch is overridden! You may override the lifting limit switch only if this is specified in the oper- ating instructions for carrying out maintenance or rigging work.
-
Page 674: Derricking Gear
Crane operation 11.3 Crane operation with main boom 11.3.6 Derricking gear You can raise and lower the main boom. Depending on the size of the load and the rigging mode, the RCL will switch off the lowering process of the boom as soon as the working area specified in the Lifting capacity table is left. - Page 675 Crane operation 11.3 Crane operation with main boom raising and You can adjust the sensitivity of the control levers to the operating condi- à Setting the characteristic curves for the control levers , p. 11 - 106. lowering tions; Risk of accident due to unexpected crane movements! If assigned more than one function, check that the Derricking control lever function is switched on before you move the control lever for derricking.
- Page 676 Crane operation 11.3 Crane operation with main boom Re-enable raising If the RCL has switched off the raising function due to an overload, you can function re-enable the raising function with switch (1). The speed will then be reduced to 50%. •...
- Page 677 Crane operation 11.3 Crane operation with main boom Lowering the Lowering the boom out of the working range is enabled only without a load main boom to and if there is a rigging table for the current rigging mode. a horizontal Enabling is automatic, the rigging tables cannot be entered manually.
-
Page 678: Telescoping Mechanism
Crane operation 11.3 Crane operation with main boom 11.3.7 Telescoping mechanism A telescoping process requires locking and unlocking processes in the main boom. You can telescope the main boom in two ways. – Manual telescoping For manual telescoping, you must initiate all locking and unlocking processes at the right time. - Page 679 Crane operation 11.3 Crane operation with main boom Overview This illustration shows the completely retracted main boom with the basic section (9) and the first three telescopic sections I to III (1) to (3). Each telescopic section is equipped with two locking pins (7) which are extended by spring force.
- Page 680 Crane operation 11.3 Crane operation with main boom 1. Unlocking the telescoping cylinder The locking pins (5) retract – the telescoping cylinder is unlocked. 2. Moving and locking the telescoping cylinder The telescoping cylinder moves into the section to be telescoped, e.g. telescopic section III (3).
- Page 681 Crane operation 11.3 Crane operation with main boom 4. Telescoping, locking and setting down a telescopic section The telescoping cylinder pushes the telescopic section to a locking point. The weight is taken off the mechanism (10). The locking pins (7) extend into the cutouts (4). The telescopic section is automatically set down.
- Page 682 Crane operation 11.3 Crane operation with main boom 1 Telescopic section I 2 Telescopic section II 3 Telescopic section III 4 Cutouts 5 Locking pins on the telescoping cylinder 6 Cutouts 7 Locking pin on the telescopic section 8 Telescoping cylinder (piston rod) 9 Basic section 10 Mechanism 11 - 70...
- Page 683 Crane operation 11.3 Crane operation with main boom Fixed length, There are lifting capacity tables for main boom fixed lengths, main boom intermediate intermediate lengths and main boom telescoping lengths. length, telescop- The lengths are automatically detected by the RCL, and the corresponding ing length lifting capacities according to the Lifting capacity tables are enabled and dis- played automatically.
- Page 684 Crane operation 11.3 Crane operation with main boom Telescoping The position of the telescopic sections (1) to (6), i.e. which telescopic section is extended to what extent, is referred to as telescoping. This section only deals with the displays on the RCL. The telescoping is also à...
- Page 685 Crane operation 11.3 Crane operation with main boom Checks before When the ignition is turned on, ECOS registers the displayed telescoping starting work status from the current status of the telescoping mechanism and the previously saved locking and unlocking procedures. Normally, ECOS detects differences between the current and the displayed à...
- Page 686 Crane operation 11.3 Crane operation with main boom Switching on the After the ignition is switched on, all of the power units will be switched off telescoping and the lamps in the corresponding buttons will light up only dimly. mechanism •...
- Page 687 Crane operation 11.3 Crane operation with main boom The distance between the hook block and the boom head changes during telescoping. Ensure that the hook block does not trigger the lifting limit switch or touch the ground. • Additionally carry out the following movements: –...
- Page 688 Crane operation 11.3 Crane operation with main boom You can set the desired engine speed (idling speed) with button (1); à p. 10 - 16. You can limit the maximum telescoping speed in the Power unit speeds sub- à menu; p.
- Page 689 Crane operation 11.3 Crane operation with main boom Manual To telescope manually, you must initiate all locking and unlocking proc- telescoping esses. The locking and unlocking processes are carried out automatically. The following sections describe the operating procedures: – Checking the initial position, à...
- Page 690 Crane operation 11.3 Crane operation with main boom Current telescoping The display (2) shows the current telescoping in per cent for each telescopic section. The display (1) shows a diagram of the current telescope state. Position of the telescoping cylinder The display (4) shows how far the telescoping cylinder is extended, e.g.
- Page 691 Crane operation 11.3 Crane operation with main boom Position of the locking pins The display (3) shows the current positions of the locking pins 1 On the telescoping cylinder 2 On the telescopic section. The current settings are shown in different colours.
- Page 692 Crane operation 11.3 Crane operation with main boom To select unlock • Press the button (1) once. – If the telescopic section is locked: Symbol (1) will flash – Unlock telescoping cylinder is selected. – If the telescopic section is unlocked: Symbol (2) will flash –...
- Page 693 Crane operation 11.3 Crane operation with main boom If symbol (1) is still flashing after approx. 10 seconds, this means that the locking pins are under load. • Release the control lever. The display (2) shows which movement you need to carry out to take the load off: –...
- Page 694 Crane operation 11.3 Crane operation with main boom Extending/retract- Operating the telescoping cylinder (without telescopic section) is required ing the telescop- when the telescoping cylinder needs to be moved into a different telescopic ing cylinder section. Prerequisites – Telescoping mechanism on – symbol (3) is green –...
- Page 695 Crane operation 11.3 Crane operation with main boom Lock telescoping The telescoping cylinder must be locked to a telescopic section so that the cylinder telescopic section can be telescoped. Prerequisites – Telescoping mechanism on – symbol (3) is green – Telescopic section locked – symbol (2) is grey –...
- Page 696 Crane operation 11.3 Crane operation with main boom Unlocking the Unlocking a telescopic section is required for the telescopic section to be telescopic section telescoped. The telescoping cylinder and the telescopic section cannot be unlocked simultaneously. Prerequisites – Telescoping mechanism on – symbol (2) is green –...
- Page 697 Crane operation 11.3 Crane operation with main boom If symbol (1) is still flashing after approx. 10 seconds, this means that the locking pins are under load. • Release the control lever. To relieve the load, carefully retract and extend a little. Risk of damage to the boom system! If extending and retracting several times does not lead to the lock being released, you must not telescope any further against the stop.
- Page 698 Crane operation 11.3 Crane operation with main boom Telescoping the You can telescope the telescopic section once it is unlocked. telescopic section Prerequisites – Telescoping mechanism on – symbol (3) is green – Telescoping cylinder locked – symbol (1) is grey –...
- Page 699 Crane operation 11.3 Crane operation with main boom Locking the tele- Every telescopic section can be locked at the fixed lengths – fixed lengths; à scopic section p. 11 - 71. Prerequisites – Telescoping mechanism on – symbol (3) is green –...
- Page 700 Crane operation 11.3 Crane operation with main boom Risk of damage to the telescoping cylinder! Move the control lever until the telescopic section is locked and set down – the symbol must be yellow. This prevents the load from exerting pressure on the telescoping cylinder and allow the load to be enabled for fixed lengths.
- Page 701 Crane operation 11.3 Crane operation with main boom Telescoping with When telescoping with teleautomation, you enter the desired fixed lengths teleautomation and then move the control lever in the required direction. Switching between the telescopic sections is carried out automatically by ECOS. If the desired telescoping status is not a fixed length, you can first telescope to the next closest fixed length with the teleautomation and then telescope further to the desired length manually.
- Page 702 Crane operation 11.3 Crane operation with main boom – The displayed symbol, e.g. symbol (1) will flash if the control lever is moved incorrectly. – If the control lever movement is correct, ECOS will telescope automati- cally until a change in direction is required. Then the symbol for the new movement will be displayed, e.g.
- Page 703 Crane operation 11.3 Crane operation with main boom Example of telescoping with teleautomation Assuming the current telescoping is 100/0/0/0/0/0 and the telescoping cylinder is locked in tele- scopic section I . The desired telescoping is 50/100/100/100/100/100. The display should correspond to the opposite diagram once you have entered the desired telescope status and confirmed it.
- Page 704 Crane operation 11.3 Crane operation with main boom Retract telescopic section I – display (3) 0% Lock telescopic section I – pins (5) green Unlock telescoping cylinder – pins (4) are red The telescoping cylinder moves into telescopic section IV – display (2) Lock telescoping cylinder –...
- Page 705 Crane operation 11.3 Crane operation with main boom • Telescoping the Derrick the main boom to the horizontal position as described in section à Lowering the main boom to a horizontal position ; main boom when p. 11 - 65. horizontal The RCL will automatically switch to the corresponding rigging table.
-
Page 706: High-Speed Mode
Crane operation 11.3 Crane operation with main boom 11.3.8 High-speed mode The slewing gear cannot be operated at high speed. You can switch on the high-speed mode for a higher speed. Risk of accidents due to the suddenly accelerating movements! Reduce the engine speed before starting high-speed mode. - Page 707 Crane operation 11.3 Crane operation with main boom Hoists The main hoist and auxiliary hoist are always switched simultaneously to high-speed mode. Risk of accidents due to overloading! Make sure the lifted load is no more than 50% of the maximum load accord- ing to the Lifting capacity table (maximum degree of utilisation of 50%) before operating the hoists in high-speed mode.
-
Page 708: Slewing Gear
Crane operation 11.3 Crane operation with main boom 11.3.9 Slewing gear Danger of overturning when slewing with a rigged counterweight! Always check before slewing whether slewing is permitted in the truck crane's current rigging mode (counterweight, outrigger span, working radius). à... - Page 709 Crane operation 11.3 Crane operation with main boom Releasing the slewing gear brake The slewing gear brake will be released as soon as you deflect the control lever (2). Lamp (1) will extinguish if the slewing gear brake has been released. Engaging the The slewing gear brake is applied when you switch off the slewing gear;...
- Page 710 Crane operation 11.3 Crane operation with main boom Danger of overturning when slewing with an incorrectly set RCL! Before slewing, always check whether the RCL code valid for the current rigging mode is displayed. This prevents slewing operations from being enabled within the impermis- sible ranges, which would cause the truck crane to overturn.
- Page 711 Crane operation 11.3 Crane operation with main boom Reading off the slewing angle In the Slewing gear/houselock submenu – display (1) shows the current position. 0° means that the superstructure is slewed to the rear. – Angles in the right semi-circle are displayed as positive values (0°...
- Page 712 Crane operation 11.3 Crane operation with main boom Slewing gear The slewing gear freewheel is required if the slewing gear needs to be freewheel slewed by means of external forces, e.g. when operating with two cranes. • Switch on the slewing gear. •...
-
Page 713: Possible Movement Combinations
Crane operation 11.3 Crane operation with main boom 11.3.10 Possible movement combinations – The main hoist, telescoping mechanism, derricking gear and slewing gear can be operated in almost any combination simultaneously. Restrictions are specified for the respective power units. The telescoping mechanism and derricking gear can only be operated simultaneously when the control lever assignment is from Version 1 ;... - Page 714 Crane operation 11.3 Crane operation with main boom Blank page 11 - 102 3 112 xxx en Operating Manual GMK6300L...
-
Page 715: Settings And Displays For Crane Operation
Crane operation 11.4 Settings and displays for crane operation 11.4 Settings and displays for crane operation This section only describes settings and displays needed during crane operation. Operating elements that can be assigned to other procedures are described with the corresponding procedures. 11.4.1 Inclining the crane cab With the appropriate equipment, you can incline the crane cab to the rear in... -
Page 716: Adjusting The Wiper Stroke Interval Of The Windscreen Wiper
Crane operation 11.4 Settings and displays for crane operation 11.4.3 Adjusting the wiper stroke interval of the windscreen wiper You can set a value between 3 and 30 seconds for the front and roof window wiper stroke interval. The higher the selected value is, the longer the pauses between the strokes of the wiper are. -
Page 717: Limiting The Power Unit Speeds
Crane operation 11.4 Settings and displays for crane operation 11.4.4 Limiting the power unit speeds You can enter what percentage of the maximum speed should be enabled for each power unit. • In the main menu press button (1) once. The Power unit speeds submenu opens. -
Page 718: Setting The Characteristic Curves For The Control Levers
Crane operation 11.4 Settings and displays for crane operation 11.4.5 Setting the characteristic curves for the control levers The control lever characteristic curve determines how high the power unit speed should be for a particular control lever movement. The set control lever characteristic curve always applies to both control levers and to all power units moved with the control levers. -
Page 719: Critical Load Control
Crane operation 11.4 Settings and displays for crane operation 11.4.6 Critical load control Function The critical load control prevents the engine from stalling at low engine speeds. ECOS registers the currently available motor output and the hydraulic performance currently required by the power units. If the required hydraulic performance is above the current motor output (e.g. -
Page 720: Using The Pivoting Spotlights
Crane operation 11.4 Settings and displays for crane operation 11.4.7 Using the pivoting spotlights With the relevant equipment, the pivoting spotlights (1) are located on the main boom. They are controlled from the crane cab. Risk of accidents due to dazzling during on-road driving! When driving on the road, always direct the spotlight in such a way that the reflector points downwards. -
Page 721: Displaying The Operating Hours
Crane operation 11.4 Settings and displays for crane operation 11.4.8 Displaying the operating hours • In the main menu press button (1) once. This opens the Settings submenu. • Press the button (1) once. The Operating hours submenu opens. The operating hours are displayed below the symbols, e.g. -
Page 722: Warning Submenu
Crane operation 11.4 Settings and displays for crane operation 11.4.9 Warning submenu ECOS differentiates between warning messages and error messages (error à messages; p. 11 - 114). A warning message indicates that certain values do not correspond to a target value. In the event of a warning message, the follow- ing lamps will flash: –... - Page 723 • Add oil if necessary. If the error message persists, refer to Manitowoc Crane Care. Risk of damage to the engine if the oil pressure drops! Switch off the engine as soon as possible and look for the cause if the lamp...
- Page 724 Crane operation 11.4 Settings and displays for crane operation Engine electronic system Malfunction in the engine electronics: à Carrier – switch off engine immediately; , p. 5 - 54. Engine electronic system Fault in the exhaust system: à Superstructure – Switch off the engine immediately; p.
- Page 725 Crane operation 11.4 Settings and displays for crane operation Anemometer not connected à • Connect the anemometer to the electrical power supply; p. 12 - 112. Voltage monitoring The voltage in the superstructure electrical system is too high or too low. à...
-
Page 726: Error Submenu
Crane operation 11.4 Settings and displays for crane operation Exiting the You can exit the submenu at any time. submenu • Press the button (1) once. The same menu opens which was open before the Warning submenu opened. If the same warning messages are still present, the lamps (1) and (2) light up. If no warning message is present, both lamps will go out. -
Page 727: Working Range Limiter
Crane operation 11.5 Working range limiter 11.5 Working range limiter You can set and monitor four different limits in the working range limiter submenus: – a maximum overall height, – a maximum working radius, – a maximum slewing angle, – objects in the working range. The monitoring of the programmed limits can be switched on and off separately. -
Page 728: Opening The Working Range Limiter Submenu
Crane operation 11.5 Working range limiter 11.5.1 Opening the working range limiter submenu • Open the main menu, if necessary – button (2). The dot in symbol (1) indicates whether limit values are being monitored: – Dot is black: Monitoring switched off –... - Page 729 Crane operation 11.5 Working range limiter Limit values/current values The displays (1) to (3) indicate values for: 1 Overall height 2 Working radius 3 Slewing angle Every display shows the following values: 4 Limit value – red 5 Current value – blue In case of manual and switched on input, à...
-
Page 730: Entering Limit Values
Crane operation 11.5 Working range limiter 11.5.3 Entering limit values This section describes how to enter unknown limit values by moving to the shutdown points. à Entering limit values/objects You can enter known limit values directly; manually , p. 11 - 124. Prerequisite Manual input must be switched off. - Page 731 Crane operation 11.5 Working range limiter The limit value for the working radius affects the representation of defined objects. Only points that are within the limit value (1) will be displayed. Slewing angle Slewing angles are entered in a submenu. Before entering values, monitoring (1) must be switched off –...
- Page 732 Crane operation 11.5 Working range limiter Entering the permissible slewing range You must enter the slewing angles A and B separately. Risk of accident due to incorrectly set slewing angles! Always slew the main boom to the shutdown point from the right with slewing angle A and from the left with slewing angle B.
- Page 733 Crane operation 11.5 Working range limiter Entering objects Objects are entered in a submenu. Before entering values, the monitoring functions (1) to (3) must be switched à off – dots black; p. 11 - 126. • Press the button (1) once. The Enter objects submenu opens.
- Page 734 Crane operation 11.5 Working range limiter Entering objects • (A) – With the buttons (10), select the first point, e.g. point (1) – blue. • Move the main boom head (11) to just before the first point of the object. •...
- Page 735 Crane operation 11.5 Working range limiter Deleting points You can delete selected, individual points or delete all points at once. (A) – Selected points • Press the button (1) once. The selected point will be deleted, e.g. point (4) – point data 0.0. (B) –...
-
Page 736: Entering Limit Values/Objects Manually
Crane operation 11.5 Working range limiter 11.5.4 Entering limit values/objects manually Limit values The limit values for the overall height, the working radius, and the slewing angle are entered in the same way. – For overall height/working radius • Press the button once: For the overall height For the working radius. - Page 737 Crane operation 11.5 Working range limiter Objects Objects are entered in a submenu. • Press the button (1) once. The Enter objects submenu opens. • With the buttons (12), select the desired point, e.g. point (1) – blue. • Press button (11) once – the dot will turn green, manual input on.
-
Page 738: Switching Monitoring Functions On/Off
Crane operation 11.5 Working range limiter 11.5.5 Switching monitoring functions on/off After turning on the ignition, all monitoring functions that were on before the ignition was switched off are switched on. • Press the buttons for the required monitoring functions once. 1 Overall height 2 Working radius 3 Slewing angle... -
Page 739: Shutdown By Working Range Limiter
Crane operation 11.5 Working range limiter 11.5.6 Shutdown by working range limiter If a limit value is reached, RCL shutdown will occur. All movements that would go closer to the limit value will be disabled. Shutdown will remain active even if you switch off the monitoring function. Shutdown point reached for Disabled movements –... - Page 740 Crane operation 11.5 Working range limiter Blank page 11 - 128 3 112 xxx en Operating Manual GMK6300L...
-
Page 741: Work Break
Crane operation 11.6 Work break 11.6 Work break 11.6.1 In case of short work breaks Risk of accidents due to suspended loads! Never switch off the engine whilst a load is suspended. You must have the control levers at hand in order to intervene at any time. Always set down the load before you leave the crane cab. -
Page 742: In Case Of Work Breaks Of More Than 8 Hours
Crane operation 11.6 Work break 11.6.2 In case of work breaks of more than 8 hours • Retract all telescopic sections. • Set down the main boom on the boom rest. • Switch off the slewing gear. – The lamp in the (1) button must be dimly lit. –... -
Page 743: Heating And Air-Conditioning System
Crane operation 11.7 Heating and air-conditioning system 11.7 Heating and air-conditioning system • Do not cover grilles (1) and (2). – Air is drawn in through grilles (1) and (2). 11.7.1 Standard heating system • Switching on Start the engine. The heating output is only provided when the engine is running. - Page 744 Crane operation 11.7 Heating and air-conditioning system Air distribution You can direct the air to flow out of various air vents. • Turn the switch (4) to the position for the required air vents. A Air vents (1), (2), windscreen, centre B Air vents (3), cab floor C Air vents (1), (2), (3)
-
Page 745: Air-Conditioning System
Crane operation 11.7 Heating and air-conditioning system 11.7.2 Air-conditioning system You can use the air-conditioning system to cool and dry the air in the crane cab. Information Do not cool the air in the crane cab too much. The difference between the outside temperature and the inside temperature should be at the most 10 °C to 14 °C (50 °F to 57.2 °F). - Page 746 Crane operation 11.7 Heating and air-conditioning system Cooling The illustration shows only a sample setting. Always adjust the setting to the current conditions. • Press switch (1) down. • Turn the switch (5) as far as it will go, to Cold . •...
-
Page 747: Auxiliary Water Heater
Crane operation 11.7 Heating and air-conditioning system 11.7.3 Auxiliary water heater The batteries will be drained if you operate the auxiliary heater with the engine switched off. You must recharge the batteries at shorter intervals if you use the auxiliary heater frequently! You can use the auxiliary water heater to: –... - Page 748 Crane operation 11.7 Heating and air-conditioning system Preheating the If the crane cab is to be preheated in addition to the engine, adjust the crane cab heating system as follows: • Switch (1) to position Warm . • Switch (3) to the Recirculated air symbol. •...
- Page 749 Crane operation 11.7 Heating and air-conditioning system • Switching on Check whether the auxiliary heater is allowed to be operated at the cur- rent site of the truck crane before switching it on. Find out whether there are any possible sources of danger that could result in an explosion. Risk of explosion when operating the auxiliary heater! The auxiliary heater is not allowed to be operated: –...
- Page 750 Crane operation 11.7 Heating and air-conditioning system Setting the day Always set the current time and current day of the week. These settings are and time required for the correct activation point of the automatic heating start. If the power supply is interrupted, all symbols in the display will flash and you must set the time and day of the week again.
- Page 751 Crane operation 11.7 Heating and air-conditioning system • To retrieve a storage location, press the button (1) once. The following flash: – The retrieved storage location, e. g. 2 – The last saved heating start, e.g. 06:00. • Set the time for the desired heating start – button (1) or (2), e.g. 08:00. Wait for approx.
- Page 752 Crane operation 11.7 Heating and air-conditioning system The last set heating period, e.g. 27 minutes, will now flash on the display for 5 seconds. • Set the desired heating period on the flashing display – button (1) or (2). You can set a heating period of 10 to 120 minutes. Wait for approx.
- Page 753 Crane operation 11.7 Heating and air-conditioning system Switching off This section only describes how to switch off the heater manually. If the aux- iliary heater was switched on automatically, it will be switched off after a à Setting the particular heating period. You can set this heating period; heating period , p.
-
Page 754: Auxiliary Air Heater
Crane operation 11.7 Heating and air-conditioning system 11.7.4 Auxiliary air heater You can use the auxiliary air heater to preheat the crane cab or provide additional heating. The batteries will be drained if you operate the auxiliary heater with the engine switched off. - Page 755 Crane operation 11.7 Heating and air-conditioning system Temperature You can preselect a temperature for the crane cab. The preselected temper- ature is automatically set and maintained. Increasing the temperature: • Turn the switch (1) clockwise. Reducing the temperature: • Turn the switch (1) anti-clockwise. The higher the selected temperature is, the faster the fan of the auxiliary heater runs.
-
Page 756: Cranestar System
Crane operation 11.8 CraneSTAR system 11.8 CraneSTAR system 11.8.1 Overview Your truck crane is equipped with the CraneSTAR system. The CraneSTAR system is used to transmit crane data via mobile phone, thus allowing remote diagnostics and localisation of the truck crane. The CraneSTAR system works automatically, no controls must be operated. - Page 757 Rigging work 12.1 Rigging work checklists for crane operation with the main boom ..12 - 12.1.1 CHECKLIST: Rigging ..........12 - 12.1.2 CHECKLIST: Unrigging .
- Page 758 12.7.7 Counterweight hoist unit ......... . 12 - 75 12.7.8 Setting down counterweight for driving the truck crane.
-
Page 759: Rigging Work
Rigging work 12.1 Rigging work checklists for crane operation with the main boom Rigging work If the truck crane on the site has already been rigged, proceed according to the CHECKLIST: Checks before operating the crane , p. 11 - 1. 12.1 Rigging work checklists for crane operation with the main boom... - Page 760 Rigging work 12.1 Rigging work checklists for crane operation with the main boom 4. For the free on wheels working position à – Check whether the tyre pressure has been correctly set; p. 1 - 14. – Check whether the ground will support the maximum axle loads; à...
- Page 761 Rigging work 12.1 Rigging work checklists for crane operation with the main boom à Switch the engine off , p. 4 - 23. 9. Turn off the engine for driving; à Earthing the truck crane , p. 12 - 13. 10.
- Page 762 Rigging work 12.1 Rigging work checklists for crane operation with the main boom à Switching off the houselock , 15. Switch off the houselock, if necessary; p. 11 - 17. 16. Pick up the hook block and reeve the hoist rope again, if necessary; à...
- Page 763 Rigging work 12.1 Rigging work checklists for crane operation with the main boom à CHECKLIST: Auxiliary 21. If required, assemble the auxiliary hoist; hoist, installing , p. 6 - 89. 22. With the RCL adjusted accordingly, rig the counterweight combination required for the operation according to Lifting capacity table ;...
-
Page 764: Checklist: Unrigging
Rigging work 12.1 Rigging work checklists for crane operation with the main boom 12.1.2 CHECKLIST: Unrigging This checklist is not a complete operating manual. There are accompanying instructions, which are indicated by cross-references. Observe the warnings and safety instructions there! 1. - Page 765 Rigging work 12.1 Rigging work checklists for crane operation with the main boom 6. Depending on transport: à – Attach the hook block to the bumper; p. 12 - 86 or – Set down the hook block and unreeve the hoist rope; à...
- Page 766 Rigging work 12.1 Rigging work checklists for crane operation with the main boom à 11. – Fold in the mirrors for crane operation; p. 12 - 123, à – Lower the slewable spotlights; p. 11 - 108 à 12. Retracting the outriggers; CHECKLIST: Retracting the outriggers , p.
-
Page 767: Choice Of A Suitable Positioning Site
Rigging work 12.2 Choice of a suitable positioning site 12.2 Choice of a suitable positioning site Choose the position of your truck crane at the site with care. Observe the fol- lowing aspects: – Check that the ground has sufficient load bearing capacity. You may need à... - Page 768 Rigging work 12.2 Choice of a suitable positioning site Load bearing capacity of the ground • Find the load bearing capacity of the ground using the table. Load bearing APPROXIMATE VALUES FOR THE LOAD BEARING capacity t/m CAPACITY OF THE GROUND (lbs/ft Backfilled, not artificially compacted ground: 0 to 10...
- Page 769 Rigging work 12.2 Choice of a suitable positioning site Load-bearing area • Now calculate the required load-bearing area. à • Check that the surface of the outrigger pad ( p. 1 - 14) is larger than the calculated ground bearing area. If the surface of the outrigger pad is smaller, you will need to enlarge the load-bearing area.
-
Page 770: Safe Distance From Slopes And Pits
Rigging work 12.2 Choice of a suitable positioning site 12.2.2 Safe distance from slopes and pits Erect the crane at a safe distance from slopes and pits. The distance also depends on the type of ground if the slopes and pits are not supported. Rule of thumb: If you are working on non-cohesive or filled-in ground, the safety distance (a) must be twice... -
Page 771: Earthing The Truck Crane
Rigging work 12.2 Choice of a suitable positioning site 12.2.3 Earthing the truck crane The truck crane may become charged with static electricity. This may occur especially when using outrigger pads made of plastic or when the outrigger pads are packed with insulating material (e.g. wooden planks). Risk of accidents due to electric shock! Earth the truck crane before you start to work with it –... -
Page 772: Safe Distance From Overhead Power Lines
Rigging work 12.2 Choice of a suitable positioning site 12.2.4 Safe distance from overhead power lines Always observe the regulations in the country in which you are working when working in the vicinity of overhead power lines. Risk of accidents due to electric shock! The truck crane is not insulated. - Page 773 Rigging work 12.2 Choice of a suitable positioning site For example, according to DIN VDE 0105 Voltage Safe distance (A) up to 1,000 V 1 m (3.3 ft) over 1,000 V to 110,000 V 3 m (9.8 ft) over 110,000 V to 220,000 V 4 m (13.1 ft) over 220,000 V to 380,000 V 5 m (16.4 ft)
- Page 774 Rigging work 12.2 Choice of a suitable positioning site Blank page 12 - 16 3 112 xxx en Operating Manual GMK6300L...
-
Page 775: Rigging Work After Driving With A Trailer
Rigging work 12.3 Rigging work after driving with a trailer 12.3 Rigging work after driving with a trailer If the main boom is resting on a trailer (dolly) whilst the truck crane is being driven, you must perform the following before working with the crane: à... -
Page 776: Switching Off The Slewing Gear Freewheel
Rigging work 12.3 Rigging work after driving with a trailer 12.3.2 Switching off the slewing gear freewheel If the slewing gear freewheel is switched on, switch it off prior to working with the crane. Risk of accidents with the slewing gear freewheel switched on! Switch off the slewing gear freewheel before working with the crane. -
Page 777: Switching Off Boom Pre-Tensioning
Rigging work 12.3 Rigging work after driving with a trailer 12.3.3 Switching off boom pre-tensioning You must switch off the boom pre-tensioning before you raise the main boom off the trailer. To switch off boom pre-tensioning, you must bring the valves I to IV into the required positions, which will empty the pressure accumulator. - Page 778 Rigging work 12.3 Rigging work after driving with a trailer Blank page 12 - 20 3 112 xxx en Operating Manual GMK6300L...
-
Page 779: Connecting/Disconnecting The Hand-Held Control
Rigging work 12.4 Connecting/disconnecting the hand-held control 12.4 Connecting/disconnecting the hand-held control Switch off the engine for driving and crane operation. Pulling a bridging plug will make the engines go out, but this action is only designed for emergencies. The ignition can be switched on or off. Connecting the hand-held control •... - Page 780 Rigging work 12.4 Connecting/disconnecting the hand-held control Blank page 12 - 22 3 112 xxx en Operating Manual GMK6300L...
-
Page 781: Starting The Engine For Driving For Rigging Work
Rigging work 12.5 Starting the engine for driving for rigging work 12.5 Starting the engine for driving for rigging work The engine for driving must be running for rigging work, e.g., to move the outriggers. You can start the engine for driving: –... - Page 782 Rigging work 12.5 Starting the engine for driving for rigging work • Press the (1) button down once. The carrier ignition is turned on: – The indicator lamp in the button (1) flashes, – The symbol (2) turns green. • Press the button (5) once.
- Page 783 Rigging work 12.5 Starting the engine for driving for rigging work • Press the (1) button up once. The carrier ignition is turned off and the engine is switched off. – The lamp in the button (1) goes out. – The symbol (2) turns red. –...
- Page 784 Rigging work 12.5 Starting the engine for driving for rigging work 12.5.2 Starting/switching off the engine from the outrigger control units Prerequisites The following requirements must be met before you can start the engine for driving from the outrigger control units: –...
-
Page 785: Outriggers
Rigging work 12.6 Outriggers 12.6 Outriggers Danger of crushing from extending outrigger beams! You may only activate the outriggers if you yourself or a banksman with whom you are in visual contact have an unobstructed view of their move- ments. 12.6.1 CHECKLIST: Extending the outriggers This checklist is not a complete operating manual. - Page 786 Rigging work 12.6 Outriggers 5. Enlarge the ground bearing area if necessary; à Determining the required load-bearing area , p. 12 - 9, à Enlarging the load-bearing area , p. 12 - 40. 6. Extend the supporting cylinders until none of the wheels is touching the ground;...
-
Page 787: Checklist: Retracting The Outriggers
Rigging work 12.6 Outriggers 12.6.2 CHECKLIST: Retracting the outriggers This checklist is not a complete operating manual. There are accompanying instructions, which are indicated by cross-references. Observe the warnings and safety instructions there! à 1. Retract the outrigger cylinders as far as possible; p. -
Page 788: Permissible Outrigger Spans
Rigging work 12.6 Outriggers 6. Switch off the engine; à – after operating it from the control units; p. 4 - 23. à – after operating it from the crane cab; p. 10 - 21. 12.6.3 Permissible outrigger spans Risk of overturning when slewing the superstructure! With some outrigger spans, slewing is only permissible with certain à... -
Page 789: Preparing The Truck Crane
Rigging work 12.6 Outriggers 12.6.4 Preparing the truck crane In the driver's cab Levelling the truck crane • Align the truck crane horizontally with the level adjustment system; à Operating the level adjustment system , p. 5 - 64. Locking the suspension à... -
Page 790: Setting The Outrigger Spans
Rigging work 12.6 Outriggers 12.6.5 Setting the outrigger spans Extend the outrigger beams only as far as the permissible spans. Danger of overturning if the outrigger beams are not correctly extended! Always extend all outrigger beams to the required outrigger span even if you are only working on one side. - Page 791 Rigging work 12.6 Outriggers Outrigger span 8.70 x 7.40 m (28.5 x 24.3 ft) (A) – Prerequisites – Pin (1) must be removed – Pin (2) inserted in holder (3) (B) – Setting and securing • Extend the outrigger beam up to the mark (4).
- Page 792 Rigging work 12.6 Outriggers Outrigger span 8.70 x 5.00 m (28.5 x 16.4 ft) (A) – Prerequisites – Pin (1) must be removed – Pin (2) must be inserted (B) – Setting and securing • Extend the outrigger beam up to the mark (3).
-
Page 793: Extending/Retracting Outrigger Beams
Rigging work 12.6 Outriggers 12.6.6 Extending/retracting outrigger beams Risk of accidents if outrigger beams cannot be seen! Cordon off the area where you intend to extend and retract the outrigger beams. Nobody is allowed to be in this area. Observe the moving outrigger beams or have them observed by a banks- man who is in visual contact with you. - Page 794 Rigging work 12.6 Outriggers If the hand-held control is connected, the Outrigger operating units are From the control units inactive. Start the engine • Remove the hand-held control if necessary, and start the engine from the à driver's cab; p. 4 - 15. à...
- Page 795 Rigging work 12.6 Outriggers The following operating elements are found in the Outriggers submenu. From the crane cab Opening the submenu • In the main menu, press button (1) once. The Outriggers submenu opens. Start the engine • Switch the carrier ignition on and start the engine for driving; à...
- Page 796 Rigging work 12.6 Outriggers If the symbol (3) appears, this means that the slewing gear is switched on – the symbols (1) and (2) remain grey. • Switch off the slewing gear. Extending/retracting outrigger beams • Observe the safety instructions for operating the outrigger beams; à...
-
Page 797: Moving The Outrigger Pads Into Working/Driving Position
Rigging work 12.6 Outriggers 12.6.7 Moving the outrigger pads into working/driving position The illustrations show one outrigger pad. The pulling direction of the other outrigger pads may differ from this. Moving them into working position • (A) – Pull out the pin (1). •... -
Page 798: Enlarging The Load-Bearing Area
Rigging work 12.6 Outriggers 12.6.8 Enlarging the load-bearing area If the surface of the outrigger pads is too small, you must enlarge the à Determining the ground bearing area by packing the outrigger pads; required load-bearing area , p. 12 - 9. For packing, use only suitable materials that will withstand the outrigger pressure, e.g. -
Page 799: Extending/Retracting Supporting Cylinders
Rigging work 12.6 Outriggers 12.6.9 Extending/retracting supporting cylinders Danger of overturning due to insufficient load bearing capacity of the ground! Enlarge the load-bearing area if the ground cannot withstand the resulting outrigger pressure. This prevents the ground under the outrigger pad giving way and causing the truck crane to tilt and overturn. - Page 800 Rigging work 12.6 Outriggers If the hand-held control is connected, the Outrigger operating units are From the control units inactive. Start the engine • Disconnect the hand-held control, if necessary, and start the engine either: à – From the driver's cab; p.
- Page 801 Rigging work 12.6 Outriggers The following operating elements are found in the Outriggers submenu. From the crane Opening the submenu • In the main menu, press button (1) once. The Outriggers submenu opens. Start the engine • Switch the carrier ignition on and start the engine for driving; à...
- Page 802 Rigging work 12.6 Outriggers If the symbol (1) appears, this means that the slewing gear is switched on – the symbols (2) and (3) remain grey. • Switch off the slewing gear. Extending/retracting supporting cylinders • Observe the safety instructions for operating the supporting cylinders; à...
- Page 803 Rigging work 12.6 Outriggers Blank page Operating Manual GMK6300L 3 112 xxx en 12 - 45...
-
Page 804: Levelling The Truck Crane On Outriggers
Rigging work 12.6 Outriggers 12.6.10 Levelling the truck crane on outriggers You must level the truck crane before crane operation and possibly correct its horizontal alignment during crane operation. Inclination After switching on the ignition, various inclination indicators display the indicators current alignment. - Page 805 Rigging work 12.6 Outriggers – Outrigger control units The assignment to the carrier corresponds to the top view. Due to the position of the control units, the displays on both sides differ. In this example, the carrier would be stand- ing higher to the rear on the right hand side.
- Page 806 Rigging work 12.6 Outriggers à • Manual alignment Check that the prerequisites are met; p. 12 - 47. • Extend all supporting cylinders until none of the wheels is touching the ground. • Level the truck crane with the supporting cylinders until the lamp (1) is the à...
- Page 807 Rigging work 12.6 Outriggers Automatic During the automatic alignment procedure, the supporting cylinders are alignment extended only to prevent any wheels touching the ground after the align- ment. à • Check that the prerequisites are met; p. 12 - 47. •...
-
Page 808: Levelling The Free-On-Wheels Truck Crane
Rigging work 12.6 Outriggers 12.6.11 Levelling the free-on-wheels truck crane The suspension is deactivated (locked) if the truck crane is in the Free on wheels working position. The suspension must remain switched off until the truck crane is on outriggers. Danger of overturning if the supporting cylinders are operated unevenly! Extend or retract the supporting cylinders as evenly as possible! This prevents the truck crane overturning when operating individual sup-... - Page 809 Rigging work 12.6 Outriggers • Press the button (2) once – dot is green. The symbol (1) is green if the suspension is switched on. Now all wheels are lowered to the ground and are in the right position for the horizontal alignment.
-
Page 810: Outrigger Pressure Display
Rigging work 12.6 Outriggers 12.6.12 Outrigger pressure display After switching on the ignition, the outrigger pressure displays indicate the current outrigger pressure for all supporting cylinders. The set unit (t or klbs) is shown next to the displays. Outrigger cylinders retracted or extended as far as possible will lead to an incorrect outrigger pressure display. -
Page 811: Rigging/Unrigging The Counterweight
Rigging work 12.7 Rigging/unrigging the counterweight 12.7 Rigging/unrigging the counterweight Depending on the version, the GMK6300L can be equipped with a counter- weight mass of 7.0 t (15,432 lbs) to 92.5 t (203,928 lbs). 12.7.1 Counterweight sections There are various counterweight sections, depending on the truck crane's version and additional equipment. - Page 812 Rigging work 12.7 Rigging/unrigging the counterweight Version B In this version, up to a maximum of 21.2 t (46,738 lbs) can be transported with the truck crane. The axle loads are over 12 t (26,455 lbs). The counterweight combinations can be comprised of: –...
-
Page 813: Identification
Rigging work 12.7 Rigging/unrigging the counterweight 12.7.2 Identification The truck crane and its corresponding counterweight sections are labelled with the same serial number. Danger if counterweight sections are interchanged! Operate the truck crane only with the counterweight sections that belong to it. -
Page 814: Slinging Points On The Counterweight Sections
Rigging work 12.7 Rigging/unrigging the counterweight 12.7.3 Slinging points on the counterweight sections Risk of accidents if used improperly! Attach the various counterweight sections only to the intended slinging points and use lifting gear of sufficient lifting capacity. Only lift the sections one by one, since the slinging points are not designed for lifting stacked sections. - Page 815 Rigging work 12.7 Rigging/unrigging the counterweight Slinging points on the blocks Two slinging points each (1) are on the 9 t and 10 t blocks. Slinging points on version B sections In contrast to version A, there are: – four slinging points (1) on the 4.75 t section, –...
-
Page 816: Checklist: Rigging The Counterweight
Rigging work 12.7 Rigging/unrigging the counterweight 12.7.4 CHECKLIST: Rigging the counterweight This checklist is not a complete operating manual. There are accompanying instructions, which are indicated by cross-references. Observe the warnings and safety instructions there! Danger of overturning when slewing with a rigged counterweight! Always check before slewing whether slewing is permitted in the truck crane's current rigging mode (counterweight, outrigger span, working radius). - Page 817 Rigging work 12.7 Rigging/unrigging the counterweight à CHECKLIST: Auxiliary 6. If required, assemble the auxiliary hoist; hoist, installing , p. 6 - 89. à 7. Open the Counterweight submenu; p. 12 - 75. à – Correct the rigging mode, if necessary; p.
-
Page 818: Checklist: Unrigging The Counterweight
Rigging work 12.7 Rigging/unrigging the counterweight 12.7.5 CHECKLIST: Unrigging the counterweight This checklist is not a complete operating manual. There are accompanying instructions, which are indicated by cross-references. Observe the warnings and safety instructions there! Danger of overturning when slewing with a rigged counterweight! Before slewing with the rigged counterweight, check whether slewing is permissible with the rigged outrigger span or with the truck crane free on à... - Page 819 Rigging work 12.7 Rigging/unrigging the counterweight à 5. Open the Counterweight submenu; p. 12 - 75. 6. Enter the current rigging mode with the presently rigged counterweight à version on the RCL; p. 11 - 23. 7. When the 3-sheave hook block is reeved: –...
-
Page 820: Assembling Counterweight Combination
Rigging work 12.7 Rigging/unrigging the counterweight 12.7.6 Assembling counterweight combination Danger of overturning when slewing with a rigged counterweight! When a counterweight version is rigged, check whether slewing is permit- ted with the current rigging mode (outrigger span, working radius). Correct à... - Page 821 Rigging work 12.7 Rigging/unrigging the counterweight Combinations for The following counterweight combinations can be combined on the coun- the basic equip- terweight platform. ment in version A Risk of accident due to an incorrect counterweight mass! Only combine the counterweights in such a manner that the counterweight mass corresponds to the specifications in this section and in the Lifting capacity table .
- Page 822 Rigging work 12.7 Rigging/unrigging the counterweight 26 t (57,320 lbs) – 7 t base plate – two 9.5 t sections 35.5 t (78,264 lbs) – 7 t base plate – three 9.5 t sections 12 - 64 3 112 xxx en Operating Manual GMK6300L...
- Page 823 Rigging work 12.7 Rigging/unrigging the counterweight 45 t (99,208 lbs) – 7 t base plate – four 9.5 t sections 54.5 t (120,152 lbs) – 7 t base plate – five 9.5 t sections Operating Manual GMK6300L 3 112 xxx en 12 - 65...
- Page 824 Rigging work 12.7 Rigging/unrigging the counterweight Combinations for Depending on the additional equipment, other counterweight sections are the additional available. This section shows how to assemble the additional counter- equipment in weight combinations. version A Risk of accident due to an incorrect counterweight mass! Only combine the counterweights in such a manner that the counterweight mass corresponds to the specifications in this section and in the Lifting capacity table .
- Page 825 Rigging work 12.7 Rigging/unrigging the counterweight The diagram shows all counterweight sections in version A with additional equipment (4) and (5) with the maximum counterweight mass of 92.5 t (203,928 lbs). – The base plate (1) must always be at the bottom. –...
- Page 826 Rigging work 12.7 Rigging/unrigging the counterweight Combinations for The following counterweight combinations can be combined on the the basic equip- counterweight platform. ment in version B Risk of accident due to an incorrect counterweight mass! Only combine the counterweights in such a manner that the counterweight mass corresponds to the specifications in this section and in the Lifting capacity table .
- Page 827 Rigging work 12.7 Rigging/unrigging the counterweight 21.2 t (46,738 lbs) – 7 t base plate – Three 4.75 t sections 26 t (57,320 lbs) – 7 t base plate – Four 4.75 t sections Operating Manual GMK6300L 3 112 xxx en 12 - 69...
- Page 828 Rigging work 12.7 Rigging/unrigging the counterweight 35.5 t (78,264 lbs) – 7 t base plate – four 4.75 t sections – one 9.5 t section 45 t (99,208 lbs) – 7 t base plate – four 4.75 t sections – two 9.5 t sections 54.5 t (120,152 lbs) –...
- Page 829 Rigging work 12.7 Rigging/unrigging the counterweight Combinations for Depending on the additional equipment, other counterweight sections are the additional available. This section shows how to assemble the additional counter- equipment in weight combinations. version B Risk of accident due to an incorrect counterweight mass! Only combine the counterweights in such a manner that the counterweight mass corresponds to the specifications in this section and in the Lifting capacity table .
- Page 830 Rigging work 12.7 Rigging/unrigging the counterweight The diagram shows all counterweight sections in version B with additional equipment (8) and (9) with the maximum counterweight mass of 92.5 t (203,928 lbs). – The base plate (1) must always be at the bottom. –...
- Page 831 Rigging work 12.7 Rigging/unrigging the counterweight Operating Manual GMK6300L 3 112 xxx en 12 - 73...
- Page 832 Rigging work 12.7 Rigging/unrigging the counterweight Blank page 12 - 74 3 112 xxx en Operating Manual GMK6300L...
-
Page 833: Counterweight Hoist Unit
Rigging work 12.7 Rigging/unrigging the counterweight 12.7.7 Counterweight hoist unit The lifting cylinders (1) can be extended and retracted. To lift and lower the counterweight, the lifting cylinders are screwed into the 7.0 t base plate (2). Risk of crushing when lifting and lowering the counterweight! Make sure nobody is on the counterweight platform while the counter- weight is being lifted or lowered. - Page 834 12.7 Rigging/unrigging the counterweight The Counterweight submenu opens. If an error symbol (1) is displayed during subsequent operation, please contact Manitowoc Crane Care. Extending/retract- This section describes how to operate the lifting cylinders manually, ing the lifting – for correcting the displayed rigging mode and cylinders –...
- Page 835 Rigging work 12.7 Rigging/unrigging the counterweight Pre-tensioning When the symbol (2) is red, you must pre-ten- sion the counterweight. • Press button (1) until symbol (2) turns green. Automatic mode While the automatic mode is being executed, you can always à...
- Page 836 Rigging work 12.7 Rigging/unrigging the counterweight • To slew, move the control lever in the dis- played direction (2) or (3) – the automatic mode continues. – The superstructure turns into position (C). – The lifting cylinders are retracted (D). –...
- Page 837 Rigging work 12.7 Rigging/unrigging the counterweight Switch on automatic mode • Press the button (2) once – the symbol flashes. Execute automatic mode • To slew, move the control lever in the dis- played direction (1) or (3) – the automatic mode starts.
- Page 838 Rigging work 12.7 Rigging/unrigging the counterweight Cancel automatic You can cancel the automatic mode any time. mode • Press the unused buttons (1), (2) or a button (3). The automatic mode is cancelled. If the symbol (1) or (2) is yellow, you can re-select the automatic mode. Risk of damage to the counterweight! With the key-operated switch actuated, the functions are always released.
-
Page 839: Setting Down Counterweight For Driving The Truck Crane
Rigging work 12.7 Rigging/unrigging the counterweight 12.7.8 Setting down counterweight for driving the truck crane Version A For driving with axle loads of at the most 12 t (26,500 lbs) the counterweight à Driving modes , p. 6 - 1. must be completely unrigged;... - Page 840 Rigging work 12.7 Rigging/unrigging the counterweight Observe the following points to avoid damage to the derricking cylinder. If a lattice extension is folded at the side: At most, set down – the 7.0 t base plate (1), – one 4.75 t section (2), –...
-
Page 841: Slewing With Rigged Counterweight
Rigging work 12.7 Rigging/unrigging the counterweight 12.7.9 Slewing with rigged counterweight You may only slew the superstructure with a rigged counterweight if the truck crane is supported by a sufficient outrigger span and the permissible working radii are observed. Otherwise the truck crane will overturn during slewing. - Page 842 Rigging work 12.7 Rigging/unrigging the counterweight Rigged outrigger span 8.70 x (28.5 x) 7.98 x (26.1 x) 2.71 m 5.00 m 6.30 m 7.40 m 8.50 m 8.50 m (8.9 ft) (16.4 ft) (20.4 ft) (24.3 ft) (27.9 ft) (27.9 ft) 1.00 m (3.3 ft) (auxiliary...
-
Page 843: Rigging Work On The Main Boom
Rigging work 12.8 Rigging work on the main boom 12.8 Rigging work on the main boom 12.8.1 Hook block on the bumper Picking up the Depending on the driving mode, you must pick up the hook block from the à Driving modes , p. - Page 844 Rigging work 12.8 Rigging work on the main boom Attaching the Depending on the driving mode, you can attach the hook block to the front à Driving modes , p. 6 - 1. hook block bumper; Risk of accidents if the view is obstructed! The reeved rope lines obstruct the view of the runway.
-
Page 845: Hook Block On A Separate Vehicle
Rigging work 12.8 Rigging work on the main boom 12.8.2 Hook block on a separate vehicle Risk of overturning while slewing! Always check before slewing whether slewing is permitted in the truck crane's current rigging mode. Correct the rigging mode if necessary; à... - Page 846 Rigging work 12.8 Rigging work on the main boom Picking up the Depending on the driving mode, the hook block can be placed on a separate à Driving modes , p. 6 - 1. hook block vehicle; • If the respective setting has been made in the RCL, slew the superstructure and lower the main boom until the boom head is directly above the hook block (1).
- Page 847 Rigging work 12.8 Rigging work on the main boom • Detach the lifting limit switch weight (2) à from the hoist rope; p. 12 - 109. à • Unreeve the hoist rope; p. 12 - 96. • Secure the hook block (1) for transport. •...
-
Page 848: Hook Block, Separable
Rigging work 12.8 Rigging work on the main boom 12.8.3 Hook block, separable The hook block can be separated for on-road driving. The block hook remains reeved and can be attached to the bumper. The hook can be transported separately, e.g. on a separate vehicle. Rigging for on-road driving •... - Page 849 Rigging work 12.8 Rigging work on the main boom Rigging for crane operation • Slacken the hoist rope and derrick the main boom simultaneously. • Raise the main boom until the boom head is in a vertical position above the block hook (1).
-
Page 850: Reeving And Unreeving The Hoist Rope
Rigging work 12.8 Rigging work on the main boom 12.8.4 Reeving and unreeving the hoist rope You must reeve a certain number of rope lines, depending on the required load bearing capacity. Four reeved rope lines correspond, for example, to 4-fall reeving. à... - Page 851 Rigging work 12.8 Rigging work on the main boom Reeving the hoist rope Danger due to slack rope! Only use hook blocks and sling gear of the minimum weight prescribed in the Lifting capacity table , depending on the reeving and boom length. This prevents slack rope forming at large heights when lifting without a load.
- Page 852 Rigging work 12.8 Rigging work on the main boom Reeving the hoist rope A for the main hoist rope B for the auxiliary hoist rope • Guide the hoist rope over the upper head sheave (1) to the lower head sheave (2). •...
- Page 853 Rigging work 12.8 Rigging work on the main boom Rope end fitting • Insert the rope end fitting (5) at the fixed point (1) and secure the pin (2). Securing the hoist rope • Insert the rods (3) and (4), (5). •...
- Page 854 Rigging work 12.8 Rigging work on the main boom Unreeving hoist rope • Remove the retaining pins and pull out the rods (3). à • Fold down the plates (1); p. 12 - 93. • Remove the rope end fitting from the fixed point (2) or (6).
-
Page 855: Possible Reeving Methods On The Main Boom
Rigging work 12.8 Rigging work on the main boom 12.8.5 Possible reeving methods on the main boom Possible reevings on lattice extensions and the auxiliary single-sheave à Operating Instructions Lattice Extension. boom top; The maximum load bearing capacity of individual hook blocks does not cor- respond to the maximum load bearing capacity of the GMK6300L together with this hook block. - Page 856 Rigging work 12.8 Rigging work on the main boom With 9 head sheaves 9-sheave hook block Reeving 7-sheave hook block Reeving 12 - 98 3 112 xxx en Operating Manual GMK6300L...
- Page 857 Rigging work 12.8 Rigging work on the main boom 5-sheave hook block Reeving Operating Manual GMK6300L 3 112 xxx en 12 - 99...
- Page 858 Rigging work 12.8 Rigging work on the main boom 3-sheave hook block Reeving 1-sheave hook block Reeving 12 - 100 3 112 xxx en Operating Manual GMK6300L...
- Page 859 Rigging work 12.8 Rigging work on the main boom Hook tackle Reeving With 10 head sheaves 9-sheave hook block Reeving Operating Manual GMK6300L 3 112 xxx en 12 - 101...
- Page 860 Rigging work 12.8 Rigging work on the main boom 7-sheave hook block Reeving 12 - 102 3 112 xxx en Operating Manual GMK6300L...
- Page 861 Rigging work 12.8 Rigging work on the main boom 5-sheave hook block Reeving Operating Manual GMK6300L 3 112 xxx en 12 - 103...
- Page 862 Rigging work 12.8 Rigging work on the main boom 3-sheave hook block Reeving 1-sheave hook block Reeving 12 - 104 3 112 xxx en Operating Manual GMK6300L...
- Page 863 Rigging work 12.8 Rigging work on the main boom Hook tackle Reeving Operating Manual GMK6300L 3 112 xxx en 12 - 105...
-
Page 864: Installing/Removing The Lifting Limit Switch
Rigging work 12.8 Rigging work on the main boom 12.8.6 Installing/removing the lifting limit switch à Function of the lifting limit switch; p. 11 - 60. For every reeved hoist rope, you must install a lifting limit switch, attach a lifting limit switch weight and place it around the hoist rope. Installing the lift- You can attach the lifting limit switch on the right or left side of main boom ing limit switch... - Page 865 Rigging work 12.8 Rigging work on the main boom If only one lifting limit switch has been installed • Check whether the bridging plug is in the socket that is not being used. If, for example, the lifting limit switch (3) is installed on the left, the bridging plug (2) must be in the socket (1) on the right.
- Page 866 Rigging work 12.8 Rigging work on the main boom Attaching the lifting limit switch weight • Attach the lifting limit switch weight (1). If two hoist ropes are reeved, you must attach a lifting limit switch weight to each of the two lifting limit switches.
- Page 867 Rigging work 12.8 Rigging work on the main boom Removing the lift- This section describes complete removal. ing limit switch If the hook block is to be attached to the bumper at a later point, you will need to detach the lifting limit switch weight from the hoist rope, so that you can unreeve or reeve when unrigging the hoist rope.
-
Page 868: Locking/Unlocking The Lifting Limit Switch
Rigging work 12.8 Rigging work on the main boom Removing the right lifting limit switch • Pull the plug from the socket (1). • Insert the bridging plug (2) into the socket (1). • Remove the lifting limit switch (4) from the bracket (3). - Page 869 Rigging work 12.8 Rigging work on the main boom • Remove the lifting limit switch weight. • (A) – Remove the cap (1). • Pull down the rope (2). • (B) – Secure the rope (2) in this position using the cap (1) – the lifting limit switch is locked and can no longer be triggered.
-
Page 870: Anemometer And Air Traffic Control Light
Rigging work 12.8 Rigging work on the main boom 12.8.8 Anemometer and air traffic control light Risk of damage during on-road driving! Always remove the anemometer and air traffic control light before on-road driving. This prevents the specified overall height being exceeded at on-road level, and the anemometer from getting damaged due to unfavourable air currents. - Page 871 Rigging work 12.8 Rigging work on the main boom Switching the air traffic control light on and off: To switch on: Press in switch (1) at the bottom To switch off: Press in switch (1) at the top Removing You must remove the rod with the anemometer/air traffic control light à...
- Page 872 Rigging work 12.8 Rigging work on the main boom Blank page 12 - 114 3 112 xxx en Operating Manual GMK6300L...
-
Page 873: Other Rigging Work
Rigging work 12.9 Other rigging work 12.9 Other rigging work 12.9.1 Railings on the turntable Always fold out the railings when you are working above on the turntable. Always fold in the railings before driving. Risk of accidents when railings are not folded out! The railings provide protection from falling. - Page 874 Rigging work 12.9 Other rigging work Folding in • Open the locking bar (2), then open the locking bar (1) and fold in the railings (3). You can additionally fold out the railings (1) for rigging work. Always fold in the railings for crane operation.
-
Page 875: Cameras For Crane Operation
Rigging work 12.9 Other rigging work 12.9.2 Cameras for crane operation Cameras on the hoists A camera can be found on both the main and auxiliary hoist (1). • Clean the camera lens if necessary. Camera on main For crane operation you have to install the camera and switch it on. boom For on-road driving, you have to switch the camera off again and remove it. - Page 876 Rigging work 12.9 Other rigging work Risk of accidents if the wrong camera is installed! If you install the wrong camera in your truck crane, you will not see an image. If your camera is installed in a neighbouring truck crane, you will see the wrong image.
- Page 877 Rigging work 12.9 Other rigging work Switching on the camera • Switch on the ignition. • Press switch (1) down. • Switch on the monitor. Switching off the camera Press switch (1) up. Removing • Switch off the camera. • Pull the plug out of the socket (3) and close the socket with the cap.
- Page 878 Rigging work 12.9 Other rigging work Turning the moni- tor on/off and switching To switch on: • Switch on the ignition. • If necessary, press the button (2) once. The lamp (1) lights up. The image appears on the monitor after a few seconds. If an à...
-
Page 879: Ladder On The Counterweight
Rigging work 12.9 Other rigging work 12.9.3 Ladder on the counterweight For rigging work, you reach the turntable via the counterweight. Risk posed by folding ladder falling down! Always secure the folding ladder before driving. This prevents the ladder from falling down while driving and endangering other vehicles. Risk of damage during crane operation! Always remove the ladder for crane operation. -
Page 880: Extendable Step
Rigging work 12.9 Other rigging work 12.9.4 Extendable step Risk of accidents by exceeding the permissible overall width! Always retract the step for on-road driving. When the step is extended, the overall width specified for on-road driving is exceeded. Risk of accidents due to extending steps! The extending steps can injure you or knock you off the carrier. -
Page 881: Folding The Mirrors In And Out, And Adjusting Them
Rigging work 12.9 Other rigging work 12.9.5 Folding the mirrors in and out, and adjusting them The mirror must be folded in for driving. You must fold the mirror out and adjust it for crane operation or driving from the superstructure. Risk of accidents due to exceeding the permissible dimensions! Fold the mirror in for driving. - Page 882 Rigging work 12.9 Other rigging work Blank page 12 - 124 3 112 xxx en Operating Manual GMK6300L...
- Page 883 Driving with a rigged truck crane 13.1 Driving path ............13 - 13.2 Permissible rigging modes and axle loads .
- Page 884 3 112 xxx en Operating Manual GMK6300L...
-
Page 885: Driving With A Rigged Truck Crane
Driving with a rigged truck crane 13.1 Driving path Driving with a rigged truck crane This section describes driving the truck crane with the counterweight à Operating Instructions rigged. If a lattice extension is rigged as well; Lattice Extension . Risk of accidents due to partially obstructed view of the truck crane! When driving the truck crane, always stay in visual or radio contact with a banksman who can observe the parts you are unable to see, e.g. -
Page 886: Permissible Rigging Modes And Axle Loads
Driving with a rigged truck crane 13.2 Permissible rigging modes and axle loads 13.2 Permissible rigging modes and axle loads Depending on the counterweight rigged, you must bring the superstructure and the main boom into certain positions so that the permissible axle loads are not exceeded. - Page 887 Driving with a rigged truck crane 13.2 Permissible rigging modes and axle loads Counter Telescope status Main Boom Superstruc- Maximum weight Angle ture position Axle load in t I/II/III/IV/V/VI in ° in t (x 1,000 lbs) (lbs) front rear 0 - 0 - 0 - 0 - 0 - 0 15 - 50 front 13.5 (29.8) 14.5 (32.0)
-
Page 888: Before Driving
Driving with a rigged truck crane 13.3 Before driving 13.3 Before driving 13.3.1 Securing the superstructure against slewing Danger of overturning by the superstructure slewing whilst driving the truck crane! Always secure the superstructure before driving the rigged truck crane to prevent it slewing. -
Page 889: Putting The Truck Crane On The Wheels
Driving with a rigged truck crane 13.3 Before driving 13.3.3 Putting the truck crane on the wheels Danger of overturning by unevenly retracting the outrigger cylinders! Retract the outrigger cylinders evenly! This prevents the truck crane overturning when individual outrigger cylinders are retracted. Risk of damage to the axle lines! Retract the outrigger cylinders evenly! This prevents excessive strain on the axle lines. - Page 890 Driving with a rigged truck crane 13.3 Before driving Horizontally aligning the truck crane Risk of damage to the tyres and suspension struts! Do not exceed the maximum permissible axle load of 32 t when levelling the truck crane. Monitor the display while levelling and adjust the axle loads as necessary! •...
-
Page 891: Gears/Connections
Driving with a rigged truck crane 13.4 Whilst driving 13.3.4 Gears/connections Transmission • Select gear 1 as the top gear to prevent the transmission from shifting à gears; p. 5 - 32. Connections If required, you can à – switch on the longitudinal differential locks; p. - Page 892 Driving with a rigged truck crane 13.4 Whilst driving Warnings whilst driving If a buzzer tone sounds in the driver's cab, stop the truck crane immediately and check whether: – The permissible lateral tilt (1) of max. 1° – The operating pressure (2) of 210 bar (3,045 psi) in the suspension has been exceeded.
-
Page 893: After Driving
Driving with a rigged truck crane 13.5 After driving 13.5 After driving • Restore the original condition: à – Switch off the longitudinal differential locks; p. 5 - 62, à – Switch off the transverse differential locks; p. 5 - 62, à... -
Page 894: Driving In Combined Operation
Driving with a rigged truck crane 13.6 Driving in combined operation 13.6 Driving in combined operation With additional equipment, you can drive the truck crane from the driver's cab while the engine for the crane operation is running. • Before driving, observe the specifications in sections 13.1 to 13.2. Risk of accidents when driving with a lifted load! The truck crane may only be moved without a load in combined operation. - Page 895 Driving with a rigged truck crane 13.6 Driving in combined operation Switching on In this section, combined operation is switched on while the engine for driving is turned off. You can also first start the engine for driving from the crane cab. •...
-
Page 896: Starting/Turning Off The Engine
Driving with a rigged truck crane 13.6 Driving in combined operation 13.6.2 Starting/turning off the engine In combined operation, the engine for driving can only be started from the driver's cab – in the main menu. You cannot start and switch off the engine with the ignition key. The ignition key must be in position 1 so that the steering cannot block. -
Page 897: Preparing To Drive
Driving with a rigged truck crane 13.6 Driving in combined operation 13.6.3 Preparing to drive Transmission à • Shift into the lowest starting gear; p. 5 - 32. In this way you prevent the gears changing up and ensure that the speed is kept to a minimum. -
Page 898: While Driving
Driving with a rigged truck crane 13.6 Driving in combined operation 13.6.4 While driving Risk of accidents when the carrier ignition is switched off! In the crane cab: Do not under any circumstances switch off the carrier igni- tion. In this way, you prevent the engine for driving from being switched off and the driver in the driver's cab from losing control of the truck crane. - Page 899 Malfunctions during crane operation 14.1 Emergency stop switch..........14 - 14.2 What to do when malfunctions occur during crane operation .
- Page 900 14.7 Other emergency operations ........14 - 77 14.7.1 External starting socket .
-
Page 901: Malfunctions During Crane Operation
Malfunctions during crane operation 14.1 Emergency stop switch Malfunctions during crane operation 14.1 Emergency stop switch Risk of overloading if used improperly! Press the emergency stop switch only if it is no longer possible to stop the crane movements with the normal operating elements. The emergency stop switch stops the crane movements suddenly. - Page 902 Malfunctions during crane operation 14.1 Emergency stop switch Blank page 14 - 2 3 112 xxx en Operating Manual GMK6300L...
-
Page 903: What To Do When Malfunctions Occur During Crane Operation
Lock the truck crane to prevent unauthorised use. Remove the ignition key and lock away the hand-held control. • Inform your supervisor. • Try to eliminate the malfunction. Inform Manitowoc Crane Care if you cannot correct the malfunction. • Load cannot be Secure the danger area using cordons and warning signs. - Page 904 Malfunctions during crane operation 14.2 What to do when malfunctions occur during crane operation Blank page 14 - 4 3 112 xxx en Operating Manual GMK6300L...
-
Page 905: Fuses
Replace blown fuses only with new fuses of the same amperage. This pre- vent parts being overloaded and damaged or the fuse being immediately blown again. Notify Manitowoc Crane Care if a fuse with the same amperage fails again once the ignition is switched on. Risk of fire! Never repair a blown fuse with other electrically conductive materials. -
Page 906: Fuses On The Turntable
Malfunctions during crane operation 14.3 Fuses 14.3.1 Fuses on the turntable • Open the distribution box (1). It contains – the fuse groups F1, F2 and F3, • Remove the screws (2) and fold the plate down. There are other fuses on the circuit board (3); à... - Page 907 Malfunctions during crane operation 14.3 Fuses Designation Amperage (A) Function F2/1 Lifting limit switch F2/2 – Unassigned F2/3 Slewing gear brake F2/4 Flame start system F2/5 ESX 4 supply Emergency operation with hand-held F2/6 control F2/7 Oil cooler F2/8 Additional oil cooler Designation Amperage (A) Function...
- Page 908 Malfunctions during crane operation 14.3 Fuses Fuse arrangement Pos. Designation Amperage (A) ESX 1 UE ESX 1 D+ ESX 1 8.5 V ESX 0 UE ESX 0 D+ ESX 0 8.5 V 14 - 8 3 112 xxx en Operating Manual GMK6300L...
-
Page 909: Fuses In The Crane Cab
Malfunctions during crane operation 14.3 Fuses 14.3.2 Fuses in the crane cab • Loosen the bolts (2) and remove the cover (1). The fuse groups F3, F4 and F5 consist of eight fuses each. The following tables show the designations of the individual fuses, including their amperage and functions. - Page 910 Malfunctions during crane operation 14.3 Fuses Designation Amperage (A) Function F4/1 Engine electronic system (ADM) 24 V/12 V voltage transformer Crane cab lighting F4/2 Air traffic control light Radio Engine electronic system diagnostics plug F4/3 Camera on the turntable auxiliary hoist F4/4 Air-conditioning system...
-
Page 911: Fuses In The Battery Box
Malfunctions during crane operation 14.3 Fuses 14.3.3 Fuses in the battery box Fuses F10 to F13 are contained in the battery box. Danger from lead and lead compounds on batteries! Battery poles, battery terminals and parts of the battery itself contain lead and lead compounds. -
Page 912: Rcl Fuses
Malfunctions during crane operation 14.3 Fuses 14.3.4 RCL fuses à Table of When a fuse is blown, a corresponding error code is displayed; error codes , p. 14 - 31. • Loosen the bolts (2) and remove the cover (1). •... -
Page 913: Finding And Eliminating Malfunctions
Malfunctions during crane operation 14.4 Finding and eliminating malfunctions 14.4 Finding and eliminating malfunctions This section does not include all malfunctions. When a lamp (1) lights up; à Warning submenu , p. 11 - 110. 14.4.1 Malfunctions on the engine Malfunction Cause Remedy... -
Page 914: Malfunctions In The Exhaust System
The engine is not switched off down – the performance will to ensure the load can be low- increase again ered and the truck crane can be unrigged Other malfunctions: Manitowoc Crane Care Report it 14.4.2 Malfunctions in the exhaust system Malfunction Cause Remedy à... -
Page 915: Malfunctions On The Main Hoist/Auxiliary Hoist
If necessary, acknowledge speed mode function not error once and briefly turn off working the ignition – if error persists, notify Manitowoc Crane Care No Lifting function Fuse RCL F6 faulty Replace the blown fuse; à p. 14 - 12 Fuse F3/3 blown Replace the blown fuse;... -
Page 916: Malfunctions In The Hoist Cameras
Adjust the receiver on the crane between camera and receiver cab. is interrupted. Connection between receiver Check cable connection and and monitor is disconnected. notify Manitowoc Crane Care if necessary. 14 - 16 3 112 xxx en Operating Manual GMK6300L... -
Page 917: Malfunctions On The Derricking Gear
Function disabled by ECOS If necessary, acknowledge working error once and briefly turn off the ignition – if error persists, notify Manitowoc Crane Care Fuse RCL F6 faulty Replace the blown fuse; à p. 14 - 12 Fuse F3/3 blown Replace the blown fuse;... -
Page 918: Malfunctions In The Telescoping Mechanism
Telescopic section/telescop- Fault in hydraulics/electrical Note the error codes à à ing cylinder locking function system p. 14 - 19, p. 14 - 35 and not working notify Manitowoc Crane Care 14 - 18 3 112 xxx en Operating Manual GMK6300L... - Page 919 Function disabled by ECOS If necessary, acknowledge working error once and briefly turn off the ignition – if error persists, notify Manitowoc Crane Care Fuse RCL F6 faulty Replace the blown fuse; à p. 14 - 12 Fuse F3/3 blown Replace the blown fuse;...
- Page 920 Emergency program à The Telescoping emergency programme is open; p. 14 - 45. Inactive Contact Manitowoc Crane Care if this status is still displayed after repeatedly switching on the ignition. 14 - 20 3 112 xxx en Operating Manual GMK6300L...
-
Page 921: Malfunctions In The Slewing Gear
12 - 76 Function disabled by ECOS If necessary, acknowledge error once and briefly turn off the ignition – if error persists, notify Manitowoc Crane Care Operating Manual GMK6300L 3 112 xxx en 14 - 21... - Page 922 Malfunctions during crane operation 14.4 Finding and eliminating malfunctions Malfunction Cause Remedy Slewing only possible in one Shutdown angle of a limited Enter the RCL code for a slew- direction slewing range reached (addi- ing range of 360° or slew in tional equipment).
-
Page 923: Malfunctions In The Counterweight Hoist Unit
Error symbol (!) is displayed Electronics has identified an the ignition – if error persists, error notify Manitowoc Crane Care Superstructure in the interme- Slew to Move lifting cylinders Retract/extend lifting cylinder not working... -
Page 924: Malfunctions In The Hydraulic System/Hydraulic Oil Cooler
4 - 23 Pre-selected function cannot Another function has been Pre-select the desired function be performed pre-selected Operation not possible Malfunction in the control Manitowoc Crane Care system Report it 14 - 24 3 112 xxx en Operating Manual GMK6300L... -
Page 925: Malfunctions Of The Outriggers
à bridging plug not inserted p. 12 - 21 None of the specified causes Solenoid valves not working Manitowoc Crane Care apply Report it Operating Manual GMK6300L 3 112 xxx en 14 - 25... -
Page 926: Troubleshooting The Rcl
If the RCL is overridden, the crane operations are not monitored and no shutdown procedures are initiated when leaving the working range. RCL program version Always note down the number of the program version after a malfunction occurs and before notifying Manitowoc Crane Care. • ö If required, open the main menu The display (1) shows the program version. - Page 927 Malfunctions during crane operation 14.4 Finding and eliminating malfunctions Error messages in If the rated capacity limiter detects an error, an error message is shown on the RCL control unit. the Monitoring submenu There are different types of error messages: –...
- Page 928 Malfunctions during crane operation 14.4 Finding and eliminating malfunctions Error message with shutdown – All crane movements not required for the correction of the error are disabled. – A continuous buzzer tone sounds. After five seconds, you can switch off the buzzer tone using button (5).
- Page 929 Malfunctions during crane operation 14.4 Finding and eliminating malfunctions • Displays in the Stop all crane movements and bring both control levers into initial posi- Error submenu tion. • Press the button (2) once. The button is only active when the lamp (1) flashes or lights up.
- Page 930 Malfunctions during crane operation 14.4 Finding and eliminating malfunctions Error message display For each error the display shows: – the error code (3), – the symbols for 4 the error group 5 the faulty component 6 the error type – Possibly the error location (1) – the respec- tive places (2) flash in red.
- Page 931 Check whether the table contains the displayed error code. If the informa- tion in the table does not help resolve the error, note the error code(s) and contact Manitowoc Crane Care. When all errors are remedied, the lamp (1) goes out.
- Page 932 Minimum load value not When the main boom is set down, reached raise main boom and acknowledge the error. Notify Manitowoc Crane Care if the error cannot be acknowledged. Fuse F1 blown Fuse F2 blown à Fuse F3 blown Replace blown fuse;...
- Page 933 Malfunctions during crane operation 14.4 Finding and eliminating malfunctions Error code Cause Remedy à Rigging state not confirmed Confirming the rigging mode , p. 11 - 29. à RCL is overridden Cancel override; p. 11 - 40. Slewing gear switched on with Switching off the slewing gear RCL code for working position 0°...
- Page 934 Malfunctions during crane operation 14.4 Finding and eliminating malfunctions Switch off the For values measured twice, you can switch off the faulty sensor/tachogen- sensor/ erator in the case of an error and continue working with one sensor/tacho- tachogenerator generator for a short time. Danger due to RCL failure Have the error resolved before the next crane job.
-
Page 935: Malfunctions Ecos - Superstructure
“error” display. ECOS programme Always note down the number of the program version before notifying version Manitowoc Crane Care in the event of a malfunction. • ö If required, open the main menu The display (1) shows the number of the current programme version. - Page 936 Malfunctions during crane operation 14.4 Finding and eliminating malfunctions Error messages If ECOS detects an error, an error message is shown: – lamp (1) flashes and – lamp (2) flashes. Open the Errors submenu for more information. • Press the button (2) once. The button is only active when the lamp (1) flashes or lights up.
- Page 937 4 the error type The error code (5) consists of 4 digits, e.g. 2332. • Always note the error code before contact- ing Manitowoc Crane Care. You can exit the Errors submenu at any time. Exiting the submenu • Press the button (1) once.
-
Page 938: Malfunctions On Cranestar System
Malfunctions during crane operation 14.4 Finding and eliminating malfunctions 14.4.16 Malfunctions on CraneSTAR system If an error is present then check the fuses and antenna plug on the TCU control unit. Risk of damage if procedure is incorrect! Observe the following notes to avoid malfunctions and damage. –... - Page 939 Malfunctions during crane operation 14.4 Finding and eliminating malfunctions After troubleshooting • Fold the plate (3) up and secure it with the screws (4). • Fasten the cover (1) using the bolts (2). Operating Manual GMK6300L 3 112 xxx en 14 - 39...
- Page 940 Malfunctions during crane operation 14.4 Finding and eliminating malfunctions Blank page 14 - 40 3 112 xxx en Operating Manual GMK6300L...
-
Page 941: Emergency Operations And Programs
Malfunctions during crane operation 14.5 Emergency operations and programs 14.5 Emergency operations and programs This section contains all the information about possible emergency opera- tions and emergency programs. The following are available: – mechanical emergency activation for retracting, – Telescoping emergency program submenu, –... -
Page 942: Mechanical Emergency Activation For Retracting
The best suitable retracting procedures in your particular case depend on the conditions on site and on the crane functions that are still available. Select the procedure best suited to your particular case and consult Manitowoc Crane Care. 14 - 42 3 112 xxx en... - Page 943 Malfunctions during crane operation 14.5 Emergency operations and programs Mechanical The following requirements must be met before unlocking manually: emergency – The main boom must be lowered to the horizontal position so that the activation telescopic section cannot retract by itself. –...
- Page 944 Malfunctions during crane operation 14.5 Emergency operations and programs Releasing the lock • (A) – Telescope out approx. 35 mm (0.11 ft), so that the cutout (4) is accessible. • (B) – Screw a bolt into the bore (1). The lock- ing pins (2) must retract behind the tele- scopic section (3).
-
Page 945: Telescoping Emergency Program
Malfunctions during crane operation 14.5 Emergency operations and programs 14.5.2 Telescoping emergency program In the event of a malfunction in the telescoping mechanism, you can retract the main boom with the Telescoping emergency program. The emergency program is not intended for crane operation and is there- fore restricted to a certain amount of time. - Page 946 Malfunctions during crane operation 14.5 Emergency operations and programs Requirements for swinging The Telescoping emergency program submenu contains the controls (1) and (2) allowing you to pivot the swing-away lattice from the crane cab. 1 Pivoting the swing-away lattice into the rigging position 2 Pivoting the swing-away lattice into the telescoping position...
- Page 947 Malfunctions during crane operation 14.5 Emergency operations and programs Checks – Before telescoping • Externally inspect the truck crane to check that the swing-away lattice is in the telescoping position. – Before on-road driving • Externally inspect the truck crane to check that the swing-away lattice is in the rigging position.
- Page 948 Malfunctions during crane operation 14.5 Emergency operations and programs • ö Open the main menu and press the button (1) once. The Telescoping submenu opens. The emergency program is active if: – The symbol (2) is displayed – The display (1) is shown for approx. 360 seconds.
- Page 949 • Note the error code (4) first if you intend to contact Manitowoc Crane Care before exe- cuting the emergency program. Risk of damage to the main boom! Never telescope the main boom if at the same time there is an error at both the length indicator and the proximity switch.
- Page 950 Press the button for unlocking the telescopic section not more than twice. If this does not start the unlocking procedure, contact Manitowoc Crane Care. – The telescoping cylinder is locked, symbol (3) is grey. – The telescopic section is unlocked (press not more than twice), symbol (1) is yellow.
- Page 951 Risk of accidents from sudden retraction of a telescopic section! Press the button for unlocking the telescopic section not more than twice. If this does not start the unlocking procedure, contact Manitowoc Crane Care. Operating Manual GMK6300L 3 112 xxx en 14 - 51...
- Page 952 Malfunctions during crane operation 14.5 Emergency operations and programs • Press the button (1) once (at the most twice). The telescoping cylinder is now unlocked. In Unlocked position: – The locking pins (3) are red, – Symbol (1) is yellow, –...
- Page 953 Malfunctions during crane operation 14.5 Emergency operations and programs If there is an error Faulty proximity switches are shown in violet. at a proximity The displays (A), (B) and (C) only show the current positions when all the switch corresponding proximity switches are free of error. Several proximity switches are related to the displays (A), (B) and (C).
- Page 954 Malfunctions during crane operation 14.5 Emergency operations and programs Required checks When the locked position can no longer be displayed, always conduct the fol- lowing checks before unlocking: • Carefully retract and extend the telescoping cylinder or telescopic section. In the Locked position, the length shown on the displays (1) should vary only slightly, i.e.
- Page 955 Malfunctions during crane operation 14.5 Emergency operations and programs Tables for The extent to which the telescoping cylinder has to be extended in order to approaching the reach a locking point depends on whether you want to lock: locking points –...
- Page 956 Malfunctions during crane operation 14.5 Emergency operations and programs The telescopic section must not be set down for locking or unlocking it. The cutout (1) must be clear. That is why you have to extend the telescoping cylinder 35 mm (0.11 ft) further than with a return run. The following table shows the extended length for locking and unlocking the telescopic sections.
-
Page 957: Entering The Current Telescoping
Malfunctions during crane operation 14.5 Emergency operations and programs 14.5.3 Entering the current telescoping ECOS no longer displays the current telescoping, – if you telescoped in emergency mode, or – if the power supply was interrupted in the course of saving data. In these cases, you must enter the current telescoping, e.g. - Page 958 Malfunctions during crane operation 14.5 Emergency operations and programs Applying values • Press the left dead man's switch (2). • Also press button (5) once – symbol (3) appears. • Press the buttons (1) in the following order: Å Æ Å Ç The symbols (4) confirm the entry.
-
Page 959: Emergency Operation With The Hand-Held Control
Malfunctions during crane operation 14.5 Emergency operations and programs 14.5.4 Emergency operation with the hand-held control If the power units no longer respond to the operating elements in the crane cab, you can operate the power units with the hand-held control. Operating them with the hand-held control is intended for emergencies only and for bringing the truck crane into a safe state or to shut it down. - Page 960 Malfunctions during crane operation 14.5 Emergency operations and programs Pre-selecting a power unit • Press the button for the desired power unit once, e.g. the button (1) for the main hoist. When the function is enabled, the lamp in the button lights up. With the telescoping mechanism, teleautomation with the target 0/0/0/0/0 is always selected at the same time –...
- Page 961 Malfunctions during crane operation 14.5 Emergency operations and programs The following table shows all the button combinations. Engaged buttons are shown in black. Pre-selected power unit Telescoping Derricking Slewing Lattice Button Hoists mechanism gear gear extension combination None Lower boom None Lower Lower boom...
- Page 962 Malfunctions during crane operation 14.5 Emergency operations and programs Stopping The movement continues until you release the button or the end position is movements reached. You can stop operations with the emergency stop switch if they do not stop by Stopping à...
-
Page 963: Switching On Emergency Operation In Coolant Circuit
Malfunctions during crane operation 14.5 Emergency operations and programs 14.5.5 Switching on emergency operation in coolant circuit The speed of the fan when for the engine is automatically controlled. You can switch on the emergency mode if this automatic system fails. The fan wheel then runs at maximum speed when the engine is switched on. - Page 964 Malfunctions during crane operation 14.5 Emergency operations and programs Blank page 14 - 64 3 112 xxx en Operating Manual GMK6300L...
-
Page 965: Hydraulic Emergency Operation
Malfunctions during crane operation 14.6 Hydraulic emergency operation 14.6 Hydraulic emergency operation With this additional equipment, the truck crane is equipped with an hydrau- lic emergency bleed valve in accordance with BGR 159 (4.2.8). This allows small loads to be transported in case of emergency, e.g. in the event of an engine failure. -
Page 966: Connecting/Disconnecting Hoses
Malfunctions during crane operation 14.6 Hydraulic emergency operation Emergency supply When using an emergency supply, the con- nections (1) feed a transformer (2) that is con- nected to the hydraulic system of the other à Emergency supply of another crane , crane;... - Page 967 Malfunctions during crane operation 14.6 Hydraulic emergency operation On the superstructure • Connect the thicker hose (2) to the connec- tion (1). • Connect the thinner hose (3) to the connec- tion (4). Disconnecting After the emergency operation, you must disconnect the hoses and the connections transformer.
-
Page 968: Switching Emergency Operation On/Off
Malfunctions during crane operation 14.6 Hydraulic emergency operation • Remove the hoses (2) from the connec- tions (1). • Close off the hoses and connections with the caps. • Remove the transformer (3). 14.6.3 Switching emergency operation on/off The emergency operation (or emergency supply of another crane) is switched on and off in the driver's cab. -
Page 969: Establishing The Hydraulic Circuits Required
Malfunctions during crane operation 14.6 Hydraulic emergency operation 14.6.4 Establishing the hydraulic circuits required To establish an hydraulic circuit, switch over the required valves and possi- bly also perform additional switching operations for lifting/lowering or slewing. Switching over The valves 1 to 5 are numbered. valves For crane operation •... - Page 970 Malfunctions during crane operation 14.6 Hydraulic emergency operation For emergency operation • Remove the cover over the valves 1 to 5. • Switch the valves 1 to 5 to the positions for the required crane movement – as shown in the following table.
- Page 971 Malfunctions during crane operation 14.6 Hydraulic emergency operation For lifting/ After establishing hydraulic circuits, switch one additional valve to lowering continuous operation. Switching on continuous operation Always switch only one valve to continuous operation. 1 Valve Y1104 – Lowering or 2 Valve Y1105 –...
- Page 972 Malfunctions during crane operation 14.6 Hydraulic emergency operation For slewing After switching over the valves behind the crane cab, you must additionally close one valve on the slewing gears. (A) – Emergency operation position • Close the valve 6 – lever (1) across the pipe. (B) –...
-
Page 973: Performing Emergency Operation
Malfunctions during crane operation 14.6 Hydraulic emergency operation 14.6.5 Performing emergency operation If the required hydraulic circuit has been established, you can make the corresponding crane movement. You can control the speed of all power units with the control lever. Turning It is not possible to control the slewing movements with the control lever for emergency operation with the same degree of sensitivity as with the control... - Page 974 Malfunctions during crane operation 14.6 Hydraulic emergency operation • Derricking Determine the maximum permissible working radius for the current rigging mode according to Lifting capacity table . Danger of overturning if the working radius is too large when lowering the boom! In emergency operation, operations are not shut down by the RCL.
-
Page 975: After Emergency Operation
Malfunctions during crane operation 14.6 Hydraulic emergency operation 14.6.6 After emergency operation You must restore the truck crane to its original state after finishing emer- gency operation. • Switching off Switch off the engine. emergency operation Switching over to After every emergency operation à... -
Page 976: Emergency Supply Of Another Crane
Malfunctions during crane operation 14.6 Hydraulic emergency operation 14.6.7 Emergency supply of another crane For emergency The hoses are assigned according to the various diameters. supply On the crane to be supplied • Attach the transformer (3). à • Operating manual Connect the hoses (4);... - Page 977 Malfunctions during crane operation 14.7 Other emergency operations 14.7 Other emergency operations With the appropriate additional equipment, you can start the truck crane externally, perform a jump start and charge the batteries. 14.7.1 External starting socket The truck crane is equipped with a socket for external starting (1) on the à...
- Page 978 Malfunctions during crane operation 14.7 Other emergency operations Performing a jump The socket (1) can also be used to supply power to another vehicle start (with a 24 V on-board network). • Start the engine for crane operation. • (A) – Insert the plug (2) into the socket (3) on the superstructure.
- Page 979 Malfunctions during crane operation 14.7 Other emergency operations 14.7.2 Battery charger Prerequisites – The engine must not be running and must be secured against unauthor- ised use, – An external 230 V mains power supply must be available at the location, –...
- Page 980 Malfunctions during crane operation 14.7 Other emergency operations Blank page 14 - 80 3 112 xxx en Operating Manual GMK6300L...
- Page 981 Index Operating Manual GMK6300L 3 112 xxx en...
- Page 982 - 30 3 112 xxx en Operating Manual GMK6300L...
- Page 983 Index Index To avoid making the index unnecessarily long and unclear, we have not included every single element from the instrument panel. Those elements, such as switches and buttons, lamps and displays are described and named in detail in the overviews of Chapter 3 and Chapter 9 Truck Crane Description .
- Page 984 Index Blank page 15 - 2 3 112 xxx en Operating Manual GMK6300L...
- Page 985 Index Access ladders on the carrier ......... . . 4 - 4 Adjusting axle pressure .
- Page 986 Index Cameras on the hoists ........... 12 - 117 on the main boom .
- Page 987 Index Short description of the operating elements ......9 - 74 Slewing with rigged counterweight ....... . . 12 - 83 Slinging points .
- Page 988 Index switching on ........... . 11 - 62 diagnostics plug .
- Page 989 Index What to do in the event of malfunctions ....... 7 - 3 with cruise control .
- Page 990 Index checks in the driver's cab ......... . . 5 - 7 display and operating elements in the crane cab .
- Page 991 Index Diagnostics ............3 - 69 Malfunctions .
- Page 992 Index Hoist rope Checking the position ..........11 - 6 positioning and reeving in .
- Page 993 Index Ladders and access ladders ..........4 - 4 Level adjustment system Changing the vehicle level .
- Page 994 Index lifting off/on the turntable ......... . 6 - 38 Removing/attaching the clamps for the hydraulic system .
- Page 995 Index in the driver's cab - overview Behind the cover ..........3 - 10 front .
- Page 996 Index Overview Operating elements - crane operation ....... . . 9 - 1 Operating elements - driving .
- Page 997 Index Reverse camera Operating elements in the driver's cab ....... 3 - 51 Rigging for on-road driving for driving with a trailer .
- Page 998 Index Safety equipment Check ............11 - 9 Seat, adjusting In the crane cab .
- Page 999 Index Supporting box Establishing/disconnecting the electrical connection ....6 - 75 establishing/disconnecting the pneumatic connection ....6 - 74 hanging/lifting on the truck crane .
- Page 1000 Index Temposet ............5 - 43 Total weight Weighing the truck crane .
- Page 1001 Index Tyres see wheels and tyres Voltage monitoring Superstructure ..........9 - 110 Warning plates for vehicle width .
- Page 1002 Index 15 - 20 3 112 xxx en Operating Manual GMK6300L...
Need help?
Do you have a question about the Grove GMK6300L and is the answer not in the manual?
Questions and answers