Table of Contents
Advertisement
Industrial Automation Headquarters
Delta Electronics, Inc.
Taoyuan Technology Center
No.18, Xinglong Rd., Taoyuan City,
Taoyuan County 33068, Taiwan
TEL: 886-3-362-6301 / FAX: 886-3-371-6301
Asia
Delta Electronics (Jiangsu) Ltd.
Wujiang Plant 3
1688 Jiangxing East Road,
Wujiang Economic Development Zone
Wujiang City, Jiang Su Province, P.R.C. 215200
TEL: 86-512-6340-3008 / FAX: 86-769-6340-7290
Delta Greentech (China) Co., Ltd.
238 Min-Xia Road, Pudong District,
ShangHai, P.R.C. 201209
TEL: 86-21-58635678 / FAX: 86-21-58630003
Delta Electronics (Japan), Inc.
Tokyo Office
2-1-14 Minato-ku Shibadaimon,
Tokyo 105-0012, Japan
TEL: 81-3-5733-1111 / FAX: 81-3-5733-1211
Delta Electronics (Korea), Inc.
1511, Byucksan Digital Valley 6-cha, Gasan-dong,
Geumcheon-gu, Seoul, Korea, 153-704
TEL: 82-2-515-5303 / FAX: 82-2-515-5302
Delta Electronics Int'l (S) Pte Ltd.
4 Kaki Bukit Ave 1, #05-05, Singapore 417939
TEL: 65-6747-5155 / FAX: 65-6744-9228
Delta Electronics (India) Pvt. Ltd.
Plot No 43 Sector 35, HSIIDC
Gurgaon, PIN 122001, Haryana, India
TEL : 91-124-4874900 / FAX : 91-124-4874945
Americas
Delta Products Corporation (USA)
Raleigh Office
P.O. Box 12173,5101 Davis Drive,
Research Triangle Park, NC 27709, U.S.A.
TEL: 1-919-767-3800 / FAX: 1-919-767-8080
Delta Greentech (Brasil) S.A.
Sao Paulo Office
Rua Itapeva, 26 - 3° andar Edificio Itapeva One-Bela Vista
01332-000-São Paulo-SP-Brazil
TEL: 55 11 3568-3855 / FAX: 55 11 3568-3865
Europe
Delta Electronics (Netherlands) B.V.
Eindhoven Office
De Witbogt 20, 5652 AG Eindhoven, The Netherlands
TEL : +31 (0)40-8003800 / FAX : +31 (0)40-8003898
*We reserve the right to change the information in this manual without prior notice.
Delta ASDA-A3 Series
Servo Drive User Manual
2017-04-26
www.deltaww.com
Advertisement
Table of Contents

Related Manuals for Delta ASDA-A3 Series


Summary of Contents for Delta ASDA-A3 Series
- Page 1 1511, Byucksan Digital Valley 6-cha, Gasan-dong, Geumcheon-gu, Seoul, Korea, 153-704 Delta ASDA-A3 Series TEL: 82-2-515-5303 / FAX: 82-2-515-5302 Delta Electronics Int’l (S) Pte Ltd. 4 Kaki Bukit Ave 1, #05-05, Singapore 417939 Servo Drive User Manual TEL: 65-6747-5155 / FAX: 65-6744-9228 Delta Electronics (India) Pvt.
- Page 2 Preface Thank you for purchasing this product. This manual provides information about the ASDA-A3 series servo drive (A3) and the ECM-A3 series servo motor. This manual includes: Installation and inspection of servo drive and servo motor Servo structure and wiring diagram ...
- Page 3 (PMSM) and to achieve precise positioning. The ASDA-A3 series are used in industrial applications and should be installed in the control box. Servo drives, wires, and motors should all be installed in an environment which complies with the minimum requirement of UL50 Type 1.
- Page 4 Operation Before operating, please change the parameter setting according to the application. If the parameters are not adjusted to the correct values, it may lead to malfunction of the machine or the operation might be out of control. Before the machine starts to operate, please ensure that the emergency stop can be ...
- Page 5 Failure to comply with the specifications may result in personnel injury. Before applying power, please inspect and ensure that the wiring is correct. Note: the content of this manual may be revised without prior notice, please download the latest version from Delta's website (http://www.deltaww.com). Revision December, 2017...
- Page 6 2.9 The use of braking ·························································································· 2-18 Wiring 3.1 System connection ··························································································· 3-3 3.1.1 Connecting to peripheral devices (connecting to Delta communication type of servo motor ······································································································ 3-3 3.1.2 Connectors and terminal blocks····································································· 3-5 3.1.3 Wiring for power supply ··············································································· 3-7 3.1.4 UVW connectors for the ASDA-A3 servo drive ················································...
- Page 7 3.3.1 CN1 I/O connector (for A3-L and A3-M series) ················································ 3-22 3.3.2 Signal explanation for connector CN1 (for A3-L and A3-M series) ······················· 3-24 3.3.3 CN1 I/O connector (for A3-F series) ····························································· 3-27 3.3.4 Signal explanation for connector CN1 (for A3-F series) ····································· 3-28 3.3.5 Wiring diagrams (CN1) ··············································································...
- Page 8 4.4.4 Digital output diagnosis operation ································································ 4-13 4.5 Testing ········································································································· 4-14 4.5.1 Testing without load ·················································································· 4-14 4.5.2 Apply power to A3 servo drive ····································································· 4-15 4.5.3 JOG trial run without load ··········································································· 4-19 4.5.4 Trial run without load (Speed mode) ····························································· 4-21 4.5.5 Trial run without load (Position mode) ···························································...
- Page 9 6.2.3 Control structure of Position mode ································································· 6-6 6.2.4 S-curve filter (Position) ················································································ 6-8 6.2.5 Electronic gear ratio (E-Gear ratio) ································································· 6-9 6.2.6 Low-pass filter ························································································· 6-10 6.2.7 Timing diagram of PR mode ······································································· 6-10 6.2.8 Gain adjustment for the position loop ···························································· 6-11 6.2.9 Low-frequency vibration suppression in Position mode ·····································...
- Page 10 7.2.1 Data array ···························································································· 7-59 7.2.2 High-speed position capturing function (Capture) ·········································· 7-62 7.2.3 High-speed position comparing function (Compare) ········································ 7-66 Parameter Setting Parameter 8.1 Parameter definitions ························································································ 8-2 8.2 List of parameters ···························································································· 8-3 8.3 Parameter descriptions ···················································································· 8-13 P0.xxx Monitoring parameters ············································································...
- Page 11 Communication type ··························································································11-33 Motion control type ····························································································11-39 Appendix Specifications A.1 ASDA-A3 series servo drive ··············································································· A-2 A.1.1 Specification of the ASDA-A3 servo drive ······················································· A-2 A.1.2 Dimensions of the servo drive ······································································ A-5 A.2 ECM-A3 series servo motor ··············································································· A-7 A.2.1 ECM-A3L low inertia series servo motor ·························································...
- Page 12 A.3.1 ECMC series servo motor with frame size 100 – 180 ······································· A-20 A.3.2 Torque features (T-N curves) ······································································ A-22 A.3.3 Overload features ···················································································· A-24 A.3.4 Dimensions of ECMC series servo motor ······················································ A-26 Accessories B.1 Power connector ····························································································· B-2 B.2 Power cable ···································································································...
- Page 13 (This page is intentionally left blank.) Revision December, 2017...
- Page 14 Product Overview Before using the ASDA-A3 series servo drive, please pay attention to the description of the inspection, nameplate, and model type. You can find a suitable motor model for your A3 servo drive in the table in Section 1.3.
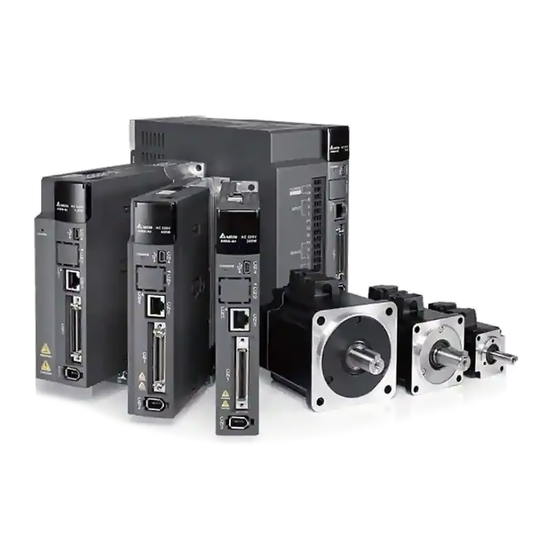
- Page 15 Product Overview ASDA-A3 1.1 Components of the servo set A complete servo set includes: (1) A servo drive and a servo motor. (2) A UVW motor power cable: one end of the U, V, and W wires connects to the servo drive and the other end to the motor (Optional purchase).
- Page 16 ASDA-A3 Product Overview Model overview 1.2.1 Nameplate information ASDA-A3 series servo drive Nameplate information Serial number (1) Model name A30421L T 07 0006 (2) Manufacturing plant (T: Taoyuan; W: Wujiang) (3) Year of production (15: year 2015) (4) Week of production (From 1 to 52)
- Page 17 Product Overview ASDA-A3 ECM-A3 series servo motor Nameplate information Serial number (1) Model name ABCYA3AA 07 0001 (2) Manufacturing plant (T: Taoyuan; W: Wujiang) (2) (3) (3) Year of production (16: year 2016) (4) Week of production (From 1 to 52) (5) Serial number (Production sequence in a week, starting from 0001) ECMC series servo motor...
- Page 18 ASDA-A3 Product Overview 1.2.2 Model explanation ASDA-A3 servo drive ASD – A3 – 04 21 – L (4) (5) (1) Product name AC Servo Drive (2) Series (3) Rated output power: Code Spec. Code Spec. Code Spec. 100 W 750 W 2.0 kW 200 W 1.0 kW...
- Page 19 Product Overview ASDA-A3 ECM-A3 series servo motor ECM - A 06 04 R (2) (3) (4) (5) (6) (7) (8) (10) (11) (1) Product name ECM: Electronic Communication Motor (2) Servo type A: High precision servo motor (3) Series 3: A3 series (4) Inertia H: High inertia L: Low inertia...
- Page 20 ASDA-A3 Product Overview (9) Type of shaft and oil seal w/o brake with brake w/o brake with brake w/o oil seal w/o oil seal with oil seal with oil seal Round shaft (with fixed screw holes) Keyway (with fixed screw holes) Note: models with an * means that this type of motor is coming soon.
- Page 21 Product Overview ASDA-A3 ECMC series servo motor ECM C – C W 13 08 R S (1) (2) (3) (4) (5) (6) (7) (8) (1) Product name ECM: Electronic Communication Motor (2) Servo type C: High-precision AC servo motor (Suitable for CNC applications) (3) Rated voltage and speed C: 200V and 3,000 rpm E: 200V and 2,000 rpm...
- Page 22 ASDA-A3 Product Overview 1.3 ASDA-A3 servo drive and motor Motor Servo drive Max. Max. Conti- instan- Rated instan- nuous Output taneous Series Power Model number current taneous Model number output output (Arms) current current current (Arms) ECM-A3L-C□ 0 40F 0.67 2.62 □...
- Page 23 Product Overview ASDA-A3 Description of the drive interface Description Description Ground terminal: connects to grounding 7-segment display wire for the power supply and servo motor. CHARGE: power indicator (10) CN10 – STO (Safety Torque Off) RST main circuit terminal: connects to the CN4 - Mini USB connector: connects to (11) commercial power source (AC200 –...
- Page 24 Installation Please follow the instructions in this chapter during installation. This chapter includes information about the circuit breaker, fuse, EMI filter selection, and the regenerative resistor. 2.1 Ambient storage conditions ·································································· 2-2 Ambient installation conditions ····························································· 2-3 2.3 Mounting direction and space ······························································· 2-4 2.4 Safety precautions for using motors ·······················································...
- Page 25 Installation ASDA-A3 Safety precautions: If the connection between the servo drive and servo motor is over 20 meters, please increase the gauge of the UVW connecting wire and the encoder cable. Please refer to Section 3.1.6 for the wire specification. 2.1 Ambient storage conditions Before installation, this product must be kept in the shipping carton.
- Page 26 ASDA-A3 Installation 2.2 Ambient installation conditions A3 servo drive: the installation location should be free of devices that generate excessive heat, water, vapor, dust, and oily dust, corrosive and inflammable gas and liquids, airborne dust and metal particles, or vibration and electronic interference. Motor: the ambient temperature for the motor location should be between 0°C and 40°C.
- Page 27 Installation ASDA-A3 2.3 Mounting direction and space Attention: Mount the servo drive according to the illustration below. The base of heat sink must be mounted vertically on the wall. Incorrect installation may result in a drive malfunction. For better ventilation and cooling, make sure there is sufficient space between the adjacent ...
- Page 28 ASDA-A3 Installation Heat dissipation requirements: In order to have adequate air flow for ventilation, please follow the suggested clearances when installing one or more servo drives (refer to the following diagrams). Avoid mounting one servo drive above one another. Keep the bottom of the servo drive clear because the generated heat rises and causes higher temperature for the drives mounted above.
- Page 29 ASDA-A3 2.4 Safety precautions for using motors The Delta AC servo motor is designed for industrial applications. It is necessary that you fully understand the motor specifications and operation manual. For your safety and correct use, please carefully read the manual, specifications, and precautions for the motor before connecting the motor to any equipment.
- Page 30 If any odor, noise, smoke, vapor, or abnormal vibration occurs during motor operation, please stop the motor and turn off the power immediately. Others Delta servo motor has no user-replaceable parts. Do not disassemble the motor or change its parts. This will void the warranty. ...
- Page 31 Installation ASDA-A3 2.5 Specifications for the circuit breaker and fuse Servo drive model Circuit breaker Fuse (Class T) ASD-A3-0121- ASD-A3-0221- ASD-A3-0421- ASD-A3-0721- ASD-A3-1021- ASD-A3-1521- ASD-A3-2023- ASD-A3-3023- Note: 1. in the servo drive model name signifies model type. 2. Operation mode: General. 3.
- Page 32 ASDA-A3 Installation Installation precautions The ferrite ring is commonly used when peripheral devices (such as controller) are affected by noise from conduction and radiation when the servo motor is in the Servo On state. The parasitic capacitance between the cables in the wiring panel and the ground is typically small. As the frequency of the signal increases (Servo On state), the resistance of the parasitic capacitance becomes small enough to let common-mode current flow through.
- Page 33 This section illustrates the installation requirements for passing the EMC test. Please note that the EMC rating varies based on the installation structure or wiring. Delta servo products are designed to conform to the specifications of the EMC test. Please refer to the following diagram for the standard installation.
- Page 34 With an EMI filter and the correct installation, you can eliminate much of the interference. For better performance, using Delta’s EMI filter to suppress the interference is recommended. Recommended EMI filter...
- Page 35 Installation ASDA-A3 Motor cable selection and installation precautions The selection of motor cables (please refer to Appendix B Accessories) and installation determines the performance of the EMI filter. Please follow the precautions below. 1. Use a cable that has braided shielding (the effect of double shielding is better). 2.
- Page 36 ASDA-A3 Installation 2.8 Selecting the regenerative resistor When the direction of torque is different from the direction of rotation, the energy generated returns to the servo drive from the load. This energy is turned into electricity in the capacitance of the DC Bus and thus increases the voltage.
- Page 37 Installation ASDA-A3 When the regenerative energy exceeds the capacity of built-in regenerative resistor, you should use an external regenerative resistor. Please pay special attention to the following when using an external regenerative resistor. 1. Please choose the correct resistance (P1.052) and capacity (P1.053) for the regenerative resistor;...
- Page 38 ASDA-A3 Installation When using an external regenerative resistor, the resistor should connect to P3, C terminal; and the contact of P3, D terminal should be left open. It is recommended that you choose the above mentioned resistance. For easy calculation of the regenerative resistor capacity, except for the energy consumed by IGBT, there are two ways provided to calculate the capacity according to the selected linear motor or rotary motor.
- Page 39 Installation ASDA-A3 Regenerative power Max. generated when the motor regenerative Servo drive Rotor inertia Motor decelerates from 3000 power of the (kW) (× 10-4kg.m2) rpm to 0 without load capacitance Eo (joule) Ec (joule) 0.05 ECM-A3H-C□ 0 40F 0.043 0.21 8.42 □...
- Page 40 ASDA-A3 Installation Example: For the motor ECM-A3L-CY0604RS1 (400 W), the reciprocating motion cycle is T = 0.4 sec. Its maximum speed is 3000 rpm and the load inertia is 15 times of the motor inertia. Regenerative power Max. regenerative generated when the motor Servo drive Rotary inertia power of the...
- Page 41 Installation ASDA-A3 Example: For a 400 W motor (ECM-A3L-CY0604RS1), and the torque of the external load is +70% of the rated torque (1.27 N-m) with rotation speed up to 3000 rpm, the required external regenerative resistance is: 2 × (0.7 × 1.27) × ( ) = 558 W 3000×2×π...
- Page 42 ASDA-A3 Installation Wiring of the brake: Servo drive Ensure the polarity of diode is correct, or it DOX:(DOX+,DOX-) will damage the drive X=1,2,3,4,5,6 It is open circuit when the Motor emergency stop signal is on. DO1:(7,6) DO2:(5,4) Brake 1 (blue) DO3:(3,2) DO4:(1,26) Brake...
- Page 43 Installation ASDA-A3 (This page is intentionally left blank.) 2-20 Revision December, 2017...
- Page 44 This chapter illustrates the power supply circuit, connectors, and wiring for each mode of the ASDA-A3. 配 3.1 System connection·············································································· 3-3 3.1.1 Connecting to peripheral devices (connecting to Delta communication type of servo motor) ················································································ 3-3 3.1.2 Connectors and terminal blocks ······················································· 3-5 3.1.3 Wiring for power supply ·································································· 3-7 3.1.4 UVW connectors for the ASDA-A3 servo drive ···································...
- Page 45 Wiring ASDA-A3 3.11.2 Position (PR) control mode ·························································· 3-57 3.11.3 Speed control mode ··································································· 3-58 3.11.4 Torque control mode ·································································· 3-59 3.11.5 Communication mode (CANopen) ················································· 3-60 3.11.6 Communication mode (DMCNET) ················································· 3-61 Revision December, 2017...
- Page 46 ASDA-A3 Wiring 3.1 System connection 3.1.1 Connecting to peripheral devices (connecting to Delta communication type of servo motor) Power 000 0 10 0 W ~1. 5 k W Single-/Three-phase 00 0 20 0 ~ 230 V 2 k W ~ 3 k W Three-phase...
- Page 47 Wiring ASDA-A3 Connecting to peripheral devices (connecting to Delta communication type of servo motor) Encoder connector (CN2 ) Position feedback connector (CN5) Fo r encoder input Power output of motor (UVW ) Regenerative resistor Braking resistor (P3 D C) (Option) Installation safety precautions: 1.
- Page 48 ASDA-A3 Wiring 3.1.2 Connectors and terminal blocks Symbol Name Description Power input for the Connect to single-phase AC power (please refer to the model L1, L2 control circuit specification for the proper input voltage). For harmonic suppression. If this function is not required, P1, P2 Input for the DC reactor short-circuit P1 and P2.
- Page 49 Wiring ASDA-A3 Pay special attention to the following when connecting the wiring: 1. When the power is off, do not touch R, S, T and U, V, W since the capacitance inside the servo drive can still contain a dangerously large amount of electric charge. Wait until the charging light is off.
- Page 50 ASDA-A3 Wiring 3.1.3 Wiring for power supply There are two methods for wiring the power supply: single-phase and three-phase. In the diagram below, Power On is normally open, Power Off and ALRM_RY are normally closed. MC (magnetic contactor) is the power relay and the contact for the main power circuit. Wiring Method for Single-phase Power Supply (suitable for models of 1.5 kW and below) ...
- Page 51 Wiring ASDA-A3 Wiring Method for Three-phase Power Supply (suitable for all series) MCCB Power Power EMI Filter ALRM_RY Servo Drive Motor 24 V DO5+ (28) ALRM_RY DO5- (27) Revision December, 2017...
- Page 52 ASDA-A3 Wiring Connecting multiple servo drives (connecting in series) Using a common DC-BUS can increase the efficiency of the regenerative power. For instance, while one of the axes is decelerating, the regenerative power can supply other axes. MCCB Power Power EMI Filter ALRM_RY...
- Page 53 Wiring ASDA-A3 3.1.4 UVW connectors for the ASDA-A3 servo drive Note: pin assignments of the A3 and A2 model are the same. For easier wiring, A3’s connector illustration (angle of viewing) is changed, which is different from that of A2. (1) Please refer to the following table for UVW connector specifications Motor model UVW connector...
- Page 54 ASDA-A3 Wiring Motor model UVW connector ECM-A3 0 40F (50W) □ □ ECM-A3 0 401 (100W) □ □ ECM-A3 0 602 (200W) □ □ ECM-A3 0 604 (400W) □ □ ECM-A3 0 804 (400W) □ □ Pin assignment ECM-A3 0 807 (750W) □...
- Page 55 Wiring ASDA-A3 3.1.5 Specification for the encoder connector Encoder connection (Diagram 1): Quick connector CN2 connector (2) Quick connector (Male) Note: the diagram shows the connection between the servo drive and the encoder and is not drawn to scale. The specification is subject to change depending on the selected servo drive and motor models. Motor model Quick connector (Male) ECM-A3...
- Page 56 ASDA-A3 Wiring Specifications and Pin assignment for the incremental encoder connector: Title Model name inch ACS3-CAEN1003 3000 ± 100 118 ± 4 ACS3-CAEN1005 5000 ± 100 197 ± 4 White Black Black White Reserved Reserved Reserved Reserved White/Red Red/Black Red/Black White/Red Reserved Reserved...
- Page 57 Wiring ASDA-A3 Model name inch ACS3-CAEA1003 3000 ± 100 118 ± 4 ACS3-CAEA1005 5000 ± 100 197 ± 4 Connection method: Caution Please wire as instructed below. Incorrect wiring may cause battery explosion. Orange White White Reserved Reserved BAT+ BAT+ Black Gray White/Red...
- Page 58 ASDA-A3 Wiring Encoder connection (Diagram 2): Military connector (1) CN2 connector (2) Military encoder Note: the diagram shows the connection between the servo drive and the encoder and is not drawn to scale. The specification is subject to change according to the selected servo drive and motor models. Motor model Military connector ECMC-F□...
- Page 59 Wiring ASDA-A3 Connection method: Caution Please wire as instructed below. Incorrect wiring may cause battery explosion. Pin No. Symbol Color White White / Red BAT+ BAT- Black DC+5V Brown Blue BRAID SHIELD – Note: if using an incremental type of encoder, connecting BAT+ and BAT- is not required. 3-16 Revision December, 2017...
- Page 60 ASDA-A3 Wiring 3.1.6 Wire selection Please refer to the requirements for doubling and note the recommended wire for connectors and signal wiring for the ASDA-A3 as listed below: Note: The shield should connect to the phase of SHIELD. When wiring, please use the wires suggested in this section to avoid danger. No doubling: single wire for one terminal ...
- Page 61 Wiring ASDA-A3 Terminal illustration: Crimping tool: DNT13-010 Doubling: two wires for one terminal Power cable-wire diameter (AWG) Servo drive and L1, L2, R, S, T, P1, P2 corresponding servo motor P3, C Terminal type / Bare wire Crimping part name ECM-A3□...
- Page 62 ASDA-A3 Wiring Encoder cable - wire diameter mm² (AWG) Servo drive model Size Number Specification Standard length ASD-A3-0121 ASD-A3-0221 ASD-A3-0421 ASD-A3-0721 10 cores 0.13 (AWG26) UL2464 3 m (9.84 ft) (4 pairs) ASD-A3-1021 ASD-A3-1521 ASD-A3-2023 ASD-A3-3023 Note: Please use shielded twisted-pair cable for wiring the encoder to reduce the noise interference. The shield should connect to the phase of the SHIELD.
- Page 63 Wiring ASDA-A3 3.2 Wiring diagram for the servo system Models of 400 W and below Connect to external regenerative resistor Power Single/Three-phase 200 ~ 230V Servo Motor Var istor Voltage Detection Encode r Curren t Dyn amic GATE Voltage DRIVER brake Detection Detection...
- Page 64 ASDA-A3 Wiring Models of 750 W – 3 kW (with built-in regenerative resistor and fan) Connect to external regenerative resistor Power 750 W ~ 1.5 kW models single/Three-phase 200 ~ 230V 2 kW ~ 3 kW models Three-phase 200 ~ 230V Built-in +12V regenerative...
- Page 65 Wiring ASDA-A3 3.3 Wiring for CN1 (I/O signal) 3.3.1 CN1 I/O connector (for A3-L and A3-M series) The ASDA-A3 provides 10 user-defined digital input (DI) points and 6 digital output (DO) points to provide highly flexible communication between the servo drive and the controller. For more information, please refer to section 3.3.5.
- Page 66 ASDA-A3 Wiring Pin assignment: Signal Function Signal Function Signal Function PULL External power Analog torque DO4+ Digital output T_REF HI_S input of Sign input (Sign) pulse Analog input DO3- Digital output SIGN Position sign (+) signal ground DO3+ Digital output Not in use /SIGN Position sign (-)
- Page 67 Wiring ASDA-A3 3.3.2 Signal explanation for connector CN1 (for A3-L and A3-M series) The following table details the signals listed in the previous section. General signals: Wiring Signal Pin No. Function method (refer to 3.3.3) (1) When motor speed command is set to -10 V to +10 V, it means the rotation speed is -3000 to +3000 r/min (default).
- Page 68 ASDA-A3 Wiring There are various operation modes available (refer to section 6.1) and the I/O configuration differs for each mode. The ASDA-A3 provides user-defined I/O for you to set functions according to the application requirements. See Chapter 8 and refer to Table 8.1 DI function setting and 8.2 DO function setting.
- Page 69 Wiring ASDA-A3 The default DO signal is explained in the following table: PT/PR/Communication Speed/Torque Wiring method (refer to 3.3.3) Signal Function Signal Function SRDY Servo ready SRDY Servo ready ZSPD Zero motor speed ZSPD Zero motor speed Target speed HOME Homing completed TSPD reached...
- Page 70 ASDA-A3 Wiring 3.3.3 CN1 I/O connector (for A3-F series) The A3-F provides 7 user-defined digital input (DI) points and 4 digital output (DO) points to provide highly flexible communication between the servo drive and the controller. For more information, please refer to section 3.3.5. In addition, differential type output signals for encoder A+, A-, B+, B-, Z+, and Z- are provided.
- Page 71 Wiring ASDA-A3 3.3.4 Signal explanation for connector CN1 (for A3-F series) The following details the signals listed in the previous section. General signals: Wiring Signal Pin No. Function method (Refer to 3.3.3) Position Pulse Encoder signal output A, B, and Z (Line Driver). C9/C10 (output) NPN: COM+ is for DI input and requires external...
- Page 72 ASDA-A3 Wiring See the default DO signal for each control mode in the table below: DMCNET Wiring method Signal Function (Refer to 3.3.3) SRDY Servo is ready. C5/C6 ALRM Alarm reset. If the default DI/DO function cannot meet the application requirement, you can specify the DI/DO functions by setting the DI or DO code to the corresponding parameters.
- Page 73 Wiring ASDA-A3 3.3.5 Wiring diagrams (CN1) The valid voltage for the analog speed command and the analog torque command is between -10 V and +10 V. You can set the command value that corresponds to the voltage range with the relevant parameters.
- Page 74 ASDA-A3 Wiring You can input the Pulse command with the open-collector or line driver. The maximum input pulse for the line driver is 4 mpps and 200 kpps for open-collector. C3-1: the source for the pulse input is open-collector NPN type equipment, which uses the external power supply.
- Page 75 Wiring ASDA-A3 C4: pulse input (Line driver) can only be used with 2.8 V – 3.6 V power systems. Do not use with 24 V power. Controller Servo Drive Max. pulse input frequency: 4 mpps 51 Ω SIGN 51 Ω /SIGN Max.
- Page 76 ASDA-A3 Wiring When the drive connects to an inductive load, you must install the diode (permissible current: below 40 mA; surge current: below 100 mA; maximum voltage: 30 V). C5: DO wiring - the servo drive uses an external power supply and the resistor is for general load.
- Page 77 Wiring ASDA-A3 DI wiring - Input signals by relay or open-collector transistor. Conditions of DI On/Off: ON: 15 V – 24 V; Condition: Input current = 8 mA OFF: below 5 V; the input current must not be higher than 0.5 mA. C7: NPN transistor (SINK mode) Servo Drive COM+...
- Page 78 ASDA-A3 Wiring C9: output for encoder position signal (Line driver) Max. output current 20 mA Servo Drive Controller AM26C31 type OA (21) /OA (22) 120 Ω OB (25) /OB (23) 120 Ω OZ (50) /OZ (24) 120 Ω Note: A3-F pins: OA (17), /OA (18), OB (19), /OB (20), OZ (21), /OZ (22). It is suggested that you connect the two GND for the controller and servo drive in parallel when the voltage level is not the same for the controller and the servo drive.
- Page 79 Wiring ASDA-A3 C11: encoder OCZ output (open-collector Z pulse output) 24 V Servo Drive Max.: 30 V; 50 mA OCZ48 GND 13 Note: this is not supported by the A3-F. 3-36 Revision December, 2017...
- Page 80 ASDA-A3 Wiring 3.3.6 Application: using the CN1 quick connector for wiring The CN1 quick connector (ASD-IF-SC5020) is designed for easy wiring. It can be used with the ASDA-A3, ASDA-A2 and ASDA-A2R series servo drive and can satisfy the needs of different DI/O applications.
- Page 81 Wiring ASDA-A3 Pin assignment for the CN1 quick connector (J2 and J1): Signal Signal COM+ COM+ 2, 4, 6, 26 DI1- DI1- DI2- DI2- DI3- DI3- DI4- DI4- DI7- DI7- DO1+ DO1+ DO2+ DO2+ /PULSE /PULSE PULSE PULSE /SIGN /SIGN SIGN SIGN 12, 13, 19, 44...
- Page 82 ASDA-A3 Wiring Wiring example: DO2+ Internal circuit / PULSE DO1+ 24 VDC PULSE DI7- Applies to Pulse input external (Line Driver) power supply / SIGN DI4- Max. output current: 50 mA SIGN DI3- voltage: 30V DI2- Z-phase open- collector signal DI1- DO4+ COM+...
- Page 83 Wiring ASDA-A3 Wiring (1) The CN1 quick connector has multiple spring terminals. Please determine which terminal is to be wired in advance. (2) Use a flathead screwdriver to press the spring down to open the pin. (3) Insert the stripped wire into the pin. (4) Withdraw the screwdriver to complete the wiring.
- Page 84 ASDA-A3 Wiring 3.4 Wiring for the CN2 encoder connector The CN2 encoder signal connector is shown below: (1) CN2 connector (Female) (2) CN2 connector (Male) Quick connector ends: Military connector ends: 3-41 Revision December, 2017...
- Page 85 Wiring ASDA-A3 CN2 pin assignment: The end that connects to the encoder The end that connects to the servo drive Military Quick Color Pin No. Symbol Description Connector Connector White Serial communication signal (+) White / Red Serial communication signal (-) Brown +5 V power supply Blue...
- Page 86 ASDA-A3 Wiring (continued) Step 5: Fasten the other side of the metal case. Step 6: Tighten the screws of the metal case. Step 7: Fit one side of the plastic case over the connector. Step 8: Place and fasten the other side of the case to complete the connector.
- Page 87 Wiring ASDA-A3 3.5 Wiring for the CN3 connector (RS-485 / high speed communication) When the servo drive is connected to the PC via CN3, you can operate the servo drive, PLC, or HMI through MODBUS using the assembly language. The CN3 connector supports two commonly used communication interfaces, RS-485 and CAN.
- Page 88 ASDA-A3 Wiring Connecting multiple servo drives: (1) Connect to the controller / PLC (2) Modbus/CAN connector (part name: ACS3-CNADC3) (3) Wiring for CAN / RS-485 terminal resistor (part name: ACS3-CNTRC3) Note: This supports up to 32 axes via RS-485 with the CANopen cable length of up to 30 m. The communication quality and the connectable axes are determined by the controller’s specifications, quality of wires, grounding, interference, and whether twisted-pair cable with shielding is used.
- Page 89 Wiring ASDA-A3 3.6 CN4 serial connector (Mini USB) CN4 is a serial connector that connects to a PC and allows you to operate the servo drive with the software. This is a Type B Mini-USB that is compatible with the USB 2.0 specification. Note: when there is high interference during operation, it is suggested that you install the USB isolator (Part number: ACS3-CAUC15 / ACS3-CAUC30).
- Page 90 ASDA-A3 Wiring 3.7 CN5 connector (for machine position feedback, applicable to full-closed loop) The CN5 connects to the external linear scale for the encoder (A, B, and Z) and forms a full closed loop with the servo system. (1) CN5 connector (Female) (2) CN5 connector (Male) Pin assignment: Pin No.
- Page 91 The CN6 connector is a standard RJ45 connector with shielded cable. You can use it to connect to the host controller or motion control card. With Delta’s DMCNET system, you can control position, torque and speed, as well as accessing or monitoring the servo status.
- Page 92 Wiring Connecting multiple servo drives: (1) Connection to the controller / motion control card (2) DMCNET terminal resistor. This is produced by Delta PLC department; please contact your local distributors for ordering information. Note: This supports up to 12 axes and the cable length of up to 30 m.
- Page 93 Wiring ASDA-A3 3.9 CN10 STO connector (Safe torque off ) This connector provides the STO function. More details are provided in the next section. Note: The STO function is supported by the A3-M only. STO certification application in progress. (1) CN10 STO connector (Female) (2) CN10 quick connector (Male) Pin assignment: Pin No.
- Page 94 After the STO function is activated, the motor is no longer controlled by the servo motor. Thus, the potential danger from STO must be taken into consideration when designing and wiring the machine. Delta is not liable for mechanical damage and personnel injury if you fail to observe the following instructions: 1.
- Page 95 Wiring ASDA-A3 3.10.3 Wiring for STO To use a safety relay to trigger the STO function, please connect the wiring as shown in the following diagram: Reserved ESTOP Reserved STO_A 24V DC / STO_A Safety Relay STO_B / STO_B FDBK+ FDBK- If you are not using the STO function, you can short-circuit the connector or plug in the connector that has been wired (provided with the servo drive).
- Page 96 ASDA-A3 Wiring 3.10.4 How does the STO function work? The STO function is controlled by the motor current from two individual circuits. It cuts off the power supply to the motor when needed, after which the motor is free from torque force. Table 1 details how this function works.
- Page 97 Wiring ASDA-A3 When the motor runs normally (Servo On), but one of the safety signal source is low for 1s, AL501 or AL502 occurs. Then the servo drive is in the Servo Off state. STO_A STO_B S_ON Servo status Servo on Servo off &...
- Page 98 ASDA-A3 Wiring FDBK status Servo drive status Logic A Logic B Logic C Logic D Parameter P2.093 XX10 XX20 XX11 XX21 XX12 XX22 XX13 XX23 FDBK behavior No latch latch No latch latch No latch Latch No latch latch No STO alarm occurs Open Close Open...
- Page 99 Wiring ASDA-A3 3.11 Standard wiring example 3.11.1 Position (PT) control mode Servo Drive MCCB ASDA Series 200/240 VAC *3 Three-phase*6 Regenerative resistor 50/ 60 Hz Power White supply Black EMGS BRKR Brake Gre en *4 Encoder + 5 V / SIGN / SIGN SIGN SIGN...
- Page 100 ASDA-A3 Wiring 3.11.2 Position (PR) control mode Servo Drive MCCB ASDA -A3 Series 200/240 VAC *2 Three-phase*5 Regenerative Resistor 50/ 60 Hz Power White Supply Black EMGS BRKR Brake Gre en *3 Encoder + 5 V 1.2 KΩ Twisted-pair or Case Shielding twisted-...
- Page 101 Wiring ASDA-A3 3.11.3 Speed control mode Servo Drive MCCB ASDA - A 3 Series *2 200/240 VAC Three-phase*5 Regenerative 50/ 60 Hz resistor Power L 1 c White Supply L 2 c Black EMGS BRKR Brake Green *3 CN 2 Encoder + 5 V 1.2KΩ...
- Page 102 ASDA-A3 Wiring 3.11.4 Torque control mode Servo Drive MCCB ASDA-A3 Series 200/240 V *2 Three-phase*5 Regenerative 50/ 60 Hz Resistor Power White Supply Black EMGS BRKR Green Brake *3 CN 2 Encoder + 5 V 1.2KΩ V-REF ± 10 V 10 KΩ...
- Page 103 Wiring ASDA-A3 3.11.5 Communication mode (CANopen) Servo Drive MCCB ASDA -A3 Series 200/240 V *2 Three-phase*5 Regenerative 50/ 60 Hz Resistor Power White Supply Black EMGS BRKR Brake Gre en *3 CN 2 Encoder + 5 V COM + *1 Reserved DI 1 4.7 KΩ...
- Page 104 ASDA-A3 Wiring 3.11.6 Communication mode (DMCNET) Servo Drive MCCB ASDA -A3 Series 200 / 230 V Three-phase Regenerative 50 /60 Hz resistor Power White supply Black EMGS BRKR Brake Green Encoder COM+ Reserved Reserved 4.7 KΩ Twisted-pair or Shielding Case Reserved twisted 4.7 KΩ...
- Page 105 Wiring ASDA-A3 (This page is intentionally left blank.) 3-62 Revision December, 2017...
- Page 106 Test Operation and Panel Display This chapter describes the panel display of ASDA-A3 series servo drive, as well as its operation and testing. 4.1 Panel description ··············································································· 4-2 4.2 Parameter setting procedure ································································ 4-3 4.3 Status display ··················································································· 4-6 4.3.1 Save the setting display ······························································· 4-6 4.3.2 Display the decimal point ······························································...
- Page 107 Trial Operation and Panel Display ASDA-A3 4.1 Panel description (1) Display: 5-digit, 7-segment LED displays the monitoring values, parameters, and setting values. (2) MODE key: switches the display among Monitoring mode, Parameter mode, and Alarm mode. In Editing mode, press the MODE key to switch to Parameter mode. (3) UP key: changes monitoring code, parameter number, and value.
- Page 108 ASDA-A3 Trial Operation and Panel Display 4.2 Parameter setting procedure Switching modes: Power On Monitoring Please refer to Chapter 8 mode Parameter Please refer to Chapter 8 for parameters mode 1. If no alarm occurs, the Alarm mode is skipped. 2.
- Page 109 Trial Operation and Panel Display ASDA-A3 Parameter mode Parameter mode ‧ Monitoring ‧ parameter P0 ‧ ‧ Basic ‧ parameter P1 ‧ ‧ Extension ‧ parameter P2 ‧ ‧ Communication ‧ parameter P3 ‧ ‧ Diagnosis ‧ parameter P4 ‧ ‧...
- Page 110 ASDA-A3 Trial Operation and Panel Display Editing mode Parameter mode Editing mode ‧‧‧ Save the parameter setting Display parameter value. Then, return to setting value Parameter mode ‧‧‧ Save the parameter setting value. Then, return to Parameter mode ‧‧‧ Save the parameter setting value.
- Page 111 Trial Operation and Panel Display ASDA-A3 4.3 Status display 4.3.1 Save the setting display When you complete the parameter setting, press the SET key to save the parameters. The panel displays the status for one second. Displayed symbol Description Correctly saved the setting value (Saved). Read-only and write-protected parameter (Read-only).
- Page 112 ASDA-A3 Trial Operation and Panel Display 4.3.3 Alarm messages Displayed symbol Description When an alarm occurs, the servo drive shows ‘AL’ as the alarm symbol and ‘nnn’ as the alarm code. For detailed information, please refer to Chapter 8 P0.001 Parameter Description or Chapter 11 Troubleshooting.
- Page 113 Trial Operation and Panel Display ASDA-A3 P0.002 Monitoring displayed Description Unit setting value symbol Input frequency of pulse command [kpps] Motor speed [rpm] Speed command [Volt] Speed command [rpm] Torque command [Volt] Torque command Average torque Peak torque Main circuit voltage [Volt] Load / Motor inertia ratio (note: if it shows 13.0, [1 times]...
- Page 114 ASDA-A3 Trial Operation and Panel Display P0.002 Monitoring displayed Description Unit setting value symbol Mapping parameter #3: shows the content of parameter P0.027 (specify the mapping target by P0.037) Mapping parameter #4: shows the content of parameter P0.028 (specify the mapping target by P0.038) Monitoring variable #1: shows the content of parameter P0.009 (specify the monitoring variable code by P0.017)
- Page 115 Trial Operation and Panel Display ASDA-A3 The following table shows the panel display of 16-bit and 32-bit value: Example of the displayed value Description If the value is 1234, it displays 01234 (in decimal format). (Dec) 16 bits If the value is 0x1234, it displays 1234 (in hexadecimal (Hex) format;...
- Page 116 ASDA-A3 Trial Operation and Panel Display 4.4 General functions 4.4.1 Operation of fault record display In Parameter mode, select P4.000 – P4.004 and press the SET key to show the corresponding fault record. The 1 recent error The 2 recent error The 3 recent...
- Page 117 Trial Operation and Panel Display ASDA-A3 4.4.2 Force DO on You can switch to the Diagnosis mode by the following steps. Set P2.008 to 406 and enable the function to force DO on. Then, set the DO by binary method with P4.006. When the parameter value is 2, it forces DO2 on.
- Page 118 ASDA-A3 Trial Operation and Panel Display 4.4.3 Digital input diagnosis operation You can switch to the Diagnosis mode by the following steps. When DI1 – DI10 are triggered by the external output signal, the panel shows the corresponding signal, displayed by bit. When it shows 1, it means the DI is on.
- Page 119 The encoder cable should be protected from excessive stress. When the motor is running, please make sure the cable is not worn or stretched. Please contact Delta if the servo motor vibrates or makes unusual noise Testing when running the during operation.
- Page 120 ASDA-A3 Trial Operation and Panel Display When the machinery is operating, please contact Delta if there is no contact noise or other abnormal noise. Check if the power indicator and LED display work properly. The 7.5 kW model is controlled by PWM. When the temperature is lower ...
- Page 121 Trial Operation and Panel Display ASDA-A3 When the screen displays Overvoltage warning: This means the voltage input from the main circuit is higher than the rated range or a power input error has occurred (incorrect power system). Corrective action: Use the voltmeter to measure the input voltage from the main circuit, and ensure it is within the rated range.
- Page 122 ASDA-A3 Trial Operation and Panel Display When the screen displays: Emergency stop warning: Please check if any of the digital inputs DI1 – DI10 are set to emergency stop (EMGS). Corrective action: If you do not want to set the emergency stop (EMGS) as one of the digital inputs, make sure no other digital input is set to emergency stop (EMGS) for DI1 –...
- Page 123 Trial Operation and Panel Display ASDA-A3 When the screen displays: Positive limit error warning: Please check if any of the digital inputs DI1–DI10 are set to positive limit (PL) and that DI is Corrective action: If you do not want to set the positive limit (PL) as one of the digital inputs, make sure no other digital input is set to positive limit (PL) for DI1 –...
- Page 124 ASDA-A3 Trial Operation and Panel Display 4.5.3 JOG trial run without load It is easy to test the motor and servo drive using a JOG trial run without load since no extra wiring is needed. For safety reasons, it is recommended to set JOG at low speed. Follow the steps below: Step 1: JOG trial run is available only when the servo drive is in the Servo On state.
- Page 125 Trial Operation and Panel Display ASDA-A3 The following shows the JOG timing diagram: Motor runs in forward direction Speed 0 Motor stops Motor runs in reverse direction Press Release Press If the motor does not run, please check if the wiring between U, V, W and encoder cable is correct.
- Page 126 (DI8) functions. Thus, parameter P2.015 – P2.017 and P2.036 – P2.041 are set to 0 (disabled); you can program the digital input of Delta’s servo drive. When programming the digital input for the servo drive, please refer to the DI code descriptions.
- Page 127 Trial Operation and Panel Display ASDA-A3 The speed command selection is determined by SPD0 and SPD1. See the following table: DI signal for CN1 Speed Command Range Content command No. source SPD1 SPD0 External Voltage difference between analog -10V to +10V V-REF and GND command P1.009...
- Page 128 (DI8) functions. Thus, parameter P2.015 – P2.017 and P2.036 – P2.041 are set to 0 (disabled); you can program the digital input of Delta’s servo drive. When programming the digital input, please refer to the DI code descriptions.
- Page 129 Trial Operation and Panel Display ASDA-A3 Refer to Section 3.10.2 for the wiring for Position (PR) control mode. Please see the table below for the 99 sets for PR and the position command (POS0 – POS6): Position Corresponding POS6 POS5 POS4 POS3 POS2...
- Page 130 Tuning This chapter contains information about the auto tuning procedure and the three tuning modes. Advanced users can also tune the servo system using the manual mode. 5.1 Tuning procedure and the applied mode ················································· 5-2 5.1.1 Flow chart for the tuning procedure ················································· 5-2 5.1.2 Tuning modes ·············································································...
- Page 131 Tuning ASDA-A3 Tuning procedure and the applied mode 5.1.1 Flow chart for the tuning procedure You can tune the servo drive by following the flow chart below. First, start from the Auto Tuning mode. If you are not satisfied with the system’s performance, you can use Tuning modes 1, 2, 3 or Manual mode for tuning the servo system.
- Page 132 ASDA-A3 Tuning 5.1.2 Tuning modes P2.032 Parameter Tuning mode Inertia estimation Setting Manual tuning Auto tuning value P1.037, P2.000, P2.004, P2.006, P2.023, P2.024, P2.025, P2.043, Manual mode Value of P1.037 P2.044, P2.045, P2.046, P2.049, P2.089, P2.098, P2.099, P2.101, P2.102、 P1.037, P2.000, P2.004, P2.006, P2.023, P2.024, P2.025, P2.043,...
- Page 133 Tuning ASDA-A3 5.2 Quick mode Quick mode is the default mode for the servo drive. In most applications, you can start the servo drive after it is installed. Please note that the gain related parameter settings are invalid when starting in Quick mode. You can enable or disable Quick mode with P2.033. When switching to Auto Tuning mode, Quick mode is automatically disabled.
- Page 134 ASDA-A3 Tuning 5.3.1 Flow chart for auto tuning You can complete auto tuning with the drive panel or ASDA-Soft. The Auto Tuning function in the A3 servo drive helps you to find the most suitable parameters for your system according to the machine characteristics.
- Page 135 Tuning ASDA-A3 5.3.2 Auto tuning through the drive panel With the tuning procedure below, you can complete auto tuning with the drive panel. Make sure the emergency stop, positive and negative limit switches work properly before you start to tune the system.
- Page 136 Instead of using the drive panel, you can use ASDA-Soft to complete auto tuning. Please go to Delta’s website (http://www.deltaww.com/) to download ADSA-Soft for free. Install the software and open the executable file (.exe). You see the screen shown below.
- Page 137 Tuning ASDA-A3 There are two types of auto-tuning procedure, one using the host controller and one using the servo drive. Both procedures are described below. Auto-tuning with host controller: the host controller sends the commands to drive the motor. Step 1: When the computer is connected to the controller, the program window appears as below.
- Page 138 ASDA-A3 Tuning Step 2: Click Controller: Motion Command From Controller and make sure the motion/machining path is set correctly. Suggestions: you should set the motor to operate at least one cycle in both forward and backward directions. It should reach the positions (in both forward and backward directions) in 1000 ms or less with the running speed not less than 500 rpm.
- Page 139 Tuning ASDA-A3 Wait until the tuning progress bar reaches 100%, after which a window with “Auto tuning completed” appears. Click OK to continue. The screen shows a table comparing the parameters before and after being changed by auto tuning. Click Update to complete auto tuning. 5-10 Revision December, 2017...
- Page 140 ASDA-A3 Tuning Auto-tuning with servo drive: the servo drive sends the commands to drive the motor. Step 1: When the computer is connected to the servo drive, the program window appears as below. Click Auto Tuning in the Function List tree view. Step 2: Click Drive: Motion Command From Drive to start the Auto Tuning procedure.
- Page 141 Tuning ASDA-A3 After you set the motor’s running path, you can use the Left or Right button to run the motor to position 1 and 2. Then, click Start Moving to run between two positions. The motor moves to position 1 and 2 in the forward and backward directions. Before running the motor, make sure no one is standing close to the machinery.
- Page 142 ASDA-A3 Tuning Step 3: Wait until the tuning progress bar reaches 100%, after which a window with “Auto tuning completed” appears. Click OK to continue. The screen shows a table comparing the parameters before and after being changed by auto tuning.
- Page 143 Tuning ASDA-A3 Please click Update to complete auto tuning. 5.3.4 Alarms related to auto tuning In Auto Tuning mode, it is vital that you program the command path, including the operation cycle (such as acceleration, constant speed and deceleration) and dwell time. See the figure below.
- Page 144 ASDA-A3 Tuning 5.4 Tuning mode Apart from the Auto Tuning function described above, there are three other tuning modes you can use to fine tune the system. You can then easily complete tuning by increasing or decreasing the frequency response bandwidth (P2.031). Please follow the tuning procedure in Section 5.1. 5.4.1 Flow chart of Tuning mode Start Tuning mode 1...
- Page 145 Tuning ASDA-A3 5.4.2 Tuning mode 1 In this mode, the servo drive continues to estimate the machine inertia and updates the value of parameter P1.037. P2.032 Parameter Tuning mode Inertia estimation Setting Manual tuning Auto tuning value P1.037, P2.000, P2.004, P2.006, P2.023, P2.024, P2.025, P2.043, Real-time...
- Page 146 ASDA-A3 Tuning 5.4.4 Tuning mode 3 If your need cannot be met by Tuning mode 1 and 2, please select Tuning mode 3. Parameter P2.089 (Command Response Gain) is available in this mode. You can increase the gain value to shorten the response and settling time for the position command.
- Page 147 Tuning ASDA-A3 5.4.5 Setting the frequency response bandwidth (stiffness) You can use parameter P2.031 to tune the servo system with an easier and user-friendly way. With the fixed inertia ratio, when increasing the bandwidth level (P2.031), the servo’s bandwidth increases as well. If resonance occurs, please lower the parameter value by one or two bandwidth levels (you should adjust the bandwidth level according to the actual situation).
- Page 148 ASDA-A3 Tuning 5.4.6 Gain response You can use parameter P2.089 to adjust the response. Increasing the gain can minimize the deviation between the position command and command response in intermittent duty zone. When adjusting the value of P2.089, please enable the function for two degrees of freedom (set P2.094 to 0x1000).
- Page 149 Tuning ASDA-A3 5.5 Tuning in Manual mode The selection of the position and speed response frequency should be determined by the machinery stiffness and the application. Generally, for applications or machines that require high speed and high precision, higher frequency response bandwidth is required. However, increasing the response bandwidth might cause resonance.
- Page 150 ASDA-A3 Tuning Low-pass filter for resonance suppression (NLP, parameter P2.025) A high inertial value ratio reduces the frequency response of the speed loop. Therefore, you must increase the KVP value to maintain the response frequency. Increasing KVP value might cause machinery resonance. Please use this parameter to eliminate the noise from resonance.
- Page 151 Tuning ASDA-A3 5.6 Mechanical resonance suppression Five sets of notch filters are provided to suppress mechanical resonance. You can set all five to the auto resonance suppression parameter (P2.047) with manual adjustment. Please see the following flowchart for manual adjustment. Use the analytic tool provided by ASDA-Soft to display the point of resonance.
- Page 152 Operation Mode This chapter describes the operation of each control mode, including gain adjustment and filters. For position control, you use the external pulse and commands from the internal registers. For Speed mode and Torque mode, apart from the commands from the internal registers, you can also control the servo drive by the analog voltage input.
- Page 153 Operation Mode ASDA-A3 6.5.1 Speed / Position dual mode ························································· 6-30 6.5.2 Speed / Torque dual mode ·························································· 6-31 6.5.3 Torque / Position dual mode ························································ 6-32 Others ·························································································· 6-33 6.6.1 Applying the speed limit ······························································ 6-33 6.6.2 Applying the torque limit······························································ 6-34 6.6.3 Analog monitoring ·····································································...
- Page 154 ASDA-A3 Operation Mode 6.1 Selecting the operation mode This servo drive provides three basic operation modes: Position, Speed, and Torque. The available communication modes are CANopen, DMCNET and EtherCAT respectively. For basic operation mode, you can choose from Single mode, Dual mode, and Multi-mode. The following table lists all the available modes.
- Page 155 Operation Mode ASDA-A3 Here are the steps to switch the operation mode: 1. Switch the servo drive to Servo Off status. You can do this by setting DI.SON to OFF. 2. Set P1.001 and refer to the code listed above for the mode selection. 3.
- Page 156 ASDA-A3 Operation Mode 6.2.2 Position command in PR mode You select the PR command source with (P6.000, P6.001) – (P7.098, P7.099), which are the 99 built-in command registers. Then, you trigger the Position command with DI.CTRG (0x08). See the following table for more detail. Position Setting POS6...
- Page 157 Operation Mode ASDA-A3 For better control, the pulse signals are processed by the Position Command processing unit. The structure is shown in the diagram below. Position command processing unit GNUM0, GNUM1 Command Accel/Decel Target Delay time source time speed S-curve Command P5.040 P6.000...
- Page 158 ASDA-A3 Operation Mode 6.2.4 S-curve filter (Position) The S-curve filter smoothes the motion command in PR mode. This filter makes speed and acceleration continuous and reduces jerking, resulting in a smoother mechanical operation. If the load inertia increases, the motor operation is influenced by friction and inertia when the motor starts or stops rotating.
- Page 159 Operation Mode ASDA-A3 6.2.5 Electronic gear ratio (E-Gear ratio) The resolution of ASDA-A3 is 24 bits, which means that it generates16777216 pulses per motor rotation. Regardless of the encoder resolution (17-bit, 20-bit, or 22-bit), the E-Gear ratio is set according to 24-bit resolution of ASDA-A3 servo drive. The Electronic gear ratio changes the resolution.
- Page 160 ASDA-A3 Operation Mode 6.2.6 Low-pass filter Target position PFLT Relevant parameters: please refer to Chapter 8 for detailed descriptions. Parameter Function P1.008 Position command smoothing constant (Low-pass filter) 6.2.7 Timing diagram of PR mode In PR mode, the Position command is issued with the DI signal (POS0 – POS6 and CTRG) for CN1.
- Page 161 Operation Mode ASDA-A3 6.2.8 Gain adjustment for the position loop There are two types of gain adjustment for the position loop: auto and manual. Auto adjustment: The ASDA-A3 servo drive provides an Auto Tuning function that allows you to easily complete the gain adjustment.
- Page 162 ASDA-A3 Operation Mode When you set the value of KPP (P2.000) too high, the bandwidth for the position loop is increased and the phase margin is reduced. Meanwhile, the motor rotates and vibrates in the forward and reverse directions. In this case, you have to decrease KPP until the rotor stops vibrating.
- Page 163 Operation Mode ASDA-A3 6.2.9 Low-frequency vibration suppression in Position mode If the machine is too flexible, vibration persists even when the motor stops after executing the Positioning command. The low-frequency vibration suppression function can reduce the machine vibration. The suppression range is between 1.0 Hz and 100.0 HZ. Both auto and manual functions are available.
- Page 164 ASDA-A3 Operation Mode Note: When the values of P1.026 and P1.028 are 0, it means that the frequency cannot be found, probably because the detection level is set too high so that the low-frequency vibration is not detected. When the values of P1.026 or P1.028 are greater than 0 and the vibration is not reduced, it is probably because the detection level is set too low, and the system detects noise or other frequency as low-frequency vibration.
- Page 165 Operation Mode ASDA-A3 6.3 Speed mode This servo drive includes two types of command inputs: analog and internal register (parameters). The Analog command controls the motor speed by scaled external voltage input. The command register input controls the speed in two ways. The first is to set different speed values in three command registers and then switch the speed by using DI.SPD0 and DI.SPD1 for CN1.
- Page 166 ASDA-A3 Operation Mode The parameter setting range (internal register) is -60000 – 60000. Setting value = setting range x unit (0.1 rpm). For example, if P1.009 = +30000, then rotation speed = +30000 x 0.1 rpm = +3000 rpm You can use the Speed command in Speed mode (S or Sz) as well as in Torque mode (T or Tz) to set the speed limit.
- Page 167 Operation Mode ASDA-A3 6.3.3 Smooth Speed command S-curve filter During the process of acceleration or deceleration, the S-curve filter uses the three-stage acceleration curve and creates a smoother motion trajectory. It avoids jerk (rapid change of acceleration), resonance, and noise caused by abrupt speed variation. You can use the S-curve acceleration constant (TACC) to adjust the slope of the change in acceleration;...
- Page 168 ASDA-A3 Operation Mode Analog Speed command filter The Analog Speed Command filter helps to stabilize the motor operation when the analog input signal (speed) changes rapidly. (1) Analog Speed command (2) Motor torque The Analog Speed Command filter smoothes the analog input signal. Its time program is the same as the S-curve filter at normal speed.
- Page 169 Operation Mode ASDA-A3 6.3.4 Scaling of the analog command In Analog mode, you control the motor’s Speed command by the analog voltage difference between V_REF and VGND. Use parameter P1.040 (maximum rotation speed for the analog Speed command) to adjust the slope of the speed change and its range. 6000 rpm Slope is set by 3000 rpm...
- Page 170 ASDA-A3 Operation Mode 6.3.5 Timing diagram for Speed mode Internal register External analog voltage or 0 SPD 0 External SPD 1 Note: “off” means that the contact is open while “on” means that the contact is closed. When in Sz mode, the Speed command S1 = 0; when in S mode, the Speed command S1 is the external analog voltage input.
- Page 171 Operation Mode ASDA-A3 6.3.6 Gain adjustment of the speed loop The structure of the speed control unit appears in the following diagram: Speed control unit Feed forward gain Differentiator System inertia J P2.007 (1+P1.037)*JM Speed control gain P2.004 Integrator Gain Rate of switching change...
- Page 172 ASDA-A3 Operation Mode Theoretically, a stepping response can be used to explain proportional gain (KVP), integral gain (KVI), and feed forward gain (KVF). Here, the frequency domain and time domain are used to illustrate the basic principle. Frequency domain The higher the KVP value, the larger the bandwidth.
- Page 173 Operation Mode ASDA-A3 6.3.7 Resonance Suppression unit When resonance occurs, it is probably because the stiffness of the control system is too high or the response is too fast. Eliminating these two factors can improve the situation. In addition, you can use the low-pass filter (parameter P2.025) and Notch filter (parameters P2.023, P2.024, P2.043 –...
- Page 174 ASDA-A3 Operation Mode The ASDA- A3 provides two types of resonance suppression: one is the Notch filter and the other is the low-pass filter. See the following diagrams for the results of using these filters. System open-loop gain with resonance: Notch Filter ...
- Page 175 Operation Mode ASDA-A3 The following figure shows the system open-loop gain with resonance suppression. When the value of P2.025 is increased from 0, BW becomes smaller. Although it solves the problem of the resonance frequency, the response bandwidth and phase margin are reduced. Also, the system becomes unstable.
- Page 176 ASDA-A3 Operation Mode 6.4 Torque mode Torque Control mode (T or Tz) is suitable for torque control applications, such as printing machines and winding machines. There are two kinds of command sources: analog input and internal register (parameters). The analog command input uses scaled external voltage to control the torque of the motor while the register uses the internal parameters (P1.012 –...
- Page 177 Operation Mode ASDA-A3 6.4.2 Control structure of Torque mode The following diagram shows the basic control structure of Torque mode: Output torque Torque Torque Resonance Current command Motor command suppression control processing Current sensor You use the Torque Command unit to specify the Torque command source (mentioned in Section 6.4.1), including the scaling of the analog voltage (P1.041) and the S-curve setting.
- Page 178 ASDA-A3 Operation Mode 6.4.3 Smooth Torque command Relevant parameters: refer to Chapter 8 for more information. Parameter Function P1.007 Torque command smoothing constant (Low-pass filter) Target speed TFLT 6.4.4 Scaling of the analog command The Torque command is controlled by the analog voltage difference between T_REF and GND. You can adjust the torque slope and its range with parameter P1.041.
- Page 179 Operation Mode ASDA-A3 6.4.5 Timing diagram in Torque mode Register External analog voltage or zero TCM 0 External TCM 1 DI/O Note: “off” signifies the contact is open while “on” signifies the contact is closed. When in Tz mode, the Torque command T1 = 0; when in T mode, the Torque command T1 is the external analog voltage input.
- Page 180 ASDA-A3 Operation Mode 6.5 Dual mode Apart from single mode for position, speed, and torque control, there are eight dual / multiple modes also provided for operation (See Section 6.1). Setting Mode Short name Description code PT-S PT and S can be switched with DI signal, S_P. PT-T PT and T can be switched with DI signal, T_P.
- Page 181 Operation Mode ASDA-A3 6.5.1 Speed / Position dual mode PT-S and PR-S are available in Speed / Position dual mode. The command source for PT-S comes from the external pulse while the source for PR-S comes from the internal parameters (P6.000 –...
- Page 182 ASDA-A3 Operation Mode 6.5.2 Speed / Torque dual mode Speed / Torque dual mode includes only the S-T mode. You control the Speed command with the external analog voltage and the internal parameters (P1.009 – P1.011), which you select with DI.SPD0 –...
- Page 183 Operation Mode ASDA-A3 6.5.3 Torque / Position dual mode Torque / Position dual mode includes PT-T and PR-T. The command source for PT-T comes from the external pulse while the source for PR-T comes from internal parameters (P6.000 – P7.027). You control the Torque command with the external analog voltage or the internal parameters (P1.012 –...
- Page 184 ASDA-A3 Operation Mode 6.6 Others 6.6.1 Applying the speed limit The maximum speed in each mode (Position, Speed, Torque) is determined by the internal parameter (P1.055). You use the same method for the Speed Limit and Speed commands. You can use either the external analog voltage or the internal parameters (P1.009 – P1.011). Please refer to Section 6.3.1 for descriptions.
- Page 185 Operation Mode ASDA-A3 6.6.2 Applying the torque limit The method for using the Torque Limit command and Torque command are the same. You can use either the external analog voltage or the internal parameters (P1.012 – P1.014). Please refer to Section 6.4.1 for descriptions. You can use the torque limit in Position mode (PT, PR) or Speed mode (S) to limit the motor torque output.
- Page 186 ASDA-A3 Operation Mode You can calculate the corresponding voltage output for the current motor speed with the formula below. Motor speed Mon1 Analog monitoring output MON1 = 8V × ×100% = 8V × ×100% = 2.4V Current speed 300 RPM 5000 RPM×...
- Page 187 Operation Mode ASDA-A3 (This page is intentionally left blank.) 6-36 Revision December, 2017...
- Page 188 Motion Control This chapter introduces internal motion commands in the ASDA-A3 in PR mode. In this mode, commands are generated based on the internal commands of the servo drive. Various motion commands are available, including homing, speed, position, parameter writing, arithmetic operation, and jump. Other motion control functions such as high-speed position capture (Capture), high-speed position compare (Compare), and E-Cam are also available.
- Page 189 Motion Control ASDA-A3 7.1 PR mode description In PR mode, the servo drive automatically generates the motion commands. Apart from the basic arithmetic operation commands, the ASDA-A3 saves all parameter settings in the parameter file in the servo drive. Thus changing parameter values simultaneously changes the PR commands. The ASDA-A3 provides 100 path setting sets, which include the homing method, Position command, Speed command, Jump command, Write command, Index Positioning command, and arithmetic operation commands.
- Page 190 ASDA-A3 Motion Control In the ASDA-Soft software, when you select the PR to be edited in PR mode, the corresponding parameters appear at the top of the window. See Figure 7.1.2. If you select PR#1, P6.002 and P6.003 appear at the top in the editing section (see P6.002 and P6.003 in Table 7.1.1 for example).
- Page 191 Motion Control ASDA-A3 ASDA-Soft version V6 provides an editing interface for PR diagrams (see Figure 7.1.3). It is easier to set PR paths in ASDA-Soft, where you can set the options for command triggering, command types and other properties. You must set the arithmetic operations and statements in the software.
- Page 192 ASDA-A3 Motion Control PR path setting ACC:1 DEC:4 DLY:2 SPD:5 Acceleration / deceleration time Delay time (DLY) Target speed (SPD) (ACC / DEC) P5.020 P5.040 P5.060 20.0 P5.021 P5.041 P5.061 50.0 P5.022 P5.042 P5.062 100.0 P5.023 P5.043 P5.063 200.0 P5.024 P5.044 P5.064 300.0...
- Page 193 Motion Control ASDA-A3 7.1.2 Monitoring variables of PR mode PR mode provides four monitoring variables for the servo command and feedback: command position (PUU), PR command end register, feedback position (PUU), and position error (PUU). These are described below: Command position (PUU): monitoring variable code 001. The target position of the motion command generated per scan cycle during servo operation (updated every 1 ms), simplified as Cmd_O (Command Operation).
- Page 194 ASDA-A3 Motion Control The detailed command behavior of each stage is illustrated in Figure 7.1.2.2. Cmd_E is the endpoint specified by the command; it is set when the PR path is triggered. Fb_PUU is the feedback position, which is motor‟s actual position. Divide this motion command into slices and take one of them as example.
- Page 195 Motion Control ASDA-A3 7.1.3 Motion Control commands The ASDA-A3 provides 100 path sets that can include homing methods, speed, position, path jumping, parameter writing, index positioning, and arithmetic operations. The following sections detail each command type. Homing methods The ASDA-A3 provides 11 homing methods in PR mode. They include home sensor, limit, and crash point.
- Page 196 ASDA-A3 Motion Control X = 5: look for Z pulse in reverse direction and define it as homing origin X = 6: homing in forward direction, ORG: ONOFF as homing origin X = 7: homing in reverse direction, ORG: ONOFF as homing origin X = 8: define current position as the origin...
- Page 197 Motion Control ASDA-A3 D: BOOT: when the drive is powered on, whether to search for the origin. 0: do not execute homing 1: execute homing automatically (servo switches to Servo On status for the first time after applying power) Apart from the above definitions, the related settings for homing also include: P5.004 homing methods.
- Page 198 ASDA-A3 Motion Control Address: 0602H P6.001 Origin definition 0603H Default: Control mode: PR Unit: Setting range: -2147483648 – 2147483647 Format: Data size: 32-bit Settings: Origin definition. The homing procedure goes through two stages: high speed and low speed. Homing starts in high speed, seeking the reference point (such as the limit switch and ORG signal).
- Page 199 Motion Control ASDA-A3 Address: 050CH P5.006 Low speed homing (second speed setting) 050DH Operation Panel / software Communication Control mode: PR (set with P5.004) interface: Default: 20.0 Data size: 32-bit 1 rpm (rotary motor)* 0.1 rpm (rotary motor)* Unit: m/s (linear motor)* m/s (linear motor)* 0.1 –...
- Page 200 ASDA-A3 Motion Control The following describes the homing methods supported by the ASDA-A3. They can be categorized into six types based on their reference points. Referencing the limit: this homing method uses the positive or negative limit as the reference point. When the limit is detected, you can choose to look for the Z pulse and use it as the homing reference point.
- Page 201 Motion Control ASDA-A3 If you set the motor to not look for the Z pulse, the servo motor first operates at high speed (first speed setting) and then decelerates to a stop once rising-edge limit signal is triggered. Then the motor changes to low speed (second speed setting) to look for rising-edge signal. Once it finds the rising-edge signal, the motor decelerates to a stop, completing the homing.
- Page 202 ASDA-A3 Motion Control changes to low speed (second speed setting) and operates until the ORG signal switches to low. Next, it starts to look for the Z pulse. When the motor finds the Z pulse, it decelerates to a stop, completing the homing. If the ORG signal is triggered (high, Start point 3), the motor reverses with low speed (second speed setting) and after the ORG signal switches to low, the motor returns to look for the Z pulse.
- Page 203 Motion Control ASDA-A3 Referencing the falling-edge of the ORG signal. This method uses the falling-edge signal of the home sensor as the reference origin. You can choose whether or not to use Z pulse as the reference origin after the ORG signal is detected. Limit Motor Reverse to Z...
- Page 204 ASDA-A3 Motion Control If you set it to look for the Z pulse or to not to look for the Z pulse in the forward direction, which is similar to the first setting mentioned above (going in the reverse direction or not to look for the Z pulse), please refer to the timing diagram above.
- Page 205 Motion Control ASDA-A3 the reverse direction to look for the Z pulse at low speed (second speed setting). Once the motor finds the Z pulse, it decelerates to a stop, completing the homing. If you set it not to look for the Z pulse, the servo motor runs at high speed (first speed setting) until it touches the collision protector.
- Page 206 ASDA-A3 Motion Control finds the reference origin, it still requires some distance for motor to decelerate to a stop. Meanwhile, Cmd_O continues to issue commands. If no other PR commands are issued after homing (other than the Position command), the contents of the final command position (Cmd_O) and command end position (Cmd_E) will be different.
- Page 207 Motion Control ASDA-A3 See Figure 7.1.3.5 for the effects of the parameters for the PR mode speed control. Table 7.1.3.1 shows the bit function when speed control is in operation. Figure 7.1.3.4 PR mode Speed screen in ASDA-Soft Speed Delay time Target speed Feedback speed Command...
- Page 208 ASDA-A3 Motion Control Table 7.1.3.1 Bit function of PR speed control parameters Command type Data Target speed [0.1 rpm / PPS] Content Note: 1. Y OPT: option Command type UNIT AUTO INS: Interrupt command that interrupts the previous motion command. AUTO: automatically load the next PR command when the current one is completed.
- Page 209 Motion Control ASDA-A3 The Position command for PR mode is illustrated in Figure 7.1.3.7. Table 7.1.3.2 lists the bit functions of position control Figure 7.1.3.6 PR mode position interface of ASDA-Soft Speed Target speed Position command Delay time Time Acceleration time Deceleration time Figure 7.1.3.7 Parameters for PR mode position setting 7-22...
- Page 210 ASDA-A3 Motion Control There are four types of position commands for the PR mode. You can choose the position command according to the application requirements. The functions of each type are described in the examples below. Please note that the condition in these examples is that a position command is still being executed and another type of command is inserted.
- Page 211 Motion Control ASDA-A3 Target Motor‟s current position position (Fb_PUU) Absolute command (ABS) 60000 PUU 10000 20000 30000 40000 50000 60000 70000 80000 90000 100000 Motor‟s current Target position 60000 position (Fb_PUU) Relative command (REL) 60000 PUU 10000 20000 30000 40000 50000 60000 70000 80000 90000 100000 Endpoint of Motor‟s current Target...
- Page 212 ASDA-A3 Motion Control Jump command PR mode includes a Jump command. It can call any PR paths or form PR paths into a loop, as shown in Figure 7.1.3.9. You can specify the PR path number to jump to in the PR mode screen in ASDA-Soft (see Figure 7.1.3.10).
- Page 213 Motion Control ASDA-A3 Table 7.1.3.3 Bit function of PR Jump command parameters Command type Data Jump to target PR path (0 – 99) content Note: 1. Y: OPT: option Command type INS: Interrupt command; interrupts the previous motion command. 2. B: DLY: delay time, which is set in P5.040 – P5.055. Write command PR mode includes a Write command.
- Page 214 ASDA-A3 Motion Control Figure 7.1.3.11 Using PR Write command in ASDA-Soft Table 7.1.3.4 Bit function for PR Write command parameters Command SOUR_DEST DESTINATION type Data SOURCE content Note: 1. Y: OPT: option Command type AUTO INS: Interrupt command interrupts the previous motion command. AUTO: once the current PR is completed, automatically load the next command.
- Page 215 Motion Control ASDA-A3 3. C: SOUR_DEST: data source and data format to be written. Description Command SOUR DEST Data source Writing target type Constant Parameter Parameter Parameter Data array Parameter Monitoring variable Parameter Data content Constant Data array Parameter Data array Data array Data array Monitoring variable...
- Page 216 ASDA-A3 Motion Control setting the delay time to 0 is suggested (refer to Section 7.1.6.). DIR sets the rotation direction with options of forward (always runs forward), backward (always runs backward), and shortest distance. The movement is illustrated in Figure 7.1.3.15. S_LOW is the speed unit with options of 0.1 rpm or 0.01 rpm.
- Page 217 Motion Control ASDA-A3 Figure 7.1.3.13 Indexing Coordinates Setting Wizard in PR mode Figure 7.1.3.14 PR mode Index Position screen in ASDA-Soft 7-30 Revision December, 2017...
- Page 218 ASDA-A3 Motion Control Always forward (Forward) Current Indexing Coordinate position Always backward (Backward) & Shortest Dist. Target position Indexing coordinates Total index moving Always forward distance 70000 PUU (Forward) 60000 PUU Current 50000 PUU position 40000 PUU Target 30000 PUU Always backward position 20000 PUU...
- Page 219 Motion Control ASDA-A3 Arithmetic operations PR mode has arithmetic operations commands, including addition, subtraction, multiplication, division, OR, AND, MOD, and logic conditions. The available operands are user variables, parameters, data arrays, monitoring variables, and constants. Among them, the user variable is the register only for arithmetic operations.
- Page 220 ASDA-A3 Motion Control Operation section: supports addition, subtraction, multiplication, division, AND, OR, and MOD operation as well as logical operations for multiple data. Table 7.1.3.6 shows the supported operators and calculation data with data format in DEC and HEX. Table 7.1.3.6 Description of each field in the Operation section Calculation Data to be written Calculation data...
- Page 221 Motion Control ASDA-A3 Statement section: this section includes statements and memory capacity. Statements save the data from the expression and procedure sections. Data in the expression and procedure sections of the same statement always remain identical and can be shared by multiple PR paths.
- Page 222 ASDA-A3 Motion Control 7.1.4 Overview of the PR procedure In PR mode, there are seven types of commands. To understand how the PR procedure works, ASDA-Soft presents the execution order and calling sequence of all PR procedures. First, symbols and contents in the PR figure are shown. This includes five parts: number, execution type, command type, next PR command, and command data.
- Page 223 Motion Control ASDA-A3 Homing methods In the display of homing methods, PR#0 always signifies the homing procedure, which is marked as “Homing”. See Figure 7.1.4.2. PR#0 (B) Homing 0:PLZ Offset=0 PR#1 Speed1=100 Speed2=20 Figure 7.1.4.2 Homing methods display Activation mode (Boot): to execute homing when the drive is in Servo On state, it displays (B);...
- Page 224 ASDA-A3 Motion Control Speed command You can use the Speed command in any PR paths (PR#1 – PR#99). It is marked as “Speed”. See Figure 7.1.4.3. PR#1 (I) Speed DLY=[0] 0 ms 100 rpm Acc=[0] 6.67 ms Dec=[0] 6.67 ms Figure 7.1.4.3 Speed command display Command execution type: a Speed command can interrupt (INS) the previous PR path.
- Page 225 Motion Control ASDA-A3 function is enabled, it displays (O). If the Overlap function is not used, no information is displayed. Delay time (DLY): determined by shared PR parameters. It is defined by a command from the controller. The servo drive starts counting the delay time once it reaches the target position.
- Page 226 ASDA-A3 Motion Control Write command You can use the Write command in any PR paths (PR#1 – PR#99). It is marked as “Write”. See Figure 7.1.4.6. PR#1 (I)(R) Write DLY=[0] 0 ms P1.001=1 7.1.4.6 Write command display Command execution type: a write command can interrupt (INS) the previous PR path. If the Interrupt function is enabled, it displays (I);...
- Page 227 Motion Control ASDA-A3 Index position command You can use the Indexing Position command in any PR paths (PR#1–PR#99). The number of PR paths is determined by the index number. It is marked as “Index Position”. See Figure 7.1.4.7. Index Position List [100000] PR#1 (I)(O) PR#3 (I)(O) PR#2 (I)(O)
- Page 228 ASDA-A3 Motion Control Arithmetic operation You can use arithmetic operations and statements in any PR paths (PR#1 – PR#99). It is marked as “Statement”. When the condition is fulfilled, an arrow pointing to the next PR path appears with a solid line; if the condition is unfulfilled, an arrow pointing to the next PR appears with a dotted line;...
- Page 229 Motion Control ASDA-A3 7.1.5 Trigger methods for the PR command There are six types of PR triggering methods. They are DI-triggered, Event-triggered, P5.007-triggered, Capture-triggered (high-speed position capturing), Compare-triggered (high-speed position comparing), and E-Cam-triggered. You can choose the most suitable triggering method according to the applications and requirements. Digital input (DI) triggering You can choose the PR path to be executed by using the internal registers (Position command Bit0 –...
- Page 230 ASDA-A3 Motion Control Table 7.1.5.1 Use DI to select the PR path to be triggered Position CTRG Parameter command P6.000 Homing P6.001 P6.002 PR#1 P6.003 P6.098 PR#50 P6.099 P7.000 PR#51 P7.001 P7.098 PR#99 P7.099 In addition, there are two sets of DI for special functions: [0x27] homing enabling and [0x46] motor stop.
- Page 231 Motion Control ASDA-A3 Event triggering You can use Event-triggered commands 1 – 4 to execute the specified PR path. You can select two types of Event triggering: rising-edge trigger and falling-edge trigger. The range of PR path numbers that you can specify is from 51 – 63 (see example in Figure 7.1.5.3). Before using the Event-trigger for PR command, you must define the DI functions, which are [0x39] Event-trigger command 1, [0x3A] Event-trigger command 2, [0x3B] Event-trigger command 3, and [0x3C] Event-trigger command 4 (see Table 8.1).
- Page 232 ASDA-A3 Motion Control You can set the rising-edge trigger of the PR path with P5.098 while you can set the falling-edge trigger with P5.099. Please refer to Chapter 8 for more details. You can set the Event trigger of PR in ASDA-Soft (see Figure 7.1.5.5). Figure 7.1.5.5 Event On/Off screen in ASDA-Soft PR command trigger register (P5.007) You can write the PR number to be executed in P5.007 to make the servo drive execute the...
- Page 233 Motion Control ASDA-A3 7.1.6 PR procedure execution flow The ASDA-A3 updates the command status every 1 ms. Figure 7.1.6.1 illustrates the PR procedure execution flow and how the servo drive deals with PR commands. Once a PR procedure is triggered, it goes through three units, which are PR queue, PR executor, and motion command generator.
- Page 234 ASDA-A3 Motion Control PR queue The triggered PR path is the lead PR. The PR group it leads goes into the PR queue to wait for prioritization. In each ms, the servo drive sends the lead PR and the PR group it leads to the PR executor no matter whether a PR path is being executed.
- Page 235 Motion Control ASDA-A3 Position command followed by a Position command When the PR executor receives two consecutive Position commands, if they do not have Interrupt or Overlap functions, the PR executor issues the first Position command to the motion command generator, and the generator starts the first part of position control.
- Page 236 ASDA-A3 Motion Control Speed command followed by a Speed command When the PR executor receives two consecutive Speed commands, if they do not have Interrupt or Overlap functions, the PR executor issues the first Speed command to the motion command generator, and the generator starts the first part of speed control.
- Page 237 Motion Control ASDA-A3 Multiple commands The PR queue updates commands every 1 ms. For a motion command, the PR queue sends the next command to the generator only after the previous command completes. Jump or Write commands are executed in the PR queue immediately. As shown in Figure 7.1.6.4, in the first ms, the PR queue receives a Position command and it sends this command to the motion command generator, causing the generator to execute the command.
- Page 238 ASDA-A3 Motion Control Command interruption Interruption (INS) causes a command in execution to be replaced or integrated. The results of the interruption differ based on the command types. The next command replaces the previous command. There are two types of interruption: internal and external, as shown in Figure 7.1.6.5. Figure 7.1.6.5 Internal and external interruption Internal Interruption For a series of PR paths, if one PR path includes an AUTO function (auto-execute the next path),...
- Page 239 Motion Control ASDA-A3 1 ms Cmd cycle (1 ms Cmd cycle) PR#1 PR#2 (I) PR#3 Position Position Position executor DLY=[0] 0 ms DLY=[0] 0 ms DLY=[0] 0 ms 1000 PUU 5000 PUU 10000 PUU 100rpm 200rpm 500rpm Speed Motion command generator Time (a) Position command without delay...
- Page 240 ASDA-A3 Motion Control Speed command Speed command (I) Speed command When the PR executor receives three consecutive Speed commands with an interrupt in the second command, the executor treats the first and the second as one PR group. Since the first Speed command is not executed, the executor replaces the first command with the second.
- Page 241 Motion Control ASDA-A3 Multiple interrupt commands The PR queue updates once every 1 ms. If all PR paths include an Interrupt function, the queue can read at least 20 PR paths in 1 ms, and these paths are called a PR group. If this PR group has multiple motion commands, the PR queue only sends the last command it receives to the motion command generator for execution.
- Page 242 ASDA-A3 Motion Control External Interruption If an external interruption is encountered, it uses the PR Command trigger method to execute another PR path (refer to Section 7.1.5 for PR trigger methods). When the PR queue receives a PR path with an Interrupt function, it sends this path to the motion command generator immediately and changes the path in execution.
- Page 243 Motion Control ASDA-A3 (1 ms command cycle) (1 ms command cycle) External PR#1 interruption PR#2 Speed Speed DLY=[1] 100 ms DLY=[0] 0 ms 100 rpm 500 rpm Acc=[11] 100 ms Acc=[11] 33.3 ms Dec=[11] 100 ms Dec=[11] 33.3 ms PR executor (1 ms command cycle) (1 ms command cycle) PR#10 (I)
- Page 244 ASDA-A3 Motion Control (1 ms command cycle) (1 ms command cycle) PR#1 (O) PR#2 Position Position DLY=[0] 0 ms DLY=[0] 0 ms 5000 PUU 10000 PUU executor 200 rpm 500 rpm Acc=[0] 6.67 ms Acc=[0] 16.65 ms Dec=[0] 6.67 ms Acc=[0] 16.65 ms Speed Motion...
- Page 245 Motion Control ASDA-A3 Arithmetic operations (Statement) You can regard arithmetic operation commands as combinations of Write commands and Jump commands. Thus, the execution priority is the same as these two types of commands, which are executed by PR executor. Arithmetic operation commands can interrupt the previous command but cannot be interrupted by the following command.
- Page 246 ASDA-A3 Motion Control 7.2 Application of motion control Applications of motion control in the ASDA-A3 include high-speed position capture (Capture), high-speed position comparing (Compare), and E-Cam. High-speed position capturing uses digital input (DI7) to capture the motor‟s feedback position instantly and store this position in the data array.
- Page 247 Motion Control ASDA-A3 With two channels available, you can use the panel, communication, or ASDA-Soft to read data from, or write data to, the data array. You can set channel 1 with P5.011, P5.012, and P5.013. P5.011 specifies the address for reading and writing the data array. P5.012 and P5.013 define the windows for reading and writing.
- Page 248 ASDA-A3 Motion Control Read and write using communication: Reading and writing using communication requires Modbus communications. You can use the communication command 0x10 to write consecutively, 0x06 to write single data, and 0x03 to read consecutive data. First, use a consecutive writing command to write 100 to Data array #11, 200 to Data array #12, and 300 to Data array #13.
- Page 249 Motion Control ASDA-A3 7.2.2 High-speed position capturing function (Capture) The high-speed position capturing function (CAP) uses the external-triggered high speed digital input DI7 (with execution time of only 5 µs) to capture the position data of the motion axis and store it in the data array for further motion control.
- Page 250 ASDA-A3 Motion Control CAP axis source CAP axis source Normally open P5.039.Z = 0 CAP axis CAP switch Aux encoder P5.039.Y = 1 position P5.039.X Bit 0 Pulse command P5.039.Y = 2 P5.037 Main encoder P5.039.Y = 3 7890 Normally closed P5.039.Z = 1 Data array Start address...
- Page 251 Motion Control ASDA-A3 It is suggested that you use PR path programming to use the motion commands with the Capture function. You can use Write commands to set the high-speed position Capture function, as well as to execute motion commands once capturing is completed. See the example in Figure 7.2.2.3. PR#1 confirms that the Capture function is disabled (P5.039.X Bit 0 = 0).
- Page 252 ASDA-A3 Motion Control PR#4 (I) PR#1 (I) PR#2 (I) PR#3 (I) Write Write Write Write DLY=[0] 0 ms DLY=[0] 0 ms DLY=[0] 0 ms DLY=[0] 0 ms P5.076=0 P5.039=0x2030 P5.038=3 P5.036=100 PR#7 (I) PR#5 (I) PR#6 (I) Speed Write Write DLY=[0] 0 ms DLY=[10] 1 ms DLY=[0] 0 ms...
- Page 253 Motion Control ASDA-A3 7.2.3 High-speed position comparing function (Compare) The purpose of high-speed position comparing (CMP) is to compare the instant position of the motion axis with the value saved in the data array. When the compare condition is fulfilled (DO4 with execution time of only 5 µs), a high-speed digital signal is sent immediately for motion control.
- Page 254 ASDA-A3 Motion Control P5.059 Function Description Trigger logic 0: NO (normally open); 1:NC (normally closed) If bit 0 is set to 1, PR#45 is triggered once the last Trigger PR path data is compared. Pulse output duration (ms) CMP axis source Data array Start address AUX ENC P5.059.Y = 1...
- Page 255 Motion Control ASDA-A3 Figure 7.2.3.2 Compare Function screen in ASDA-Soft It is suggested that you use PR path programming to use motion commands with the Compare function. You can use Write commands to edit the contents of the data array and set the high-speed position Compare function, as well as executing the motion command.
- Page 256 ASDA-A3 Motion Control From Figure 7.2.3.4, you see that when the comparing axis runs to 20000 pulses, it is identical to the contents of data array #50 and the first DO4 is set to on. When the comparing axis runs to 30000 pulses, it is identical to the contents of data array #51 and the second DO4 is set to on.
- Page 257 Motion Control ASDA-A3 Data array 20000 20000 20000 20000 20000 20000 CMP axis 30000 30000 30000 30000 30000 30000 position 40000 40000 40000 40000 40000 40000 (PUU) 40000 30000 20000 5000 Time DO4: CMP PR path #1 ~ 7 Figure 7.2.3.4 Timing of the Compare function 7-70 Revision December, 2017...
- Page 258 Parameters This chapter introduces the parameter settings of the servo drive, as well as the descriptions for digital input (DI) and digital output (DO). You control the drive functions with these parameters and DI/O. 8.1 Parameter definitions·········································································· 8-2 8.2 List of parameters ·············································································· 8-3 8.3 Parameter descriptions ·····································································...
- Page 259 Parameters ASDA-A3 8.1 Parameter definitions The servo drive parameters are divided into eight groups. The first character after the start code P is the group character and the following three characters are the parameter indicator. The communication address is the combination of the group number and the three-digit number, expressed in hexadecimal.
- Page 260 ASDA-A3 Parameters 8.2 List of parameters Monitor and general output parameters Control mode Parameter Function Default value Unit PT PR P0.000★ Firmware version Factory setting Current drive alarm code P0.001■ (Seven-segment display) P0.002 Drive status P0.003 Analog output monitoring P0.008★ Total servo drive operation time hour P0.009★...
- Page 261 Parameters ASDA-A3 Monitor and general output parameters (continued) Control mode Parameter Function Default value Unit PT PR Target setting for mapping parameter P0.039 P0.029 Target setting for mapping parameter P0.040 P0.030 Target setting for mapping parameter P0.041 P0.031 Target setting for mapping parameter P0.042 P0.032 P0.046★...
- Page 262 ASDA-A3 Parameters Filter and resonance suppression parameters (continued) Control mode Parameter Function Default value Unit PT PR S Second set of vibration elimination - P1.092 4000 0.1 Hz Anti-resonance frequency Second set of vibration elimination - P1.093 4000 0.1 Hz Resonance frequency Second set of vibration elimination - P1.094...
- Page 263 Parameters ASDA-A3 Gain and switching parameters Control mode Parameter Function Default value Unit PT PR S 1 times (panel / (panel / Load inertia ratio and load weight ratio P1.037 software) software) to servo motor 0.1 times (communication) (communication) P2.000 Position control gain rad/s P2.001...
- Page 264 ASDA-A3 Parameters Position control parameters Control mode Parameter Function Default value Unit PT PR pulse Input for control mode and control P1.001● command P1.002▲ Speed and torque limits P1.003 Encoder pulse output polarity P1.012 – Internal torque limits 1 – 3 P1.014 P1.044▲...
- Page 265 Parameters ASDA-A3 Position control parameters - Internal register control command (PR mode) Control mode Parameter Function Default value Unit PT PR S P5.008 Forward software limit P5.009 Reverse software limit P6.002 – Internal Position commands 1 – 99 P7.099 20 – 3000 1 rpm (panel / (panel /...
- Page 266 ASDA-A3 Parameters Speed control parameters Control mode Parameter Function Default value Unit PT PR pulse Input for control mode and control P1.001● command P1.002▲ Speed and torque limits P1.003 Encoder pulse output polarity P1.046▲ Encoder pulse number output 2500 pulse P1.055 Maximum speed limit rated...
- Page 267 Parameters ASDA-A3 Planning of digital input / output pin and output parameters (continued) Control mode Parameter Function Default value Unit PT PR S General range compare DO output - P0.055 First upper limit P2.009 Response filter time of DI P2.010 DI1 functional planning P2.011 DI2 functional planning...
- Page 268 ASDA-A3 Parameters Communication parameters Control mode Parameter No. Function Default value Unit PT PR P3.000● Address 0x7F P3.001● Transmission speed 0x0203 P3.002 Communication protocol P3.003 Communication error handling P3.004 Communication timeout P3.005 Communication mechanism P3.006■ Digital input (DI) control switch P3.007 Communication response delay time 1 ms...
- Page 269 Parameters ASDA-A3 Diagnosis parameters (continued) Control mode Parameter Function Default value Unit PT PR P4.013 Analog torque input (1) offset adjustment Factory setting P4.014 Analog torque input (2) offset adjustment Factory setting Current encoder (V1 phase) offset P4.015 Factory setting adjustment Current encoder (V2 phase) offset P4.016...
- Page 270 ASDA-A3 Parameters 8.3 Parameter descriptions P0.xxx Monitoring parameters Address: 0000H P0.000★ Firmware version 0001H Default: Factory setting Control mode: All Unit: Setting range: - Format: Data size: 16-bit Settings: Displays the firmware version of the servo drive. Address: 0002H ■ P0.001 Current drive alarm code (Seven-segment display) 0003H...
- Page 271 Parameters ASDA-A3 Address: 0006H P0.003 Analog output monitoring 0007H Default: 0x0000 Control mode: All Unit: Setting range: 0 – 77 Format: Data size: 16-bit Settings: X: MON2 Y: MON1 UZ: reserved MON1 and MON2 MON1 and MON2 Description Description value...
- Page 272 ASDA-A3 Parameters Address: 0010H P0.008★ Total servo drive operation time 0011H Default: Control mode: All Unit: Setting range: 0 – 65535 Hour Format: Data size: 16-bit Settings: Displays the total servo drive operation time. The unit is in hours and durations of less than 1 hour are not recorded.
- Page 273 Parameters ASDA-A3 Address: 0016H P0.011★■ Status monitoring register 3 0017H Default: Control mode: All Unit: Setting range: - Format: Data size: 32-bit Settings: Set the value to be monitored in P0.019 through the drive panel or communication. Please refer to P0.002.
- Page 274 ASDA-A3 Parameters Address: 0024H P0.018 Select content displayed by status monitoring register 2 0025H Default: Control mode: All Unit: Setting range: 0 – 127 Format: Data size: 16-bit Settings: Please refer to Table 8.3 for the available values. Address: 0026H P0.019 Select content displayed by status monitoring register 3 0027H...
- Page 275 Parameters ASDA-A3 Address: 0032H ■ P0.025 Mapping parameter #1 0033H Default: Control mode: All Setting range: Determined by the corresponding Unit: parameter P0.035 Format: Data size: 32-bit Settings: You can continuously read and write parameters faster if they are not in the same group. You can use P0.035 to specify the mapping parameter number through the panel or communication.
- Page 276 ASDA-A3 Parameters Address: 003AH ■ P0.029 Mapping parameter #5 003BH Default: Control mode: All Setting range: Determined by the corresponding Unit: parameter P0.039 Format: Data size: 32-bit Settings: This setting is the same as P0.025, except its mapping target is set in P0.039. Address: 003CH ■...
- Page 277 Parameters ASDA-A3 Address: 0046H P0.035 Target setting for mapping parameter P0.025 0047H Default: Control mode: All Setting range: Determined by the communication Unit: address of the parameter group Format: Data size: 32-bit Settings: The formats of the high-bit parameter (PH) and the low-bit parameter (PL) are: Hexadecimal code for the parameter Hexadecimal code for the parameter index...
- Page 278 ASDA-A3 Parameters When PH = PL = P, it indicates that P0.025 has one 32-bit parameter. Example: Target: set P6.010 to 0x00050064 in the mapping parameter. Setting: set both the high bit and low bit of P0.035 to 060A (P6.010). Thus, P6.010 = 0x060A060A.
- Page 279 Parameters ASDA-A3 Address: 004CH P0.038 Target setting for mapping parameter P0.028 004DH Default: Control mode: All Setting range: Determined by the communication Unit: address of the parameter group Format: Data size: 32-bit Settings: High-bit Low-bit Position of Position of P0.038 mappin g p arameter mappin g p arameter Content of...
- Page 280 ASDA-A3 Parameters Address: 0052H P0.041 Target setting for mapping parameter P0.031 0053H Default: Control mode: All Setting range: Determined by the communication Unit: address of the parameter group Format: Data size: 32-bit Settings: High-bit Low-bit Position of Position of P0.041 mappin g p arameter mappin g p arameter Content of...
- Page 281 Parameters ASDA-A3 Status monitoring register content selection Address: 005AH P0.045■ (for PC software) 005BH Default: Control mode: All Unit: Setting range: 0 – 127 Format: Data size: 16-bit Settings: This setting is the same as P0.017. Address: 005CH P0.046★■ Servo drive digital output (DO) status 005DH Default: 0x0000...
- Page 282 ASDA-A3 Parameters Address: 0064H P0.050★■ Absolute coordinate system status 0065H Default: 0x0000 Control mode: All Unit: Setting range: 0x00 – 0x1F Format: Data size: 16-bit Settings: Bit 0: 1 means the absolute position is lost; 0 means normal. Bit 1: 1 means the battery is undervoltage; 0 means normal. Bit 2: 1 means the absolute multiple turns is overflowing;...
- Page 283 Parameters ASDA-A3 Address: 006AH P0.053 General range compare DO output - Filter time 006BH Default: 0x0000 Control mode: All Unit: Setting range: 0x0000 – 0x000F Format: Data size: 16-bit Settings: X: first filter time Y – U: reserved Example of the first filter: P0.055 P0.054...
- Page 284 ASDA-A3 Parameters P0.056 – Reserved P0.062 Address: 007EH P0.063 Duration of voltage exceeding 400V 007FH Default: Control mode: All Unit: Setting range: 0x00000000 – 0x7FFFFFFF Format: Data size: 32-bit Settings: Records the total time during which the voltage of the servo drive exceeded 400V. P0.064 –...
- Page 285 Parameters ASDA-A3 P1.xxx Basic parameters Address: 0100H ▲ P1.000 External pulse input type 0101H Default: 0x1042 Control mode: PT Unit: Setting range: 0x0000 – 0x11F2 Format: Data size: 16-bit Settings: Command source Logic type Filter width X: command source 0: AB phase pulse (4x) 1: clockwise and counterclockwise pulse 2: pulse + symbol...
- Page 286 ASDA-A3 Parameters Logic Pulse Pulse input type type Forward Reverse Sign = low Sign = high (43) (43) Pulse Pulse (41) Z = 0 X = 2 (41) (36) (36) Sign Sign (37) (37) Maximum Minimum allowed time width Pulse specification input frequency Differential signal...
- Page 287 Parameters ASDA-A3 For example: When U is set to 1 and Y is set to 1 (and filter width is therefore 0.2 μs), and when the high and low duty width of the command pulse are both larger than 0.8 μs (and filter width is 4 times 0.2 μs), then the pulse command is not filtered out.
- Page 288 ASDA-A3 Parameters YX: control mode setting Mode ▲ ▲ ▲ ▲ ▲ ▲ Dual mode ▲ ▲ ▲ ▲ ▲ ▲ ▲ ▲ ▲ ▲ DMCNET mode CANopen mode Multi-mode ▲ ▲ ▲ ▲ ▲ ▲ PT: Position control mode; the command source is from the external pulse and the external analog voltage (*coming soon).
- Page 289 Parameters ASDA-A3 Z: direction control Z = 0 Z = 1 Forward direction Reverse direction U: DIO value control 0: when switching modes, DIO settings (P2.010 – P2.022) remain the same. 1: when switching modes, DIO settings (P2.010 – P2.022) are reset to the default for each mode. Address: 0104H P1.002▲...
- Page 290 ASDA-A3 Parameters See the diagram below for Torque Limit setting: Vref (Analog command) P1.012 (1) Torque limit command P1.013 (2) P1.014 (3) Select by DI TCM0, TCM1 When using the Torque Limit function, you can set this parameter to 1 to limit the torque permanently without occupying a DI setting.
- Page 291 Parameters ASDA-A3 Address: 0108H P1.004 MON1 analog monitor output proportion 0109H Default: Control mode: All Unit: % (full scale) Setting range: 0 – 100 Format: Data size: 16-bit Settings: Please refer to P0.003 for the analog output setting. Example 1: If the requirement is for the motor to run at 1000 rpm, which corresponds to 8V, and its maximum speed is 5000 rpm, the setting is: ×100% =...
- Page 292 ASDA-A3 Parameters Address: 0110H P1.008 Position command smoothing constant (Low-pass filter) 0111H Default: Control mode: PT / PR Unit: 10 ms Setting range: 0 – 1000 Format: Data size: 16-bit Example: 11 = 110 ms Settings: 0: disable this function Address: 0112H P1.009 Internal Speed command 1 / internal speed limit 1...
- Page 293 Parameters ASDA-A3 Example of internal speed limit: Speed limit Speed limit in Speed limit in Valid speed range value of P1.010 forward direction reverse direction 1000 -100 to +100 rpm 100 rpm -100 rpm -1000 Note: rotary motor means a permanent-magnet synchronous rotary motor; linear motor means a permanent-magnet synchronous linear motor.
- Page 294 ASDA-A3 Parameters Address: 011AH P1.013 Internal Torque command 2 / internal torque limit 2 011BH T / Tz: internal Torque command 2 Default: Control mode: PT / PR / S / Sz: internal torque limit 2 Unit: Setting range: -400 to +400 Format: Data size: 16-bit...
- Page 295 Parameters ASDA-A3 Address: 0126H P1.019 Capture / Compare additional function settings 0127H Default: 0x0000 Control mode: ALL Unit: Setting range: 0x0000 – 0x0101 Format: Data size: 16-bit Settings: Additional function for Capture Additional function for Compare Reserved Reserved X: additional function for Capture ...
- Page 296 ASDA-A3 Parameters P1.021 – Reserved P1.022 Address: 012EH P1.023 Compare - Data translation (non-volatile) 012FH Default: Control mode: ALL Unit: Pulse unit of compare source Setting range: -10000000 to +100000000 Format: Data size: 32-bit Settings: When using the Compare function, you can add the translation value to the data array to be used as the actual comparison data: CMP_DATA = DATA_ARRAY[*] + P1.023 + P1.024 For example:...
- Page 297 Parameters ASDA-A3 Address: 0132H P1.025 Low-frequency vibration suppression frequency (1) 0133H Default: 1000 Control mode: PT / PR Unit: 0.1 Hz Setting range: 10 – 1000 Format: Data size: 16-bit Example: 150 = 15 Hz Settings: Sets the first low-frequency vibration suppression frequency. When you set P1.026 to 0, the first low-frequency vibration suppression filter is disabled.
- Page 298 ASDA-A3 Parameters Address: 013AH P1.029 Auto low-frequency vibration suppression mode 013BH Default: Control mode: PT / PR Unit: Setting range: 0 – 1 Format: Data size: 16-bit Settings: 0: disable the automatic low-frequency vibration detection function. 1: disable the function automatically after vibration suppression. The value resets to 0 automatically. Auto mode setting description: When the value is 1, vibration suppression is in automatic mode.
- Page 299 Parameters ASDA-A3 Y: options for using the dynamic brake when the servo is in Servo Off state or an alarm (including EMGS) occurs 0: use dynamic brake 1: motor runs freely 2: use dynamic brake first. Then let the motor run freely once the speed is slower than the value of P1.038 When the motor reaches PL (CCWL) or NL (CWL), please refer to P5.003 for setting the deceleration time.
- Page 300 ASDA-A3 Parameters Address: 0148H P1.036 S-curve acceleration / deceleration constant 0149H Default: Control mode: PR / S / Sz Unit: Setting range: 0 – 65500 Format: Data size: 16-bit Settings: 0: disable this function. Acceleration / deceleration constant of S-curve: Speed Time (ms)
- Page 301 Parameters ASDA-A3 Address: 014CH P1.038 Zero speed range 014DH Operation Panel / software Communication Control mode: All interface: Default: 10.0 Data size: 16-bit Unit: 1 rpm 0.1 rpm Setting range: 0.0 – 200.0 0 – 2000 Format: One decimal Example: 15 = 1.5 rpm 1.5 = 1.5 rpm Settings:...
- Page 302 ASDA-A3 Parameters Address: 0152H P1.041▲ Maximum output for analog Torque command 0153H Default: Control mode: All Unit: Setting range: -1000 to +1000 Format: Data size: 16-bit Settings: Maximum output for analog Torque command: Torque mode: Input voltage×P1.041 Torque control command = (Unit: %) Set the torque corresponding to 10V (maximum voltage) for the analog Torque command.
- Page 303 Parameters ASDA-A3 Address: 0156H P1.043 Disable delay time for magnetic brake 0157H Default: Control mode: All Unit: Setting range: -1000 to +1000 Format: Data size: 16-bit Settings: Set the delay time from Servo Off status to the deactivation of the magnetic brake signal (DO:0x08, BRKR).
- Page 304 ASDA-A3 Parameters Setting of pulse input: Pulse input Position command f2 = f1 x Command pulse input range: 1 / 4<Nx / M < 262144. For the E-Gear ratio setting, please refer to Section 6.2.5. Note: 1. Do not change the setting in the Servo On state. In direct communication mode (DMCNET / CANopen / EtherCAT), if you cycle the power to the drive, the E-Gear ratio is set to the default value of the communication protocol.
- Page 305 Parameters ASDA-A3 Diagram: 1. Speed command 3. Obtain absolute 2. Feedback speed value 4. Determine if the absolute value of speed deviation is smaller than P1.047 5. DO.SPOK is on 6. DO.SPOK is off 1. Speed command: command that you input without acceleration / deceleration, not the command from the front end speed circuit.
- Page 306 ASDA-A3 Parameters Diagram: 1. Position command triggered 2. DO.CMD_OK 3. Output command 4. DO.TPOS 5. DO.MC_OK P1.048.X = 0 output will not hold 6. DO.MC_OK P1.048.X = 1 output will hold P1.048.Y = 1 7. Keep activated after 8. AL380 activated first time on Description: 1.
- Page 307 Parameters ASDA-A3 Address: 0168H P1.052 Regenerative resistor value 0169H Determined by the model. Default: Control mode: All Please refer to the following table. Unit: Setting range: Please refer to the note below. Format: Data size: 16-bit Settings: Model Default (Ω) Model Default (Ω) 1.5 kW or below...
- Page 308 ASDA-A3 Parameters Address: 016CH P1.054 Pulse range for position reached 016DH Default: 167772 Control mode: PT / PR Unit: Pulse Setting range: 0 – 16777216 Format: Data size: 32-bit Settings: In Position (PT) mode, when the deviation pulse number is smaller than the range of P1.054, DO.TPOS is on.
- Page 309 Parameters ASDA-A3 Address: 0174H P1.058 Motor crash protection (protection time) 0175H Default: Control mode: All Unit: Setting range: 1 – 1000 Format: Data size: 16-bit Settings: Set the protection time: when the motor reaches the protection level and exceeds the protection time, AL030 occurs.
- Page 310 ASDA-A3 Parameters Address: 017CH P1.062 Percentage of friction compensation 017DH Default: Control mode: PT / PR / S / Sz Unit: Setting range: 0 – 100 Format: Data size: 16-bit Settings: The level of friction compensation. For the percentage of rated torque, set the value to 0 to disable the function;...
- Page 311 Parameters ASDA-A3 Address: 0190H P1.072 Resolution of linear scale for full-closed loop control 0191H Default: Control mode: PT 5000 Unit: pulse / rev Setting range: 200 – 1280000 Format: Data size: 32-bit Settings: A/B pulse corresponding to a full-closed loop when the motor runs a cycle (after quadruple frequency). Address: 0192H P1.073 Error protection range for full-closed loop control...
- Page 312 ASDA-A3 Parameters Z: positive / negative direction selection of linear scale feedback 0: positive direction when A phase leads B phase of linear scale 1: positive direction when B phase leads A phase of linear scale U: linear scale filter function ...
- Page 313 Parameters ASDA-A3 Address: 01A2H Second set of maximum rotation speed for analog Speed P1.081 01A3H command Default: Control mode: S / T Motor rated speed Unit: rpm / 10V Setting range: 0 – 50000 Format: Data size: 32-bit Settings: Please refer to the description of P1.040. Address: 01A4H P1.082 Filter switching time between P1.040 and P1.081...
- Page 314 ASDA-A3 Parameters Protector Torque limit time setting P1.088 Torque limit setting P1.087 Torque curve Starting point Z Pulse Address: 01B0H P1.088 Torque limit time 01B1H Default: Control mode: PR 2000 Unit: Setting range: 2 – 2000 Format: Data size: 16-bit Settings: Set the Torque limit time for Torque limit homing mode.
- Page 315 Parameters ASDA-A3 Address: 01B4H P1.090 First set of vibration elimination - Resonance frequency 01B5H Default: Control mode: PT / PR 4000 Unit: 0.1 Hz Setting range: 10 – 4000 Format: Data size: 16-bit Settings: Anti-resonance frequency for the first set of low frequency vibration elimination. Address: 01B6H P1.091 First set of vibration elimination - Resonance difference...
- Page 316 ASDA-A3 Parameters Address: 01C2H P1.097▲ Encoder output denominator 01C3H Default: Control mode: All Unit: Setting range: 0 – 160000 Format: Data size: 32-bit Settings: When P1.097 = 0, OA/OB pulse output refers to the value of P1.046. Example 1: When P1.097 = 0 and P1.046 = 2500 OA/OB output is P1.046 multiplied by 4 times the frequency, which is 10,000 pulses.
- Page 317 Parameters ASDA-A3 Address: 01CAH P1.101■ Analog monitor output voltage 1 01CBH Default: Control mode: ALL Unit: Setting range: -10000 to +10000 Format: Data size: 16-bit Settings: When you select 6 for the monitor source for P0.003 [YX], then the analog monitor output voltage refers to the voltage value of P1.101.
- Page 318 ASDA-A3 Parameters P2.xxx Extension parameters Address: 0200H P2.000 Position control gain 0201H Default: Control mode: PT / PR Unit: Setting range: 0 – 2047 rad/s Format: Data size: 16-bit Settings: Increasing the value of the position control gain can enhance the position response and reduce the position errors.
- Page 319 Parameters ASDA-A3 Address: 0208H P2.004 Speed control gain 0209H Default: Control mode: All Unit: Setting range: 0 – 8191 rad/s Format: Data size: 16-bit Settings: Increasing the speed control gain can enhance the speed response. If you set the value too high, it may cause vibration and noise.
- Page 320 ASDA-A3 Parameters Address: 0210H P2.008■ Special parameter write-in function 0211H Default: Control mode: All Unit: Setting range: 0 – 65535 Format: Data size: 16-bit Settings: Special parameter write-in function: Code Function Reset parameter (power back on after reset). P4.010 is writable. P4.011 –...
- Page 321 Parameters ASDA-A3 When these parameters are modified, please re-start the servo drive to ensure it functions normally. Use P3.006 to change the source for the digital signal, either through an external terminal block or communication parameter P4.007. Address: 0216H P2.011 DI2 functional planning 0217H Default:...
- Page 322 ASDA-A3 Parameters Address: 021EH P2.015 DI6 functional planning 021FH Default: 0x0022 Control mode: All Setting range: 0 – 0x015F (last two codes are Unit: DI codes) Format: Data size: 16-bit Settings: Please refer to the description of P2.010. Address: 0220H P2.016 DI7 functional planning 0221H...
- Page 323 Parameters ASDA-A3 Address: 0226H P2.019 DO2 functional planning 0227H Default: 0x0103 Control mode: All Setting range: 0 – 0x013F (last two codes are Unit: DO code) Format: Data size: 16-bit Settings: Please refer to the description of P2.018. Address: 0228H P2.020 DO3 functional planning 0229H...
- Page 324 ASDA-A3 Parameters Address: 0230H P2.024 Notch filter attenuation level (1) 0231H Default: Control mode: All Unit: Setting range: 0 – 40 Format: Data size: 16-bit Settings: This is the first Notch filter attenuation level. For example, an attenuation level of 5 indicates -5 dB. Set this parameter to 0 to disable the Notch filter function.
- Page 325 Parameters ASDA-A3 Settings: Gain switching condition Gain switching method Reserved X: gain switching condition 0: disable gain switching function 5: signal of gain switching (GAINUP) is off 6: in position control mode, position error is 1: signal of gain switching (GAINUP) is on smaller than P2.029 2: in position control mode, position error is 7: frequency of Position command is smaller...
- Page 326 ASDA-A3 Parameters Settings: You determine the gain switching (pulse error, kpps, rpm) by the selection of gain switching condition (P2.027). Address: 023CH P2.030■ Auxiliary function 023DH Default: Control mode: All Unit: Setting range: -8 to +8 Format: Data size: 16-bit Settings: Value Function...
- Page 327 Parameters ASDA-A3 Address: 0240H P2.032 Gain adjustment mode 0241H Default: 0x0001 Control mode: All Unit: Setting range: 0 – 4 Format: Data size: 16-bit Settings: The servo drive provides three gain adjustment modes for fine tuning. You only need to increase or decrease the frequency response level (P2.031) to tune the machine.
- Page 328 ASDA-A3 Parameters Address: 0244H P2.034 Speed command error warning 0245H Default: 5000 Control mode: S / Sz 1 – 30000 (rotary motor) Unit: Setting range: 1 – 15999 (linear motor) Format: Data size: 16-bit Settings: In Speed mode, this parameter sets the acceptable difference between the command speed and the feedback speed.
- Page 329 Parameters ASDA-A3 Settings: Please refer to the description of P2.010. Virtual digital input is useful when triggering communication or when DI points are insufficient. You can set the DI to be used as soon as power is on when the contact would be normally closed for virtual digital input, such as Servo On.
- Page 330 ASDA-A3 Parameters Address: 0258H P2.044 Notch filter attenuation level (2) 0259H Default: Control mode: All Unit: Setting range: 0 – 40 Format: Data size: 16-bit Settings: The second Notch filter attenuation level. A value of 5 indicates -5 dB. Set this parameter to 0 to disable the Notch filter.
- Page 331 Parameters ASDA-A3 X: auto resonance suppression function 0: disable auto resonance suppression. After the function is disabled, the existing resonance suppression parameter values do not change. 1: auto resonance suppression. When the servo determines it is stable, meaning that resonances have been suppressed, and there is no other resonance, and there is no other interference that is affecting the operation, or any other factors, then the servo automatically saves the resonance suppression data, and resets the value to 0.
- Page 332 ASDA-A3 Parameters Address: 0260H P2.048 Auto resonance detection level 0261H Default: Control mode: All Unit: Setting range: 1 – 1000 Format: Data size: 16-bit Settings: The smaller this parameter value, the more sensitive it is to resonance. If P2.048 is larger, the resonance sensitivity is lower;...
- Page 333 Parameters ASDA-A3 Address: 0268H P2.052▲ Indexing coordinates scale 0269H Default: 1000000000 Control mode: All Unit: Setting range: 0 – 1000000000 Format: Data size: 32-bit Settings: Set the scale of the indexing coordinates, indexing command position, and indexing feedback position. If the value is too small, it may cause errors in the indexing coordinates. The ranges of values for P2.052 are: 16777216 P1.045...
- Page 334 ASDA-A3 Parameters Address: 0270H P2.056▲ Synchronous position integral compensation 0271H Default: Control mode: All Unit: rad/s Setting range: 0 – 1023 Format: Data size: 16-bit Settings: Increase synchronous speed integral compensation to enhance the speed following and reduce the speed error between two motors. If the value is too high, it may cause vibration and noise. It is recommended that you set this value to the same value as P2.006.
- Page 335 Parameters ASDA-A3 Address: 0278H P2.060 E-Gear ratio (Numerator) (N2) 0279H Default: 16777216 Control mode: PT Unit: pulse Setting range: 1 to (2 Format: Data size: 32-bit Settings: The numerator of the E-Gear ratio can be selected with DI.GNUM0 and DI.GNUM1 (please refer to Table 8.1).
- Page 336 ASDA-A3 Parameters Address: 0282H P2.065 Special bit register 0283H Default: Control mode: PT / PR / S / Sz Unit: Setting range: 0 – 0xFFFF Format: Data size: Settings: Bit 0 – Bit 2, Bit 4, Bit 5, Bit 7, and Bit 14: reserved, please set to 0. Bit 3: set the method for regenerative energy consumption.
- Page 337 Parameters ASDA-A3 1: command source is the analog voltage. ZCLAMP function uses the analog Speed command without acceleration / deceleration to determine if this function is enabled. When ZCLAMP conditions are met, the motor speed decelerates to 0 rpm by S-curve deceleration. If ZCLAMP conditions are not met, the motor follows the analog Speed command through the S-curve.
- Page 338 ASDA-A3 Parameters Bit 11: enable pulse inhibit function. 0: disable NL / PL pulse inhibit function. In PT mode, the external Position pulse command is input to the servo drive under any condition. 1: enable NL / PL pulse inhibit function. In PT mode, if NL exists, the external NL pulse is not input to the servo drive and the PL Pulse command is accepted.
- Page 339 Parameters ASDA-A3 Bit 4: disable AL044 detection (servo function overload warning). 0: enable AL044 detection. 1: disable AL044 detection. Bit 5: enable AL041 disconnection detection of linear scale (only when the full-closed loop control function is activated). 0: enable AL041 detection. 1: disable AL041 detection.
- Page 340 ASDA-A3 Parameters Address: 028AH P2.069● Absolute encoder 028BH Default: 0x0000 Control mode: All Unit: Setting range: 0 – 1 Format: Data size: 16-bit Settings: Index coordinates function setting Set up operation mode when overflow occurs Y: Pulse command setting when Reserved absolute position is lost X: set up operation mode...
- Page 341 Parameters ASDA-A3 Bit 0: DI/DO data unit setting 0: PUU 1: Pulse Bit 1: communication data unit setting 0: PUU 1: Pulse Bit 2: overflow warning setting 0: overflow warning, including AL289 (PUU) and AL062 (pulse) 1: no overflow warning Bit 3 –...
- Page 342 ASDA-A3 Parameters 01 – 5F Function Filter disabled | Error | <= (1 to YX)%: filter enabled Note: using the filter allows the alignment to be more stable and reduces any position errors caused by DI noise and so the operation can be smoother. UZ: maximum allowable correction rate (0 –...
- Page 343 Parameters ASDA-A3 Address: 0296H P2.075■ E-Cam alignment - Alignment target position 0297H Default: Control mode: PR Unit: Pulse unit of master axis Setting range: 0 to (P5.084 / P5.083) -1 Format: Data size: 32-bit Settings: Set the alignment target position for E-Cam alignment (master axis pulse). Note: 1.
- Page 344 ASDA-A3 Parameters Y: filter intensity (0 – F) Indicates average of 2^(value). Set to 0 to disable the filter. When the value of Y increases, the correction is slower which can avoid large amounts of correction during E-Cam adjustment. This can also avoid disturbances caused by sensor noise for a smoother operation.
- Page 345 Parameters ASDA-A3 Actual Virtual Function master Description pulse axis pulse Function Receive E-Cam is driven by the actual master axis pulse. disabled actual Stops E-Cam stops operating, but the masked master master operation pulse continues to be stored in the internal variable. axis pulse Continuous forward...
- Page 346 ASDA-A3 Parameters UZ: pulse data when master axis performs continuous forward / reverse running or JOG function. Example: Initiate masking UZYX = 0x0001 Continuous forward running at 20 kpps UZYX = 0x1402 Continuous reverse running at 32 kpps UZYX = 0x2003 Forward JOG for 255 pulses ...
- Page 347 Parameters ASDA-A3 P2.080 – Reserved P2.088 Address: 02B2H P2.089 Command responsiveness gain 02B3H Default: Control mode: PT / PR Unit: rad/s Setting range: 1 – 2000 Format: Data size: 16-bit Settings: Increasing this gain speeds up the responsiveness of the Position command and shortens the tuning time, but when the gain is too large, it causes position overshoot which leads to machine jitter.
- Page 348 ASDA-A3 Parameters Address: 02BCH P2.094▲ Special bit register 3 02BDH Default: 0x1000 Control mode: PT / PR / S / Sz Unit: Setting range: 0x0000 – 0xF3A6 Format: Data size: 16-bit Settings: Function Description Bit 15 – 13 Reserved 0: disable two dimensional control function Two dimensional Bit 12 control function...
- Page 349 Parameters ASDA-A3 Address: 02C0H P2.096 Notch filter bandwidth (2) 02C1H Default: Control mode: All Unit: Setting range: 1 – 10 Format: Data size: 16-bit Settings: The second value of resonance width. This function is disabled if P2.044 is 0. P2.043, P2.044, and P2.096 are the second set of Notch filter parameters.
- Page 350 ASDA-A3 Parameters Address: 02C8H P2.100 Notch filter bandwidth (4) 02C9H Default: Control mode: All Unit: Setting range: 1 – 10 Format: Data size: 16-bit Settings: The fourth value of resonance width. This function is disabled if you set P2.099 to 0. P2.098, P2.099, and P2.100 are the fourth set of Notch filter parameters.
- Page 351 Parameters ASDA-A3 Address: 02D0H P2.104 P/PI torque switching command condition 02D1H Default: Control mode: PT / PR / S / Sz Unit: Setting range: 1 – 800 Format: Data size: 16-bit Settings: When the Torque command exceeds P2.104, the speed controller gain is switched from PI to P in order to reduce response overshoot.
- Page 352 ASDA-A3 Parameters Address: 02D4H P2.106 Automatic gain adjustment level 2 02D5H Default: Control mode: PT / PR 2000 Unit: Pulse number Setting range: 1 – 50331648 Format: Data size: 16-bit Settings: Use this parameter to adjust the maximum allowable overshoot when auto-tuning. The overshoot range is set for either the user or the machine.
- Page 353 Parameters ASDA-A3 P3.xxx Communication parameters Address: 0300H P3.000 Address 0301H Default: 0x7F Control mode: All Unit: Setting range: 0x01 – 0x7F Format: Data size: 16-bit Settings: Communication address setting Reserved When using RS-485 to communicate, one servo drive can set only one address. Setting more than one addresses causes abnormal communications.
- Page 354 ASDA-A3 Parameters Definition of U value 0: use Delta’s controller, such as PLC or HMI 3: use Delta’s motion card Note: If this parameter is set through CANopen, only Z can be set and the others remain unchanged. The communication speed of USB is set at 1.0 Mbit/s and it cannot be changed.
- Page 355 Parameters ASDA-A3 Address: 030CH P3.006 Digital input (DI) control switch 030DH Default: Control mode: All Unit: Setting range: 0x0000 – 0x1FFF Format: Data size: 16-bit Settings: Source of the DI that controls the switch. Each bit of this parameter determines one input source of DI signal: Bit0 –...
- Page 356 ASDA-A3 Parameters The slave synchronizes with the master via SYNC. The definition is as follows: M: reserved. D: set the size of deadband (Unit: usec). If the deviation between the SYNC reaching time and the target value does not exceed the deadband, a correction is not needed. T: target value of SYNC arrival time.
- Page 357 Parameters ASDA-A3 Communication setting is divided into X, Y, Z, and U (hexadecimal): Digit Parameter is saved in Function Undefined Undefined Undefined EEPROM or not Range 0 – 1 0 – F 0 – F 0 – 1 Definition is as follows: X: 1: when writing parameters via CANopen / DMCNET PDO, parameters are saved in EEPROM;...
- Page 358 ASDA-A3 Parameters CANopen mode: Variables during initialization P3.012.Z = 0 P3.012.Z = 1 Note P1.032 0x0010 EEPROM P2.035 50331648 EEPROM P1.047 EEPROM P1.049 EEPROM P1.038 EEPROM Home offset EEPROM Used in HM mode P1.044 EEPROM P1.045 EEPROM DMCNET mode: Variables during initialization P3.012.Z = 0 P3.012.Z = 1 Note...
- Page 359 Parameters ASDA-A3 P4.xxx Diagnosis parameters Address: 0400H P4.000★ Fault record (N) 0401H Default: Control mode: All Unit: Setting range: - Format: Data size: 32-bit Settings: The last abnormal status record. Low word (LXXXX): the alarm number. High word (hYYYY): the error code corresponding to CANopen / DMCNET. Address: 0402H P4.001★...
- Page 360 ASDA-A3 Parameters Address: 0408H P4.004★ Fault record (N-4) 0409H Default: Control mode: All Unit: Setting range: - Format: Data size: 32-bit Settings: The fifth to last abnormal status record. Low word (LXXXX): the alarm number. High word (hYYYY): the error code corresponding to CANopen / DMCNET. Address: 040AH P4.005 Servo motor JOG control...
- Page 361 Parameters ASDA-A3 Settings: bit 00: corresponds to DO code = 0x30 bit 08: corresponds to DO code = 0x38 bit 01: corresponds to DO code = 0x31 bit 09: corresponds to DO code = 0x39 bit 02: corresponds to DO code = 0x32 bit 10: corresponds to DO code = 0x3A bit 03: corresponds to DO code = 0x33 bit 11: corresponds to DO code = 0x3B...
- Page 362 ASDA-A3 Parameters Address: 0410H P4.008★ Input status of servo drive panel (read-only) 0411H Default: Control mode: All Unit: Setting range: Read-only Format: Data size: 16-bit Settings: Use this communication parameter to read and check that the five keys (MODE, UP, DOWN, SHIFT, and SET) can function normally.
- Page 363 Parameters ASDA-A3 Address: 0418H P4.012 Analog speed input (2) offset adjustment 0419H Default: Factory setting Control mode: All Unit: Setting range: 0 – 32767 Format: Data size: 16-bit Settings: Manually adjust the offset. The function must be enabled by setting P2.008. Do not change the auxiliary adjustment as this parameter cannot be reset.
- Page 364 ASDA-A3 Parameters Address: 0420H P4.016 Current encoder (V2 phase) offset adjustment 0421H Default: Factory setting Control mode: All Unit: Setting range: 0 – 32767 Format: Data size: 16-bit Settings: Manually adjust the offset. The function must be enabled by setting P2.008. Do not change the auxiliary adjustment as this parameter cannot be reset.
- Page 365 Parameters ASDA-A3 Address: 0428H P4.020 Offset adjustment for analog monitor output (Ch1) 0429H Default: Control mode: All Unit: Setting range: -800 to +800 Format: Data size: 16-bit Settings: Offset adjustment value (cannot reset). Address: 042AH P4.021 Offset adjustment for analog monitor output (Ch2) 042BH Default: Control mode: All...
- Page 366 ASDA-A3 Parameters P5.xxx Motion control parameters Address: 0500H P5.000★■ Firmware subversion 0501H Default: Factory setting Control mode: All Unit: Setting range: - Format: Data size: 32-bit Settings: The low bit is the subversion of the firmware. P5.001 – Reserved P5.002 Address: 0506H P5.003 Deceleration time for auto-protection...
- Page 367 Parameters ASDA-A3 Definition of each setting value: Reserved Limit setting Z pulse setting Homing method 0 – 1 0 – 2 0 – 8 Y = 0: return to Z pulse X = 0: homing in forward direction and Y = 1: go forward to define PL as homing Z pulse origin...
- Page 368 ASDA-A3 Parameters Address: 050AH P5.005 High speed homing (first speed setting) 050BH Operation Panel / software Communication Control mode: PR (set with P5.004) interface: Default: 100.0 1000 Data size: 32-bit 1 rpm (rotary motor)* 0.1 rpm (rotary motor)* Unit: m/s (linear motor)* m/s (linear motor)* 0.1 –...
- Page 369 Parameters ASDA-A3 Settings: Set P5.007 to 0 to start homing Set P5.007 to 1 – 99 to execute the specified PR procedure, which is the same as using DI.CTRG+POSn. You cannot set P5.007 to 100 – 999 as the value exceeds the valid range. Example: to trigger PR#2 Trigger by DI: Method 1...
- Page 370 ASDA-A3 Parameters Address: 0514H P5.010★■ Data array - Data size 0515H Default: Control mode: All Unit: Setting range: Read-only Format: Data size: 16-bit Settings: Data size (N x 32 bits) means size N of data array. Address: 0516H P5.011■ Data array - Address for reading and writing 0517H Default: Control mode: All...
- Page 371 Parameters ASDA-A3 Address: 051EH P5.015■ PATH#1 – PATH#2 Volatile setting 051FH Default: Control mode: All Unit: Setting range: 0x0 – 0x0011 Format: Data size: 16-bit Settings: This parameter allows you to write data to the target continuously through communication. PATH#1 Volatile setting Reserved PATH#2 Volatile setting Reserved...
- Page 372 ASDA-A3 Parameters Address: 0524H P5.018 Axis position – Pulse command 0525H Default: Control mode: All Unit: Pulse number Setting range: -2147483648 to +2147483647 Format: Data size: 32-bit Settings: Pulse count from the pulse command. Address: 0526H P5.019 E-Cam curve scaling 0527H Default: 1.000000...
- Page 373 Parameters ASDA-A3 Address: 052CH P5.022 Acceleration / deceleration time (Number #2) 052DH Default: Control mode: PR Unit: Setting range: 1 – 65500 Format: Data size: 16-bit Settings: Please refer to P5.020 for the acceleration / deceleration time in PR mode. Address: 052EH P5.023 Acceleration / deceleration time (Number #3)
- Page 374 ASDA-A3 Parameters Address: 0536H P5.027 Acceleration / deceleration time (Number #7) 0537H Default: 1200 Control mode: PR Unit: Setting range: 1 – 65500 Format: Data size: 16-bit Settings: Please refer to P5.020 for the acceleration / deceleration time in PR mode. Address: 0538H P5.028 Acceleration / deceleration time (Number #8)
- Page 375 Parameters ASDA-A3 Address: 0540H P5.032 Acceleration / deceleration time (Number #12) 0541H Default: 5000 Control mode: PR Unit: ms Setting range: 1 – 65500 Format: DEC Data size: 16-bit Settings: Please refer to P5.020 for the acceleration / deceleration time in PR mode. Address: 0542H P5.033 Acceleration / deceleration time (Number #13)
- Page 376 ASDA-A3 Parameters Address: 0548H P5.036 Capture - Start address of data array 0549H Default: Control mode: All Unit: Setting range: 0 to (value set by P5.010 minus 1) Format: Data size: 16-bit Settings: The first data Capture obtained is saved at this address for the data array. Please note that this parameter is only writable when Capture stops (please refer to P5.039).
- Page 377 Parameters ASDA-A3 Address: 054EH P5.039■ Capture - Activate CAP control 054FH Default: 0x2010 Control mode: All Unit: Setting range: 0x0000 – 0xF13F Format: Data size: 16-bit Settings: Capture setting Triggering logic Axis source of Capture Trigger minimum interval X: Capture setting ...
- Page 378 ASDA-A3 Parameters Address: 0552H P5.041 Delay time after position reached (Number #1) 0553H Default: Control mode: PR Unit: Setting range: 0 – 32767 Format: Data size: 16-bit Settings: The second delay time of PR mode. Address: 0554H P5.042 Delay time after position reached (Number #2) 0555H Default: Control mode: PR...
- Page 379 Parameters ASDA-A3 Address: 055CH P5.046 Delay time after position reached (Number #6) 055DH Default: 1000 Control mode: PR Unit: Setting range: 0 – 32767 Format: Data size: 16-bit Settings: The seventh delay time of PR mode. Address: 055EH P5.047 Delay time after position reached (Number #7) 055FH Default: 1500...
- Page 380 ASDA-A3 Parameters Address: 0566H P5.051 Delay time after position reached (Number #11) 0567H Default: 3500 Control mode: PR Unit: Setting range: 0 – 32767 Format: Data size: 16-bit Settings: The twelfth delay time of PR mode. Address: 0568H P5.052 Delay time after position reached (Number #12) 0569H Default: 4000...
- Page 381 Parameters ASDA-A3 Address: 0570H P5.056 Compare - Start address of data array 0571H Default: Control mode: All Unit: Setting range: 0 to (value of P5.010 minus 1) Format: Data size: 16-bit Settings: The address of data array where the first Compare data is saved. Please note that this parameter is only writable when Compare stops (please refer to P5.059).
- Page 382 ASDA-A3 Parameters Address: 0576H P5.059■ Compare - Activate CMP control 0577H Default: 0x00640010 Control mode: All Unit: Setting range: 0x00010000 – 0x0FFF313F Format: Data size: 32-bit Settings: Duration of pulse output (unit: 1 ms) Compare setting Compare axis source Triggering logic Trigger PR High bit Low bit...
- Page 383 Parameters ASDA-A3 Address: 0578H P5.060 Target speed setting #0 0579H Operation Panel / software Communication Control mode: PR interface: Default: 20.0 Data size: 16-bit 1 rpm (rotary motor)* 0.1 rpm (rotary motor)* Unit: m/s (linear motor)* m/s (linear motor)* 0.0 – 6000.0 (rotary motor)* 0 –...
- Page 384 ASDA-A3 Parameters Address: 057EH P5.063 Target speed setting #3 057FH Operation Panel / software Communication Control mode: PR interface: Default: 200.0 2000 Data size: 16-bit 1 rpm (rotary motor)* 0.1 rpm (rotary motor)* Unit: m/s (linear motor)* m/s (linear motor)* 0.0 –...
- Page 385 Parameters ASDA-A3 Address: 0584H P5.066 Target speed setting #6 0585H Operation Panel / software Communication Control mode: PR interface: Default: 600.0 6000 Data size: 16-bit 1 rpm (rotary motor)* 0.1 rpm (rotary motor)* Unit: m/s (linear motor)* m/s (linear motor)* 0.0 –...
- Page 386 ASDA-A3 Parameters Address: 058AH P5.069 Target speed setting #9 058BH Operation Panel / software Communication Control mode: PR interface: Default: 1300.0 13000 Data size: 16-bit 1 rpm (rotary motor)* 0.1 rpm (rotary motor)* Unit: m/s (linear motor)* m/s (linear motor)* 0.0 –...
- Page 387 Parameters ASDA-A3 Address: 0590H P5.072 Target speed setting #12 0591H Operation Panel / software Communication Control mode: PR interface: Default: 2000.0 20000 Data size: 16-bit 1 rpm (rotary motor)* 0.1 rpm (rotary motor)* Unit: m/s (linear motor)* m/s (linear motor)* 0.0 –...
- Page 388 ASDA-A3 Parameters Address: 0596H P5.075 Target speed setting #15 0597H Operation Panel / software Communication Control mode: PR interface: Default: 3000.0 30000 Data size: 16-bit 1 rpm (rotary motor)* 0.1 rpm (rotary motor)* Unit: m/s (linear motor)* m/s (linear motor)* 0.0 –...
- Page 389 Parameters ASDA-A3 Settings: Interval between two capturing actions. The new value can only be written to the parameter when Capture is not in operation (P5.039.X0 set to 0). Note: A3-L does not support the E-Cam function. Address: 059EH P5.079■ E-Cam: following error for synchronous Capture axis 059FH Default: Control mode: All...
- Page 390 ASDA-A3 Parameters Address: 05A2H P5.081 E-Cam: start address for data array 05A3H Default: Control mode: PR Unit: Setting range: 0 to (800 minus value set by P5.082) Format: Data size: 16-bit Settings: The first data in the E-Cam table is saved at the address of the data array. This parameter can be set at any time, but will be effective only when status changes from pre-engaged to engaged.
- Page 391 Parameters ASDA-A3 Settings: When receiving the pulse number defined by P5.084 from the master axis, E-Cam rotates the number of cycles defined by P5.083 (One cycle of E-Cam = Rotate from 0° – 360°). This parameter can be modified at any time. Its range must be the value of P5.082 x P5.083 smaller than or equal to P5.084, and P5.082 x P5.084 must be smaller than or equal to 2147483647.
- Page 392 ASDA-A3 Parameters Address: 05B0H P5.088■ E-Cam: activate E-Cam control 05B1H Default: 0x00000000 Control mode: PR Unit: Setting range: 0x0 – 0x203FF257 Format: Data size: 32-bit Settings: Format of this parameter: (High word h) S0BA : (Low word L) UZYX Activation setting of PR path to execute E-Cam function Reserved...
- Page 393 Parameters ASDA-A3 Z: engaging time 0: immediately 1: trigger DI.CAM 2: any one position data is captured U: disengaging condition (2, 4, and 6 cannot be selected at the same time) Disengagement condition Action after disengaged Never disengage DI.CAM OFF In stop status Master axis reaches the setting value of...
- Page 394 ASDA-A3 Parameters Address: 05B4H P5.090 E-Cam: DO.CAM_Area rising-edge phase 05B5H Default: Control mode: PR Unit: Degree Setting range: 0 – 360 Format: Data size: 16-bit Settings: See the correlation between DO.CAM_Area and parameters in the figure below. When E-Cam is disengaged, DO.CAM_Area is always off. Slave axis position (PUU) E-Cam angle (°) 45 90 135 180 225 270 315 360...
- Page 395 Parameters ASDA-A3 Address: 05BAH P5.093 Motion control macro command: command parameter #4 05BBH Control mode: All Default: Unit: Setting range: 0x00000000 – 0xFFFFFFFF Format: Data size: 32-bit Settings: Before executing the macro command, you must set the relevant parameter #4 in advance. The function of the parameter is determined by the macro command.
- Page 396 ASDA-A3 Parameters Settings: Before executing the macro command, you must set the relevant parameter # 1 in advance. The function of the parameter is determined by the macro command. Not every macro command requires this parameter. Note: A3-L does not support the E-Cam function and macros with E-Cam settings. Motion control macro command: issue command / Address: 05C2H P5.097■...
- Page 397 Parameters ASDA-A3 Command code Motion parameter protection: unlock protection 0004h Macro parameters P5.096 = enter password (1 – 16777215) This function can only be executed when the parameter protection function has been activated. When the protection function has been unlocked, the failure code is returned if this function is executed repeatedly.
- Page 398 ASDA-A3 Parameters Command code Build up the E-Cam table: rotary shear (multi-dimensional control) 0007h P5.081 = address of table (data array) General parameters P5.082 = N (30 – 72) (area number of E-Cam) P1.044 and P1.045 = E-Gear ratio (must be set up in advance). P5.093.H16 (high 16-bit) = S P5.093.L16 (low 16-bit) = W Note:...
- Page 399 Parameters ASDA-A3 Command code E-Cam curve scaling (P5.019) is effective immediately. 0008h Macro parameters This macro can be triggered when E-Cam is engaged, and P5.019 becomes effective immediately. Normally, E-Cam scaling is only loaded into the system by P5.019 at the point when E-Cam engages (see below: transition 3).
- Page 400 ASDA-A3 Parameters General parameters P5.093.Low_Word = DCBA : UZYX (8 digits, HEX) YX (PR number) = 0 – 0X3F (invalid when value is 0) Value of UZ has to be set to 0 BA (function of P5.095): 0 (use avoid point); 1 (use allowable forward rate) Macro parameters DC (inhibit reverse rotation): 0 (invalid), 1 (inhibit reverse rotation) P5.095: avoid point (cannot pass this point) = 0 –...
- Page 401 Parameters ASDA-A3 (Continued) When executing this macro command, E-Cam is not in engaged status. Failure code F0D1h E-Cam should be engaged. Failure code F0D2h P5.093.YX (PR number) exceeds the range: 1 – 0x3F Failure code F0D3h P5.095 (allowable forward rate) exceeds the range: 0 – 100 (%) Position correction value does not exist.
- Page 402 ASDA-A3 Parameters (Continued) *Allowable forward rate: the allowable maximum proportion of the forward path. Please see below for details. E-Cam current position Max. forward rotation limit. Counterclockwise forward direction in the figure Target position is within the range; onward trip is in forward direction Target position...
- Page 403 Parameters ASDA-A3 (Continued) When the master axis resumes operation, use another PR for the moving distance of the return trip (-Y_Drift) to return to the original position (moving distance of onward trip + moving distance of return trip = 0). E-Cam position remains the same. When E-Cam rotates one cycle, pulse number of master axis: (P5.084 / P5.083) Moving distance...
- Page 404 ASDA-A3 Parameters Command code E-Cam pauses for one cycle and resumes operation at next cycle. 0010h General parameters Macro parameters P5.093 must be set to 0. After E-Cam is engaged, this macro command can pause the slave axis for one distance cycle regardless of the current E-Cam degree.
- Page 405 Parameters ASDA-A3 Y: PR triggered when EV2 is on 0: no action 1 – D: execute PR# 51 – 63 Z: PR triggered when EV3 is on 0: no action 1 – D: execute PR# 51 – 63 U: PR triggered when EV4 is on ...
- Page 406 ASDA-A3 Parameters Address: 05C8H P5.100■ Data array - Window #3 for reading / writing 05C9H Default: Control mode: All Unit: Setting range: -2147483648 to +2147483647 Format: Data size: 32-bit Settings: Window #3: when reading or writing the parameter by any method, the value set by P5.011 does not increase by 1.
- Page 407 Parameters ASDA-A3 P6.xxx PR parameters Address: 0600H P6.000 Homing definition 0601H Default: 0x00000000 Control mode: PR Unit: Setting range: 0x00000000 – 0xFFFFFF3F Format: Data size: 32-bit Settings: Homing definition: DEC2: deceleration time selection of PATH: path type second homing DLY: select 0 – F for delay time ACC: select 0 –...
- Page 408 ASDA-A3 Parameters Note: After the origin is found (sensor or Z), it has to decelerate to a stop. The stop position exceeds the origin by a short distance: If returning to the origin is not needed, set PATH to 0; If returning to the origin is needed, set PATH to a non-zero value and set PABS = ORG_DEF.
- Page 409 Parameters ASDA-A3 Definitions are as follows: Y: OPT, Option X: TYPE, Path type BIT 3 BIT 2 BIT 1 BIT 0 UNIT AUTO 1: SPEED, constant speed control. 2: SINGLE, positioning control. It stops when finished. OVLP 3: AUTO, positioning control. It loads the next path automatically when finished.
- Page 410 ASDA-A3 Parameters A: SPD, target speed index Corresponding Default value (ms) parameters P5.060 P5.061 P5.062 P5.063 P5.064 P5.065 P5.066 P5.067 P5.068 1000 P5.069 1300 P5.070 1500 P5.071 1800 P5.072 2000 P5.073 2300 P5.074 2500 P5.075 3000 B: DLY, Delay time index ...
- Page 411 Parameters ASDA-A3 C: AUTO: once current PR path is finished, load the next path automatically. This function is only enabled when X = A indexing position control. Description of each bit: 0: disable auto function Bit 2 AUTO 1: once current PR path is finished, load next path automatically Bit 0 –...
- Page 412 ASDA-A3 Parameters Address: 060CH P6.006 PATH#3 definition 060DH Default: 0x00000000 Control mode: PR Unit: Setting range: 0x00000000 – 0xFFFFFFFF Format: Data size: 32-bit Settings: Please refer to the description of P6.002. Address: 060EH P6.007 PATH#3 data 060FH Default: Control mode: PR Unit: Setting range: -2147483648 to +2147483647 Format:...
- Page 413 Parameters ASDA-A3 Address: 0616H P6.011 PATH#5 data 0617H Default: Control mode: PR Unit: Setting range: -2147483648 to +2147483647 Format: Data size: 32-bit Settings: Please refer to the description of P6.003. Address: 0618H P6.012 PATH#6 definition 0619H Default: 0x00000000 Control mode: PR Unit: Setting range: 0x00000000 –...
- Page 414 ASDA-A3 Parameters Address: 0620H P6.016 PATH#8 definition 0621H Default: 0x00000000 Control mode: PR Unit: Setting range: 0x00000000 – 0xFFFFFFFF Format: Data size: 32-bit Settings: Please refer to the description of P6.002. Address: 0622H P6.017 PATH#8 data 0623H Default: Control mode: PR Unit: Setting range: -2147483648 to +2147483647 Format:...
- Page 415 Parameters ASDA-A3 Address: 062AH P6.021 PATH#10 data 062BH Default: Control mode: PR Unit: Setting range: -2147483648 to +2147483647 Format: Data size: 32-bit Settings: Please refer to the description of P6.003. Address: 062CH P6.022 PATH#11 definition 062DH Default: 0x00000000 Control mode: PR Unit: Setting range: 0x00000000 –...
- Page 416 ASDA-A3 Parameters Address: 0634H P6.026 PATH#13 definition 0635H Default: 0x00000000 Control mode: PR Unit: Setting range: 0x00000000 – 0xFFFFFFFF Format: Data size: 32-bit Settings: Please refer to the description of P6.002. Address: 0636H P6.027 PATH#13 data 0637H Default: Control mode: PR Unit: Setting range: -2147483648 to +2147483647 Format:...
- Page 417 Parameters ASDA-A3 Address: 063EH P6.031 PATH#15 data 063FH Default: Control mode: PR Unit: Setting range: -2147483648 to +2147483647 Format: Data size: 32-bit Settings: Please refer to the description of P6.003. Address: 0640H P6.032 PATH#16 definition 0641H Default: 0x00000000 Control mode: PR Unit: Setting range: 0x00000000 –...
- Page 418 ASDA-A3 Parameters Address: 0648H P6.036 PATH#18 definition 0649H Default: 0x00000000 Control mode: PR Unit: Setting range: 0x00000000 – 0xFFFFFFFF Format: Data size: 32-bit Settings: Please refer to the description of P6.002. Address: 064AH P6.037 PATH#18 data 064BH Default: Control mode: PR Unit: Setting range: -2147483648 to +2147483647 Format:...
- Page 419 Parameters ASDA-A3 Address: 0652H P6.041 PATH#20 data 0653H Default: Control mode: PR Unit: Setting range: -2147483648 to +2147483647 Format: Data size: 32-bit Settings: Please refer to the description of P6.003. Address: 0654H P6.042 PATH#21 definition 0655H Default: 0x00000000 Control mode: PR Unit: Setting range: 0x00000000 –...
- Page 420 ASDA-A3 Parameters Address: 065CH P6.046 PATH#23 definition 065DH Default: 0x00000000 Control mode: PR Unit: Setting range: 0x00000000 – 0xFFFFFFFF Format: Data size: 32-bit Settings: Please refer to the description of P6.002. Address: 065EH P6.047 PATH#23 data 065FH Default: Control mode: PR Unit: Setting range: -2147483648 to +2147483647 Format:...
- Page 421 Parameters ASDA-A3 Address: 0666H P6.051 PATH#25 data 0667H Default: Control mode: PR Unit: Setting range: -2147483648 to +2147483647 Format: Data size: 32-bit Settings: Please refer to the description of P6.003. Address: 0668H P6.052 PATH#26 definition 0669H Default: 0x00000000 Control mode: PR Unit: Setting range: 0x00000000 –...
- Page 422 ASDA-A3 Parameters Address: 0670H P6.056 PATH#28 definition 0671H Default: 0x00000000 Control mode: PR Unit: Setting range: 0x00000000 – 0xFFFFFFFF Format: Data size: 32-bit Settings: Please refer to the description of P6.002. Address: 0672H P6.057 PATH#28 data 0673H Default: Control mode: PR Unit: Setting range: -2147483648 to +2147483647 Format:...
- Page 423 Parameters ASDA-A3 Address: 067AH P6.061 PATH#30 data 067BH Default: Control mode: PR Unit: Setting range: -2147483648 to +2147483647 Format: Data size: 32-bit Settings: Please refer to the description of P6.003. Address: 067CH P6.062 PATH#31 definition 067DH Default: 0x00000000 Control mode: PR Unit: Setting range: 0x00000000 –...
- Page 424 ASDA-A3 Parameters Address: 0684H P6.066 PATH#33 definition 0685H Default: 0x00000000 Control mode: PR Unit: Setting range: 0x00000000 – 0xFFFFFFFF Format: Data size: 32-bit Settings: Please refer to the description of P6.002. Address: 0686H P6.067 PATH#33 data 0687H Default: Control mode: PR Unit: Setting range: -2147483648 to +2147483647 Format:...
- Page 425 Parameters ASDA-A3 Address: 068EH P6.071 PATH#35 data 068FH Default: Control mode: PR Unit: Setting range: -2147483648 to +2147483647 Format: Data size: 32-bit Settings: Please refer to the description of P6.003. Address: 0690H P6.072 PATH#36 definition 0691H Default: 0x00000000 Control mode: PR Unit: Setting range: 0x00000000 –...
- Page 426 ASDA-A3 Parameters Address: 0698H P6.076 PATH#38 definition 0699H Default: 0x00000000 Control mode: PR Unit: Setting range: 0x00000000 – 0xFFFFFFFF Format: Data size: 32-bit Settings: Please refer to the description of P6.002. Address: 069AH P6.077 PATH#38 data 069BH Default: Control mode: PR Unit: Setting range: -2147483648 to +2147483647 Format:...
- Page 427 Parameters ASDA-A3 Address: 06A2H P6.081 PATH#40 data 06A3H Default: Control mode: PR Unit: Setting range: -2147483648 to +2147483647 Format: Data size: 32-bit Settings: Please refer to the description of P6.003. Address: 06A4H P6.082 PATH#41 definition 06A5H Default: 0x00000000 Control mode: PR Unit: Setting range: 0x00000000 –...
- Page 428 ASDA-A3 Parameters Address: 06ACH P6.086 PATH#43 definition 06ADH Default: 0x00000000 Control mode: PR Unit: Setting range: 0x00000000 – 0xFFFFFFFF Format: Data size: 32-bit Settings: Please refer to the description of P6.002. Address: 06AEH P6.087 PATH#43 data 06AFH Default: Control mode: PR Unit: Setting range: -2147483648 to +2147483647 Format:...
- Page 429 Parameters ASDA-A3 Address: 06B6H P6.091 PATH#45 data 06B7H Default: Control mode: PR Unit: Setting range: -2147483648 to +2147483647 Format: Data size: 32-bit Settings: Please refer to the description of P6.003. Address: 06B8H P6.092 PATH#46 definition 06B9H Default: 0x00000000 Control mode: PR Unit: Setting range: 0x00000000 –...
- Page 430 ASDA-A3 Parameters Address: 06C0H P6.096 PATH#48 definition 06C1H Default: 0x00000000 Control mode: PR Unit: Setting range: 0x00000000 – 0xFFFFFFFF Format: Data size: 32-bit Settings: Please refer to the description of P6.002. Address: 06C2H P6.097 PATH#48 data 06C3H Default: Control mode: PR Unit: Setting range: -2147483648 to +2147483647 Format:...
- Page 431 Parameters ASDA-A3 P7.xxx PR parameters Address: 0700H P7.000 PATH#50 definition 0701H Default: 0x00000000 Control mode: PR Unit: Setting range: 0x00000000 – 0xFFFFFFFF Format: Data size: 32-bit Settings: Please refer to the description of P6.002. Address: 0702H P7.001 PATH#50 data 0703H Default: Control mode: PR Unit:...
- Page 432 ASDA-A3 Parameters Address: 070AH P7.005 PATH#52 data 070BH Default: Control mode: PR Unit: Setting range: -2147483648 to +2147483647 Format: Data size: 32-bit Settings: Please refer to the description of P6.003. Address: 070CH P7.006 PATH#53 definition 070DH Default: 0x00000000 Control mode: PR Unit: Setting range: 0x00000000 –...
- Page 433 Parameters ASDA-A3 Address: 0714H P7.010 PATH#55 definition 0715H Default: 0x00000000 Control mode: PR Unit: Setting range: 0x00000000 – 0xFFFFFFFF Format: Data size: 32-bit Settings: Please refer to the description of P6.002. Address: 0716H P7.011 PATH#55 data 0717H Default: Control mode: PR Unit: Setting range: -2147483648 to +2147483647 Format:...
- Page 434 ASDA-A3 Parameters Address: 071EH P7.015 PATH#57 data 071FH Default: Control mode: PR Unit: Setting range: -2147483648 to +2147483647 Format: Data size: 32-bit Settings: Please refer to the description of P6.003. Address: 0720H P7.016 PATH#58 definition 0721H Default: 0x00000000 Control mode: PR Unit: Setting range: 0x00000000 –...
- Page 435 Parameters ASDA-A3 Address: 0728H P7.020 PATH#60 definition 0729H Default: 0x00000000 Control mode: PR Unit: Setting range: 0x00000000to – 0xFFFFFFFF Format: Data size: 32-bit Settings: Please refer to the description of P6.002. Address: 072AH P7.021 PATH#60 data 072BH Default: Control mode: PR Unit: Setting range: -2147483648 to +2147483647 Format:...
- Page 436 ASDA-A3 Parameters Address: 0732H P7.025 PATH#62 data 0733H Default: Control mode: PR Unit: Setting range: -2147483648 to +2147483647 Format: Data size: 32-bit Settings: Please refer to the description of P6.003. Address: 0734H P7.026 PATH#63 definition 0735H Default: 0x00000000 Control mode: PR Unit: Setting range: 0x00000000 –...
- Page 437 Parameters ASDA-A3 Address: 073CH P7.030 PATH#65 definition 073DH Default: 0x00000000 Control mode: PR Unit: Setting range: 0x00000000 – 0xFFFFFFFF Format: Data size: 32-bit Settings: Please refer to the description of P6.002. Address: 073EH P7.031 PATH#65 data 073FH Default: Control mode: PR Unit: Setting range: -2147483648 to +2147483647 Format:...
- Page 438 ASDA-A3 Parameters Address: 0746H P7.035 PATH#67 data 0747H Default: Control mode: PR Unit: Setting range: -2147483648 to +2147483647 Format: Data size: 32-bit Settings: Please refer to the description of P6.003. Address: 0748H P7.036 PATH#68 definition 0749H Default: 0x00000000 Control mode: PR Unit: Setting range: 0x00000000 –...
- Page 439 Parameters ASDA-A3 Address: 0750H P7.040 PATH#70 definition 0751H Default: 0x00000000 Control mode: PR Unit: Setting range: 0x00000000 – 0xFFFFFFFF Format: Data size: 32-bit Settings: Please refer to the description of P6.002. Address: 0752H P7.041 PATH#70 data 0753H Default: Control mode: PR Unit: Setting range: -2147483648 to +2147483647 Format:...
- Page 440 ASDA-A3 Parameters Address: 075AH P7.045 PATH#72 data 075BH Default: Control mode: PR Unit: Setting range: -2147483648 to +2147483647 Format: Data size: 32-bit Settings: Please refer to the description of P6.003. Address: 075CH P7.046 PATH#73 definition 075DH Default: 0x00000000 Control mode: PR Unit: Setting range: 0x00000000 –...
- Page 441 Parameters ASDA-A3 Address: 0764H P7.050 PATH#75 definition 0765H Default: 0x00000000 Control mode: PR Unit: Setting range: 0x00000000 – 0xFFFFFFFF Format: Data size: 32-bit Settings: Please refer to the description of P6.002. Address: 0766H P7.051 PATH#75 data 0767H Default: Control mode: PR Unit: Setting range: -2147483648 to +2147483647 Format:...
- Page 442 ASDA-A3 Parameters Address: 076EH P7.055 PATH#77 data 076FH Default: Control mode: PR Unit: Setting range: -2147483648 to +2147483647 Format: Data size: 32-bit Settings: Please refer to the description of P6.003. Address: 0770H P7.056 PATH#78 definition 0771H Default: 0x00000000 Control mode: PR Unit: Setting range: 0x00000000 –...
- Page 443 Parameters ASDA-A3 Address: 0778H P7.060 PATH#80 definition 0779H Default: 0x00000000 Control mode: PR Unit: Setting range: 0x00000000 – 0xFFFFFFFF Format: Data size: 32-bit Settings: Please refer to the description of P6.002. Address: 077AH P7.061 PATH#80 data 077BH Default: Control mode: PR Unit: Setting range: -2147483648 to +2147483647 Format:...
- Page 444 ASDA-A3 Parameters Address: 0782H P7.065 PATH#82 data 0783H Default: Control mode: PR Unit: Setting range: -2147483648 to +2147483647 Format: Data size: 32-bit Settings: Please refer to the description of P6.003. Address: 0784H P7.066 PATH#83 definition 0785H Default: 0x00000000 Control mode: PR Unit: Setting range: 0x00000000 –...
- Page 445 Parameters ASDA-A3 Address: 078CH P7.070 PATH#85 definition 078DH Default: 0x00000000 Control mode: PR Unit: Setting range: 0x00000000 – 0xFFFFFFFF Format: Data size: 32-bit Settings: Please refer to the description of P6.002. Address: 078EH P7.071 PATH#85 data 078FH Default: Control mode: PR Unit: Setting range: -2147483648 to +2147483647 Format:...
- Page 446 ASDA-A3 Parameters Address: 0796H P7.075 PATH#87 data 0797H Default: Control mode: PR Unit: Setting range: -2147483648 to +2147483647 Format: Data size: 32-bit Settings: Please refer to the description of P6.003. Address: 0798H P7.076 PATH#88 definition 0799H Default: 0x00000000 Control mode: PR Unit: Setting range: 0x00000000 –...
- Page 447 Parameters ASDA-A3 Address: 07A0H P7.080 PATH#90 definition 07A1H Default: 0x00000000 Control mode: PR Unit: Setting range: 0x00000000 – 0xFFFFFFFF Format: Data size: 32-bit Settings: Please refer to the description of P6.002. Address: 07A2H P7.081 PATH#90 data 07A3H Default: Control mode: PR Unit: Setting range: -2147483648 to +2147483647 Format:...
- Page 448 ASDA-A3 Parameters Address: 07AAH P7.085 PATH#92 data 07ABH Default: Control mode: PR Unit: Setting range: -2147483648 to +2147483647 Format: Data size: 32-bit Settings: Please refer to the description of P6.003. Address: 07ACH P7.086 PATH#93 definition 07ADH Default: 0x00000000 Control mode: PR Unit: Setting range: 0x00000000 –...
- Page 449 Parameters ASDA-A3 Address: 07B4H P7.090 PATH#95 definition 07B5H Default: 0x00000000 Control mode: PR Unit: Setting range: 0x00000000 – 0xFFFFFFFF Format: Data size: 32-bit Settings: Please refer to the description of P6.002. Address: 07B6H P7.091 PATH#95 data 07B7H Default: Control mode: PR Unit: Setting range: -2147483648 to +2147483647 Format:...
- Page 450 ASDA-A3 Parameters Address: 07BEH P7.095 PATH#97 data 07BFH Default: Control mode: PR Unit: Setting range: -2147483648 to +2147483647 Format: Data size: 32-bit Settings: Please refer to the description of P6.003. Address: 07C0H P7.096 PATH#98 definition 07C1H Default: 0x00000000 Control mode: PR Unit: - Setting range: 0x00000000 –...
- Page 451 Parameters ASDA-A3 Table 8.1 Digital input (DI) descriptions Value: 0x01 Triggering Control DI name Description method mode Level When this DI is on, servo is activated (Servo On). triggered Value: 0x02 Triggering Control DI name Description method mode After the alarm is cleared, the drive shows that the alarm is cleared Rising-edge ARST when this DI is on.
- Page 452 ASDA-A3 Parameters Value: 0x09 Triggering Control DI name Description method mode In Speed and Position modes, motor torque is limited when this DI is on, Level TRQLM and source of the torque limit command is the internal register or analog triggered PT, PR, S voltage.
- Page 453 Parameters ASDA-A3 Value: 0x0D Triggering Control DI name Description method mode Clear function of analog Position command. If this DI is on, the position of the motor is held at the current position when DI is triggered. Despite the change in the analog command during DI is on, the motor remains at the current position even when the DI is off.
- Page 454 ASDA-A3 Parameters Value: 0x1D Triggering Control DI name Description method mode When DI.ABSE is on, it is in absolute mode and can enable the functions of DI.ABSQ, DI.ABSC, DI.ABSR, DI.ABSD, and DI.ABSC at the same time. Level ABSE When DI.ABSE is on, the functions of DI4, DO2, and DO3 are no longer triggered the ones assigned by the parameter.
- Page 455 Parameters ASDA-A3 Value: 0x16, 0x17 Triggering Control DI name Description method mode Register Torque command selection (1 – 4) Torque DI signal of CN1 Command command Content Range source TCM1 TCM0 number Torque TCM0 Level Mode Tz command is 0 TCM1 triggered P1.012...
- Page 456 ASDA-A3 Parameters Value: 0x2B Triggering Control DI name Description method mode Use this DI to select the command source in PT-PR dual mode or Level PT-PR PT-PR-S multiple mode. If this DI is off, it is in PT mode; if this DI is on, Dual mode triggered it is in PR mode.
- Page 457 Parameters ASDA-A3 Value: 0x43, 0x44 Triggering Control DI name Description method mode E-Gear ratio (Numerator) selection 0 E-Gear ratio (Numerator) selection 1 GNUM0, GNUM1 Position numerator (P1.044) command numerator (P2.060) moving filter numerator (P2.061) Pulse GNUM0 (P1.068) Level numerator (P2.062) GNUM1 triggered ----------------------------...
- Page 458 ASDA-A3 Parameters Table 8.2 Digital output (DO) descriptions Value: 0x01 Triggering Control DO name Description method mode When the control and main circuit power is applied to the drive, Level SRDY this DO is on if no alarm occurs. triggered Value: 0x02 Triggering Control...
- Page 459 Parameters ASDA-A3 Value: 0x08 Triggering Control DO name Description method mode When the magnetic brake control signal is detected, please adjust the settings of parameters P1.042 and P1.043. [1*] Level BRKR BRKR triggered (P1.043) (P1.042) Motor Speed (P1.038) ZSPD [1*] Value: 0x09 Triggering Control...
- Page 460 ASDA-A3 Parameters Value: 0x11 Triggering Control DO name Description method mode Warning outputs (forward / reverse limit, communication error, Level WARN undervoltage, and fan error). triggered Value: 0x12 Triggering Control DO name Description method mode Level PT, PR Position command / feedback overflows. triggered Value: 0x13 Triggering...
- Page 461 Parameters ASDA-A3 Value: 0x2C Triggering Control DO name Description method mode When the value of the item monitored by P0.009 ranges between the Zon1 value of P0.054 and P0.055, then this DO is on. Value: when DI.ABSE is on, DI.ABSR triggered by DO2 will replace the DO2 assigned by P2.019 Triggering Control DO name...
- Page 462 ASDA-A3 Parameters Value: 0x36 Triggering Control DO name Description method mode Level SPO_6 Output bit 06 of P4.006. triggered Value: 0x37 Triggering Control DO name Description method mode Level SPO_7 Output bit 07 of P4.006. triggered Value: 0x38 Triggering Control DO name Description method...
- Page 463 Parameters ASDA-A3 Table 8.3 Monitoring variables descriptions Item Description Monitoring Each monitoring variable has a code, and you can use P0.002 to set the code and code monitor the variable. Format Each monitoring variable is stored in the 32-bit format (long integer) of the servo drive. Basic variables / expansion variables: 1.
- Page 464 ASDA-A3 Parameters Variable name / Description Code property Speed command (analog) 008 (08h) Speed command from the analog channel. Unit: 0.01 Volt. B D2 Dec Integrated Speed command. Unit: 1 rpm. Speed command 009 (09h) (integrated) B Source includes analog, register, or position loop. Torque command (analog) 010 (0Ah)
- Page 465 Parameters ASDA-A3 Variable name / Description Code property Main / auxiliary Feedback position deviation between main encoder and 031 (1Fh) encoder position auxiliary encoder (applicable to A3-F). deviation (PUU) Indexing coordinate Current command for the indexing coordinates. 035 (23h) command Unit: Pulse of User Unit (PUU).
- Page 466 ASDA-A3 Parameters Variable name / Description Code property Endpoint register of PR 064 (40h) In PR mode, the endpoint of the Position command (Cmd_E). command Output register of PR In PR mode, the accumulative output of the Position 065 (41h) command command.
- Page 467 Parameters ASDA-A3 (This page is intentionally left blank.) 8-210 Revision December, 2017...
- Page 468 MODBUS Communication This chapter describes the MODBUS communication which you use for setting, reading and writing general parameters. For the motion control network, please refer to the related DMCNET, CANopen and EtherCAT documentation. The details of ASCII, RTU and TCP modes are also provided in this chapter. 9.1 RS-485 communication interface (hardware) ···········································...
- Page 469 MODBUS Communication ASDA-A3 9.1 RS-485 communication interface (hardware) The ASDA-A3 series servo drive supports RS-485 serial communication that you can use to access and change the parameters of the servo system. See the following description of the wiring: Note: The cable length can be up to 100 meters when the servo drive is installed in a quiet environment. If the transmission speed is over 38400 bps, however, a 15 meter cable is recommended to ensure data transmission accuracy.
- Page 470 ASDA-A3 MODBUS Communication 9.2 RS-485 communication parameter settings The required parameters for a single servo drive connection are: P3.000 (Address setting), P3.001 (Transmission speed) and P3.002 (Communication protocol). P3.003 (Communication error disposal), P3.004 (Communication timeout setting), P3.006 (Digital input (DI) control switch) and P3.007 (Communication delay time) are optional settings.
- Page 471 MODBUS Communication ASDA-A3 9.3 MODBUS communication protocol There are two modes of MODBUS network communication: ASCII (American Standard Code for Information Interchange) and RTU (Remote Terminal Unit). You can set both communication protocols (ASCII and RTU) with the P3.002 parameter. The ASDA-A3 servo drive also supports these functions: accessing data (03H), writing one character (06H) and writing multiple characters (10H).
- Page 472 ASDA-A3 MODBUS Communication 11-bit character frame (for 8-bit character) Start Stop Stop 8-data bits 11-bit character frame Start Even Stop parity 8-data bits 11-bit character frame Start Stop parity 8-data bits 11-bit character frame Revision December, 2017...
- Page 473 MODBUS Communication ASDA-A3 Communication data structure Definitions for the data frames in the two modes are as follows: ASCII mode: Start Start character ‟:” (3AH) Slave Address Communication address: 1 byte consists of 2 ASCII codes Function Function code: 1 byte consists of 2 ASCII codes Data (n-1) …….
- Page 474 ASDA-A3 MODBUS Communication Example 1: function code 03H, accessing multiple words: The master issues a command to the first slave and reads two continuous words starting from the start data address 0200H. In the response message from the slave, the content of the start data address 0200H is 00B1H, and the content of the second data address is 1F40H.
- Page 475 MODBUS Communication ASDA-A3 Example 2: function code 06H, writing single word: The master issues a command to the first slave and writes data 0064H to address 0200H. The slave sends a response message to the master after writing is completed. The calculation of LRC and CRC is described below.
- Page 476 ASDA-A3 MODBUS Communication Example 3: function code 10H, writing multiple words: The master issues a command to the 1 slave and writes data 0BB8H and 0000H to the start data address 0112H. In other words, 0BB8H is written into 0112H and 0000H is written into 0113H.
- Page 477 MODBUS Communication ASDA-A3 RTU mode: Command Message (Master): Response Message (Slave): Slave Address Slave Address Function Function 01H (High) 01H (High) Start Data Address Start Data Address 12H (Low) 12H (Low) 00H (High) 00H (High) Data Number Data Number (In words) (In words) 02H (Low) 02H (Low)
- Page 478 ASDA-A3 MODBUS Communication LRC and CRC transmission error check The error check in ASCII mode is LRC (Longitudinal Redundancy Check). In RTU mode, it is CRC (Cyclical Redundancy Check). See the details below. LRC (ASCII mode): Start ‘:’ ‘7’ Slave Address ‘F’...
- Page 479 MODBUS Communication ASDA-A3 CRC (RTU mode): To calculate the CRC value: Step 1: Load a 16-bit register of FFFFH, which is called the ‟CRC” register. Step 2: (The low byte of the CRC register) XOR (The first byte of the command), and save the result in CRC register.
- Page 480 ASDA-A3 MODBUS Communication CRC program example: This function calculates the CRC value in the C language. It needs two parameters: unsigned char* data; unsigned char length // The function returns the CRC value as a type of unsigned integer. unsigned int crc_chk(unsigned char* data, unsigned char length) { int j;...
- Page 481 MODBUS Communication ASDA-A3 outportb(PORT+BRDH,0x00); /* set prorocol outportb(PORT+LCR,0x06); <7,E,1> = 1AH, <7,O,1> = 0AH <8,N,2> = 07H <8,E,1> = 1BH <8,O,1> = 0BH for( I = 0; I<=16; I++ ) { while( !(inportb(PORT+LSR) & 0x20) ); /* wait until THR empty */ /* send data to THR */ outportb(PORT+THR,tdat[I]);...
- Page 482 ASDA-A3 MODBUS Communication 9.4 Setting and accessing communication parameters Please refer to Chapter 8 for the descriptions of the parameters that you can write or read through the communication interface. The ASDA-A3 servo drive parameters are divided into eight groups: Group 0 (Monitoring parameters), Group 1 (Basic parameters), Group 2 (Extension parameters), Group 3 (Communication parameters), Group 4 (Diagnosis parameters), Group 5 (Motion control parameters) and Group 6 and Group 7 (PR parameters).
- Page 483 MODBUS Communication ASDA-A3 (This page is intentionally left blank.) 9-16 Revision December, 2017...
- Page 484 Absolute System This chapter introduces the absolute servo system, including the wiring and installation of the absolute encoder, the steps to set up the system, and the procedures for initializing and operating the system for the first time. 10.1 Battery box (absolute type) and wiring ················································ 10-3 10.1.1 Specifications ·······································································...
- Page 485 Install the battery properly with the encoder cable. One servo drive uses one single battery box; two servo drives can share one double battery box. Please use Delta’s encoder cable to connect to the battery box. See the following section for the specifications of the battery box and its accessories.
- Page 486 Do not directly weld on the surface of the battery. Battery specifications Item Li/SOCl2 Cylindrical Battery Type ER14505 Delta part number ASD-CLBT0100 International standard size Standard voltage 3.6V Standard capacity 2700 mAh Maximum continuous...
- Page 487 Absolute System ASDA-A3 10.1.2 Battery box dimensions Single battery box Delta part number: ASD-MDBT0100 Double battery box Delta part number: ASD-MDBT0200 10-4 Revision December, 2017...
- Page 488 ASDA-A3 Absolute System 10.1.3 Connection cable for the absolute encoder A. Quick connector Delta part number: ACS3-CAEA1003, ACS3-CAEA1005 Title Model name inch ACS3-CAEA1003 3000 ± 100 118 ± 4 ACS3-CAEA1005 5000 ± 100 197 ± 4 Connection method: Note Please follow the instructions below when connecting the cable. Incorrect wiring may result in an explosion.
- Page 489 Absolute System ASDA-A3 B. Military connector Delta part number: ACS3-CAEA3003, ACS3-CAEA3005 Title Model name inch 3000 ± 100 118 ± 4 ACS3-CAEA3003 ACS3-CAEA3005 5000 ± 100 197 ± 4 Connection method: Note Please follow the instructions below when connecting the cable. Incorrect wiring may result in an explosion.
- Page 490 ASDA-A3 Absolute System 10.1.4 Battery box cable Battery box cable AW (Battery connection cable to the encoder; Unit: mm) Delta part number: 3864573700 10-7 Revision December, 2017...
- Page 491 Absolute System ASDA-A3 10.2 Installation 10.2.1 Installing the battery box in the servo system Single battery box (standard wiring) (1) Encoder cable; (2) Single battery box (absolute type); (3) CN2 connector; (4) Battery box wiring Pin assignment of CN2: The end that connects to the encoder The end that connects to the servo drive Military Quick...
- Page 492 ASDA-A3 Absolute System Double battery box (connects to CN2) (1) Encoder cable; (2) Battery box cable AW; (3) Double battery box (absolute type); (4) CN2 connector 10-9 Revision December, 2017...
- Page 493 Absolute System ASDA-A3 10.2.2 Installing and replacing a battery Single battery box Step 1: Loosen the hooks on both sides to open the lid of the battery box. Step 2: Attach the metal clip to the connection cable. Please note that the metal clip should be placed close to the heat shrink.
- Page 494 ASDA-A3 Absolute System Double battery box Step 1: Loosen the hooks on both sides to open the lid of the battery box. (A) Please replace the batteries only when the main power to the servo drive is on. Do not remove the power cables, or else the system might lose data.
- Page 495 Absolute System ASDA-A3 Step 5: Pull the clips at the bottom of the battery box outwards. Step 6: Tighten the screws to secure the battery box. Note: to avoid data loss, please replace the battery when any of the following circumstances occurs: 1.
- Page 496 -32768 to 32767, AL062 occurs. When the PUU position value goes outside the range -2147483648 to 2147483647, AL289 occurs. Except for the alarms mentioned above, you can use P2.070 to set up Delta’s absolute servo system. You can choose not to show AL062 and AL289 if the absolute coordinate system overflows when the number of rotations exceeds the range -32768 to 32767 or when the PUU exceeds the range -2147483648 to 2147483647.
- Page 497 Absolute System ASDA-A3 10.3.2 Pulse number When the motor is running in the clockwise direction, the cycle number is expressed as a negative value. When the motor runs in the counterclockwise direction, the cycle number is expressed as a positive value. The range of the number of rotations is between -32768 and +32767, and AL062 occurs once the number exceeds the range.
- Page 498 ASDA-A3 Absolute System 10.3.3 PUU number The PUU number is a 32-bit absolute value with positive and negative signs. When the motor is running in the forward direction, the PUU number increases; when it is running in the reverse direction, the PUU number decreases. The forward direction does not mean the motor is running clockwise;...
- Page 499 Absolute System ASDA-A3 10.3.4 Initializing the absolute coordinates with DI/DO When the servo system is controlled by the host controller, you can reset the absolute coordinate system with DI/DO. To initialize the coordinate system, set DI.ABSE to on and switch DI.ABSC from off to on.
- Page 500 ASDA-A3 Absolute System 10.3.6 Reading the absolute position with DI/DO Set P2.070 Bit 0 to 0 so that you can read the PUU number with DI/DO. See the descriptions below: Bit 79 – Bit 64 Bit 63 – Bit 32 Bit 31 –...
- Page 501 Absolute System ASDA-A3 You can read the pulse number or PUU number with DI/DO and P2.070. See the timing diagram below: Continue to (14) Continue to (15) in below figure in below figure (14) (15) ABSE (DIx) Communication enabled (12) (Changeable DI) ABSQ (DI4) Signal request...
- Page 502 ASDA-A3 Absolute System Descriptions: When handshake communication starts, the ABSE signal is triggered. After the T delay time (make sure the signal is on), the functions for DI4, DO2, and DO3 are switched to ABSQ, ABSR, and ABSD, respectively. If DI4 was in the high-level state before, it remains in the high-level state when switched to ABSQ (logic high-level signal).
- Page 503 Absolute System ASDA-A3 10.3.7 Reading the absolute position with communication You can access the data of the absolute encoder through two communication methods: instant access or parameter access. Instant access refers to reading the motor’s feedback position as soon as power is sent to the servo. When you set the status monitoring register 1 to the motor's feedback pulse number (P0.017 = 0), you can access the motor’s current position by reading P0.009.
- Page 504 ASDA-A3 Absolute System 10.4 List of absolute parameters, DI/DO, and alarms Relevant parameters (please refer to Chapter 8 for detailed information): Parameter Function P0.002 Drive status P0.049 Update encoder absolute position P0.050 Absolute coordinate system status P0.051 Encoder absolute position - Multiple turns P0.052 Encoder absolute position - Pulse number or PUU within single turn P2.069...
- Page 505 Absolute System ASDA-A3 Relevant alarms (please refer to Chapter 11 for detailed information): Display Alarm name AL060 Absolute position is lost AL061 Encoder undervoltage Number of turns for the absolute encoder overflows AL062 AL069 Wrong motor type AL072 Encoder overspeed AL073 Encoder memory error AL074...
- Page 506 Troubleshooting This chapter provides alarm descriptions and the corrective actions you can use for troubleshooting. 本 11.1 Alarm list ·······················································································11-3 General type ·······················································································11-3 STO type ····························································································11-5 Communication type ·············································································11-5 Motion control type ···············································································11-6 11.2 Causes and corrective actions ···························································11-7 General type ·······················································································11-7 STO type ··························································································...
- Page 507 Troubleshooting ASDA-A3 There are four types of alarms: General, STO, Communication, and Motion control. General type: alarms caused by hardware or encoder signal errors. STO type: alarms caused by STO errors. Communication type: alarms caused by CANopen or DMCNET errors. Motion control type: alarms caused by motion control command (in PR mode) errors.
- Page 508 ASDA-A3 Troubleshooting 11.1 Alarm list General type: Error type Servo state Display Alarm name WARN AL001 Overcurrent ○ ○ AL002 Overvoltage ○ ○ AL003 Undervoltage ○ ○ AL004 Motor combination error ○ ○ AL005 Regeneration error ○ ○ AL006 Overload ○...
- Page 509 Troubleshooting ASDA-A3 General type (continued): Error type Servo state Display Alarm name WARN Excessive deviation of full closed-loop position AL040 ○ ○ control AL041 Linear scale communication is cut off ○ ○ AL042 Analog input voltage is too high ○ ○...
- Page 510 ASDA-A3 Troubleshooting General type (continued): Error type Servo state Display Alarm name WARN AL095 Regenerative resistor disconnected ○ ○ AL099 DSP firmware update ○ ○ AL521 Vibration elimination parameter error ○ ○ Note: if the servo drive shows an alarm that is not in this table, please contact the local distributor or technician.
- Page 511 Troubleshooting ASDA-A3 Communication type (continued): Error type Servo state Display Alarm name WARN AL186 CAN Bus off ○ ○ AL201 Error occurs when loading CANopen data ○ ○ AL301 CANopen synchronization failure ○ ○ Synchronization signal for CANopen sent too AL302 ○...
- Page 512 2. If the temperature of the heat sink is abnormal, please send the servo Checking methods drive back to the distributor or contact Delta. Check if the setting value and corrective is much greater than the default. It is suggested that you reset the servo...
- Page 513 Troubleshooting ASDA-A3 contact Delta. How to clear the DI.ARST alarm? AL003 Under voltage Condition: main circuit voltage is below the rated value. By default, AL003 is defined as a warning. To define it as an alarm, set P2.066 [Bit 9].
- Page 514 (A) Check if there is any mechanical vibration. actions (B) Acceleration/deceleration constant is set too high. 2. Check if the wiring of UVW and the encoder cables is correct. 3. Send the servo drive back to distributors or contact Delta. How to clear the DI.ARST alarm?
- Page 515 Troubleshooting ASDA-A3 AL007 Excessive speed deviation Condition: deviation from the Speed command and the feedback speed exceeds the allowable range (P2.034). Trigger condition Causes: and causes 1. A drastic change in speed. 2. Incorrect setting for P2.034. 1. Use the signal detector to check if the input analog voltage signal is normal.
- Page 516 ASDA-A3 Troubleshooting 5. Check if the settings for P1.044 and P1.045 are appropriate for the application and set the correct values. How to clear the DI.ARST alarm? AL011 Encoder error Condition: the encoder produces abnormal pulses. Causes: 1. Encoder wiring is wrong. Trigger condition 2.
- Page 517 2. Reset the power supply. If the issue persists, please send the servo actions drive back to the distributor or contact Delta. How to clear the Remove the connection cable for CN1 and then execute auto calibration. alarm?
- Page 518 2. Data in ROM is damaged or there is no data in ROM. This occurs when the system is in Servo On status. If this alarm occurs, please send the servo drive back to the distributor or contact Delta. Press the SHIFT key on the panel and “EXGAB” is displayed.
- Page 519 (AL011, AL024, AL025, and AL026). Use the checking methods and corrective actions to clear the alarm if any of them occurs. 1. DI.ARST How to clear the alarm? 2. Please send the product to the distributor or Delta. AL019 Serial communication error Condition: RS-485 communication error. Causes: Trigger condition 1.
- Page 520 Correctly connect the power to the servo drive. If the issue persists, please send your A3 servo drive back to the distributor or contact Delta. How to clear the DI.ARST...
- Page 521 3. Use shielded cable for the encoder. If the issue persists, please send your servo drive back to the distributor or contact Delta. How to clear the Re-power on the servo drive. alarm? AL025 Encoder internal error Condition: internal memory and counter of the encoder are in error.
- Page 522 If the value is greater than 0 and the value increases continuously, please check steps 1—3 again. If the value is 0, send the motor back to the distributor or contact Delta. How to clear the Re-power on the servo drive.
- Page 523 (B) Make sure the encoder cable is separated from the power supply or any high-current cables to avoid interference. (C) Use shielded cable for the encoder. If issue persists, please send your servo drive back to the distributor or contact Delta. How to clear the Cycle power on the servo drive.
- Page 524 ASDA-A3 Troubleshooting Check if the motor power cable (U, V, W, GND) is firmly connected. Please Checking methods and corrective connect wiring and ground properly by following the instructions in this user actions manual. How to clear the Cycle power on the servo drive. alarm? AL034 Encoder internal communication error Condition:...
- Page 525 Troubleshooting ASDA-A3 AL041 Linear scale communication is cut off Trigger condition Linear scale communication is cut off. and causes Checking methods and corrective Make sure the wiring for the linear scale is correct. actions How to clear the DI.ARST alarm? AL042 Analog input voltage is too high Analog input voltage for the speed command is higher than the level Trigger condition...
- Page 526 ASDA-A3 Troubleshooting AL060 Absolute position is lost Condition: losing number of revolutions because of low battery voltage or loss of the power. Causes: Trigger condition 1. Voltage level of the battery is too low. and causes 2. The battery is replaced when the main power of the servo drive is off. 3.
- Page 527 Troubleshooting ASDA-A3 AL062 Number of turns for the absolute encoder overflows Condition: the number of turns for the absolute encoder exceeds the range: Trigger condition -32768 to +32767. and causes Cause: motor’s rotation cycle exceeds the allowable range. Checking methods Check if the motor’s number of turns while operating is within the range and corrective between -32768 and +32767.
- Page 528 ASDA-A3 Troubleshooting AL069 Wrong motor type Trigger condition Incremental motor does not support the absolute function. and causes 1. Check to see if your servo motor has an incremental or absolute Checking methods encoder. and corrective 2. Check the setting of P2.069 and correctly set the value. Set P2.069 to 0 actions if your encoder does not use the absolute function.
- Page 529 4. Check the motor speed and make sure it is within the rated range. If issue persists, please send your servo drive back to the distributor or contact Delta. How to clear the Re-power on the servo drive.
- Page 530 4. Check the motor speed and make sure it is within the rated range. If the issue persists, please send your servo drive back to the distributor or contact Delta. How to clear the Cycle power on the servo drive.
- Page 531 4. Check the motor speed and make sure it is within the rated range. If the issue persists, please send your servo drive back to the distributor or contact Delta. How to clear the Cycle power on the servo drive.
- Page 532 In this case, please replace the UVW cable and prevent the metal conductor from being exposed. 2. Refer to Chapter 3 Wiring and check the following: (A) If you do not use the Delta standard power cable, make sure the Checking methods and corrective UVW wiring sequence is correct.
- Page 533 Checking methods and corrective for the regenerative resistor, and reset the value of P1.052 and P1.053. If actions this does not clear the alarm, please send the servo drive back to Delta. How to clear the DI.ARST alarm? AL086 Input voltage is too high...
- Page 534 How to clear the alarm? 3. If the issue persists, please send the servo drive back to the distributor or contact Delta. AL08A Auto-tuning function - Command error Condition: no command is issued when the servo drive starts the auto-tuning procedure.
- Page 535 2. If not using the regenerative brake, set P1.053 (capacity of regenerative actions resistor) to 0. If the issue persists, please send the servo drive back to the distributor or contact Delta. How to clear the DI.ARST alarm? 11-30...
- Page 536 ASDA-A3 Troubleshooting AL099 DSP firmware update Trigger condition EEPROM is not reset after DSP firmware is updated. and causes Checking methods Check if the firmware is updated. Set P2.008 to 30 first and then set it to 28. and corrective Next, cycle power on the servo drive.
- Page 537 Troubleshooting ASDA-A3 STO type: AL500 STO function is enabled Trigger condition Safe torque off function (STO) is enabled. and causes Checking methods and corrective Safe torque off function (STO) is enabled. Please check why it is enabled. actions 1. Use DI.ARST or 0x6040.Fault Reset, or set P0.001 to 0. 2.
- Page 538 ASDA-A3 Troubleshooting Communication Type: AL111 Buffer overflow occurs when receiving CANopen SDO Trigger condition SDO Rx Buffer overflow (receives more than two SDOs within 1 ms). and causes Checking methods Check if the servo drive (master) receives or sends more than one SDO and corrective within 1 ms.
- Page 539 Troubleshooting ASDA-A3 AL123 Data size error occurs when CANopen PDO is received Trigger condition Data length in the message does not match the length of the specified and causes object. Checking methods Check if the data length for PDO mapping is changed when the servo drive and corrective receives or sends PDO.
- Page 540 ASDA-A3 Troubleshooting AL128 Error occurs when reading CANopen PDO from EEPROM An error occurs when loading the default value from ROM at start-up. Trigger condition and causes All objects of CAN automatically return to the default value. Checking methods When PDO is receiving or sending, check if the error occurs because the and corrective specified object reads from EEPROM.
- Page 541 Troubleshooting ASDA-A3 How to clear the NMT: reset node or 0x6040 (fault reset). alarm? AL180 CANopen heartbeat or NodeGuarding error CANopen communication is cut off resulting in Heartbeat or NodeGuarding Trigger condition and causes error. Checking methods 1. Check if the CANopen communication is normal. and corrective 2.
- Page 542 ASDA-A3 Troubleshooting AL201 Error occurs when loading CANopen data Condition: an error has occurred when loading data from EEPROM. Trigger condition and causes Cause: initialization error of CANopen data. 1. If the alarm is cleared after cycling power on the servo drive, it means the error occurs at the moment when reading the data.
- Page 543 Troubleshooting ASDA-A3 AL303 CANopen synchronization signal timeout Condition: in CANopen IP mode, the synchronization with the controller Trigger condition failed. and causes Cause: timeout of CANopen synchronization signal. 1. Make sure the communication quality is good. 2. Make sure the setting of synchronization cycle (0x1006) is identical to that of the controller.
- Page 544 ASDA-A3 Troubleshooting Motion control type: AL207 Parameter group of PR#8 is out of range Condition: parameter group for PR#8, P_Group, is out of range. Trigger condition and causes Cause: the group for PR#8 command source exceeds the range. Checking methods Writing parameter using PR procedure: the parameter group of command and corrective source exceeds the range.
- Page 545 Troubleshooting ASDA-A3 AL217 Write parameters: parameter locked Condition: write parameters using PR procedure: the parameter is write-protected when the servo drive is on or the parameter’s value exceeds Trigger condition and causes the range. Condition: an error occurs when writing parameters with PR#8 command. Checking methods Please write the parameters when the servo drive is off and make sure the and corrective...
- Page 546 ASDA-A3 Troubleshooting feedback position has overflowed. Check steps 1—4 above and perform the homing procedure. How to clear the Perform homing procedure. alarm? AL237 Indexing coordinate is undefined Condition: using the indexing function and execute positioning command Trigger condition before defining the start point of the indexing coordinate. and causes Cause: The servo drive cannot identify this coordinate system.
- Page 547 Troubleshooting ASDA-A3 proper deceleration time for the application. Please refer to the description for P5.003. How to clear the NMT: reset node or 0x6040 (fault reset). alarm? AL289 Feedback position counter overflows Trigger condition Feedback position counter overflows. and causes Please set the gear ratio according to the total traveling distance of the absolute motor and the actual application requirements to avoid the Checking methods...
- Page 548 AL555 System failure Trigger condition DSP processing error. and causes Checking methods If this alarm occurs, please send the servo drive directly back to Delta and corrective without making any modification. actions How to clear the alarm? AL809 PR Arithmetic operation parmeter error or secondary platform error Condition: an error occurs when the servo drive decodes the motion command.
- Page 549 Troubleshooting ASDA-A3 3. For advanced users: you can save the scope screenshot when the alarm occurs. Set P5.007 and P0.001 for the two channels to monitor the status and save the scope. How to clear the Cycle power on the servo drive. alarm? 11-44 Revision December, 2017...
- Page 550 Specifications Appendix A.1 ASDA-A3 series servo drive ································································ A-2 A.1.1 Specification of the ASDA-A3 servo drive········································· A-2 A.1.2 Dimensions of the servo drive ······················································· A-5 A.2 ECM-A3 series servo motor ································································· A-7 A.2.1 ECM-A3L low inertia series servo motor ·········································· A-9 A.2.2 ECM-A3H high inertia series servo motor ······································...
- Page 551 Specifications ASDA-A3 A.1 ASDA-A3 series servo drive A.1.1 Specification of the ASDA-A3 servo drive 100 W 200 W 400 W 750 W 1 kW 1.5 kW 2 kW 3 kW ASDA-A3 Three-phase Phase / Voltage Single-phase / Three-phase 220 V...
- Page 552 ASDA-A3 Specifications 100 W 200 W 400 W 750 W 1 kW 1.5 kW 2 kW 3 kW ASDA-A3 ±0.01% at 0 to 100% load fluctuation Speed accuracy ±0.01% at ±10% power fluctuation ±0.01% at 0 ˚C to 50 ˚C ambient temperature fluctuation Voltage Analog 0 to ±10 V...
- Page 553 Specifications ASDA-A3 100 W 200 W 400 W 750 W 1 kW 1.5 kW 2 kW 3 kW ASDA-A3 Indoors (avoid direct sunlight), no corrosive vapor Installation site (avoid fumes, flammable gases, and dust) Altitude Altitude 1000 m or lower above sea level Atmospheric pressure 86 –...
- Page 554 ASDA-A3 Specifications A.1.2 Dimensions of the servo drive 100 W / 200 W Weight 0.84 kgf (1.85 Ibf) 400 W Weight 0.92 kgf (2.03 Ibf) Revision December, 2017...
- Page 555 Specifications ASDA-A3 750 W / 1 kW / 1.5 kW Weight 1.3 kgf (2.87 Ibf) 2 kW / 3 kW Weight 2.7 kgf (5.95 Ibf) Note: dimensions and weights of the servo drive may be updated without prior notice. Revision December, 2017...
- Page 556 ASDA-A3 Specifications A.2 ECM-A3 series servo motor ECM-A3 series servo motor ECM - A 06 04 R (2) (3) (4) (5) (6) (7) (8) (10) (11) (1) Product name ECM: Electronic Commutation Motor (2) Motor type A: AC Servo Motor (3) Name of the Series 3: A3 series (4) Inertia type...
- Page 557 Specifications ASDA-A3 (9) Shaft type and oil seal w/o brake with brake w/o brake with brake w/o oil seal w/o oil seal with oil seal with oil seal Round shaft (with fixed screw holes) Keyway (with fixed screw holes) Note: * signifies that this motor model is coming soon. (10) Shaft diameter S: standard 7: specific (14 mm)
- Page 558 ASDA-A3 Specifications A.2.1 ECM-A3L low inertia series servo motor ECM-A3L 040F 0401 0602 0604 0804 0807 Rated power (kW) 0.05 0.75 Rated torque (N-m) 0.159 0.32 0.64 1.27 1.27 2.39 Max. torque (N-m) 0.557 1.12 1.92 3.82 3.82 7.17 Rated speed (rpm) 3000 Max.
- Page 559 Specifications ASDA-A3 ECM-A3L 040F 0401 0602 0604 0804 0807 Operating humidity 20 – 90%RH (non-condensing) Storage humidity 20 – 90%RH (non-condensing) Vibration capacity 2.5 G IP67 (when using waterproof connectors, or when an oil seal is fitted to the IP rating rotating shaft (for an oil seal model)) Approvals Note:...
- Page 560 ASDA-A3 Specifications A.2.2 ECM-A3H high inertia series servo motor ECM-A3H 040F 0401 0602 0604 0804 0807 Rated power (kW) 0.05 0.75 Rated torque (N-m) 0.159 0.32 0.64 1.27 1.27 2.39 Max. torque (N-m) 0.557 1.12 2.24 4.45 4.44 8.36 Rated speed (rpm) 3000 Max.
- Page 561 Specifications ASDA-A3 ECM-A3H 040F 0401 0602 0604 0804 0807 Operating humidity 20 – 90%RH (non-condensing) Storage humidity 20 – 90%RH (non-condensing) Vibration capacity 2.5 G IP67 (when using waterproof connectors, or when an oil seal is fitted to the IP rating rotating shaft (for an oil seal model)) Approvals Note:...
- Page 562 ASDA-A3 Specifications A.2.3 Torque features (T-N curves) Torque (N-m) Torque (N-m) 0.557 1.12 (350%) (350%) Intermittent 0.35 Intermittent Duty Zone (220%) Duty Zone 0.45 (140%) 0.159 0.32 (100%) (100%) 0.0795 0.16 Continuous Duty Zone (50%) Continuous Duty Zone (50%) Speed (rpm) Speed (rpm) 3000 4500...
- Page 563 Specifications ASDA-A3 Torque (N-m) Torque (N-m) 0.557 1.12 (350%) (350%) Intermittent Intermittent 0.68 (250%) Duty Zone Duty Zone (210%) 0.159 0.32 (100%) (100%) 0.0795 0.16 Continuous Duty Zone Continuous Duty Zone (50%) (50%) Speed (rpm) Speed (rpm) 3000 4500 6000 3000 4500 6000...
- Page 564 ASDA-A3 Specifications A.2.4 Overload features Definition of overload protection The overload protection prevents the motor from overheating. Causes of overloading 1. The motor’s rated torque exceeds the rated range and the operation time is too long. 2. The inertia ratio is too high and the motor frequently accelerates and decelerates. 3.
- Page 565 Specifications ASDA-A3 High inertia (ECM-A3H series) Operating Load time 120% 263.8 s 140% 35.2 s 160% 17.6 s 180% 11.2 s 200% 220% 6.1 s 240% 4.8 s 260% 3.9 s 280% 3.3 s 300% 2.8 s 350% 2.1 s A-16 Revision December, 2017...
- Page 566 ASDA-A3 Specifications A.2.5 Dimensions of ECM-A3L/A3H series servo motor Motor frame size: 80 mm and below Model □ 0 40F □ □ □ 0 401 □ □ □ 0 602 □ □ □ 0 604 □ □ □ 0 804 □...
- Page 567 Specifications ASDA-A3 A.3 ECMC series servo motor ECMC series servo motor ECM C – C W 13 08 R S (1) (2) (3) (4) (5) (6) (7) (8) (1) Product name ECM: Electronic Commutation Motor (2) Motor type C: High-Precision AC Servo Motor (recommended for CNC applications) (3) Series C: Rated voltage: 200V;...
- Page 568 ASDA-A3 Specifications (7) Shaft type and oil seal w/o brake with brake w/o brake with brake w/o oil seal w/o oil seal with oil seal with oil seal Round shaft (with fixed screw holes) Keyway (with fixed screw holes) (8) Shaft diameter S: standard A-19 Revision December, 2017...
- Page 569 Specifications ASDA-A3 A.3.1 ECMC series servo motor with frame size 100 – 180 □ □ □ □ □ ECMC Medium inertia High inertia Medium inertia Rated power (kW) 0.85 Rated torque 3.18 4.77 7.16 9.55 5.41 8.34 11.48 9.55 14.32 19.10 (N-m) Max.
- Page 570 ASDA-A3 Specifications □ □ □ □ □ ECMC Medium inertia High inertia Medium inertia Brake release time [ms (max.)] Brake pull-in time [ms (Max)] Vibration grade (μm) Operating 0˚C – 40˚C (32˚F – 104˚F) temperature (˚C) Storage -10˚C to 80˚C (-14˚F to 176˚F) temperature (˚C) Operating humidity 20 –...
- Page 571 Specifications ASDA-A3 A.3.2 Torque features (T-N curves) Torque (N-m) Torque (N-m) 9.54 14.32 (300%) (300%) Intermittent Intermittent Duty Zone Duty Zone 4.77 3.18 (100%) (100%) 1.91 Continuous Duty Zone Continuous Duty Zone (67%) (60%) Speed (rpm) Speed (rpm) 3000 2000 5000 3000 ECMC-Er1310S...
- Page 572 ASDA-A3 Specifications Torque (N-m) Torque (N-m) 28.65 28.7 (300%) (250%) Intermittent Intermittent Duty Zone Duty Zone 11.48 9.55 (100%) (100%) 5.74 Continuous Duty Zone Continuous Duty Zone (50%) (67%) Speed (rpm) Speed (rpm) 2000 3000 3000 1500 2200 ECMC-Er1820S ECMC-Fr1318S Torque (N-m) Torque (N-m) 42.97...
- Page 573 Specifications ASDA-A3 A.3.3 Overload features Definition of overload protection The overload protection prevents the motor from overheating. Causes of overloading 1. The motor’s rated torque exceeds the rated range and the operation time is too long. 2. The inertia ratio is set too high and the motor frequently accelerates and decelerates. 3.
- Page 574 ASDA-A3 Specifications Medium and medium-high inertia (ECMC E, F series) Operating Load time 120% 527.6 s 140% 70.4 s 160% 35.2 s 180% 22.4 s 200% 16 s 220% 12.2 s 240% 9.6 s 260% 7.8 s 280% 6.6 s 300% 5.6 s A-25...
- Page 575 Specifications ASDA-A3 A.3.4 Dimensions of ECMC series servo motor Motor frame size: 100 mm / 130 mm / 180 mm Model □ 1 010 □ □ 1 310 □ □ 1 315 □ □ 1 320 □ □ 1 308 □...
- Page 576 ASDA-A3 Specifications Model 1 820 1 830 1 830 □ □ □ □ □ □ □ □ □ 13.5 13.5 13.5 LL (w/o brake) 202.1 202.1 LL (with brake) 203.1 235.3 235.3 M12 Depth 25 M12 Depth 25 M12 Depth 25 Note: in motor model name represents the encoder type;...
- Page 577 Specifications ASDA-A3 (This page is intentionally left blank.) A-28 Revision December, 2017...
- Page 578 Accessories Appendix B.1 Power connector ··············································································· B-2 B.2 Power cable ····················································································· B-3 B.3 Encoder cable (incremental type) ·························································· B-7 B.4 Encoder cable (absolute type) ······························································ B-8 B.5 Battery box cable AW ········································································· B-9 B.6 Battery box (absolute type) ·································································· B-9 B.7 I/O signal connector ·········································································...
- Page 579 Accessories ASDA-A3 Power connector Delta part number: ASDBCAPW0000 (for 200V servo drives) Delta part number: ASDBCAPW0100 (for 200V servo drives with brake contact) Delta part number: ASD-CAPW1000 Delta part number: ASD-CAPW2000 Revision December, 2017...
- Page 580 ACS3-CAPW1103 3000 ± 100 118 ± 4 ACS3-CAPW1105 5000 ± 100 197 ± 4 Delta part number: ACS3-CAPW2103, ACS3-CAPW2105 (for 200V series servo drives and comes with a brake cable) Part No. inch ACS3-CAPW2103 3000 ± 100 118 ± 4 ACS3-CAPW2105 5000 ±...
- Page 581 Straight inch ACS3-CAPW1203 3106A-20-18S 3000 ± 100 118 ± 4 ACS3-CAPW1205 3106A-20-18S 5000 ± 100 197 ± 4 Delta part number: ACS3-CAPW2203, ACS3-CAPW2205 (with brake cable) Part No. Straight inch ACS3-CAPW2203 3106A-20-18S 3000 ± 100 118 ± 4 ACS3-CAPW2205 3106A-20-18S 5000 ±...
- Page 582 Straight inch ACS3-CAPW1303 3106A-20-18S 3000 ± 100 118 ± 4 ACS3-CAPW1305 3106A-20-18S 5000 ± 100 197 ± 4 Delta part number: ACS3-CAPW2303, ACS3-CAPW2305 (with brake cable) Part No. Straight inch ACS3-CAPW2303 3106A-20-18S 3000 ± 100 118 ± 4 ACS3-CAPW2305 3106A-20-18S 5000 ±...
- Page 583 Straight inch ACS3-CAPW1403 3106A-24-11S 3000 ± 100 118 ± 4 ACS3-CAPW1405 3106A-24-11S 5000 ± 100 197 ± 4 Delta part number: ACS3-CAPW2403, ACS3-CAPW2405 (with brake cable) Part No. Straight Inch ACS3-CAPW2403 3106A-24-11S 3000 ± 100 118 ± 4 ACS3-CAPW2405 3106A-24-11S 5000 ±...
- Page 584 ASDA-A3 Accessories B.3 Encoder cable (incremental type) Delta part number: ACS3-CAEN1003, ACS3-CAEN1005 Part No. inch ACS3-CAEN1003 3000 ± 100 118 ± 4 ACS3-CAEN1005 5000 ± 100 197 ± 4 Delta part number: ACS3-CAEN3003, ACS3-CAEN3005 Part No. Straight inch ACS3-CAEN3003 3106A-20-29S 3000 ±...
- Page 585 Accessories ASDA-A3 B.4 Encoder cable (absolute type) Delta part number: ACS3-CAEA1003, ACS3-CAEA1005 Model name inch ACS3-CAEA1003 3000 ± 100 118 ± 4 ACS3-CAEA1005 5000 ± 100 197 ± 4 Delta part number: ACS3-CAEA3003, ACS3-CAEA3005 Model name Straight inch ACS3-CAEA3003 3106A-20-29S 3000 ±...
- Page 586 ASDA-A3 Accessories B.5 Battery box cable AW Battery box cable that connects to the encoder Delta part number: 3864573700 B.6 Battery box (absolute type) Single battery box Delta part number: ASD-MDBT0100 Revision December, 2017...
- Page 587 Accessories ASDA-A3 Double battery box Delta part number: ASD-MDBT0200 B.7 I/O signal connector Delta part number: ACS3-CNADC150 B-10 Revision December, 2017...
- Page 588 Delta part number: UC-CMC030-01A, UC-CMC050-01A Part No. inch UC-CMC030-01A 300 ± 10 11 ± 0.4 UC-CMC050-01A 500 ± 10 19 ± 0.4 Note: Please refer to Delta PLC/HMI Cable Selection Guide for cables of other length. B-11 Revision December, 2017...
- Page 589 Accessories ASDA-A3 B.10 CANopen distribution box Delta part number: TAP-CN03 B.11 Ferrite ring Delta part number: ASD-ACFC7K00 Model name Outer diameter Inner diameter Height ± ± 13.5 ± ASD-ACFC7K00 68.0 44.0 B-12 Revision December, 2017...
- Page 590 ASDA-A3 Accessories B.12 A3 / A2 conversion cable A3 / A2_CN1_conversion cable Delta part number: 3081709800 A3 / A2_CN2_conversion cable Delta part number: 3081709600 A3 / A2_CN5_conversion cable Delta part number: 3081709700 B-13 Revision December, 2017...
- Page 591 Accessories ASDA-A3 B.13 A3 CN3 RS-485 / CANOpen connector Delta part number: ACS3-CNADC3RC B.14 A3 CN3 RS-485 / CANOpen terminal resistor Delta part number: ACS3-CNADC3TR B-14 Revision December, 2017...
- Page 592 ASDA-A3 Accessories B.15 CN4 Mini USB module Delta part number: UC-PRG015-01B, UC-PRG030-01B Part No. inch UC-PRG015-01B 1500 ± 100 59 ± 4 UC-PRG030-01B 3000 ± 100 118 ± 4 B-15 Revision December, 2017...
- Page 593 Accessories ASDA-A3 B.16 Optional accessories 100 W servo drive and 50 W / 100 W low / high inertia servo motor Servo drive ASD-A3-0121- ECM-A3L-C△040FS1, ECM-A3L-C△0401S1, Motor model name ECM-A3H-C△040FS1, ECM-A3H-C△0401S1 Motor power cable (without brake) ACS3-CAPW110X Power connector (without brake) ASDBCAPW0000 Motor power cable (with brake) ACS3-CAPW210X...
- Page 594 ASDA-A3 Accessories 400 W servo drive and 400 W low / high inertia servo motor Servo drive ASD-A3-0421- ECM-A3L-C△0604S1, ECM-A3L-C△0804S1, Motor model name ECM-A3H-C△0604S1, ECM-A3H-C△0804S1 Motor power cable ACS3-CAPW110X (without brake) Power connector (without brake) ASDBCAPW0000 Motor power cable (with brake) ACS3-CAPW210X Power connector (with brake) ASDBCAPW0100...
- Page 595 Accessories ASDA-A3 1 kW servo drive and 1 kW medium inertia / 850 W high inertia servo motor Servo drive ASD-A3-1021- Motor model name ECMC-CW1010S, ECMC-EW1310S, ECMC-FW1308S Motor power cable (without brake) ACS3-CAPW120X Motor power cable (with brake) ACS3-CAPW220X Power connector ASD-CAPW1000 Encoder cable (incremental type) ACS3-CAEN300X...
- Page 596 ASDA-A3 Accessories 2 kW servo drive and 2 kW medium inertia servo motor Servo drive ASD-A3-2023- Motor model name ECMC-EW1820S Motor power cable (without brake) ACS3-CAPW140X Motor power cable (with brake) ACS3-CAPW240X Power connector ASD-CAPW2000 Encoder cable (incremental type) ACS3-CAEN300X Encoder cable (absolute type) ACS3-CAEA300X Encoder connector...
- Page 597 Accessories ASDA-A3 (This page is intentionally left blank.) B-20 Revision December, 2017...
- Page 598 Revision History Release date Version Chapter Revision contents April, 2017 V1.0 (First edition) December, V2.0 2017 (Second edition) Change the parameter default value of P1.000, P1.030, P2.031, and P2.047. Change the parameter format of P2.031. Add notes for the UVW connector illustration 3.1.4 (angle of viewing).
- Page 599 Revision History ASDA-A3 For relevant information about [ASDA-A3], please refer to: (1) ASDA-A2 User Manual (issued on February, 2017 Revision December, 2017...
- Page 600 Index Command filter Encoder absolute position - Pulse number or PUU within single turn (P0.052) 8-25 Low-pass filter Pulse number 10-14 Low-pass filter 6-9, 6-23 Control structure of Torque mode 6-26 High-speed position capturing function (Capture) Low-pass filter for commands 6-17 DO.CAP_OK 7-63, 8-205 Relevant Parameters Low-pass filter time constant of full- and half-closed loop...
- Page 601 Target setting of mapping parameter P0.026 (P0.036) 8-3, Motion command generator 7-48 8-21 Electronic gear ratio (E-Gear ratio) 6-8 Target setting of mapping parameter P0.027 (P0.037) 8-3, Timing diagram of PR mode 6-9 8-21 Command type Target setting of mapping parameter P0.028 (P0.038) 8-3, Index position command 7-29~7-32 8-22 Position command 7-22, 7-38...
- Page 602 Resonance suppression (Notch filter) width (1) (P2.095) 8-5, Acceleration constant of S-curve (P1.034) 8-4, 8-43 8-93 Deceleration constant of S-curve (P1.035) 8-4, 8-43 Resonance suppression (Notch filter) (2) (P2.043) 8-5, 8-74 Acceleration / deceleration constant of S-curve (P1.036) 8-4, Resonance suppression (Notch filter) attenuation rate (2) 8-43 (P2.044) 8-5, 8-75 Internal speed command 1 ~ 3 (P1.009 ~ P1.011) 8-9,...
- Page 603 (This page is intentionally left blank.) Revision December, 2017...
Need help?
Do you have a question about the ASDA-A3 Series and is the answer not in the manual?
Questions and answers