Digi TX54 Manuals
Manuals and User Guides for Digi TX54. We have 3 Digi TX54 manuals available for free PDF download: User Manual

Digi TX54 User Manual (1087 pages)
Brand: Digi
|
Category: Network Router
|
Size: 19 MB
Table of Contents
-
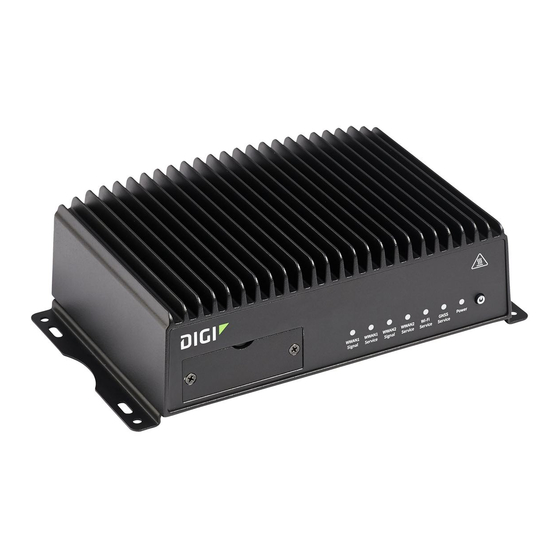
TX54 Leds28
-
Power28
-
GNSS Service29
-
WWAN Signal29
-
WWAN Service29
-
Local Webui39
-
Interfaces57
-
Configure a LAN141
-
Delete a LAN161
-
DHCP Servers163
-
Bridging183
-
Serial Port196
-
Wi-Fi232
-
Hotspot286
-
Hotspot Security288
-
Routing340
-
IP Routing341
-
Routing Services364
-
Dynamic DNS369
-
Vrrp375
-
Configure VRRP375
-
Configure VRRP379
-
Ipsec401
-
Ipsec Mode401
-
Ipsec Modes401
-
Authentication402
-
Openvpn455
-
Show GRE Tunnels492
-
L2Tp508
-
L2TP with Ipsec526
-
L2Tpv3 Ethernet528
-
Nemo534
-
Show NEMO Status540
-
Configure DNS571
-
Show DNS Server577
-
SNMP Security578
-
Download Mibs583
-
Modbus Gateway619
-
System Time636
-
Local Users742
-
Ldap767
-
Packet Filtering805
-
Web Filtering831
-
Downgrading858
Advertisement
Digi TX54 User Manual (1049 pages)
Brand: Digi
|
Category: Network Router
|
Size: 19 MB
Table of Contents
-
-
TX54 Leds28
-
-
Interfaces
52-
-
Bridging172
-
-
Serial Port
182 -
Wi-Fi
214 -
Hotspot
266-
Hotspot Security268
-
-
Routing
320-
IP Routing321
-
Dynamic DNS349
-
-
-
Ipsec381
-
Ipsec Modes381
-
Authentication382
-
Openvpn430
-
Nemo483
-
L2Tpv3491
-
-
Services
499-
Configure DNS527
-
Show DNS Server533
-
-
-
Modbus Gateway574
-
System Time591
-
Applications
623 -
-
Local Users700
-
Ldap724
-
Firewall
749-
Packet Filtering762
-
Web Filtering788

Digi TX54 User Manual (800 pages)
Brand: Digi
|
Category: Network Router
|
Size: 14 MB
Table of Contents
-
TX54 Leds18
-
Power18
-
GNSS Service19
-
WWAN Signal19
-
WWAN Service19
-
Local Webui28
-
Interfaces39
-
Configure a LAN104
-
Delete a LAN122
-
DHCP Servers123
-
Bridging143
-
Serial Port152
-
Wi-Fi157
-
Hotspot194
-
Hotspot Security196
-
Routing248
-
IP Routing249
-
Routing Services272
-
Dynamic DNS278
-
Configure VRRP283
-
Ipsec290
-
Ipsec Modes290
-
Authentication291
-
Openvpn332
-
Show GRE Tunnels370
-
Configure DNS416
-
SNMP Security423
-
Download Mibs428
-
System Time451
-
Local Users526
-
Packet Filtering578
Advertisement
Advertisement