Sirona teneo Operating Instructions Manual
Hide thumbs
Also See for teneo:
- Operating instructions manual (200 pages) ,
- Service manual (86 pages) ,
- Installation requirements (52 pages)

Related Manuals for Sirona teneo


Summary of Contents for Sirona teneo
- Page 1 NMKOMNS kÉï=~ë=çÑW qbkbl léÉê~íáåÖ=fåëíêìÅíáçåë=Erp^F båÖäáëÜ TENEO Operating Instructions...
-
Page 3: Table Of Contents
Sirona Dental Systems GmbH Table of contents Operating Instructions (USA) TENEO Table of contents General information ....................Dear Customer, .................... Contact information ..................Notes on these Operating Instructions ............1.3.1 General information on the operating Instructions ......1.3.2 Scope of these Operating Instructions .......... - Page 4 Table of contents Sirona Dental Systems GmbH Operating Instructions (USA) TENEO Unit description......................Standards/Approvals ..................Technical data....................System overview ................... Patient chair ....................Motor-driven headrest ................... Foot control ....................Dentist element ..................... 3.7.1 Instrument positions ................. 3.7.2 EasyTouch user interface ..............
- Page 5 Sirona Dental Systems GmbH Table of contents Operating Instructions (USA) TENEO Patient chair ....................4.4.1 Safety instructions ................4.4.2 Safety stop ..................4.4.3 Triggering an immediate movement stop ........4.4.4 Armrests ..................4.4.5 VARIO footrest ................4.4.6 Adjusting the motor-driven headrest ..........
- Page 6 Table of contents Sirona Dental Systems GmbH Operating Instructions (USA) TENEO 4.5.8 General instrument functions ............4.5.8.1 Opening the sub-screen ............ 4.5.8.2 Selecting a coolant ............4.5.8.3 Switching the preselected coolant on/off......4.5.8.4 Setting the ApexLocator ............ 4.5.8.5 Switch instrument light on/off ..........
- Page 7 Sirona Dental Systems GmbH Table of contents Operating Instructions (USA) TENEO 4.6.4.4 Timer function..............4.6.4.5 Chair programs..............4.6.4.6 Headrest ................4.6.4.7 Composite function............4.6.4.8 Operating light ..............4.6.5 Suction handpieces ................. 4.6.6 SPRAYVIT M multifunctional syringe ..........4.6.7 Mini L.E.D. curing light ..............
- Page 8 Table of contents Sirona Dental Systems GmbH Operating Instructions (USA) TENEO 4.14 Operation with a PC ..................179 4.14.1 SIVISION program ................180 4.14.1.1 Starting PC communication..........180 4.14.1.2 Communication with the media player ......181 4.14.1.3 Communication with Microsoft PowerPoint ....... 181 4.14.1.4 Communication with SIDEXIS...........
- Page 9 Sirona Dental Systems GmbH Table of contents Operating Instructions (USA) TENEO 4.15.6 Configuring the network connection ..........4.15.7 Opening the service function............Care, cleaning and maintenance by the practice team ........... Basics......................5.1.1 Intervals................... 5.1.2 Care, cleaning, and disinfecting agents ..........
- Page 10 Table of contents Sirona Dental Systems GmbH Operating Instructions (USA) TENEO 5.4.4 Cleaning and disinfecting the suction hoses ........229 5.4.5 Thermodisinfecting suction hoses ............ 231 Components of the water unit ............... 232 5.5.1 Clean the gold trap................232 5.5.2 Clean/disinfect the cuspidor .............
-
Page 11: General Information
These Operating Instructions are designed to assist you prior to initial use and whenever you require information later on. ® We wish you a great deal of success and pleasure with TENEO ® Your TENEO team... -
Page 12: Notes On These Operating Instructions
Online portal for technical documents We have set up an online portal for the Technical Documents at http:// www.sirona.com/manuals. From here, you can download these Operating Instructions along with other documents. Please complete the online form if you would like a hard copy of a particular document. We will then be happy to send you a printed copy free of charge. -
Page 13: Other Valid Documents
The instructions as well as any warning and safety information contained therein also must be observed. There are separate operating instructions for each of the following Sirona products: ● Treatment instruments and accessories... -
Page 14: Intended Use
1 General information Sirona Dental Systems GmbH 1.6 Intended use Operating Instructions (USA) TENEO Intended use This dental treatment unit with accessories is intended to supply power to and serve as a base for dental devices and accessories. This product includes a dental chair. The dental treatment unit is intended for use in the dental clinic environment and is used by trained dentists and/or dental assistants. -
Page 15: Formats And Symbols Used
Sirona Dental Systems GmbH 1 General information Operating Instructions (USA) TENEO 1.8 Formats and symbols used Formats and symbols used The formats and symbols used in this document have the following meaning: Prerequisite Prompts you to do something. 1. First action step 2. -
Page 16: Safety Information
2 Safety information Sirona Dental Systems GmbH 2.1 Identification of the danger levels Operating Instructions (USA) TENEO Safety information Identification of the danger levels To prevent personal injury and material damage, please observe the warning and safety information provided in these operating instructions. -
Page 17: On-Site Installation
Sirona Dental Systems GmbH 2 Safety information Operating Instructions (USA) TENEO 2.3 On-site installation On-site installation The on-site installation must have been performed according to our requirements. The details are described in the document "Installation Requirements". Installation of the dental treatment unit Installation must be carried out by authorized personnel according to the installation instructions. -
Page 18: Maintenance And Repair
No restrictions apply when using salt blasting devices in connection with Suction of steel abrasives permissible Sirona dental treatment units. However, in such cases, make sure that the system is subsequently flushed with an adequate amount of water. 65 48 510 D3509... -
Page 19: Patient Chair
Sirona Dental Systems GmbH 2 Safety information Operating Instructions (USA) TENEO 2.10 Patient chair 2.10 Patient chair Please observe the maximum load capacity of 165 kg (363.8 lbs) for the Maximum load capacity 165 kg max. load of chair patient chair. 165 kg... -
Page 20: Care, Cleaning, And Disinfecting Agents
For reasons of product safety, this product may be operated only with original Sirona accessories or third-party accessories expressly approved by Sirona. The user is responsible for any damage resulting from the use of non-approved accessories. If any units not approved by Sirona are connected, they must comply with the applicable standards, e.g.:... -
Page 21: Electrostatic Discharge
Sirona Dental Systems GmbH 2 Safety information Operating Instructions (USA) TENEO 2.18 Electrostatic discharge Operating an HF surgical device HF surgical device, with pressure-sensitive user interfaces Treatment with HF surgical devices creates strong electromagnetic fields, which may affect other electronic devices. Do not place external HF surgical devices on the work surfaces of the dental treatment unit and do not guide the HF handpiece cable over it. -
Page 22: Dismantling/Installation
2 Safety information Sirona Dental Systems GmbH 2.19 Dismantling/Installation Operating Instructions (USA) TENEO Physics of electrostatic charges An electrostatic discharge requires prior electrostatic charging. There is a danger of electrostatic charges building up whenever two bodies rub against each other, e.g. when: ●... -
Page 23: Unit Description
Sirona Dental Systems GmbH 3 Unit description Operating Instructions (USA) TENEO 3.1 Standards/Approvals Unit description Standards/Approvals ® The TENEO dental treatment unit complies with the following standards: Compliance with standards, without HF surgery ● IEC 60601-1 (electrical, mechanical, and software safety) ● IEC 60601-1-2 (electromagnetic compatibility) ●... -
Page 24: Sirona Dental Systems Gmbh
The current approvals of the wireless foot control are listed on the rating label on the underside of the wireless foot control. ® TENEO is a registered trademark of Sirona Dental Systems GmbH. Product name is a registered trademark 65 48 510 D3509 D3509.201.03.03.23 10.2016... -
Page 25: Technical Data
Sirona Dental Systems GmbH 3 Unit description Operating Instructions (USA) TENEO 3.2 Technical data Technical data Model designation: TENEO Model designation, power ratings Power connection: 100 - 230 V AC ± 10% 50/60 Hz Nominal current: 4.8 A at 230 V 9.6 A at 115 V 11 A at 100 V also max. -
Page 26: Sirona Dental Systems Gmbh
3 Unit description Sirona Dental Systems GmbH 3.2 Technical data Operating Instructions (USA) TENEO Transport and storage Temperature: -40 °C – +70 °C Operating and transport conditions 1060 conditions: (-40 °F – 158 °F) Relative humidity: 10% – 95% Air pressure: 500 hPa – 1,060 hPa Operating conditions: Ambient temperature: 10 °C –... -
Page 27: System Overview
Sirona Dental Systems GmbH 3 Unit description Operating Instructions (USA) TENEO 3.3 System overview System overview The dental treatment unit comprises the following main components: Patient chair [ → 28] Motor-driven headrest [ → 29] Foot control [ → 30] (with cable or wireless link) Dentist element [ →... -
Page 28: Patient Chair
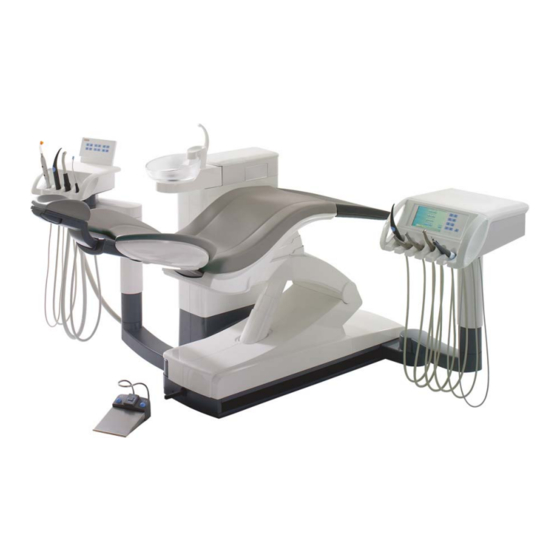
3 Unit description Sirona Dental Systems GmbH 3.4 Patient chair Operating Instructions (USA) TENEO Patient chair The patient chair features a variety of motor adjustment options to optimally adapt the patient's position to the given treatment. Motor-driven headrest Backrest Seat Armrest Footrest... -
Page 29: Motor-Driven Headrest
Sirona Dental Systems GmbH 3 Unit description Operating Instructions (USA) TENEO 3.5 Motor-driven headrest Motor-driven headrest The headrest allows for the following adjustment options: ● Motor-driven extension/retraction to adapt to the patient's stature ● Motor-driven tilting for maxillary/mandibular treatment ● Manual tilting via quick mechanical adjustment ●... -
Page 30: Foot Control
3 Unit description Sirona Dental Systems GmbH 3.6 Foot control Operating Instructions (USA) TENEO Foot control The foot control enables hand-free control of the treatment instruments. Via the integrated cursor control, virtually all functions of the dental treatment unit can be controlled via the foot control as an alternative to hand control. -
Page 31: Dentist Element
Sirona Dental Systems GmbH 3 Unit description Operating Instructions (USA) TENEO 3.7 Dentist element Dentist element All functions of the dental treatment unit can be controlled via the EasyTouch control panel on the dentist element. The dentist element is moved via a motor-driven travel track. -
Page 32: Instrument Positions
3 Unit description Sirona Dental Systems GmbH 3.7 Dentist element Operating Instructions (USA) TENEO 3.7.1 Instrument positions The following instrument positions are available: Holder 1 Holder 2 Holder 3 Holder 4 Holder 5 Holder 6 Extra holder SPRAYVIT M Motor: Motor: Motor:... -
Page 33: Touchscreen
Sirona Dental Systems GmbH 3 Unit description Operating Instructions (USA) TENEO 3.7 Dentist element 3.7.3 Touchscreen The touchscreen displays virtual function keys according to the program selected. A list of all function keys is provided in the Appendix of this document, see "Overview of all function keys".. -
Page 34: Fixed Keys On The Dentist Element
3 Unit description Sirona Dental Systems GmbH 3.7 Dentist element Operating Instructions (USA) TENEO 3.7.4 Fixed keys on the dentist element For a more detailed description of the fixed key functions, see "Fixed keys on the dentist element" [ → 78]. Main switch Fixed keys on the dentist element Switches the dental treatment unit on/off. -
Page 35: Sirona Dental Systems Gmbh
Sirona Dental Systems GmbH 3 Unit description Operating Instructions (USA) TENEO 3.7 Dentist element Freely selectable function Freely available relay 230 VAC, 6 A (connected by the service engineer). This function can be preset as a button or as a switch in the Setup program. -
Page 36: Assistant Element
3 Unit description Sirona Dental Systems GmbH 3.8 Assistant element Operating Instructions (USA) TENEO Assistant element The functional scope of the assistant element is adapted to the dental assistant's field of activity. It can, however, also be positioned so as to enable unassisted treatment by the dentist. -
Page 37: Instrument Positions
Sirona Dental Systems GmbH 3 Unit description Operating Instructions (USA) TENEO 3.8 Assistant element 3.8.1 Instrument positions The following instrument positions are available: Holder 1 Holder 2 Holder 3 Holder 4 Mini L.E.D. curing light SPRAYVIT M Spray aspirator Saliva ejector multifunctional syringe... -
Page 38: User Interface
3 Unit description Sirona Dental Systems GmbH 3.8 Assistant element Operating Instructions (USA) TENEO 3.8.2 User interface 3.8.3 Fixed keys on the assistant element For a more detailed description of the fixed key functions, see "Fixed keys on the assistant element" [ → 146]. -
Page 39: Water Unit
Sirona Dental Systems GmbH 3 Unit description Operating Instructions (USA) TENEO 3.9 Water unit Water unit The water unit is equipped with a waterline treatment system. It adds a waterline treatment solution to the water that the patient comes in contact with. This reduces the amount of germs in the water lines. -
Page 40: Sirona Dental Systems Gmbh
3 Unit description Sirona Dental Systems GmbH 3.9 Water unit Operating Instructions (USA) TENEO Swiveling cuspidor Tumbler filler (depicted) or tumbler filler with automatic sensor control for automatic filling of the tumbler Cover of tank for waterline treatment solution The tank can also be used as a self-sufficient water supply. In... -
Page 41: External Device Connection
Sirona Dental Systems GmbH 3 Unit description Operating Instructions (USA) TENEO 3.10 External device connection 3.10 External device connection External medical accessories can be connected to external device connection. They must comply with the requirements of the Medical Device Directive 93/42/EEC. NOTICE Additional devices, hydrogen peroxide up to 0.2‰, with waterline treatment system... -
Page 42: Sirona Dental Systems Gmbh
3 Unit description Sirona Dental Systems GmbH 3.10 External device connection Operating Instructions (USA) TENEO T E R A I R x . 6 H 2 5 . 3 A e T 6 F u s IEC outlet socket with power supply (max. 6 A) Fuse for inlet connector (6.3 A slow-blow) -
Page 43: Operation
Sirona Dental Systems GmbH 4 Operation Operating Instructions (USA) TENEO 4.1 Starting up the dental treatment unit Operation Starting up the dental treatment unit 4.1.1 Initial startup Sanitation must be performed prior to initial startup of your dental treatment unit. This is done by filling all water-bearing lines with DENTOSEPT P concentrated waterline treatment solution to reduce the exposure of the water to bacteria. -
Page 44: Main Switch
4 Operation Sirona Dental Systems GmbH 4.1 Starting up the dental treatment unit Operating Instructions (USA) TENEO Main switch 4.1.2.2 Switching the dental treatment unit on The main switch switches the dental treatment unit from Standby mode to operational readiness. Following switch-on, the operating system is booted and an automatic self-test is performed. -
Page 45: Selecting A User Profile
The user profile that is displayed in the status bar is active. Tip: The individual user settings can be read out by the service engineer and transferred to other TENEO dental treatment units. In this case, the user profiles only have to be set once. -
Page 46: Operating Concept Of The Touchscreen
4 Operation Sirona Dental Systems GmbH 4.2 Operating concept of the touchscreen Operating Instructions (USA) TENEO Operating concept of the touchscreen 4.2.1 Virtual function keys The touchscreen displays virtual function keys according to the program selected. Required functions can be activated either by touching the function keys with your finger or via cursor with the foot control. -
Page 47: Start Program Operating Modes
Sirona Dental Systems GmbH 4 Operation Operating Instructions (USA) TENEO 4.2 Operating concept of the touchscreen 4.2.2 Start program operating modes Start program After the dental treatment unit is switched on, the automatically appears. The Start program can run in the following three operating modes: ●... -
Page 48: Sirona Dental Systems Gmbh
Switching between the Start and Instrument programs does not apply. This makes operation of the TENEO dental treatment unit similar to other Sirona dental treatment units that are operated without a touchscreen. In the EasyMode Start program operating mode, no instrument taken from... - Page 49 EasyMode Start program operating mode is intended for users who would like to retain the familiar operating concept of other Sirona dental treatment units and who can do without the functions listed above. Opening the Start program...
-
Page 50: Sub-Screens And Settings Screens
4 Operation Sirona Dental Systems GmbH 4.2 Operating concept of the touchscreen Operating Instructions (USA) TENEO Start program ➢ Touch the program change key in the status bar of the touchscreen. Start program The is displayed in the selected operating mode. -
Page 51: Sirona Dental Systems Gmbh
Sirona Dental Systems GmbH 4 Operation Operating Instructions (USA) TENEO 4.2 Operating concept of the touchscreen Connection errors involving the PC are marked by a warning triangle as shown below. In the sub-screens or settings screens (see below), as well as in the... -
Page 52: Foot Control
4 Operation Sirona Dental Systems GmbH 4.3 Foot control Operating Instructions (USA) TENEO Foot control The dental treatment unit can be operated using a wireless foot control or a foot control with a cable connection. 4.3.1 Wireless foot control Technical data of the wireless module, see Foot control radio interface"... -
Page 53: Operating The Foot Control
Sirona Dental Systems GmbH 4 Operation Operating Instructions (USA) TENEO 4.3 Foot control 4.3.2 Operating the foot control The foot control operating elements are assigned different functions, depending on whether the instruments are all in place or an instrument is removed from its holder. -
Page 54: Sirona Dental Systems Gmbh
4 Operation Sirona Dental Systems GmbH 4.3 Foot control Operating Instructions (USA) TENEO The cooling system (spray, air, or NaCl) is switched on/off. If the intraoral camera is removed, the video still image is saved in SIDEXIS; the live image is displayed in the next quadrant in SI Video. -
Page 55: Using The Cursor Control
Sirona Dental Systems GmbH 4 Operation Operating Instructions (USA) TENEO 4.3 Foot control 4.3.3 Using the cursor control EasyMode Start program The cursor control cannot be used in the operating mode. 4.3.3.1 Functionality Cursor control as an alternative mode of operation The touchscreen and the fixed keys of the dentist element can also be operated hand-free via the foot control. -
Page 56: Sirona Dental Systems Gmbh
4 Operation Sirona Dental Systems GmbH 4.3 Foot control Operating Instructions (USA) TENEO Cursor path The cursor path runs between the pairs of keys, moving from top to bottom and from left to right, usually in multiple loops. The cursor path can be traversed between the starting and end points either in a forward or a reverse direction. -
Page 57: Operating The Cursor Control
Sirona Dental Systems GmbH 4 Operation Operating Instructions (USA) TENEO 4.3 Foot control Operating the cursor control 4.3.3.2 Moving the cursor ➢ Briefly slide the 4-way foot control plate upward or downward. The orange cursor moves forward or back one cursor position. -
Page 58: Sirona Dental Systems Gmbh
4 Operation Sirona Dental Systems GmbH 4.3 Foot control Operating Instructions (USA) TENEO Changing programs ✔ Cursor control with program change is switched on. 1. Position the cursor at the starting point of the cursor path. 2. Move the cursor past the start position. Hold the 4-way foot control plate in the upward position. -
Page 59: Patient Chair
Sirona Dental Systems GmbH 4 Operation Operating Instructions (USA) TENEO 4.4 Patient chair Patient chair 4.4.1 Safety instructions ü û Patient chair, chair movements CAUTION The free space under the patient couch and up to the water unit can be decreased due to chair movements. -
Page 60: Safety Stop
4 Operation Sirona Dental Systems GmbH 4.4 Patient chair Operating Instructions (USA) TENEO 4.4.2 Safety stop The dental treatment unit is equipped with various safety stops to prevent crushing and damage. The cutoff trigger points are shown in the following illustration: Display of triggered safety switches (all shown on one illustration) -
Page 61: Triggering An Immediate Movement Stop
Sirona Dental Systems GmbH 4 Operation Operating Instructions (USA) TENEO 4.4 Patient chair 4.4.3 Triggering an immediate movement stop You can stop the movement of the chair to a programmed position as follows: Shock positioning ➢ Press the main switch or the fixed key on the dentist element. -
Page 62: Armrests
4 Operation Sirona Dental Systems GmbH 4.4 Patient chair Operating Instructions (USA) TENEO 4.4.4 Armrests The patient chair can be equipped with armrests on both sides. Armrest CAUTION The clearance between the left armrest and the water unit is confined. The patient's hand can be caught between the left armrest and the housing of the water unit during chair travel. -
Page 63: Vario Footrest
Sirona Dental Systems GmbH 4 Operation Operating Instructions (USA) TENEO 4.4 Patient chair 4.4.5 VARIO footrest The footrest can be folded forward by approximately 10 cm to adjust it to the patient's height. ➢ Lift the foot end and pivot the footrest forward or backwards. -
Page 64: Adjusting The Motor-Driven Headrest
4 Operation Sirona Dental Systems GmbH 4.4 Patient chair Operating Instructions (USA) TENEO 4.4.6 Adjusting the motor-driven headrest The motor-driven headrest can be adjusted via the touchscreen or directly on the headrest. Headrest, motor-driven, catching of hair CAUTION Fine objects can enter the mechanism of the motor-driven headrest through the gap. -
Page 65: Inclining The Headrest
With SIDEXIS 4, the last set height of the motorized headrest can be saved and then automatically reset when the patient is logged in again. For this, SIDEXIS 4 and the Sirona Dental Unit plugins must be installed on the PC . -
Page 66: Moving The Patient Chair Via Chair Programs
4 Operation Sirona Dental Systems GmbH 4.4 Patient chair Operating Instructions (USA) TENEO 4.4.7 Moving the patient chair via chair programs The chair programs can be selected via the touchscreen or via the control Chair programs 0, S, 1, and 2 on the assistant element, references to “Creating chair programs” and “Linking to dentist element movement”... -
Page 67: Moving The Patient Chair To The Mouth Rinsing Position
Sirona Dental Systems GmbH 4 Operation Operating Instructions (USA) TENEO 4.4 Patient chair Via foot control ✔ All instruments are in place. ➢ Press the right button of the foot control. Via the assistant element ➢ Press the key on the assistant element briefly (< 2 s). -
Page 68: Activating Other Chair Programs
4 Operation Sirona Dental Systems GmbH 4.4 Patient chair Operating Instructions (USA) TENEO 1. Press the key on the touchscreen, or press the key on the user interface of the assistant element, or press the left button of the foot control (with all instruments in place in their holders). -
Page 69: Moving The Chair Manually
Sirona Dental Systems GmbH 4 Operation Operating Instructions (USA) TENEO 4.4 Patient chair 4.4.8 Moving the chair manually IMPORTANT Cuspidor, motor-driven, starting position The cuspidor bowl automatically swivels back to its starting position The cuspidor bowl automatically returns beforehand to ensure that the patient does not collide with it during chair movements. -
Page 70: Orthomotion - Tilting The Patient Chair
4 Operation Sirona Dental Systems GmbH 4.4 Patient chair Operating Instructions (USA) TENEO Via the 4-way foot switch ✔ Setup program In the , control of the ErgoMotion function via the 4- way foot switch cannot be replaced by control of the headrest tilt function, see "Linking the headrest tilt to the 4-way foot switch"... -
Page 71: Moving The Patient Chair With The Fine Adjustment
Sirona Dental Systems GmbH 4 Operation Operating Instructions (USA) TENEO 4.4 Patient chair Moving the patient chair with the fine adjustment 4.4.8.5 Depending on the type of treatment, it may be necessary to adjust the patient chair more slowly and more precisely (e.g., for tiny corrections in Fine Adjustment case of treatment under a microscope). -
Page 72: Creating Chair And Shock Positioning Programs
4 Operation Sirona Dental Systems GmbH 4.4 Patient chair Operating Instructions (USA) TENEO 4.4.9 Creating chair and shock positioning programs Chair programs The six chair programs preset at the factory: ● Mouth rinsing position S ● Entry/exit position 0 ● 1 and 2 ●... -
Page 73: Dental Unit Plugin "Patient-Specific Chair Programs
(S, 0, 1, 2, and if applicable 3, 4). The next time the patient is logged in, the chair positions are available again. For this, SIDEXIS 4 and the Sirona Dental Unit plugins must be installed on the PC. - Page 74 With SIDEXIS 4, the last height of the motorized headrest that was set can be saved and then automatically activated when the patient is logged in again, see "Sirona Dental Unit plugin for automatic headrest adjustment" [ → 65]. Delete patient-specific chair programs The patient-specific chair programs saved in the SIDEXIS 4 can be overwritten or deleted by reprogramming the program key.
-
Page 75: Setting The Massage/Active Lumbar Support Functions
Sirona Dental Systems GmbH 4 Operation Operating Instructions (USA) TENEO 4.4 Patient chair 4.4.11 Setting the Massage/Active lumbar support functions The patient chair can be set to a gentle massage function and/or an active lumbar support function. Opening Start sub-screen Start program ✔... -
Page 76: Dentist Element
4 Operation Sirona Dental Systems GmbH 4.5 Dentist element Operating Instructions (USA) TENEO Dentist element 4.5.1 Maximum load capacity The maximum load of the dentist element is 2 kg (4.4 lbs). A silicone mat and an NaCl bottle with the corresponding accessories (weighing approx. -
Page 77: Motor-Driven Travel Track
Sirona Dental Systems GmbH 4 Operation Operating Instructions (USA) TENEO 4.5 Dentist element 4.5.3 Motor-driven travel track The dental treatment unit is equipped with a motor-driven travel track for the dentist element. In combination with the rotary joints on the support arm, the dentist element can be perfectly adjusted to suit any treatment. -
Page 78: Fixed Keys On The Dentist Element
4 Operation Sirona Dental Systems GmbH 4.5 Dentist element Operating Instructions (USA) TENEO 4.5.4 Fixed keys on the dentist element Main switch 4.5.4.1 The dental treatment unit is switched on/off with the main switch. To switch off, press and hold the key until an acoustic signal sounds. -
Page 79: Shock Positioning
Sirona Dental Systems GmbH 4 Operation Operating Instructions (USA) TENEO 4.5 Dentist element – 3. Use the keys to set the required time. Increments: From 00:05 to 1:00 = 5 s steps From 1:00 to 3:00 = 10 s steps From 3:00 to 9:30 = 30 s steps 4. -
Page 80: Operating Light
4 Operation Sirona Dental Systems GmbH 4.5 Dentist element Operating Instructions (USA) TENEO Operating light 4.5.4.4 Switching the operating light on/off Operating light ➢ Briefly press the fixed key on the dentist or assistant element. When the operating light is switched on, the LED of the fixed key lights up on the dentist and assistant elements. -
Page 81: Flushing Of The Cuspidor Bowl
Sirona Dental Systems GmbH 4 Operation Operating Instructions (USA) TENEO 4.5 Dentist element Linking tumbler filling to the mouth rinsing position and setting the filling time Link tumbler filling to mouth rinsing position 1. Touch the key. If the key is marked orange, the tumbler filling function will... -
Page 82: Freely Selectable Function
4 Operation Sirona Dental Systems GmbH 4.5 Dentist element Operating Instructions (USA) TENEO Freely selectable function 4.5.4.8 Bell e.g. call key Freely available relay 230 V, 6 A (connected by service engineer). This function can be preset as a pushbutton or as a switch in the Setup program, see "Setting the bell/hash key as a pushbutton or as a switch"... -
Page 83: Quick Setting Keys And Function Levels
Sirona Dental Systems GmbH 4 Operation Operating Instructions (USA) TENEO 4.5 Dentist element 4.5.5 Quick setting keys and function levels Depending on which instrument is taken from the holder, the corresponding instrument program or functions appear in the start program. Instrument program in the Simple/Advanced Start program operating... - Page 84 The operating concept corresponds with other Sirona dental treatment units which have membrane keys. The EasyMode Start program with instrument functions for motor and...
-
Page 85: Saving Instrument Settings
Sirona Dental Systems GmbH 4 Operation Operating Instructions (USA) TENEO 4.5 Dentist element 4.5.6 Saving instrument settings With static quick setting keys Memory You can determine whether the key should be displayed in the instrument programs with the quick setting keys, see "Preselecting the quick setting key or function level types"... - Page 86 4 Operation Sirona Dental Systems GmbH 4.5 Dentist element Operating Instructions (USA) TENEO An acoustic signal sounds. The set speed and preselection and activation of the coolant are saved on the quick setting key. 3. Repeat this process for other quick setting keys if necessary.
-
Page 87: Placing The Instruments In Their Holders
Sirona Dental Systems GmbH 4 Operation Operating Instructions (USA) TENEO 4.5 Dentist element 4.5.7 Placing the instruments in their holders Automatic opening of instrument dialogs Simple/Advanced Start program In the operating modes, the instrument program of the instrument removed is displayed automatically on the EasyMode Start program touchscreen. -
Page 88: General Instrument Functions
4 Operation Sirona Dental Systems GmbH 4.5 Dentist element Operating Instructions (USA) TENEO 4.5.8 General instrument functions Settings for the coolant, instrument light, and foot switch can be made in the sub-screen of the instrument removed from the holder. The sub-screens vary according to the instrument removed. Functions not available for the respective instrument are not displayed in the sub- screen. -
Page 89: Switching The Preselected Coolant On/Off
Sirona Dental Systems GmbH 4 Operation Operating Instructions (USA) TENEO 4.5 Dentist element Switching the preselected coolant on/off 4.5.8.3 Cooling of treatment areas CAUTION Instrument can be operated without coolant. Tooth substance can be damaged by frictional heat. ➢ Always make sure that the treatment area does not overheat whenever you switch the coolant off. -
Page 90: Preselecting The Instrument Light Operating Voltage
Operating Instructions (USA) TENEO Preselecting the instrument light operating voltage 4.5.8.6 The original Sirona halogen and LED lamps are usually operated at 3.6 V. Voltages over 3.8 V destroy the lamp. The operating voltage can be adjusted for lamps made by other manufacturers. -
Page 91: Control 4.5.8.8 Setting The Spray Amount
Sirona Dental Systems GmbH 4 Operation Operating Instructions (USA) TENEO 4.5 Dentist element Setting the spray amount 4.5.8.8 The spray amount is preset at the factory. However, it can be adjusted using the regulating screw underneath the dentist element. This setting is then valid for all burr drives. -
Page 92: Setting The Nacl Flow Rate
4 Operation Sirona Dental Systems GmbH 4.5 Dentist element Operating Instructions (USA) TENEO 4. Swivel the latch fastener B down onto the hose on the pump wheel. Secure the latch fastener B with the locking mechanism A. IMPORTANT Flow rate of the peristaltic pump The flow rate is set with the spring on the locking mechanism A. - Page 93 NOTICE Flow rate of the ultrasonic tip Ultrasonic tips of third-party manufacturers in some cases don't offer a sufficient flow rate in conjunction with the NaCl function. ➢ Use only ultrasonic tips from Sirona. 65 48 510 D3509 D3509.201.03.03.23 10.2016...
-
Page 94: Apexlocator
4 Operation Sirona Dental Systems GmbH 4.5 Dentist element Operating Instructions (USA) TENEO 4.5.9 ApexLocator The ApexLocator can be used to measure the working length of the root canal file in endodontic treatments using electrical impedance. The ApexLocator can be used as follows: ●... - Page 95 For endodontic treatments with the ApexLocator, the Sirona ENDO handpiece 6:1 (starting from SN 6407 / July 2010), ENDO 6L, or ENDO L is required when using the treatment function; the Sirona handpiece SIRONiTi Apex is required when the motor program (without electronic torque limitation) is used.
- Page 96 4 Operation Sirona Dental Systems GmbH 4.5 Dentist element Operating Instructions (USA) TENEO Standardizing the measuring system Before starting the apex measurement, a functional check or standardization of the measuring system can be performed by shorting the electrodes. This cancels out any inaccuracies caused by skips in impedance in the measurement setup.
-
Page 97: Distance Display
Sirona Dental Systems GmbH 4 Operation Operating Instructions (USA) TENEO 4.5 Dentist element Distance display 4.5.9.2 The measured root canal depth is shown in the distance display on the touchscreen. A bar with 11 display levels shows the distance from the root canal file to the physiological apex (apical constriction). The root canal is divided into four colored sections in the distance display. - Page 98 In the event of electromagnetic interference, the red bar flashes. Maximum root canal depth reached, automatic motor stop and Sirona Dental Unit plugin "ApexLocator distance display" Maximum root canal depth reached The maximum root canal depth reached is displayed as a black triangle to the left of the distance display under the text "Max".
- Page 99 Sirona Dental Unit plugin "ApexLocator distance display" The distance display on the touchscreen can be additionally shown on the SIVISION monitor. For this, SIDEXIS 4 and the Sirona Dental Unit plugins must be installed on the PC . In SIDEXIS 4, this is displayed/hidden on the touchscreen by touching the distance display.
-
Page 100: Beeps
4 Operation Sirona Dental Systems GmbH 4.5 Dentist element Operating Instructions (USA) TENEO Beeps 4.5.9.3 In addition to the graphical distance display on the touchscreen, the position of the file in the root canal can also be indicated as an acoustic signal. -
Page 101: Performing Manual Measurements With The File Clamp
Sirona Dental Systems GmbH 4 Operation Operating Instructions (USA) TENEO 4.5 Dentist element Performing manual measurements with the file clamp 4.5.9.4 For endodontic examination, a manual measurement can be performed using the file clamp and a root canal file. ✔ The dental treatment unit is prepared for manual measurements using the file clamp, see section "Preparing to use the ApexLocator"... - Page 102 4 Operation Sirona Dental Systems GmbH 4.5 Dentist element Operating Instructions (USA) TENEO For information on apex measurements during treatment, refer to the section "Implantology/endodontic treatments with motor" [ → 109], and the section "Using the ApexLocator" [ → 137] in the "Endodontics"...
-
Page 103: Electric Motor
Sirona Dental Systems GmbH 4 Operation Operating Instructions (USA) TENEO 4.5 Dentist element 4.5.10 Electric motor IMPORTANT Electric motor, observe the Operating Instructions Also observe the operating instructions for the different motors. 4.5.10.1 Motor and coupling versions Different brushless motors are available depending on the type of use and the coupling of the handpiece. - Page 104 4 Operation Sirona Dental Systems GmbH 4.5 Dentist element Operating Instructions (USA) TENEO BL ISO C motors The green coded instrument hose (GN) must be used for the BL ISO C motor. BL ISO C The BL ISO C motor is directly equipped with an ISO coupling. T1 LINE and handpieces can thus be used without an adapter.
-
Page 105: Setting The Speed
Sirona Dental Systems GmbH 4 Operation Operating Instructions (USA) TENEO 4.5 Dentist element Setting the speed 4.5.10.2 Simple/Advanced Start program In the mode settings can be made using the static quick setting keys (with the key values 0.09, 10, 20, 30, 40), with programmable quick setting keys (with changeable key values) or via function levels (E1, E2). - Page 106 4 Operation Sirona Dental Systems GmbH 4.5 Dentist element Operating Instructions (USA) TENEO Setting intermediate speed values with static quick setting keys ✔ The electric motor is removed from its holder. ✔ Motor program EasyMode with static quick setting keys or the Start program is displayed on the touchscreen.
-
Page 107: Setting The Direction Of Rotation
Sirona Dental Systems GmbH 4 Operation Operating Instructions (USA) TENEO 4.5 Dentist element Setting the direction of rotation 4.5.10.3 The direction of rotation can be changed only when the motor is at a standstill. EasyMode Start program In the operating mode, the direction of rotation can only be set by using the foot control. - Page 108 4 Operation Sirona Dental Systems GmbH 4.5 Dentist element Operating Instructions (USA) TENEO EasyMode Start program In the If counterclockwise rotation is selected, an orange counterclockwise arrow appears. The counterclockwise arrow disappears when clockwise rotation is selected. Tip: After starting the electric motor with the foot switch, an audible warning signal sounds 6 times if counterclockwise rotation is activated.
-
Page 109: Implantology/Endodontics Treatments With Motor
IMPORTANT ApexLocator, SIRONiTi APEX SIRONiTi APEX Only Sirona SIRONiTi APEX must be used to perform apex measurement using a torque-limiting handpiece! The electrical conductivity can only be ensured using this handpiece. SIRONiTi APEX is not available in the USA. - Page 110 4 Operation Sirona Dental Systems GmbH 4.5 Dentist element Operating Instructions (USA) TENEO Apex stop 3. Touch the key. If the key is highlighted orange, the motor stops automatically when the physiological apex is reached. The – and + keys and AutoReverse key are displayed.
- Page 111 Sirona Dental Systems GmbH 4 Operation Operating Instructions (USA) TENEO 4.5 Dentist element The Motor screen is displayed. CAUTION Preventing incorrect measurements When performing the apex measurement, wear non-conductive gloves to avoid measurement errors caused by unwanted leakage current. During the measurement, the instrument must not come into contact with the patient's mucosa or the mucosal electrode.
-
Page 112: Turbine
4 Operation Sirona Dental Systems GmbH 4.5 Dentist element Operating Instructions (USA) TENEO 4.5.11 Turbine IMPORTANT High-speed handpiece, observe the Operating Instructions Also observe the operating instructions for the different high-speed handpieces. The high-speed handpiece hose is equipped with a standardized coupling according to ISO 9168. -
Page 113: Sprayvit M Multifunctional Syringe
Sirona Dental Systems GmbH 4 Operation Operating Instructions (USA) TENEO 4.5 Dentist element 4.5.12 SPRAYVIT M multifunctional syringe The multifunctional syringe is used to clean the treatment areas and blow them dry. It supplies air and preheated water media. The heating cartridge for the water is located in the handpiece. -
Page 114: Using The Sprayvit M Multifunctional Syringe
4 Operation Sirona Dental Systems GmbH 4.5 Dentist element Operating Instructions (USA) TENEO Using the SPRAYVIT M multifunctional syringe 4.5.12.2 The following instructions apply to the standard version (water on the Operating the SPRAYVIT right) of the SPRAYVIT M multifunctional syringe. A SPRAYVIT M with inverted media (water on the left) is available as an option. - Page 115 Sirona Dental Systems GmbH 4 Operation Operating Instructions (USA) TENEO 4.5 Dentist element Switching instrument light on/off in the setup program of the SPRAYVIT M In order to prevent interference with the treatment process, the corresponding program does not automatically appear on the touchscreen when the SPRAYVIT M is removed from its holder.
-
Page 116: Sirosonic Tl Scaler
➢ Always attach the torque wrench to the scaler for protection as soon as you deposit the handpiece. Ultrasonic handpiece, only Sirona tips CAUTION In some cases, ultrasonic tips from other manufacturers do not guarantee safe operation. ➢ Use only ultrasonic tips from Sirona. 65 48 510 D3509 D3509.201.03.03.23 10.2016... -
Page 117: Setting The Intensity
Sirona Dental Systems GmbH 4 Operation Operating Instructions (USA) TENEO 4.5 Dentist element Setting the intensity 4.5.13.2 Simple/Advanced Start program In the mode, settings can be made using the static quick setting keys (with the key values 1, 25, 50, 75, 100), with programmable quick setting keys (with changeable key values) or via function levels (E1, E2). - Page 118 4 Operation Sirona Dental Systems GmbH 4.5 Dentist element Operating Instructions (USA) TENEO Setting intermediate intensity values with static quick setting keys ✔ The SIROSONIC TL scaler is removed from its holder. ✔ Ultrasonic program with static quick setting keys or the EasyMode Start program is displayed on the touchscreen.
- Page 119 Sirona Dental Systems GmbH 4 Operation Operating Instructions (USA) TENEO 4.5 Dentist element Increasing the intensity by 20 steps (boost function) The boost function allows for a 20-step increase of the intensity during treatment in relation to the final value. From an intensity of 80, the maximum value of 100 is the maximum that can be selected.
- Page 120 4 Operation Sirona Dental Systems GmbH 4.5 Dentist element Operating Instructions (USA) TENEO Ultrasonic The sub-screen is displayed. Endo 2. Touch the key. The key is highlighted orange. Instead of the ultrasonic intensity values, the touchscreen displays the endodontic intensity values (1e to 5e).
-
Page 121: External Hf Surgical Device
Sirona Dental Systems GmbH 4 Operation Operating Instructions (USA) TENEO 4.5 Dentist element 4.5.14 External HF surgical device External HF surgical devices may interfere with the dental treatment unit and SIVISION monitor. The dental treatment unit should therefore be protected against interference caused by the external HF surgical unit whenever it is used. -
Page 122: Implantological And Endodontic Treatments
4 Operation Sirona Dental Systems GmbH 4.5 Dentist element Operating Instructions (USA) TENEO 4.5.15 Implantological and endodontic treatments The treatment functions support implantology and endodontic treatments. The speed and torque of the rotating instrument can be precisely adjusted and saved for later reference, if desired. This is possible for every work step for implantology treatments. - Page 123 Sirona Dental Systems GmbH 4 Operation Operating Instructions (USA) TENEO 4.5 Dentist element 2. Touch the button for the desired endodontic (left) or implantological (right) treatment. The Simple/Advanced Start program is displayed or, if an instrument has already been taken out, the system will switch to Instrument program .
- Page 124 4 Operation Sirona Dental Systems GmbH 4.5 Dentist element Operating Instructions (USA) TENEO Left key: endodontic treatment Right key: implantology treatment The next usable burr drive is marked using the orange circle. The required burr drive is assigned to the "endodontics" or "implantology"...
-
Page 125: Implantology
Implantology 4.5.15.2 Contra-angle handpiece, implantology CAUTION Only the Sirona contra-angle handpiece IMPLANT 20:1 may be used for the Implantology function. Instruments from other manufacturers can lead to malfunctions. Outside instruments may be improperly calibrated for implantology. ➢ Use only the IMPLANT 20:1 contra-angle handpiece from Sirona for implantology. - Page 126 4 Operation Sirona Dental Systems GmbH 4.5 Dentist element Operating Instructions (USA) TENEO IMPORTANT Treatment, torque adjustment Torque adjustment The maximum adjustable torque depends on the system motor and the speed settings. Endodontics, speed and torque settings CAUTION Improperly selected speeds and torque values endanger the patient.
- Page 127 Sirona Dental Systems GmbH 4 Operation Operating Instructions (USA) TENEO 4.5 Dentist element 4.5.15.2.5 Selecting a work step Individual settings can be made and saved for each implantology work step, e.g. predrilling, final drilling, tapping, etc., see "Saving settings" [ → 129]. At the end of each work step, the required settings can be accessed immediately by selecting the next step.
- Page 128 4 Operation Sirona Dental Systems GmbH 4.5 Dentist element Operating Instructions (USA) TENEO 4.5.15.2.6 Sub-screen functions Opening the implantology sub-screen ✔ Implantology program is displayed on the touchscreen. Sub-screen ➢ Touch the key. Implantology The sub-screen is displayed. Preselecting NaCl rinsing, setting the flow rate, and activating the...
- Page 129 Sirona Dental Systems GmbH 4 Operation Operating Instructions (USA) TENEO 4.5 Dentist element Activating NaCl rinsing via button on foot control ✔ NaCl rinsing Implantology program key is displayed in the ➢ Press the right button of the foot control. The NaCl rinsing function remains active as long as the key is pressed.
- Page 130 4 Operation Sirona Dental Systems GmbH 4.5 Dentist element Operating Instructions (USA) TENEO ✔ The corresponding settings are made. ✔ Implantology program is displayed. Memory ➢ Press and hold the key (> 2 s). An audible signal sounds. The settings you have made will be saved for every work step and the entire treatment session.
-
Page 131: Endodontics
4.5.15.3 Contra-angle handpiece, endodontics CAUTION Only the Sirona ENDO 6:1 (after SN 6407 / July 2010) and ENDO 6 L contra-angle handpieces can be used for the endodontics function. Instruments from other manufacturers can lead to malfunctions. Third- party instruments may be improperly calibrated for endodontics. - Page 132 4 Operation Sirona Dental Systems GmbH 4.5 Dentist element Operating Instructions (USA) TENEO Tip: The four keys that are marked with cursor positions (blue/orange) can also be operated with the foot control, even when the cursor control is not active. Treatment, Background shading of files...
- Page 133 Sirona Dental Systems GmbH 4 Operation Operating Instructions (USA) TENEO 4.5 Dentist element 4.5.15.3.2 Inserting a file in the sequence Individual files from other popular file systems can be inserted in a treatment session for endodontic treatment. The file is then inserted according to the position of the file list selected.
- Page 134 4 Operation Sirona Dental Systems GmbH 4.5 Dentist element Operating Instructions (USA) TENEO 4. Select the file system from which you would like to insert a file in the File System file sequence. Touch the key. Each time the key is touched, the next file system is displayed on the left side of the touchscreen.
- Page 135 This includes a measurement of motor current at different speeds to assess the properties of the system. Calibration only with Sirona instruments CAUTION Use only Sirona instruments to guarantee correct calibration. ✔ Simple Endodontics program Advanced (shown here) or the Endodontics program is displayed on the touchscreen.
- Page 136 4 Operation Sirona Dental Systems GmbH 4.5 Dentist element Operating Instructions (USA) TENEO ✔ Advanced Endodontics program is displayed on the touchscreen. ✔ A file is selected. ➢ Use the – and + keys to set the speed and torque of the contra-angle handpiece.
- Page 137 Sirona Dental Systems GmbH 4 Operation Operating Instructions (USA) TENEO 4.5 Dentist element 4.5.15.3.7 Using reciprocal rotating files For endodontic treatment with reciprocal rotating files, the sequence of the files and the preset values recommended by the manufacturer cannot be changed. expanded endodontic dialogue...
- Page 138 The selected file is highlighted orange. 2. Perform the settings as described in the following sections: Switch instrument light on/off The Sirona ENDO 6L handpiece is equipped with an optical fiber. Instrument light ➢ Switch the instrument light on or off with the key.
- Page 139 Sirona Dental Systems GmbH 4 Operation Operating Instructions (USA) TENEO 4.5 Dentist element Setting the automatic motor stop of the ApexLocator If your dental treatment unit is equipped with the ApexLocator option, the motor can be set to stop automatically at a preset distance from the apex.
- Page 140 4 Operation Sirona Dental Systems GmbH 4.5 Dentist element Operating Instructions (USA) TENEO Switching AutoReverse ON/OFF A setting can be made so that the bur drive automatically switches to counterclockwise rotation when the preset torque value is reached. If your dental treatment unit is equipped with the ApexLocator option, you...
- Page 141 Sirona Dental Systems GmbH 4 Operation Operating Instructions (USA) TENEO 4.5 Dentist element 4.5.15.3.10 Endodontic treatment administration Up to five endodontic treatments can be added to the left treatment list of Treatment selection screen. The following functions are for managing the endodontic treatment list: ●...
- Page 142 4 Operation Sirona Dental Systems GmbH 4.5 Dentist element Operating Instructions (USA) TENEO 2. Enter the designation of the endodontic treatment you would like to create. Confirm your entry with the key. The keyboard is hidden. The new endodontic treatment is displayed in the treatment list with the designation you entered.
- Page 143 Sirona Dental Systems GmbH 4 Operation Operating Instructions (USA) TENEO 4.5 Dentist element 1. Touch the button of an endodontic treatment that you would like to rename. The selected button is highlighted orange. Rename endodontic treatment 2. Touch the key. A keyboard is displayed.
- Page 144 4 Operation Sirona Dental Systems GmbH 4.5 Dentist element Operating Instructions (USA) TENEO 2. Select the file system that you would like to add to the endodontic treatment list. You can scroll in the list with the ↑ and ↓ keys. Touch the button of the desired file system (multiple file systems can also be selected).
-
Page 145: Assistant Element
Sirona Dental Systems GmbH 4 Operation Operating Instructions (USA) TENEO 4.6 Assistant element Assistant element 4.6.1 Maximum load capacity The maximum load of the assistant element is 1.5 kg (3.3 lbs). A skid- proof silicone mat can also be used. Assistant element, support arm... -
Page 146: Fixed Keys On The Assistant Element
4 Operation Sirona Dental Systems GmbH 4.6 Assistant element Operating Instructions (USA) TENEO 4.6.4 Fixed keys on the assistant element The functions assigned to the keys can be switched on/off on the TENEO reference assistant element. The settings screens can be opened only on the touchscreen of the dentist element. -
Page 147: Timer Function
Sirona Dental Systems GmbH 4 Operation Operating Instructions (USA) TENEO 4.6 Assistant element X-ray viewer Alternatively, the key on the assistant element can also be used to activate the bell or hash key, e.g. if neither an X-ray viewer or a SIVISION monitor is available. See also "Setting the x-ray viewer key on the assistant element"... -
Page 148: Operating Light
4 Operation Sirona Dental Systems GmbH 4.6 Assistant element Operating Instructions (USA) TENEO Operating light 4.6.4.8 The operating light is always switched on at the set brightness level. Operating Light ➢ Press the fixed key. If the operating light is switched on, the LED on the fixed key lights up on the dentist and assistant elements. -
Page 149: Suction Handpieces
➢ Make sure that you hold the suction tip in such a way that the opening cannot accidentally attach to the oral mucous membranes. Sirona recommends using spray aspirator cannulas with additional air intake, see "Spare parts, Consumables" [ → 266]. - Page 150 4 Operation Sirona Dental Systems GmbH 4.6 Assistant element Operating Instructions (USA) TENEO Saliva ejector A curved tip that can be placed in the corner of the mouth is provided for saliva ejection. Surgical suction device The surgical cannula can be inserted directly into the saliva ejector handpiece.
-
Page 151: Sprayvit M Multifunctional Syringe
Sirona Dental Systems GmbH 4 Operation Operating Instructions (USA) TENEO 4.6 Assistant element 4.6.6 SPRAYVIT M multifunctional syringe The functionality is described in the chapter on the dentist element, see "SPRAYVIT M multifunctional syringe" [ → 113]. 65 48 510 D3509 D3509.201.03.03.23 10.2016... -
Page 152: Mini L.e.d. Curing Light
4 Operation Sirona Dental Systems GmbH 4.6 Assistant element Operating Instructions (USA) TENEO 4.6.7 Mini L.E.D. curing light The curing light is used to cure composite material with short-wave light. 4.6.7.1 Safety instructions Curing light, laser radiation CAUTION The curing light contains powerful LEDs. In accordance with IEC 62471, they are classified in risk group 2 with the light bar removed. -
Page 153: Connecting The Mini L.e.d
Sirona Dental Systems GmbH 4 Operation Operating Instructions (USA) TENEO 4.6 Assistant element Connecting the Mini L.E.D. 4.6.7.3 The Mini L.E.D. is connected to the assistant element in holder 1. 1. Connect the supply cable A to the dental treatment unit. 2. Screw the hose coupling B onto the Mini L.E.D. C. -
Page 154: Operating The Mini L.e.d
4 Operation Sirona Dental Systems GmbH 4.6 Assistant element Operating Instructions (USA) TENEO Quick curing mode In the quick curing mode, the Mini L.E.D. operates at full power for 10 seconds. In this mode, the light intensity output is as follows: Sec. -
Page 155: Technical Data
Sirona Dental Systems GmbH 4 Operation Operating Instructions (USA) TENEO 4.6 Assistant element Technical data 4.6.7.6 General Technical Data on Mini L.E.D. Model: Mini L.E.D. Weight of handpiece without hose: 105 g Dimensions: Dia. 23mm x 240mm Current consumption of handpiece: 5 V DC / 0.65 A... -
Page 156: Hydrocolloid
4 Operation Sirona Dental Systems GmbH 4.6 Assistant element Operating Instructions (USA) TENEO 4.6.8 Hydrocolloid Hydrocolloid impressions of the upper and lower jaw can be made using the coolable impression tray. The molding compound hardens quickly due to the cooling. 4.6.8.1 Connecting/removing the hydrocolloid The scope of delivery also includes two quick-release couplings. -
Page 157: Setting The Hydrocolloid And Switching It On/Off
Sirona Dental Systems GmbH 4 Operation Operating Instructions (USA) TENEO 4.6 Assistant element Setting the hydrocolloid and switching it on/off 4.6.8.2 Start program Opening Start sub-screen ✔ Start program is displayed on the touchscreen. Sub-screen ➢ Touch the key. Start The sub-screen is displayed. -
Page 158: Water Unit
4 Operation Sirona Dental Systems GmbH 4.7 Water unit Operating Instructions (USA) TENEO Water unit 4.7.1 Swiveling the cuspidor bowl The cuspidor on the water unit can be manually swiveled approx. 110 mm toward the patient chair. A setting can be made that causes the cuspidor bowl to automatically Reference “Link cuspidor to mouth rinsing position”... -
Page 159: Adjusting The Water Amount For Flushing
Sirona Dental Systems GmbH 4 Operation Operating Instructions (USA) TENEO 4.7 Water unit Setting the filling level The tumbler filling level can be preset. 1. Open the maintenance flap A on the base of the water unit. 2. Set the filling level with control knob B. -
Page 160: Self-Sufficient Water Supply
4 Operation Sirona Dental Systems GmbH 4.7 Water unit Operating Instructions (USA) TENEO 4.7.4 Self-sufficient water supply If the water quality of the public drinking water supply is not suitable for the treatment of patients, a dental treatment unit can be operated with a self-sufficient water supply. - Page 161 Sirona Dental Systems GmbH 4 Operation Operating Instructions (USA) TENEO 4.7 Water unit Opening Start sub-screen ✔ Start program is displayed on the touchscreen. Sub-screen ➢ Touch the key. Start The sub-screen is displayed. Changing waterline treatment system to stand-alone water supply...
- Page 162 4 Operation Sirona Dental Systems GmbH 4.7 Water unit Operating Instructions (USA) TENEO Start Aqua In the sub-screen, the key is highlighted in orange. The waterline treatment system is now changed to stand-alone water supply. If the dental treatment unit is changed to stand-alone water supply, in the...
-
Page 163: Tray
Sirona Dental Systems GmbH 4 Operation Operating Instructions (USA) TENEO 4.8 Tray Tray Maximum load capacity The maximum load is 1 kg (2.2 lbs). Removing the tray 1. Hold the tray tightly. 2. Open the lock by swiveling the lever downwards. 3. Remove the tray. - Page 164 4 Operation Sirona Dental Systems GmbH 4.8 Tray Operating Instructions (USA) TENEO Removing the brake knob The brake knob of the support arm can be removed if it is found to be disturbing. 1. Loosen the brake knob at the safety screw A.
-
Page 165: Switching On/Off The X-Ray Viewer Or White Screen On The Sivision Monitor
Sirona Dental Systems GmbH 4 Operation Operating Instructions (USA) TENEO 4.9 Switching on/off the X-ray viewer or white screen on the SIVISION monitor Switching on/off the X-ray viewer or white screen on the SIVISION monitor If the dental treatment unit has no X-ray viewer but is equipped with a... -
Page 166: Operating Light
4 Operation Sirona Dental Systems GmbH 4.10 Operating light Operating Instructions (USA) TENEO 4.10 Operating light The operating light is attached to a multi-jointed support arm. It can be LEDview and LEDviewPLUS operating lights easily adjusted to the work area using the handles. Brakes in the support arm hold the operating light in the position to which it has been adjusted. -
Page 167: Setting The Brightness And Sensor Control Of The Ledview
Sirona Dental Systems GmbH 4 Operation Operating Instructions (USA) TENEO 4.10 Operating light touchscreen. The distance at which the contactless sensor will react to movements can also be adjusted. 4.10.2 Setting the brightness and sensor control of the LEDview Operating Light 1. Press and hold the fixed key on the dentist element (>... -
Page 168: Switching The Composite Function On/Off
4 Operation Sirona Dental Systems GmbH 4.10 Operating light Operating Instructions (USA) TENEO 2. Use the – and + keys to set the desired brightness of the operating light (7 levels). The – key decreases the brightness and the + key increases it. -
Page 169: Cerec Ai
The Omnicam cable is guided via a swivel arm and has a connector. This allows the camera to be used with other TENEO dental treatment units. The camera shelf has a heater plate to prewarm the sapphire disc. A green LED indicates that the Omnicam is ready for operation. -
Page 170: X-Ray Tube Unit
4 Operation Sirona Dental Systems GmbH 4.12 X-ray tube unit Operating Instructions (USA) TENEO 4.12 X-ray tube unit PLUS The dental treatment unit can be equipped with the HELIODENT ray tube unit. The X-ray tube unit is attached to the light post of the dental treatment unit using a multi-jointed support arm that can be adjusted both horizontally and vertically. -
Page 171: Sivision Digital Video System
Sirona Dental Systems GmbH 4 Operation Operating Instructions (USA) TENEO 4.13 SIVISION digital video system 4.13 SIVISION digital video system The SIVISION digital video system enables intraoral and extraoral images to be made. The SiroCam AF+ intraoral camera generates digital image data which can be transmitted via a USB 2.0 port (high-speed Universal Serial Bus) to a connected PC and stored there. -
Page 172: Sivision Monitor
4 Operation Sirona Dental Systems GmbH 4.13 SIVISION digital video system Operating Instructions (USA) TENEO 4.13.1 SIVISION monitor 22" monitor The monitor is equipped with loudspeakers and a glass screen to facilitate cleaning. Please refer to the operating instructions for the 22“ flat screen monitor 2015 model. -
Page 173: Sirocam Af+ Intraoral Camera
Sirona Dental Systems GmbH 4 Operation Operating Instructions (USA) TENEO 4.13 SIVISION digital video system 4.13.2 SiroCam AF+ intraoral camera Safety instructions 4.13.2.1 The SiroCam AF+ intraoral camera is a sensitive optical instrument and must therefore always be handled with care. NOTICE Intraoral camera, lens window The lens window is sensitive to scratches. -
Page 174: Connecting The Sirocam Af+ Intraoral Camera
4 Operation Sirona Dental Systems GmbH 4.13 SIVISION digital video system Operating Instructions (USA) TENEO Connecting the SiroCam AF+ intraoral camera 4.13.2.3 Connecting the intraoral camera Depending on the equipment version, the intraoral camera can be placed at instrument position 6 or in the additional holder. - Page 175 Sirona Dental Systems GmbH 4 Operation Operating Instructions (USA) TENEO 4.13 SIVISION digital video system 4.13.2.4.2 Using the camera with SI Video Using SI Video, up to four still images can be generated with the SiroCam AF+ intraoral camera. These can be displayed on the SIVISION monitor either as a sequence of single images or simultaneously as a quad image.
- Page 176 4 Operation Sirona Dental Systems GmbH 4.13 SIVISION digital video system Operating Instructions (USA) TENEO Switching between quad image and single image When you change from quad to single image, the previously marked quad image is displayed as a single image. Conversely, the displayed single image is marked in the quad image.
- Page 177 Sirona Dental Systems GmbH 4 Operation Operating Instructions (USA) TENEO 4.13 SIVISION digital video system 4.13.2.4.3 Using the camera with SIDEXIS Besides the display and processing of X-ray images, SIDEXIS XG or SIDEXIS 4 can be used additionally as a video application for the SiroCam AF+ intraoral camera.
-
Page 178: Technical Data Of Camera
4 Operation Sirona Dental Systems GmbH 4.13 SIVISION digital video system Operating Instructions (USA) TENEO Saving an image ✔ The patient must be registered in SIDEXIS. ✔ The still image to be saved is displayed on the SIVISION monitor. ➢ Press the left button of the foot control or put the camera back in the holder. -
Page 179: Operation With A Pc
/ SIVISION connect" manual. IT network CAUTION Integrating the TENEO into an IT network that includes other devices can lead to previously unknown risks. The following changes to the IT network can lead to new risks: • Changes to the IT network configuration •... -
Page 180: Sivision Program
4 Operation Sirona Dental Systems GmbH 4.14 Operation with a PC Operating Instructions (USA) TENEO 4.14.1 SIVISION program Various PC applications of the PC can be started and operated in the SIVISION program. You can select the PC applications to be operable via the dental treatment unit in SIUCOM plus. -
Page 181: Communication With The Media Player
Sirona Dental Systems GmbH 4 Operation Operating Instructions (USA) TENEO 4.14 Operation with a PC The dental treatment unit starts the PC applications automatically. An orange square located in front of the respective PC application on the touchscreen indicates whether the application has been started and is ready for operation on the PC. -
Page 182: Communication With Sidexis
4 Operation Sirona Dental Systems GmbH 4.14 Operation with a PC Operating Instructions (USA) TENEO Communication with SIDEXIS 4.14.1.4 The SIDEXIS PC application enables you e.g. to display X-ray and intraoral camera images and transmit them to the SIVISION monitor. The live image of the SiroCam AF+ intraoral camera is displayed in SIDEXIS and can be saved as a still image in the patient database. - Page 183 Sirona Dental Systems GmbH 4 Operation Operating Instructions (USA) TENEO 4.14 Operation with a PC Overview layout The opened image windows are scaled in the display area so that no scroll bars or as few scroll bars as possible must be displayed. The image windows are arranged without overlapping.
- Page 184 4 Operation Sirona Dental Systems GmbH 4.14 Operation with a PC Operating Instructions (USA) TENEO Reducing noise Individual scattered pixels and minor disturbing information which lead to a noisy image are eliminated without reducing the overall definition of the image. Undo The effect of the last filter operation is undone.
-
Page 185: Usb Port
USB interface, only units of type BF CAUTION Only type BF medical devices and applied parts according to IEC 60601-1, e.g. the Sirona XIOS XG USB module intraoral X-ray system, may be connected to the USB interface. USB interface, only units without power supply unit CAUTION USB devices with their own voltage supply (e.g., via a power supply unit) -
Page 186: Configuration Of The Dental Treatment Unit (Setup)
4 Operation Sirona Dental Systems GmbH 4.15 Configuration of the dental treatment unit (setup) Operating Instructions (USA) TENEO 4.15 Configuration of the dental treatment unit (setup) Various dental treatment unit functions can be individually configured via the Setup settings. The dental treatment unit can therefore be adapted to match each user's personal method of treatment. -
Page 187: Configuring The Easytouch User Interface
Sirona Dental Systems GmbH 4 Operation Operating Instructions (USA) TENEO 4.15 Configuration of the dental treatment unit (setup) 4.15.2 Configuring the EasyTouch user interface EasyTouch user interface ➢ Touch the key in the setup program. The sub-screen opens. Switching the key sound on/off 4.15.2.1... -
Page 188: Setting The Date And Time
PC. The setting keys for the time and date are shown on the touchscreen. This function can be switched on and off with the Sirona Dental Unit plugin "Time synchronization". For more details, refer to the "Sirona Dental Unit plugins" user manual. -
Page 189: Configuring Control Options
Sirona Dental Systems GmbH 4 Operation Operating Instructions (USA) TENEO 4.15 Configuration of the dental treatment unit (setup) 4.15.4 Configuring control options Operation of the entire dental treatment unit operation can be configured in this dialog. Control options ➢ Touch the key in the setup program. -
Page 190: Showing/Hiding The Fine Adjustment Key
4 Operation Sirona Dental Systems GmbH 4.15 Configuration of the dental treatment unit (setup) Operating Instructions (USA) TENEO Showing/hiding the fine adjustment key 4.15.4.4 Depending on the type of treatment, it may be necessary to adjust the patient chair more slowly and more precisely (e.g., for tiny corrections in Fine Adjustment case of treatment under a microscope). -
Page 191: Automatic Activation Of The Operating Light With
Sirona Dental Systems GmbH 4 Operation Operating Instructions (USA) TENEO 4.15 Configuration of the dental treatment unit (setup) ➢ Change to the next setup dialog page. 4.15.4.7 Automatic activation of the operating light with approaching dentist element Operating light ➢ Touch the key. -
Page 192: 10Linking The Dentist Element Movement To Chair Programs
4 Operation Sirona Dental Systems GmbH 4.15 Configuration of the dental treatment unit (setup) Operating Instructions (USA) TENEO Linking the dentist element movement to chair programs 4.15.4.10 A setting can be made to designate the chair programs for which the position of the dentist element can be additionally programmed. -
Page 193: 13Setting The X-Ray Viewer Key On The Assistant Element
Switching the central supply for chemical suction hose cleaning off and on For clinical use, TENEO dental treatment units can be fitted with a central cleaning agent supply for chemical suction hose cleaning. The CDS 60 system of Dürr Dental is intended for this purpose. -
Page 194: 16Linking The Spray Aspirator To The 4-Way Foot Switch
Operating Instructions (USA) TENEO NOTICE The CDS 60 station may only be operated with a cleaning agent approved by Dürr Dental and Sirona, e.g., Orotol plus. IMPORTANT Also observe the installation and operating instructions for the CDS 60 from Dürr Dental. - Page 195 Sirona Dental Systems GmbH 4 Operation Operating Instructions (USA) TENEO 4.15 Configuration of the dental treatment unit (setup) Autofocus ➢ Touch the key. If the key is highlighted orange, the function is activated. The camera image is focused using the foot control.
-
Page 196: Configure Instruments
4 Operation Sirona Dental Systems GmbH 4.15 Configuration of the dental treatment unit (setup) Operating Instructions (USA) TENEO 4.15.5 Configure instruments Instruments ➢ Touch the key in the setup program. The sub-screen opens. Preselecting how instrument settings are to be saved 4.15.5.1... -
Page 197: Showing/Hiding The Key For The External Hf Surgical Unit
Sirona Dental Systems GmbH 4 Operation Operating Instructions (USA) TENEO 4.15 Configuration of the dental treatment unit (setup) Showing/hiding the key for the external HF surgical unit 4.15.5.2 External HF surgical units may interfere with the dental treatment unit and external HF surgical SIVISION monitor. -
Page 198: Configuring The Network Connection
The sub-dialog opens. It shows the currently used network configuration. Call in your data processing specialist for network configuration. Network configuration is described in detail in the "TENEO installation instructions". 4.15.7 Opening the service function The Service domain is intended to be used only by service engineers. -
Page 199: Care, Cleaning And Maintenance By The Practice Team
Sirona Dental Systems GmbH 5 Care, cleaning and maintenance by the practice team Operating Instructions (USA) TENEO 5.1 Basics Care, cleaning and maintenance by the practice team Basics Handling mainly involves the following steps: ● Cleaning ● Disinfection ● Sterilization if possible It is recommended to clean the unit as soon as possible after use. - Page 200 Check the message system of the amalgam separator [ → 240] Change the battery of the wireless foot control [ → 245] For a quick overview of the work involved, see the “Maintenance, ® cleaning, and disinfection schedule” for the TENEO dental treatment unit. 65 48 510 D3509...
-
Page 201: Care, Cleaning, And Disinfecting Agents
Approved care, cleaning, and disinfecting agents Approved care, cleaning, and disinfecting agents Use only care, cleaning and disinfecting agents approved by Sirona! For a continuously updated list of approved agents, please visit Care, cleaning, and disinfecting agents, with REF number "www.sirona.com"... -
Page 202: General Handling Instructions
7. Count all germs found on the surface of the tester. If the number of germs significantly exceeds 100, then sanitation is Link to sanitizing the dental treatment unit, TENEO required; see "Sanitizing the dental treatment unit" [ → 248]. -
Page 203: Inspection, Maintenance And Testing
Sterilization Sterilization may be done for components that are marked accordingly. Sirona recommends sterilization in a steam sterilizer (autoclave) according to ISO 13060, Class B (e.g., DAC PREMIUM/DAC PROFESSIONAL). The sterilization must be carried out with a multiple fractionated suction system (Class B sterilizer). -
Page 204: Surfaces
5 Care, cleaning and maintenance by the practice team Sirona Dental Systems GmbH 5.2 Surfaces Operating Instructions (USA) TENEO Surfaces 5.2.1 Clean/disinfect surfaces The surfaces can be disinfected by spraying and wiping with surface disinfectants. NOTICE Surfaces, medication Drugs have a chemical reaction with the surface of the unit. -
Page 205: Disinfect The Easytouch
NOTICE Care, cleaning, and disinfecting agents Approved care, cleaning, and disinfecting agents Use only care, cleaning and disinfecting agents approved by Sirona, see "Care, cleaning, and disinfecting agents" [ → 201]. Clean 1. Actuate the fixed key on the dentist element. -
Page 206: Disinfecting Handles
NOTICE Care, cleaning, and disinfecting agents Approved care, cleaning, and disinfecting agents Use only care, cleaning and disinfecting agents approved by Sirona, see "Care, cleaning, and disinfecting agents" [ → 201]. Dentist element The handles on the dentist element can be spray, wipe and thermally disinfected. -
Page 207: Disinfecting The Tray
NOTICE Care, cleaning, and disinfecting agents Approved care, cleaning, and disinfecting agents Use only care, cleaning and disinfecting agents approved by Sirona, see "Care, cleaning, and disinfecting agents" [ → 201]. 1. Hold the tray tightly. 2. Open the lock by swiveling the lever downwards. -
Page 208: Thermally Disinfecting The Instrument Holder Of The Dentist Element
5 Care, cleaning and maintenance by the practice team Sirona Dental Systems GmbH 5.2 Surfaces Operating Instructions (USA) TENEO 5.2.6 Thermally disinfecting the instrument holder of the dentist element and sterilizing the silicone mat The instrument holder can be removed for easier cleaning or thermal disinfection. -
Page 209: Thermally Disinfecting The Instrument Holder Of The Assistant
Sirona Dental Systems GmbH 5 Care, cleaning and maintenance by the practice team Operating Instructions (USA) TENEO 5.2 Surfaces 5.2.7 Thermally disinfecting the instrument holder of the assistant element and sterilizing the silicone mat The instrument holder can be removed for cleaning and thermal disinfection. -
Page 210: Instruments And Instrument Hoses
5 Care, cleaning and maintenance by the practice team Sirona Dental Systems GmbH 5.3 Instruments and instrument hoses Operating Instructions (USA) TENEO Instruments and instrument hoses 5.3.1 Rinse water lines Microorganisms can grow in the water lines of the dental treatment unit. - Page 211 Sirona Dental Systems GmbH 5 Care, cleaning and maintenance by the practice team Operating Instructions (USA) TENEO 5.3 Instruments and instrument hoses Start The sub-dialog is displayed. Purge function 2. Touch the key. Purge The screen is displayed on the touchscreen.
- Page 212 5 Care, cleaning and maintenance by the practice team Sirona Dental Systems GmbH 5.3 Instruments and instrument hoses Operating Instructions (USA) TENEO Error message: Deposit instruments in instrument holders Deposit instruments If the display appears after the purge function has been started, the dental treatment unit has detected that not all of the instruments have been placed in their holders.
-
Page 213: Automatically Purge Water Lines (Autopurge Function)
Sirona Dental Systems GmbH 5 Care, cleaning and maintenance by the practice team Operating Instructions (USA) TENEO 5.3 Instruments and instrument hoses 5.3.3 Automatically purge water lines (autopurge function) The AutoPurge function enables automatic purging of all water-carrying instruments in the dentist element, of the SPRAYVIT M multifunctional syringe in the dentist and assistant elements and of the suction hoses and the tumbler filling. - Page 214 5 Care, cleaning and maintenance by the practice team Sirona Dental Systems GmbH 5.3 Instruments and instrument hoses Operating Instructions (USA) TENEO AutoPurge The screen is displayed on the touchscreen. Setting the instrument purge time and starting the AutoPurge function The purging time of the instruments may be set between 60 and 180 seconds.
- Page 215 Sirona Dental Systems GmbH 5 Care, cleaning and maintenance by the practice team Operating Instructions (USA) TENEO 5.3 Instruments and instrument hoses 2. If the adapters are not yet located in the receptacles of the water unit, insert them into the receptacles until they lock into place. The SPRAYVIT adapters can be inserted only into the two receptacles on the right side of the dentist element with the guide rib facing upward.
- Page 216 5 Care, cleaning and maintenance by the practice team Sirona Dental Systems GmbH 5.3 Instruments and instrument hoses Operating Instructions (USA) TENEO IMPORTANT Pinching the instrument hoses Be careful not to pinch the instrument hoses when inserting the instruments. If the hoses are pinched, the water flow will be obstructed during purging.
- Page 217 Sirona Dental Systems GmbH 5 Care, cleaning and maintenance by the practice team Operating Instructions (USA) TENEO 5.3 Instruments and instrument hoses Purging water lines The removed instruments are purged with water for the duration of the set AutoPurge time. Afterwards, the tumbler filler is purged and the suction hoses are cleaned.
- Page 218 5 Care, cleaning and maintenance by the practice team Sirona Dental Systems GmbH 5.3 Instruments and instrument hoses Operating Instructions (USA) TENEO If any instruments are removed from the water unit or new instruments are connected to the dental treatment unit while the latter...
-
Page 219: Care For, Disinfect And Sterilize The Treatment Instruments
Care, cleaning, and disinfecting agents Approved care, cleaning, and disinfecting agents Use only care, cleaning and disinfecting agents approved by Sirona, see "Care, cleaning, and disinfecting agents" [ → 201]. Disconnect the mucosal electrode from the connection cable. The metal hook can be sterilized, and the connection cable can be disinfected by wiping. -
Page 220: Disinfecting/Sterilizing Mini L.e.d. Curing Light
Care, cleaning, and disinfecting agents Approved care, cleaning, and disinfecting agents Use only care, cleaning and disinfecting agents approved by Sirona, see "Care, cleaning, and disinfecting agents" [ → 201]. 1. Remove the connection cable of the Mini L.E.D. by turning the 132°C –... -
Page 221: Cleaning/Disinfecting The Sirocam Af+ Intraoral Camera
It can be wipe disinfected. NOTICE Care, cleaning, and disinfecting agents Approved care, cleaning, and disinfecting agents Use only care, cleaning and disinfecting agents approved by Sirona, see "Care, cleaning, and disinfecting agents" [ → 201]. NOTICE Intraoral camera, lens window The lens window is sensitive to scratches. -
Page 222: Changing The Cotton Wool Roll On The Turbine Hose
5 Care, cleaning and maintenance by the practice team Sirona Dental Systems GmbH 5.3 Instruments and instrument hoses Operating Instructions (USA) TENEO 5.3.5 Changing the cotton wool roll on the turbine hose Return air containing a small amount of high-speed handpiece oil is emitted at the unit end of the high-speed handpiece hose. -
Page 223: Vacuum System
Sirona Dental Systems GmbH 5 Care, cleaning and maintenance by the practice team Operating Instructions (USA) TENEO 5.4 Vacuum system Vacuum system 5.4.1 Cleaning the suction hoses The suction system is exposed daily to secretions, saliva, and blood that contain bacteria. Therefore, for reasons of hygiene, the used suction hoses must be cleaned after each patient, in particular after every treatment involving blood. - Page 224 ➢ Do not fill DENTOSEPT P waterline treatment solution into the cleaning agent tank for chemical suction hose cleaning! Use only "Agents for the suction lines" approved by Sirona, see Care, cleaning and disinfecting agents" [ → 201]. 1. Open the maintenance flap on the base of the water unit. The cleaning agent tank for chemical suction hose cleaning is located on the left side.
-
Page 225: Cleaning Vacuum System Using Cleaning Adapter In The Cuspidor Or
NOTICE Care, cleaning, and disinfecting agents Approved care, cleaning, and disinfecting agents Use only care, cleaning and disinfecting agents approved by Sirona, see "Care, cleaning, and disinfecting agents" [ → 201]. NOTICE Vacuum system, foaming cleaning agents Domestic cleaning agents foam up. - Page 226 5 Care, cleaning and maintenance by the practice team Sirona Dental Systems GmbH 5.4 Vacuum system Operating Instructions (USA) TENEO 7. Attach the adapter C to the saliva ejector. Cleaning procedure 1. Pour 1 liter of cleaning solution into the cuspidor. 2. Remove the suction hoses from their holders and attach them to the side of the cleaning adapter as simultaneously as possible.
-
Page 227: Cleaning The Suction System Via External Container
Sirona Dental Systems GmbH 5 Care, cleaning and maintenance by the practice team Operating Instructions (USA) TENEO 5.4 Vacuum system Cleaning the suction system via external container 5.4.2.2 If the dental treatment unit is not equipped with a cuspidor, the suction system must be cleaned via external container. -
Page 228: Sterilize And Disinfect The Suction Handpieces
➢ Do not under any circumstances use vaseline or silicone greases. ➢ Use only greases approved by Sirona. 1. Pull the handpiece of the spray aspirator, the saliva ejector and, if installed, the surgical suction device off of their suction hoses. -
Page 229: Cleaning And Disinfecting The Suction Hoses
Sirona Dental Systems GmbH 5 Care, cleaning and maintenance by the practice team Operating Instructions (USA) TENEO 5.4 Vacuum system 5.4.4 Cleaning and disinfecting the suction hoses The hoses of the spray aspirator, the saliva ejector and the surgical Surgical suction device option suction device as well as the connection hose to the water unit can be pulled off for rinsing under running water. - Page 230 5 Care, cleaning and maintenance by the practice team Sirona Dental Systems GmbH 5.4 Vacuum system Operating Instructions (USA) TENEO 4. Take the collectors C out of the suction hoses. Collect the amalgam residues in a glass filled with water. 5. Take off the suction needles and flush the suction hoses with clean water.
-
Page 231: Thermodisinfecting Suction Hoses
Sirona Dental Systems GmbH 5 Care, cleaning and maintenance by the practice team Operating Instructions (USA) TENEO 5.4 Vacuum system 5.4.5 Thermodisinfecting suction hoses The dental treatment unit is not equipped with thermally disinfectable suction hoses as standard. Thermally disinfectable suction hoses are available as special accessories. -
Page 232: Components Of The Water Unit
5 Care, cleaning and maintenance by the practice team Sirona Dental Systems GmbH 5.5 Components of the water unit Operating Instructions (USA) TENEO Components of the water unit 5.5.1 Clean the gold trap The gold trap retains larger solid particles to prevent them from being washed down the drain in the cuspidor bowl. -
Page 233: Clean/Disinfect The Cuspidor
Foaming cleaning agents often cause foam and water to be sucked into the dry suction system. This can cause damage to the suction machine. ➢ Use only care, cleaning and disinfecting agents approved by Sirona, see"Care, cleaning, and disinfecting agents" [ → 201]. -
Page 234: Cleaning The Outlet Lines Of The Cuspidor
Use the same agent as for the suction lines. NOTICE Care, cleaning, and disinfecting agents Approved care, cleaning, and disinfecting agents Use only care, cleaning and disinfecting agents approved by Sirona, see "Care, cleaning, and disinfecting agents" [ → 201]. NOTICE Vacuum system, foaming cleaning agents Domestic cleaning agents foam up. -
Page 235: Refilling Dentosept P Waterline Treatment Solution
Approved care, cleaning, and disinfecting agents Use only waterline treatment solution which have been approved for water lines by Sirona for the waterline treatment system; see "Care, cleaning, and disinfecting agents" [ → 201]. 65 48 510 D3509... -
Page 236: Change The Water And Air Filters
5 Care, cleaning and maintenance by the practice team Sirona Dental Systems GmbH 5.5 Components of the water unit Operating Instructions (USA) TENEO 5.5.5 Change the water and air filters If you notice any changes in media flows, check the water and air filters for permeability. -
Page 237: Changing The Amalgam Rotor
Sirona Dental Systems GmbH 5 Care, cleaning and maintenance by the practice team Operating Instructions (USA) TENEO 5.5 Components of the water unit 5.5.6 Changing the amalgam rotor Amalgam residues and other solid particles are trapped in the amalgam rotor according to the centrifugal principle. - Page 238 6. Place the container in the special packaging and ship it for disposal or authorize a certified waste management company. Installing the amalgam rotor Use only original Sirona accessories. Never use a used or recycled amalgam rotor. To reorder the amalgam rotor, see "Spare parts and consumables"...
- Page 239 Sirona Dental Systems GmbH 5 Care, cleaning and maintenance by the practice team Operating Instructions (USA) TENEO 5.5 Components of the water unit 4. Close the flap A. 5. In Germany: Document the exchange of the amalgam rotor in the "D3521 amalgam separator operation log".
-
Page 240: Check The Message System Of The Amalgam Separator
5 Care, cleaning and maintenance by the practice team Sirona Dental Systems GmbH 5.5 Components of the water unit Operating Instructions (USA) TENEO 5.5.7 Check the message system of the amalgam separator An electronic control monitors the function of the amalgam separator. It detects any mechanical blocking or failure of the drive motor. -
Page 241: Emptying The Sediment Container
Sirona Dental Systems GmbH 5 Care, cleaning and maintenance by the practice team Operating Instructions (USA) TENEO 5.5 Components of the water unit 5.5.8 Emptying the sediment container In addition to other solid particles, a large proportion of the amalgam residues are trapped in the sediment container by gravitational force. - Page 242 5 Care, cleaning and maintenance by the practice team Sirona Dental Systems GmbH 5.5 Components of the water unit Operating Instructions (USA) TENEO 2. Hold the sediment container B so that the latching noses of the bayonet catch are positioned transverse to the water unit. Rotate the sediment container B clockwise.
-
Page 243: Cleaning The Filter Insert Of The Standard Wet Suction
Sirona Dental Systems GmbH 5 Care, cleaning and maintenance by the practice team Operating Instructions (USA) TENEO 5.5 Components of the water unit 5.5.9 Cleaning the filter insert of the standard wet suction The automatic separator and amalgam separator or sediment container are not installed in the water unit for standard wet suction. - Page 244 5 Care, cleaning and maintenance by the practice team Sirona Dental Systems GmbH 5.5 Components of the water unit Operating Instructions (USA) TENEO Removing and cleaning the filter insert NOTICE Wet suction The flushing and tumbler filling functions may not be activated when the filter housing is open.
-
Page 245: Foot Control And Connection Box
Sirona Dental Systems GmbH 5 Care, cleaning and maintenance by the practice team Operating Instructions (USA) TENEO 5.6 Foot control and connection box Foot control and connection box 5.6.1 Changing the battery of the wireless foot control The wireless foot control is powered by a battery. An empty battery is detected and displayed by the system. - Page 246 5 Care, cleaning and maintenance by the practice team Sirona Dental Systems GmbH 5.6 Foot control and connection box Operating Instructions (USA) TENEO Replacing the battery (with battery compartment) 1. If the adjustable feet D sit close to the battery cover E, slide this small part outward.
-
Page 247: Changing The Fuse Of The External Device Connection
Sirona Dental Systems GmbH 5 Care, cleaning and maintenance by the practice team Operating Instructions (USA) TENEO 5.6 Foot control and connection box 5.6.2 Changing the fuse of the external device connection The inlet connector remains live even when the power switch is turned off. -
Page 248: Sanitation
5 Care, cleaning and maintenance by the practice team Sirona Dental Systems GmbH 5.7 Sanitation Operating Instructions (USA) TENEO Sanitation Sanitation effectively combats the reproduction of microorganisms in the water lines. If the waterline treatment system is set for operation with public drinking water supply, the sanitization must be guided using the sanitization screen, see "Interactively guided sanitation of the dental treatment unit"... - Page 249 Sirona Dental Systems GmbH 5 Care, cleaning and maintenance by the practice team Operating Instructions (USA) TENEO 5.7 Sanitation 2. Set all bur drives and the SIROSONIC TL scaler to the maximum water flow rate. max. 3. Put all instruments and suction hoses in place.
- Page 250 5 Care, cleaning and maintenance by the practice team Sirona Dental Systems GmbH 5.7 Sanitation Operating Instructions (USA) TENEO The top row of symbols indicates the instrument positions in the dentist element, while the bottom row indicates the instrument positions in the assistant element.
- Page 251 Sirona Dental Systems GmbH 5 Care, cleaning and maintenance by the practice team Operating Instructions (USA) TENEO 5.7 Sanitation 2. If the adapters are not yet located in the receptacles of the water unit, insert them into the receptacles until they lock into place. The SPRAYVIT adapters can be inserted only into the two receptacles on the right side of the dentist element with the guide rib facing upward.
- Page 252 5 Care, cleaning and maintenance by the practice team Sirona Dental Systems GmbH 5.7 Sanitation Operating Instructions (USA) TENEO IMPORTANT Pinching the instrument hoses Be careful not to pinch the instrument hoses when inserting the instruments. If the hoses are pinched, the water flow will be obstructed during purging.
- Page 253 Sirona Dental Systems GmbH 5 Care, cleaning and maintenance by the practice team Operating Instructions (USA) TENEO 5.7 Sanitation Sanitation phase 3 – Treating water lines with DENTOSEPT P waterline treatment solution The water is pumped out of the water tank of the water unit via the tumbler filler.
- Page 254 5 Care, cleaning and maintenance by the practice team Sirona Dental Systems GmbH 5.7 Sanitation Operating Instructions (USA) TENEO Error message: Inserting instruments in the water unit If an instrument is accidentally deposited in its holder during the reaction Insert instruments in water unit...
-
Page 255: Display Sanitation Report
Sirona Dental Systems GmbH 5 Care, cleaning and maintenance by the practice team Operating Instructions (USA) TENEO 5.7 Sanitation Canceling the sanitizing process Sanitation can be canceled during some sanitation phases, e.g. if the dental treatment unit must be switched back on before the 24 hours have Stop expired. -
Page 256: Sanitizing The Dental Treatment Unit Manually
5 Care, cleaning and maintenance by the practice team Sirona Dental Systems GmbH 5.7 Sanitation Operating Instructions (USA) TENEO 5.7.3 Sanitizing the dental treatment unit manually IMPORTANT The procedure described below regarding manual sanitation is only feasible if the dental treatment unit is operated with a self-sufficient water supply. - Page 257 Sirona Dental Systems GmbH 5 Care, cleaning and maintenance by the practice team Operating Instructions (USA) TENEO 5.7 Sanitation Emptying the tank for waterline treatment solution and mixing tank Before manual sanitation, the tank for waterline treatment solution and mixing tank must be emptied using the SPRAYVIT.
- Page 258 5 Care, cleaning and maintenance by the practice team Sirona Dental Systems GmbH 5.7 Sanitation Operating Instructions (USA) TENEO 3. Remove the instruments one after the other from the holder and hold them over the cuspidor or over a watertight container with sufficient max.
- Page 259 Sirona Dental Systems GmbH 5 Care, cleaning and maintenance by the practice team Operating Instructions (USA) TENEO 5.7 Sanitation 1. Switch off the dental treatment unit via the user interface, not via the power switch on the base of the patient chair. Make sure that the dental treatment unit is switched off for at least 24 hours, but not longer than 3 days (maximum sanitation time).
-
Page 260: Biofilm Removal By The Service Technician
5 Care, cleaning and maintenance by the practice team Sirona Dental Systems GmbH 5.7 Sanitation Operating Instructions (USA) TENEO Cleaning the suction hoses After the manual sanitation, all suction hoses should also be cleaned. ● If the dental treatment unit is equipped with the chemical suction hose cleaning option, see "Cleaning the suction hoses"... -
Page 261: Maintenance By The Service Engineer
Sirona Dental Systems GmbH 6 Maintenance by the service engineer Operating Instructions (USA) TENEO 6.1 Inspection and maintenance Maintenance by the service engineer Inspection and maintenance In order to ensure the operational safety and reliability of your dental treatment unit and to avoid damage due to natural wear, annual inspection and maintenance must be performed on your dental treatment unit. -
Page 262: Maintenance Manual
6 Maintenance by the service engineer Sirona Dental Systems GmbH 6.3 Maintenance Manual Operating Instructions (USA) TENEO Maintenance Manual Keep this Maintenance Manual near your dental treatment unit. Any inspection and maintenance work as well as all safety tests are Documentation of the maintenance documented by the service engineer in the Maintenance Manual. -
Page 263: Malfunctions
Sirona Dental Systems GmbH 7 Malfunctions Operating Instructions (USA) TENEO 7.1 Error messages Malfunctions Error messages Any error states of the dental treatment unit that cannot be immediately recognized by the user and must nevertheless be corrected are displayed on the touchscreen. If an error state exists, this is indicated by a warning triangle A in the status line of the touchscreen. - Page 264 7 Malfunctions Sirona Dental Systems GmbH 7.1 Error messages Operating Instructions (USA) TENEO Code Error Description Measure Injection valve for waterline No waterline treatment solution is Inform your service technician. treatment solution defective added if the injection valve is defective. The flushing tank is empty...
-
Page 265: Remote Diagnosis
Sirona Dental Systems GmbH 7 Malfunctions Operating Instructions (USA) TENEO 7.2 Remote diagnosis Remote diagnosis Functional description With remote diagnosis, you enable the staff of your dental depot or our Customer Service Center, see "Contact data" [ → 11], to connect to the PC of your dental treatment unit. -
Page 266: Spare Parts And Consumables
Sirona Dental Systems GmbH Operating Instructions (USA) TENEO Spare parts and consumables Use only original accessories and original spare parts from Sirona! Please order the materials listed below from a specialized dental dealer. Care, cleaning, and disinfecting Care, cleaning agents, and disinfectants... - Page 267 Sirona Dental Systems GmbH 8 Spare parts and consumables Operating Instructions (USA) TENEO Miscellaneous Ball stopper Ball stopper For sealing the instrument holder of the dentist element REF 58 99 575 Silicone isolation sleeve for endodontics with the ApexLocator REF 63 24 631 (5 pcs)
-
Page 268: Disposal
9 Disposal Sirona Dental Systems GmbH Operating Instructions (USA) TENEO Disposal In accordance with Directive 2012/19/EU and national disposal regulations regarding old electrical and electronic devices, please be advised that such items must be disposed of in a special way within the European Union (EU). - Page 269 Sirona Dental Systems GmbH 9 Disposal Operating Instructions (USA) TENEO 9.1 Battery disposal Battery disposal Note for disposal company: Battery in the wireless foot control and on NSA Prior to disposal, remove the following batteries from the dental treatment unit: ● Battery in the wireless foot control ●...
-
Page 270: Overview Of All Function Keys
10 Overview of all function keys Sirona Dental Systems GmbH 10.1 Fixed keys Operating Instructions (USA) TENEO Overview of all function keys The following contains a brief description of the fixed keys on the dentist For Instructions for Use and assistant elements and the function keys on the touchscreen and to provide the reader with a quick overview of the significance of the symbols on the keys. - Page 271 Sirona Dental Systems GmbH 10 Overview of all function keys Operating Instructions (USA) TENEO 10.1 Fixed keys Freely selectable function e.g., call key Freely available relay 230 VAC, 6 A (connected by the service engineer). This function can be preset as a button or as a switch in the Setup program.
- Page 272 10 Overview of all function keys Sirona Dental Systems GmbH 10.1 Fixed keys Operating Instructions (USA) TENEO 10.1.2 Assistant element Tumbler filling Fixed keys on the assistant element on/off Flushing the cuspidor on/off X-ray viewer on/off Also white screen on SIVISION monitor for SIVISION digital...
- Page 273 Sirona Dental Systems GmbH 10 Overview of all function keys Operating Instructions (USA) TENEO 10.2 Start program 10.2 Start program Chair program S Mouth rinsing position with last-position memory function (programmable) Chair program 0 Entry/exit position (programmable) Chair programs 1, 2 and, if required, 3, 4...
- Page 274 10 Overview of all function keys Sirona Dental Systems GmbH 10.2 Start program Operating Instructions (USA) TENEO Opening the sub-screen Used to access additional subordinate functions; see the following function keys: Purging water lines Starts the purge function Purging water lines automatically...
- Page 275 Sirona Dental Systems GmbH 10 Overview of all function keys Operating Instructions (USA) TENEO 10.3 Instrument program 10.3 Instrument program Static speed quick setting keys Quick setting keys without HF surgery Setting preset or intermediate speeds min. 90 rpm, max. 40,000 rpm...
- Page 276 10 Overview of all function keys Sirona Dental Systems GmbH 10.3 Instrument program Operating Instructions (USA) TENEO Sub-screen Used to access additional subordinate functions; see the following function keys: Preselecting spray coolant Used to cool the treatment area with spray Preselecting air coolant...
- Page 277 Sirona Dental Systems GmbH 10 Overview of all function keys Operating Instructions (USA) TENEO 10.4 Treatment program 10.4 Treatment program 10.4.1 Treatment selection Assigning the burr drive A burr drive must be assigned to each treatment type, i.e. endodontics Treatment type Endo and Implant (left key) and implantology (right key).
- Page 278 10 Overview of all function keys Sirona Dental Systems GmbH 10.4 Treatment program Operating Instructions (USA) TENEO Direct starter/speed foot control Direct starter (highlighted gray): Switches the instrument on with the set speed or intensity Speed foot control (highlighted orange): Regulates the instrument to the set speed or intensity after setting the foot switch to maximum.
- Page 279 Sirona Dental Systems GmbH 10 Overview of all function keys Operating Instructions (USA) TENEO 10.4 Treatment program AutoReverse function When the set torque value is reached, the burr drive automatically switches to counterclockwise. If your dental treatment unit is equipped with the ApexLocator option, the burr drive stops automatically when the set motor stop position is reached.
- Page 280 10 Overview of all function keys Sirona Dental Systems GmbH 10.5 Other dialogs Operating Instructions (USA) TENEO 10.5 Other dialogs 10.5.1 Timer screen Timer keys 6 Timer keys Up to six timers can be set. The maximum time setting is 9 minutes and 30 seconds.
- Page 281 Sirona Dental Systems GmbH 10 Overview of all function keys Operating Instructions (USA) TENEO 10.5 Other dialogs 10.5.5 Operating light setting program Sensor control for switching the operating light on/off If the key is highlighted orange, the operating light can be switched on/off or changed to the Composite function by a hand movement.
- Page 282 10 Overview of all function keys Sirona Dental Systems GmbH 10.6 SIVISION program Operating Instructions (USA) TENEO 10.6 SIVISION program 10.6.1 Media Player Start Media Player Media Player is started on the external PC. The keys corresponding to the Media Player PC application are displayed on the right side of the...
- Page 283 Sirona Dental Systems GmbH 10 Overview of all function keys Operating Instructions (USA) TENEO 10.6 SIVISION program Accepting an order Accepts an order that was placed and is waiting in SIDEXIS, e.g. for creating an intraoral image with the X-ray unit of the dental treatment unit or a video recording with the intraoral camera.
- Page 284 10 Overview of all function keys Sirona Dental Systems GmbH 10.6 SIVISION program Operating Instructions (USA) TENEO Display image in pseudocolors To enable better distinction of image details, an image can be displayed in a so-called pseudo color mode. The grayscale values of the image are replaced by colors which the human eye can distinguish better from one another than the corresponding gray levels.
- Page 285 Sirona Dental Systems GmbH 10 Overview of all function keys Operating Instructions (USA) TENEO 10.6 SIVISION program 10.6.4 SI Video Start SI Video SI Video is started on the external PC if SIDEXIS is not installed on it. Or:SI Video is started on the internal PC if the dental treatment unit is operated as a standalone unit.
- Page 286 10 Overview of all function keys Sirona Dental Systems GmbH 10.7 Setup program Operating Instructions (USA) TENEO 10.7 Setup program 10.7.1 User interface Configuring the user interface User Interface Opens the setup program. Key tone A setting can be made to activate or deactivate an acoustic signal that sounds when the operator touches a key on the touchscreen.
- Page 287 Sirona Dental Systems GmbH 10 Overview of all function keys Operating Instructions (USA) TENEO 10.7 Setup program Increasing the travel speed of the patient chair The travel speed can be increased for manual chair settings and programmed movements of the chair. Fine adjustment...
- Page 288 Central supply for chemical suction hose cleaning For clinical use, TENEO dental treatment units can be fitted with a central cleaning agent supply for chemical suction hose cleaning. The function can be switched on and off.
- Page 289 Sirona Dental Systems GmbH 10 Overview of all function keys Operating Instructions (USA) TENEO 10.7 Setup program 10.7.4 Instruments Configure instruments Instruments Opens the setup program. Quick setting keys/Function levels The settings in the instrument programs can be made either via static quick setting keys (with the key values 0.09, 10, 20, 30, 40 or 1, 25, 50,...
-
Page 290: Network Connection
10 Overview of all function keys Sirona Dental Systems GmbH 10.7 Setup program Operating Instructions (USA) TENEO 10.7.5 Network connection Configure IP address setup program IP Address Opens the setup program. Entry of the IP Address, subnet mask and the Gateways To configure a static network connection... -
Page 291: Index
Sirona Dental Systems GmbH Index Operating Instructions (USA) TENEO Index Numerical Assistant element Height adjustment, 145 4-way foot control plate, 53, 57 Hydrocolloid, 156 4-way foot switch, 194 Instrument positions, 37 Maximum load capacity, 145 Accessories, 20, 266 Mini L.E.D., 152, 220... - Page 292 Index Sirona Dental Systems GmbH Operating Instructions (USA) TENEO CDS 60, 193 Patient-specific chair programs, 73 CE marking, 23 Practitioner code, 45 Cellular phones, 20 Time synchronization , 188 CEREC AI, 169 Dentist element Chair height, 70 Covering with surgical drape, 130...
- Page 293 Sirona Dental Systems GmbH Index Operating Instructions (USA) TENEO enretec GmbH, 268 Foot control Entry/exit position 0, 54, 66, 147 Battery (wireless foot control), 52, 245 ErgoMotion, 69 Chip blower, 54 Error message, 51 Cleaning, 209 External device connector, 41...
- Page 294 Index Sirona Dental Systems GmbH Operating Instructions (USA) TENEO Implantology, 109, 122 Speed, 105, 125, 135 Impression tray, 156 Spray amount, 91 Indication, 14 SPRAYVIT, 113, 221 Industry Canada, 24 Switch on/control, 53 Initial startup, 43 Torque limitation, 109, 125, 126, 135...
- Page 295 Sirona Dental Systems GmbH Index Operating Instructions (USA) TENEO Maintenance deadline , 261 Name of practitioner, 45 Maintenance Manual, 261, 262 Name of the patient in the start program, 65, 73 Maintenance Service , 13 Network configuration, 198 Maintenance, cleaning, and disinfecting intervals, 199...
- Page 296 Index Sirona Dental Systems GmbH Operating Instructions (USA) TENEO Programs SIRONiTi, 109 Instrument program, 83, 87 SIROSONIC TL scaler, 116 Settings screen, 50 SIUCOM plus, 171, 179, 180 SIVISION program, 180 SIVISION connect, 171, 179, 180 Start program, 189, 190...
- Page 297 Sirona Dental Systems GmbH Index Operating Instructions (USA) TENEO Support arm, 163, 207 User profile, 45, 190 Surfaces, 204 Using saline solution, 91 Surgical drape, 130 Surgical light, 166 Vacuum system, 18 Surgical procedures, 130 Ventilation holes on the spray aspirator, 149...
- Page 300 tÉ=êÉëÉêîÉ=íÜÉ=êáÖÜí=íç=ã~âÉ=~åó=~äíÉê~íáçåë=ïÜáÅÜ=ã~ó=ÄÉ=êÉèìáêÉÇ=ÇìÉ=íç=íÉÅÜåáÅ~ä=áãéêçîÉãÉåíëK «=páêçå~=aÉåí~ä=póëíÉãë=dãÄe= péê~ÅÜÉW ÉåÖäáëÅÜ=ErpF mêáåíÉÇ=áå=dÉêã~åó aPRMVKOMNKMPKMPKOP NMKOMNS ûKJkêKW= NOO=VOS páêçå~=aÉåí~ä=póëíÉãë=dãÄe `çåí~Åí=áå=íÜÉ=rp^W páêçå~=aÉåí~äI=fåÅK SR=QU=RNM=aPRMV c~Äêáâëíê~≈É=PN QUPR=páêçå~=aêáîÉ lêÇÉê=kç aJSQSOR=_ÉåëÜÉáã `Ü~êäçííÉI=k`=OUOTP dÉêã~åó ïïïKëáêçå~KÅçã...
Need help?
Do you have a question about the teneo and is the answer not in the manual?
Questions and answers