Sirona CEREC MC XL Operating Instructions Manual
Dental milling machine
Hide thumbs
Also See for CEREC MC XL:
- Installation instructions manual (88 pages) ,
- Operating instructions manual (70 pages) ,
- Operating instructions manual (50 pages)
Table of Contents
Advertisement
Quick Links
Advertisement
Table of Contents

Related Manuals for Sirona CEREC MC XL


Summary of Contents for Sirona CEREC MC XL
- Page 1 NMKOMMV kÉï=~ë=çÑW== `bob`=j`=ui léÉê~íáåÖ=fåëíêìÅíáçåë båÖäáëÜ...
-
Page 2: Table Of Contents
Sirona Dental Systems GmbH Contents Operating Instructions CEREC MC XL Contents Dear Customer, .................... General information ..................Structure of the documents .............. Note PC / Acquisition Unit ..............Warranty ................... General description ..................Certification ..................Intended use ..................Safety ...................... - Page 3 Sirona Dental Systems GmbH Operating Instructions CEREC MC XL Contents Scope of supply ................Storage ..................... Operation ...................... Setting the acquisition unit to scanner (onl with integrated scanner) Calibrating the unit ................6.2.1 Calibrating the milling unit ............ 6.2.2 Calibrating the scanner (only with integrated scanner) ..
- Page 4 Sirona Dental Systems GmbH Contents Operating Instructions CEREC MC XL Disposal......................Index......................61 46 885 D 3439 D 3439.201.02.11.02 10.2009...
-
Page 5: Dear Customer
1 Dear Customer, Operating Instructions CEREC MC XL Dear Customer, ® Thank you for purchasing your CEREC MC XL from Sirona. This device enables you to produce dental restorations, e.g. from ceramic material with a natural appearance (CEramic REConstruction). Improper use and handling can create hazards and cause damage. Please read and follow these operating instructions carefully and Always keep them within easy reach. -
Page 6: General Information
2 General information Sirona Dental Systems GmbH Structure of the documents Operating Instructions CEREC MC XL General information CAUTION Be sure to observe all warnings! Please observe the warning and safety information provided to prevent personal injury and material damage. Any such information is highlighted by a signal word, i.e. -
Page 7: Warranty
Sirona Dental Systems GmbH 2 General information Operating Instructions CEREC MC XL Warranty Warranty To safeguard your warranty claims, please complete the attached Installation Report / Warranty Passport when the system is handed over. Then fax it to the specified fax no. -
Page 8: General Description
3 General description Sirona Dental Systems GmbH Certification Operating Instructions CEREC MC XL General description Certification CE mark SU + inEos CE mark This product bears the CE mark in accordance with the provisions of Council Directive 73/23/EEC of February 19, 1973 concerning electrical equipment designed for use within certain voltage limits. -
Page 9: Safety
● The Maintenance and repair of this unit may be performed only by Sirona or by agencies authorized by Sirona. ● Components which have failed and influence the safety of the unit must be replaced with original (OEM) spare parts. -
Page 10: Milling Unit
4 Safety Sirona Dental Systems GmbH Milling unit Operating Instructions CEREC MC XL Milling unit 4.2.1 Safety information for the scanner (option) The milling unit complies with Laser class 1. It poses no hazard of any kind. Safety information for the scanner The laser itself is in Laser class 2 and can pose a hazard to the skin and eyes. -
Page 11: Milling Chamber Door Open During The Milling Operation
Note on wireless communication Note on wireless communication The data communication between the acquisition unit and the CEREC MC XL milling unit should preferably be implemented via the wireless H&W interface or WLAN. As for all wireless connections (e.g. mobile telephones) heavy utilization of the available radio channels or shielding caused by building installations (e.g. -
Page 12: Installation And Startup
Operating Instructions CEREC MC XL Installation and startup Transport and unpacking All Sirona products are carefully checked prior to shipment. Please perform Transport and unpacking an incoming inspection immediately after delivery. Check the delivery note to ensure that the consignment is complete. -
Page 13: Only With Integrated Scanner (Option)
Sirona Dental Systems GmbH 5 Installation and startup Operating Instructions CEREC MC XL Initial startup Make sure that the ventilation slots underneath and at the back of the unit remain unobstructed. The distance between the rear side of the unit and the room wall must be at least 10 cm. -
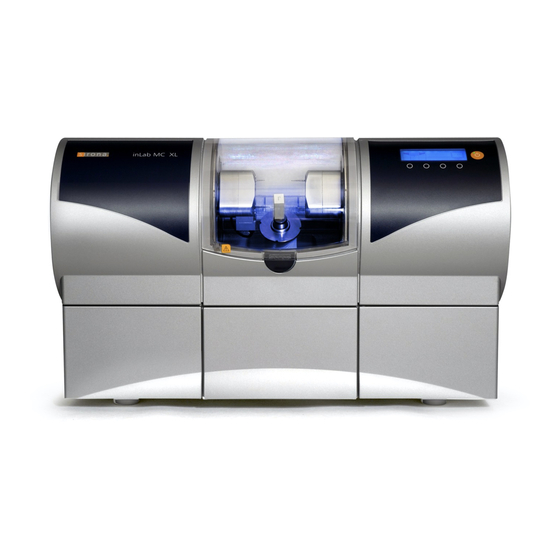
Page 14: Functional Elements
5 Installation and startup Sirona Dental Systems GmbH Initial startup Operating Instructions CEREC MC XL 5.4.1 Functional elements Overview of unit Overview of the milling unit Milling chamber ON/OFF switch Milling chamber Drawer door catch Display Water tank Ports on the back side... - Page 15 Sirona Dental Systems GmbH 5 Installation and startup Operating Instructions CEREC MC XL Initial startup Milling chamber Milling chamber Scanner (optional) Motor mount Scanner window (optional) Ceramic block Bur Set 2 Workpiece spindle Bur set 1 (option) 61 46 885 D 3439...
-
Page 16: Display Description
5 Installation and startup Sirona Dental Systems GmbH Initial startup Operating Instructions CEREC MC XL 5.4.2 Display description These operating instructions describe how to operate the unit by executing and confirming commands via your PC. "Start" "Stop" "Cancel" "OK" You can also confirm commands such as directly on the display of your milling unit. -
Page 17: Inserting The Milling Chamber Sieve
Sirona Dental Systems GmbH 5 Installation and startup Operating Instructions CEREC MC XL Initial startup 5.4.4 Inserting the milling chamber sieve WARNING Risk of injury on milling instruments Be careful not to brush against the milling instruments with your hand. - Page 18 5 Installation and startup Sirona Dental Systems GmbH Initial startup Operating Instructions CEREC MC XL "Settings" "Configuration" In the menu line, select the command Automatic unit search "Devices..." "Configure Devices" window opens. "Add automatically" In the window which then opens, select The software searches for and installs a new device.
- Page 19 To operate several MC XL milling units over one access point, you need the following additional components: ● 1x LAN switch (e.g. Netgear ProSave 5 Port Gigabit Switch, Model GS105) ● 1x LAN network cable (10m, Sirona Order No.: 61 51 521). 61 46 885 D 3439 D 3439.201.02.11.02 10.2009...
- Page 20 5 Installation and startup Sirona Dental Systems GmbH Initial startup Operating Instructions CEREC MC XL LAN switch, connection example with 2 milling units Connect the LAN port (A) of the MC XL milling unit with the LAN switch using the included 10m LAN network cable.
-
Page 21: Filling The Water Tank
Sirona Dental Systems GmbH 5 Installation and startup Operating Instructions CEREC MC XL Initial startup 5.4.6 Filling the water tank NOTICE Note on the tank cap opener Using the tank cap opener If you find the tank cap, tank drain or filter insert hard to open by hand, use the tank cap opener (see "Using the tank cap opener"... -
Page 22: Switching The Unit On And Off
5 Installation and startup Sirona Dental Systems GmbH Initial startup Operating Instructions CEREC MC XL "Pump" Switch the pump on (press the button), to fill the water circuit. 10. Fill the water tank up again until the filter insert is completely immersed (up to the bottom edge of the cap thread). -
Page 23: Repacking
Sirona Dental Systems GmbH 5 Installation and startup Operating Instructions CEREC MC XL Repacking Switching the unit off ✔ The unit has finished the machining operation. ➢ Briefly press the ON/OFF button on the front panel. When you let go of the button, the unit switches off. -
Page 24: Operation
6 Operation Sirona Dental Systems GmbH Setting the acquisition unit to scanner (onl with integrated scanner) Operating Instructions CEREC MC XL Operation WARNING Risk of injury on calibration pins/milling instruments If you reach into the milling chamber (e.g.: when inserting/removing a... -
Page 25: Calibrating The Milling Unit
Sirona Dental Systems GmbH 6 Operation Operating Instructions CEREC MC XL Calibrating the unit 6.2.1 Calibrating the milling unit NOTICE Calibrating the inLab+Cerec milling unit Unit calibrated ex works The unit is calibrated at the factory. No additional calibration is required during initial startup. - Page 26 6 Operation Sirona Dental Systems GmbH Calibrating the unit Operating Instructions CEREC MC XL Remove the adapter sleeve (see "Using the manual block clamp" [ 35]). To insert the calibration phantom in the block clamp, grasp it by its narrow surfaces (B).
-
Page 27: Calibrating The Scanner (Only With Integrated Scanner)
Sirona Dental Systems GmbH 6 Operation Operating Instructions CEREC MC XL Calibrating the unit "Device In all of these cases, you can deactivate sets 1 and 2 separately in the Configuration" dialog box. A deactivated set will simply be ignored during milling, calibration etc. - Page 28 6 Operation Sirona Dental Systems GmbH Calibrating the unit Operating Instructions CEREC MC XL Calibration phantom NOTICE Grasp the calibration phantom correctly Grasping the calibration phantom by its wide surfaces may cause calibration errors. ➢ Always grasp the calibration phantom by its clamping shank (A) when removing it from the storage box.
-
Page 29: Starting The Scanning Process (Only With Integrated Scanner)
Sirona Dental Systems GmbH 6 Operation Operating Instructions CEREC MC XL Starting the scanning process (only with integrated scanner) Starting the scanning process (only with integrated scanner) ✔ The acquisition system must be set to Scanner, see "Setting the Starting the inLab + Cerec scanning process acquisition system to scanner". -
Page 30: Start The Milling Process
6 Operation Sirona Dental Systems GmbH Start the milling process Operating Instructions CEREC MC XL 10. Press the catch of the milling chamber door and open the door. 11. Loosen the ball pressure screw. 12. Pull off the model holder. - Page 31 Sirona Dental Systems GmbH 6 Operation Operating Instructions CEREC MC XL Start the milling process a message window. NOTICE Canceling the milling process "Stop" You can cancel the milling process at any time by pressing the button. 11. When the milling process has been completed, open the milling chamber door.
-
Page 32: Preparing Optical Scanning (Only With Integrated Scanner)
6 Operation Sirona Dental Systems GmbH Preparing optical scanning (only with integrated scanner) Operating Instructions CEREC MC XL Preparing optical scanning (only with integrated scanner) 6.5.1 Information on preparing models for implants NOTICE Prerequisites This information applies only under the following conditions:... -
Page 33: Creating A Model
Sirona Dental Systems GmbH 6 Operation Operating Instructions CEREC MC XL Preparing optical scanning (only with integrated scanner) 6.5.2 Creating a model NOTICE KwikkModel as modeling compound ® The following instructions are based on the use of KwikkModel as a modeling compound. -
Page 34: Preparing For Scanning Of The Veneer Model
6 Operation Sirona Dental Systems GmbH Preparing optical scanning (only with integrated scanner) Operating Instructions CEREC MC XL Fastening the model Position of the model Fastening the model Allen screw Center line ✔ The preparation margin is not visible from all sides. -
Page 35: Using The Manual Block Clamp
Sirona Dental Systems GmbH 6 Operation Operating Instructions CEREC MC XL Using the manual block clamp Using the manual block clamp Store the block clamp tool in the corresponding holder. You can attach the holder to a suitable location with the adhesive pad. Clean and degrease the contact surface beforehand. - Page 36 6 Operation Sirona Dental Systems GmbH Using the manual block clamp Operating Instructions CEREC MC XL Blocks with 6 mm diameter block holders NOTICE Fastening the block Fasten the block tightly If the block is not tightened sufficiently, this may result in falsification of the milling result and fracturing of its ceramic material.
-
Page 37: Maintenance
Do not confuse the block screw with the ball pressure screw When operating a CEREC 3 milling unit and a CEREC MC XL milling unit in the same room, be careful not to confuse the block screw of the CEREC 3 with the ball pressure screw of the CEREC MC XL. -
Page 38: Changing The Water
7 Maintenance Sirona Dental Systems GmbH Changing the water Operating Instructions CEREC MC XL Changing the water 7.1.1 General information CAUTION Damage to the pump and milling drives! An excessively high ceramic content in the cooling water will damage the pump and milling drives. -
Page 39: Changing The Water
Sirona Dental Systems GmbH 7 Maintenance Operating Instructions CEREC MC XL Changing the water 7.1.2 Changing the water To change the water, proceed as follows: ✔ The unit is switched on. ✔ No milling/scanning process is running. Pull out the water tank at the front of the unit. -
Page 40: Milling Instruments
7 Maintenance Sirona Dental Systems GmbH Milling instruments Operating Instructions CEREC MC XL Milling instruments NOTICE Second bur set Second burr set The following information on the two but sets is only applicable if the second but set (optional) is also installed. -
Page 41: Changing Milling Instruments (Burs)
Sirona Dental Systems GmbH 7 Maintenance Operating Instructions CEREC MC XL Milling instruments If you frequently process materials from both groups, equip the bur sets as follows: Milling instrument Milling instrument Bur set "Left" "Right" "Step Bur 20" "Cyl. Pointed Bur 20"... -
Page 42: Care And Cleaning Agents
Press the button. Care and cleaning agents CAUTION Approved Care and cleaning agents Use only care and cleaning agents which have been approved by Sirona! A continuously updated list of approved agents can be downloaded from the Internet at: "www.sirona.com" "SERVICE"... -
Page 43: Cleaning Surfaces
Cleaning surfaces Cleaning surfaces CAUTION Care and cleaning agents Use only cleaning and care agents which have been approved by Sirona, see Cleaning and care agents [ 42]. CAUTION Do not allow liquids to run into the ventilation slots! 7.4.1 Disinfecting Wiping off surfaces with surface disinfectants (wipe disinfection). -
Page 44: Replacing The Main Fuses
7 Maintenance Sirona Dental Systems GmbH Replacing the main fuses Operating Instructions CEREC MC XL Replacing the main fuses WARNING Warning: main fuse Electric shock Disconnect the power plug at the unit end before replacing the fuses. CAUTION Fuse type... -
Page 45: Changing The Filter
Sirona Dental Systems GmbH 7 Maintenance Operating Instructions CEREC MC XL Changing the filter Changing the filter NOTICE Change the filter regularly! Clean the filter regularly and change it immediately when damaged. Otherwise, change it every 3 months. If a message appears stating that the water pressure is too low, you must clean the filter or, if it is damaged, replace it immediately. -
Page 46: Removing Water From The Unit
7 Maintenance Sirona Dental Systems GmbH Removing water from the unit Operating Instructions CEREC MC XL NOTICE Cleaning the filter Clean the filter approx. every 12 to 15 units under running water, but at least with every water change. Removing water from the unit You must remove the water from the unit if you will not be using it for a longer period of time or wish to transpot it. - Page 47 Sirona Dental Systems GmbH 7 Maintenance Operating Instructions CEREC MC XL Using the tank cap opener Opening the tank cap ✔ The water tank has been pulled out and drained. ➢ Place the tank cap opener on the tank cap as shown, and take off the tank cap by unscrewing it counter-clockwise.
-
Page 48: Technical Description
8 Technical description Sirona Dental Systems GmbH System requirements Operating Instructions CEREC MC XL Technical description System requirements Working without the acquisition unit An inLab system PC is required to run this software. The hardware version must be PC Hardware A or higher. -
Page 49: Technical Data
Sirona Dental Systems GmbH 8 Technical description Operating Instructions CEREC MC XL Milling unit 8.2.2 Technical data Type designation Milling unit CEREC MC XL Rated line voltage 100V - 230V AC Rated power frequency 50/60 Hz Rated current 1.5 - 3.5 A... -
Page 50: Scanner For Optical Measurement Of The Preparation (Option)
8 Technical description Sirona Dental Systems GmbH Milling unit Operating Instructions CEREC MC XL 8.2.3 Scanner for optical measurement of the preparation (option) ● Noncontact optical measurement Technical data of scanner ● Digital control of the axes for fast measurement ●... - Page 51 Sirona Dental Systems GmbH 9 Disposal Operating Instructions CEREC MC XL Disposal Your product is marked with the adjacent symbol. Within the European Environmentally sound disposal Economic Area, this product is subject to Directive 2002/96/EC as well as the corresponding national laws. This directive requires environmentally sound recycling/disposal of the product.
-
Page 52: Index
Sirona Dental Systems GmbH Operating Instructions CEREC MC XL Index Index Building installation ............9 Installation site ..............13 Installing the unit automatic ..............17 deinstallation............18 Calibration tool manual..............18 Calibration body............24 Intended use ..............8 Calibration tools Calibration phantom .......... - Page 53 Sirona Dental Systems GmbH Index Operating Instructions CEREC MC XL Scanning technique ............50 Crown framework............. 50 Model 15°..............50 Model 45°..............50 Scope of supply .............. 23 Temperature range ............49 Transport................. 12 Type designation............. 49 Unpacking ............... 12 Usage................
- Page 54 tÉ=êÉëÉêîÉ=íÜÉ=êáÖÜí=íç=ã~âÉ=~åó=~äíÉê~íáçåë=ïÜáÅÜ=ã~ó=ÄÉ=êÉèìáêÉÇ=ÇìÉ=íç=íÉÅÜåáÅ~ä=áãéêçîÉãÉåíëK «=páêçå~=aÉåí~ä=póëíÉãë=dãÄe=OMMV péê~ÅÜÉW==ÉåÖäáëÅÜ= mêáåíÉÇ=áå=dÉêã~åó a=PQPVKOMNKMOKNNKMO NMKOMMV ûKJkêKW= NNO=MMP páêçå~=aÉåí~ä=póëíÉãë=dãÄe áå=íÜÉ=rp^W SN=QS=UUR=a=PQPV c~Äêáâëíê~≈É=PN páêçå~=aÉåí~ä=póëíÉãë=ii` lêÇÉê=kç SQSOR=_ÉåëÜÉáã QUPR=páêçå~=aêáîÉI=pìáíÉ=NMM dÉêã~åó `Ü~êäçííÉI=k`=OUOTP ïïïKëáêçå~KÅçã...
Need help?
Do you have a question about the CEREC MC XL and is the answer not in the manual?
Questions and answers