
Related Manuals for Zhone IMACS 8000


Summary of Contents for Zhone IMACS 8000
- Page 1 IMACS 8000 Integrated Access Device User Guide September 2016 Document Part Number: 830-04175-02 version A2 Release 7.5.4...
- Page 2 Further, Zhone Technologies reserves the right to revise this publication and to make changes from time to time in the contents hereof without obligation of Zhone Technologies to notify any person of such revision or changes.
-
Page 3: Table Of Contents
Chapter 1 What’s New Product Description ..................1-1 1.1.1 CPU Card Support..................1-1 1.1.2 Interface Cards Supported in Release............1-2 1.1.3 Low interruption Cards Supported on the IMACS 8000......1-2 System Cards ....................1-2 1.2.1 Card Support....................1-2 1.2.1.1 CPU XCON (CPU) ................1-2 1.2.1.2 Voice Cards ....................1-3 1.2.1.3... - Page 4 2.8.4.1 135 Watt Load Card ................2-18 2.8.5 Connecting Cables to the Cards............... 2-19 Chapter 3 IMACS 8000 Chassis Description Introduction ....................3-1 Chassis ......................3-2 3.2.1 Front-Loading 8000-CHASSIS with Rear Power Supply ......3-2 U.S. and European Chassis Configuration ............ 3-6...
- Page 5 Table of Contents Router Server Card (8000-Router) ...............4-15 OC3 Point to Point Server (8000-OC3-PT2PT) ...........4-16 PWE IP Uplink Server (8000-PWE) ............4-17 Chapter 5 System Configuration and Operation Basic Operations ....................5-1 Basic Screen Map and Legend ...............5-1 System Initialization ..................5-2 5.3.1 Registration....................5-2 5.3.2 Logging Into the System ................5-5...
- Page 6 Model No. Running Head Table of Contents 5.12.8 ASCII Backup Procedure................. 5-34 5.12.9 ASCII Restore Procedure................. 5-35 5.12.10 XMODEM 128k and XMODEM 1k Backup .......... 5-35 5.12.11 XMODEM 128k and XMODEM 1k Restore .......... 5-36 5.13 Taking a Card Out of Service ..............5-37 5.14 CPU Switching ....................
- Page 7 Table of Contents 5.34.2.5 QUICK TIPS:..................5-116 Chapter 6 System Testing and Diagnostics Introduction ....................6-1 Integral Test Capabilities ................6-1 User Card Diagnostics ..................6-2 6.3.1 WAN Diagnostics..................6-2 6.3.2 Voice Diagnostics..................6-3 6.3.3 Data Diagnostics..................6-3 Diagnostics at the ‘X’ Cross-Connect Option ..........6-6 6.4.1 Circuit Diagnostics ..................6-6 Benefits of Built-In Diagnostics ..............6-8 Performance Monitoring ................6-11 6.6.1...
- Page 8 Model No. Running Head Table of Contents 7.4.2.8 SNMP Parameters................7-40 IP Packet Routing ..................7-41 7.5.1 nX64 Screen..................... 7-47 7.5.2 Network Statistics Screen ................ 7-50 CPU Host Software Upgrade Procedure ............. 7-51 7.6.1 Equipment Requirements................. 7-51 7.6.2 Laptop Setup .................... 7-51 7.6.2.1 Log Upgrade Activity ................
- Page 9 Table of Contents 8.3.6 Interface Card Ports and Functionality.............8-24 8.3.7 Using the Node Port .................8-24 Interface Card Error Messages ..............8-26 Interface Card Troubleshooting ..............8-26 8.5.1 User Interface Problems ................8-26 8.5.2 Alarm Reporting Problems...............8-27 8.5.3 WAN Transmission Problems..............8-27 Interface Card Specifications ...............8-28 Chapter 9 WAN Card Introduction ....................9-1...
- Page 10 Model No. Running Head Table of Contents Chapter 10 Alarm Cards 10.1 Introduction ....................10-1 10.2 Alarm Card Descriptions ................10-1 10.2.1 ALR 4+4 Card Description (8000-ALARM-4P)........10-1 10.2.1.1 Card Jumper/Switch Settings............... 10-2 10.2.1.2 Installing the Alarm Card ..............10-2 10.3 Alarm Card User Screens and Settings ............
- Page 11 Table of Contents 12.6 FXS Card Specifications ................12-20 Chapter 13 FXO Card 13.1 Introduction ....................13-1 13.2 FXO Card Descriptions ................13-1 13.2.1 FXO 2W*8-6 Card Description (8000-FXO-8P) ........13-1 13.2.1.1 Card Jumper/Switch Settings ...............13-2 13.2.1.2 Installing the FXO 2W*8-6 Card ............13-2 13.3 FXO Card User Screens and Settings ............13-3 13.3.1 FXO Card Main Screen ................13-3...
- Page 12 Model No. Running Head Table of Contents 14.3.7 Inverse Multiplexer (IMUX) Screen............14-36 14.3.8 Dialing with High Speed Data Cards............. 14-39 14.3.8.1 Basic HSU Dialing ................14-39 14.3.8.2 RS366 and V.25bis HSU Dialing ............14-39 14.3.9 Master Dialing ..................14-39 14.3.10 Dialing with RS366 Commands ............
- Page 13 Table of Contents 16.2 LD-SRU Card Description ................16-1 16.2.1 LD-SRU*10 Card Description (8000-LDSRU-10P)........16-2 16.2.1.1 Card Jumper/Switch Settings ...............16-3 16.2.1.2 Installing the LD-SRU*10 Card............16-3 16.2.1.3 Installing the LD-SRU*10 Card............16-4 16.3 LD-SRU Card User Screens and Settings ............16-4 16.4 Card Configuration Examples ..............16-14 16.5 Test Screen ....................16-16 16.6...
- Page 14 Model No. Running Head Table of Contents Chapter 19 ADPCM Card 19.1 Introduction ....................19-1 19.2 ADPCM Card Descriptions ................. 19-1 19.2.1 ADPCM 64 Card Description (8000-ADPCM)........19-1 19.2.1.1 Card Jumper/Switch Settings............... 19-2 19.2.1.2 Installing the ADPCM Card ..............19-2 19.3 ADPCM Card User Screens and Settings ............
- Page 15 Table of Contents 21.9.1 IPR*4 Connecting IP LANs ..............21-22 21.10 IPR*4PPP Configuration Screens and Settings .........21-23 21.10.1 IPR*4 10/100BT (ROUTER-PPP-HS) Card Main Screen ....21-23 21.10.2 IPR*4 provisioning card setup ...............21-25 21.10.3 IPR*4 INTF NAME screen ..............21-26 21.10.4 IPR*4 Ethernet Connectivity Screen............21-27 21.10.4.1 IPR*4 Ethernet Connectivity Screen - Perf........21-30 21.10.4.2...
- Page 16 Model No. Running Head Table of Contents 24.2.1.2 Faceplate Descriptions................. 24-3 24.2.1.3 Installing the Card ................24-4 24.3 PWE Card User Screens and Settings ............24-4 24.3.1 PWE Card Main Screen ................24-4 24.3.2 Main Screen Option Settings ..............24-7 24.4 PWE Card Error Messages ................
- Page 17 Table of Contents Year 2000 Compliance ................A-19 A.8.1 Service requirements ................A-19 Safety Information and Precautions ............A-20 A.9.1 Disclaimer for Shielded Cables ............... A-21 A.9.2 Panel and Cover Removal ............... A-21 A.9.3 Power Source................... A-22 A.9.4 Fusing ...................... A-22 A.10 Power Supply Safety Information ...............
- Page 18 Model No. Running Head Table of Contents C.4.1.1 ALR 4+4 Card External Connectors and Pinouts........C-25 E&M Cards ....................C-26 C.5.1 E&M-2W-8P Card (810860) ..............C-26 C.5.1.1 E&M 2W*8 Card External Connectors and Pinouts ......C-26 C.5.2 E&M-4W-8P Card (811960) ..............C-27 C.5.2.1 E&M 4W*8ER Card External Connectors and Pinouts ......C-27 FXS Cards ....................C-29 C.6.1 FXS-8P Card (812960) ................C-29...
- Page 19 Table of Contents D.1.1.2 Setting up the Remote IMACS to Provide Remote Access ....D-3 D.1.2 Remote Management of an IMACS Using DS0 Daisy-Chaining ..... D-4 D.1.2.1 Setting up the Local IMACS for Ethernet Hosting ....... D-4 D.1.2.2 Setting up the Transport IMACS for DS0 Daisy-Chaining ....D-5 D.1.2.3 Setting up the Termination IMACS for DS0 Daisy-Chaining ....
- Page 20 Model No. Running Head Table of Contents xviii Table of Contents...
- Page 21 List of Figures List of Figures Mounting Bracket Holes .......................2-4 Chassis Mounting Holes .......................2-5 JP1 Jumper Settings ......................2-6 -48V Converter Fuse......................2-8 105V Ringing Generator Jumper Setting................2-10 DC Terminal Block in a DC Environment with one Power Source ........2-12 AC Environment with an -48VDC AC/DC Converter for Voice or Data Applications..2-13 DC Powered System - Single DC Power Supply in Slot F1 - No Voice Cards....2-14 Redundant DC Power Supplies with Redundant Power Feeds - No Voice Cards .....2-15 2-10...
- Page 22 Model No. Running Head List of Figures 5-22 Typical 2-Port HSU Card Time Slot Assignments for T1 ..........5-40 5-23 Typical 4-Port HSU Card Time Slot Assignments for E1 ..........5-41 5-24 Cross Connect Screen ......................5-43 5-25 Cross Connect Screen -View All ..................5-44 5-26 Cross Connect Circuit (Rename) ..................
- Page 23 List of Figures 5-70 Split Circuit Diagram......................5-84 5-71 TADS Restore Circuit Screen.....................5-85 5-72 TLA Circuit State Screen....................5-86 5-73 Typical Time Slot Screen for T1 Operation ...............5-88 5-74 Typical Time Slot Screen in E1 Operation .................5-89 5-75 Typical Redundant-Power Supply System Main Screen ............5-93 5-76 Manually Switching to a Redundant CPU ................5-94 5-77...
- Page 24 Model No. Running Head List of Figures 7-20 Routing Address Entry Screen ................... 7-45 7-21 Slot/Unit Options Screen....................7-46 7-22 IP Static Routing Information Screen ................7-46 7-23 nX64 Main Screen......................7-47 7-24 nX64 Netstat Screen......................7-50 7-25 CPU Programming level ....................7-55 INTF-R Ext Interface Card (IF+EXT) .................
- Page 25 List of Figures 11-4 Typical E&M Card Test Screen..................11-11 11-5 Typical E&M Loopback Screen ..................11-16 12-1 FXS 2W*8-6 Card Jumpers Settings ..................12-2 12-2 Typical FXS Card Main Screen..................12-3 12-3 FXS Card Loopbacks......................12-10 12-4 Typical FXS Card Test Screen ..................12-13 13-1 FXO 2W*8-6 Card Jumper Settings ...................13-2 13-2 Typical FXO Card Main Screen ..................13-3...
- Page 26 Model No. Running Head List of Figures 17-4 OCU Local Loopback (net-a option) ................. 17-9 17-5 OCU Local Loopback (net-d option) ................. 17-9 17-6 OCU Remote Loopback (ds0-n and ocu-n options)............17-10 17-7 OCU Remote Loopback (csu-n option) ................17-10 17-8 OCU Remote Loopback (csu-u option) ................
- Page 27 List of Figures 23-4 OC3 Setup Screen .......................23-5 23-5 OC3 Main Card Screen.......................23-5 23-6 Provisioning the sixteen external T1/E1 facilities ..............23-7 23-7 LOS alarm on external facility, Manifest indication of EXT alarm on P3 ......23-7 23-8 OWAN facility screen ......................23-9 23-9 STATE and TRIB provisioning ..................23-11 24-1...
- Page 28 Model No. Running Head List of Figures C-33 ACS-MCC Card Ethernet Port Jack...................C-47 C-34 IPR*4 10/100 BT Card Ethernet Port Jack ................C-48 C-35 OC3 TDM Mapper Faceplate.....................C-49 C-36 PWE IP uplink card faceplate ....................C-52 C-37 RJ45 Gigabit Ethernet Port ....................C-53 Sample Remote Management Need - E1 ................D-1 Sample Remote Management Need - T1 or E1 ..............D-4 xxvi...
- Page 29 List of Tables List of Tables Low impact Supported Card list ..................1-2 Minimum Chassis Clearances ....................2-5 Terminals on DC Terminal Block ..................2-14 Card Slots for the 8000-CHASSIS ..................3-5 User Access Table ......................5-7 Default User Table......................5-8 User Accesses by Group.....................5-8 Default Group Permissions....................5-9 usrName Screen Actions ....................5-11 System Main Screen Actions....................5-16 Alarm Filters........................5-26...
- Page 30 Model No. Running Head List of Tables “AT” Commands Used by RITS..................8-21 Interface Ports and Functions................... 8-24 801070 WAN Strap Setting Options.................. 9-4 T1 CSU and DSX Main Screen Actions................9-21 T1 CSU and DSX Option Settings and Defaults ............. 9-22 DS0-to-SLC-96 Time Slot Conversion................
- Page 31 List of Tables 14-11 HSU Card Call Profile Screen Option Settings and Defaults.........14-30 14-12 Call Profile Broadcast Screen Actions ................14-36 14-13 IMUX Call Screen Actions.....................14-37 14-14 IMUX Call Screen Option Settings and Defaults............14-37 14-15 Values for Service Type Field ..................14-41 14-16 Call Profile Parameter Numbers and Values ..............14-43 14-17...
- Page 32 Model No. Running Head List of Tables 23-2 OC3 STS VT 1.5 mapping defined by GR-253-Core............23-8 23-3 Main Screen Option Settings and Defaults ..............23-10 24-1 Pseudowire to WAN associations ..................24-6 24-2 PWE Card Setting Options and Defaults ................. 24-7 24-3 Main Screen Actions......................
-
Page 33: Chapter 1 What's New
Appendix C, Table C-34. Product Description Release 7.5.1 and above is required to support the IMACS 8000 shelf. All supported capabilities existing in the 7.x.y series is available and supported in the 8000 shelf, with the exception of being able to load some of the older user cards. These older user cards have not had a software update since 2005, and the likelihood of needing to upgrade one is remote. -
Page 34: Interface Cards Supported In Release
893470. No other Interface Cards are supported. 1.1.3 Low interruption Cards Supported on the IMACS 8000 As described, low-impact to service during a processor switch on CPU-7 hardware platform is meant to be less than 250 micro seconds for several card types. The cards tested, validated and updated to be low-interrupt are listed below in Table 1-1. -
Page 35: Voice Cards
What’s New System Cards module. A system that uses an 8000-CPU Card operates in “cross-connect” mode. Two Model 8000-CPUs can be installed in slots C1 and C2 to achieve CPU redundancy. The CPU also supports 1xN WAN and Power Supply redundancy. The CPU XCON Card with Ethernet port controls the Integrated Access System. -
Page 36: Server Cards
Model No. Running Head System Cards What’s New • 8000-OHSU-4P (823870) • 8000-LDSRU-10P (822570) • 8000-OCUDP-5P (824160) • 8000-OCUDP-10P (824660) • 8000-DS0DP-4P (825460) 1.2.1.4 Server Cards Following is a list of server cards offered on the IMACS-8000 shelf, along with the noted factory programmed model number in parenthesis. -
Page 37: Wan Cards
Customer Service and Ordering Information 1.3.1 Technical support If you require assistance with the installation or operation of your product, or if you want to return a product for repair under warranty, contact Zhone customer service. The contact information is as follows: E-mail support@zhone.com... - Page 38 Model No. Running Head Customer Service and Ordering Information What’s New Reference Guide...
-
Page 39: System Installation
System Installation Introduction Chapter 2 System Installation Introduction This chapter provides instructions for unpacking and installing the 8000 chassis and plug-in cards at the user site. It also includes other information you will need to properly install the system and refers you to other chapters for additional card-level information. The system can operate on either AC or DC power when equipped with the proper power supply. -
Page 40: Choosing A Location For Your System
Model No. Running Head Chassis Installation System Installation 1. Choose a suitable location for the system, as described in this chapter. 2. Unpack and inspect the equipment for damage. 3. Mount the chassis on the desired surface (rack, tabletop, or wall). 4. -
Page 41: Rack Installation Tips
System Installation Chassis Installation Most of the system plug-in cards have highly sensitive components that could be damaged by static electricity. Whenever you handle any system cards, be sure to observe local electrostatic discharge (ESD) precautions. The mounting brackets supplied with the chassis are needed for tabletop installation. The top and bottom of each chassis also must be clear of objects to ensure proper air flow through the chassis. -
Page 42: Tabletop Installation Tips
Model No. Running Head Chassis Installation System Installation 2.3.3.3 Tabletop Installation Tips The chassis should be placed on a flat, smooth surface (e.g., a table) that is free of contaminants. This surface should be capable of supporting a fully equipped chassis. Be sure to allow enough clearance above and below the chassis for proper air circulation. -
Page 43: 8000 Chassis
System Installation Power Supplies and Ringing Generators 2.3.4.1 8000 Chassis The chassis have 12 holes on each side, as shown in Figure 2-2. These holes facilitate mounting in a 19- or 23-inch rack (48.2 or 58.4 cm). You can attach the front, middle, or rear of this chassis to a rack, using the mounting brackets as previously shown for the front-loading chassis with power supplies on the side. -
Page 44: System Power (Redundancy)
Model No. Running Head Power Supplies and Ringing Generators System Installation 2.4.1 System Power (Redundancy) Note: The system always requires a 120/240 VAC or -48 VDC Power Supply. For backup, you may add a second identical power supply. The shelf can also be power off of one AC supply and one DC supply. -
Page 45: Installing The System Power Cards
System Installation Power Supplies and Ringing Generators 2.4.4 Installing the System Power Cards Next, install power supplies, AC-to-DC power converters and ringing generators into the system chassis as described in this section. However, do not apply power to the system until you finish installing these cards, AND after making the power and ground connections to the chassis as described in the next section of this chapter. -
Page 46: Installing The -48V Converters
Model No. Running Head Ringing Generators System Installation 2.4.8 Installing the -48V Converters To install a -48V Converter in a chassis, proceed as follows. Refer to the system specification section in this manual for the -48V Converters. Figure 2-4 shows the location of the fuse on the converter board. -
Page 47: Installing The 105V Ringing Generator (890620)
System Installation Ringing Generators Make sure the system uses a -48V power source before installing any ringing generators.The chassis can have a maximum of two ringing generators. When two ringing generators are used, the outputs of all ringing generators are linked together by OR circuits on the ringing bus. - Page 48 Model No. Running Head Ringing Generators System Installation 1. . The 890620 may be installed with power applied (“Hot swapping”). The 890620 ring generator has improved operating efficiency resulting in lower operating temperatures which promote a longer life expectancy and support of more analog voice ports per ring generator.
-
Page 49: System Power And Ground Connections
System Installation System Power and Ground Connections System Power and Ground Connections After installing the system power cards into the chassis, make the power and ground connections to the chassis as described in this section. Each chassis has a terminal strip for the DC voltage, ringing generator, and ground connections. -
Page 50: Dc Terminal Block In A Dc Environment With One Power Source
Model No. Running Head System Power and Ground Connections System Installation Sites using only loop start telecommunication circuits (no ground start or E&M signaling) can operate properly without the Telecom Signaling Ground. When grounding the system, use 14 gauge solid wire for a single connection to the terminal block connector. - Page 51 System Installation System Power and Ground Connections Note: The diagram above only depicts one DC power source which would support the F1 power supply. If a redundant power configuration is desired, then a second power source would be applied to the V (+ &...
-
Page 52: Dc Powered System - Single Dc Power Supply In Slot F1 - No Voice Cards
Model No. Running Head System Power and Ground Connections System Installation The Table 2-2 describes the function of all the terminals on the DC Terminal Block. Table 2-2. Terminals on DC Terminal Block DC Terminal Block Function Connection Connect external Ring Generator to this terminal only if 8000-RG cards are not provided in the 8000 chassis and ringing voltage is required (e.g. -
Page 53: Redundant Dc Power Supplies With Redundant Power Feeds - No Voice Cards
System Installation System Power and Ground Connections -48 V DC S uppl y -48 V D C R eturn -48 V DC S up pl y T erminal -48 V D C R eturn B lock P rotective E arth/C has s is G round Figure 2-9.Redundant DC Power Supplies with Redundant Power Feeds - No Voice Cards -48 V DC S uppl y -48 V D C R eturn... -
Page 54: Completely Redundant Dc Power Supplies And All Feeds
Model No. Running Head System Power and Ground Connections System Installation -48 V DC S uppl y -48 V D C R eturn -48 V DC S up pl y -48 V DC R eturn -48 V DC S uppl y -48 V D C R eturn -48 V DC S up pl y T erminal... -
Page 55: Powering Up The System
System Installation Powering Up the System Powering Up the System After connecting the chassis to the external power sources and making the proper ground connections, apply power to the chassis. Plug the AC power cord into the associated electrical outlets, or turn on the external DC power supply. Then, observe the following front-panel LEDs: 1. -
Page 56: Cpu Cards
Power down the shelf, remove and firmly insert the 8000-CPU again in the C1 slot, as you re-power the shelf. If the card is still not properly recognized, contact Zhone GSS. Insert another 8000-CPU card into slot C2. After installing these cards, verify that the green LEDs illuminate on their faceplate, with the C2 processor also intermittently flashing its’... -
Page 57: Connecting Cables To The Cards
System Installation Installing the Other Plug-In Cards a future date and have purchased the 135 Watt power supplies to support the load but do not have a minimum load on the shelf to maintain the 5V regulation. The 8000-135W-LOAD card is installed in a server slot and has five factory-installed straps to provide a 1.8 AMP load on the 5 volt power rail. - Page 58 Model No. Running Head Installing the Other Plug-In Cards System Installation 2-20 Reference Guide...
-
Page 59: Imacs 8000 Chassis Description 3.1 Introduction
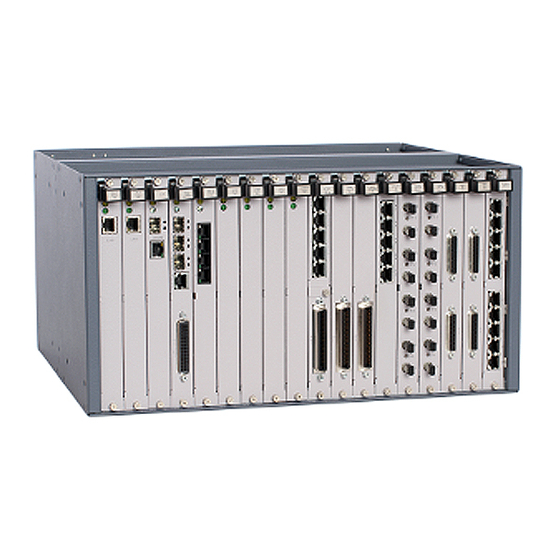
Introduction Chapter 3 IMACS 8000 Chassis Description Introduction This chapter describes IMACS 8000-CHASSIS and the card slot locations. The 8000-CHASSIS is available with AC and / or DC power supplies. Four basic types of plug-in cards are available: • Common cards include the CPU card and the Interface card and the alarm card. -
Page 60: Chassis
Model No. Running Head Chassis IMACS 8000 Chassis Description Chassis 3.2.1 Front-Loading 8000-CHASSIS with Rear Power Supply Figure 3-1 shows the back panel used when viewing the front of the 8000-CHASSIS. This chassis is designed for table top, wall or rack mounting. All card access is from the front of the chassis, while power supply and ring generator slots are located in the rear. -
Page 61: Chassis Rear (8000-Chassis)
IMACS 8000 Chassis Description Chassis Zhone Technologies Model: IMAC S 8000 8A S B 250V Figure 3-2.Chassis Rear (8000-CHASSIS) This chassis can accept a total of four power supplies. Two are standard power supplies, and two are load sharing power supplies. -
Page 62: External Power Source For The Power Enhanced Chassis (8000-Chassis)
Model No. Running Head Chassis IMACS 8000 Chassis Description Zhone Technologies Model: IMAC S 8000 105-240V ~ 6A 50/60 Hz C AUT ION: F or continued protection against fire, replace fuses only with the same type and rating. F use 8A... -
Page 63: Card Slots For The 8000-Chassis
IMACS 8000 Chassis Description Chassis Table 3-1 shows the card slots for the 8000-CHASSIS. Table 3-1. Card Slots for the 8000-CHASSIS # of Type of Card Slots Used Notes Cards 1 or 2 C1, C2 One required in either slot... -
Page 64: And European Chassis Configuration
Model No. Running Head U.S. and European Chassis ConfigurationIMACS 8000 Chassis Description U.S. and European Chassis Configuration The chassis can be configured to comply with either U.S. (domestic) or European electrical safety standards by setting a jumper inside each chassis. Refer to Chapter 3. Installation for details. -
Page 65: Applications 4.1 Introduction
Applications Introduction Chapter 4 Applications Introduction By virtue of its open design, this system is capable of serving many different roles within a network. Some of the various functions the system can perform include: • Cross-Connect Functionality • Leased Line Provisioning •... -
Page 66: Voice Modules
Model No. Running Head Voice Modules Applications Voice Modules 4.2.1 Foreign Exchange Station (FXS) Card (8000-FXS-8P) This Integrated Access System supports two variants of Foreign Exchange Station (FXS) cards: • 8000-FXS-8P FXS Card provides eight 2-wire analog ports with a terminating impedance of 600 ohms. -
Page 67: Foreign Exchange Office (Fxo) Card (8000-Fxo-8P)
Applications Voice Modules 4.2.2 Foreign Exchange Office (FXO) Card (8000-FXO-8P) This Integrated Access System supports three variants of Foreign Exchange Office (FXO) cards: • 8000-FXO-8P Card provides eight 2-wire analog ports with terminating impedance of 600 ohms with improved ground-start signaling. FXO cards can be installed in any of the User Slots of the system chassis. -
Page 68: E&M Card
Model No. Running Head Voice Modules Applications It also sets and monitors the state of the digitized voice signal's ABCD signaling bits. In cross-connect systems, the Test functionality also includes the ability to generate test tones (300Hz, 1 kHz, 3 kHz and "quiet") and transmit those toward either the user side or the network side of the system. -
Page 69: Voice Channel Bank Application
Applications Voice Modules 4.2.4 Voice Channel Bank Application This is the simplest application which can be used by a service provider. The Integrated Access System is used in this configuration when one or more digital T1/E1 trunks are needed to interface with analog PBXs or key systems at the customer premises. In the US, the break-even point for bringing in a T1 trunk as opposed to multiple analog lines is typically 6 analog lines. -
Page 70: Tr008 Application
Model No. Running Head Voice Modules Applications 4.2.5 TR008 Application BellCore’s TR-TSY-000008 standard describes the requirements necessary for a Local Digital Switch (LDS) to connect to a remote terminal (RT) across a T1 (1.544Mbps) digital interface. The standard allows supporting from one to four T1s per RT without facility Automatic Protection Switching (APS), and three to five T1s with facility APS. -
Page 71: T1-E1 Conversion Application
Applications Voice Modules 4.2.6 T1-E1 Conversion Application The Digital Access and Cross-connect System (DACS) capabilities and the signaling and companding conversion features of the Integrated Access System can be used to provide gateway functionality between a DS1 transport network and an E1 transport network. See Figure 4-3 for an illustration of this capability. -
Page 72: Data Modules And Applications
Model No. Running Head Data Modules and Applications Applications Data Modules and Applications This Integrated Access System supports multiple user cards for transport of digital data. 4.3.1 HSU Cards The HSU card allows the connection of high speed data terminal equipment (DTE) and data communications equipment (DCE) to WAN links, server cards (ADPCM) or another HSU card. -
Page 73: Hsu Application Example
Applications Data Modules and Applications Software-initiated diagnostics support include the setting of local loop backs towards either the network or the attached DTE equipment. Additionally, a remote loop back function allows the HSU card to generate three DDS-compatible latching loop back codes for the far-end OCU, CSU and DSU equipment. -
Page 74: Ohsu Card
Model No. Running Head Data Modules and Applications Applications Remote Medical Facility Video Codec Main Medical Facility 1 WAN card 1 WAN Video Codec Remote Medical Multichannel Facility Conferencing Unit Video Codec Figure 4-4.Point to MultiPoint One-Way Video and Audio using HSUs 4.3.3 OHSU Card The 8000-OHSU-4P card allows the connection of IEEE C37.94 compliant teleprotection... -
Page 75: Iad With Sru Card Application
Applications Data Modules and Applications Since an SRU port does not require a complete 64Kbps time slot, the Sub-Rate card allows you to multiplex a number of devices into a single, subdivided time slot on a WAN card. SRU card ports can also be multiplexed with voice traffic on an ADPCM engine. Each RS-232 port can be independently programmed for synchronous (including HDLC) or asynchronous operation. -
Page 76: Ocu-Dp Cards
Model No. Running Head Data Modules and Applications Applications 4.3.5 OCU-DP Cards The 8000-OCUDP (Office Channel Unit - Data Port) is used to interface directly to Data Service Units (DSUs)/Channels Service Units (CSUs) supporting data traffic up to and including 64Kbps. A four-wire circuit can connect the OCU-DP card to a DSU/CSU that can be located up to four miles away. -
Page 77: Dso-Dp Card
Applications Data Modules and Applications An OCU-DP port may be programmed for OCU mode or CSU mode. OCU mode is the most common and is used whenever the OCU-DP port attaches to a CSU/DSU over a four-wire circuit. CSU mode allows the card to be connected directly to the digital network. Software initiated diagnostics supported by the OCU-DP card include the setting of six different loop backs. -
Page 78: Adpcm Voice Compression Server (8000-Adpcm)
Model No. Running Head ADPCM Voice Compression Server (8000-ADPCM) Applications In G.703 Co-Directional mode, the Transmit Data and Receive Data leads are supported. The clock information and the data make up a composite signal and the clock must be derived from the data stream. -
Page 79: Pbx To Pbx Trunk Application
Applications Router Server Card (8000-Router) • PBX to PBX trunk application • Automatic Call Distribution application • Efficient wireless base station/hub application 4.4.1 PBX to PBX Trunk Application Figure 4-6 shows the IAD with an ADPCM server used to compress two T1 or E1 PBX-to-PBX trunks into a single trunk. -
Page 80: Oc3 Point To Point Server (8000-Oc3-Pt2Pt)
OC3 card as a drop point to a SONET based product has limitations as far as the manual protection switch is concerned. Until Zhone completes the SONET integration of the product, it is only supported in a true point to point configuration. -
Page 81: Pwe Ip Uplink Server (8000-Pwe)
Applications PWE IP Uplink Server (8000-PWE) PWE IP Uplink Server (8000-PWE) The 8000-PWE card offers another new uplink card to the IMACS portfolio. The PWE card uses PWE specifications to encapsulate the traditional IMACS TDM data stream and transport the TDM data over a packet network to the far end. The packetized data can arrive at the far end with each node being timed off the same source (common mode clock), or the far end system can recover the clocking by the use of an adaptive clock on the incoming packet stream. - Page 82 Model No. Running Head PWE IP Uplink Server (8000-PWE) Applications 4-18 Reference Guide...
-
Page 83: System Configuration And Operation
Therefore, in order to minimize the possibility of data errors during a circuit card hot swap, Zhone recommends that maintenance procedures on the IMACS be done during periods of low system activity or during the maintenance window whenever possible. -
Page 84: System Initialization
Model No. Running Head System Initialization System Configuration and Operation System Initialization System initialization consists of registering your system then logging into it for additional configuration. These operations are described on the following pages. 5.3.1 Registration To register your system after starting it up for the first time, proceed as follows: 1. -
Page 85: First Time Login Screen
System Configuration and Operation System Initialization Figure 5-2.First Time Login Screen 7. Enter your vendor code in the Vendor Code field. See Figure 5-3 below, press the <Enter> key. Figure 5-3.Welcome to Registration Screen The Vendor Code for this Integrated Access System is given in a registration sheet that is usually in a plastic bag attached to the Power Supply Cover panel. -
Page 86: Selecting Chassis Type Screen
Figure 5-4.Selecting Chassis Type Screen The new IMACS 8000 shelf - easily identifiable by it’s distinct purple color is a Front and Rear Loading shelf with Power Supplies in the rear - option four as seen above in Figure 5-4. -
Page 87: Logging Into The System
System Configuration and Operation System Initialization 5.3.2 Logging Into the System The first step in starting an operator session is to log into the system. You must enter a username and password that allows you to perform the required tasks on the system. The initial (default) login information corresponds to one of four different access levels, each allowing you to perform certain tasks. -
Page 88: User Names, Passwords And Groups
Model No. Running Head System Initialization System Configuration and Operation 4. A System Main Screen appears. Figure 5-7 shows this screen for the 8000 chassis. Refer to the next section for a discussion of the Integrated Access System’s user interface screen hierarchy. -
Page 89: Cpu Screen - Usernames Option
System Configuration and Operation System Initialization Note: The passwords MUST be at least six characters long and MUST be a combination of characters and at least one digit! Figure 5-8.CPU screen - userNames option The system supports 256 possible users. Each user is defined by the use of three entries or fields. -
Page 90: User Groups
Model No. Running Head System Initialization System Configuration and Operation When the system is first commissioned, there is only one group defined: Table 5-2. Default User Table Default User Name Default Password Default User Group admin admin Each user group represents a different access level that allows a login ID to perform certain system tasks after logging in. -
Page 91: Default Group Permissions
System Configuration and Operation System Initialization When the system is first commissioned, or after a ZIP function, the user group defaults to the following configuration: Table 5-4. Default Group Permissions 2 - 32 User group 1 is the "Superuser" and its attributes are not provisionable. User groups 2 to 32 default to R in all attributes. -
Page 92: User Name Screen
Model No. Running Head System Initialization System Configuration and Operation Figure 5-9.User Name Screen Table 5-5 shows the valid actions that a user can perform when at the user name field. 5-10 Reference Guide... -
Page 93: Usrname Screen Actions
System Configuration and Operation System Initialization Table 5-5. usrName Screen Actions Action Function Refresh Re-paints the current screen Allows you to add a user Allows you to delete a user Group Displays the Group settings and access level permissions as explained in Section 5.3.4 on page 14. -
Page 94: Adding A User
Model No. Running Head System Initialization System Configuration and Operation confirmed the password by typing in “flood01” a second time and carriage return, right arrow to the group field, carriage return and then used the up arrow until ‘06’ appeared and hit carriage return. -
Page 95: Login Log Sample Display
System Configuration and Operation System Initialization Login Log Selecting ‘L’ will take the user to a screen where the login log is stored. This table is read-only, and will display the last twenty login and logout events.Figure 5-11 shows how a typical entry will appear. -
Page 96: Access Level Permissions
Model No. Running Head System Initialization System Configuration and Operation Main Selecting the ‘M’ function will return the user back one level to the CPU Main Screen. 5.3.4 Access Level Permissions With the Admin level user, the Group setting can be changed on a group basis. Begin by accessing the User Name Screen as shown in Figure 5-9 on page 5-10. - Page 97 System Configuration and Operation System Initialization WAN Alarms This covers all alarm reporting screens and activities associated with both the copper and optical WAN interfaces. Read access allows alarms to be viewed only. RW access allows changes to severity, thresholds etc. (any provisionable alarm attributes) WAN PMs This covers all performance monitoring screens and activities associated with both the copper and optical WAN interfaces.
-
Page 98: System Screens
Model No. Running Head System Screens System Configuration and Operation System Screens The system screen will display each card that is currently installed onto the system along with the card status and location. 5.4.1 System Main Screen After you log in, a System Main Screen similar to Figure 5-7 or appears, showing all of the cards currently in the system. -
Page 99: Power Supplies And Ringing Generators Card Status
System Configuration and Operation System Screens 5.4.3 Power Supplies and Ringing Generators Card Status The power supply status will display PS1 when a power supply is properly inserted into slot F1 or F2 for the front-loading chassis with power supplies on top and the front & rear loading chassis with power supplies on side. -
Page 100: Server Card Status
Model No. Running Head System Screens System Configuration and Operation 5.4.5 Server Card Status Port status for the Server cards is determined in the same way as Voice and Data cards, with the possible status values of s (Standby), a (Active), and r (on a Redundant card). Port status is determined somewhat differently for the PWE3, OC3, BRIDGE and IPR*4 Server cards, as these cards have more logical ports than can be represented on the screen. -
Page 101: Test And Debug Screen
System Configuration and Operation System Screens The highlighted area in the upper right corner shows the current alarm status data. In Figure 5-14, an Out-Of-Service (OOS) alarm has occurred on the card in chassis slots C1, P1, W2, F2, U2 as well as U5 and U8. Figure 5-14.Typical Card Main Screen The bottom line of each Card Main Screen lists other actions you can perform by simply pressing the letter key that corresponds to the uppercase letter of your desired action. -
Page 102: Time Slot Configuration And Cross-Connect Screens
Model No. Running Head Card Configuration System Configuration and Operation 5.4.8 Time Slot Configuration and Cross-Connect Screens From the System Main Screen, you also can access a Configuration Screen that lets you automatically configure the system. This time-saving function assigns DS0 time slots of the system’s T1 and E1 WAN lines to certain user voice and data cards in your system. -
Page 103: Recording Your Configuration Settings
System Configuration and Operation Card Configuration If you replace a card with an identical type new card, the system automatically copies the NVRAM configuration data from its active CPU card to the new card. However, if you replace a card with a different type of card, you must first delete the existing card settings from the slot before the new card will be recognized by the system. -
Page 104: Reinitializing The System
Model No. Running Head Reinitializing the System System Configuration and Operation Reinitializing the System The system stores information about its currently installed cards, the card configuration option settings, WAN connections, passwords, and other data in nonvolatile memory (NVRAM) on the CPU card. These cards are labeled CPU or CPU 7 on its faceplate ejector. Your telnet connection to the system is through the Ethernet O&M port on the active CPU card. -
Page 105: Alarms
System Configuration and Operation Alarms If the CPU card is replaced with an identical CPU card but the new card has a different firmware version, a “zip” may need to be performed. Figure 5-15.Cold-Start NVRAM Test Screen. WARNING! The "Z" command will start the ZIP process. "Zipping" the system deletes all of the information stored on NVRAM and resets it. -
Page 106: Alarm Screens
Model No. Running Head Alarms System Configuration and Operation All alarm events are also sent to the Syslog server. See “SYSLOG” on page 24. for more information regarding the syslog server. 5.7.1 Alarm Screens Refer to Figure 5-16. To view the current system alarms, you can go from the System Main Screen to an Alarm Screen. -
Page 107: Alarm Filter Settings
System Configuration and Operation Alarms The fifth character set (RED) is the type of alarm generated (in this case, a facility Red alarm on WAN port W2-1 is reported). The last two character sets are the date and time the alarm was logged. 5.7.2 Alarm Filter Settings You can set filters for each alarm so that the alarm reports occurrences in a number of different... - Page 108 Model No. Running Head Alarms System Configuration and Operation The fourth column of the Alarm Filters Screen contains the filter modifiers info, minor, major, and crit. This column specifies a level of importance (information only, minor alarm, major alarm, or critical alarm) for each alarm. These settings are described later in this chapter. The last column sets the alarm cutoff (ACO) to aco-off or aco-on.
-
Page 109: Alarm Modifiers
System Configuration and Operation Alarms SYNC Clock Sync Alarm The SYNC alarm is generated when either the primary or secondary external clock source is lost. This alarm is in addition to the condition that lost the clock source (CGA-RED or OOS). ERR-3 Excessive Error Rate (10e-3) While using transcoder operations for E1 that involve downstream... -
Page 110: Alarm Cutoff (Aco)
Model No. Running Head Alarms System Configuration and Operation 5.7.4 Alarm Cutoff (ACO) The ACO (Alarm Cutoff) security feature is used by the system to alert an operator to alarms that clear themselves while the system is unattended. The ACO option settings are aco-on and aco-off. -
Page 111: Alarm Handling
System Configuration and Operation Alarms 5.7.6 Alarm Handling The report alarm function attempts to send alarm information to a remote printer, network management system (NMS), or other device, in addition to recording the alarm in the Alarm History log. These features use the built-in serial port and modem on the Interface card. You will need to change the settings in the Ports screen on the Interface card to be either modem or printer, and the printer (Prt) screen on the CPU card to activate the alarm reporting functions to a printer or modem interface. -
Page 112: Time Slot Configuration Screen
Model No. Running Head Time Slot Configuration Screen System Configuration and Operation Time Slot Configuration Screen From the System Main Screen, you can access a Configuration Screen by pressing “c” (Config) that lets you automatically configure the system. This time-saving function assigns DS0 time slots of the system’s T1 and E1 WAN lines to certain user voice and data cards in your system. -
Page 113: Test, Debug, Backup & Restore
System Configuration and Operation System Level Maintenance 5.12.1 Test, Debug, Backup & Restore Advanced configuration and diagnostics are available through the use of the sYs (sYstem) command from the System Main Screen. Pressing “y” brings up the Test and Debug screen shown in Figure 5-19. -
Page 114: Debugging The System
Model No. Running Head System Level Maintenance System Configuration and Operation 5.12.3 Debugging the System The D (Debug) command is only available to factory personnel with a password authorization higher than "Superuser." It gives access to the system software coding. 5.12.4 Registering the System The R (Registration) command allows a user with Operator or higher password authority to change the system registration. -
Page 115: Tftp Backup For 7.X.y
System Configuration and Operation System Level Maintenance 5.12.6 TFTP Backup for 7.x.y Follow the instructions listed below to perform a TFTP backup. 1. Log into the Integrated Access System using the Manager Password. 2. Press “Y” for System at the main menu. 3. -
Page 116: Ascii Backup Procedure
Model No. Running Head System Level Maintenance System Configuration and Operation 4. Select TFTP and press Enter. 5. You will receive an NV Ram image overwrite confirmation message. Press “Y” for yes. 6. Enter the desired number of Mismatch retries and press Enter. 7. -
Page 117: Ascii Restore Procedure
System Configuration and Operation System Level Maintenance 5.12.9 ASCII Restore Procedure Follow the steps listed below to perform an ASCII restore. 1. From the main menu press “Y” for System. 2. Press “E” for Restore. 3. Select “ascii” from the Protocol selection using the arrow keys to navigate. Press Enter. 4. -
Page 118: Xmodem 128K And Xmodem 1K Restore
Model No. Running Head System Level Maintenance System Configuration and Operation 6. Press “G” for Go. An NV Ram image overwrite command confirmation appears (i.e., Previous NV image, cksum: ox2DF05, date 09-08-96 05:58 overwrite (y/n)?) Enter “Y” for yes. 7. Prior to starting the backup or restore process, ensure that the PC emulation package is set to the XMOD128 or XMOD 1K type format, otherwise an error will occur during the process. -
Page 119: Taking A Card Out Of Service
System Configuration and Operation Taking a Card Out of Service 10. Following system reboot, login as usual and proceed as appropriate. 5.13 Taking a Card Out of Service The user can “OOS” (Out Of Service) a card for various reasons by pressing “O” (OOS) from the System Main Screen. -
Page 120: Modes Of Operation
Model No. Running Head Assigning Time Slots System Configuration and Operation The fifth section describes signaling status, signaling, and companding conversion. The last section shows you how to view the time slot map after making your assignments and cross-connections. This chapter defines "assigning time slots" as the process of connecting user card ports to WAN ports and time slots, and it defines "cross-connecting time slots”... -
Page 121: Assigning Multiple Time Slots To A Port
System Configuration and Operation Assigning Time Slots 5. Change the STATE of the port from stdby to actv. 6. Repeat steps 2 through 5 for the remaining card ports, to assign time slots to them. 7. Press “s” to save your settings, using the Save command in the Card Main Screen. Figure 5-21.Typical E&M Card Time Slot Assignments 5.16.2 Assigning Multiple Time Slots to a Port Figure 5-22 shows the HSU Card Main Screen for the time slot assignment example. -
Page 122: Typical 2-Port Hsu Card Time Slot Assignments For T1
Model No. Running Head Assigning Time Slots System Configuration and Operation 4. Place an “x” under each desired time slot by using the space bar to either select or de-select a time slot. Use the right arrow key to move to the next time slot (TS) for selection. -
Page 123: Typical 4-Port Hsu Card Time Slot Assignments For E1
System Configuration and Operation Assigning Time Slots Figure 5-23.Typical 4-Port HSU Card Time Slot Assignments for E1 Reference Guide 5-41... -
Page 124: Cross-Connect Model
Model No. Running Head Circuit Names System Configuration and Operation 5.16.3 Cross-Connect Model The Cross-connect model allows you to access two T1/E1 links for each of four WAN cards, for a total of eight T1/E1 links. All WAN card connections to other WAN cards are accomplished through the cross-connect option on the System Main Screen, and must be individually specified. -
Page 125: Display And Change Circuit Names
System Configuration and Operation Circuit Names Note: Not all circuits formed in the IMACS system have a direct relationship with a slot and unit. These types of circuits are not maintained by the CNA. Circuits made manually from the Cross Connect screen are not be affected by other resources. Examples of this type of circuit are WAN-to-WAN, broadcast, and Tads circuits. -
Page 126: Cross Connect Screen -View All
Model No. Running Head Circuit Names System Configuration and Operation Figure 5-25.Cross Connect Screen -View All Renaming Circuits For the renaming feature, it does not matter which side of the circuit is selected, only the line at which the original circuit is printed matters. After hitting the 'n' key on the ViewAll screen, circuits can be renamed by hitting 'Enter' as shown in the following figure. -
Page 127: Cross Connect Rename Circuit (Saving)
System Configuration and Operation Circuit Names Hitting "S" to save the circuit name changes the name of the circuit as shown in the below figure: Figure 5-27.Cross Connect Rename Circuit (Saving) Wan Circuits Similar to other circuits, WAN circuits can be renamed from the WAN Cross Connect screen. The WAN Cross Connect screen lists circuits relative to the selected WAN. -
Page 128: Wan Cross Connect Screen (Rename)
Model No. Running Head Circuit Names System Configuration and Operation Selecting the second circuit and hitting "enter" to rename, renames the circuit as shown below. Figure 5-29.WAN Cross Connect Screen (Rename) After the renaming operation, the renamed circuit appears in the WAN Cross Connect screen as shown below: Figure 5-30.Cross Connect Screen (Rename Displayed) 5-46... -
Page 129: Backup And Restore Circuit Name Table
System Configuration and Operation Circuit Names 5.17.2 Backup and Restore Circuit Name Table The circuit name table can be backed up and restored via NBR, adding additional flexibility for managing circuit names. Note: If a different version host CPU is used after circuit names have been renamed, the changed circuit names are maintained until a resource is changed, at which time the circuit name is restored to default. -
Page 130: Snmp
Model No. Running Head DS0 Naming System Configuration and Operation When NVRAM is restored via TFTP or from FLASH, the entire image is transferred including the circuit name table. The circuit name table shown as Xcon Names has been added to the selections to allow ascii restore as shown in the figure below. -
Page 131: E&M Provisioning Screen
System Configuration and Operation DS0 Naming Figure 5-33.E&M Provisioning screen A new option has been added at the bottom of the screen, "Name". Hitting N for name takes the user to the screen shown below in Figure 5-34. Figure 5-34.Name screen From this screen, the user can name any of the eight DS0's with up to a fourteen character name. -
Page 132: Automatic Time Slot Assignment
Model No. Running Head Automatic Time Slot Assignment System Configuration and Operation 5.19 Automatic Time Slot Assignment You can automatically assign time slots to voice (E&M, FXS, etc.) cards by using the Configuration command in the System Main Screen. Figure 5-35 shows typical time slot assignments from four E&M cards to an E1 WAN port. -
Page 133: Typical Card Slot And Type Selection
System Configuration and Operation Automatic Time Slot Assignment 4. Select the type of voice card from the types listed above the bottom line of the screen, as shown in Figure 5-36. In that screen, fxs-6 is chosen as the card type (FXS, 600 ohms). Figure 5-36.Typical Card Slot and Type Selection 5. -
Page 134: Typical System Main Screen With Alarms
Model No. Running Head Automatic Time Slot Assignment System Configuration and Operation 6. The system automatically builds the necessary time slot structure. Since the user slots are vacant, the system will register Out Of Service (OOS) alarms for each of the four cards, as shown in Figure 5-38. -
Page 135: Typical Wan Time Slot Assignment Screen
System Configuration and Operation Automatic Time Slot Assignment In Figure 5-39, the XCON column shows the user card slot and card port to which each time slot of the E1 line is assigned. Time Slot 16 is reserved for signaling (CAS), and time slot 0 is used for signal frame alignment. -
Page 136: Cross-Connecting Wan Time Slots
Model No. Running Head Cross-Connecting WAN Time Slots System Configuration and Operation 5.20 Cross-Connecting WAN Time Slots After assigning the user cards to DS0 time slots, you can also assign the remaining WAN time slots for pass-through cross-connections between T1 and E1 links. You can cross-connect WAN time slots from the System Main Screen. -
Page 137: Time Slot Cross-Connection Options And Defaults
System Configuration and Operation Cross-Connecting WAN Time Slots Table 5-9. Time Slot Cross-Connection Options and Defaults Parameter User Options Default CIRCUIT ID Any combination of letters or numbers up to 14 characters, including ************** spaces w1-1 w1-2 w2-1 w2-2 w3-1 w3-2 w4-1 w4-2... -
Page 138: New Circuit Selection And Id Assignment
Model No. Running Head Cross-Connecting WAN Time Slots System Configuration and Operation WARNING! When cross-connecting multiple independent data DS0 time slots (sequentially grouped time slots should work) for data. Super-rate [data type cross-connect] is multiple DS0s sequentially assigned between WAN aggregates in a cross-connect system. DO NOT attempt to save time by cross-connecting independent data time slots as one super-rate circuit (could cause data errors.) This limitation does not apply to voice time slots. -
Page 139: Wan Unit Options
System Configuration and Operation Cross-Connecting WAN Time Slots The example in Figure 5-43 shows w1-1 (WAN 1, port 1) as the selected WAN card and port. Figure 5-43.WAN Unit Options TS/BW The first Time Slot/Bandwidth column shows the different time slots of w1-1 that will be assigned to this pass-through connection. -
Page 140: Time Slot And Bandwidth Options
Model No. Running Head Cross-Connecting WAN Time Slots System Configuration and Operation Make your selection by using the space bar and arrow keys. The arrow key moves from slot to slot, and the space bar toggles between selecting and deselecting a time slot. Figure 5-44.Time Slot and Bandwidth Options TEST The first Test column allows you to select the test pattern to be applied to this circuit in the... -
Page 141: Test Options
System Configuration and Operation Cross-Connecting WAN Time Slots Figure 5-45.Test Options The second WAN Unit column is the T1/E1 link in which the pass-through connection ends. The options are all of the WAN cards and ports. If a WAN card is not present in the W/U selected, an error message is generated. -
Page 142: Cross-Connect Circuit Type Selection
Model No. Running Head Cross-Connecting WAN Time Slots System Configuration and Operation When the circuit is saved, the system will send the selected pattern toward the second end of the circuit on each time slot, to facilitate testing. When circuit testing is finished, reset the Test field to off. -
Page 143: Trunk Conditioning Option Selection
System Configuration and Operation Cross-Connecting WAN Time Slots You can define the pattern to be transmitted on a cross-connected circuit if one of the circuit’s two WAN links fails. This is known as Trunk Conditioning (TC), and the available selections depend on the Type column setting. -
Page 144: Signaling Bit Pattern Selection
Model No. Running Head Cross-Connecting WAN Time Slots System Configuration and Operation If you choose user, also enter a two-digit hexadecimal code for the bit pattern to be sent in each direction. Each digit can be from 0 to 9 or a to f. Figure 5-48 shows a typical signaling bit pattern entry screen. -
Page 145: Selecting Pcm Conversion
System Configuration and Operation Cross-Connecting WAN Time Slots The Conversion (CNV) parameter allows you to request that PCM companding and signaling conversion be performed on this cross-connect circuit. Since these conversions only apply to voice circuits, if the TYPE selected is d (data), then the only acceptable value here is n/a. Similarly, if the TYPE selected is v (voice without signaling), the system will only allow users to request PCM companding conversion. -
Page 146: Selecting Signaling Conversion
Model No. Running Head Cross-Connecting WAN Time Slots System Configuration and Operation The ABCD-ABAB setting will convert the incoming CEPT signaling to T1 signaling for an ESF or D4 cross-connect. The ABCD-AB01 option will convert the incoming T1 signaling to CEPT signaling for an ESF or D4 cross-connection. -
Page 147: Cross-Connect Actions
System Configuration and Operation Cross-Connect Actions 5.21 Cross-Connect Actions Table 5-10 summarizes the actions you can perform from the CPU Cross-Connect Screen. These actions appear at the bottom highlighted line of the screen. Table 5-10. CPU Cross-Connect Screen Actions Action Function Allows you to program additional pass-through cross-connects in the system. -
Page 148: Updated Wan Card Screen
Model No. Running Head Cross-Connect Actions System Configuration and Operation To update a cross-connected circuit from the CPU Cross-Connect Screen, highlight the circuit name to be updated, and press “p” to invoke the uPdate command. Figure 5-53 shows the WAN card in TS (time slot) 8 through 12 being updated. However if the WANs are selected and deleted as shown in Figure 5-54 then the screen in Figure 5-53 will be blank for WAN TS 8 through 12. -
Page 149: Delete Cross-Connection Screen
System Configuration and Operation Cross-Connect Actions To delete a cross-connected circuit from the CPU Cross-Connect Screen, highlight the circuit name to be deleted, and press “e” to invoke the dElete command. Figure 5-54 shows the deletion process. Figure 5-54.Delete Cross-Connection Screen Reference Guide 5-67... -
Page 150: Testing Voice Cross-Connects
Model No. Running Head Testing Voice Cross-Connects System Configuration and Operation 5.22 Testing Voice Cross-Connects Voice and data circuits differ in the way the test function is accessed. While you can set up test patterns on data circuits on the cross-connect screen from the System Main Screen, you must use a subscreen of the WAN Cross-Connect Card Screen for circuit testing. -
Page 151: Highlighted Circuit On A Wan Cross-Connect Screen
System Configuration and Operation Testing Voice Cross-Connects Figure 5-56 shows the WAN Cross-Connect Screen for the voice circuit used in this example. Place the cursor over the selected circuit and press the "t" key to bring up the Test Screen shown in Figure 5-57. -
Page 152: Typical Test Screen And Abcd Bit Options
Model No. Running Head Testing Voice Cross-Connects System Configuration and Operation Figure 5-57.Typical Test Screen and ABCD Bit Options Table 5-11. WAN Cross-Connect Test Screen Options Parameter User Options Default Tx ABCD PATTERN off all 0 all 1 m_oos 1:1 1:7 lpbk 300Hz 1KHz 3KHz MON Tx ABCD... -
Page 153: Voice Test Diagram
System Configuration and Operation Testing Voice Cross-Connects Figure 5-58 shows a diagram of the test process. When Tx ABCD for w2-1 is set to mon, the w2-1 column reflects the ABCD bits being sent out on w2-1. This pattern should be identical to Rx ABCD on w2-2, unless the conversion table is used. -
Page 154: Using The Broadcast Option
Model No. Running Head Using the Broadcast Option System Configuration and Operation CONVERSION The Conversion information field shows users the conversion setting selected from the cross-connect screen. The possible values are no (no conversion), sig (signaling is converted, but not the PCM), pcm (PCM is converted, but not the signaling) and p&s (both signaling and PCM are converted). -
Page 155: Typical Main Cross-Connect Screen
System Configuration and Operation Using the Broadcast Option Note: The screen only shows the cross-connects made from WAN cards to WAN cards, not from user cards to WAN cards. Figure 5-59.Typical Main Cross-Connect Screen Broadcast circuits can be initiated, updated, or deleted only from the broadcast screen. Reference Guide 5-73... -
Page 156: Typical All Circuits Screen
Model No. Running Head Using the Broadcast Option System Configuration and Operation To access the Broadcast option, press "v" (for View all) in the Main Cross-Connect Screen. The All Circuits Screen of Figure 5-60 appears. In addition to the WAN card-to-WAN card cross-connects, this screen also shows all user card-to-WAN card time slot assignments for all WAN cards. -
Page 157: Typical Add Broadcast Screen
System Configuration and Operation Using the Broadcast Option Figure 5-61.Typical Add Broadcast Screen In this example, the broadcast circuit is named "Lecture_Pipe" for easier identification later, when the circuit will be disconnected. Figure 5-61 shows the selection of a second destination for the broadcast circuit. In that example, that destination is Salt Lake City, which is accessed through w2-1. -
Page 158: Typical "To" Destination Selection
Model No. Running Head Using the Broadcast Option System Configuration and Operation Use similar actions to duplicate this circuit for the other destinations. Figure 5-62 shows the completed circuits. To disconnect the circuits when the program is finished, highlight the circuit to be disconnected and press the "e"... -
Page 159: Typical Time Slot Selection
System Configuration and Operation Using the Broadcast Option Figure 5-63.Typical Time Slot Selection Figure 5-64.Typical Complete Broadcast Circuit Reference Guide 5-77... -
Page 160: Wan Link To Wan Link
Model No. Running Head Using the Broadcast Option System Configuration and Operation 5.23.1 WAN Link to WAN Link Circuits from a WAN link to another WAN link can also be duplicated from the broadcast screen. Use the same procedure to establish multiple connections for WAN-to-WAN circuits. In Figure 5-62, highlighting the WAN link circuit on slot w1-1 allows you to cross-connect duplicate information to any other WAN link. -
Page 161: Test Access Digroups (Tads)
System Configuration and Operation Using the Broadcast Option 5.23.3 Test Access Digroups (TADS) The Test Access Digroups (TADS) is a remote test access for data cross connects that pass through the system according to publication TR-TSY-00033, Issue #1, June 1986. A test center can access the system and assign split intrusive or non-intrusive monitor testing circuits between the unit and the test center via another WAN link. -
Page 162: Monitor Circuit
Model No. Running Head Using the Broadcast Option System Configuration and Operation 5.23.4 Monitor Circuit With the monitor circuit, the data test center (by remote access) creates a “hitless” monitor connection (i.e.,one that can be created, maintained and dropped without affecting the information on the circuit being tested) between the data test center and the Node_1 Device. -
Page 163: Completed Monitor Circuit
System Configuration and Operation Using the Broadcast Option Cross connect information is added in a similar fashion to the Add Broadcast screen mentioned previously. Figure 5-67 shows the completed monitor circuit. Figure 5-67.Completed Monitor Circuit Reference Guide 5-81... -
Page 164: Monitor Circuit Diagram
Model No. Running Head Using the Broadcast Option System Configuration and Operation Figure 5-68 shows a diagram of how the Monitor circuit splits the original cross connect circuit for testing. Notice how the test circuit uses two 64kbps WAN time slots, one for the transmit side and one for the receive side of the line. -
Page 165: Split Circuit
System Configuration and Operation Using the Broadcast Option 5.23.5 Split Circuit Pressing the “L” command from the Menu of Actions allows you to split the circuit through the data test center equipment. New circuit information is added in the same way as with the monitor circuit. -
Page 166: Split Circuit Diagram
Model No. Running Head Using the Broadcast Option System Configuration and Operation Fremont DTE W1-1 #1(R) W1-1 #1 (T) W2-1 #1 Data Test Center Equipment W2-1 #2 W1-2 #1 W1-2 #1 Jacksonville DCE Figure 5-70.Split Circuit Diagram 5-84 Reference Guide... -
Page 167: Release
System Configuration and Operation Using the Broadcast Option 5.23.6 Release Pressing the “R” (Release) command allows you to release the circuit from the data test equipment. The system will verify the action desired with a yes/no question. With the Release Circuit, the Data Test Center removes the connection between the circuit being tested and restores the circuit to its pre-accessed state. -
Page 168: Terminate And Leave Access
Model No. Running Head Using the Broadcast Option System Configuration and Operation 5.23.7 Terminate and Leave Access The Terminate and Leave Access (TLA) circuit gives the data test center the capability to terminate one or both directions of transmission on a circuit by inserting an unassigned channel code (01111111) in the outgoing transmission path(s). - Page 169 System Configuration and Operation Using the Broadcast Option The Terminate and Leave Access (TLA) command is the capability to terminate one or both directions of transmission on a circuit. See section above. pgUp The pgUp (Page Up) action is initiated by pressing the "u" key. Since the system can handle many different TADS circuits, you may fill the screen allotment for data.
-
Page 170: Checking The Time Slot Map
Model No. Running Head Checking the Time Slot Map System Configuration and Operation 5.24 Checking the Time Slot Map Once you select and assign the time slots, you can view the list of DS0 connections (the time slot map) through the WAN card Cross-Connect Screen for cross-connect systems. You can see the results of your assignments in the time slot map as follows: 1. -
Page 171: Typical Time Slot Screen In E1 Operation
System Configuration and Operation Checking the Time Slot Map For E1 transmission (Figure 5-74), time slot 0 and 16 are not available for assignment on either the HSU table or the voice card time slots. Like T1 operation in d/i mode, unspecified time slots are automatically assigned to corresponding slots on the other WAN port on the same card. -
Page 172: Recording The Time Slot Configuration
Model No. Running Head Recording the Time Slot ConfigurationSystem Configuration and Operation 5.25 Recording the Time Slot Configuration After setting up the initial system configuration and define the time slot map, record this information on paper. Recording the initial configuration in a logical manner will help if you have a problem later. -
Page 173: Time Slot Recording Form For E1 Operation
System Configuration and OperationRecording the Time Slot Configuration Table 5-15. Time Slot Recording Form for E1 Operation WAN Port No. _______ - _______ TS Number Card Type Port Number Reference Guide 5-91... -
Page 174: Redundant Operations
Model No. Running Head Redundant Operations System Configuration and Operation 5.26 Redundant Operations This section describes the redundancy features of the Integrated Access System, and provides instructions for configuring the system with redundant elements. The Integrated Access System can be configured with redundant (backup) critical system elements. -
Page 175: Typical Redundant-Power Supply System Main Screen
System Configuration and Operation Power Supply Redundancy Figure 5-75 shows a System Main Screen with redundant power supplies, in which Power Supply 1 (PS1) has failed. The power supply failure is noted in the alarm message PS1 OOS in the upper right corner of the screen. Figure 5-75.Typical Redundant-Power Supply System Main Screen Reference Guide 5-93... -
Page 176: Cpu Card Redundancy
Model No. Running Head CPU Card Redundancy System Configuration and Operation 5.28 CPU Card Redundancy CPU card redundancy is valuable because the CPU card is essential to system operation. CPU redundancy is supported using two CPU-7 XCON (CPU). The CPU card in slot C2 will be the redundant card for the CPU XCON card in slot C1, but only if they are both the same type with the same level of Host Code, for example 7.5.x. -
Page 177: Typical System With Cpu Switchover Completed
System Configuration and Operation CPU Card Redundancy Figure 5-77.Typical System with CPU Switchover Completed When configuring a system with 8000-CPU w/Ethernet card, you must use two CPU cards and cable both to the LAN to keep the Ethernet port functioning after a CPU switch. The illustration above in Figure 5-77 shows a system where the Ethernet port is assigned and active for management. -
Page 178: Wan Card Redundancy
Model No. Running Head WAN Card Redundancy System Configuration and Operation 5.29 WAN Card Redundancy Both T1 and E1 WAN redundancy are supported in cross-connect systems. The cross-connect system allows 1:N redundancy with an WAN-R-T1 ow WAN-R-E1 WAN in slot W4 protecting the WAN-T1 or WAN-E1 WANs in slot W1 through W3. Only WAN cards with identical DSX, CEPT and/or CSU modules and configured the same are protected. -
Page 179: Typical Cross-Connect System With Wan Card Redundancy
System Configuration and Operation WAN Card Redundancy Therefore if a situation occurs (such as a shelf restart or power cycle), an 801460 card in the RDNT slot will swiftly come into service, and therefore take over traffic for an 801070 which is still booting up. -
Page 180: Switching To A Redundant Cross-Connect Wan Card
Model No. Running Head WAN Card Redundancy System Configuration and Operation Figure 5-79 shows a WAN Card Main Screen for the card in slot W1 with port 1-1 selected. To force a switch, press “w” (sWitch command), then press "y" to complete the switch. The traffic on the WAN card in slot W1 will be switched to the WAN-R card in slot W4. -
Page 181: Interface Card (If) Redundancy
System Configuration and Operation Interface Card (IF) Redundancy Figure 5-80.Typical Cross-Connect WAN Card Redundancy Switch in Progress 5.30 Interface Card (IF) Redundancy The Interface card (8000-IF, 8000-IF+EXT and 8000-IF+MODEM) cannot be spared in the shelf for redundant operation. This card contains both the copper traces for the WAN interfaces, but also contains the terminal driver technology and can provide an on-board MODEM interface and timing sync card depending on the type of IF card installed. -
Page 182: Adpcm Card Redundancy
Model No. Running Head ADPCM Card Redundancy System Configuration and Operation 5.31 ADPCM Card Redundancy The Integrated Access System can also have ADPCM cards, which use voice compression technology to effectively increase the digital voice transmission capabilities of voice cards (E&M, FXS, or FXO) or WAN links. -
Page 183: Typical Adpcm Card Main Screen
System Configuration and Operation ADPCM Card Redundancy Figure 5-82.Typical ADPCM Card Main Screen To choose a redundant ADPCM card for the system, proceed as follows: 1. Go to the System Main Screen (if you are not already there). 2. Select the desired ADPCM card from the System Main Screen, and press <Enter> to go to the Main Screen of that card. -
Page 184: Typical Adpcm Card Redundancy
Model No. Running Head ADPCM Card Redundancy System Configuration and Operation The System Main Screen now looks like Figure 5-83. The status of all ADPCM ports of the card in slot P1 is “r”. Figure 5-83.Typical ADPCM Card Redundancy If the card in slot P2 or P3 fails, the entire voice compression network will switch to the redundant card in slot P1. -
Page 185: Analog Bridge Card Redundancy
System Configuration and Operation Analog Bridge Card Redundancy 5.32 Analog Bridge Card Redundancy The Integrated Access System can also have Analog Bridge Server cards, which can combine E&M circuits and / or WAN links into one of 32 possible conference bridging circuits. See “Analog Bridging Server Card”... -
Page 186: Analog Bridge Card Main Screen
Model No. Running Head Analog Bridge Card Redundancy System Configuration and Operation Figure 5-85.Analog Bridge Card Main Screen Analog Bridge To choose a redundant card for the system, proceed as follows: 1. Go to the System Main Screen (if you are not already there). Analog Bridge 2. -
Page 187: Analog Bridge Card In Redundant Mode
System Configuration and Operation Analog Bridge Card Redundancy Analog Bridge The System Main Screen now looks like Figure 5-87. The status of all ports of the card in slot P3 is “r”. Figure 5-87.Analog Bridge Card in Redundant Mode If the card in slot P2 fails, the entire conference bridge network will switch to the redundant card in slot P3 after a brief interruption in service. -
Page 188: Pwe Card Redundancy
Model No. Running Head PWE Card Redundancy System Configuration and Operation 5.33 PWE Card Redundancy The IMACS can also have two Pseudowire (PWE) Server cards, which can convert all native TDM termination points and send out the TDM data over the IP packet uplink after the TDM to IP packet conversion. -
Page 189: Pwe Card Main Screen
System Configuration and Operation PWE Card Redundancy Figure 5-89.PWE Card Main Screen To choose a redundant card for the system, proceed as follows: 1. From the System Main Screen select the desired card and press <Enter> to go to the Main Screen of that card. Figure 5-85 shows the card in slot P3 is chosen. -
Page 190: System Redundancy
Model No. Running Head System Redundancy System Configuration and Operation The System Main Screen now looks like Figure 5-87. The status of all ports of the card in slot P3 is “r”. Figure 5-90.PWE Card in Redundant Mode If the card in slot P1 fails, the PWE uplink will switch to the redundant card in slot P3 after a brief interruption in service. -
Page 191: Alternative Mapping Table
System Configuration and Operation System Redundancy Figure 5-91.Xcon Screen - amt Options Selecting ‘O’ from the XCON screen for the amt Options takes the user to the Alternative Mapping Table (AMT) feature, as described in the following section. Included in the feature changes are associated syslog events. See “SYSLOG” on page 24. for new syslog events related to the ATMT feature. -
Page 192: Remote Amt
Model No. Running Head System Redundancy System Configuration and Operation situation. Please note however, that this is a service affecting procedure, and changes made in this mode are both instantly implemented on the shelf, as well as written to the alternative map for use when the feature is set to active in the case of an emergency. -
Page 193: Remote Amt Main Screen
System Configuration and Operation System Redundancy Figure 5-93.Remote AMT Main screen This procedure requires the use of a tftp server and both systems must have IP service connectivity. The ideal location for the remote editing node is in a lab where IP connectivity can be locally controlled. -
Page 194: Remote Shelf With Database Restored
Model No. Running Head System Redundancy System Configuration and Operation 5. From the CPU XCON IP screen, enter a valid IP address and subnet mask scheme for Ethernet TFTP access to the IMACS system. Save these changes and return to the main menu. -
Page 195: Active Amt
System Configuration and Operation System Redundancy 11. Once all changes have been made to enable an emergency IMACS configuration, navigate back to the sYs / rem amT level and select Backup from this screen. NOTE: This backup must be used to backup an alternative map. Failure to use the backup command from the rem amT screen will fail to put the proper AMT flag surrounding the information, and the alternate map will not be correctly installed. -
Page 196: Active Amt Main Screen
Model No. Running Head System Redundancy System Configuration and Operation Figure 5-95.Active AMT main screen An AMT MAP can also be created on a remote node and loaded via the rEstore function. See the AMT help for remote operation. SWITCHING SETUP PROCEDURE: Note: This version of the AMT set up process is service effecting. -
Page 197: Alarm Filter Triggers
System Configuration and Operation System Redundancy 4. Once all desired configuration settings have been completed for the alternate map, the user then needs to return to the AMT MGMT menu screen. 5. From the AMT MGMT menu screen select Backup. This function makes a backup copy of the ALT MAP using TFTP. -
Page 198: Alarm Information
Model No. Running Head System Redundancy System Configuration and Operation If the user wants any single or combination of ENABLED WAN slots and/or port(s) to generate a switch to the ALT MAP, then set the AMT TRIGGER field to ANY OF THE ABOVE. -
Page 199: Chapter 6 System Testing And Diagnostics
System Testing and Diagnostics Introduction Chapter 6 System Testing and Diagnostics Introduction This chapter describes the Integrated Access Systems’ comprehensive set of built-in diagnostic tools that enable the operator to remotely troubleshoot and resolve problems. Throughout the user card chapters in this system reference guide are brief explanations of system testing and problem solving. -
Page 200: User Card Diagnostics
Model No. Running Head User Card Diagnostics System Testing and Diagnostics User Card Diagnostics 6.3.1 WAN Diagnostics Software-initiated diagnostics on T1 and E1 WAN aggregates include looping the WAN signal toward the network (line loopback) or the system (local loopback) and placing any one of the DS0 channels that make up the WAN signal in local loopback. -
Page 201: Voice Diagnostics
System Testing and Diagnostics User Card Diagnostics 6.3.2 Voice Diagnostics The software-initiated diagnostics supported are voice cards include the setting of both analog and digital loopbacks toward the network and the generation of Quiet Tone and a Digital MilliWatt signal on a port-by-port basis. The operator can also monitor and set the state of the analog leads of any FXS, FXO or E&M port. - Page 202 Model No. Running Head User Card Diagnostics System Testing and Diagnostics loop-up and loop-down codes that are compatible with DDS, V.54 and/or Fractional T1 (FT1) formats. The DS0-DP data card generates and detects DS0-DP loopback codes. The table below shows detailed information on the diagnostic capabilities of the Data cards. EIA530 V.35 HSU EIA530/V.35...
- Page 203 System Testing and Diagnostics User Card Diagnostics EIA530 V.35 HSU EIA530/V.35 OCU-DP DS0-DP HSU 2-port 2-port HSU 4-port 2/5/10-port 4-port Bit Error Rate Tester (BERT) Patterns Supported All 1s All 0s 2047 QRSS BERT Direction Toward User Toward Network Statistics Gathered by BERT Bit Errors (BE) Errored Seconds (ES)
-
Page 204: Diagnostics At The 'X' Cross-Connect Option
Model No. Running Head Diagnostics at the ‘X’ Cross-Connect OptionSystem Testing and Diagnostics Diagnostics at the ‘X’ Cross-Connect Option 6.4.1 Circuit Diagnostics The cross-connect element adds another level of testing within the node and enhances the system’s diagnostic capabilities. The operator may also monitor and set the state of the Transmit and Receive ABCD signaling bits of a digitized voice circuit that is cross-connected between WANs. - Page 205 System Testing and DiagnosticsDiagnostics at the ‘X’ Cross-Connect Option Single Data Super-rate Voice Voice with Data without Signaling Signaling (64 Kbps) (N x 64 Kbps) Signaling Manipulation Toward WAN 1 Set Transmit ABCD Signaling Bits Monitor Status of Transmit ABCD Signaling Bits Monitor Status of Receive ABCD Signaling Bits Toward WAN 2 Set Transmit ABCD Signaling Bits...
-
Page 206: Benefits Of Built-In Diagnostics
Model No. Running Head Benefits of Built-In Diagnostics System Testing and Diagnostics Benefits of Built-In Diagnostics The real power of the integral diagnostics of the Integrated Access System can be fully appreciated when the individual diagnostic tools are applied to everyday troubleshooting such as the one illustrated in the following example. -
Page 207: Built-In Diagnostics Example (Diagnostics 1 - 4)
System Testing and Diagnostics Benefits of Built-In Diagnostics In Figure 6-1, diagnostics 4, the T1 link of the remote Integrated Access System is configured in Line Loopback. Alternatively, a loop up code can be sent from the local Integrated Access System to put the T1 link of the remote Integrated Access System in Line loopback. -
Page 208: Built-In Diagnostics Example (Diagnostics 4 - 8)
Model No. Running Head Benefits of Built-In Diagnostics System Testing and Diagnostics Diagnostics 5 T1 Facility DDS Facility Local Cross- Cross- Remote OCU/ Connect Connect CSU/DSU Element Element v.35 v.35 Diagnostics 6 T1 Facility DDS Facility Local Remote Cross- Cross- OCU/ Connect Connect... -
Page 209: Performance Monitoring
System Testing and Diagnostics Performance Monitoring Performance Monitoring The Integrated Access System provides non-intrusive performance monitoring of T1 lines and DDS circuits that terminate on OCU-DP cards. This capability is built into the system software and does not require any special options or expensive external equipment. 6.6.1 T1 Line Performance Monitoring Performance monitoring, statistics gathering and performance reporting of T1 facilities is... - Page 210 Model No. Running Head Performance Monitoring System Testing and Diagnostics 6-12 Reference Guide...
-
Page 211: Cpu Card 7.1 Introduction
CPU Card Introduction Chapter 7 System Cards CPU Card Introduction The CPU is the “brain” of the Integrated Access System and performs most of the configuration, management, and common processing for the system. In addition the CPU card provides the interconnection of WAN/User/Server Pulse Code Modulation (PCM) buses through a bus connect or cross connect function. -
Page 212: Card Jumper/Switch Settings
Model No. Running Head CPU Card Description CPU Card • Performs primary-secondary CPU arbitration. In a system with redundant CPU cards, the two CPU cards communicate their status to each other. If the primary CPU card fails, the redundant card takes over and becomes the primary. •... -
Page 213: Setting Up Cpu Ethernet Port
CPU Card CPU Card Description Array) device, which takes approximately 35 seconds to load upon power-up. As a standby processor, the CPU card will appear on the user interface map in an OOS state until the FPGA has been successfully loaded. Note: The CPU-7 series of processor cannot be used with any other processor card. - Page 214 Model No. Running Head CPU Card Description CPU Card 10. From a PC on a different network than the IP network: a. Ping [device IP address] b. Telnet [device IP address] 11. From the IMACS, Ping PC on the network different from IP subnetwork. Other settings are also possible, such as setting the host CPU to gateway, and then route Ethernet packets to a different IMACS across another nx64 port, FDL, SLIP/PPP or server card.
-
Page 215: Cpu Card User Screens And Settings
CPU Card CPU Card User Screens and Settings CPU Card User Screens and Settings The CPU card has several user interface screens for card configuration and network status viewing purposes. These screens are described in the remainder of this chapter. 7.3.1 CPU Card Main Screen Figure 7-2 shows the CPU Card Main Screen. -
Page 216: Radius Authentication
Model No. Running Head CPU Card User Screens and Settings CPU Card Table 7-1. CPU Card Main Screen Actions Action Function Save Saves changes to settings. Undo Returns all settings to the last saved state. Refresh Updates certain time-related information fields that are not automatically updated (i.e., performance and test data). - Page 217 RADIUS server to authenticate the user. Failure to have the server setup, or failure to be able to reach the server will deny the user access to the node. Zhone Technologies or its affiliates will not be able to grant access to the IMACS shelf.
- Page 218 ################################ # Zhone IMACS ################################ VENDOR Zhone 5504 BEGIN-VENDOR Zhone ATTRIBUTE Zhone-IMACS-User-Group 1 integer END-VENDOR Zhone *************************************************************** users file ========== - add the following lines to the user file, one for each user: frank Cleartext-Password := "frank" Zhone-IMACS-User-Group = 1 *************************************************************** clients.conf file...
-
Page 219: User Names, Passwords And Groups
CPU Card CPU Card User Screens and Settings 7.3.3 User Names, Passwords and Groups Password updating is covered in Chapter 5. Refer to that chapter for full details on updating and maintaining user names and passwords.You may want to change your system access passwords frequently, in order to maintain optimum security on your network. -
Page 220: Login Log Sample Display
Model No. Running Head CPU Card User Screens and Settings CPU Card Selecting the ‘E’ delete function will allow the user to delete the user that the cursor is currently positioned upon. Group Selecting ‘G’ will show the permissions for access to a Superuser that can be changed. Login Log Selecting ‘L’... -
Page 221: Other Cpu Card Settings
VIEWER In this field, enter a 14-character community string to be used for SNMP read only access to the Zhone MIBS. Allows numbers, lower and uppercase letters as well as special characters. PUBLIC In this field, enter a 14-character community string to be used for SNMP read access to the standard mib-2. - Page 222 Model No. Running Head CPU Card User Screens and Settings CPU Card SYS CONT In this field, enter the name of a person to contact for questions about the Integrated Access System. This field can have up to 23 alphanumeric characters, including spaces. For convenience, use the system administrator’s name in this field.
-
Page 223: Printing Alarms Remotely
CPU Card CPU Card User Screens and Settings FCR On With FCR On the Integrated Access System will bypass the standard equipment. The system will clear CGA-RED and CGA-YEL alarms immediately after a T1 frame is recovered. This will allow restoration of the voice and data circuits within 700 400ms. 7.3.4 Printing Alarms Remotely Integrated Access Systems are typically placed in unattended locations (equipment closets,... -
Page 224: Typical Cpu Print Alarm Screen
Model No. Running Head CPU Card User Screens and Settings CPU Card To get to the CPU Print Alarm screen in Figure 7-5, press “p” to choose the Prt command from the CPU Card Main Screen. Figure 7-5.Typical CPU Print Alarm Screen Table 7-3 lists the operations that can be performed from the Print Alarm Screen above. -
Page 225: Print Alarm Screen Options And Defaults
CPU Card CPU Card User Screens and Settings Table 7-4 summarizes the option settings for the CPU Print Alarm Screen. These settings are also described in the following paragraphs. Table 7-4. Print Alarm Screen Options and Defaults Parameter User Options Notes Default PRT ALARMS... - Page 226 Model No. Running Head CPU Card User Screens and Settings CPU Card The remote device’s modem must be compatible with CCITT V.22bis and support connections at 2.4 kbps. Set the remote modem for auto-answer mode. Both the remote device and modem should be set for 8 data bits, 1 stop bit and no parity.
-
Page 227: Typical Alarm Printout
CPU Card CPU Card User Screens and Settings 1. The end of the last Minor alarm cycle (if no alarms occur). 2. When parameters are saved via the Save command from the Menu of Actions. 3. Forty (40) seconds after the last alarm message is reported. When the specified interval cycle for major or minor alarms is reached, the system will send a list of the accumulated alarms sorted by the elements below. -
Page 228: Tcp/Ip Network Management
Model No. Running Head TCP/IP Network Management CPU Card TCP/IP Network Management This section presents another type of Network Management System (NMS) for diagnosing and reporting trouble at unsupervised locations. The SNMP and TELNET configuration can connect using this alternate method. Both formats can use the 4 kbps FDL (Facility Data Link) of an ESF-framed T1 link, the SA4 on an E1 link, a Nx64 on a T1 or E1 link (see Section 7.5.1 on page 7-47), or the computer port of the Interface card via SLIP or PPP protocol. -
Page 229: Typical Tcp/Ip Screen
CPU Card TCP/IP Network Management Using IP addresses, you can communicate directly with the affected system, diagnose the problem, and dispatch a technician if necessary. Figure 7-8 shows the TCP/IP Screen. To access this screen, press “I” (tcp/Ip) in the CPU Card Main Screen. -
Page 230: Tcp/Ip Screen Actions
Model No. Running Head TCP/IP Network Management CPU Card Table 7-5. TCP/IP Screen Actions Action Function Ping Test whether the connected device responds to an echo request message. After entering the IP address of the host device, the status line will display, "Testing . - Page 231 CPU Card TCP/IP Network Management HOST ID ADDR The Host IP Address is the IP address for this specific system unit. If the B7R card is used for this NMS, the Port IP address must be the same as the one entered in the ADDR field of that card.
-
Page 232: Cpu Default Ip Port Selection Screen
Model No. Running Head TCP/IP Network Management CPU Card DEFAULT IP PORT The Default IP Port setting (Figure 7-9), tells the CPU card where IP packets will be sent when there is no matching entry in the routing table. The options are none (no default route used), local (SLIP/PPP over DB-9 serial port), wan (W1 W2 W3 W4) (FDL/SA4 or B7R [chosen on the WAN card main screen with ESF/NMS RPT option]) servr (P1 P2 P3) (WAN DS0s or Ethernet depending on type of server card) or nX64 (C1, C2, C3, C4 WAN nx64 ports). -
Page 233: Cpu Default Ip Unit Selection Screen
CPU Card TCP/IP Network Management DEFAULT IP SLOT The Default IP Slot options are determined by the choice of Default IP Port. If off or local is selected for that parameter, this option will show n/a. If wan is selected, the options for this parameter will show W1-W4 (the WAN card slot that transmits and receives NMS information). -
Page 234: Syslog
Model No. Running Head TCP/IP Network Management CPU Card RPT1 IP ADDR The RPT1 IP Address is the IP address of the first Network Management System host running an SNMP trap server. RPT1 COMMUN STR The RPT1 Community String holds the community string for the first NMS host running a SNMP trap server. -
Page 235: Syslog Server Level
CPU Card TCP/IP Network Management To setup up the SYSLOG service on the IMACS, the user must log in with administrative privileges. Position on the active CPU, and press carriage return. On the CPU XCON screen, then hit ‘I’ for tcp/Ip and the screen below will appear. Figure 7-11.SYSLOG server level Once at this level, simply hit 'L"... -
Page 236: Syslog Server Test Log Result
Model No. Running Head TCP/IP Network Management CPU Card Figure 7-13. SYSLOG server test log result As seen above, the SYSLOG information includes the date and timestamp information.The following illustrations show some of the various types of events noted. This is not meant to be an exhaustive list, but representative of the types of data captured by SYSLOG. -
Page 237: Syslog Alarm Indications
CPU Card TCP/IP Network Management Table 7-8 below illustrates alarm events that are raised or cleared on the IMACS CPU-7 shelf. Table 7-8. SYSLOG Alarm Indications CLEAR: 01487 W1 DSX+DSX M OOS Syslog.Error RAISE: 01487 W1 DSX+DSX M OOS Syslog.Error RAISE: 01530 W1-2 DSX+DSX m LOS Syslog.Warning RAISE: 01531 W1-1 DSX+DSX M CGA_RED... -
Page 238: Network Statistics Screens
Model No. Running Head TCP/IP Network Management CPU Card 7.4.2 Network Statistics Screens The Network Statistics Screens provide maintenance and diagnostic information for the different protocols supported by this equipment. The system starts accumulating statistics when the TCP/IP Port is changed from off to local or wan, and it continues to store information until it is turned off. -
Page 239: Slip Parameters
CPU Card TCP/IP Network Management Table 7-11. Network Statistics Screen Actions Action Function pgUp Scrolls backward through network statistics, one page at a time. If you are on the first screen (Page 1), automatically “wraps around” back to the fourth screen (Page 4). -
Page 240: Fdl Parameters
Model No. Running Head TCP/IP Network Management CPU Card Packets Dropped - Buffer The Packets Dropped - Buffer field shows the number of incoming packets that were dropped because there was not enough free memory to buffer them. Buffer Overflow The Buffer Overflow field shows the occurrences of buffer overflow at the local system. -
Page 241: Ip Parameters
CPU Card TCP/IP Network Management Frames to Transmit from Above The Frames to Transmit from Above field shows the number of frames that were sent by the local system to the TCP layer of the network host. Frames Transmitted The Frames Transmitted field shows the number of frames sent from the local system to the network host. -
Page 242: Typical Network Statistics Screen
Model No. Running Head TCP/IP Network Management CPU Card Figure 7-15.Typical Network Statistics Screen, Page 2 Default TTL The Default TTL field shows the Time To Live for information packets from transmission to delivery. The TTL for this system is 255 seconds. Datagrams Received The Datagrams Received field shows the number of IP datagrams (packets) received by the local system from the network host. -
Page 243: Icmp Parameters
CPU Card TCP/IP Network Management Datagrams Delivered Above The Datagrams Delivered Above field shows the number of datagrams sent to the TCP layer of the network host to the local system. Datagrams From Above The Datagrams From Above field shows the number of information or traps sent by the local system to the UDP or TCP layer of the network host. - Page 244 Model No. Running Head TCP/IP Network Management CPU Card Echo Requests Received The Echo Requests Received field shows the number of "ping" message requests received by local system by the network host. This figure is part of the total messages received. Echo Replies Sent The Echo Replies Sent field shows the number of "ping"...
-
Page 245: Tcp State Parameters
CPU Card TCP/IP Network Management 7.4.2.5 TCP State Parameters The TCP state parameters appear in the third Network Statistics Screen (Figure 7-16). They are described below. Figure 7-16.Typical Network Statistics Screen, Page 3 Packets Received The Packets Received field shows the number of TCP packets received by the local system from the network host. - Page 246 Model No. Running Head TCP/IP Network Management CPU Card Packets Discarded - Window The Packets Discarded - Window field shows the number of TCP packets that were discarded by the local system because the window data was incorrect. Bytes Delivered Above The Bytes Delivered Above field shows the number of information or traps sent from TCP layer of the network host to the local system.
- Page 247 CPU Card TCP/IP Network Management RTT Increased The RTT Increased field shows the number of times the retransmission time-out was increased because the system was busy. RTT Decreased The RTT Decreased field shows the number of times the retransmission time-out was decreased because the system was not busy.
-
Page 248: Udp Parameters
Model No. Running Head TCP/IP Network Management CPU Card 7.4.2.6 UDP Parameters The UDP parameters appear in the fourth Network Statistics Screen (Figure 7-17). They are described below. Figure 7-17.Typical Network Statistics Screen, Page 4 Packets From Above The Packets From Above field shows the number of UDP packets sent by the local system to the network host. -
Page 249: Telnet Parameters
CPU Card TCP/IP Network Management 7.4.2.7 TELNET Parameters The TELNET parameters also appear in the fourth Network Statistics Screen (Figure 7-17). They are described below. Bytes Received The Bytes Received field shows the total number of bytes that were received by the local system from the network host. -
Page 250: Snmp Parameters
Model No. Running Head TCP/IP Network Management CPU Card Sessions Closed The Sessions Closed field shows the total number of sessions that were closed by the local system with the network host. TX Wait for Buffer The TX Wait for Buffer field shows the total number of transmissions that were delayed by the local system for free memory in the buffer. -
Page 251: Ip Packet Routing
CPU Card IP Packet Routing IP Packet Routing The Integrated Access System supports multipoint routing of Internet Protocol (IP) between all of its interfaces. These are: Serial Computer Port Interface, Server card interface (service depends on type of card), 4 nx64 interfaces, and 8 WAN interfaces using FDL or B7R time slot 24 of a D4-framed T1 link, or the Facility Data Link (FDL) of an ESF-framed T1 link. -
Page 252: Typical Routing Diagram
Model No. Running Head IP Packet Routing CPU Card Figure 7-18.Typical Routing Diagram In Figure 7-18, 24 system units transmit alarm information to an IP routing system unit (System 25) via the optional paths of separate WAN links. The network administrator assigns IP addresses for each system on the TCP/IP screen of each system’s ICPU card (HOST IP ADDR). -
Page 253: Typical Ip Routing Screen
CPU Card IP Packet Routing Figure 7-19 shows the Routing Screen, and Table 7-12 lists the actions that can be performed from that screen. Table 7-13 summarizes the available option settings and defaults for that screen. Figure 7-19.Typical IP Routing Screen Table 7-12. -
Page 254: Settings For Routing Parameters
Model No. Running Head IP Packet Routing CPU Card Table 7-13. Settings for Routing Parameters Parameter User Options Default IP NET a valid IP address 0.0.0.0 SUBNETMASK a valid Netmask IP address 0.0.0.0 SLOT/UNIT wan: W1-1 through W4-2 w1-1 serv: P1-P3 user: not supported local: COMP nX64: C1 through C4... -
Page 255: Routing Address Entry Screen
CPU Card IP Packet Routing Delete a Route In the Routing Screen, scroll to the route to be deleted. With the route highlighted, press e to delete. Get Information To obtain addressing information, press g for Get. The system displays the destination variables wan, serv, user, and local across the bottom of the screen. -
Page 256: Slot/Unit Options Screen
Model No. Running Head IP Packet Routing CPU Card Figure 7-21.Slot/Unit Options Screen Table 7-14. Slot/Unit Options Slot/Unit Options Description Default w1-1 w1-2 w2-1 w2-2 w3-1 w3-2 w4-1 w4-2 w1-1 SERV P1 P2 P3 USER not supported LOCAL IF-2 IF-2 nX64 C1 through C4 Figure 7-22.IP Static Routing Information Screen... -
Page 257: Nx64 Screen
CPU Card IP Packet Routing 7.5.1 nX64 Screen The Enhanced NMS Connectivity screen (Figure 7-23) provides a solution to increase bandwidth channel for management purposes. FDL was previously the answer to this need for not consuming valuable bandwidth. However, by giving up a time slot the increase of bandwidth provided better connectivity allowing a variable bandwidth from 56 Kbps to 1.54 Mbps for T1 and 2 Mbps for E1. -
Page 258: Nx64 Screen Options And Defaults
Model No. Running Head IP Packet Routing CPU Card Main Returns to the CPU card main screen. If changes are made to settings and not saved, you will be prompted to save or lose changes. Table 7-16. nX64 Screen Options and Defaults Parameter User Options Default... - Page 259 CPU Card IP Packet Routing RATE The Rate setting allows you to adjust the speed of the circuit according to the application requirements. The only speed available for ports C1 to C4 is 64k (64 kbps). However, ports 1 to 64 can be set to either 56k or 64k. The MTU needs to be 240 for 1x64 in order to communicate with the MCC.
-
Page 260: Network Statistics Screen
Model No. Running Head IP Packet Routing CPU Card 7.5.2 Network Statistics Screen Figure 7-24 shows the Netstat screen for the network statistics at the interface level for the selected nX64 communications port. The IP stack netstat is available from the standard CPU IP screen. -
Page 261: Cpu Host Software Upgrade Procedure
CPU Card CPU Host Software Upgrade Procedure CPU Host Software Upgrade Procedure This section provides procedures for upgrading Integrated Access System host software. The CPU-7 XCON card (CPU) contains the host software that controls the Integrated Access System. The host software is stored in flash memory facilitating download of future software releases to the CPU card. -
Page 262: Log Upgrade Activity
Model No. Running Head Upgrades CPU Card 10. In Upgrade window, click File menu, select Properties, and select Settings. 11. In Emulation window, select VT100 and click Terminal Setup. 12. Select 132 column mode, click OK. 13. Close Properties window and save. 14. -
Page 263: Software Download Procedures
CPU Card Upgrades 4. When making a database, choosing the xmodem or tftp options will automatically write the a copy of the running configuration to flash on the CPU card. This should be done from both processors, so each will have a backup and on-board copy of the running configuration. -
Page 264: Tftp Protocol Bin Download
Model No. Running Head Upgrades CPU Card of the PC or server from which you are downloading the firmware. You may need to change the routing table on your PC to include the MCC ethernet address as the gateway, or the local host address as the gateway for the system receiving the file as the destination IP address. -
Page 265: Cpu Programming Level
CPU Card Upgrades Figure 7-25.CPU Programming level 5. If both buffers have files in them, highlight the buffer that is not active. Press the Enter key and three options appear at the bottom of the screen. 6. Using the arrow keys, highlight the dnload (download) parameter and press Enter. The CPU will automatically erase the existing load. -
Page 266: Xmodem Protocol Binary Download
Model No. Running Head Upgrades CPU Card 13. For a simplex system, load the inactive processor and the upgrade is complete. For a duplex system, repeat steps 5 through 11 to load the new software into the ‘full’ bank. 14. Once the bank has loaded and the checksum has passed, once again press carriage return and choose the actsw command. - Page 267 CPU Card Upgrades 8. Once the inactive bin has completed loading, the system will automatically check that it has loaded properly. If a checksum mismatch message appears, then the bank must be loaded again. Once the bank is loaded and passes checksum validation, it will be marked as “full”.
-
Page 268: Cpu Card Error Messages
Model No. Running Head CPU Card Error Messages CPU Card CPU Card Error Messages Refer to Appendix B in the System Reference Guide for further information on Error Messages regarding this card. CPU Card Troubleshooting On power-up, the CPU card performs a self-test. This is the only diagnostic available for the CPU. -
Page 269: Cpu Card Specifications
CPU Card CPU Card Specifications 7.10 CPU Card Specifications CPU Card CPU with 10baseT Ethernet port. LED Indicators Operation Green for normal operation. Yellow for card fault or test mode (amber on Model CPU). Code storage Model CPU Configurable with maximum 8 MB DRAM and 4 MB Flash Memory Operational Modes Model Mode... - Page 270 Model No. Running Head CPU Card Specifications CPU Card 7-60 System Cards...
-
Page 271: Chapter 8 Interface Card
Interface Card Introduction Chapter 8 Interface Card Introduction This chapter provides specific installation, configuration, and troubleshooting information for the Interface Cards of the Integrated Access System. These cards are labeled as the INTF-R EXT T1E1*8, INTF-R MODEM T1E1*8, and INTF-R T1E1*8 cards on their faceplate ejectors. -
Page 272: Card Jumper/Switch Settings
Model No. Running Head Interface Card Descriptions Interface Card INTF-R T1E1*8 Figure 8-1.INTF-R Ext Interface Card (IF+EXT) 8.2.1.1 Card Jumper/Switch Settings The INTF-R Ext card doesn’t have any jumpers or switches on its mainboard. 8.2.1.2 Installing the INTF-R Ext Card Install the INTF-R Ext card into the IF slot of the system chassis. -
Page 273: Equipment Grounding Requirements
Interface Card Interface Card Descriptions JP11 JP10 Figure 8-2.Jumper Arrangements for the T1/E1 External Sync Card Table 8-1. Jumper Settings for the T1/E1 External Sync Card Jumper # Position Results Open Closed JP8 and JP11 Open Balanced JP8 and JP11 Closed Unbalanced JP6 and 7... - Page 274 Model No. Running Head Interface Card Descriptions Interface Card As a rule, all cards with data interface connectors (RS-232, RS-422, RS-530,etc.) could be damaged if connected to poorly grounded equipment. All persons authorized to use or service the Integrated Access System should be familiar with good grounding practices. System Cards...
-
Page 275: Intf-R Modem Card Description (If+Modem)
Interface Card Interface Card Descriptions 8.2.2 INTF-R Modem Card Description (IF+MODEM) The INTF-R Modem card has an internal modem that allows remote operator to communicate with the system. However, it does not accept external synchronization clocks. In all other respects, the INTF-R Modem card is functionally identical to the INTF-R Ext card (see Figure 8-3). -
Page 276: Intf-R Card Description (If)
Model No. Running Head Interface Card Descriptions Interface Card 8.2.3 INTF-R Card Description (IF) The INTF-R card does not have a modem and does not accept external synchronization clocks. In all other respects, it is functionally identical to the INTF-R Ext and INTF-R Modem cards (see Figure 8-4). -
Page 277: Interface Card User Screens And Settings
Interface Card Interface Card User Screens and Settings Interface Card User Screens and Settings 8.3.1 Interface Card Main Screen Figure 8-5 shows the Interface Card Main Screen. You must use this screen to define two timing sources for the card, and then go to other screens for additional setup and information viewing instructions. -
Page 278: Setting The System Date And Time
Model No. Running Head Interface Card User Screens and Settings Interface Card Table 8-2. Interface Card Main Screen Actions Action Function Save Saves changes to settings. Undo Returns all settings to the last saved state. Refresh Used to redraw the screen. Time Sets the system time and date. -
Page 279: Sntp Time Server Enabled
Interface Card Interface Card User Screens and Settings Figure 8-6.SNTP time server enabled The default for the SNTP server is disabled. If the customer chooses to use the SNTP feature, then the state should be changed to enable and a server address input in the SNTP SERVER field to indicate the source of the timing stream. -
Page 280: Selecting The System Timing Clocks
Model No. Running Head Interface Card User Screens and Settings Interface Card 8.3.1.2 Selecting the System Timing Clocks Table 8-3 lists the Interface Card Main Screen configuration options, along with the possible and default values. In this screen, you must specify a primary and secondary timing source (clock) for the Integrated Access System. - Page 281 Interface Card Interface Card User Screens and Settings Select user for a primary clock from a BRI card in the system. If you select user, also specify the chassis slot location of the desired card (U1 to U8), followed by the card port from which the clock will be provided (u1-1 through u8-8) as required.
- Page 282 Model No. Running Head Interface Card User Screens and Settings Interface Card user card, or external source, or it can be the system’s internal crystal oscillator. Although a secondary clock source is not required for system operation, you should always provide one for the system.
-
Page 283: Call Profile Screen
Interface Card Interface Card User Screens and Settings 8.3.2 Call Profile Screen To enter a new call profile, first press “f” in the Interface Card Main Screen (proFiles command). Then, type 01 for the first new profile to be created. This brings up the Call Profile Screen shown in Figure 8-7. -
Page 284: Call Profile Screen Actions
Model No. Running Head Interface Card User Screens and Settings Interface Card Table 8-4. Call Profile Screen Actions Action Function Save Saves changes to settings. Undo Returns all settings to the last saved state. Refresh Used to redraw the screen. Delete Deletes the call profile on the screen. - Page 285 Interface Card Interface Card User Screens and Settings CALLED # The Called Number is the full telephone number of the device you are calling. Up to 25 numeric characters are allowed, although most calls use only ten digits. This parameter can be overridden on a call-by-call basis when RS-366 or V.25bis dialing is used with the 8213 HSU Card.
- Page 286 Model No. Running Head Interface Card User Screens and Settings Interface Card IMUX CALL The IMUX Call field has no application on this screen and will always show as n/a. This field is only activated when downloaded to the HSU card and used to designate an IMUX call. For more information, please review the HSU card chapter.
- Page 287 Interface Card Interface Card User Screens and Settings PRESENT. INDCTR The Present Indicator field determines whether or not the calling number may be displayed to the called party. The options are yes and no. SCREEN. INDCTR The Screen Indicator field is reserved for future use. BCAST.
-
Page 288: Signaling Conversion Table Screen
Model No. Running Head Interface Card User Screens and Settings Interface Card 8.3.3 Signaling Conversion Table Screen Signaling conversion is required when cross-connecting a T1 (ANSI) voice circuit to E1 (ITU-T). This process translates the sequences of the ABCD signaling bits to allow proper signaling between the two carrier types. -
Page 289: Remote Imacs Terminal System (Rits)
Interface Card Interface Card User Screens and Settings The E&M portion of the Signaling Conversion Table Screen is also used for FXSDN, FXODN, PLAR-D3, DPO, and DPT signaling. The FXS/FXSC portion is used for FXO-to-FXS signaling, and the FXO/FXOC portion is used for FXS-to-FXO signaling. The PLAR portion is used for PLAR-D4 to PLAR and MRD. -
Page 290: Network Priorities
Model No. Running Head Interface Card User Screens and Settings Interface Card The identification numbers for the integrated access controllers cannot be entered through a control station. This safeguard is provided to ensure a reliable connection between a control station and an integrated access controller. Attempts to change an identification number of a system remotely will be denied. -
Page 291: Terminal Security
Interface Card Interface Card User Screens and Settings 8.3.4.4 Terminal Security No user may log into any integrated access controller on the network without knowing the individual password of each system. Table 8-7 list the “AT” commands and the associated function. All “AT” commands are followed by pressing the <ENTER>... -
Page 292: Ports Screen
Model No. Running Head Interface Card User Screens and Settings Interface Card 8.3.5 Ports Screen You also must configure each of the Interface card’s user interface ports. This is done from the Ports Screen, which is shown in Figure 8-10 . - Page 293 Interface Card Interface Card User Screens and Settings RATE The transmission rate for the VT is 9.6 kbps when selecting protocol setting ui. The transmission rates for C1 port when selecting protocol setting ui are: 0.3, 1.2, 2.4, 4.8, 9.6 or 19.2 kpbs, 9.6 kpbs for protocol setting pr, 9.6 kbps for protocol setting slip and 19.2 kbps for protocol setting ppp.
-
Page 294: Interface Card Ports And Functionality
Model No. Running Head Interface Card User Screens and Settings Interface Card 8.3.6 Interface Card Ports and Functionality The Interface card controls many critical functions in the system. It provides interfaces to external control devices, terminates all T1 and E1 WAN links, and houses the internal modem. Table 8-8 lists the interface ports and functions. -
Page 295: Node Port Aco Alarm Interface
Interface Card Interface Card User Screens and Settings The node port uses an RJ48 connector. Pins 3, 4, and 5 uses an RS485 compatible form c-contact closure that can be used to report ACO alarms to an external system. Pins 1, 2, 6 and 7 are reserved for future use. -
Page 296: Interface Card Error Messages
Model No. Running Head Interface Card Error Messages Interface Card Interface Card Error Messages Refer to Appendix B in the System Reference Guide for further information on Error Messages regarding this card. Interface Card Troubleshooting 8.5.1 User Interface Problems The Interface card provides the connections from the Integrated Access System to the external control terminals and/or other network management systems. -
Page 297: Alarm Reporting Problems
Interface Card Interface Card Troubleshooting 8.5.2 Alarm Reporting Problems The Interface card also provides a relay contact closure to an external alarm annunciation (or other alarm reporting device at the system site) when an alarm is declared. The card may be faulty if an alarm is declared but not indicated on the external alarm reporting system. -
Page 298: Interface Card Specifications
Model No. Running Head Interface Card Specifications Interface Card Interface Card Specifications Interface Cards (Models IF+EXT, IF+MODEM and IF) Interfaces Model T1/E1 Links Computer Control Node Port Internal External Port Terminal Modem Sync Interface Port IF+EXT 8 T1/E1 IF+MODEM 8 T1/E1 8 T1/E1 WAN Ports Electrical Interface... - Page 299 Interface Card Interface Card Specifications Modem Port (Model IF+MODEM only) Connector Female 6-pin RJ-11C socket Electrical Interface 600 ohm 2-wire balanced Protection HV zener, 0.25A fuses on Tip and Ring Function Connect internal modem to PSTN (Public Switched Telephone Network) for access to remote operator and remote EMS network management system.
- Page 300 Model No. Running Head Interface Card Specifications Interface Card 8-30 System Cards...
-
Page 301: Chapter 9 Wan Card
WAN Card Introduction Chapter 9 WAN Card Introduction This chapter provides installation, configuration, and troubleshooting information for the Wide-Area Network (WAN) Cards. These include the WAN DUAL (WAN-T1 and WAN-E1), WAN-R DUAL (WAN-R-T1 and WAN-R-E1) Cards. These designations are marked on the faceplate ejectors of the associated cards. -
Page 302: Card Jumper/Switch Settings
Model No. Running Head WAN Card Descriptions WAN Card DUAL Area of Detail Figure 9-1.WAN DUAL Card with CSU Support (801070) 9.2.1.1 Card Jumper/Switch Settings The 801070 card utilizes jumpers to set each of the two ports for T1, E1 or T1 CSU. These straps are located in the “Area of Detail”... - Page 303 WAN Card WAN Card Descriptions Figure 9-2.801070 Strap Settings for T1, E1 and T1 CSU The 801070 Dual WAN supports two interfaces, and the straps shown in Figure 9-2 detail the different ports and respective jumpers. Port 1 on the interface is labelled as P1, and the associated jumpers for setting parameters on the port are labelled as J10, J12 ad J13.
-
Page 304: Wan Software Level
Model No. Running Head WAN Card Descriptions WAN Card Table 9-1. 801070 WAN Strap Setting Options WAN Interface Type J10 J12 J13 J11 J14 J15 None or None or T1 DSX Mode between 2 and 3 between 2 and 3 T1 CSU Mode None None... -
Page 305: Wan Software Download
WAN cards with software loads 1.0.1 through 1.0.7 do not have the ability to write to the on-board flash and thus required that the card be returned to Zhone or Zhone's designee to be re-programmed. The 1.0.9 WAN load requires complementary software on the CPU card to properly send, receive and write to the flash device on the WAN card. - Page 306 Model No. Running Head WAN Card Descriptions WAN Card Figure 9-4.WAN load 1.0.7 If the load displayed from the serialization command above is 1.0.9 or higher, then this card can be downloaded from the CPU as long as the CPU is at software release 6.0.5 or higher. On the initial login to the IMACS, position on the WAN load to be downloaded (the card must be a 8000-801070 or 8000-801470) and hit the 'P' key for program.
-
Page 307: Wan Download Screen
WAN Card WAN Card Descriptions Figure 9-5.WAN Download screen Since this screen appears and the WAN load is 1.0.9 or higher, a download can commence on this card. NOTE: A WAN card running 1.0.7 or below will appear to download using software release 6.0.5 or higher if attempted. -
Page 308: Wan Download Options
Model No. Running Head WAN Card Descriptions WAN Card Figure 9-6.WAN Download Options To download the new software, use the arrow key to move over to the 'dnload' option. The user will be presented with a question: "Are you sure you want to overwrite this block (y/n)?". Select 'y' to confirm the process. -
Page 309: Tftp Download In Progress
WAN Card WAN Card Descriptions File name: Enter the name of the load, for example WAN1010.bin Once all the parameters have been chosen and the TFTP server is properly started and configured, the WAN load should start being transferred to the 8000-801070 or 8000-801470 WAN card. -
Page 310: Xmodem Download Screen
Model No. Running Head WAN Card Descriptions WAN Card process. Alternatively, the user could go back to the serialization screen to observe the load running on the WAN card (seen in Figure 9-4 at the beginning of this procedure). Should the checksum function not pass, then the user will be prompted to try the download action again. -
Page 311: Wan Dual Card Description (801060, 801065)
WAN Card WAN Card Descriptions Note: NOTE: The card will automatically restart to activate the new load. Once the XMODEM process has completed, the card will take an additional 30 seconds to complete. The user will be notified of a successful XMODEM download by the generation and clearing of a WAN OOS alarm. -
Page 312: Card Jumper/Switch Settings
Model No. Running Head WAN Card Descriptions WAN Card DUAL Figure 9-9.WAN DUAL Card (801060) 9.2.2.1 Card Jumper/Switch Settings The WAN DUAL card does not have any jumpers or switches on its motherboard. 9.2.3 WAN-R Card Description (801460) The WAN-R card is a dual-T1/E1 card with relays for use in CPU XCON systems with redundant WAN cards. -
Page 313: Card Jumper/Switch Settings
WAN Card WAN Module Descriptions 9.2.3.1 Card Jumper/Switch Settings The WAN-R card does not have any jumpers or switches on its motherboard. 9.2.4 WAN-R Card Description (801470) The 801470 WAN-R card is a dual-T1/E1 card with relays for use in CPU XCON systems with redundant WAN cards. -
Page 314: Dsx/Cept Module Jumper Settings
Model No. Running Head WAN Module Descriptions WAN Card 9.3.1.1 DSX/CEPT Module Jumper Settings After installing the DSX/CEPT modules, set their jumpers for either DSX (T1) or CEPT (E1) operation. These jumpers are factory-set for DSX. To convert a module to CEPT, reset the jumpers as described below. -
Page 315: Installing Dsx/Cept Modules
WAN Card WAN Module Descriptions First, install a DSX/CEPT module in the slot reserved for WAN port 1-1. Insert the pins for TX into socket JP10 on the WAN card (see Figure 9-10), while also inserting the pins for RX in JP9 and the 24-pin end connector pins in JP6. -
Page 316: Dsx/Cept Module
Model No. Running Head WAN Module Descriptions WAN Card 9.3.1.3 DSX/CEPT Module The DSX/CEPT Revision F module is shown in Figure 9-11. These modules may be optioned for T1, 120-ohm balanced E1, or 75-ohm unbalanced E1, as shown in Figure 9-12. The jumper option configuration is silk-screened on the card. -
Page 317: E1 Interface Adapter Panel (11830 Or 1184)
WAN Card WAN Module Descriptions W 1 - W 1 - UNBAL W 2 - W 2 - W 3 - W 3 - W 4 - UNBAL BAL W 4 - 1 8 3 E L 1 M O D Options on the Rear Figure 9-13.E1 Interface Adapter Panel (11830 or 1184) For 120-ohm balanced E1 operation, set the jumpers on the adapter panel as shown in Figure... -
Page 318: Csu Module Description (81230)
Model No. Running Head WAN Module Descriptions WAN Card 9.3.2 CSU Module Description (81230) The CSU module is required for Channel Service Unit (CSU) operation on a T1 line. This module mounts on the WAN SINGLE, WAN DUAL, and WAN-R cards, as shown in Figure 9-10. - Page 319 WAN Card WAN Module Descriptions JP14 JP15 JP14 JP15 JP13 JP13 JP10 JP10 Figure 9-14.Installing DSX/CEPT Modules System Cards 9-19...
-
Page 320: Wan Card User Screens And Settings
Model No. Running Head WAN Card User Screens and Settings WAN Card WAN Card User Screens and Settings 9.4.1 T1 CSU and DSX Settings The DSX/CEPT and CSU Modules for T1 operation have identical configuration parameters, which you must set on, the WAN Card Main Screen. To go to that screen, select the desired WAN card on the System Main Screen, then press <Enter>. -
Page 321: T1 Csu And Dsx Main Screen Actions
WAN Card WAN Card User Screens and Settings Table 9-2 lists several actions you can perform from the WAN Card Main Screen. These actions appear in the bottom-highlighted line of the screen. To perform an action, simply press the key corresponding to the capital letter of the desired action. For example, to save your parameter settings, press “s”... -
Page 322: T1 Csu And Dsx Option Settings And Defaults
Model No. Running Head WAN Card User Screens and Settings WAN Card Table 9-3. T1 CSU and DSX Option Settings and Defaults Parameter User Options Notes Default STATE stdby actv stdby MODE xcon xcon FORMAT slc96 slcd4 LINE CODE b8zs b8zs PULSE trnsp... - Page 323 WAN Card WAN Card User Screens and Settings STATE In the standby state, the WAN port is electrically disconnected from the network. Set this field to stdby (standby) while configuring WAN links, and then change it to actv (active) when starting normal operations.
-
Page 324: Ds0-To-Slc-96 Time Slot Conversion
Model No. Running Head WAN Card User Screens and Settings WAN Card SLIP LIM The Slip Limit defines how many bits of wander the WAN port will tolerate before forcing a frame slip. The options are 126 bits and 138 bits, which correspond to an older and a more recent version of the specification, respectively. -
Page 325: Ais/Alm Settings
WAN Card WAN Card User Screens and Settings Table 9-5. AIS/ALM Settings System Frame Format AIS/ALM Cross-Connect none, tcodr none, frm, unfrm SLC-96 note, orb13, orb16 In a cross-connect system, the options available for D4 or ESF frame format are none (no AIS signal is generated) and tcodr (transcoder operations). -
Page 326: Line And Local Loopbacks
Model No. Running Head WAN Card User Screens and Settings WAN Card LINE LB The Line Loopback setting loops the T1/E1 line back toward the network, as shown in Figure 9-16. This loopback also continues sending the incoming data toward the CPE. Choosing on allows you to test the end-to-end T1/E1 circuit path from the far end. -
Page 327: Ds0 Time Slot Loopback
WAN Card WAN Card User Screens and Settings CH LB The Channel Loopback setting allows you to loop the data in an individual DS0 time slot on the WAN link toward the CPE (see Figure 9-17). However, you cannot use this feature to loop multiple time slots or any portions of them. - Page 328 Model No. Running Head WAN Card User Screens and Settings WAN Card Note that the actual transmission of the command happens after you press ‘s’ for Save. If you have already sent one of the loopback activation commands, it is recommend that you send an off command before sending another loopback activation command.
-
Page 329: Using Wan Groups
WAN Card WAN Card User Screens and Settings RDNT RULES The selection of Redundancy Rules will define the method of determining what event will trigger a WAN port to switch to its redundant mate. The options are none, OOS, and CGA. GROUP The Group setting identifies a method of link-fail alarm propagation from upstream trunks to downstream tributaries when the system is configured for alarm transcoding. -
Page 330: E1 Cept Settings
Model No. Running Head WAN Card User Screens and Settings WAN Card 2. SYS 1 detects the failure on the receive leg and declares an alarm for W1-1(A). 3. SYS 1 sets the A Bit (Yellow Alarm) in the transmit leg of W1-1(A). Device 1 detects this condition and knows not to use W1-1(A). -
Page 331: Wan Actions
WAN Card WAN Card User Screens and Settings Table 9-6. WAN actions Action Function Save Saves changes to settings. Undo Returns all settings to the last saved state. Refresh Updates certain time-related information fields that are not automatically updated (i.e., performance and test data). Xcon Shows the time slot cross-connect map for each WAN port. -
Page 332: E1 Screen Option Settings And Defaults
Model No. Running Head WAN Card User Screens and Settings WAN Card Table 9-7. E1 Screen Option Settings and Defaults Parameter User Options Notes Default STATE stdby actv stdby MODE xcon xcon FRAME d-frm TS16 EVEN BIT norm norm AIS/ALM none tcodr none... - Page 333 WAN Card WAN Card User Screens and Settings FRAME The Frame setting toggles the frame type from crc (Cyclic Redundancy Check, 4th level) to d-frm (Double Frame). TS 16 The TS 16 setting changes the signaling usage of slot 16 for cas (Channel Associated Signaling), ccs (Common Channel Signaling) or nos (No Signaling).
- Page 334 Model No. Running Head WAN Card User Screens and Settings WAN Card LB ADDR The Loopback Address setting, in conjunction with the Channel Loopback setting, specifies which channel is to be looped back. Only one channel may be looped back at any one time for each E1 link.
- Page 335 WAN Card WAN Card User Screens and Settings GROUP The Group setting identifies a method of link-fail alarm propagation from upstream trunks to downstream tributaries. Selection of group is a two-step process. After identifying the group number (1-4), the user must select the secondary group (A [child group], B [child group], or C [parent group]).
-
Page 336: Cross-Connect (Xcon)
Model No. Running Head WAN Card User Screens and Settings WAN Card 9.4.3 Cross-Connect (XCON) The Cross-Connect (Xcon) command in the Main WAN screen allows you to view the time slot or DS0 assignments that have been set up in the system. Highlight the WANs on the card and press the “x”... -
Page 337: T1 Wan Cross-Connect Screen (Display Only)
WAN Card WAN Card User Screens and Settings Figure 9-21.T1 WAN Cross-Connect Screen (display only) System Cards 9-37... -
Page 338: Performance Data
Model No. Running Head WAN Card User Screens and Settings WAN Card 9.4.4 Performance Data All WAN cards gather performance data. The performance data for a T1 or E1 line is viewed by typing “p” in the WAN Card Main Screen, to invoke the Perf command. Performance data is accumulated for 15-minute increments that include the current period and the previous 96 periods (24 hours), which are accessed via the pgUp and pgDn commands of the Main Screen. -
Page 339: Performance Data Screen Actions
WAN Card WAN Card User Screens and Settings Table 9-8 lists the actions available from the Performance Data Screen. Table 9-8. Performance Data Screen Actions Action Function Refresh Because statistics are not calculated in real time, the Refresh command must be used to update the screen with new information. pgUp Pages through the performance statistics for the current 15 minute period and periods 96-1. - Page 340 Model No. Running Head WAN Card User Screens and Settings WAN Card LOFC The Loss of Frame Count (LOFC) is the number of times a Loss Of Frame (LOF) is declared. An LOF is declared after 2.5 seconds of a continuous Loss Of Synchronization (LOS) or Out-Of-Frame (OOF) condition.
-
Page 341: Far-End Performance Data
WAN Card WAN Card User Screens and Settings 9.4.5 Far-End Performance Data The Far-End Performance Data Screen is similar to the Performance Data Screen. The same statistics are collected in a slightly different manner. Figure 9-23 shows a typical display of far-end network register data in the AT&T mode. -
Page 342: Far-End Performance Data Screen Actions
Model No. Running Head WAN Card User Screens and Settings WAN Card “Ok to clear performance (y/n)?” Press “y” to clear the statistics, or “n” to leave the screen contents intact. To view the far-end information again, press “r” (restore) to send an FDL message and refresh the screen. Table 9-9 lists the actions available from the above screen. - Page 343 WAN Card WAN Card User Screens and Settings LOFC The Loss of Frame Count (LOFC) is the accumulation of the number of times a Loss Of Frame (LOF) is declared. An LOF is declared after 2.5 seconds of continuous Loss Of Synchronization (LOS) or OOF condition.
-
Page 344: Test Screen
Model No. Running Head WAN Card User Screens and Settings WAN Card 9.4.6 Test Screen Pressing “t” (Test command) in the WAN Card Main Screen brings up the screen shown in Figure 9-24. From this screen, you can create test situations between WAN cards or between a single WAN card and data test equipment at a remote site. - Page 345 WAN Card WAN Card User Screens and Settings information only–no user options information only–no user options CSES information only–no user options information only–no user options information only–no user options ELAP information only–no user options LB STATE information only–no user options Notes: 1.
- Page 346 Model No. Running Head WAN Card User Screens and Settings WAN Card CSES The Consecutive Severely Errored Seconds (CSES) field is triggered by the occurrence of ten consecutive Severely Errored Seconds. Once triggered, the CSES field will increment (by one) for each elapsed second until the system logs ten consecutive non-Severely Errored Seconds.
-
Page 347: Wan Card Error Messages
WAN Card WAN Card Error Messages WAN Card Error Messages Refer to Appendix B in the System Reference Guide for further information on Error Messages regarding this card. WAN Card Troubleshooting The WAN card (or a T1 or E1 port on it) may be faulty if a CGA-Red alarm is in progress on either port of the card. -
Page 348: Wan Card Specifications
Model No. Running Head WAN Card Specifications WAN Card WAN Card Specifications WAN Cards (Models 801060, 801065, 801070, WAN-R-T1 and WAN-R-E1 T1/E1) Physical Model Number of Number of Physical I/F Electrical I/F Ports Cards 801060, 801065, 1 to 4 Through 893x70 I/F card 81130 (T1-DSX/E1-CEPT) 801460, 801560 81200 (T1-CSU) - 1 per port... - Page 349 WAN Card WAN Card Specifications CSU Interface Bit Rate and Tolerance 1.544 Mbps + 32 ppm No. of T1 WAN Links per module Max. No. per WAN card Electrical Interface Per ANSI T1.102/T1.403, DSX-1 100 balanced Transmission Range Software Selectable - 0 dB, 7.5 dB, 15 dB 3000 feet to 6000 feet with 40 dB cable loss (@ 5000 ft.
- Page 350 Model No. Running Head WAN Card Specifications WAN Card E1 Interface Bit Rate and Tolerance 2.048 Mbps + 50 ppm No. of E1 WAN Links per module Max. No. per WAN card Electrical Interface G.703 balanced 120 W or unbalanced 75 W Prior to Rev F0 - Jumper Selectable: 75 unbalanced or 120 balanced.
- Page 351 WAN Card WAN Card Specifications G.736 Characteristics of A Synchronous Digital Multiplex Equipment at 2048 Kbits/sec. G.823 The Control of Jitter and Wander Within Digital Networks which are based on the 2048 Kbits/sec Hierarchy. G.824 The Control of Jitter and Wander Digital which are based on the 1544 Kbits/sec Hierarchy.
- Page 352 Model No. Running Head WAN Card Specifications WAN Card 9-52 System Cards...
-
Page 353: Alarm Cards 10.1 Introduction
Alarm Cards Introduction Chapter 10 Alarm Cards 10.1 Introduction This chapter provides installation, configuration, and troubleshooting information for the Alarm card. The card is labeled as the ALR 4+4 on the faceplate ejector. The Alarm card allow the system to report alarms to external alarm annunciators and other systems. -
Page 354: Card Jumper/Switch Settings
Model No. Running Head Alarm Card Descriptions Alarm Cards Each outbound "floating" relay has normally open contacts and normally closed contacts. It responds to major, critical, minor, and informational alarms, and activates an external device. Two relays are provided for each Alarm Card port. The relays are dual-pole, double-throw. 10.2.1.1 Card Jumper/Switch Settings The US/Euro jumper pair on the ALR 4+4 card must be configured to the same setting as that of the chassis. -
Page 355: Alarm Card User Screens And Settings
Alarm Cards Alarm Card User Screens and Settings 10.3 Alarm Card User Screens and Settings 10.3.1 Alarm Filter Screen Sensor Setting First, make sure the master setting for all alarm sensors is set properly as the SENSOR variable in the Alarm Filter Screen. To set this variable, first select Alarms from the System Main Screen, then choose Filters. -
Page 356: Alr 4+4 Card Main Screen
Model No. Running Head Alarm Card User Screens and Settings Alarm Cards Figure 10-3.ALR 4+4 Card Main Screen The Alarm card displays the number of major and minor alarms are active on this system, as can be seen in the figure and in the alarm banner in inverse video. The bottom highlighted line of the screen shows several actions that you can perform from this screen. -
Page 357: Alr 4+4 Card Option Settings And Defaults
Alarm Cards Alarm Card User Screens and Settings Table 10-2. ALR 4+4 Card Option Settings and Defaults Parameter User Options Default SWITCH stdby actv stdby ACT ON minor major minor SENSOR stdby actv stdby TRIG ON close open close SWITCH The Switch setting indicates that the outbound alarm switch is actv (on) or stdby (off). -
Page 358: Alarm Card Error Messages
Model No. Running Head Alarm Card Error Messages Alarm Cards 10.4 Alarm Card Error Messages Refer to Appendix B in the System Reference Guide for further information on Error Messages regarding this card. 10.5 Alarm Card Troubleshooting Alarm card problems could indicate a number of possible causes. Typically, a problem is indicated by the loss of an incoming alarm signal on a sensor port or the lack of a contact closure/open in response to an internal alarm. - Page 359 Alarm Cards Alarm Card Troubleshooting 6. Verify the amphenol cable is connected correctly to the Alarm card. At a cross-connection point between the Alarm card and the external equipment, open the circuit under test. Connect a short across the Alarm card sensor input in question. A SENSOR alarm should be reported.
- Page 360 Model No. Running Head Alarm Card Troubleshooting Alarm Cards 10-8 System Cards...
-
Page 361: Chapter 11 E&M Card
E&M Card Introduction Chapter 11 Voice Cards E&M Card 11.1 Introduction This chapter provides switch settings, connector pinouts, configuration, and troubleshooting information for the E&M Voice Cards. These cards are identified as the E&M 2W*8 (EM-2W-8P) and E&M 4W*8ER (EM-4W-8P) on their faceplate ejectors. The E&M cards manage the flow of toll-grade voice traffic through the integrated access system. -
Page 362: Card Jumper/Switch Settings
Model No. Running Head E&M Card Descriptions E&M Card 11.2.1.1 Card Jumper/Switch Settings The E&M 2W*8 card has four switches (S1 through S4) that you must set before inserting the card into the chassis. These switches establish the type of E&M the card will use on all eight ports. -
Page 363: Typical E&M Card Switch Definitions
E&M Card E&M Card Descriptions Table 11-1. Typical E&M Card Switch Definitions Switch Definition Source of the E (recEive or Earth) lead; can be internal (INT) or external (EXT). Type of internal source for the E lead; either battery (-48 VDC) or ground (GND). -
Page 364: Installing The E&M 2W*8 Card
Model No. Running Head E&M Card Descriptions E&M Card 11.2.1.2 Installing the E&M 2W*8 Card Insert the E&M 2W*8 card into any user card slot. These slots are U1 to U8 on the two-sided chassis or the front-loading chassis with power supplies on top or P1 to P4 and W1-W4 on the front-loading chassis with power supplies on the side. -
Page 365: E&M Card User Screens And Settings
E&M Card E&M Card User Screens and Settings 11.3 E&M Card User Screens and Settings 11.3.1 E&M Card Main Screen You must configure the E&M card for operation after installing it in the system chassis. This is done from the E&M Main Card Screen, which is shown in Figure 11-2. To go to that screen, highlight the desired card on the System Main Screen, then press <Enter>. -
Page 366: Main Screen Option Settings And Defaults
Model No. Running Head E&M Card User Screens and Settings E&M Card Table 11-3. Main Screen Actions Action Function Save Saves changes to settings. Undo Returns all settings to the last saved state. Refresh Updates certain time-related information fields that are not automatically updated (i.e., test status). - Page 367 E&M Card E&M Card User Screens and Settings 4. The extended setting range for the E&M-4W-8P card is from -16.3 to +7.5 dB. 5. The default coding is a-inv for E1 and u-law for T1. Choosing a Rate other than 64K allows you to select an ADPCM slot. STATE The State setting determines whether the port is active or inactive.
- Page 368 Model No. Running Head E&M Card User Screens and Settings E&M Card R2 TYPE The R2 Type setting is set to n/a reserved for future use; its setting is always and cannot be changed. when the Mode is set to e&m or to. The signaling type for all eight E&M ports is established by setting hardware switches S1 through S4 as described earlier.
-
Page 369: E&M Card Loopbacks
E&M Card E&M Card User Screens and Settings In most cases, you should set this parameter to busy. If a call is in progress when the CGA alarm is received, the system holds the call for two seconds, drops it, and then busies out the port to the attached PBX for the duration of the alarm. - Page 370 Model No. Running Head E&M Card User Screens and Settings E&M Card HYBRID Available for the two-wire 8108 E&M card only, the Hybrid option assigns a three byte pattern to define the adjustment for return loss (similar to Build Out Capacitors). The default, set1, balances to the ideal termination of 600Ω...
-
Page 371: Test Screen
E&M Card E&M Card User Screens and Settings 11.3.2 Test Screen The Test Screen (Figure 11-4) facilitates testing and maintenance by allowing you to monitor and set the status of the analog signals and/or the A, B, C, and D signaling bits of all E&M circuits on the card. -
Page 372: Test Screen Actions
Model No. Running Head E&M Card User Screens and Settings E&M Card Table 11-5. Test Screen Actions Action Function Save Saves changes to settings. Undo Returns all settings to the last saved state. Refresh Updates certain time-related information fields that are not automatically updated (i.e., test status). - Page 373 E&M Card E&M Card User Screens and Settings Tx ABCD The Transmit ABCD setting allows you to either monitor the status of the ABCD signaling bits being transmitted towards the network or set a specific ABCD pattern for testing the transmit side of the circuit.
- Page 374 Model No. Running Head E&M Card User Screens and Settings E&M Card Tx ABCD The Transmit ABCD information field shows the current values of the ABCD bits that are being transmitted to the network. If TX ABCD in the top half of the screen is changed via the set function mentioned above, and the settings are saved by the Save command in the Test Screen, the new bit pattern chosen will be reflected here.
-
Page 375: Status Information Field Settings
E&M Card E&M Card User Screens and Settings Table 11-7. Status Information Field Settings Setting Meaning stdby The E&M port is in standby. W stb The WAN card to which the E&M port is assigned is in standby. W tst The WAN card to which the E&M port is assigned is under test. -
Page 376: Loopback Screen
Model No. Running Head E&M Card User Screens and Settings E&M Card 11.3.3 Loopback Screen The Loopback (Figure 11-5) facilitates loopback detection by allowing the user to enable/disable automatic time out and also get the loopback status of the channel. This feature will provide the digital loopback (both audio and signaling) when activated by a 2713 Hz tone level and duration. - Page 377 E&M Card E&M Card User Screens and Settings LB DET The user can either enable or disable the loopback detection. The options available are w/to, on and off. The w/to option indicates the loopback detection is ON and 20 minute timeout is enabled.
-
Page 378: E&M Card Error Messages
Model No. Running Head E&M Card Error Messages E&M Card 11.4 E&M Card Error Messages Refer to Appendix B in the System Reference Guide for further information on Error Messages regarding this card. 11.4.1 E&M Card Troubleshooting The E&M card may be faulty if a voice signal is not received at one end of a circuit, or if E&M signaling is not detected. - Page 379 E&M Card E&M Card Error Messages 4. At your end, go to the E&M Card’s Main Screen and send a digital milliwatt test tone (0 dBm) toward the CPE. If you still don’t receive a signal, check the cabling from the E&M card to your CPE, and check the CPE itself.
-
Page 380: E&M Card Specifications
Model No. Running Head E&M Card Specifications E&M Card 11.5 E&M Card Specifications E&M Cards (E&M-2W-8P and E&M-4W-8P) Physical Interface (Models EM-2W-8P and EM-4W-8P) Number of Ports Connectors 1 female 50-pin telco connector Transmission Performance Performance Exceeds requirements of ITU-T G.712 (4-wire) and IT-T G.713 (2-wire) Signaling Signaling Types Switch selectable per card... - Page 381 E&M Card E&M Card Specifications Against 600 Ohms, in series with 2.16 µf termination. Relative Transhybrid Loss Model E&M-2W-8P Echo 34dB Singing 20dB Idle Channel Noise (rcv and xmt) < -65 dBm0p. Typically < -70 dBm0p or < 20 dBrnc0 Interchannel Crosstalk Typical <...
- Page 382 Model No. Running Head E&M Card Specifications E&M Card 11-22 Voice Cards...
-
Page 383: Chapter 12 Fxs Card
FXS Card Introduction Chapter 12 FXS Card 12.1 Introduction This chapter provides connector pinout, configuration, and troubleshooting information for the Foreign Exchange - Station (FXS) Voice Cards. These are labeled as the FXS 2W*4-6 and FXS 2W*8-6 cards on their faceplate ejectors. These cards manage the flow of FXS voice traffic over the network. -
Page 384: Card Jumper/Switch Settings
Model No. Running Head FXS Card Description FXS Card 12.2.1.1 Card Jumper/Switch Settings The FXS 2W*8-6 Card has two sets of jumpers on the motherboard. The jumper JP1 (US/EUR) has two settings. One set is for US domestic applications and the other is for European applications. -
Page 385: Installing The Fxs 2W*8-6 Card
FXS Card FXS Card User Screens and Settings 12.2.1.2 Installing the FXS 2W*8-6 Card Install the FXS 2W*8-6 Card in any user card slot. These slots are U1 to U8 on the two-sided chassis and front-loading chassis with power supplies on top, or P1 to P4 and W1 to W4 on the front-loading chassis with power supplies on the side. -
Page 386: Main Screen Actions
Model No. Running Head FXS Card User Screens and Settings FXS Card Table 12-1. Main Screen Actions Action Function Save Saves changes to settings. Undo Returns all settings to the last saved state. Refresh Updates certain time-related information fields that are not automatically updated (i.e., test status). - Page 387 FXS Card FXS Card User Screens and Settings system has the ATM card installed you can proceed directly with voice compression (there is no need for the LBRV Card to be installed.) The user option is not used. See the WAN/SRV paragraph that follows.
- Page 388 Model No. Running Head FXS Card User Screens and Settings FXS Card MODE The Mode setting should be determined by the type of equipment to which the user is connecting the port. All options use two-wire balanced connections. The fxs (Foreign Exchange Station) option allows users to connect the system to a two-way (both inbound and outbound calls) PBX trunk or a key system trunk.
-
Page 389: Incoming Calls (Ls-R2E)
FXS Card FXS Card User Screens and Settings FXS-LS-R2E Office Originate - Incoming Calls (ls-R2e) In this case, RxAB is Forward signaling. TxAB is Backward signaling. See Table 12-3. Table 12-3. Incoming Calls (ls-R2e) State T/R Stat T/R Cntl TxAB RxAB Note Idle/Released... -
Page 390: Incoming Calls (R1.5I)
Model No. Running Head FXS Card User Screens and Settings FXS Card and the types are R1.5i and R1.5o. R1.5i is for incoming calls (Office Originate) and R1.5o is for outgoing calls (Station Originate). The following tables below represent the FXS R1.5i and R1.5o signaling. - Page 391 FXS Card FXS Card User Screens and Settings Use sp for Single Party signaling in an ESF (Extended SuperFrame) mode along with Feature Group "D" high-speed modem services that require special software. The choice of boa (bill on answer) sends a signal back to the office when the customer answers the phone, to start billing for the call.
-
Page 392: Fxs Card Loopbacks
Model No. Running Head FXS Card User Screens and Settings FXS Card CODING The Coding setting sets the PCM companding method used for a port. Generally, the North American T1 environment uses m-law coding, and the International E1 environment uses a-law or a-inv (inverted A-law) coding. - Page 393 FXS Card FXS Card User Screens and Settings PATTRN The Pattern field selects an outgoing test pattern for the current card port. The test pattern is generated by the system and sent to the selected port. You can select a different pattern for each port.
- Page 394 Model No. Running Head FXS Card User Screens and Settings FXS Card RATE The Rate parameter allows you to use the voice compression capabilities of an ADPCM card. If that card is not present in the system, the Rate stays at 64k and cannot be changed. The 64k option is the normal encoding/decoding rate for voice circuits.
-
Page 395: Test Screen
FXS Card FXS Card User Screens and Settings 12.3.2 Test Screen The Test option facilitates testing and maintenance by allowing you to monitor and set the status of the analog interface leads, and to monitor or set the value of the A, B, C, and D signaling bits of all FXS circuits on that card. -
Page 396: Test Screen Option Settings And Defaults
Model No. Running Head FXS Card User Screens and Settings FXS Card Table 12-8. Test Screen Option Settings and Defaults Parameter User Options Default SIG MON TEST Tx ABCD Rx ABCD T-R-CNTL TO USER 300Hz 1kHz 3kHz quiet TO NTWK 300Hz 1kHz 3kHz... - Page 397 FXS Card FXS Card User Screens and Settings Rx ABCD The Receive ABCD setting allows the user to either monitor the status of the ABCD signaling bits being received from the network or set a specific ABCD pattern for testing the receive side of the circuit.
- Page 398 Model No. Running Head FXS Card User Screens and Settings FXS Card Rx ABCD The Receive ABCD informational field shows the current values of the ABCD signaling bits that are received from the network. If RX ABCD in the top half of the screen is changed via the set function mentioned above, and the settings are saved by the Save command in the Menu of Actions, the new bit pattern chosen will be reflected here.
-
Page 399: Status Information Field Settings
FXS Card FXS Card User Screens and Settings STATUS The Status field shows the current status of the port. Table 12-9 lists and describes all of the possible conditions reported by this field. Table 12-9. Status Information Field Settings Setting Meaning stdby The FXS port is in standby. -
Page 400: Fxs Error Messages
Model No. Running Head FXS Error Messages FXS Card 12.4 FXS Error Messages Refer to Appendix B in the System Reference Guide for further information on Error Messages regarding this card. 12.5 FXS Card Troubleshooting The FXS card may be faulty if a voice signal is not received at one end of a circuit, or if signaling is not detected. - Page 401 FXS Card FXS Card Troubleshooting 4. At your end, go to the FXS Card Main Screen and send a digital milliwatt test tone (0 dBm) toward the CPE. If you still don’t receive a signal, check the cabling from the FXS card to your CPE, and check the CPE itself.
-
Page 402: Fxs Card Specifications
Model No. Running Head FXS Card Specifications FXS Card 12.6 FXS Card Specifications FXS Cards (8000-FXS-8P 2-wire) Number of Ports Model FXS-8P 8 ports Physical Interface Connector 1 female 50-pin telco connector Transmission Performance Performance Exceeds requirements of ITU-T Rec. G.713 Signaling Modes Model 812X Signaling Modes Software selectable on a per port basis... -
Page 403: Chapter 13 Fxo Card
FXO Card Introduction Chapter 13 FXO Card 13.1 Introduction This chapter provides installation, configuration, and troubleshooting information for the Foreign Exchange - Office (FXO) Card, which is identified as a FXO 2W*8-6 card on its faceplate ejector. The FXO 2W*8-6 Card manages the flow of FXO voice traffic through the integrated access system. -
Page 404: Card Jumper/Switch Settings
Model No. Running Head FXO Card Descriptions FXO Card 13.2.1.1 Card Jumper/Switch Settings The FXO 2W*8-6 Card has eight sets of jumpers that you must set before inserting the card into a system chassis. Figure 13-1 shows these jumpers, which allow you to configure individual ports of the card for either FXO or MRD operation. -
Page 405: Fxo Card User Screens And Settings
FXO Card FXO Card User Screens and Settings 13.3 FXO Card User Screens and Settings 13.3.1 FXO Card Main Screen The FXO Card must be configured for operation after installing it into the system chassis. This is done from the FXO Card Main Screen (see Figure 13-2). To go to that screen, highlight the desired card in the System Main Screen and press <Enter>. -
Page 406: Main Screen Actions
Model No. Running Head FXO Card User Screens and Settings FXO Card Table 13-1. Main Screen Actions Action Function Save Saves changes to settings. Undo Returns all settings to the last saved state. Refresh Updates certain time-related information fields that are not automatically updated (i.e., test status). - Page 407 FXO Card FXO Card User Screens and Settings 2. Time slot 16 is not available if the port is assigned to an E1 WAN link whose time slot 16 is programmed for CAS or CCS. 3. These options are only valid if the Mode selected is fxo, or fxodn. If the mode is dpt, then the Signal options are dpt (default), R2, i-R2 or dp-em.
- Page 408 Model No. Running Head FXO Card User Screens and Settings FXO Card The TS setting identifies the time slot on the WAN link to which this port is assigned. Values range from 1-24 for T1 links and 1-31 for E1 links. Time slot 16 is not available on E1 links that are programmed for cas or ccs signaling.
- Page 409 FXO Card FXO Card User Screens and Settings Electromechanical) used for timing relays that are specific to Russia. If you selected mrd as the Mode, then Signal will automatically default to mrd. If you select fxodn in Mode the options are loop, gs, lp-fd, R2, gs-a and lp-em. For fxo the additional option is ls-R2. CAUTION! Before activating a port, verify the behavior expected by both the station equipment and the remote central office equipment and ensure that you have the system properly configured.
-
Page 410: Fxo Card Loopbacks
Model No. Running Head FXO Card User Screens and Settings FXO Card busy. If a call is in progress when the CGA alarm is received, the system will hold the call for two seconds, drop it and then busy out the port to the attached PBX for the duration of the alarm. - Page 411 FXO Card FXO Card User Screens and Settings HYBRID The Hybrid option assigns a three-byte pattern to define the adjustment for return loss (similar to Build-Out Capacitors). The default, set1, balances to the ideal termination of 600 ohms + 2.15 uF. The other settings are reserved for future use. WK DLY The Wink Delay setting allows you to set the wink delay time.
- Page 412 Model No. Running Head FXO Card User Screens and Settings FXO Card ADPCM The ADPCM parameter lets you choose the ADPCM card on which to place this FXO port. The default setting is n/a and only changes when a Rate smaller than 64k is selected (see above).
-
Page 413: Test Screen
FXO Card FXO Card User Screens and Settings 13.3.2 Test Screen The Test option facilitates testing and maintenance by allowing you to monitor and set the status of the analog interface leads as well as monitoring and setting the value of the A, B, C and D signaling bits of all FXO circuits on that card. - Page 414 Model No. Running Head FXO Card User Screens and Settings FXO Card Parameter User Options Default SIG MON TEST Tx ABCD Rx ABCD T-R-CNTL TO USER 300Hz 1kHz 3kHz quiet TO NTWK 300Hz 1kHz 3kHz quiet Tx ABCD Status information only; not editable Rx ABCD Status information only;...
- Page 415 FXO Card FXO Card User Screens and Settings Rx ABCD The Receive ABCD setting allows you to either monitor the status of the ABCD signaling bits being received from the network or set a specific ABCD pattern for testing the receive side of the circuit.
- Page 416 Model No. Running Head FXO Card User Screens and Settings FXO Card Rx ABCD The Receive ABCD information field shows the current values of the ABCD signaling bits that are received from the network. If RX ABCD in the top half of the screen is changed via the set function mentioned above, and the settings are saved by the Save command in the Menu of Actions, the new bit pattern chosen will be reflected here.
-
Page 417: Status Information Field Settings
FXO Card FXO Card User Screens and Settings TYPE The Type information field shows the current status of the signal field selected on the main FXO card screen for this port. Valid settings for both fxo and fxodn modes are loop (loop), gs (ground start), lp-fd (loop start-forward disconnect) and R2 (R2). -
Page 418: Fxo Card Error Messages
Model No. Running Head FXO Card Error Messages FXO Card 13.4 FXO Card Error Messages Refer to Appendix B in the System Reference Guide for further information on Error Messages regarding this card. 13.5 FXO Card Troubleshooting The FXO card may be faulty if a voice signal is not received at one end of a circuit, or if signaling is not detected. - Page 419 FXO Card FXO Card Troubleshooting 4. At your end, go to the FXO Card Main Screen and send a digital milliwatt test tone (0 dBm) toward the CPE. If you still don’t receive a signal, check the cabling from the FXO card to your CPE, and check the CPE itself.
-
Page 420: Fxo Card Specifications
Model No. Running Head FXO Card Specifications FXO Card 13.6 FXO Card Specifications FXO Card (813970 2-wire) Number of Ports Models 8000-FXO-8P 8 ports Physical Interface Connector 1 female 50-pin telco connector Transmission Performance Performance Exceeds requirements of ITU-T Rec. G.713 Signaling Modes Model 813X Signaling Modes Software selectable on a per port basis... -
Page 421: Chapter 14 Hsu Card
HSU Card Introduction Chapter 14 Data Cards HSU Card 14.1 Introduction This chapter provides installation, configuration, and troubleshooting information for the High-Speed Data Unit (HSU) Cards. These cards are labeled as follows on their faceplate ejectors: HSU 35 (HSU-2P) and the four-port HSU 530/35 (HSU-4P). This chapter also provides information for the Personality Modules used with some of these cards. -
Page 422: Two-Port Hsu Card Jumper/Switch Settings
Model No. Running Head HSU Card Description HSU Card 14.2.1.1 Two-Port HSU Card Jumper/Switch Settings The HSU 530/35 Card has two slide switches that you must set for either RS-530 or V.35 interfacing on its data ports. Figure 14-1 shows these switches, which are factory-set to RS-530 operation (up positions) for both ports. -
Page 423: Hsu-T V11 Card Description (8000-Hsu-2P-V11)
HSU Card HSU Card Description 14.2.2 HSU-T V11 Card Description (8000-HSU-2P-V11) The HSU-T V11 Card has two ports that connect to RS-530 or X.21 CPE devices. Each port can operate as either DCE or DTE, with data speeds ranging from 56 or 64 kbps to 1.536 or 1.984 Mbps. -
Page 424: Four-Port Hsu Card Jumper/Switch Settings
Model No. Running Head HSU Card Description HSU Card CAUTION! If used in a system using a T1 “Line Code” other than “B8ZS,” HSU card ports assigned to multirate circuits greater than or equal to 4 or more consecutive time slots at 64kbps must have DTE connected to the port prior to activation. -
Page 425: Installing The Four-Port Hsu 530/35 Card
HSU Card HSU Card Description Note: When setting switch to V.35 mode it unbalances the CTS Lead. It does not change the voltage levels of the driver output. (The Personality Module will do the same thing as setting the switch). RS-530 HSU*4 530/35... -
Page 426: Personality Module (1251)
Model No. Running Head HSU Card Description HSU Card 14.2.5 V.35 Personality Module (1251) When using the two-port HSU 530/35, HSU-AD 530/35, and four-port HSU 530/35 Cards, you may want to connect the RS-530 output jack to RS-232 external equipment (for all of these cards). -
Page 427: Rs-232-E Personality Module Description (1253)
HSU Card HSU Card Description 14.2.6 RS-232-E Personality Module Description (1253) The RS-232-E Personality Module converts 530-A signals to RS-232-E format which allows the HSU Cards to interoperate with equipment employing an interface conforming to the ANSI/EIA/TIA-232-E electrical characteristics. Figure 14-4 shows this module. DB25 Male-Female DB25 Male-Female (Male view) -
Page 428: Hsu Card Cables
Model No. Running Head HSU Card Description HSU Card 14.2.7 HSU Card Cables Table 14-1 and Table 14-2, represent a matrix used for connecting cables to HSU Cards for DTE and DCE transmit clocking. The following HSU Cards apply (820260, 820360, HSU-2P, 821360, 821460, HSU-4P and 821660). -
Page 429: Hsu Card User Screens And Settings
HSU Card HSU Card User Screens and Settings 14.3 HSU Card User Screens and Settings The HSU Cards permit configuration and operation through use of several user screens and optional settings. 14.3.1 HSU Card Main Screen You must configure the HSU Card ports for operation. Configuration can be performed from the HSU Card Main Screen, which is shown in Figure 14-5 . -
Page 430: Hsu Card Main Screen Actions
Model No. Running Head HSU Card User Screens and Settings HSU Card Table 14-3. HSU Card Main Screen Actions Action Function Save Saves changes to settings. Undo Returns all settings to the last saved state. Refresh Updates certain time-related information fields that are not automatically updated (i.e., performance and test data). -
Page 431: Hsu Card State Status
HSU Card HSU Card User Screens and Settings 3. These options are only valid if the Loopback Generation Mode selected is dds. If the Loopback Generation Mode is v.54 or ft1, then the LB GEN options are off and on. 4. - Page 432 Model No. Running Head HSU Card User Screens and Settings HSU Card MODE The Mode parameter appears only for the HSU-T V11 and HSU-T 35 Cards. It allows you to identify how the HSU port appears to the device on the other end of the interface cable. The dce option causes the port to be recognized as a DCE (data circuit-terminating equipment) device.
-
Page 433: Typical Hsu Port Time Slot Assignment Screen
HSU Card HSU Card User Screens and Settings Note: Do not change this parameter when the HSU Card is linked to an ISDN-PRI connection. Figure 14-6.Typical HSU Port Time Slot Assignment Screen RATE The Rate setting allows you to select the bandwidth for all time slots assigned to this port. The available options are 56k or 64k. - Page 434 Model No. Running Head HSU Card User Screens and Settings HSU Card If ext is selected but the system does not detect an incoming clock on the SCTE leads, the HSU Card automatically generates an internal clock. If this clock is not synchronized with the incoming data, reset the CLOCK PLRTY option to synchronize the clock and data.
-
Page 435: Local Dte Loopback
HSU Card HSU Card User Screens and Settings On the HSU-T V11 and HSU-T 35 Cards, the CTS settings are used only if the port Mode is set to dce. The default setting in that mode is perm. For a dte port, the only available setting is n/a. -
Page 436: Local Network Loopback
Model No. Running Head HSU Card User Screens and Settings HSU Card Choose the net (network) setting to loop the incoming data from the network back toward the far end. This loopback is shown in Figure 14-8 . It tests some of the local HSU Card circuitry, the local system common cards, the WAN link card, the far-end HSU Card and CPE device, and the WAN link between the two sites. -
Page 437: Remote Ocu Or Ds0 Loopback
HSU Card HSU Card User Screens and Settings LB GEN If you selected v.54, ft1, or perf as the Loopback Generation (LB GEN) mode setting, the Loopback Generation setting allows you to send an on (loop-up command) or off (loop-down command). -
Page 438: Remote Csu Loopback
Model No. Running Head HSU Card User Screens and Settings HSU Card Local System Remote System HSU Card OCU-DP Card Carrier's DDS Local Remote Network Local Site Remote Site Figure 14-10.Remote CSU Loopback Local System Remote System HSU Card OCU-DP Card Carrier's DDS Local Remote... - Page 439 HSU Card HSU Card User Screens and Settings ISDN CONN This option is not available with this host release. EER ( 821360 card) The Excessive Error Rate (EER) parameter is only available on the HSU-AD 530/35 Card. This setting defines an error rate threshold which, when exceeded, causes an alarm to be declared.
-
Page 440: Hsu Card Test Screen
Model No. Running Head HSU Card User Screens and Settings HSU Card 14.3.2 HSU Card Test Screen Selecting “Test” from the HSU Card Main Screen will access the Test Screen shown in Figure 14-12. From this screen, you can create test situations between HSU Cards, or between a single card and test equipment at a remote site. -
Page 441: Test Screen Option Settings And Defaults
HSU Card HSU Card User Screens and Settings Table 14-7. Test Screen Option Settings and Defaults Parameter User Options Notes Default BERT mark space qrss 2047 ocu-a csu-a dsu-a csu1a csu2a norm norm RLSD norm norm norm norm SYNC information only–no user options information only–no user options information only–no user options information only–no user options... - Page 442 Model No. Running Head HSU Card User Screens and Settings HSU Card The Clear To Send (CTS) option allows you to define whether the CTS control lead should be held on (high, asserted) or off (low, negated). Selecting either on or off will override the selection made in the HSU Card Main Screen.
- Page 443 HSU Card HSU Card User Screens and Settings CSES The Consecutive Severely Errored Seconds (CSES) field is triggered by the occurrence of ten consecutive Severely Errored Seconds. Once triggered, this field will increment (by one) for each elapsed second until the system logs ten consecutive non-Severely Errored Seconds. This is an information-only field;...
- Page 444 Model No. Running Head HSU Card User Screens and Settings HSU Card LB ST The Loopback State (LB ST) field indicates whether there are any remotely-initiated loopbacks currently active on the HSU port. This field displays both latching and non-latching loopbacks initiated from a remote device via in-band loop-up codes.
-
Page 445: Hsu Dial Screen
HSU Card HSU Card User Screens and Settings 14.3.3 HSU Dial Screen A call profile template must be downloaded to the HSU port before it can be used as a dialing resource by DTE devices, such as video codecs or LAN routers. Each DTE device is assigned a telephone number which is stored on the HSU port Dial screen. -
Page 446: Hsu Dial Screen Actions
Model No. Running Head HSU Card User Screens and Settings HSU Card Table 14-8. HSU Dial Screen Actions Action Function Save Saves changes to settings. Undo Returns all settings to the last saved state. Refresh Updates certain time-related information fields that are not automatically updated (i.e. - Page 447 HSU Card HSU Card User Screens and Settings AUTO ANSWER The Auto Answer feature allows the HSU port to automatically answer an incoming call either the primary number or the hunt group number. A value of yes means the equipment will always accept the incoming call for an port that is not already busy.
-
Page 448: Hsu Call Profile Screen
Model No. Running Head HSU Card User Screens and Settings HSU Card IMUX HUNT # The IMUX Hunt Number is an optional number that makes the port of this HSU part of a hunt group. The hunt group number is the same for all HSU ports in the hunt group. The system will route any incoming IMUX calls placed to the hunt group number to the first available HSU port in the group, provided there is an available IMUX engine. -
Page 449: Hsu Card Call Profile Screen
HSU Card HSU Card User Screens and Settings Figure 14-14.HSU Card Call Profile Screen Table 14-10. HSU Card Call Profile Screen Actions Action Function Save Saves changes to settings. Undo Returns all settings to the last saved state. Refresh Updates certain time-related information fields that are not automatically updated (i.e. -
Page 450: Hsu Card Call Profile Screen Option Settings And Defaults
Model No. Running Head HSU Card User Screens and Settings HSU Card Table 14-11. HSU Card Call Profile Screen Option Settings and Defaults Parameter User Options Default DCHAN 01-08 CALLED # telephone number (25 numeric characters) blank CALLED # TYPE natnl intnl sbscr natnl CALLED # PLAN... - Page 451 HSU Card HSU Card User Screens and Settings CHANNEL RATE The Channel Rate selection specifies the bandwidth to be used by the call. Different carriers support different rates, so it is important to check with your carrier before setting rates greater than 64Kbps.
- Page 452 Model No. Running Head HSU Card User Screens and Settings HSU Card To change this selection, highlight the selection with the cursor and press the <Enter> key. A list of all service options for this D channel will appear at the bottom of the screen. Move the cursor to the appropriate selection using the right and left arrow keys and press the <Enter>...
-
Page 453: Broadcast Screen
HSU Card HSU Card User Screens and Settings 14.3.5 Broadcast Screen One of the special features of the HSU Call Profile is the ability to establish a “two-way” connection to the Called # on the Call Profile and broadcast a “one-way” copy of the data sent by the Calling # to a series of additional users. -
Page 454: Hsu Broadcast Screen
Model No. Running Head HSU Card User Screens and Settings HSU Card Figure 14-16.HSU Broadcast Screen 14-34 Data Cards... -
Page 455: Broadcast Connection Status Screen
HSU Card HSU Card User Screens and Settings 14.3.6 Broadcast Connection Status Screen WHen the main ISDN call is placed, the system will attempt to establish connection with all of the numbers on the Broadcast screen. The Broadcast screen allows the user to monitor or change the status of each broadcast phone number on the list. -
Page 456: Inverse Multiplexer (Imux) Screen
Model No. Running Head HSU Card User Screens and Settings HSU Card Table 14-12. Call Profile Broadcast Screen Actions Action Function Connect If the call placed to one of the Broadcast phone numbers fails to connect, this command will attempt to reconnect the call. Disconnect Breaks the connection of the number highlighted on the screen. -
Page 457: Imux Call Screen Actions
HSU Card HSU Card User Screens and Settings Table 14-13. IMUX Call Screen Actions Action Function Save Saves changes to settings. Undo Returns all settings to the last saved state. Refresh Updates certain time-related information fields that are not automatically updated (i.e. - Page 458 Model No. Running Head HSU Card User Screens and Settings HSU Card TXINIT TIMER The Timer (bothway) Initial Channel setting defines the duration of time necessary for negotiation for the initial 56kbps or H0 (384kbps) channel. The values (in milliseconds) are 5000, 2500, 7500 and 10000.
-
Page 459: Dialing With High Speed Data Cards
HSU Card HSU Card User Screens and Settings 14.3.8 Dialing with High Speed Data Cards All models of HSU cards can place outgoing calls and can receive incoming calls. All outgoing calls use call profile information to dial (see HSU Call Profile section earlier in this chapter). -
Page 460: Dialing With Rs366 Commands
Model No. Running Head HSU Card User Screens and Settings HSU Card This type of dialing is called “master” dialing. With master dialing, the DTE will signal the Model 821360 HSU master port (via RS366 or V.25bis) that the following commands should be applied to another HSu port, not to itself. -
Page 461: Escape Character
HSU Card HSU Card User Screens and Settings 14.3.10.2 Escape Character The Escape Character marks the beginning of the new command. It can also be used to initiate an action (i.e. dial a phone number). Values for the Escape Character can be: *, #, 5, 6, 7, 9, 0 (zero) or 00 (double zero). The default value is *. -
Page 462: Example
Model No. Running Head HSU Card User Screens and Settings HSU Card 14.3.11.1 Example If a specific call requires a 384kb multirate channel, and the current call profile for that port is set to 64kb channelization can be changed directly from the keypad by typing the digits, *06000. -
Page 463: Loopback Management
HSU Card HSU Card User Screens and Settings 14.3.13 Loopback Management The RS366 command structure allows the user to control the loopback state for active calls within the system. The user can start a call with one RS366 command string and place a loopback on it with another command. -
Page 464: Example
Model No. Running Head HSU Card User Screens and Settings HSU Card Table 14-17. MUX Call Screen Actions Parameter Parameter Parameter Value Name Number DChan a number from 01-08 Called # 4 through 25 numeric characters can be entered Called # Type 01=natnl, 02=intnl, 03=sbscr Called # Plan 01=unkwn, 02=isdn, 03=phone, 04=print... -
Page 465: V.25Bis Dialing
HSU Card HSU Card User Screens and Settings Once a Master Dialing command is issued for HSU 821360 RS366 dialing ports, all further dialing commands on this port will be applied to the new slot and port designated by the Master Dialing command. -
Page 466: The Crn Command
Model No. Running Head HSU Card User Screens and Settings HSU Card 14.3.17 The CRN Command The Call Request with Number command is sent form the DTE to the HSU card to request a particular number to be dialed. The DTE may include parameters setting the call type, rate bandwidth range, etc. -
Page 467: Example
HSU Card HSU Card User Screens and Settings 14.3.20.1 Example An example of a CRS command is: CRS4 This example commands the system to change the existing loaded call profile to call profile #4 of the Interface card and dial the number. 14.3.21 The DIC Command The Disregard Incoming Call command is issued by the DTE to reject an incoming call. -
Page 468: Typical Hsu Performance Data Screen
Model No. Running Head HSU Card User Screens and Settings HSU Card Each one-hour reporting period is divided into 3600 seconds, and statistics are kept for the current hour and the past 24 one-hour periods. Figure 14-19 shows a typical Performance Data Screen, which is accessed by typing “p” (Perf command) from the bottom highlighted line of the HSU Card Main Screen. - Page 469 HSU Card HSU Card User Screens and Settings An Unavailable Second (UAS) is any second during which service is unavailable. An unavailable signal state is declared after ten consecutive SESs (Severely Errored Seconds) are logged. An unavailable state is cleared after ten consecutive non-Severely Errored Seconds are logged.
-
Page 470: Hsu Card Error Messages
Model No. Running Head HSU Card Error Messages HSU Card 14.4 HSU Card Error Messages Refer to Appendix B in the System Reference Guide for further information on HSU Card Error Messages. 14.5 HSU Card Troubleshooting Problems with an HSU Card could be caused by a number of things. Typically, a problem is indicated by a loss of incoming signal on a data port at either end of the circuit. -
Page 471: Hsu Card Specifications
HSU Card HSU Card Specifications 14.6 HSU Card Specifications Model Number of Physical Interfaces Electrical Interfaces Number Data Ports HSU-2P 2 female 25-pin DB25 D-connectors ITU-T V.35 (True V.35) HSU-4P 4 female 26-pin DB26 D-connectors ITU-T V.35, V.11, RS232, RS530, V.24* Note: *External adapter is required. - Page 472 Model No. Running Head HSU Card Specifications HSU Card Data Speeds N x 56k and N x 64k, where N = 1 to 31 (up to 1984 kbps) - Software Configurable by Data Format Synchronous Data Protocol Transparent Transmit Clock per Port Internal or External (software selectable) Clock Polarity per Port Normal or inverted (software selectable)
- Page 473 HSU Card HSU Card Specifications Standards Compatibility ITU-T V.35 Data Transmission of 48 kbps using 60-108 kHz Group Bank Circuits. V.11 (10/96) Electrical characteristics for balanced double-current interchange circuits operating at data signaling rates up to 10 Mbit/s. V.28 Electrical characteristics for unbalanced double-current interchange circuits.
- Page 474 Model No. Running Head HSU Card Specifications HSU Card 14-54 Data Cards...
-
Page 475: Ohsu-4P Card
OHSU-4P Card Introduction Chapter 15 OHSU-4P Card 15.1 Introduction This chapter provides installation, configuration, and troubleshooting information for the Optical High-Speed Data Unit (OHSU) card. The OHSU card allows the customer to connect to Tele Protection Equipment (TPE) in compliance with IEEE C37.94. 15.2 OHSU Alarming Capability Introduced in the 7.3.0 release is a feature to alarm OHSU ports that are in trouble. -
Page 476: Ohsu Card Description
Due to the polling nature, it is possible for a card port to go into alarm and fifteen seconds transpire prior to the alarm being raised to the user. This apparent delay is intentional and protects the alarm integrity of the IMACS 8000 platform. 15.3 OHSU Card Description 15.3.1 Four-Port OHSU Card Description (8000-OHSU-4P) -
Page 477: Installing The Four-Port Ohsu Card
OHSU-4P Card OHSU Card Description OHSU C37.94 4 PORT Figure 15-2.8000-OHSU-4P OHSU Card 15.3.1.1 Installing the Four-Port OHSU Card Install the Four-Port OHSU Card into any user card slot. These slots are U1 to U8 on the two-sided chassis and front-loading chassis with power supplies on top, or P1 to P4 and W1 to W4 on the front-loading chassis with power supplies on the side. -
Page 478: Ohsu Card User Screens And Settings
Model No. Running Head OHSU Card User Screens and Settings OHSU-4P Card 15.4 OHSU Card User Screens and Settings The OHSU Cards permit configuration and operation through use of several user screens and optional settings. 15.4.1 OHSU Card Main Screen You must configure the OHSU Card ports for operation. -
Page 479: Ohsu Card Main Screen Actions
OHSU-4P Card OHSU Card User Screens and Settings Table 15-1. OHSU Card Main Screen Actions Action Function Save Saves changes to settings. Undo Returns all settings to the last saved state. Refresh Updates certain time-related information fields that are not automatically updated (i.e., performance and test data). -
Page 480: Typical Ohsu Port Time Slot Assignment Screen
Model No. Running Head OHSU Card User Screens and Settings OHSU-4P Card WAN TS The TS (time slot) setting identifies the time slots on the WAN link. Unlike other user cards, the OHSU Card can use many time slots on a single WAN port to create a super-rate circuit for an individual OHSU port. -
Page 481: Local User Loopback
OHSU-4P Card OHSU Card User Screens and Settings LOCAL LB The LOCAL Loopback (LOCAL LB) option activates a loopback on the selected card port. Choose the User setting to loop the outgoing data from the external TPE device back to the TPE receiver. -
Page 482: Local Network Loopback
Model No. Running Head OHSU Card User Screens and Settings OHSU-4P Card Choose the net (network) setting to loop the incoming data from the network back toward the far end. This loopback is shown in Figure 15-6 . It tests some of the local OHSU Card circuitry, the local system common cards, the WAN link card, the far-end OHSU Card and CPE device, and the WAN link between the two sites. -
Page 483: Ohsu Card Specification
OHSU-4P Card OHSU Card Specification 15.5 OHSU Card Specification Model Number of Physical Interfaces Optical Interfaces Number Data Ports OHSU-4P 8 ST connectors IEEE C37.94 823875 Data Speeds N x 64k, where N = 1 to 12 - Software Configurable Data Format Synchronous Data Protocol... - Page 484 Model No. Running Head OHSU Card Specification OHSU-4P Card 15-10 Data Cards...
-
Page 485: Ldsru-10P Card
LDSRU-10P Card Introduction Chapter 16 LDSRU-10P Card 16.1 Introduction This chapter provides installation, configuration, and troubleshooting information for the Low Delay Subrate Data (SRU) Card, which is identified as an LD-SRU card on its faceplate ejector. The LDSRU-10P Card allows you to connect up to 10 RS-232, low-speed and medium-speed (300 kbps to 38.4 kbps) data terminals to the Integrated Access System. -
Page 486: Ld-Sru*10 Card Description (8000-Ldsru-10P)
Model No. Running Head LD-SRU Card Description LDSRU-10P Card 16.2.1 LD-SRU*10 Card Description (8000-LDSRU-10P) The LD-SRU*10 Card allows you to connect up to ten (10) RS-232, low-speed and medium-speed data terminal to the Integrated Access System. The functionality of the LD-SRU*10 card is the same as the SRU 232*10 card with the exception of a lower delay throughput. -
Page 487: Card Jumper/Switch Settings
LDSRU-10P Card LD-SRU Card Description 16.2.1.1 Card Jumper/Switch Settings The LDSRU-10P Card has no jumpers or switches on its mainboard. LD-SRU 232*10 Figure 16-1.8000-LDSRU-10P LD-SRU board 16.2.1.2 Installing the LD-SRU*10 Card Install the LD-SRU*10 Card into any user card slot. These slots are U1 to U8 on the two-sided chassis and front-loading chassis with power supplies on top, or P1 to P4 and W1 to W4 on the front-loading chassis with power supplies on the side. -
Page 488: Installing The Ld-Sru*10 Card
Model No. Running Head LD-SRU Card User Screens and Settings LDSRU-10P Card 16.2.1.3 Installing the LD-SRU*10 Card Install the SRU-LD*10 Card into any user card slot. These slots are U1 to U8 on the two-sided chassis and front-loading chassis with power supplies on top, or P1 to P4 and W1 to W4 on the front-loading chassis with power supplies on the side. -
Page 489: Main Screen Actions
LDSRU-10P Card LD-SRU Card User Screens and Settings Table 16-1. Main Screen Actions Action Function Save Saves changes to settings. Undo Returns all settings to the last saved state. Refresh Updates certain time-related information fields that are not automatically updated (i.e., test status). Copy Copies the contents of the current column to the next column. -
Page 490: Sru Card State Status
Model No. Running Head LD-SRU Card User Screens and Settings LDSRU-10P Card 3. Speeds of 0.3, 1.2, and 14.4 are not supported for synchronous channels (except 14.4 sync with FRAME set to adpcm or hlink). 4. Communication Configuration is a three step process. This field will show n/a when sync is chosen as the INTF option. - Page 491 LDSRU-10P Card LD-SRU Card User Screens and Settings FRAME The Frame setting allows you to define the sub-rate format that the port will use and to set the usable space allotted to each WAN time slot. The choices are DS0A (a) for one subrate time slot, DS0B with a limit of five subrate time slots (b-5).
-
Page 492: Sru Time Slot Integration
Model No. Running Head LD-SRU Card User Screens and Settings LDSRU-10P Card increments (i.e. a 19.2Kbps circuit would take SRU timeslots #1 and #2) Figure 16-4.SRU Time Slot Integration SR TS The Subrate Time Slot (SR TS) indicates the subrate position within the DS0 time slot the port will occupy (see Figure 16-4). - Page 493 LDSRU-10P Card LD-SRU Card User Screens and Settings INTF The Interface setting allows you to choose the protocol necessary for the terminal associated with this port. The choices are asyn (Asynchronous), sync (Synchronous), and v.14 (v.14). If Synchronous transmission is selected, the choices for STOP, DATA and PAR will show as n/a (not applicable).
-
Page 494: Local Loopbacks
Model No. Running Head LD-SRU Card User Screens and Settings LDSRU-10P Card The Loopback setting allows you to activate local loopbacks on the SRU card. These settings are off, toward the dte (DTE), and toward the net (network). Figure 16-5 shows a diagram of the local loopback conditions. -
Page 495: Inband Remote Sru Loopback
LDSRU-10P Card LD-SRU Card User Screens and Settings Local System Remote System SRU Card OCU-DP Card Carrier's DDS Local Remote Network Local Site Remote Site Figure 16-6.Inband Remote SRU Loopback Local System Remote System SRU Card OCU-DP Card Carrier's DDS Local Remote Network... -
Page 496: Bit Error Rates For Majority-Vote Error Correction
Model No. Running Head LD-SRU Card User Screens and Settings LDSRU-10P Card LB DET The Loopback Detection setting determines how the card will respond to latching and non-latching loopback commands from remote equipment. The SRU reacts only to the inband DDS-format loopback commands for OCU Loop, CSU Loop, and DSU Loop. - Page 497 LDSRU-10P Card LD-SRU Card User Screens and Settings 10e-5 38 or more errors 37 or less errors 60 seconds or any of the above 10e-6 3 or more errors 2 or less errors 60 seconds or any of the above 10e-7 17 or more errors 16 or less errors...
-
Page 498: Card Configuration Examples
Model No. Running Head Card Configuration Examples LDSRU-10P Card 16.4 Card Configuration Examples Figure 16-9 shows ways in which SRU cards can be used to network low-speed data with DS0A and DS0B framing. In this diagram, five cards are connected to eight WAN time slots of one WAN port on one WAN card (many combinations of cards/ports/time slots are possible). -
Page 499: Typical Wan Time Slot Assignments To An Sru Card
LDSRU-10P Card Card Configuration Examples WAN CARD #1 PORT #1 Port # 38.4 28.8 TS #1 TS #2 TS #3 TS #4 SRU #1 1-10 1-20 Port # SRU TS SRU #2 WAN CARD #1 PORT #1 Port # TS #5 TS #6 TS #7 TS #8... -
Page 500: Test Screen
Model No. Running Head Test Screen LDSRU-10P Card 16.5 Test Screen Pressing “t” (Test command) in the SRU Card Main Screen will bring up the Test Screen shown in Figure 16-10. From this screen, you can create test situations between SRU cards, or between a single card and data test equipment at a remote site. -
Page 501: Test Screen Actions
LDSRU-10P Card Test Screen Table 16-5. Test Screen Actions Action Function Save Saves changes to settings. Undo Returns all settings to the last saved state. Refresh Updates certain time-related information fields that are not automatically updated (i.e., test status). InsertErr Allows you to manually insert a single error into the clear data signal. - Page 502 Model No. Running Head Test Screen LDSRU-10P Card The Clear To Send (CTS) option allows you to define whether the CTS control lead should be held on (high) or off (low). Selecting either on or off will override the selection made in the SRU Card screen.
- Page 503 LDSRU-10P Card Test Screen The Out of Synchronization Seconds field shows the number of seconds that the SRU BERT has been out of synchronization. Since this is an information-only field, there are no user-selectable parameters. The Bit Error Rate (BER) field shows the rate at which errors are being logged. The system calculates BER by dividing the number of bit errors (BE) by the total number of bits transmitted during the test.
- Page 504 Model No. Running Head Test Screen LDSRU-10P Card The Excessive Error field will display the computed the DS0 error rate for each port where that option was selected. The Majority Error Rate will be computed based on the integration period for the selected threshold. For example, if the 10e-4 threshold was selected, the integration would be 10 seconds.
-
Page 505: Sru Card Error Messages
LDSRU-10P Card SRU Card Error Messages 16.6 SRU Card Error Messages Refer to Appendix B in the System Reference Guide for further information on Error Messages regarding this card. 16.7 SRU Card Troubleshooting SRU card problems could indicate a number of possible causes, including: •... - Page 506 Model No. Running Head SRU Card Troubleshooting LDSRU-10P Card 5. If necessary, also perform loopbacks and send test signals to the affected circuit from the other end. In addition, you can perform end-to-end tests using a suitable data test set at one or both ends of the circuit in conjunction with the loopback functions of the SRU card at either end.
-
Page 507: Sru Card Specifications
LDSRU-10P Card SRU Card Specifications 16.8 SRU Card Specifications SRU Card (Models 822060 and 822160) Number of Ports Physical Interface female 8-pin RJ-48 Electrical Interface RS232C, ITU-T V.28 Operational Interface DCE - Full Duplex Interface Settings Asynchronous, Synchronous, V.14 Sub-rate Framing Format X.50, V.14, DS0-A, DS0-B with 5, 10, or 20 divisions per DS0 Sub-rate Time slot Number 1 through 20 depending on Sub-rate Framing Format... - Page 508 Model No. Running Head SRU Card Specifications LDSRU-10P Card Standards Compatibility Bellcore GR-63-CORE Issue 1 Network Equipment-Building System (NEBS) Requirements: Physical Protection AT&T TR 54075 Subrate Data Multiplexing - A Service of DATAPHONE Digital Service ITU-T V.28 Electrical characteristics for unbalanced double-current interchange circuits X.50 Division 3 Fundamental Parameters of a Multiplexing Scheme for the...
-
Page 509: Chapter 17 Ocu-Dp Card
OCU-DP Card Introduction Chapter 17 OCU-DP Card 17.1 Introduction This chapter provides installation, configuration, and troubleshooting information for the Office Channel Unit - Dataport (OCU-DP) Cards. These are labeled as the OCU-DP 2, OCU-DP 5 and OCU-DP 10 Cards on their faceplate ejectors. This chapter also provides installation information for the OCU-DP port activation card, which is used on the OCU-DP 5 Card. -
Page 510: Installing The Ocu-Dp 5 Card
Model No. Running Head OCU-DP Card User Screens and Settings OCU-DP Card 17.2.1.2 Installing the OCU-DP 5 Card Install the OCU-DP 5 Card in any user card slot. These slots are U1 to U8 on the two-sided chassis and front-loading chassis with power supplies on top, and P1 to P4 or W1 to W4 on the front-loading chassis with power supplies on the side. -
Page 511: Typical Ocu-Dp Card Main Screen
OCU-DP Card OCU-DP Card User Screens and Settings Figure 17-1.Typical OCU-DP Card Main Screen The bottom highlighted line of this screen lists various actions that you can perform from this screen. To perform an action, simply type the uppercase letter corresponding to the desired action on this line. -
Page 512: Main Screen Actions
Model No. Running Head OCU-DP Card User Screens and Settings OCU-DP Card Table 17-1. Main Screen Actions Action Function Save Saves changes to settings. Undo Returns all settings to the last saved state. Refresh Updates certain time-related information fields that are not automatically updated (i.e., performance and test data). - Page 513 OCU-DP Card OCU-DP Card User Screens and Settings WAN/SRV The WAN/SRV setting identifies the card to which the output of this port is directed. If wan is chosen, the data from this port will be directed to a WAN port (the options are w1-1 to w4-2).
-
Page 514: Data Frames, Rates, And Time Slot Assignments
Model No. Running Head OCU-DP Card User Screens and Settings OCU-DP Card The SR TS number selected will be the first segment occupied by this circuit. If a 19.2 kbps circuit occupies two segments of the b-5 frame, selecting SR TS 1 will assign it to segments 1 and 2. -
Page 515: Ocu-Dp Primary And Secondary Channel Rates
OCU-DP Card OCU-DP Card User Screens and Settings ERR COR The Error Correction setting is used only on the OCU-DP 2 Card. It provides different methods of error correction, depending on the data Rate selected. The default ERR COR setting is off. If you choose subrate speeds of 9.6k or less in the Rate setting, the Error Correction option maj-v (majority voting) is available. -
Page 516: Ocu Local Loopback (Dte Option)
Model No. Running Head OCU-DP Card User Screens and Settings OCU-DP Card The OCU-DP card supports three Loopback options that test on the card itself. The dte option loops the 4-wire analog interface of the OCU-DP port towards the attached CSU/DSU. It is used to test the local cabling and the analog drivers in the OCU-DP card (see Figure 17-3 The net-a (Network A) option loops the 4-wire OCU-DP interface towards the network. -
Page 517: Ocu Local Loopback (Net-A Option)
OCU-DP Card OCU-DP Card User Screens and Settings Local System Remote System OCU-DP Card OCU-DP Card Carrier's DDS Local Remote CSU/DSU CSU/DSU Network Local Site Remote Site Figure 17-4.OCU Local Loopback (net-a option) Local System Remote System OCU-DP Card OCU-DP Card Carrier's DDS Local Remote... -
Page 518: Ocu Remote Loopback (Ds0-N And Ocu-N Options)
Model No. Running Head OCU-DP Card User Screens and Settings OCU-DP Card Local System Remote System OCU-DP Card OCU-DP Card Carrier's DDS Local Remote CSU/DSU CSU/DSU Network Local Site Remote Site Figure 17-6.OCU Remote Loopback (ds0-n and ocu-n options) Local System Remote System OCU-DP Card OCU-DP Card... -
Page 519: Performance Data Screen
OCU-DP Card OCU-DP Card User Screens and Settings LB DET The Loopback Detection setting determines how the system responds to latching loopback commands from remote equipment. The OCU-DP reacts only to the in-band DDS format loopback commands for Channel Loop, OCU Loop and DSU Loop. The Loopback Detection setting does not affect local loopback commands from the local control terminal. -
Page 520: Typical Performance Data Screen
Model No. Running Head OCU-DP Card User Screens and Settings OCU-DP Card If the majority vote method of error correction is selected, the OCU-DP card will monitor data traffic coming in from the T1 network and use the majority-vote algorithm to determine if any data errors have occurred. -
Page 521: Performance Data Screen Actions
OCU-DP Card OCU-DP Card User Screens and Settings Table 17-4. Performance Data Screen Actions Action Function Refresh Updates certain time-related information fields that are not automatically updated (i.e. performance and test data). Clear Clears the test screen. pgUp Scrolls through data screens from the oldest to the newest. pgDn Scrolls through data screens from the newest to the oldest. -
Page 522: Test Screen
Model No. Running Head OCU-DP Card User Screens and Settings OCU-DP Card OCSES The Output Consecutive Severely Errored Seconds (OCSES) field is triggered by the occurrence of ten consecutive Output Severely Errored Seconds. Once triggered, the OCSES field will increment by one for each elapsed second until the system logs ten consecutive that are not severely errored. -
Page 523: Test Screen Actions
OCU-DP Card OCU-DP Card User Screens and Settings Table 17-5 lists the actions you can perform from the Test Screen. These appear on the bottom highlighted line of the screen. Table 17-6 lists the settings controlled on this screen along with their possible and default values. - Page 524 Model No. Running Head OCU-DP Card User Screens and Settings OCU-DP Card The Direction (DIR) setting allows users to specify where the BERT test signal should be directed. The net (network) option transmits the test signal toward the Wide Area Network (WAN).
- Page 525 OCU-DP Card OCU-DP Card User Screens and Settings The Out of Synchronization Seconds (OSS) field shows the number of seconds that the OCU-DP BERT has been out of synchronization. Since this is an information-only field, there are no user-selectable parameters. The Bit Error Rate (BER) field shows the rate at which errors are being logged.
-
Page 526: Ocu-Dp Card Error Messages
Model No. Running Head OCU-DP Card Error Messages OCU-DP Card 17.4 OCU-DP Card Error Messages Refer to Appendix B in the System Reference Guide for further information on Error Messages regarding this card. 17.5 OCU-DP Card Troubleshooting OCU-DP card problems could indicate a number of possible causes, including: •... -
Page 527: Ocu-Dp Card Specifications
OCU-DP Card OCU-DP Card Specifications 17.6 OCU-DP Card Specifications OCU-DP Card OCUDP-5P Number of Ports - 5 Connector - female 8-pin RJ-48 OCU-DP Card OCUDP-10P Number of Ports - 10 Connector - female 8-pin RJ-48 OCU-DP 824x Card Specifications Data Format Synchronous-binary, serial Data Encoding Bipolar, return to 0, AMI... - Page 528 Model No. Running Head OCU-DP Card Specifications OCU-DP Card Distances Supported Secondary Loss Limit Primary Rate Line Rate 19 Ga. (KF) 22 Ga. (KF) 24 Ga. (KF) 26 Ga. (KF) Rate 2400 2400 133.0 90.7 71.5 56.8 2400 3200 114.3 79.1 61.9 48.7...
-
Page 529: Chapter 18 Ds0-Dp Card
DS0-DP Card Introduction Chapter 18 DS0-DP Card 18.1 Introduction This chapter provides installation, configuration, and troubleshooting information for the DS0 Dataport (DS0-DP) Card. This card is labeled as the DS0-DP 4 card on its faceplate ejector. 18.2 DS0-DP Card Description 18.2.1 DS0-DP 4 Card Description (8000-DS0DP-4P) The DS0-DP 4 Card Contradirectional/Codirectional Data Unit (DS0-DP/G.703) provides a 64 kbps interface to a DS0 time slot of a T1 or E1 network. -
Page 530: Ds0-Dp Card User Screens And Settings
Model No. Running Head DS0-DP Card User Screens and Settings DS0-DP Card 18.3 DS0-DP Card User Screens and Settings 18.3.1 DS0-DP Card Main Screen You must configure the DS0-DP card for operation. This is done from the DS0-DP Card Main Screen, which is shown in Figure 18-1. -
Page 531: Main Screen Actions
DS0-DP Card DS0-DP Card User Screens and Settings Table 18-1. Main Screen Actions Action Function Save Saves changes to settings. Undo Returns all settings to the last saved state. Refresh Redraws the Main Screen. Copy Copies the contents of the current column to the next column. Useful if you change a lot of entries in one column and want to repeat those changes in subsequent columns. - Page 532 Model No. Running Head DS0-DP Card User Screens and Settings DS0-DP Card If the WAN/SRV parameter is none, the TS parameter will always be n/a. If the WAN/SRV parameter is wan (or a WAN port) then TS setting identifies the time slot on the WAN link to which this port is assigned.
- Page 533 DS0-DP Card DS0-DP Card User Screens and Settings LB DET This option allows the card to detect DDS latching loopbacks. When set to off, no loopbacks can be detected. When set to enab, loopbacks will be detected. When a loopback is detected, it will be maintained until a loop down is detected.
-
Page 534: Ds0-Dp Card Error Messages
Model No. Running Head DS0-DP Card Error Messages DS0-DP Card 18.4 DS0-DP Card Error Messages Refer to Appendix B in the System Reference Guide for further information on Error Messages regarding this card. 18.5 DS0-DP Card Troubleshooting Problems with a DS0-DP card could indicate a number of causes. Some possibilities are: •... -
Page 535: Ds0-Dp Card Specifications
DS0-DP Card DS0-DP Card Specifications 18.6 DS0-DP Card Specifications DS0-DO Card (DS0DP-10P) Data Rate 64 Kbps Interface Connector DB15 Receptacle Electrical Interface DS0-DP + 5.0V, 135 Ohms G.703 + 1.0V, 120 Ohms Control Configuration Control via local terminal or remote Dimensions Height 8”... - Page 536 Model No. Running Head DS0-DP Card Specifications DS0-DP Card 18-8 Data Cards...
-
Page 537: Adpcm Card
ADPCM Card Introduction Chapter 19 Server Cards ADPCM Card 19.1 Introduction This chapter provides installation, configuration, and troubleshooting information for the Adaptive Differential Pulse-Code Modulation (ADPCM) Card. This card is labeled as the ADPCM 64 card on its faceplate ejector. 19.2 ADPCM Card Descriptions 19.2.1 ADPCM 64 Card Description (8000-ADPCM) The ADPCM 64 Card has 32 pairs of voice compression engines that accept inputs directly... -
Page 538: Card Jumper/Switch Settings
Model No. Running Head ADPCM Card Descriptions ADPCM Card The rate of a DS0 time slot is 64 kbps, so the sum of the compression rates for engines 1 and 2 must equal 64 kbps. For example, if you assign a 32 kbps circuit to engine 1, engine 2 can only accept another 32 kbps circuit. -
Page 539: Adpcm Card User Screens And Settings
ADPCM Card ADPCM Card User Screens and Settings 19.3 ADPCM Card User Screens and Settings 19.3.1 ADPCM Card Main Screen You must configure the ADPCM card ports for operation. This is done from the ADPCM Card Main Screen, which is shown in Figure 19-1. To go to this screen, highlight the ADPCM card in the System Main Screen and press <Enter>. -
Page 540: Adpcm Card Main Screen Actions
Model No. Running Head ADPCM Card User Screens and Settings ADPCM Card Table 19-2. ADPCM Card Main Screen Actions Action Function Save Saves changes to settings. Undo Returns all settings to the last saved state. Refresh Redraws the current screen with the latest information. pg_Left Pages through the 64 engines (highest to lowest), 8 at a time. - Page 541 ADPCM Card ADPCM Card User Screens and Settings USER The User setting identifies the user card and port connected to this engine. This is the place where the ADPCM card will expect incoming (non-compressed) voice, subrate data, and B-channel traffic. If assigned from a voice, SRU, or BRI card port, this selection will show the user card slot and port number (e.g., u5-2 for the card in slot U5, port 2).
- Page 542 Model No. Running Head ADPCM Card User Screens and Settings ADPCM Card TYPE The Type parameter identifies the voice and signaling requirements for the incoming circuit. The options are v (voice), voice and v&s (signaling) and trnsp (transparent). Use v when the input to the ADPCM channel is a 64 kbps channel and inband signaling is not required.
-
Page 543: Adpcm Card Error Messages
ADPCM Card ADPCM Card Error Messages TC CGA The Trunk Conditioning CGA setting identifies the type of trunk conditioning required for the incoming circuit. If v&s is chosen in the Type setting, the options are idle or busy. If trnsp or v is chosen as the Type, the only option is n/a. -
Page 544: Adpcm Server Card Specifications
Model No. Running Head ADPCM Server Card Specifications ADPCM Card 19.6 ADPCM Server Card Specifications ADPCM Card (ADPCM) Input Voice Channels Can originate from any 2-wire or 4-wire voice card or from a DSO on a WAN (El/T1 or HDSL) interface. µ-law & A-law 64Kbps PCM compatible on a per channel basis. -
Page 545: Chapter 20 Analog Bridging Server Card
Analog Bridging Server Card Introduction Chapter 20 Analog Bridging Server Card 20.1 Introduction This chapter provides installation, configuration, and troubleshooting information for the Analog Bridging Server Card, (BRIDGE). 20.2 Analog Bridging Server Card Description (8000-BRIDGE) The Analog Bridging Server Card is a plug-in server card which allows the analog voice band signals from up to thirty two voice circuits to be combined (bridged). -
Page 546: Card Jumper/Switch Settings
Model No. Running Head Analog Bridging Server Card Description (8000-BRIDGE)Analog Bridging 20.2.0.1 Card Jumper/Switch Settings The Analog Bridge Server Card has no jumpers. The card illustrated in Figure 20-1 below. Figure 20-1.Analog Bridge Server BRIDGE SERVER 20.2.0.2 Installing the Analog Bridge Server Card Insert the Analog Bridge Server card into any server card slot. -
Page 547: Analog Bridge Server Card User Screens And Settings
Analog Bridging Server Card Analog Bridge Server Card User Screens and Settings 20.3 Analog Bridge Server Card User Screens and Settings 20.3.1 Analog Bridge Provisioning Bridge setup and participant provisioning is done from the Analog Bridge card itself. To start potential bridge participants should be in an un-provisioned state, or in stdby mode at the card/port level. -
Page 548: Analog Bridge Main Screen Option Settings And Defaults
Model No. Running Head Analog Bridge Server Card User Screens and SettingsAnalog Bridging Serv- Copy Copies the contents of the current column to the next column. Useful if you change a lot of entries in one column and want to repeat those changes in subsequent columns. - Page 549 Analog Bridging Server Card Analog Bridge Server Card User Screens and Settings PORTS USED The Ports Used field is a display-only field. It reflects the number of ports (subscribers) that are assigned to the particular Bridge. BRDG TYPE This is for fur future development, currently only voice is supported. GAIN The gain setting allows for a specified gain to be applied to the bridge itself.
-
Page 550: Port Provisioning On The Bridge
Model No. Running Head Analog Bridge Server Card User Screens and SettingsAnalog Bridging Serv- In the example shown in Figure 20-3 above, the user is setting up bridge five to contain 30 participants. To save the information and provision the new bridge, the user simply hits 'S' for save. -
Page 551: Analog Bridge Port Screen Option Settings And Defaults
Analog Bridging Server Card Analog Bridge Server Card User Screens and Settings Refresh Refresh - Updates certain time-related information fields that are not automatically updated (i.e., test status). Refresh will also compact and reorder all the ports in the LogUNIT sequence. Copy Copies the contents of the current column to the next column. - Page 552 Model No. Running Head Analog Bridge Server Card User Screens and SettingsAnalog Bridging Serv- USER This field can be chosen to add a participant from a User card, U1 through U8. This field is used to choose to add to a bridge a WAN port. Available are WAN 1-1 through WAN 4-2.
-
Page 553: Bridge 5 - Three Ports In Use
Analog Bridging Server Card Analog Bridge Server Card User Screens and Settings ECHO CAN Echo cancellation is used to prevent feedback disturbances on the parties line. The default is set to disable. GAIN The gain for circuits can be set from this screen. Valued individual port gain settings are -15dB to +7.5dB logUNIT This display-only field shows the logical unit assigned to this port, useful when using the all... -
Page 554: All Ports Screen
Model No. Running Head Analog Bridge Server Card User Screens and SettingsAnalog Bridging Serv- Figure 20-6.E&M card screen 20.3.4 All ports Screen Keeping with the example running through this document, one can view and/or validate the provisioning information through the use of the All ports option. This command displays all ports available to the Bridge card itself (there are 240 logical ports available) and displays them in groups of eight. -
Page 555: Bridge All Ports Command
Analog Bridging Server Card Analog Bridge Server Card User Screens and Settings Figure 20-7.Bridge All Ports command Figure 20-7 shows ports 001, 002 and 008 in the logUNIT field being connected to User card U8. We can also see that the seventh port displayed is connected to our newly provisioned bridge number 5, and shows us that ports 1 and 2 on card U8 are connected to Bridge number 14. -
Page 556: Bridge 14 Display - Ports On The Bridge
Model No. Running Head Analog Bridge Server Card User Screens and SettingsAnalog Bridging Serv- Figure 20-8.Bridge 14 display - ports on the bridge To remove a participant and the resource from a bridge, you must use the delete function at the All ports level. -
Page 557: All Ports - Delete A Port
Analog Bridging Server Card Analog Bridge Server Card User Screens and Settings Figure 20-9.All ports - delete a port Performing the action in the All ports screen of setting the bridge number to zero or deleting them will result in the circled field displaying the logUNIT numbers to transition to 'xx' as seen on logical port 6 above. -
Page 558: Analog Bridge Server Card Specifications
Model No. Running Head Analog Bridge Server Card Specifications Analog Bridging Server Card 20.4 Analog Bridge Server Card Specifications Analog Bridge Card (BRIDGE) Physical Interface (Model BRIDGE) Card Height 8 inches (20 cm) Card Width 15/18 inches (2.35 cm) Card Depth 7.5 inches (18.75 cm) Power Consumption 6.74 Watts... -
Page 559: Ipr*4 Router Card
IPR*4 Router Card Introduction Chapter 21 IPR*4 Router Card IPR*4 Card Basics 21.1 Introduction This chapter provides installation, configuration, and troubleshooting information for the IPR*4 Router Card. This card is labeled as the IPR*4 10/100BT SS (8000-ROUTER-PPP-HS) card on the faceplate ejector. 21.2 IPR*4 Router Card Descriptions 21.2.1 IPR*4 Router 10/100BT Card Description (8000-ROUTER-PPP-HS) -
Page 560: Ipr*4 Available Options
Model No. Running Head IPR*4 Router Card Descriptions IPR*4 Router Card Table 21-1. IPR*4 available options Faceplate Transport High Speed Card Display Firmware Ethernet Ports Links Ports Individually IPR*4 PPP HS 1.2.6 8 PPP Yes, 8 Addressable The IPR*4 10/100BT Cards are IP routers that route packets based on IP destination addresses. -
Page 561: Card Jumpers/Switch Settings
IPR*4 Router Card IPR*4 Router Card Descriptions IPR*4 provides the capability to deliver IP packets to the CPU hosting the IPR*4. Assuming an average frame of 256 bytes, IPR*4 maintains LAN to WAN (and WAN to LAN) throughput of 2.048 Mbps. Figure 21-1.IPR*4 Card Layout IPR*4 10/100BT... -
Page 562: Ipr*4 Configuration In A Ppp Network
Model No. Running Head IPR*4 configuration in a PPP Network IPR*4 Router Card 21.3 IPR*4 configuration in a PPP Network In the IPR*4 1.2.6 and higher release, the four ethernet ports are individually addressable and the card supports 8 multi-DS0 PPP links. With 1.1.x loaded on the IPR*4 card, it displays IPR*4PPP. -
Page 563: Ipr*4 Card Configuration Screens And Settings
IPR*4 Router Card IPR*4 Card Configuration Screens and Settings 21.4 IPR*4 Card Configuration Screens and Settings 21.4.1 IMACS Main Screen Figure 21-3.IPR*4 card interactions The IPR*4 card displays the four ethernet ports and their current status on the main login screen. -
Page 564: Imacs Management Through The Ipr*4 Card
Model No. Running Head IPR*4 Card Configuration Screens and Settings IPR*4 Router Card 21.4.2 IMACS Management Through the IPR*4 Card Figure 21-4.Setting the CPU management through the IPR*4 card The system can be configured in such a way as to allow the IMACS management port to come over the PPP link. -
Page 565: Ipr*4 10/100Bt Card Interface Main Screen
IPR*4 Router Card IPR*4 Card Configuration Screens and Settings Figure 21-5.IPR*4 10/100BT Card Interface Main Screen The default IPR*4 screen shows the current software level of the IPR*4 card, as well as all the routes visible to the IPR*4 card. The Interface column displays the interface name as assigned either in the Intf name window or from PPP discovery messages. -
Page 566: Ipr*4 Provisioning Card Setup
Model No. Running Head IPR*4 Card Configuration Screens and Settings IPR*4 Router Card Table 21-2. IPR*4 10/100BT Card Main Screen Actions Action Function Refresh Refresh the current screen. PgUP Scrolls up one page. PgDn Scrolls down one page. eNet Go to Ethernet and Default IP screen. Stat Go to Static Route configuration screen. - Page 567 IPR*4 Router Card IPR*4 Card Configuration Screens and Settings Step 5: Go to the porT screen, and assign the WAN connections to the remote systems.Enter the name from the INTF NAME screen that contains the definition of the far-end IP address. For PPP systems, the IP address will be automatically discovered.
-
Page 568: Ipr*4 Card Download
Model No. Running Head IPR*4 Card Download IPR*4 Router Card 21.5 IPR*4 Card Download The IPR*4 card will allow the downloading of new software onto the card. The currently running card software can be confirmed in one of two ways. Entering into the card main level, as seen in Figure 21-5 on page 21-7 shows the currently running software release on the top left-hand corner of the screen. -
Page 569: Tftp And Xmodem Upgrades
IPR*4 Router Card IPR*4 Card Download Upon entry into this programming level, the cursor is positioned on the status of the card, the ‘actv’ field. To place new code in the IPR*4 card, depress the carriage return or enter key in this field. -
Page 570: Configuration Change - Reprovisioning Needed
Model No. Running Head IPR*4 Card Download IPR*4 Router Card Figure 21-7.Configuration change - reprovisioning needed Once the proper values have been set up, and communications to the tftp server has been established, then the load size still to be transferred will begin to decrement in the window as shown in Figure 21-8. -
Page 571: Checksum Passed, Writing Load To Flash
WARNING!Once the card begins to write to flash, any disruption in this process could cause the card to become inoperable, and would require the card to be returned to Zhone for repair. DO NOT remove the card during this time! DO NOT attempt to change the... -
Page 572: Xpress Upgrade Option
Model No. Running Head IPR*4 Card Download IPR*4 Router Card Should the card now have new functionality (one of the first two load digits has changed), then the card will be placed into the rejected (REJ) state as illustrated in Figure 21-3 on page 21-5. Once the card is in this state, then select ‘t’... -
Page 573: Xpress Download Of Ipr*4 Card
IPR*4 Router Card IPR*4 Card Download Figure 21-10.xpress download of IPR*4 card Prior to beginning the download, the user will be prompted to confirm the location for the tftp server and the filename, as illustrated in Figure 21-11. Figure 21-11.Download Confirmation Server Cards 21-15... -
Page 574: Configuration Change - Reprovisioning Needed
Model No. Running Head IPR*4 Card Download IPR*4 Router Card Caution should be exercised when confirming the download. Once the process begins, it cannot be stopped. Ensure that the tftp server is ready to receive the request, and that the IP address and file name are correct prior to confirming the action! If the loadname selected will results in a functionality change, then the user will be prompted that they will need to reprovision services as noted in Figure 21-12. -
Page 575: Xpress Download In Progress
WARNING!Once the card begins to write to flash, any disruption in this process could cause the card to become inoperable, and would require the card to be returned to Zhone for repair. DO NOT remove the card during this time! DO NOT attempt to change the... -
Page 576: Ipr*4 Card Alarm And Upgrade Events
Model No. Running Head IPR*4 Card Alarm and Upgrade Events IPR*4 Router Card 21.6 IPR*4 Card Alarm and Upgrade Events A new log has been added for the IPR*4 card. An entry has been added for a Heart Beat (HB) fault. - Page 577 IPR*4 Router Card IPR*4 Card Troubleshooting If the IPR*4 card is determined to be faulty, replace it and return the faulty unit for repair to the location specified by your distributor. Server Cards 21-19...
-
Page 578: Introduction
Model No. Running Head Introduction IPR*4 Router Card IPR*4PPP Configuration 21.8 Introduction The IPR*4 card provides a PPP backbone for customers to extend their communications, command and control capability in an IMACS network. This card extends the capability of the IMACS shelf to expand the range of control in the customers private network. - Page 579 IPR*4 Router Card Introduction IPR*4 provides the capability to deliver IP packets to the CPU hosting the IPR*4. Assuming an average frame of 256 bytes, IPR*4 maintains LAN to WAN (and WAN to LAN) throughput of 2.048 Mbps. Server Cards 21-21...
-
Page 580: Ipr*4 Card Connected To Ip Lans Through A Ppp Network
Model No. Running Head IPR*4 configuration in a PPP Network IPR*4 Router Card 21.9 IPR*4 configuration in a PPP Network In the IPR*4 1.1.x release, the four ethernet ports are individually addressable and the card supports 128 PPP links. With 1.1.x loaded on the IPR*4 card, it displays IPR*4PPP. 21.9.1 IPR*4 Connecting IP LANs The IPR*4 Card can be used for connecting IP LANs together through a PPP Network. -
Page 581: Ipr*4Ppp Configuration Screens And Settings
IPR*4 Router Card IPR*4PPP Configuration Screens and Settings 21.10 IPR*4PPP Configuration Screens and Settings The IPR*4 card displays the four ethernet ports and their current status on the main login screen. The PPP link ports are not displayed at this level. The IPR*4PPP card has 128 provisionable PPP WAN links available. - Page 582 Model No. Running Head IPR*4PPP Configuration Screens and Settings IPR*4 Router Card The default IPR*4 screen shows the current software level of the IPR*4 card, as well as all the routes visible to the IPR*4 card. The Interface column displays the interface name as assigned either in the INTF NAME window or from PPP discovery messages.
-
Page 583: Ipr*4 Provisioning Card Setup
IPR*4 Router Card IPR*4PPP Configuration Screens and Settings Table 21-4. IPR*4 10/100BT Card Main Screen Actions Action Function Refresh Refresh the current screen. PgUP Scrolls up one page. PgDn Scrolls down one page. eNet Go to Ethernet and Default IP screen. Stat Go to Static Route configuration screen. -
Page 584: Ipr*4 Intf Name Screen
Model No. Running Head IPR*4PPP Configuration Screens and Settings IPR*4 Router Card 9. Go to the porT screen, and assign the WAN connections to the remote systems. The IP address that exists at the far-end of the PPP link will be automatically discovered through IPCP messaging. -
Page 585: Ipr*4 Ethernet Connectivity Screen
IPR*4 Router Card IPR*4PPP Configuration Screens and Settings Table 21-5. IPR*4 Interface Name Screen Action Action Function Refresh the current screen. Adds a new Interface name Deletes the currently selected Interface name if not in use. PgUP Scrolls up one page. PgDn Scrolls down one page. -
Page 586: Ethernet Screen For Ipr*4 Card
Model No. Running Head IPR*4PPP Configuration Screens and Settings IPR*4 Router Card release in use, some of the field actions (such as State, Interface name and/or Default gateway) will update all four jacks. The system will prompt to apply the change to all the affected jacks when the change taking place affects all four jacks. - Page 587 IPR*4 Router Card IPR*4PPP Configuration Screens and Settings State Activates or deactivates Ethernet jack. The settings are actv or stdby. Placing jack 1 into a stdby state will result in the restart of the IPR*4 card once it is placed back into the actv state. Default Gateway The default gateway is used to set the default route that unknown packets should be sent.
-
Page 588: Ipr*4 Ethernet Connectivity Screen - Perf
Model No. Running Head IPR*4PPP Configuration Screens and Settings IPR*4 Router Card RIP Tx Set each jack to transmit RIP packets in v1 or v2 mode - or turn it off. v2 is the default. Enables or disables split horizon on Ethernet. Options are yes or no. Split-horizon route advertisement is a method of preventing routing loops in distance-vector routing protocols (such as RIP) by prohibiting a router from advertising a route back onto the interface from which it was learned. -
Page 589: Ipr*4 Port Screen
IPR*4 Router Card IPR*4PPP Configuration Screens and Settings The ARP screen will display when pressing the “A” (Arp) from the Ethernet screen. Figure 21-19 shows the ARP Table screen. This screen will display ARP Entries, Ethernet Addresses, and the State in which each ARP entry (e.g GOOD, BAD, etc.). Figure 21-19.IPR*4 10/100BT ARP Table Screen 21.10.5 IPR*4 Port Screen Once the ethernet side of the IPR*4 card has been setup, then the PPP T1/E1 WAN link side... -
Page 590: Ipr*4Ppp Port Display
Model No. Running Head IPR*4PPP Configuration Screens and Settings IPR*4 Router Card Figure 21-20.IPR*4PPP Port Display When defining the ports for the PPP interface, the IP address is determined through the use of IPCP discovery messages when the T1/E1 WAN link is coming up in-service. Since the IP address is determined by the link itself, the porT provisioning provides a descriptive field called INTF NAME for the customer to name the particular T1/E1 interface. -
Page 591: Ipr*4 10/100Bt Port Menu Option Settings And Defaults
IPR*4 Router Card IPR*4PPP Configuration Screens and Settings Find Provides the user the ability to find a particular string in a name. For example, if the user knew that the string ATL was in use then the user could use the find function and search for the string “ATL”. - Page 592 Model No. Running Head IPR*4PPP Configuration Screens and Settings IPR*4 Router Card Ports 1 through 4 can be set for any number of contiguous timeslots, up to 24 for T1 (DSX) WAN and 32 for E1 (CEPT) WAN. For ports 5 through 128, these can set for a single DS0 only.
-
Page 593: Ipr*4 Static Route Screen
IPR*4 Router Card IPR*4PPP Configuration Screens and Settings 21.10.6 IPR*4 Static Route Screen Figure 21-21.IPR*4 Static Route Entry Table 21-9. IPR*4 10/100BT IP Static Routes Configuration Table Screen Actions Action Function Refresh Refreshes the current screen Adds the selected information on the screen (e.g. IP net, Subnet, etc.) dElete Deletes the selected information from the screen pgUp... - Page 594 Model No. Running Head IPR*4PPP Configuration Screens and Settings IPR*4 Router Card GOTO IP address of the next IP gateway for this static route. Enter a valid IP address gateway (e.g. 192.168.1.254). DIST Administrative distance (in hops) for this static route. Note: The static routes will always be preferred to dynamic routes regardless of the Distance.
-
Page 595: Ipr*4 Server Card Specifications
IPR*4 Router Card IPR*4 Server Card Specifications 21.11 IPR*4 Server Card Specifications IPR*4 Card (Models ROUTER-PPP-HS ) Physical Interface (Models ROUTER-PPP-HS) Card Height 8 inches (20 cm) Card Width 15/18 inches (2.35 cm) Card Depth 7.5 inches (18.75 cm) Power Consumption 10.7 Watts BTU per hour 36.5... - Page 596 Model No. Running Head IPR*4 Server Card Specifications IPR*4 Router Card 21-38 Server Cards...
-
Page 597: Mcc Card
MCC Card Introduction Chapter 22 MCC Card 22.1 Introduction This chapter provides installation, configuration, and troubleshooting information for the Management Channel Concentrator (MCC) card. Note that this card is labeled as an ACS card on its faceplate ejector, and it is called an ACS-MCC card only in the user interface screens described in this chapter. -
Page 598: Jumper/Switch Settings
Model No. Running Head ACS-MCC Card Descriptions MCC Card The FDL is a 4 kbps channel that uses every other framing bit of the T1 extended superframes. When the FDL is used for remote system control via TCP/IP, T1 performance statistics are not gathered. -
Page 599: Acs-Mcc Card User Screens And Settings
MCC Card ACS-MCC Card User Screens and Settings 22.3 ACS-MCC Card User Screens and Settings 22.3.1 ACS-MCC Card Main Screen (Ethernet Port Configuration) The ACS-MCC card routes datagrams onto Ethernet at the NMS site for communications with the NMS. Figure 22-2 shows the ACS-MCC Card Main Screen, in which you must set various parameters for the Ethernet interface. -
Page 600: Main Screen Actions
Model No. Running Head ACS-MCC Card User Screens and Settings MCC Card Table 22-1. Main Screen Actions Action Function Save Saves changes to settings. Undo Returns all settings to the last saved state. Refresh Redraws the screen. Copy Copies the contents of the current column to the next column. Useful if you change a lot of entries in one column and want to repeat those changes in subsequent columns. - Page 601 MCC Card ACS-MCC Card User Screens and Settings NETMASK The IPADDR together with the NETMASK identifies the IP network for the Ethernet interface. Any valid netmask address is acceptable. DEF RT The Default Route setting identifies the IP Address of the port used to forward IP datagrams with destination unknown to the MCC.
- Page 602 Model No. Running Head ACS-MCC Card User Screens and Settings MCC Card FMT-SUB This parameter is used to indicate the format of the 64 ports on the sub-board. When bxr is selected, ports 65 through 128 are configured to B4R (E1) or B7R (T1). When hdlc is selected, ports 65 through 128 are configured to 64 kbps.
-
Page 603: C-Port And Numbered Port Configuration (1.1 Version Only)
MCC Card ACS-MCC Card User Screens and Settings 22.3.1.1 C-Port and Numbered Port Configuration (1.1 Version Only) After establishing the card’s Ethernet parameter settings, configure the card’s ports. From the ACS-MCC Card Main Screen, press “t” (porT command) to go to its ports. The ACS-MCC card has three high-speed ports (C1, C2, and C3) and 128 other ports (1 to 128), in addition to the Ethernet port. -
Page 604: Typical Numbered Port Screen
Model No. Running Head ACS-MCC Card User Screens and Settings MCC Card Figure 22-4.Typical Numbered Port Screen Table 22-3. Port Assignment Screen Actions Action Function Save Saves changes to settings. Undo Returns all settings to the last saved state. Refresh Redraws the screen. -
Page 605: Port Screen Option Settings And Defaults
MCC Card ACS-MCC Card User Screens and Settings Table 22-4. Port Screen Option Settings and Defaults Parameter User Options Notes Default STATE stdby actv stdby none w1-1 through w4-2 none 1-24 1-31 IPADDR 0.0.0.0 NETMASK 0.0.0.0 FORMAT hdlc see note 1 rx/tx WEIGHT 1-15... - Page 606 Model No. Running Head ACS-MCC Card User Screens and Settings MCC Card NETMASK The NETMASK setting together with the IP ADDR identifies the network for this port. FORMAT The Format setting determines the format of the information received from the remote system unit.
-
Page 607: Network Port Statistics Screen
MCC Card Network Port Statistics Screen NETWORK DATA The Network Data Screens provide maintenance and diagnostics information for this equipment. Statistics begin to accumulate when the port is changed from stdby to actv and they continue to store information until the port is changed back to stdby. These are status information screens;... - Page 608 Model No. Running Head Network Port Statistics Screen MCC Card IN OCTETS The In Octets counter shows the total number of octets received from the remote systems for this port. IN DISCARDS The In Discards counter shows the total number of packets received from the remote systems and discarded due to lack of resources for this port.
-
Page 609: Mcc Protocol Stack Data Screen
MCC Card Network Port Statistics Screen Table 22-5. Network Port Data Screen Actions Action Function interFace Switches from the IP Data Screen to the Interface Data Screen. Switches from the Interface Data Screen to the IP Data Screen. Refresh Data collection is not updated automatically. Pressing the “r” key will update all data fields. - Page 610 Model No. Running Head Network Port Statistics Screen MCC Card INPUT DATAGRAMS DISCARDED The Input Datagrams Discarded counter shows the total number of IP datagrams received that were discarded. OUTPUT DATAGRAMS DISCARDED The Output Datagrams Discarded counter shows the total number of IP datagrams sent to the remote system and discarded.
- Page 611 MCC Card Network Port Statistics Screen IN ECHO REPLIES The In Echo Replies counter shows the total number of ICMP echo replies sent by the remote systems. OUT ECHO REQUESTS The Out Echo Requests counter shows the total number of ICMP echo requests sent to the remote systems.
-
Page 612: Acs-Mcc Card Error Messages
Model No. Running Head ACS-MCC Card Error Messages MCC Card 22.5 ACS-MCC Card Error Messages Refer to Appendix B in the System Reference Guide for further information on Error Messages regarding this card. 22.6 ACS-MCC Card Troubleshooting MCC card problems could indicate a number of possible causes, including: •... - Page 613 MCC Card ACS-MCC Card Troubleshooting 6. Verify the configuration settings for the affected MCC port. Be sure the port is connected to the proper WAN card and port, that the correct FORMAT is selected and that the appropriate IP address (IPADDR) and NETMASK have been entered. If these assignments appear correct, go back to the CPU TCP/IP menu and ping the address of the remote device connected to that MCC port.
- Page 614 Model No. Running Head ACS-MCC Card Troubleshooting MCC Card 22-18 Server Cards...
-
Page 615: Oc3 Card
OC3 Card Introduction Chapter 23 OC3 Card 23.1 Introduction This chapter provides installation, configuration, and troubleshooting information for the OC3 card. 23.2 OC3 Card Description 23.2.1 OC3 Card Description (8000-OC3-PT2PT) The 882570 OC3 Server card introduces an optical uplink to the IMACS shelf. This card will conform to SONET standards for optical TDM transmission, and can operate in either E1 or T1 mode. -
Page 616: Card Jumper/Switch Settings
Model No. Running Head OC3 Card Description OC3 Card Working Protection Figure 23-1.OC3 Point to Point offering 23.2.1.1 Card Jumper/Switch Settings The OC3 card does not have any jumpers or switch settings. 23-2 Server Cards... -
Page 617: Faceplate Descriptions
OC3 Card OC3 Card Description MAPPER Figure 23-2.OC3 Server card 23.2.1.2 Faceplate Descriptions The faceplate on the IMACS OC3 Server cards has connections for five different interfaces and devices. Port 1 and port 2 are SFP cages to enable our customers to use OC3 dual-LC optical SFPs. -
Page 618: Installing The Card
Presently the system can accommodate only one OC3 server card. Due to power demands, a new power supply is under development by Zhone Technologies to allow the shelf to power and support two OC3 cards when the ring feature has been fully developed. Some customer configurations could create issues for running on a simplex power supply, contact Zhone GSS for a copy of the IMACS CPU-7 Power Consumption Calculator, 815-00018-01. -
Page 619: Oc3 Setup Screen
OC3 Card OC3 Card User Screens and Settings Figure 23-4.OC3 Setup Screen As illustrated in Figure 23-4, set the state of the card to active (actv) and set the type to T1.The first offering of the card does not support E1 mode. Save these parameters to progress to the OC3 main screen, which is shown below in Figure 23-5. -
Page 620: Main Screen Actions
Model No. Running Head OC3 Card User Screens and Settings OC3 Card pass-through facilities (EXTERNAL). The bottom section of the OC3 main screen displays the eight available T1/E1 facilities dropping on the local IMACS backplane. This final section of the card display is the only fields available to the user for provisioning actions - the other two sections are display only. -
Page 621: Provisioning The Sixteen External T1/E1 Facilities
OC3 Card OC3 Card User Screens and Settings Figure 23-6.Provisioning the sixteen external T1/E1 facilities The following figure shows that the external facility has been saved, but as yet there is not electrical termination on the T1 port. Note that two alarm indications exist. One, the loss of signal (LOS) appears on the Vt itself. -
Page 622: Oc3 Sts Vt 1.5 Mapping Defined By Gr-253-Core
Model No. Running Head OC3 Card User Screens and Settings OC3 Card The Vt command will take the user to the highlighted eight terminating WAN facilities. It is at the traditional WAN level that the operator can change the port facility from standby to active. -
Page 623: Owan Facility Screen
OC3 Card OC3 Card User Screens and Settings By Group/port By VT NUM If you want Choose Lands on Group Port VT Num VT Num Group Port Figure 23-8.OWAN facility screen Ether This command is currently a place-holder for future development. In the initial offering of the point to point configuration, STS-2 and STS-3 are hard-coded as up and functional. -
Page 624: Main Screen Option Settings And Defaults
Model No. Running Head OC3 Card User Screens and Settings OC3 Card Table 23-3. Main Screen Option Settings and Defaults Parameter User Options Default FIBER 1 and 2 trbl actv rdnt trbl ETHERNET sts2 sts3 sts2 sts3 INTERNAL - a s EXTERNAL s f a STATE... -
Page 625: State And Trib Provisioning
OC3 Card OC3 Card User Screens and Settings - as long as the electrical facility does not exist. The OC3 uplink card allows for not only the optical facilities to route, but the customer can continue to use their electrical facilities. As seen in Figure 23-9, WAN port 2-1 is in the process of being set to Group 3 and Vt 2. -
Page 626: Oc3 Card Error Messages
Model No. Running Head OC3 Card Error Messages OC3 Card 23.4 OC3 Card Error Messages Refer to Appendix B in the System Reference Guide for further information on Error Messages regarding this card. 23.5 OC3 Card Troubleshooting OC3 card problems could indicate a number of possible causes, including: •... -
Page 627: Pwe Card
If you do not have the current release notes for 7.5.4 or PWE card load 1.2.1, contact Zhone for assistance. 24.2 PWE Card Description 24.2.1 PWE Card Description The introduction of the 883570 PWE Server card introduces an GigE uplink from the IMACS shelf. -
Page 628: Card Jumper/Switch Settings
Due to packet jitter in the network, echo is inherent in traffic traversing the packet network, and is not normally experienced in a traditional TDM network. Zhone Technologies is presently working to introduce a companion Echo Canceller card for voice traffic which experiences delay and therefore produces echo. -
Page 629: Faceplate Descriptions
PWE Card PWE Card Description P WE UP LINK Figure 24-2.PWE Server card 24.2.1.2 Faceplate Descriptions The faceplate on the IMACS PWE Server card has a mutually exclusive SFP and RJ45 Ethernet port connection for a single GigE interface to the IP cloud. It is highly suggested that the port is used at 1 Gigabyte speed, although the system does support 100 MB. -
Page 630: Installing The Card
The system can accommodate two PWE server cards, where the second card supports equipment protection in the case of catastrophic card failure. Due to power demands of new card offerings, Zhone has created a new IMACS CPU-7 Power Consumption Calculator, 815-00018-01 which is available upon request. -
Page 631: Pwe Card Initial Setup Parameters
PWE Card PWE Card User Screens and Settings Note: These settings are done as a one-time only environmental selection. If you are unsure, consult the IT responsible personnel in order to correctly configure the packet stream environment.Once set, a change to these setting will require that the card be deleted and re-added to the system. -
Page 632: Pwe Card Main Screen
Model No. Running Head PWE Card User Screens and Settings PWE Card Figure 24-5.PWE Card Main Screen The PWE main screen is split into two sections, bordered on the top and bottom with information and options. The screen displays all available facilities and provisioning for the PWE uplink. -
Page 633: Main Screen Option Settings
PWE Card PWE Card User Screens and Settings The basic philosophy of the Pseudowire card offering is to keep all the user (DS0 level) provisioning the same for individual circuits to the WAN, and then convert the WAN from an electrical to a virtual facility. - Page 634 Model No. Running Head PWE Card User Screens and Settings PWE Card STATE The state of the PWE card. Can be stand by (stdby, the default), active (actv) or redundant (rdnt). When in stdby or rdnt mode, the card is not transmitting any packets. In rdnt mode, the card is ready to take over packet transmission should the primary card become unavailable, or is switched to by the operator.
- Page 635 PWE Card PWE Card User Screens and Settings TYPE These columns represent the eight available Pseudowire streams one through eight. These all default to WAN type. In order to create a Pseudowire, the operator must change the wan type to PWAN and save it. Once done, then a stream can be provisioned on this appearance. The following parameters will show a “-”...
-
Page 636: Main Screen Actions
Model No. Running Head PWE Card User Screens and Settings PWE Card Table 24-3. Main Screen Actions Action Function Save Saves changes to settings. Undo Returns all settings to the last saved state. sWitch Switch the card status from active to redundant, assuming there is a redundant card and it is in-service. -
Page 637: Creating A Pseudowire Stream For Wan 2-2 (Pw4)
PWE Card PWE Card User Screens and Settings Figure 24-6.Creating a Pseudowire stream for WAN 2-2 (PW4) The fields to be addressed in creating a Pseudowire are: 1. PW - numerical representation of the Pseudowire, it is system generated. Numbers are 1 through 8. -
Page 638: Pwe Port Statistics
Model No. Running Head PWE Card User Screens and Settings PWE Card MEF: A unique number from 1 through 1048575 MPLS: MPLS INNER - a unique inner tag from 16 to 1048575. MPLS OUTER - if turned on, the outer tag must be between 16 to 1048575. Eth stats/test The Eth stats screen will show the user statistics on the Ethernet port on the faceplate of the card. -
Page 639: Arp Screen
PWE Card PWE Card User Screens and Settings Figure 24-8.ARP screen The final capability on the Eth stats screen is the ability to read SFP information if an SFP is plugged into the shelf. The I option for sfp Info will return a display similar to the one seen in Figure 24-9. - Page 640 Model No. Running Head PWE Card User Screens and Settings PWE Card After the PWE card screen has been updated to select PW4 to be of type PWAN and that data saved (refer to Figure 24-5), the main screen will be updated to show that a PWAN has been provisioned in the WAN W2-2 slot as shown below in Figure 24-10.
-
Page 641: Pwe Card Error Messages
PWE Card PWE Card Error Messages 24.4 PWE Card Error Messages Refer to Appendix B in the System Reference Guide for further information on Error Messages regarding this card. Card ACTV;Cannot change IP,Mask,GW,Speed,Connector Card does not respond Card is being reset Inner label must be unique Invalid IP address Invalid state for PWAN... -
Page 642: Pwe Card Troubleshooting
Model No. Running Head PWE Card Troubleshooting PWE Card 24.5 PWE Card Troubleshooting PWE card problems could indicate a number of possible causes, including: • Misconfigured IP parameter at the far end • Faulty cabling between the PWE LAN port and the LAN •... -
Page 643: Clock Failing To Lock
PWE Card PWE Card Troubleshooting – If using SFPs, ensure SFP in the connected device matches the one in the PWE card and that the correct fiber is being used. – Ensure the Ethernet speed and duplex mode on the connected device matches what is provisioned on the PWE card. - Page 644 Model No. Running Head PWE Card Troubleshooting PWE Card 24-18 Server Cards...
-
Page 645: Appendix A System Standards And Specifications
Appendix A Appendices System Standards and Specifications Introduction This appendix lists the Integrated Access System standards, specifications, compliance, power sources and pre-installation settings for the user cards. Reference Guide... -
Page 646: Standards Compatibility
Model No. Running Head Standards Compatibility The following is a comprehensive list of standards that the System Chassis, Common Equipment and User Cards comply to, or are compatible with.Cards and components are listed alphabetically in each area: System: Chassis, CPU, Interface cards, Power Supplies, WAN cards Voice: E&M, FXO, FXS Data: DS0-DP, HSU, OCU-DP, OHSU, SRU Server: ADPCM, Analog Bridge, IPR*4... - Page 647 RFC 2882 Extended RADIUS Practices RFC 5424 The Syslog Protocol IEEE 802.3i 10BASE-T 10 Mbit/s (1.25 MB/s) over twisted pair. 802.3u 100BASE-TX, 100BASE-T4, 100BASE-FX Fast Ethernet at 100 Mbit/s (12.5 MB/s) w/auto negotiation Interface Cards ITU-T V.28 Electrical characteristics for unbalanced double-current interchange circuits G.703 Physical/Electrical Characteristics of Hierarchical Digital I/F...
- Page 648 Model No. Running Head G.823 The Control of Jitter and Wander Within Digital Networks which are based on the 2048 Kbps Hierarchy G.824 The Control of Jitter and Wander within Digital Networks which are based on the 1544 Kbps Hierarchy Safety and EMC of WAN Cards Bellcore GR-63-CORE Issue 1...
- Page 649 Voice E&M Cards Bell System TR433801 Digital Channel Bank Requirements and Objectives - November 1982 TR-NWT-000057 Functional Criteria for Digital Loop Carrier System - January 1993 GR-63-CORE Issue 1 Network Equipment-Building System (NEBS) Requirements: Physical Protection ITU-T G.712 (11/96) Transmission Performance Characteristics of Pulse Code Modulation (replaces G.712, G.713, G.714 and G.715) Q.552 Transmission Characteristics of 2-wire analog interface of a...
- Page 650 Model No. Running Head Data DS0-DP ITU-T G.703 Physical/Electrical Characteristics of Hierarchical Digital I/F HSU Cards BellCore GR-63-CORE Issue 1 Network Equipment-Building System (NEBS) Requirements: Physical Protection ITU-T V.35 Data Transmission of 48 kbps using 60-108 kHz Group Bank Circuits V.11 (10/96) Electrical characteristics for balanced double-current interchange circuits operating at data signaling rates up to 10 Mbps...
- Page 651 X.50 Division 3 Fundamental Parameters of a Multiplexing Scheme for the International Interface Between Synchronous Data Networks (note: does not support 600bps data) V.14 Transmission of Start-Stop Characters over Synchronous Bearer Channels (using Async to sync converters) RS232-C Interface Between DTE and DCE Employing Serial Binary Data Interchange 1950 UL Standard for Safety of Information Technology Equipment...
- Page 652 Model No. Running Head Server ADPCM Card (Models 887160 and ADPCM) ITU-T G.726 Adaptive Differential Pulse Code Modulation (ADPCM) Analog Bridge Card (Model BRIDGE) ITU-T G.726 Adaptive Differential Pulse Code Modulation (ADPCM) IPR*4 Card (Models ROUTER-PPP-HS, ROUTER-PPP-HS and 883280) IEEE 802.3i 10BASE-T 10 Mbit/s (1.25 MB/s) over twisted pair.
-
Page 653: Chassis Standards
Chassis Standards A.3.1 Dimensions Height Width Depth Weight Model Chassis Description Number 600 Chassis with 891630 9.12 23.16 17.042 43.29 9.121 23.19 7.44 3.38 Installation Kit Steel Chassis, Front Loading, “V” Steel Card Guides, CE Marked 800 Chassis with 891830 9.12 23.16 16.99... -
Page 654: Chassis Power
Model No. Running Head A.3.2 Chassis Power Power AC Power (50-60 Hz) DC Power Model Consumption Chassis Description Number 110 VAC 220 VAC -48 VDC 24 VDC Watts 600 Chassis with Installation 891630 90 VAC 175 VAC -40 VDC +18 VDC 125 (typical) Kit Steel Chassis, Front to 135... -
Page 655: Airflow
A.3.3.3 Airflow Convection cooled (no fans required). Except for Model 891930 Power Enhanced Chassis. A.3.3.4 Fire Resistance As per GR-63-CORE Section 4.2.2.2 Shelf-Level Fire-Resistance Criteria R4-19 for Firespread R4-20, Fire Propagation R4-21, O4-22 and O4-23. A.3.4 Equipment Handling A.3.4.1 Packaged Equipment Shock Criteria As per GR-63-CORE Section 4.3.1.1 for category A containers, R4-41. -
Page 656: Mounting
Model No. Running Head A.3.6 Cable/Power Connections • Chassis Model 891630 - front panel • Chassis Model 891830 - rear panel • Chassis Model 891930 - front panel A.3.7 Mounting A.3.7.1 Types EIA 19” (482 mm) Standard Open Rack or Enclosed Cabinet. WECO 23” Standard Open Rack or Enclosed Cabinet. -
Page 657: System Power Supplies And Converters
System Power Supplies and Converters The following is a list of standards for the Integrated Access System power supplies, converters and ring generators. Model 8000-AC-55W AC Power Supply 120/240 VAC, CE Marked Input Voltage Self detecting 90VAC to 135VAC at 60 Hz 175VAC to 264VAC at 50 Hz Input Frequency 47 to 63 Hz... -
Page 658: Power Supply Compatibility
Model No. Running Head Model 8905 Power Converter 120/240 VAC to -48 VDC, 100 W, CE Marked Input Voltage 90 Vrms to 260 Vrms Input Frequency 50/60 Hz Output Power 100 W Max. Output Voltage -48.0 VDC Output Current 2 amp Max. -
Page 659: External Talk Battery Fuses
A.4.2 External Talk Battery Fuses Manufacturer Part NumberA3 Little Fuse 218.005 Bussman GDC-5 Reference Guide A-15... -
Page 660: Card Specifications
Model No. Running Head Card Specifications A.5.1 Current in milliamperes, weight and power consumption Item Model +5VDC -5VDC +12VDC -12VDC Weight Power watt BTU/hr Common Equipment CPU Card 7.X 3.59 12.3 Interface Card IF+EXT 1.25 0.69 2.34 Interface Card IF+MODEM 0.94 3.19 Interface Card... -
Page 661: Pre-Installation Card Setup
A.5.2 Pre-Installation Card Setup The table shown below lists all system user cards that require pre-installation setup. Refer to the separate card chapters in this manual for more information about system settings and configuration parameters. Card Model Jumpers or Switches Options Ring Generator 8906... -
Page 662: Fcc Requirements
Model No. Running Head FCC Requirements The three tables below outline the FCC Registration Information for Part 1, Part 2 and Part 3 for these system cards. Reg. MTS/WATS Network Canadian Status Interfaces Model # Ringer Equiv. Number USOC Jacks 02LS2 FXO 2W*8-6 0.4B (ac), 0.0 (dc) -
Page 663: Uk Requirements
Access System will computer them as leap years. A.8.1 Service requirements If the product malfunctions, all repairs must be performed by the manufacturer or a Zhone-authorized agent. It is the responsibility of users requiring service to report the need for service to Zhone customer service. Reference Guide... -
Page 664: Safety Information And Precautions
Model No. Running Head Safety Information and Precautions The equipment is designed and manufactured in compliance with Safety Standard EN60950. However, the following precautions should be observed to ensure personal safety during installation or service, and prevent damage to the equipment or equipment to be connected. Read and follow all warning notices and instructions marked on the product or included in this Reference Guide. -
Page 665: Disclaimer For Shielded Cables
10. DO NOT allow anything to rest on the power cord and do not locate the product where persons could step on or walk on the power cord. 11. DO NOT attempt to service this product yourself. Refer all servicing to qualified service personnel. -
Page 666: Power Source
Model No. Running Head Notice! Never attempt to operate the equipment with the power panel fasteners removed. Do not remove power panel covers without first disconnecting the input power. A.9.3 Power Source Please refer to Appendix A, System Specifications in the System Reference Guide regarding System Requirements. -
Page 667: Electrostatic Discharge Prevention
Notice! Passive Cooling Requirements DO NOT Stack Units on top of one another. There MUST be at least 1” clearance between units. A.10.2 Electrostatic Discharge Prevention The plug-in cards contain components that could be damaged by electrostatic discharge. When handling any cards, wear a properly grounded wrist strap to prevent possible card damage, or follow other suitable precautions to prevent equipment damage. -
Page 668: Ce Marking
91/263/EEC on the approximation of the laws of the Member States concerning telecommunications terminal equipment, including the mutual recognition of their conformity. A.11.3 Declaration of Conformity Manufacturer Authorized Representative in EC Zhone Technologies Inc. 2050 The Crescent 7195 Oakport Street Solihull Parkway Oakland, CA 94621 Birmingham Business Park... -
Page 669: Country-Specific Regulatory Compliance Information
Under 91/263/EEC In accordance with the following Common Technical Regulations: CTR 12 - as described EC Type Examination Certificate BABT/97/4841 CTR 13 - as described EC Type Examination Certificate BABT/97/4841 CE MARK Affixed 1996 This Declaration is made 10 March 1998. A.12 Country-Specific Regulatory Compliance Information A.12.1 Canada... -
Page 670: Japan
Model No. Running Head CAUTION! Users should not attempt to make such connections themselves, but should contact the appropriate electrical inspection authority, or electrician, as appropriate. The Load Number (LN) assigned to each terminal device denotes the percentage of the total load to be connected to a telephone loop which is used by the device to prevent overloading. -
Page 671: Uk Compliance Statements
A.12.4.2 UK Compliance Statements The E1 Interface is approved in the UK for direct connection to PTO-provided circuits operating at data rates up to 2.4Mbit/s. The E1 Interface comprises a combination of single or dual WAN cards, CEPT modules, and connector panels as listed in the UK approval documentation. -
Page 672: Germany
Model No. Running Head become conductive due to condensation. Failure to maintain these minimum distances would invalidate the approval. Refer to Appendix A. System Specifications in this System Reference Guide. A.12.5 Germany A.12.5.1 German Approval Number The German approval number is A118 142F. Safety Warning SPEZIFISCHE SICHERHEITSMAßNAHMEN DIE EINRICHTUNG IST GEMÄß... - Page 673 Betreiben Sie nie die Einrichtung, wenn die Stromplattenverschlüsse entfernt worden sind, und entfernen Sie nie die Stromplattenabdeckung, ohne zuerst die Stromversorgung abzustellen. Reference Guide A-29...
- Page 674 Model No. Running Head A-30 Reference Guide...
-
Page 675: Appendix B Error Messages
Appendix B Error Messages Error Messages Introduction This appendix lists the Integrated Access System error messages. One of these messages may appear at the bottom of the screen when you enter a command, indicating that the system did not perform the requested action. This condition may have been caused by an operator error, absence of a card in the system, or other condition. - Page 676 Model No. Running Head All blank prt report. You chose the empty option setting for all four elements of the Print Alarm on the Interface Card. This combination of settings is invalid and cannot be saved. Choose the proper option settings for these elements.
- Page 677 Both WAN’s cannot be in test mode. You cannot use the test option on both sides of a cross-connect simultaneously. Bridge port limit exceeded The user has tried to enter a bridge participant number higher then 32. Broadcast cannot be looped back. You cannot activate a loopback on a broadcast cross-connection.
- Page 678 Model No. Running Head Cannot define any more XCON circuits. The maximum number of cross-connect circuits is 99. Can NOT delete circuit while test is active. You must end the test in progress before deleting the circuit. Cannot do it in Viewer mode. You are logged in under the Viewer password, but that level of access does not allow you to perform the desired operation.
- Page 679 Cannot talk to NTU while BERT is running. You must stop the BERT test before accessing the NTU. Cannot use the same TS on different WAN. You cannot assign an SRU card port to the same time slot on different WAN ports. Can’t define any more IP entries.
- Page 680 Model No. Running Head Channel test is available from WAN XCON screen. To test a cross-connected voice circuit, go to the Cross-Connect Screen. Checksum mismatch A download has completed, and the checksum has completed but failed. The download experienced a data transfer issue, and must be restarted. Circuit is already used, no subaddress allowed.
- Page 681 Current CPU does not support redundancy. The selected CPU card does not support redundancy. If the system has two CPUs, be sure they are both 8803s. D-channel is active. You cannot change WAN parameters because ISDN D-channel associated with it is still active. Dialing is not available with Alarm Card.
- Page 682 Model No. Running Head Each WAN can have only one d-chan. You cannot assign two D-channels to the same WAN port. Empty field is not allowed. You cannot assign a blank password on the CPU Card Main Screen. Always enter alphanumeric characters.
- Page 683 Ethernet port must be active An attempt has been made to use the xpress option to download the IPR*4 card with the Ethernet port turned off. Failed Generation of a test syslog message failed, perhaps due to permissions error of the requestee Field can NOT be MODIFIED.
- Page 684 Model No. Running Head Illegal IP Mask. The IP netmask number you chose is invalid. Inner label must be unique The number chosen for the PWE inter tag label is not unique. Try another number. Intf. ID must be uniquely identified. The ISDN PRI card must have a different two-digit number for each WAN port used for B-channels.
- Page 685 Invalid parameters for ADPCM. You cannot use ADPCM on voice cards that use A-Law coding. This is only allowed on mu-Law voice cards. Invalid password for this command. You cannot use the debug command from the System Test and Debug Screen without the proper password authorization.
- Page 686 Model No. Running Head IP Address must be unique. The IP address is already assigned. ISDN connected circuit. You cannot place an HSU card port with an active ISDN call in standby. Wait for the call to end. ISDN, FRAD, ADPCM do not support WAN switch. WAN redundancy is not available if any of those cards are used in the system.
- Page 687 Multi DS0 only allowed for PPP 1-4 Only ports one through four on an IPR*4 card are granted higher then a single DS0 of bandwidth. Must be in terminal mode. You cannot use the Configuration option on a WAN card in the drop-and-insert mode. Must have clean WAN.
- Page 688 Model No. Running Head No historical alarms. You have selected the History command in the Alarm Screen, but no alarms exist in that log. No more profiles allowed. You cannot assign more than 16 call profiles to the Interface Card. No more than 1 ts allowed.
- Page 689 No Voice Compress. WAN card using ALL resources. No ADPCM card is currently available for voice compression. Not applicable for S/T card. This does not apply for a BRI S/T card. Not enabled, cannot send test syslog A request to send a test syslog message is denied, since the feature is turned off. Not enough available U-slots.
- Page 690 Model No. Running Head Only B-chan can be controlled. You cannot update or delete a regular cross-connect circuit from the Cross-Connect Broadcast Screen. Only broadcast/data type can be controlled. You cannot update or delete a regular cross-connect circuit from the Cross-Connect Broadcast Screen.
- Page 691 Performance statistics is not available in slc96. You cannot obtain performance statistics for a WAN port in the slc96 mode. Performance statistics not available. You cannot obtain performance statistics for this card or port. Phone number must be unique. The primary phone number on an HSU card must be unique. Port already configured for Remote Terminal.
- Page 692 Model No. Running Head Port is not active. You cannot use the Hangup option on an HSU card port in the standby state. Port is not configured for ASCII. This port is not configured for ASCII operation. Port is not configured for TCP/IP. This port is not configured for TCP/IP operation.
- Page 693 PVC name must be unique. The current PVC name is already in use. Enter a different name. PWAN must be in standby before making changes Changing something on an individual PW provisioning is not allowed unless the PWAN appearance is placed to stdby first. PWE Switch Failed No ACT or RDNT card.
- Page 694 Model No. Running Head Redundant WAN is taken already. You cannot switch to the redundant WAN card in slot WAN-4 if it is already in use from a previous WAN card switch. Remote session active. Can’t change setting. You cannot change this setting because a remote operator has accessed the system and is controlling it.
- Page 695 SNMP Options not available on this CPU. The current CPU card does not support SNMP configuration. Specify Sys Ph# before activating REMOTE vt100. You must enter the Integrated Access System’s phone number before a remote operator can connect to the system. SR TS overlapping.
- Page 696 Model No. Running Head The IP ADDR and NET MASK must be set before PWAN set to active An attempt to make the PWE card active before setting vital routing parameters is not allowed. timeout, no data received from server. The user is attempting to download code, but the IMACS is unable to communicate to the server, or the server is not transferring any data.
- Page 697 Type must be PWAN before provisioning PW The WAN TYPE on the PWE screen must be set to PWAN before assigning a PW stream. Type must be PWAN to change state Changing the STATE to something other than “-” is not allowed unless the WAN TYPE is set to PWAN.
- Page 698 Model No. Running Head Xconnect table can be accessed from primary WAN. You cannot access the WAN cross-connect information from a redundant WAN port. Do this from a primary WAN port instead. B-24 Reference Guide...
-
Page 699: Appendix C Pinouts
Appendix C Pinouts Introduction This appendix describes the pinouts of the card connectors used to attach circuits and devices to the network. The number and type of connectors needed will vary with the card installed. Pin Outs... -
Page 700: Cpu Card
Model No. Running Head CPU Card C.2.1 CPU Card (CPU) C.2.1.1 CPU External Connector and Pinouts Figure C-1 shows the CPU card front panel, which has a single jack. CPU - 7 X-CONN Figure C-1.CPU-7 Card Connector (CPU) Pin Outs... -
Page 701: Rj48 Ethernet Jack
Pin 1 Pin 8 Figure C-2.RJ48 Ethernet Jack Table C-1. RJ48 Ethernet Port Jack Pinouts RJ48 Pin Name Definition Direction TXD+ Transmit Data Output TXD- Transmit Data Output RXD+ Receive Data Input RXD- Receive Data Input Pin Outs... -
Page 702: Interface Cards
Model No. Running Head Interface Cards C.3.1 INF-R EXT Card (IF+EXT) C.3.1.1 INF-R External Connector and Pinouts Figure C-3 shows the INF-R EXT card front panel, which has several jacks. INTF-R T1E1*8 Figure C-3.INF-R EXT Card Connectors (IF+EXT) Pin Outs... -
Page 703: Rj45 (Com2) Jack
Using the COM2 Port The COM2 jack provides an RJ45 DTE connection to an external DTE device. Figure C-4 shows the COM2 jack pin locations, and Table C-2 lists the signal pinouts. Pin 1 Pin 8 Figure C-4.RJ45 (COM2) Jack Table C-2. -
Page 704: Rj45 Node Jack
Model No. Running Head Using the RJ-45 Node Port The RJ-45 Node port allows you to activate external alarms that alert on-site personnel to critical situations. Using the ACO function will keep the alarm active until it is manually cleared form a control terminal. Connect the NODE jack of the INF-E card to the external alarm equipment. - Page 705 Using the Control Terminal Port The RJ-45 Control Terminal Port allows you to connect the Integrated Access System to a local VT100-compatible terminal, which you can then use to control the system. This port is configured as a DCE interface. Connect your local terminal to the TERM jack of the INF-R card.
-
Page 706: Rj45 External Sync Jack
Model No. Running Head Using the External Sync Port The External Sync Port allows you to connect up to two external clocking sources from the external timing clock panel to an INF-E Card. The external sync port is provided on the SYNC jack of the card. Connect the external clock sources to this jack. -
Page 707: Management Connector
Using the COM1 Management Port Connect an external computer or other device to the jack for alarm reporting locally. This is a RJ45 connector. Figure C-8 shows the connector pin orientation, and Table C-6 lists the signal pinouts and directions for this DTE terminal device. Pin 1 Pin 8 Figure C-8.Management Connector... -
Page 708: Net Jack
Model No. Running Head WAN Port Connections The NET jack allows you to connect the system’s WAN card ports to incoming and outgoing T1/E1 lines. This jack (Figure C-9) is a 50-pin, Amphenol-type connector. Table C-7 lists the signal pinouts for the NET jack. Pin 50 Pin 25 Pin 26... -
Page 709: Net Jack Signal Pinouts
Table C-7. NET Jack Signal Pinouts WAN Link Designation Function WAN 1-1 Rx from Network WAN 1-1 Rx from Network WAN 1-1 Tx to Network WAN 1-1 Tx to Network WAN 1-2 Rx from Network WAN 1-2 Rx from Network WAN 1-2 Tx to Network WAN 1-2... -
Page 710: Inf-R Modem Card (If+Modem
Model No. Running Head C.3.2 INF-R MODEM Card (IF+MODEM) C.3.2.1 INF-R MODEM Card External Connector and Pinouts Figure C-10 shows the INF-R MODEM card front panel, which has several jacks. INTF-R MODEM T1E1*8 Figure C-10.INF-R Modem Card Jacks (IF+MODEM) C-12 Pin Outs... -
Page 711: Modem Jack
Using the Modem Port The internal modem of the INF-R modem card is an asynchronous, ITU-T V.22bis modem. It allows remote access to the terminal interface and automatic reporting of alarm messages to a remote device. Table C-8 lists the specifications of the modem. Table C-8. -
Page 712: Rj45 (Node) Jack
Model No. Running Head Using the RJ-45 Node Port The RJ-45 Node port allows you to activate external alarms that alert on-site personnel to critical situations. Using the ACO function will keep the alarm active until it is manually cleared form a control terminal. Connect the NODE jack of the INF+M card to the external alarm equipment. -
Page 713: Rs232 (Term) Local Interface Jack
Using the Control Terminal Port The RS-232 Control Terminal Port allows you to connect the Integrated Access System to a local VT100-compatible terminal, which you can then use to control the system. This port is configured as a DCE interface. Connect your local terminal to the TERM jack of the INF-E card. -
Page 714: Management Connector
Model No. Running Head Using the COMP Port Connect an external computer or other device to the jack for alarm reporting locally. This is a RJ45 male connector. Figure C-14 shows the connector pin orientation, and Table C-11 lists the signal pinouts and directions. Pin 1 Pin 8 Figure C-14.Management Connector... -
Page 715: Net Jack
WAN Port Connections The NET jack allows you to connect the system’s WAN card ports to incoming and outgoing T1/E1 lines. This jack (Figure C-15) is a 50-pin, Amphenol-type connector. Table C-12 lists the signal pinouts for the NET jack. Pin 50 Pin 25 Pin 26... -
Page 716: Net Jack Signal Pinouts
Model No. Running Head Table C-12. NET Jack Signal Pinouts WAN Link Designation Function WAN 1-1 Rx from Network WAN 1-1 Rx from Network WAN 1-1 Tx to Network WAN 1-1 Tx to Network WAN 1-2 Rx from Network WAN 1-2 Rx from Network WAN 1-2 Tx to Network... -
Page 717: Inf-R Card (If
C.3.3 INF-R Card (IF) The INF-R card does not have a modem and does not accept external synchronization clocks. In all other respects, it is functionally identical to the INF-R EXT and INF-R MODEM cards. C.3.3.1 INF Card External Connector and Pinouts Figure C-16 shows the INF-R card front panel, which has several jacks. -
Page 718: Rj45 (Node) Jack
Model No. Running Head The INF-R card uses faceplate connectors that are electrically similar to those of the INF-R EXT and INF-R MODEM cards previously described. The only exception is that the NODE jack of the INF card serves two purposes. It provides alarm relay contacts for external activation, and also provides data and clock interfaces for external alarm reporting systems. -
Page 719: Rs232 (Term) Local Interface Jack
Table C-13. RJ45 (NODE) Jack Signal Pinouts RJ48 Pin Designation Function not used not used Alarm on Closed Condition Alarm on Open Condition ACOM Alarm Common Lead (Source) not used not used Chassis Ground The alarm interface is activated by the ACO setting. This will activate the device when a designated alarm occurs. -
Page 720: Management Connector
Model No. Running Head Using the COMP Port Connect an external computer or other device to the jack for alarm reporting locally. This is a RJ45 male connector. Figure C-14 shows the connector pin orientation, and Table C-11 lists the signal pinouts and directions. Pin 1 Pin 8 Figure C-19.Management Connector... -
Page 721: Net Jack
WAN Port Connections The NET jack allows you to connect the system’s WAN card ports to incoming and outgoing T1/E1 lines. This jack (Figure C-15) is a 50-pin, Amphenol-type connector. Table C-12 lists the signal pinouts for the NET jack. Pin 50 Pin 25 Pin 26... -
Page 722: Net Jack Signal Pinouts
Model No. Running Head Table C-16. NET Jack Signal Pinouts WAN Link Designation Function WAN 1-1 Rx from Network WAN 1-1 Rx from Network WAN 1-1 Tx to Network WAN 1-1 Tx to Network WAN 1-2 Rx from Network WAN 1-2 Rx from Network WAN 1-2 Tx to Network... -
Page 723: Alarm Cards
Alarm Cards C.4.1 ALR 4+4 Card (ALARM-4P) C.4.1.1 ALR 4+4 Card External Connectors and Pinouts The ALR 4+4 Card has a 50-pin Amphenol female connector (jack) on its faceplate. Figure C-21 shows the jack, and Table C-17 shows the pinouts for the inbound sensor alarms and outbound internal alarms. -
Page 724: E&M Cards
Model No. Running Head E&M Cards C.5.1 E&M-2W-8P Card (810860) C.5.1.1 E&M 2W*8 Card External Connectors and Pinouts The card has a 50-pin, Amphenol-type jack on its faceplate. Figure C-22 shows this jack, and Table C-18 lists the signal pinouts. Pin 50 Pin 25 Pin 26... -
Page 725: E&M 4W*8Er Card Jack
C.5.2 E&M-4W-8P Card (811960) C.5.2.1 E&M 4W*8ER Card External Connectors and Pinouts The card has a 50-pin, Amphenol-type jack on its faceplate. Figure C-23 shows this jack, and Table C-19 lists the signal pinouts. Pin 50 Pin 25 Pin 26 Pin 1 Figure C-23.E&M 4W*8ER Card Jack Pin Outs... -
Page 726: E&M 4W*8Er Card Jack Pinouts
Model No. Running Head Table C-19. E&M 4W*8ER Card Jack Pinouts Port Designation Port Designation All channels All channels C-28 Pin Outs... -
Page 727: Fxs Cards
FXS Cards C.6.1 FXS-8P Card (812960) C.6.1.1 FXS 2W*8-6 Card External Connectors and Pinouts The FXS 2W*8-6 Card has a 50-pin Amphenol jack on its faceplate. Figure C-24 shows this jack, and Table C-20 lists the signal pinouts. Pin 50 Pin 25 Pin 26 Pin 1... -
Page 728: Fxo Cards
Model No. Running Head FXO Cards C.7.1 FXO-8P Card (813970) C.7.1.1 FXO 2W*8-6 Card External Connector and Pinouts The FXO 2W*8-6 card has a 50-pin Amphenol jack on its faceplate. Figure C-25 shows this jack, and Table C-21 lists the signal pinouts. Pin 50 Pin 25 Pin 26... -
Page 729: Hsu Cards
HSU Cards Pin Outs C-31... -
Page 730: Hsu 35 Card (Hsu-2P
Model No. Running Head C.8.1 HSU 35 Card (HSU-2P) C.8.1.1 HSU 35 Card External Connectors and Pinouts The HSU 35 Card has two DB-25 jacks for V.35 connections to the external CPE. Figure C-26 shows their pin locations, and Table C-22 lists the signal pinouts. Pin 13 Pin 25 in 14... -
Page 731: Four-Port Hsu 530/35 Card (Hsu-4P
C.8.2 Four-Port HSU 530/35 Card (HSU-4P) C.8.2.1 Four-Port HSU 530/35 Card External Connectors and Pinouts The four-port HSU 530/35 Card has four DB-26 female connectors, as shown in Figure C-27. HSU*4 530/35 Port #1 Port #2 Port #3 Port #4 Figure C-27.Four-Port HSU 530/35 Card Jacks (821560) The RS-530/V.35 connectors allow you to connect the system to external data devices. -
Page 732: Four-Port Hsu 530/35 Jack Pinouts
Model No. Running Head Table C-23. Four-Port HSU 530/35 Jack Pinouts Function Direction Cable Shield Send Data A Input Receive Data A Output RTS A Input CTS A Output DCE Ready Output Signal Common RR/RLSD A Output Receive Timing B Output RR/RLSD B Output... -
Page 733: Hsu Card Cables
C.8.3 HSU Card Cables Table C-24, Table C-25, and Table C-26 represent a matrix used for connecting cables to HSU Cards for DTE and DCE transmit clocking. The following HSU Cards apply (820260, 820360, HSU-2P, 821360, 821460, 821560 and 821660). Table C-24. -
Page 734: Hsu To Cable Matrix (Dce Provides Clock
Model No. Running Head Table C-26. HSU to Cable Matrix (DCE Provides Clock) HSU CARD DCE PROVIDES CLOCK RS530 V.35 RS449 HSU-2P 2 PORT EXT. CABLES 4 PORT EXT. CABLES C-36 Pin Outs... -
Page 735: Ohsu Card
OHSU Card C.9.1 OHSU 4-Port Card (OHSU-4P / 823875) C.9.1.1 OHSU Card External Connector and Pinouts The OHSU 4-port Card has eight optical jacks on its faceplate for connections to the external data devices. Figure C-28 shows these jacks, and Table C-27 lists the signal pinouts. OHSU C37.94 4 PORT... -
Page 736: Sru Cards
Model No. Running Head Port 3 TX Transmit Port 3 Port 4 RX Receive Port 4 Port 4 TX Transmit Port 4 C.10 SRU Cards C-38 Pin Outs... -
Page 737: Sru-Ld*10 Card (822560 / Ldsru-10P
C.10.1 SRU-LD*10 Card (822560 / LDSRU-10P) C.10.1.1 SRU-LD*10 Card External Connector and Pinouts The SRU-LD*10 Card has ten modular jacks on its faceplate for connections to the external data devices. Figure C-29 shows these jacks, and Table C-28 lists the signal pinouts. 232*10 RJ-48C Figure C-29.SRU-LD*10 Card Jacks (822560 / LDSRU-10P) -
Page 738: Sru-Ld*10 Card Jack Pinouts
Model No. Running Head Table C-28. SRU-LD*10 Card Jack Pinouts Connector Pin Signal Name Direction RCLK To DTE RLSD To DTE TCLK To DTE To DTE From DTE To DTE From DTE C-40 Pin Outs... -
Page 739: Ocu-Dp Cards
C.11 OCU-DP Cards C.11.1 OCU-DP 5 Card (OCUDP-5P) C.11.1.1 OCU-DP 5 Card External Connectors and Pinouts The OCU-DP 5 Card has five standard modular jacks. Figure C-30 shows the card jacks, and Table C-29 lists the signal pinouts for each jack. OCU-DP RJ-48C Figure C-30.OCU-DP 5 Card Jacks (842160) -
Page 740: Ocu-Dp 5 Jack Signals Pinouts
Model No. Running Head Table C-29. OCU-DP 5 Jack Signals Pinouts RJ-48 Pin Signal Name Direction input input output output C-42 Pin Outs... -
Page 741: Ocu-Dp 10 Card (Ocudp-10P
C.11.2 OCU-DP 10 Card (OCUDP-10P) C.11.2.1 OCU-DP 10 Card External Connectors and Pinouts Figure C-31 shows the 10 RJ-48C jacks, and Table C-30 lists the signal pinouts for each jack. OCU-DP RJ-48C RJ-48C Figure C-31.OCU-DP 10 Card Jacks (OCUDP-10P) Pin Outs C-43... -
Page 742: Ocu-Dp 10 Jack Signals Pinouts
Model No. Running Head Table C-30. OCU-DP 10 Jack Signals Pinouts RJ-48 Pin Signal Name Direction input input output output C-44 Pin Outs... -
Page 743: Ds0-Dp Cards
C.12 DS0-DP Cards C.12.1 DS0-DP 4 Card (DS0DP-10P) C.12.1.1 DS0-DP 4 Card External Connector and Pinouts The DS0-DP 4 Card has four standard DB-15 jacks that correspond to the four data ports assignable on each card. Figure C-32 shows the card jacks and Table C-31 lists the signal pinouts for these jacks. -
Page 744: Ds0-Dp 4 Card Jack Pinouts
Model No. Running Head Table C-31. DS0-DP 4 Card Jack Pinouts Description Direction Mode XMT CLK A To DTE G.703 Contradirectional RCV CLK A To DTE G.703 Contradirectional XMT DAT A To DTE DS0-DP/G.703 RCV DAT A From DTE DS0-DP/G.703 BYTE CLK A int/ext To/From DTE DS0-DP... -
Page 745: Server Cards
C.13 Server Cards C.13.1 MCC Server Card (881360) C.13.1.1 ACS-MCC External Connectors and Pinouts The ACS-MCC card has an Ethernet interface port and uses a modular jack for a 10Base-T connection. Figure C-33 shows this jack, and Table C-32 lists the pinouts for this jack. Pin 1 Pin 8 Figure C-33.ACS-MCC Card Ethernet Port Jack... -
Page 746: Ipr*4 10/100 Bt Card (Router-Ppp-Hs
Model No. Running Head C.13.2 IPR*4 10/100 BT Card (ROUTER-PPP-HS) C.13.2.1 IPR*4 10/100 BT Card External Connectors and Pinouts The IPR*4 10/100 BT card has four Ethernet interface ports that use a modular jack for a 10/100 Base-T connection. Figure C-34 shows this jack, and Table C-33 lists the pinouts for these jacks. -
Page 747: Oc3 Tdm Mapper Card (882570
C.13.3 OC3 TDM Mapper Card (882570) C.13.3.1 OC3 TDM Mapper Card External Connectors and Pinouts The OC3 TDM Mapper card has three SFP interface ports, one RJ-45 port and a 96-pin T1/E1 port. Figure C-35 shows the card faceplate, and Table C-34 lists the pinouts for these jacks. MAPPER Figure C-35.OC3 TDM Mapper Faceplate As illustrated, the OC3 TDM mapper card contains two SFP cages labeled 1 and 2 for the... - Page 748 These cables all feature a 96-pin connector on one end, and a blunt end opposite. These cables are all identical, except for the length. Zhone offers 30 foot, 50 foot and 100 foot versions of the cable. Pin outs for the cable and connector are shown in the illustration on the following page.
-
Page 749: Oc3 Faceplate
Table C-34. OC3 Faceplate... -
Page 750: Pwe Mapper Card (883570
Model No. Running Head C.13.4 PWE Mapper Card (883570) C.13.4.1 PWE IP Uplink Mapper Card External Connectors and Pinouts The PWE IP uplink card has two ports for the uplink. These two ports are mutually exclusive - the customer can use one or the other, but not both. The SFP cage resides near the top of the card and offers a 1 Gigabyte transport mechanism of the customers choosing;... -
Page 751: Rj45 Gigabit Ethernet Port
Pin 1 Pin 8 Figure C-37.RJ45 Gigabit Ethernet Port Table C-35. RJ45 Pinout Signal RDC1 RDC2 RDC3 RDC4 Pin Outs C-53... - Page 752 Model No. Running Head C-54 Pin Outs...
-
Page 753: Appendix D Node Management Provisioning Examples
Appendix D Node Management Provisioning Examples Introduction This appendix describes various configurations supported on the IMACS. Some of the more enticing features on the IMACS require more in-depth knowledge then is delivered in the individual sections of the manual. This section is our attempt to make understanding of certain IMACS capabilities more clear, by the introduction of example setups of working systems. -
Page 754: Setting Up The Local Imacs To Provide Remote Access
Model No. Running Head D.1.1.1 Setting up the Local IMACS to Provide Remote Access Setting up an IMACS to connect to the Ethernet requires the use of a CPU with an ethernet port, an MCC or ACS card, or an IPR card. Following are screen captures from the various entities required in the setup of the IMACS. -
Page 755: Setting Up The Remote Imacs To Provide Remote Access
LOCAL LB LOCAL LB CH LB CH LB LB ADDR LB ADDR LB GEN LB GEN COM/NMS RP e-sa4 COM/NMS RP none EER THRHD 10e-4 EER THRHD 10e-4 RDNT RULES none RDNT RULES none GROUP none GROUP none D.1.1.2 Setting up the Remote IMACS to Provide Remote Access Setting up the remote IMACS to be served by the SA4 bit is referenced in the following examples. -
Page 756: Remote Management Of An Imacs Using Ds0 Daisy-Chaining
Model No. Running Head D.1.2 Remote Management of an IMACS Using DS0 Daisy-Chaining The use of the SA4 bit does provide a management channel, but at 4Kbps it has it’s limitations. For customers desiring a faster connection, use of the full DS0 (64Kbps) is accomplished using WAN ports.This port speed will enable the IMACS to be upgraded remotely. -
Page 757: Setting Up The Transport Imacs For Ds0 Daisy-Chaining
CPU rOute screen IP STATIC ROUTING IP Net SubNetMask SLOT/UNIT GATEWAY 192.168.0.1 255.255.255.0 c1-C2 D.1.2.2 Setting up the Transport IMACS for DS0 Daisy-Chaining Refer to the Figure D-2 on page D-4. This is the IMACS noted as 192.168.0.2. CPU IP Screen HOST IP STATE actv HOST IP ADDR... -
Page 758: Setting Up The Termination Imacs For Ds0 Daisy-Chaining
Model No. Running Head D.1.2.3 Setting up the Termination IMACS for DS0 Daisy-Chaining From Figure D-2 on page D-4, this is the last IMACS in the chain, 192.168.0.17. CPU IP Screen HOST IP STATE actv HOST IP ADDR 192.168.0.17 HOST NETMASK 255.255.255.255 HOST TYPE host... -
Page 759: Appendix E Glossary
Appendix E Glossary Definition of common terms ATM Adaption Layer ABCD bits The bits that carry signaling information over a T1 or E1 line. Available Bit Rate ACAMI Alternate Channel AMI, transmitting data on every other DS0 in a DS1 to ensure ones-density. Alarm Cutoff Advanced Communications Server ADPCM... - Page 760 Model No. Running Head A single bitstream combining many bitstreams of lower rates. Alarm Indication Signal AIS/ALM Alarm Indication Signal/Alarm ATM Inverse Multiplexer a-law E1 companding standard used in the conversion between analog and digital signals in PCM ALIS Analogue Line Interface Solution systems. Alternate Mark Inversion, a line coding format for T1 lines.
- Page 761 Bit #7 Redundant B7R card A network card used to provide Network Management capability for the system. B8ZS Bipolar 8-Zero Substitution, a coding scheme that maintains minimum-ones density on a T1 line. Baud Rate A measure of transmission speed over an analog phone line B-channel In ISDN, a full-duplex, 64 kbps (“bearer”) channel that carries user data.
- Page 762 Model No. Running Head Basic Rate Interface, (2B+D) in ISDN BRITE BRI Terminal Emulation Channel-Associated Signaling, a means of conveying voice-circuit signaling over an E1 line. CAS–CC Channel Associated Signaling–Common Channel CAS–BR Channel Associated Signaling–Bit-robbing mode, used to convey voice-circuit signaling over a T1 line.
- Page 763 Carrier Group Alarm, a condition that results from a network failure. Forces all voice circuits off-hook or on-hook until the alarm-causing condition is cleared and the CGA ends. CLUE Customer-Located Equipment clear channel A DS0 channel without formatting restrictions (i.e., uses the full 64 kbps bandwidth for data transmission).
- Page 764 Model No. Running Head CRC using six check bits Carrier Serving Area Common Signaling Channel Channel Service Unit, an interface to a T1 line that terminates the local loop. Channel Terminating Equipment (Network) Clear To Send, a lead on an interface indicating that the DCE is ready to receive data. A common T1 framing format, consisting of 12 frames.
- Page 765 Digital Data Service Drop and Insert, one of the modes of operation for the WAN card. Direct Inward Dialing Digital Loop Carrier DLCI Data Link Connection Identifier Degraded Minutes. Number of minutes with ES, UAS or LOS greater than zero (0). Direct Memory Access Dial-Pulse Originating Dial-Pulse Terminating...
- Page 766 Model No. Running Head Strategy for multiplexing two or more DS0-A low-speed data circuits onto a single DS0 (e.g., 5x9.6kbps, 10x4.8kbps or 20x2.4kbps). DS0–DP Card Digital Signal Zero–Dataport Card (one of the data cards for this system). Digital Signal, Level 1 Digital Subscriber Line Data Set Ready Digital Signal Cross-connect...
- Page 767 Electronic Programmable Read-Only Memory, stores firmware on plug-in modules of the system. Errored Seconds. The number of seconds for which BRI card has detected a NEBE or FEBE greater than zero (0). Extended Superframe (24-frame sequence for a T1 line; consists of two superframes) Electronic Switching System E&M Earth and Magnetic, or recEive and transMit.
- Page 768 Model No. Running Head Fractional E1 FEBE Far End Block Error, shows transmission errors detected by the far end equipment FOTS Fiber Optics Transmission Systems frame A delineated assembly of information, consisting of one sequence of 24 encoded channel samples (T1) or 32 channel samples (E1). FRAD Frame Relay Assembler/Disassembler, a card used in this system.
- Page 769 Foreign Exchange - Office, performs analog to digital and digital to analog transmission at the FXO Card One of the voice cards for this system Foreign Exchange - Subscriber or Station, an interface at the end of an FX line connected to a telephone or PBX.
- Page 770 Model No. Running Head HDSL OEM Module ICMP Internet Control Message Protocol Interexchange Carrier (also called IXC) IMUX Inverse Multiplexer IMUX Card A resource card that gives users access to the ISDN network for bandwidth-on-demand applications. inverted a-law A variation of a-law encoding that provides a higher ones density on E1 lines. Internet Protocol Internet Protocol Router Internet Service Provider...
- Page 771 Kilobits per second Local Area Network LANE LAN Emulation loopback Path for returning a signal back to the point of origin for circuit testing Loss Of Synchronization. Shows the number of seconds for which the BRI card detects LOS. Least Significant Bit Line Termination LULT LT Like Unit...
- Page 772 Model No. Running Head Meridian Digital Centrex modem Contraction of the words “modulator” and “demodulator” Manual Ringdown Maintenance Service Provider Memory Time Switch Maximum Transfer Unit mu-law T1 companding standard used in the conversion between analog and digital signals in PCM systems.
- Page 773 Non-Return-to-Zero signal format Network Termination Network Termination Unit, connects BRI station equipment to the integrated access system. Any standard 2B1Q (U interface) device that supports "nailed-up" (one or two B-channels) connections with no D-channel signaling. OCU–DP Card Office Channel Unit - Dataport (one of the data cards for this system). Out Of Frame, an indication that the system is searching for the framing bit pattern in the signal received from the network.
- Page 774 Model No. Running Head A program used to test IP-level connectivity from one IP address to another. PLAR Private Line Automatic Ringdown Pulse Link Repeater Point of Presence, usually a telephone carrier office. POTS Plain Old Telephone Service PPhone Foreign Exchange Office card. An interface at the end of the FX line connected to DMS SuperNode Switch.
- Page 775 Quadrature Amplitude Modulation Remote Alarm Indication Red alarm A local alarm on a T1 line, indicating that a major failure has occurred at this location. robbed-bit A type of analog signaling that occasionally “robs” information bits to convey encoded voice-circuit signaling. Return-to-Zero signal format Service Access Point Severely Errored Seconds...
- Page 776 Model No. Running Head SONET Synchronous Optical Network SRU Card Subrate Unit Card (one of the data cards for this system). system Often used as a synonym for the integrated access system. Terminal Adapter Terminal Equipment The North American DS1 transmission rate, 1.544 Mbps. Test Access Digroup TCP/IP Transmission Control Protocol/Internet Protocol...
- Page 777 Time Slot Time Slot Assigner UART Universal Asynchronous Receiver/Transmitter Unavailable Seconds. Incremented by 10 when LOS has remained for more than 10 consecutive seconds and incremented by 1 every second until LOS is removed. User Datagram Protocol Unit Interval User Network Interface User card A Voice card, Data card, or Alarm card.
- Page 778 Model No. Running Head Virtual Path Connection Wide Area Network WAN Card Wide Area Network Card (one of the cards for this system). wideband A bandwidth equal to many individual channels X.50 CCITT (ITU) standard data transmission protocol. yellow alarm Remote alarm on a T1 line.
-
Page 779: Index
NDEX ADPCM compression rates 17-2, 17-6 engines 17-1 time slots 17-5 ADPCM card compression engines 17-1 compression rates 17-2 configuration 17-3 description 17-1 error messages 17-7 option settings and defaults 17-4 signaling modes supported 17-2 time slot assignments 17-2 troubleshooting 17-8 ADPCM card redundancy viewing current ADPCM status 3-125, 3-128 ADPCM compression rates 9-10, 10-12, 11-9... - Page 780 NDEX Assigning a user card and port 17-5 Assigning a WAN link incoming traffic 17-5 outgoing traffic 17-5 Broadcasting adding a connection 3-103 deleting a connection 3-100, 3-103 updating a connection 3-103 viewing connections 3-103 CGA trunk conditioning 17-7 Changing passwords 5-10 Chassis configuration for U.S.
- Page 781 RATE (compression rate, ADPCM) 11-9 RX TLP (receive TLP) 11-7 SIG CONV (signaling conversion) 11-9 SIGNAL (choose signaling type) 11-6 STATE (activating a port) 11-5 TC CGA (trunk conditioning) 11-7 TS (assign time slot) 11-6 TX TLP (transmit TLP) 11-7 WAN/SRV (assign WAN or server port) 11-5 WINK (duration of wink) 11-9 WK DLY (wink delay time) 11-9...
- Page 782 NDEX CSU module description 7-18 installation 7-18 Description alarm printing 5-15 configuration 9-5, 10-3, 11-3 CSU module 7-18 DS0-DP card 16-1 E&M 4W*8 (S 60) card C-27 E&M 4W*8 ER (S 60) card 9-4 FXO card 11-1, C-30 FXS 2W*8-6 (S 60) card 10-1, C-29 IP packet routing 5-42 TCP/IP network management 5-20 testing 9-11, 10-13, 11-11...
- Page 783 connectors and pinouts C-30 description 11-1, C-30 error messages 11-16 installation 11-2 jumper settings 11-2 testing 11-11 troubleshooting 11-16 FXS card configuration 10-3 connectors and pinouts C-29 description 10-1, C-29 installation 10-3 testing 10-13 troubleshooting 10-18 ICMP parameters destination unreachable 5-35 display, typical 5-33 echo replies received 5-35 echo replies sent 5-35...
- Page 784 NDEX description 5-42 example 5-43 REM NETM 5-45 REM START and REM END 5-45 IP parameters datagrams delivered above 5-34 datagrams discarded 5-34 datagrams from above 5-34 datagrams received from network 5-34 datagrams sent to network 5-34 default TTL 5-34 display, typical 5-33 TX discarded, mailbox overflow 5-34 TX discarded, other causes 5-35...
- Page 785 installation 15-2 Option settings and defaults 17-4 configuration 9-6, 10-4, 11-4, 15-4 IP packet routing 5-45, 5-47 summary, alarm printing 5-17 summary, TCP/IP management 5-22, 5-50 testing 9-12, 9-17, 10-14, 11-12 Options and default settings summary, WAN testing 7-45 Outgoing circuit configuration WAN link 17-5 WAN time slot 17-5 Passwords...
- Page 786 NDEX SLIP parameters buffer overflow, incoming 5-32 bytes received from network 5-31 display, typical 5-30 MTU size (maximum outgoing packet size) 5-31 packets discarded from network 5-31 packets dropped, insufficient memory 5-32 packets received from network 5-31 packets sent to network 5-32 SNMP parameters display, typical 5-39 PDUs sent 5-41...
- Page 787 RPT2 COMMUN STR 5-26 RPT2 IP ADDR 5-26 RPT3 COMMUN STR 5-26 RPT3 IP ADDR 5-26 TELNET parameters bytes delivered above 5-40 bytes received 5-40 bytes received above 5-40 bytes received as commands 5-40 bytes replied as commands 5-40 bytes sent 5-40 display, typical 5-39 sessions closed 5-41 sessions opened 5-40...
- Page 788 NDEX UDP parameters display, typical 5-39 packets from above 5-39 packets sent 5-39 Viewing performance data clearing data registers 7-39 user registers 7-39 Viewing port information CPE activity on tip and ring 10-16, 11-14 current status 9-14, 10-17, 11-15 E&M signaling type 9-15 E-lead status 9-14 M-lead status 9-14 port test status 9-12...
Need help?
Do you have a question about the IMACS 8000 and is the answer not in the manual?
Questions and answers