Table of Contents
Advertisement
Quick Links
Advertisement
Table of Contents
Troubleshooting

Related Manuals for Printronix SLPA7000


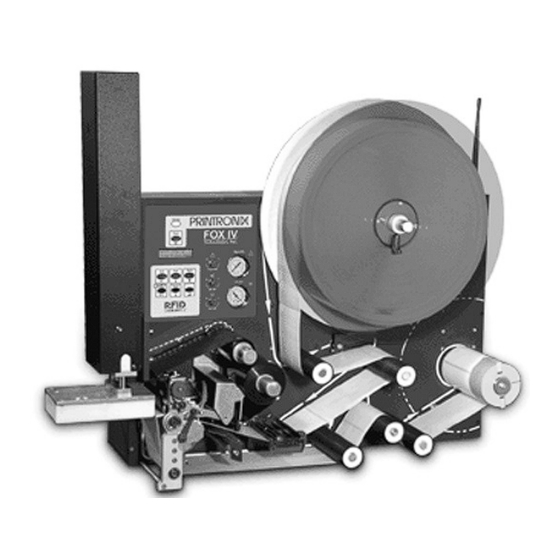
Summary of Contents for Printronix SLPA7000
- Page 1 User’s Manual SLPA7000 Smart Label Printer Applicator...
- Page 3 User’s Manual SLPA7000 Smart Label Printer Applicator...
-
Page 4: Important Warranty Information
THERMAL PRINTHEAD Printronix warrants the printhead for a period of one hundred eighty (180) days, or 1,000,000 linear inches for direct thermal use, or 2,000,000 linear inches for thermal transfer use, whichever comes first. - Page 5 Model ____________ Setup Values Software Version ___________________________ Touch-Blo Control ___________________________ Print Mode ___________________________ Apply Mode ___________________________ Print Darkness ___________________________ Machine Type ___________________________ Pinch Roller ___________________________ Random Stroke Delay ___________________________ Cycle Time Delay ___________________________ Cylinder Extend Time ___________________________ Vacuum Delay Time ___________________________ CPU Dip Switch Settings __________________________ Printer Serial Number ___________________________...
-
Page 6: Communication Notices
Properly shielded and grounded cables and connectors must be used in order to meet FCC emission limits. Printronix is not responsible for any radio or television interference caused by using other than recommended cables and connectors or by any unauthorized changes or modifications to this equipment. - Page 7 EN 55022 Klasse A Geräte bedürfen folgender Hinweise: Nach dem EMVG: “Geräte dürfen an Orten, für die sie nicht asreichend entstört sind, nur mit besonderer Genehmigung des Bundesminesters für Post und Telekommunikation oder des Bundesamtes für Post und Telekommunikation betrieben werden. Die Genehmigung wird erteilt, wenn keine elektromagnetischen Störungen zu erwarten sind.”...
-
Page 8: Trademark Acknowledgements
HP is a registered trademark of Hewlett-Packard Company. IBM is a registered trademark of International Business Machines Corporation. IGP, LinePrinter Plus, PGL, Printronix, and PSA are registered trademarks of Printronix, Inc. IPDS is a trademark of International Business Machines Corporation. -
Page 9: Table Of Contents
Table Of Contents 1 Introduction ............15 Printronix Customer Support Center............ 15 To Replace Parts ................15 To Order Parts ................16 Notes And Notices ................ 16 Manual Conventions ..............17 Related Manuals ................17 Overview....................18 General Operation................. 18 Operating Specifications ............... - Page 10 Table of Contents Setup ....................41 Removing Label Backing .............. 41 Threading The Label Roll .............. 41 Loading Ribbon ................49 Positioning The Air Jets ..............52 RFID System Configuration Parameters ..........53 System Adjustments ................55 Printhead Pressure Adjustment ............ 55 Printhead Pressure Block Adjustments .........
- Page 11 Table of Contents ETHERNET ADDRESS Menu ............144 ETHERNET ADDRESS Submenus ..........145 ETHERNET PARAMS Menu ............. 146 ETHERNET PARAMS Submenus..........147 GPIO CONTROL Menu ..............149 GPIO CONTROL Submenus............150 Applicator Delay Menu............... 152 4 Preventive Maintenance ........153 Cleaning.....................
- Page 12 Table of Contents 6 Replacing Parts..........223 About This Chapter................223 Preparing The Printer For Maintenance ........223 Restoring The Printer To Operation ..........224 Removal And Replacement Procedures..........225 Access Panels................226 Control Panel Assembly .............. 227 Controller PCBA (Printed Circuit Board Assembly)..... 228 Damper, Media................
- Page 13 Table of Contents Ribbon ....................322 Electrical .................... 322 Pneumatic..................322 Environmental..................323 Physical ..................... 323 Connections..................324 Communications Interface ..............324 B Options.............. 325 Expansion Modules ................325 Beacon Package Options ..............325 Fault/Warning Beacon Package..........326 Pneumatic Monitor Package ............326 Fault/Warning Beacon Package With Interface Module....
- Page 14 Table of Contents F RFID Encoder and Antenna Assemblies... 369 Installation And Removal ..............369 Prepare The Printer ................369 Replace The RFID Antenna And Encoder Assemblies ..... 370 Remove the RFID Encoder Assembly ........370 Replace The RFID Antenna Assembly ........372 Install The RFID Encoder Assembly ...........
-
Page 15: Introduction
Introduction CAUTION Thoroughly review this manual before attempting to install, set up, and operate the SLPA. Printronix Customer Support Center The Printronix Customer Support Center offers technical support with: • Installation • Configuration and setup • Operation and supplies loading •... -
Page 16: To Order Parts
Chapter Printronix Customer Support Center To Order Parts Go to the Illustrated Parts Breakdown (IPB) on page 263, which contains drawings of all printer assemblies. Next to each illustration is a list of the parts shown and their part numbers. When locating parts, note the following: •... -
Page 17: Manual Conventions
This manual does not explain how to install, operate, configure the printer, or how to program application software for operation with the printer. That information is in the following manuals, available online at www.printronix.com: • T5000 Thermal Printer User’s Manual •... -
Page 18: Overview
General Operation Figure 1. SLPA Dimensions This document contains information and instructions for the Printronix Smart Label Printer Applicator (SLPA). The SLPA can print label patterns up to 4.1 inches (104 mm) wide and applies them by means of a pneumatic applicator system, although optional methods of applying the label are available by design. -
Page 19: Operating Specifications
Operating Specifications Operating Specifications Operating Environment The SLPA is designed for general use in warehouse and industrial environments. It should not be exposed to liquids or damaging chemical vapors, and will function properly in environments with an ambient temperature between 40 to 100 F (4 to 38... -
Page 20: Storage, Shipping, & Handling
Chapter Overview Storage, Shipping, & Handling Storage • Store the SLPA in a clean dry area. • Storage temperatures should be between -40 to 150 F (-40 to 65 • Do not store the SLPA with labels or printing ribbon installed. •... -
Page 21: Safety
Safety Warnings And Cautions WARNING Printronix has provided the necessary guards and warnings within the confines of the SLPA, but cannot anticipate each customer’s individual installation and operational environments. It is the customer’s responsibility to provide in-house safety guards to provide adequate worker safety for their respective production settings. -
Page 22: Operating Precautions
Proper operation of the SLPA depends upon timely maintenance and appropriate operation. Always observe the following precautions: • Use label stock which is designed for use with the SLPA. Printronix supplied replacement stock is recommended. • Ensure that a regulated air supply is used for the pneumatic system. Use the appropriate filters for the removal of dirt, oil, and excessive moisture. -
Page 23: The T5000E Series Label Printer
, Windows , or ASCII- based computer. Printronix Dynamic Print Control provides exceptional print quality. A circuit monitors the data to be printed and automatically adjusts the energy applied to the thermal printhead for maximum performance. The printer can communicate with the host computer via RS-232 and RS-422 ®... -
Page 24: Optional Features
ZPL and TEC application environments without requiring modifications to the host data stream. PPI1 (Zebra) enables you to print files formatted for Zebra printers to the Printronix SLPA. PPI2 (TEC) prints files formatted for TEC printers to the Printronix SLPA. -
Page 25: Thermal Printer Media
Most thermal transfer papers can be die-cut for easy label applications. Printronix offers a selection of thermal transfer paper sizes and face stocks, which ensures high print quality and long life when used with Printronix ribbons. -
Page 26: Dynamic Print Control
Chapter The T5000e Series Label Printer Dynamic Print Control Print quality in thermal printers depends on how well the thermal ribbon and thermal transfer paper respond to the heat of the thermal printhead. The thermal printhead must reach a specific temperature to print, then must cool down in the shortest possible time after printing. - Page 27 Thermal Printer Technology Cutter P301 PCBA Option J301 Control Panel Cutter Option Serial Port Flash DRAM Upper Media DB25 SIMM SIMM Sensor Ribbon Diagnostic Port Supply Controller Motor Expansion Port Stepper Motor Head Up Sensor Ribbon Take-up Label J112 Motor Taken P112 Sensor...
-
Page 28: Installing The Slpa
3. Save the shipping container and protective layers of paper to ensure proper return shipping to Printronix, if necessary. 4. Organize all items as they are unpacked from their containers. Carefully inspect each item for signs of damage. Make certain that all parts (options) requested are received with the order. -
Page 29: Optional Mounting Accessories
Optional Mounting Accessories Figure 3. Mounting Hole Configuration CAUTION The mounting plates of the SLPA are 0.375 inches (9.25 mm) thick. When mounting the SLPA, use screws that will secure the assembly into place but will not penetrate deeper than 1/2 inch (12.7 mm) in the SLPA. IMPORTANT Retain cap screws in mounting holes that are not to be utilized. -
Page 30: Air, Power, And Communications Connections
Chapter Installing The SLPA Air, Power, And Communications Connections CAUTION Any external communications cables to be used with the SLPA must be properly shielded and grounded. Failure to provide proper shielding or grounding for these cables could result in malfunctioning or damage to the SLPA. - Page 31 Air, Power, And Communications Connections Air Pressure Adjustment Knob Air Pressure Gauge To Air Air Hose to Supply SLPA Hose Air Supply Quick Connector Connect Air Fitting Figure 5. Air Filter 6. If you have a fault warning beacon, connect it to the beacon port. (Figure 4.) The fault warning beacon can also be mounted remotely from the SLPA.
- Page 32 Chapter Installing The SLPA Quick Connect Air Fitting AC Power Power Switch Receptacle Figure 6. Power Panel 10. Connect the opposite end of the air hose to the quick connect air fitting on the power panel. (Figure 6.) NOTE: Make certain that all communication port parameters have been configured according to purchase order requirements.
-
Page 33: Adjusting The Voltage
Adjusting The Voltage Adjusting The Voltage Power Switch AC Power Receptacle Selected Voltage Facing Arrows Slot Active Fuse Fuse Holder Assembly Figure 7. Adjusting the Voltage The facing arrows indicate the selected voltage setting. (Figure 7.). If the setting is incorrect, adjust the voltage as follows: 1. - Page 34 Chapter Installing The SLPA...
-
Page 35: Operation
Operation Control Panel The operation and system status of the SLPA are provided on the control panel. Information concerning the SLPA is displayed on the liquid crystal display (LCD), while commands are given to the SLPA through the control panel keypad. Control valves are provided for refined adjustments to the pneumatic system. -
Page 36: Lcd
Chapter Control Panel The LCD is a 2 line by 16 character per line reflective display with a light emitting diode (LED) backlight. The LCD displays system information on the SLPA when performing system set-up procedures, print batch status during operation, and system information in a fault condition. - Page 37 Keypad Table 1. Control Panel Keys Indicator or Description Online Mode Offline Mode Menu Mode Print key Print key Prints the next None Scrolls left label in the through current – (decrease) key buffer. menu options. in Menu mode. Decreases option values in submenus.
-
Page 38: Key And Indicator Descriptions
Chapter Control Panel Key and Indicator Descriptions For the locations of these keys and indicators, refer to Figure 8 on page 35. Online Status Indicator The SLPA is online when the Online status indicator light is on. When the SLPA is offline, the light is off. Pause Key When the SLPA is online or in Menu mode, the Pause key takes the SLPA offline (offline mode) and suspends all SLPA operations, but operations do... -
Page 39: Cancel Key
Key and Indicator Descriptions Menu Key and Data Indicator Light When the SLPA is either online or offline, the Menu key takes the SLPA offline and into Menu mode. In Menu mode, the Menu key scrolls through the Main menu of the SLPA’s operating system. -
Page 40: Pneumatic Control Valves And Gauges
Chapter Control Panel Pneumatic Control Valves And Gauges Air Cylinder Regulator NOTE: You may also adjust the cylinder delay time through the Applicator Delay menu. See “Applicator Delay Menu” on page 152. The air cylinder regulator (CYLINDER valve) is used to regulate the air to the applicator cylinder. -
Page 41: Setup
Removing Label Backing Setup Removing Label Backing If the media rewind spool needs to be unloaded during operation, proceed as follows: 1. Press the Pause key to take the SLPA offline. Disable the product sensor if necessary. 2. Tear the label backing near the media rewind hub, then reach around the rewound backing, placing your fingers behind the hub of the media rewind spool. - Page 42 Chapter Setup 1. Press the Pause key to take the SLPA offline. 2. Open the pivoting deck by rotating the deck lock lever fully clockwise. Label Roll Core Label Roll Retainer Label Roll Hub Label Roll Hub Collar Cam Lock Figure 10.
- Page 43 Threading The Label Roll Label Roll Back Stop Label Roll Spindle Label Roll Retainer Label Collar Label Roll Cam Lock Figure 11. Loading Label Media 6. Slide the new label roll onto the label roll hub (unwinding counterclockwise) and against the label roll back stop. 7.
- Page 44 Chapter Setup Label Roll Retainer Label Roll Brake Assembly Printhead Platen Label Backing (Liner) Path Media Damper Figure 12. Loading Labels 9. Unwind approximately 3.0 feet (91cm) of media from the label roll. If your label roll does not have a leader, remove the labels from the backing. The empty backing (leader) will act as a leader to thread the media through the SLPA components.
- Page 45 Threading The Label Roll Lower Media Sensor Leader Media Guard Fixed Guide Media Sensor Media Width Handle Guide Media Damper Figure 13. Threading Media Through the Printhead Assembly 12. Slide the media width guide close to the outside end of the media damper.
- Page 46 Chapter Setup Printhead Assembly Upper Media Sensor Visible Red Beam Lower Sensor Upper Sensor Handle Platen Roller Figure 14. Threading the Leader 17. Slide the upper sensor directly over the lower sensor. 18. Thread the leader between the printhead assembly and across the top of the platen roller.
- Page 47 Threading The Label Roll Media Edge Platen Peel Bar Figure 15. Aligning Media 19. Align the inside edge of the media with the inside edge of the peel bar. 20. Thread the leader over the peel bar, then between the lower platen roller and the air jet.
- Page 48 Chapter Setup Pivoting Deck Deck Lock Lever Figure 16. Locking the Pivoting Deck 25. Ensure that the label path is clear of obstructions, then close the pivoting deck and rotate the deck lock lever fully counterclockwise. This locks the pivoting deck and printhead assembly into the printing position. IMPORTANT Ensure the pivoting deck is down and locked before attempting to advance media or print.
-
Page 49: Loading Ribbon
Loading Ribbon Loading Ribbon Ribbon Take-Up Core Ribbon Take-Up Spindle Pivoting Deck Ribbon Supply Spindle Ribbon Roll Deck Lock Lever Figure 17. Loading Ribbon 1. Press the Pause key to take the SLPA offline. 2. Install the ribbon take-up core on the ribbon take-up spindle. NOTE: The first ribbon take-up fiberboard core comes with the SLPA. - Page 50 Chapter Setup Ribbon Printhead Rear Ribbon Guide Roller Figure 18. Threading Ribbon Through the Printhead Assembly 5. Thread the end of the ribbon under the rear ribbon guide roller, then between the platen and the printhead using the dotted line etched on the front center wall plate.
- Page 51 Loading Ribbon Ribbon Take-up Core Ribbon Ribbon Take-up Spindle Figure 19. Attaching the Ribbon to the Take-up Core 6. Wrap the ribbon from the front of the printhead assembly to the top of the ribbon take-up spindle. Attach the ribbon to the take-up core on the ribbon take-up spindle with tape.
-
Page 52: Positioning The Air Jets
Chapter Setup Positioning The Air Jets When a printed label is being fed from the SLPA onto the applicator pad, it must be held against the pad so that it can be properly positioned. The air jets located on the air jet tube direct air at the label while it is being fed, so that it does not bend or fall from the pad. -
Page 53: Rfid System Configuration Parameters
Positioning The Air Jets RFID System Configuration Parameters The following is a list of the four system configuration parameters required for the operation of the SLPA as an RFID label printer/applicator. They are Media Handling, RFID Reader, GPIO Port, and GPIO Table. NOTE: You may need to set or configure other parameters for proper SLPA operation. - Page 54 Chapter RFID System Configuration Parameters GPIO Table Control Sets the required GPIO Table Control. 1. Press the Menu key to take the SLPA offline and into Menu mode. 2. Press the Menu key until GPIO CONTROL displays. 3. Press the ↑ or ↓ key to scroll through the GPIO CONTROL submenu until GPIO Table displays in the first line of the LCD.
-
Page 55: System Adjustments
Printhead Pressure Adjustment System Adjustments This portion of the manual covers all general aspects of printhead and system adjustment and replacement. Printhead Pressure Adjustment Right Pressure Block Right Pressure Left Pressure Block Pointer Block Lead Screw Knob Left Pressure Block Handle Bold Mark Printhead Pressure... -
Page 56: Printhead Pressure Block Adjustments
Chapter System Adjustments Printhead Pressure Block Adjustments These adjustments to the left and right pressure blocks are typically made when the print quality is not even across the surface of the label, and may be necessary when replacing the printhead. NOTE: Make no changes or adjustments while the SLPA is in operation. - Page 57 Positioning The Media Sensors The upper media sensor, located in the slot under the printhead cover (see Figure 21 on page 55), should be located directly over the lower media sensor. The lower media sensor should not be placed in the path of media features that could cause false gap detection or paper out faults.
-
Page 58: Sensing Different Media Types
Chapter System Adjustments Sensing Different Media Types The SLPA’s media sensors can detect the different types of label length indicators on a large variety of media types. This requires changes to the Gap/Mark Sensor menu item in the CALIBRATE CTRL menu: 1. - Page 59 Sensing Different Media Types Sensing Media with Horizontal Black Marks (Mark) Visible Red Beam from Lower Sensor Lower Sensor Black Mark (underside of media) Sensor Handle Media Guard Opening Figure 24. Media with Horizontal Black Marks Position the lower media sensor for detecting horizontal black marks located on the underside of media.
- Page 60 Chapter System Adjustments Sensing Media with Gaps, Notches, or Holes (Gap) Visible Red Beam from Lower Sensor Media Guard Opening Figure 25. Media with Gaps, Notches, or Holes Position the lower media sensor for detecting gaps, notches, or holes in media with a white background.
- Page 61 Sensing Different Media Types Sensing Media with Dark Background Labels with Gaps (Advanced Gap) Fixed Upper Sensor Visible Red Beam Lower Sensor Media Guard Opening Figure 26. Dark Background Media with Gaps NOTE: Ribbon is not displayed in this illustration. The upper and lower sensors are designed to function with or without ribbon installed.
- Page 62 Chapter System Adjustments Sensing Dark Background Media with Notches or Holes (Advanced Notch) Fixed Upper Sensor Visible Red Beam Lower Sensor Black line on underside of media Media Guard Opening Figure 27. Dark Background Media with Notches or Holes NOTE: Ribbon is not displayed in this illustration. The upper and lower sensors are designed to function with or without ribbon installed.
-
Page 63: Calibrating The Media Sensors
Calibrating The Media Sensors Calibrating The Media Sensors Due to manufacturing differences in media and ribbon, the media sensors may have difficulty differentiating between the label and the liner or the label and the black mark. When this occurs, the SLPA may intermittently skip a label or display a fault message such as GAP NOT DETECTED / See Manual or PAPER OUT / Load Paper. - Page 64 Chapter System Adjustments 5. Auto Calibrate is successful when the Sensed Distance value correctly matches that of the installed media: • Gap/Mark Sensor = Gap, Advanced Gap, or Advanced Notch: The Sensed Distance value is the physical length of one label plus the length of one gap, notch, or hole.
-
Page 65: Running Media Profile
Calibrating The Media Sensors Running Media Profile The Media Profile printout shows the relationship of the Paper Out Threshold and the Gap/Mark Threshold values, illustrates if and when each label length indicator is detected, and shows the difference between the label length indicators and the label. -
Page 66: Running Manual Calibrate
Chapter System Adjustments 11. Press Menu until CALIBRATE CTRL displays. ↵ 12. Press ↓ until Media Profile / Profile Print displays and then press . (The ↵ SLPA will continue to print the profile until you press The SLPA will advance media and continue to print a dynamic profile image depicting the relationship of the label and any label length indicators detected. - Page 67 Calibrating The Media Sensors Ensure the media sensors are horizontally positioned to permit sensing of the label length indicators. See “Positioning The Media Sensors” on page 56. Ensure the Print Mode option selected in the QUICK SETUP menu matches the media installed. Select Direct for heat sensitive media (no ribbon required) or Transfer for thermal transfer media (ribbon required).
-
Page 68: Printing And Applying Labels
Printing And Applying Labels Printing And Applying Labels WARNING Printronix has provided the necessary guards and warnings within the confines of the SLPA, but cannot anticipate each customer’s individual installation and operational environments. It is the customer’s responsibility to provide in-house safety guards to provide adequate worker safety for their respective production settings. - Page 69 Label Application (Positioning) Adjustments Flow Control Valve Air Shut Off Valve Figure 29. Return Speed Control Valve 2. Use the flow control valve (located on the air cylinder) to adjust the speed of the return stroke. (Figure 29.) Increase the speed by rotating the valve counterclockwise and decrease the speed by rotating the valve clockwise.
-
Page 70: Adjusting The Cylinder Extend Time
Chapter Printing And Applying Labels 4. Place the product sample on the conveyor and allow it move past the SLPA. The label that is applied will be used as a reference point for positioning the rest of the labels. 5. To move the label toward the leading edge of the product, decrease the Cycle Delay time. -
Page 71: The Print And Apply Process
The Print And Apply Process • If the applicator pad remains on the product for too long (if the stroke time is too long): Decrease the Cylinder Extend time using the Applicator Delay menu. Begin by increasing the time in intervals of 6 msec, then fine tune in increments of 1 msec. - Page 72 Chapter Printing And Applying Labels...
-
Page 73: Configuring The Slpa
Configuring The SLPA IMPORTANT Changing system parameters can affect SLPA operation and could disable it. Thoroughly review this chapter, as inappropriate settings may impair the SLPA’s functionality. Setting Printer Configuration Parameters Configuration parameters are set from the control panel or are retrieved from the printer’s memory. -
Page 74: Selecting A Menu Option
Chapter Moving Within The Configuration Menu Selecting A Menu Option ↵ To select an option, you need to press the key. By default, however, the ↵ key is “locked” when the printer is turned on to prevent accidental changes ↵ to the configuration menu. -
Page 75: Saving A Configuration
Saving A Configuration • Ver Image Shift • Hor Image Shift • Orientation • Gap/Mark Sensor • Auto Calibrate • Save Config. • Power-Up Config. 3. When the desired submenu displays, press the + or – key to scroll through the values or options. ↵... -
Page 76: Specifying A Power-Up Configuration
Chapter Moving Within The Configuration Menu ↵ 4. When the desired number displays, press the key to select it. The following message displays briefly: Saving Configuration When processing is completed, the display shows: Save Config. NOTE: If the configuration number has been previously saved and Protect Configs. -
Page 77: Modifying A Saved Configuration
Modifying A Saved Configuration NOTE: If the configuration number has not been saved previously, the following error message displays: CONFIG. DOES NOT EXIST/Save First If this error message displays, see “Saving A Configuration” on page 75. Once you have saved a configuration, repeat the steps in this procedure. -
Page 78: Printing A Configuration
Chapter Moving Within The Configuration Menu 4. Before saving the modified configuration, you must delete the original configuration if the Protect Configs. option is enabled. a. Press the ↑ or ↓ key until the following message displays: Delete Config. b. Press the + or – key to cycle through the options (1-8). When the ↵... - Page 79 Printing A Configuration 3. Press the + or – key to cycle through the following printout options: Current* Factory Power-Up 1-8 customized configurations ↵ 4. When the desired option displays, press the key. The printer prints the specified configuration. NOTE: If the configuration you want to print has not been saved, the following message displays momentarily: CONFIG.
- Page 80 Chapter Moving Within The Configuration Menu Figure 30. Sample Configuration Printout...
- Page 81 Printing A Configuration Sample Configuration Printout (cont.)
-
Page 82: Main Menus
Chapter Main Menus Main Menus QUICK RFID CONFIG. MEDIA SETUP CONTROL CONTROL CONTROL (page 87) (page 95) (page 102) (page 105) Print Intensity RFID Reader Load Config. Print Intensity Print Speed Tag Type Save Config. Print Speed Print Mode Error Handling Print Config. - Page 83 Printing A Configuration CALIBRATE IGP/PGL PRINTER 4, 5 SETUP CTRL CONTROL (page 121) (page 127) Gap/Mark Sensor LP+ Emulation Character Group Auto Calibrate CTHI Emulation Standard Sets Media Profile Host Interface Select LPI Sensed Distance Active IGP Emul Define CR Code Gap/Mark Thresh Power Saver Time Define LF Code...
- Page 84 Chapter Main Menus IGP/PPI1 DIAGNOSTICS PARALLEL SERIAL 1, 2 SETUP (page 140) PORT PORT Printer Tests Port Type ZPL Compatible Port Type Test Count Baud Rate Command Prefix Data Bit 8 Software Build Word Length Label Prefix PI Ignored Security PAL Stop Bits Delimiter Buffer Size in K...
- Page 85 Printing A Configuration WIRELESS WIRELESS 1, 2 1, 2 ADDRESS PARAMS Signal Strength WEP Key 2 Format IP Address SEG1: IP Address SEG2: Operation Mode WEP Key 2 Width SSID Name(01-15) WEP Key 2 BYTE1: IP Address SEG3: SSID Name(16-30) WEP Key 2 BYTE2: IP Address SEG4: Subnet Mask SEG1:...
- Page 86 Chapter Main Menus GPIO BATTERY 1, 2 CONTROL CONTROL (page 149) Battery Monitor GPIO Port Time To Go GPIO Tables Percent Charge GPIO Sel. Table Current Draw GPIO Start Print Voltage GPIO End Print Amp-Hour Used GPIO Ctrl Status Time To Go Alert GPIO Monitor High Volt Alert Print And Apply...
-
Page 87: Quick Setup Menu
Printing A Configuration QUICK SETUP Menu QUICK SETUP Print Intensity –3* –15 to 15 Print Speed 6 ips* 2 to 10 ips Print Mode Transfer* Direct Media Handling Tear-Off Strip* Tear-Off Peel-Off Continuous Paper Feed Shift 0.00 inches* –0.50 to X inches Label Length 2, 4 4 or 6 inches*... -
Page 88: Quick Setup Submenus
Chapter QUICK SETUP Menu QUICK SETUP (cont. from previous page) SMT: Status Disabled* Enabled SMT: Sel Toolset Toolset [1]* Toolset [1] to Toolset [4] GTIN UPCA EAN8 EAN13 UCC128 SMT: Select Tool 2, 3 2, 3 2, 3 2, 3 2, 3 2, 3 zEPC... -
Page 89: Print Speed
QUICK SETUP Submenus Print Speed This menu item specifies the speed in inches per second (ips) at which the media passes through the printer while printing. The range is 2 through 10 ips (in increments of 1 ips). The default is 6 ips. NOTE: The maximum print speed varies based on maximum printer width and dot per inch (dpi) resolution of the printhead installed (203 or 300 dpi). -
Page 90: Label Length
Chapter QUICK SETUP Menu Paper Feed Shift This menu item represents the distance to advance a label (+ shift) or pull back (– shift) when the Tear-Off Strip, Tear-Off, Peel-Off, or Cut Media Handling option is enabled. The allowable range is –0.50 inches to the current Label Length value setting up to a maximum of 12.80 inches in 0.01 inch increments. - Page 91 QUICK SETUP Submenus Orientation Specifies the image orientation to be used when printing the label. • Portrait. The default. Portrait refers to vertical page orientation, where the height of a page is greater than its width. The top edge of the image is parallel to the leading edge of the media.
- Page 92 Chapter QUICK SETUP Menu • Inv. Portrait. Inverse Portrait refers to vertical page orientation, where the height of a page is greater than its width. The top edge of the image is parallel to the trailing edge of the media. The following example is viewed from the front of the printer.
- Page 93 QUICK SETUP Submenus Gap/Mark Sensor Specifies the sensor type needed for detecting the top-of-form position on media with label length indicators (gaps, notches, holes, or black marks). • Disable. Select when using media with no label length indicators (no black marks, gaps, notches, or holes), or when you want the printer to ignore all existing label length indicators on the installed media.
-
Page 94: Save Config
Chapter QUICK SETUP Menu select Mark, the Sensed Distance should match the length from the leading edge of one black mark to the leading edge of the next black mark. Auto Calibrate supports label lengths up to 24 inches. Save Config. Allows you to save up to eight unique configurations to meet different print job requirements. -
Page 95: Rfid Control Menu
QUICK SETUP Submenus RFID CONTROL Menu RFID CONTROL RFID Reader Enable* Disable Tag Type Alien Squig 64 * Alien Squig 96 Alien M-TAG 64 Alien M-TAG 96 RAF Omni 313 64 RAF Omni 432 96 Matrics1020 64 Matrics1020 96 Matrics2020 64 Matrics2020 96 RAFUCode 450 96 RAFUCode 477 96... -
Page 96: Rfid Control Submenus
Chapter RFID CONTROL Menu RFID CONTROL (cont. from previous page) Custom Tag Disable * Enable Duplicate Custom Write Pwr 1 to 20 Custom Read Pwr 1 to 20 Custom Tag Len 8 to 32 Custom Tag Class Class 1 * Class 0 Class 0+ Class 1.19... - Page 97 RFID CONTROL Submenus Label Retry NOTE: Label Retry only applies when the Error Handling mode is set to Overstrike. This menu item selects the number of label retries that the RFID encoder will attempt before declaring a fault. This may indicate a problem with the RFID encoder, the antenna assembly, the printer setup, or the label stock.
- Page 98 Chapter RFID CONTROL Menu Precheck Tags NOTE: This menu item applies to Class 1 tags only. When this menu item is set to Enable, the RFID encoder checks the tags for a pre-programmed quality code. If the code is absent, the tag immediately fails and the selected Error Handling mode is performed (Overstrike, None, or Stop).
-
Page 99: Admin User Submenus
Admin User Submenus Admin User Submenus To see these submenus, set Admin User to Enable in the PRINTER CONTROL menu. (See “Admin User” on page 135.) IMPORTANT Admin User submenus should only be used by authorized personnel. Tag Type This menu item selects the tag type in use. The following is a list of tag types available. -
Page 100: Auto Retry
The custom tag menus allow the RFID encoder to work with tag types that are not listed in the Tag Type menu item. NOTE: Printronix cannot guarantee the performance of tag types not certified by Printronix. When Custom Tag is set to Disable, the settings in the custom tag menus are ignored by the RFID encoder. -
Page 101: Requesting An Rfid Report
Admin User Submenus Custom Tag Len NOTE: To enable this menu item, set Custom Tag to Enable. This menu item selects the number of bytes in the tag. The default is 8. Custom Tag Class NOTE: To enable this menu item, set Custom Tag to Enable. This menu item selects the class of the custom tag. -
Page 102: Config. Control Menu
Chapter CONFIG. CONTROL Menu CONFIG. CONTROL Menu CONFIG. CONTROL Load Config. Factory* Save Config. Print Config. Current* Factory Power-Up Delete Config. Power-Up Config. Factory* Protect Configs. Disable* Enable Name Config 1 Name Config 2 Name Config 3 Name Config 4 Name Config 5 Name Config 6 Name Config 7... -
Page 103: Config. Control Submenus
CONFIG. CONTROL Submenus CONFIG. CONTROL Submenus Load Config. The printer can store up to eight configurations in memory. This parameter allows you to select and load a specific configuration. The factory default is Factory. Save Config. This option allows you to save up to eight unique configurations to meet different print job requirements. - Page 104 Chapter CONFIG. CONTROL Menu Name Config (1-8) You may specify a 15-character name which can be used to refer to a configuration. The name you enter for a configuration will be used in the Load Config., Save Config., Print Config., Delete Config., and Power-Up Config. menus.
-
Page 105: Media Control Menu
CONFIG. CONTROL Submenus MEDIA CONTROL Menu MEDIA CONTROL Print Intensity -15 to 15 Print Speed 6 ips* 2-10 ips Print Mode Transfer* Direct Media Handling Tear-Off Strip* Tear-Off Peel-Off Continuous Paper Feed Shift 0.00 inches* -0.50 to X inches Label Length 2, 4 4 or 6 inches* 00.1 to 99.0 inches... - Page 106 Chapter MEDIA CONTROL Menu MEDIA CONTROL (cont. from previous page) Print Direction Head First* Foot First Tear-Strip Time 1.0 seconds* .1-60.0 seconds Pre-Peel Mode Disable* Enable Pre-Peel Adjust 1.00 inches* 0.00 to 2.00 inches Clip Page Enable* Disable Error Recover Disable* Enable Ribbon Width...
-
Page 107: Media Control Submenus
MEDIA CONTROL Submenus MEDIA CONTROL Submenus Print Intensity This option specifies the level of thermal energy from the printhead to be used for the type of media and ribbon installed. Large numbers imply more heat (thermal energy) to be applied for each dot. This has a significant effect on print quality. - Page 108 Chapter MEDIA CONTROL Menu • Peel-Off. Prints and peels die-cut labels from the liner without assistance. The printer waits for you to take away the label before printing the next one (on-demand printing). The label liner is rewound on the internal rewinder.
- Page 109 MEDIA CONTROL Submenus • Continuous media (no label length indicators) – measurable length should be within + 1-2% the Label Length value entered in the MEDIA CONTROL menu or the value sent via host software command. • Logical Label Length (Host Forms Length) is the length that a user or programmer bases his printable image on.
- Page 110 Chapter MEDIA CONTROL Menu Ver Image Shift This option specifies the amount to shift an image vertically up (-) or down (+) for precise positioning on the label. The actual height of the image is not affected by this parameter. The allowable range is -1.00 inches to the current Label Length value setting, up to a maximum of 12.80 inches, in .01 inch increments.
- Page 111 MEDIA CONTROL Submenus • Inv. Portrait. Inverse Portrait refers to vertical page orientation, where the height of a page is greater than its width. The top edge of the image is parallel to the trailing edge of the media. The following illustration is an example, with the operator viewing the front of the printer.
- Page 112 The IGP/Auto Label Mapping feature allows backward compatibility of programs written for P5000 line-matrix printers using the Printronix PGL graphics language. It allows the printer to print two-up (or other multi-up) labels. Instead of printing multiple labels across the printer, it prints the leftmost label and the rightmost label, so the printout will be twice as long but half as wide.
- Page 113 MEDIA CONTROL Submenus Example 2: Uneven Number Case Problem: A file has been constructed with three horizontally adjacent 2” labels. The user now desires to use this file with a printer that has a 4” physical width. Solution #1: The user sets Auto Label Width to 4” (the width of two labels), configures the Num Auto Labels to 2, and enables the Auto Label Mapping feature.
- Page 114 Chapter MEDIA CONTROL Menu Example 3: Past Maximum File Width Problem: A file has been constructed with three horizontally adjacent 4” labels. The user now desires to use this file with a printer that has a 8” physical width. The user should have used a solution similar to one of the solutions in the section above, but the user erroneously enters an Auto Label Width of 12”...
- Page 115 MEDIA CONTROL Submenus Num Auto Labels The desired number of labels to be printed vertically adjacent on the form. The value is selectable with a range of 1 through 40 (T5X04), 1 through 21 (T5X06) and 1 through 17 (T5X08). The factory default is 2.
- Page 116 Chapter MEDIA CONTROL Menu Print Direction and Orientation are two independent options that can be combined to produce the following results depending on the Active IGP Emulation: Table 4. Head First Print Direction Result in Active IGP Emulations Orientation Option Option (IGP/PGL or IGP/VGL) Head First...
- Page 117 MEDIA CONTROL Submenus Pre-Peel Adjust Pre-Peel Adjust represents the selectable distance that the label advances during Pre-Peel Mode. The Pre-Peel Adjust distance selected is automatically used when Pre-Peel Mode is enabled. The range is 0.00 to 2.00 inches in .01 inch increments. The factory default is 1.00 inch.
-
Page 118: Ribbon Low
Chapter MEDIA CONTROL Menu Length value is equal to the physical length of a die cut or removable label. When using Mark sensing, the Label Length value is the physical distance from the leading edge of one black mark to the leading edge of the next black mark. - Page 119 MEDIA CONTROL Submenus Units This item selects either millimeters or inches as the unit of measure. The options are In Inches (the factory default) and In Millimeters. Set Label Length This feature selects whether the Sensed Distance value derived from an Auto or Manual Calibrate will be used to set the Label Length value in the MEDIA CONTROL menu (and the QUICK SETUP menu).
- Page 120 Chapter MEDIA CONTROL Menu Continuous Mode Allows selection of special media modes when Continuous Media Handling mode (see “Media Handling” on page 107) is selected. • Standard. Labels are printed and sent out the front. The cross perforation following the last printed label is aligned at the tear bar. No auto feeding of a blank label should exist between print jobs, but you may need to press the FEED key to move approximately .80 inches of the last printed label from under the printhead.
-
Page 121: Calibrate Ctrl Menu
MEDIA CONTROL Submenus CALIBRATE CTRL Menu CALIBRATE CTRL Gap/Mark Sensor Disable* Mark Advanced Gap Advanced Notch Auto Calibrate Run Calibrate Media Profile Print Profile Sensed Distance 0.00 inches Gap/Mark Thresh 171* 000-255 Paper Out Thresh 136* 000-255 Paper Out Sensor Reflective* Transmissive Manual Calibrate... -
Page 122: Calibrate Ctrl Submenus
Chapter CALIBRATE CTRL Menu CALIBRATE CTRL Submenus Gap/Mark Sensor The available options specify the sensor type needed for detecting the Top-of- Form position on media with label length indicators (gaps, notches, holes, or black marks). • Disable. Select when using media with no label length indicators (no gaps, notches, holes, or black marks), or when you want the printer to ignore all existing label length indicators on the installed media. -
Page 123: Media Profile
CALIBRATE CTRL Submenus Media Profile This feature provides a graphical printout showing the relationship of the Paper Out Threshold and the Gap/Mark Threshold. The profile printout assists you in setting the thresholds for difficult media. This includes pre- printed labels, and labels with poor gap/media dynamic range. When selected, the printer will advance media and print the media profile along the length of each label. -
Page 124: Manual Calibrate
Chapter CALIBRATE CTRL Menu Manual Calibrate Manual Calibrate is another method of improving the printer’s media sensing and is only used when Auto Calibrate has failed or the Gap/Mark Threshold or Paper Out Threshold values derived from Auto Calibrate do not improve the media sensors’... -
Page 125: Gap Length
CALIBRATE CTRL Submenus Gap Windowing This feature compensates for any early falling edges or spurious peaks and troughs that may appear within the gap length in media. These edges or peaks and troughs can cause unreliable detection of the leading edge of the next label (top-of-form). - Page 126 Chapter CALIBRATE CTRL Menu Min Calib Delta Minimum Calibrate Delta changes the minimum threshold value the sensor(s) require to detect the difference between the label and a gap, notch, hole or black mark. This allows bolder gaps (such as notches or holes) to be used as the TOF while intermediate gaps (liner) can be ignored.
-
Page 127: Printer Control Menu
CALIBRATE CTRL Submenus PRINTER CONTROL Menu PRINTER CONTROL LP+ Emulation P-Series* P-Series XQ Serial Matrix Proprinter XL Epson FX CTHI Emulation Simp Prot Conv Standard* Host Interface Auto Switching* Centronics Serial IEEE 1284 Twinax Coax Ethernet Active IGP Emul IGP* CODE V Power Saver Time 15 minutes*... - Page 128 Chapter PRINTER CONTROL Menu PRINTER CONTROL (cont. from previous page) Save Char to Fls Del Char frm RAM Ld Char at PwrUp Disable* Enable Del Set frm Flsh Ld Set from Flsh Save Set to Flsh Del Set from RAM Ld Set at PwrUp Disable* Enable...
- Page 129 CALIBRATE CTRL Submenus PRINTER CONTROL (cont. from previous page) Max Cached Char 01 KBytes* 01-20 KBytes Standard Chars. 340* 0-512 Bold Chars. 448* 0-512 Extra Bold Char. 504* 0-512 OCR-A Chars. 384* 0-512 OCR-B Chars. 304* 0-512 Tall Characters Disable* Enable Batch Counter Disable*...
-
Page 130: Printer Control Submenus
The Simple Protocol Converter (SPC) option allows those who use add- on coax or twinax protocol converters to produce the same output on a Printronix thermal printer with the Coax/Twinax (CTHI) capability as done using a non-CT printer with the third party converter interfaces. The SPC... - Page 131 PRINTER CONTROL Submenus The SPC will support the same models for Twinax as the Printronix P5000 printer. The printer emulations supported by the SPC are Twinax 5225 and Coax 3287. The SPC also provides a range of interfaces available in your thermal printer: Centronics, serial, coax, and twinax.
- Page 132 Chapter PRINTER CONTROL Menu Power Saver Time The time interval you specify for this parameter sets the amount of idle time before the printer goes into Power Saver mode. Pressing any key removes the power saver message from the control panel. Sending a print job to the printer also turns off power saver mode.
- Page 133 PRINTER CONTROL Submenus Save Set to Flsh This option saves downloaded overlay set(s) to flash memory. Del Set from RAM This option deletes the downloaded overlay set(s) from RAM. Ld Set at PwrUp This option loads the downloaded overlay set from flash memory at Power The options are Disable (the factory default) and Enable.
- Page 134 Chapter PRINTER CONTROL Menu Delete Files Allows you to delete files in the file list. Contact your administrator for assistance. Optimize&Reboot ↵ Reclaims flash space from deleted flash files. After pressing wait for the printer to reboot. Print File List Prints a summary of the files stored in flash memory and several statistics on File System usage.
- Page 135 PRINTER CONTROL Submenus Set Sharing This option allows character sets to be shared between the active LP+ protocol and the active emulation. If CT is installed and active, choosing a character set in the CT activates that character set in the active emulation and LP+ protocols.
- Page 136 Chapter PRINTER CONTROL Menu ↵ 2. Press . The display reads, “Select a new lock key.” 3. Press the combination of keys that you want to be the new lock key. Make sure you press all keys selected at the same time. 4.
- Page 137 PRINTER CONTROL Submenus Max Cache Memory The Maximum Cache Memory option specifies the size of the memory block that can be allocated to the font cache. The font cache stores bitmaps that are created on demand from the font outlines stored on the printer flash. The cache allows the printer to print scalable fonts at optimum speed.
- Page 138 Chapter PRINTER CONTROL Menu Standard Chars. This menu entry permits you to adjust the thickness or font weight of standard text fonts. The range is 0 to 512, and the factory default is 340. Bold Chars. This menu entry permits you to adjust the thickness or font weight of bold text fonts.
- Page 139 PRINTER CONTROL Submenus Batch Counter Displays the number of pages remaining in a print job. • Enable. The # Pages remaining to be printed will display on the second line of the control panel LCD. This feature is supported in PGL and PPI1 only.
-
Page 140: Diagnostics Menu
Chapter DIAGNOSTICS Menu DIAGNOSTICS Menu DIAGNOSTICS Printer Tests Auto Calibrate* Checkerboard Grey Grid Current Config Left Test Right Test E-Net Test Page Barcode Demo Valid. Report Test Count Continuous* 1 Page 2 Pages 5 Pages 10 Pages Software Build XXXXXX Ver. XXX Security PAL XXXXXX - XXX Feature File... -
Page 141: Diagnostics Submenus
DIAGNOSTICS Submenus DIAGNOSTICS Submenus Printer Tests The printer tests below allow you to check for proper printer operation and print quality: • Auto Calibrate. Senses paperout, perforation, gap, or mark, and calibrates the printer for the currently installed media. • Checkerboard. - Page 142 Chapter DIAGNOSTICS Menu Software Build This is the reference number which includes the program file part number and revision number of the software installed in the printer, e.g., 358186 V1.07G. Security PAL Displays the part number of the Security PAL (device) installed. Feature File Displays the part number only when a feature file has been installed.
- Page 143 DIAGNOSTICS Submenus Head Print Dist Displays the length of media actually printed since the last Reset Head Data operation. This value is set to zero at the factory after burn-in testing. Head On Time Displays the time that power has been applied to the printhead since the last Reset Head Data operation.
-
Page 144: Ethernet Address Menu
Chapter ETHERNET ADDRESS Menu ETHERNET ADDRESS Menu ETHERNET ADDRESS IP Address 000* 0 to 255 SEG1: IP Address 000* 0 to 255 SEG2: IP Address 000* 0 to 255 SEG3: IP Address 000* 0 to 255 SEG4: Subnet Mask 000* 0 to 255 SEG1: Subnet Mask... -
Page 145: Ethernet Address Submenus
ETHERNET ADDRESS Submenus ETHERNET ADDRESS Submenus IP Address This item allows you to set the IP Address for the TCP/IP protocol in four three-digit segments (SEG1 through SEG4). If the IP Address is assigned by Bootp, ARP or DHCP, it is dynamic and read-only. The factory defaults for the SEG1 through SEG4 are 000, 000, 000, and 000. -
Page 146: Ethernet Params Menu
Chapter ETHERNET PARAMS Menu ETHERNET PARAMS Menu ETHERNET PARAMS Novell Protocol Enable* Disable Nest Serv Type Auto* Bindery NetBIOS Protocol Enable* Disable Novell Frame Auto Sensing* Ethernet II Ethernet 802.3 Ethernet 802.2 802.2 Snap ASCII Data Port 9100* 0 to 65535 IPDS Data Port 5001* 0 to 65535... -
Page 147: Ethernet Params Submenus
ETHERNET PARAMS Submenus ETHERNET PARAMS Submenus Novell Protocol • Enable. The NIC will respond to the Novell protocol. • Disable. The NIC does not recognize the Novell protocol. The factory default is Enable. Nest Serv Type You can change the Nest Server using this option, but consult your administrator for the appropriate setting. -
Page 148: Ethernet Speed
Chapter ETHERNET PARAMS Menu Ethernet Speed This menu appears only if a 10/100Base-T NIC (network interface card) is installed. The Ethernet Speed menu has five different speed modes to allow compatibility with different systems and networks: • Auto Select. Tells the 10/100Base-T NIC to perform an auto detection scheme and configure itself to be 10 Half Duplex, 10 Full Duplex, 100 Half Duplex, or 100 Full Duplex. -
Page 149: Gpio Control Menu
ETHERNET PARAMS Submenus GPIO CONTROL Menu GPIO CONTROL GPIO Disable* Enable GPIO Tables Internal* User Defined GPIO Sel. Table Main CylExtend CycleDelay VacDelay LabelOn PowerUp Offline Applied GPIO Start Print Input Low* Input High GPIO End Print Mode 1* Mode 2 Mode 3 Mode 4 Mode 5... -
Page 150: Gpio Control Submenus
Chapter GPIO CONTROL Menu GPIO CONTROL Submenus GPIO Enables the use of the GPIO hardware. • Disable. The default. • Enable. GPIO Tables NOTE: This menu appears only if a user-defined table is downloaded to the printer. Allows you to select a mapping table. •... - Page 151 GPIO CONTROL Submenus • Mode 5. Normally high. When the label has been printed completely, a low going, 50 millisecond pulse is sent. (This mode shows the end of a label print cycle, even in batch mode where labels are continuously being printed.) •...
-
Page 152: Applicator Delay Menu
Chapter Applicator Delay Menu Applicator Delay Menu ↵ With the SLPA online, press the key to enter the Applicator Delay menu. Press ↑ or ↓ to scroll through the submenus: Cycle Delay, Cylinder Extend, ↵ and Vacuum Delay. Press + or – to adjust the values. Press to set a new value. -
Page 153: Preventive Maintenance
Never use metallic tools to clean the interior of the SLPA. Dust the exterior of the SLPA regularly. It is preferable to use a Printronix cleaning kit to clean the exterior of the SLPA, or a soft cloth dampened with isopropyl alcohol. - Page 154 Chapter Cleaning Pivoting Deck Printhead Heating Elements Printhead Cover/ Upper Media Sensor Lower Media Sensor with visible red LED Deck Lock Lever Platen Roller Print Element Upper Sensor Figure 31. Cleaning the Printhead...
-
Page 155: Cleaning The Printhead, Platen Roller And Media Sensors
Cleaning The Printhead, Platen Roller And Media Sensors Cleaning The Printhead, Platen Roller And Media Sensors Printhead Cleaning As you use your SLPA, the printhead may become dirty which can result in poor print quality. Clean the printhead each time you install new ribbon (thermal transfer print mode) or install new media (direct thermal print mode). -
Page 156: Cleaning The Applicator Pad
Chapter Cleaning Cleaning The Applicator Pad Hex Screw (4 or 6) Top Pad Gasket Bottom Pad Figure 32. The Applicator Pad Assembly The applicator pad must be clean to ensure that labels will properly dispense. Use isopropyl alcohol and a clean soft cloth. No other cleaning agent should be used to clean the applicator pad. -
Page 157: Cleaning/Replacing The Vacuum Generator
Cleaning/Replacing The Vacuum Generator Cleaning/Replacing The Vacuum Generator Air flow through the vacuum generator creates the vacuum for the applicator pad, allowing the label to be held in place. If the label is not retained on the pad and the pad has already been inspected for leaks, then the vacuum generator should be cleaned as follows. -
Page 158: Cleaning Schedule
Printhead Elements Weekly or as Wipe with a Printronix printhead cleaning pen or a needed cotton swab moistened with isopropyl alcohol. See Figure 31 on page 154. Printhead cleaning needs depend upon the print mode which is being used. -
Page 159: Troubleshooting
Troubleshooting Introduction This chapter lists fault messages and symptoms, and gives procedures for troubleshooting printer malfunctions. You must operate the printer to check its performance and you may have to reconfigure it. What You Should Know About Print Quality The print quality of a thermal printer is affected most by the amount of heat applied by the printhead to the media and by the location of the printhead in relation to the print media. -
Page 160: Troubleshooting At A Glance
Chapter Introduction 2. Avoid excessive printhead pressure, usually indicated by white wear spots on the printhead element. Reduce the pressure until you see print quality problems, then increase the pressure slightly until you have good print quality. 3. Avoid excessively high Intensity settings. Intensity is the burn temperature that the printhead operates at. -
Page 161: Start Here
Troubleshooting At A Glance Start Here Are you here because of an Go to Troubleshooting error message? Display Messages, page 164. Power on the printer and observe the control panel for the following sequence of events (retry as required): 1. TESTING HARDWARE PLEASE WAIT appears on display. -
Page 162: How To Troubleshoot
Chapter How To Troubleshoot How To Troubleshoot You will be more successful in troubleshooting printer problems if you use standard fault isolation techniques, which are summarized below: 1. Ask the operator to describe the problem. 2. Verify the fault by running a diagnostic printer test or by replicating the conditions reported by the user. -
Page 163: Printer Tests
Printer Tests Printer Tests This section lists SLPA printer tests which may be performed to check or confirm the proper operation of the SLPA with regard to print quality. The default is Auto Calibrate. The SLPA will display the last test displayed before going online. -
Page 164: Troubleshooting Display Messages
Chapter Troubleshooting Display Messages Current Configuration Prints the current SLPA configuration and helps identify the text print quality. Left Test Prints a pattern containing a series of ladder-type bar code symbols, starting with four and decreasing by one symbol on each print until a single symbol prints on the left side.This pattern helps identify ribbon wrinkle problems. -
Page 165: List Of Messages
List Of Messages List Of Messages Find the message in the Message List below and follow the suggested procedure. After correcting an error, press the PAUSE key to erase the message and put the printer in the offline mode. If an error is not cleared, the printer will try to print again but will display the error message until the error is cleared. - Page 166 Chapter Troubleshooting Display Messages Table 8. Message List Message Explanation Solution 15 COMM CHECK Communication message that 1. Reseat the twinax host data appears in the CT emulation cable connection and the and means the line is not active twinax I/O cable connection on a twinax interface.
- Page 167 List Of Messages Table 8. Message List Message Explanation Solution 27 CU TIMED OUT Controller Unit Timed Out: Poll Check cable connection and time-out error. The printer was host system. (Refer to line not polled for one minute across problem determination a coax interface.
- Page 168 Chapter Troubleshooting Display Messages Table 8. Message List Message Explanation Solution 300 DPI Head Installed Normal power-up message. No action required. The printer is running its initialization routine and indicating the DPI resolution of the installed printhead. BAD VFU CHANNEL The user tried to use an Use defined channels.
- Page 169 List Of Messages Table 8. Message List Message Explanation Solution This is the High Volt Alert that 1. Raise the value in the High BATT HIGH VOLT can be set by the user (factory Volt Alert option in the default = 16.0 Volts). This fault BATTERY CONTROL detection is only supported menu.
- Page 170 Chapter Troubleshooting Display Messages Table 8. Message List Message Explanation Solution Calibration The validator has detected that Press PAUSE to clear the warning it needs calibration. This message. Calibrate the message is a reminder and validator. See “Calibration” on does not halt printing. page 295.
- Page 171 List Of Messages Table 8. Message List Message Explanation Solution CUTTER FAULT 1. The cutter option was not 1. Clear obstructions from the Jam or Cut Fail able to complete a full cut cutter assembly. cycle due to a jam. 2.
- Page 172 Chapter Troubleshooting Display Messages Table 8. Message List Message Explanation Solution DOWNLOADING TO Normal message when the No action required. VALIDATOR printer is downloading NOTE: The validator software emulation software with a update can be verified validator option installed. in the F/W Revision NOTE: Many software builds menu option of the contain updates to the...
- Page 173 List Of Messages Table 8. Message List Message Explanation Solution ERROR: DRAM AT The printer found a defective 1. Reseat or replace DRAM ADDRESS XXXXXXXX memory location. SIMM at J33. 2. Replace Controller PCBA. Write down the message and return it with the defective board.
- Page 174 Chapter Troubleshooting Display Messages Table 8. Message List Message Explanation Solution ERROR: PROGRAM The printer requires more flash 1. Install a 10 MB Flash SIMM NEEDS MORE FLASH memory in order to run the at J38. downloaded program. 2. If the message reappears, replace the Flash SIMM.
- Page 175 List Of Messages Table 8. Message List Message Explanation Solution ERROR: WRITING Hardware or software fault in 1. Download the emulation TO FLASH flash memory. software again. 2. If the message reappears, replace the Flash SIMM. 3. Download the emulation. If the message reappears, replace the controller PCBA.
- Page 176 Chapter Troubleshooting Display Messages Table 8. Message List Message Explanation Solution The printer detected that the 1. Verify that the fan rotates FAN WARNING power supply fan did not rotate when the printer is first for at least a 45 second period powered up and when the when it is was supposed to.
- Page 177 List Of Messages Table 8. Message List Message Explanation Solution FILE SYS INVALID The file system was not 1. Install the Flash SIMM that Optimize & Reboot detected. The flash memory was removed. was corrupted or the Flash 2. Enter the PRINTER SIMM was removed.
- Page 178 Chapter Troubleshooting Display Messages Table 8. Message List Message Explanation Solution GAP NOT DETECTED The printer is set for Gap or 1. If the customer is not using Check Media Mark sensing, but a gap, mark, die-cut labels, set the or notch is not being detected.
- Page 179 List Of Messages Table 8. Message List Message Explanation Solution GAP NOT DETECTED d. Make sure the media Check Media sensor cable has a good connection to J15 and J21 on the controller board. e. Verify that the media is within the specification of the printer.
- Page 180 Chapter Troubleshooting Display Messages Table 8. Message List Message Explanation Solution HEAD POWER FAIL The printhead lost power. 1. Check the connection of the Call For Service phone-style power supply control cable at J5 on the controller PCBA and CN403 on the power supply.
- Page 181 List Of Messages Table 8. Message List Message Explanation Solution LABEL MISSING The Label Taken Sensor did not 1. Press PAUSE to continue Check Paper Path detect the label present over printing and then wait for the tear bar with Tear-Off or the “Remove Label”...
- Page 182 Chapter Troubleshooting Display Messages Table 8. Message List Message Explanation Solution OPTION NOT 1. A cutter option must be 1. Check that the cutter option INSTALLED installed and in the up is installed, connected, in (operating) position with the the up position, and the upper enclosure installed upper enclosure properly when the printer is powered...
- Page 183 List Of Messages Table 8. Message List Message Explanation Solution PAPER OUT The printer does not detect print 1. Verify that the media is Load Paper media. This message is usually within the specification of caused by a break in the media, the printer.
- Page 184 Chapter Troubleshooting Display Messages Table 8. Message List Message Explanation Solution PAPER OUT 7. If the printer detected a Load Paper false PAPER OUT when changing from Advanced Gap or Advanced Notch to Gap or Mark sensing or vice-versa, press PAUSE and run Auto Calibrate 8.
- Page 185 List Of Messages Table 8. Message List Message Explanation Solution Poor scanning Data validation failure: 1. Adjust Print Intensity and Check heat&head decodeability. The difference Print Speed in the QUICK between wide and narrow SETUP menu or via host elements is too close for the software.
- Page 186 Chapter Troubleshooting Display Messages Table 8. Message List Message Explanation Solution POWER SAVER MODE The printer is in a low-energy No action required. idle state. The fan, printhead, and all motors are off, only the +5 VDC logic circuits are active. POWER SUPPLY VOLT* The power supply has failed.
- Page 187 List Of Messages Table 8. Message List Message Explanation Solution PRINT HEAD HOT The printhead is close to 1. Allow the printhead to cool See Manual overheating. This fault causes for five minutes, then press the printer to stop printing and PAUSE.
- Page 188 Chapter Troubleshooting Display Messages Table 8. Message List Message Explanation Solution PRINTER HOT The printer has detected higher 1. Print jobs do not create See Manual than usual temperatures on the such temperatures. Make controller PCBA. sure the fan works during the power on sequence and This fault can only by cleared by that the fan is unobstructed.
- Page 189 List Of Messages Table 8. Message List Message Explanation Solution PWR SUPPLY HOT The power supply is operating 1. Make sure the fan works. See Manual at higher than normal 2. Verify that the tab on the temperatures. This fault causes panel is not interfering with the printer to stop printing.
- Page 190 Chapter Troubleshooting Display Messages Table 8. Message List Message Explanation Solution RBN TAKEUP FULL 1. The ribbon take-up spindle 1. If this message is briefly Remove Used Rbn is full. flashing on the display while continuing to move media 2. The printer is falsely back and forth, see detecting a take-up full “General Symptom List —...
- Page 191 List Of Messages Table 8. Message List Message Explanation Solution RBN TAKEUP FULL Verify that the ribbon Remove Used Rbn take-up motor is connected to J8 on the controller board. g. Replace the ribbon take-up motor. 5. If the message reappears, replace the controller PCBA.
- Page 192 Chapter Troubleshooting Display Messages Table 8. Message List Message Explanation Solution RESETTING The printer finished loading the No action required. PLEASE WAIT program into flash memory and is automatically resetting itself. RESTORING Normal download initialization No action required. BOOT CODE message.
- Page 193 List Of Messages Table 8. Message List Message Explanation Solution RIBBON FAULT In the CT emulation with a coax 1. Clean the printer. TIMEOUT interface, the ribbon has not 2. Power on the printer. Install moved for 10 minutes after media.
- Page 194 Chapter Troubleshooting Display Messages Table 8. Message List Message Explanation Solution SECURITY CODE The software running or being Install the correct PAL at U7 or VIOLATION downloaded does not match the use the correct emulation security PAL code. program. (PAL and program must match.) SELECT DOWNLOAD Normal message when the...
- Page 195 List Of Messages Table 8. Message List Message Explanation Solution Speed Exceeds Print Speed is set above 6 IPS Change Print Speed in the Validator Limit as the Power-Up configuration QUICK SETUP menu or via with the validator option host software to 6 IPS or less installed.
- Page 196 Chapter Troubleshooting Display Messages Table 8. Message List Message Explanation Solution Test Page An attempt was made to print Replace the dual NIC wireless Not Available an E-Net test page. The dual interface. NIC wireless interface may be defective. TESTING HARDWARE Normal message at power-up.
- Page 197 List Of Messages Table 8. Message List Message Explanation Solution WAITING FOR Normal message when the 1. Complete the downloading PROGRAM DOWNLOAD printer is powered up while software procedure. See “Downloading Software” on holding down both the page 351. ↓ keys in preparation to download software to the 2.
-
Page 198: Troubleshooting Other Symptoms
Chapter Troubleshooting Other Symptoms Troubleshooting Other Symptoms Use standard fault isolation techniques to troubleshoot malfunctions not indicated by display messages. These techniques are summarized below: 1. Ask the operator to describe the problem. 2. Verify the fault by running a diagnostic printer test or by replicating conditions reported by the user. - Page 199 General Symptom List Table 9. General Symptom List Symptom Solution COMMUNICATIONS FAILURES Printer hangs during print job. 1. Redownload the latest level of software (page 351). 2. Refer to Table 11 on page 219. Fails to print from host. See Table 11 on page 219. Prints incorrect characters.
- Page 200 Chapter Troubleshooting Other Symptoms Table 9. General Symptom List Symptom Solution Cannot access the printer If the ethernet port is not enabled under the Debug menu, the through the remote following message will appear in the Status and Error Log management software (NIC).
- Page 201 General Symptom List Table 9. General Symptom List Symptom Solution CONTROL PANEL Black squares on the control 1. Install the Flash SIMM. panel display. 2. If the message reappears, replace the Flash SIMM with a Flash SIMM that has working boot code. 3.
- Page 202 Chapter Troubleshooting Other Symptoms Table 9. General Symptom List Symptom Solution POWER FAILURES Printer fails to turn on, the 1. Check that printer AC power cord is correctly attached to display is not backlit, and the the printer and to the AC power outlet. fan is not running.
- Page 203 General Symptom List Table 9. General Symptom List Symptom Solution PRINT QUALITY • Label(s) did not get 1. If the serial interface is being used, verify that the correct printed within a multi label data protocol is selected to match the host interface print job.
- Page 204 Chapter Troubleshooting Other Symptoms Table 9. General Symptom List Symptom Solution Media and ribbon move, but 1. Print a checkerboard diagnostic test pattern (page 163) no image prints in Thermal and check if the image appears on the used portion of the Transfer mode.
- Page 205 General Symptom List Table 9. General Symptom List Symptom Solution Print is light on the left or right Check to see if the pressure blocks are set for the width of the side of the label. media being used. Set each block near the edge of the media. Prints strange characters 1.
- Page 206 Chapter Troubleshooting Other Symptoms Table 9. General Symptom List Symptom Solution • Start of image is printed 1. In the MEDIA CONTROL menu, set Clip Page to Disable. an erroneous distance 2. Make sure the Label Length value matches the actual from the top-of-form.
- Page 207 7. Use the correct ribbon type. Genuine Printronix Supplies are highly recommended to ensure the best possible print quality. (Refer to the User’s Manual .) 13. Check the ribbon for creases or folds across its surface.
- Page 208 Chapter Troubleshooting Other Symptoms Table 9. General Symptom List Symptom Solution Smears or voids in printed 15. Reduce the Print Speed value through the QUICK SETUP image (continued). or MEDIA CONTROL menu or via host software. (Refer to the User’s Manual .) 16.
- Page 209 General Symptom List Table 9. General Symptom List Symptom Solution PRINTER OPERATION “*** 053 Insufficient memory Install more DRAM. to create the LOGO” printed on the media. “*** 055 LOGO call not Install more DRAM. previously defined” printed on the media. The printer loses its values for After performing a media calibration procedure, save the Sensed Distance, Gap/Mark...
- Page 210 Chapter Troubleshooting Other Symptoms Table 9. General Symptom List Symptom Solution • Print quality is good, but 1. Make sure that the image is not formatted too close to the the printer skips every top edge of the label. Leave white space equal to eight dot other label.
- Page 211 General Symptom List Table 9. General Symptom List Symptom Solution Bar code print jobs print as 1. Make sure the correct microcode to support IGP or Code V control codes for IGP or Code emulation is loaded in the printer. V bar code jobs.
- Page 212 Chapter Troubleshooting Other Symptoms Table 9. General Symptom List Symptom Solution RIBBON Printer advances media, but 1. Make sure the ribbon is installed correctly. ribbon does not advance. 2. A poor ribbon/media combination can cause insufficient friction between media and ribbon. Verify that the correct ribbon and media are being used.
- Page 213 The printer loses data from Use a Printronix ribbon. the print job when an end of NOTE: Some ribbons use a trailer: foil or mylar material at the ribbon condition occurs while end of a ribbon roll that is attached to the fiber core.
- Page 214 Chapter Troubleshooting Other Symptoms Table 10. Applicator Troubleshooting Chart Sympton Diagnosis Solution Cylinder will not cycle 1. Check for faults on the 1. Correct or clear any faults after the label is encoded/ display. on the LCD. printed. 2. Check the photocell 2.
- Page 215 2. Store labels in an area 60 to expired or defective. 80 degrees F at 50 to 60% humidity. If defective, order new labels from Printronix. 3. Verify that the labels are 3. Make sure the labels are loaded properly and the loaded correctly (page 41).
- Page 216 Check for clogged vacuum carb. 3. Check for defective or old 3. Order new labels from label supplies that are Printronix. curling. Labels buckling while 1. Check vacuum pressure. 1. Lower vacuum pressure feeding onto the tamp and turning the VACUUM pad assembly.
- Page 217 General Symptom List Table 10. Applicator Troubleshooting Chart Sympton Diagnosis Solution Label advances but the 1. Check that the labels are 1. Make sure the labels are backing rewind motor is loaded properly. loaded correctly (page 41). not turning. 2. Check dancer spring 2.
-
Page 218: Communications Failures
Chapter Communications Failures Communications Failures With the exception of a defective interface cable, most communications problems between the host computer and printer are not the result of a hardware failure. Communications problems most often result from incompatible configuration of the host computer system, network (LAN, print server, controller, multiplexer, etc.), or the printer. - Page 219 General Symptom List Table 11. Common Communications Problems Problem Interface Common Causes Fails to print from host parallel - Interface cable defective - Host/Network configuration -or- - Printer logic - Terminating resistors Prints incorrect characters - Incorrect printer configuration. Refer customer to the User’s Manual .
- Page 220 Chapter Communications Failures Device Handshaking Handshaking is the exchange of signals between the host computer and the printer to indicate the status of the data being transferred. In serial data transfer the printer uses both hardware and software handshaking and transmits both forms simultaneously when the input buffer is full.
-
Page 221: Troubleshooting A New Installation
Printer Configuration Troubleshooting A New Installation Customers with new printers sometimes report “problems” that reflect unfamiliarity with the printer and manuals rather than true fault conditions. If a customer reports general printer problems and the printer was recently installed, check the following: Printer Configuration Many customers have difficulty configuring new printers for operation with their computer system. - Page 222 Chapter Troubleshooting A New Installation...
-
Page 223: Replacing Parts
Replacing Parts About This Chapter This chapter contains removal/installation procedures for the parts and assemblies that you can replace at the field service level of maintenance. Part numbers for replacement parts are listed in Chapter 7, “Illustrated Parts Breakdown” (IPB), which begins on page 263. Preparing The Printer For Maintenance WARNING Always unplug the printer power cord from the printer or power outlet... -
Page 224: Restoring The Printer To Operation
Chapter About This Chapter Restoring The Printer To Operation When you are finished servicing the printer, follow the steps below. 1. Install the access panels if they were removed to service the printer (page 226). 1. Install the ribbon if thermal transfer is the required print mode. 2. -
Page 225: Removal And Replacement Procedures
Restoring The Printer To Operation Removal And Replacement Procedures Access Panels................. page 226 Control Panel Assembly ..............page 227 Controller PCBA (Printed Circuit Board Assembly)......page 228 Damper, Media................page 230 Drive Belt, Platten Rollers ............... page 231 Gear, Ribbon Drive, Final..............page 232 Gear, Ribbon Drive, Intermediate ........... -
Page 226: Access Panels
Chapter Removal And Replacement Procedures Access Panels Removal 1. Prepare the printer for maintenance (page 223). 2. Remove the two screws securing the small access panel. 3. Slide the small access panel out of the SLPA. 4. Remove the screw securing the large access panel. 5. -
Page 227: Control Panel Assembly
Control Panel Assembly Control Panel Assembly Removal 1. Prepare the printer for maintenance (page 223). 2. Remove the access panels (page 226). CAUTION To prevent electrostatic damage to electronic components, always wear a properly grounded static wrist strap when you handle circuit boards. 3. -
Page 228: Controller Pcba (Printed Circuit Board Assembly)
Chapter Removal And Replacement Procedures Controller PCBA (Printed Circuit Board Assembly) Removal 1. Prepare the printer for maintenance (page 223). 2. Remove the access panels (page 226). CAUTION To prevent electrostatic damage to electronic components, always wear a properly grounded static wrist strap when you handle circuit boards. 3. - Page 229 Controller PCBA (Printed Circuit Board Assembly) Installation CAUTION To prevent electrostatic damage to electronic components, always wear a properly grounded static wrist strap when you handle circuit boards. 1. Put on a static wrist strap and ground it to an unpainted part of the printer frame.
-
Page 230: Damper, Media
Chapter Removal And Replacement Procedures Damper, Media Removal 1. Prepare the printer for maintenance (page 223). 2. Remove the access panels (page 226). 3. Remove the main power supply. 4. Remove the retaining E-ring securing the damper shaft to the printer frame. -
Page 231: Drive Belt, Platten Rollers
Drive Belt, Platten Rollers Drive Belt, Platten Rollers Removal CAUTION Do not use excessive force to remove the drive belt from the platten rollers, which can stretch or permanently damage the belt. A stretched drive belt causes images to print with incorrect lengths. 1. -
Page 232: Gear, Ribbon Drive, Final
Chapter Removal And Replacement Procedures Gear, Ribbon Drive, Final Removal 1. Prepare the printer for maintenance (page 223). 2. Remove the appropriate retaining E-ring securing the final ribbon drive gear to the spindle shaft. (Figure 46, page 268, items 2 and 3.) 3. -
Page 233: Gear, Ribbon Drive, Intermediate
Gear, Ribbon Drive, Intermediate Gear, Ribbon Drive, Intermediate Removal 1. Prepare the printer for maintenance (page 223). 2. Remove the appropriate final ribbon drive gear (page 232). 3. Remove the appropriate DC ribbon drive motor (page 242). 4. Remove the retaining E-ring securing the intermediate ribbon drive gear to the shaft. -
Page 234: Head Pressure Block Assembly
Chapter Removal And Replacement Procedures Head Pressure Block Assembly Removal 1. Prepare the printer for maintenance (page 223). 2. Remove the printhead assembly (page 250). 3. Rotate the lead screw knob until the outboard head pressure block is exactly one inch from the inboard head pressure block. (Figure 49, page 276, item 5.) 4. - Page 235 Head Pressure Block Assembly Installation 1. Install the gimbal pivot rack on the outboard head pressure block. (Figure 49, page 276, items 18 and 20.) 2. Position the pressure cam in the outboard head block so that the widest flat spot rides on the plunger. Position the outboard head pressure block in the pivoting deck and insert the head pressure shaft through both sides and the cam.
- Page 236 Chapter Removal And Replacement Procedures Adjusting Head Pressure Blocks The pressure blocks should be positioned to obtain a uniform printing density across the media. In most cases, only the right pressure block will need adjustment. For the best printing quality under a variety of media and ribbon conditions, adjust printhead pressure blocks as explained below.
-
Page 237: Media Sensor Assembly, Lower
Media Sensor Assembly, Lower Media Sensor Assembly, Lower Removal 1. Prepare the printer for maintenance (page 223). 2. Remove the access panels (page 226). Actuator 4 Pin Media Sensor Cable Figure 36. Removing the 4 Pin Media Sensor Cable from the J15 Connector 3. - Page 238 Chapter Removal And Replacement Procedures Installation 1. Reverse the steps of the remove procedure. 2. Restore the printer to operation (page 224). Actuator 4 Pin Media Sensor Cable Figure 37. Unlocking the J15 Connector NOTE: Later version controller PCBAs do not have an actuator on J15; the sensor cable just pushes in.
-
Page 239: Memory Modules, Flash And Dram
Memory Modules, Flash And DRAM Memory Modules, Flash And DRAM Printer memory is held in two SIMMs (Single In-line Memory Modules) on the controller board. The DRAM SIMM plugs into socket J33 on the controller board. The Flash SIMM plugs into socket J38 on the controller board. (Figure 39, page 240.) The procedure for removing and installing all SIMMs is the same, but if you are replacing the Flash SIMM be sure to make a printout of all the desired... - Page 240 Chapter Removal And Replacement Procedures Controller Board DRAM Location U7: SIMM Security PAL Notch Flash Notch SIMM Notch Figure 39. Replacing Memory Modules and Security PAL...
- Page 241 Memory Modules, Flash And DRAM Label Taken Sensor Upper Media Head Up Sensor Sensor Lower Media Sensor Ribbon Supply Motor Stepper Motor Ribbon Take-up Motor Power Figure 40. Controller PCBA Connectors...
-
Page 242: Motor, Dc Ribbon Drive
Chapter Removal And Replacement Procedures Motor, DC Ribbon Drive Removal 1. Prepare the printer for maintenance (page 223). 2. Remove the access panels (page 226). 3. Disconnect the appropriate DC ribbon drive motor cable assembly from the controller board: a. Disconnect the upper (ribbon take-up) DC ribbon drive motor cable from connector J8 on the lower right edge of the controller board. -
Page 243: Motor, Stepper
Motor, Stepper Motor, Stepper Removal 1. Prepare the printer for maintenance (page 223). 2. Remove the access panels (page 226). 3. Remove the power supply. 4. Disconnect the stepper motor spring from the stepper motor mount plate. (Figure 45, page 264, item 10.) 5. -
Page 244: Nic Assembly
Chapter Removal And Replacement Procedures NIC Assembly NOTE: The NIC LAN option is a 10/100Base-T ethernet interface available either factory installed or as a field kit. The functions of the LEDs and DIP switches on the interface board are described on page 245. If the NIC is installed in the printer, the NIC configuration values appear under the ETHERNET PARAMS menu, accessed through the control panel. - Page 245 NIC Assembly 10/100Base-T LEDs And DIP Switches The 10/100Base-T NIC has two indicator lights and two DIP Switches, as shown below. DIP Switches Shown in OFF (default) position STAT (status indicator) (network indicator) Figure 41. The 10/100Base-T LEDs and DIP Switches Inspect the two LEDs on the 10/100Base-T NIC: 1.
- Page 246 Chapter Removal And Replacement Procedures The STAT (Status) Indicator In Run And Auto Reset Modes Run Mode is the normal operating state of this interface. Auto Reset mode is entered when the watchdog timer is triggered and the print server resets itself. In either mode, the STAT LED flashes at a varying rate, depending on whether the unit IP address is configured.
-
Page 247: Dip Switches
NIC Assembly DIP Switches Two DIP switches, labeled 1 and 2, are mounted on the 10/100Base-T interface inside the printer. The functions of these switches are explained below. Table 14. 10/100Base-T DIP Switch Settings DIP Switch Description Normal operation. The interface boots up using the (up) (up) settings in flash memory rather than the default... -
Page 248: Platen
Chapter Removal And Replacement Procedures Platen Removal 1. Prepare the printer for maintenance (page 223). 2. Open the pivoting deck by rotating the deck lock lever fully clockwise. 3. Loosen the top and bottom screws securing the stepper motor. (Figure 45, page 264, items 11 and 12.) 4. -
Page 249: Power Supply Assembly
Power Supply Assembly Power Supply Assembly Removal 1. Prepare the printer for maintenance (page 223). 2. Make sure the pivoting deck is closed and disconnect the power supply cable assembly from the printhead assembly. (Figure 48, page 272, items 9 and 10.) 3. -
Page 250: Printhead Assembly
Chapter Removal And Replacement Procedures Printhead Assembly CAUTION Oils from your hands can damage the light brown area (heating elements) of the printhead. Do not touch the light brown area when you handle the printhead assembly. Removal 1. Prepare the printer for maintenance (page 223). 2. - Page 251 Printhead Assembly 5. Hold the printhead assembly by the printhead cover as it is released. 6. Push the release tab down on the power supply cable assembly and remove the cable from the printhead assembly. 7. Use the pull-tab to remove the printhead controller cable assembly from the printhead assembly.
-
Page 252: Printhead Cover/Upper Media Sensor
Chapter Removal And Replacement Procedures Printhead Cover/Upper Media Sensor NOTE: The printhead cover/upper media sensor is not available for RFID printheads. An entire printhead assembly must be replaced. (Figure 89, page 382, item 3.) Removal 1. Prepare the printer for maintenance (page 223). 2. -
Page 253: Resistors, Terminating
Resistors, Terminating Resistors, Terminating For parallel interface configurations, the printer is equipped with 470 Ohm pull-up terminating resistors and 1K Ohm pull-down terminating resistors on the controller board. These are suitable for most applications. (See Figure 44 on page 254.) If the standard terminating resistor pack is not compatible with the particular interface driver requirements of the host computer, other values of pull-up and pull-down resistors may be required. - Page 254 Chapter Removal And Replacement Procedures Default: 1K Ohm Default: 470 Ohm Alt 1: 330 Ohm Alt 1: 220 Ohm Alt 2: None Alt 2: 1K Ohm Figure 44. This figure shows the size and location of the terminating resistors on the controller board.
-
Page 255: Rewind (Label Liner Take-Up) Assembly
Rewind (Label Liner Take-Up) Assembly Rewind (Label Liner Take-Up) Assembly Removal 1. Prepare the printer for maintenance (page 223). 2. Remove the access panels (page 226). 3. Remove the rewind hub: a. Remove the 1/4-20 socket cap screw and spring from the end of the hub. -
Page 256: Security Pal
Chapter Removal And Replacement Procedures Security PAL You must have a security PAL installed that supports your desired emulation. Refer to Table 15. NOTE: All security PALs support 4, 6, and 8 inch printers. IGP includes VGL, PGL, and LP+ emulations. CT = coax/twinax interface option NOTE: Security PAL part numbers are for reference only. - Page 257 Security PAL Installation CAUTION To prevent electrostatic damage to electronic components, always wear a properly grounded static wrist strap when you handle circuit boards. 1. Put on a static wrist strap and ground it to an unpainted part of the printer frame.
-
Page 258: Sensor, Head Up
Chapter Removal And Replacement Procedures Sensor, Head Up Removal 1. Prepare the printer for maintenance (page 223). 2. Disconnect the head up sensor cable from connector J11 on the controller board. (Figure 40, page 241.) 3. Remove the head up sensor cable from the wire saddles and feed it through the frame opening into the media side of the printer. -
Page 259: Spindle Assembly, Ribbon Supply Or Take-Up
Spindle Assembly, Ribbon Supply Or Take-Up Spindle Assembly, Ribbon Supply Or Take-Up Removal 1. Prepare the printer for maintenance (page 223). 2. Remove the appropriate retaining E-ring securing the final ribbon drive gear to the desired ribbon spindle shaft. (Figure 46, page 268, items 1, 2, and 3). -
Page 260: Support Assembly, Lower
Chapter Removal And Replacement Procedures Support Assembly, Lower Removal 1. Prepare the printer for maintenance (page 223). 2. Remove the platen (page 248). 3. Remove the media sensor assembly (page 237). 4. Remove two screws and the peel/tear assembly. (Figure 48, page 272, items 5 and 6.) 5. -
Page 261: Support Assembly, Upper
Support Assembly, Upper Support Assembly, Upper Removal 1. Prepare the printer for maintenance (page 223). 2. Remove the printhead assembly (page 250). 3. Remove the head up sensor (page 258). 4. Pull the grommet out of the frame on the drive (electronics) side and feed the cables back inside the frame while they are still through the grommet. - Page 262 Chapter Removal And Replacement Procedures...
-
Page 263: Illustrated Parts Breakdown
Illustrated Parts Breakdown Organization Of This Chapter This chapter contains drawings of the electromechanical assemblies comprising the SLPA. The table following each illustration lists the illustrated parts and their part numbers. Items marked “Ref” (reference) are not spared, are part of another assembly, or are shown elsewhere. - Page 264 Chapter Illustrated Parts Breakdown Figure 45. Power Supply, Belts, and Stepper Motor...
- Page 265 Item Part No. Description Notes 173344-001 Power Supply Assembly Includes items 3, 4, 14, 17, 18, and 21. 750489-001 Power Supply Assembly Includes items 3, 14, and 17. 203824-001 Screw, Flanged, Socket Head, Available only in Hardware M4x10mm (2) Kit 171629-001 (page 316). 140822-007 Screw, M4x30mm (4) Part of items 1 and 1a.
- Page 266 Chapter Illustrated Parts Breakdown Item Part No. Description Notes Power Supply Part of item 1. Power Supply Part of item 1a. 750695-001 Cable Assy, Printhead Controller 6 and 8 inch printers only. 171774-001 Cable Assy, Printhead Controller 4 inch printers only. Cable Assembly, Power Supply Part of items 1 and 1a.
- Page 267 (Parts lists continue on the next page.)
- Page 268 Chapter Illustrated Parts Breakdown See page 270. Figure 46. Shafts and Spindles...
- Page 269 Item Part No. Description Notes 171409-001 Field Kit, Ribbon Spindle, 8 inch Includes items 3, 7, 12 and 171408-001 Field Kit, Ribbon Spindle, 6 inch 13. Not used on -DT models. 172264-001 Field Kit, Ribbon Spindle, 4 inch 750569-001 Gear, Ribbon Drive, Final Not used on -DT models.
- Page 270 Chapter Illustrated Parts Breakdown From page 268. Figure 47. Media Damper...
- Page 271 Item Part No. Description Notes 750477-001 Shaft, Media Damper 6 and 8 inch printers only. 171825-001 Shaft, Media Damper 4 inch printers only. 175169-001 Damper, Media, 8 inch 175169-002 Damper, Media, 6 inch 175169-003 Damper, Media, 4 inch 750472-001 Damper, Media, 8 inch Replace with 175169-001.
- Page 272 Chapter Illustrated Parts Breakdown See page 276. See page 280. Figure 48. Upper and Lower Support Assemblies...
- Page 273 Item Part No. Description Notes 750695-001 Cable Assembly, Printhead/Controller 6 and 8 inch printers only. See item 20, page 264. 171774-001 Cable Assembly, Printhead/Controller 4 inch printers only. See item 20, page 264. 172268-001 Field Kit, Upper Support Assy, 4 inch Does not include printhead 171597-001 Field Kit, Upper Support Assy, 6 inch...
- Page 274 Chapter Illustrated Parts Breakdown Item Part No. Description Notes 175063-901 Tear Bar, Adjustable, 4 inch Supports Continuous and 175063-902 Tear Bar, Adjustable, 6 inch Tear-Off Strip media handling 175063-903 Tear Bar, Adjustable, 8 inch modes only. Does not support any paper path assy.
- Page 275 (Parts lists continue on the next page.)
- Page 276 Chapter Illustrated Parts Breakdown From page 272. Figure 49. Four Inch Printhead, Pivoting Deck, and Upper Support Assembly For RFID models, see Figure 89 on page 382.
- Page 277 Item Part No. Description Notes 173603-001 Field Kit, Printhead Assy, 203 dpi, 4 in Includes items 31, 32, and 173606-001 Field Kit, Printhead Assy, 300 dpi, 4 in 33. Does not include item 30. For RFID models, see Figure 89, page 382, item 3. 203419-001 Ring, Retaining, E, .188 inch (3) Available only in Hardware...
- Page 278 Chapter Illustrated Parts Breakdown Item Part No. Description Notes 171146-001 Spring, Leaf (2) Not on -DT models. 171996-001 Bushing, Ribbon Guide, RH Not on -DT models. 171996-002 Bushing, Ribbon Guide, LH Not on -DT models. 171166-001 Shaft, Ribbon Guide, 4 inch Not on -DT models.
- Page 279 (Parts lists continue on the next page.)
- Page 280 Chapter Illustrated Parts Breakdown From page 272. Figure 50. Platen and Lower Support Assemblies...
- Page 281 Item Part No. Description Notes 171405-001 Field Kit, Platen Assembly, 8 inch Includes: platen shaft, 8 inch 750572-001; bearing, ball, sealed (2) 151944-001; bearing, roller (2) 203376- 001; and spacer, platen (2) 170258-001. 171404-001 Field Kit, Platen Assembly, 6 inch Includes: platen shaft, 6 inch 750572-002;...
- Page 282 Chapter Illustrated Parts Breakdown Figure 51. Controller Board and I/O Assemblies...
- Page 283 Item Part No. Description Notes 750906-001 Grommet, Rubber 175077-901 Controller PCBA, V5 Includes items 19, 20, and 172087-001 SIMM, Flash, 4 MB 172088-001 SIMM, Flash, 10 MB 173024-001 Field Kit, SIMM, DRAM, 8 MB 170978-001 Field Kit, SIMM, DRAM, 16 MB 152439-901 Cable Assembly, Centronics I/O 203548-001...
- Page 284 Chapter Illustrated Parts Breakdown Item Part No. Description Notes 203711-001 Screw, Captive, Btn Hd, M4x10mm (6) Part of items 2 and 2a, but also available in Hardware Kit 171629-001 (page 316). 202434-001 Kit, Screw, M/F, 4-40 (2) Part of items 2, 2a, and 10, but also available in Hardware Kit 171629-001 (page 316).
- Page 285 (Parts lists continue on the next page.)
- Page 286 Chapter Illustrated Parts Breakdown Figure 52. Screen, Gears, and Ribbon Drive Motors...
- Page 287 Item Part No. Description Notes 750568-001 Gear, Ribbon Drive, Intermediate Not on -DT models. 203419-001 Ring, Retaining, E Available only in Hardware Kit 171629-001 (page 316). 171403-001 Field Kit, DC Motor Does not include item 4. Not on -DT models. 204002-001 Screw, Flanged, Socket Head, Not part of item 3.
- Page 288 Chapter Illustrated Parts Breakdown Figure 53. Control Panel Assembly...
- Page 289 Item Part No. Description Notes 170644-001 Control Panel Assembly Does not include overlay. Includes item 8. 750561-001 Overlay, Control Panel, English 170504-001 Overlay, Control Panel, International 171731-001 Overlay, Control Panel, French 171732-001 Overlay, Control Panel, German 171733-001 Overlay, Control Panel, Italian 171734-001 Overlay, Control Panel, Spanish 171735-001...
- Page 290 Chapter Illustrated Parts Breakdown Figure 54. Cable Assemblies and Interconnections...
- Page 291 Item Part No. Description Notes 152439-901 Centronics I/O Cable Assembly 171947-001 Field Kit, Cable Assy, Validator option Includes ferrite. 750695-001 Printhead/Controller Cable Assembly 6 and 8 inch printers. 171774-001 Printhead/Controller Cable Assembly 4 inch printers. 170070-901 Cable Assembly, Power Supply/ Controller PCBA Part of Power Supply Assembly Part of Ribbon Drive DC Motor...
- Page 292 Chapter Illustrated Parts Breakdown Figure 55. Ribbon Drive Assembly...
- Page 293 Item Part No. Description Notes F0147-008 Ribbon Spindle Tube F0147-009 Ribbon Motor Spacer F0147-010 Ribbon Gear Drive Block H0038-603 External RR 0.250 inch Shaft (E Ring) H0038-660 Ring Ret Ext Ser 5304 0.375 D (E-Style) H0079-254 SHSS #10-32x0.375 Lg H0110-009 Flat Washer 1/4 inch H0130-067 SHCS M4 x 0.70 x 20 mm...
- Page 294 Chapter Illustrated Parts Breakdown Figure 56. Air Jet Assembly...
- Page 295 Item Part No. Description Notes F0147-011 Air Jet H0038-020 Retaining Ring 0.250 External H0079-041 SHSS #2-56x0.125 Lg Cup Pt H0115-009 "O" Ring 7/32 ID x 11/32 OD...
- Page 296 Chapter Illustrated Parts Breakdown Figure 57. Control Panel Assembly...
- Page 297 Item Part No. Description Notes 170644-001 Control Panel Assy Does not include overlay. F0147-012 Control Panel Membrane F0147-013 Control Panel Plate F0147-014 Control Panel Clip H0026-210 Lock Nut, #6-32...
- Page 298 Chapter Illustrated Parts Breakdown Figure 58. Pneumatic Assembly...
- Page 299 Item Part No. Description Notes F0005-006 Gauge Clamp F0032-007 Manifold, 1.250 inch Reg. Spacing H0122-101 1/8 NPT Pipe Plug, Socket H H0123-001 Close Nipple 1/8 NPT 178631-001 Pressure Gauge, 100 psi 178632-001 Vacuum Gauge, 30 hg P0037-175 1/4 x 0.159 Tubing-Blue Polyurethane P0038-523 1/4 Tube 1/8 NPT Elbow P0038-659...
- Page 300 Chapter Illustrated Parts Breakdown Figure 59. Dancer Arm Assembly...
- Page 301 Item Part No. Description Notes B5606-502 Dancer Roller Sub-Assembly F0024-505 Dancer Arm Sub-Assembly H0054-195 SHCS #8-32x0.500 Lg PF010-006 Spring Anchor #8-32 Thds 178630-001 Spring Extension, 4 inch...
- Page 302 Chapter Illustrated Parts Breakdown Figure 60. Rewind Shaft Assembly...
- Page 303 Item Part No. Description Notes F0113-011 F0113-015 Shaft Pulley F0113-040 Rewind Shaft (5142) H0020-009 Key Woodruff 0.125x0.491 H0032-221 Spring Pin, 3/16 inch Dia. x 1 5/8 inch Long H0038-035 Ring Ret. Ext. Ser. 5100 0.500 D H0054-255 SHCS #10-32x0.500 Lg H0079-193 SHSS #8-32x0.250 Lg H0110-315...
- Page 304 Chapter Illustrated Parts Breakdown Figure 61. Unwind Shaft Assembly...
- Page 305 Item Part No. Description Notes F0113-011 F0113-041 Unwind Shaft H0038-035 Ring Ret. Ext. Ser. 5100 0.500 D H0054-255 SHCS #10-32x0.500 Lg H0110-315 Stainless Steel Wave Washer, 0.734 inch OD x 0.531 inch ID x 0.009 inch Thk. PF001-003 Ball Bearing 0.50 ID x 1.12 OD...
- Page 306 Chapter Illustrated Parts Breakdown Figure 62. Brake Assembly...
- Page 307 Item Part No. Description Notes B5605-502 Media Roller Sub-Assembly 178518-001 Brake Pad F0032-006 Brake Shaft F0032-008 Spring Post F0076-011 Block F0153-006 4601 Brake Arm H0038-028 Ring Ret. Ext. Ser. 5100 0.375 D H0051-255 FHSCS #10-32x0.500 Lg H0053-154 BHCS #6-32x0.375 Lg H0054-195 SHCS #8-32x0.500 Lg H0054-196...
- Page 308 Chapter Illustrated Parts Breakdown Figure 63. Label Roll Back Stop Assembly...
- Page 309 Item Part No. Description Notes C4215-001 Label Unwind Base Plate C4215-005 Inner Unwind Cover Hub H0051-074 FHSCS #4-40x0.375 Lg H0079-277 SHSS 1/4-20x0.750 Lg...
- Page 310 Chapter Illustrated Parts Breakdown Figure 64. Label Roll Retainer Assembly...
- Page 311 Item Part No. Description Notes C4215-002 16 OD Lexan Unwind Cover C4215-004 Outer Lexan Unwind Lock Hub F0045-081 Unwind Pinch Plate H0051-074 FHSCS #4-40x0.375 Lg H0079-194 SHSS #8-32x0.375 Lg LP701-149 Unwind Lever...
- Page 312 Chapter Illustrated Parts Breakdown Figure 65. 14 inch Cylinder Assembly...
- Page 313 Item Part No. Description Notes 178499-901 Cylinder Assy, Swing, 14 inch/356 mm Includes all items shown in Figure 65. F0058-002 Cylinder Cover, 14 inch F0061-502 Solid State Swith Assy, 14 inch F0147-019 Cylinder Bracker, 20 mm H0054-277 SHCS 1/4-20x0.750 Lg H0110-049 Washer Splitlock 0.250 H0132-094...
- Page 314 Chapter Illustrated Parts Breakdown Figure 66. 20 inch Cylinder Assembly...
- Page 315 Item Part No. Description Notes 178500-901 Cylinder Assy, Swing, 20 inch/508 mm Includes all items shown in Figure 66. F0058-003 Cylinder Cover, 20 inch F0061-503 Solid State Switch Assembly, 20 inch F0147-035 Cylinder Bracket, 25 mm H0054-277 SHCS 1/4-20x0.75 Lg SS H0110-049 Washer Splitlock 0.250 H0130-158...
-
Page 316: Hardware Kit
Chapter Illustrated Parts Breakdown Hardware Kit Hardware Kit 171629-001 contains an assortment of fasteners used in the SLPA. The contents of the kit are listed below. Part No. Description Notes 101480-001 Tie Wrap, 4 inch 102559-405 Screw, w/lock washer, 4-40x.31 105625-005 Screw, Set, Oval, 8-32x3/8 Use on aluminum pulley. - Page 317 Hardware Kit Part No. Description Notes 203526-001 Washer, .390x.656x.020 203527-001 Clip, EMI 203590-001 Grommet, Hole For DC and stepper motors. 203643-001 Plug, Frame, .5 inch Frame plugs. 203662-001 Nut, Locking, M10 203682-001 Plug, Frame, .4375 inch For 4 inch rewinder hole. 203711-001 Screw, Captive, Btn Hd, M4x10mm Use to fasten frame side...
- Page 318 Chapter Illustrated Parts Breakdown...
-
Page 319: A Specifications
Specifications Applicator Orientation The SLPA may be mounted for top, bottom, or side applications. Product Distance Variation The relationship between the SLPA and the product is adjustable by moving the entire machine on the mounting stand. The applicator effective stroke length is adjustable by setting the cylinder apply pressure along with the cylinder extend time. -
Page 320: Printing
2.0 to 10 inches * Gap for 100% Printing 0.10 inches 2.54 mm Thickness 0.0025 to 0.0100 inches 0.0635 to 0.254 mm * For labels longer than 8.0 inches custom work is needed. Contact your Printronix service representative for details. - Page 321 I. Tag Specification II. Tag Specification III. Label Specification (Mark Sensing) (Gap Sensing) (Gap Sensing) Black Mark (on underside) Recommended Recommended Cross Perf Cross Perf Location Location Direction of Media Motion Direction of Media Motion Direction of Media Motion Figure 67. Media Dimensions Table 16.
-
Page 322: Ribbon
Appendix A Ribbon Ribbon Roll OD 3.0 inches 76 mm Roll ID 1.0 inches 25.4 mm Std Length 1476 feet 450 meters Max Length 2050 feet 625 meters Thickness 4.5 micron 4.5 micron Electrical Input Voltage ± 115 VAC 10%, single phase @ 50 to 60 Hz ±... -
Page 323: Environmental
Environmental Operating Temperature to 100 F (4 to 38 Storage Temperature to 150 F (-40 to 65 Operating Humidity 10 to 95% non-condensing Storage Humidity 5 to 85% non-condensing Liquids Free of direct fluid contact Solids Minimize unnecessary exposure to dirt, dust, and other debris;... -
Page 324: Connections
Appendix A Connections Connections RS-232C Serial Port One serial port (COM 1) is provided on the SLPA as a connection for host devices. This female DB25, RS-232C serial port has the following connections: Pin 2 Transmit Data Pin 3 Receive Data Pin 7 Signal Ground The serial ports must be configured for the correct baud rate, parity, and stop... -
Page 325: B Options
Options Expansion Modules The following modules may be used to expand system capabilities, and are inserted into an open slot in the system’s card cage. Two different modules are available for the SLPA: • Font Expansion Card: Contains a 4 MB Flash memory for printing international languages/ graphics and contains either a CG-Times, a Kanji Gothic, a Simplified Chinese, or a Korean Hangul Scalable font. -
Page 326: Fault/Warning Beacon Package
Appendix Beacon Package Options Fault/Warning Beacon Package This option provides a blue and an amber beacon tower that is connected to the SLPA. The blue/amber lights are used to convey fault/warning information in this package, as follows: • Fault: An illuminated blue beacon signals a fault situation. Fault conditions (such as Out of Label) signal a state where operation is suspended until the condition is cleared. -
Page 327: Mounting The Beacon
Mounting The Beacon Mounting The Beacon Beacon Assembly Mounting Holes Figure 68. Beacon Mounting If a beacon option was ordered with the system, it is advisable to mount it before mounting the SLPA to the conveyor line. To mount the beacon post: 1. -
Page 328: Mounting Accessories
Appendix Mounting Accessories Mounting Accessories U-Arm And Accessories Socket Screw (4) 3/8 in. Washer 3/8-16 Socket Head Cap Screw (4) 3/8 in. Washer Mounting Clamp (2) Support Rod (2) U-Arm Figure 69. U-Arm and Offset Arms The SLPA is designed so that it can be mounted to a stand, or other fixturing device, using button head socket screws and U-arm. -
Page 329: Mounting Stand
Mounting Stand 4. Secure the SLPA into place using the 3/8-16 socket h ead cap screws provided with the two U-arm clamps. Torque the bolts to 36 ft-lbs in increments of 6 ft-lbs for each bolt. CAUTION Use extreme caution when lowering the SLPA onto the U-arm. The SLPA is a heavy unit and may be difficult to lift by one individual. -
Page 330: Low Label Sensor
Appendix Low Label Sensor Low Label Sensor The low label sensor activates the warning beacon to alert the operator of a low label situation. This photo eye sensor is typically not adjusted after manufacturing as it is located behind the media unwind assembly. Its position may be moved to allow more or less media stock on the unwind roll before signal activation. -
Page 331: Product Sensor
Mounting Stand Product Sensor Figure 72. Product Sensor Adjustment The product sensor mounts on the side of the conveyor and detects the presence of the product and activates the print cycle. The print cycle begins by printing a label and feeding it to the applicator. The system then waits the designated Delay Time, after which the applicator extends to place the label, then returns to await the beginning of the next print command. - Page 332 200 Ω ferrite be attached to the cable for adequate EMI shielding. The product sensor supplied by Printronix has a range of 12 inches (300mm) and has a sensitivity adjustment for different sensing levels. This sensor has two modes of operation, Light Operate and Dark Operate.
-
Page 333: Application Options
Cylinder Stroke Lengths Application Options NOTE: The following application options require custom work and must therefore be specified prior to order placement. Cylinder Stroke Lengths To customize the SLPA to meet individual application requirements, applicators are available in the following cylinder stroke lengths: •... - Page 334 Appendix Application Options...
-
Page 335: C Wire Data
Wire Data Circuit Board And Cable Pinouts Interconnection Diagram ..............page 336 Cable Routing ................. page 337 Controller Board Pinouts ..............page 338 Cable Assemblies Centronics I/O................page 344 Printhead/Controller..............page 345 Power Supply Control ............... page 346 Control Panel ................page 347 Sensors Sensor, Head Up .............. -
Page 336: Interconnection Diagram
Appendix C Circuit Board And Cable Pinouts Interconnection Diagram = n wires Legend: in cable assy Cutter P301 PCBA Option J301 Control Validator Option Panel Cutter Option Serial Port Flash DRAM Upper Media DB25 SIMM SIMM Sensor Ribbon Diagnostic Port Supply Controller Motor... -
Page 337: Cable Routing
Cable Routing Upper Media Sensor (Part of the Printhead Cover) Printhead/ Power Supply Cable Assy Head Up Lower Media Sensor Sensor Printhead/Controller Cable Assy P8,16 P8,16 P112 P403... -
Page 338: Controller Board Pinouts
Appendix C Circuit Board And Cable Pinouts Controller Board J20 (Not used) 0.1W 0.25W MM LED POS Media MM LED NEG Motion MM SENSE COLLECTOR Sensor MM SENSE EMITTER µ 1000 PF 1000 PF R OUT2A Ribbon 0.25W 0.25W 0.25W Motor 0.25W 0.25W... - Page 339 Controller Board Head Up Sensor 0.1W HEAD UP 4.7K 1000 PF 0.1W PEEL Label Taken 1000 PF Sensor Serial Port HOST TXD HOST RXD2 HOST RTS HOST CTS HOST DSR HOST DCD Stepper Motor DIFF RXD- DIFF RXD+ DIFF TXD- HOST DTR DIFF TXD+...
- Page 340 Appendix C Circuit Board And Cable Pinouts Controller Board Flash SIMM DRAM SIMM Upper Media Sensor Lower Media Sensor MG LED DRIVE FF RESISTOR REFL LED SINK MG IRED DRIVE FF RESISTOR MG SENSE COLLECTOR MG SENSE EMITTER...
- Page 341 Controller Board Diagnostic Port EXT 5V DB TXD Control Panel DB RXD N FP DATA AVAIL FP CLK 475 PF N FP LED WR FP DATA Verifier N FP LCD WR Port (Validator) +24V 0.1W Media MEDIA CUT RUN Cutter MEDIA CUT DIR CUT DONE µ...
- Page 342 Appendix C Circuit Board And Cable Pinouts Controller Board J112 Expansion-CT Expansion Port Parallel Port 4.7K 4.7K 0.1W 0.1W EXPD6 EXPD7 EXPD4 EXPN ID SEL EXPD5 NC 12/10V EXPD3 NDMAREQ0 EXPD1 EXPD2 EXPA15 NDMAREQ1 EXPD0 EXPN INT EXPA14 EXPN WR EXPA12 EXPA13 EXPA10...
- Page 343 Controller Board Thermal Printhead Signal Radio Card 0.1W Power PRINT ENABLE BUF V SELECT 1 V SELECT 2 Power V SELECT 3 Supply N OVER TEMP Signal +24V +40V Testpoint Testpoint µ µ Power Supply µ µ +24V SWITCHED 0.1W 0.1W FAN NEG Testpoint...
-
Page 344: Cable Assemblies Centronics I/O
Appendix C Circuit Board And Cable Pinouts Cable Assembly, Centronics I/O 152439-901 PIN 1 NOTE: If you replace the I/O cable assembly, you must install the ferrite clamp. See Appendix E. PIN 1... -
Page 345: Printhead/Controller
Cable Assembly, Printhead/Controller 750695-001 PIN 1 PIN 1 750695 April 11, 200... -
Page 346: Power Supply Control
Appendix C Circuit Board And Cable Pinouts Cable Assembly, Power Supply Control 170070-901 PIN 1 PIN 8 PIN 8 PIN 1 170070 April 11, 200... -
Page 347: Control Panel
Cable Assembly, Control Panel 750560-001 CONTROLLER BOARD... -
Page 348: Sensor, Head Up
Appendix C Circuit Board And Cable Pinouts Sensor, Head Up 171746-001 30±0.25” 0.26 0.258 Attach label here 24 AWG, twisted 1 turn Molex Mini II system connector Terminal pins: 50212-8000 Series 51090 Housings: 51090-0300 (3 pins) Wire Table Signal Wire Color Vout White Ground... -
Page 349: Media Sensor Assembly, Lower
Media Sensor Assembly, Lower 173625-001 Wire Table Signal MG LED DRIVE REF LED SINK MG SENSE COLLECTOR MG SENSE EMITTER... -
Page 350: Media Sensor Assembly, Upper
Appendix C Circuit Board And Cable Pinouts Media Sensor Assembly, Upper NOTE: Part of the printhead cover. See Figure 49, page 276, item 32. Wire Table Signal Not used Not used Not used Not used Not used MG IRED DRIVE FF RESISTOR... -
Page 351: Downloading Software
Downloading Software Flash Memory Flash memory retains its contents when printer power is turned off. (Compare this to RAM, which loses its contents when power is removed.) Flash memory is contained in an 80-pin 4MB (or optional 10MB) SIMM (Single Inline Memory Module) at location J38 on the controller board. -
Page 352: Downloading Software Through The Serial Or Parallel Port
Appendix D Flash Memory Downloading Software Through the Serial or Parallel Port 1. Make a printout of all saved configurations. (Installing new software erases all saved configurations. You will use the printouts to restore the printer configurations.) 2. Set the printer power switch to O (Off). 3. - Page 353 Downloading Software Through the Serial or Parallel Port 14. When the printer download port you want to use is displayed on the LCD, ↵ press . “WAITING DOWNLOAD / PORT = < your selection >” appears on the display. 15. Using Windows Explorer, create a directory named download at the root level of your C: hard drive.
- Page 354 Appendix D Flash Memory Figure 74. Copying the Emulation File to the Download Directory 19. Copy the file to the download directory. NOTE: You may need to hold Ctrl to make sure a + appears to the right of the pointer. (Figure 74.) 20.
-
Page 355: Downloading Software Through The Nic
Downloading Software Through the NIC CAUTION Do not interrupt the downloading process once it has started. Interrupting a download will damage the flash memory on the controller board and NIC. While the file is copied into memory, the printer LCD informs you of the load process and status. - Page 356 Appendix D Flash Memory Figure 75. Navigating to the Appropriate Emulation File on the CD 8. Using Windows Explorer, navigate to the appropriate file on the CD (using the Unzipped directory) based on the printer model number and desired emulation, e.g., Unzipped T5000 IGP.
- Page 357 Downloading Software Through the NIC 14. Log in to the printer by typing: root<Enter> You are given a password prompt. NOTE: The default is no password. If the FTP program requires a password, contact your system administrator. 15. At the password prompt, press <Enter>. 16.
-
Page 358: Downloading Optional Fonts To Flash Memory
Appendix D Flash Memory Downloading Optional Fonts to Flash Memory Optional fonts are stored on a 3.5 inch floppy diskette that contains file names comprised of a part number with a .dwn extension. You will insert this diskette in your IBM-compatible computer and use either the parallel or serial port to download the desired font(s) to the printer’s flash memory. - Page 359 Downloading Optional Fonts to Flash Memory 1. Set the printer power switch to O (Off). 2. Connect a parallel data cable to the LPT1 port or a serial cable to the COM1 port of an IBM-compatible computer running the Microsoft Windows (95, 98, Me, NT, 2000, or XP) operating system.
- Page 360 Appendix D Flash Memory NOTE: The numeric portion of the file name will match the numbers of the font typefaces listed in Appendix E of the PGL and VGL Programmer’s Reference Manuals and provide you with a description and print sample of the typeface. 15.
-
Page 361: E Dual Nic Wireless Interface
Dual NIC Wireless Interface Installation and Removal IMPORTANT If you just need to install the radio card, protective cover, and antenna, see page 365. This chapter explains how to install the dual NIC wireless interface (wireless interface, radio card, protective cover, and antenna). To remove the dual NIC wireless interface, reverse the steps of these procedures. -
Page 362: Install The Dual Nic Wireless Interface
Appendix E Installation and Removal Install The Dual NIC Wireless Interface 1. Prepare the printer for maintenance (page 223). CAUTION To prevent electrostatic damage to electronic components, always wear a properly grounded static wrist strap when you handle circuit boards. 2. - Page 363 Install The Dual NIC Wireless Interface 8. Insert the BNC connector into the BNC connector hole in the wireless interface. 9. Slide the BNC connector washer and nut onto the RF cable and install them onto the BNC connector. 10. Route the radio card connector end of the RF cable through the radio card connector hole in the wireless interface.
- Page 364 Appendix E Installation and Removal 11. Plug the wireless interface parallel cable into the J112 receptacle on the controller board. 12. Plug the other end of the parallel cable into the wireless interface as shown in Figure 78. 13. Plug the power cable into the J22 receptacle on the controller board. 14.
-
Page 365: Install The Radio Card, Protective Cover, And Antenna
Install The Radio Card, Protective Cover, And Antenna Install The Radio Card, Protective Cover, And Antenna NOTE: If the card you have appears different than shown in Figure 79, installation is the same. If your card has a protective cap covering the RF cable receptacle, use a very small slot screwdriver to remove it. - Page 366 Appendix E Installation and Removal 5. Rotate the antenna upright. 6. Remove the top two M3x8mm screws securing the rear panel. 7. Slide the antenna plate over the antenna. 8. Align the plate over the two holes in the frame, then secure the plate using the two M3x8mm screws.
-
Page 367: Spare Parts
Install The Radio Card, Protective Cover, And Antenna Spare Parts Part No. Description Notes 177744-901 Dual NIC Assy Assembly includes dual NIC wireless interface and mounting hardware. Does not include radio card, cable kit, or antenna kit. 176293-901 Cable Kit, Dual NIC, Power and Parallel Includes power and parallel cables for all dual NIC assemblies. - Page 368 Appendix E Spare Parts...
-
Page 369: F Rfid Encoder And Antenna Assemblies
RFID Encoder and Antenna Assemblies Installation And Removal This document also describes how to replace an RFID antenna or encoder assembly, or both, in a SLPA. Prepare The Printer 1. Since you may be reloading the flash memory, make a configuration printout of all saved configurations. -
Page 370: Replace The Rfid Antenna And Encoder Assemblies
Appendix F Replace The RFID Antenna And Encoder Assemblies Replace The RFID Antenna And Encoder Assemblies Use these instructions to replace either assembly; you do not have to replace both assemblies at the same time. Remove the RFID Encoder Assembly Captive Thumb Nut RFID Encoder... - Page 371 Remove the RFID Encoder Assembly Alien Encoder Antenna Cable Antenna Cable Connector AWID Encoder P1 Data Cable Connector Power Cable Small Connector RFID Encoder Assembly Interface Board Figure 82. Disconnecting the Antenna, Power, and Data Cables CAUTION The antenna cable connector is easily damaged. Grasp it with pliers at the square end only and pull it straight out of the encoder without twisting or tilting it.
-
Page 372: Replace The Rfid Antenna Assembly
Appendix F Replace The RFID Antenna And Encoder Assemblies Replace The RFID Antenna Assembly Media Guard Front Tab Figure 83. Removing the Old Media Guard 1. Raise the media cover. 2. Remove media and ribbon. 3. Reaching under the old media guard, simultaneously push upward on the front tab and downward on the back of the media guard to lift it up. - Page 373 Replace The RFID Antenna Assembly Lower Media Sensor Media Guard (Old and New) RFID Antenna Assembly Front Back T1 Transformer Figure 84. Removing and Installing the Lower Media Sensor CAUTION When handling the old media guard, do not disconnect the attached lower media sensor cable from the controller board.
- Page 374 Appendix F Replace The RFID Antenna And Encoder Assemblies Lower Media Media Guard Sensor Cable Front Edge Rear Tab (2) Shoulder (2) Antenna Cable Lower Support Frame Opening Figure 85. Installing the New Media Guard 9. Turn the new media guard over, and route the antenna cable through the frame opening as shown in Figure 85.
-
Page 375: Install The Rfid Encoder Assembly
Install The RFID Encoder Assembly Install The RFID Encoder Assembly Alien Encoder Antenna Cable AWID Encoder P1 Data Cable Connector Power Cable Small Connector RFID Encoder Assembly Interface Board Figure 86. Connecting the Data, Power, and Antenna Cables 1. If you are replacing the RFID encoder assembly, read the IMPORTANT notice and go to step 2;... - Page 376 Appendix F Replace The RFID Antenna And Encoder Assemblies Notch Captive Thumb Nut RFID Encoder Assembly Mounting Stud (2) Figure 87. Installing the RFID Encoder Assembly 5. Align the captive thumb nut over the mounting stud closest to you. Align the notch in the RFID encoder assembly over the mounting stud furthest from you.
-
Page 377: Route The Data And Power Cables
Route The Data And Power Cables Route The Data And Power Cables Wire Saddle (3) Power Cable Power Cable Large Connector Data Cable P10 Data Cable Connector Figure 88. Routing and Connecting the Power and Data Cables 7. Route the power and data cables through the three wire saddles as shown in Figure 88. -
Page 378: Finish The Installation
Appendix F Finish The Installation Finish The Installation IMPORTANT The printer may not recognize the RFID encoder until you download the latest printer operating system software into the flash memory. 1. If an RFID Emulation Software CD is included in your kit, go to step 2; otherwise, go to step 3. -
Page 379: Error Messages
Route The Data And Power Cables Error Messages The RFID encoder can detect a number of errors. When one of these errors occurs, the RFID encoder alerts the printer to perform the currently selected error action (see “Error Handling” in the Smart Label RFID Printer Quick Setup Guide ) and display the appropriate error message on the control panel’s LCD (see Table 18). -
Page 380: Troubleshooting
Appendix F Troubleshooting Troubleshooting If you are having trouble with the RFID encoder, consult Table 19 for a list of symptoms and possible solutions. Table 19. Troubleshooting the RFID Encoder Symptom Solution No communication between the 1. Make sure Reader = Enable in the RFID printer and the reader CONTROL menu. -
Page 381: Spare Parts
Route The Data And Power Cables Spare Parts This section contains a drawing of the RFID encoder (Figure 89). The table following the illustration lists the spare parts and their part numbers. - Page 382 Appendix F Spare Parts Figure 89. RFID Encoder...
- Page 383 Route The Data And Power Cables Item Part No. Description Notes 178406-001 Field Kit, Upper Deck Assy, 4 inch, Includes item 2 installed. RFID 178168-003 Spring, Pivot Deck, 4 inch Included with item 1. 178403-001 Field Kit, Printhead Assy, 203 dpi, 4 inch, RFID 178404-001 Field Kit, Printhead Assy, 300 dpi,...
- Page 384 Appendix F Spare Parts...
- Page 385 Index Numerics Air jet adjustment control valve, 40 AIR JET control valve, 40 06 HOST REQUEST, 165 Air jets, position, 52 08 HOLD PRINT / TIMEOUT, 165 Air supply, 19 15 COMM CHECK, 166 Alarm option, 133 203 DPI Head Installed, 167 Application options, 333 22 INVALID ADDR, 166 cylinder stroke lengths, 333...
- Page 386 Beacon, mounting, 327 Configuration menu Block, head pressure, assembly, replacement, 234 moving within, 73 Bold Chars. option, 138 printout (sample), 80 BUFFER OVERFLOW, 169 Configurations BUFFER OVERRUN, 169 modifying saved, 77 printing, 78 printout (sample), 80 Cables saving, 75 interconnection diagram, 336 specifying power-up, 76 routing diagram, 337 Connections...
- Page 387 DEACTIVATING / HOST SERIAL, 171 Environmental specifications, 323 Del Char frm Flsh option, 132 EPC Mgr Report, 101 Del Char frm RAM option, 132 ERROR Del Set frm Flsh option, 132 DC PROGRAM / NOT VALID, 172 Del Set from RAM option, 133 DRAM AT / ADDRESS XXXXXXXX, 173 Delete Config option, 103 FLASH / DID NOT PROGRAM, 173...
- Page 388 Feature File option, 142 Features Gap Length option, 125 optional, 24 GAP NOT DETECTED / Check Media, 178, 179 standard, 23 Gap Windowing option, 125 FILE EXISTS / Enable Overwrite, 176 Gap, media sensing, 58, 60 FILE SYS FULL / Add Flash, 176 Gap/Mark Sensor option, 93, 122 FILE SYS FULL / Delete Files, 176 Gap/Mark Thresh option, 123...
- Page 389 Indicator light Ld Set at PwrUp option, 133 data, 39 Ld Set from Flsh option, 132 online status, 38 Left pressure block adjustment, 56 Indicators, 10/100Base-T, 245 Left Test, printer test, 164 Indicators, keypad, 36 Liquid Crystal Display, 36 Installation, 17 Load Config.
- Page 390 Media sensor CLEARING PROGRAM / FROM FLASH, 170 disable, 58 Contrast too low / Check media, 170 gap, 58 CUTTER FAULT / Jam or Cut Fail, 171 mark, 58 DEACTIVATING / HOST SERIAL, 171 Media sensor adjustment, 56 DIAGNOSTICS PASSED, 171 Media sensor assembly, lower, replacement, 237 DIRECT THERMAL / Remove Ribbon, 171 Media sensors...
- Page 391 INSUFFICIENT RAM / Reboot/Add RAM, 180 TCP Port Busy, 195 LABEL MISSING / Check Paper Path, 181 Test Page / Not Available, 196 LOADING PROGRAM / FROM PORT XX%, TESTING HARDWARE / PLEASE WAIT, 196 Unscannable code / check media, 196 LOADING PROGRAM / INTO FLASH, 181 Validator not / communicating, 196 MENU MODE / QUICK SETUP, 181...
- Page 392 PARITY ERROR, 184 Part numbers, replaceable parts, 263 OCR-A Chars. option, 138 PCBA, 228 OCR-B Chars. option, 138 Peel-Off option, 119 Offline mode, 38 Physical specifications, 323 Online Auto-Cal option, 124 Pinouts, controller board, 338 Online mode, 38 Placement accuracy specifications, 319 Online status indicator light, 38 Platen replacement, 248 Onsite maintenance service, 4...
- Page 393 Print Error Log option, 142 Printhead cover/upper media sensor, Print File List option, 134 replacement, 252 PRINT HEAD COLD / See Manual, 186 Printhead pressure adjustment, 55 PRINT HEAD HOT / See Manual, 187 Printhead pressure block adjustments, 56 PRINT HEAD UP / Close Print Head, 187 Printhead, cleaning, 155 Print Intensity option, 88, 107 Printing a configuration, 78...
- Page 394 gear, ribbon drive, final, 232 RFID CONTROL gear, ribbon drive, intermediate, 233 menu, 95 submenus, 96 head pressure block assembly, 234 RFID MAX RETRY / Check System, 192, 379 media damper, 230 RFID Reader, 96 media sensor assembly, lower, 237 RFID system configuration parameters, 53 memory, 239 RFID TAG FAILED / Check Media, 192, 379...
- Page 395 Sensor replacement, head up, 258 Specifying a power-up configuration, 76 Set Label Length option, 119 Speed Exceeds / Validator Limit, 195 Set Lock Key option, 135 Spindle assembly, ribbon supply or take-up, Set Sharing option, 135 replacement, 259 Setting printer configuration parameters, 73 Stand, mounting, 329 Shipping, 20 Standard Chars.
- Page 396 U-arm and accessories, 328 Units option, 119 Unpack, SLPA, 28 Unscannable code / check media, 196 Use Label Length option, 126 Vacuum adjustment control valve, 40 VACUUM control valve, 40 Vacuum generator cleaning, 157 replacing, 157 Validator messages Bar Code Improper / Data Format, 168 Bar code quiet / zone too small, 168 Calibration / warning, 170 Checksum Failure, 170...
- Page 398 For technical assistance, contact your Distributor/VAR/Reseller for service. For further assistance, contact the Printronix Customer Support Center. Printronix Customer Support Center Americas (714) 368-2686 Europe, Middle East, and Africa (31) 24 6489 410 Asia Pacific (65) 6548 4114 Web site: http://www.printronix.com/public/servicessupport/default.aspx...
Need help?
Do you have a question about the SLPA7000 and is the answer not in the manual?
Questions and answers