Sign In
Upload
Manuals
Brands
Christie Manuals
Projector
CP2000-MR
Christie CP2000-MR Manuals
Manuals and User Guides for Christie CP2000-MR. We have
5
Christie CP2000-MR manuals available for free PDF download: User Manual, Service Booklet, Setup Manual, Instruction Sheet
Christie CP2000-MR User Manual (176 pages)
Brand:
Christie
| Category:
Projector
| Size: 21.57 MB
Table of Contents
Table of Contents
5
Using this Manual
13
Labels and Marking
14
Typographical Notations
14
Purchase Record and Service Contacts
15
Projector Overview
16
How the Projector Works
16
User Interface Overview
16
List of Components
16
Key Features
17
2: Installation & Setup
19
Projector Installation
19
Position the Projector
20
Optional) Install Projector on Rack Stand
20
Optional) Mount the Control Display Panel
21
Optional) Connect Exhaust Ducting
22
Install Lens(Es)
23
Primary Zoom Lens Installation
23
Optional) CP2000-M Motorized Auxiliary Lens Mount (M-MALM) Installation
24
Add Anamorphic Lens
24
Add Wide Converter Lens (WCL)
24
Install Lamp
25
Connect to Power
25
Connect Sources and Initial Power up
26
Connecting Sources
27
Cinema Servers
27
Connecting for Communications
28
Adjusting Tilt and Leveling
29
Adjusting Tilt
29
Adjusting Feet/Leveling
29
Carrying/Moving the Projector
30
Maximizing Light Output
30
Adjusting Screen Brightness (Fl) Via Web User Interface
31
Basic Image Alignment
31
Basic Optical Alignment Procedure
31
Lens Mount Offset and Boresight Alignment
32
Adjust Offset
32
Adjust Lens Mount Boresight
33
Lens Mount Vertical Boresight
33
Lens Mount Horizontal Boresight
34
Adjustable Fold Mirror & Convergence Adjustments
35
DMD Convergence
35
Fold Mirror Adjustment
36
Calibrating the System
37
Color Calibration
37
Electronic Screen Masking
38
Projector Configuration Files (Pcfs)
38
Projector Components
39
Air Filter
39
Control Display Panel (CDP)
39
Douser
39
Exhaust Duct (Optional)
39
Adjustable Leveling Feet
39
Lamp
40
Lens Mount and CP2000-M Motorized Auxiliary Lens Mount (M-MALM)
40
Security Locks
40
Signal Input and Communications Panel
40
User I/O Panel
40
PCM Interface Panel
41
Powering up the Projector
41
Powering down the Projector
42
Projector Power States
43
Using the Control Display Panel (CDP)
44
CDP Key Descriptions
44
CDP Functionality
45
Guidelines for Using the CDP
45
Navigating the CDP Menus
46
Navigation Icons
46
Pull-Down Lists
47
Using Slide Bar Controls
47
Editing Text or Numerical Values
47
Channel Menu
48
Lamp Menu
49
Perform Lamp Change Using the CDP
49
Lens Control Menu
50
Lens Adjustment
50
Lens Reset
50
Lens Calibration
51
Auto ILS
51
Reset on Startup
51
Auxiliary Lens
51
Status Menu
51
Configuration Menu
52
Test Patterns Menu
52
Using the Web User Interface
53
User Access and Rights
53
Navigating the Web User Interface
55
Main Toolbar (Appears on All Screens)
55
Main Menu
55
Power on or off
56
Turn Lamp on or off
56
Open or Close Douser (Shutter)
56
Display Test Pattern
56
Move Auxiliary Lens
56
Intelligent Lens System (ILS)
56
To Enable ILS Per Channel
57
To Edit Active Channel ILS Settings
57
To Temporarily Alter the Active Channel ILS Settings
57
Start Features or Presentations
57
Status Menu
58
Status: System Menu
58
Status: Test Menu
61
Status: Status Summary Menu
62
Status: SMPTE Errors Menu
63
Status: Interrogator Menu
64
Alarm Window
64
How to Respond to an Alarm Window
65
Setting Alarm Triggers
65
About Menu
66
Channel Menu
67
Channel: Page 1 and Page 2 Menus
67
Channel: 3D Control Menu
70
Summary of Channel: 3D Control Menu Options
70
Channel: Lamp Per Channel Menu
72
Summary of Channel: Lamp Per Channel Menu
73
Channel: Lens Menu
73
Summary of Channel: Lens Menu
74
Channel: Lens Menu Disabled
74
Advanced Menu
75
Advanced: Preference Menu
75
Summary Advanced: Preference Menu Options
75
Advanced: Lamp Menu
76
Summary of Advanced: Lamp Menu
76
Advanced: Lamp History Menu
77
Summary of Advanced: Lamp History Menu
78
Advanced: Lens Menu
78
Summary of Advanced: Lens Menu
79
Advanced - Test Patterns Menu
80
Advanced - User Menu
81
To Change User's Access Rights
82
To Change Password
82
To Add a New User
82
To Delete a User
82
Admin Menu
83
Admin: Source Menu
83
Summary of Admin: Source Menu Options
84
Admin: Screen Menu
85
Summary of Admin: Screen Menu
85
Admin: MCGD Menu
87
Summary of Admin: MCGD Menu Options
87
Admin: TCGD Menu
88
Summary of Admin: TCGD Menu Options
89
Admin: Network Menu
90
Summary of Admin: Network Menu Options
90
Admin: General Menu
91
Admin: Lamp Menu
92
Working with the Lamp
93
Turning the Lamp on or off Using Web User Interface
93
Lamp on
93
Lamp off
93
Using the CDP
93
If the Lamp Fails to Ignite
93
Adjusting Lamp Power (Liteloc™ or Manually)
94
Using Liteloc
94
Adjusting Lamp Position (Lamploc™)
95
Age of a Lamp
96
When to Replace a Lamp
96
Lamp Rotation
96
Maintaining Footlamberts
96
Working with the Lenses
97
Lens Mount Functions
97
Zoom
97
Focus
97
Adjust Lens Offsets
97
Working with 3D
98
Requirements for 3D
98
Hardware Setup
99
Instructions
99
Troubleshooting
100
Test Pattern
100
Image Breakup
100
No 3D Effect
100
Ghosting/Cross-Talk
100
Motion Artifacts
100
Single 3D Input Not Working
100
Cinema Operation
101
Compatible Cinema Sources
101
Image Formats
102
Projector Variables: Using an Anamorphic Lens
102
Projector Variables: Using a Wide Converter Lens
103
Theater Variables: Masking
103
Non-Cinema Operation
104
Selecting a Source
105
To Select a Non-Cinema Source
105
To Return to a Cinema Source
105
4: CDP Menu Tree
107
Safety Warnings and Guidelines
111
General Precautions
111
Ac/Power Precautions
111
Lamp Precautions
112
Wear Protective Clothing
112
Cool the Lamp Completely
112
Maintaining Proper Cooling
113
Ventilation
113
Air Filter (P/N: 003-002311-XX)
113
Liquid Cooler (P/N: 003-100668-XX)
113
Filling the Coolant Reservoir
113
Optional) Exhaust Duct (P/N: 119-103105-XX)
114
Maintenance and Cleaning
114
Lamp
114
Optical
114
Optical Components Cleaning Supplies
114
Cleaning the Lens
115
Cleaning the Reflector
115
Other Components
116
Lamp Fans
116
Replacing Lamp
116
Replacing the Filter
118
Replacing a Lens
119
Remove Lens
119
Insert New Lens
120
Power
121
Projector Does Not Power on
121
Lamp
121
Lamp Does Not Ignite
121
Lamp Suddenly Goes off
121
Flicker, Shadows or Dimness
122
Lamploc™ Does Not Seem to Work
122
Liteloc™ Does Not Seem to Work
122
Ils
123
Resetting the ILS
123
Calibrating the ILS
123
Cdp
124
Projector ON, but no Light at the CDP
124
Ethernet
124
Trouble Establishing Communication with Projector
124
Cinema Displays
124
Blank Screen, no Display of Cinema Image
124
Severe Motion Artifacts
124
Image Appears Vertically Stretched or 'Squeezed' into Center of Screen
125
No Image, Just Pink Snow
125
Non-Cinema Displays
125
The Projector Is ON, but There Is no Display
125
The Display Is Jittery or Unstable
125
The Display Is Faint
126
The Upper Portion of the Display Is Waving, Tearing or Jittering
126
Portions of the Display Are Cut off or Warped to the Opposite Edge
126
Display Appears Compressed (Vertically Stretched)
126
Data Is Cropped from Edges
126
Display Quality Appears to Drift from Good to Bad, Bad to Good
126
Display Has Suddenly Froze
126
Colors in the Display Are Inaccurate
126
Display Is Not Rectangular
126
Display Is "Noisy
127
Random Streaks on Bottom of the Image
127
Display
129
Panel Resolution and Refresh Rate
129
Achievable Brightness (Measured at Screen Center)
129
Minimum Contrast Ratio
129
Luminance Uniformity
129
Color and Gray Scale
129
Gamma
130
Axial Focus
130
Lens Offset Range (Usable)
130
D-Cinema Ports
130
Graphic Ports
131
Control Signal Compatibility
131
Ethernet Management Port (2X)
131
Ethernet Auxiliary Port
131
RS232-A Port (TI Light Engine)
131
RS232-B Port (PCM)
132
GPIO Port
132
Simple Contact Closure Interface (SCCI) Port
132
Control Display Panel (CDP)
132
Power Requirements
133
Standard Mode (Uses Line Cord Provided)
133
UPS (Uninterruptible Power Supply) Mode
133
Lamp
133
Physical Specifications
134
Regulatory
134
Environment
134
Standard and Optional Components
135
Standard
135
Optional Components
135
Setup
158
Advertisement
Christie CP2000-MR Service Booklet (122 pages)
Brand:
Christie
| Category:
Projector
| Size: 3.41 MB
Table of Contents
Table of Contents
5
1 Introduction
8
Using this Manual
9
Labels and Marking
9
Typographical Notations
9
Projector Description
10
How the Projector Works
10
Keypad Control
10
2 Parts and Module Replacement
11
Ordering Parts
12
Index of Parts and Modules
13
Safety Warnings and Guidelines
15
Replacement Procedures
16
Tools Required
16
Servicing Guidelines
16
Externals and Consumables
17
Lens
17
Lens Flags
18
Air Filter Cover
19
Intake Air Filter
19
Top Lid
20
Rear Lamp Door
21
Control Display Panel (CDP)
22
Cardcage Panel Skin
23
Exhaust Panel Skin
23
Front Face Skin
24
Lamp Door Frame Skin
24
Intake Duct
25
Liquid Cooling Air Filter
27
Remove Lamp
28
Installing a New Lamp
29
Lamp Compartment
29
Safety Shield
29
Main Blower Assembly
30
Lamp Adjuster Assembly
31
Reflector Assembly (Including Heat Dump)
32
Projector Feet
33
UV Filter
34
Lamp Door Interlock
35
Lamp Ballast
35
Lamp Ballast - Fans 1 and 2
37
AC Line Filters
38
AC Line Filter
38
A/C Selector Switch
39
Cardcage and LVPS Compartment
39
Cardcage Module
39
Projector Control Module (PCM)
40
Interface Board
41
Processor Board
43
FPGA Formatter Interface Board (FFIB)
43
Motherboard
43
Stepper Driver Board (SDB)
44
Low Voltage Power Supply (LVPS) - Phase I
45
Low Voltage Power Supply (LVPS) - Phase II
47
LVPS Rail Adjustment
51
Rail Adjustment Via CDP (Preferred Method)
51
Rail Adjustment Via Multimeter (Alternative Method)
52
Fans
53
Light Engine Fans - Fan 8
53
Intake - Fans 7, 8, 10 and 11
54
Front Engine Compartment
55
Primary Lens Mount
55
Liquid Cooling Assembly
56
Integrator Assembly
57
Contrast Aperture
59
Light Sensor Module
59
Cold Mirror
60
Fold Mirror 1
61
Yellow Notch Filter (YNF)
62
Shutter Assembly
63
Light Engine
64
LVDS Connector Cable Insertion
65
Cooling Heat Sinks and Hoses
66
Illumination Optic System (IOS)
67
Fold Mirror 2
68
3 Troubleshooting
69
Overview
70
Troubleshooting Trees
71
CDP no Activity/No Response
71
Projector Does Not Attempt to Go into Full Power Mode from Standby
72
Lamp will Not Ignite
73
Lamp Ignites but Does Not Stay on
74
Lamploc™ Not Working
75
Liteloc™ Not Working
76
DMD Over-Temperature Warning
77
Ethernet Communication Error
78
DLP Communications Error
79
Ballast Communication Failure
80
ILS Has Lost Focus, Offset And/Or Zoom
81
4 Serial Communications
82
5 Specifications
109
Display
110
Panel Resolution and Refresh Rate
110
Achievable Brightness (Measured at Screen Center/2000W)
110
Minimum Contrast Ratio
110
Luminance Uniformity
110
Color and Gray Scale
110
White Point
110
Gamma
110
Axial Focus
111
Lens Offset Range (Usable)
111
D-Cinema Ports
111
Graphic Ports
112
Control Signal Compatibility
112
Ethernet Management Port
112
Ethernet Auxiliary Port
112
RS232-A Port (TI Light Engine)
112
RS232-B Port (PCM)
113
GPIO Port
113
Simple Contact Closure Interface (SCCI) Port
113
Control Display Panel (CDP)
113
Power Requirements
114
Standard Mode (Uses Line Cord Provided)
114
UPS (Uninterruptible Power Supply) Mode
114
Lamp
114
Physical Specifications
115
Regulatory
115
Environment
116
Standard and Optional Components
116
Standard
116
Optional Components
116
6 Interconnections
117
Interconnect Drawing
118
Appendix A Block Diagram
119
Appendix B Shutter Override
121
Shutter Manual Override
122
Christie CP2000-MR Setup Manual (74 pages)
Brand:
Christie
| Category:
Projector
| Size: 8.03 MB
Table of Contents
Table of Contents
3
1 Introduction
7
Purchase Record and Service Contacts
7
List of Components
7
Key Features
8
2 Basic Operation
9
Safety Warnings and Guidelines
9
General Precautions
9
Ac/Power Precautions
10
Lamp Precautions
10
Wear Protective Clothing
10
Cool the Lamp Completely
11
Powering up the Projector
11
Powering down the Projector
13
Projector Power States
13
Using the Control Display Panel (CDP)
13
Guidelines for Using the CDP
13
Navigating the CDP Menus
14
Navigation Icons
14
Channel Menu
16
Summary of Edit Channel Menu Options
17
Lamp Menu
19
Lens Control Menu
20
Status Menu
22
Configuration Menu
23
Using the Web User Interface
24
Main Menu
24
Power on or off
25
Turn Lamp on or off
25
Open or Close Douser (Shutter)
25
Display Test Pattern
25
Move Auxiliary Lens
25
Intelligent Lens System (ILS)
25
To Enable ILS
26
Channel: 3D Control
27
Requirements for 3D
27
Hardware Setup
28
Instructions
28
Admin Menu
29
Admin: Source Menu
29
Summary of Admin: Source Menu Options
30
Admin: Screen Menu
31
Summary of Admin: Screen Menu
31
Admin: MCGD Menu
33
Summary of Admin: MCGD Menu Options
33
Admin: TCGD Menu
35
Summary of Admin: TCGD Menu Options
35
Admin: Lamp Menu
37
Working with the Lamp
38
Turning the Lamp on or off Using Web User Interface
38
Lamp on
38
Lamp off
38
Using the CDP
38
If the Lamp Fails to Ignite
38
Adjusting Lamp Power (Liteloc™ or Manually)
39
Using Liteloc
39
Adjusting Lamp Position (Lamploc™)
40
Cinema Operation
41
Compatible Cinema Sources
41
Non-Cinema Operation
42
Selecting a Source
42
To Select a Non-Cinema Source
42
To Return to a Cinema Source
42
3 Installation & Setup
43
Position the Projector
44
Optional) Install Projector on Rack Stand
44
Optional) Mount the Control Display Panel
45
Optional) Connect Exhaust Ducting
46
Optional) CP2000-M Motorized Auxiliary Lens Mount (M-MALM) Installation
47
Add Anamorphic Lens
47
Add Wide Converter Lens (WCL)
47
Install Lens(Es)
48
Primary Zoom Lens Installation
48
Connect Sources and Initial Power up
50
Connecting Sources
51
Cinema Servers
51
Connecting for Communications
52
Pc/Laptop, Server or Network
52
Adjusting Tilt and Leveling
53
Adjusting Tilt
53
Adjusting Feet/Leveling
53
Carrying/Moving the Projector
53
Basic Image Alignment
54
Basic Optical Alignment Procedure
54
Lens Mount Offset and Boresight Alignment
54
Adjust Offset
55
Adjust Lens Mount Boresight
55
Lens Mount Vertical Boresight
55
Lens Mount Horizontal Boresight
56
Adjustable Fold Mirror & Convergence Adjustments
58
DMD Convergence
58
Fold Mirror Adjustment
58
4 Maintenance
59
Lamp Replacement
59
Filter Replacement
61
Lens Replacement
62
Remove Lens
62
Install Lens
63
5 Troubleshooting
65
Power
65
Projector Does Not Power on
65
Lamp
65
Lamp Does Not Ignite
65
Lamp Suddenly Goes off
65
Flicker, Shadows or Dimness
65
Lamploc™ Does Not Seem to Work
66
Liteloc™ Does Not Seem to Work
66
Cinema Displays
66
Blank Screen, no Display of Cinema Image
66
Severe Motion Artifacts
66
Image Appears Vertically Stretched or 'Squeezed' into Center of Screen
67
No Image, Just Pink Snow
67
Non-Cinema Displays
67
The Projector Is ON, but There Is no Display
67
The Display Is Jittery or Unstable
67
The Display Is Faint
68
The Upper Portion of the Display Is Waving, Tearing or Jittering
68
Portions of the Display Are Cut off or Warped to the Opposite Edge
68
Display Appears Compressed (Vertically Stretched)
68
Data Is Cropped from Edges
68
Display Quality Appears to Drift from Good to Bad, Bad to Good
68
Display Has Suddenly Froze
68
Colors in the Display Are Inaccurate
68
Display Is Not Rectangular
68
Display Is "Noisy
69
Random Streaks on Bottom of the Image
69
6 Specifications
71
Control Signal Compatibility
71
Ethernet Management Port
71
Ethernet Auxiliary Port
71
RS232-A Port (TI Light Engine)
71
RS232-B Port (PCM)
71
GPIO Port
71
Simple Contact Closure Interface (SCCI) Port
72
Control Display Panel (CDP)
72
Power Requirements
73
Standard Mode (Uses Line Cord Provided)
73
UPS (Uninterruptible Power Supply) Mode
73
Lamp
73
Regulatory
74
Environment
74
Advertisement
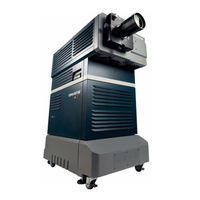
Christie CP2000-MR Instruction Sheet (9 pages)
Coolant Refill
Brand:
Christie
| Category:
Projector
| Size: 6.9 MB
Christie CP2000-MR Instruction Sheet (5 pages)
Ballast Replacement
Brand:
Christie
| Category:
Projector
| Size: 0.5 MB
Advertisement
Related Products
Christie CP2000-X
Christie CP2000-M
Christie CP2000-ZX
Christie CP2000
Christie CP2000-SB
Christie CP2000-XB
Christie CP2000-H
Christie CP2000-S
Christie CP2000-i
Christie CP2000-Z
Christie Categories
Projector
Monitor
Projector Accessories
Racks & Stands
Speakers
More Christie Manuals
Login
Sign In
OR
Sign in with Facebook
Sign in with Google
Upload manual
Upload from disk
Upload from URL