Sign In
Upload
Manuals
Brands
Auerswald Manuals
PBX
COMpact 5000
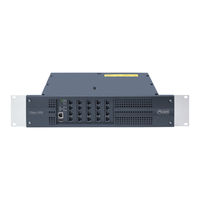
Auerswald COMpact 5000 IP-PBX System Manuals
Manuals and User Guides for Auerswald COMpact 5000 IP-PBX System. We have
3
Auerswald COMpact 5000 IP-PBX System manuals available for free PDF download: Operation Manual, Setup Manual, Instructions Manual
Auerswald COMpact 5000 Operation Manual (932 pages)
PBX for Analogue/ISDN/Internet Telephony
Brand:
Auerswald
| Category:
PBX
| Size: 7 MB
Table of Contents
Table of Contents
2
Important Information
27
Used Symbols and Signal Words
28
Safety Information
29
Proper Use
32
Product Details
33
Basic Assembly and Extensions
33
Installation
44
Configuration and Administration
45
Using Different Telephone Types
46
Technical Data
48
Minimum Requirements PC
52
Copyright and Trademarks
53
Environmental Notice
54
Installation and Commissioning
55
Preparation (Modules)
56
Planning the System Configuration
56
Base Circuit Board Overview
56
Compact CPU Module Overview
57
Compact 2FXO Module Overview
58
Compact 4FXS Module Overview
59
Compact 2BRI Module Overview
60
Compact 4DSP Module Overview
61
Preparation (Compact 5000)
62
Opening the Casing
62
Wall-Mounting the PBX
63
Connecting the Earthing
64
Updating or Upgrading the PBX
66
Closing the Casing
68
Preparation (Compact 5000R)
70
Rack Mounting of the PBX
70
Connecting the Earthing
71
Opening the Casing
73
Updating or Upgrading the PBX
74
Closing the Casing
76
Network Provider
77
Connecting the Analogue Connection Directly to the External Analogue Port
78
Installing Cable between External Analogue Port and Analogue Connection
79
Connecting an ISDN Connection (NTBA) Directly to the External S Port
80
Installing Cable between the External S Port and ISDN (NTBA)
81
Connecting the Ethernet Port with the Internet/Lan
82
Analogue End Devices
85
Connecting Analogue End Devices Directly to the Internal A/B Port
85
Installing Cables and Wall Sockets at the Internal A/B Port
86
ISDN End Devices
89
Connecting ISDN End Devices Directly to the Internal S Port
89
Available Bus Variants for the Installation of an Internal S Bus
90
Connecting the Cable and the Wall Sockets to the Internal S Port (Internal S Bus)
92
Connecting ISDN End Devices Directly to the Internal U P0 Port
96
Connecting the Cable and the Wall Sockets to the Internal U P0 Port
98
Voip End Devices
101
Connecting a Voip End Device to the Ethernet Port
101
Printers and Data Storage Devices
103
Connecting a USB Printer to the USB Host
103
Commissioning
105
Turning on the PBX
105
Connecting the PC to the Ethernet Port of the PBX
106
Opening the Configuration Manager at First Commissioning
106
Commissioning Analogue End Devices
108
Commissioning Standard ISDN End Devices
108
Commissioning ISDN System Telephones
109
Commissioning Standard Voip End Devices
109
Commissioning Voip System Telephones
110
Introduction to the Configuration Manager
112
Configuration Manager
113
Opening the Configuration Manager
113
Operating Instructions for the Configuration Manager
115
Configuration Wizard
121
Network Configuration
124
Selecting the Language
129
Configuring the Port on the Web Server
129
Configuring the Time Lapse for Forced Logout
130
Logging out a User/Sub-Administrator from the Configuration Manager as Administrator
131
Help
132
Opening Help
132
Navigating in the Help Window
132
Searching in Help
134
Printing from Within the Help
135
Icons in the Help Window
136
Telephoning
137
Incoming Calls
138
Accepting Incoming Calls
138
Call Waiting Calls
139
Options During a Call Waiting Call
139
Rejecting a Call Waiting Call
139
Accepting the Call Waiting Call
140
Disconnecting the Current Call and Accepting the Call Waiting Call
140
Outgoing Calls
142
Initiating an Internal Call
143
Initiating an External Call
143
Initiating an External Call with Calling Line Identity Restriction
144
Unsuccessful Outgoing Calls
146
Initiating Internal Callback on Busy
147
Initiating External Callback on Busy
147
Deleting Callback on Busy
149
Initiating Reservation of Exchange Line on Busy
149
Initiating Internal Callback on no Response
150
Initiating External Callback on no Response
151
Initiating Priority Call for Do-Not-Disturb
152
Query Calls
153
Initiating a Query Call
153
Ending a Query Call
154
Options During a Query Call
154
Toggling between Conversations
155
Ending One of the Two Calls
155
Connecting both Communication Partners
156
Initiating Query Call to Third Subscriber
156
Transferring
159
Options for Transferring a Call
159
Transferring with Announcement
160
One-Man Transfer (Transferring Without Announcement)
161
Placing External Communication Partner in Waiting Loop
161
Calling a Third Subscriber and Transferring to an Active Communication Partner
162
Conference Calls
164
Initiating Conference Calls
164
Options During a Conference Call
164
Initiating Toggling between Conversations During a Conference Call
165
Connecting both Conference Call Partners
166
Ending Conference Call
166
Address Books and Lists
167
Address Books
168
Elements of a Contact
168
Searching and Displaying a Contact
169
Dialling from Within the Contacts (Soft Call)
170
Creating a Contact
171
Importing an Image for a Contact Person
172
Deleting a Contact Person's Image
174
Editing a Contact
174
Reading the QR Code
175
Exporting a Contact Data Record (Vcard)
176
Importing a Contact Data Record (Vcard)
177
Adopting a Contact from the Call Data List
178
Short-Code Numbers
179
Entering a Short-Code Number
179
Deleting a Contact
180
Deleting All Contacts
181
Setting Display Name Conversion
182
Exporting Address Books
182
Importing Address Books
184
File Formats for Adress Book Import
185
Contact Groups
189
Creating a Contact Group
190
Setting Authorisations for Contact Groups
192
Switching Use as Standard Contact Group On/Off
193
Assigning a Contact to a Contact Group
194
Deleting a Contact from a Contact Group
195
Deleting a Contact Group
196
Google Contact Groups
197
Creating a Google Contact Group
197
Synchronising a Google Contact Group Manually with Gmail
199
LDAP Server
201
Switching the LDAP Server On/Off
201
Information about Transfer
202
Entering the LDAP Server's User Name
203
Entering the LDAP Server's Password
203
Setting Contact Groups for Export to the LDAP Server
204
Entering Passwords for Exported Contact Groups
204
Call Data
206
Contents of the Call Data Record
206
Opening the Call Data List
206
Columns on the Call Data List
207
Using a Filter
214
Creating Filters
214
Configuring a Filter
215
Printing the Call Data List
216
Exporting the Call Data List
217
Deleting Call Data
218
Dialling from the Call Data List (Soft Call)
218
Configuring the Display
219
Configuring Calls to be Recorded for the Call Data List
220
Configuring a Currency Name
221
Configuring the Cost Per Call Unit
222
Configuring the Billing Factor
222
Deleting the List of Single Call Records
223
Switching Authorisation for Deleting Single Call Records On/Off
224
Configuring SFTP Transfer of a Call Data File
224
Voice Mail and Fax Boxes
227
Voice Mail/Fax Function and Memory Management
228
Voice Mail/Fax Function Settings
228
Memory Overview
231
Voice Mailbox
232
Configuring a Voice Mailbox
232
Creating Voice Mailboxes
233
Entering the Maximum Recording Capacity of a Voice Mailbox
240
Switching Automatic Clean-Up of a Voice Mailbox On/Off
241
Switching Message Forwarding On/Off
242
Switching Automatic Replay of New Messages On/Off
243
Configuring Call Take-Over
243
Configuring E-Mail Transfer for Voice Mailbox
244
Entering E-Mail Addresses of Message Recipients for Voice Mailbox
245
Configuring Users and Their Authorisations for a Voice Mailbox
246
Configuring the Language of the Announcements
248
Saving, Recording, Listening To, and Deleting Announcements for Voice Mailboxes
248
Switching Readiness of a Voice Mailbox Depending on the Configuration On/Off
252
Configuring Call Acceptance (Standard Behaviour) for Voice Mailboxes
253
Voice Mailbox (Continued)
253
Configuring Call Acceptance (Call-Specific Behaviour) for Voice Mailboxes
255
Switching the Replacement Function On/Off
257
Operating and Querying a Voice Mailbox
258
Switching Remote Access and Entering PIN for Remote Access
263
Searching for a Voice Message
263
Switching a Voice Mailbox for a Subscriber/A Group On/Off
265
Switching Info Call On/Off
266
Restoring Voicemailbox
267
Overview Voice Mail/Fax Function
269
Fax Box
270
Configuring a Fax Box
270
Creating Fax Boxes
271
Entering the Maximum Recording Capacity of a Fax Box
277
Switching Automatic Clean-Up of a Fax Box On/Off
278
Configuring E-Mail Transfer for Fax Box
278
Entering E-Mail Addresses of Message Recipients for a Fax Box
280
Entering Fax ID
281
Configuring the Fax Transmission
282
Configuring Users and Their Authorisations for a Fax Box
283
Switching the Reject Anonymous Fax Calls Function On/Off
284
Switching Readiness of the Fax Box Depending on the Configuration On/Off
285
Switching Fax Box for a Subscriber/A Group On/Off
285
Fax Transfer
287
Operating and Querying a Fax Box
292
Searching for a Fax
294
Restoring Fax Box
295
Mwi
298
RSS Feed
299
Switching RSS Feed Initiation On/Off
299
Subscribing to an RSS Feed
300
Functions
302
Alarm
304
Confirming Alarms
305
Creating an Alarm
306
Creating a Switch Input and Assigning It to the Alarm
306
Creating a Relais and Assigning It to the Alarm
308
Alarm Settings
309
Activating Alarms
311
Alarm Device
312
Switching Alarm Device On/Off
312
Exchange Line Authorisation
313
Configuring Exchange Line Authorisation for Subscribers
313
Configuring Exchange Line Authorisation for Groups
315
Exchange Line Transfer
317
Exchange Line Transfer Process
317
Configuring an Exchange Line Transfer
317
Configuring the Exchange Line Settings for Exchange Line Access to be Transferred
318
Switching the Callback Option On/Off
319
Configuring Subscribers for the Charge Burden
319
Configuring the Time Limit for Initiating an External Call
320
Call Waiting
321
Switching Call Waiting On/Off
321
Do-Not-Disturb
322
Switching the Do-Not-Disturb Function On/Off
322
Automatic Reception
323
Automatic Reception Management
325
Settings for Automatic Receptions
326
Overview Automatic Receptions
330
Baby Call
331
Switching Baby Call On/Off
331
Entering the Delay Time for Baby Call
332
Busy-On-Busy
333
Switching Busy-On-Busy On/Off
333
Call through
335
The Call through Process
335
Configuring Call through
335
Switching LCR for Call through Calls On/Off
336
Configuring the Maximum Duration for External Call through Calls
336
Call through (Continued)
337
Making Exchange Line Settings for Call through Calls
337
Configuring Call Assignments
338
Creating Call through Users
338
Boss/Secretary Function
340
Configuring the Boss/Secretary Function
340
Follow-Me
341
Configuring Follow-Me
341
Call Deblocker (Outgoing) - Released Numbers
343
Switching the Call Deblocker (Outgoing) On/Off for Subscribers
343
Switching the Call Deblocker (Outgoing) On/Off for Group
344
Creating a Call Deblocker (Outgoing)
345
List of Configured Call Deblocker (Outgoing)
346
Call Deblocker (Incoming) - VIP Numbers
347
Switching the Call Deblocker (Incoming) On/Off
347
Creating a Call Deblocker (Incoming)
348
List of Configured Call Deblockers (Incoming)
348
Call Charge Information
350
Call Allowance Account
351
Configuring Credit for a Call Allowance Account
351
Configuring Maximum Credit for Call Allowance Accounts
354
Configuring the Call Type Used for Account Debiting
355
Switching Recording Changes for Account Debit During Transfers On/Off
355
Targeted Exchange Line Access
357
Initiating Targeted Exchange Line Access
357
Targeted Voip Access
358
Initiating Targeted Voip Access
358
Groups
359
Detailed Information about Group Functions
359
Logging Subscribers In/Out
360
Hotel Function
362
Function Areas of the Hotel Function
362
Configuring the Hotel Function
363
Selecting Reception Telephones
364
Selecting Room Telephones
365
Switching the Print Option On/Off
366
Configuring the Print Quality
367
Hotel Function (Continued)
367
Configuring the Number of Printouts
367
Restoring the Preadjustment for the Printing Form
368
Switching the Form Feed On/Off
369
Entering the Header Text
369
Entering the Footer Text
370
Entering the Relevancy
371
Entering Terms for Invoice Data
371
Entering the Column Headlines
373
Entering Terms for the Final Amount
374
Entering Text for Missing Call Data
375
Entering Separators for the Date
376
Entering Separators for the Time
377
Printing a Test Page
377
Setting the Room State at the Room Telephone
378
Intercom Announcement/Hands-Free
379
Intercom Announcement / Intercom Hands-Free Calling
379
Initiating Intercom Announcement/Hands-Free
380
Switching Intercom Permission On/Off
380
Ringing Sequence
382
More Information on the Ringing Sequences
382
Configuring Ringing Sequence
389
Configuring Priority
393
Switching the Ringing Delay On/Off
393
Configuring the Ringing Delay Time
394
Configuration Switchover
395
Configuration-Dependent Functions
395
Switching Authorisation for Configuration Switching On/Off
395
Creating Configurations
396
Copying Configurations
397
Switching a Configuration on
397
Switching Automatic Configuration Switchover On/Off
398
Creating Switching Times for Switching the Configuration
399
Copying Switching Times
400
Permanent Configuration
401
Switching Permanent Configuration On/Off for Call Forwarding
401
Overview of the Configured Switching Times
402
Lan-Tapi
403
LAN-TAPI Functions
403
Switching PBX Call Assist On/Off
404
Configuring Subscribers for LAN-TAPI
404
Configuring the Network Port on the TAPI Server
405
Configuring the Password for the Network Connection on the TAPI Server
405
Installing TAPI Driver (TSP)
406
Restarting the TAPI Server
407
Checking the Function of the LAN-TAPI
407
Loudspeaker Announcement
409
Creating an Announcement Output for Loudspeaker Announcements
409
Entering DTMF Sequences to Control the Announcement Output
410
Entering the Dead Time of the Announcement Output
411
Creating a Relais and Assigning It to an Announcement Output
412
Switching Authorisation for Speaker Announcements On/Off
413
Performing Loudspeaker Announcement
413
Lcr
414
Configuring Subscribers for LCR
415
Importing the LCR Configuration (Providers, Tariff Groups and Data) for Soft-LCR
415
Creating Providers
416
Creating Default Networks Based on a Provider Area Code
417
Creating Networks Manually for Soft-LCR 4.0
417
Creating Prefixes for Networks Manually for Soft-LCR 4.0
418
Creating Tariff Information for Networks for Soft-LCR 4.0
419
Reading the LCR Configuration for Soft-LCR 4.0 from the PBX
422
Call Parking
423
Call Parking Process
423
Parking the Call Internally
423
Unparking the Call
424
Unparking a Second Call During a Call
424
Switching Authorisation for Call Parking On/Off
425
Configuring the Internal Base Telephone Number for the Parking Zone
425
Configuring Hold Time
426
Online Name Search
427
Information on Online Name Search
427
Switching the Online Name Search On/Off
427
Creating Default Service Providers Automatically
428
Importing Service Providers
429
Downloading Provider Data from the Auerswald Update Server
429
Online Name Search (Continued)
429
Creating Service Providers Manually
430
Creating Group Filters for Service Providers
431
Setting the Priority of the Group Filters
433
Copying Provider Data, Group Filters or Search Attributes
434
Testing Configured Search Properties
435
Exporting Service Providers
435
Entering Character Strings into the Text Converter
436
Multi-Path Call Forwarding
437
Switching Multi-Path Call Forwarding for Subscriber On/Off
437
Switching Multi-Path Call Forwarding for Group On/Off
438
Pick-Up
440
Performing Pick-Up
440
Picking up During a Call
441
Switching the Authorisation for Pick-Up On/Off
441
Switching Call Take-Over for Subscribers On/Off
442
Performing Call Pick-Up
443
Preliminary Pickup Query and Monitoring
444
Switching Preliminary Pick-Up Query and Monitoring for Subscribers On/Off
444
Switching Preliminary Pick-Up Query and Monitoring for Groups On/Off
445
Pick-Up of All Calls to Group Members
447
Switching Pick-Up of All Calls to Group Members On/Off
447
Picking up a Direct Call to a Group Member
448
Private (Personalised) Exchange Line Access
449
Switching Differently Configurable Functions for Private and Business Calls On/Off
449
Initiating Private Exchange Line Access
450
Initiating Private Exchange Line Access Without a PIN
450
Switching Authorisation for Private Exchange Line Access Without PIN Entry On/Off
451
Project Assignment
452
Configuring Project Assignment
452
Room Monitoring
453
Switching Room Monitoring On/Off
453
Performing Room Monitoring
454
Relays (Actuators)
455
Relay Operating Modes
455
Creating an IP Switch Relay
458
Creating a Relay
459
Identification Number
460
Configuring the Operating Mode
461
Switching PBX as Master of the Relay On/Off
462
Switching off Control On/Off
462
Entering the Switching Duration of the Relay
463
Entering the Hold Time of the Relay
464
Entering the Dead Time of the Relay
465
Entering DTMF Sequences to Control the Relay
465
Switching Authorisation for Switching of Relays On/Off
466
Switching a Relay Manually
467
Call Channel Reservation
468
Switching Call Channel Reservation On/Off
468
Telephone Number Display (CLIP)
470
Switching CLIP Information On/Off
470
Switching Extended CLIP Information On/Off
471
Number Presentation (Outgoing)
472
Configuring Number Presentation (Outgoing) for Subscriber
472
Configuring Number Presentation (Outgoing) for Group
473
Suppressing Number Presentation
474
Number Presentation (Incoming)
476
Configuring Number Presentation (Incoming) for Subscriber
476
Configuring Number Presentation (Incoming) for Group
477
Configuring Number Presentation (Internal) for Group Calls
479
Call Forwarding
480
Call Forwarding Variations
480
Call Forwarding Types
481
Switching Call Forwarding for Subscribers On/Off
481
Switching Subscriber Call Forwarding Only for External Calls On/Off
483
Switching Cascading of Call Forwarding for Subscribers On/Off
484
Switching Call Forwarding for Subscribers for Group Calls On/Off
485
Switching the Authorisation for Configuring Call Forwarding for Subscribers to External Numbers On/Off
486
Switching the Authorisation for Group Properties and Follow-Me for Subscribers On/Off
486
Entering the Delay Time for Call Forwarding on no Reply for Subscribers
487
Overview of the Status of Call Forwarding for Subscribers and Groups
488
Switching Call Forwarding for Groups On/Off
488
Switching Group Call Forwarding Only for External Calls On/Off
490
Call Forwarding (Continued)
490
Switching Cascading of Call Forwarding for Groups On/Off
491
Switching Call Forwarding for Groups for Group Calls On/Off
492
Entering the Delay Time for Call Forwarding on no Reply for Groups
493
Switching Call Forwarding for External Numbers On/Off
493
Switching the Authorisation for Configuring Features Configured by the Network Provider On/Off
495
Switch Input
496
Creating a Switch Input
496
Entering the DTMF Sequence
496
Entering the SIP Invite
497
Call Restrictor (Outgoing) - Restricted Numbers
498
Switching the Call Restrictor (Outgoing) On/Off for Subscriber
498
Switching the Call Restrictor (Outgoing) On/Off for Group
499
Creating a Call Restrictor (Outgoing)
500
List of Configured Call Restrictors (Outgoing)
501
Call Restrictor (Incoming) - Robinson Numbers
502
Switching the Call Restrictor (Incoming) On/Off for Subscribers
502
Switching the Call Restrictor (Incoming) On/Off for Group
503
Creating a Call Restrictor (Incoming)
504
List of Configured Call Restrictors (Incoming)
504
Telephone Book Authorisation
506
Switching Telephone Book Authorisation for Subscriber On/Off
506
Switching Telephone Book Authorisation for Group On/Off
507
Announcement before Answering
509
Switching Announcement before Answering On/Off
509
Configuring the Call Signallisation
510
Selecting an Announcement before Answering
511
Switching Announcement before Answering for Fallback On/Off and Selecting Announcement
511
Text Messages (Instant Messaging)
513
Door Functions
514
Creating a Door Terminal
514
Entering DTMF Sequences to Control a Door Terminal
519
Entering the Dead Time of the Door Terminal
520
Entering the SIP Password of the Door Terminal
521
Creating a Door Call and Assigning It to the Door Terminal
521
Configuring a Ringtone for the Door Call
523
Configuring the Call Duration for the Door Call
524
Configuring the Exchange Line Settings and Number Presentation for Door Calls
525
Configuring a Second Ringer for Door Calls
526
Creating a Relay and Assigning It to the Door Terminal
526
Switching the Authorisation for Opening the Door On/Off
527
Accepting a Door Call
528
Calling a Door
529
Calling a Door During a Call
529
Accepting Door Call During a Call
529
Opening the Door During a Door Call
530
Transmission of the Display Name
531
Switching Transmission of the Display Name On/Off
531
Voip/Gsm Routing
533
Voip/Gsm Routing Sequence
533
Entering Exception Telephone Numbers
534
Importing Exception Telephone Numbers
536
Exporting Exception Telephone Numbers
536
Configuring Configuration Dependent Voip/Gsm Routing
537
Preferred Exchange Line
538
Switching Preferred Exchange Line for Subscriber On/Off
538
Switching Preferred Exchange Line for Group On/Off
539
Waiting Field Function
541
Configuring the Waiting Field
541
Sequence for Call Acceptance in Waiting Field
542
Selecting Subscriber or Group Telephone Number as Waiting Field
543
Switching Automatic Call Take-Over On/Off
544
Music on Hold and Announcement
545
Music on Hold and Announcements Management
545
Settings for Music on Hold and Announcements
547
Switching Music on Hold During the Ringing Period On/Off
550
Wake-Up Functions
551
Settings for Wake-Up Functions
551
Creating Switching Times for Switching the Wake-Up Announcement
553
Overview Wake-Up Times
554
Central Caller List
555
Switching Central Caller List On/Off
555
Settings
557
Hardware
558
Selecting Modules
558
Configuring the Use of the ISDN Ports
559
Configuring the Connection Type for the ISDN Connection
559
Switching S Bus Monitoring On/Off
560
Configuring the Use of the External Analogue Ports
561
Identification
562
Switching the DHCP Client On/Off
562
Configuring the Ipv4 Address of the PBX
562
Configuring the Ipv4 Subnet Mask
563
Configuring the Ipv4 Gateway
563
Switching the Permanent IP Address from the APIPA Address Range On/Off
564
Switching Upnp On/Off
564
Switching Ipv6 On/Off
565
Configuring the Ipv6 Address of the PBX
565
Configuring the DSP Module
566
Internet Access
567
Configuring the DNS Server
567
Configuring the Use of Your Own DNS Server
568
Configuring the HTTP Proxy
568
Forcing HTTPS Connection
569
IP Blacklist and Whitelist as Protection against Attacks from the Internet
570
SFTP Server
573
Configuring the SFTP Server
573
Internal Telephone Numbers
575
Possible Types of Internal Telephone Numbers
575
Overview of the Internal Telephone Numbering Plan
576
Creating Analogue Subscribers
577
Creating ISDN Subscribers
578
Creating Voip or IP DECT Subscribers
580
Creating Subscribers Without Assignment
582
Function Overview for Subscriber Properties
583
Monitoring Status Internal Subscriber
584
Managing Unassigned Telephones
587
Creating Groups
587
Assigning Group Members to a Group
588
Group Overview
589
Switching Authorisation to Change the Port for ISDN Subscriber On/Off
590
Configuring the Size of the Jitter Buffer for Voip Subscribers
590
Switching Echo Cancellation for Voip Subscribers On/Off
591
Configuring the Telephone Number Format for Voip Subscribers
592
Analogue Connection
593
Analogue Connection Settings
593
Expert Configuration, Analogue Connection
595
ISDN Connection
603
PTMP Connection Settings
604
PBX Base Number/Bundle Settings
609
PTP Connection Settings
611
Extension Settings
616
Settings for Additional Numbers
617
Voip
619
Sequence of an External Call Via Voip
619
Configuring External Internet Telephony
620
Configuring Internal IP Telephony
621
Configuring Remote Extensions
622
Voip Settings
624
SIPS/SRTP Settings
627
Voip Provider Management
628
Voip Provider Settings
630
Voip Account Management
643
Voip Account Settings
644
Monitoring Voip Status
654
Profiles
658
Subscriber Properties Via Subscriber Profiles
658
Group Properties Via Group Profiles
659
Creating Profiles
659
Assigning Profiles
660
Function Overview
661
DECT Telephones
662
Using the Configuration Manager to Switch on the Login Mode of a Comfortel DECT 900 Base
663
Assigning Internal Telephone Numbers to Comfortel DECT 900/900C Handsets
664
Using the Configuration Manager to Log out Comfortel DECT 900/900C Handsets
665
Using the Configuration Manager to Configure a Function Key for PBX Functions
666
Copying a Function Key Assignment into Other Comfortel DECT 900/900C Handsets
667
Transferring Telephone Numbers from the Address Books into the Telephone Book on a Comfortel DECT 900/900C Handset
668
Restoring a Telephone Book from the PBX
670
E-Mail
672
Configuring Outgoing Mail Server
672
Entering the Address of the Outgoing Mail Server
673
Entering the Port of the Outgoing Mail Server
673
Configuring the Authentication Type of the Outgoing Mail Server
674
Entering the User Name of the Outgoing Mail Server
674
Entering the Password of the Outgoing Mail Server
675
Switching Encryption for the Outgoing Mail Server On/Off
675
Switching the Use as Default Outgoing Mail Server on
676
Entering the Address of the E-Mail Sender for the Outgoing Mail Server
677
Assigning Outgoing Mail Servers
677
Deleting Outgoing Mail Servers
678
Importing a Logo
678
Assigning a Logo
679
Internationalisation/Language Files
680
Creating a Language File
681
Exporting a Language File
681
Importing a Language File
682
Assigning a Language File
683
System Messages
684
Monitoring System Messages
685
System Message Settings
686
GSM Gateway
689
Call Distribution
690
Creating a Call Distribution
690
Configuring Fallback
695
Switching Delayed Fallback On/Off
696
Overview of the Call Distribution
697
Configuring the Modem/Fax Call Distribution for Analogue Connections
698
Emergency Calls
701
Switching the Emergency Call Priority Switch On/Off
703
Switching Emergency Call Only with Exchange Line Access Number On/Off
703
Entering Your Own Emergency Telephone Numbers
704
Entering Service Numbers
705
PBX Time
707
Configuring PBX Time (Time and Date) Manually
707
Switching the Automatic Updating of the PBX Time On/Off Via the Network
708
Switching Automatic Updating of the PBX Time after each ISDN Call On/Off
709
Switching NTP Server Service On/Off
710
Calendar
711
Adding Holidays from Holiday Lists
711
Creating and Editing Holidays
711
Importing Holidays
712
Exporting Holidays
713
Tones
714
Presenting the Tones
715
Configuring the Internal Dial Tone
715
Switching the Busy Tone for the End of Call On/Off
716
Switching the Special Dial Tone On/Off
716
Ringtones
718
Configuring the Ringer Frequency
719
CLIP Texts
720
Configuring CLIP Texts
720
Protection from Unauthorised Access
721
Access Authorisation
721
Configuring Access Authorisation
722
Configuring Administrator Access
722
Configuring Sub-Administrator Access
724
Configuring User Pins and Passwords
726
Changing the PIN
727
Switching Authorisation for Controlling the PBX On/Off
728
Exchange Line Request
730
Switching System-Wide Automatic Exchange Line Request On/Off
731
Configuring Exchange Line Request
732
Configuring the Exchange Line Access Number
733
Configuring the Country Code
733
Configuring the Local Area Code
734
Transfer and Callback
735
Configuring Hook Flash Timing
735
Switching the Authorisation for External Call Transfer Externally On/Off
736
Configuring the Maximum Duration of Transferred Calls (External to External)
737
PBX, Dealer and Operator Data
738
Configuring the Country
738
Entering PBX Name and Description
738
Entering Dealer Data
739
Entering Operator Data
739
Advertisement
Auerswald COMpact 5000 Setup Manual (100 pages)
PBX for analogue/ISDN/Internet telephony
Brand:
Auerswald
| Category:
PBX
| Size: 1 MB
Table of Contents
Table of Contents
3
Wichtige Informationen
7
Verwendete Symbole und Signalwörter
7
Sicherheitshinweise
7
Bestimmungsgemäße Verwendung
11
Grundausbau
12
Hardware-Erweiterungen
13
Software-Erweiterungen
13
Maximalausbau
14
Externer S 2M -Port
15
Externer S -Port
15
Externer Analoger Port (POTS)
15
Ethernet-Port
15
Interner S -Port
17
Interner U P0 -Port
18
Interner Analoger Port
18
USB-Host-Port 2.0
19
Türstation
19
Relais
19
Schalteingang
19
Ansageausgang
20
Installation
20
Konfiguration/Administration
20
Technische Daten
21
Umwelthinweis
25
Entsorgung
25
Energieverbrauch
25
Reparatur
26
Weitere Umweltinformationen
26
Informationen zu den Beiliegenden Anleitungen
26
Weitere Anleitungen
26
Aktuelles
26
Copyright und Marken
26
Vorbereitung (Module)
28
Übersicht Compact CPU-Modul
28
Übersicht Compact 2FXO-Modul
29
Übersicht Compact 4FXS-Modul
29
Übersicht Compact 2BRI-Modul
30
Übersicht Compact 4DSP-Modul
31
Vorbereitung (Compact 5000)
32
Gehäuse Öffnen
32
Gehäuse an der Wand Montieren
33
Erdung Anschließen
35
TK-Anlage Um- oder Aufrüsten
36
Modul Einstecken
37
Modul Herausziehen
38
Gehäuse Schließen
38
Vorbereitung (Compact 5000R)
40
Gehäuse IM Rack Montieren
40
Erdung Anschließen
41
Gehäuse Öffnen
42
TK-Anlage Um- oder Aufrüsten
43
Modul Einstecken
44
Modul Herausziehen
45
Gehäuse Schließen
45
Inbetriebnahme
47
TK-Anlage Einschalten
47
Konfigurationsmanager Öffnen
48
Important Information
50
Used Symbols and Signal Words
50
Safety Information
50
Proper Use
53
Basic Assembly
54
Hardware Extensions
55
Software Extensions
56
Maximum Extension
56
External S 2M Port
57
External S Port
57
External Analogue Port (POTS)
57
Ethernet Port
58
Internal S Port
59
Internal U P0 Port
60
Internal Analogue Port
60
USB Host Port 2.0
61
Door Terminal
61
Relay
61
Switch Input
61
Announcement Output
62
Installation
62
Configuration and Administration
62
Technical Data
63
Environmental Notice
67
Disposal
67
Energy Consumption
67
Repair
67
Further Environmental Information
68
Information about the Accompanying Instructions
68
Additional Instructions
68
The Latest Information
68
Copyright and Trademarks
68
Preparation (Modules)
69
Compact CPU Module Overview
69
Compact 2FXO Module Overview
70
Compact 4FXS Module Overview
70
Compact 2BRI Module Overview
71
Compact 4DSP Module Overview
72
Preparation (Compact 5000)
73
Opening the Casing
73
Wall Mounting of the PBX
74
Connecting the Earthing
75
Updating or Upgrading the PBX
77
Inserting a Module
78
Removing a Module
78
Closing the Casing
79
Preparation (Compact 5000R)
81
Rack Mounting of the PBX
81
Connecting the Earthing
82
Auerswald COMpact 5000 Instructions Manual (59 pages)
PBX for ISDN/Analogue/Internet Telephony
Brand:
Auerswald
| Category:
PBX
| Size: 1 MB
Table of Contents
Deutsch
3
Table of Contents
3
Wichtige Informationen
3
Sicherheitshinweise
3
Bestimmungsgemäße Verwendung
6
Technische Daten
6
Umwelthinweise
12
Garantiebedingungen
12
Inbetriebnahme (Compact 5000)
13
Gehäuse Öffnen
13
Gehäuse an der Wand Montieren
14
Erdung Anschließen
15
TK-Anlage Um- oder Aufrüsten
16
PC Anschließen
17
Gehäuse Schließen
17
TK-Anlage Einschalten
17
Inbetriebnahme (Compact 5000R)
18
Gehäuse IM Rack Montieren
18
Erdung Anschließen
19
Gehäuse Öffnen
19
TK-Anlage Um- oder Aufrüsten
20
Gehäuse Schließen
21
PC Anschließen
21
TK-Anlage Einschalten
22
Ersteinrichtung
22
Informationen zur Netzwerkverbindung
22
Konfigurationsmanager Öffnen
23
Telefonieren
23
Gehende Rufe/Amtholung
23
Notrufe
24
Installation
25
Installationshinweise
25
ISDN-Netzbetreiber am Externen S -Port
26
Analoge Netzbetreiber am Externen Analogen Port
27
Internet und Voip-Endgeräte Sowie PC am Ethernet-Port
27
Analoge Endgeräte am Internen Analogen Port
28
ISDN-Endgeräte am Internen S -Port
29
ISDN-Endgeräte am Internen U P0 -Port
30
English
32
Important Information
32
Safety Information
32
Proper Use
34
Technical Data
35
Environmental Notice
40
Conditions of Guarantee
41
Commissioning (Compact 5000)
41
Opening the Casing
41
Wall-Mounting the PBX
42
Connecting the Earthing
43
Updating or Upgrading the PBX
44
Connecting the PC
45
Closing the Casing
45
Turning on the PBX
46
Commissioning (Compact 5000R)
46
Rack Mounting the PBX
46
Connecting the Earthing
47
Opening the Casing
48
Updating or Upgrading the PBX
48
Closing the Casing
49
Connecting the PC
50
Turning on the PBX
50
First Setup
50
Information about the Network Connection
51
Opening the Configuration Manager
51
Telephoning
52
Outgoing Calls/Exchange Line Request
52
Emergency Calls
52
Installation
53
Installation Instructions
53
Network Provider at the External S Port
54
Network Provider at the External Analogue Port
55
Analogue Terminals at the Analogue Port
56
ISDN Terminals at the Internal S Port
57
ISDN Terminal at the Internal U P0 Port
58
Advertisement
Advertisement
Related Products
Auerswald COMpact 5000R
Auerswald COMpact 5020 VoIP
Auerswald COMpact 5010 VoIP
Auerswald COMpact 2206 USB
Auerswald COMpact 4410 USB
Auerswald COMpact 3000 ISDN
Auerswald COMpact 3000 analog
Auerswald COMpact 4000
Auerswald COMpact 3000 VoIP
Auerswald COMfortel 500
Auerswald Categories
Telephone
IP Phone
PBX
Cordless Telephone
Server
More Auerswald Manuals
Login
Sign In
OR
Sign in with Facebook
Sign in with Google
Upload manual
Upload from disk
Upload from URL