Table of Contents
Advertisement
Quick Links
What's New in Release 20.04
Wacom Tablet Additions
Wacom Cintiq Pro 32 can be locally terminated when connecting to Cloud Access Software
standard or Graphics agent.
Keyboard Fixes
• Fixed issue where the 'calculator' button was not working on some keyboards.
• Fixed issue where 'function' key could not be toggled on some keyboards.
USB Headset Fixes
Fixes issue with Logitech H540 headset
Security Update
Security updates
© 2020 Teradici
What's New in Release 20.04
1
Advertisement
Table of Contents

Related Manuals for Wacom Cintiq Pro 32


Summary of Contents for Wacom Cintiq Pro 32
- Page 1 What's New in Release 20.04 What's New in Release 20.04 Wacom Tablet Additions Wacom Cintiq Pro 32 can be locally terminated when connecting to Cloud Access Software standard or Graphics agent. Keyboard Fixes • Fixed issue where the 'calculator' button was not working on some keyboards.
- Page 2 Overview Overview The PCoIP® Zero Client Firmware Administrators' Guide provides administrators the necessary information to configure and deploy PCoIP Zero Clients. It provides configuration steps for connecting to a variety of hosts, and contains links to related documentation that may be required to successfully complete a PCoIP solution.
-
Page 3: Who Should Read This Guide
Who Should Read This Guide? Who Should Read This Guide? This guide is written for IT administrators who are managing and configuring Tera2 PCoIP® Zero Clients in a PCoIP environment. Understanding Terms and Conventions in Teradici guides For information on the industry specific terms, abbreviations, text conventions, and graphic symbols used in this guide, see Using Teradici Product and Component Guides and the... -
Page 4: Using This Guide
Using This Guide Using This Guide This guide explains how to configure Tera2 PCoIP Zero Client firmware for this release. This guide describes your Tera2 PCoIP Zero Client's capabilities, and explains how to set up, configure, and manage your Tera2 PCoIP Zero Client. It also answers frequently asked questions. Use the following list for quick access to the topics covered in this guide: •... -
Page 5: Getting More Information
Getting More Information Getting More Information In addition to this guide, the Tera2 PCoIP Zero Client documentation includes Release Notes For detailed information on using the PCoIP Management Console to manage deployments with large numbers of PCoIP Zero Clients and Remote Workstation Cards, see the PCoIP®... -
Page 6: Release Notes
Release Notes Release Notes Release Notes for PCoIP Zero Client firmware releases can be found at the Teradici support site on release notes page. © 2020 Teradici... - Page 7 About the Tera2 PCoIP Zero Client About the Tera2 PCoIP Zero Client This section provides an overview of your Tera2 PCoIP Zero Client. It also describes the devices and PCoIP hosts that can connect to it, introduces the tools you use to manage your Tera2 PCoIP Zero Client, and summarizes support for common features under typical deployment scenarios.
- Page 8 Introducing Your Tera2 PCoIP Zero Client Introducing Your Tera2 PCoIP Zero Client Tera2 PCoIP Zero Clients are hardware and firmware-based endpoints that enable users to connect remotely to PCoIP Remote Workstations. These workstations use PCoIP Remote Workstation Cards or run Teradici Cloud Access Software, Amazon WorkSpaces desktops, and VMware Horizon desktops.
- Page 9 About the Management Tools About the Management Tools The following configuration and administrative management tools are available for PCoIP Zero Clients: • PCoIP On-Screen Display (OSD): The PCoIP Zero Client's pre-session built-in interface for configuring the device’s firmware. For more information, see About the PCoIP On-Screen Display.
- Page 10 About the PCoIP On-Screen Display About the PCoIP On-Screen Display The PCoIP On-Screen Display (OSD) is a graphical user interface (GUI) embedded within the client. It displays when the client is powered on and a PCoIP session is not in progress. The only exception to this is when the client is configured for a managed startup or auto-reconnect.
- Page 11 OSD Recovery Mode OSD Recovery Mode Recovery mode is a special mode of the Tera2 PCoIP Zero Client firmware that takes effect when the client experiences a problem that renders it unable to operate. Recovery mode automatically becomes active under the following conditions: •...
- Page 12 OSD Recovery Mode Options OSD recovery mode available options • Configuration: Lets you correct the problem by changing the network configuration (including IPv6 settings), clearing the management state, and resetting the configuration and permissions settings stored on the device. • Diagnostics: Displays the client’s event log messages.
- Page 13 About Overlay Windows About Overlay Windows Overlay windows occasionally appear on top of the user’s PCoIP session to display pertinent information when the status changes, for example, when the network connection is lost or an unauthorized USB device is plugged in. These overlays show network, USB device, and monitor statuses as icons and text.
- Page 14 About Overlay Windows Overlay Window Description Display resolution may have limitations due to resource constraints when all four ports have large displays connected. If the resolution limit is exceeded, this overlay appears with the message: No support resolutions found. No support resolutions found overlay Please Try unplugging other displays.
- Page 15 About Overlay Windows Overlay Window Description If a configuration change via AWI or Management Console profile application requires a PCoIP Zero Client reboot, the user will be provided with a warning of the pending reboot. This will allow the user to save any work they may have open.
- Page 16 About Overlay Windows Overlay Window Description When a video source to the host does not correspond to the video port used on the client, this overlay appears with the message: Source signal on other port. This helps you debug a situation where the video source is connected to the wrong port.
-
Page 17: Osd Menus
OSD Menus OSD Menus The Options menu in the upper left corner has five sub-menus that link to OSD configuration, information, and status pages: • Configuration: This menu contains links to pages that let you define how the device operates and interacts with its environment. - Page 18 OSD Menus The GUI Reference in this documentation contains full details about each page. For information about how to configure or manage a device using these OSD pages, see the appropriate section in the GUI Reference. © 2020 Teradici...
- Page 19 About the PCoIP Administrative Web Interface About the PCoIP Administrative Web Interface The PCoIP Administrative Web Interface (AWI) enables you to interact remotely with a PCoIP endpoint. From the AWI, you can manage and configure a client, view important information about it, and upload firmware and certificates to it.
- Page 20 Logging into the Administrative Web Interface Logging into the Administrative Web Interface To log into the Administrative Web Interface (AWI) web page: 1. Using a web browser, enter the client's IP address in the address bar. According to network requirements, this address may be either a static or dynamic address as follows: •...
- Page 21 Logging into the Administrative Web Interface Some PCoIP devices do not require a password to log in Some PCoIP devices have password protection disabled and do not require a password to log in. If configured in the firmware defaults, the Initial Setup page appears the first time you log in. You can configure audio, network, and session parameters on this page.
- Page 22 AWI Initial Setup Page AWI Initial Setup Page The AWI’s Initial Setup page contains the audio, and network configuration parameters that you must set before a client or host device can be used. This page helps to simplify initial setup and reduce the time for new users to establish a session between a Tera2 PCoIP Zero Client and PCoIP Remote Workstation Card.
- Page 23 AWI Home Page AWI Home Page The AWI Home page displays a statistics summary for the Tera2 PCoIP Zero Client. You can display the Home page at any time by clicking the Home link at the top left section of the menu bar. AWI: Home page ©...
- Page 24 AWI Home Page The previous figure shows session statistics for devices that can support four connected displays. If your deployment only supports two displays, information for these two displays will appear in the bottom area of the page. AWI Home Page Statistics Statistics Description Processor...
- Page 25 AWI Home Page Statistics Description Bytes Bytes Sent: The total number of bytes sent in the current/last session. Bytes Received: The total number of bytes received in the current/last session. Round Trip Latency The minimum, average, and maximum round-trip PCoIP system and network latency in milliseconds (±...
- Page 26 AWI Home Page Statistics Description Output Process Rate The frame rate currently being sent from the image engine on the host to the client. Image Quality Shows the current lossless state of the attached display: • Lossy • Perceptually lossless •...
- Page 27 AWI Recovery Mode AWI Recovery Mode Recovery mode is a special mode of the Tera2 PCoIP Zero Client firmware that takes effect when the client experiences a problem that renders it unable to operate. Recovery mode automatically becomes active under the following conditions: •...
- Page 28 AWI Recovery Mode Options AWI Recovery Mode Options After logging in, the AWI displays the recovery mode Home page. The menus at the top show the available options for configuring and displaying information. © 2020 Teradici...
- Page 29 AWI Recovery Mode Options AWI recovery mode – home page • Configuration: Enables you to correct the problem by changing the network configuration (including IPv6 settings), clearing the management state, updating the client’s administrative password, and resetting the configuration and permissions settings stored on the device. ©...
- Page 30 AWI Recovery Mode Options • Diagnostics: Displays the client’s event log messages and lets you reset the PCoIP processor. • Information: Displays hardware and firmware version information about the client. • Upload: Lets you upload firmware and certificates for a client. You can also use the Management Console to upload firmware and certificates to a group of Tera2 PCoIP Zero Clients.
- Page 31 AWI Menus AWI Menus The AWI has five main menus that link to the various configuration and status pages: • Configuration: The pages under this menu let you configure the various aspects for the device, such as network settings, language, session parameters, and so on. •...
- Page 32 AWI Menus AWI menu overview Refer to GUI Reference section The GUI Reference in this documentation contains full details about each page. For information about how to configure or manage a device using these AWI pages, see the appropriate section in the GUI Reference. ©...
-
Page 33: Device Support
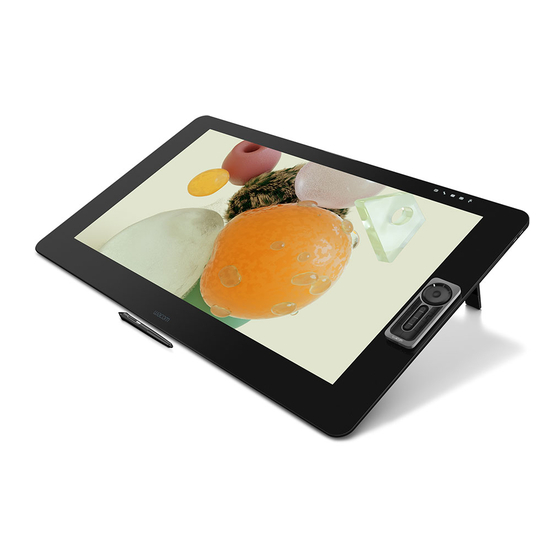
What Can You Connect To Using Your Tera2 PCoIP Zero Client? What Can You Connect To Using Your Tera2 PCoIP Zero Client? Your Tera2 PCoIP Zero Client can connect to wide variety of host desktops and peripherals. This section provides an overview of your connection options. It describes: •... - Page 34 • USB devices: You can attach a variety of USB devices to your Tera2 PCoIP Zero Client. USB human interface device (HID) devices (for example, keyboards, mice, Wacom tablets) are locally terminated by the client. Non-HID devices (for example, mass storage devices, some printers, non-isochronous scanners) are automatically bridged when the USB permissions are set to allow the device.
- Page 35 4K Capabilities EDID and timing behavior The PCoIP Zero Client will attempt to use the native timing of the monitor's EDID. 4K 60 Hz timings are not supported and the Zero Client will search for a 4K @ 30 Hz timing instead. ...
- Page 36 4K Capabilities 4K Host Requirements 4K host requirements are found in their respective Administrators' Guides • PCoIP Remote Workstation Card Administrative Guide • Cloud Access Software Host Agent Administrative Guides • VMware Documentation 1. Tera2 PCoIP Zero Clients support 2560x1600 resolution on attached displays using either DVI (with Y-cable) or DisplayPort interfaces.
-
Page 37: Connecting Peripherals
Setting Up Your Tera2 PCoIP Zero Client Setting Up Your Tera2 PCoIP Zero Client This section describes how to connect your Tera2 PCoIP Zero Client to the network. You'll also learn how to configure initial setup parameters, as well as secure your Tera2 PCoIP Zero Client so that you can establish a successful PCoIP session. - Page 38 Reset Notification change via the AWI or a PCoIP Management Console profile update that requires the PCoIP Zero Client to reboot. Enabling this feature can provide you the time to save important work before the reboot happens. This setting can be found in the AWI Reset Parameters page and in the Management Console profile Power section.
- Page 39 Connecting the Tera2 PCoIP Zero Client to the Network Connecting the Tera2 PCoIP Zero Client to the Network To connect the Tera2 PCoIP Zero Client: 1. Connect a USB keyboard and mouse to any of the Tera2 PCoIP Zero Client USB ports. 2.
- Page 40 Connecting the Tera2 PCoIP Zero Client to the Network Supporting 2560 x 1600 resolutions Ensure your cables are connected as shown when configuring monitors for 2560 x 1600 resolutions. For more information see knowledge base article 1025 Single Display at 2560 x 1600 Resolution Dual Displays at 2560 x 1600 Resolutions ...
- Page 41 Configuring Initial Setup Parameters Configuring Initial Setup Parameters Before you use your Tera2 PCoIP Zero Client for the first time, you need to configure initial setup parameters, including setting basic audio, network, and session information. You can perform this initial setup from the AWI Initial Setup page, shown next. AWI Initial Setup page The following parameters display on the AWI Initial Setup page: Audio Parameters...
- Page 42 Configuring Initial Setup Parameters Category Parameter Description Subnet Mask Device’s subnet mask Gateway Device’s gateway IP address Primary DNS Server Device’s primary DNS IP address Secondary DNS Server Device’s secondary DNS IP address You can also configure network settings from the OSD and AWI Network and Audio pages You can configure the initial setup settings, as well as other network settings, from the OSD and AWI Network pages.
- Page 43 Securing Your Tera2 PCoIP Zero Client Securing Your Tera2 PCoIP Zero Client The security needs of your deployment are driven by your specific environment. You can configure Tera2 PCoIP Zero Clients to meet security requirements for a range of scenarios, from high- security environments to trusted environments.
- Page 44 Securing Your Tera2 PCoIP Zero Client You can access additional security functionality from the PCoIP Management Console You can configure security settings for multiple devices from the PCoIP Management Console, as well as access additional AWI and OSD security settings (including password settings and the option to hide OSD menus). For more information, see the PCoIP®...
- Page 45 Default Security Mode Default Security Mode Out of the box, the Tera2 PCoIP Zero Client is configured with the following security settings: • The Certificate Checking Mode is set to Warn before connecting to untrusted servers. See Setting Certificate Checking Mode.
- Page 46 Setting Certificate Checking Mode Setting Certificate Checking Mode When the Tera2 PCoIP Zero Client can't verify a secure connection to the host or connection broker, its behavior is determined by the Certificate Checking Mode option. You configure this option from the OSD Certificate page (shown next). OSD Certificate page ©...
- Page 47 Setting Certificate Checking Mode Trusting Servers Server trust is established by certificates. Certificates are uploaded to the Tera2 PCoIP Zero Client through endpoint managers such as the PCoIP Management Console. For more information, see Performing Common Tasks. Preventing users from changing the Certificate Checking Mode option You can prevent users from changing the Certificate Checking Mode option on the OSD Certificate page.
- Page 48 Peering Zero Clients to Remote Workstation Cards Peering Zero Clients to Remote Workstation Cards PCoIP Zero Clients can be peered (paired) to Remote Workstation Cards using custom certificates to establish a secure PCoIP peer-to-peer connection. This optional but recommended configuration allows for a more secure connection then the default connection. The custom peer- to-peer certificate and the root certificate must be present in both the Zero Client and Remote Workstation card certificate store.
- Page 49 Peering Zero Clients to Remote Workstation Cards Remote Workstation Certificate Ensure the desired trusted certificate is uploaded to the Remote Workstation Card certificate store. 2. Select Direct to Host for the Session Connection Type on the Session page. 3. Enter the DNS Name or IP Address of the Remote Workstation Card that you are going to have a peer-to-peer connection with.
- Page 50 Peering Zero Clients to Remote Workstation Cards © 2020 Teradici...
- Page 51 Establishing a PCoIP Connection Establishing a PCoIP Connection Tera2 PCoIP Zero Clients can connect to the following hardware and software host endpoints: • PCoIP Remote Workstation cards see Connecting to PCoIP Remote Workstation Cards. • Teradici Cloud Access Software see Connecting to Teradici Cloud Access Software.
-
Page 52: Auto Detect
Configuring a Session Connection Type Configuring a Session Connection Type The Session pages on the AWI and OSD let you configure how the device connects to PCoIP endpoints. The available configuration options depend on the session connection type you select. Session Connection Types The following are the main session connection types: •... - Page 53 Direct to Host Connection Managers) do not have to manually reconfigure the session type each time they switch brokers. Auto Detect is the default session connection type. Auto Detect Connections Management Tool Session Connection Options Auto Detect Auto Detect Direct to Host A Direct to Host session is a direct connection between a Tera2 PCoIP Zero Client and a remote workstation containing a PCoIP Remote Workstation Card.
- Page 54 View Connection Server PCoIP Connection Manager Connections Management Tool Session Connection Options PCoIP Connection Manager PCoIP Connection Manager + Auto-Logon PCoIP Connection Manager PCoIP Connection Manager + Auto-Logon View Connection Server A VMware Horizon session is a connection between a Tera2 PCoIP Zero Client and a VMware Horizon VDI desktop, DaaS desktop, or RDS-hosted desktop using View Connection Server as the connection manager (also known as the connection broker).
- Page 55 OSD: Amazon WorkSpaces Session Settings OSD: Amazon WorkSpaces Session Settings Use the Amazon WorkSpaces session Connection Type to connect directly to your Amazon WorkSpaces desktop through multi-factor authentication when connecting with PCoIP Zero Clients on firmware 6.0 or later. This connection type removes the need to deploy and manage the PCoIP Connection Manager for Amazon WorkSpaces in order to connect PCoIP Zero Clients to Amazon WorkSpaces.
- Page 56 OSD: Amazon WorkSpaces Session Settings The following parameters can be found on the OSD Session tab for the Amazon WorkSpaces selection. OSD Amazon WorkSpaces Parameters Parameter Description Registration Code Enter the code provided by Amazon when your Workspace was created. Connection Name The name you gave your connection displayed in the OSD when you turn your zero client on.
- Page 57 OSD: Auto Detect Session Settings OSD: Auto Detect Session Settings This connection type automatically detects which broker protocol a connection server is using so users in a mixed environment (for example, one that uses View Connection Servers and PCoIP Connection Managers) do not have to manually reconfigure the session type each time they switch brokers.
- Page 58 OSD: Auto Detect Session Settings OSD Auto Detect Parameters Parameter Description Server Enter the Uniform Resource Identifier (URI) of the current connection broker. Once a successful connection has been made to this server, it will appear in the Server drop-down list on the OSD Connect page if the Tera2 PCoIP Zero Client is configured to cache servers.
- Page 59 OSD: Direct to Host Session Settings OSD: Direct to Host Session Settings Select the Direct to Host session connection type from the Options > Configuration > Session page to configure a client to connect directly to a host. Click the Advanced button to configure advanced settings for this option. OSD Session Connection Type –...
- Page 60 OSD: Direct to Host Session Settings Advanced Settings The following parameters can be found on the OSD Direct to Host page. OSD Direct to Host Parameters Parameters Description DNS Name or Enter the IP address or DNS name for the host. IP Address ©...
- Page 61 OSD: Direct to Host Session Settings Parameters Description Wake Host Select whether to use the PCoIP Remote Workstation Card’s MAC and IP address or a custom from Low MAC and IP address when configuring the Wake-On-LAN feature on a client. This feature wakes Power State up the host when the user presses the client’s power button, a key on the keyboard, or clicks the Connect button on the Connect window .
- Page 62 OSD: Direct to Host Session Settings Parameters Description Enable When enabled, the 'Preparing Desktop' overlay appears on the display(s) when users log in. Preparing This overlay provides assurance that login is proceeding if the desktop takes more than a few Desktop seconds to appear.
- Page 63 OSD: Direct to Host Session Settings Disconnect This field lets you control what type of messages appear when a session is disconnected. There Message Filter are three categories: Information: User- or administrator-initiated actions affecting the session: • You have been disconnected because you logged in from another location or your host was shut down or restarted.
- Page 64 OSD: Direct to Host + SLP Host Discovery Session Settings OSD: Direct to Host + SLP Host Discovery Session Settings Select the Direct to Host + SLP Host Discovery session connection type from the Options > Configuration > Session page to configure a client to connect directly to a host and to use Service Location Protocol (SLP) to discover the host automatically.
- Page 65 OSD: Direct to Host + SLP Host Discovery Session Settings OSD session connection type – Direct to Host + SLP Host Discovery © 2020 Teradici...
- Page 66 OSD: Direct to Host + SLP Host Discovery Session Settings Advanced Settings The following parameters can be found on the OSD Direct to Host + SLP Host Discovery page. OSD Direct to Host + SLP Host Discovery Parameters Parameters Description Enable Auto- When enabled, lets the client automatically reconnect with the last connected host when a Reconnect...
- Page 67 OSD: Direct to Host + SLP Host Discovery Session Settings Disconnect This field lets you control what type of messages appear when a session is disconnected. Message Filter There are three categories: Information: User- or administrator-initiated actions affecting the session: •...
- Page 68 OSD: PCoIP Connection Manager Session Settings OSD: PCoIP Connection Manager Session Settings Select the PCoIP Connection Manager session connection type from the Options > Configuration > Session page to configure the client to use a PCoIP Connection Manager as the PCoIP session broker.
- Page 69 OSD: PCoIP Connection Manager Session Settings Advanced Settings The following parameters can be found on the OSD PCoIP Connection Manager page. OSD PCoIP Connection Manager Parameters Parameter Description Server URI Enter the Uniform Resource Identifier (URI) for the PCoIP Connection Manager. The URL must be in the form https://<hostname>...
- Page 70 OSD: PCoIP Connection Manager Session Settings Parameter Description Auto Connect This field determines the client’s auto connect behavior after startup: Enabled: The client automatically connects with the connection server after startup and a PCoIP session ends, bypassing the OSD Connect page. Disabled: The client does not automatically connect with the connection server.
- Page 71 OSD: PCoIP Connection Manager Session Settings Disconnect This field lets you control what type of messages appear when a session is disconnected. Message Filter There are three categories: Information: User- or administrator-initiated actions affecting the session: • You have been disconnected because you logged in from another location or your host was shut down or restarted.
- Page 72 OSD: PCoIP Connection Manager Session Settings Parameter Description Organization ID Enter an organization ID for the company (for example, 'mycompany.com'). This field accepts any UTF-8 character. You only need to specify this parameter if the PCoIP Connection Manager requests it. The organization ID is used for certain types of PCoIP Broker Protocol authentication messages.
- Page 73 OSD: PCoIP Connection Manager + Auto-Logon Session Settings OSD: PCoIP Connection Manager + Auto-Logon Session Settings Select the PCoIP Connection Manager + Auto-Logon session connection type from the Options > Configuration > Session page to configure a client to automatically enter a user’s login details when a PCoIP Connection Manager is used as the PCoIP session broker.
- Page 74 OSD: PCoIP Connection Manager + Auto-Logon Session Settings OSD Session Connection Type – PCoIP Connection Manager + Auto-Logon © 2020 Teradici...
- Page 75 OSD: PCoIP Connection Manager + Auto-Logon Session Settings Advanced Settings The following parameters can be found on the OSD PCoIP Connection Manager + Auto-Logon page. OSD PCoIP Connection Manager + Auto-Logon Parameters Parameter Description Server URI Enter the Uniform Resource Identifier (URI) for the PCoIP Connection Manager. The URL must be in the form https://<hostname>...
- Page 76 OSD: PCoIP Connection Manager + Auto-Logon Session Settings Parameter Description Domain Enter the domain for the client (maximum number of characters is 256). This domain will be sent to the specified connection server. Desktop Name to Enter the desktop name used by the client when starting a session. Select Auto Connect This field determines the client’s auto connect behavior after startup:...
- Page 77 OSD: PCoIP Connection Manager + Auto-Logon Session Settings Disconnect This field lets you control what type of messages appear when a session is disconnected. Message Filter There are three categories: Information: User- or administrator-initiated actions affecting the session: • You have been disconnected because you logged in from another location or your host was shut down or restarted.
- Page 78 OSD: View Connection Server Session Settings OSD: View Connection Server Session Settings Select the View Connection Server session connection type from the Options > Configuration > Session page to configure a client to use a View Connection Server as the broker when connecting to a VMware desktop.
- Page 79 OSD: View Connection Server Session Settings OSD Session connection type – View Connection Server © 2020 Teradici...
- Page 80 OSD: View Connection Server Session Settings Advanced Settings The following parameters can be found on the OSD View Connection Server page. OSD View Connection Server Parameters Parameter Description DNS Name or Enter the View Connection Server’s DNS name or IP address. For VMware Horizon DaaS, this is IP Address the DNS name or IP address of the VMware Horizon DaaS Desktop Portal.
- Page 81 OSD: View Connection Server Session Settings Parameter Description Auto Connect This field determines the client’s auto connect behavior after startup: Enabled: The client automatically connects with the connection server after startup and a PCoIP session ends, bypassing the OSD Connect page. Disabled: The client does not automatically connect with the connection server.
- Page 82 OSD: View Connection Server Session Settings Parameter Description Enable When enabled, the 'Preparing Desktop' overlay appears on the display(s) when users log in. Preparing Desktop This overlay provides assurance that login is proceeding if the desktop takes more than a few Overlay seconds to appear.
- Page 83 OSD: View Connection Server Session Settings Disconnect This field lets you control what type of messages appear when a session is disconnected. There Message are three categories: Filter Information: User- or administrator-initiated actions affecting the session: • You have been disconnected because you logged in from another location or your host was shut down or restarted.
- Page 84 OSD: View Connection Server + Auto-Logon Session Settings OSD: View Connection Server + Auto-Logon Session Settings Select the View Connection Server + Auto-Logon session connection type from the Options > Configuration > Session page to configure a client to automatically enter a user’s login details when a View Connection Server is used to connect to a VMware desktop.
- Page 85 OSD: View Connection Server + Auto-Logon Session Settings OSD Session connection type – View Connection Server + Auto-Logon © 2020 Teradici...
- Page 86 OSD: View Connection Server + Auto-Logon Session Settings Advanced Settings The following parameters can be found on the OSD View Connection Server + Auto-Logon page. OSD View Connection Server + Auto-Logon Parameters Parameter Description DNS Name or IP Enter the View Connection Server’s DNS name or IP address. For VMware Horizon DaaS, this Address is the DNS name or IP address of the VMware Horizon DaaS Desktop Portal.
- Page 87 OSD: View Connection Server + Auto-Logon Session Settings Parameter Description Pool Name to Enter the pool name. When the list includes a pool with this name, the client will immediately Select start a session with that pool. This field is case-insensitive. For Tera1 PCoIP Zero Clients, this parameter is called Desktop Name to Select.
- Page 88 OSD: View Connection Server + Auto-Logon Session Settings Parameter Description Enable Preparing When enabled, the 'Preparing Desktop' overlay appears on the display(s) when users log in. Desktop Overlay This overlay provides assurance that login is proceeding if the desktop takes more than a few seconds to appear.
- Page 89 OSD: View Connection Server + Auto-Logon Session Settings Disconnect This field lets you control what type of messages appear when a session is disconnected. Message Filter There are three categories: Information: User- or administrator-initiated actions affecting the session: • You have been disconnected because you logged in from another location or your host was shut down or restarted.
- Page 90 OSD: View Connection Server + Kiosk Session Settings OSD: View Connection Server + Kiosk Session Settings Select the View Connection Server + Kiosk session connection type from the Options > Configuration > Session page to configure a client to use Kiosk mode when connecting to a VMware desktop via a View Connection Server.
- Page 91 OSD: View Connection Server + Kiosk Session Settings OSD Session connection type – View Connection Server + Kiosk © 2020 Teradici...
- Page 92 OSD: View Connection Server + Kiosk Session Settings Advanced Settings The following parameters can be found on the OSD View Connection Server + Kiosk page. OSD View Connection Server + Kiosk Parameters Parameter Description DNS Name or IP Enter the View Connection Server’s DNS name or IP address. Address Username Select the type of user name that matches the naming you use for the devices on the View...
- Page 93 OSD: View Connection Server + Kiosk Session Settings Parameter Description Password To password protect the virtual machine for the kiosk, enter a password in this field. This password must match the one entered for the device in the View Connection Server. Port By default, port 443 is used to communicate with the connection server.
- Page 94 OSD: View Connection Server + Kiosk Session Settings Disconnect This field lets you control what type of messages appear when a session is disconnected. Message Filter There are three categories: Information: User- or administrator-initiated actions affecting the session: • You have been disconnected because you logged in from another location or your host was shut down or restarted.
- Page 95 OSD: View Connection Server + Imprivata OneSign Session Settings OSD: View Connection Server + Imprivata OneSign Session Settings Select the View Connection Server + Imprivata OneSign session connection type from the Options > Configuration > Session page to configure a client to authenticate through the Imprivata OneSign system in addition to a View Connection Server when connecting to a VMware desktop.
- Page 96 OSD: View Connection Server + Imprivata OneSign Session Settings Advanced Settings The following parameters can be found on the OSD View Connection Server + Imprivata OneSign page. OSD View Connection Server + Imprivata OneSign Parameters Parameter Description Bootstrap URL Enter the bootstrap URL used to find an initial OneSign server in a OneSign authentication deployment.
- Page 97 OSD: View Connection Server + Imprivata OneSign Session Settings Parameter Description Pool Name to Enter the pool name. When the list includes a pool with this name, the client will immediately Select start a session with that pool. This field is case-insensitive. For Tera1 PCoIP Zero Clients, this parameter is called Desktop Name to Select Remember When enabled, the user name text box automatically populates with the last username entered.
- Page 98 OSD: View Connection Server + Imprivata OneSign Session Settings Disconnect This field lets you control what type of messages appear when a session is disconnected. There Message are three categories: Filter Information: User- or administrator-initiated actions affecting the session: • You have been disconnected because you logged in from another location or your host was shut down or restarted.
- Page 99 AWI: Amazon WorkSpaces AWI: Amazon WorkSpaces Select the Amazon WorkSpaces session connection type from the Configuration > Session page to configure the client to connect directly to your Amazon WorkSpaces desktop through multi-factor authentication when connecting with PCoIP Zero Clients on firmware 6.0 or newer. This connection type removes the need to deploy and manage the PCoIP Connection Manager for Amazon WorkSpaces in order to connect PCoIP Zero Clients to Amazon WorkSpaces.
- Page 100 AWI: Amazon WorkSpaces AWI Session Connection type – Amazon WorkSpaces The following parameters can be found in the AWI Session tab when the Amazon WorkSpaces connection type is selected with the advanced tab showing. AWI Amazon WorkSpaces Parameter Description Enter the registration code from the invitation email sent after creating your Amazon Registration WorkSpace.
- Page 101 AWI: Amazon WorkSpaces Parameter Description Enter a name for this registered Amazon WorkSpace instance. Connection Name Desktop Name Enter the desktop name used by the client when starting a session. to Select This field is case-insensitive. Certificate Select the level of verification performed on the certificate presented by the connection server: Check Mode •...
- Page 102 AWI: Amazon WorkSpaces Parameter Description Connection This field determines whether a connection server is dynamically added to the Server drop-down Server Cache menu on the OSD Connect page when a user types in a valid server URI, or whether it appears in Mode a read-only list for the user to select.
- Page 103 AWI: Amazon WorkSpaces Parameter Description PCoIP Utility When enabled, the PCoIP Utility Bar appears at the top of the primary display when a user is in Bar Mode session and moves the cursor directly under the bar. The utility bar can be used to disconnect a session or to shut down a remote workstation.
- Page 104 AWI: Amazon WorkSpaces Disconnect This field lets you control what type of messages appear when a session is disconnected. There Message Filter are three categories: Information: User- or administrator-initiated actions affecting the session: • You have been disconnected because you logged in from another location or your host was shut down or restarted.
- Page 105 AWI: Amazon WorkSpaces Parameter Description Enable DSCP When enabled, the device populates the Differentiated Services Code Point (DSCP) field in the IP header, enabling intermediate network nodes to prioritize PCoIP traffic accordingly. Enable When enabled, transport congestion notification is enabled to enable PCoIP endpoints to react Congestion accordingly if an intermediate network node sets the congestion notification bit in either the IP Notification...
- Page 106 AWI: Auto Detect Session Settings AWI: Auto Detect Session Settings Select the Auto Detect session connection type from the Configuration > Session page to let the Tera2 PCoIP Zero Client automatically detect which broker protocol a connection server is using so users in a mixed environment (for example, one that uses View Connection Servers and PCoIP Connection Managers) do not have to manually reconfigure the session type each time they switch brokers.
- Page 107 AWI: Direct to Host Session Settings AWI: Direct to Host Session Settings Select the Direct to Host session connection type from the Configuration > Session page to configure the client to connect directly to a Remote Workstation Card. AWI Session connection type – Direct to Host The following parameters can be found on the AWI Direct to Host page.
- Page 108 AWI: Direct to Host Session Settings Parameters Description Wake Host Select whether to use the PCoIP Remote Workstation Card’s MAC and IP address or a custom from Low MAC and IP address when configuring the Wake-On-LAN feature on a client. This feature wakes Power State up the host when the user presses the client’s power button, a key on the keyboard, or clicks the Connect button on the Connect window.
- Page 109 AWI: Direct to Host Session Settings Parameters Description Enable Session When enabled, users can press the Ctrl hotkey sequence to pop up the 'Zero Disconnect Client Control Panel' overlay, which lets them disconnect the current session on the workstation Hotkey or power off the workstation.
- Page 110 AWI: Direct to Host Session Settings Disconnect This field lets you control what type of messages appear when a session is disconnected. There Message Filter are three categories: Information: User- or administrator-initiated actions affecting the session: • You have been disconnected because you logged in from another location or your host was shut down or restarted.
- Page 111 AWI: Direct to Host Session Settings Parameters Description Enable DSCP When enabled, the device populates the Differentiated Services Code Point (DSCP) field in the IP header, enabling intermediate network nodes to prioritize PCoIP traffic accordingly. Enable When enabled, transport congestion notification is enabled to enable PCoIP endpoints to react Congestion accordingly if an intermediate network node sets the congestion notification bit in either the IP Notification...
- Page 112 AWI: Direct to Host + SLP Host Discovery Session Settings AWI: Direct to Host + SLP Host Discovery Session Settings Select the Direct to Host + SLP Host Discovery session connection type from the Configuration > Session page to configure the client to connect directly to a host and to use Service Location Protocol (SLP) to discover the host automatically.
- Page 113 AWI: Direct to Host + SLP Host Discovery Session Settings Parameters Description Enable Peer When enabled, the 'Network Connection Lost' overlay appears on the display(s) when a loss of Loss Overlay network connectivity is detected. Normal hypervisor scheduling delays can falsely trigger this message.
- Page 114 AWI: Direct to Host + SLP Host Discovery Session Settings Disconnect This field lets you control what type of messages appear when a session is disconnected. There Message Filter are three categories: Information: User- or administrator-initiated actions affecting the session: •...
- Page 115 AWI: Direct to Host + SLP Host Discovery Session Settings Parameters Description Enable DSCP When enabled, the device populates the Differentiated Services Code Point (DSCP) field in the IP header, enabling intermediate network nodes to prioritize PCoIP traffic accordingly. Enable When enabled, transport congestion notification is enabled to enable PCoIP endpoints to react Congestion accordingly if an intermediate network node sets the congestion notification bit in either the IP...
- Page 116 AWI: PCoIP Connection Manager Session Settings AWI: PCoIP Connection Manager Session Settings Select the PCoIP Connection Manager session connection type from the Configuration > Session page to configure the client to use a PCoIP Connection Manager as the PCoIP session broker. AWI Session connection type –...
- Page 117 AWI: PCoIP Connection Manager Session Settings Parameter Description Server URI Enter the Uniform Resource Identifier (URI) for the PCoIP Connection Manager. The URL must be in the form https://<hostname> or https://<ip address>. Desktop Name Enter the desktop name used by the client when starting a session. to Select This field is case-insensitive.
- Page 118 AWI: PCoIP Connection Manager Session Settings Parameter Description Connection This field determines whether a connection server is dynamically added to the Server drop- Server Cache down menu on the OSD Connect page when a user types in a valid server URI, or whether it Mode appears in a read-only list for the user to select.
- Page 119 AWI: PCoIP Connection Manager Session Settings Parameter Description Enable Session When enabled, users can press the Ctrl+Alt+F12 hotkey sequence to pop up the 'Zero Client Disconnect Control Panel' overlay, which lets them disconnect the current session on the workstation or Hotkey power off the workstation.
- Page 120 AWI: PCoIP Connection Manager Session Settings Disconnect This field lets you control what type of messages appear when a session is disconnected. Message Filter There are three categories: Information: User- or administrator-initiated actions affecting the session: • You have been disconnected because you logged in from another location or your host was shut down or restarted.
- Page 121 Enabling the Self Help Link Parameter Description Enable DSCP When enabled, the device populates the Differentiated Services Code Point (DSCP) field in the IP header, enabling intermediate network nodes to prioritize PCoIP traffic accordingly. Enable When enabled, transport congestion notification is enabled to enable PCoIP endpoints to react Congestion accordingly if an intermediate network node sets the congestion notification bit in either the IP Notification...
- Page 122 Enabling the Self Help Link Parameter Description Connection Enter the fully-qualified domain name of the connection server brokering the desktop (for Server example, a PCoIP Connection Manager for a PCoIP Connection Manager session connection type, or a View Connection Server for a View Connection Server session connection type). Port By default, port 443 is used to communicate with the connection server.
- Page 123 AWI: PCoIP Connection Manager + Auto-Logon Session Settings AWI: PCoIP Connection Manager + Auto-Logon Session Settings Select the PCoIP Connection Manager + Auto-Logon session connection type from the Configuration > Session page to configure the client to automatically enter a user’s login details when a PCoIP Connection Manager is used as the PCoIP session broker.
- Page 124 AWI: PCoIP Connection Manager + Auto-Logon Session Settings AWI Session Connection type – PCoIP Connection Manager + Auto-Logon The following parameters can be found on the AWI PCoIP Connection Manager + Auto-Logon page. AWI PCoIP Connection Manager + Auto-Logon Parameters Parameter Description Server URI...
- Page 125 AWI: PCoIP Connection Manager + Auto-Logon Session Settings Parameter Description Logon Enter the password for the client (maximum number of characters is 128). This password will be Password sent to the specified connection server. Logon Domain Enter the domain for the client (maximum number of characters is 256). This domain will be Name sent to the specified connection server.
- Page 126 AWI: PCoIP Connection Manager + Auto-Logon Session Settings Parameter Description Connection This field determines whether a connection server is dynamically added to the Server drop-down Server Cache menu on the OSD Connect page when a user types in a valid server URI, or whether it appears in Mode a read-only list for the user to select.
- Page 127 AWI: PCoIP Connection Manager + Auto-Logon Session Settings Parameter Description PCoIP Utility When enabled, the PCoIP Utility Bar appears at the top of the primary display when a user is in Bar Mode session and moves the cursor directly under the bar. The utility bar can be used to disconnect a session or to shut down a remote workstation.
- Page 128 AWI: PCoIP Connection Manager + Auto-Logon Session Settings Disconnect This field lets you control what type of messages appear when a session is disconnected. There Message Filter are three categories: Information: User- or administrator-initiated actions affecting the session: • You have been disconnected because you logged in from another location or your host was shut down or restarted.
- Page 129 AWI: PCoIP Connection Manager + Auto-Logon Session Settings Parameter Description Enable DSCP When enabled, the device populates the Differentiated Services Code Point (DSCP) field in the IP header, enabling intermediate network nodes to prioritize PCoIP traffic accordingly. Enable When enabled, transport congestion notification is enabled to enable PCoIP endpoints to react Congestion accordingly if an intermediate network node sets the congestion notification bit in either the IP Notification...
- Page 130 AWI: View Connection Server Session Settings AWI: View Connection Server Session Settings Select the View Connection Server session connection type from the Configuration > Session page to configure the client to use a View Connection Server as the broker when connecting to a VMware desktop.
- Page 131 AWI: View Connection Server Session Settings AWI Session Connection type – View Connection Server The following parameters can be found on the AWI View Connection Server page. AWI View Connection Server Parameters © 2020 Teradici...
- Page 132 AWI: View Connection Server Session Settings Parameter Description DNS Name or Enter the View Connection Server’s DNS name or IP address. For VMware Horizon DaaS, this is IP Address the DNS name or IP address of the VMware Horizon DaaS Desktop Portal. Pool Name to Enter the pool name.
- Page 133 AWI: View Connection Server Session Settings Parameter Description Connection This field determines whether a connection server is dynamically added to the Server drop-down Server Cache menu on the OSD Connect page when a user types in a valid server address, or whether it Mode appears in a read-only list for the user to select.
- Page 134 AWI: View Connection Server Session Settings Parameter Description Enable When enabled, the 'Preparing Desktop' overlay appears on the display(s) when users log in. Preparing • This overlay provides assurance that login is proceeding if the desktop takes more than a Desktop few seconds to appear.
- Page 135 AWI: View Connection Server Session Settings Disconnect This field lets you control what type of messages appear when a session is disconnected. There Message Filter are three categories: Information: User- or administrator-initiated actions affecting the session: • You have been disconnected because you logged in from another location or your host was shut down or restarted.
- Page 136 Enabling the Self Help Link Parameter Description Custom When enabled, sets a customized Server Name Indication (SNI) string on authorized man-in-the- Session SNI middle-enabled clients. The SNI string is appended to the TLS HELLO when the client initiates a connection with the host. Enable DSCP When enabled, the device populates the Differentiated Services Code Point (DSCP) field in the IP header, enabling intermediate network nodes to prioritize PCoIP traffic accordingly.
- Page 137 Enabling the Self Help Link Enable Self Help Link options When you enable this field, the following options appear: Parameter Description Connection Enter the fully-qualified domain name of the connection server brokering the desktop (for Server example, a PCoIP Connection Manager for a PCoIP Connection Manager session connection type, or a View Connection Server for a View Connection Server session connection type).
- Page 138 AWI: View Connection Server + Auto-Logon Session Settings AWI: View Connection Server + Auto-Logon Session Settings Select the View Connection Server + Auto-Logon session connection type from the Configuration > Session page to configure the client to automatically enter a user’s login details when a View Connection Server is used to connect to a VMware desktop.
- Page 139 AWI: View Connection Server + Auto-Logon Session Settings AWI Session Connection type – View Connection Server + Auto-Logon The following parameters can be found on the AWI View Connection Server + Auto-Logon page. AWI View Connection Server + Auto-Logon Parameters ©...
- Page 140 AWI: View Connection Server + Auto-Logon Session Settings Parameter Description DNS Name or Enter the View Connection Server’s DNS name or IP address. For VMware Horizon DaaS, this is IP Address the DNS name or IP address of the VMware Horizon DaaS Desktop Portal. Logon Enter the user name for the client (maximum number of characters is 128).
- Page 141 AWI: View Connection Server + Auto-Logon Session Settings Parameter Description Auto Connect This field determines the client’s auto connect behavior after startup: Enabled: The client automatically connects with the connection server after startup and a PCoIP session ends, bypassing the OSD Connect page. Disabled: The client does not automatically connect with the connection server.
- Page 142 AWI: View Connection Server + Auto-Logon Session Settings Parameter Description Enable When enabled, the 'Preparing Desktop' overlay appears on the display(s) when users log in. Preparing Desktop This overlay provides assurance that login is proceeding if the desktop takes more than a few Overlay seconds to appear.
- Page 143 AWI: View Connection Server + Auto-Logon Session Settings Parameter Description Session Configure the Transport Layer Security (TLS) cipher to use for negotiating the TLS session Negotiation between the PCoIP client and the PCoIP host. Cipher Suites • Maximum Compatibility: TLS 1.1 or higher with RSA keys: This option provides maximum compatibility.
- Page 144 AWI: View Connection Server + Auto-Logon Session Settings Disconnect This field lets you control what type of messages appear when a session is disconnected. There Message Filter are three categories: Information: User- or administrator-initiated actions affecting the session: • You have been disconnected because you logged in from another location or your host was shut down or restarted.
- Page 145 AWI: View Connection Server + Auto-Logon Session Settings Parameter Description Custom When enabled, sets a customized Server Name Indication (SNI) string on authorized man-in-the- Session SNI middle-enabled clients. The SNI string is appended to the TLS HELLO when the client initiates a connection with the host.
- Page 146 AWI: View Connection Server + Kiosk Session Settings AWI: View Connection Server + Kiosk Session Settings Select the View Connection Server + Kiosk session connection type from the Configuration > Session page to configure the client to use Kiosk mode when a View Connection Server is used to connect to a VMware desktop.
- Page 147 AWI: View Connection Server + Kiosk Session Settings AWI Session Connection type – View Connection Server + Kiosk The following parameters can be found on the AWI Session Connection Server + Kiosk page. AWI View Connection Server + Kiosk Parameters Parameter Description DNS Name or...
- Page 148 AWI: View Connection Server + Kiosk Session Settings Parameter Description Username Select the type of user name that matches the naming you use for the devices on the View Type Connection Server. • Zero Client MAC: Select this option to automatically populate the Username field with the MAC address of the Tera2 PCoIP Zero Client.
- Page 149 AWI: View Connection Server + Kiosk Session Settings Parameter Description Enable Peer When enabled, the 'Network Connection Lost' overlay appears on the display(s) when a loss of Loss Overlay network connectivity is detected. Normal hypervisor scheduling delays can falsely trigger this message.
- Page 150 AWI: View Connection Server + Kiosk Session Settings Parameter Description Session Configure the Transport Layer Security (TLS) cipher to use for negotiating the TLS session Negotiation between the PCoIP client and the PCoIP host. Cipher Suites • Maximum Compatibility: TLS 1.1 or higher with RSA keys: This option provides maximum compatibility.
- Page 151 AWI: View Connection Server + Kiosk Session Settings Disconnect This field lets you control what type of messages appear when a session is disconnected. There Message Filter are three categories: Information: User- or administrator-initiated actions affecting the session: • You have been disconnected because you logged in from another location or your host was shut down or restarted.
- Page 152 AWI: View Connection Server + Kiosk Session Settings Parameter Description Custom When enabled, sets a customized Server Name Indication (SNI) string on authorized man-in-the- Session SNI middle-enabled clients. The SNI string is appended to the TLS HELLO when the client initiates a connection with the host.
- Page 153 AWI: View Connection Server + Imprivata OneSign Session Settings AWI: View Connection Server + Imprivata OneSign Session Settings Select the View Connection Server + Imprivata OneSign session connection type from the Configuration > Session page to configure the client to authenticate through the Imprivata OneSign system in addition to a View Connection Server when connecting to a VMware desktop.
- Page 154 AWI: View Connection Server + Imprivata OneSign Session Settings AWI Session Connection type – View Connection Server + Imprivata OneSign The following parameters can be found on the AWI View Connection Server + Imprivata OneSign page. AWI View Connection Server + Imprivata OneSign Parameters ©...
- Page 155 AWI: View Connection Server + Imprivata OneSign Session Settings Parameter Description Bootstrap URL Enter the bootstrap URL used to find an initial OneSign server in a OneSign authentication deployment. OneSign Pool Select whether the Pool Name to Select property is used in OneSign mode. Name Mode •...
- Page 156 AWI: View Connection Server + Imprivata OneSign Session Settings Parameter Description Certificate When enabled, prevents users from changing the Certificate Check Mode settings from the OSD or Check Mode AWI. Lockout Trusted View Click the Show button to display View Connection Servers for which the client has received a valid Connection certificate.
- Page 157 AWI: View Connection Server + Imprivata OneSign Session Settings Parameter Description Enable RDS When enabled and users connect to a VMware Horizon View Connection Server that offers Application applications, a list of available applications will be presented. Access Applications open in full-screen mode, but can be re-sized once users are in session. PCoIP Utility When enabled, the PCoIP Utility Bar appears at the top of the primary display when a user is in Bar Mode...
- Page 158 AWI: View Connection Server + Imprivata OneSign Session Settings Parameter Description Invert Configure whether or not the rf IDEAS proximity reader will invert the Wiegand bits that are read Wiegand Data from a user’s ID token. This feature is useful when some of the rf IDEAS readers in your system are programmed to invert the Wiegand data and others are not.
- Page 159 AWI: View Connection Server + Imprivata OneSign Session Settings Disconnect This field lets you control what type of messages appear when a session is disconnected. There Message Filter are three categories: Information: User- or administrator-initiated actions affecting the session: • You have been disconnected because you logged in from another location or your host was shut down or restarted.
- Page 160 AWI: View Connection Server + Imprivata OneSign Session Settings Parameter Description Custom When enabled, sets a customized Server Name Indication (SNI) string on authorized man-in-the- Session SNI middle-enabled clients. The SNI string is appended to the TLS HELLO when the client initiates a connection with the host.
- Page 161 Connecting to a Session Connecting to a Session The OSD enables users to create a PCoIP session between the client and a remote resource by clicking the green Connect button in the center of the Connect window. Connecting to a Session from the Connect Window 1.
- Page 162 Connecting to a Session from the Connect Window OSD Auto Detect window OSD Direct to Host connect window While the network connection is initializing, various status messages are displayed above the button to indicate the progress. If problems are experienced during startup—for example, if the connection cannot be made or a DHCP lease fails—other messages display in this area to indicate the nature of the problem.
- Page 163 Connecting to a Session Using Smart Cards Connecting to a Session Using Smart Cards Users can connect to a session using smart cards when connected to VMware View virtual desktops or a PCoIP Connection Manager that supports this feature. This section addresses using smart cards when connected to a PCoIP Connection Manager. Before connecting to a session using a smart card, connect the USB smart card reader into the Tera2 PCoIP Zero Client.
- Page 164 Making a Trusted HTTPS Connection Making a Trusted HTTPS Connection After connecting to the connection server, a user authentication page displays to enable the user to enter login credentials. The banner on this page indicates the type of connection. If the correct trusted SSL root certificate for the server has been installed in the Tera2 PCoIP Zero Client and all other certificate requirements are met for the configured certificate checking mode (see Requirements for Trusted Server...
- Page 165 Making an Untrusted HTTPS Connection Trusted Server Connections), a warning such as the following appears if your Tera2 PCoIP Zero Client is configured to warn before connecting to untrusted servers. View Connection Server Certificate Warning PCoIP Connection Manager Certificate Warning If the user clicks Continue at this warning, the connection will still be secured with HTTPS, but an open padlock icon with a red 'x' will display on the login screen, along with red 'https' text with strikethrough formatting, as seen in the top row of the following image.
- Page 166 Making an Untrusted HTTPS Connection Tera2 PCoIP Zero Client untrusted HTTPS connection As an administrator, you can use the Options > User Settings > Certificate page to prevent users from initiating untrusted server sessions by configuring the Tera2 PCoIP Zero Client to refuse a connection to a server that cannot be verified.
- Page 167 Making an Untrusted HTTPS Connection VMware Horizon Certificate Checking Mode page © 2020 Teradici...
- Page 168 Authenticating the User Teradici Certificate Checking Mode Using the AWI, you can enable Certificate Check Mode Lockout from the Session – View Connection Server or Session – PCoIP Connection Manager page to prevent users from changing this setting. Authenticating the User After the user sends the login credentials, the server performs authentication.
- Page 169 Authenticating the User Unknown user name or password All connections support the down-level logon user name format (DOMAIN\user) in the User name field. If using a compatible PCoIP Connection Manager (see its release details for more information), UPN (user@domain) is also supported in the User name field. Tera2 PCoIP Zero Client with domain field hidden ©...
- Page 170 Connecting to a Desktop Tera2 PCoIP Zero Client with domain field hidden Connecting to a Desktop If the user is not configured to connect automatically to a desktop, a list of one or more desktops to which the user is entitled displays. The user may select the desired one and click Connect. Selecting an entitlement ©...
- Page 171 Connecting to a Desktop If the desktop is available, a message displays on the Connect screen to inform the user that the server is preparing the desktop. After a few seconds, the PCoIP session is established and the user connected. If the desktop is not available (for example, if the desktop is in the process of rebooting), a second message also flashes on the Connect screen to inform the user that the assigned desktop source for this desktop is not currently available.
- Page 172 Connecting to PCoIP Remote Workstation Cards Connecting to PCoIP Remote Workstation Cards You can move high-performance Windows or Linux workstations with PCoIP Remote Workstation Cards into your data center, and configure sessions between Tera2 PCoIP Zero Clients and these workstation hosts over a LAN or WAN. This type of configuration provides a secure, reliable, and easy-to-manage solution that meets the needs of users who have dedicated computers with graphically demanding applications.
-
Page 173: Configuration Options
Configuration Options • The Host Driver Function is enabled on the PCoIP Remote Workstation Card. • Your network resources meet bandwidth, QoS, latency, jitter, and packet loss requirements. For more information about designing PCoIP network architecture, see PCoIP Session Planning Administrators' Guide. - Page 174 Connecting Using SLP Host Discovery For details about how to configure the session connection type, see the following topics in the GUI Reference: • AWI: Direct to Host Session Settings • OSD: Direct to Host Session Settings Connecting Using SLP Host Discovery If PCoIP Remote Workstation Cards reside on the same subnet as Tera2 PCoIP Zero Clients, you can use the Direct to Host + SLP session connection type to configure clients to use Service Location Protocol (SLP) to discover the PCoIP Remote Workstation Cards on the subnet.
- Page 175 Connecting Using a Third-Party Connection Broker Workstation Card deployment, allowing the desktop to be managed by Teradici Cloud Access Manager or by third-party brokers like Leostream. Cloud Access Manager is best suited smaller Remote Desktop Card deployments. Cloud Access Manager requires the PCoIP Connection Manager session connection type. For more information, see Connection broker support with PCoIP technology (1044 For details about how to configure the session connection type, see the following topics in the GUI...
- Page 176 Connecting Using Cloud Access Manager or a Third Party Broker For details about how to configure the session connection type, see the following topics in the GUI Reference: • AWI: View Connection Server Session Settings • OSD: View Connection Server Session Settings For this option, VMware View Agent must be installed on the remote workstation, and a number of other configuration requirements for both the client and host must be in place.
- Page 177 Connecting Using Cloud Access Manager or a Third Party Broker 3. Enter the DNS name or IP address of the broker, and click OK. 4. Click the Connect button. 5. When prompted, enter your remote workstation’s login credentials. Advanced settings For details about advanced settings, see View Connection Server PCoIP Connection...
- Page 178 Connecting to Teradici Cloud Access Software Connecting to Teradici Cloud Access Software Teradici Cloud Access Software, also known as Cloud Access Software, is a Teradici application that enables users to remotely access a physical or virtualized remote workstation using the PCoIP protocol without having to install a PCoIP Remote Workstation Card.
-
Page 179: Connection Instructions
Configuration Options • If using a broker, see the appropriate broker documentation. ◦ Cloud Access Manager ◦ See your third party broker documentation. For a list of compatible third party brokers see our list of Connection Brokering Technology Partners. Configuration Options For both deskside and data center deployments, the following session connection types are available for PCoIP Zero Client-to-Cloud Access Software connections: •... - Page 180 Connecting Using Auto Detect Connecting Using Auto Detect This connection type automatically detects which broker protocol a connection server is using so users in a mixed environment (for example, one that uses View Connection Servers and PCoIP Connection Managers) do not have to manually reconfigure the session type each time they switch brokers.
- Page 181 Connecting Using PCoIP Connection Manager + Auto-Logon Advanced settings For details about advanced settings, see OSD: PCoIP Connection Manager Session Settings. Connecting Using PCoIP Connection Manager + Auto-Logon To connect using the PCoIP Connection Manager and Auto-Logon connection type: 1.
- Page 182 Connecting to Amazon WorkSpaces Desktops Connecting to Amazon WorkSpaces Desktops Amazon WorkSpaces is a fully managed cloud-based desktop service that enables end users to access their documents, applications, and resources. Tera2 PCoIP Zero Clients together with Amazon WorkSpaces provide a secure, easy to manage solution for delivering users with a rich desktop experience.
- Page 183 Configuration Options Configuration Options The following session connection types are available for Tera2 PCoIP Zero Client-to-Amazon WorkSpaces connections: • AWI: Amazon WorkSpaces • OSD: Amazon WorkSpaces Session Settings • AWI: Auto Detect Session Settings • OSD: Auto Detect Session Settings •...
- Page 184 Connecting to Amazon WorkSpaces using the PCoIP Connection Manager for Amazon WorkSpaces Connecting to Amazon WorkSpaces using the PCoIP Connection Manager for Amazon WorkSpaces PCoIP Connection Manager for Amazon WorkSpaces is required to connect to Amazon WorkSpaces when using PCoIP Zero Clients with firmware releases older than 6.0. You will need to know the IP address of your PCoIP Connection Manager for Amazon WorkSpaces appliance when using this connection type.
- Page 185 Connecting Using PCoIP Connection Manager After connecting using Auto Detect, the system saves your host's IP address or fully qualified computer name After you make a successful connection using Auto Detect, the IP address or FQDN of your host is automatically saved in the Server drop-down list on the OSD Connect dialog, along with the IP address or FQDN of any other hosts to which you have connected.
- Page 186 Connecting Using PCoIP Connection Manager + Auto-Logon Advanced settings For details about advanced settings, see OSD: PCoIP Connection Manager + Auto-Logon Session Settings. © 2020 Teradici...
- Page 187 Connecting to VMware Horizon Desktops and Applications Connecting to VMware Horizon Desktops and Applications VMware Horizon View provides remote desktop capabilities to users using the PCoIP protocol and VMware’s virtualization technology. You can configure Tera2 PCoIP Zero Clients to connect to desktops in a VMware Horizon VDI or DaaS environment, or when connecting to VMware Horizon app-remoting desktops and applications published on an RDS server.
- Page 188 Connection Instructions • OSD: View Connection Server • AWI: View Connection Server + Auto-Logon • OSD: View Connection Server + Auto-Logon • AWI: View Connection Server + Kiosk • OSD: View Connection Server + Kiosk • AWI: View Connection Server + Imprivata OneSign •...
- Page 189 Connecting with View Connection Server After connecting using Auto Detect, the system saves your host's IP address or fully qualified computer name After you make a successful connection using Auto Detect, the IP address or FQDN of your host is automatically saved in the Server drop-down list on the OSD Connect dialog, along with the IP address or FQDN of any other hosts to which you have connected.
- Page 190 Connecting with View Connection Server + Kiosk 4. If you are making a VMware Horizon RDS-hosted application connection: a. Click Advanced. b. Click to enable the Enable RDS Application Access option. c. Click Apply and then OK. 5. Click the Connect button. ...
- Page 191 Connecting with View Connection Server + Imprivata OneSign d. Click the Connect button. Advanced settings For details about advanced settings, see OSD: View Connection Server + Kiosk. Connecting with View Connection Server + Imprivata OneSign Imprivata OneSign enables users to access corporate networks, desktops, and applications with a single sign on.
-
Page 192: Disconnecting From A Session
Disconnecting from a Session Disconnecting from a Session You can disconnect from a virtual desktop session and return to the OSD by pressing the device’s Connect or Disconnect button. However, if a user is in a session with a PCoIP Remote Workstation Card, pressing this button will display the Zero Client Control Panel overlay, which provides options to disconnect from the session, to power off the remote workstation, or to cancel the operation. - Page 193 Disconnecting from a Session • The Enable Local Cursor and Keyboard feature must be enabled on the Remote Workstation Card Software on the host computer. • On the client, the keyboard must be recognized as locally connected (that is, not bridged). ...
- Page 194 Managing Your Tera2 PCoIP Zero Client Managing Your Tera2 PCoIP Zero Client This section shows you how to manage your Tera2 PCoIP Zero Client. You'll learn how to perform common tasks, view information about your Tera2 PCoIP Zero Client, configure your Tera2 PCoIP Zero Client, and perform diagnostics, such as viewing and configuring logging information, testing audio, and viewing session statistics.
-
Page 195: Performing Common Tasks
Performing Common Tasks Performing Common Tasks This section describes common tasks you may perform on a regular basis, such as connecting to an endpoint manager, and uploading firmware and certificates. Other tasks you may perform on a less regular basis include setting up touch screen displays, configuring the OSD to display a custom logo, and resetting the Tera2 PCoIP Zero Client to its factory default values. - Page 196 Connecting to an Endpoint Manager Connecting to an Endpoint Manager Tera2 PCoIP Zero Clients are managed in groups by an endpoint manager, such as the PCoIP Management Console. Endpoint managers are also the recommended method to configure your zero client to maintain a high security environment. Before the endpoint manager can administer a client, the client must see the endpoint manager and establish a connection to it.
- Page 197 About Tera2 PCoIP Zero Client Security Level Settings About Tera2 PCoIP Zero Client Security Level Settings The Discovery Mode setting described in this article is found on the Management page and configures how endpoint managers are discovered by the Tera2 PCoIP Zero Client. Discovery in this context does not refer to discovery of the Tera2 PCoIP Zero Client by endpoint managers.
- Page 198 Low Security Mode Medium Medium High Security Security Security Security Security Can trust endpoint managers using DNS Can manually connect to endpoint managers Can trust endpoint managers using an ...
- Page 199 Medium Security Mode Certificates are installed by an endpoint manager If a certificate for the endpoint manager has not previously been installed by an endpoint manager in the client’s certificate store, one must be installed by the endpoint manager. See Staging Clients Using an Endpoint Manager.
-
Page 200: High Security Mode
High Security Mode High Security Mode In high security mode, the discovery bootstrap phase is disabled. All settings must be manually configured, and certificates are required: • The client is not discoverable by endpoint managers. • The client must be manually configured with the endpoint managers’ internal (and, optionally, external) URI. -
Page 201: About Certificates
About Certificates About Certificates Certificates can be used to trust endpoint managers at all security levels, but are required when using medium or high security. If a PCoIP Management Console certificate is required, you can use an issuer certificate—either the root CA certificate, or the intermediate certificate used to issue the PCoIP Management Console’s public key certificate, or the PCoIP Management Console’s public key certificate. - Page 202 Endpoint Manager Discovery Methods Endpoint Manager Discovery Methods From the AWI Management page, you can set the Tera2 PCoIP Zero Client’s Security Level setting and discovery method. From the OSD Management page, you can view these settings. To view and set these settings, see Configuring Security Level Configuring Discovery.
- Page 203 Automatic Endpoint Manager Discovery Using DNS Automatic Endpoint Manager Discovery Using DNS Tera2 PCoIP Zero Clients can use DNS to automatically find an endpoint manager. To use automatic endpoint manager discovery, you must configure the environment for DNS service record discovery, and the Tera2 PCoIP Zero Client's security level must be set to low or medium. ...
- Page 204 Discovering the Client Manually from the Endpoint Manager Discovering the Client Manually from the Endpoint Manager Endpoint managers can be configured to discover endpoints like the Tera2 PCoIP Zero Client. This discovery method requires configuration on both the Tera2 PCoIP Zero Client and the endpoint manager.
- Page 205 Discovering the Endpoint Manager Manually from the Client Using High Security Mode To configure a PCoIP Zero Client with an endpoint manager in low or medium security mode: 1. From the AWI, select Configuration > Management. The AWI Management page displays. 2.
- Page 206 Discovering the Endpoint Manager Manually from the Client Using High Security Mode 3. In the Endpoint Manager URI for Direct Connect section, find the Internal URI field and type the endpoint manager’s URI. You can also provide an external URI, if needed. ...
- Page 207 Staging Clients Using an Endpoint Manager Staging Clients Using an Endpoint Manager An installed certificate is required to connect to an endpoint manager in medium or high security levels; however, out of the box, the Tera2 PCoIP Zero Client‘s local certificate store is empty and it can only connect using the low security level.
-
Page 208: Uploading Firmware
Uploading Firmware Uploading Firmware You can upload new firmware to your Tera2 PCoIP Zero Client from the AWI Firmware Upload page as shown next. AWI Firmware Upload page The following parameters display on the AWI Firmware Upload page: Firmware Upload Parameters Parameter Description Firmware build... - Page 209 Uploading Firmware 3. Double-click the correct firmware file. *.all 4. Click Upload. 5. Click OK to confirm that you want to proceed with the upload. The operation may take a few minutes. When completed, the AWI page displays two buttons: Reset and Continue. 6.
-
Page 210: Uploading Certificates
Uploading Certificates Uploading Certificates You can upload and manage your CA root and client certificates for Tera2 PCoIP Zero Clients from the AWI's Certificate Upload page, shown below. AWI Certificate Upload Page The maximum certificate size that you can upload from the AWI is 10,237 bytes. You can upload up to 16 certificates providing you don't exceed the maximum storage size of 98,112 bytes. - Page 211 802.1x Authentication Authentication issues If you have authentication issues after uploading a Connection Server client certificate, see PCoIP TROUBLESHOOTING STEPS: View Connection Server Client Certificates (KB 1363) for further information. Include all security information in 802.1x client certificate The PCoIP protocol reads just one 802.1x client certificate for 802.1x compliant networks.
- Page 212 802.1x Authentication Parameter Description Certificate Used to select a certificate to upload. filename You can upload up to a maximum of 16 root and client certificates. Uploaded This displays any uploaded certificates. To delete an uploaded certificate, click the Remove Certificates button.
- Page 213 Obtaining Certificates Automatically Using SCEP Obtaining Certificates Automatically Using SCEP Setting Default Management Console SCEP Server URL Challenge Password CA Issuer Identifier Root CA Client Certificate ...
- Page 214 Obtaining Certificates Automatically Using SCEP SD SCEP page AWI SCEP page The following settings display on the OSD and AWI SCEP pages: © 2020 Teradici...
- Page 215 Obtaining Certificates Automatically Using SCEP SCEP Parameters Parameter Description SCEP Server URL Enter the URL for the SCEP server that is configured to issue certificates for the device. Challenge Enter the password to present to the SCEP server. Password Root CA Displays the name of the root CA certificate that has been installed in the device.
- Page 216 Assigning an IP Address to a Tera2 PCoIP Zero Client Assigning an IP Address to a Tera2 PCoIP Zero Client When a Tera2 PCoIP Zero Client is powered on for the first time, you can display its IP address by logging into the OSD and selecting Options >...
- Page 217 Assigning the IP Address Statically You can also configure an IP address from the AWI Initial Setup page You can also assign an IP address (and other network settings) from the AWI Initial Setup page. To configure the IP address from this page, see Configuring Initial Setup Parameters.
- Page 218 Assigning a Name to Your Tera2 PCoIP Zero Client Assigning a Name to Your Tera2 PCoIP Zero Client You can assign a name to your Tera2 PCoIP Zero Client, as well as add a description and additional information about the device. You can use the OSD or AWI to assign the information. Assigning a Device Name from the OSD You can configure a device name from the OSD Label page, as shown next.
- Page 219 Assigning a Device Name from the AWI The following parameters display on the OSD Label page: OSD Label Parameters Parameter Description PCoIP Device Lets you give the device a logical name. The default is pcoip-portal-<MAC>, where <MAC> is Name the device’s MAC address. This field is the name the device registers with the DNS server if DHCP is enabled and the system is configured to support registering the hostname with the DNS server.
- Page 220 Assigning a Device Name from the AWI AWI Label page The following parameters display on the AWI Label page: AWI Label Parameters Parameter Description PCoIP Device Lets you give the device a logical name. The default is pcoip-portal-, where is the device’s Name MAC address.
- Page 221 Assigning a Device Name from the AWI To assign a device name from the AWI: 1. From the AWI, select Configuration > Label. 2. From the AWI Label page, enter a device name, a description, and additional information (if necessary). 3.
- Page 222 Resetting Your Tera2 PCoIP Zero Client Resetting Your Tera2 PCoIP Zero Client Setting Default Management Console Reset Parameters (a button) Enable keyboard shortcut Disabled Hide keyboard shortcut sequence in OSD Disabled ...
- Page 223 Resetting Your Tera2 PCoIP Zero Client Access after a factory reset A factory reset may require you to access the OSD to perform additional configurations or it may require your endpoint to be able to connect to a Management Console so the AWI can be enabled if disabled should you not be at the location of your endpoint.
- Page 224 Resetting Your Tera2 PCoIP Zero Client OSD Reset page © 2020 Teradici...
-
Page 225: Resetting Parameters
Resetting Parameters AWI Reset page Factory Default Values Resetting parameters to factory default values does not revert the firmware or clear the custom OSD logo. Resetting Parameters From the OSD and AWI Reset pages, you can reset parameters to the factory default values stored in flash memory. - Page 226 Configuring a Reset Shortcut 2. From the OSD or AWI Reset page, click Reset. When you click Reset, a prompt appears to confirm you want to reset the parameters. Configuring a Reset Shortcut From the AWI, you can enable a keyboard shortcut ( ) to reset your Ctrl Shift...
- Page 227 Displaying an OSD Logo Displaying an OSD Logo From the AWI, you can upload an image to display on the OSD Connect page. After you've uploaded an image, you can configure the image to display on OSD login screens (instead of the default banner). You can do this if you've configured your Tera2 PCoIP Zero Client to use a PCoIP Connection Manager as the PCoIP session broker, or a View Connection Server as the broker when connecting to a VMware desktop.
- Page 228 Displaying a Logo on OSD Login Screens Displaying a Logo on OSD Login Screens You can configure the image you uploaded to display on the OSD Connect page to display at the top of OSD login screens. You can do this if you've configured your Tera2 PCoIP Zero Client to use a PCoIP Connection Manager as the PCoIP session broker, or a View Connection Server as the broker when connecting to a VMware desktop.
- Page 229 Setting Up a Touch Screen Display Setting Up a Touch Screen Display This topic explains how to install and configure an Elo TouchSystems touch screen display for your Tera2 PCoIP Zero Client. You'll learn how to: • Install an Elo TouchSystems touch screen display (see Installing the Touch Screen Display).
- Page 230 Configuring the Touch Screen from the OSD Touch screen's co-ordinates are saved in flash memory Once the touch screen is calibrated, the co-ordinates are saved in flash memory. You can manually recalibrate the screen as required through the OSD Touch Screen page. 5.
- Page 231 Configuring the Touch Screen from the OSD OSD Touch Screen page Supported touch screens Elo IntelliTouch and Elo AccuTouch are the only Elo TouchSystems touch screens supported. The following parameters display on the OSD Touch Screen page. OSD Touch Screen Parameters ©...
- Page 232 Setting up the Touch Screen as a Bridged Device Parameter Description Enable right Select this check box to let users generate a right-click when they touch the screen and hold it click on hold for a few seconds. If disabled, right-clicking is not supported. Right click delay Slide the pointer to the position (between Long and Short) to determine how long the users must touch and hold the screen to generate a right-click.
- Page 233 Configuring the Tera2 PCoIP Zero Client to Automatically Log into a Host Brokered by a Connection Manager 2. Log into the Tera2 PCoIP Zero Client AWI. 3. From the AWI Info menu, click Attached Devices. The Attached Devices page displays (as shown next), showing the PID and VID information.
- Page 234 Viewing Information About your Tera2 PCoIP Zero Client Viewing Information About your Tera2 PCoIP Zero Client From time to time, you'll want to view information about your Tera2 PCoIP Zero Client so you can complete certain tasks or troubleshoot issues. Information you can view includes your Tera2 PCoIP Zero Client's IP address, hardware, firmware, and processor information, and information about attached devices, such as monitors and USB devices.
-
Page 235: Viewing The Ip Address
Viewing the IP Address Viewing the IP Address You can view your Tera2 PCoIP Zero Client's IP address from the OSD Network page. To view the Tera2 PCoIP Zero Client IP address: • From the OSD, choose Options > Information > Network. The OSD Network page displays, as shown next, showing the device's IP address. - Page 236 Viewing Information About Attached Devices Viewing Information About Attached Devices You can view information about the devices (such as keyboards, mice, monitors, and tablets) attached to your Tera2 PCoIP Zero Client. The information displays on the AWI Attached Devices page, as shown next. The following information displays on the AWI Attached Devices page: Attached Devices Information Statistic...
- Page 237 Viewing Information About Attached Devices Statistic Description This section displays the port mode, model, status, device class, subclass, protocol, vendor Devices identification (VID), and product identification (PID) of the USB device attached to the client. USB Device Status options include: Status •...
- Page 238 Viewing Hardware and Firmware Information Viewing Hardware and Firmware Information You can view the device's hardware and firmware details from both the OSD and AWI. The information displays on the OSD and AWI Version pages. Processor information is also available on the AWI Home page You can view processor and statistical information about your setup from the AWI Home page.
- Page 239 Viewing Hardware and Firmware Information AWI Version page (sample data only) The following parameters display on the OSD and AWI Version pages: Version Parameters Parameters Description VPD Information (Vital Product Data): Information provisioned by the factory to uniquely identify each device: •...
- Page 240 Viewing Hardware and Firmware Information Parameters Description Firmware Information This information reflects the current firmware details: • Firmware Version: Version of the current firmware. • Firmware Build ID: Revision code of the current firmware. • Firmware Build Date: Build date for the current firmware. PCoIP Processor This information provides details about the PCoIP processor.
- Page 241 Configuring Your PCoIP Zero Client Configuring Your PCoIP Zero Client Using either the OSD or AWI PCoIP Zero Client administrative interfaces, you can configure the PCoIP Zero Client to connect to a variety of hosts under different security requirements. These configurable parameters allow your Zero Client to comply with your company's security policies.
- Page 242 Configuring Access to Management Tools Configuring Access to Management Tools Secure Environments Disable the AWI and use the PCoIP Manamgement Console to configure endpoints in environments that have high security requirements. Consider hiding the OSD for extra security. Setting Default Management Console Disable Management Console Interface...
- Page 243 Configure Administrative Access Settings via the PCoIP Management Console As of firmware 6.4, the Administrative Web Interface is disabled by default. You can enable the AWI by using the OSD or by the PCoIP Management Console. You can configure administrative access settings from the OSD, AWI Access pages, as well as the PCoIP Management Console.
- Page 244 Configure Administrative Access Settings via the PCoIP Management Console Profile Management Access Settings © 2020 Teradici...
- Page 245 Configure Administrative Access Settings via the PCoIP Management Console 2. Apply the profile to your Zero Client. The following instructions provided consider the case when the AWI is disabled and the OSD is available. The images show that the settings in the OSD and AWI are the same, thus the same instructions apply to changes done via the AWI when it is available.
- Page 246 To Disable or Enable the Administrative Web or PCoIP Management Console Interface AWI Access page To Disable or Enable the Administrative Web or PCoIP Management Console Interface 1. From the OSD, select Options > Configuration > Access. 2. Uncheck the Disable Administrative Web Interface: or Disable Management Console Interface: option to enable either interface.
- Page 247 To Force an AWI Password Change To Force an AWI Password Change When this option is selected, a new password is required when you next access your zero client AWI. 1. From the OSD, select Options > Configuration > Access. 2.
- Page 248 To Require a Password for OSD User Settings Failed Login Attempt Warning A warning message displays if any failed access attempts to the AWI or OSD were detected since the last successful login. The message provides the date and time of the failed attempt, as shown next. Failed login attempt message (from AWI) ©...
-
Page 249: Configuring Audio
Configuring Audio Configuring Audio Setting Default Management Console Enable HD Audio Disabled Enable Audio Enabled Enable Local USB Audio Driver Enabled Enable Dual Audio Ouput Enable Opus Audio Codec Enabled ... - Page 250 Configuring Audio Enabling HD audio You enable HD audio from the AWI Initial Setup page. To enable HD audio, see Configuring Initial Setup Parameters. You configure audio parameters from the OSD and AWI Audio pages (shown next). OSD Audio page ©...
- Page 251 Configuring Audio AWI Audio page When connected USB audio devices are not available USB devices can be restricted using the USB permissions tables. If your USB device does not appear as a selectable device check your USB permissions configurations. The following parameters display on the OSD and AWI Audio pages: Audio Parameters Category...
- Page 252 Configuring Audio Category Parameter Description Enable Local USB This option locally terminates any USB audio devices that are attached to the Audio Driver Tera2 PCoIP Zero Client. When enabled, the audio stream is moved out of the PCoIP USB data channel and into a PCoIP audio data channel that handles lost and out-of-sequence packets without retransmitting them.
- Page 253 Configuring Audio Category Parameter Description Audio Device Type This field applies when you enable the Enable Local USB Audio Driver option and both an analog input device and a USB input device are connected to the Tera2 PCoIP Zero Client. Since you can only use one audio device at a time when devices are locally terminated, select the type of device you want to use: •...
- Page 254 Configuring Audio Category Parameter Description Audio Device Type This field applies when you enable the Enable Local USB Audio Driver option and both an analog output device and a USB output device are connected to the Tera2 PCoIP Zero Client. Since you can use only one audio device at a time when devices are locally terminated, select the type of device you want to use: •...
- Page 255 Configuring Certificate Checking Mode Configuring Certificate Checking Mode Setting Default Management Console Certificate Checking Mode Warn before connecting to untrusted servers Certificate Check Mode Disabled Lockout The Certificate Checking Mode option configures how the Tera2 PCoIP Zero Client behaves if it can't verify a secure connection to the server.
-
Page 256: Configuring Discovery
Configuring Discovery Configuring Discovery Setting Default Management Console Internal Endpoint Manager URI External Endpoint Manager URI Manager Discovery Mode Automatic Endpoint Bootstrap Manager URI Enable Discovery Enabled ... - Page 257 Viewing Discovery Information Viewing Discovery Information From the OSD MANAGEMENT page (shown next), you can view the discovery mode. Clearing the Tera2 PCoIP Zero Client's management state From the Management page, you also have the option to remove the current endpoint manager information for the client.
- Page 258 Configuring the Discovery Method To view discovery information: 1. From the OSD, select Configuration > Management. 2. From the OSD Management page, view the Manager Discovery Mode setting. The setting will be one of the following: • Automatic: When this option is set, the client attempts to receive the Endpoint Bootstrap Manager connection information from a DHCP server or DNS server.
- Page 259 Configuring the Discovery Method AWI Management page – manual discovery mode The following discovery parameters display on the AWI Management page: Discovery Parameters Parameter Description Internal Endpoint This field displays when the security level is set to High Security Environment - Bootstrap Manager URI phase disabled.
- Page 260 Configuring the Discovery Method Parameter Description External Endpoint This optional field displays the security level is set to High Security Environment - Bootstrap Manager URI phase disabled. (optional) If the client is unable to connect to the internal Endpoint Manager, it will attempt to connect to the external Endpoint Manager if this field is configured.
- Page 261 Configuring SLP Discovery Parameter Description Endpoint Manager When the client has been automatically discovered by an Endpoint Manager, this section Topology displays information about the connection. If the client used manual discovery, this information does not display. • URI Type: Displays whether the client is connected to an internal Endpoint Manager or an external one.
- Page 262 Configuring SLP Discovery OSD Discovery page © 2020 Teradici...
- Page 263 Configuring DNS-SRV Discovery for Connection Brokers AWI Discovery page To enable SLP discovery: 1. Open the Discovery page: • From the OSD, select Options > Configuration > Discovery. • From the AWI, select Configuration > Discovery. 2. From the Discovery page, enable SLP discovery so that SLP management entities can dynamically discover devices.
- Page 264 Configuring DNS-SRV Discovery for Connection Brokers Enabling DNS SRV Discovery option configures the discovery for connection brokers The Enable DNS SRV Discovery option configures discovery for connection brokers, but doesn't affect DNS SRV functionality for the PCoIP Management Console. You enable DNS-SRV discovery for connection brokers from the AWI Discovery page, shown next.
- Page 265 Configuring DNS-SRV Discovery for Connection Brokers DNS SRV Discovery Delay and the PCoIP Management Console The Enable DNS SRV option doesn't affect the DNS SRV functionality for the PCoIP Management Console; however, the DNS SRV Discovery Delay option does. When DNS SRV records are not installed, it is recommended that you set the delay to the maximum value of 9999.
- Page 266 Clearing the Management State Clearing the Management State Setting Default Management Console Clear Management State (a button) From the AWI and OSD, you can clear the Tera2 PCoIP Zero Client's management state. Clearing the management state removes the current endpoint manager information for the client. Once the client is managed by an endpoint manager, you must clear its management state before the client can accept a new endpoint manager.
- Page 267 Clearing the Management State OSD Management page © 2020 Teradici...
- Page 268 Clearing the Management State AWI Management page – automatic discovery mode AWI Management page – manual discovery mode To clear the management state: 1. From the OSD or AWI, select Configuration > Management. 2. From the OSD or AWI Management page, click Clear Management State so that the endpoint will accept a new endpoint manager.
- Page 269 Configuring a Quad Display Topology Configuring a Quad Display Topology Setting Default Management Console Enable Configuration Layout Alignment Primary/Position/Rotation/Resolution The Display Topology page lets users change the display topology for a PCoIP session. ...
- Page 270 Configuring a Quad Display Topology OSD Quad-display Topology page The following parameters can be found on the OSD Quad-display Topology page. OSD Quad-display Topology Parameters Parameter Description Enable Enable to configure a device that supports four displays per PCoIP chipset. Configuration ©...
- Page 271 Configuring a Quad Display Topology Parameter Description Display Layout Select the layout for the displays (A, B, C, and D). This setting should reflect the physical layout of the displays on the desk. • Horizontal: Select to arrange displays horizontally, as indicated in the diagram. •...
- Page 272 Configuring a Quad Display Topology Parameter Description Primary Configure which video port on the Tera2 PCoIP Zero Client that you want as the primary port. The display that is connected to the primary port becomes the primary display (that is, the display that contains the OSD menus before you initiate a PCoIP session and the display that is requested for the Windows taskbar after you initiate the session).
- Page 273 Configuring IPv4 Network Settings Configuring IPv4 Network Settings Setting Default Management Console Enable DHCPv4 Enabled IP Address Subnet Mask Gateway Primary DNS Server ...
- Page 274 Configuring IPv4 Network Settings The Static Fallback Network Configuration The PCoIP Zero Client has a default static fallback configuration that is applied if enabled and a DHCP server is not found on the network. The specific configuration can be different for different brand names of PCoIP Zero Clients. This configuration can be disabled or enabled, and configured through the Management Console.
- Page 275 Configuring IPv4 Network Settings OSD Network page © 2020 Teradici...
- Page 276 Configuring IPv4 Network Settings AWI Network page The following parameters display on the OSD and AWI Network pages: Network Parameters Parameter Description Enable DHCP When enabled, the device contacts a DHCP server to be assigned an IP address, subnet mask, gateway IP address, and DNS servers, and also requests a domain name (option 15), host name (option 12), and client Fully Qualified Domain Name (FQDN).
- Page 277 Configuring IPv4 Network Settings Parameter Description Subnet Mask The device’s subnet mask. If DHCP is disabled, you must set this field to a valid subnet mask. If DHCP is enabled, you cannot edit this field. Warning: Take care when setting the subnet mask It is possible to configure an invalid IP address/subnet mask combination (for example, invalid mask) that leaves the device unreachable.
- Page 278 Configuring IPv4 Network Settings Parameter Description Ethernet Mode Lets you configure the Ethernet mode of the client as follows: • Auto • 100 Mbps Full-Duplex • 10 Mbps Full-Duplex When you choose 10 Mbps Full Duplex or 100 Mbps Full-Duplex and click**Apply**, the following warning message appears: Warning: Different parameters may result in a loss of network connectivity When Auto-Negotiation is disabled on the PCoIP device, it must also be disabled on the...
- Page 279 Configuring IPv4 Network Settings Parameter Description Identity Enter the identity string used to identify your device to the network. Should be the Common Name (CN ) or subject name (SN ) of the 802.1x certificate entered in the Client Certificate field. Client Certificate Click Choose to select the client certificate you want to use for your 802.1x devices.
- Page 280 Configuring IPv6 Network Settings Configuring IPv6 Network Settings Setting Default Management Console Enable IPv6 Disabled Link Local Address IPv6 Gateway Enable DHCPv6 Enable DHCPv6 Addresses ...
- Page 281 Configuring IPv6 Network Settings OSD IPv6 page © 2020 Teradici...
- Page 282 Configuring IPv6 Network Settings AWI IPv6 page Restart your device When you make a change to one of the settings on this page, you must reboot your device for the change to take effect. The following parameters display on the OSD and AWI IPv6 pages: IPv6 Parameters ©...
- Page 283 Configuring IPv6 Network Settings Parameter Description Enable IPv6 Select the check box to enable IPv6 for your PCoIP devices. Link Local Address This field is automatically populated. Gateway Enter the IPv6 gateway address. Enable DHCPv6 Select the check box to set up Dynamic Host Configuration Protocol version 6 (DHCPv6) for your device.
- Page 284 Configuring IPv6 Network Settings To configure IPv6 settings: 1. Open the IPv6 page: • From the OSD, select Options > Configuration > IPv6. • From the AWI, select Configuration > IPv6. 2. From the IPv6 page, update the IPv6 network settings. 3.
- Page 285 Configuring OSD and AWI Password Configuring OSD and AWI Password The OSD Password page is only visible when there is a password applied to your zero client. OEMs have the option of applying a password in a new product. Consult your IT department or PCoIP Zero Client OEM documentation for OEM default password information.
- Page 286 Configuring OSD and AWI Password also reset the password if you forget it. This process requires external communication with Teradici or the Zero Client vendor. OSD Change Password page AWI Password page © 2020 Teradici...
- Page 287 Configuring OSD and AWI Password The password can be a maximum of 20 characters. Some PCoIP devices have password protection disabled by default, and the Password page is not available on these devices. You can enable password protection for these devices from the PCoIP Management Console. For details, PCoIP®...
- Page 288 Configuring OSD and AWI Password 2. Update the password and select: • From the OSD select OK • From the AWI select Apply To Reset the password using the challenge code 1. From the OSD, open the Password page by browsing to Options > Password. 2.
-
Page 289: Configuring Power Settings
Configuring Power Settings Configuring Power Settings Setting Default Management Console OSD Screen Saver Timeout Display Suspend Timeout Auto Power-Off Timeout Remote Host Power Control Power On After Power Loss ... - Page 290 Configuring Power Settings OSD Power page © 2020 Teradici...
- Page 291 Configuring Power Settings AWI Power page The following settings display on the OSD and AWI Power pages: Power Parameters Parameter Description OSD Screen- Configure the number of seconds to wait after a period of inactivity (that is, no keyboard or Saver Timeout mouse action) before the client puts its attached displays into low power mode.
- Page 292 Configuring Power Settings Parameter Description Display Configure the number of seconds to wait after a period of inactivity (that is, no keyboard or Suspend mouse action) before the client puts its attached displays into low power mode. Valid values are Timeout 10 to 14400 seconds, or use 0 to disable the feature.
- Page 293 Configuring Power Settings Parameter Description Enable Wake- When enabled, configures the client to wake up from a low power state when it receives Wake- on-LAN on-LAN magic packets. To configure power settings and permissions: 1. Open the Power page: • From the OSD, select Options > Configuration > Power. •...
-
Page 294: Configuring Security Level
Configuring Security Level Configuring Security Level Setting Default Management Console Low Security Environment Enabled Medium Security Environment High Security Environment Peer-to-Peer Certificate You can view your Tera2 PCoIP Zero Client's security level from the OSD Management page and configure the security level from the AWI Management page. - Page 295 Viewing the Security Level OSD Management page To view the security level using the OSD: 1. From the OSD, select Configuration > Management. 2. From the OSD Management page, view the Security Level setting. The setting will be either: • Low: Discoverable by endpoint managers. This is the only security mode where certificates are optional.
-
Page 296: Configuring The Security Level
Configuring the Security Level • High: Not discoverable by endpoint managers, and the bootstrap phase is disabled. All endpoint manager connection configuration is manual. The installed certificate must trust the endpoint manager. 3. Click Ok. Configuring the Security Level From the AWI Management page, you can configure the Tera2 PCoIP Zero Client's security level. The information that displays on the AWI Management page (shown next) depends on whether the client uses automatic or manual discovery. - Page 297 Configuring the Security Level To configure the security level: 1. From the AWI, select Configuration > Management. 2. From the AWI Management page, set the Security Level setting to one of the following: • Low: Discoverable by endpoint managers. This is the only security mode where certificates are optional.
- Page 298 Configuring Session Bandwidth Configuring Session Bandwidth Setting Default Management Console Device Bandwidth Limit Device Bandwidth Target Device Bandwidth Floor From the AWI Bandwidth page as shown next, you can control the bandwidth that your Tera2 PCoIP Zero Client uses during a PCoIP session.
- Page 299 Configuring Session Bandwidth Parameter Description Device Enter the maximum bandwidth peak from the client to the host (for example, USB data). Bandwidth Limit The usable range of the device bandwidth is 1,000 to 220,000 Kbps for Tera1 devices and 1,000 to 600,000 Kbps for Tera2 devices.
- Page 300 Configuring Session Bandwidth To configure session bandwidth: 1. From the AWI, select Configuration > Bandwidth. 2. From the AWI Bandwidth page, update the bandwidth settings. 3. Click Apply to apply your updates immediately. © 2020 Teradici...
-
Page 301: Configuring Snmp Settings
Configuring SNMP Settings Configuring SNMP Settings Setting Default Management Console Enable SNMP Disabled Community Name public From the AWI SNMP page as shown next, you can enable or disable the device’s SNMP agent. AWI SNMP page ... - Page 302 Configuring SNMP Settings responding to SNMP requests and from generating traps. It also ensures that the PCoIP SNMP MIB cannot be accessed. • For Community Name, enter the SNMP community name used by the device. 3. Click Apply. © 2020 Teradici...
- Page 303 Configuring USB Settings and Permissions Configuring USB Settings and Permissions | Setting | Default | AWI | OSD | Management Console | | :---: | :---: | :---: | :---: | :--: | | Force Local Cursor Visible | Disabled | | | | | Enable EHCI (USB 2.0) | Enabled | | | | | Authorized Devices (Add new)| ...
- Page 304 Configuring USB Permissions from the AWI Parameter Description Force Local When enabled, the Tera2 PCoIP Zero Clientalways shows the local cursor. When disabled, the Cursor local cursor is only shown when the host requests it or a locally-terminated mouse is connected. Visible For information about the local cursor feature, see Local Cursor and...
- Page 305 Configuring USB Permissions from the AWI AWI USB permissions page From this page, you can: • Authorize and unauthorize a list of USB devices based on ID or Class. You can use wildcards (or specify any) to reduce the number of entries needed to define all devices. •...
- Page 306 Configuring USB Permissions from the AWI The factory defaults have no USB permissions configured on the host. The factory defaults for the client USB permissions are 'any, any, any' (that is, authorized USB devices). Depending on the host implementation (for example, hardware PCoIP host or software PCoIP host), you can configure the USB permissions as required on the client and/or host.
- Page 307 Configuring USB Permissions from the AWI Parameter Description Bridged Devices Tera2 PCoIP Zero Clients locally terminate HID devices when connecting to VMware Horizon virtual desktops. However, some devices advertise as HID but use different drivers. These devices may need to be bridged to the host rather than locally terminated. This setting lets you force the Tera2 PCoIP Zero Client to bridge specific USB devices so that they use the drivers on the virtual desktop.
- Page 308 Configuring USB Permissions from the AWI Device ID parameters The following parameters display when you authorize or unauthorize USB device parameters: USB Authorized/Unauthorized Devices Parameters Parameter Description Add new When adding a new USB authorization or unauthorization entry, select one of the following: •...
- Page 309 Configuring USB Permissions from the AWI USB Bridged Parameters The following parameters display when you add a new USB bridged entry: USB Bridged Devices Parameters Parameter Description Vendor ID Enter the vendor ID of the bridged device. The valid range is hexadecimal 0-FFFF. Protocol ID Enter the product ID of the bridged device.
-
Page 310: Configuring User Settings
Configuring User Settings Configuring User Settings This section describes how you can customize your environment to suit your personal preferences. For example, you can configure regional settings (such as the timezone and daylight saving time), configure multiple monitors to accommodate your physical desktop, and configure the language and keyboard layout to use for the OSD user interface. - Page 311 AWI: Power Permissions AWI: Power Permissions The Power page lets you configure timeout and power settings for the device. You can access this page from the Configuration > Power menu. AWI Power page The following parameters can be found on the AWI Power page. AWI Power Parameters Parameter Description...
- Page 312 AWI: Power Permissions Parameter Description Display Configure the number of seconds to wait after a period of inactivity (that is, no keyboard or Suspend mouse action) before the client puts its attached displays into low power mode. Valid values are Timeout 10 to 14400 seconds, or use 0 to disable the feature.
- Page 313 Configuring OSD Language Configuring OSD Language Setting Default Management Console Language English Keyboard Layout OSD Region Tab Lockout Disabled When you configure OSD language settings, you configure the language to use for the OSD user interface, as well as the keyboard layout to use when you type information within the OSD.
- Page 314 Configuring OSD Language OSD Region page From the AWI Language page, as shown next, you can update language and keyboard settings. In addition, you can enable a setting to prevent users from changing the configuration on the OSD Region page. ©...
- Page 315 Configuring OSD Language AWI Language page To update language settings: 1. Do one of the following: • From the OSD, select Options > User Settings > Region • From the AWI, select Configuration > Language. 2. From the OSD Region page or the AWI Language page, do the following: •...
-
Page 316: Configuring Time Settings
Configuring Time Settings Configuring Time Settings Setting Default Management Console Enable NTP Disabled Identify NTP Host by NTP Host DNS Name NTP Host Port NTP Query Interval ... - Page 317 Configuring Time Settings OSD Region page From the AWI Time page, as shown next, you can set the time zone, enable Daylight Saving Time, and configure NTP. © 2020 Teradici...
- Page 318 Configuring Time Settings AWI Time page The following time parameters display on the OSD Region and AWI Time pages: Time Parameters Parameter Description Current Time Displays the time based on the NTP. (AWI only) Enable NTP (AWI Enable or disable the NTP feature. only) ©...
- Page 319 Configuring Time Settings Parameter Description Identify NTP Select if the NTP host is identified by IP address or by Fully Qualified Domain Name (FQDN). If Host by (AWI NTP is disabled, this field is not required and is not editable. If you enter an invalid IP address only) or DNS name, a message appears to prompt you to correct it.
- Page 320 Configuring Time Settings NTP server does not provide time zone information The device does not obtain time zone or Daylight Saving Time information from the NTP server. Enabling user events to correlate with log entries To simplify system troubleshooting, set the NTP parameters to enable user events to correlate with the relevant diagnostic event log entries.
- Page 321 Configuring Image Quality Configuring Image Quality Setting Default Management Console Minimum Image Quality Maximum Initial Image Quality Image Quality Preference Maximum Frame Rate 0 fps Disable Build to Lossless Disabled ...
- Page 322 Configuring Image Quality OSD Image page You adjust the image quality setting, as well as other advanced settings, from the AWI Image page, as shown next. © 2020 Teradici...
- Page 323 Configuring Image Quality AWI Image page The following image parameters display on the OSD and AWI Image pages: Image Parameters Parameter Description Minimum Image Quality Enables you to compromise image quality and frame rate when network bandwidth is (AWI only) limited.
- Page 324 Configuring Image Quality Parameter Description Maximum Initial Image Move the slider towards Reduced to reduce the network bandwidth peaks caused by Quality (AWI only) screen content changes, but produce lower quality images. Move the slider towards Perception-Free to produce higher quality images but also higher bandwidth peaks. This parameter limits the initial quality on the first display frame of a screen change.
- Page 325 Configuring Image Quality Parameter Description Enable Low Bandwidth When enabled, Low Bandwidth Text Codec Mode will be used for TERA2321 PCoIP Text Codec (TERA2321 Zero Clients. PCoIP Zero Clients only) (AWI only) The Low Bandwidth Text Codec is a new compression method that provides improved bandwidth usage when encoding lossless data, such as text and background.
- Page 326 Configuring Mouse Speed Configuring Mouse Speed Setting Default Management Console Mouse speed From the OSD Mouse page, as shown next, you can change the mouse cursor speed. OSD Mouse page © 2020 Teradici...
- Page 327 Configuring Mouse Speed Mouse settings only apply when you use the OSD Mouse cursor speed only applies when you use the OSD. They have no effect on keyboard settings during PCoIP sessions. Local cursor and keyboard feature Local cursor and keyboard is a feature of the PCoIP Host Software that improves usability for PCoIP sessions operating over WAN connections (latency >...
-
Page 328: Configuring Keyboard Settings
Configuring Keyboard Settings Configuring Keyboard Settings Setting Default Management Console Keyboard Repeat Delay Keyboard Repeat Rate Repeat Settings Test Box From the OSD Keyboard page, as shown next, you can change the keyboard character delay and character repeat settings. - Page 329 Configuring Keyboard Settings OSD Keyboard page Keyboard settings only apply when you use the OSD Keyboard settings only apply when you use the OSD. They have no effect on keyboard settings during PCoIP sessions. © 2020 Teradici...
- Page 330 Configuring Keyboard Settings Local cursor and keyboard feature Local cursor and keyboard is a feature of the PCoIP Host Software that improves usability for PCoIP sessions operating over WAN connections (latency > 40 ms). When enabled, the Tera2 PCoIP Zero Client can terminate input from the mouse and keyboard, and draw the cursor on the attached display(s).
- Page 331 Configuring Multiple Displays Configuring Multiple Displays Setting Default Management Console Enable Configuration Disabled Layout Alignment Primary Position Rotation ...
- Page 332 Configuring Two Displays Configuring Two Displays If your Tera2 PCoIP Zero Client supports two attached displays, The OSD Display Topology page, as shown next, enables you to configure the display topology for the attached displays. OSD Display Topology page (for two displays) The following parameters display on the OSD Display Topology page: Display Topology Parameters (Two-Display Configuration) ©...
- Page 333 Configuring Two Displays Parameter Description Enable Enable to configure a device that supports two displays per PCoIP chipset. Configuration Display Layout Select the layout for the displays (A and B). This setting should reflect the physical layout of the displays on the desk. •...
- Page 334 Configuring Four Displays Parameter Description Primary Configure which video port on the Tera2 PCoIP Zero Client you want as the primary port. The display that is connected to the primary port becomes the primary display (that is, the display that contains the OSD menus before you initiate a PCoIP session and the display that is requested for the Windows taskbar after you initiate the session).
- Page 335 Configuring Four Displays OSD Display Topology page (for four displays) The following parameters display on the OSD Display Topology page: Display Topology Parameters (Four-Display Configuration) Parameter Description Enable Enable to configure a device that supports four displays per PCoIP chipset. Configuration ©...
- Page 336 Configuring Four Displays Parameter Description Display Layout Select the layout for the displays (A, B, C, and D). This setting should reflect the physical layout of the displays on the desk. • Horizontal: Select to arrange displays horizontally, as indicated in the diagram. •...
- Page 337 Configuring Four Displays Parameter Description Primary Configure which video port on the Tera2 PCoIP Zero Client that you want as the primary port. The display that is connected to the primary port becomes the primary display (that is, the display that contains the OSD menus before you initiate a PCoIP session and the display that is requested for the Windows taskbar after you initiate the session).
- Page 338 From the OSD Tablet page, you can select whether to map an attached Wacom tablet to the entire desktop or to a specific attached monitor. You can also specify whether the tablet operates in a left-handed or right-handed orientation.
- Page 339 Configuring Tablet Settings OSD Tablet page Changing display topology settings clears the tablet mappings Changing topology settings on the Display Topology page (for example, after you rearrange your display setup) automatically clears the tablet mappings. You need to reconfigure your tablet setup whenever you apply topology changes.
- Page 340 Tablet settings only apply in certain environments and setups Tablet settings only apply when a Wacom tablet is attached to a Tera2 PCoIP Zero Client that is connected to a remote Linux workstation, and the local tablet driver feature is enabled in the remote workstation’s Remote Workstation Card Software (PCoIP Host Software for Linux, version 4.5.0 or later).
- Page 341 Configuring Tablet Settings • To configure the tablet for a left-handed orientation, use either a mouse or the tablet’s stylus to select the tablet’s Left-Handed Orientation check box, and then click Apply. Rotate the tablet 180° before using it. Clear the check box for a right-handed orientation. •...
-
Page 342: Configuring User Interface
Configuring User Interface Configuring User Interface The User Interface tab of the On Screen Display (OSD) allows you to change the color palette of the OSD making the OSD appear less bright to accommodate low light environments. This setting can be locked or removed by the PCoIP Management Console. ... - Page 343 Configuring User Interface Low Light Setting The image below shows the difference in brightness when using the low light setting. © 2020 Teradici...
- Page 344 Configuring User Interface © 2020 Teradici...
- Page 345 Configuring 802.1x Network Device Authentication Configuring 802.1x Network Device Authentication Setting Default Management Console Enable 802.1x security Identity Authentication TLS (this is the only available setting) Client Certificate ...
- Page 346 Configuring Devices for 802.1x Authentication • A switch with 802.1x support configured Configuring Devices for 802.1x Authentication To configure 802.1x device authentication, complete the following steps: Create a Client User. Export the Root CA Certificate. Create a Certificate Template for Client Authentication. Issue the Client Certificate.
- Page 347 Export the Root CA Certificate Export the Root CA Certificate In the Certificate Authority (CA) server, export the root CA certificate. To export the root CA certificate: 1. Log in to the Certificate Authority (CA) server. 2. Open a Microsoft Management Console window (for example,enter mmc.exe in the Start menu search field).
- Page 348 Issue the Client Certificate b. From the General tab, enter a name for the template (for example, PCoIP Zero Client 802.1x) and change the validity period to match the organization’s security policy. c. From the Request Handling tab, select Allow private key to be exported. d.
- Page 349 Export the Client Certificate b. In the Identifying Information for Offline Template section, enter the account name in the Name field. The other fields are not required. The other fields are not required. Enter the same name as the universal principal name of the client user The name you enter in the Name field must be the universal principal name (UPN) of the client user you created in Create a Client...
- Page 350 Convert the Certificate Format from .pfx to .pem e. Click Finish, and then click OK. 8. Repeat Steps 5 to 7 again to export the Tera2 PCoIP Zero Client certificate, but this time without the private key (No, do not export the private key), selecting the DER encoded binary X.509 (.CER) format instead of the PKCS format.
- Page 351 Import the Client Certificate into the Client User Account !!! "RSA .pem file" In other words, make sure that all the text from -----BEGIN PRIVATE (including the dashes) in the original .pem file is KEY----- -----END PRIVATE KEY replaced with the contents of -----BEGIN RSA PRIVATE KEY ----- -----END RSA (including the dashes) from the RSA .pem file.
- Page 352 Import the Certificates to the Client Device To import the certificates to a device using the AWI: 1. From a browser, log into the AWI for the Tera2 PCoIP Zero Client or PCoIP Remote Workstation Card. 2. From the AWI, select Upload > Certificate. 3.
- Page 353 Configuring Display Override Settings Configuring Display Override Settings Under normal operation, the GPU in the host computer queries a monitor attached to the PCoIP Zero Client to determine the monitor’s capabilities. These are reported in the Extended Display Identification Data (EDID) information. In some situations, a monitor may be connected to a client in a way that prevents the client from reading the EDID information, such as when connecting through certain devices, such as keyboards and mice.
- Page 354 Configuring Display Override Settings TERA232 OSD Display page (dual display models) © 2020 Teradici...
- Page 355 Configuring Display Override Settings TERA2140 OSD Display page (quad display models) Activate the Enable Attached Display Override feature when there is no valid EDID information Only activate the Enable Attached Display Override feature when there is no valid EDID information and your monitor display characteristics are understood.
- Page 356 Configuring Display Override Settings Performing a hot plug reset won't revert the display for a custom resolution If you have set a custom resolution, performing a hot plug reset will not cause the display to revert to its previous resolution if both Enable Attached Display Override and Enable Preferred Resolution Override are activated at the same time.
- Page 357 Configuring Display Override Settings Enable Attached This option is intended for legacy systems. It configures the Tera2 PCoIP Zero Client to Display Override send default EDID information to the host when a monitor cannot be detected or is not attached to the client. For Windows versions earlier than Windows 7, if the host didn't have EDID information, it would assume no monitors were attached.
- Page 358 Configuring Display Override Settings Parameter Description Enable Preferred Enable this option when a display is attached but can't be detected by the system, and Resolution Override you want to specify a preferred resolution for the display. The same default list of resolutions listed for the Enable Attached Display Override will be advertised, except that the display resolution you configure here will be sent as the native resolution, instead of the default native resolution of 1024x768.
- Page 359 Configuring Display Override Settings 2. From the Display page, update the display settings. 3. To save your updates, click OK. 1. The Enable Display Cloning setting is only found on dual display PCoIP Zero Client models (TERA2321) © 2020 Teradici...
-
Page 360: Performing Diagnostics
Performing Diagnostics Performing Diagnostics This section describes the tools you can use and the tasks you can perform to help you diagnose and troubleshoot issues with your Tera2 PCoIP Zero Client. Using diagnostic tools, you can also gather important information and statistics to help you optimize your environment and test your Tera2 PCoIP Zero Client's performance. - Page 361 Configuring the Event Log and Syslog Configuring the Event Log and Syslog Setting Default Management Console Enable Event Log Enabled Enable Syslog Enabled Identify Syslog Host By IP Address Syslog Host IP Address / Syslog Host DNS Name ...
- Page 362 Enabling Event Log You enable the event log, as well as syslog settings, from the AWI Event Log page, as shown next. AWI Event Log page Enabling Event Log Enable the event log so that logging occurs in verbose mode. When you enable the event log, you can view event logs from the OSD and AWI, as well as access and configure other logging options, such as syslog and enhanced logging mode.
-
Page 363: Enabling Syslog
Enabling Syslog When you disable the event log, you won't be able to access logging options, all existing event logs will be deleted, and logging will be disabled. If you've configured syslog settings, logs won't be sent to the syslog server. To enable the event log: 1. - Page 364 Enabling Syslog Ensure that the syslog server can manage the volume of messages Ensure that your syslog server can handle the volume of messages that the Tera2 PCoIP Zero Client sends. With certain free syslog servers, messages are lost if the volume is too great. The following syslog settings display on the AWI Event Log page: Syslog Parameters Parameter...
- Page 365 Enabling Syslog Parameter Description Syslog Facility The facility is a number attached to every syslog message. The number categorizes the source of the syslog messages. The facility is part of the standard syslog header and all syslog servers can interpret it. Enter a facility to suit your logging needs.
- Page 366 Performing Logging Tasks Performing Logging Tasks Setting Default Management Console Refresh (a button) Refresh (F5) Clear (a button) Enable Event Log Enabled Enable Syslog Enabled ...
- Page 367 Performing Logging Tasks from the OSD Performing Logging Tasks from the OSD The OSD Event Log page, as shown next, enables you to view, refresh, and clear event log messages. OSD Event Log page To view or clear event log messages: 1.
- Page 368 Performing Logging Tasks from the AWI Performing Logging Tasks from the AWI The AWI Event Log page, as shown next, enables you to enable or disable logging, view and clear event log messages, and set the log filtering mode. You can also enable and configure syslog as the logging protocol to use to collect and report events.
- Page 369 Performing Logging Tasks from the AWI AWI Event Log Parameters Parameter Description Enable Event Log When this feature is enabled, logging occurs in verbose mode, and all event log and syslog options display. When this feature is disabled, the logging options are hidden. Disabling the event log disables logging and deletes existing persistent event logs.
- Page 370 Performing Logging Tasks from the AWI Parameter Description Syslog Facility The facility is a number attached to every syslog message. The number categorizes the source of the syslog messages. The facility is part of the standard syslog header and all syslog servers can interpret it.
- Page 371 Performing Logging Tasks from the AWI Parameter Description Enhanced logging If you require enhanced logging details in the event log to help troubleshoot a problem with mode a Tera2 PCoIP Zero Client or PCoIP Remote Workstation Card, select an enhanced logging category, and click Apply >...
- Page 372 Performing Logging Tasks from the AWI 2. From the AWI Event Log page, you can: • Select or clear the Enable Event Log check box. • View all the event log messages stored on the Tera2 PCoIP Zero Client. • Press to refresh the browser page displaying the log information.
- Page 373 Configuring Enhanced Logging Mode Configuring Enhanced Logging Mode Setting Default Management Console Enhanced logging mode Disabled From the AWI Event Log page, as shown next, you can perform additional logging tasks, including enabling enhanced logging mode for specific components. Enabling this mode provides advanced information in the event log to help you troubleshoot issues you may encounter with specific devices (such as USB or video components).
- Page 374 Configuring Enhanced Logging Mode AWI Event Log page You can only enable enhanced logging for one category at a time You can only apply enhanced logging mode to one category at a time. Enhanced logging mode messages display in the event log by their Level 3 (LVL:3) designation, which indicates a debug-level message.
- Page 375 Configuring Enhanced Logging Mode At any given time, you can enable enhanced logging mode for any one of the following categories: • Audio: Provides enhanced audio-related details, such as audio compression levels and audio bandwidth. Enable this mode if you experience issues with audio quality. •...
-
Page 376: Viewing Event Logs
Viewing Event Logs Viewing Event Logs Setting Default Management Console View (a button on the AWI, a list of messages on the OSD) Refresh (a button on the OSD, F5 from the AWI) ... - Page 377 Viewing Event Logs OSD Event Log page © 2020 Teradici...
- Page 378 Viewing Event Logs AWI Event Log page To view, refresh, and clear event log messages from the OSD: 1. From the OSD, select Options > Diagnostics > Event Log. 2. From the OSD Event Log page, you can: • Scroll to view all the event log messages stored on the Tera2 PCoIP Zero Client. ©...
- Page 379 Viewing Event Logs • Click Refresh to refresh the information that displays on the page and view the most updated event log information. • Click Clear to delete all the event log messages stored on the Tera2 PCoIP Zero Client. 3.
- Page 380 Viewing and Resetting Session Statistics Viewing and Resetting Session Statistics Setting Default Management Console Reset Statistics (button) The OSD displays session statistics from the last PCoIP session. The AWI displays session statistics for the current session. If a session isn't active, the AWI displays statistics for the previous PCoIP session.
- Page 381 Viewing Session Statistics from the OSD OSD Session Statistics page To view session statistics from the OSD: 1. From the OSD, select Options > Diagnostics > Session Statistics. 2. From the OSD Session Statistics page, you can view the following information: •...
- Page 382 Viewing and Resetting Session Statistics from the AWI Viewing and Resetting Session Statistics from the AWI The AWI Session Statistics page (shown next) displays statistics for the current session. If a session isn't active, the statistics from the last session display. You can also reset session statistics from the AWI.
- Page 383 Viewing and Resetting Session Statistics from the AWI The sample AWI Session Statistics page shows client statistics for a two-display setup The sample page shows session statistics for a client with two connected displays. If your deployment uses four displays, information about all four displays will display on the page.
- Page 384 Viewing and Resetting Session Statistics from the AWI Parameters Description Bandwidth Transmit Bandwidth: The minimum, average, and maximum traffic transmitted by the Tera Statistics processor. The active bandwidth limit is the maximum amount of network traffic the Tera processor may currently generate. The value is derived from the configured bandwidth parameters and the current (or last) network congestion levels.
- Page 385 Viewing and Resetting Session Statistics from the AWI Parameters Description Initial Image Shows the current lossless state of the attached display: Quality • .Lossy • Perceptually lossless • Lossless To display session statistics: 1. From the AWI, select Diagnostics > Session Statistics. 2.
- Page 386 Viewing PCoIP Processor Statistics Viewing PCoIP Processor Statistics Setting Default Management Console Reset PCoIP Processor (a button) From the OSD and AWI, you can view the time elapsed since the Tera2 PCoIP Zero Client's PCoIP processor last re-booted. The AWI also enables you to view the current time and reset the Tera2 PCoIP Zero Client's PCoIP processor.
- Page 387 Viewing and Resetting PCoIP Processor Statistics from the AWI OSD PCoIP Processor page To view PCoIP processor information: 1. From the OSD, select Options > Diagnostics > PCoIP Processor. 2. From the OSD PCoIP Processor page, view the time elapsed since the Tera2 PCoIP Zero Client's PCoIP processor last re-booted.
- Page 388 Viewing and Resetting PCoIP Processor Statistics from the AWI AWI PCoIP Processor page To view and reset PCoIP processor information from the AWI: 1. From the AWI, select Diagnostics > PCoIP Processor. 2. From the AWI PCoIP Processor page, you can: 3.
- Page 389 Pinging the Host Pinging the Host Setting Default Management Console Destination Interval Packet Size Sent Received Start (a button) ...
- Page 390 Pinging the Host OSD Ping page You can use the ping feature to determine the maximum MTU size Because firmware releases 3.2.0 and later force the do not fragment flag in the ping command, you can ping a host to determine the maximum MTU size.
- Page 391 Pinging the Host Parameter Description Packet Size Size of the ping packet. Packets Sent Number of ping packets transmitted. Packets Received Number of ping packets received. Start/Stop Press Start or Stop to start or stop the ping. To ping a host: 1.
- Page 392 Controlling Sessions Controlling Sessions Setting Default Management Console Connect (a Enabled if a session is disconnected / Disabled if a button) session is connected Disconnect (a Enabled if a session is connected / Disabled if a ...
- Page 393 Controlling Sessions Parameter Description Connection This field displays the current state of the session. Options include the following: State • Disconnected • Connection Pending • Connected Two buttons appear below the Connection State field: • Connect: If the connection state is Disconnected, click this button to initiate a PCoIP session between the client and its peer device.
-
Page 394: Testing Audio
Testing Audio Testing Audio Setting Default Management Console Start (a button) Stop (a button) From the AWI Audio page, as shown next, you can generate an audio test tone from the Tera2 PCoIP Zero Client. - Page 395 Testing Attached Displays Testing Attached Displays Setting Default Management Console Test mode Video Test Pattern Generator Test resolution 2048x1152 Start (a button) Stop (a button) From the AWI Display page, as shown next, you can initiate and view a visual test pattern on the Tera2 PCoIP Zero Client's attached display(s).
- Page 396 Testing Attached Displays AWI Display page To initiate a test pattern: 1. From the AWI, select Diagnostics > Display. 2. From the AWI Display page, do the following: • From the Test mode list, select the type of test pattern to display on the Tera2 PCoIP Zero Client's attached display(s).
- Page 397 Using the Packet Capture Tool Using the Packet Capture Tool Setting Default Management Console Start (a button) Download (a link) The AWI Packet Capture page, as shown next, provides a diagnostic tool to capture network packets on the Tera2 PCoIP Zero Client.
- Page 398 Using the Packet Capture Tool Parameters Description Bytes (Captured/ Shows the number of captured bytes over the maximum number you can capture (in numeric Max) and percentage format) along with the number of packets captured. Diagnostic Click Start to start the capture and click Stop to stop the capture. Packet Capture Diagnostic Click Download to save...
- Page 399 Troubleshooting a Tera2 PCoIP Zero Client in Recovery Mode Troubleshooting a Tera2 PCoIP Zero Client in Recovery Mode If your Tera2 PCoIP Zero Client firmware goes into recovery mode, here are some ideas to troubleshoot the problem: • It is possible that the Tera2 PCoIP Zero Client was forced into recovery mode by a user repeatedly tapping the power button when turning it on.
- Page 400 Security Cipher Suites Security Cipher Suites The Tera2 PCoIP Zero Client exchanges information with several services while connecting to endpoint managers, connection managers, and PCoIP hosts. The various communication phases are described here, together with the set of cipher algorithms available to each phase. The topics include: •...
- Page 401 Encrypting Endpoint Discovery Recommended Web Browsers Recommended web browsers are Firefox, Chrome, Internet Explorer 11, and Edge. Encrypting Endpoint Discovery Tera2 PCoIP Zero Clients that are not managed by an endpoint manager, such as the PCoIP Management Console, listen for incoming discovery requests. When an endpoint discovery request from an endpoint manager is received by the Tera2 PCoIP Zero Client, communications between the endpoint manager and the Tera2 PCoIP Zero Client are established securely using one of the following cipher suites:...
- Page 402 Encrypting Pre-Session Communications with VMware Horizon Environments • TLS_ECDHE_RSA_WITH_AES_128_CBC_SHA256 • TLS_ECDHE_RSA_WITH_AES_256_CBC_SHA384 • TLS_ECDHE_RSA_WITH_AES_128_GCM_SHA256 • TLS_ECDHE_RSA_WITH_AES_256_GCM_SHA384 Minimum SSL Version There is a minimum requirement of TLS 1.1. Encrypting Pre-Session Communications with VMware Horizon Environments Before a PCoIP session is negotiated with a PCoIP host in a VMware Horizon environment, each user is authenticated and then selects a desktop from a list of authorized resources.
- Page 403 Encrypting Pre-Session Communications with PCoIP Connection Managers Encrypting Pre-Session Communications with PCoIP Connection Managers Before a PCoIP session is negotiated with a PCoIP host using a PCoIP Connection Manager, each user is authenticated and then selects a desktop from a list of authorized resources. To complete this authentication process, the Tera2 PCoIP Zero Client communicates with a PCoIP Connection Manager over port 443 using one of the following cipher suites: •...
- Page 404 In-Session Encryption • TLS_ECDHE_RSA_WITH_AES_128_CBC_SHA256 • TLS_RSA_WITH_AES_256_GCM_SHA384 • TLS_RSA_WITH_AES_128_GCM_SHA256 • TLS_RSA_WITH_AES_256_CBC_SHA256 • TLS_RSA_WITH_AES_128_CBC_SHA256 • TLS_RSA_WITH_AES_256_CBC_SHA • TLS_RSA_WITH_AES_128_CBC_SHA Minimum SSL Version These Max Compatibility security level cipher suites have a minimum requirement of TLS 1.1. The following Suite B security level cipher suite has a minimum requirement of TLS 1.2, and applies only to Remote Workstation Card connections: •...
-
Page 405: Frequently Asked Questions
Frequently Asked Questions Frequently Asked Questions This section provides answers to some commonly-asked questions about the Tera2 PCoIP Zero Client. For additional information, see Getting More Information, or the Teradici Support Center. Q: What is a Tera2 PCoIP Zero Client? A: Tera2 PCoIP Zero Clients are hardware- and firmware-based endpoints that enable users to connect remotely to PCoIP Remote Workstations, workstations running Teradici Cloud Access Software, Teradici Cloud Access Platform desktops and workstations, Amazon WorkSpaces... - Page 406 • USB devices: You can attach a variety of USB devices to your Tera2 PCoIP Zero Client. USB human interface device (HID) devices (for example, keyboards, mice, Wacom tablets) are locally terminated by the client. Non-HID devices (for example, mass storage devices, some printers, non-isochronous scanners) are automatically bridged when the USB permissions are ©...
- Page 407 Frequently Asked Questions set to allow the device. The drivers for many of these devices need to be installed in the host operating system. © 2020 Teradici...
- Page 408 PCoIP Connection Brokers PCoIP Connection Brokers PCoIP connection brokers are resource managers that dynamically assign host PCs to Tera2 PCoIP Zero Clients based on the identity of the user establishing a connection from the Tera2 PCoIP Zero Client. Connection brokers are also used to allocate a pool of hosts to a group of Tera2 PCoIP Zero Clients.
- Page 409 DVI and DisplayPort Interfaces DVI and DisplayPort Interfaces Tera2 PCoIP Zero Clients support both DVI and DisplayPort digital display interfaces. The following port options are available for these clients: • TERA2321 DVI-I dual-display Tera2 PCoIP Zero Client: contains two DVI ports. •...
- Page 410 Support for 2560x1600 Display Resolution Connecting video cables to each type of Tera2 PCoIP Zero Client DVI and DisplayPort Connectors for 2560x1600 Resolution • TERA2321 DVI-I dual-display Tera2 PCoIP Zero Client: This PCoIP Zero Client supports one 2560x1600 monitor. Connect the two DVI-I cable connectors on a custom dual-link DVI-I cable adapter to the two DVI-I ports on the Tera2 PCoIP Zero Client, as shown in the previous illustration (upper left).
- Page 411 Support for 2560x1600 Display Resolution • TERA2140 DVI-D quad-display Tera2 PCoIP Zero Client: This client supports up to two 2560x1600 resolution monitors. For each monitor, connect the two DVI-D cable connectors on a custom dual-link DVI-D cable adapter to the two DVI-D ports that are shown in the previous illustration (lower left).
- Page 412 Local Cursor and Keyboard Local Cursor and Keyboard Local cursor and keyboard is a feature of the PCoIP Host Software that improves usability for PCoIP sessions operating over WAN connections (latency > 40 ms). When enabled, the Tera2 PCoIP Zero Client can terminate input from the mouse and keyboard, and draw the cursor on the attached display(s).
- Page 413 Remote Workstation Cards Remote Workstation Cards PCoIP Remote Workstation Cards are small add-in cards that can be integrated into tower PCs, rack mount PCs, PC blades, and server blades. The card’s TERA-series processor performs advanced display compression algorithms to encode a user’s full desktop environment. This information is communicated in real time over an IP network to the user’s Tera2 PCoIP Zero Client.
- Page 414 PCoIP Software Session Variables PCoIP Software Session Variables The PCoIP software session variables in Microsoft’s Group Policy Object (GPO) editor let you configure users’ desktops with a collection of parameters that affect PCoIP sessions with soft hosts. These variables are defined in a GPO administrative template file called pcoip.adm , which is located on the View Connection Server installation directory (\'servername'\c$\Program...
- Page 415 PCoIP Packet Format PCoIP Packet Format PCoIP is a real-time technology that uses UDP as the transport-layer protocol. PCoIP supports two encryption types—UDP-encapsulated ESP and native IPsec ESP. An unencrypted PCoIP transport header field is also present for devices with firmware 4.1.0 or later installed and/or for scenarios using View 5.1 or later.
- Page 416 IPsec ESP Packet Format IPsec ESP Packet Format IPsec ESP encapsulation is the default packet format for direct connections that involve a Tera1 PCoIP Zero Client and/or Tera1 PCoIP Remote Workstation Card. The IPsec ESP packet format is illustrated in the following figure. This figure also shows the location of the PCoIP transport header in an IPsec ESP packet.
- Page 417 Tera2 PCoIP Zero Clients Tera2 PCoIP Zero Clients Tera2 PCoIP Zero Clients are secure client endpoints that enable users to connect to a virtual desktop or remote host workstation over a local or wide area IP network. They can take many form factors, such as small stand-alone devices, PCoIP integrated displays, VoIP phones, and touch- screen monitors.
- Page 418 Requirements for Trusted Server Connections Requirements for Trusted Server Connections When connecting a Tera2 PCoIP Zero Client to a PCoIP endpoint using a View Connection Server or PCoIP Connection Manager session connection type, the padlock icon and 'https' text on the user login screen indicates whether the HTTPS connection is trusted or untrusted, see Connecting a Session...
- Page 419 PCoIP Connection Manager Requirements Certificate Requirement Never connect Warn before connecting to untrusted Do not verify to untrusted servers server servers certificates Certificate subject or a subject Required Not required if the server Not checked alternative name must match the VCS certificate is self-signed.
- Page 420 PCoIP Connection Manager Requirements Certificate Requirement Never connect Warn before connecting to untrusted Do not verify to untrusted servers server servers certificates Certificate subject or a subject Required Not required if the server Not checked alternative name must match the VCS certificate is self-signed.
- Page 421 Syslog Syslog The syslog protocol is a standard for logging program messages to a database. It is commonly used to monitor devices that do not have a large amount of storage capacity, such as networking devices, ESX servers, PCoIP Zero Clients, and PCoIP Remote Workstation Cards. Using syslog for logging enables you to centralize the storage of log messages and to capture and maintain a longer history of log data.
- Page 422 Teradici PCoIP Hardware Accelerator (APEX 2800) Teradici PCoIP Hardware Accelerator (APEX 2800) The Teradici PCoIP Hardware Accelerator card provides hardware-accelerated PCoIP image encoding for virtual desktop infrastructure (VDI) implementations. The card constantly monitors the graphic encoding demands of each virtual machine, dynamically switching the image compression tasks from software image encoding in the CPU to hardware image encoding, and back again.
-
Page 423: Smart Cards
Smart Cards Smart Cards This reference provides the requirements to support pre-session smart card authentication when connecting to VMware Horizon (View) know to work with the latest firmware. It also lists Supported Smart Cards and USB Smart Card Readers for Tera2 PCoIP Zero Clients Connected to PCoIP Connection Managers ... - Page 424 Smart Card Certificate Requirements Smart Card Certificate Requirements • Key usage must be set to digital signature • Subject common name and/or subject alternative name (other name) must be set • Enhanced key usage must include client authentication and/or smart card logon •...
- Page 425 Known Smart Card Readers compatible with SC650/SIPR • Gemalto IDBridge CR20/CT30/CT31 • HP KUS0133 Smart Card Keyboard • Leadtek Alcor Reader • OmniKey 3021 • OmniKey 3121 • OmniKey 5321 (Note: the 5321 CLi variant is currently not supported) • Omnikey 5421 •...
- Page 426 Tested Smartcard Models Tested Smartcard Models GSC-IS and PIV Authentication Flow The default authentication flow prior to firmware 6.5 was to use the GSC-IS driver before the PIV driver. Now the PIV driver is used first before the GSC-IS driver. If required, you can change the default authentication flow by enabling the Prefer GSC-IS setting.
- Page 427 Tested Smartcard Models Model Specification Middleware Pre-Session Comments and/or Applet Provider Authentication Session ID-One Cosmo v5.2 CAC (GSC- ActivIdentity 3.2.0 and 3.2.0 Also referred to as higher the Oberthur ID One ActivClient higher V5.2 Note 2,3 v2.6.1 applet Cyberflex Access CAC (GSC- ActivIdentity 3.2.0 and...
- Page 428 Tested Smartcard Models Model Specification Middleware Pre-Session Comments and/or Applet Provider Authentication Session ID-One Cosmo CAC (PIV ActivIdentity 3.3.0 and 3.2.0 Also referred to as v5.2D 72K Endpoint) higher the Oberthur ID One ActivClient higher V5.2 Dual This card v2.6.2 has both contact applet and contactless...
- Page 429 Tested Smartcard Models Model Specification Middleware Pre-Session Comments and/or Applet Provider Authentication Session Oberthur ID-One CAC (PIV ActivIdentity 3.3.0 and 3.2.0 Also referred to as Cosmo 128 v5.5 Endpoint) higher the Oberthur ID One for DoD CAC ActivClient higher 128 v5.5 Dual. This v2.6.2b card has both applet...
- Page 430 Tested Smartcard Models Model Specification Middleware Pre-Session Comments and/or Applet Provider Authentication Session ID-One Cosmo v7.0 CAC (PIV ActivIdentity 3.3.0 and 3.2.0 Note 2, 3 128K Endpoint) higher ActivClient higher v2.6.2b applet SmartCafe Expert CAC (PIV ActivIdentity 3.3.0 and 3.2.0 Note 2, 3 144K DI v3.2 Endpoint)
- Page 431 Tested Smartcard Models Model Specification Middleware Pre-Session Comments and/or Applet Provider Authentication Session SafeNet SC650 SafeNet PKI SafeNet SHAC 5.1.0 and 5.1.0 Note 3 Blade higher higher Atos CardOS CardOS CardOS API 4.1.0 and 4.1.0 Note 3 higher higher eToken 4100 eToken SafeNet 5.1.1 and...
- Page 432 Tested Smartcard Models Model Specification Middleware Pre-Session Comments and/or Applet Provider Authentication Session Gemalto IDCore Windows 4.8.0 and 4.8.0 Note 3 Install user 3020 PIV NIST SP higher cert using 800-73 PIV higher Charismathics STC (can be provisioned with Charismathics Security Token Configurator...
- Page 433 Tested Smartcard Models Model Specification Middleware Pre-Session Comments and/or Applet Provider Authentication Session PIVkey C980 Taglio PIVKey 5.5.1 and 4.8.0 Note 3 Install user Installer- higher cert using Versasec User-7.1.0.5 higher vSEC_CMS_K2.0 (https:// from certificate PFX- pivkey.com/ File. vSEC- download/ CMS_K2.0.exe can pkuser.zip) be downloaded as...
- Page 434 Tested Smartcard Models Model Specification Middleware Pre-Session Comments and/or Applet Provider Authentication Session SafeNet eToken eToken SHAC 6.1.0 and 6.1.0 Note 3 5110 FIPS Java 2.12.020 higher higher SafeNet AT SC650 Entrust PIV Windows 6.3.0 and 6.3.0 v3.2 2.4.2R0 NIST SP higher 800-73 PIV higher...
- Page 435 Undocumented Smart Card Support Model Specification Middleware Pre-Session Comments and/or Applet Provider Authentication Session Gemalto IDPrime IDPrime Safenet 6.4.0 and 6.4.0 MD 830 Rev B Java Applet Authentication higher 4.3.5.D with Client 10.7 higher • Level 3 Secure • Level 2 with Messaging Secure Messaging...
- Page 436 Supported Smart Cards and USB Smart Card Readers for Tera2 PCoIP Zero Clients Connected to PCoIP Connection Managers The communication protocol between the smart card and the reader is referred to as T=X, where X is 0 or 1. Firmware 3.2.0 and higher supports T=0. Firmware 3.4.0 and higher supports T=1. Support for additional smart card variants will be added to future firmware releases.
- Page 437 Features tab. Supported Wacom tablets require the correct firmware uploaded to the PCoIP Zero Client as newer tablet models can be added to newer firmware releases. New supported tablet models can be identified by reviewing firmware release notes. To ensure you have the most complete set of supported Wacom tablets, use the latest release of PCoIP Firmware.
- Page 438 Hosts PCoIP Zero Clients support locally terminating Wacom tablets when a PCoIP Zero Client connects to any of the following hosts: • Windows workstations with Cloud Access Software Graphics Agent installed.
- Page 439 Tablets with PCoIP Zero Client Local Termination Support when Connecting to Linux Based Hosts The supported tablet tables are separated by Windows and Linux host operating systems Tablets with PCoIP Zero Client Local Termination Support when Connecting to Linux Based Hosts Description Cloud Access Software Remote...
- Page 440 Tablets with PCoIP Zero Client Local Termination Support when Connecting to Linux Based Hosts Description Cloud Access Software Remote Model/Product ID for Linux Workstation Card Cintiq 24HD DTK-2400 / 0x00F4 Cintiq 24HD touch DTH-2400 / 0x00F8 Cintiq 24 Pro ...
- Page 441 Tablets with PCoIP Zero Client Local Termination Support when Connecting to Linux Based Hosts Description Cloud Access Software Remote Model/Product ID for Linux Workstation Card Intuos3 4x6 PTZ-431W / 0X00B7 Intuos4 4x6 PTK-440 / 0X00B8 Intuos4 6x9 ...
- Page 442 Tablets with PCoIP Zero Client Local Termination Support when Connecting to Windows Based Hosts Description Cloud Access Software Remote Model/Product ID for Linux Workstation Card Intuos Pro Medium PTH-660 / 0x0357 Intuos Pro Large PTH-860 / 0x0358 Intuos PT S ...
- Page 443 3. Bare metal support for Cloud Access Software. Installation of Graphics Agent requires some additional configuration. See the extra installation instructions for Ubuntu RHEL/CentOS 4. Requires Wacom Windows driver version 6.3.32-4 5. Cannot be driven at 4K resolutions © 2020 Teradici...
- Page 444 Creating and Applying Custom Certificates Creating and Applying Custom Certificates In order to securely connect your PCoIP Zero Client to a Remote Workstation Card, the certificates must meet PCoIP Zero Client and PCoIP Remote Workstation Card Suite B requirements and both devices must be configured correctly.
- Page 445 All Certificate Requirements (Root/Client/Server) Required Certificate Parameters All Certificate Requirements (Root/Client/Server) • Subject and Issuer name must be valid (both the CN and O and cannot be empty). • Signature algorithm must be SHA-384ECDSA. © 2020 Teradici...
- Page 446 Client Certificate Specific Requirements • Signature hash algorithm must be SHA-384. • Public key needs to be an 384 bit elliptic curve key that was generated from the secp384r1 curve (commonly known as the P-384 curve). • Must be generated as unencrypted .pem files. Client Certificate Specific Requirements •...
- Page 447 Server Certificate Specific Requirements 4. Select Direct from Client for session connection type and select Show Advanced Options. 5. Select Suite B: TLS 1.2 with Suite B-compliant 192-bit elliptic curve encryption for TLS Security Mode parameter. 6. Select the correct Server certificate for the Peer-to-Peer Certificate parameter. Zero Client Configuration 1.
- Page 448 PCoIP Zero Client Quick Start Guide PCoIP Zero Client Quick Start Guide ESTABLISHING A PCoIP CONNECTION Your PCoIP Zero Client is pre-configured to connect directly to a PCoIP Remote Workstation Card, but can be configured to use a third party connection broker such as VMware Horizon to connect to virtual desktops or PCoIP Remote Workstation Cards.
- Page 449 PCoIP Zero Client Quick Start Guide LED STATUS INDICATORS Session LED • Solid green – PCoIP session is active. • Power Button LED** • Solid green – Indicates unit is powered on. • Flashing green – Host PC in low power state. •...
- Page 450 PCoIP Zero Client Quick Start Guide INSTALLATION STEPS 1. Connect USB keyboard and mouse. 2. Connect one end of the Ethernet cable to the zero client and the other end to a switch/router. The switch or router should be on the same network as the Remote Workstation Card or virtual desktop server.
- Page 451 PCoIP Zero Client Quick Start Guide RESOLUTION OPTIONS Model TERA2321 DVI • 1-2 DVI monitors up to 1920x1200 • 1 DVI + 1 VGA monitor up to 1920x1200 • 1 DVI monitor up to 2560x1600* Model TERA2321 DP+DVI • 1 DisplayPort + 1 DVI or VGA monitor up to 1920x1200 •...
- Page 452 PCoIP Zero Client Quick Start Guide • TERA2321 DVI+DP Dual Display PCoIP Zero Client • TERA2140 DVI Quad Display PCoIP Zero Client • TERA2140 DP Quad Display PCoIP Zero Client © 2020 Teradici...
Need help?
Do you have a question about the Cintiq Pro 32 and is the answer not in the manual?
Questions and answers