Table of Contents
Advertisement
Quick Links
Advertisement
Chapters
Table of Contents

Subscribe to Our Youtube Channel
Related Manuals for Emerson R&S SGT100A


Summary of Contents for Emerson R&S SGT100A
- Page 1 ® R&S SGT100A SGMA Vector RF Source User Manual (;ÚäØ2) 1176867402 Version 12...
- Page 2 ® This manual describes the following R&S SGT100A, stock no. 1419.4501.02 and its options. ● ® R&S SGT-B1, Reference Oscillator OCXO (1419.5608.02) ● ® R&S SGT-B88, Extension Unit (1419.8207.02) ● ® R&S SGT-KB106, Frequency extension to 6 GHz (1419.5708.02) ● ®...
-
Page 3: Table Of Contents
® Contents R&S SGT100A Contents 1 Safety and regulatory information............11 Safety instructions...................... 11 Labels on R&S SGT....................13 Warning messages in the documentation..............14 Korea certification class A..................14 2 Welcome....................15 Key features.........................15 What's new........................15 Documentation overview....................16 2.3.1 User manual and help....................16 2.3.2 Data sheets and brochures................... - Page 4 ® Contents R&S SGT100A 3.2.1 Front panel tour......................33 3.2.2 Rear panel tour......................35 3.2.3 Connector extension unit (R&S SGT-B88)..............37 Trying out the instrument...................39 3.3.1 How to generate a CW signal..................39 3.3.2 How to create and load a waveform file................ 41 Instrument control......................
- Page 5 ® Contents R&S SGT100A 5.6.2 R&S SGMA-GUI commands..................79 5.6.3 List of R&S SGMA-GUI commands................84 6 Signal generator settings..............85 Baseband........................85 6.1.1 System configuration.....................85 6.1.2 ARB..........................87 6.1.3 Trigger, marker and clock settings................121 6.1.4 ARB offsets......................... 135 6.1.5 Crest factor reduction....................135 Additive white Gaussian noise (AWGN) - noise generator........
- Page 6 ® Contents R&S SGT100A 6.7.3 Frequency / phase...................... 217 6.7.4 Local oscillator (LO) coupling..................219 6.7.5 Reference oscillator....................221 6.7.6 RF level settings......................224 6.7.7 Using power sensors....................242 6.7.8 Pulse modulation......................255 Connectors........................ 260 External baseband signal - baseband input............262 6.9.1 Important signal parameters..................263 6.9.2 BB input block......................
- Page 7 ® Contents R&S SGT100A How to configure the local oscillator coupling source......... 303 How to define the signal at the REF/LO OUT connector........304 How to create and save ARB test signals...............304 How to load and play waveform files..............305 How to restore the LAN connection................
- Page 8 ® Contents R&S SGT100A 9.5.4 Event status register (ESR) and event status enable register (ESE)......334 9.5.5 Questionable status register (STATus:QUEStionable)..........334 9.5.6 Operation status register (STATus:OPERation)............335 9.5.7 Application of the status reporting system..............335 9.5.8 Reset values of the status reporting system............... 337 LXI configuration.......................337 9.6.1 Default network settings....................338...
- Page 9 ® Contents R&S SGT100A 10.14.4 SOURce:BB:ARB subsystem..................401 10.14.5 SOURce:BB:ARBitrary:CFR subsystem..............449 10.14.6 SOURce:BBIN subsystem..................455 10.14.7 SOURce:BB:IMPairment subsystem................462 10.14.8 SOURce:BB:PROGress subsystem general commands..........467 10.14.9 SOURce:BB:POWer subsystem................. 468 10.14.10 SOURce:CORRection subsystem................469 10.14.11 SOURce:IQ subsystem....................478 10.14.12 SOURce:IQ:OUTPut subsystem................. 481 10.14.13 SOURce:IQ:OUTPut:ENVelope commands..............485 10.14.14 SOURce:IQ:DPD subsystem..................
- Page 10 ® Contents R&S SGT100A 13 Transporting..................585 14 Maintenance, storage and disposal..........586 14.1 Cleaning........................586 14.2 Storage........................586 14.3 Disposal........................586 Annex....................587 A Telnet program examples..............587 Glossary: References................ 593 Index....................594 User Manual 1176.8674.02 ─ 12...
-
Page 11: Safety And Regulatory Information
® Safety and regulatory information R&S SGT100A Safety instructions 1 Safety and regulatory information The product documentation helps you use the product safely and efficiently. Follow the instructions provided here and in the following chapters. Intended use The product is intended for the development, production and verification of electronic components and devices in industrial, administrative, and laboratory environments. - Page 12 ® Safety and regulatory information R&S SGT100A Safety instructions Lifting and carrying the product The maximum weight of the product is provided in the data sheet. You can lift or carry the product by yourself, if you can manage the weight on your own. Alternatively, you can use lifting or transporting equipment.
-
Page 13: Labels On R&S Sgt
® Safety and regulatory information R&S SGT100A Labels on R&S SGT ● Only use intact cables and route them carefully so that they cannot be damaged. Check the power cables regularly to ensure that they are undamaged. Also ensure that nobody can trip over loose cables. ●... -
Page 14: Warning Messages In The Documentation
® Safety and regulatory information R&S SGT100A Korea certification class A 1.3 Warning messages in the documentation A warning message points out a risk or danger that you need to be aware of. The sig- nal word indicates the severity of the safety hazard and how likely it will occur if you do not follow the safety precautions. -
Page 15: Welcome
® Welcome R&S SGT100A What's new 2 Welcome The R&S SGT is a signal generator intended for the generation of IQ-modulated sig- nals and the playback and output of externally calculated modulation signals in the form of waveforms. Optimized for use in automated test equipment (ATE), the instrument offers fast settling times in an exceptionally small form factor and low power consumption. -
Page 16: Documentation Overview
® Welcome R&S SGT100A Documentation overview 2.3 Documentation overview This section provides an overview of the R&S SGT user documentation. Unless speci- fied otherwise, you find the documents at: www.rohde-schwarz.com/manual/sgt100a 2.3.1 User manual and help Separate manuals for the base unit and the software options are provided for down- load: ●... -
Page 17: Typographical Conventions
® Welcome R&S SGT100A Notes on screenshots See www.rohde-schwarz.com/application/sgt100a. 2.4 Typographical conventions The following text markers are used throughout this documentation: Convention Description "Graphical user interface ele- All names of graphical user interface elements on the screen, such as ments" dialog boxes, menus, options, buttons, and softkeys are enclosed by quotation marks. -
Page 18: Getting Started
® Getting started R&S SGT100A Preparing for use 3 Getting started 3.1 Preparing for use Here, you can find basic information about setting up the product for the first time. 3.1.1 Lifting and carrying See also "Lifting and carrying the product" on page 12. -
Page 19: Setting Up The R&S Sgt
® Getting started R&S SGT100A Preparing for use – Environments that are directly connected to a low-voltage supply network that supplies residential buildings ● Class A equipment is intended for use in industrial environments. It can cause radio disturbances in residential environments due to possible conducted and radi- ated disturbances. -
Page 20: Considerations For Test Setup
® Getting started R&S SGT100A Preparing for use Left = Stacked correctly, same dimensions Middle = Stacked correctly, different dimensions Right = Stacked incorrectly, too many products 3. NOTICE! Overheating can damage the product. Prevent overheating as follows: ● Keep a minimum distance of 10 cm between the fan openings of the product and any object in the vicinity. -
Page 21: Connecting To Power
® Getting started R&S SGT100A Preparing for use To suppress electromagnetic radiation during operation: ● Use high-quality shielded cables, especially for the following connector types: – SMA/SMB Double-shielded SMA/SMB cables. How to: Chapter 3.1.8, "Connecting to RF 50Ω", on page 22 –... -
Page 22: Connecting To Lan
® Getting started R&S SGT100A Preparing for use 3.1.7 Connecting to LAN Network environment Before connecting the product to a local area network (LAN), consider the following: ● Install the latest firmware to reduce security risks. ● For internet or remote access, use secured connections if applicable. ●... -
Page 23: Connecting To Non-Screwable Connectors
® Getting started R&S SGT100A Preparing for use To connect to screwable connectors Additional to the RF 50Ω connector, the following procedure holds for all screwable connectors of the R&S SGT. Screwable connectors include connector types as listed in Table 3-1. -
Page 24: Switching On Or Off
® Getting started R&S SGT100A Preparing for use b) Mate the connectors along the common axis until the male pin of the connector of the cable engages with the female socket of the RF 50Ω connector. 3.1.10 Switching on or off The following table provides an overview of power states, LEDs and power switch posi- tions. - Page 25 ® Getting started R&S SGT100A Preparing for use ● Selftest A selftest is provided for service purposes ("SGMA-GUI > Instrument > Diagnostic/ Test > Self Test"). To switch between standby and ready state ► Press the [POWER ON/STANDBY] key briefly to switch the instrument from the standby to ready state or vice versa.
-
Page 26: Checking Default Settings
® Getting started R&S SGT100A Preparing for use 3.1.11 Checking default settings When the instrument is switched on, it is not the preset state that is active, but rather the instrument state that was set before the instrument was switched off. It is recom- mended that you use the "SGMA-GUI >... - Page 27 ® Getting started R&S SGT100A Preparing for use This section gives an introduction on how to configure the external PC for manual operation. See Chapter 3.1.13.1, "Installing the R&S SGMA-GUI software", on page 27. In addition to connecting an external controller, you can connect other external devi- ces, e.g.
- Page 28 ® Getting started R&S SGT100A Preparing for use 2. In Windows Explorer, navigate to the download folder of the installation file SGMA-GUI_V.VV.VVV.VV.exe (<version_number>=v.vv.vvv.vv). 3. Open the installation file using administrator rights. 4. Follow the instructions in the installation wizard. After the installation of the R&S SGMA-GUI software, two icons will be shown in your Windows menu: one is the standard version and one for which the remote command of the software through SCPIs is disabled.
- Page 29 ® Getting started R&S SGT100A Preparing for use Connecting to the network There are two methods to establish a LAN connection to the instrument: ● A non-dedicated network (Ethernet) connection from the instrument to an existing network. ● A dedicated network connection (Point-to-point connection) between the instru- ment and a single computer.
- Page 30 ® Getting started R&S SGT100A Preparing for use The R&S SGT uses the Zeroconf IP addresses 169.254.xxx.yyy, where xxx takes val- ues from 1 to 254 and yyy the values from 1 to 255. The subnet mask is always 255.255.0.0. The IP address of the host must be within the same address area for Zer- oconf.
- Page 31 ® Getting started R&S SGT100A Preparing for use Adding instruments to R&S SGMA-GUI For information on how to install the R&S SGMA-GUI software, refer to Chap- ter 3.1.13.1, "Installing the R&S SGMA-GUI software", on page 27. 1. For each new instrument perform the following steps: a) Connect the instrument to the network.
-
Page 32: Instrument Tour
® Getting started R&S SGT100A Instrument tour An external PC with installed R&S SGMA-GUI is required for manual operation of the R&S SGT. Setting up a USB connection from a PC to the R&S SGT If your network does not support DHCP, you can set a USB connection between a PC and a R&S SGT. -
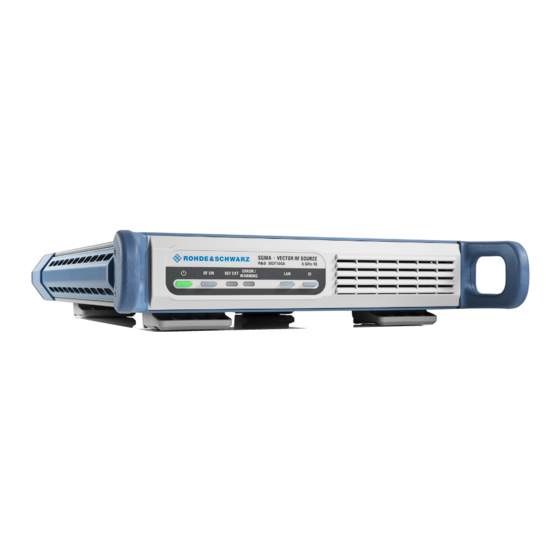
Page 33: Front Panel Tour
® Getting started R&S SGT100A Instrument tour The meanings of the labels on the R&S SGT are described in Chapter 1.2, "Labels on R&S SGT", on page 13. 3.2.1 Front panel tour This section provides an overview of control elements on the front panel of the R&S SGT. - Page 34 ® Getting started R&S SGT100A Instrument tour Use the "USER 1/2" on the rear panel for input of the external reference signal. Table 3-5: Overview of external reference signal states [REF EXT] state Remark Synchronized R&S SGT synchronizes to the external clock signal. green Error R&S SGT cannot synchronize to the external clock signal.
-
Page 35: Rear Panel Tour
® Getting started R&S SGT100A Instrument tour ● Set "Edit Instrument > Device Identify > On" to identify your R&S SGT from the remote controller. The LED of the [ID] key is orange and blinking. Table 3-8: Overview of [ID] key states [ID] state Remark Identification... - Page 36 ® Getting started R&S SGT100A Instrument tour ● Chapter 3.1.13.2, "Connecting a remote PC via LAN", on page 28 PCIe PCIe (Peripheral Component Interconnect Express) single lane interface for remote control with optimized speed. How to: Chapter 9.3.4, "Connecting the controller and the instrument", on page 326.
-
Page 37: Connector Extension Unit (R&S Sgt-B88)
® Getting started R&S SGT100A Instrument tour 3.2.3 Connector extension unit (R&S SGT-B88) This chapter provides an overview of control elements and connectors of the R&S SGT connector extension unit. Order the R&S SGT connector extension unit R&S SGT-B88 together with a new R&S SGT instrument. - Page 38 ® Getting started R&S SGT100A Instrument tour Figure 3-6: Rear panel view of the R&S SGT and the connector extension unit 1 = R&S SGT rear panel, page 35 REF IN, REF OUT, LO IN, LO OUT, page 38 User 2, page 38 I/Q, page 38 REF IN, REF OUT, LO IN, LO OUT BNC type connectors, for reference signals or local oscillator signals, and alternatively...
-
Page 39: Trying Out The Instrument
® Getting started R&S SGT100A Trying out the instrument 3.3 Trying out the instrument This chapter introduces the most important functions and settings of the R&S SGT step by step. Prerequisites Before you try out the following tasks, connect the R&S SGT to a remote PC. Install the R&S SGMA-GUI software on this PC and add the R&S SGT to the list of "Available Instruments". - Page 40 ® Getting started R&S SGT100A Trying out the instrument 3. In the R&S SGMA-GUI main panel, the green indicator in front of the name of the instrument confirms an active connection. The software recognizes the instrument and displays the connection state between the instrument and the remote PC.
-
Page 41: How To Create And Load A Waveform File
® Getting started R&S SGT100A Trying out the instrument The 2 GHz signal is output at the [RF OUT] connector at the rear panel of the R&S SGT. 3.3.2 How to create and load a waveform file The following is an example of how to use the R&S WinIQSIM2 to generate a wave- form and load it in the ARB of the R&S SGT. - Page 42 ® Getting started R&S SGT100A Trying out the instrument The general instrument settings of the destination instrument affect various functions, like, the maximum size of the file the waveform is stored in. It is recommended that you configure the destination instrument before you generate the waveform with the R&S WinIQSIM2.
- Page 43 ® Getting started R&S SGT100A Trying out the instrument The two lines to the "Vector Sig Gen" and "Arb Sig Gen" blocks on the block dia- gram confirm that a remote connection to the R&S SGT is established. To generate an LTE example waveform file with the R&S WinIQSIM2 1.
- Page 44 ® Getting started R&S SGT100A Trying out the instrument The R&S WinIQSIM2 calculates the signal and displays important signal parame- ters, like the used "Sample Rate" and "Number of Samples". Use "Graphics > Graphic 1" view to retrieve more information on the generated signal. The display confirms the expected EUTRA/LTE 10 MHz spectrum.
-
Page 45: Instrument Control
® Getting started R&S SGT100A Instrument control To transfer the generated file to the R&S SGT 1. In the R&S WinIQSIM2, select "Transmission > Transmit". 2. In the "Waveform Transmission to Arbitrary Waveform Generator" dialog, select: a) "Source > Internal (WinIQSIM2)" b) "Destination >... - Page 46 ® Getting started R&S SGT100A Instrument control 3.4.1.1 Introduction to the user interface After the start of R&S SGMA-GUI, the main dialog of the application is displayed. The main dialog with an overview of the configured instruments is the operating and control interface for the whole program.
- Page 47 ® Getting started R&S SGT100A Instrument control 3.4.1.2 How to use the help system The R&S SGMA-GUI is equipped with a context-sensitive help function. A help page is available for each parameter and can be called anytime during instrument operation. Calling context-sensitive and general help ►...
- Page 48 ® Getting started R&S SGT100A Instrument control Using the index 1. Select "SGMA-GUI > Help > Index" or use the "Go to Index" button in the "Help" display. 2. Enter the first characters of the topic that you are interested in. The entries starting with these characters are displayed.
-
Page 49: System Overview
® System overview R&S SGT100A Setups for instrument control 4 System overview The R&S SGT RF Source is a vector signal generator intended for the generation of IQ-modulated signals and the playback and output of externally calculated modulation signals in the form of waveforms. Optimized for use in automated test equipment (ATE), the instrument offers fast settling times in an exceptionally small formfactor and low power consumption. -
Page 50: Managing Files On The R&S Sgt
® System overview R&S SGT100A Managing files on the R&S SGT and sequences, these settings are grouped in the remote control programs, i.e. appli- cation programs. An instrument can be connected to the controller via any of the supported interfaces LAN, USB or PCIe. - Page 51 ® System overview R&S SGT100A Managing files on the R&S SGT A folder opens, containing the share and the update folder. The share folder contains the user files, e.g. waveforms, lists. You can copy, delete and rename the files contained in this folder. The update folder allows you to start an update of the instrument's firmware.
- Page 52 ® System overview R&S SGT100A Managing files on the R&S SGT ● Temporary, i.e. volatile data that the instrument retains while it is powered on. Volatile data is immediately lost when the R&S SGT is switched off. File storage location Without any additional measures, the R&S SGT stores user files on the internal mem- ory, the removable memory, or if connected, on a memory stick.
-
Page 53: Understanding R&S Sgma-Gui
® Understanding R&S SGMA-GUI R&S SGT100A Operating menu and toolbar 5 Understanding R&S SGMA-GUI This section gives a detailed description of the R&S SGMA-GUI user interface and information on how to work with it. The main panel with the overview of the configured instruments is the operating and control interface for the whole program. -
Page 54: File Menu
® Understanding R&S SGMA-GUI R&S SGT100A Operating menu and toolbar File Setup Help Save Reset SGMA-GUI Index For R&S SGS/R&S SGT: Protection Save as Exit For R&S SGS/R&S SGT: Remote Shut down instruments and exit ● File menu........................ 54 ● Setup menu......................55 ●... -
Page 55: Setup Menu
® Understanding R&S SGMA-GUI R&S SGT100A Operating menu and toolbar Shut down instruments and exit Quits the R&S SGMA-GUI and switches the connected instruments to the standby state (see also Chapter 8.7, "How to switch between operating states", on page 306). 5.1.2 Setup menu Access: ►... - Page 56 ® Understanding R&S SGMA-GUI R&S SGT100A Operating menu and toolbar 5.1.2.1 Configure instruments Access: ► Select "Setup" > "Instruments". The dialog provides settings to manage connections of SGMA instruments via the R&S SGMA-GUI software. You can add new instruments, remove instruments or edit instrument connection settings.
- Page 57 ® Understanding R&S SGMA-GUI R&S SGT100A Operating menu and toolbar Available Instruments This section comprises a list of configured instruments. Each instrument is represented by a "Symbolic Name" which is also displayed in the main panel and an "Instrument Type". It is also displayed whether the instrument is activated in the R&S SGMA-GUI and hence displayed in the main panel or not.
- Page 58 ® Understanding R&S SGMA-GUI R&S SGT100A Operating menu and toolbar Figure 5-1: Mapping file example Tip: In a remote control application program, address the instruments by their symbolic names and retrieve the remain required settings from the mapping file. This workflow is especially useful for frequent exchange of instruments.
- Page 59 ® Understanding R&S SGMA-GUI R&S SGT100A Operating menu and toolbar 5.1.2.2 Add/Edit instrument Access: ► Select "Setup" > "Instruments" > "New"/"Edit". The dialogs provide settings to add or edit an instrument. How to: Chapter 5.5.2, "Managing instruments with R&S SGMA-GUI", on page 71 Settings: Instrument...
- Page 60 ® Understanding R&S SGMA-GUI R&S SGT100A Operating menu and toolbar Ok..........................61 Apply..........................61 Cancel........................... 61 Instrument Nr. Automatically assigned number that indicates the instrument's index in the list of "Avail- able Instruments". Symbolic Name Selects the alias name of the instrument. Remote command: on page 81 :INSTruments:NAME...
- Page 61 ® Understanding R&S SGMA-GUI R&S SGT100A Operating menu and toolbar See also Chapter 5.5.4, "Bidirectional instrument identification", on page 74. Hardware Channel Selects the hardware interface used by the remote channel. Remote command: on page 81 :INSTruments:REMote:CHANnel Instrument Name / IP Address Enters the IP address or the host name of the connected instrument.
- Page 62 ® Understanding R&S SGMA-GUI R&S SGT100A Operating menu and toolbar 5.1.2.3 Software To find out the software version and installed options ► Select "Setup > Software". The dialog provides information on the software opens showing program informa- tion. Software Displays information on: "Package"...
- Page 63 ® Understanding R&S SGMA-GUI R&S SGT100A Operating menu and toolbar Unlocking of protected service functions 1. Select "SGMA-GUI > Setups > Protection". After the instrument has been switched on, the protection levels 1 to 4 are auto- matically activated. 2. To deactivate the protection, enter the correct password. Enter "Protection Level 1"...
-
Page 64: Help Menu
® Understanding R&S SGMA-GUI R&S SGT100A Info dialog and messages in the info bar 5.1.3 Help menu The R&S SGMA-GUI software is equipped with a context-sensitive help function. A help page can be called anytime during software operation. The context-sensitive page which is opened with the [F1] key is part of a comprehen- sive help system. -
Page 65: Understanding The Messages In The Info Bar
® Understanding R&S SGMA-GUI R&S SGT100A Info dialog and messages in the info bar The upper part of the "Info" dialog lists the currently active permanent messages. See the following table for explanation of the displayed information. Parameter Description "LEV" Message level. -
Page 66: Main Panel
® Understanding R&S SGMA-GUI R&S SGT100A Main panel The information, e.g., file not found, is displayed in black color. ● Warning A warning indicates a less significant error and is displayed in black color. ● Brief message Brief messages report automatic settings in the program, e.g. switching on illegal entries that are not accepted by the program, e.g., range violations. - Page 67 ® Understanding R&S SGMA-GUI R&S SGT100A Main panel Settings: Instrument/Connection State..................67 Maximum Frequency.....................67 Pulse Modulation......................67 Instrument Name / IP Address..................67 Freq/Freq (Offs)......................67 On/Off........................68 I/Q Mod State........................ 68 Level/Level Offset......................68 Ref. Oscillator Source/Ext Ref On/Off................68 LO Scr Ext........................69 Instrument/Connection State The three colors of the state indicator in front of the instrument's name distinguish between the following states: ●...
- Page 68 ® Understanding R&S SGMA-GUI R&S SGT100A Main panel The value of the parameter "SGMA-GUI main panel > instrument name > Frequency/ Phase > Frequency" is the RF frequency at the RF output without the frequency offset. The icon "Freq (Offs)" indicates that a frequency offset is applied. Remote command: on page 390 [:SOURce]:FREQuency[:CW|FIXed]...
-
Page 69: Block Diagram
® Understanding R&S SGMA-GUI R&S SGT100A Block diagram To feed in an external instrument reference, use the input connector "REF/LO IN". To output the reference frequency at the output "REF/LO OUT", select "SGMA-GUI > Instrument Name > RF > Ref. Oscillator > REF/LO Output > REF". "Int"... -
Page 70: Signal Flow And Input/Output Symbols In The Block Diagram
® Understanding R&S SGMA-GUI R&S SGT100A Working with R&S SGMA-GUI 5.4.2 Signal flow and input/output symbols in the block diagram The input/output symbols in the block diagram show the currently used inputs and out- puts of the signal generator. Unused inputs and outputs are not shown. The lines indi- cate the signal flow. -
Page 71: Managing Instruments With R&S Sgma-Gui
® Understanding R&S SGMA-GUI R&S SGT100A Working with R&S SGMA-GUI 6. Navigate to the storage directory of the saved file. 7. Select this file. Loads the saved settings to the R&S SGMA-GUI software and the main panel dis- plays the saved configuration of the instrument. 5.5.2 Managing instruments with R&S SGMA-GUI This section provides information on how to configure and manage instruments in the R&S SGMA-GUI software. - Page 72 ® Understanding R&S SGMA-GUI R&S SGT100A Working with R&S SGMA-GUI 7. Enter the IP address or the hostname of the connected instrument, e.g. rssgt100a100021. See also Chapter 5.5.3, "Finding out the default hostname of the instrument", on page 74. 8. For USB or PCIe interfaces, select "Remote Control > Serial Number". 9.
- Page 73 ® Understanding R&S SGMA-GUI R&S SGT100A Working with R&S SGMA-GUI 3. Select "Edit". 4. In the "Edit Instrument" dialog, enable "Exclusive Access". 5. Alternatively, send the SCPI command from :INSTruments:EACCess[:STATe] the external PC that has an R&S SGMA-GUI software installation. The instrument is reserved for control from this external PC and cannot be accessed from any other controller.
-
Page 74: Finding Out The Default Hostname Of The Instrument
® Understanding R&S SGMA-GUI R&S SGT100A Working with R&S SGMA-GUI 5.5.3 Finding out the default hostname of the instrument The default hostname of the instrument is a non-case-sensitive string built as follows: ● hostname = <instrument name><serial number> ● <serial number> is the individual serial number of the instrument. ●... -
Page 75: Managing Messages In The Info Dialog
® R&S SGT100A Understanding R&S SGMA-GUI Working with R&S SGMA-GUI Dialog "Edit Instrument" does not appear If this dialog does not open, perform the following: ● Check whether the instrument is correctly connected to the external PC on which you work with the R&S SGMA-GUI. ●... -
Page 76: Remote Control Of R&S Sgma-Gui
® Understanding R&S SGMA-GUI R&S SGT100A Remote control of R&S SGMA-GUI To display all messages ► In the "Info" dialog, click the "History" key. A history of all messages that have occurred since the R&S SGMA-GUI software was started is listed in the upper dialog pane. The most recent message is dis- played first. -
Page 77: Programming Examples
® Understanding R&S SGMA-GUI R&S SGT100A Remote control of R&S SGMA-GUI Prerequisites for remote control of R&S SGMA-GUI Remote control of R&S SGMA-GUI requires the following: ● A remote PC is connected to the SGMA instrument. ● The remote PC and the SGMA instrument are switched on. ●... - Page 78 ® Understanding R&S SGMA-GUI R&S SGT100A Remote control of R&S SGMA-GUI // Response: SGU,SGS,SGT // Query the symbolic names. INSTruments:NAME? // Response: SGU-100002,SGS-100006,SGT-100008 // Query the serial numbers. INSTruments:SERial? // Response: 100002,100006,100008 // Query the remote channel used. INSTruments:REMote:CHANnel? // Response: LAN,USB,PCIe // Query the hostname/IP address.
-
Page 79: R&S Sgma-Gui Commands
® Understanding R&S SGMA-GUI R&S SGT100A Remote control of R&S SGMA-GUI Example: Configuring SGMA instruments // Clear the device list and add new instruments manually. INSTruments:CLEar INSTruments:NAME "MYSGT100A","MYSGS100A","MYSGU100A" // Define the instrument types. INSTruments:TYPE "SGT","SGS" // Specify the remote interface and name or address for the instruments in the // device list. - Page 80 ® Understanding R&S SGMA-GUI R&S SGT100A Remote control of R&S SGMA-GUI Manual operation: "Available Instruments" on page 57 "Active" on page 60 :INSTruments:CLEar Clears all instruments in the device list. Parameters: <Count> float Range: 0 to 12 Example: Example"Configuring SGMA instruments" on page 79.
- Page 81 ® Understanding R&S SGMA-GUI R&S SGT100A Remote control of R&S SGMA-GUI Manual operation: "GPIB Address" on page 61 :INSTruments:GPIB:BOARd <Board> Identifies the GPIB bus card the controller uses. Parameters: <Board> List of Numbers Example: Example"Configuring SGMA instruments" on page 79. Manual operation: "Board Number"...
- Page 82 ® Understanding R&S SGMA-GUI R&S SGT100A Remote control of R&S SGMA-GUI :INSTruments:REMote:NAME <Name> Enters the IP Address or the host name of the connected instrument. Parameters: <Name> <Hostname/IP-AddressInsr#1>,<Hostname/IP-Addres- sInsr#2>,... Example: Example"Searching for SGMA instruments" on page 77. Manual operation: "Instrument Name / IP Address" on page 61 :INSTruments:SCAN <State>...
- Page 83 ® Understanding R&S SGMA-GUI R&S SGT100A Remote control of R&S SGMA-GUI :INSTruments:SCAN:SNET:PLENgth <Number> Sets the prefix length of the subnet mask. Use the prefix length to optimize scanning for instruments within a subnet. A higher value accelerates the scanning procedure but lowers the ability to detect all instru- ments within the subnet.
-
Page 84: List Of R&S Sgma-Gui Commands
® Understanding R&S SGMA-GUI R&S SGT100A Remote control of R&S SGMA-GUI Manual operation: "Available Instruments" on page 57 "Instrument Type" on page 60 5.6.3 List of R&S SGMA-GUI commands :INSTruments:ACTive[:STATe]......................... 79 :INSTruments:CLEar............................80 :INSTruments:COUNt?............................ 80 :INSTruments:EACCess[:STATe]........................80 :INSTruments:GPIB:ADDRess........................80 :INSTruments:GPIB:BOARd..........................81 :INSTruments:MAPPing:FILE.......................... -
Page 85: Signal Generator Settings
® Signal generator settings R&S SGT100A Baseband 6 Signal generator settings This section summarizes the settings necessary to configure the instrument for signal generation. The description in this section follows the menu tree structure of the graph- ical user interface. 6.1 Baseband 6.1.1 System configuration Access:... - Page 86 ® Signal generator settings R&S SGT100A Baseband When the "ARB for Envelope Tracking" mode is selected, a second ARB for the enve- lope tracking is generated, which is output at the analog I/Q output. The ARB of the first "Baseband" is then output at the [RF] output. You can configure the envelope tracking signal in the "Arbitrary Waveform for ET"...
-
Page 87: Arb
® Signal generator settings R&S SGT100A Baseband Remote command: on page 374 :SCONfiguration:MODE Apply Triggers the instrument to adopt the selected configuration. Applies the configuration and exits the dialog. 6.1.2 ARB The arbitrary waveform generator (ARB) is an I/Q modulation source forming a part of the R&S SGT. - Page 88 ® Signal generator settings R&S SGT100A Baseband R&S Pulse Sequencer. Besides, waveform files can also consist of signals calcula- ted using a mathematical program such as Matlab. Generation of waveform files and their transfer from R&S WinIQSIM2 or R&S Pulse Sequencer to the R&S SGT is menu-guided. The externally generated waveform files can be loaded into the instrument via one of the available interfaces (USB, LAN or PCIe).
- Page 89 ® Signal generator settings R&S SGT100A Baseband In general, the I/Q samples are located on a deformed circle which is confined to the dashed square in the upper diagrams. ● Rectangular test signal: Rectangle signal with selectable but equal On and Off periods and amplitude.
-
Page 90: State
® Signal generator settings R&S SGT100A Baseband 6.1.2.2 General settings Access: ► Select "SGMA-GUI > Instrument Name > BB > ARB > General". The "Arbitraty Waveform Modulation" menu provides settings for enabling the ARB and calling further dialogs for selecting and configuring a waveform. Settings: State..........................90 Set To... -
Page 91: Set To Default
® Signal generator settings R&S SGT100A Baseband If no waveform file is loaded, ARB modulation cannot be powered up. "None" is dis- played next to "Load Waveform". An error message asks you to load a waveform file: "No waveform file loaded. ARB MOD state remains off. Please select a waveform file to load, before switching on ARB MOD state."... -
Page 92: Waveform Info
® Signal generator settings R&S SGT100A Baseband For a description on how to manage the waveform files, refer to Chapter 4.2, "Manag- ing files on the R&S SGT", on page 50. Remote command: on page 437 [:SOURce<hw>]:BB:ARBitrary:WAVeform:SELect Waveform Info Opens a dialog with detailed information about the currently selected waveform. The waveform information displayed in this dialog depends on whether the selected waveform file is a multisegment one or not. -
Page 93: Create Test Signal
® Signal generator settings R&S SGT100A Baseband Create Test Signal... Selects the form of the test signal and calls the menu for generating it. A sinusoidal, rectangular or test signal with constant I/Q can be selected. See the corresponding section for detailed description of the parameters for the selected test signal: ●... - Page 94 ® Signal generator settings R&S SGT100A Baseband It is also possible to create and output a blank segment, i.e. segments containing a zero signal. Multi-segment waveforms processing Processing of the waveform is triggered by the "Create" or "Create and Load" function. To process the waveform, the instrument loads the entire multi-segment waveform into the memory.
-
Page 95: General Settings
® Signal generator settings R&S SGT100A Baseband 2. Use the "Append" function to add two or more waveform files. 3. Adjust the "Level", "Clock" and "Segment Marker" settings. 4. Select the "Output File". 5. Enter a filename. 6. Select "Save" to save the configuration. 7. -
Page 96: New List
® Signal generator settings R&S SGT100A Baseband New List Calls the "Create Multi Segment Waveform List" dialog to enter the name of the new file. A new configuration table is created. Remote command: on page 445 [:SOURce<hw>]:BB:ARBitrary:WSEGment:CONFigure:SELect Load List Opens the file menu to select the configuration file to be edited. Remote command: on page 440 [:SOURce<hw>]:BB:ARBitrary:WSEGment:CONFigure:CATalog? -
Page 97: Comment
® Signal generator settings R&S SGT100A Baseband The multi-segment waveform is saved with the filename specified in "Output File". As with normal waveforms, the file extension is *.wv. Depending on the configuration of the multi-segment waveform, calculation can take some time. Afterwards, the "Create Multi Segment Waveform File" submenu is closed and the new multi-segment waveform is loaded. -
Page 98: Segment Table
® Signal generator settings R&S SGT100A Baseband Segment table Access: ► Select "SGMA-GUI > Instrument Name > Baseband > ARB > Multi Segment > Segment Table". This dialog comprises the settings for creating and adjusting the contents of the multi-segment file. Settings: Multi Segment Table......................98... - Page 99 ® Signal generator settings R&S SGT100A Baseband "Path" Indication of the location of the waveform file used for the corre- sponding segment. "Comment" Indication of the comment on the segment. "Info" Opens a dialog with detailed information about the currently selected waveform.
-
Page 100: Level/Clock/Marker Settings
® Signal generator settings R&S SGT100A Baseband Level/clock/marker settings Access: ► Select "SGMA-GUI > Instrument Name > Baseband > ARB > Multi Segment.. > Segment Table". The Level/Marker/Clock section provides the parameters necessary to adjust the level, marker and clock settings for the selected multi-segment waveform file. Settings: Level..........................100 Clock........................... -
Page 101: User Clock Rate
® Signal generator settings R&S SGT100A Baseband "Unchanged" A segment is output with the clock rate defined in the file. If segments have different clock rates, extended trigger mode "Next Segment" allows internal segment switchovers only ("Internal" trigger source). Extended trigger mode "Next Segment Seamless" can only be selected if all segments have the same clock rate. -
Page 102: Multi-Segment Waveform Sequencing
® Signal generator settings R&S SGT100A Baseband Remote command: [:SOURce<hw>]:BB:ARBitrary:WSEGment:CONFigure:MARKer:FSEGment on page 442 Segment Restart Enables/disables the generation of an additional marker restart signal in the output waveform file. If additional marker generation is enabled, the existing marker signals in the individual segment waveform files are not considered. - Page 103 ® Signal generator settings R&S SGT100A Baseband Assigned to Multi Seg. Waveform Displays the name of the multi-segment waveform file that the current sequencing list file is assigned to. Remote command: n.a. Sequencing Play List The "Sequencing Play List" table defines the sequence order that the waveform file segments are processed and how many times each of them is repeated.
- Page 104 ® Signal generator settings R&S SGT100A Baseband Remote command: on page 448 [:SOURce<hw>]:BB:ARBitrary:WSEGment:SEQuence:SELect on page 447 [:SOURce<hw>]:BB:ARBitrary:WSEGment:SEQuence:APPend Delete ← Sequencing Play List Deletes the selected row. Shift Id# Up/Down ← Sequencing Play List Rearranges the rows, i.e. moves the selected row up and down. Sequencing Graphic Displays the play list graph according to the current configuration.
- Page 105 ® Signal generator settings R&S SGT100A Baseband Creating a multi-carrier waveform file 1. Configure general settings. 2. Configure carrier table. 3. Enter filename of the multi-carrier waveform ("Output File"). 4. Save and load the multi-carrier waveform ("Create" or "Create and Load"). Accessing the multi-carrier settings To access the "Multi Carrier"...
- Page 106 ® Signal generator settings R&S SGT100A Baseband Parameter Value "Number of Carriers" "Carrier Spacing" 0 MHz "Crest Factor Mode" "Signal Period Mode" Longest file wins Remote command: on page 430 [:SOURce<hw>]:BB:ARBitrary:MCARrier:PRESet Save/Recall Frame Calls the "Save/Recall" dialog. From the "Save/Recall" menu, the "File Select" windows for saving and recalling the configurations of the ARB "Multi Carrier"...
- Page 107 ® Signal generator settings R&S SGT100A Baseband Settings: Mode........................... 107 Number of Carriers......................107 Carrier Spacing......................107 Crest Factor Mode...................... 108 Clipping........................108 Target Crest Factor..................... 108 Filter Cut Off Frequency....................109 Signal Period Mode.....................109 Signal Period.......................109 Power Reference......................110 Carrier Table........................110 Mode Selects the carrier frequency mode.
- Page 108 ® Signal generator settings R&S SGT100A Baseband ● For even number of carriers: RoundedCarrierSpacing=2/OutputSignalDuration*round(0.5 *CarrierSpacing * Out- putSignalDuration) Remote command: on page 420 [:SOURce<hw>]:BB:ARBitrary:MCARrier:CARRier:SPACing Crest Factor Mode Selects the mode for optimizing the crest factor by calculating the carrier phases. The crest factor represents the ratio of the peak voltage value to the rms voltage value.
- Page 109 ® Signal generator settings R&S SGT100A Baseband Filter Cut Off Frequency Available only for "Clipping > On" Sets the cut-off frequency of the final lowpass filter. If the cut-off frequency is set as half of the output sample rate, a final lowpass filter improves the spectrum of the clipped multicarrier signal.
- Page 110 ® Signal generator settings R&S SGT100A Baseband Power Reference Defines the way the individual carriers in a composed multi carrier signal are leveled. The difference between the provided modes is especially important if signals with dif- ferent crest factors are composed together into a multi carrier signal. "RMS"...
- Page 111 ® Signal generator settings R&S SGT100A Baseband The multi carrier waveform is calculated and saved under this name by clicking the "Create" or "Create and Load" button. Remote command: on page 430 [:SOURce<hw>]:BB:ARBitrary:MCARrier:OFILe Clock Rate Displays the resulting sample rate at which the multi carrier waveform is output by the arbitrary waveform generator.
- Page 112 ® Signal generator settings R&S SGT100A Baseband The "Carrier Table Assistant" section can be used to set a selectable carrier range. Use it to set up a multi carrier scenario within a specified carrier range. Settings: Number of Carriers......................112 Carrier Start.........................113 Carrier Stop.........................
- Page 113 ® Signal generator settings R&S SGT100A Baseband By default the multi carrier table lists 1 carrier. When the number of carriers is increased, the multi carrier table is extended by adding further lines at the end of the table. If these carrier already have been defined before, the settings are preset accord- ing to the former settings.
- Page 114 ® Signal generator settings R&S SGT100A Baseband Phase Step Sets the step width that is used to increment the phase. The resulting phase in the carrier table equals: PhaseStart + n* PhaseStep Where n ranges from 0 to (Carrier Stop –...
- Page 115 ® Signal generator settings R&S SGT100A Baseband State ← Carrier Table Switches On/Off a carrier. Remote command: on page 423 [:SOURce<hw>]:BB:ARBitrary:MCARrier:CARRier<ch>:STATe Carrier Freq Offs. ← Carrier Table Sets the carrier frequency offset. Remote command: [:SOURce<hw>]:BB:ARBitrary:MCARrier:CARRier<ch>:FREQuency on page 422 Gain ← Carrier Table Sets the gain of a carrier.
- Page 116 ® Signal generator settings R&S SGT100A Baseband Carrier graph table ► To access this dialog select "Baseband > ARB > Multi Carrier... > Carrier Graph" Carrier Graph Calls a graphical representation of the current multi carrier configuration in the fre- quency domain.
- Page 117 ® Signal generator settings R&S SGT100A Baseband 6.1.2.5 Sine test signal This dialog provides settings for configuration of a sinusoidal test signal. A sine wave is generated on the I path, and a sine wave of the same frequency but phase-shifted is generated on the Q path.
- Page 118 ® Signal generator settings R&S SGT100A Baseband Remote command: on page 418 [:SOURce<hw>]:BB:ARBitrary:TSIGnal:SINE:SAMPles Phase Offset Q Enters the phase offset of the sine wave signal on the Q channel relative to the sine wave signal on the I channel. Remote command: on page 418 [:SOURce<hw>]:BB:ARBitrary:TSIGnal:SINE:PHASe Generate Signal File...
- Page 119 ® Signal generator settings R&S SGT100A Baseband Settings: Frequency........................119 Samples per Period.....................119 Amplitude........................119 Offset DC........................119 Generate Signal File....................119 Generate Signal RAM....................119 Frequency Enters the frequency of the test signal. Remote command: on page 417 [:SOURce<hw>]:BB:ARBitrary:TSIGnal:RECTangle:FREQuency Samples per Period Enters the number of sample values required for the rectangular signal per period. The maximum allowed value is determined by the maximum ARB clock rate (see data sheet) and the selected frequency.
- Page 120 ® Signal generator settings R&S SGT100A Baseband 6.1.2.7 Const I/Q Test Signal This dialog provides settings for configuration of a continuous test signal with constant IQ. The I and Q values for each path are adjustable but constant. After converting to an analog signal, the signal is output directly at the I and Q connec- tors of the instrument.
-
Page 121: Trigger, Marker And Clock Settings
® Signal generator settings R&S SGT100A Baseband Remote command: on page 415 [:SOURce<hw>]:BB:ARBitrary:TSIGnal:SINE:CREate on page 415 [:SOURce<hw>]:BB:ARBitrary:TSIGnal:RECTangle:CREate on page 415 [:SOURce<hw>]:BB:ARBitrary:TSIGnal:CIQ:CREate 6.1.3 Trigger, marker and clock settings 6.1.3.1 Trigger in settings Access: ► Select "SGMA-GUI > Instrument Name > Baseband > ARB > Trigger In". The "Trigger In"... -
Page 122: Signal Duration Unit
® Signal generator settings R&S SGT100A Baseband "Auto" The signal is generated continuously. "Retrigger" The signal is generated continuously. A trigger event (internal or external) causes a restart. "Armed_Auto" The signal is generated only when a trigger event occurs. Then the signal is generated continuously. -
Page 123: Arm
® Signal generator settings R&S SGT100A Baseband Available only in the "Running mode" and for "Trigger Mode > Armed_Auto" or "Trigger Mode > Armed_Retrigger". Stops the waveform output. Signal output can be restarted by a new trigger (internally with "Execute Trigger" or externally). -
Page 124: External Delay Unit
® Signal generator settings R&S SGT100A Baseband "Off" The signal output begins after the elapsing of the processing time and starts with sample 0, i.e. the complete signal is outputted. This mode is recommended for triggering of short signal sequences with signal duration comparable to the processing time of the instru- ment. -
Page 125: Settings: Current Segment
® Signal generator settings R&S SGT100A Baseband In the "Retrigger" mode, every trigger signal causes signal generation to restart. This restart is inhibited for the specified number of samples. Remote command: [:SOURce<hw>]:BB:ARBitrary:TRIGger[:EXTernal<1|2>]:INHibit on page 411 6.1.3.2 Next segment trigger in settings The section "Next Segment Trigger In"... -
Page 126: Next Segment
® Signal generator settings R&S SGT100A Baseband Next Segment Selects the waveform segment to be output next. It determines the start segment when switching on the ARB and enables switchover to any other segment. The switchover is performed either after receiving an external next segment trigger event or, for the internal trigger case, by changing the segment index in the "Next Seg- ment"... - Page 127 ® Signal generator settings R&S SGT100A Baseband been output (wrap around). The signal transition is seamless. As a prerequisite for a seamless switchover, all segments must have the same sample rate. The following figure shows an example of the seamless transition from a sine-wave signal segment to a sawtooth segment (I channel, above) for next segment exter- nal triggering (below).
- Page 128 ® Signal generator settings R&S SGT100A Baseband "Same Segment" Depending on the trigger setting, the currently selected segment is continuously output either immediately or after a trigger event. Signal generation takes place differently according to the trigger selected in the "Trigger In" section: ●...
- Page 129 ® Signal generator settings R&S SGT100A Baseband "Next Segment" Depending on the trigger setting, the segment selected under "Next Segment" is output either immediately or after a trigger event. ● For "internal Trigger = Auto", output starts at once and the seg- ment is generated continuously.
-
Page 130: Execute Next Segment
® Signal generator settings R&S SGT100A Baseband "Next Segment Seamless" The segment selected under "Next Segment" is output. This mode is only available if all segments have the same sample rate. ● For "Internal Trigger = Auto", output starts at once and the seg- ment is generated continuously. -
Page 131: Trigger Example
® Signal generator settings R&S SGT100A Baseband Remote command: on page 448 [:SOURce<hw>]:BB:ARBitrary:WSEGment:SEQuence:SELect Trigger Example Displays an example of a multi-segment waveform. The currently enabled trigger and next segment mode are considered. After the instrument switch on, the graph of the last loaded waveform is displayed. - Page 132 ® Signal generator settings R&S SGT100A Baseband "Restart" A marker signal is generated at the start of each ARB sequence. This marker mode is not enabled for multi-segment waveforms. "Pulse" A regular marker signal is generated. The pulse frequency is defined by entering a divider.
- Page 133 ® Signal generator settings R&S SGT100A Baseband Remote command: [:SOURce<hw>]:BB:ARBitrary:TRIGger:OUTPut<ch>:DELay:MINimum? on page 407 [:SOURce<hw>]:BB:ARBitrary:TRIGger:OUTPut<ch>:DELay:MAXimum? on page 407 Fix marker delay to current range Restricts the marker delay setting range to the dynamic range. In this range, the delay can be set without restarting the marker and signal. Remote command: on page 414 [:SOURce<hw>]:BB:ARBitrary:TRIGger:OUTPut:DELay:FIXed...
- Page 134 ® Signal generator settings R&S SGT100A Baseband "Sync Dig I/Q In" The instrument receives the synchronization and reference clock sig- nal from the [DIGITAL I/Q] connector. Remote command: on page 404 [:SOURce<hw>]:BB:ARBitrary:CLOCk:SYNChronization:MODE Clock Source Selects the clock source. "Internal" The internal clock reference is used to generate the symbol clock. "External"...
-
Page 135: Arb Offsets
® Signal generator settings R&S SGT100A Baseband Remote command: on page 358 :CLOCk:SYNC[:STATe]? 6.1.4 ARB offsets ► To access this dialog, select "SGMA-GUI > Instrument Name >Baseband > Fre- quency/Phase Offsets". Settings: Frequency Offset Sets the frequency offset and shifts the ARB signal in the center frequency. Remote command: on page 400 [:SOURce]:BB:FOFFset... - Page 136 ® Signal generator settings R&S SGT100A Baseband About crest factors The crest factor represents the ratio of the peak voltage value to the RMS voltage value, i.e. the peak to average ratio (PAR). The higher the crest factor and the resulting dynamics of a signal, the greater the requirement for a power amplifier fed by the sig- nal to be linear.
- Page 137 ® Signal generator settings R&S SGT100A Baseband 6.1.5.2 Crest factor reduction settings Access: ► Select "Baseband" > "ARB" > "Crest Factor Reduction". The dialog provides settings to configure and activate crest factor reduction. Activating crest factor reduction Crest factor reduction requires an active "ARB" state and a valid waveform file loaded to the ARB application.
-
Page 138: State
® Signal generator settings R&S SGT100A Baseband Maximum Filter Order....................141 Cancellation Pulse Bandwidth..................141 Transition Bandwidth....................141 State Requires an active "ARB" state, see "Activating crest factor reduction" on page 137. Activates crest factor reduction calculation. Note: You cannot activate the crest factor reduction and the notch filter simultaneously. Enabling the notched filter automatically disables the crest factor reduction. -
Page 139: Original Crest Factor
® Signal generator settings R&S SGT100A Baseband Original Crest Factor Displays the original crest factor of the waveform after the calculation of the resulting crest factor is completed. The original crest factor is calculated as an average over the whole waveform, including any idle periods that can be present in TDD waveforms. Remote command: on page 452 [:SOURce<hw>]:BB:ARBitrary:CFR:OCFactor? -
Page 140: Channel Spacing
® Signal generator settings R&S SGT100A Baseband "Enhanced" In the enhanced filter mode, you can specify the passband and stop- band frequencies of the lowpass filter. Figure 6-3: Enhanced filter mode Remote command: on page 451 [:SOURce<hw>]:BB:ARBitrary:CFR:FILTer Channel Spacing Requires "Algorithm" > "Clipping and Filtering" and "Filter Mode" > "Simple". Sets the channel spacing. -
Page 141: Additive White Gaussian Noise (Awgn) - Noise Generator
® Signal generator settings R&S SGT100A Additive white Gaussian noise (AWGN) - noise generator Maximum Filter Order Requires "Algorithm" > "Clipping and Filtering" and "Filter Mode" > "Enhanced". Sets the maximum filter order. Remote command: on page 452 [:SOURce<hw>]:BB:ARBitrary:CFR:FORDer Cancellation Pulse Bandwidth Requires "Algorithm"... - Page 142 ® Signal generator settings R&S SGT100A Additive white Gaussian noise (AWGN) - noise generator Figure 6-4: Representation of an "AWGN > Mode > Noise Only" in the block diagram ● "CW Interferer mode": a sinusoidal signal with an adjustable frequency offset and carrier-to-interferer (C/I) power ratio is added to the baseband signal by a counter instead of a shift register.
-
Page 143: Awgn Settings
® Signal generator settings R&S SGT100A Additive white Gaussian noise (AWGN) - noise generator The noise signal is not generated arbitrarily for a particular bandwidth, but instead it is generated in steps. Noise therefore also occurs outside the set system bandwidth. The total measurable noise power usually exceeds the displayed value "Noise Power". - Page 144 ® Signal generator settings R&S SGT100A Additive white Gaussian noise (AWGN) - noise generator Settings: State..........................144 Mode........................... 144 System Bandwidth...................... 144 Minimum Noise/System Bandwidth Ratio..............145 Target CW Frequency Offset..................145 Resulting CW Frequency Offset..................145 State Activates/deactivates the generation of an AWGN signal. The interferer (AWGN or CW interferer, depending on the selected mode) is generated after the generator is activa- ted.
- Page 145 ® Signal generator settings R&S SGT100A Additive white Gaussian noise (AWGN) - noise generator Remote command: on page 393 [:SOURce<hw>]:AWGN:BWIDth Minimum Noise/System Bandwidth Ratio Available only for "Mode > Additive Noise" or "Mode > Noise Only". Sets the ratio of minimum noise bandwidth to system bandwidth, as required by some standards.
-
Page 146: Settings: Noise Bandwidth
® Signal generator settings R&S SGT100A Additive white Gaussian noise (AWGN) - noise generator Settings: Noise Bandwidth......................146 Display Mode......................146 Set Noise Power Via....................147 Reference Mode......................147 Rate........................147 Carrier/Noise Ratio / Signal/Noise Ratio..............147 ..........................148 Carrier Power / Signal Power..................148 Noise Power (System Bandwidth) / Interferer Power..........148... -
Page 147: Set Noise Power Via
® Signal generator settings R&S SGT100A Additive white Gaussian noise (AWGN) - noise generator This setting also influences: ● The way the interfering parameters are displayed, e.g. if the SNR value is defined as C/N or as S/N. ● The value units: –... -
Page 148: E B /N
® Signal generator settings R&S SGT100A Additive white Gaussian noise (AWGN) - noise generator ● The power of the useful signal is displayed with the parameter Carrier Power / Sig- nal Power and can also be changed there. This indication corresponds to the "Level"... -
Page 149: Noise Power (Total Bandwidth)
® Signal generator settings R&S SGT100A Additive white Gaussian noise (AWGN) - noise generator Displays the power of the noise signal in the system respectively to the total band- width. ● "Noise Only" mode Sets the power of the noise signal. This indication corresponds to the "Level" value in the "Status bar". -
Page 150: I/Q Modulation And Impairment Settings
® Signal generator settings R&S SGT100A I/Q modulation and impairment settings Carrier + Noise Power / Signal + Noise Power (System Bandwidth) / Carrier + Interferer Power / Signal + Interferer Power Available only for "Mode > Additive Noise" and "Mode > CW Interferer". Displays the overall power of the noise/interferer signal plus useful signal. -
Page 151: Impairments
® Signal generator settings R&S SGT100A I/Q modulation and impairment settings The internally generated baseband signal is configured in the baseband function block (see Chapter 6.1, "Baseband", on page 85). Before the signal is fed into the I/Q modu- lator, noise can be added and/or the signal can be impaired. Impairments can also be set in the"I/Q Mod"... - Page 152 ® Signal generator settings R&S SGT100A I/Q modulation and impairment settings 6.3.2.2 Gain and gain imbalance An I/Q gain is a multiplication of all I/Q amplitudes by a common factor. The effect is equivalent to two identical I and Q gain factors. The effect of an increased gain factor in the I/Q constellation diagram is shown below.
-
Page 153: I/Q Modulator Settings
® Signal generator settings R&S SGT100A I/Q modulation and impairment settings angle greater than 90 degrees. The effect of a positive quadrature offset in the I/Q con- stellation diagram is shown below. Figure 6-9: Positive quadrature offset in the I/Q constellation diagram 6.3.3 I/Q modulator settings 6.3.3.1 General settings... - Page 154 ® Signal generator settings R&S SGT100A I/Q modulation and impairment settings Settings: State..........................154 Source........................154 Swap........................154 Wideband......................155 Optimization Mode...................... 155 Crest Factor........................ 156 State Activates/deactivates I/Q modulation. If "Analog Wideband I/Q In" is selected, the I/Q modulator is also deactivated and acti- vated.
- Page 155 ® Signal generator settings R&S SGT100A I/Q modulation and impairment settings In the final step, the filtered I/Q signal is modulated to the desired RF in a different way in the I/Q modulator: Figure 6-10: Definition of I/Q modulator in IS2000 and R&S SGT According to IS2000, the RF signal s(t) is derived from the baseband I/Q signal as fol- lows: s(t)=i(t)cos(2pif...
- Page 156 ® Signal generator settings R&S SGT100A I/Q modulation and impairment settings "High Quality" With "Source > Internal Baseband", enable an optimization by com- pensation for I/Q skew and frequency response correction. The set- ting times, however, increase. Use this mode to generate an extremely flat signal. For information on the I/Q modulation performance, see the data sheet.
- Page 157 ® Signal generator settings R&S SGT100A I/Q modulation and impairment settings I/Q impairment for specific impairment of the I/Q modulation is set in the "Analog Impairments" dialog. Settings: State..........................157 Offset........................157 Gain Imbalance......................157 Quadrature Offset......................158 State Activates/deactivates I/Q impairment. If activated, the settings for leakage, I/Q imbalance and quadrature offset become effective.
- Page 158 ® Signal generator settings R&S SGT100A I/Q modulation and impairment settings The entry is made in dB (default) or %, where 1 dB offset is roughly 12 % according to the following: Imbalance [dB] = 20log ( | GainQ | / | GainI |) Positive values mean that the Q vector is amplified more than the I vector by the corre- sponding percentage.
- Page 159 ® Signal generator settings R&S SGT100A I/Q modulation and impairment settings State Activates/deactivates digital I/Q impairment. When activated, the settings for carrier leakage, I/Q imbalance and quadrature offset become effective. Internal predistortion for compensating the I/Q modulator is not influenced by this set- ting.
-
Page 160: I/Q Analog Output Settings
® Signal generator settings R&S SGT100A I/Q analog output settings A positive I/Q skew means that the Q vector delays relative to the I vector and vice versa. Remote command: on page 464 [:SOURce<hw>]:BB:IMPairment:SKEW on page 467 [:SOURce]:BB:IMPairment:IQOutput<ch>:SKEW IQ Delay Sets the time delay of both I and Q vectors relative to the selected trigger and marker or relative to the other instruments working in the primary/secondary instrument mode. -
Page 161: General Analog I/Q Output Settings
® Signal generator settings R&S SGT100A I/Q analog output settings Maximum overall output voltage The voltage of the analog output signals is defined as a combination of output voltage of the I and Q signal components and an optional bias voltage. If the differential output is used, an additional offset can be set, too. -
Page 162: Set To Default
® Signal generator settings R&S SGT100A I/Q analog output settings Set to Default Calls the default settings. The values of the main parameters are listed in the following table. Parameter Value "State" Not affected by the "Set to Default" "RF Envelope" "I/Q Output Type"... -
Page 163: Mode
® Signal generator settings R&S SGT100A I/Q analog output settings "Single-Ended" ● If "RF Envelope > Off" Single-ended output at the I/Q connectors. ● If "RF Envelope > On" The envelope signal E is output at the I connectors. You can define a bias between the output signal and ground. ●... -
Page 164: Offset (Emf)
® Signal generator settings R&S SGT100A I/Q analog output settings Effect of a positive bias Effect of a negative bias In "Single Ended" mode, this parameter defines the bias between the output signal and ground. It can be used to define the operating point of a DUT. The value range is adjusted so that the maximum overall output voltage does not exceed 4V, see "Maximum overall output voltage"... -
Page 165: Generation Of Envelope Tracking Signals
® Signal generator settings R&S SGT100A Generation of envelope tracking signals Remote command: on page 484 [:SOURce<hw>]:IQ:OUTPut[:ANALog]:OFFSet:I on page 484 [:SOURce<hw>]:IQ:OUTPut[:ANALog]:OFFSet:Q 6.5 Generation of envelope tracking signals Envelope tracking (ET) is a method used by modern power amplifiers (PA) to improve their efficiency, especially when amplifying RF signals with a high peak to average power (PAPR). - Page 166 ® Signal generator settings R&S SGT100A Generation of envelope tracking signals Figure 6-11: Simplified test setup for power amplifier envelope tracking tests The R&S SGT in this setup is configured to generate both, an RF signal with complex modulation scheme and an envelope signal, that follows the envelope variation of this RF signal.
- Page 167 ® Signal generator settings R&S SGT100A Generation of envelope tracking signals are the supply voltage V , the input power PEP required for working in the linear range and the gain characteristics of the external DC modulator. You find the required values in the documentation of your power amplifier, for example in its data sheet.
- Page 168 ® Signal generator settings R&S SGT100A Generation of envelope tracking signals Table 6-4: Definition of the variable x depending on the envelope voltage adaptation mode "Envelope Voltage Adaptation" Auto Power x = V in, min x ≥ 0 Auto Normalized x = V in,max Manual...
- Page 169 ® Signal generator settings R&S SGT100A Generation of envelope tracking signals About the detroughing function Detroughing functions are well defined mathematical functions that prevent that the supply voltage V drops down to zero or falls under specified limits. That is, they pre- vent that the signal is clipped.
- Page 170 ® Signal generator settings R&S SGT100A Generation of envelope tracking signals File format of the polynomial function file You can store a polynomial function in a file or even define the polynomial coefficients, store them as a file and load this file into the instrument. The polynomial files are files with extension *.iq_poly.
- Page 171 ® Signal generator settings R&S SGT100A Generation of envelope tracking signals Example: Shaping table file content (*.iq_lut file) # Rohde & Schwarz - IQ Output Envelope Shaping Table # Vin/Vmax,Vcc/Vmax 0.3,0.4 0.35,0.45 0.56,0.55 0.4,0.5 0.6,0.65 0,0.135 Shaping function in raw data format The shaping values are defined directly, with a single remote control command.
- Page 172 ® Signal generator settings R&S SGT100A Generation of envelope tracking signals Figure 6-12: Understanding the displayed values ("Shaping > Linear (Voltage)") Shaded area = Area where the signal is clipped and the envelope signal is held constant. 1a, 1b, 2a, 2b = V and PEP Min/Max values that set the borders of the clipping areas cc,min...
- Page 173 ® Signal generator settings R&S SGT100A Generation of envelope tracking signals ● Max = 0 dBm corresponds to V = 0.2236 V in,max ● = -15 dBm corresponds V = 0.04 V ● PEP = -3.4 dB ● "Shaping > Linear (Voltage)" "Graphic Scale >...
- Page 174 ® Signal generator settings R&S SGT100A Generation of envelope tracking signals Example: Calculating the current V ("Auto Power" mode, V Min > 0 V) Configuration as described in Common settings and: ● = 200 mV cc,min = [(V )/(V )] * (V ) + V cc,max cc,min...
- Page 175 ® Signal generator settings R&S SGT100A Generation of envelope tracking signals If the V value is changed (V > 0 V), then the following applies: cc,min cc,min ● ≤ V If 0 < V , the signal is clipped and V Norm = V in,max cc,min...
-
Page 176: General Rf Envelope Settings
® Signal generator settings R&S SGT100A Generation of envelope tracking signals Additional information The described principle applies for any shaping function. Only if linear shaping is used, the V Norm can also be directly converted to V according to the following formula: (x) = [f (x) - V ]*[(V... -
Page 177: Settings: State
® Signal generator settings R&S SGT100A Generation of envelope tracking signals The remote commands required to define these settings are described in Chap- ter 10.14.13, "SOURce:IQ:OUTPut:ENVelope commands", on page 485. Settings: State..........................177 Set to Default......................177 Save/Recall......................... 178 Envelope....................... 178 Envelope Voltage Adaptation.................. -
Page 178: Save/Recall
® Signal generator settings R&S SGT100A Generation of envelope tracking signals Remote command: on page 481 [:SOURce<hw>]:IQ:OUTPut[:ANALog]:PRESet Save/Recall Accesses the "Save/Recall" dialog, that is the standard instrument function for saving and recalling the complete dialog-related settings in a file. The provided navigation possibilities in the dialog are self-explanatory. -
Page 179: I/Q Output Type
® Signal generator settings R&S SGT100A Generation of envelope tracking signals Remote command: on page 489 [:SOURce<hw>]:IQ:OUTPut[:ANALog]:ENVelope:ETRak I/Q Output Type Selects the type of output signal. The provided parameters in the "I/Q Analog Outputs" dialog depend on the selected output mode. "Single-Ended"... -
Page 180: Dc Modulator Characteristics
® Signal generator settings R&S SGT100A Generation of envelope tracking signals "I/Q Output Type" Termination "Bias" defines "Single Ended" The bias between the envelope signal E and ground "Differential" "To Ground" Superimposed DC voltage, where "Bias" is related to the selected See also Table 6-6 "Wire To Wire"... -
Page 181: Bipolar Input
® Signal generator settings R&S SGT100A Generation of envelope tracking signals The termination influences the way an enabled Bias is applied. "To Ground" "Wire to Wire" Bias = 0 and Offset Bias = 0 and Offset Both inputs of the DC modulator are terminated to This termination is also referred as a common mode ground. -
Page 182: Pp Max
® Signal generator settings R&S SGT100A Generation of envelope tracking signals Remote command: on page 492 [:SOURce<hw>]:IQ:OUTPut[:ANALog]:ENVelope:BINPut Max ← DC Modulator characteristics Sets the maximum value of the peak-to-peak driving voltage V of the external DC modulator. The V limits: ●... -
Page 183: Cc Min/Max
® Signal generator settings R&S SGT100A Generation of envelope tracking signals The following settings are required: Min/Max ← PA characteristics Displays the minimum and maximum values of the supply voltage V , as required by the power amplifier (PA). For "Envelope Voltage Reference > Vcc", sets the minimum and maximum values of the supply voltage V The value range of the supply voltage V is determined by the allowed peak-to-peak... -
Page 184: Envelope Settings
® Signal generator settings R&S SGT100A Generation of envelope tracking signals Min/Max ← PA characteristics Sets the minimum and maximum values of the input power PEP , as required by the power amplifier (PA). The "PEP Min/Max" parameters define the linear range of the PA. Refer to the product documentation of the PA for information on the characteristics of the required input sig- nal. - Page 185 ® Signal generator settings R&S SGT100A Generation of envelope tracking signals Settings: Envelope to RF Delay....................185 Calculate Envelope from Predistorted Signal..............185 Envelope to RF Delay Sets the time delay of the generated envelope signal relative to the corresponding RF signal.
-
Page 186: Shaping Settings
® Signal generator settings R&S SGT100A Generation of envelope tracking signals 6.5.5 Shaping settings Access: 1. Enable the generation of envelope tracking signal. Chapter 6.5.3, "General RF envelope settings", on page 176. 2. Enable "Envelope Voltage Adaptation > Auto Power/Normalized". 3. -
Page 187: Settings: Shaping
® Signal generator settings R&S SGT100A Generation of envelope tracking signals See also: ● "Converting shaping functions and understanding the displayed values" on page 171. The remote commands required to define these settings are described in Chap- ter 10.14.13, "SOURce:IQ:OUTPut:ENVelope commands", on page 485. - Page 188 ® Signal generator settings R&S SGT100A Generation of envelope tracking signals "Off" Envelope shaping is not adopted. Previously configured values of the parameters Pre-Gain Post- Gain are ignored. Figure 6-18: Generated RF, envelope and inverted envelope signal = RF signal (simple ramp function) 2a, 2b = Envelope signal E and inverted envelope signal E Bar "Linear (Voltage)/Linear (Power)"...
- Page 189 ® Signal generator settings R&S SGT100A Generation of envelope tracking signals "Polynomial" The shaping function is defined by a polynomial with configurable order and coefficients. Select Polynomial coefficients settings to access the settings. Figure 6-19: Effect of a polynomial shaping on the envelope and inverted enve- lope signal = RF signal (simple ramp function) 2a, 2b = Envelope signal E and inverted envelope signal E Bar...
- Page 190 ® Signal generator settings R&S SGT100A Generation of envelope tracking signals "From Table" The shaping function is defined by user-defined value pairs in form of a shaping table. This shaping function is suitable if you have knowledge on or aim to achieve an exact relation between the supply voltage and RF output power.
-
Page 191: Detroughing Function
® Signal generator settings R&S SGT100A Generation of envelope tracking signals "Detroughing" The shaping function applies a detroughing to prevent that the supply voltage V drops down to zero. Use the "Detroughing Factor" to limit the supply voltage V in the low-power region. -
Page 192: Detroughing Factor (D)
® Signal generator settings R&S SGT100A Generation of envelope tracking signals Detroughing Factor (d) For inactive coupling of the detroughing factor with V , sets a start offset to limit the supply voltage V in the low-power region. The detroughing factor also controls the shaping. "Detroughing Factor = 0" defines a linear function. -
Page 193: Polynomial Coefficients
® Signal generator settings R&S SGT100A Generation of envelope tracking signals Polynomial Coefficients For "Shaping > Polynomial", accesses a dialog to describe the envelope shape as a polynomials function, see Chapter 6.5.7, "Polynomial coefficients settings", on page 196. Shaping Table For "Shaping >... -
Page 194: Edit I/Q Envelope Shape Settings
® Signal generator settings R&S SGT100A Generation of envelope tracking signals Remote command: [:SOURce<hw>]:IQ:OUTPut[:ANALog]:ENVelope:SHAPing:INTerp on page 497 Graphic Configuration Comprises settings to configure the graphical display. Scale ← Graphic Configuration Determines the units, "Voltage" or "Power", used on the x and y axis. Table 6-8: Units on the x axis "Envelope Voltage Adaption"... - Page 195 ® Signal generator settings R&S SGT100A Generation of envelope tracking signals The "Shaping > Shaping Table" confirms that the newly created file is assigned. 6. Select "Shaping Table > MyLUT > Edit" 7. Define the value pairs "Vin/Vmax" and "Vcc/Vmax". The order is uncritical. 8.
-
Page 196: Polynomial Coefficients Settings
® Signal generator settings R&S SGT100A Generation of envelope tracking signals Remote command: n.a. 6.5.7 Polynomial coefficients settings Access: 1. Enable the generation of envelope tracking signal. Chapter 6.5.3, "General RF envelope settings", on page 176. 2. Select "Envelope Voltage Adaptation > Auto Normalized". 3. - Page 197 ® Signal generator settings R&S SGT100A Generation of envelope tracking signals Settings: Save/Recall Polynomial....................197 Polynomial Order......................197 Polynomial constant and coefficients................197 Apply, OK........................197 Save/Recall Polynomial Accesses the "Save/Recall" dialog, that is the standard instrument function for saving and recalling the complete dialog-related settings in a file.
-
Page 198: Applying Digital Predistortion
® Signal generator settings R&S SGT100A Applying digital predistortion 6.6 Applying digital predistortion Digital predistortion (DPD) is a method to improve the efficiency of RF power amplifi- ers. In the R&S SGT, the generated digital signal can be deliberately AM/AM and AM/PM predistorted. - Page 199 ® Signal generator settings R&S SGT100A Applying digital predistortion Of several known models, this implementation focuses on the following two types of distortion: ● The AM/AM (amplitude-to-amplitude) distortion and ● The AM/PM (amplitude-to-phase) distortion. An AM/AM representation is a standard method that shows the signal power level at the input of the DUT against the power level at the output of the DUT.
- Page 200 ® Signal generator settings R&S SGT100A Applying digital predistortion Polynomial function The polynomial function is an analytical method to describe a predistortion function. When using the polynomial function, you do not define the correction values (ΔPower and ΔPhase) directly as it is in the look-up table. You describe the predistortion func- tion and the R&S SGT derives the correction values out of it.
- Page 201 ® Signal generator settings R&S SGT100A Applying digital predistortion Create a correction table file as a CSV file with Microsoft Excel, with a Notepad or a similar tool. Save the file with the predefined extension, transfer and load it into the instrument.
- Page 202 ® Signal generator settings R&S SGT100A Applying digital predistortion File format of the normalized data The normalized data files are files with predefined extension *.dpd_norm and simple file format, see "File format of the normalized data" on page 202. The file contains an optional header # Rohde & Schwarz - Digital Predistortion Normalized Table Data # PinMax [dBm] # number of points # Vin/Vmax, deltaV/V, deltaPhase [deg], the values of the the number of the subsequent points and a list of comma-separated groups of three...
-
Page 203: Digital Predistortions Am/Am And Am/Pm Settings
® Signal generator settings R&S SGT100A Applying digital predistortion 6.6.2.3 Finding out the correction values If you know the properties of the used power amplifier, you can calculate suitable cor- rection values. We assume that the characteristics of a power amplifier have been measured and that the left graphic in the following table shows the AM/AM curve of this amplifier. -
Page 204: State
® Signal generator settings R&S SGT100A Applying digital predistortion Access: ► Select "I/Q Mod > Digital Predistortion > AM/AM AM/PM". The dialog covers the settings for digital predistortion, like select and enabling an AM/AM and/or AM/PM predistortion, select the way the predistortion function is defined and specify the correction values. -
Page 205: Save/Recall
® Signal generator settings R&S SGT100A Applying digital predistortion Parameter Value "AM/AM First" "AM/PM, AM/AM" Remote command: on page 503 [:SOURce<hw>]:IQ:DPD:PRESet Save/Recall Accesses the "Save/Recall" dialog, that is the standard instrument function for saving and recalling the complete dialog-related settings in a file. The provided navigation possibilities in the dialog are self-explanatory. -
Page 206: Achieved Output Level Error
® Signal generator settings R&S SGT100A Applying digital predistortion See also Chapter 6.6.2.1, "Defining the power level of the generated signal", on page 199. Remote command: on page 508 [:SOURce<hw>]:IQ:DPD:OUTPut:ERRor:MAX Achieved Output Level Error Displays the resulting level error, see Chapter 6.6.2.1, "Defining the power level of the generated signal",... -
Page 207: Settings: Shaping
® Signal generator settings R&S SGT100A Applying digital predistortion 2. Select a shaping function, for example the shaping file form Example"Shaping table file content (*.dpd_magn file)" on page 201. Figure 6-24: Predistortion Settings > From Table: Understanding the displayed information = Normalized value of the current RF RMS power level = Normalized value of the current PEP of the generated RF signal 1b, 2b... -
Page 208: Interpolation
® Signal generator settings R&S SGT100A Applying digital predistortion "Polynomial" By a polynomial with configurable order and coefficients. Select "Polynomial Coefficients" to access the settings, see Chap- ter 6.6.3.4, "Polynomial coefficients settings", on page 211. "Normalized" As a normalized data. Select "Normalized Data"... -
Page 209: Input Range
® Signal generator settings R&S SGT100A Applying digital predistortion Remote command: on page 511 [:SOURce<hw>]:IQ:DPD:SHAPing[:TABLe]:INVert Input Range (PEP ) From/To Defines the minimum and maximum input power PEP If you apply digital predistortion on signals used for power amplifier tests with envelope tracking, set the PEP Max value to the maximum value of the input power PEPin... -
Page 210: Polynomial Coefficients
® Signal generator settings R&S SGT100A Applying digital predistortion You can create a shaping table externally or internally. "Select" Selects and loads an existing file. "New" Creates a file. "Edit" Access a standard built-in table editor, see Chapter 6.6.3.3, "Edit pre- distortion table settings", on page 210. - Page 211 ® Signal generator settings R&S SGT100A Applying digital predistortion Settings: Pin (dBm), Delta Power (dB)/Pin (dBm), Delta Phase (deg)........211 Fill Table Automatically....................211 Goto, Edit, Save As, Save...................211 Pin (dBm), Delta Power (dB)/Pin (dBm), Delta Phase (deg) Sets the correction value pairs. "Pin, ΔPower"...
- Page 212 ® Signal generator settings R&S SGT100A Applying digital predistortion 2. Select "Shaping > Polynomial". 3. Select "AM/PM > Polynomial Coefficients". Figure 6-25: Polynomial Coefficients: Understanding the displayed information = Polynomial order a0, b0, ... = Polynomial coefficients = Ideal AM/AM function (the normalized amplitude is a line). = Resulting AM/AM predistortion function, calculated as AM/AM(x) = abs[P (x)] = Ideal AM/PM function (constant phase at 0 degrees)
- Page 213 ® Signal generator settings R&S SGT100A Applying digital predistortion Figure 6-26: Predistortion Settings > Polynomial: Understanding the displayed information = Normalized value of the current RF RMS power level = Normalized value of the current PEP of the generated RF signal 1b, 2b = Correction values White dashed line...
- Page 214 ® Signal generator settings R&S SGT100A Applying digital predistortion The polynomial files are files with extension *.dpd_poly, see "File format of the poly- nomial file" on page 200. The polynomial function is stored in Cartesian format. Remote command: [:SOURce<hw>]:IQ:DPD:SHAPing:POLYnomial:COEFficients:CATalog? on page 512 [:SOURce<hw>]:IQ:DPD:SHAPing:POLYnomial:COEFficients:LOAD on page 512 [:SOURce<hw>]:IQ:DPD:SHAPing:POLYnomial:COEFficients:STORe...
- Page 215 ® Signal generator settings R&S SGT100A Applying digital predistortion To access the internal editor 1. Select "I/Q Mod > Digital Predistortion > AM/AM AM/PM > Predistortion Settings". 2. Select "Shaping > Normalized Data". 3. Select "Normalized Data". 4. Enter the Pin Note: Enter the correction values in the required order.
-
Page 216: Rf Settings
® Signal generator settings R&S SGT100A RF settings Remote command: on page 514 [:SOURce<hw>]:IQ:DPD:SHAPing:NORMalized:DATA:CATalog? on page 514 [:SOURce<hw>]:IQ:DPD:SHAPing:NORMalized:DATA:LOAD on page 514 [:SOURce<hw>]:IQ:DPD:SHAPing:NORMalized:DATA:STORe Sets the value of the maximum input power level. corresponds to a normalized input power of 1, that is the max. allowed value on the x-axis. -
Page 217: Operation Mode
® Signal generator settings R&S SGT100A RF settings RF On/Off Activates and deactivates the RF output signal. The current state of the RF output (activated and deactivated) is indicated in the main panel by the different block color (blue or grey) and the status "On/Off". Remote command: on page 374 :OUTPut[:STATe]... - Page 218 ® Signal generator settings R&S SGT100A RF settings Configuring the RF frequency 1. To change the RF frequency of the selected instrument, perform one of the follow- ing: a) To set the frequency at the RF output, select "SGMA-GUI > Instrument Name > Frequency/Phase >...
-
Page 219: Local Oscillator (Lo) Coupling
® Signal generator settings R&S SGT100A RF settings In the "SGMA-GUI main panel", enabled frequency offset is also indicated with the key- word "Freq (Offs)". Remote command: on page 390 [:SOURce]:FREQuency:OFFSet Delta Phase Sets the phase of the RF signal. The current phase of the signal is used as the refer- ence. - Page 220 ® Signal generator settings R&S SGT100A RF settings If two signal generators are coupled via their 10 MHz reference, they are generating the same frequency but only in the long-term perspective. Having a closer look into the instantaneous differential phase (“delta phase”) of the two RF signals, the phase of the signals are instable due to: ●...
-
Page 221: Reference Oscillator
® Signal generator settings R&S SGT100A RF settings "Ext" The signal fed-in at the [REF/LO IN] input connector is used as signal source. An icon in the block diagram indicates that an external LO source is used. Note: The local oscillator input/output requires the additional software option R&S SGT-K90. - Page 222 ® Signal generator settings R&S SGT100A RF settings Ref. Oscillator Source/Ext Ref On/Off Determines whether the internal built-in oscillator (TXCO or OXCO) is used as a refer- ence source or if an external reference is used. The internal reference oscillator OCXO requires the additional option R&S SGT-B1. To feed in an external instrument reference, use the input connector "REF/LO IN".
- Page 223 ® Signal generator settings R&S SGT100A RF settings To find out the RF board installed in the instrument: ● Select "SGMA-GUI > instrument name > Setup > Hardware Config" > "RF Assem- bly" ● Observe the part number of the assembly "RfBoard". Remote command: on page 528 [:SOURce]:ROSCillator:OUTPut:FREQuency...
-
Page 224: Rf Level Settings
® Signal generator settings R&S SGT100A RF settings 6.7.6 RF level settings This section explains the level settings of the R&S SGT. Configuring RF level ► To change the RF level of the selected instrument, perform one of the following: a) Select "SGMA-GUI main panel >... - Page 225 ® Signal generator settings R&S SGT100A RF settings If you set a digital attenuation, while "I/ Q Mod > Modulation Source > Internal Base- band" and "I/ Q Mod > Modulation State > ON", it will be indicated in the R&S SGMA- GUI main panel by a change in the name of this parameter from "Level"...
- Page 226 ® Signal generator settings R&S SGT100A RF settings Mode Allows you to optimize the RF output signal for applications, where improved harmonic distortion or improved wideband noise is required. "Normal" In normal mode, the generator provides an RF output signal with high signal to noise ratio and low distortion, according to the data sheet.
- Page 227 ® Signal generator settings R&S SGT100A RF settings Limit Sets the level limit. The value specifies the upper limit of the level at the [RF Out] connector. A message appears if an attempt is made to set a level above this limit and the level at the RF out- put is confined to the upper limit.
- Page 228 ® Signal generator settings R&S SGT100A RF settings "Fixed" The level settings are made without switching the attenuator. When this operating mode is switched on, the attenuator is fixed in the current position to provide level settings without interruption. The resulting variation range is defined and displayed with the parameters Level Range.
- Page 229 ® R&S SGT100A Signal generator settings RF settings 6.7.6.3 Power-On settings Access: ► Select "SGMA-GUI > Instrument Name > RF > Level > Power-On/EMF". This dialog comprises the settings for the power-on behavior of the instrument. Power-On State Selects the state which the RF output takes after the instrument is switched on. "RF Off"...
- Page 230 ® Signal generator settings R&S SGT100A RF settings By default, the instrument operates in "Table & On" mode to provide the highest level accuracy and fastest setting time. Level control can be switched to "Off (Table)" or "On" for particular applications. The "Off (Table)" state (level control Off) is recommended if in CW mode the signal/intermodulation ratio is to be improved for multi-transmitter measurements.
- Page 231 ® Signal generator settings R&S SGT100A RF settings The "User Correction" function is used to create and activate lists in which level correc- tion values predefined by the user are freely assigned to RF frequencies. Correction is performed by the user-defined table values being added to the output level for the respective RF frequency.
- Page 232 ® Signal generator settings R&S SGT100A RF settings User Cor. Data - User Correction Calls the "File Select" menu for selecting and creating a list or the "File Manager". Remote command: on page 472 [:SOURce]:CORRection:CSET:DELete on page 476 [:SOURce<hw>]:CORRection:CSET[:SELect] Edit User Cor. Data Calls the editor for editing the selected user correction list.
- Page 233 ® Signal generator settings R&S SGT100A RF settings "Power/dB" Enters the level correction value to which the specified frequency applies. "Goto" Selects row for editing. If "Goto Row" is selected, a window opens for entering the requested row. "Edit" Calls a selection of possible actions described below. "Insert Range"...
- Page 234 ® Signal generator settings R&S SGT100A RF settings "Delete Range..." Allows you to delete any number of rows starting with the marked row. The number of rows to be deleted can be defined in an entry window. "Save as" Open the file menu to save the list under a new name. Note: Save list only after filling both columns (frequency and level), otherwise the entries are lost.
- Page 235 ® Signal generator settings R&S SGT100A RF settings Remote command: [:SOURce<hw>]:CORRection:DEXChange:AFILe:SEParator:DECimal on page 474 Column Separator Selects the separator between the frequency and level column of the ASCII table that the user correction list is exported to or imported from. Remote command: [:SOURce<hw>]:CORRection:DEXChange:AFILe:SEParator:COLumn on page 474...
- Page 236 ® Signal generator settings R&S SGT100A RF settings The start line and the number of rows to be filled are defined under "From" and "Range". The column to be filled is selected under "Select column to fill". Depending on the selection here, the default for start, end, and increment value are set.
- Page 237 ® Signal generator settings R&S SGT100A RF settings 6.7.6.7 Fill with sensor ► To access this dialog, select "SGMA-GUI > Instrument Name > Level > UCOR > Edit User Cor. Data> Fill With Sensor". This dialog describes all parameters for filling a table automatically with sensor readings.
- Page 238 ® Signal generator settings R&S SGT100A RF settings The "Execute" button is only enabled if a sensor is detected and the user correction list contains at least one frequency value. Remote command: on page 477 [:SOURce<hw>]:CORRection:ZERoing:STATe [:SOURce<hw>]:CORRection:CSET:DATA[:SENSor<ch>][:POWer]:SONCe on page 472 Used Instrument Settings For Measurement Displays the settings relevant for the measurement.
- Page 239 ® Signal generator settings R&S SGT100A RF settings About power servoing Component tests are complicated by the fact that they can be defined as a function of the DUT output power, e.g. a power amplifier. To the test engineer, this dependency poses a problem because the DUT gain is not necessarily: ●...
- Page 240 ® Signal generator settings R&S SGT100A RF settings Figure 6-28, the test setup also comprises an optional spectrum analyzer and a power splitter for additional power measurements. For more information, see the appli- cation sheet. LAN PoE+ F requency Selective Power Sensor Host Interface LO I/...
- Page 241 ® Signal generator settings R&S SGT100A RF settings For more information, see the application sheet "R&S NRQ6 Power Servoing". Settings Sensor.........................241 State..........................241 Target.......................... 241 Offset / Offset (Gain)....................241 Tolerance........................242 Sensor Aperture Time....................242 Sensor Bandwidth....................... 242 Level Tracking (500 ms)....................242 Start..........................242 Sensor...
-
Page 242: Using Power Sensors
® Signal generator settings R&S SGT100A RF settings Tolerance Sets the tolerance level interval, in which the "Target" output power level of the DUT lies. A large tolerance accelerates the power servoing procedure but also reduces the accu- racy of the target output power level. Remote command: on page 525 [:SOURce]:POWer:SERVoing:TOLerance... - Page 243 ® Signal generator settings R&S SGT100A RF settings The R&S SGT supports up to four R&S NRP, allowing up to four power measurements simultaneously. Check the firmware version of the R&S NRP sensors regularly. Update the firmware, if necessary. For updates, see the Rohde & Schwarz website http://www.rohde-schwarz.com in sec- tion "Power Meters &...
- Page 244 ® Signal generator settings R&S SGT100A RF settings I, II = Connection order G = Signal source (R&S SGT) = USB type Micro-A connector = USB Adapter Micro-A to A = Standard USB cable with USB type A and USB type B connectors = USB type B connector 4a = External power supply unit, incl.
- Page 245 ® Signal generator settings R&S SGT100A RF settings On connection, the R&S SGT immediately starts the measurement of a detected R&S NRP power sensor. If you perform an instrument preset, the R&S SGT stops the measurements. The connection and the mapping of the power sensors remain, the measurements must be restarted.
- Page 246 ® Signal generator settings R&S SGT100A RF settings Trigger the "Auto Once" function to search for the optimum filter length for the cur- rent measurement conditions. The estimated value is indicated as filter length. ● If the target measurement accuracy value is known, select "Filter > Fixed Noise". The averaging factor is selected automatically and so that the sensor's intrinsic noise (two standard deviations) does not exceed the specified noise content.
- Page 247 ® Signal generator settings R&S SGT100A RF settings Additional information See the Rohde & Schwarz website http://www.rohde-schwarz.com, section "Power Meters & Voltmeters" for: ● R&S NRP power sensor manual. ● Information on the R&S NRP-Z5 sensor hub and the available accessories. ●...
- Page 248 ® Signal generator settings R&S SGT100A RF settings A sensor tab contains all parameters for configuring the sensor settings, like aver- age or peak display, reference source, filter and level offset. The remote commands required to define these settings are described in Chap- ter 10.13, "SENSe, READ, INITiate and SLISt subsystems",...
- Page 249 ® Signal generator settings R&S SGT100A RF settings └ Aperture Time....................252 └ S-Parameter....................252 └ Enable Logging..................... 252 Sensor type and serial number The side tab label indicates type and serial number of an R&S NRP power sensor and its mapping index. Level (Peak) / Level (Average) values display the current readings of the sensor.
- Page 250 ® Signal generator settings R&S SGT100A RF settings Permanent ← Display ← Sensor Settings Activates the permanent indication of the power measurement result in the block dia- gram. The task bar label shows the measurement result, the channel, the sensor is mapped to and its serial number.
- Page 251 ® Signal generator settings R&S SGT100A RF settings Filter ← Sensor Settings Selects the way the length of the used filter is defined. See also "About the measuring principle, averaging filter, filter length, and achieving stable results" on page 245. "Auto"...
- Page 252 ® Signal generator settings R&S SGT100A RF settings Timeout ← Sensor Settings For "Filter > Fixed Noise", sets a time limit for the averaging process. Remote command: on page 385 :SENSe<ch>[:POWer]:FILTer:NSRatio:MTIMe Default Aperture Time ← Sensor Settings The sensor default setting is sufficient. Disable this parameter to specify a user-defined aperture time per sensor, if, for example, the readings vary.
- Page 253 ® Signal generator settings R&S SGT100A RF settings 6.7.7.3 NRP sensor mapping The "NRP Sensor Mapping" lists the sensors detected by the instrument. Any R&S NRP sensor that supports the USB legacy protocol and is connected to one of the USB interfaces, is detected automatically and added to the list. When you dis- connect a power sensor, the R&S SGT removes it from the list accordingly.
- Page 254 ® Signal generator settings R&S SGT100A RF settings Add Sensor settings....................254 └ Add LAN Sensor settings................254 └ Add USB Sensor settings................255 Sensor Mapping List Shows the sensors that are connected to the R&S SGT. The table informs on the sensor type, specific features and the installed sensor firm- ware.
-
Page 255: Pulse Modulation
® Signal generator settings R&S SGT100A RF settings Add USB Sensor settings ← Add Sensor settings Configures settings to add sensors connected to the R&S SGT via USB. "Device ID or Sensor Name" Displays the device identifier or the name of the R&S NRP power sensor. - Page 256 ® Signal generator settings R&S SGT100A RF settings Figure 6-31: Pulse generator - single pulse mode 1 = Pulse period 2 = Pulse width 3 = Pulse delay Figure 6-32: Pulse generator - double pulse mode 1 = Pulse period 2 = Pulse width 3 = Double pulse width 4 = Double pulse delay...
- Page 257 ® Signal generator settings R&S SGT100A RF settings 6.7.8.1 Pulse modulation settings ► To access the pulse modulation settings, select "SGMA-GUI > Instrument Name > RF > Pulse Modulation". The "Pulse Modulation" dialog contains all parameters required to configure pulse modulation and pulse signal generation.
- Page 258 ® Signal generator settings R&S SGT100A RF settings Remote command: on page 519 [:SOURce<hw>]:PULM:TRIGger:EXTernal:IMPedance 6.7.8.2 Pulse generator settings ► To access the pulse connector/trigger settings, select "SGMA-GUI > Instrument Name > RF > Pulse Modulation > Connector/Trigger". Comprises the settings necessary to configure the internal pulse modulation signal. Pulse Mode Sets the operating mode of the pulse generator.
- Page 259 ® Signal generator settings R&S SGT100A RF settings Remote command: on page 517 [:SOURce<hw>]:PULM:DOUBle:DELay 6.7.8.3 Pulse connector/trigger settings ► To access the pulse connector/trigger settings, select "SGMA-GUI > Instrument Name > RF> Pulse Modulation > Connector/Trigger". Comprises the settings necessary to configure the signal at the multi-purpose [TRIG] connector in the external trigger mode.
-
Page 260: Connectors
® Signal generator settings R&S SGT100A Connectors "Pulse Mod Ext Source" Available only for "USER 2". Input for an externally provided pulse modulation signal. Used when an external pulse modulator source is provided at the connector. Remote command: on page 359 :CONNector:USER<ch>:OMODe Trigger Mode Selects between continuous pulse modulation or pulse modulation triggered by an... - Page 261 ® Signal generator settings R&S SGT100A Connectors Mode Selects the mode for the correspondent connector. Some settings are only available for connector "USER 2". "Marker 1/2" Output for a defined marker signal. "Trigger/ Trigger Out" Input/output for an external trigger signal. "Clock In/Out"...
-
Page 262: External Baseband Signal - Baseband Input
® Signal generator settings R&S SGT100A External baseband signal - baseband input "Pulse Mod Ext Source" Available only for "USER 2". Input for an externally provided pulse modulation signal. Used when an external pulse modulator source is provided at the connector. -
Page 263: Important Signal Parameters
® Signal generator settings R&S SGT100A External baseband signal - baseband input 6.9.1 Important signal parameters The correct signal processing of input signals in the instrument requires information of some signal parameters. Among these parameters are sampling rate, crest factor and signal level, that is expressed as peak or as RMS level value. -
Page 264: Bb Input Block
® Signal generator settings R&S SGT100A External baseband signal - baseband input In the two automatic ways, the R&S SGT adjusts the corresponding input fields with the measured/received values. The internal gain control mechanism uses these received values to adjust the input signal gain to achieve an optimal dynamic range. Sample rate ●... - Page 265 ® Signal generator settings R&S SGT100A External baseband signal - baseband input 6.9.2.1 Baseband input settings menu This dialog comprises the settings necessary to adjust the signal parameters, like the sample rate, the baseband input level and to perform simple signal monitoring. Baseband input general settings ►...
- Page 266 ® Signal generator settings R&S SGT100A External baseband signal - baseband input Sample rate ► To access this dialog, select "SGMA-GUI > Instrument Name > BB Input > Digital BB In > Sample Rate". In this section, you can set the sample rate of the external digital baseband signal. Sample Rate Source Selects the source for estimating the sample rate or defining it by the user.
- Page 267 ® Signal generator settings R&S SGT100A External baseband signal - baseband input The crest factor and the peak power of the external baseband signal are entered in the section "Baseband Input Level". These values are necessary for a correct inter- nal signal processing in the R&S SGT.
- Page 268 ® Signal generator settings R&S SGT100A External baseband signal - baseband input Signal monitoring The section "Signal Monitoring" indicates an overload. Overflow Indicates that the I/Q input is overloaded. If overload is indicated, either the amplitude of the external signal is too high (full scale of 0.5 V) and must be reduced or the entered "Peak Level"...
- Page 269 ® Signal generator settings R&S SGT100A External baseband signal - baseband input Remote command: on page 456 [:SOURce<hw>]:BBIN:FOFFset Phase Offset Enters the phase offset for the external baseband signal. The offset affects the signal on the output of the "Baseband In/Out" block. Remote command: n.a.
-
Page 270: General Instrument Settings And Instrument Setup
® General instrument settings and instrument setup R&S SGT100A 7 General instrument settings and instrument setup This section describes the general settings of the instrument that do not directly affect signal generation. Access: 1. Select "SGMA-GUI > Instrument Name > Setup". 2. -
Page 271: Internal Adjustments
® General instrument settings and instrument setup R&S SGT100A Internal adjustments 7.1 Internal adjustments Access: ► Select "Setup > Internal Adjustments". The dialog provides settings for internal adjustments of the R&S SGT. All internal adjustments for which no external measuring equipment is needed can be started in the "Internal Adjustments"... - Page 272 ® General instrument settings and instrument setup R&S SGT100A Internal adjustments Wait until the instrument has reached its operating temperature before you start the adjustment procedure. The warm-up time is up to 30 minutes. 2. Select "Setup > Internal Adjustment > Adjust All". The adjustment process starts.
-
Page 273: Hardware Configuration
® General instrument settings and instrument setup R&S SGT100A Hardware configuration Remote command: on page 356 :CALibration:LEVel[:MEASure]? I/Q Modulator Starts the adjustment procedure for the I/Q modulator and/or the baseband for the entire frequency range. The I/Q modulator is adjusted regarding carrier leakage, I/Q imbalance and quadrature. - Page 274 ® General instrument settings and instrument setup R&S SGT100A Hardware configuration The dialog is a table that lists the installed assemblies. It is divided into the sec- tions: ● "Common Assembly" ● "RF Assembly" Settings: Assembly........................274 Assembly The tables list the installed assemblies. "Assembly"...
-
Page 275: Software And Hardware Options
® General instrument settings and instrument setup R&S SGT100A Software and hardware options 7.3 Software and hardware options To check the software packages and installed options ► Select "SGMA-GUI > Instrument Name > Setup > Software/Options". The "Software / Options" dialog shows the firmware version of the instrument soft- ware and all installed hardware and software options. -
Page 276: Manage License Keys
® General instrument settings and instrument setup R&S SGT100A Manage license keys Settings: Software........................276 Hardware / Software / WinIQSIM................276 Loaded Modules......................276 Show Open Source Acknowledgments...............276 LucasFonts RSCorpid EULA..................276 Software Shows the software/firmware version and the version of the software platform. Note: Your instrument is delivered with the latest firmware version available. - Page 277 ® General instrument settings and instrument setup R&S SGT100A Manage license keys An option is ready to operate after it is enabled by a license key code supplied with the option. The license key is delivered as a file or on paper. Unregistered licenses must be registered for a particular instrument before the corresponding option can be enabled for operation.
- Page 278 ® R&S SGT100A General instrument settings and instrument setup Manage license keys a) On the source instrument, select "Setup > Manage License Keys > Device ID". b) On the target instrument, select "Setup > Manage License Keys > Device ID". c) In the browser, select "Manage Licenses >...
- Page 279 ® General instrument settings and instrument setup R&S SGT100A Manage license keys 12. Enter the deactivation response of the instrument. The license is deactivated for the source instrument. 13. In the section "Manage Licenses > Move Portable License", go to step "Create License"...
- Page 280 ® General instrument settings and instrument setup R&S SGT100A Manage license keys Show Inactive Licenses Enables/disables the display of the inactive (expire) licenses in the License Table. Show Deactivated Licenses Enables/disables the display of the deactivated licenses in the License Table.
-
Page 281: Protection
® General instrument settings and instrument setup R&S SGT100A Protection "License Type" Display the type of license. A license type is a joint qualification for the duration of applicability and the portability of a license. The following license types are provi- ded: evaluation, permanent, portable, quantified, timed with duration of 1, 3, 6 or 12 months. -
Page 282: Security
® General instrument settings and instrument setup R&S SGT100A Security The other protection levels 2 to 4 provide access to protected service functions. Only the authorized personnel of R&S service departments can access these functions. 7.6 Security The R&S SGT employs a security concept based on a user password and the security password. - Page 283 ® General instrument settings and instrument setup R&S SGT100A Security a) To configure the user-defined password, select the "User Password" side-tab. b) To configure the security password, select "Security Pasword". Disabling the LAN interface Remote control over LAN requires that you have enabled the LAN interface. 1.
- Page 284 ® General instrument settings and instrument setup R&S SGT100A Security 5. If you have locked the access accidentally, you have the following options: ● Update the instrument firmware using ISO image (<instrument>_<version-number>.iso). Note: A firmware update with the ISO image resets the instrument. The instru- ment reset dismisses user-specific configurations and deletes user data.
- Page 285 ® General instrument settings and instrument setup R&S SGT100A Security Note: Remove all USB memory devices before disabling the USB storage. If any USB memory device remains connected, disabling is blocked, and the instrument returns a warning message. Volatile Mode ← General Enables volatile mode.
-
Page 286: Network Settings
® General instrument settings and instrument setup R&S SGT100A Network settings User Name ← User Password Indicates the user name used for access to the Linux operating system and valid for VNC, FTP and SAMBA access. Old Password ← User Password Enter the currently used user password. - Page 287 ® General instrument settings and instrument setup R&S SGT100A Network settings Access: ► Select "SGMA-GUI > Instrument Name > Setup > Network Settings". The dialog provides access to the network settings, like settings about the general net- work environment and specific identification of the computer in the network. The dialog also displays an indication whether the instrument is connected to the network or not.
- Page 288 ® General instrument settings and instrument setup R&S SGT100A Network settings Hostname Displays the individual computer name of the instrument. A predefined name is indicated and can be used for network connections, see Chap- ter 5.5.3, "Finding out the default hostname of the instrument", on page 74.
-
Page 289: Remote Channels
® General instrument settings and instrument setup R&S SGT100A Remote channels Remote command: on page 541 :SYSTem:COMMunicate:NETWork[:IPADdress]:SUBNet:MASK Default Gateway Displays the IP address of the default gateway. To enter the default gateway manually, select "Address Mode > Static". This address identifies the router on the same network as the instrument that is used to forward traffic to destinations beyond the local network. -
Page 290: Lxi Status
® General instrument settings and instrument setup R&S SGT100A LXI status Settings: Visa Resource Strings....................290 Device Identity......................290 Visa Resource Strings Indicates the VISA resource strings used for remote control of the instrument. A sepa- rate string is provided for remote control via the different interfaces. Note: For background information and description of the syntax of the VISA resource strings, refer to the description of the corresponding interface in Chapter 9.1, "Remote... - Page 291 ® General instrument settings and instrument setup R&S SGT100A LXI status Settings: Status........................291 Reset........................291 Device Identity......................291 LAN Status The LED indicates the LXI status. The LAN status is also indicated with the LED "LAN Status" on the front panel of the instrument.
-
Page 292: Emulations
® General instrument settings and instrument setup R&S SGT100A Emulations See also Chapter 5.5.4, "Bidirectional instrument identification", on page 74. 7.10 Emulations You can control the R&S SGT remotely via the command set of another signal genera- tor, for example the R&S SMATE generator. With this function you can, for example, replace a signal generator with an R&S SGT in an automated test setup, without adjusting the command scripts used. -
Page 293: Date And Time
® General instrument settings and instrument setup R&S SGT100A Date and time Language Selects the instrument whose remote command set is emulated by the R&S SGT. Remote command: on page 544 :SYSTem:LANGuage Identification Mode Selects the way that the instrument identification is performed. "Automatic"... -
Page 294: Factory Preset
® General instrument settings and instrument setup R&S SGT100A Factory preset Settings: Date..........................294 Time..........................294 Time Zone........................294 Date Indicates the date in the format day.month.year. To prevent accidental changes, this parameter is protected. It can be accessed with protection level 1, see Chapter 7.5, "Protection", on page 281. -
Page 295: Standby And Restart
® General instrument settings and instrument setup R&S SGT100A Diagnostic and tests 2. Select "Execute Factory Preset". The instrument's settings are reset to their factory states. Security settings and user data are not affected. Settings: Execute Factory Preset....................295 Execute Factory Preset Reset the instrument's settings to their factory state. -
Page 296: Selftest
® General instrument settings and instrument setup R&S SGT100A Diagnostic and tests Access: ► Select "SGMA-GUI > Instrument Name > Setup > Diagnostic / Test". The selection provides the following settings. Settings: ● Selftest........................296 ● Connector test.......................297 ● Keyboard tests...................... -
Page 297: Connector Test
® General instrument settings and instrument setup R&S SGT100A Diagnostic and tests Settings: Start Selftest Triggers execution of a selftest off all installed hardware options. How to: "To run a selftest" on page 296 Remote command: on page 551 :TEST:ALL:STARt on page 551 :TEST:ALL:RESult? 7.14.2 Connector test... -
Page 298: Power Servoing Test
® General instrument settings and instrument setup R&S SGT100A Diagnostic and tests If "Keyboard Test" is enabled, all front panel LEDs except the [POWER ON] are orange. The exact test procedure is described in the service manual. SCPI command: on page 551 :TEST:KEYBoard[:STATe] 7.14.4 Power servoing test Access:... -
Page 299: Simulation
® General instrument settings and instrument setup R&S SGT100A Diagnostic and tests Sensor Sets the power sensor from a list as detected in the "NRP Sensor Mapping" dialog. If the list has only one entry, this power sensor is displayed automatically. Remote command: on page 524 [:SOURce]:POWer:SERVoing:SENSor... -
Page 300: External Adjustments
® General instrument settings and instrument setup R&S SGT100A External adjustments The dialog displays a list of software options. 5. Enable the option to be simulated. The block diagram and the provided signal generator settings are updated accord- ingly. You can open dialogs, interact with functions or observe the influence of set- tings as if the virtual instrument is equipped with the selected options. - Page 301 ® General instrument settings and instrument setup R&S SGT100A External adjustments tion value. In the external adjustment dialog, you can select a different (custom) cali- bration value. Settings: Active Adjustment Data....................301 Calibration Value......................301 Active Adjustment Data Selects whether the factory provided or a user-defined calibration value is used to adjust the reference oscillator.
-
Page 302: Performing Configuration Tasks
® Performing configuration tasks R&S SGT100A How to configure the reference oscillator source 8 Performing configuration tasks This section provides a general explanation on how to operate the instrument manually via the R&S SGMA-GUI software. We assume, that the R&S SGT is connected to a remote PC. The R&S SGMA-GUI software is installed on this remote PC and the instrument has to be added to the list of "Available Instruments". -
Page 303: How To Configure The Local Oscillator Coupling Source
® Performing configuration tasks R&S SGT100A How to configure the local oscillator coupling source b) Select "SGMA-GUI > Instrument Name > RF > Reference Oscillator > Source > Ext". 3. In the "Reference Oscillator" dialog, set the parameter "Ext. Ref. Input Frequency" to the value of the fed external reference frequency. -
Page 304: How To Define The Signal At The Ref/Lo Out Connector
® Performing configuration tasks R&S SGT100A How to create and save ARB test signals 8.3 How to define the signal at the REF/LO OUT connec- The reference oscillator and the LO use the same "REF IN" connector. Hence, it is not possible to use both an external reference source and an external LO source signal at the same time. -
Page 305: How To Load And Play Waveform Files
® Performing configuration tasks R&S SGT100A How to load and play waveform files 5. Select "ARB > State > On". The R&S SGT processes the waveform file. 8.5 How to load and play waveform files Irrespective of the way a waveform file is generated, you can transfer it to the instru- ment, load it in the ARB and play it. -
Page 306: How To Restore The Lan Connection
® Performing configuration tasks R&S SGT100A How to switch between operating states 5. Select "ARB > State > On". The R&S SGT processes the waveform file. 8.6 How to restore the LAN connection If you lose the LAN connection of the instrument, for example, after assigning a static IP address, proceed as follows: ►... - Page 307 ® Performing configuration tasks R&S SGT100A How to switch between operating states Table 8-2: Indication of the operating states Operating Description Indication state The instrument is shut down. All LEDs on the front panel of the instrument are off. Booting The instrument boots the operating system The green [POWER ON/STANDBY] key blinks.
-
Page 308: How To Use Computer Names
® Performing configuration tasks R&S SGT100A How to install a new firmware version on the instrument To switch all connected instruments to standby state and close the R&S SGMA- ► In the R&S SGMA-GUI main panel, select "File > Shut down instruments and exit". The R&S SGMA-GUI quits and switches the connected instruments to standby state. - Page 309 ® Performing configuration tasks R&S SGT100A How to install a new firmware version on the instrument Firmware installation via R&S SGMA-GUI Install or update the firmware of the R&S SGT before installing or updating the soft- ware R&S SGMA-GUI. 1. Select "SGMA-GUI main panel > Instrument Name > Setup > Maintenance > Oper- ation >...
- Page 310 ® Performing configuration tasks R&S SGT100A How to install a new firmware version on the instrument 4. Enter the user name and password to connect to the R&S SGT. The default user name is instrument and the password is instrument. A folder opens, containing the share and the update folder.
-
Page 311: How To Activate Options
® Performing configuration tasks R&S SGT100A How to activate options Unsuccessful or erroneous firmware update An erroneous or unsuccessful installation of firmware update package is indicated by a combination of one orange and red LEDs on the front panel. Refer to the service manual for a description of the displayed error code or contact the customer support center, see Chapter 12.5, "Contacting customer support",... -
Page 312: Network Operation And Remote Control
® Network operation and remote control R&S SGT100A Remote control interfaces and protocols 9 Network operation and remote control As an alternative to operating the R&S SGT interactively via the R&S SGMA-GUI, you can operate the R&S SGT also from a remote location. Information on network operation and remote control The following descriptions provide information required for operating the R&S SGT remotely. -
Page 313: Remote Control Programs And Libraries
® Network operation and remote control R&S SGT100A Remote control interfaces and protocols Interface Remarks Protocols, VISA address string and Library PCIe Proprietary A PCIe connector is located on the rear panel of the instrument. PCIe::<vendor ID>::<product ID>:: <serial number>[::INSTR] For details, see Chapter 9.1.4, "PCI Express... - Page 314 ® Network operation and remote control R&S SGT100A Remote control interfaces and protocols Figure 9-1: Remote control interfaces, protocols and libraries The following examples give an overview of the dependencies between the available libraries, the possible interfaces and protocols, and whether an instrument driver is pro- vided.
- Page 315 ® Network operation and remote control R&S SGT100A Remote control interfaces and protocols Figure 9-3: Remote control program using instrument driver (VISA available) Protocol Remote control program Socket rssgt_init ("TCPIP:rssgt100a100010::5025::SOCKET", ...) rssgt_SetFrequency (..., 2e9) VXI-11 rssgt_init ("TCPIP:rssgt100a100010::inst0::INSTR", ...) rssgt_SetFrequency (..., 2e9) HiSLIP rssgt_init ("TCPIP:rssgt100a100010::hislip0::INSTR", ...) rssgt_SetFrequency (..., 2e9)
-
Page 316: Lan Interface
® Network operation and remote control R&S SGT100A Remote control interfaces and protocols Protocol Remote control program Socket rssgt_init ("TCPIP:rssgt100a100010::5025::SOCKET", ...) rssgt_SetFrequency (..., 2e9) rssgt_init ("PCIe::0x162f::0x1336::1000010::INSTR", ...) PCIe rssgt_SetFrequency (..., 2e9) 9.1.2 LAN interface To be integrated in a LAN, the instrument is equipped with a LAN interface, consisting of a connector, a network interface card and protocols. - Page 317 ® Network operation and remote control R&S SGT100A Remote control interfaces and protocols See below the characteristics of the VISA resource strings for the corresponding inter- face protocols. The highlighted characters are crucial. HiSLIP TCPIP::host address::hislip0[::INSTR] ● hislip0 HiSLIP device name, designates that the interface protocol HiSLIP is used (mandatory).
- Page 318 ® Network operation and remote control R&S SGT100A Remote control interfaces and protocols sockets for a single connection - one for fast data transfer, the other for non-sequential control commands (e.g. Device Clear or SRQ). HiSLIP has the following characteristics: ●...
-
Page 319: Usb Interface
® Network operation and remote control R&S SGT100A Remote control interfaces and protocols The instrument also supports the fast socket channel. For details, see Chapter 9.4, "Advanced remote control using fast socket", on page 327. 9.1.3 USB interface For remote control via USB connection, the PC and the instrument must be connected via the USB interface. -
Page 320: Gpib Interface (Iec/Ieee Bus Interface)
® Network operation and remote control R&S SGT100A Remote control interfaces and protocols ● <product ID> is the product identification of the R&S instrument ● <serial number> is the individual serial number on the rear of the instrument ● [::INSTR] indicates the instrument resource class (optional) You can retrieve the PCIe resource string from the "SGMA-GUI >... -
Page 321: Starting A Remote Control Session
® Network operation and remote control R&S SGT100A Starting a remote control session 9.2 Starting a remote control session To start a remote control session, connect the instrument and the controller with a suit- able cable and switch on both of them. A remote control program must open a connection to the instrument, before it can send commands to and receive device responses from the instrument. -
Page 322: Advanced Remote Control Using Pcie
® Network operation and remote control R&S SGT100A Advanced remote control using PCIe The socket address is a combination of the IP address or the host name of the R&S SGT and the number of the port configured for remote-control via telnet. Tip: The R&S SGT uses the port number 5025 for remote connection via Telnet. -
Page 323: Setting Up A Remote Control Connection Via Pcie
® Network operation and remote control R&S SGT100A Advanced remote control using PCIe called fast settings mode. The specially for this purpose provided instrument's driver is mandatory for the instrument control with fast settings. This instrument driver contains special functions for fast setup. To use the advantage of the fast settings, the following prerequisites must be fulfilled: ●... -
Page 324: Configuring The Controller
® Network operation and remote control R&S SGT100A Advanced remote control using PCIe – SharedLibraries-Dlls Shared libraries (*.dll files) for remote control channels Socket and PCIe. To be used with the instrument driver. ● VXIplug&play x64/x86 driver rssgt Download the required archive and extract the files on a remote PC. 9.3.3 Configuring the controller This section lists the steps necessary to configure a controller with Linux or Windows operating system. - Page 325 ® Network operation and remote control R&S SGT100A Advanced remote control using PCIe These libraries act as the dynamic link libraries for programs using the socket or PCIe interface. Linux operating system ► To make the libraries accessible, perform one of the following: a) Append the environment variable LD_LIBRARY_PATH with the path of these two files, e.g., by changing the /etc/environment file.
-
Page 326: Connecting The Controller And The Instrument
® Network operation and remote control R&S SGT100A Advanced remote control using PCIe ● cmd is an optional command (see table). The following table list the available commands. Command Description Usage Quit f value Set frequency Query frequency l value Set level Query level Set RF state (value = 0 | 1 | ON | OFF) -
Page 327: Enabling Fast Settings
® Network operation and remote control R&S SGT100A Advanced remote control using fast socket 3. Switch on the instrument. 4. Wait until the instrument has completed the booting (the "POWER" LED on the instrument's front panel is constantly on). 5. Switch on the external PC. 9.3.5 Enabling fast settings ►... -
Page 328: Setting Up A Remote Control Connection Via Fast Socket
® Network operation and remote control R&S SGT100A Advanced remote control using fast socket 9.4.1 Setting up a remote control connection via fast socket Download the required archive and extract the files on a remote PC, as described in Chapter 9.3.2, "Downloading the drivers", on page 323. -
Page 329: Enabling Fast Settings
® Network operation and remote control R&S SGT100A Status reporting system The "Local Area Connection Status" dialog opens. 3. Click "Properties" to open the "Local Area Connection Properties" dialog. 4. Click "Install" to open the "Select Network Feature Type" dialog. 5. - Page 330 ® Network operation and remote control R&S SGT100A Status reporting system Figure 9-5: Graphical overview of the status registers hierarchy OPER = Operation Status Summary Bit RQS/MSS = Service Request Generation = Standard Event Status Summary Bit = Message Available in Output Queue QUES = Questionable Status Summary Bit = Error- /Event-Queue...
-
Page 331: Structure Of A Scpi Status Register
® Network operation and remote control R&S SGT100A Status reporting system ● Standard Event Status, i.e. the Event status Register (ESR) and the Event Status Enable (ESE), see Chapter 9.5.4, "Event status register (ESR) and event status enable register (ESE)", on page 334. - Page 332 ® Network operation and remote control R&S SGT100A Status reporting system Description of the five status register parts The five parts of a SCPI status register have different properties and functions: ● CONDition The CONDition part is written directly by the hardware or it mirrors the sum bit of the next lower register.
-
Page 333: Status Byte (Stb) And Service Request Enable Register (Sre)
® Network operation and remote control R&S SGT100A Status reporting system The instrument automatically generates the sum bit for each register. Thus an event can lead to a service request throughout all levels of the hierarchy. 9.5.3 Status byte (STB) and service request enable register (SRE) The STatus Byte (STB) is already defined in IEEE 488.2. -
Page 334: Event Status Register (Esr) And Event Status Enable Register (Ese)
® Network operation and remote control R&S SGT100A Status reporting system 9.5.4 Event status register (ESR) and event status enable register (ESE) The ESR is defined in IEEE 488.2. It can be compared with the EVENt part of a SCPI register. -
Page 335: Operation Status Register (Status:operation)
® Network operation and remote control R&S SGT100A Status reporting system Table 9-4: Meaning of the bits used in the questionable status register Bit No. Meaning 0–15 Not used 9.5.6 Operation status register (STATus:OPERation) This condition part contains information on the actions that the instrument currently executes. - Page 336 ® Network operation and remote control R&S SGT100A Status reporting system Example: Use command *OPC to generate an SRQ. *ESE 1 - set bit 0 of ESE (Operation Complete) *SRE 32 - set bit 5 of SRE (ESB). After its settings have been completed, the instrument generates an SRQ. The SRQ is the only possibility for the instrument to become active on its own.
-
Page 337: Reset Values Of The Status Reporting System
® Network operation and remote control R&S SGT100A LXI configuration larly since faulty commands from the controller to the instrument are recorded there as well. 9.5.8 Reset values of the status reporting system The following table contains the different commands and events causing the status reporting system to be reset. -
Page 338: Default Network Settings
® Network operation and remote control R&S SGT100A LXI configuration 9.6.1 Default network settings According to the LXI standard, an LCI must set the following parameters to a default state. Parameter Value TCP/IP mode DHCP + Auto IP Address Dynamic DNS Enabled ICMP ping Enabled... -
Page 339: Lan Configuration
® Network operation and remote control R&S SGT100A LXI configuration The instrument home page (welcome page) opens. The navigation pane of the browser interface contains the following elements: ● "LXI" – "Home" opens the instrument home page. The home page displays the device information required by the LXI stan- dard, including the VISA resource string in read-only format. - Page 340 ® Network operation and remote control R&S SGT100A LXI configuration ● configuration..................... 340 ● Advanced Config....................340 ● Ping client......................341 ● SCPI remote trace....................342 9.6.3.1 IP configuration The "IP configuration" web page displays all mandatory LAN parameters and allows their modification. The "IP Address Mode"...
- Page 341 ® Network operation and remote control R&S SGT100A LXI configuration The following advanced parameters are available: ● "mDNS and DNS-SD": The additional protocols "multicast DNS" and "DNS service discovery" are used for device communication in zero configuration networks, working without DNS and DHCP. ●...
- Page 342 ® Network operation and remote control R&S SGT100A LXI configuration To initiate a ping at the instrument: 1. On the "Ping Client" page, enter the IP address of the host in the "Destination Address" field (for example 10.111.0.125). 2. Select "Submit". 9.6.3.4 SCPI remote trace The remote trace functionality allows you to trace input and output strings at the...
- Page 343 ® Network operation and remote control R&S SGT100A LXI configuration Toolbars The toolbar at the top of the dialog provides basic settings and functions. ● "Live mode" / "logging": If logging is switched on, messages are traced. They are stored in an internal database and can be displayed upon request, using the refresh button (live mode off) or they can be displayed automatically (live mode on).
-
Page 344: How To Record Scpi Commands And Messages Via Lxi
® Network operation and remote control R&S SGT100A LXI configuration ● I: number of the subinstrument ● "message": indicates the type of the message. Possible values and related mes- sage contents are: – > = incoming command – < = outgoing response to a query –... -
Page 345: Monitoring Remote Control Operation With R&S Sgma-Gui
® Network operation and remote control R&S SGT100A Monitoring remote control operation with R&S SGMA-GUI The function records all sent commands, received responses and messages, and stores them in an internal database. If "live mode" is disabled, you can display the recent traces upon request, using the "refresh"... - Page 346 ® Network operation and remote control R&S SGT100A Monitoring remote control operation with R&S SGMA-GUI The figure below shows an example of configuration where the monitor and the con- troller are two different computers, connected to the same instrument over two different hardware interfaces.
-
Page 347: Remote Control Commands
® Remote control commands R&S SGT100A 10 Remote control commands In the following, all remote-control commands are presented in detail with their param- eters and the ranges of numerical values. For an introduction to remote control and the status registers, refer to the following sec- tions: ●... -
Page 348: Common Commands
® Remote control commands R&S SGT100A Common commands Commands ● Common commands..................... 348 ● General commands....................353 ● Preset commands....................354 ● CALibration subsystem..................354 ● CLOCk subsystem....................357 ● CONNector subsystem..................358 ● DIAGnostic subsystem..................360 ● FORMat Subsystem....................361 ● MMEMory subsystem....................363 ●... - Page 349 ® Remote control commands R&S SGT100A Common commands *CLS Clear status Sets the status byte (STB), the standard event register (ESR) and the EVENt part of the QUEStionable and the OPERation registers to zero. The command does not alter the mask and transition parts of the registers. It clears the output buffer. Usage: Setting only *ESE <Value>...
- Page 350 ® Remote control commands R&S SGT100A Common commands Returns the contents of the IST flag in decimal form. The IST flag is the status bit which is sent during a parallel poll. Return values: <ISTflag> 0 | 1 Usage: Query only *OPC Operation complete Sets bit 0 in the event status register when all preceding commands have been execu-...
- Page 351 ® Remote control commands R&S SGT100A Common commands Determines whether the contents of the ENABle registers are preserved or reset when the instrument is switched on. Thus a service request can be triggered when the instru- ment is switched on, if the status registers ESE and SRE are suitably configured. The query reads out the contents of the "power-on-status-clear"...
- Page 352 ® Remote control commands R&S SGT100A Common commands Parameters: <Contents> Contents of the service request enable register in decimal form. Bit 6 (MSS mask bit) is always 0. Range: 0 to 255 *STB? Status byte query Reads the contents of the status byte in decimal form. Usage: Query only *TRG...
-
Page 353: General Commands
® Remote control commands R&S SGT100A General commands 10.2 General commands .........................353 :LOCK? ........................353 :UNLock :LOCK? <LockRequestId> Sends a lock request ID which uniquely identifies the controller to the instrument. Parameters: <LockRequestId> Number test query to prove whether the instrument is locked Controller ID request lock from the controller with the specified Controller ID Return values:... -
Page 354: Preset Commands
® Remote control commands R&S SGT100A CALibration subsystem 10.3 Preset commands The preset commands are not bundled into one subsystem. Therefore, they are listed separately in this section. These specific commands are described in the associated subsystems. The following presetting actions are available: ●... - Page 355 ® Remote control commands R&S SGT100A CALibration subsystem ..................356 :CALibration:LEVel[:MEASure]? ................356 :CALibration:FREQuency:TEMPerature? ................... 356 :CALibration:LEVel:TEMPerature? ................356 :CALibration:IQModulator:TEMPerature? ................357 :CALibration:ROSCillator:DATA:MODE ..................357 :CALibration:ROSCillator[:DATA] :CALibration<hw>:BBIN[:MEASure]? Starts adjustment of the analog I/Q input. The I/Q input is adjusted with respect to DC offset and gain. Return values: <Measure>...
- Page 356 ® Remote control commands R&S SGT100A CALibration subsystem :CALibration:IQModulator:FULL? Starts the adjustment of the I/Q modulator for the entire frequency range. The I/Q mod- ulator is adjusted with respect to carrier leakage, I/Q imbalance and quadrature. Return values: <Modulator> 1 | ON | 0 | OFF Usage: Query only Manual operation:...
-
Page 357: Clock Subsystem
® Remote control commands R&S SGT100A CLOCk subsystem :CALibration:ROSCillator:DATA:MODE <Mode> Defines whether the factory provided or a custom defined calibration value is used to adjust the reference oscillator. Parameters: <Mode> FACTory | CUSTomer *RST: FACTory Example: :CALibration1:ROSCillator:DATA:MODE CUSTomer :CALibration1:ROSCillator:DATA 35600 Manual operation: "Active Adjustment Data"... -
Page 358: Connector Subsystem
® Remote control commands R&S SGT100A CONNector subsystem :CLOCk:INPut:SLOPe <Slope> The command sets the active slope of an externally applied clock signal at the [USER 1/2] connector. Parameters: <Slope> NEGative | POSitive *RST: POSitive Example: CLOC:INP:SLOP NEG The active slope of the external clock signal is the falling slope. :CLOCk:OUTPut:MODE <Mode>... - Page 359 ® Remote control commands R&S SGT100A CONNector subsystem ................360 :CONNector:USER<ch>:CLOCk:SLOPe .................360 :CONNector:USER<ch>:TRIGger:SLOPe :CONNector:REFLo:OUTPut <Output> Determines the signal provided at the output connector [REF/LO OUT] (rear of the instrument). Parameters: <Output> REF | LO | OFF *RST: Manual operation: "REF/LO Output" on page 221 :CONNector:USER<ch>:OMODe <Omode>...
-
Page 360: Diagnostic Subsystem
® Remote control commands R&S SGT100A DIAGnostic subsystem :CONNector:USER<ch>:THReshold <Threshold> Sets the threshold for the user connector. Parameters: <Threshold> float Range: 0 to 2 Increment: 0.1 *RST: Manual operation: "Threshold" on page 262 :CONNector:USER<ch>:CLOCk:IMPedance <Impedance> :CONNector:USER<ch>:TRIGger:IMPedance <Impedance> Selects the input impedance for the external trigger/clock inputs, when :CONNector: is set to TRIGger or CIN/COUT. -
Page 361: Format Subsystem
® Remote control commands R&S SGT100A FORMat Subsystem :DIAGnostic[:MEASure]:POINt? <Name> Triggers voltage or temperature measurement at the specified test point and returns the measured value. Use the command to retrieve a list of the available :DIAGnostic:POINt:CATalog? test points. For description of the test points, see the service manual. Query parameters: <Name>... - Page 362 ® Remote control commands R&S SGT100A FORMat Subsystem :FORMat[:DATA] <Data> Determines the data format which the R&S SGT uses to return data. When data is transferred from the control computer to the instrument, the instrument detects the data format automatically. In this case, the value set here is irrelevant. Parameters: <Data>...
-
Page 363: Mmemory Subsystem
® Remote control commands R&S SGT100A MMEMory subsystem 10.9 MMEMory subsystem The MMEMory subsystem (Mass Memory) contains the commands for managing files and directories as well as for loading and storing complete instrument settings in files. The files are stored on the internal flash memory of the instrument or on external USB memory devices. -
Page 364: Extensions For User Files
® Remote control commands R&S SGT100A MMEMory subsystem Before the instrument settings can be stored in a file, they have to be stored in an inter- mediate memory using common command *SAV <number>. The specified number is subsequently used in the on page 372 command. -
Page 365: Remote Control Commands
® Remote control commands R&S SGT100A MMEMory subsystem the directory usbuser contains the subdirectories test and temp as well as the files readme.txt, state.savrcltxt and waveform.wv which have different file types. Tip: To query only the subdirectories of the current or specified directory, perform: MMEM:DCAT? 'usbuser' Response: 'test', 'temp' To query only the number of subdirectories in the current or specified directory, per-... -
Page 366: Mmemory:catalog
® Remote control commands R&S SGT100A MMEMory subsystem :MMEMory:CATalog? <path> Returns the content of a particular directory. Query parameters: <path> string String parameter to specify the directory. If you leave out the path, the command returns the contents of the directory selected with :MMEMory:CDIRectory. The path may be relative or absolute. -
Page 367: Mmemory:copy
® Remote control commands R&S SGT100A MMEMory subsystem Parameters: <Directory> <directory_name> String containing the path to another directory. The path can be relative or absolute. To change to a higher directory, use two dots '..' . Usage: SCPI confirmed :MMEMory:COPY <SourceFile>[,<DestinationFile>] Copies an existing file to a new file. -
Page 368: Mmemory:data:unprotected
® Remote control commands R&S SGT100A MMEMory subsystem Parameters for setting and query: <Filename> string String parameter to specify the name of the file. Example: MMEMory:DATA '/var/user/test.txt',#15hallo Writes the block data to the file test.txt. The digit 1 indicates a length entry of one digit; the digit 5 indi- cate a length of the binary data (hallo) in bytes. -
Page 369: Mmemory:dcatalog
® Remote control commands R&S SGT100A MMEMory subsystem <Digits> Decimal value Gives the number of decimal digits used for the <Length> value <Length> Decimal value Number of bytes that follow in the <Binary data> part I0Q0..IxQx…IN-1QN-1 Binary data in ASCII format IxQx…... -
Page 370: Mmemory:dcatalog:length
® Remote control commands R&S SGT100A MMEMory subsystem Query parameters: <path> String parameter to specify the directory. If the directory is omit- ted, the command queries the content of the current directory, queried with command. :MMEMory:CDIRectory Return values: <Catalog> <file_entry> Names of the subdirectories separated by colons. -
Page 371: Mmemory:load:state
® Remote control commands R&S SGT100A MMEMory subsystem <HeapAvailableKb> integer Available heap memory. Usage: Query only :MMEMory:LOAD:STATe <SavRclStateNumb>, <file_name> Loads the specified file stored under the specified name in an internal memory. After the file has been loaded, the instrument setting must be activated using an *RCL command. -
Page 372: Fast Speed Commands
® Remote control commands R&S SGT100A Fast speed commands Note: Instruments with Linux operating system ignore this command, since Linux does not use drive letter assignment. Usage: SCPI confirmed :MMEMory:RDIRectory <Directory> Removes an existing directory from the mass memory storage system. If no directory is specified, the subdirectory with the specified name is deleted in the default directory. -
Page 373: Output Subsystem
® Remote control commands R&S SGT100A OUTPut subsystem :PFASt <Pow> Special command to set the RF output level with minimum latency at the RF output connector. This value does not consider a specified offset. No unit (e.g. dBm) allowed. Bypasses the status system so command *OPC? cannot be appended. Parameters: <Pow>... -
Page 374: Sconfiguration Subsystem
® Remote control commands R&S SGT100A SCONfiguration subsystem AUTO The attenuator is switched automatically. The level settings are made in the full range. APASsive The attenuator is switched automatically. The level settings are made only for the passive reference circuits. The high-level ranges are not available. -
Page 375: Sense, Read, Initiate And Slist Subsystems
® Remote control commands R&S SGT100A SENSe, READ, INITiate and SLISt subsystems STANdard Standard mode used for signal generation. AFETracking ARB foe Envelope Tracking: enables the usage of an extra baseband for enabling the envelope tracking ARB generation. *RST: STANdard Manual operation: "System Configuration"... - Page 376 ® Remote control commands R&S SGT100A SENSe, READ, INITiate and SLISt subsystems Programming examples Example: Detecting and assigning a power sensor SLISt:LIST? // Response: "NRP33SN-V-900007-USB Legacy","NRP-Z211-900001-USB Legacy" // Lists all automatically detected sensors. SLISt:SCAN:STATe 1 // Searches for sensors connected in the LAN or via the USBTMC protocol. SLISt:SCAN:LSENsor 'NRQ6',101624 // sensor name, serial number SLISt:SCAN:LSENsor 11.123.1.123, 101624 // IP address, serial number // Adds sensors to the list, that are connected to LAN.
- Page 377 ® Remote control commands R&S SGT100A SENSe, READ, INITiate and SLISt subsystems Example: Performing a power measurement with a fixed filter Prerequisite: The sensor is connected to the instrument and mapped to the first sensor channel. SENSe1:SOURce RF // Sensor measures the power of the RF signal. SENSe1:FILTer:TYPE NSRatio // Selects fixed noise filter mode.
- Page 378 ® Remote control commands R&S SGT100A SENSe, READ, INITiate and SLISt subsystems ..............384 :SENSe<ch>[:POWer]:FILTer:LENGth[:USER] ................385 :SENSe<ch>[:POWer]:FILTer:NSRatio ..............385 :SENSe<ch>[:POWer]:FILTer:NSRatio:MTIMe ................385 :SENSe<ch>[:POWer]:FILTer:SONCe ................. 386 :SENSe<ch>[:POWer]:FILTer:TYPE ..................386 :SENSe<ch>[:POWer]:FREQuency ................387 :SENSe<ch>[:POWer]:LOGGing:STATe ..................387 :SENSe<ch>[:POWer]:OFFSet ................387 :SENSe<ch>[:POWer]:OFFSet:STATe ................... 387 :SENSe<ch>[:POWer]:SNUMber? ..................388 :SENSe<ch>[:POWer]:SOURce .................
- Page 379 ® Remote control commands R&S SGT100A SENSe, READ, INITiate and SLISt subsystems Setting parameters: <IP> string *RST: Example: Example"Detecting and assigning a power sensor" on page 376. Usage: Setting only Manual operation: "Add LAN Sensor settings" on page 254 :SLISt:SCAN:USENsor <DeviceID>, <Serial> Scans for R&S NRP power sensors connected over a USB interface.
- Page 380 ® Remote control commands R&S SGT100A SENSe, READ, INITiate and SLISt subsystems :SLISt:CLEar[:ALL] Removes all R&S NRP power sensors from the list. Example: Example"Detecting and assigning a power sensor" on page 376. Usage: Event Manual operation: "Clear" on page 254 :SLISt:ELEMent<ch>:MAPPing <Mapping>...
- Page 381 ® Remote control commands R&S SGT100A SENSe, READ, INITiate and SLISt subsystems The remote measurement is triggered with :READ<ch>[:POWer]?). This command also returns the measurement results. The local state is not affected, measurement results can be retrieved with local state on or off. Parameters: <Continuous>...
- Page 382 ® Remote control commands R&S SGT100A SENSe, READ, INITiate and SLISt subsystems Parameters: <Power> DBM | DBUV | WATT *RST: Example: :SENS2:UNIT DBM Selects dBm as unit for the measured value returned by com- mand READ. :READ2? Response: 7.34 7.34 dBm are measured by sensor 2. Manual operation: "Level (Peak) / Level (Average)"...
- Page 383 ® Remote control commands R&S SGT100A SENSe, READ, INITiate and SLISt subsystems Manual operation: "S-Parameter" on page 252 :SENSe<ch>[:POWer]:CORRection:SPDevice:STATe <State> Activates the use of the S-parameter correction data. Note: If you use power sensors with attenuator, the instrument automatically activates the use of S-parameter data.
- Page 384 ® Remote control commands R&S SGT100A SENSe, READ, INITiate and SLISt subsystems Parameters: <State> 1 | ON | 0 | OFF *RST: Example: :SENS1:POW:DISP:PERM:STAT ON Turns on the permanent view. Manual operation: "Permanent" on page 250 :SENSe<ch>[:POWer]:FILTer:LENGth:AUTO? Queries the current filter length in filter mode AUTO (:SENSe<ch>[:POWer]: FILTer:TYPE) Return values:...
- Page 385 ® Remote control commands R&S SGT100A SENSe, READ, INITiate and SLISt subsystems Manual operation: "Filter Length" on page 251 :SENSe<ch>[:POWer]:FILTer:NSRatio <NSRatio> Sets an upper limit for the relative noise content in fixed noise filter mode SENSe<ch>[:POWer]:FILTer:TYPE). This value determines the proportion of intrin- sic noise in the measurement results.
- Page 386 ® Remote control commands R&S SGT100A SENSe, READ, INITiate and SLISt subsystems Manual operation: "Auto Once" on page 251 :SENSe<ch>[:POWer]:FILTer:TYPE <Type> Selects the filter mode. The filter length is the multiplier for the time window and thus directly affects the measurement time. Parameters: <Type>...
- Page 387 ® Remote control commands R&S SGT100A SENSe, READ, INITiate and SLISt subsystems :SENSe<ch>[:POWer]:LOGGing:STATe <State> Activates the recording of the power values, measured by a connected R&S NRP power sensor. Parameters: <State> 1 | ON | 0 | OFF *RST: Example: :SENS:LOGG:STAT ON Activates recording of the power measurement of the first sen- sor.
- Page 388 ® Remote control commands R&S SGT100A SENSe, READ, INITiate and SLISt subsystems Return values: <SNumber> string Example: :SENS1:SNUM? Queries the serial number. Usage: Query only Manual operation: "Sensor type and serial number" on page 249 :SENSe<ch>[:POWer]:SOURce <Source> Determines the signal to be measured. Note: When measuring the RF signal, the sensor considers the corresponding correc- tion factor at that frequency, and uses the level setting of the instrument as reference level.
-
Page 389: Source Subsystem
® Remote control commands R&S SGT100A SOURce subsystem :SENSe<ch>[:POWer]:TYPE? Queries the sensor type. The type is automatically detected. Return values: <Type> string Example: :SENS1:TYPE? Queries the type of sensor. Response: NRP-Z21 The R&S NRP-Z21 sensor is used. Usage: Query only Manual operation: "Sensor type and serial number"... -
Page 390: Source General Commands
® Remote control commands R&S SGT100A SOURce subsystem ● SOURce:BB:ARBitrary:CFR subsystem............... 449 ● SOURce:BBIN subsystem..................455 ● SOURce:BB:IMPairment subsystem..............462 ● SOURce:BB:PROGress subsystem general commands........467 ● SOURce:BB:POWer subsystem................468 ● SOURce:CORRection subsystem.................469 ● SOURce:IQ subsystem..................478 ● SOURce:IQ:OUTPut subsystem................481 ●... - Page 391 ® Remote control commands R&S SGT100A SOURce subsystem Parameters: <Offset> float Range: -3e9 to 3e9 Increment: 1E-3 *RST: Example: SOURce:FREQuency:OFFSet 0 SOURce:FREQuency:CW 2143000000 SOURce:FREQuency:OFFSet 20000000 SOURce:FREQuency:CW? // 2163000000 Manual operation: "Offset" on page 218 [:SOURce]:OPMode <OpMode> Sets the operation mode. Parameters: <OpMode>...
-
Page 392: Source:awgn Subsystem
® Remote control commands R&S SGT100A SOURce subsystem Example: PATH:COUN? Queries the number of RF paths. Response: 1 The instrument is equipped with one RF path. Usage: Query only 10.14.2 SOURce:AWGN subsystem The SOURce:AWGN subsystem contains the commands for setting the noise generator. These commands are available in instrument equipped with the option R&S SGT-K62 (Additive White Gaussian Noise). - Page 393 ® Remote control commands R&S SGT100A SOURce subsystem [:SOURce<hw>]:AWGN:BWIDth <BWidth> Sets the system bandwidth. The noise signal at the level which corresponds to the specified carrier/noise ratio is generated in the bandwidth specified here. This command is available for modes Additive Noise and Noise Only (SOUR:AWGN:MODE ADD|ONLY).
- Page 394 ® Remote control commands R&S SGT100A SOURce subsystem Example: AWGN:BWID:RAT 2 sets a minimum noise/system bandwidth ratio of 2. Manual operation: "Minimum Noise/System Bandwidth Ratio" on page 145 [:SOURce<hw>]:AWGN:CNRatio <CnRatio> In Additive Noise and CW Interferer (SOUR:AWGN:MODE ADD|CW) mode, sets the car- rier/interferer ratio.
- Page 395 ® Remote control commands R&S SGT100A SOURce subsystem [:SOURce<hw>]:AWGN:ENRatio <EnRatio> In Additive Noise mode, sets the ratio of bit energy to noise power density. For Digital Standard signals, the bit rate used for calculation of E value from C/N value is defined with command SOUR:AWGN:BRAT. Parameters: <EnRatio>...
- Page 396 ® Remote control commands R&S SGT100A SOURce subsystem Manual operation: "Target CW Frequency Offset" on page 145 [:SOURce<hw>]:AWGN:MODE <Mode> Selects the mode for generating the interfering signal. Parameters: <Mode> ONLY | ADD | CW The AWGN noise signal is added to the baseband signal. ONLY The pure AWGN noise signal is modulated to the carrier.
- Page 397 ® Remote control commands R&S SGT100A SOURce subsystem [:SOURce<hw>]:AWGN:POWer:MODE <Mode> In Additive Noise (SOUR:AWGN:MODE ADD) mode, selects the mode for setting the noise power. Parameters: <Mode> CN | SN | EN CN|SN The noise power is set on the basis of the value entered for the carrier/noise or signal/noise ratio (SOURce:AWGN:CNRatio|SNRatio).
- Page 398 ® Remote control commands R&S SGT100A SOURce subsystem Return values: <Total> float Range: -145 to 20 Increment: 0.01 *RST: Example: SOURce:AWGN:POWer:NOISe:TOTal? queries the noise power in the total bandwidth. Response: 15 the noise power in the total bandwidth is 15 dBm. Usage: Query only Manual operation:...
- Page 399 ® Remote control commands R&S SGT100A SOURce subsystem Return values: <Sum> float Range: -145 to 20 Increment: 0.01 *RST: Example: SOURce:AWGN:POWer:SUM? queries the overall power of the noise signal plus useful signal. Usage: Query only Manual operation: "Carrier + Noise Power / Signal + Noise Power (System Bandwidth) / Carrier + Interferer Power / Signal + Interferer Power"...
-
Page 400: Source:bb Subsystem General Commands
® Remote control commands R&S SGT100A SOURce subsystem 10.14.3 SOURce:BB subsystem general commands The following section describes the commands for setting the frequency shift and the phase offset for the signal at the "Baseband" block output....................400 [:SOURce]:BB:FOFFset ....................400 [:SOURce]:BB:POFFset ..................... -
Page 401: Source:bb:arb Subsystem
® Remote control commands R&S SGT100A SOURce subsystem Return values: <InfoXmlString> string Usage: Query only 10.14.4 SOURce:BB:ARB subsystem The ARB subsystem contains the commands for setting the ARB Generator. Settings for clock and trigger interfaces and for external outputs are entered in the SOURce:INPut and SOURce:OUTput subsystems. - Page 402 ® Remote control commands R&S SGT100A SOURce subsystem [:SOURce<hw>]:BB:ARBitrary:STATe <State> Activates the standard and deactivates all the other digital standards and digital modu- lation modes in the same path. You have to selecta an waveform first. Parameters: <State> 0 | 1 | OFF | ON *RST: Example: SOURce1:BB:ARBitrary:WAV:SELect 'wave1'...
- Page 403 ® Remote control commands R&S SGT100A SOURce subsystem [:SOURce<hw>]:BB:ARBitrary:CLOCk <Clock> The command sets the clock rate in samples. Loading a waveform waveform (ARB:WAV:SEL <name>) sets the clock rate that is defined in the waveform tag 'clock'. The command subsequently changes the clock rate; see data sheet for value range. In the case of an external clock source (selection ARB:CLOCk:SOURce EXTernal) the clock for the external source must be entered with this command.
- Page 404 ® Remote control commands R&S SGT100A SOURce subsystem Example: BB:ARB:CLOC:SOUR EXT selects the external clock source. The clock is supplied via the CLOCK connector. BB:ARB:CLOC:MODE MSAM selects clock type Multiple Samples, i.e. the supplied clock has a rate which is a multiple of the sample rate. BB:ARB:CLOC:MULT 12 The multiplier for the external clock rate is 12.
- Page 405 ® Remote control commands R&S SGT100A SOURce subsystem SECondary The instrument receives the synchronisation and reference clock signal from another instrument working in primary mode. DIIN The instrument receives the synchronisation and reference clock signal from the "DIG I/Q" connector. *RST: NONE Manual operation:...
- Page 406 ® Remote control commands R&S SGT100A SOURce subsystem [:SOURce<hw>]:BB:ARBitrary:TRIGger:ARM:EXECute The command stops waveform output for trigger modes Armed_Auto and Armed_Ret- rigger. A subsequent internal or external trigger event restart waveform output. Example: BB:ARB:TRIG:SOUR INT sets internal triggering. BB:ARB:TRIG:SEQ ARET sets Armed_Retrigger mode, i.e. every trigger event causes waveform output to restart.
- Page 407 ® Remote control commands R&S SGT100A SOURce subsystem The signal calculation starts simultaneously with the external trigger event but because of the instrument’s processing time the first samples are cut off and no signal is outputted. After elapsing of the internal processing time, the output signal is syn- chronous to the trigger event.
- Page 408 ® Remote control commands R&S SGT100A SOURce subsystem The waveform is output. A trigger event occurred in the triggered mode. STOP The waveform is not output. A trigger event did not occur in the triggered modes, or waveform output was stopped by the com- mand :BB:ARB:TRIG:ARM:EXECute (armed trigger modes only).
- Page 409 ® Remote control commands R&S SGT100A SOURce subsystem Parameters: <SLUnit> SEQuence | SAMPle *RST: SEQuence Example: BB:ARB:SEQ SING sets trigger mode Single. BB:ARB:TRIG:SLUN SEQ sets unit Sequence length for the entry of sequence length. BB:ARB:TRIG:SLEN 2 sets a sequence length of 2 waveforms. The current waveforms will be output twice after the next trigger event.
- Page 410 ® Remote control commands R&S SGT100A SOURce subsystem Parameters: <TrigDelUnit> SAMPle | TIME *RST: SAMPle Manual operation: "External Delay Unit" on page 124 [:SOURce<hw>]:BB:ARBitrary:TRIGger[:EXTernal<1|2>]:DELay <Delay> The command specifies the trigger delay (expressed as a number of samples) for external triggering. Parameters: <Delay>...
- Page 411 ® Remote control commands R&S SGT100A SOURce subsystem [:SOURce<hw>]:BB:ARBitrary:TRIGger[:EXTernal<1|2>]:INHibit <Inhibit> Specifies the number of samples by which a restart is to be inhibited following a trigger event. This command applies only in the case of external triggering. Parameters: <Inhibit> integer Range: 0 to 67108863 *RST:...
- Page 412 ® Remote control commands R&S SGT100A SOURce subsystem Example: BB:ARB:SEQ AAUT sets the "Armed_auto" trigger mode; the device waits for the first trigger (e.g. with *TRG) and then generates the signal continu- ously. Manual operation: "Trigger Mode" on page 121 10.14.4.4 Marker commands The TRIGger:OUTPut subsystem contains the commands for setting the marker.
- Page 413 ® Remote control commands R&S SGT100A SOURce subsystem RATio A regular marker signal corresponding to the Time Off / Time On specifications in the com- mands :ARB:TRIGger:OUTPut:OFFTime and :ARB:TRIGger:OUTPut:ONTime is generated. *RST: UNCHanged Manual operation: "Marker Mode" on page 131 [:SOURce<hw>]:BB:ARBitrary:TRIGger:OUTPut<ch>:OFFTime <OffTime>...
- Page 414 ® Remote control commands R&S SGT100A SOURce subsystem Parameters: <Divider> integer Range: 2 to 1024 *RST: Manual operation: "Marker Mode" on page 131 [:SOURce<hw>]:BB:ARBitrary:TRIGger:OUTPut<ch>:PULSe:FREQuency? The command queries the pulse frequency of the pulsed marker signal in the setting SOURce:BB:ARB:TRIGger:OUTPut:MODE PULSe. The pulse frequency is derived by dividing the symbol rate by the divider.
- Page 415 ® Remote control commands R&S SGT100A SOURce subsystem [:SOURce<hw>]:BB:ARBitrary:TRIGger:OUTPut<ch>:DELay <Delay> Sets the delay between the signal on the marker outputs and the start of the signals. Parameters: <Delay> integer Range: 0 to depends on other values Increment: 0.001 *RST: Default unit: Samples Manual operation: "Marker x Delay"...
- Page 416 ® Remote control commands R&S SGT100A SOURce subsystem Manual operation: "Generate Signal RAM" on page 118 [:SOURce<hw>]:BB:ARBitrary:TSIGnal:CIQ:CREate:NAMed <Filename> [:SOURce<hw>]:BB:ARBitrary:TSIGnal:RECTangle:CREate:NAMed <Filename> [:SOURce<hw>]:BB:ARBitrary:TSIGnal:SINE:CREate:NAMed <Filename> Generates a signal and saves it to a waveform file. Setting parameters: <Filename> string Example: BB:ARB:TSIG:SINE:CRE:NAM 'sine_test' generates a test sine signal and saves it into the wavefile sine_test.
- Page 417 ® Remote control commands R&S SGT100A SOURce subsystem [:SOURce<hw>]:BB:ARBitrary:TSIGnal:RECTangle:FREQuency <Frequency> Sets the frequency of the test signal. Parameters: <Frequency> float Range: 100 to depends on hardware Increment: 0.01 *RST: 1000 Example: SOURce:BB:ARBitrary:TSIGnal:RECTangle:FREQuency 100 kHz sets the frequency of the test signal of 100 kHz. Manual operation: "Frequency"...
- Page 418 ® Remote control commands R&S SGT100A SOURce subsystem Parameters: <Frequency> float Range: 100 to depends on hardware Increment: 0.01 *RST: 1000 Default unit: Hz Example: BB:ARB:TSIG:SINE:FREQ 100 kHz sets a sine signal of 100 kHz. Manual operation: "Frequency" on page 117 [:SOURce<hw>]:BB:ARBitrary:TSIGnal:SINE:PHASe <Phase>...
- Page 419 ® Remote control commands R&S SGT100A SOURce subsystem CARRier<ch> The numerical suffix under CARRier distinguish between the carriers. The value range is 0 .. 31..........419 [:SOURce<hw>]:BB:ARBitrary:MCARrier:CARRier:COUNt ..........420 [:SOURce<hw>]:BB:ARBitrary:MCARrier:CARRier:MODE ..........420 [:SOURce<hw>]:BB:ARBitrary:MCARrier:CARRier:SPACing ........421 [:SOURce<hw>]:BB:ARBitrary:MCARrier:CARRier<ch>:CONFlict? .......... 421 [:SOURce<hw>]:BB:ARBitrary:MCARrier:CARRier<ch>:DELay ..........421 [:SOURce<hw>]:BB:ARBitrary:MCARrier:CARRier<ch>:FILE ........
- Page 420 ® Remote control commands R&S SGT100A SOURce subsystem Parameters: <Count> integer Range: 1 to 512 *RST: Example: BB:ARB:MCAR:CARR:COUN 10 sets 10 carriers for the multi carrier waveform. Manual operation: "Number of Carriers" on page 107 [:SOURce<hw>]:BB:ARBitrary:MCARrier:CARRier:MODE <Mode> The command sets the carrier frequency mode. Parameters: <Mode>...
- Page 421 ® Remote control commands R&S SGT100A SOURce subsystem Parameters: <Spacing> float Range: 0.0 to 120E6 Increment: 0.01 *RST: Default unit: Hz Example: BB:ARB:MCAR:CARR:SPAC 10 MHz sets a carrier spacing of 10 MHz. Manual operation: "Carrier Spacing" on page 107 [:SOURce<hw>]:BB:ARBitrary:MCARrier:CARRier<ch>:CONFlict? Queries carrier conflicts.
- Page 422 ® Remote control commands R&S SGT100A SOURce subsystem Example: BB:ARB:MCAR:CARR15:FILE "/var/user/IQ_wcdma" selects file IQ_wcdma. The data of the file is modulated onto carrier 15. Manual operation: "File" on page 115 [:SOURce<hw>]:BB:ARBitrary:MCARrier:CARRier<ch>:FREQuency <Frequency> Sets or indicates the carrier frequency, depending on the selected carrier frequency mode.
- Page 423 ® Remote control commands R&S SGT100A SOURce subsystem Parameters: <Power> float Range: -80 to 0 Increment: 0.01 *RST: Default unit: dB Example: BB:ARB:MCAR:CARR15:POW -50 dB sets the power of carrier 15 to -50 dB. Manual operation: "Gain" on page 115 [:SOURce<hw>]:BB:ARBitrary:MCARrier:POWer:REFerence <Reference>...
- Page 424 ® Remote control commands R&S SGT100A SOURce subsystem The crest factor is maximized by internally calculating optimized carrier phases. The Phase setting (command BB:ARB:MCAR:CARR:PHAS) is invalid. *RST: Example: BB:ARB:MCAR:CFAC:MODE OFF switches off automatic crest factor optimization. The setting SOUR:BB:ARB:MCAR:CARR:PHAS has an effect. Manual operation: "Crest Factor Mode"...
- Page 425 ® Remote control commands R&S SGT100A SOURce subsystem Example: BB:ARB:MCAR:CLIP:STAT ON Enables clipping BB:ARB:MCAR:CLIP:CUT 50 MHz Sets the cut off frequency of the filter. Manual operation: "Filter Cut Off Frequency" on page 109 [:SOURce<hw>]:BB:ARBitrary:MCARrier:CLIPping[:STATe] <State> Switches baseband clipping on and off. Clipping reduces the peak power of the resulting multi carrier signal according to the value set with the command BB:ARB:MCAR:CLIP:CFAC.
- Page 426 ® Remote control commands R&S SGT100A SOURce subsystem [:SOURce<hw>]:BB:ARBitrary:MCARrier:CLOCk? The command queries the resulting sample rate at which the multi carrier waveform is output by the arbitrary waveform generator. The output clock rate depends on the num- ber of carriers, carrier spacing and input sample rate of the leftmost or rightmost carri- ers.
- Page 427 ® Remote control commands R&S SGT100A SOURce subsystem Example: BB:ARB:MCAR:EDIT:CARR:DEL 5 us sets a start delay of 5 us for the carriers in the carrier range. BB:ARB:MCAR:EDIT:CARR:DEL:STEP 1 us the start delay is incremented by 1us for each carrier, i.e. the first carrier has a start delay of 5us, the second a start delay of 6 us, etc.
- Page 428 ® Remote control commands R&S SGT100A SOURce subsystem Parameters: <File> string Example: BB:ARB:MCAR:EDIT:CARR:FILE "/var/user/IQ_wcdma' Manual operation: "Input Waveform File" on page 114 [:SOURce<hw>]:BB:ARBitrary:MCARrier:EDIT:CARRier:PHASe:STEP <Step> The command sets the step width by which the start phases of the carriers in the defined carrier range will be incremented.
- Page 429 ® Remote control commands R&S SGT100A SOURce subsystem [:SOURce<hw>]:BB:ARBitrary:MCARrier:EDIT:CARRier:POWer:STEP <Step> The command sets the step width by which the starting power of the carriers in the defined carrier range will be incremented. Parameters: <Step> float Range: -80 to 80 Increment: 0.01 *RST: Default unit: dB Example:...
- Page 430 ® Remote control commands R&S SGT100A SOURce subsystem Example: BB:ARB:MCAR:EDIT:CARR:STOP 4 the carrier range stops at carrier 4. Manual operation: "Carrier Stop" on page 113 [:SOURce<hw>]:BB:ARBitrary:MCARrier:EDIT:CARRier:STATe <State> The command switches all the carriers in the selected carrier range on or off. Parameters: <State>...
- Page 431 ® Remote control commands R&S SGT100A SOURce subsystem Example: BB:ARB:MCAR:SAMP? queries the file size of the currently calculated multi carrier waveform. Usage: Query only Manual operation: "File Size" on page 111 [:SOURce<hw>]:BB:ARBitrary:MCARrier:SETTing:CATalog? Queries the available settings files in the specified default directory. The settings files are used to set the ARB multi carrier submenu.
- Page 432 ® Remote control commands R&S SGT100A SOURce subsystem Example: BB:ARB:MCAR:SETT:STOR '/var/user/mcarr2' stores settings file mcarr2.arb_multcarr in the default direc- tory. Usage: Setting only Manual operation: "Save/Recall Frame" on page 106 [:SOURce<hw>]:BB:ARBitrary:MCARrier:SETTing:STORe:FAST <Fast> Determines whether the instrument performs an absolute or a differential storing of the settings.
- Page 433 ® Remote control commands R&S SGT100A SOURce subsystem LONG The resulting signal period is defined by the longest I/Q file in the carrier table. Shorter I/Q files are periodically repeated. SHORt The resulting signal period is defined by the shortest I/Q file in the carrier table.
- Page 434 ® Remote control commands R&S SGT100A SOURce subsystem Example: MMEM:CDIR '/var/user/waveform' sets the default directory. BB:ARB:WAV:CAT? reads out all the files in the default directory. Response: sin1, wave the directory contains the waveform files sin1.wv and wave.wv. Usage: Query only [:SOURce<hw>]:BB:ARBitrary:WAVeform:CATalog:LENGth? Reads out the files in the default directory and returns the number of waveform files in this directory.
- Page 435 ® Remote control commands R&S SGT100A SOURce subsystem Example: on page 368 :MMEMory:DATA:UNPRotected [:SOURce<hw>]:BB:ARBitrary:WAVeform:DATA <Filename>, <Data> [:SOURce<hw>]:BB:ARBitrary:WAVeform:DATA? <Tag> The setting command writes the binary block data <data> to the file identified by <filename>. The complete content of the waveform file is transmitted as a binary data block.
- Page 436 ® Remote control commands R&S SGT100A SOURce subsystem Setting parameters: <Filename> string Example: BB:ARB:WAV:DEL '/var/user/wave1.wv' deletes waveform file wave1.wv. Usage: Setting only [:SOURce<hw>]:BB:ARBitrary:WAVeform:FREE? Queries the free disk space on the default path of the instrument's harddisk. Return values: <Free> integer Range: 0 to INT_MAX *RST:...
- Page 437 ® Remote control commands R&S SGT100A SOURce subsystem Example: [:SOURce<hw>]:BB:ARBitrary:WAVeform: on page 436 HDDStreaming:BLEVel? [:SOURce<hw>]:BB:ARBitrary:WAVeform:POINts? The command queries the number of samples in the waveform file selected using com- mand :ARB:WAV:SEL. Only the file name has to be entered. Only files with the file extension *.wv will be read out.
- Page 438 ® Remote control commands R&S SGT100A SOURce subsystem 10.14.4.8 SOURce:BB:ARB:WSEG subsystem The WSEGment subsystem contains the commands for setting the Multi Segment Waveform Generator..............438 [:SOURce<hw>]:BB:ARBitrary:WSEGment? ............439 [:SOURce<hw>]:BB:ARBitrary:WSEGment:CLOad ......439 [:SOURce<hw>]:BB:ARBitrary:WSEGment:CONFigure:BLANk:APPend ........440 [:SOURce<hw>]:BB:ARBitrary:WSEGment:CONFigure:CATalog? .......... 440 [:SOURce<hw>]:BB:ARBitrary:WSEGment:CONFigure:CLOCk ....... 441 [:SOURce<hw>]:BB:ARBitrary:WSEGment:CONFigure:CLOCk:MODE ........441 [:SOURce<hw>]:BB:ARBitrary:WSEGment:CONFigure:COMMent ..........441 [:SOURce<hw>]:BB:ARBitrary:WSEGment:CONFigure:DELete...
- Page 439 ® Remote control commands R&S SGT100A SOURce subsystem [:SOURce<hw>]:BB:ARBitrary:WSEGment:CLOad <FilenameInput> Creates a and loads a multi segment waveform using the current entries of the speci- fied configuration file. This multi segment waveform is saved with the file name specified in the configuration file.
- Page 440 ® Remote control commands R&S SGT100A SOURce subsystem Example: SOUR:BB:ARB:WSEG:CONF:SEL "MSegFile" selects a multi segment file. SOUR:BB:ARB:WSEG:CONF:BLAN:APP 1000,100000000 adds a blank segment with 1000 samples and 100 MHz clock rate to the selected multi segment file Usage: Setting only Manual operation: "Clock Rate"...
- Page 441 ® Remote control commands R&S SGT100A SOURce subsystem [:SOURce<hw>]:BB:ARBitrary:WSEGment:CONFigure:CLOCk:MODE <Mode> Selects the clock rate mode for the multi segment waveform. Parameters: <Mode> UNCHanged | HIGHest | USER UNCHanged The segments are output with the clock rate defined in the wave- form file.
- Page 442 ® Remote control commands R&S SGT100A SOURce subsystem [:SOURce<hw>]:BB:ARBitrary:WSEGment:CONFigure:LEVel[:MODE] <Mode> This command selects the level mode for the multi segment waveform. Parameters: <Mode> UNCHanged | ERMS UNCHanged The segments are output exactly as defined in the files. ERMS The segments are output so that all segments have the same rms value.
- Page 443 ® Remote control commands R&S SGT100A SOURce subsystem If additional marker generation is enabled, the existing marker signals in the individual segment waveform files are not considered. Parameters: <Mode> OFF | MRK1 | MRK2 | MRK3 | MRK4 No additional marker is generated. MRK1|MRK2|MRK3|MRK4 Generates a restart marker signal at the beginning of the first segment for the corresponding marker.
- Page 444 ® Remote control commands R&S SGT100A SOURce subsystem Example: MMEM:CDIR '/var/user/waveform' sets the default directory. BB:ARB:WSEG:CONF:SEL 'multi1' creates the configuration file multi1.inf_mswv in default directory. BB:ARB:WSEG:CONF:OFIL 'mseg1_2' defines the file name mseg1_2.wv for the multi segment wave- form file created using configuration file multi1.inf_mswv. Manual operation: "Save List"...
- Page 445 ® Remote control commands R&S SGT100A SOURce subsystem Manual operation: "Append" on page 99 [:SOURce<hw>]:BB:ARBitrary:WSEGment:CONFigure:SELect <Filename> Selects the configuration file in the default directory. A path can also be specified, in which case the files in the specified directory are selected.
- Page 446 ® Remote control commands R&S SGT100A SOURce subsystem [:SOURce<hw>]:BB:ARBitrary:WSEGment:LMODe <LevelMode> Sets how the segments are leveled. Parameters: <LevelMode> HIGHest | UNCHanged *RST: HIGHest Example: :SOURce1:BB:ARBitrary:WSEGment:LMODe HIGHest [:SOURce<hw>]:BB:ARBitrary:WSEGment:NAME? This command queries the name of the waveform of the currently output segment of the multi segment waveform.
- Page 447 ® Remote control commands R&S SGT100A SOURce subsystem [:SOURce<hw>]:BB:ARBitrary:WSEGment:NEXT:EXECute Triggers manually switchover to the subsequent segment in the mutli segment file. A manual trigger can be executed only when an internal next segment source (BB:ARB:WSEG:NEXT:SOUR INT) has been selected. To perform a switchover to any segment within the multi segment file, select the next segment with the command BB:ARB:WSEG:NEXT.
- Page 448 ® Remote control commands R&S SGT100A SOURce subsystem <Segment> integer indicates the number of the segment as in the multi segment waveform file Range: 0 to SegmentCount - 1 <Count> integer defines how many times this segment is repeated Range: 1 to 65535 <Next>...
-
Page 449: Source:bb:arbitrary:cfr Subsystem
® Remote control commands R&S SGT100A SOURce subsystem 10.14.5 SOURce:BB:ARBitrary:CFR subsystem Option R&S SGT-K548 is required for the use of the following SCPIs. Example: Preparing for CFR // Load an ARB waveform file, e.g., the file "test.wv". SOURce1:BB:ARBitrary:LOAD "test" // Activate ARB. SOURce1:BB:ARBitrary:STATe 1 Example: Applying clipping and filtering algorithm // Set for filter and clipping CFR algorithm. - Page 450 ® Remote control commands R&S SGT100A SOURce subsystem ..............450 [:SOURce<hw>]:BB:ARBitrary:CFR[:STATe] ..............450 [:SOURce<hw>]:BB:ARBitrary:CFR:ALGorithm .............451 [:SOURce<hw>]:BB:ARBitrary:CFR:CPBandwidth ..............451 [:SOURce<hw>]:BB:ARBitrary:CFR:CSPacing ..............451 [:SOURce<hw>]:BB:ARBitrary:CFR:DCFDelta ............... 451 [:SOURce<hw>]:BB:ARBitrary:CFR:FILTer ..............452 [:SOURce<hw>]:BB:ARBitrary:CFR:FORDer ..............452 [:SOURce<hw>]:BB:ARBitrary:CFR:ITERations .............452 [:SOURce<hw>]:BB:ARBitrary:CFR:MEASure[:STATe]? ..............452 [:SOURce<hw>]:BB:ARBitrary:CFR:OCFactor? ..............453 [:SOURce<hw>]:BB:ARBitrary:CFR:PFReq ..............453 [:SOURce<hw>]:BB:ARBitrary:CFR:RCFactor? ..............
- Page 451 ® Remote control commands R&S SGT100A SOURce subsystem Manual operation: "Algorithm" on page 138 [:SOURce<hw>]:BB:ARBitrary:CFR:CPBandwidth <ArbCfrCancPulBw> Sets the cancellation pulse bandwidth for peak cancellation CFR algorithm. Parameters: <ArbCfrCancPulBw> float Range: 0 to 250E6 Increment: 0.1 Example: Example"Applying peak cancellation algorithm" on page 449.
- Page 452 ® Remote control commands R&S SGT100A SOURce subsystem [:SOURce<hw>]:BB:ARBitrary:CFR:FORDer <ArbCfrMaxFilOrd> Sets the maximum filter order, if [:SOURce<hw>]:BB:ARBitrary:CFR:FILTer set to ENHanced. Parameters: <ArbCfrMaxFilOrd> integer Range: 0 to 300 *RST: Example: Example"Applying clipping and filtering algorithm" on page 449. Manual operation: "Maximum Filter Order" on page 141 [:SOURce<hw>]:BB:ARBitrary:CFR:ITERations <ArbCfrMaxIter>...
- Page 453 ® Remote control commands R&S SGT100A SOURce subsystem Return values: <ArbCfrOCrestFac> float Range: 1 to 100 Increment: 0.01 *RST: Usage: Query only Manual operation: "Original Crest Factor" on page 139 [:SOURce<hw>]:BB:ARBitrary:CFR:PFReq <ArbCfrPassBFreq> Sets the passband frequency, if [:SOURce<hw>]:BB:ARBitrary:CFR:FILTer set to ENHanced. Frequency components lower than the passband frequency are passed through unfiltered.
- Page 454 ® Remote control commands R&S SGT100A SOURce subsystem The value of the signal bandwidth should not be higher than the channel spacing SOURce<hw>]:BB:ARBitrary:CFR:CSPacing). Parameters: <ArbCfrSignalBw> float Range: 0 to depends on the sample rate of the loaded file Increment: 0.1 *RST: 250E6 Manual operation:...
-
Page 455: Source:bbin Subsystem
® Remote control commands R&S SGT100A SOURce subsystem Setting parameters: <CreateWvFile> string Example: Example"Activating and monitoring CFR characteristics" on page 449. Usage: Setting only Manual operation: "Generate Waveform" on page 138 10.14.6 SOURce:BBIN subsystem The SOURce:BBIN subsystem contains the commands for setting the external digital baseband signals. - Page 456 ® Remote control commands R&S SGT100A SOURce subsystem [:SOURce<hw>]:BBIN:CDEVice? Digital Input only. Indicates the ID of an externally connected R&S Instrument or R&S Device. Return values: <CDevice> string Example: BBIN:CDEV queries the connected device ID. Usage: Query only Manual operation: "Connected Device"...
- Page 457 ® Remote control commands R&S SGT100A SOURce subsystem Parameters: <FOffset> float Range: -40E6 to 40E6 Increment: 0.01 *RST: Default unit: Hz Example: BBIN:FOFF 2 MHz sets a frequency offset of 2 MHz. Manual operation: "Frequency Offset" on page 268 [:SOURce<hw>]:BBIN:GIMBalance <GImbalance> This command enters a gain to the Q component of the external baseband signal.
- Page 458 ® Remote control commands R&S SGT100A SOURce subsystem DIGItal The external digital baseband signal is fed into the signal path via the "Digital Input" connector. The internal signal processing is based on a sample rate of 100 MHz. Input signals with a sam- ple rate less than 100 MHz are upsampled.
- Page 459 ® Remote control commands R&S SGT100A SOURce subsystem Example: BBIN:MODE DIG selects the digital baseband input mode. BBIN:OLO:HOLD:RES resets the overload hold state. Usage: Event [:SOURce<hw>]:BBIN:OLOad:HOLD:STATe? This command queries an overload since the last reset for evaluating the measure- ment. The Overload Hold state can be reset via the "Reset" command, or is reset auto- matically by starting a new measurement ("Auto Level Set") or by setting new values (Crest Factor, Peak Level, Level).
- Page 460 ® Remote control commands R&S SGT100A SOURce subsystem Parameters: <Delay> float Range: 0 to 1 Increment: 1E-9 *RST: [:SOURce<hw>]:BBIN:PGAin <PGain> This command enters the relative gain for the external baseband signal compared with the signals of the other baseband sources. The actual gain of the different baseband signals depends not only on the path gain setting but also on the signal characteristics such as the crest factor and on the number of used sources.
- Page 461 ® Remote control commands R&S SGT100A SOURce subsystem Example: BBIN:POW:RMS queries the estimated rms level. Usage: Query only Manual operation: "Level" on page 267 [:SOURce<hw>]:BBIN:SKEW <Skew> This command determines the delay between Q and I channel. Positive values repre- sent a delay for Q versus I. Parameters: <Skew>...
-
Page 462: Source:bb:impairment Subsystem
® Remote control commands R&S SGT100A SOURce subsystem [:SOURce<hw>]:BBIN:STATe <State> This command switches the feeding of an external analog signal into the signal path on/off. Parameters: <State> 0 | 1 | OFF | ON *RST: Example: BBIN:SOUR ANAL selects an external analog signal as the input signal. The signal must be applied at the inputs I and Q. - Page 463 ® Remote control commands R&S SGT100A SOURce subsystem A positive value means that the I and Q vectors delay relative to the marker/trigger or to the other instrument and vice versa. Parameters: <Delay> float Range: -500E-9 to 500E-9 Increment: 1E-12 *RST: Example: BB:IMP:DEL 32.0E-9...
- Page 464 ® Remote control commands R&S SGT100A SOURce subsystem [:SOURce<hw>]:BB:IMPairment:LEAKage:Q <Q> This command sets the carrier leakage amplitude for the Q-signal component. Parameters: <Q> float Range: -10 to 10 Increment: 0.01 *RST: Default unit: PCT Example: BB:IMP:LEAK:Q 3 PCT sets the leakage for the Q-component to 3 percent. Manual operation: "I/Q Offset"...
- Page 465 ® Remote control commands R&S SGT100A SOURce subsystem [:SOURce<hw>]:BB:IMPairment:STATe <State> The command activates (ON) and deactivates (OFF) the three impairment or correc- tion values LEAKage, QUADrature and IQRatio for the digital baseband signal prior to input into the I/Q modulator. Parameters: <State>...
- Page 466 ® Remote control commands R&S SGT100A SOURce subsystem Parameters: <State> 0 | 1 | OFF | ON *RST: Manual operation: "State" on page 159 [:SOURce]:BB:IMPairment:IQOutput<ch>:DELay <Delay> Defines the time delay of both I and Q vectors between the marker signal at the marker outputs relative to the signal generation start.
-
Page 467: Source:bb:progress Subsystem General Commands
® Remote control commands R&S SGT100A SOURce subsystem [:SOURce]:BB:IMPairment:IQOutput<ch>:QUADrature[:ANGLe] <Angle> Sets the quadrature offset. A positive quadrature offset results in a phase angle greater than 90 degrees. Parameters: <Angle> float Range: -10 to 10 Increment: 0.01 *RST: Manual operation: "Quadrature Offset" on page 159 [:SOURce]:BB:IMPairment:IQOutput<ch>:SKEW <Skew>... -
Page 468: Source:bb:power Subsystem
® Remote control commands R&S SGT100A SOURce subsystem ................468 [:SOURce<hw>]:BB:PROGress:MCODer? ..........468 [:SOURce<hw>]:BB:PROGress:MCODer:ARBitrary:MCARrier? ........468 [:SOURce<hw>]:BB:PROGress:MCODer:ARBitrary:WSEGment? [:SOURce<hw>]:BB:PROGress:MCODer? [:SOURce<hw>]:BB:PROGress:MCODer:ARBitrary:MCARrier? [:SOURce<hw>]:BB:PROGress:MCODer:ARBitrary:WSEGment? Queries the status of an initiated process, like for example the calculation of a signal in accordance to a digital standard, or the calculation of a multi-carrier or multi-segment waveform file. -
Page 469: Source:correction Subsystem
® Remote control commands R&S SGT100A SOURce subsystem Return values: <Peak> float Range: -145 to 30 Increment: 0.01 *RST: Default unit: dBfs Example: BB:POW:PEAK queries the peak power of the baseband signal. Usage: Query only [:SOURce<hw>]:BB:POWer:RMS? This command queries the power of the baseband signal relative to full scale of 0.5V (in terms of dB full scale). - Page 470 ® Remote control commands R&S SGT100A SOURce subsystem ............471 [:SOURce<hw>]:CORRection:CSET:DATA:POWer ..........471 [:SOURce<hw>]:CORRection:CSET:DATA:POWer:POINts? ......472 [:SOURce<hw>]:CORRection:CSET:DATA[:SENSor<ch>][:POWer]:SONCe ................472 [:SOURce]:CORRection:CSET:DELete ..........472 [:SOURce<hw>]:CORRection:DEXChange:AFILe:CATalog? ..........473 [:SOURce<hw>]:CORRection:DEXChange:AFILe:EXTension ..........473 [:SOURce<hw>]:CORRection:DEXChange:AFILe:SELect ........474 [:SOURce<hw>]:CORRection:DEXChange:AFILe:SEParator:COLumn ........474 [:SOURce<hw>]:CORRection:DEXChange:AFILe:SEParator:DECimal ............475 [:SOURce<hw>]:CORRection:DEXChange:EXECute ............475 [:SOURce<hw>]:CORRection:DEXChange:MODE ............476 [:SOURce<hw>]:CORRection:DEXChange:SELect ..............476 [:SOURce<hw>]:CORRection:CSET[:SELect] ................477 [:SOURce<hw>]:CORRection[:STATe] ................477...
- Page 471 ® Remote control commands R&S SGT100A SOURce subsystem Manual operation: "Edit User Cor. Data" on page 232 [:SOURce<hw>]:CORRection:CSET:DATA:FREQuency:POINts? Queries the number of frequency values in the selected table. The numerical suffix at SOURce must not be used for this command. Return values: <Points>...
- Page 472 ® Remote control commands R&S SGT100A SOURce subsystem Example: CORR:CSET '/var/user/ucor1' selects the table ucor1. CORR:CSET:DATA:POW:POIN? queries the number of level values in the table ucor1. Response: 440 the table ucor1 contains 440 level values. Usage: Query only [:SOURce<hw>]:CORRection:CSET:DATA[:SENSor<ch>][:POWer]:SONCe The command fills the selected user correction list with the level values measured by the power sensor for the given frequencies.
- Page 473 ® Remote control commands R&S SGT100A SOURce subsystem Return values: <Catalog> string Example: MMEM:CDIR '/var/user/import' selects the directory for the ASCII files with frequency and level value pairs. CORR:DEXC:AFIL:EXT TXT selects that ASCII files with extension *.txt are listed. CORR:DEXC:AFIL:CAT? queries the available files with extension *.txt.
- Page 474 ® Remote control commands R&S SGT100A SOURce subsystem Example: CORR:DEXC:MODE IMP selects that ASCII files with frequency and level value pairs are imported and transferred into user correction lists. CORR:DEXC:AFIL:SEL '/var/user/import_ucor.csv' selects that ASCII file ucor.csv is imported. CORR:DEXC:SEL '/var/user/import_ucor_imp' selects that the ASCII file ucor.csv is imported into user cor- rection list ucor_imp.
- Page 475 ® Remote control commands R&S SGT100A SOURce subsystem Example: CORR:DEXC:MODE EXP selects that the user correction list is exported into an ASCII file. CORR:DEXC:AFIL:SEL '/var/user/import_ucor.csv' selects ASCII file ucor.csv as destination for the user correction list data. CORR:DEXC:AFIL:SEP:COL TAB the pairs of frequency and level values are separated by a tabu- lator.
- Page 476 ® Remote control commands R&S SGT100A SOURce subsystem Example: CORR:DEXC:MODE IMP selects that ASCII files with frequency and level value pairs are imported and transferred into user correction lists. CORR:DEXC:AFIL:SEL '/var/user/ucor.csv' selects that ASCII file ucor.csv is imported. CORR:DEXC:SEL '/var/user/ucor_imp' selects that the ASCII file ucor.csv is imported into user cor- rection list ucor_imp.
- Page 477 ® Remote control commands R&S SGT100A SOURce subsystem Example: CORR:CSET '/var/user/ucor1' selects the table ucor1. CORR ON activates level correction. Correction is performed using the table ucor1. Manual operation: "User Cor. Data - User Correction" on page 232 "Edit User Cor. Data" on page 232 [:SOURce<hw>]:CORRection[:STATe] <State>...
-
Page 478: Source:iq Subsystem
® Remote control commands R&S SGT100A SOURce subsystem Parameters: <State> 0 | 1 | OFF | ON *RST: Manual operation: "Fill User Correction Data with Sensor" on page 237 10.14.11 SOURce:IQ subsystem This subsystem contains the commands for checking the I/Q modulation....................478 [:SOURce]:IQ:CREStfactor ..............478... - Page 479 ® Remote control commands R&S SGT100A SOURce subsystem [:SOURce]:IQ:IMPairment:LEAKage:I <I> Sets the carrier leakage amplitude for the I-signal component. Parameters: <I> float Range: -10 to 10 Increment: 0.01 *RST: Manual operation: "I/Q Offset" on page 157 [:SOURce]:IQ:IMPairment:LEAKage:Q <Q> Sets the carrier leakage amplitude for the Q-signal component. Parameters: <Q>...
- Page 480 ® Remote control commands R&S SGT100A SOURce subsystem Parameters: <State> 1 | ON | 0 | OFF *RST: Manual operation: "I/Q Swap" on page 154 [:SOURce]:IQ:STATe <State> Switches the I/Q modulation on and off. Parameters: <State> 1 | ON | 0 | OFF *RST: Manual operation: "I/Q Mod State"...
-
Page 481: Source:iq:output Subsystem
® Remote control commands R&S SGT100A SOURce subsystem 10.14.12 SOURce:IQ:OUTPut subsystem Example: Enabling and configuring the analog output SCONfiguration:OUTPut:MAPPing:IQOutput1:STReam1:STATe 1 SOURce1:IQ:OUTPut:ANALog:PRESet SOURce1:IQ:OUTPut:ANALog:TYPE DIFF SOURce1:IQ:OUTPut:ANALog:MODE VAR SOURce1:IQ:OUTPut:LEVel 2 SOURce1:IQ:OUTPut:ANALog:BIAS:COUPling:STATe 1 SOURce1:IQ:OUTPut:ANALog:BIAS:I 1 SOURce1:IQ:OUTPut:ANALog:BIAS:Q? // 1 SOURce1:IQ:OUTPut:ANALog:OFFSet:I 2 SOURce1:IQ:OUTPut:ANALog:OFFSet:Q 2.5 SOURce1:IQ:OUTPut:ANALog:STATe 1 ..............481 [:SOURce<hw>]:IQ:OUTPut:ANALog:STATe ..............481... - Page 482 ® Remote control commands R&S SGT100A SOURce subsystem Not affected are: ● The state set with the command [:SOURce<hw>]:IQ:OUTPut:ANALog:STATe. ● If SCONfiguration:EXTernal:PBEHaviour 1, the I/Q ouptput type set with the command [:SOURce<hw>]:IQ:OUTPut[:ANALog]:TYPE. Example: Example"Enabling and configuring the analog output" on page 481. Usage: Event Manual operation:...
- Page 483 ® Remote control commands R&S SGT100A SOURce subsystem [:SOURce<hw>]:IQ:OUTPut[:ANALog]:SETTing:DELete <Filename> Deletes the selected file from the default or specified directory. Deleted are files with the file extension *.iqout. Setting parameters: <Filename> "<filename>" Filename or complete file path Usage: Setting only Manual operation: "Save/Recall"...
- Page 484 ® Remote control commands R&S SGT100A SOURce subsystem Example: Example"Enabling and configuring the analog output" on page 481. Manual operation: "Bias (EMF)" on page 163 [:SOURce<hw>]:IQ:OUTPut:LEVel <Level> Sets the off-load voltage Vp of the analog I/Q signal output. The value range is adjusted so that the maximum overall output voltage does not exceed 4V, see "Maximum overall output voltage"...
-
Page 485: Source:iq:output:envelope Commands
® Remote control commands R&S SGT100A SOURce subsystem Parameters: <Q> float Range: -0.3V to 0.3V Increment: 1E-4 *RST: Default unit: V Example: Example"Enabling and configuring the analog output" on page 481. Manual operation: "Offset (EMF)" on page 164 10.14.13 SOURce:IQ:OUTPut:ENVelope commands The following remote control commands require software option R&S SGT-K540. - Page 486 ® Remote control commands R&S SGT100A SOURce subsystem SOURce1:IQ:OUTPut:ANALog:ENVelope:PIN:MIN -30 SOURce1:IQ:OUTPut:ANALog:ENVelope:PIN:MAX 0 SOURce1:IQ:OUTPut:ANALog:ENVelope:DELay 0.00000000001 SOURce1:IQ:OUTPut:ANALog:ENVelope:FDPD OFF // enable envelope shaping // SOURce1:IQ:OUTPut:ANALog:ENVelope:SHAPing:MODE DETR // SOURce1:IQ:OUTPut:ANALog:ENVelope:SHAPing:DETRoughing:FUNCtion F3 // SOURce1:IQ:OUTPut:ANALog:ENVelope:SHAPing:DETRoughing:COUPling OFF // SOURce1:IQ:OUTPut:ANALog:ENVelope:SHAPing:DETRoughing:FACtor 0.225 // SOURce1:IQ:OUTPut:ANALog:ENVelope:SHAPing:DETRoughing:PEXPonent 1 // quering the oprating point level, current PEP and levels // SOURce1:IQ:OUTPut:ANALog:ENVelope:ADAPtion? // Response: Auto // SOURce1:IQ:OUTPut:ANALog:ENVelope:VCC:VALue:LEVel?
- Page 487 ® Remote control commands R&S SGT100A SOURce subsystem // enable the outputs SOURce1:IQ:OUTPut:ANALog:STATe 1 OUTPut1:STATe 1 // store the settings MMEMory:CDIRectory "/var/user/setups" SOURce1:IQ:OUTPut:ANALog:SETTings:CATalog? // Response: etrak_v1-2 SOURce1:IQ:OUTPut:ANALog:SETTings:STORe "my_ET" SOURce1:IQ:OUTPut:ANALog:PREset // change the envelope voltage adaptation mode SOURce1:IQ:OUTPut:ANALog:ENVelope:ADAPtion MAN SOURce1:IQ:OUTPut:LEVel 4 SOURce1:IQ:OUTPut:ANALog:ENVelope:SHAPing:GAIN:PRE -3 SOURce1:IQ:OUTPut:ANALog:ENVelope:SHAPing:GAIN:POST 2.5 // change the envelope shaping mode...
- Page 488 ® Remote control commands R&S SGT100A SOURce subsystem ..........492 [:SOURce<hw>]:IQ:OUTPut[:ANALog]:ENVelope:VCC:OFFSet ..........493 [:SOURce<hw>]:IQ:OUTPut[:ANALog]:ENVelope:VCC:MIN ..........493 [:SOURce<hw>]:IQ:OUTPut[:ANALog]:ENVelope:VCC:MAX ........493 [:SOURce<hw>]:IQ:OUTPut[:ANALog]:ENVelope:VCC:VALue:PEP? .........493 [:SOURce<hw>]:IQ:OUTPut[:ANALog]:ENVelope:VCC:VALue:LEVel? .......... 494 [:SOURce<hw>]:IQ:OUTPut[:ANALog]:ENVelope:VCC:VALue? ..........494 [:SOURce<hw>]:IQ:OUTPut[:ANALog]:ENVelope:PIN:MIN ..........495 [:SOURce<hw>]:IQ:OUTPut[:ANALog]:ENVelope:PIN:MAX ........495 [:SOURce<hw>]:IQ:OUTPut[:ANALog]:ENVelope:POWer:OFFSet? ........495 [:SOURce<hw>]:IQ:OUTPut[:ANALog]:ENVelope:SHAPing:MODE ........496 [:SOURce<hw>]:IQ:OUTPut[:ANALog]:ENVelope:SHAPing:SCALe ....... 496 [:SOURce<hw>]:IQ:OUTPut[:ANALog]:ENVelope:SHAPing:GAIN:PRE ......496 [:SOURce<hw>]:IQ:OUTPut[:ANALog]:ENVelope:SHAPing:GAIN:POST ......
- Page 489 ® Remote control commands R&S SGT100A SOURce subsystem Parameters: <AdaptionMode> AUTO | MANual | POWer AUTO = Auto Normalized, POWer = Auto Power, MANual = Man- *RST: AUTO Example: Example"Generating an RF envelope signal and defining the shaping function" on page 485 Manual operation: "Envelope Voltage Adaptation"...
- Page 490 ® Remote control commands R&S SGT100A SOURce subsystem Manual operation: "Envelope to RF Delay" on page 185 [:SOURce<hw>]:IQ:OUTPut[:ANALog]:ENVelope:FDPD <CalcFromDpdStat> Enables calculation of the envelope from predistorted signal. Parameters: <CalcFromDpdStat> 1 | ON | 0 | OFF *RST: Example: Example"Generating an RF envelope signal and defining the shaping function"...
- Page 491 ® Remote control commands R&S SGT100A SOURce subsystem [:SOURce<hw>]:IQ:OUTPut[:ANALog]:ENVelope:OFFSet <Offset> Sets an offset between the envelope and the inverted envelope signal. Parameters: <Offset> float Range: -8V to 8V Increment: 1E-4 *RST: Default unit: V Example: Example"Generating an RF envelope signal and defining the shaping function"...
- Page 492 ® Remote control commands R&S SGT100A SOURce subsystem Example: Example"Generating an RF envelope signal and defining the shaping function" on page 485 Manual operation: "R " on page 180 [:SOURce<hw>]:IQ:OUTPut[:ANALog]:ENVelope:TERMination <Termination> Sets how the inputs of the DC modulator are terminated. Parameters: <Termination>...
- Page 493 ® Remote control commands R&S SGT100A SOURce subsystem Parameters: <VccOffset> float Range: 0 to 30 Increment: 1E-3 *RST: Default unit: mV Example: Example"Generating an RF envelope signal and defining the shaping function" on page 485 Manual operation: "V Offset" on page 182 [:SOURce<hw>]:IQ:OUTPut[:ANALog]:ENVelope:VCC:MIN <VccMin>...
- Page 494 ® Remote control commands R&S SGT100A SOURce subsystem Return values: <VccForRfLevel> float Range: 0 to 38 Increment: 1E-3 *RST: Example: Example"Generating an RF envelope signal and defining the shaping function" on page 485 Usage: Query only Manual operation: "Diagram" on page 194 [:SOURce<hw>]:IQ:OUTPut[:ANALog]:ENVelope:VCC:VALue? <xValue>, <xUnit>, <xScale>...
- Page 495 ® Remote control commands R&S SGT100A SOURce subsystem Example: Example"Generating an RF envelope signal and defining the shaping function" on page 485 Manual operation: "PEP Min/Max" on page 184 [:SOURce<hw>]:IQ:OUTPut[:ANALog]:ENVelope:PIN:MAX <PinMax> Sets the maximum value of the input power P Parameters: <PinMax>...
- Page 496 ® Remote control commands R&S SGT100A SOURce subsystem [:SOURce<hw>]:IQ:OUTPut[:ANALog]:ENVelope:SHAPing:SCALe <Scale> Determines the units used on the x and y axis. Parameters: <Scale> POWer | VOLTage *RST: VOLTage Example: Example"Generating an RF envelope signal and defining the shaping function" on page 485 Manual operation: "Scale"...
- Page 497 ® Remote control commands R&S SGT100A SOURce subsystem Parameters: <Filename> string Example: Example"Generating an RF envelope signal and defining the shaping function" on page 485 Manual operation: "Shaping Table" on page 193 [:SOURce<hw>]:IQ:OUTPut[:ANALog]:ENVelope:SHAPing:FILE:DATA [:SOURce<hw>]:IQ:OUTPut[:ANALog]:ENVelope:SHAPing:PV:FILE:DATA Defines the shaping function in a raw data format. See also [:SOURce<hw>]:IQ:OUTPut[:ANALog]:ENVelope:SHAPing:PV: on page 497.
- Page 498 ® Remote control commands R&S SGT100A SOURce subsystem Example: Example"Generating an RF envelope signal and defining the shaping function" on page 485 Manual operation: "Polynomial Order" on page 197 "Polynomial constant and coefficients" on page 197 "Apply, OK" on page 197 [:SOURce<hw>]:IQ:OUTPut[:ANALog]:ENVelope:SHAPing:COEFficients: CATalog? Queries the available polynomial files in the default directory.
- Page 499 ® Remote control commands R&S SGT100A SOURce subsystem [:SOURce<hw>]:IQ:OUTPut[:ANALog]:ENVelope:SHAPing:CLIPping:FROM <ClippingFrom> Enables clipping and defines its limits. Parameters: <ClippingFrom> integer Range: 0 to 100 *RST: Example: Example"Generating an RF envelope signal and defining the shaping function" on page 485 [:SOURce<hw>]:IQ:OUTPut[:ANALog]:ENVelope:SHAPing:CLIPping:TO <ClippingTo> Enables clipping and defines its limits.
-
Page 500: Source:iq:dpd Subsystem
® Remote control commands R&S SGT100A SOURce subsystem Manual operation: "Couple Detroughing Factor with Vcc" on page 192 [:SOURce<hw>]:IQ:OUTPut[:ANALog]:ENVelope:SHAPing:DETRoughing:FACTor <DetrFactor> Sets the detroughing factor. Parameters: <DetrFactor> float Range: 0 to 2 Increment: 1E-3 *RST: Example: Example"Generating an RF envelope signal and defining the shaping function"... - Page 501 ® Remote control commands R&S SGT100A SOURce subsystem SOURce1:IQ:DPD:SHAPing:TABLe:AMPM:FILE:CATalog? // Response: My_DPD_AM-PM,MyDPD_AM-PM SOURce1:IQ:DPD:SHAPing:TABLe:AMPM:FILE:SELect "My_DPD_AM-PM" SOURce1:IQ:DPD:SHAPing:TABLe:INTerp LINear SOURce1:IQ:DPD:SHAPing:TABLe:INVert? // Response: 0 // enable digital predistortion SOURce1:IQ:DPD:AMPM:AMFirst 1 SOURce1:IQ:DPD:AMAM:STATe 1 SOURce1:IQ:DPD:AMPM:STATe 1 SOURce1:IQ:DPD:LREFerence BDPD SOURce1:IQ:DPD:STATe 1 // enable the output SOURce1:IQ:STATe 1 OUTPut1:STATe 1 // query the PEP, level and crest factor values before and after the DPD SOURce1:IQ:DPD:INPut:PEP?
- Page 502 ® Remote control commands R&S SGT100A SOURce subsystem SOURce1:IQ:DPD:SHAPing:TABLe:AMAM:FILE:DATA -30.4,-5.2, -25.1,-4.5, -18.5,-2.5, -10.5,-1 SOURce1:IQ:DPD:SHAPing:TABLe:AMPM:FILE:DATA -30.4, -5, -25.1, 5, -10, 0 SOURce1:IQ:DPD:SHAPing:TABLe:AMPM:FILE:CATalog? // Response: My_DPD_AM-PM,MyDPD_AM-PM // set the predistorion values and store them into a file SOURce1:IQ:DPD:SHAPing:TABLe:AMPM:FILE:NEW "DPD_AM-PM_raw", -30.4, -5, -25.1, 5, -10, 0 SOURce1:IQ:DPD:SHAPing:TABLe:AMPM:FILE:CATalog? // Response: My_DPD_AM-PM,MyDPD_AM-PM,DPD_AM-PM_raw SOURce1:IQ:DPD:AMPM:VALue:PEP?
- Page 503 ® Remote control commands R&S SGT100A SOURce subsystem ................509 [:SOURce<hw>]:IQ:DPD:OUTPut:PEP? ..................509 [:SOURce<hw>]:IQ:DPD:PIN:MIN ...................509 [:SOURce<hw>]:IQ:DPD:PIN:MAX ................509 [:SOURce<hw>]:IQ:DPD:GAIN:PRE ................ 510 [:SOURce<hw>]:IQ:DPD:SHAPing:MODE ........510 [:SOURce<hw>]:IQ:DPD:SHAPing:TABLe:AMAM:FILE:CATalog? ........510 [:SOURce<hw>]:IQ:DPD:SHAPing:TABLe:AMPM:FILE:CATalog? .........510 [:SOURce<hw>]:IQ:DPD:SHAPing:TABLe:AMAM:FILE[:SELect] .........510 [:SOURce<hw>]:IQ:DPD:SHAPing:TABLe:AMPM:FILE[:SELect] ..........510 [:SOURce<hw>]:IQ:DPD:SHAPing:TABLe:AMAM:FILE:NEW ..........510 [:SOURce<hw>]:IQ:DPD:SHAPing:TABLe:AMPM:FILE:NEW ..........511 [:SOURce<hw>]:IQ:DPD:SHAPing:TABLe:AMAM:FILE:DATA ..........
- Page 504 ® Remote control commands R&S SGT100A SOURce subsystem Return values: <Catalog> string Usage: Query only Manual operation: "Save/Recall" on page 205 [:SOURce]:IQ:DPD:SETTing:DELete <Filename> Deletes the selected file from the default or specified directory. Deleted are files with the file extension *.dpd. Setting parameters: <Filename>...
- Page 505 ® Remote control commands R&S SGT100A SOURce subsystem Parameters: <State> 1 | ON | 0 | OFF *RST: Example: Example"Defining correction coefficients and enabling digi- tal predistortion" on page 500 Manual operation: "AM/AM and AM/PM State" on page 206 [:SOURce<hw>]:IQ:DPD:AMAM:VALue? <XValue>, <XUnit> Queries the delta power value of the generated RF signal for a selected <XValue>.
- Page 506 ® Remote control commands R&S SGT100A SOURce subsystem [:SOURce<hw>]:IQ:DPD:AMAM:VALue:LEVel? Queries the delta power value for the current root mean square (RMS) power level of the generated RF signal. Return values: <DeltaPower> float Range: -20 to 20 Increment: 0.01 *RST: Example: Example"Defining correction coefficients and enabling digi- tal predistortion"...
- Page 507 ® Remote control commands R&S SGT100A SOURce subsystem Example: Example"Defining correction coefficients and enabling digi- tal predistortion" on page 500. Usage: Query only [:SOURce<hw>]:IQ:DPD:AMPM:VALue:LEVel? Queries the delta phase value for the current root mean square (RMS) power level of the generated RF signal. Return values: <DeltaPhase>...
- Page 508 ® Remote control commands R&S SGT100A SOURce subsystem Return values: <AchievedError> float Example: Example"Defining correction coefficients and enabling digi- tal predistortion" on page 500 Usage: Query only Manual operation: "Achieved Output Level Error" on page 206 [:SOURce<hw>]:IQ:DPD:OUTPut:ERRor:MAX <MaximumError> Sets the allowed maximum error. Parameters: <MaximumError>...
- Page 509 ® Remote control commands R&S SGT100A SOURce subsystem [:SOURce<hw>]:IQ:DPD:INPut:CFACtor? [:SOURce<hw>]:IQ:DPD:OUTPut:CFACtor? [:SOURce<hw>]:IQ:DPD:INPut:LEVel? [:SOURce<hw>]:IQ:DPD:OUTPut:LEVel? [:SOURce<hw>]:IQ:DPD:INPut:PEP? [:SOURce<hw>]:IQ:DPD:OUTPut:PEP? Queries the measured values the before and after the enabled digital predistortion. Return values: <PEP> float The query returns -1000 if the calculation is impossible or there are no measurements results available.
- Page 510 ® Remote control commands R&S SGT100A SOURce subsystem [:SOURce<hw>]:IQ:DPD:SHAPing:MODE <Shaping> Selects the method to define the correction coefficients. Parameters: <Shaping> TABLe | POLYnomial | NORMalized *RST: TABLe Example: Example"Defining correction coefficients and enabling digi- tal predistortion" on page 500. Manual operation: "Shaping"...
- Page 511 ® Remote control commands R&S SGT100A SOURce subsystem Example: Example"Defining correction coefficients and enabling digi- tal predistortion" on page 500 Usage: Setting only [:SOURce<hw>]:IQ:DPD:SHAPing:TABLe:AMAM:FILE:DATA [:SOURce<hw>]:IQ:DPD:SHAPing:TABLe:AMPM:FILE:DATA Defines the predistortion function in a raw data format. See also [:SOURce<hw>]:IQ:DPD:SHAPing:TABLe:AMPM:FILE:NEW on page 510. Example: Example"Defining correction coefficients and enabling digi- tal predistortion"...
- Page 512 ® Remote control commands R&S SGT100A SOURce subsystem In Cartesian coordinates system, the coefficients b are expressed in degrees. Parameters: <I0> float Range: -1E6 to 1E6 Increment: 1E-3 *RST: <J0> float Range: -1E6 to 1E6 Increment: 1E-3 *RST: <J1> float Range: -1E6 to 1E6 Increment: 1E-3...
- Page 513 ® Remote control commands R&S SGT100A SOURce subsystem Usage: Setting only Manual operation: "Save/Recall Polynomial" on page 213 [:SOURce<hw>]:IQ:DPD:SHAPing:POLYnomial:COEFficients:STORe <Filename> Saves the polynomial function as polynomial file. Setting parameters: <Filename> string Example: Example"Defining correction coefficients and enabling digi- tal predistortion" on page 500 Usage: Setting only...
- Page 514 ® R&S SGT100A Remote control commands SOURce subsystem Example: SOURce1:IQ:DPD:SHAPing:NORMalized:DATA #240<values> // the binary <values> are not printable SOURce1:IQ:DPD:SHAPing:NORMalized:DATA:CATalog? // norm SOURce1:IQ:DPD:SHAPing:NORMalized:DATA:STORe "My_DPD_Normalized" SOURce1:IQ:DPD:SHAPing:NORMalized:DATA:CATalog? // norm,My_DPD_Normalized SOURce1:IQ:DPD:SHAPing:NORMalized:DATA:LOAD "norm" SOURce1:IQ:DPD:SHAPing:NORMalized:DATA? // #3112 // the binary data <NormData> is 112 bytes long (3 points are defined) // binary data is machine readable but not printable Manual operation: "Apply, OK"...
-
Page 515: Source:phase Subsystem
® Remote control commands R&S SGT100A SOURce subsystem Usage: Setting only Manual operation: "Save/Recall Normalized Data" on page 215 10.14.15 SOURce:PHASe subsystem ......................515 [:SOURce]:PHASe ..................515 [:SOURce]:PHASe:REFerence [:SOURce]:PHASe <Phase> Specifies the phase variation relative to the current phase. Parameters: <Phase>... - Page 516 ® Remote control commands R&S SGT100A SOURce subsystem SOURce:POWer:LEVel:IMMediate:AMPLitude -25 // ****************************************************************** // Configure the pulse modulation settings // ****************************************************************** // Select the internal modulation generator SOURce:PULM:SOURce INT // Set trigger mode SOURce:PULM:TRIGger:MODE AUTO // Select pulse mode SOURce:PULM:MODE DOUB // ****************************************************************** // Alternatively configure the pulse modulation settings for // external modulation source...
- Page 517 ® Remote control commands R&S SGT100A SOURce subsystem ..........519 [:SOURce<hw>]:PULM:TRIGger:EXTernal:GATE:POLarity ............519 [:SOURce<hw>]:PULM:TRIGger:EXTernal:IMPedance ............519 [:SOURce<hw>]:PULM:TRIGger:EXTernal:SLOPe ................520 [:SOURce<hw>]:PULM:TRIGger:MODE ..................520 [:SOURce<hw>]:PULM:WIDTh [:SOURce<hw>]:PULM:DELay <Delay> Sets the pulse delay. Parameters: <Delay> float Range: 0 to 100 s Increment: 10 ns *RST: 10 ns Example: PULM:DEL 13 us...
- Page 518 ® Remote control commands R&S SGT100A SOURce subsystem DOUBle Enables double pulse generation. The two pulses are generated in one pulse period. *RST: SINGle Example: PULM:MODE DOUB enables double pulse generation. Manual operation: "Pulse Mode" on page 258 [:SOURce<hw>]:PULM:PERiod <Period> Sets the period of the generated pulse.
- Page 519 ® Remote control commands R&S SGT100A SOURce subsystem [:SOURce<hw>]:PULM:STATe <State> Activates the pulse modulation. Parameters: <State> 0 | 1 | OFF | ON *RST: Example: PULM:STAT ON activates pulse modulation. Manual operation: "State" on page 257 [:SOURce<hw>]:PULM:TRIGger:EXTernal:GATE:POLarity <Polarity> Selects the polarity of the Gate signal. Parameters: <Polarity>...
-
Page 520: Source:power Subsystem
® Remote control commands R&S SGT100A SOURce subsystem [:SOURce<hw>]:PULM:TRIGger:MODE <Mode> Selects the trigger mode for pulse modulation. Parameters: <Mode> AUTO | EXTernal | EGATe AUTO The pulse modulation is generated continuously. EXTernal The pulse modulation is triggered by an external trigger event. The trigger signal is supplied via the trigger connector. - Page 521 ® Remote control commands R&S SGT100A SOURce subsystem .................525 [:SOURce]:POWer:SERVoing:TOLerance ................526 [:SOURce]:POWer:SERVoing:TRACking ............526 [:SOURce]:POWer[:LEVel][:IMMediate][:AMPLitude] ..............526 [:SOURce]:POWer[:LEVel][:IMMediate]:OFFSet ................526 [:SOURce]:POWer:RANGe:LOWer? ................. 526 [:SOURce]:POWer:RANGe:UPPer? ................... 527 [:SOURce]:POWer:WIGNore [:SOURce]:POWer:ALC:DSENsitivity <Sensitivity> Sets the power detector sensitivity. Used for compatibility reasons only. Parameters: <Sensitivity>...
- Page 522 ® Remote control commands R&S SGT100A SOURce subsystem [:SOURce]:POWer:ATTenuation:RFOFf:MODE <Mode> Determines the attenuator's state after the instrument is switched on. Parameters: <Mode> MAX | FATTenuated | FIXed | UNCHanged MAX = FATTenuated Sets attenuation to maximum when the RF signal is switched off. This setting is recommended for applications that require a high level of noise suppression.
- Page 523 ® Remote control commands R&S SGT100A SOURce subsystem NORM automatic selection of the best settings LNOISe settings for lowest noise LDIStortion settings for lowest distortions *RST: n.a. (factory preset: NORMal) Manual operation: "Mode" on page 226 [:SOURce]:POWer:POWer <Amplitude> Sets the level at the RF output connector. This value does not consider a specified offset.
- Page 524 ® Remote control commands R&S SGT100A SOURce subsystem *RST: AUTO Manual operation: "Setting Characteristic" on page 226 [:SOURce]:POWer:SERVoing:SENSor <Sensor> Sets the power sensor as mapped with the remote command :SLISt: on page 380. ELEMent<ch>:MAPPing Parameters: <Sensor> SENS1 | SENS2 | SENSor2 | SENS3 | SENSor3 | SENS4 | SENSor4 | SENSor1 | UNDefined *RST: n.a.
- Page 525 ® Remote control commands R&S SGT100A SOURce subsystem Manual operation: "Start" on page 242 [:SOURce]:POWer:SERVoing:STATe <State> Activates/deactivates power servoing. Parameters: <State> 1 | ON | 0 | OFF *RST: Manual operation: "State" on page 241 [:SOURce]:POWer:SERVoing:TARGet <Targetlevel> Sets the target output power level required at the DUT. Parameters: <Targetlevel>...
- Page 526 ® Remote control commands R&S SGT100A SOURce subsystem [:SOURce]:POWer:SERVoing:TRACking <State> Activates/deactivates level tracking. Activation increases measurement accuracy but also measurement time. Parameters: <State> 1 | ON | 0 | OFF *RST: Manual operation: "Level Tracking (500 ms)" on page 242 [:SOURce]:POWer[:LEVel][:IMMediate][:AMPLitude] <Amplitude>...
-
Page 527: Source:roscillator Subsystem
® Remote control commands R&S SGT100A SOURce subsystem Return values: <Upper> float Usage: Query only Manual operation: "Level Range" on page 226 [:SOURce]:POWer:WIGNore <State> Ignores level range warnings. Parameters: <State> 0 | 1 | OFF | ON *RST: n.a. (factory preset: 0) Example: POW:WIGN ON suppresses the level range warnings. - Page 528 ® Remote control commands R&S SGT100A SOURce subsystem [:SOURce]:ROSCillator:OUTPut:FREQuency <OutputFreq> Selects the output for the reference oscillator signal. Parameters: <OutputFreq> 10MHZ | 100MHZ | 1000MHZ | 13MHZ 13MHZ requires RF board with part number 1419.5308.02. Manual operation: "Output Frequency" on page 222 [:SOURce]:ROSCillator:EXTernal:SBANdwidth <SBandwidth>...
-
Page 529: Status Subsystem
® Remote control commands R&S SGT100A STATus subsystem Manual operation: "Adjustment Active" on page 223 [:SOURce]:ROSCillator[:INTernal]:ADJust:VALue <Value> Allows an application to shift the reference oscillator frequency by a small amount. The setting range depends on the reference oscillator type and its factory calibration value. - Page 530 ® Remote control commands R&S SGT100A STATus subsystem :STATus:OPERation:CONDition? Quieries the content of the CONDition part of the STATus:OPERation register. This part contains information on the action currently being performed in the instru- ment. The content is not deleted after being read out because it indicates the current hardware status.
- Page 531 ® Remote control commands R&S SGT100A STATus subsystem :STATus:OPERation:PTRansition <Ptransition> Sets the bits of the PTRansition part of the STATus:OPERation register. If a bit is set, a transition from 0 to 1 in the condition part causes an entry to be made in the EVENt part of the register.
- Page 532 ® Remote control commands R&S SGT100A STATus subsystem Example: STAT:QUES:ENAB 1 Problems when performing an adjustment cause an entry to be made in the sum bit. :STATus:QUEStionable[:EVENt] <Event> Queries the content of the EVENt part of the STATus:QUEStionable register. This part contains information on the actions performed in the instrument since the last readout.
-
Page 533: System Subsystem
® Remote control commands R&S SGT100A SYSTem subsystem Return values: <Next> string Example: :STATus:QUEue? queries the oldest entry in the error queue. Response: 0, 'no error' no errors have occurred since the error queue was last read out Usage: Query only 10.16 SYSTem subsystem The SYSTem subsystem contains a series of commands for general functions which do not directly affect signal generation. - Page 534 ® Remote control commands R&S SGT100A SYSTem subsystem // ***************************************************************************** // Disable the LAN services individually. // ***************************************************************************** SYSTem:SECurity:NETWork:RAW:STATe "<password>", 0 // Disables remote access over raw socket. SYSTem:SECurity:NETWork:SOE:STATe "<password>", 0 // Disables SCPI over Ethernet/LAN communication. SYSTem:SECurity:NETWork:HTTP:STATe "<password>", 0 // Disables remote access over HTTP.
- Page 535 ® Remote control commands R&S SGT100A SYSTem subsystem ................ 543 :SYSTem:COMMunicate:USB:RESource? ....................544 :SYSTem:IDENtification ......................544 :SYSTem:KLOCk ......................544 :SYSTem:LANGuage ....................545 :SYSTem:NINFormation? ......................545 :SYSTem:REBoot ......................545 :SYSTem:RESTart ..............545 :SYSTem:SECurity:NETWork:AVAHi[:STATe] ............... 545 :SYSTem:SECurity:NETWork:FTP[:STATe] ..............546 :SYSTem:SECurity:NETWork:HTTP[:STATe] ..............546 :SYSTem:SECurity:NETWork:RAW[:STATe] ............546 :SYSTem:SECurity:NETWork:REMSupport[:STATe] ...............546 :SYSTem:SECurity:NETWork:RPC[:STATe] ..............
- Page 536 ® Remote control commands R&S SGT100A SYSTem subsystem Usage: Query only :SYSTem:ERRor:CODE:ALL? Queries the error numbers of all entries in the error queue and then deletes them. Return values: <All> string Returns the error numbers. To retrieve the entire error text, send the command :SYSTem:ERRor:ALL?.
- Page 537 ® Remote control commands R&S SGT100A SYSTem subsystem :SYSTem:ERRor:COUNt? Queries the number of entries in the error queue. Return values: <Count> integer The error queue is empty. Example: SYSTem:ERRor:COUNt? // queries the number of entries in the error queue. Response: 1 // one error has occurred since the error queue was last read out.
- Page 538 ® Remote control commands R&S SGT100A SYSTem subsystem Example: Response: -221, 'Settings conflict', 153, 'Input voltage out of range' The two returned errors have occurred since the error queue was last queried. Usage: Query only :SYSTem:VERSion? Queries the SCPI version the instrument's command set complies with. Return values: <Version>...
- Page 539 ® Remote control commands R&S SGT100A SYSTem subsystem Example: SYSTem:COMMunicate:GPIB:RESource? queries the VISA resource string. Response: "GPIB::28::INSTR"' Usage: Query only :SYSTem:COMMunicate:GPIB[:SELF]:ADDRess <Address> Sets the GPIB address. Parameters: <Address> integer Range: 0 to 30 *RST: n.a. (factory preset: 28) SYSTem:COMMunicate:GPIB:SELF:ADDRess 28 Example: Sets GPIB address.
- Page 540 ® Remote control commands R&S SGT100A SYSTem subsystem :SYSTem:COMMunicate:NETWork:STATus? Queries the network configuration state. Return values: <State> 0 | 1 | OFF | ON Usage: Query only :SYSTem:COMMunicate:NETWork:RESTart Restarts the network connection to the instrument, terminates the connection and sets it up again.
- Page 541 ® Remote control commands R&S SGT100A SYSTem subsystem Parameters: <Gateway> string Range: 0.0.0.0 to ff.ff.ff.ff Example: SYSTem:COMMunicate:NETWork:IPADdress:GATeway '1.2.3.4' sets the IP address of the default gateway. Manual operation: "Default Gateway" on page 289 :SYSTem:COMMunicate:NETWork[:IPADdress]:SUBNet:MASK <Mask> Sets the subnet mask. Parameters: <Mask>...
- Page 542 ® Remote control commands R&S SGT100A SYSTem subsystem Parameters: <Parity> NONE | ODD | EVEN *RST: n.a. (factory preset: NONE) Example: SYST:COMM:SER:PAR NONE Selects parity NONE. :SYSTem:COMMunicate:SERial:RESource? Queries the VISA resource string for the serial remote control interface. This string is used for remote control of the instrument.
- Page 543 ® Remote control commands R&S SGT100A SYSTem subsystem Usage: Query only Manual operation: "Visa Resource Strings" on page 290 :SYSTem:COMMunicate:SOCKet:PORT <ScpiEthPort> Sets the port number for remote control via socket communication. Parameters: <ScpiEthPort> integer Range: 1000 to 65535 *RST: n.a. (factory preset: 5025) Example: SYSTem:COMMunicate:SOCKet:PORT 5030 // specifies the socket port number.
- Page 544 ® Remote control commands R&S SGT100A SYSTem subsystem :SYSTem:IDENtification <Identification> Selects the mode the instrument identification is performed. Parameters: <Identification> AUTO | USER AUTO The *IDN string and the *OPT string are set automatically. USER Enables the selection of user definable *IDN and *OPT strings. *RST: n.a.
- Page 545 ® Remote control commands R&S SGT100A SYSTem subsystem :SYSTem:NINFormation? Queries the oldest information message ("Error History > Level > Info") in the error/ event queue. Return values: <NextInfo> string Example: :SYSTem:NINFormation? // queries the oldest entry in the info message queue. Response: 90,"Info;=== Instrument startup...
- Page 546 ® Remote control commands R&S SGT100A SYSTem subsystem Example: Example"To disable the LAN interface and LAN services" on page 533. :SYSTem:SECurity:NETWork:HTTP[:STATe] <SecPassWord>, <HttpState> Disables control of the instrument over HTTP, the protocol for hypermedia information systems. Parameters: <HttpState> 1 | ON | 0 | OFF Setting parameters: <SecPassWord>...
- Page 547 ® Remote control commands R&S SGT100A SYSTem subsystem Setting parameters: <SecPassWord> string Current security password. Example: Example"To disable the LAN interface and LAN services" on page 533. :SYSTem:SECurity:NETWork:SMB[:STATe] <SecPassWord>, <SmbState> Disables access to the file system, printers and serial ports in a network over SMB. Parameters: <SmbState>...
- Page 548 ® Remote control commands R&S SGT100A SYSTem subsystem :SYSTem:SECurity:NETWork:SWUPdate[:STATe] <SecPassWord>, <SwUpdateState> Disables software update over LAN. Parameters: <SwUpdateState> 1 | ON | 0 | OFF Setting parameters: <SecPassWord> string Current security password. Example: Example"To disable the LAN interface and LAN services" on page 533.
- Page 549 ® Remote control commands R&S SGT100A SYSTem subsystem :SYSTem:PROTect<ch>[:STATe] <State>[, <Key>] Activates and deactivates the specified protection level. Suffix: <ch> Indicates the protection level. Parameters: <State> select *RST: n.a. (factory preset: 1) Setting parameters: <Key> integer The respective functions are disabled when the protection level is activated.
- Page 550 ® Remote control commands R&S SGT100A SYSTem subsystem Example: SYSTem:OSYStem? Response: "Linux" Usage: Query only :SYSTem:UPTime? Queries the up time of the operating system. Return values: <UpTime> "<ddd.hh:mm:ss>" Example: SYSTem:UPTime? Response: "0.08:11:00" Usage: Query only :SYSTem:MMEMory:PATH:USER? Queries the user directory, that means the directory the instrument stores user files on. Return values: <PathUser>...
-
Page 551: Test Subsystem
® Remote control commands R&S SGT100A TEST subsystem 10.17 TEST subsystem The TEST system contains the commands for performing test routines. Self tests return a "0", if the test is performed successfully, otherwise a value other than "0" is returned. None of the commands of this system have an *RST value......................551 :TEST:ALL:STARt ...................... -
Page 552: Unit Subsystem
® Remote control commands R&S SGT100A UNIT subsystem :TEST:BB:CONNection? Queries the state of the connection between connectors [USER1] and [USER2]. A 0=PASS response indicates that the connection is established, whereas a response 1=FAIL stands for a faulty connection. Return values: <Connection>... -
Page 553: List Of R&S Sgt Commands
® Remote control commands R&S SGT100A List of R&S SGT commands Example: UNIT:POW V sets V as a default unit for all commands which determine power values. 10.19 List of R&S SGT commands :CALibration:ALL[:MEASure]?........................355 :CALibration:FREQuency:TEMPerature?...................... 356 :CALibration:FREQuency[:MEASure]?......................355 :CALibration:IQModulator:BBANd[:STATe]....................355 :CALibration:IQModulator:FULL?........................356 :CALibration:IQModulator:IQModulator[:STATe].................... - Page 554 ® Remote control commands R&S SGT100A List of R&S SGT commands :MMEMory:LOAD:STATe..........................371 :MMEMory:MDIRectory..........................371 :MMEMory:MOVE............................371 :MMEMory:MSIS............................371 :MMEMory:RDIRectory..........................372 :MMEMory:STORe:STATe..........................372 :OUTPut:AFIXed:RANGe:LOWer?........................ 373 :OUTPut:AFIXed:RANGe:UPPer?......................... 373 :OUTPut:AMODe............................373 :OUTPut[:STATe]............................374 :OUTPut[:STATe]:PON...........................374 :PFASt................................373 :READ<ch>[:POWer]?........................... 381 :SCONfiguration:MODE..........................374 :SENSe<ch>:UNIT[:POWer].......................... 381 :SENSe<ch>[:POWer]:APERture:DEFault:STATe..................382 :SENSe<ch>[:POWer]:APERture:TIMe......................382 :SENSe<ch>[:POWer]:CORRection:SPDevice:LIST?...................383 :SENSe<ch>[:POWer]:CORRection:SPDevice:SELect.................382 :SENSe<ch>[:POWer]:CORRection:SPDevice:STATe..................
- Page 555 ® Remote control commands R&S SGT100A List of R&S SGT commands :STATus:OPERation:NTRansition........................530 :STATus:OPERation:PTRansition........................531 :STATus:OPERation[:EVENt].........................530 :STATus:PRESet............................531 :STATus:QUEStionable:CONDition........................531 :STATus:QUEStionable:ENABle........................531 :STATus:QUEStionable:NTRansition......................532 :STATus:QUEStionable:PTRansition......................532 :STATus:QUEStionable[:EVENt]........................532 :STATus:QUEue[:NEXT]?..........................532 :SYSTem:COMMunicate:GPIB:LTERminator....................538 :SYSTem:COMMunicate:GPIB:RESource?....................538 :SYSTem:COMMunicate:GPIB[:SELF]:ADDRess..................539 :SYSTem:COMMunicate:HISLip:RESource?....................542 :SYSTem:COMMunicate:NETWork:IPADdress..................... 539 :SYSTem:COMMunicate:NETWork:IPADdress:MODE..................539 :SYSTem:COMMunicate:NETWork:MACaddress..................539 :SYSTem:COMMunicate:NETWork:RESource?.................... 541 :SYSTem:COMMunicate:NETWork:RESTart....................540 :SYSTem:COMMunicate:NETWork:STATus?....................
- Page 556 ® Remote control commands R&S SGT100A List of R&S SGT commands :SYSTem:SECurity:NETWork:HTTP[:STATe]....................546 :SYSTem:SECurity:NETWork:RAW[:STATe]....................546 :SYSTem:SECurity:NETWork:REMSupport[:STATe]..................546 :SYSTem:SECurity:NETWork:RPC[:STATe]....................546 :SYSTem:SECurity:NETWork:SMB[:STATe]....................547 :SYSTem:SECurity:NETWork:SOE[:STATe]....................547 :SYSTem:SECurity:NETWork:SSH[:STATe]....................547 :SYSTem:SECurity:NETWork:SWUPdate[:STATe]..................548 :SYSTem:SECurity:NETWork[:STATe]......................548 :SYSTem:SECurity:VOLMode[:STATe]......................550 :SYSTem:SERRor?............................537 :SYSTem:SHUTdown.............................548 :SYSTem:STARtup:COMPlete?........................548 :SYSTem:TIME:ZONE........................... 549 :SYSTem:TIME:ZONE:CATalog?........................549 :SYSTem:UPTime?............................550 :SYSTem:VERSion?............................538 :TEST:ALL:RESult?............................551 :TEST:ALL:STARt............................
- Page 557 ® Remote control commands R&S SGT100A List of R&S SGT commands [:SOURce]:IQ:SOURce..........................480 [:SOURce]:IQ:STATe............................480 [:SOURce]:IQ:WBSTate..........................480 [:SOURce]:LOSCillator:SOURce........................391 [:SOURce]:OPMode............................391 [:SOURce]:PATH:COUNt?..........................391 [:SOURce]:PHASe............................515 [:SOURce]:PHASe:REFerence........................515 [:SOURce]:POWer:ALC:DSENsitivity......................521 [:SOURce]:POWer:ALC:SONCe........................521 [:SOURce]:POWer:ALC[:STATe]........................521 [:SOURce]:POWer:ATTenuation:DIGital......................521 [:SOURce]:POWer:ATTenuation:RFOFf:MODE.................... 522 [:SOURce]:POWer:ATTenuation:SOVer[:OFFSet]..................522 [:SOURce]:POWer:LIMit[:AMPLitude]......................522 [:SOURce]:POWer:LMODe..........................522 [:SOURce]:POWer:PEP?..........................523 [:SOURce]:POWer:POWer..........................523 [:SOURce]:POWer:RANGe:LOWer?......................526 [:SOURce]:POWer:RANGe:UPPer?......................526 [:SOURce]:POWer:SCHaracteristic.......................
- Page 558 ® Remote control commands R&S SGT100A List of R&S SGT commands [:SOURce<hw>]:AWGN:POWer:MODE......................397 [:SOURce<hw>]:AWGN:POWer:NOISe......................397 [:SOURce<hw>]:AWGN:POWer:NOISe:TOTal?....................397 [:SOURce<hw>]:AWGN:POWer:RMODe...................... 398 [:SOURce<hw>]:AWGN:POWer:SUM:PEP?....................399 [:SOURce<hw>]:AWGN:POWer:SUM?......................398 [:SOURce<hw>]:AWGN:STATe........................399 [:SOURce<hw>]:BB:ARBitrary:CFR:ALGorithm.................... 450 [:SOURce<hw>]:BB:ARBitrary:CFR:CPBandwidth..................451 [:SOURce<hw>]:BB:ARBitrary:CFR:CSPacing..................... 451 [:SOURce<hw>]:BB:ARBitrary:CFR:DCFDelta....................451 [:SOURce<hw>]:BB:ARBitrary:CFR:FILTer....................451 [:SOURce<hw>]:BB:ARBitrary:CFR:FORDer....................452 [:SOURce<hw>]:BB:ARBitrary:CFR:ITERations....................452 [:SOURce<hw>]:BB:ARBitrary:CFR:MEASure[:STATe]?................452 [:SOURce<hw>]:BB:ARBitrary:CFR:OCFactor?....................452 [:SOURce<hw>]:BB:ARBitrary:CFR:PFReq....................453 [:SOURce<hw>]:BB:ARBitrary:CFR:RCFactor?.................... 453 [:SOURce<hw>]:BB:ARBitrary:CFR:SBANdwidth..................
- Page 559 ® Remote control commands R&S SGT100A List of R&S SGT commands [:SOURce<hw>]:BB:ARBitrary:MCARrier:EDIT:CARRier:PHASe:STEP............428 [:SOURce<hw>]:BB:ARBitrary:MCARrier:EDIT:CARRier:PHASe[:STARt]............428 [:SOURce<hw>]:BB:ARBitrary:MCARrier:EDIT:CARRier:POWer:STEP............429 [:SOURce<hw>]:BB:ARBitrary:MCARrier:EDIT:CARRier:POWer[:STARt]............429 [:SOURce<hw>]:BB:ARBitrary:MCARrier:EDIT:CARRier:STARt..............429 [:SOURce<hw>]:BB:ARBitrary:MCARrier:EDIT:CARRier:STATe..............430 [:SOURce<hw>]:BB:ARBitrary:MCARrier:EDIT:CARRier:STOP..............429 [:SOURce<hw>]:BB:ARBitrary:MCARrier:OFILe................... 430 [:SOURce<hw>]:BB:ARBitrary:MCARrier:POWer:REFerence..............423 [:SOURce<hw>]:BB:ARBitrary:MCARrier:PRESet..................430 [:SOURce<hw>]:BB:ARBitrary:MCARrier:SAMPles?..................430 [:SOURce<hw>]:BB:ARBitrary:MCARrier:SETTing:CATalog?...............431 [:SOURce<hw>]:BB:ARBitrary:MCARrier:SETTing:LOAD................431 [:SOURce<hw>]:BB:ARBitrary:MCARrier:SETTing:STORe................431 [:SOURce<hw>]:BB:ARBitrary:MCARrier:SETTing:STORe:FAST..............432 [:SOURce<hw>]:BB:ARBitrary:MCARrier:TIME.................... 432 [:SOURce<hw>]:BB:ARBitrary:MCARrier:TIME:MODE.................432 [:SOURce<hw>]:BB:ARBitrary:PRAMp[:STATe].................... 402 [:SOURce<hw>]:BB:ARBitrary:PRESet......................401 [:SOURce<hw>]:BB:ARBitrary:SIGNal:TYPE....................415 [:SOURce<hw>]:BB:ARBitrary:STATe......................
- Page 560 ® Remote control commands R&S SGT100A List of R&S SGT commands [:SOURce<hw>]:BB:ARBitrary:TSIGnal:RECTangle:CREate:NAMed............416 [:SOURce<hw>]:BB:ARBitrary:TSIGnal:RECTangle:FREQuency..............417 [:SOURce<hw>]:BB:ARBitrary:TSIGnal:RECTangle:OFFSet................417 [:SOURce<hw>]:BB:ARBitrary:TSIGnal:RECTangle:SAMPles..............417 [:SOURce<hw>]:BB:ARBitrary:TSIGnal:SINE:CREate..................415 [:SOURce<hw>]:BB:ARBitrary:TSIGnal:SINE:CREate:NAMed..............416 [:SOURce<hw>]:BB:ARBitrary:TSIGnal:SINE:FREQuency................417 [:SOURce<hw>]:BB:ARBitrary:TSIGnal:SINE:PHASe.................. 418 [:SOURce<hw>]:BB:ARBitrary:TSIGnal:SINE:SAMPles................418 [:SOURce<hw>]:BB:ARBitrary:WAVeform:CATalog:LENGth?...............434 [:SOURce<hw>]:BB:ARBitrary:WAVeform:CATalog?..................433 [:SOURce<hw>]:BB:ARBitrary:WAVeform:CLOCk..................434 [:SOURce<hw>]:BB:ARBitrary:WAVeform:DATA...................435 [:SOURce<hw>]:BB:ARBitrary:WAVeform:DELete..................435 [:SOURce<hw>]:BB:ARBitrary:WAVeform:FREE?..................436 [:SOURce<hw>]:BB:ARBitrary:WAVeform:HDDStreaming:BLEVel?............. 436 [:SOURce<hw>]:BB:ARBitrary:WAVeform:HDDStreaming:STATe..............436 [:SOURce<hw>]:BB:ARBitrary:WAVeform:POINts?..................437 [:SOURce<hw>]:BB:ARBitrary:WAVeform:SELect..................437 [:SOURce<hw>]:BB:ARBitrary:WAVeform:TAG?...................437 [:SOURce<hw>]:BB:ARBitrary:WSEGment:CLOad..................
- Page 561 ® Remote control commands R&S SGT100A List of R&S SGT commands [:SOURce<hw>]:BB:IMPairment:LEAKage:Q....................464 [:SOURce<hw>]:BB:IMPairment:OPTimization:MODE................. 465 [:SOURce<hw>]:BB:IMPairment:QUADrature[:ANGLe]................464 [:SOURce<hw>]:BB:IMPairment:SKEW......................464 [:SOURce<hw>]:BB:IMPairment:STATe......................465 [:SOURce<hw>]:BB:PGAin..........................400 [:SOURce<hw>]:BB:POWer:PEAK?......................468 [:SOURce<hw>]:BB:POWer:RMS?....................... 469 [:SOURce<hw>]:BB:PROGress:MCODer:ARBitrary:MCARrier?..............468 [:SOURce<hw>]:BB:PROGress:MCODer:ARBitrary:WSEGment?............... 468 [:SOURce<hw>]:BB:PROGress:MCODer?....................468 [:SOURce<hw>]:BBIN:ALEVel:EXECute....................... 455 [:SOURce<hw>]:BBIN:CDEVice?........................456 [:SOURce<hw>]:BBIN:CFACtor........................456 [:SOURce<hw>]:BBIN:DIGital:ASETting:STATe.................... 456 [:SOURce<hw>]:BBIN:FOFFset........................456 [:SOURce<hw>]:BBIN:GIMBalance.......................457 [:SOURce<hw>]:BBIN:IQSWap[:STATe]......................457 [:SOURce<hw>]:BBIN:MODE........................457 [:SOURce<hw>]:BBIN:MPERiod........................
- Page 562 ® Remote control commands R&S SGT100A List of R&S SGT commands [:SOURce<hw>]:CORRection[:STATe]......................477 [:SOURce<hw>]:IQ:DPD:AMAM:STATe......................504 [:SOURce<hw>]:IQ:DPD:AMAM:VALue:LEVel?....................506 [:SOURce<hw>]:IQ:DPD:AMAM:VALue:PEP?....................505 [:SOURce<hw>]:IQ:DPD:AMAM:VALue?...................... 505 [:SOURce<hw>]:IQ:DPD:AMFirst........................507 [:SOURce<hw>]:IQ:DPD:AMPM:STATe......................504 [:SOURce<hw>]:IQ:DPD:AMPM:VALue:LEVel?....................507 [:SOURce<hw>]:IQ:DPD:AMPM:VALue:PEP?....................506 [:SOURce<hw>]:IQ:DPD:AMPM:VALue?...................... 506 [:SOURce<hw>]:IQ:DPD:GAIN:PRE......................509 [:SOURce<hw>]:IQ:DPD:INPut:CFACtor?.....................509 [:SOURce<hw>]:IQ:DPD:INPut:LEVel?......................509 [:SOURce<hw>]:IQ:DPD:INPut:PEP?......................509 [:SOURce<hw>]:IQ:DPD:LREFerence......................507 [:SOURce<hw>]:IQ:DPD:MEASurement:STATe?..................508 [:SOURce<hw>]:IQ:DPD:OUTPut:CFACtor?....................509 [:SOURce<hw>]:IQ:DPD:OUTPut:ERRor:MAX.....................
- Page 563 ® Remote control commands R&S SGT100A List of R&S SGT commands [:SOURce<hw>]:IQ:OUTPut[:ANALog]:BIAS:COUPling[:STATe]..............483 [:SOURce<hw>]:IQ:OUTPut[:ANALog]:BIAS:I....................483 [:SOURce<hw>]:IQ:OUTPut[:ANALog]:BIAS:Q.....................483 [:SOURce<hw>]:IQ:OUTPut[:ANALog]:ENVelope:ADAPtion................ 488 [:SOURce<hw>]:IQ:OUTPut[:ANALog]:ENVelope:BIAS................490 [:SOURce<hw>]:IQ:OUTPut[:ANALog]:ENVelope:BINPut................492 [:SOURce<hw>]:IQ:OUTPut[:ANALog]:ENVelope:DELay................489 [:SOURce<hw>]:IQ:OUTPut[:ANALog]:ENVelope:EMF[:STATe]..............491 [:SOURce<hw>]:IQ:OUTPut[:ANALog]:ENVelope:ETRak................489 [:SOURce<hw>]:IQ:OUTPut[:ANALog]:ENVelope:FDPD................490 [:SOURce<hw>]:IQ:OUTPut[:ANALog]:ENVelope:GAIN................492 [:SOURce<hw>]:IQ:OUTPut[:ANALog]:ENVelope:OFFSet................491 [:SOURce<hw>]:IQ:OUTPut[:ANALog]:ENVelope:PIN:MAX................. 495 [:SOURce<hw>]:IQ:OUTPut[:ANALog]:ENVelope:PIN:MIN................494 [:SOURce<hw>]:IQ:OUTPut[:ANALog]:ENVelope:POWer:OFFSet?............495 [:SOURce<hw>]:IQ:OUTPut[:ANALog]:ENVelope:RIN..................491 [:SOURce<hw>]:IQ:OUTPut[:ANALog]:ENVelope:SHAPing:CLIPping:FROM..........499 [:SOURce<hw>]:IQ:OUTPut[:ANALog]:ENVelope:SHAPing:CLIPping:TO........... 499 [:SOURce<hw>]:IQ:OUTPut[:ANALog]:ENVelope:SHAPing:COEFficients...........
- Page 564 ® Remote control commands R&S SGT100A List of R&S SGT commands [:SOURce<hw>]:IQ:OUTPut[:ANALog]:ENVelope:VREF................489 [:SOURce<hw>]:IQ:OUTPut[:ANALog]:MODE....................484 [:SOURce<hw>]:IQ:OUTPut[:ANALog]:OFFSet:I..................484 [:SOURce<hw>]:IQ:OUTPut[:ANALog]:OFFSet:Q..................484 [:SOURce<hw>]:IQ:OUTPut[:ANALog]:PRESet.................... 481 [:SOURce<hw>]:IQ:OUTPut[:ANALog]:SETTing:CATalog?................482 [:SOURce<hw>]:IQ:OUTPut[:ANALog]:SETTing:DELete................483 [:SOURce<hw>]:IQ:OUTPut[:ANALog]:SETTing:LOAD................482 [:SOURce<hw>]:IQ:OUTPut[:ANALog]:SETTing:STORe................482 [:SOURce<hw>]:IQ:OUTPut[:ANALog]:TYPE....................483 [:SOURce<hw>]:IQ:SWAP[:STATe]....................... 480 [:SOURce<hw>]:PULM:DELay........................517 [:SOURce<hw>]:PULM:DOUBle:DELay......................517 [:SOURce<hw>]:PULM:DOUBle:WIDTh......................517 [:SOURce<hw>]:PULM:MODE........................517 [:SOURce<hw>]:PULM:PERiod........................518 [:SOURce<hw>]:PULM:POLarity........................518 [:SOURce<hw>]:PULM:SOURce........................518 [:SOURce<hw>]:PULM:STATe........................519 [:SOURce<hw>]:PULM:TRIGger:EXTernal:GATE:POLarity................
-
Page 565: Waveform And List Format
® Waveform and list format R&S SGT100A Tag description 11 Waveform and list format The R&S SGT uses a tag-oriented format for externally or internally generated wave- forms. A waveform version number is not necessary due to the flexible, tag-based form. Tags are self-contained information units. - Page 566 ® Waveform and list format R&S SGT100A Tag description {MWV_SEGMENT_START: ..572 SampleStartOffsetSeg0, SampleStartOffsetSeg1, …, SampleStartOffsetSegN-1} ..............573 {MWV_SEGMENT_CLOCK_MODE: Mode} .......573 {MWV_SEGMENT_CLOCK: ClockSeg0, ClockSeg1, …, ClockSegN-1} {MWV_SEGMENT_LEVEL_OFFS: ..574 RMSOffs_dBSg0,PeakOffs_dBSg0, …, RMSOffs_dBSgN-1, PeakOffs_dBSgN-1} {MWV_SEGMENT_FILES: ......574 “FileNameSeg0.wv”, “FileNameSeg1.wv”, …, “FileNameSegN-1.wv”} ................574 {MWV_SEGMENTx_COMMENT: text} ..........575 {CONTROL LIST WIDTH4–Length: #m0m1…mx…mM-1} {TYPE: magic, xxxxxxxx}...
- Page 567 ® Waveform and list format R&S SGT100A Tag description {CLOCK: frequency} (mandatory for waveforms) The tag specifies the clock frequency at which the waveform has to be output, in Hz (on multi-segment waveforms this tag contains the maximal clock of all segments). A query of ARB:CLOCk? after loading the waveform returns the value set using the CLOCK tag.
- Page 568 ® Waveform and list format R&S SGT100A Tag description {DATE: yyyy-mm-dd;hh:mm:ss} (optional) The tag contains the date and time at which the file was created. The year must be expressed as four digits. The instrument does not analyze this tag. Example: {DATE: 2009-04-02;14:32:12} BB:ARB:WAV:TAG? 'DATE'...
- Page 569 ® Waveform and list format R&S SGT100A Tag description Example: {TYPE:SMU-WV, 837236424} {COPYRIGHT:2003 Rohde&Schwarz SMU} {DATE:2012-07-11;14:38:01} {SAMPLES:80000} {CLOCK:8666666.666666666} {VECTOR MAX:1.000000038569158} {LEVEL OFFS:3.333553817875577e-07,0} {MARKER LIST 1:0:1;1:0;1249:0} {MARKER LIST 2:0:1;1:0;1249:0} {MARKER LIST 3:0:1;1:0;1249:0} {MARKER LIST 4:0:1;1:0;1249:0} {EMPTYTAG-15947:# ...} {WAVEFORM-320017:#IQIQIQ...} The example waveform file contains 436 (0x1b4) bytes before the # sign in the EMPTYTAG;...
- Page 570 ® Waveform and list format R&S SGT100A Tag description Crest Factor = |PeakOffset_dB - RMSOffset_dB| {LEVEL OFFS: 3.45,2} Example: BB:ARB:WAV:TAG? 'LEVEL OFFS' Queries the content of the LEVEL OFFS tag of the selected waveform file. Response: 3.45,2 The level of the waveform is below full scale, clipping does not occur.
- Page 571 ® Waveform and list format R&S SGT100A Tag description Specifies the binary state of the marker or of the control signal {0; 1} from Pos to Pos exclusive in ASCII format. Example: {MARKER LIST 1: 0:0;10:1;20:0;30:1} BB:DM:CLIS:TAG? 'MARKER LIST 1' Queries the content of the MARKER LIST 1 tag of the selected control list file.
- Page 572 ® Waveform and list format R&S SGT100A Tag description Example: One segment waveform {WAVEFORM-401:#I ,...I 100 I/Q pairs with 4 bytes each are transmitted - none multi-seg- ment Example: Multi-segment waveform {WAVEFORM-1201: ,...I 0,Seg0 0,Seg0 1,Seg0 1,Seg0 99,Seg0 99,Seg0 0,Seg1 0,Seg1 1,Seg1 ,…...
- Page 573 ® Waveform and list format R&S SGT100A Tag description {MWV_SEGMENT_CLOCK_MODE: Mode} (mandatory for multi-segment waveforms) The tag contains a string in ASCII format which supplies the clock rate mode, that was used for calculation of the multi-segment output waveform. The tag CLOCK contains always the highest clock rate of all segments. The tag MWV_SEGMENT_CLOCK contains the clock rates of the individual segments.
- Page 574 ® Waveform and list format R&S SGT100A Tag description Example: {MWV_SEGMENT_CLOCK: 100e6,80e6} 2 segments: clock of segment 0 is 100 MHz, clock of segment 1 is 80 MHz. Note: If the segments have different clock frequencies, there are some restrictions on signal output, i.e. seamless switching between segments is only possible, if all segments have the same clock frequency.
-
Page 575: How To Manually Create A Waveform Using Tag File Format
® Waveform and list format R&S SGT100A How to manually create a waveform using tag file format {CONTROL LIST WIDTH4–Length: #m0m1…mx…mM-1} (optional for waveforms and multi-segment waveforms) The tag contains a binary marker element stream, which is transmitted synchronously to the I/Q sample sequence. One marker element 'mx' consists of 4 bit, which are assigned to the 4 possible marker lines of the instrument (one bit per marker line). - Page 576 ® Waveform and list format R&S SGT100A How to manually create a waveform using tag file format between –1.0 and +1.0. The data is converted into binary format. The appropriate man- datory tags are added and the data is packed into the WAVEFORM tag. As result, the waveform file SICO.wv is generated.
- Page 577 ® Waveform and list format R&S SGT100A How to manually create a waveform using tag file format 2. Convert the values from the file SICO.txt into binary format consisting of 16-bit signed integer numbers. The numeric range between –1.0 and +1.0 corresponds to the modulation range of the waveform 16-bit D/A converter of -32767 to +32767.
- Page 578 ® Waveform and list format R&S SGT100A How to manually create a waveform using tag file format ● Place the string {WAVEFORM-81:# at the beginning of the data set ● Place the symbol } at the end of the data set The contents of the waveform file SICO.wv for 20 I/Q pairs is now ready for opera- tion and reads: {TYPE: SMU-WV,0}...
- Page 579 ® Waveform and list format R&S SGT100A How to manually create a waveform using tag file format if (fp == 0) return; for (i=0; i<samples; i++) grad = (360.0f / (float)samples) * (float)i; rad = grad * (pi / 180.0f); fprintf(fp, "%f %f\n", sin(rad), cos(rad));...
-
Page 580: Editing Waveform Files
® Waveform and list format R&S SGT100A Editing waveform files 11.3 Editing waveform files You can edit the internally and externally crated waveform files. The waveform contains binary and ASCII data. Consider the following rules while editing files with binary data. Rules for editing binary data (waveforms, data and control lists) ●... -
Page 581: Error Messages And Troubleshooting
® Error messages and troubleshooting R&S SGT100A Error messages 12 Error messages and troubleshooting This chapter describes the error messages of the R&S SGT. The error messages are output in the "Info" line on the screen and entered in the error/event queue of the sta- tus reporting system. -
Page 582: Permanent Messages
® Error messages and troubleshooting R&S SGT100A Device-Specific error messages instrument (e.g. range violations). They are displayed in the info line on a yellow back- ground. They are displayed on top of status information or permanent messages. Volatile messages do not normally demand user actions and disappear automatically after a brief period of time. - Page 583 ® Error messages and troubleshooting R&S SGT100A Device-Specific error messages Error Error Description Remedy Code Adjustment failed Adjustment could not be executed The adjustment data have to be generated first by an internal or external adjustment or to be loa- ded into the device.
-
Page 584: Contacting Customer Support
® Error messages and troubleshooting R&S SGT100A Contacting customer support Error Error Description Remedy Code File contains invalid The selected file contains data that is Check the file extension. data not valid for the file type. The file extension determines the data that is valid for this file type. -
Page 585: Transporting
® Transporting R&S SGT100A 13 Transporting Lifting and carrying See: ● "Lifting and carrying the product" on page 12 ● Chapter 3.1.1, "Lifting and carrying", on page 18. Packing Use the original packaging material. It consists of antistatic wrap for electrostatic pro- tection and packing material designed for the product. -
Page 586: Maintenance, Storage And Disposal
® Maintenance, storage and disposal R&S SGT100A Disposal 14 Maintenance, storage and disposal The product does not require regular maintenance. It only requires occasional clean- ing. It is however advisable to check the nominal data from time to time. 14.1 Cleaning How to clean the product is described in "Cleaning the product"... -
Page 587: Annex
® Telnet program examples R&S SGT100A Annex A Telnet program examples The following program example shows a simple TcpClient class that is intended to explain on how to get started with programming of sockets. The example sets up a socket communication to R&S SGT and opens a simple user interface, very similar to the telnet, which allows input of commands. - Page 588 ® Telnet program examples R&S SGT100A public: TcpClient(); ~TcpClient(); void connectToServer( string &hostname, int port ); void disconnect( ); void transmit( string &txString ); void receive( string &rxString ); string getCurrentHostName( ) const; getCurrentPort( ) const; private: string currentHostName; currentPort; currentSocketDescr;...
- Page 589 ® Telnet program examples R&S SGT100A currentHostName = hostname; currentPort = port; currentSocketDescr = socket(AF_INET, SOCK_STREAM, 0); if( currentSocketDescr == 0 ) currentHostName = ""; currentPort = 0; currentHostInfo = NULL; clientIsConnected = false; printf("can't create socket\n" ); serverAddress.sin_family = currentHostInfo->h_addrtype; serverAddress.sin_port = htons( currentPort );...
- Page 590 ® Telnet program examples R&S SGT100A if( !clientIsConnected ) throw string("connection must be established before any data can be received\n"); char * receiveBuffer = new char[receiveBufferSize]; memset( receiveBuffer, 0, receiveBufferSize ); bool receiving = true; while( receiving ) int receivedByteCount = recv( currentSocketDescr, receiveBuffer, receiveBufferSize, 0 );...
- Page 591 ® Telnet program examples R&S SGT100A useSingleCommand = true; singleCommand = argv[2]; case 2: hostname = argv[1]; break; default: printUsage(); return(-1); client.connectToServer( hostname, port ); bool terminate = false; while( !terminate ) char buffer[1024]; if( useSingleCommand ) input = singleCommand; //send string else cin.getline( buffer, 1024 );...
- Page 592 ® Telnet program examples R&S SGT100A client.disconnect( ); return errorCode; User Manual 1176.8674.02 ─ 12...
-
Page 593: Glossary: References
® Glossary: References R&S SGT100A Glossary: References Symbols 1GP103: Rohde & Schwarz application note 1GP103 "Connecting and Interfacing with SGMA Instruments" available at: https://www.rohde-schwarz.com/appnote/1GP103 1GP109: Rohde & Schwarz application note 1GP109 "Remote Emulation with the ® R&S SGT100A SGMA Vector RF Source " available at: https://www.rohde-schwarz.com/appnote/1GP109 1MA028: Rohde &... -
Page 594: Index
® Index R&S SGT100A Index Symbols Apply Normalized data ............216 /var directory ..............363 Polynomial function ........... 197, 214 180 - Adjustment failed ........... 583 Apply assistant settings ........... 114 182 - Adjustment data missing ........583 Apply Assistant Settings ..........427 183 - Adjustment data invalid .......... - Page 595 ® Index R&S SGT100A Carrier Start ..............429 Connected device - Baseband Input ....... 456 Carrier state ............. 113, 115 Connecting Carrier State ..............430 LAN ................22 Carrier stop ..............113 Power ................21 Carrier Stop ..............429 RF ................. 22, 23 Carrier table ..............
- Page 596 ® Index R&S SGT100A Deactivated licenses ............280 Decimal point Import/Export - user correction data ..234 Default instrument settings ..........26 Edit Default settings ............91, 105 Binary data ..............580 Edit User Correction Data ..........232 Digital predistortion ........... 204 I/Q output analog ..........
- Page 597 ® Index R&S SGT100A Event status enable register (ESE) ......... 334 Frequency Remote ..............349 At the RF output ............218 Event status register (ESR) ..........334 Incl. RF offset .............. 67 Remote ..............349 Offset ................ 218 Execute BBIN A/B Selftest ..........551 Power sensors ............
- Page 598 ® Index R&S SGT100A I/Q impairments Instrument settings Non-linear ..............198 Recall ..............351, 371 I/Q modulation ............68, 154 Save ..............351, 372 Crest factor ............... 156 Interfaces I/Q modulator GPIB ................. 320 Nonlinearity ............... 198 USB ................319 I/Q output Internal adjustments RF envelope .............
- Page 599 ® Index R&S SGT100A Level range Mode ............... 107, 420 RF output ..............226 I/Q Out ..............163 License for software option ..........276 PULM ................ 258 License key ..............276 Pulse modulation ............258 Lifting the instrument ............18 RF level ..............
- Page 600 ® Index R&S SGT100A I/Q OUT ..............164 Placing, on a bench top .............19 Inverted envelope, E BAR ........164 Play list ............94, 102, 103, 130 Old password ..............286 Play list file ON/OFF ratio marker ............131 Sequencing list file ............94 ON/OFF Ratio Marker .............
- Page 601 ® Index R&S SGT100A Power Start ..............422 REF OUT Power Step ..............429 Connector ..............36 Power viewer REF/LO OUT connector ..........304 Auto once ..............251 Reference frequency adjustment mode ......223 PPE ................. 330 Register selected waveform ..........280 Predistortion Registers .................
- Page 602 ® Index R&S SGT100A Save/recall USB device (security) ..........284 Normalized data ............215 USB storage (security) ..........284 Polynomial function ........... 197, 213 Shape Save/Recall ..............106 DPD, digital predistortion .......... 207 Digital predistortion ........... 205 RF envelope ............. 186 I/Q output analog ..........
- Page 603 ® Index R&S SGT100A State ................265 Date ................568 ALC ................230 Samples ..............570 AM/AM, AM/PM ............206 Segment Clock Mode ..........573 AWGN ............... 144 Segment comment ............ 574 Digital predistortion ........... 204 Segment Files ............574 I/Q modulation ............
- Page 604 ® Index R&S SGT100A Value User correction ............231 Value range Pin, power amplifier .......... 184, 209 Vcc, power amplifier ..........183 Vin/Vmax, Vcc/Vmax Settings ..............195 VISA ................312 HiSLIP string ............. 290 LAN string ..............290 PCIe string ..............290 Resource string ............
Need help?
Do you have a question about the R&S SGT100A and is the answer not in the manual?
Questions and answers