YASKAWA FS100 Maintenance Manual
Hide thumbs
Also See for FS100:
- Instructions manual (246 pages) ,
- Option addendum (20 pages) ,
- Operator's manual (20 pages)
Table of Contents
Advertisement
Quick Links
FS100
MAINTENANCE MANUAL
Upon receipt of the product and prior to initial operation, read these instructions thoroughly, and
retain for future reference.
MOTOMAN INSTRUCTIONS
MOTOMAN- INSTRUCTIONS
FS100 INSTRUCTIONS
FS100 OPERATOR'S MANUAL
FS100 MAINTENANCE MANUAL
The FS100 OPERATOR'S MANUAL above is applicable to both FS100 and FS100L controllers.
Part Number:
Revision:
MANUAL NO. RE-CHO-A111
159645-1CD
5
9
1 of 348
Advertisement
Table of Contents

Subscribe to Our Youtube Channel
Related Manuals for YASKAWA FS100


Summary of Contents for YASKAWA FS100
- Page 1 Upon receipt of the product and prior to initial operation, read these instructions thoroughly, and retain for future reference. MOTOMAN INSTRUCTIONS MOTOMAN- INSTRUCTIONS FS100 INSTRUCTIONS FS100 OPERATOR’S MANUAL FS100 MAINTENANCE MANUAL The FS100 OPERATOR’S MANUAL above is applicable to both FS100 and FS100L controllers. Part Number: 159645-1CD Revision: MANUAL NO. RE-CHO-A111 1 of 348...
- Page 2 YASKAWA customers to assist in the operation of Motoman robots, related equipment and software This manual is copyrighted property of YASKAWA and may not be sold or redistributed in any way. You are welcome to copy this document to your computer or mobile device for...
- Page 3 If such modification is made, the manual number will also be revised. • If your copy of the manual is damaged or lost, contact a YASKAWA representative to order a new copy. The representatives are listed on the back cover. Be sure to tell the representative the manual number listed on the front cover.
- Page 4 ALLOW UNTRAINED PERSONNEL TO OPERATE, PROGRAM, OR REPAIR THE EQUIPMENT! We recommend approved YASKAWA training courses for all personnel involved with the operation, programming, or repair of the equipment. This equipment has been tested and found to comply with the limits for a Class A digital device, pursuant to part 15 of the FCC rules.
- Page 5 FS100 Notes for Safe Operation Read this manual carefully before installation, operation, maintenance, or inspection of the FS100 . In this manual, the Notes for Safe Operation are classified as “DANGER”, “WARNING”, “CAUTION”, “MANDATORY”, or “PROHIBITED”. Indicates an imminent hazardous...
- Page 6 17 pin of the robot system signal connector (CN2). • Upon shipment of the FS100, this signal is connected by a jumper cable in the dummy connector. To use the signal, make sure to supply a new connector, and then input it.
- Page 7 Definition of Terms Used Often in This Manual The MOTOMAN is the YASKAWA industrial robot product. The MOTOMAN usually consists of the manipulator, the FS100 controller, manipulator cables, the FS100 programming pendant (optional), and the FS100 programming pendant dummy connector (optional).
- Page 8 159645-1CD Description of the Operation Procedure FS100 Descriptions of the programming pendant keys, buttons, and displays are shown as follows: Equipment Manual Designation Programming Character Keys The keys which have characters printed on Pendant them are denoted with [ ].
- Page 9 • The following warning labels are attached to FS100. Observe the precautions on the warning labels. Failure to observe this warning may result in injury or damage to equipment. Fig. : Location of Warning Labels...
- Page 10 159645-1CD Safeguarding Tips FS100 Safeguarding Tips All operators, programmers, maintenance personnel, supervisors, and anyone working near the system must become familiar with the operation of this equipment. All personnel involved with the operation of the equipment must understand potential dangers of operation. General safeguarding tips are as follows: •...
- Page 11 Do not make any modifications to the controller unit. Making any changes without the written permission from YASKAWA will void the warranty. • Some operations require a standard passwords and some require special passwords.
- Page 12 It is important that users operate the equipment in accordance with this instruction manual and any additional information which may be provided by YASKAWA. Address any questions regarding the safe and proper operation of the equipment to YASKAWA Customer Support.
- Page 13 159645-1CD Customer Support Information FS100 Customer Support Information If you need assistance with any aspect of your FS100 system, please contact YASKAWA Customer Support at the following 24-hour telephone number: (937) 847-3200 For routine technical inquiries, you can also contact YASKAWA Customer Support at the following e-mail address: techsupport@motoman.com...
-
Page 14: Table Of Contents
5.4 FS100 Replacement ......................5-8 5.4.1 Backup Device Preparation .................. 5-9 5.4.2 System Backup..................... 5-9 5.4.3 Replacement of the FS100 ................. 5-12 5.4.4 Loading the Backup Data ................... 5-14 6 Recommended Spare Parts......................6-1 6.1 List of Accessories ......................6-1 6.2 Recommended Spare Parts.................... -
Page 15: Table Of Contents
159645-1CD Table of Contents FS100 7 Operations After Replacing Parts ....................7-1 7.1 Home Position Calibration ....................7-2 7.1.1 Home Position Calibration ..................7-2 7.1.2 Calibrating Operation.................... 7-4 7.1.2.1 Registering All Axes at One Time ............7-4 7.1.2.2 Registering Individual Axes ..............7-6 7.1.2.3 Changing the Absolute Data .............. -
Page 16: Table Of Contents
159645-1CD Table of Contents FS100 8.3.6 Signal Number Search..................8-8 8.3.6.1 Direct Search on the Universal/Specified Input/Output Window ..... 8-9 8.3.6.2 Search from the Menu ................8-10 8.3.7 Relay Number Search ..................8-11 8.3.7.1 Direct Search on the Universal/Specified Input/Output Window ... 8-12 8.3.7.2 Search from the Menu ................ -
Page 17: Table Of Contents
159645-1CD Table of Contents FS100 9.3 Display of Alarm Details..................... 9-5 9.3.1 Parameter......................9-5 9.3.2 Display of Alarm Detail Window ................9-5 9.3.3 Transition of Alarm Detail Window ............... 9-7 9.4 Alarm Message List ......................9-8 Error ............................10-1 10.1 Error Message ....................... 10-1 10.1.1 System and General Operation ................ -
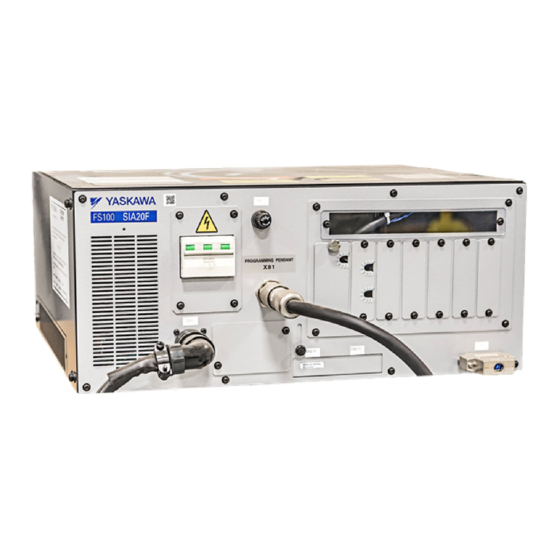
Page 18: Equipment Configuration
159645-1CD Equipment Configuration FS100 1.1 Arrangement of Units and Circuit Boards Equipment Configuration Arrangement of Units and Circuit Boards Fig. 1-1: Arrangement of Units and Circuit Boards Mounting base unit CSTR-MBB08AAA PWM amplifier module CSTR-SDB Converter unit Major axes control circuit board... -
Page 19: Power Flow
159645-1CD Equipment Configuration FS100 1.2 Power Flow Power Flow Noise filter CIRCUIT POWER PROTECTOR RELAY Three phase 220/200VAC 50Hz/60Hz COOLING COOLING REGENERATIVE RESISTOR CN301 (24V output) CN304 CN303 (PN) CN307 (Control power supply) (Main circuit) (Brake release) CN210 CN310 CAPACITOR... -
Page 20: Signal Flow
159645-1CD Equipment Configuration FS100 1.3 Signal Flow Signal Flow Feed back signal POWER RELAY Control signal (24V output) CN301 CN304 CN303 (Control (PN) CN307 power supply) (Main circuit) (Break release) CN210 CN310 (24V3 output) CN209 (Relay IO) CN211 CONVERTER (External IO) -
Page 21: Security System
Security System Protection Through Security Mode Settings The FS100 modes setting are protected by a security system. The system allows operation and modification of settings according to operator clearance. Be sure operators have the correct level of training for each level to which they are granted access. - Page 22 159645-1CD Security System FS100 2.1 Protection Through Security Mode Settings Table 2-2: Menu & Security Mode (Sheet 1 of 3) Main Menu Sub Menu Allowed Security Mode DISPLAY EDIT Operation Edit SELECT JOB Operation Operation CREATE NEW JOB Edit Edit...
- Page 23 159645-1CD Security System FS100 2.1 Protection Through Security Mode Settings Table 2-2: Menu & Security Mode (Sheet 2 of 3) Main Menu Sub Menu Allowed Security Mode DISPLAY EDIT ROBOT CURRENT POSITION Operation COMMAND POSITION Operation SERVO MONITOR Management -...
- Page 24 159645-1CD Security System FS100 2.1 Protection Through Security Mode Settings Table 2-2: Menu & Security Mode (Sheet 3 of 3) Main Menu Sub Menu Allowed Security Mode DISPLAY EDIT PARAMETER S1CxG Management Management Management Management Management Management Management Management Management Management...
-
Page 25: Changing The Security Mode
159645-1CD Security System FS100 2.1 Protection Through Security Mode Settings 2.1.1.1 Changing the Security Mode 1. Select {SYSTEM INFO} under the main menu. – The sub menu appears. 2. Select {SECURITY}. – The selection window of security mode appears. 3. Press [SELECT] and select "SECURITY MODE". - Page 26 159645-1CD Security System FS100 2.1 Protection Through Security Mode Settings 4. Input the user ID. – The user ID input window appears. At the factory, the following below user ID number is preset. • Editing Mode:[00000000] SUPPLE- MENT Management Mode:[99999999] 5.
-
Page 27: User Id
(“0 to 9”,“-” and “.”) 2.1.2.1 Changing a User ID In order to change the user ID, the FS100 must be in Editing Mode or Management Mode. Higher security modes can make changes the user ID of to lower security modes. - Page 28 159645-1CD Security System FS100 2.1 Protection Through Security Mode Settings 3. Select the desired ID. – The character input line appears, and the message "Input current ID no. (4 to 8 digits)" is shown. 4. Input current ID and press [ENTER].
-
Page 29: Maintenance And Inspections
Maintenance and Inspections Operator’s manual for daily inspection and parts replacement are explained in this section. Be sure to read and understand this instruction before operating the FS100. To ensure correct and safe operation, carefully read the FS100 INSTRUCTIONS (159644-1CD). WARNING •... - Page 30 Check for damages connections. and loose connectors Manipulator cable Check for damages or Check visually As required Check for damages (between the FS100 connections. and loose and the manipulator) connectors Cover mounting Check for defect or Use screw driver As required...
-
Page 31: Cooling Fan Inspections
FS100 3.2 Cooling Fan Inspections Cooling Fan Inspections Inspect the cooling fans as required. A defective fan can cause the FS100 to malfunction because of excessive high temperatures inside. The interior circulation fan and cooling fan normally operate while the power is turned ON. -
Page 32: Emergency Stop Button Inspections
159645-1CD Maintenance and Inspections FS100 3.3 Emergency Stop Button Inspections Emergency Stop Button Inspections The emergency stop button is located on the programming pendant. Before operating the manipulator, confirm that the SERVO power is ON/ OFF by pressing the emergency stop button after the SERVO is ON. -
Page 33: Battery Inspections
Refer to section 5.3 “Battery Replacement” for the battery replacement. When the programming pendant is not used, be sure to confirm, from the LED audit window on the FS100 front door, that the battery alarm LED of the CPU unit (CPU-201R) is not lit up. -
Page 34: Preparation Before Replacing Parts
16-17 pin of the robot system signal connector (CN2). • Upon shipment of the FS100, this signal is connected by a jumper cable in the dummy connector. To use the signal, make sure to supply a new connector, and then input it. - Page 35 Be sure to create a check program referring to section 4.1 “Creating a Check Program”. • Change in the combination of the manipulator and FS100 • Replacement of the motor or absolute encoder • Clearing stored memory (by replacement of main CPU board, weak battery, etc.)
-
Page 36: Creating A Check Program
159645-1CD Preparation before Replacing Parts FS100 4.1 Creating a Check Program Creating a Check Program To check position deviation whenever necessary, create a program in which a check point is taught (the job for the check point). In the job for the check point, teach two points;... -
Page 37: Replacing Parts
(F2: right side of the following figure) fast-blow type 1 A fuse is delivered with the FS100 before shipment for replacement. 2 Fuse for regenerative resistor fan protection is mounted on the FS100 for HP20F only. RE-CHO-A111 37 of 348... - Page 38 159645-1CD Replacing Parts FS100 5.1 Fuse Replacement Locations of the fuse If the fuse seems to be blown, check its conduction. If it is blown, replace it with the same type of fuse (supplied). If the fuse seems to be blown, be sure to investigate its NOTE cause, or blown again after the replacement.
-
Page 39: Interior Circulation Fan Replacement
2. Remove the screws (3 places) fixing the fan and the fan guard. 3. Uninstall the fan from the FS100. 4. Install the new fan to the FS100. (When installing the fan, be carefull to its installing direction so that the air is drewn inside the FS100.) -
Page 40: Battery Replacement
FS100 while the power is turned ON. Do NOT open the plate to perform the operation within five minutes after turning OFF the FS100 power supply and primary power source. • Do NOT touch units or terminal parts within five minutes after turning OFF the FS100 power supply. - Page 41 159645-1CD Replacing Parts FS100 5.3 Battery Replacement Replacement Procedure 1. Uninstall the top plate and loosen the strap which is fixing the battery. Battery fixing strap 2. Disconnect the connector from the battery extension lead wire and remove the battery.
- Page 42 159645-1CD Replacing Parts FS100 5.3 Battery Replacement 4. Fix the battery with the strap. Fasten the strap till the third hole of it. When fixing the battery, put the black lead wire toward inner side of the FS100. Inner side of the controller...
- Page 43 159645-1CD Replacing Parts FS100 5.3 Battery Replacement Inner side of the controller Wrong example Do not fix the battery lead parallel to the inner side of the controller. Fix the battery lead wire to the inner side of the controller.
-
Page 44: Fs100 Replacement
5.4 FS100 Replacement FS100 Replacement This section explains about replacement of the FS100. All the data inside of the FS100 need to be transferred to the replaced one. However if those cases shown below are the reasons for the replacement, the system cannot be backed up at this time. -
Page 45: Backup Device Preparation
All the systems need to be backed up to a device for transferring to the replaced FS100. Perform the system backup at CMOS.BIN. For the backup of the FS100 system, a CompactFlash card or a USB memory stick can be used. The following tables show the recommended CompactFlash and USB memory. - Page 46 5.4 FS100 Replacement Follow the procedures below to save CMOS.BIN. MAIN 1. While pressing the main menu key , turn ON the FS100 power MENU supply. 2. Insert a CompactFlash card into the CompactFlash slot on the programming pendant.
- Page 47 159645-1CD Replacing Parts FS100 5.4 FS100 Replacement 5. Select {CMOS}. – The confirmation dialog box appears. 6. Select {YES}. – Select {YES} to save the CMOS data into a CompactFlash card. – When saving the file, if the CMOS.BIN file already exists in the CompactFlash card, the following confirmation dialog box appears.
-
Page 48: Replacement Of The Fs100
Use a platform truck to carry the FS100. – Avoid jarring, dropping, or hitting the FS100 during handling. Failure to observe these cautions may cause the FS100 to fall down, which may result in personal injury or equipment damage. ... - Page 49 X21/2BC Power cable Back view of the FS100 4. Replace the FS100 and be sure to fix it securely. 5. Connect all the cables that were removed as explained in the procedure 3. 6. Confirm all the cables connected correctly, then turn ON the primary power supply of the FS100.
-
Page 50: Loading The Backup Data
FS100 5.4 FS100 Replacement 5.4.4 Loading the Backup Data To the replaced FS100, load the backup data (CMOS.BIN) that was saved before the replacement. Perform the backup by CMOS.BIN in the maintenance mode. The chart below shows the availability of CMOS save and CMOS load in each security mode in the maintenance mode. - Page 51 159645-1CD Replacing Parts FS100 5.4 FS100 Replacement 11. Select {LOAD}. – The load display appears. – The items marked with “ ” cannot be selected. 12. Select {CMOS}. – The confirmation dialog box appears. 13. Select {YES}. – The dialog box “Overwrite network configuration?” appears.
- Page 52 “CMOS.BIN” file are reflected to the CMOS in the FS100. – If {NO} is selected, the network configuration in the FS100 is not updated and the other data are reflected to the CMOS in the FS100.
-
Page 53: Recommended Spare Parts
159645-1CD Recommended Spare Parts FS100 6.1 List of Accessories Recommended Spare Parts List of Accessories Accessories of FS100 are as follows. No. Name Type Manufacturer Qty. Qty. unit Power supply CE05-6A18-10SD- connector D-BSS Waterproof cable CE3057-10A-1-D clamp Dummy connector HB1370101-1... - Page 54 CAUTION • It is recommended to use the parts and components in the following table as spare parts for the FS100. Product performance cannot be guaranteed when using spare parts from any company other than YASKAWA. • Rank A: Expendable and frequently replaced parts.
-
Page 55: Operations After Replacing Parts
16-17 pin of the robot system signal connector (CN2). • Upon shipment of the FS100, this signal is connected by a jumper cable in the dummy connector. To use the signal, make sure to supply a new connector, and then input it. -
Page 56: Home Position Calibration
• Change in the combination of the manipulator and FS100 • Replacement of the motor or absolute encoder • Clearing stored memory (by replacement of main CPU board, weak battery, etc.) - Page 57 159645-1CD Operations After Replacing Parts FS100 7.1 Home Position Calibration If the absolute data of the home position is already known, set the absolute data again after completing home position registration. Home Position SUPPLE- The home position is the position with the pulse value "0" for MENT each axis.
-
Page 58: Calibrating Operation
159645-1CD Operations After Replacing Parts FS100 7.1 Home Position Calibration 7.1.2 Calibrating Operation 7.1.2.1 Registering All Axes at One Time 1. Select {ROBOT} under the main menu. 2. Select {HOME POSITION}. – The HOME POSITIONING window appears. 3. Select {DISPLAY} under the menu, or select "PAGE"... - Page 59 159645-1CD Operations After Replacing Parts FS100 7.1 Home Position Calibration 4. Select the desired control group. 5. Select {EDIT} under the menu. – The pull-down menu appears. 6. Select {SELECT ALL AXES}. – The confirmation dialog box appears. 7. Select “YES”.
-
Page 60: Registering Individual Axes
159645-1CD Operations After Replacing Parts FS100 7.1 Home Position Calibration 7.1.2.2 Registering Individual Axes 1. Select {ROBOT} under the main menu. 2. Select {HOME POSITION}. 3. Select the desired control group. – Perform steps 3 and 4 which have been described in section 7.1.2.1 “Registering All Axes at One Time”... -
Page 61: Changing The Absolute Data
159645-1CD Operations After Replacing Parts FS100 7.1 Home Position Calibration 7.1.2.3 Changing the Absolute Data To change the absolute data of the axis when home position calibration is completed, perform the following: 1. Select {ROBOT} under the main menu. 2. Select {HOME POSITION}. -
Page 62: Clearing Absolute Data
159645-1CD Operations After Replacing Parts FS100 7.1 Home Position Calibration 7.1.2.4 Clearing Absolute Data 1. Select {ROBOT} under the main menu. 2. Select {HOME POSITION}. – Perform steps 2, 3, and 4 which have been described in "Registering All Axes at One Time" to display the HOME POSITIONING window and select the desired control group. - Page 63 159645-1CD Operations After Replacing Parts FS100 7.1 Home Position Calibration 5. Select "YES". – The all absolute data are cleared. When "NO" is selected, the operation will be canceled. RE-CHO-A111 63 of 348...
-
Page 64: Manipulator Home Position
159645-1CD Operations After Replacing Parts FS100 7.1 Home Position Calibration 7.1.3 Manipulator Home Position With the MOTOMAN-HP20F, the home position is as follows. B-axis center line angle against U-axis center line (-90°) U-axis angle against horizontal line on the ground (-0°) L-axis angle against vertical line to the ground (-0°) -
Page 65: Position Deviation Check Using The Check Program
159645-1CD Operations After Replacing Parts FS100 7.2 Position Deviation Check Using the Check Program Position Deviation Check Using the Check Program Use the check program to check if positions are deviated with the following procedure. 1. Call up the check program in which the check point is taught (the job for) and operate the manipulator at low speed. -
Page 66: Checking Of The Check Program
159645-1CD Operations After Replacing Parts FS100 7.3 Checking of the Check Program Checking of the Check Program 7.3.1 Motion of the Check Program Call up the check program in which the check point is taught (the job for avoiding the position deviation) and operate the manipulator at low speed. -
Page 67: Home Position Data Correction
159645-1CD Operations After Replacing Parts FS100 7.3 Checking of the Check Program 7.3.3 Home Position Data Correction When there is a deviation from the positions, correct the home position data with the following procedure. 1. Check the values of the following pulses. -
Page 68: Setting The Second Home Position (Check Point)
16-17 pin of the robot system signal connector (CN2). • Upon shipment of the FS100, this signal is connected by a jumper cable in the dummy connector. To use the signal, make sure to supply a new connector, and then input it. - Page 69 159645-1CD Operations After Replacing Parts FS100 7.4 Setting the Second Home Position (Check Point) CAUTION • Perform the following inspection procedures prior to teaching the manipulator. If problems are found, correct them immediately, and be sure that all other necessary tasks have been performed.
-
Page 70: Purpose Of Position Check Operation
If the absolute number of rotation detected at power supply ON does not match the data stored in the absolute encoder the last time the power supply was turned OFF, an alarm is issued when the FS100 power is turned ON. - Page 71 159645-1CD Operations After Replacing Parts FS100 7.4 Setting the Second Home Position (Check Point) 2. Pulse Difference Check The pulse number at the second home position is compared with that at the current position. If the difference is within the allowable range, playback is enabled.
-
Page 72: Procedure For The Second Home Position Setting (Check Point)
Use the following steps to set the specified point. If two or more manipulators or stations are controlled by one FS100, the second home position must be set for each manipulator or station. -
Page 73: Procedure After The Alarm
159645-1CD Operations After Replacing Parts FS100 7.4 Setting the Second Home Position (Check Point) 7.4.3 Procedure after the Alarm WARNING • Be aware of safety hazards when performing the position confirmation of the specified point. Abnormality of the PG system may be cause for alarm. The manipulator may operate in an unexpected manner, and there is a risk of damage to equipment or injury to personnel. - Page 74 159645-1CD Operations After Replacing Parts FS100 7.4 Setting the Second Home Position (Check Point) GO BACK 3. Press the page key PAGE or select "PAGE" to display the selection window for the control group. – The group axes by which the second home position is set is selected when there are two or more group axes.
-
Page 75: System Diagnosis
159645-1CD System Diagnosis FS100 8.1 System Version System Diagnosis System Version It is possible to check the system CPU version information as follows. 1. Select {SYSTEM INFO} under the main menu. 2. Select {VERSION}. – The VERSION window appears. Manipulator Model 1. -
Page 76: Input/Output Status
159645-1CD System Diagnosis FS100 8.3 Input/Output Status Input/Output Status 8.3.1 Universal Input The status of input signal which is referred to by input instruction of a job can be confirmed. 8.3.1.1 Universal Input Window 1. Select {IN/OUT} under the main menu. -
Page 77: Universal Output
159645-1CD System Diagnosis FS100 8.3 Input/Output Status 8.3.2 Universal Output The status of the output signal set by the output instruction can be confirmed and modified. 8.3.2.1 Universal Output Window 1. Select {IN/OUT} under the main menu. 2. Select {UNIVERSAL OUTPUT}. -
Page 78: Modifying The Output Status
159645-1CD System Diagnosis FS100 8.3 Input/Output Status 8.3.2.3 Modifying the Output Status The status of universal output signal can be changed by the operation below. 1. Select the desired output signal number. the desired output signal, “ – Select the status of ”... -
Page 79: Specific Input
159645-1CD System Diagnosis FS100 8.3 Input/Output Status 8.3.3 Specific Input 8.3.3.1 Specified Input Window 1. Select {IN/OUT} under the main menu. 2. Select {SPECIFIED INPUT}. – The SPECIFIED INPUT window appears. 8.3.3.2 Specific Input Simple Window 1. Select {IN/OUT} under the main menu. -
Page 80: Specific Output
159645-1CD System Diagnosis FS100 8.3 Input/Output Status 8.3.4 Specific Output 8.3.4.1 Specified Output Window 1. Select {IN/OUT} under the main menu. 2. Select {SPECIFIED OUTPUT}. – The SPECIFIED OUTPUT window appears. 8.3.4.2 Specific Output Simple Window 1. Select {IN/OUT} under the main menu. -
Page 81: Rin Input
159645-1CD System Diagnosis FS100 8.3 Input/Output Status 8.3.5 RIN Input 8.3.5.1 RIN Input Window 1. Select {IN/OUT} under the main menu. 2. Select {RIN}. – The RIN window appears. RE-CHO-A111 81 of 348... -
Page 82: Signal Number Search
159645-1CD System Diagnosis FS100 8.3 Input/Output Status 8.3.6 Signal Number Search A search can be made for a signal number of a universal input, universal output, system input, and system output. Signal number A search for the signal number can be made in the following two ways. -
Page 83: Direct Search On The Universal/Specified Input/Output Window
159645-1CD System Diagnosis FS100 8.3 Input/Output Status 8.3.6.1 Direct Search on the Universal/Specified Input/Output Window 1. Move the cursor to a signal number in the UNIVERSAL/SPECIFIED INPUT/OUTPUT window, and press [SELECT]. – Numeric values can now be entered. 2. Enter the signal number to be searched. -
Page 84: Search From The Menu
159645-1CD System Diagnosis FS100 8.3 Input/Output Status 8.3.6.2 Search from the Menu 1. Select {EDIT} under the menu in the UNIVERSAL/SPECIFIED INPUT/ OUTPUT window. – The pull-down menu appears. 2. Select {SEARCH SIGNAL NO.}. – Numeric values can now be entered. -
Page 85: Relay Number Search
159645-1CD System Diagnosis FS100 8.3 Input/Output Status 8.3.7 Relay Number Search A search can be made for a relay number of a universal input, universal output, system input, and system output. Relay number A search for the relay number can be made in the following two ways. - Page 86 159645-1CD System Diagnosis FS100 8.3 Input/Output Status 8.3.7.1 Direct Search on the Universal/Specified Input/Output Window 1. Move the cursor to a relay number in the UNIVERSAL/SPECIFIED INPUT/OUTPUT window, and press [SELECT]. – Numeric values can now be entered. 2. Enter the relay number to be searched.
- Page 87 159645-1CD System Diagnosis FS100 8.3 Input/Output Status 8.3.7.2 Search from the Menu 1. Select {EDIT} under the menu in the UNIVERSAL/SPECIFIED INPUT/ OUTPUT window. – The pull-down menu appears. 2. Select {SEARCH RELAY SIGNAL NO.}. – Numeric values can now be entered.
-
Page 88: Modification Of The Signal Name
159645-1CD System Diagnosis FS100 8.3 Input/Output Status 8.3.8 Modification of the Signal Name The name of the universal input or output signal can be modified. Signal name The name can be modified in the following two ways. • Direct modification on the UNIVERSAL/SPECIFIED INPUT/OUTPUT window. -
Page 89: Modification From The Menu
159645-1CD System Diagnosis FS100 8.3 Input/Output Status 8.3.8.2 Modification from the Menu 1. Move the cursor to the signal name to be modified in the UNIVERSAL/ SPECIFIED INPUT/OUTPUT window. 2. Select {EDIT} under the menu. – The pull-down menu appears. -
Page 90: System Monitoring Time Display
159645-1CD System Diagnosis FS100 8.4 System Monitoring Time Display System Monitoring Time Display 8.4.1 System Monitoring Time Display Window The status of system operation, e.g. power ON time, can be checked. 1. Select {SYSTEM INFO}. 2. Select {MONITORING TIME}. – The SYS MONITORING TIME window appears. -
Page 91: Individual Window Of The System Monitoring Time Display
159645-1CD System Diagnosis FS100 8.4 System Monitoring Time Display 8.4.2 Individual Window of the System Monitoring Time Display GO BACK If the page key is pressed, or "PAGE" is selected to display the PAGE selection window for the system monitoring time display, the servo power time, playback time, moving time, and each-application operating time by each control group are individually displayed. -
Page 92: Clearing The System Monitoring Time Display
159645-1CD System Diagnosis FS100 8.4 System Monitoring Time Display 8.4.3 Clearing the System Monitoring Time Display The moving time and operating time can be cleared and set back to 0 by following procedure. These operations can be performed in the SYS MONITORING TIME window, or in the individual windows. -
Page 93: Alarm History
159645-1CD System Diagnosis FS100 8.5 Alarm History Alarm History 8.5.1 Alarm History Window The alarm history can be confirmed in the alarm history window. There are five types of alarm history windows: the "MAJOR ALARM" window, the "MINOR ALARM" window, the "USER ALARM (SYSTEM)" window, the "USER ALARM (USER)"... -
Page 94: Clearing The Alarm History
159645-1CD System Diagnosis FS100 8.5 Alarm History 8.5.2 Clearing the Alarm History The history of the minor alarms and the user alarms (system and user) can be cleared. 1. Display the alarm history window to be cleared. 2. Select {DATA} under the menu. -
Page 95: I/O Message History
159645-1CD System Diagnosis FS100 8.6 I/O Message History I/O Message History 8.6.1 I/O Message History Window The I/O message history can be confirmed in the I/O MESSAGE HISTORY window. The I/O MESSAGE HISTORY window shows the date and time, job name, line number, and step number of the I/O message that appeared on the window. -
Page 96: Clearing The I/O Message History
159645-1CD System Diagnosis FS100 8.6 I/O Message History 8.6.2 Clearing the I/O Message History Use the following operation to clear the I/O message history. 1. Select {DATA} under the menu. 2. Select {CLEAR HISTORY}. – The confirmation dialog box appears. -
Page 97: Position Data When Power Is Turned On/Off
159645-1CD System Diagnosis FS100 8.7 Position Data When Power is Turned ON/OFF Position Data When Power is Turned ON/OFF 8.7.1 Power ON/OFF Position Window The Power ON/OFF position window shows the position of the manipulator when power was turned OFF the last time, the current position of the manipulator when power was later turned ON, and the amount of difference between the two positions. -
Page 98: Current Position
159645-1CD System Diagnosis FS100 8.8 Current Position Current Position 8.8.1 Current Position Window 1. Select {ROBOT} under the main menu. 2. Select {CURRENT POSITION} under the sub menu. – The CURRENT POSITION window appears. 3. Select the types of coordinates to be displayed. -
Page 99: Servo Monitoring
159645-1CD System Diagnosis FS100 8.9 Servo Monitoring Servo Monitoring 8.9.1 Servo Monitor Window The servo monitor window shows the servo-related data of each axis. Monitor Items Description FEEDBACK PULSE Feedback position (actual position) of each axis “0” at the home position... -
Page 100: Changing The Monitor Items
159645-1CD System Diagnosis FS100 8.9 Servo Monitoring 8.9.1.1 Changing the Monitor Items 1. Set the security mode to the management mode. 2. Select {ROBOT} under the main menu. 3. Select {SERVO MONITOR}. – The SERVO MONITOR window appears. 4. Select {DISPLAY} under the menu. - Page 101 159645-1CD System Diagnosis FS100 8.9 Servo Monitoring 5. Select MONITOR ITEM 1 or 2, and view the sub-menu choices by the cursor key. – The sub-menu choices appear. 6. Select a menu. – The type of monitor-related information is changed.
-
Page 102: Clearing Maximum Torque Data
159645-1CD System Diagnosis FS100 8.9 Servo Monitoring 8.9.1.2 Clearing Maximum Torque Data The data for the maximum torque can be cleared when the maximum torque-related information is being displayed. 1. Select {DATA} under the menu. – The clear max torque window appears 2. -
Page 103: Alarm
159645-1CD Alarm FS100 9.1 Outline of Alarm Alarm Outline of Alarm When an alarm of level 0 to 3 (major alarm) occurs, the servo power supply is turned OFF. Table 9-1: Alarm Code Classification Alarm Code Alarm Level Alarm Reset Method It is not possible to reset by "RESET"... -
Page 104: Alarm Display
159645-1CD Alarm FS100 9.2 Alarm Display Alarm Display 9.2.1 Displaying and Releasing Alarm If an alarm occurs during operation, the manipulator stops immediately and the ALARM window appears on the programming pendant indicating that the machine was stopped by an alarm. -
Page 105: Special Alarm Display
159645-1CD Alarm FS100 9.2 Alarm Display 9.2.2 Special Alarm Display (1) Sub Data Sub data such as data for the axis where the alarm occurred, may also be displayed for some alarms. • Decimal data Without signs: 0 to 65535 With signs: -32768 to 32767 •... - Page 106 159645-1CD Alarm FS100 9.2 Alarm Display (3) Independent Control Function (Optional) In the independent control function (multi-task job), the tasks that were being done when the alarm occurred are also displayed. TASK#0: Master-task job TASK#1: Sub-task1 job (SUB1) TASK#2: Sub-task2 job (SUB2)
-
Page 107: Display Of Alarm Details
159645-1CD Alarm FS100 9.3 Display of Alarm Details Display of Alarm Details Alarm details displaying function indicates the alarm contents breakdown on the alarm window. Press [Select] after moving the cursor to the subject alarm on the alarm window to display its “content”, “cause” and “measure”. - Page 108 159645-1CD Alarm FS100 9.3 Display of Alarm Details {Right/Left} button This button appears when there can be several “cause”s and “measure”s to one alarm. Press this to right/left ward to alternate the “cause” and the “measure”. Cause Displays the cause of an alarm.
-
Page 109: Transition Of Alarm Detail Window
159645-1CD Alarm FS100 9.3 Display of Alarm Details 9.3.3 Transition of Alarm Detail Window Alarm ALARM DETAIL window While direct display setting is set Standard (S2C406=1) Move the Cursor (up and down) to select the alarm number to display each ALARM DETAIL window . -
Page 110: Alarm Message List
• CPU-201R is saving important file data for the user program through its battery backup operation. Contact your YASKAWA representatives when measures for CPU-201R alarms are considered to be needed. Careless operation may delete registered data. - Page 111 (2)If the alarm occurs again, replace the controller. Save the CMOS.BIN before power turned ON. replacement to be safe. In this case, the FS100 may make wrong judgement that a signal such as external hold signal is input. However, it is caused by the communication error with Servo control board #1.
- Page 112 Alarm Alarm Name Meaning Cause Remedy Number Code converter unit failure (1)Turn the power OFF then back ON. (2)If the alarm occurs again, replace the controller. Save the CMOS.BIN before replacement to be safe. Main CPU board failure (1)Turn the power OFF then back ON. (2)If the alarm occurs again, replace the controller.
- Page 113 Alarm Alarm Name Meaning Cause Remedy Number Code The system program of Servo Software operation error (1)Turn the power OFF then back ON. control board #1 is damaged. occurred (2)If the alarm occurs again, replace the controller. Save the CMOS.BIN before replacement to be safe.
- Page 114 Alarm Alarm Name Meaning Cause Remedy Number Code An error was detected in Setting error (1)Check the following settings. communications with the I/O ·The rotary switch setting which specifies slot numbers of each I/O module module board connected with 2nd ·I/O module settings in maintenance mode serial bus when the control power turned ON.
- Page 115 Alarm Alarm Name Meaning Cause Remedy Number Code An error was detected in Setting error (1)Check the following settings. communications with the I/O ·The rotary switch setting which specifies slot numbers of each I/O module module board connected with 4th ·I/O module settings in maintenance mode serial bus when the control power turned ON.
- Page 116 Alarm Alarm Name Meaning Cause Remedy Number Code An error was detected in Setting error (1)Check the following settings. communications with the I/O ·The rotary switch setting which specifies slot numbers of each I/O module module board connected with 6th ·I/O module settings in maintenance mode serial bus when the control power turned ON.
- Page 117 Alarm Alarm Name Meaning Cause Remedy Number Code An error was detected in Setting error (1)Check the following settings. communications with the I/O ·The rotary switch setting which specifies slot numbers of each I/O module module board connected with 8th ·I/O module settings in maintenance mode serial bus when the control power turned ON.
- Page 118 Alarm Alarm Name Meaning Cause Remedy Number Code Connection failure (1)Turn the power OFF then back ON. (2)If the alarm occurs again, replace the controller. Save the CMOS.BIN before replacement to be safe. Servo control board failure (1)Turn the power OFF then back ON. (2)If the alarm occurs again, replace the controller.
- Page 119 Alarm Alarm Name Meaning Cause Remedy Number Code Converter unit failure (1)Turn the power OFF then back ON. (2)If the alarm occurs again, replace the controller. Save the CMOS.BIN before replacement to be safe. Main CPU board failure (1)Turn the power OFF then back ON. (2)If the alarm occurs again, replace the controller.
- Page 120 Alarm Alarm Name Meaning Cause Remedy Number Code The SD parameter is damaged. Data error (1)Turn the power OFF then back ON. (2)If the alarm occurs again, initialize the appropriate data in maintenance mode, and then load the data saved in the external memory device. Main CPU board failure (1)Turn the power OFF then back ON.
- Page 121 Alarm Alarm Name Meaning Cause Remedy Number Code The SVC parameter is damaged. Data error (1)Turn the power OFF then back ON. (2)If the alarm occurs again, initialize the appropriate data in maintenance mode, and then load the data saved in the external memory device. Main CPU board failure (1)Turn the power OFF then back ON.
- Page 122 Alarm Alarm Name Meaning Cause Remedy Number Code Main CPU board failure (1)Turn the power OFF then back ON. (2)If the alarm occurs again, replace the controller. Save the CMOS.BIN before replacement to be safe. The job files are damaged. Data error (1)Turn the power OFF then back ON.
- Page 123 Alarm Alarm Name Meaning Cause Remedy Number Code VERIFY ERROR CIO parameter error. Setting error (1)Check the following settings. (SYSTEM CONFIG- ·I/O module settings in maintenance mode DATA) Main CPU board failure (1)Turn the power OFF then back ON. (2)If the alarm occurs again, replace the controller. Save the CMOS.BIN before replacement to be safe.
- Page 124 Alarm Alarm Name Meaning Cause Remedy Number Code The CRC data in CMOS memory Setting error (1)Check the following settings. and the CRC data calculated by ·Set the security mode to MANAGEMENT MODE. the system software are ·Data rebuild in maintenance mode inconsistent.
- Page 125 Alarm Alarm Name Meaning Cause Remedy Number Code Main CPU board failure (1)Turn the power OFF then back ON. (2)If the alarm occurs again, replace the controller. Save the CMOS.BIN before replacement to be safe. The I/O module connected to the Setting error (1)Check the following settings.
- Page 126 Alarm Alarm Name Meaning Cause Remedy Number Code The I/O module connected to the Setting error (1)Check the following settings. serial bus #5 is different from the ·The rotary switch setting which specifies slot numbers of each I/O module function of the set I/O module. ·I/O module settings in maintenance mode Connection failure (1)Turn the power OFF then back ON.
- Page 127 Alarm Alarm Name Meaning Cause Remedy Number Code Connection failure (1)Turn the power OFF then back ON. (2)If the alarm occurs again, check the connecting or inserting state of the following cables or connectors. ·IO module cable of the corresponding slot. ·Terminator ·24V power of the corresponding IO module.
- Page 128 Alarm Alarm Name Meaning Cause Remedy Number Code PARAMETER An error occurred during the Setting error (1)Check the following settings. TRANSMISSION ERROR parameter/file transfer to the 1st ·Control group settings in maintenance mode Servo control board. ·The Servo control board rotary switch setting (0) of the corresponding node number (SV#1) Connection failure (1)Turn the power OFF then back ON.
- Page 129 Alarm Alarm Name Meaning Cause Remedy Number Code Main CPU board failure (1)Turn the power OFF then back ON. (2)If the alarm occurs again, replace the controller. Save the CMOS.BIN before replacement to be safe. An error occurred during startup Setting error (1)Check the following settings.
- Page 130 Alarm Alarm Name Meaning Cause Remedy Number Code LADDER INITIALIZE Data error (1)Turn the power OFF then back ON. ERROR (2)If the alarm occurs again, initialize the appropriate data in maintenance mode, and then load the data saved in the external memory device. Main CPU board failure (1)Turn the power OFF then back ON.
- Page 131 Alarm Alarm Name Meaning Cause Remedy Number Code Unconnected relay exists. Data error (1)Turn the power OFF then back ON. (2)If the alarm occurs again, initialize the appropriate data in maintenance mode, and then load the data saved in the external memory device. Main CPU board failure (1)Turn the power OFF then back ON.
- Page 132 Alarm Alarm Name Meaning Cause Remedy Number Code The last instruction is not the END Data error (1)Turn the power OFF then back ON. instruction. (2)If the alarm occurs again, initialize the appropriate data in maintenance mode, and then load the data saved in the external memory device. Main CPU board failure (1)Turn the power OFF then back ON.
- Page 133 Connection failure (1)Confirm that the battery is appropriately connected to the main CPU board. WEAK weakening. Connection failure (1)Replace the battery in accordance with the instructions in FS100 MAINTENANCE MANUAL. CNTR01R HARDWARE Sub Code: Option board. Number CNTR01R board failure (1)Turn the power OFF then back ON.
- Page 134 Alarm Alarm Name Meaning Cause Remedy Number Code CNTR01R SOFTWARE Sub Code: Option board. CNTR01R board failure (1)Turn the power OFF then back ON. ERROR Number×100 factor (2)If the alarm occurs again, replace the CNTR01R board. Save the CMOS.BIN factor: before replacing the board to be safe.
- Page 135 (1)Turn the power OFF then back ON. (Main CPU) occurred (2)If the alarm occurs again, save the CMOS.BIN in maintenance mode, and then contact your YASKAWA representative about occurrence status (operating procedure). 1001 ROM ERROR 1*:A checksum error occurred in Servo control board failure (1)Turn the power OFF then back ON.
- Page 136 Memory to work MotoPlus application is insufficient under the combination of current system configuration and its optional function. IIf the alarm occurs again, save the CMOS.BIN in maintenance mode, and then contact your YASKAWA representative about occurrence status (operating procedure). MotoPlus application folder Setting error (1)Turn the power OFF then back ON.
- Page 137 Memory to work MotoPlus application is insufficient under the combination of current system configuration and its optional function. If the alarm occurs again, save the CMOS.BIN in maintenance mode, and then contact your YASKAWA representative about occurrence status (operating procedure).
- Page 138 Alarm Alarm Name Meaning Cause Remedy Number Code ROxG parameter error Data error (1)Turn the power OFF then back ON. (2)If the alarm occurs again, initialize the appropriate parameter file in maintenance mode, and then load the parameter file saved in the external memory device.
- Page 139 Alarm Alarm Name Meaning Cause Remedy Number Code CIO parameter error Data error (1)Turn the power OFF then back ON. (2)If the alarm occurs again, initialize the appropriate parameter file in maintenance mode, and then load the parameter file saved in the external memory device.
- Page 140 Alarm Alarm Name Meaning Cause Remedy Number Code SVCxB parameter error Data error (1)Turn the power OFF then back ON. (2)If the alarm occurs again, initialize the appropriate parameter file in maintenance mode, and then load the parameter file saved in the external memory device.
- Page 141 Alarm Alarm Name Meaning Cause Remedy Number Code RExG parameter error Data error (1)Turn the power OFF then back ON. (2)If the alarm occurs again, initialize the appropriate parameter file in maintenance mode, and then load the parameter file saved in the external memory device.
- Page 142 Alarm Alarm Name Meaning Cause Remedy Number Code Press characteristics file Data error (1)Turn the power OFF then back ON. (2)If the alarm occurs again, initialize the appropriate data in maintenance mode, and then load the data saved in the external memory device. Servo float condition file Data error (1)Turn the power OFF then back ON.
- Page 143 Software operation error (1)Turn the power OFF then back ON. occurred (2)If the alarm occurs again, save the CMOS.BIN in maintenance mode, and then contact your YASKAWA representative about occurrence status (operating procedure). Online error Main CPU board failure (1)Turn the power OFF then back ON.
- Page 144 Software operation error (1)Turn the power OFF then back ON. occurred (2)If the alarm occurs again, save the CMOS.BIN in maintenance mode, and then contact your YASKAWA representative about occurrence status (operating procedure). Unable to prepare a feedback Servo control board failure (1)Turn the power OFF then back ON.
- Page 145 Software operation error (1)Turn the power OFF then back ON. occurred (2)If the alarm occurs again, save the CMOS.BIN in maintenance mode, and then contact your YASKAWA representative about occurrence status (operating procedure). 1053 SYSTEM ERROR Sub Code Software operation error (1)Turn the power OFF then back ON.
- Page 146 (1)Turn the power OFF then back ON. (2)If the error occurs again, set the I/O module again in maintenance mode. (3)If the alarm occurs again, save the CMOS.BIN in maintenance mode, and then contact your YASKAWA representative about occurrence status (operating procedure). Main CPU board failure (1)Turn the power OFF then back ON.
- Page 147 (1)Turn the power OFF then back ON. servo float is ON. (2)If the alarm occurs again, save the CMOS.BIN in maintenance mode, and then contact your YASKAWA representative about occurrence status (operating procedure). 500μs non real process execution Software operation error (1)Turn the power OFF then back ON.
- Page 148 (2)If the alarm occurs again, save the CMOS.BIN in maintenance mode, and the scheduling table. then contact your YASKAWA representative about occurrence status (operating procedure). Servo control board failure (1)Turn the power OFF then back ON.
- Page 149 Software operation error (1)Turn the power OFF then back ON. occurred (2)If the alarm occurs again, save the CMOS.BIN in maintenance mode, and then contact your YASKAWA representative about occurrence status (operating procedure). 1000 The check item number of SVD Software operation error (1)Turn the power OFF then back ON.
- Page 150 (1)Turn the power OFF then back ON. parameter is unmatched. occurred (2)If the alarm occurs again, save the CMOS.BIN in maintenance mode, and then contact your YASKAWA representative about occurrence status (operating procedure). 4000 Execution of the motion command Software operation error (1)Turn the power OFF then back ON.
- Page 151 (2)If the alarm occurs again, save the CMOS.BIN in maintenance mode, and Ethernet function. then contact your YASKAWA representative about occurrence status (operating procedure). Main CPU board failure (1)Turn the power OFF then back ON.
- Page 152 (1)Turn the power OFF then back ON. occurred (2)If the alarm occurs again, save the CMOS.BIN in maintenance mode, and then contact your YASKAWA representative about occurrence status (operating procedure). Main CPU board failure (1)Turn the power OFF then back ON.
- Page 153 (2)If the alarm occurs again, save the CMOS.BIN in maintenance mode, and Ethernet function. then contact your YASKAWA representative about occurrence status (operating procedure). Main CPU board failure (1)Turn the power OFF then back ON.
- Page 154 Alarm Alarm Name Meaning Cause Remedy Number Code Main CPU board failure (1)Turn the power OFF then back ON. (2)If the alarm occurs again, replace controller. Save the CMOS.BIN before replace controller to be safe. Watchdog timer error Connection failure (1)Turn the power OFF then back ON.
- Page 155 Software operation error (1)Turn the power OFF then back ON. occurred (2)If the alarm occurs again, save the CMOS.BIN in maintenance mode, and then contact your YASKAWA representative about occurrence status (operating procedure). 1303 ARITHMETIC ERROR The data [X____] indicates the Tool file setting error (1)Check the following settings.
- Page 156 Software operation error (1)Turn the power OFF then back ON. occurred (2)If the alarm occurs again, save the CMOS.BIN in maintenance mode, and then contact your YASKAWA representative about occurrence status (operating procedure). 156 of 348...
- Page 157 Software operation error (1)Turn the power OFF then back ON. occurred (2)If the alarm occurs again, save the CMOS.BIN in maintenance mode, and then contact your YASKAWA representative about occurrence status (operating procedure). 1311 A/D DETECTION Sub Code: Signifies the converter Module failure (converter) (1)Turn the power OFF then back ON.
- Page 158 Alarm Alarm Name Meaning Cause Remedy Number Code 1326 DEFECTIVE ENCODER Sub Code: Signifies the axis in Connection failure (1)Turn the power OFF then back ON. ABSOLUTE DATA which the alarm occurred (2)If the alarm occurs again, check the connecting or inserting state of the following cables.
- Page 159 Alarm Alarm Name Meaning Cause Remedy Number Code 1328 DEFECTIVE ENCODER Sub Code: Signifies the axis in Connection failure (1)Turn the power OFF then back ON. which the alarm occurred (2)If the alarm occurs again, check the connecting or inserting state of the following cables.
- Page 160 Alarm Alarm Name Meaning Cause Remedy Number Code Connection failure (1)Turn the power OFF then back ON. (2)If the alarm occurs again, check the connection and insertion of the following cables and connectors. {Robot axis} ·Cable between encoders ·EAXA-CN508 {External axis} ·Cable between encoders ·EAXB-CN0534,535,536 Module failure...
- Page 161 Alarm Alarm Name Meaning Cause Remedy Number Code An error occurred at conveyor Cable (defect), Module failure Replace the encoder cable or encoder of the conveyor encoder 2. encoder 2. (encoder) An error occurred at conveyor Cable (defect), Module failure Replace the encoder cable or encoder of the conveyor encoder 3.
- Page 162 (2)If the alarm occurs again, save the CMOS.BIN in maintenance mode, and first data communication at then contact your YASKAWA representative about occurrence status (operating execution of motion command. procedure). Servo control board failure (1)Turn the power OFF then back ON.
- Page 163 Software operation error (1)Turn the power OFF then back ON. occurred (2)If the alarm occurs again, save the CMOS.BIN in maintenance mode, and then contact your YASKAWA representative about occurrence status (operating procedure). 1653 BASE BLOCK SIGNAL Servo control board failure (1)Turn the power OFF then back ON.
- Page 164 PG POWER ON Setting error (1)Turn the power OFF then back ON. MULTIPLE REQ (SV) (2)If the alarm occurs again, save the CMOS.BIN in maintenance mode, and then contact your YASKAWA representative about occurrence status (operating procedure). 1655 CONVERTER Software operation error (1)Turn the power OFF then back ON.
- Page 165 Alarm Alarm Name Meaning Cause Remedy Number Code The general servo function was Setting error Disable the corresponding axis endless function. used for the axis for which the axis endless function was enabled. The general servo function cannot be used for the axis which the axis endless function was enabled.
- Page 166 Alarm Alarm Name Meaning Cause Remedy Number Code 1674 CTRL LAW SWITCHING Sub code: specifies the axis that Servo control board failure (1)Turn the power OFF then back ON. ORDER ERROR (SV) alarm occurred. (2)If the alarm occurs again, replace controller. Save the CMOS.BIN before replace controller to be safe.
- Page 167 Software operation error (1)Turn the power OFF then back ON. occurred (2)If the alarm occurs again, save the CMOS.BIN in maintenance mode, and then contact your YASKAWA representative about occurrence status (operating procedure). 1837 M-SAFETY 24V POWER Connection failure (1)Turn the power OFF then back ON.
- Page 168 (1)Turn the power OFF then back ON. ERROR (2)If the alarm occurs again, save the CMOS.BIN in maintenance mode, and (LOOP BACK) then contact your YASKAWA representative about occurrence status (operating procedure). Servo control board failure (1)Turn the power OFF then back ON.
- Page 169 Alarm Alarm Name Meaning Cause Remedy Number Code 4000 MEMORY ERROR Sub Code: Tool number Data error (1)Reset the alarm. (TOOL FILE) (2)If the alarm occurs again, initialize the tool file in maintenance mode, and then load the tool file saved in the external memory device. Main CPU board failure (1)Reset the alarm.
- Page 170 Alarm Alarm Name Meaning Cause Remedy Number Code Main CPU board failure (1)Reset the alarm. (2)If the alarm occurs again, replace controller. Save the CMOS.BIN before replace controller to be safe. 4013 MEMORY ERROR Sub Code: Condition file number Data error (1)Reset the alarm.
- Page 171 Alarm Alarm Name Meaning Cause Remedy Number Code 4022 MEMORY ERROR Sub Code: Page number Data error (1)Reset the alarm. (PAINT SPECIAL FILE) (2)If the alarm occurs again, initialize the paint special file in maintenance mode, and then load the paint special file saved in the external memory device. Main CPU board failure (1)Reset the alarm.
- Page 172 Alarm Alarm Name Meaning Cause Remedy Number Code Main CPU board failure (1)Reset the alarm. (2)If the alarm occurs again, replace controller. Save the CMOS.BIN before replace controller to be safe. 4039 MEMORY ERROR Sub Code: File number Data error (1)Reset the alarm.
- Page 173 Alarm Alarm Name Meaning Cause Remedy Number Code 4047 MEMORY ERROR Data error (1)Reset the alarm. (MACRO DEFINITION (2)If the alarm occurs again, initialize the macro definition file in maintenance FILE) mode, and then load the macro definition file saved in the external memory device.
- Page 174 Alarm Alarm Name Meaning Cause Remedy Number Code Main CPU board failure (1)Reset the alarm. (2)If the alarm occurs again, replace controller. Save the CMOS.BIN before replace controller to be safe. 4072 MEMORY ERROR Data error (1)Reset the alarm. (LASER TRACKING (2)If the alarm occurs again, initialize the laser tracking track start file in TRACK START FILE) maintenance mode, and then load the laser tracking track start file saved in the...
- Page 175 Alarm Alarm Name Meaning Cause Remedy Number Code Multiple start of same job: Setting error (1)Check the following settings. The job that was tried to be ·The same job is not used in the another task started was executed by another sub task.
- Page 176 Alarm Alarm Name Meaning Cause Remedy Number Code PSTART instruction is the old Setting error (1)Check the following settings. specification. ·The specifications of PSTART instruction Register the PSTART instruction as new specification. PWAIT instruction is the old Setting error (1)Check the following settings. specification.
- Page 177 Alarm Alarm Name Meaning Cause Remedy Number Code Heading length is too long. Setting error (1)Reset the alarm. (2)If the alarm occurs again, send EOT code to release the data link and then check that the sending side data is correctly set. (3)Check that the communication setting is correct.
- Page 178 Alarm Alarm Name Meaning Cause Remedy Number Code Received EOT before last block Communication error (1)Reset the alarm. reception. (2)If the alarm occurs again, check the setting of communication or transmission side data is correctly set. Received codes other than EOT Communication error (1)Reset the alarm.
- Page 179 ·The Parameter for communication port initialized. Connection failure (1)Reset the alarm. (2)If the alarm occurs again, check the connection of the following cables. ·Cable between vision system and FS100 system Time-out occurred during data Setting error (1)Check the following settings. transmission.
- Page 180 (2)If the alarm occurs again, save the CMOS.BIN in maintenance mode, and then contact your YASKAWA representative about occurrence status (operating procedure). The setting value of measurement Correct the setting value of a measurement item.
- Page 181 In that case, delete the unuse (4)If the alarm occurs again, save the CMOS.BIN in maintenance mode, and then contact your YASKAWA representative about occurrence status (operating procedure). The job under execution is Setting error (1)Check the following settings.
- Page 182 (2)If the alarm occurs again, save the CMOS.BIN in maintenance mode, and unsuccessfully completed in the then contact your YASKAWA representative about occurrence status (operating Ethernet function. procedure). Main CPU board failure (1)Turn the power OFF then back ON.
- Page 183 (2)If the alarm occurs again, save the CMOS.BIN in maintenance mode, and response receiving process of the then contact your YASKAWA representative about occurrence status (operating Ethernet function. procedure). Main CPU board failure (1)Turn the power OFF then back ON.
- Page 184 FTP client task of the occurred (2)If the alarm occurs again, save the CMOS.BIN in maintenance mode, and Ethernet function. then contact your YASKAWA representative about occurrence status (operating procedure). Main CPU board failure (1)Turn the power OFF then back ON.
- Page 185 (2)If the alarm occurs again, save the CMOS.BIN in maintenance mode, and Ethernet function. then contact your YASKAWA representative about occurrence status (operating procedure). Main CPU board failure (1)Turn the power OFF then back ON.
- Page 186 (2)If the alarm occurs again, save the CMOS.BIN in maintenance mode, and UDP process of the Ethernet then contact your YASKAWA representative about occurrence status (operating function. procedure). Main CPU board failure (1)Turn the power OFF then back ON.
- Page 187 (2)If the alarm occurs again, save the CMOS.BIN in maintenance mode, and UDP process of the Ethernet then contact your YASKAWA representative about occurrence status (operating function. procedure). Main CPU board failure (1)Turn the power OFF then back ON.
- Page 188 (2)If the alarm occurs again, save the CMOS.BIN in maintenance mode, and process of TCP server of the then contact your YASKAWA representative about occurrence status (operating Ethernet function. procedure). Main CPU board failure (1)Turn the power OFF then back ON.
- Page 189 (2)If the alarm occurs again, save the CMOS.BIN in maintenance mode, and specifications. then contact your YASKAWA representative about occurrence status (operating procedure). Main CPU board failure (1)Reset the alarm, and then try again.
- Page 190 (2)If the alarm occurs again, save the CMOS.BIN in maintenance mode, and name. then contact your YASKAWA representative about occurrence status (operating procedure). Main CPU board failure (1)Reset the alarm, and then try again.
- Page 191 (1)Reset the alarm, and then try again. control system. occurred (2)If the alarm occurs again, save the CMOS.BIN in maintenance mode, and then contact your YASKAWA representative about occurrence status (operating procedure). Main CPU board failure (1)Reset the alarm, and then try again.
- Page 192 (1)Reset the alarm, and then try again. expanded. occurred (2)If the alarm occurs again, save the CMOS.BIN in maintenance mode, and then contact your YASKAWA representative about occurrence status (operating procedure). Main CPU board failure (1)Reset the alarm, and then try again.
- Page 193 (1)Reset the alarm, and then try again. damaged. occurred (2)If the alarm occurs again, save the CMOS.BIN in maintenance mode, and then contact your YASKAWA representative about occurrence status (operating procedure). Main CPU board failure (1)Reset the alarm, and then try again.
- Page 194 (4)If the alarm occurs again, save the CMOS.BIN in maintenance mode, and then contact your YASKAWA representative about occurrence status (operating procedure). A job was newly created with the Software operation error (1)Reset the alarm.
- Page 195 (5)If the alarm occurs again, save the CMOS.BIN in maintenance mode, and then contact your YASKAWA representative about occurrence status (operating procedure). An attempt was made to change Setting error (1)Check the following settings.
- Page 196 (4)If the alarm occurs again, save the CMOS.BIN in maintenance mode, and then contact your YASKAWA representative about occurrence status (operating procedure). A job specified at job search did Software operation error (1)Reset the alarm.
- Page 197 (4)If the alarm occurs again, save the CMOS.BIN in maintenance mode, and then contact your YASKAWA representative about occurrence status (operating procedure). The number of steps added to a Setting error (1)Check the following settings.
- Page 198 (4)If the alarm occurs again, save the CMOS.BIN in maintenance mode, and then contact your YASKAWA representative about occurrence status (operating procedure). An error occurred when reading Software operation error (1)Reset the alarm.
- Page 199 (4)If the alarm occurs again, save the CMOS.BIN in maintenance mode, and then contact your YASKAWA representative about occurrence status (operating procedure). A job data in the memory was Software operation error (1)Reset the alarm.
- Page 200 (1)Reset the alarm, and then try again. exist. occurred (2)If the alarm occurs again, save the CMOS.BIN in maintenance mode, and then contact your YASKAWA representative about occurrence status (operating procedure). Main CPU board failure (1)Reset the alarm, and then try again.
- Page 201 (1)Reset the alarm, and then try again. the undefined position data. occurred (2)If the alarm occurs again, save the CMOS.BIN in maintenance mode, and then contact your YASKAWA representative about occurrence status (operating procedure). Main CPU board failure (1)Reset the alarm, and then try again.
- Page 202 (4)If the alarm occurs again, save the CMOS.BIN in maintenance mode, and then contact your YASKAWA representative about occurrence status (operating procedure). Unused position data file does not Setting error (1)Check the following settings.
- Page 203 (4)If the alarm occurs again, save the CMOS.BIN in maintenance mode, and then contact your YASKAWA representative about occurrence status (operating procedure). An attempt was made to access Software operation error (1)Reset the alarm.
- Page 204 (TRANSMISSION) internal software error during data occurred (2)If the alarm occurs again, save the CMOS.BIN in maintenance mode, and transmission. then contact your YASKAWA representative about occurrence status (operating procedure). 4207 SYSTEM ERROR An interrupt undefined in the main Software operation error (1)Reset the alarm, and then try again.
- Page 205 Software operation error (1)Reset the alarm, and then try again. occurred (2)If the alarm occurs again, save the CMOS.BIN in maintenance mode, and then contact your YASKAWA representative about occurrence status (operating procedure). Mail-box Token is not generated. Software operation error (1)Reset the alarm, and then try again.
- Page 206 Software operation error (1)Reset the alarm, and then try again. occurred (2)If the alarm occurs again, save the CMOS.BIN in maintenance mode, and then contact your YASKAWA representative about occurrence status (operating procedure). Stack area overflow Software operation error (1)Reset the alarm, and then try again.
- Page 207 (1)Reset the alarm, and then try again. conversion processing) occurred (2)If the alarm occurs again, save the CMOS.BIN in maintenance mode, and then contact your YASKAWA representative about occurrence status (operating procedure). S -> M offline processing Software operation error (1)Reset the alarm, and then try again.
- Page 208 Software operation error (1)Reset the alarm, and then try again. occurred (2)If the alarm occurs again, save the CMOS.BIN in maintenance mode, and then contact your YASKAWA representative about occurrence status (operating procedure). Sub-segment process timeout Software operation error (1)Reset the alarm, and then try again.
- Page 209 (2)If the alarm occurs again, save the CMOS.BIN in maintenance mode, and category1 emergency stop then contact your YASKAWA representative about occurrence status (operating procedure). Conversion primary expression Software operation error (1)Reset the alarm, and then try again.
- Page 210 (2)If the alarm occurs again, save the CMOS.BIN in maintenance mode, and system then contact your YASKAWA representative about occurrence status (operating procedure). No data link added to the Software operation error (1)Reset the alarm, and then try again.
- Page 211 Software operation error (1)Reset the alarm, and then try again. occurred (2)If the alarm occurs again, save the CMOS.BIN in maintenance mode, and then contact your YASKAWA representative about occurrence status (operating procedure). Output buffer SYSCON for Software operation error (1)Reset the alarm, and then try again.
- Page 212 (1)Reset the alarm, and then try again. table for physical axes occurred (2)If the alarm occurs again, save the CMOS.BIN in maintenance mode, and then contact your YASKAWA representative about occurrence status (operating procedure). Error in the parameter for the Software operation error (1)Reset the alarm, and then try again.
- Page 213 (1)Reset the alarm, and then try again. area for correction-amount data occurred (2)If the alarm occurs again, save the CMOS.BIN in maintenance mode, and then contact your YASKAWA representative about occurrence status (operating procedure). Queue operation error for variable Software operation error (1)Reset the alarm, and then try again.
- Page 214 (1)Reset the alarm, and then try again. instruction execution (at ENQUE) occurred (2)If the alarm occurs again, save the CMOS.BIN in maintenance mode, and then contact your YASKAWA representative about occurrence status (operating procedure). Queue operation error for Software operation error (1)Reset the alarm, and then try again.
- Page 215 IN/OUT checking conveyor (at occurred (2)If the alarm occurs again, save the CMOS.BIN in maintenance mode, and DEQUE) then contact your YASKAWA representative about occurrence status (operating procedure). Queue operation error for WORK Software operation error (1)Reset the alarm, and then try again.
- Page 216 (1)Reset the alarm, and then try again. exceeded occurred (2)If the alarm occurs again, save the CMOS.BIN in maintenance mode, and then contact your YASKAWA representative about occurrence status (operating procedure). The number of WORK ID data Software operation error (1)Reset the alarm, and then try again.
- Page 217 (1)Reset the alarm, and then try again. conveyor queue (empty queue) occurred (2)If the alarm occurs again, save the CMOS.BIN in maintenance mode, and then contact your YASKAWA representative about occurrence status (operating procedure). Marking error for WORK IN/OUT Software operation error (1)Reset the alarm, and then try again.
- Page 218 (1)Reset the alarm, and then try again. instruction execution occurred (2)If the alarm occurs again, save the CMOS.BIN in maintenance mode, and then contact your YASKAWA representative about occurrence status (operating procedure). Data latch processing (function Software operation error (1)Reset the alarm, and then try again.
- Page 219 (1)Reset the alarm, and then try again. parameter error occurred (2)If the alarm occurs again, save the CMOS.BIN in maintenance mode, and then contact your YASKAWA representative about occurrence status (operating procedure). Arithmetic answer is not set at Software operation error (1)Reset the alarm, and then try again.
- Page 220 (1)Reset the alarm, and then try again. (main command) occurred (2)If the alarm occurs again, save the CMOS.BIN in maintenance mode, and then contact your YASKAWA representative about occurrence status (operating procedure). SL undefined interrupt command Software operation error (1)Reset the alarm, and then try again.
- Page 221 Software operation error (1)Reset the alarm, and then try again. (semBCreate) occurred (2)If the alarm occurs again, save the CMOS.BIN in maintenance mode, and then contact your YASKAWA representative about occurrence status (operating procedure). 1007 VxWorks primitive error Software operation error (1)Reset the alarm, and then try again.
- Page 222 JOG operation using occurred (2)If the alarm occurs again, save the CMOS.BIN in maintenance mode, and the external reference point. then contact your YASKAWA representative about occurrence status (operating procedure). Designation error of cubic Software operation error (1)Reset the alarm, and then try again.
- Page 223 (1)Reset the alarm, and then try again. occurred (2)If the alarm occurs again, save the CMOS.BIN in maintenance mode, and then contact your YASKAWA representative about occurrence status (operating procedure). The system number is not set at Software operation error (1)Reset the alarm, and then try again.
- Page 224 (2)If the alarm occurs again, save the CMOS.BIN in maintenance mode, and continuous motion stop operation then contact your YASKAWA representative about occurrence status (operating procedure). Arithmetic error occurred when Software operation error (1)Reset the alarm, and then try again.
- Page 225 (2)If the alarm occurs again, save the CMOS.BIN in maintenance mode, and deceleration for PL control then contact your YASKAWA representative about occurrence status (operating plucking in prereading processing procedure). Arithmetic error occurred when Software operation error (1)Reset the alarm, and then try again.
- Page 226 (2)If the alarm occurs again, save the CMOS.BIN in maintenance mode, and canceling PL control of station then contact your YASKAWA representative about occurrence status (operating were recalculated. procedure). PL during current → Arithmetic Software operation error (1)Reset the alarm, and then try again.
- Page 227 (1)Reset the alarm, and then try again. error occurred (2)If the alarm occurs again, save the CMOS.BIN in maintenance mode, and then contact your YASKAWA representative about occurrence status (operating procedure). Mail-receiving error of offline task Software operation error (1)Reset the alarm, and then try again.
- Page 228 (1)Reset the alarm, and then try again. (LOCAL VARIABLE) occurred (2)If the alarm occurs again, save the CMOS.BIN in maintenance mode, and then contact your YASKAWA representative about occurrence status (operating procedure). Memory area for local variable Software operation error (1)Reset the alarm, and then try again.
- Page 229 (1)Reset the alarm, and then try again. area. occurred (2)If the alarm occurs again, save the CMOS.BIN in maintenance mode, and then contact your YASKAWA representative about occurrence status (operating procedure). An error occurred in exclusive Software operation error (1)Reset the alarm, and then try again.
- Page 230 (2) If the restoration cannot be completed, execute the followings. ·Execute "RECONFIRM" by selecting "UTILITY" from the pull-down menu. (3)If the alarm occurs again, save the CMOS.BIN in maintenance mode, and then contact your YASKAWA representative about occurrence status (operating procedure). Data error (1) If different axes configuration data is loaded, the system data becomes incorrect status, which causes this alarm.
- Page 231 (2)If the alarm occurs again, check the parameter setting if there were any parameters which were modified before the alarm. (3)If the alarm occurs again or when it occurs other than above mentioned (2) case, contact your YASKAWA representative. Servo control board failure (1)Reset the alarm (2)If the alarm occurs again, replace controller.
- Page 232 (1)Reset the alarm ERROR occurred (2)If the alarm occurs again, save the CMOS.BIN in maintenance mode, and then contact your YASKAWA representative about occurrence status (operating procedure). Servo control board failure (1)Reset the alarm (2)If the alarm occurs again, replace controller. Save the CMOS.BIN before replace controller to be safe.
- Page 233 Alarm Alarm Name Meaning Cause Remedy Number Code Connection failure (1)Reset the alarm (2)If the alarm occurs again, check the connection and inserting state of the following cables and connectors. {Robot axis} ·Cable between encoders {External axis} ·Cable between encoders (3)If the alarm occurs again, replace controller Module failure (motor)
- Page 234 Alarm Alarm Name Meaning Cause Remedy Number Code Servo control board failure (1)Reset the alarm (2)If the alarm occurs again, replace controller. Save the CMOS.BIN before replace controller to be safe. 4311 ENCODER BACK-UP Sub Code: Signifies the axis in Module failure (encoder [AL-4314 occurred] ERROR...
- Page 235 Alarm Alarm Name Meaning Cause Remedy Number Code Interference error Remove the following interferences. ·The interferences to the jigs of Robot. ·The interferences to the jigs of workpieces. ·If there is no interference between robot and workpieces, set the shock detection level to more than maximum eternal value.
- Page 236 Alarm Alarm Name Meaning Cause Remedy Number Code Servo control board failure (1)Reset the alarm (2)If the alarm occurs again, replace controller. Save the CMOS.BIN before replace controller to be safe. 4320 OVERLOAD Sub Code: Signifies the axis in Setting error Check the following settings.
- Page 237 Alarm Alarm Name Meaning Cause Remedy Number Code 4322 AMPLIFIER OVERLOAD Sub Code: Signifies the axis in Setting error Check the following settings. (CONTINUE) which the alarm occurred ·The tools or the mass of the workpieces Interference error Remove interference with the workpiece and peripheral device. Setting error Correct the job whether load late does not exceed 100%.
- Page 238 Alarm Alarm Name Meaning Cause Remedy Number Code 4324 CONVERTER Setting error Check the settings of the following. OVERLOAD ·If the tool or the workpiece used has exceeded the allowable load. Setting error Adjust the job speed. Adjust the acceleration/deceleration of ACC and DEC instructions. Module failure (converter) (1)Reset the alarm.
- Page 239 Setting error (1)Reset the alarm, and then try again. (2)If the alarm occurs again, save the CMOS.BIN in maintenance mode, and then contact your YASKAWA representative about occurrence status (operating procedure). Connection failure (1)Reset the alarm. (2)If the alarm occurs again, replace the motor.
- Page 240 Setting error (1)Reset the alarm, and then try again. (2)If the alarm occurs again, save the CMOS.BIN in maintenance mode, and then contact your YASKAWA representative about occurrence status (operating procedure). Connection failure (1)Reset the alarm. (2)If the alarm occurs again, check that U-, V- and W-phase are appropriately connected.
- Page 241 Alarm Alarm Name Meaning Cause Remedy Number Code Connection failure (1)Reset the alarm. (2)If the alarm occurs again, check that U-, V- and W-phase are appropriately connected. Module failure (motor) (1)Reset the alarm. (2)If the alarm occurs again, replace the motor. Servo control board failure (1)Reset the alarm.
- Page 242 Alarm Alarm Name Meaning Cause Remedy Number Code 4337 OVERCURRENT Sub Code: Signifies the axis in Connection failure (1)Reset the alarm. (AMP) which the alarm occurred (2)If the alarm occurs again, replace controller. Save the CMOS.BIN before replace controller to be safe. Connection failure (1)Reset the alarm.
- Page 243 Alarm Alarm Name Meaning Cause Remedy Number Code 4344 LINEAR SERVOFLOAT Software operation error Confirm the job settings so that excess load would not be applied to the axis in TRACKING ERROR occurred the linear servo float. 4345 LNK SERVOFLOAT Setting error Confirm the job settings so that excess load would not be applied to the axis in EXECUTE ERROR...
- Page 244 (2)If the alarm occurs again, save the CMOS.BIN in maintenance mode, and regulated time. No motion then contact your YASKAWA representative about occurrence status (operating command was prepared. procedure). The arithmetic processing section Software operation error (1)Reset the alarm, and then try again.
- Page 245 Software operation error (1)Reset the alarm, and then try again. occurred (2)If the alarm occurs again, save the CMOS.BIN in maintenance mode, and then contact your YASKAWA representative about occurrence status (operating procedure). A_BANK conversion could not be Software operation error (1)Reset the alarm, and then try again.
- Page 246 (1)Reset the alarm, and then try again. has not been completed normally. occurred (2)If the alarm occurs again, save the CMOS.BIN in maintenance mode, and then contact your YASKAWA representative about occurrence status (operating procedure). An error occurred in job data Software operation error (1)Reset the alarm, and then try again.
- Page 247 (2)If the alarm occurs again, save the CMOS.BIN in maintenance mode, and task (job) in SYNC specification. then contact your YASKAWA representative about occurrence status (operating procedure). An attempt was made to execute Software operation error (1)Reset the alarm, and then try again.
- Page 248 (2)If the alarm occurs again, save the CMOS.BIN in maintenance mode, and prereading processing. then contact your YASKAWA representative about occurrence status (operating procedure). An error occurred at IES switching Software operation error (1)Reset the alarm, and then try again.
- Page 249 Software operation error (1)Reset the alarm, and then try again. occurred (2)If the alarm occurs again, save the CMOS.BIN in maintenance mode, and then contact your YASKAWA representative about occurrence status (operating procedure). Master-axis designation error for Software operation error (1)Reset the alarm, and then try again.
- Page 250 Alarm Alarm Name Meaning Cause Remedy Number Code 4414 EXCESSIVE SEGMENT Sub Code: Control group and axis Setting error (1)Reduce the speed in the step where the alarm occurred. (LOW/HIGH) (2)Change the move instruction to joint interpolation (MOVJ). * Be careful to the peripheral interference since its movement changes. 4416 PULSE LIMIT Sub Code: Control group and axis Setting error...
- Page 251 (1)Reset the alarm, and then try again. ERROR occurred (2)If the alarm occurs again, save the CMOS.BIN in maintenance mode, and then contact your YASKAWA representative about occurrence status (operating procedure). Segment-receiving control Software operation error (1)Reset the alarm, and then try again.
- Page 252 Software operation error (1)Reset the alarm, and then try again. occurred (2)If the alarm occurs again, save the CMOS.BIN in maintenance mode, and then contact your YASKAWA representative about occurrence status (operating procedure). Master control-group error Software operation error (1)Reset the alarm, and then try again.
- Page 253 (2)If the alarm occurs again, save the CMOS.BIN in maintenance mode, and start point then contact your YASKAWA representative about occurrence status (operating procedure). Occupation control-group error Software operation error (1)Reset the alarm, and then try again.
- Page 254 (1)Reset the alarm, and then try again. (2)If the alarm occurs again, save the CMOS.BIN in maintenance mode, and between MOTION section and occurred then contact your YASKAWA representative about occurrence status (operating CV#1 procedure). Interrupt processing error Software operation error (1)Reset the alarm, and then try again.
- Page 255 Software operation error (1)Reset the alarm, and then try again. occurred (2)If the alarm occurs again, save the CMOS.BIN in maintenance mode, and then contact your YASKAWA representative about occurrence status (operating procedure). Box number is incorrect. Software operation error (1)Reset the alarm, and then try again.
- Page 256 (1)Reset the alarm, and then try again. data reading. occurred (2)If the alarm occurs again, save the CMOS.BIN in maintenance mode, and then contact your YASKAWA representative about occurrence status (operating procedure). Variable data type is not defined. Software operation error (1)Reset the alarm, and then try again.
- Page 257 (1)Reset the alarm, and then try again. expression operation exceeded. occurred (2)If the alarm occurs again, save the CMOS.BIN in maintenance mode, and then contact your YASKAWA representative about occurrence status (operating procedure). Arithmetic stack used for Software operation error (1)Reset the alarm, and then try again.
- Page 258 (1)Reset the alarm, and then try again. area is incorrect. occurred (2)If the alarm occurs again, save the CMOS.BIN in maintenance mode, and then contact your YASKAWA representative about occurrence status (operating procedure). The set data for character-string Software operation error (1)Reset the alarm, and then try again.
- Page 259 (1)Reset the alarm, and then try again. processing could not be obtained. occurred (2)If the alarm occurs again, save the CMOS.BIN in maintenance mode, and then contact your YASKAWA representative about occurrence status (operating procedure). The prereading processing has Software operation error (1)Reset the alarm, and then try again.
- Page 260 (1)Reset the alarm, and then try again. completed. occurred (2)If the alarm occurs again, save the CMOS.BIN in maintenance mode, and then contact your YASKAWA representative about occurrence status (operating procedure). An exceptional error occurred in Software operation error (1)Reset the alarm, and then try again.
- Page 261 Alarm Alarm Name Meaning Cause Remedy Number Code The value for the character-string Setting error (1)Check the following settings. type variable is less than the ·Check the settings for variable, and then correct the job to fall within the input minimum value.
- Page 262 Alarm Alarm Name Meaning Cause Remedy Number Code An error occurred in calibration Setting error (1)Check the following settings. file number check between the ·Confirm that the specified robot calibration file number is 1 to 32. manipulators. An error occurred in tool Setting error (1)Check the following settings.
- Page 263 COMMAND (ARITH) issued to the offline position-data occurred (2)If the alarm occurs again, save the CMOS.BIN in maintenance mode, and preparation section. then contact your YASKAWA representative about occurrence status (operating procedure). 4467 USER COORD STEP Setting error (1)Check the following settings.
- Page 264 (1)Reset the alarm, and then try again. for calibration data is insufficient. occurred (2)If the alarm occurs again, save the CMOS.BIN in maintenance mode, and then contact your YASKAWA representative about occurrence status (operating procedure). 4469 ROBOT CALIBRATION The calibration between Setting error (1)Check the following settings.
- Page 265 (2)If the alarm occurs again, save the CMOS.BIN in maintenance mode, and calibration data then contact your YASKAWA representative about occurrence status (operating procedure). Incorrect designation of the Software operation error (1)Reset the alarm, and then try again.
- Page 266 (2)If the alarm occurs again, replace controller and load the MotoPlus application which was loaded to the previous controller. (3)If the alarm occurs again, save the CMOS.BIN in maintenance mode, and then contact your contact your YASKAWA representative about occurrence status (operating procedure). 4479...
- Page 267 (2)If the alarm occurs again, save the CMOS.BIN in maintenance mode, and preparation then contact your YASKAWA representative about occurrence status (operating procedure). Designation error for the Software operation error (1)Reset the alarm, and then try again.
- Page 268 (1)Reset the alarm, and then try again. number is incorrect. (2)If the alarm occurs again, save the CMOS.BIN in maintenance mode, and then contact your YASKAWA representative about occurrence status (operating procedure). Zero is set for the resolution. Setting error (1)Reset the alarm, and then try again.
- Page 269 (1)Reset the alarm, and then try again. the play-mode servo averaging (2)If the alarm occurs again, save the CMOS.BIN in maintenance mode, and time. then contact your YASKAWA representative about occurrence status (operating procedure). The setting of the manipulator Setting error (1)Reset the alarm, and then try again.
- Page 270 (1)Reset the alarm, and then try again. the speed reducer is incorrect. (2)If the alarm occurs again, save the CMOS.BIN in maintenance mode, and then contact your YASKAWA representative about occurrence status (operating procedure). The setting of allowable torque for Setting error (1)Reset the alarm, and then try again.
- Page 271 Setting error (1)Reset the alarm, and then try again. dynamics fixed model. (2)If the alarm occurs again, save the CMOS.BIN in maintenance mode, and then contact your YASKAWA representative about occurrence status (operating procedure). Designation error for dynamics- Setting error (1)Reset the alarm, and then try again.
- Page 272 (1)Reset the alarm, and then try again. information "a3" for the SKR (2)If the alarm occurs again, save the CMOS.BIN in maintenance mode, and manipulator. then contact your YASKAWA representative about occurrence status (operating procedure). The parameter setting for the Setting error (1)Reset the alarm, and then try again.
- Page 273 (2)If the alarm occurs again, save the CMOS.BIN in maintenance mode, and group other than robot axis. then contact your YASKAWA representative about occurrence status (operating procedure). Zero is set for the dimension Setting error (1)Reset the alarm, and then try again.
- Page 274 (1)Reset the alarm, and then try again. mass acceleration/deceleration (2)If the alarm occurs again, save the CMOS.BIN in maintenance mode, and speed correction function. then contact your YASKAWA representative about occurrence status (operating procedure). Incorrect coefficient/item settings Setting error (1)Reset the alarm, and then try again.
- Page 275 Setting error (1)Reset the alarm, and then try again. specification error (2)If the alarm occurs again, save the CMOS.BIN in maintenance mode, and then contact your YASKAWA representative about occurrence status (operating procedure). Dual drive control specification Setting error (1)Reset the alarm, and then try again.
- Page 276 (1)Reset the alarm, and then try again. (PARALLEL PROCESS) occurred (2)If the alarm occurs again, save the CMOS.BIN in maintenance mode, and then contact your YASKAWA representative about occurrence status (operating procedure). 4502 SL BOARD ON-LINE The option board was detected Software operation error (1)Reset the alarm, and then try again.
- Page 277 Alarm Alarm Name Meaning Cause Remedy Number Code Designation error of the direction Setting error (1)Check the following settings. of travel coordinate system (for a ·Check the settings for the coordinate system which can be used. shared function). This coordinate system cannot be used.
- Page 278 (1)Reset the alarm, and then try again. ERROR (SERVO) group occurred (2)If the alarm occurs again, save the CMOS.BIN in maintenance mode, and then contact your YASKAWA representative about occurrence status (operating procedure). 4518 SEARCH MON Sub Code: The related control- Software operation error (1)Reset the alarm, and then try again.
- Page 279 Software operation error (1)Reset the alarm, and then try again. occurred (2)If the alarm occurs again, save the CMOS.BIN in maintenance mode, and then contact your YASKAWA representative about occurrence status (operating procedure). The tag data was variable Setting error (1)Check the following settings.
- Page 280 (2)If the alarm occurs again, save the CMOS.BIN in maintenance mode, and instructions for the master and the then contact your YASKAWA representative about occurrence status (operating slave disagreed. procedure). At full synchronization, no Software operation error (1)Reset the alarm, and then try again.
- Page 281 (2)If the alarm occurs again, save the CMOS.BIN in maintenance mode, and processing. then contact your YASKAWA representative about occurrence status (operating procedure). No base axis in the job for arc Setting error (1)Check the following settings.
- Page 282 Alarm Alarm Name Meaning Cause Remedy Number Code 4534 TORQUE Setting error (1)Check the following settings. INTERFERENCE ·Correctly set the weight information in the tool file. ( Are the weight: W and the number set to the load value of either Xg, Yg or Zg) ·Reduce the speed in the step where the alarm occurred.
- Page 283 (2)If the alarm occurs again, save the CMOS.BIN in maintenance mode, and empty job call stack or to stack a then contact your YASKAWA representative about occurrence status (operating data in the job call stack that is procedure). full.
- Page 284 Software operation error (1)Reset the alarm, and then try again. SYSTEM JOB occurred (2)If the alarm occurs again, save the CMOS.BIN in maintenance mode, and then contact your YASKAWA representative about occurrence status (operating procedure). 4547 PRIMITIVE ERROR Sub Code: Error code Software operation error (1)Reset the alarm, and then try again.
- Page 285 (1)Reset the alarm, and then try again. used. occurred (2)If the alarm occurs again, save the CMOS.BIN in maintenance mode, and then contact your YASKAWA representative about occurrence status (operating procedure). The general sensor function is not Software operation error (1)Reset the alarm, and then try again.
- Page 286 (1)Reset the alarm, and then try again. occurred (2)If the alarm occurs again, save the CMOS.BIN in maintenance mode, and then contact your YASKAWA representative about occurrence status (operating procedure). The ME-NET function is not used. Software operation error (1)Reset the alarm, and then try again.
- Page 287 Software operation error (1)Reset the alarm, and then try again. user coordinate conversion occurred (2)If the alarm occurs again, save the CMOS.BIN in maintenance mode, and then contact your YASKAWA representative about occurrence status (operating procedure). 4567 CANNOT MONITOR Setting error (1)Check the following settings.
- Page 288 (1)Reset the alarm, and then try again. CANCEL ERROR(SV) occurred (2)If the alarm occurs again, save the CMOS.BIN in maintenance mode, and then contact your YASKAWA representative about occurrence status (operating procedure). 4595 CAN'T DO FIXED FORM The setting for radius is incorrect.
- Page 289 Alarm Alarm Name Meaning Cause Remedy Number Code The setting for overlap is Setting error (1)Check the following settings. incorrect. ·Setting of the overlap data (1) For a rectangle, it is incorrectly set as overlap > width/2. (2) For a circle, it is incorrectly set as overlap >...
- Page 290 (2)If the alarm occurs again, save the CMOS.BIN in maintenance mode, and data conversion then contact your YASKAWA representative about occurrence status (operating procedure). Incorrect reference-point data for Software operation error (1)Reset the alarm, and then try again.
- Page 291 (2)If the alarm occurs again, save the CMOS.BIN in maintenance mode, and incremental value of angle at the then contact your YASKAWA representative about occurrence status (operating offline position data conversion. procedure). The reverse shift value could not Software operation error (1)Reset the alarm, and then try again.
- Page 292 (1)Reset the alarm, and then try again. VARIABLE AREA occurred (2)If the alarm occurs again, save the CMOS.BIN in maintenance mode, and then contact your YASKAWA representative about occurrence status (operating procedure). 4607 WRONG EXECUTION The execution macro job is not Setting error (1)Check the following settings.
- Page 293 Alarm Alarm Name Meaning Cause Remedy Number Code 4615 I/O AXIS OPERATING An attempt was made to Setting error (1)Check the following settings. command a job whose control ·Does not the I/O axis motion executed for the control group that executing the group was in I/O axis motion.
- Page 294 Alarm Alarm Name Meaning Cause Remedy Number Code An attempt was made to obtain Setting error (1)Check the following settings. ·Check the settings for the GETPOS instruction. the step that used a local position type variable. (The step with local position type variable cannot be fetched.
- Page 295 (2)If the alarm occurs again, save the CMOS.BIN in maintenance mode, and manipulator motion start position then contact your YASKAWA representative about occurrence status (operating for the SYMOVJ motion. procedure). An error occurred in the Software operation error (1)Reset the alarm, and then try again.
- Page 296 Software operation error (1)Reset the alarm, and then try again. SET ERROR(SV) occurred (2)If the alarm occurs again, save the CMOS.BIN in maintenance mode, and then contact your YASKAWA representative about occurrence status (operating procedure). 4653 TRQ MEASURE MODE Software operation error (1)Reset the alarm, and then try again.
- Page 297 Alarm Alarm Name Meaning Cause Remedy Number Code 4670 INSUFFICIENT NUM OF Sub Code: Signifies the axis in Setting error Lengthen the measurement section. which the alarm occurred SAMPLE DATA 4671 SAMPLE BUFFER OVER Sub Code: Signifies the axis in Setting error Shorten the measurement section.
- Page 298 (2)If the alarm occurs again, save the CMOS.BIN in maintenance mode, and position data conversion then contact your YASKAWA representative about occurrence status (operating procedure). Incorrect reference-point data Software operation error (1)Reset the alarm, and then try again.
- Page 299 (2)If the alarm occurs again, save the CMOS.BIN in maintenance mode, and ERROR error then contact your YASKAWA representative about occurrence status (operating procedure). Reference position and target Software operation error (1)Reset the alarm, and then try again.
- Page 300 (1)Reset the alarm, and then try again. specified tag side error occurred (2)If the alarm occurs again, save the CMOS.BIN in maintenance mode, and then contact your YASKAWA representative about occurrence status (operating procedure). 4715 CIP MESSAGE Failed in the generation of the Software operation error (1)Reset the alarm, and then try again.
- Page 301 IP address setting error (1)Reset the alarm, and then try again. SERVER FUNC ERR (2)The IP address is duplicated with the FS100 controller. Confirm the IP address of the communication target. (3)If the alarm occurs again, save the CMOS.BIN in maintenance mode, and then contact your YASKAWA representative about occurrence status (operating procedure).
- Page 302 RC connect management occurred (2)If the alarm occurs again, save the CMOS.BIN in maintenance task. mode, and then contact your YASKAWA representative about occurrence status (operating procedure). Failed in the generation of the Software operation error (1)Reset the alarm, and then try again.
- Page 303 (1)Reset the alarm, and then try again. task,undefine error detected. occurred (2)If the alarm occurs again, save the CMOS.BIN in maintenance mode, and then contact your YASKAWA representative about occurrence status (operating procedure). 1060 Failed in the ID take of the RC Software operation error (1)Reset the alarm, and then try again.
- Page 304 IP address duplicated. IP address setting error (1)Reset the alarm, and then try again. (2)The IP address is duplicated with the FS100 controller. Confirm the IP address of the communication target. (3)If the alarm occurs again, save the CMOS.BIN in maintenance mode, and then contact your YASKAWA representative about occurrence status (operating procedure).
- Page 305 (1)Reset the alarm, and then try again. conversion. occurred (2)If the alarm occurs again, save the CMOS.BIN in maintenance mode, and then contact your YASKAWA representative about occurrence status (operating procedure). 2085 Detect file server task send Software operation error (1)Reset the alarm, and then try again.
- Page 306 POWER ERROR For example slot3 case: following items. (0000_0100), slot4 (1) Check the fuse on the front panel of FS100, and replace it if it was case:(0000_1000). If multiple cut. I/O boards detecting the error, (2) Check the CN3 connecter and the cable of the I/O board.
- Page 307 (1)Reset the alarm, and then try again. detected. occurred (2)If the alarm occurs again, save the CMOS.BIN in maintenance mode, and then contact your YASKAWA representative about occurrence status (operating procedure). In a RC task, undefined error Software operation error (1)Reset the alarm, and then try again.
- Page 308 (1)Reset the alarm, and then try again. occurred. occurred (2)If the alarm occurs again, save the CMOS.BIN in maintenance mode, and then contact your YASKAWA representative about occurrence status (operating procedure). 2141 In a file task, file writing error Software operation error (1)Reset the alarm, and then try again.
- Page 309 (1)Reset the alarm, and then try again. area overflow occurred. occurred (2)If the alarm occurs again, save the CMOS.BIN in maintenance mode, and then contact your YASKAWA representative about occurrence status (operating procedure). 3165 In a file task, received data Software operation error (1)Reset the alarm, and then try again.
- Page 310 (1)Reset the alarm, and then try again. area overflow occurred. occurred (2)If the alarm occurs again, save the CMOS.BIN in maintenance mode, and then contact your YASKAWA representative about occurrence status (operating procedure). 5533 In a RC task, interface data Software operation error (1)Reset the alarm, and then try again.
- Page 311 (1)Reset the alarm, and then try again. error. occurred (2)If the alarm occurs again, save the CMOS.BIN in maintenance mode, and then contact your YASKAWA representative about occurrence status (operating procedure). 7550 In a RC task, request send Software operation error (1)Reset the alarm, and then try again.
- Page 312 (2)If the alarm occurs again, replace controller. Save the CMOS.BIN before replace controller to be safe. Software operation error (1)Reset the alarm. occurred (2)If the alarm occurs again, save the CMOS.BIN in maintenance mode, and then contact your YASKAWA representative about occurrence status (operating procedure). 312 of 348...
- Page 313 Software operation error (1)Reset the alarm. occurred (2)If the alarm occurs again, save the CMOS.BIN in maintenance mode, and then contact your YASKAWA representative about occurrence status (operating procedure). 4825 BASE ENABLE ERROR Connection failure (1)Reset the alarm (2)If the alarm occurs again, replace controller.
- Page 314 Machine safety board failure (1)Reset the alarm. ERROR (2)If the alarm occurs again, save the CMOS.BIN in maintenance mode, and then contact your YASKAWA representative about occurrence status (operating procedure). Connection failure (1)Reset the alarm. (2)If the alarm occurs again, save the CMOS.BIN in maintenance mode, and then contact your YASKAWA representative about occurrence status (operating procedure).
- Page 315 ·Replacement of the switch used for protection stop signal or the corresponding parts. Machine safety board failure (1)Reset the alarm. (2)If the alarm occurs again, save the CMOS.BIN in maintenance mode, and then contact your YASKAWA representative about occurrence status (operating procedure). 4836 OVERRUN SIGNAL Sub Code: Control group Enable signal unmatched (1)Reset the alarm.
- Page 316 ·Replacement of the limit switch or corresponding parts. Machine safety board failure (1)Reset the alarm. (2)If the alarm occurs again, save the CMOS.BIN in maintenance mode, and then contact your YASKAWA representative about occurrence status (operating procedure). 4839 MODE SIGNAL CUT Dummy connector not Insert the dummy connector.
- Page 317 (2)If the alarm occurs again, save the CMOS.BIN in maintenance mode, and AREA SETTING ERROR allowable range. then contact your YASKAWA representative about occurrence status (operating procedure). The number of cube interference Setting error Reduce the number of cube interference area whose monitoring part is "whole"...
- Page 318 Software operation error (1)Reset the alarm. ERROR (SERVO) occurred (2)If the alarm occurs again, save the CMOS.BIN in maintenance mode, and then contact your YASKAWA representative about occurrence status (operating procedure). 4944 POSITION LOOP GAIN Software operation error (1)Reset the alarm.
- Page 319 Software operation error (1)Reset the alarm. ERROR (SERVO) occurred (2)If the alarm occurs again, save the CMOS.BIN in maintenance mode, and then contact your YASKAWA representative about occurrence status (operating procedure). 4957 AVERAGING STATUS Software operation error (1)Reset the alarm.
- Page 320 Alarm Alarm Name Meaning Cause Remedy Number Code Setting error Check the following settings. ·The tool information ·JOB ·Work ·The speed of JOB ·The acceleration/deceleration speed of ACC and DEC Connection failure (1)Reset the alarm (2)If the alarm occurs again, replace controller. Save the CMOS.BIN before replace controller to be safe.
-
Page 321: Error
159645-1CD 10 Error FS100 10.1 Error Message Error 10.1 Error Message Error warns the operator not to advance to the next operation caused by a wrong operation or the access method when using the programming pendant or an external equipment (computer, PLC, etc.). -
Page 322: System And General Operation
159645-1CD 10 Error FS100 10.1 Error Message 10.1.1 System and General Operation Error No. Data Error Message Contents Turn OFF servo power and perform It cannot be operated while servo power supply corrective action is ON. Depress TEACH Out of specified operation mode... - Page 323 159645-1CD 10 Error FS100 10.1 Error Message Error No. Data Error Message Contents Cannot initialize Teach point not specified No SYNCRO operation Position not checked Second home position was not checked. Select joint coordinate system and perform forward operation Can specify servo OFF by safety relay...
- Page 324 159645-1CD 10 Error FS100 10.1 Error Message Error No. Data Error Message Contents It is already registered for IN/OUT signal name. It is already registered for Variable name. It is already registered for Local variable name. The existing names cannot be...
-
Page 325: Editing
159645-1CD 10 Error FS100 10.1 Error Message 10.1.2 Editing Error No. Data Error Message Contents 1010 EDIT LOCK mode 1020 Enter correct value 1030 Unauthorized ID No. 1050 Enter correct date 1060 Enter correct clock 1070 Enter an ID number in 4-8 figures 1080 Negative value can’t be set... -
Page 326: Job Defined Data
159645-1CD 10 Error FS100 10.1 Error Message 10.1.3 Job Defined Data Error No. Data Error Message Contents 2010 Incorrect character 2020 Name not entered 2030 Undefined JOB name 2040 Defined JOB name 2050 Address not found 2060 Select master 2070... - Page 327 159645-1CD 10 Error FS100 10.1 Error Message Error No. Data Error Message Contents 2291 Undefined SUB Master JOB Sub-master 1 Sub-master 2 Sub-master 3 Sub-master 4 Sub-master 5 2292 Undefined MASTER START JOB 2293 Undefined SUB START JOB Sub-master 1...
- Page 328 159645-1CD 10 Error FS100 10.1 Error Message Error No. Data Error Message Contents 2551 Duplicated line number 2560 Cannot correct steps of position variables and REFP 2570 The step does not contain speed 2580 The step dose not contain PL/CONT...
-
Page 329: External Memory Equipment
159645-1CD 10 Error FS100 10.1 Error Message 10.1.4 External Memory Equipment Error No. Data Error Message Contents 3021 CompactFlash not inserted into CompactFlash slot(PP) 3022 USB media not inserted 3040 File not saved on the media 3050 File saved on the media... - Page 330 159645-1CD 10 Error FS100 10.1 Error Message Error No. Data Error Message Contents 3190 Error in JOB data record Record on the number of position data (NPOS) is wrong for the format. Record on the user coordinate No. (USER) is wrong for the format.
- Page 331 159645-1CD 10 Error FS100 10.1 Error Message Error No. Data Error Message Contents 3220 No instruction Invalid instruction Invalid tag Invalid character Undefined intermediate code Intermediate code shortage Syntax stack overflow Syntax stack underflow Array type tag uncompleted Tag [ARRAY]...
- Page 332 159645-1CD 10 Error FS100 10.1 Error Message Error No. Data Error Message Contents 3240 Undefined application 3250 Cannot load this file 3260 Excess input data 3270 Cannot verify this file 3290 Serial port not defined 3300 Serial port being used...
- Page 333 159645-1CD 10 Error FS100 10.1 Error Message Error No. Data Error Message Contents 3600 system configuration data not matched 3610 Excessive path 3620 Excess folders RE-CHO-A111 10-13 333 of 348...
-
Page 334: Concurrent I/O
159645-1CD 10 Error FS100 10.1 Error Message 10.1.5 Concurrent I/O Error No. Data Error Message Contents 4010 Illegal relay No. Line no. 4020 Illegal block No. 4030 Illegal instruction Line no. 4040 Relay/register No. duplicated in OUT/ Multiple outputs are instructed to the relay or GOUT or arithmetic instruction register. -
Page 335: Maintenance Mode
159645-1CD 10 Error FS100 10.1 Error Message 10.1.6 Maintenance Mode Error No. Data Error Message Contents 8010 Too many axes 8011 Choose the input of overrun 8020 Too many I/O points 8030 Too many boards (DEVICENET) 8033 Too many boards... -
Page 336: Particular Error Message
159645-1CD 10 Error FS100 10.2 Particular Error Message 10.2 Particular Error Message Apart from ordinary alarms or errors, some may display an error box message on the programming pendant. This message is displayed, when the system of the programming pendant becomes unauthorized. -
Page 337: Application Transaction Error
159645-1CD 10 Error FS100 10.2 Particular Error Message 10.2.1.2 Application Transaction Error This message is displayed when the system or the software of the programming pendant becomes unauthorized due to unexpected transaction or failure in softaware transaction, etc. The message in the message box varies depending on the occurence status. -
Page 338: When The Error Is Indicated
159645-1CD 10 Error FS100 10.2 Particular Error Message 10.2.2 When the Error is Indicated 10.2.2.1 Fatal Error Prgramming pendant becomes inoperable when this message appears. Please restart the system. 10.2.2.2 Application Transaction Error It is possible to keep the operation after pressing {OK} button to disappear the message box. -
Page 339: Led Indicator On Each Circuit Board
159645-1CD 11 LED Indicator on Each Circuit Board FS100 LED Indicator on Each Circuit Board Before the check of LED indicator In principle, the door must not be opened to prevent electric shock while power is ON. However, open the door with extreme care only if it is required to check the LED display on each circuit board for maintenance. -
Page 340: Led-Spot Indicator On The Main Cpu Circuit Board (Cpu201R)
159645-1CD 11 LED Indicator on Each Circuit Board FS100 11.1 6 LED-Spot Indicator on the Main CPU Circuit Board (CPU201R) 11.1 6 LED-Spot Indicator on the Main CPU Circuit Board (CPU201R) CPU201R board shows its operation status with 6 LED-spot indicator. -
Page 341: Segment Led Indicator On The Main Cpu Circuit Board (Cpu201R)
159645-1CD 11 LED Indicator on Each Circuit Board FS100 11.2 7-Segment LED Indicator on the Main CPU Circuit Board (CPU201R) 11.2 7-Segment LED Indicator on the Main CPU Circuit Board (CPU201R) CPU201R board indicates its start-up status and error causes with 7-segment LED indicator. -
Page 342: Status Of 7-Segment Led Indicator At Error Occurrence
159645-1CD 11 LED Indicator on Each Circuit Board FS100 11.2 7-Segment LED Indicator on the Main CPU Circuit Board (CPU201R) 11.2.1 Status of 7-Segment LED Indicator at Error Occurrence Error cause indication Meaning F0100 Critical Input F0200 Machine Check F0300... -
Page 343: Status Of 7-Segment Led Indicator At Control Power Start-Up (One Digit)
159645-1CD 11 LED Indicator on Each Circuit Board FS100 11.2 7-Segment LED Indicator on the Main CPU Circuit Board (CPU201R) 11.2.2 Status of 7-Segment LED Indicator at Control Power Start-up (one digit) Error Status The system program has started. Starts verifying the existence of other circuit boards. -
Page 344: Status Of 7-Segment Led Indicator At Alarm Occurrence
11.2 7-Segment LED Indicator on the Main CPU Circuit Board (CPU201R) 11.2.4 Status of 7-Segment LED Indicator at Alarm Occurrence Only when the PP is not connected the FS100, the alarm number is indicated with 4-digit numbers with the letter [A] at its head. -
Page 345: Seg-Led Indicator On Machine Safety Board (Sf2300)
159645-1CD 11 LED Indicator on Each Circuit Board FS100 11.3 7 SEG-LED Indicator on Machine Safety Board (SF2300) 11.3 7 SEG-LED Indicator on Machine Safety Board (SF2300) SF2300 board indicates its operation status with LED indicator. Indication LED Color Board Status when LED is lit Green When the control power is turned ON. -
Page 346: Seg-Led Indicator On Servo Control Board (Ifm)
159645-1CD 11 LED Indicator on Each Circuit Board FS100 11.4 7 SEG-LED Indicator on SERVO Control Board (IFM) 11.4 7 SEG-LED Indicator on SERVO Control Board (IFM) IFM board indicates its start-up status and error causes with 6 LED-spot indicator. - Page 347 (Starts up each SERVO part CMERR initialization) LNK1 LNK2 Starts up pre-online processes (LNK2 blinks at 0.3 sec intervals) CMERR LNK1 LNK2 FS100 setup competed (SERVO ON enabled) CMERR (LNK2 blinks at 1 sec intervals) LNK1 LNK2 RE-CHO-A111 11-9 347 of 348...
- Page 348 MAINTENANCE MANUAL HEAD OFFICE 2-1 Kurosakishiroishi, Yahatanishi-ku, Kitakyushu 806-0004, Japan Phone +81-93-645-7703 Fax +81-93-645-7802 YASKAWA America Inc. (Motoman Robotics Division) 100 Automation Way, Miamisburg, OH 45342, U.S.A. Phone +1-937-847-6200 Fax +1-937-847-6277 YASKAWA Europe GmbH Robotics Divsion ) Yaskawastrasse 1, 85391 Allershausen, Germany...
Need help?
Do you have a question about the FS100 and is the answer not in the manual?
Questions and answers