Spectra Logic T-Series Spectra T50e User Manual
Spectra logic t-series spectra t50e: user guide
Hide thumbs
Also See for T-Series Spectra T50e:
- Release note (26 pages) ,
- Hardware replacement manual (21 pages) ,
- Install manual (8 pages)
Table of Contents
Advertisement
Quick Links
Advertisement
Chapters
Table of Contents
Troubleshooting

Subscribe to Our Youtube Channel
Related Manuals for Spectra Logic T-Series Spectra T50e


Summary of Contents for Spectra Logic T-Series Spectra T50e
- Page 1 Spectra T50e User Guide...
- Page 2 THE IMPLIED WARRANTIES OF MERCHANTABILITY OR FITNESS FOR A PARTICULAR PURPOSE, BOTH OF WHICH ARE EXPRESSLY DISCLAIMED. In no event shall Spectra Logic be liable for any loss of profits, loss of business, loss of use or data, interruption of business, or for indirect, special, incidental or consequential damages of any kind, even if Spectra Logic has been advised of the possibility of such damages arising from any defect or error.
- Page 3 If you do not agree to this end user license agreement (EULA), do not use the Spectra Product; instead, promptly contact Spectra Logic for instructions on return of the Spectra Product for a refund. Any use of the Software, including but not limited to use on the Spectra Product, will constitute your agreement to this EULA (or ratification of any previous consent).
-
Page 4: Warnings And Cautions
Warnings and Cautions Warnings and Cautions The maximum ambient temperature of the library is 95º F. Ensure that you select a Warning location where the air vents at the front of the library and the fans at the back of the library are not blocked. - Page 5 Caution on top of the library. The library cover is not designed to hold weight. Use only the media approved by Spectra Logic for use in the tape drives installed in Caution your library. Improper media will result in damage to the tape drives, library, and the media.
-
Page 6: Contacting Spectra Logic
Contacting Spectra Logic Contacting Spectra Logic To obtain general information Spectra Logic Web Site: www.spectralogic.com United States Headquarters European Office Spectra Logic Corporation Spectra Logic Europe Ltd. 1700 North 55th Street Magdalen Centre Boulder, CO 80301 Robert Robinson Avenue Oxford Science Park OXFORD Phone: 1.800.833.1132 or 1.303.449.400... -
Page 7: Table Of Contents
Contents About This Guide Intended Audience ........11 Related Publications . - Page 8 Contents Chapter 4 – Library Configuration Configure Library Users ........73 Access the Configuration Screen .
- Page 9 Contents Chapter 9 – Encryption Configuration and Use BlueScale Encryption Overview ......163 Configure Encryption .
- Page 10 Contents Appendix B – Service and Support SpectraGuard Technical Support ......221 RMA Returns ......... .223 Repair Policy: Warranty .
-
Page 11: About This Guide
T50e Library This guide and the following documents related to the T50e library are available as PDF files on the Spectra Logic web site at www.spectralogic.com/documents. The Spectra T50e Quick Start Guide provides detailed instructions for installing the library and performing the initial power-on and configuration. -
Page 12: Conventions Used In This Guide
About This Guide LTO Ultrium Tape Drives Check the IBM web site at www.storage.ibm.com/tape/lto/oem/index.html to locate documentation for LTO Ultrium tape drives. ONVENTIONS SED IN UIDE This manual uses the following conventions to highlight important information: Note: Read notes for additional information or suggestions about the current topic. -
Page 13: Chapter 1 - Library Overview
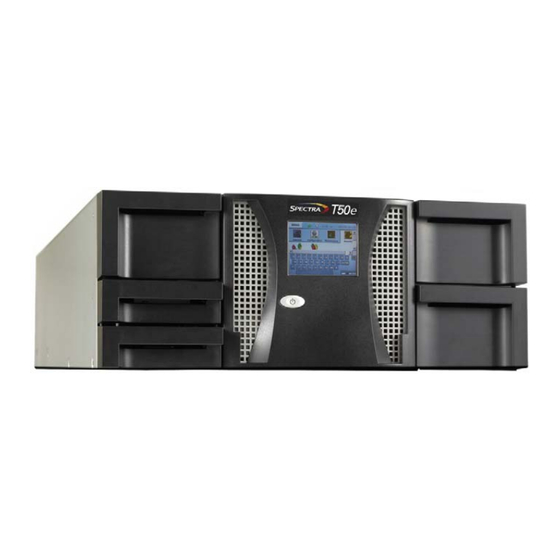
Chapter 1 Library Overview ® The Spectra T50e library provides unattended data storage, archiving, backup, and retrieval for environments ranging from small PC workgroups to multi-server networks. This chapter provides an overview of the library features, components, and the library management user interface. Task Described on... -
Page 14: Library Features
Chapter 1 — Library Overview IBRARY EATURES The library includes the following features: Media Storage The library accommodates up to a total of 50 cartridges stored in four magazines and three expansion slots. Magazines Three of the magazines hold 12 cartridges each and the fourth magazine holds 11 cartridges. -
Page 15: Bar Code Reader
Library Features Tape Drive Connectivity Each tape drive supports an independent set of SCSI messages and commands. Depending on the tape drive(s) installed in your library, the interface used by the tape drives and library will be one of the following: Wide, low-voltage differential (LVD) SCSI Each tape drive can be connected to a separate LVD SCSI bus. -
Page 16: Bluescale Media Lifecycle Management
BlueScale Media Lifecycle Management (MLM) helps you manage your tape media by giving you tools to proactively detect potential media errors well before they happen. When used in combination with Spectra Logic MLM-capable Media, MLM lets you manage, track, and report all facets of tape usage from creation to retirement —... -
Page 17: Library Components
Library Components Rack-mount Hardware The library is designed to mount in a standard 4-post, 19-inch rack using just 4 units (4U) of rack space. Alternatively, the library can be placed on a level tabletop or other level horizontal surface. See Rack-mount Installation on page 36 for important information. -
Page 18: Interior Components
Chapter 1 — Library Overview Magazine Handles. The magazine handles let you slide individual magazines into and out of the library. The magazines must be unlocked from the user interface before they can be removed. See Interior Components for information about the magazines. Access Port. -
Page 19: Rear Panel Components
Library Components Transporter. The robotic transporter (robot) performs all media movement within the library. The integrated bar code reader mounted on the transporter reads the bar code labels on individual cartridges. The library uses the bar code label information to maintain an inventory of the media currently stored inside the library. -
Page 20: Library Management
Chapter 1 — Library Overview Power Supply. The library includes one power supply to provide DC power to the library and its tape drives. A second power supply provides N+1 redundancy and failover protection. The power supply modules needed for the N+1 power redundancy configuration are an option that you can purchase separately or when you order the library. -
Page 21: User Security
Knowledge Base, streamlines the online ordering of media and capacity, and more. Online access can be enabled or disabled during any browser session; it does not affect AutoSupport. See Online Access to Spectra Logic Library Settings on page Spectra T50e library... - Page 22 Spectra T50e library’s functions in combination with those of multiple other Spectra Logic libraries. You can run no more than two simultaneous Observatory sessions. Automatic E-mail Alerts—Simple Mail Transfer Protocol (SMTP) allows users to receive library status information via e-mail.
-
Page 23: Access Port
Library Management Access Port The library includes one slot for importing or exporting a single cartridge without affecting the library’s operation.See Import and Export Cartridges on page Access port Figure 5 Access Port Importing—You can use the Access port door to import media from the library. -
Page 24: Tape Drives
Chapter 1 — Library Overview RIVES The library’s tape drives are installed in drive bays located at the back of the library and are easily accessible. The library accommodates up to two full-height LTO-4 or LTO-3 tape drives or up to four half-height LTO-4 tape drives. - Page 25 Tape Drives In addition to the electrical connections for the tape drive, the drive sled includes a handle to simplify sliding the tape drive into or out of a drive bay, a fan to control the internal temperature, an external interface for SCSI or Fibre Channel, and thumb screws to prevent the tape drive from being accidentally pulled out of the library.
- Page 26 Chapter 1 — Library Overview Tape Drive Interfaces The method used to connect the library’s tape drives to the network depends on the type of network and the tape drive interface. The tape drives used in the library have either an Ultra320 SCSI or a native Fibre Channel interface.
-
Page 27: Library Control Module (Lcm)
Library Control Module (LCM) (LCM) IBRARY ONTROL ODULE The library contains a single Library Control Module (LCM). The LCM provides the operating system and circuitry to control the library’s operation and to display the BlueScale user interface on the library’s touch screen. - Page 28 Chapter 1 — Library Overview Notes User Guide 90970015...
-
Page 29: Chapter 2 - Library Installation
Chapter 2 Library Installation This chapter describes how to install the library and log into the user interface. Task Described on... Prepare for the Installation page 29 below Unpack the Library page 32 Install the Library page 36 Install the Tape Drives page 42 Connect the Tape Drives page 45... - Page 30 Chapter 2 — Library Installation Location and Rack-mounting—Ensure that you follow these guidelines. Location Ensure that the installation location is properly prepared and has adequate clearance for ventilation, minimal dust and debris, and proximity to an appropriate AC power source. WARNING! The maximum ambient temperature of the library is 95 ˚F.
- Page 31 Prepare for the Installation Drivers and Ensure that any necessary device drivers and the backup software are compatible with Software the library and the tape drive(s). Note: The software can be installed on the host computer before or after library installation.
-
Page 32: Unpack The Library
Chapter 2 — Library Installation Accessory Description Interface cables and Fibre Channel (FC) Cables (FC tape drives only)—For each accessories Fibre Channel tape drive you will need at least one optical continued cable. A second optical may be connected to the Fibre Channel tape drive to configure fail-over, if necessary. -
Page 33: Unpack The Library
Unpack the Library Unpack the Library Save all the original packing materials in case it is necessary to ship or move the library later. 1. Use scissors to cut away the tape securing the library shipping box. Figure 11 Spectra T50e in packing box. 2. -
Page 34: Inventory The Components
USB storage device One USB Storage device is shipped with the library, and additional USB storage devices are available for purchase from Spectra Logic. SCSI bus One SCSI terminator that is appropriate for your terminator configuration is shipped with each purchased SCSI tape drive. -
Page 35: Remove The Shipping Lock
Unpack the Library Component Description Power cord One AC power cord is included for each power supply module you purchased. See Power Cord Specifications on page 229 for the requirements. CAUTION! Only use power cables supplied by the vendor. Remove the Shipping Lock The shipping lock, which prevents the transporter from moving during shipment, must be removed before the library is powered on. -
Page 36: Install The Library
Chapter 2 — Library Installation NSTALL THE IBRARY Rack-mount Installation The Spectra T50e is designed to fit into a standard 4-post rack using just 4U of rack space. Do not install the tape drives or cartridges until after the library is installed in the rack. Note: If you plan to install the library in a tabletop configuration, go to Tabletop Installation on page... -
Page 37: Gather Tools And Supplies
Install the Library Gather Tools and Supplies Obtain the following tools and equipment: #2 Phillips screwdriver, magnetic if available Level (recommended) Identify the Rack-mount Kit Components Unpack the rack-mount kit and identify the components listed in the following table. Component Rail assemblies Support the chassis in the rack. - Page 38 Chapter 2 — Library Installation Install the Rails in the Rack Ensure that the rails and the library are level from front to back and from side to Caution side so that it functions properly when installed. Back of Rack Adjust length to Adjustable slider depth of rack...
-
Page 39: Place The Library In The Rack
Install the Library 4. Using a #2 Phillips screwdriver, install four M6 screws—two in the front and two in the rear—to secure the rail to the rack (Figure Tighten the screws securely. Note: Two sets of M6 screws are provided. The type you use depends on the type of rack you have. - Page 40 Chapter 2 — Library Installation 3. Using a #2 Phillips screwdriver, install one M5 screw in each mounting bracket to secure the library to the rack, as shown in Figure Mounting bracket screw Figure 14 Secure the library to the rack (right side shown). The maximum ambient temperature of the library is 95º...
- Page 41 Install the Library 1. If required, remove the mounting brackets installed at the front of the library and the guide pulleys installed on the two sides of the library using a T10 torx driver (see Figure 15). Set the brackets and pulleys aside in case you decide to rack-mount the library at a later date.
-
Page 42: Install The Tape Drives
Gathering Tools and Supplies You need the following tools and supplies to install a tape drive: A new tape drive in a Spectra Logic drive carrier A #2 Phillips screwdriver Interface cables SCSI tape drive—A SCSI cable and terminator Fibre Channel tape drive—An optical Fibre Channel cable... -
Page 43: Installing The Tape Drive
Install the Tape Drives Installing the Tape Drive Follow these steps to install a tape drive: 1. Determine where to install each tape drive—The drive bays are numbered from bottom to top. Depending on whether you ordered full-height or half-height tape drives, there are two or four drive bays, respectively. - Page 44 Chapter 2 — Library Installation Screws (two each side) Tape drive cover plate Product ID slide Figure 17 Rear panel – Add tape drive b. Remove the tape drive from its protective packaging. The full-height tape drive assembly weighs approximately 15 lb. (7 kg). Be careful Caution not to drop it.
-
Page 45: Connect The Tape Drives
SCSI bus. Though it is possible to daisy-chain LTO-4 tape drives it is not recommended, nor does Spectra Logic support this configuration. If you must daisy-chain LTO-4 drives, the recommended length for the link cable is 6 to 10 feet; do not daisy-chain more than two drives. - Page 46 LTO-4—Though it is possible to daisy-chain LTO-4 tape drives it is not recommended, nor does Spectra Logic support this configuration. If you must daisy-chain LTO-4 drives, the recommended length for the link cable is 6 to 10 feet; do not daisy- chain more than two drives.
- Page 47 Connect the Tape Drives Connecting Fibre Channel Tape Drives In a Fibre Channel environment, you can connect the tape drive(s) to a Fibre Channel hub or switch in an arbitrated loop or a switched fabric or directly to the host or HBA. For simplicity in these instructions, each of these situations is referred to as a “network.”...
- Page 48 Chapter 2 — Library Installation 3. Insert the connector into either port on the tape drive until it snaps into place (Figure 20). LTO-4 Fibre Channel tape drives have dual ports (labeled Port A and Port B). Note: The connector only fits one way. Do not force it. Fibre Channel ports Fibre Channel...
-
Page 49: Connect The Library To An Ethernet Network
Connect the Library to an Ethernet Network ONNECT THE IBRARY TO AN THERNET ETWORK If you want to use the BlueScale user interface to manage and monitor the library remotely using a web browser, connect a cable to the Ethernet port on the library’s LCM (Figure 21). -
Page 50: Connect The Ac Power
Chapter 2 — Library Installation AC P ONNECT THE OWER Follow these steps connect the AC power cords to the library. Only use the power cord supplied with the library! 1. Plug the AC power cord into the AC connector on the power supply module (Figure 22). -
Page 51: Power On The Library
Power On the Library OWER N THE IBRARY Follow these steps to power on the library: 1. Press and hold the front panel power button (Figure 23) for two to three seconds until the button’s LED illuminates. Power button Figure 23 Press and hold the front panel power button. 2. - Page 52 Chapter 2 — Library Installation 4. Close the keyboard by selecting its icon with the stylus. Type “su” Login Wait Close keyboard Figure 24 The user interface main login screen. Review Messages, if shown. If there are any alerts, the Messages screen displays (Figure 25).
- Page 53 Enter the Option Keys Follow these steps to enter any option keys (also called “license keys”) that you received from Spectra Logic. 1. Locate the document(s) containing the option key(s)—each is a sequence of numbers and letters.
- Page 54 Chapter 2 — Library Installation 5. With the letters keyboard visible, select Save. Note: Option keys are not case- sensitive. Switch between the letter and Example number keyboards using the screen Letter/Number icon. Repeat the steps for each option key and then close the keyboard. Open/close keyboard Letter/Number...
-
Page 55: Chapter 3 - Library Operation
Chapter 3 Library Operation This chapter describes procedures for day-to-day operation of your Spectra T50e library. Task Described on... Power the Library On and Off page 55 below Log In and Out of the User Interface page 57 User Interface Overview page 60 Library Screen Use page 65... -
Page 56: Powering Off The Library
Chapter 3 — Library Operation Powering Off the Library To power off the library, press and hold the front panel power button for one second. The power-off sequence takes approximately two minutes while the library allows applications to shut down gracefully. If the system is stable at power off, a message displays indicating that the power button was pressed. -
Page 57: Log In And Out Of The User Interface
Log In and Out of the User Interface N AND UT OF THE NTERFACE Accessing the Stylus Every library comes with a stylus, which is used to navigate through the BlueScale User Interface screens. Stylus Stylus in holder Figure 29 Location of the stylus. Before you can manage or configure the library, you must log into the user interface. - Page 58 Chapter 3 — Library Operation Logging In Follow these steps to log into the library. 1. Select the screen’s keyboard icon (Figure 30) to activate the soft keyboard. Note: Selecting the keyboard icon on the Login screen activates the soft keyboard on the library’s touch screen.
- Page 59 Log In and Out of the User Interface If there are any alerts, the Messages screen displays (Figure 31). Respond to the messages as necessary or select MENU to view the General Status screen. Figure 31 The Messages screen. If the library initializes and finds no alerts to report, the General Status displays (Figure 35).
-
Page 60: User Interface Overview
Chapter 3 — Library Operation 2. Select Switch Users to log out and re-display the Login screen. Figure 33 The Security screen. NTERFACE VERVIEW The library’s user interface lets you set configuration options, view library and tape drive information, manage media, and monitor library operations. - Page 61 User Interface Overview MENU After you log in, the user interface displays a MENU button on the top of the screen at all times. Selecting the MENU button displays the menu screen from which you can navigate through the user interface options. See Using the Menus on page 62 for a description of the available options.
-
Page 62: Using The Menus
Chapter 3 — Library Operation Waiting for Progress Bars When the library is busy processing a command, a horizontal progress bar displays along the bottom of the screen. Do not use the touch screen (or access the user interface remotely) until the progress bar disappears. Using the Menus Selecting the MENU button displays the menu screen from which you can navigate through the user interface options. - Page 63 Settings Displays options for configuring the library name, refresh rate, and web server port. It also lets you set online access to Spectra Logic and enable the auto- configure save option. Option Keys Displays a list of currently enabled options and lets you enter keys to enable purchased options.
- Page 64 Chapter 3 — Library Operation Maintenance – Maintenance and troubleshooting options for the library and tape drives. Item Description Figure 37 The Maintenance screen. Auto Support Provides controls for creating and maintaining AutoSupport profiles and for opening and updating support tickets. AutoSupport level 1 is a standard feature for the library.
-
Page 65: Library Screen Use
Library Screen Use Edit Users Provides adding, deleting, and managing users options. See Understanding User Groups and Security on page 74 for detailed information. Encryption Accesses the BlueScale Encryption options, including the library’s built-in encryption key management. BlueScale Encryption capability is enabled only with LTO-4 tape drives installed in the library and when the library is licensed for encryption. -
Page 66: Checking Messages
2. Read the message(s), and follow any recommended steps. If you need assistance, contact SpectraGuard Technical Support (see Contacting Spectra Logic on page 3. When you are finished reading the messages and have completed the appropriate actions, you can either:... - Page 67 Library Screen Use Item Description IP Address If you are managing the library from the touch screen, the library’s IP address is displayed on the status bar. If you are accessing the library remotely, the library’s name, if set, is shown in place of the library’s IP address. Menu >...
-
Page 68: Use A Usb Storage Device
Figure 41 The Storage Density metrics screen. USB S SE A TORAGE EVICE One Spectra Logic USB storage device is shipped with the library, but most types of USB devices work. A USB storage device can be used for the following: Item Description... -
Page 69: Continuing Library Operations While Using A Usb Device
Use a USB Storage Device Item Description Encryption import Importing a previously exported BlueScale encryption key Note: If you are unable to access a USB storage device connected to the library, remove it and use a different one. Not all USB storage devices are compatible with the library. Continuing Library Operations While Using a USB Device It is safe/not safe... -
Page 70: Copying Data From A Usb Storage Device To The Library
Chapter 3 — Library Operation 2. Plug the USB storage device into the USB port on the LCM. USB ports Figure 42 Location of the USB port on the LCM. Copying Data From a USB Storage Device to the Library You can copy (download) the following types of data from a USB device to the library: Firmware package updates... -
Page 71: Saving Data From The Library To A Usb Storage Device
Use a USB Storage Device Saving Data From the Library to a USB Storage Device You can save (upload) the following types of data from the library to a USB device: Library configurations – Whenever you modify the configuration of the library or a partition, you have the option of saving the configuration to a USB storage device. - Page 72 Chapter 3 — Library Operation Notes User Guide 90970015...
-
Page 73: Configure Library Users
Chapter 4 Library Configuration This chapter describes the procedures for modifying the library configuration, including the following: Task Described on... Configure Library Users (from the Security menu) page 73 (below) Access the Configuration Screen page 73 Add Capacity to Your Library (optional) page 77 Enable Purchased Options... -
Page 74: Understanding User Groups And Security
Chapter 4 — Library Configuration Understanding User Groups and Security Before you begin, read this section to understand the three types of user groups and what types of privileges each has. By default, passwords are not required for any of the three default users. Note: If encryption is enabled, there is an additional, separate Encryption user for accessing the encryption features. -
Page 75: Editing An Existing User
Configure Library Users 4. Enter the user’s name in the User field. Figure 44 The Library Users screen. 5. If desired, enter a password for the user in the Password field, then again in the Retype Password field. Note: For security, the text in the Password field is shown as asterisks (*). -
Page 76: Access The Configuration Screen
Chapter 4 — Library Configuration Deleting an Existing User Follow these steps to delete an existing user. Note: The library requires a minimum of one Superuser. You cannot delete the last member of the Superuser group. 1. Log into the library with superuser privileges. 2. -
Page 77: Add Capacity To Your Library
You can also purchase additional capacity at a later date. Follow these steps to generate the activation key required to enable additional slots in the library. If you need assistance, contact Spectra Logic support at www.spectralogic.com/support. 1. Unpack all of the cartridges. - Page 78 Chapter 4 — Library Configuration 5. Using a standard web browser, go to Spectra Logic’s www.spectralogic.com/shop. A web page similar to the one shown in Figure 47 displays asking for information about your library. Enter library SN here. Enter Hardware ID here.
-
Page 79: Enable Purchased Options
Enable Purchased Options NABLE URCHASED PTIONS When you purchase options, including additional capacity, for your library, you must enable them before you can use them. 1. Have on hand the activation code for the option. This code is included in the information you received when you purchased the option. 2. - Page 80 Chapter 4 — Library Configuration 4. Select New, enter the activation key for the option you want to enable in the Enter Key field, and select Save. Figure 50 The New Option Key screen. When accessing the library remotely through a web browser, do not use the Enter Important key on your keyboard when entering information in any of the text fields.
-
Page 81: Library Settings
Library Settings IBRARY ETTINGS This section describes how to modify the library’s general configuration settings. Entering the Library Settings Follow these steps to configure the library name, refresh rate, web server port, online access, and automatic configuration save settings: 1. Log in as a user in either the superuser or administrator group (see Configure Library Users on page 73 to learn how to setup users groups). - Page 82 Chapter 4 — Library Configuration 6. Select whether you’d like the RLC to have online access to Spectra Logic. (For details on online access, see Online Access to Spectra Logic on page 21.) Online access can be turned on and off at any time.
- Page 83 Library Settings Setting the Static IP Address Follow these steps to set a static IP address: 1. Log in as a user in either the superuser or administrator group. 2. Select Configuration > Network. The Network screen appears. Figure 52 The Network DHCP screen. 3.
-
Page 84: Configuring Mail Users
Chapter 4 — Library Configuration Configuring Mail Users Understanding Mail Users You can configure mail users to receive on-demand output generated by the library. This output may include the results of traces, utilities, or automatic library messages. These are the same messages that you see in the Messages screen. - Page 85 Library Settings 3. Select New. The New Mail User screen appears (Figure 55). Figure 55 New Mail User screen. 4. In the To field, enter the e-mail address of the party to receive messages. Use the full address with the @ symbol, and do not use any spaces in the e-mail address.
-
Page 86: Setting The Date And Time
Chapter 4 — Library Configuration 8. Select Save. The Mail Users screen appears, showing the added user (Figure 56). Figure 56 The Mail Users screen. Setting the Date and Time The date and time set on the library is used only for library messages and in trace logs;... -
Page 87: Enable And Configure Media Lifecycle Management
Option Description Enable Alerts for Generates an alert message when tapes that are not Spectra Logic Certified Non-Certified Media Media are loaded into a tape drive. Enable Alerts for Generates an alert message when the load count for the cartridge stored in the... -
Page 88: Back Up The Library Configuration
Chapter 4 — Library Configuration Option Description Maximum Tape Sets the number of times a tape can be loaded into a tape drive before it reaches Loads (before the usage threshold you set. The default value is 10,000 loads. warning) When the number of tape loads reaches the specified threshold, a warning message is generated. - Page 89 Back Up the Library Configuration Restoring From an Auto-Save Configuration File on page 195 You can optionally store the library’s configuration, either by saving it to a USB key or by emailing it to one of the library’s configured mail users. If you choose either of these option, verify the backup as described in the following sections.
-
Page 90: Verify The Configuration Backup
Chapter 4 — Library Configuration 5. Scroll through the list of utilities and select Save Library Configuration. The screen refreshes to show the details for the utility (Figure 60). name1@yourcompany.com name2@your company.com Figure 60 The Save Library Configuration utility. The save library configuration to USB option is only available if you connect the Important USB key to the library USB port before you access the advanced utilities. -
Page 91: Configure A Firmware Web Package Server
205. You may choose to set up and use one or more local servers to store library firmware packages downloaded from Spectra Logic. This may be useful for the following types of situations: If you have multiple Spectra libraries to update. - Page 92 Chapter 4 — Library Configuration 3. From the toolbar menu, select Maintenance > Package Update. The Package Update screen displays (Figure 61). Figure 61 The Package Update screen. 4. Select Manage Package Servers. The Manage Package Servers screen displays (Figure 62).
- Page 93 Configure a Firmware Web Package Server Proxy If your site funnels all HTTP traffic through a proxy server, enter its address here. Note: Spectra Logic does not support Authenticating Proxy servers; this must be a non-authenticating proxy server. Directory The is the path from the root of the web server to the directory where the firmware packages will be stored.
- Page 94 Chapter 4 — Library Configuration Notes User Guide 90970015...
-
Page 95: Cartridge Inventory Overview
Chapter 5 Cartridge Use This chapter describes procedures for importing, exporting, and moving the cartridges used in your Spectra T50e library. Task Described on... Cartridge Inventory Overview page 95 below Prepare Cartridges for Use page 96 Import and Export Cartridges page 98 Move Cartridges Within the Library page 111... -
Page 96: Prepare Cartridges For Use
For best performance, use Spectra Logic Certified Media (including MLM media), which guarantees media compatibility and the media itself over the media’s lifetime. To learn more about the cartridges supported by the... - Page 97 Prepare Cartridges for Use Follow these steps to prepare cartridges for use before importing them into the library: 1. If your cartridges are unlabeled, prepare and affix a bar code label to each cartridge. Position each label in the indented area on the cartridge, as illustrated in Figure 65.
-
Page 98: Import And Export Cartridges
Partition Management on page 119 for additional information. Importing Cartridges Spectra Logic recommends ONLY using the Bulk Load/Bulk Unload option to Important during the initial installation and setup import or export multiple cartridges If you have Media Lifecycle Management (MLM) enabled, remove cartridges via the Access Port, power off the library, and then load cartridges manually, your MLM database is no longer accurate in the library. - Page 99 Import and Export Cartridges Importing a Single Cartridge via the Open Door Option Spectra Logic recommends using the Bulk Load/Bulk Unload option to import or export multiple cartridges. Follow these steps carefully or you risk destroying your data. However, you may occasionally want to load a single cartridge and can use the Open Door option for this purpose.
- Page 100 Chapter 5 — Cartridge Use 4. Select Add Move for each cartridge that you wish to import and move. Figure 68 Inventory Add Move screen. When you have set up all of the moves, select Start Moves. The library opens the Access port. 5.
- Page 101 Import and Export Cartridges Importing Multiple Cartridges via Bulk Load Spectra Logic recommends ONLY using the Bulk Load/Bulk Unload option to Important during the initial installation and setup import or export multiple cartridges If you have Media Lifecycle Management (MLM) enabled, remove cartridges via the Access Port, power off the library, and then load cartridges manually, your MLM database is no longer accurate in the library.
- Page 102 “chambers” (slots). Figure 71 The Delete Partitions Confirmation screen. 4. Select whether to save the current library configuration. Spectra Logic recommends saving your partition configuration settings. If you select to save the configuration, choose whether to save it to USB...
- Page 103 Figure 72 The Partitions setup screen. 1. Accept the Automatically create a partition option and select New. 2. Select whether to save the current library configuration. Spectra Logic recommends saving your partition configuration settings. If you select to save the configuration, choose whether to save it to USB...
- Page 104 Chapter 5 — Cartridge Use Bulk Load the Cartridges Spectra Logic recommends ONLY using the Bulk Load/Bulk Unload option to Important import or export multiple cartridges during the initial installation and setup If you have Media Lifecycle Management (MLM) enabled, remove cartridges via the Access Port, power off the library, and then load cartridges manually, your MLM database is no longer accurate in the library.
- Page 105 Import and Export Cartridges 2. Remove one or both magazines, load the cartridges with the bar code labels facing out, and carefully reinsert the magazine(s) into the library. Expansion slots located at back of library—see Add or Remove a Cartridge Capacity Sled on page 113 for information about these slots.
-
Page 106: Exporting Cartridges
Chapter 5 — Cartridge Use Modify Your Partition Settings If you have a license for multiple partitions, you can change the library configuration to enable multiple partitions again. See Partition Management on page 119. Follow these steps in reverse order to use the Bulk Unload operation to remove multiple cartridges from the library. - Page 107 Import and Export Cartridges Queued Ejects Understanding Queued Ejects Queued Ejects allows two or more partitions in the library to share the EE port. When this mode is used, access to certain tapes and slots may be restricted and imports or exports may not be handled the way you may expect.
- Page 108 Chapter 5 — Cartridge Use Follow these steps to remove cartridges via the queued eject option. 1. Using your backup software to export cartridges from the library, export as many tapes as desired. This process ‘logically’ removes the cartridges from the library. Note: You must move cartridges for each partition separately if you have two partitions configured in the library.
- Page 109 Import and Export Cartridges 4. Remove the cartridge and gently push the door closed. Note: Do not use force to push the door closed. Figure 77 Access port door. The library repeats the steps (move cartridge, open door) for each queued move.
- Page 110 Chapter 5 — Cartridge Use 1. Select General > Import/Export from the toolbar menu on the library’s user interface. The Import/Export screen displays. Figure 79 Import/Export screen. Note: The access port can only be included in the partition from which you are trying to export cartridges.
-
Page 111: Move Cartridges Within The Library
Move Cartridges Within the Library Select Delete Selected to go back one step Select Delete All to start over Toggle between Show Slots and Show Barcodes, as needed Figure 81 Move cartridge action screen. 6. Select Start Moves and wait for the library to complete the move. A progress bar displays while the move occurs. - Page 112 Chapter 5 — Cartridge Use 2. If the cartridge is in a partition other than the one currently displayed, select the desired partition from the Partition drop-down menu, then select Go. The screen refreshes to display a list of the cartridges for the requested partition.
-
Page 113: Add Or Remove A Cartridge Capacity Sled
Add or Remove a Cartridge Capacity Sled 6. If you wish to queue up another move, select Add Move, and repeat Step 3 through Step 5. If you are finished queuing up moves select Start Moves. Figure 85 Moving cartridges in the library–step 4. 7. - Page 114 Chapter 5 — Cartridge Use 2. Using a #3 Phillips screwdriver, remove one of the tape drive cover plates. Set the plate and screws aside for future use. Screw (2x) Plate Figure 87 Adding a Cartridge Capacity Sled. 3. Insert the cartridge into the expansion slot with the bar code label facing toward the inside of the library and the open triangle toward the top.
- Page 115 Add or Remove a Cartridge Capacity Sled The library performs inventory on the new slot(s). Expansion slots located at back of library Left-side magazines Right-side magazines HH tape drive Bottom Bottom Access port 3-slot option 2-slot option 1-slot option 1-slot FH option 2-slot FH option Cover plate HH tape drive...
- Page 116 Chapter 5 — Cartridge Use 1. Remove the cartridges in the expansion slots from any partitions that they report to prior to removing the sled from the library (Configuration > Partitions). 2. Use the inventory screen to move the cartridge out of the sled to a different slot (General >...
- Page 117 Add or Remove a Cartridge Capacity Sled 7. Replace the tape drive cover plate that you removed when you initially installed the sled. Screw (2x) Plate Figure 91 Replacing the tape drive cover plate. Do not leave any openings uncovered. All openings must be covered for safety and Caution for proper library cooling.
- Page 118 Chapter 5 — Cartridge Use Notes User Guide 90970015...
-
Page 119: Partition Configuration Overview
You can add SLS support by purchasing an activation key from Spectra Logic. When partitions are enabled, each partition Has exclusive access to the tape drive and slots assigned to it Can control the transporter to move media within the partition The library requires, at a minimum, one partition. - Page 120 Chapter 6 — Partition Management Helping Data Center Efficiency In some environments, partitioning the library into multiple virtual libraries is crucial to data center efficiency and growth. For example, multiple partitions are extremely useful in the following situations: Mixed Backup Software Packages. If groups within your company use different backup software packages, each software package requires its own dedicated library.
-
Page 121: Create A New Partition
Create a New Partition REATE A ARTITION Note: If all of the enabled slots and tape drives in your library are already assigned to an existing partition, you must modify or delete one or more partitions to provide slots and tape drives for the new partition. - Page 122 Chapter 6 — Partition Management Manually create a partition—to examine and edit current partition settings, or to create the first library partition manually, follow these steps: 1. Log in as a superuser or administrator. 2. Select MENU > Configuration > Partitions. The Partitions screen appears (Figure 92).
- Page 123 Create a New Partition You may chose to change the tape drive that receives and processes robotic commands. Select a tape drive to operate as the exporter of robotic commands. This is how the host communicates with library robotics. Figure 94 The Exporter screen. Note the emulation that is reported to the host system: the default SPECTRA PYTHON.
- Page 124 Chapter 6 — Partition Management Editing Slots and Tape Drives To edit slots and tape drives: 1. From the Exporter screen, select Next. The Chambers & Drives screen appears (Figure 97). The line at the top of the screen describes how many total slots are available to assign to the partition.
-
Page 125: Configuring Encryption
Create a New Partition Configuring Encryption As long as the partition is using an LTO-4 tape drive, you can enable encryption for the partition and assign one or more encryption keys to it. See the Spectra BlueScale Encryption User Guide for detailed information about enabling and configuring encryption for a partition. - Page 126 Chapter 6 — Partition Management Specifying Partition Users To specify partition users: 1. In the Chambers and Drives screen or the Encryption screen, select Next. The Partition Users screen appears (Figure 98). Figure 98 The Partition Users screen. 2. Select the users who will have access to the partition. Note: The Allow only list is a list of operators only.
- Page 127 (Figure 101). Figure 101 The Save Library Configuration screen. 2. Select whether to save the current library configuration. Spectra Logic recommends saving your partition configuration settings. If you want to save the configuration, choose whether to save it to USB...
- Page 128 Chapter 6 — Partition Management 3. Select Next. The Save Partition screen displays (Figure 102). Note: The Save Partition screen on your library may be different from the one shown in Figure 102. The information on this screen varies depending on the type of partition you have configured. Figure 102 The Partition summary screen.
- Page 129 Create a New Partition 5. Select Save. The library requires several minutes to store the configuration information, after which the Shared Library Services screen re-displays (Figure 103) with the partition you just created added to the list of partitions. Figure 103 The Partition List screen. 6.
-
Page 130: Modify An Existing Partition
Chapter 6 — Partition Management ODIFY AN XISTING ARTITION If you currently have configured partition(s) with the Shared Entry/Exit Port Mode option enabled, you must reconfigure and save the partition(s) to use the Queued Ejects option (Configuration > Partitions > Chambers and Drives). -
Page 131: Delete A Partition
Delete a Partition ELETE A ARTITION When you delete a partition, the tape drives and slots previously assigned to that partition can be reassigned to an existing partition or used to create a new partition. Before deleting a partition, either physically export the cartridges stored in the Caution slots for that partition or have a plan to add the slots to another partition. - Page 132 Figure 106 The Delete Partitions Confirmation screen. 4. Select whether to save the current library configuration. Spectra Logic recommends saving your partition configuration settings. If you select to save the configuration, choose whether to save it to USB...
-
Page 133: Autosupport Overview
Chapter 7 AutoSupport This chapter describes how to configure and use AutoSupport with your library. All AutoSupport functionality is included with your library purchase. Task Described on... AutoSupport Overview page 133 below Configure AutoSupport page 135 Use AutoSupport page 141 UPPORT VERVIEW AutoSupport configures the library to automatically contact library users... - Page 134 Chapter 7 — AutoSupport Critical Alarms – Provides additional methods for submitting ASL sets to pre-configured recipients. You can configure the library to automatically generate and submit Auto Support Log sets whenever any of the following critical alarms occur (Motion Restart through Library Controller Fails to Initialize).
-
Page 135: Configure Autosupport
AutoSupport, use the RLC or a USB keyboard attached to the LCM. Getting Started with AutoSupport Configuration Before you configure AutoSupport, Spectra Logic recommends connecting the library to an email gateway. You will need the following: Connect a10BaseT/100BaseT Ethernet cable to the Ethernet connector... - Page 136 Chapter 7 — AutoSupport If not already completed, configure the mail recipients who should receive AutoSupport information (see Configuring Mail Recipients on page 135). 2. From the toolbar menu, select Maintenance > AutoSupport. The AutoSupport screen displays. Note: If you have not yet configured an AutoSupport profile, the Send Log Set button will be grayed out.
- Page 137 5. Select Next. The Contact Information screen displays. Figure 110 AutoSupport Contact Information screen. Enter the information for your contact person in the fields provided. This information determines how Spectra Logic contacts this person. 6. Select Next. The System Information screen displays (Figure 111).
- Page 138 Chapter 7 — AutoSupport 8. Select Next. The Summary screen displays (Figure 113). Verify that all of the information shown is correct. Figure 113 The Profile Summary screen. If any information needs to be changed, select Previous to display the screen in which the changes need to be made.
- Page 139 Configure AutoSupport Deleting AutoSupport Profiles Follow these steps to delete an existing profile. 1. Log into the library with superuser or administrator privileges. 2. From the toolbar menu, select Maintenance > AutoSupport. The AutoSupport screen displays (see Figure 107 on page 136).
- Page 140 Chapter 7 — AutoSupport You can specify the threshold for the number of failed drives in a partition that will cause an AutoSupport ticket request to be generated. The threshold is a percentage of drives assigned to the partition. You can choose 25% and 50%;...
-
Page 141: Use Autosupport
Advanced Service Options on page 226), call SpectraGuard Technical Support after submitting the AutoSupport ticket (see Contacting Spectra Logic on page 1. If you plan to save the ticket information to a USB device, insert the device into the LCM’s USB port (see Figure 121). - Page 142 Chapter 7 — AutoSupport 3. From the toolbar menu, select Maintenance > AutoSupport. The main AutoSupport screen displays (Figure 120). Figure 120 The main AutoSupport screen. 4. Select Send Log Set. The AutoSupport Select Profiles screen displays (Figure 121). Bob User Figure 121 AutoSupport Profiles screen.
- Page 143 Use AutoSupport 7. In the Description screen (Figure 123), type a detailed description of the issue in the Description field, including what happened just before the failure occurred. Figure 123 The Description screen. 8. Select Next. If desired, you can override your AutoSupport profile information.
- Page 144 When completed, the AutoSupport Profiles screen displays. When Spectra Logic receives the request, a ticket is opened and an email response is sent to the user with a ticket number. A support technician evaluates the ticket’s urgency as well as the level of the user’s service agreement, then telephones the user promptly.
-
Page 145: Updating Existing Support Tickets
Use AutoSupport Updating Existing Support Tickets Follow these steps to update a ticket that you have already opened with SpectraGuard Technical Support. Updating a ticket is particularly useful for mailing new logs to Technical Support. Note: You must have the reference number for the existing ticket— which you receive when you open the ticket—and the information you are sending must relate to only that ticket. - Page 146 When completed, the AutoSupport Profiles screen displays. When Spectra Logic receives the request, a ticket is opened and an email response is sent to the user with a ticket number. A support technician evaluates the ticket’s urgency as well as the level of the user’s service agreement, then telephones the user promptly.
-
Page 147: Bluescale Media Lifecycle Management Overview
Chapter 8 Media Lifecycle Management This chapter describes how to use BlueScale Media Lifecycle Management to proactively monitor the health of media in your library. Task Described on... BlueScale Media Lifecycle Management Overview page 147 (below) Configure Media Lifecycle Management page 149 Media Lifecycle Management Best Practices page 150... - Page 148 Spectra Logic Certified Media (LTO-3 and LTO-4) and MLM LTO cleaning cartridges from Spectra Logic. Before shipment, Spectra Logic writes baseline data, including its bar code information and the date on which the media was certified, to the memory chip embedded in each cartridge.
-
Page 149: Configure Media Lifecycle Management
153). Option Description Enable Alerts for Generates an alert message when tapes that are not Spectra Logic Certified Non-Certified Media Media are loaded into a tape drive. Enable Alerts for Generates an alert message when the load count for the cartridge stored in the... -
Page 150: Media Lifecycle Management Best Practices
Chapter 8 — Media Lifecycle Management Option Description Minimum Cleaning Sets the threshold for the minimum number cleaning passes remaining on a Passes Before cleaning cartridge. The default value is zero (0). Warning When a cleaning cartridge reaches threshold, a warning message is generated showing that the cleaning cartridge is nearly expended. - Page 151 MLM database but none of the other data has changed. This type of discrepancy can indicate that the tape has been loaded into a non-Spectra Logic library. Use this alert as a security feature to let you know when a tape was removed and loaded elsewhere.
- Page 152 Only use your MLM-capable media and cleaning cartridges in MLM- compatible libraries and tape drives. For the most accurate tracking, do not load your MLM-capable media into non-Spectra Logic libraries or drive generations lower than LTO-4. The memory chip in the...
-
Page 153: Use Media Lifecycle Management
After you enable Media Lifecycle Management (see Configure Media Lifecycle Management on page 149) and load Spectra Logic Certified MLM media and cleaning cartridges into the library, BlueScale MLM writes the cartridge bar code information and other information about the library to the cartridge’s memory chip and to the library’s MLM database the first... - Page 154 Chapter 8 — Media Lifecycle Management Another MLM report shows you the remaining uncompressed storage capacity for the MLM-compatible media (Figure 129). You can view information for the entire library or by individual partitions. Note: Until a cartridge is loaded into a tape drive the first time and then unloaded, its capacity is not included on the Filled Capacity bar graph.
-
Page 155: Generating Media Lifecycle Management Reports
Load Count Shows the load count for each cartridge in the selected location and the born on date (the date on which the Spectra Logic certified the MLM cartridge). Write Errors Shows the number of soft errors and load count for each cartridge. - Page 156 Chapter 8 — Media Lifecycle Management 4. Select Go. The Media Lifecycle Management Report screen refreshes to display the selected report with a list of the bar code labels for all media in the selected location. A media health icon (see Figure 128 on page 151) indicates the overall health of each piece of media, as of the...
-
Page 157: Saving An Mlm Report
Use Media Lifecycle Management 5. To view detailed information about a specific tape, select the Barcode label for the cartridge. The Details screen for the selected tape displays. Note: Media health is based on the history of the cartridge. The heath indicated by the Health graph may fluctuate until the cartridge has been loaded six times. - Page 158 Note: Do not use the default autosupport@spectralogic.com email recipient. Spectra Logic does not save emailed MLM report files unless they are specifically requested by SpectraGuard Technical Support for troubleshooting. Save to USB Save the report to the USB key.
-
Page 159: Back Up The Mlm Database
P THE ATABASE After using MLM for some period of time, Spectra Logic strongly recommends backing up the MLM database to a USB key. In the event of a disaster, you can use the backup files to restore the MLM database... - Page 160 Chapter 8 — Media Lifecycle Management 6. Scroll down and select Save MLM Database > Select. The screen refreshes to show the details for the utility. Select Next. Figure 132 The Save Library Configuration utility. 7. Use the drop-down list to choose the destination for the saved file. Figure 133 The Save Library Configuration destination screen.
- Page 161 Back Up the MLM Database Verifying the MLM Database Backup After performing the MLM database backup, confirm that the backup file was generated. Make sure the file is more than 0 bytes in size. Backup Saved to a USB Key 1.
-
Page 162: Restore The Mlm Database
Chapter 8 — Media Lifecycle Management MLM D ESTORE THE ATABASE Follow these steps to restore the MLM database from a previously saved backup that was created using the Save MLM Database utility (see Back Up the MLM Database on page 159). -
Page 163: Bluescale Encryption Overview
Chapter 9 Encryption Configuration and Use This chapter describes configuring and using BlueScale Encryption Basic Edition, which is included with the T50e library. For information about using BlueScale Professional Edition, see the Spectra BlueScale Encryption User Guide. This guide also provides useful information about encryption best practices. - Page 164 Chapter 9 — Encryption Configuration and Use Together, these components let you easily implement the strongest encryption available, as recognized by the federal government: AES encryption using a 256-bit key. BlueScale Encryption incorporates multiple layers of security, some of which are discussed in this chapter. Others are technically implemented and invisible to the user.
- Page 165 BlueScale Encryption Overview Feature Standard Edition Professional Edition Compatibility Data encrypted using either version can be decrypted by a library running between Versions the other version. Data encrypted and compressed by a library using LTO-4 tape drives, Professional Edition, or both, can be decrypted and decompressed by a library running Standard Edition.
- Page 166 Superuser Login/Encryption Passwords Passwords are the standard method of user security that restricts access. To use Spectra Logic BlueScale Encryption, you must first log into the library with superuser privileges, then enter an encryption password. The encryption password lets you access the library’s encryption features.
- Page 167 BlueScale Encryption Overview Password(s) for Key Import and Export Passwords are also used to encrypt keys for export and when importing previously exported keys. This feature is only available after you log into the library as a superuser and enter the encryption password. Your site may want to consider whether to create different rules for these passwords, such as requiring that these passwords are longer than the encryption access password(s), and therefore more secure.
-
Page 168: Configure Encryption
Chapter 9 — Encryption Configuration and Use Security Considerations Data sets requiring None. A single partition for encrypted data is sufficient. isolation Key escrow Staff at company will escrow keys at a site remote from the data storage method location. Copies of each key Keep three copies of each key: one with the senior IT administrator, one with to store and their... - Page 169 Configure Encryption Logging Into the Encryption Application 1. Log in as a superuser, then select Security > Encryption. The Encryption User Login screen displays (Figure 135). Figure 135 The Encryption User Login screen. 2. Select OK. No login or password is required the first time you log in. The Encryption Configuration screen displays (Figure 136).
- Page 170 Chapter 9 — Encryption Configuration and Use Configuring the Encryption Initialization Mode and Password 1. From the Encryption Configuration screen, select Configure. The Encryption Users screen displays (Figure 137). Figure 137 The Encryption Users screen. 2. Determine whether to establish Single User Mode or Multi-User Mode based on your requirements.
- Page 171 Configure Encryption Encryption Settings for a Multiple Users Figure 139 The Encryption Settings for Multi-Users screen. 3. Select the initialization mode you want to use: Standard Mode – When the library is powered on during startup, data can be backed up to partitions that support encryption without entering an encryption password.
-
Page 172: Creating An Encryption Key
Chapter 9 — Encryption Configuration and Use 4. In the New Encryption User Password field, type in a password, using any combination of the numbers 0–9, lower and upper case alphabetic characters (a–z and A–Z), and the “at” sign (@), dash (–), underscore (_), and colon (:) characters. -
Page 173: Assign The Encryption Key To A Partition
Assign the Encryption Key to a Partition 3. Select OK. The Encryption Configuration screen displays with a confirmation showing the moniker for the newly created encryption key and a message reminding you to create a copy of the key for safekeeping. -
Page 174: Export And Protect Encryption Keys
Chapter 9 — Encryption Configuration and Use 1. Log in as a superuser, then select Security > Encryption. The Encryption User Login screen displays. 2. Enter the encryption password, then select OK. 3. Select Configuration > Partitions. 4. Select New to add a partition, or select Edit to modify the settings for an existing partition. - Page 175 Export and Protect Encryption Keys 3. Select Export. The Export Type screen displays (Figure 143). Figure 143 Exporting an Encryption Key. 4. Select either Export Single File to USB or Email Exported Key. If you select Export Single File to USB, plug a USB storage device into the USB port on the LCM (see Figure 10 on page 27).
- Page 176 Chapter 9 — Encryption Configuration and Use Protecting the Key Make sure you track, in conformance with your security plan, where you store the key and who received an email message with the key. Also keep track of the password used when you exported the key. You need the password created when exporting the key the encrypted file Caution...
-
Page 177: Restore Encrypted Data
Restore Encrypted Data Spectra Logic recommends tracking the information listed in the following table for every key that you create. For added security, encrypt the file containing the tracking information. Key Moniker: Detailed Information _______________________ Number of key copies ______ and location of each copy: . - Page 178 Chapter 9 — Encryption Configuration and Use Restoring Encrypted Data from a Key Stored in the Library If the key used to encrypt the data is currently stored in the library, Follow these steps to decrypt and restore the data. 1.
- Page 179 Restore Encrypted Data Figure 144 The Encryption Import Key Selection screen. 4. Select Next. The Import Password screen displays (Figure 145). Figure 145 The Import Password screen 5. Enter the password that was used to encrypt the key when it was being exported, then select Next.
- Page 180 Chapter 9 — Encryption Configuration and Use 3. Select Import Key. The Encryption Key Files Source screen displays. Note that this screen only displays when you are using the RLC. 4. Select Import key from RLC, then select Next. The RLC Encryption Key Upload screen displays.
-
Page 181: Delete An Encryption Key
Delete an Encryption Key ELETE AN NCRYPTION BlueScale Encryption Basic Edition only supports storing a single encryption key in the library. You must first delete the key currently stored in the library before you can create the new key and assign it to one or more partitions (see Assign the Encryption Key to a Partition on page 173). -
Page 182: Recycle Media
Chapter 9 — Encryption Configuration and Use ECYCLE EDIA LTO-4 tape drives require that all data encrypted and written to a single tape use the same encryption key—that is, a single key is associated with all the encrypted data on an individual tape. After encrypted data is written to a tape, the tape drive will not overwrite the data using a different encryption key until you recycle the tape through BlueScale Encryption. - Page 183 Recycle Media 3. Select Recycle. The Select Tapes screen displays. Figure 147 The Select Tape to Recycle screen. 4. Select a tape to recycle, then select Add. The Tapes to Recycle screen appears with the tape displayed in the list. 5.
-
Page 184: Bluescale Professional Edition
Chapter 9 — Encryption Configuration and Use 7. Choose the drive that you want to use to scratch the media, then select Next. The Summary screen displays. Figure 149 The Recycling Summary screen. 8. Verify your selections, then select Recycle to scratch the tapes. CALE ROFESSIONAL DITION... -
Page 185: Library Troubleshooting
SpectraGuard Technical Support. Note: Knowledgebase–For additional suggestions or for troubleshooting problems that are not covered in this guide, search Spectra Logic’s online Technical Support Knowledge Base located at www.spectralogic.com/knowledgebase. The library troubleshooting procedures in this chapter are divided into the following categories: Task Described on... -
Page 186: Check Screen Messages
Chapter 10 — Library Troubleshooting HECK CREEN ESSAGES The first step in troubleshooting is to review the library’s messages, which provide important information about library problems. Follow these steps to view messages: 1. Select the Messages icon on the status bar (Figure 150), which is available from most screens. -
Page 187: Bluescale Hardware Health Monitoring
BlueScale Hardware Health Monitoring CALE ARDWARE EALTH ONITORING This section shows you how to view the current BlueScale Hardware Health Monitoring (HHM) data. Note: You should not typically access or use the Advanced Utilities unless SpectraGuard Technical Support instructs you to do so; treat this utility as you do all other advanced utilities. - Page 188 User list to select the recipient for the report file. Note: Do not use the default autosupport@spectralogic.com email recipient. Spectra Logic does not save emailed HHM report files unless they are specifically requested for troubleshooting. Save results to USB Saves the report to the USB key.
-
Page 189: Host Behavior With Media Compatibility
Host Behavior with Media Compatibility 8. Select Run. After a brief delay, the Utility Results screen displays the current HHM data. Scroll as necessary to view all of the data. Figure 153 The HHM: View Data Utility Results screen. The information includes: General Information (power-on hours) Robotic Moves (moves between drives and slots) 9. -
Page 190: Check The Library Firmware Versions
Figure 154 The Package Update screen. 2. Compare the current package level (circled in Figure 154) to the latest firmware package available for the library on the Spectra Logic Web site. Go to the Spectra Logic web site at www.spectralogic.com/downloads. Note:... -
Page 191: Check Component Firmware Versions
Check Component Firmware Versions HECK OMPONENT IRMWARE ERSIONS Note: This procedure is not necessary or helpful unless recommended by SpectraGuard Technical Support. 1. From the tool bar menu, select Maintenance > Utilities. The Utilities screen displays (Figure 155). Figure 155 The Utilities screen. 2. -
Page 192: Capture Traces
6) for advanced troubleshooting. APTURE RACES Spectra Logic uses traces to help diagnose problems with the library. You only need to capture traces when instructed to do so by SpectraGuard Technical Support. Emailing Trace Results If you plan to email trace results directly from the... - Page 193 Capture Traces 1. From the tool bar menu, select Maintenance > Traces. The LCM Traces screen displays (Figure 159). Figure 159 The LCM Traces screen. 2. Highlight the trace that you want to capture and press Select. 3. Choose any of the following options: Figure 160 The CAN Log screen.
-
Page 194: Restore A Saved Configuration
Chapter 10 — Library Troubleshooting ESTORE A AVED ONFIGURATION If you previously saved the configuration to a USB storage device or uploaded the configuration to a file on a computer (see Manually Backing up the Library Configuration on page 89), this section describes how to restore the previously saved configuration. -
Page 195: Restore The Library Configuration
Restore the Library Configuration Restore Library To Backup Configuration. This utility resets the library to the backup configuration stored on the RCM. The RCM will store a backup configuration when either the Reset to Factory Defaults or Remove All Library Partition diagnostics are run. This utility resets the library when completed. - Page 196 Chapter 10 — Library Troubleshooting 1. If you plan to restore using the zip file containing the auto-save file that was sent as an email attachment, follow these steps to copy it to a USB key; otherwise, skip to Step 2. a.
- Page 197 Restore the Library Configuration Restore Other Configuration Changes The library does not automatically save a backup when you make changes to any of the library configuration settings other than those for partitions. If you made configuration changes after the creation date of the auto save file you used, you will need to use the options in the Configuration menu to repeat those changes after the restore is complete.
- Page 198 Chapter 10 — Library Troubleshooting Select Previous to move backward through the configuration screens until you reach the settings that need correction. Make any necessary corrections, then select Next to move forward through the screens and return to the Save Partition screen. 10.
-
Page 199: Restoring The Mlm Database
Restore the Library Configuration 6. Select Next > Run. After a brief delay, the Utility Results screen appears, showing that the configuration file was uploaded and/or the configuration restored. Note: If you use the Upload Backup Configuration option, you must then run the Restore Library Configuration from Uploaded File utility to restore the library configuration. - Page 200 Chapter 10 — Library Troubleshooting Notes User Guide 90970015...
-
Page 201: View Tape Drive Status Information
General Troubleshooting Tips page 202 Troubleshoot LTO Tape Drives page 203 Note: For additional suggestions or for troubleshooting problems that are not covered in this guide, search Spectra Logic’s online Technical Support Knowledge Base located at www.spectralogic.com/knowledgebase. RIVE TATUS NFORMATION The library’s Drive Details screen provides information about the current... -
Page 202: General Troubleshooting Tips
Chapter 11 — Tape Drive Troubleshooting 2. Select Detail next to the tape drive you want to check. The Drive Details screen displays. Figure 166 The Drive Details screen. 3. Use the information on the Drive Details screen to troubleshoot tape drive problems. -
Page 203: Troubleshoot Lto Tape Drives
2. Refer to the following table to interpret the information on the Drive Details screen. 3. If the tape drive is in an error state, contact SpectraGuard Technical Support (see Contacting Spectra Logic on page Detail Field Description Status Indicates whether the tape drive status is normal or in an error state. - Page 204 Chapter 11 — Tape Drive Troubleshooting Detail Field Description Partition Shows what partition this tape drive is assigned to (see Partition Management on page 119). Connection Shows the connection status: in the example below, it shows that the host is connected directly to this tape drive and that the tape drive’s SCSI ID is 15.
-
Page 205: Update Library Firmware
Note: To access and upgrade the library with the latest firmware package, you must have a current service agreement with SpectraGuard Technical Support. If you have questions about your service agreement, contact Technical Support (see Contacting Spectra Logic on page... -
Page 206: Understanding Firmware Package Support
Confirming the Current Firmware Version Check the version of your library’s firmware package and compare it with the most current version available on the Spectra Logic web site. If a newer version of the firmware is available, proceed with the firmware upgrade. -
Page 207: Updating The Library Firmware
2. Compare the current package level (circled in Figure 169) to the latest firmware package available for the library on the Spectra Logic Web site. If you do NOT have a current service key—If you do not have a current service key, the Package Update button is not visible. - Page 208 Upgrading via a USB Device You can use a USB device that has been sent to you from Spectra Logic, or you can download firmware files from the Spectra Logic Web site onto your own USB device, using your computer.
- Page 209 5. Select the source for the firmware update package you want to use: Select Local for packages already stored on the library’s LCM flash (SD) card. Select Spectra Logic to download a package from Spectra Logic’s server. This option is only available if the library has a configured Internet connection.
- Page 210 8. Select Next. The Save Library Configuration screen displays (Figure 174). Figure 174 The Save Library Configuration screen. Note: Spectra Logic highly recommends that you save a backup of your configuration prior to upgrading your library. 9. Select Next. The Package Select screen displays (Figure 175).
-
Page 211: Managing Firmware Packages
To keep local, in-house copies of all firmware packages that have been (or will be) installed in your library. To set up local package servers: 1. Identify the server or servers to locally store Spectra Logic library firmware packages. Make sure that these servers can access the Internet. - Page 212 Figure 178 The Manage Package Servers screen. Note: Spectra Logic’s online package server is there by default. Microsoft Internet Information Services (IIS) and the UNIX- based Apache server are also supported. 4. Select New. The Package Server screen appears.
-
Page 213: Editing Firmware Servers
Update Library Firmware 6. Select Save. The Manage Package Servers screen reappears, showing the new package server. Figure 180 The updated Package Servers screen. Editing Firmware Servers To edit a server, select Edit next to the server’s name and details. Change the server information as necessary, then select Save. -
Page 214: Update Tape Drive Firmware
IRMWARE The tape drives in the library may occasionally require firmware updates. When they do, Spectra Logic will send you information on when and how to update the tape drives. To ensure that updated tape drive firmware has been properly tested for use in the library, Spectra Logic recommends that you only update tape drive firmware when you receive a notification from Spectra Logic. -
Page 215: Cartridges And Accessories
Appendix A Cartridges and Upgrades This appendix describes items that are available for purchase for use with the Spectra T50e library. To contact a Spectra Logic sales representative at any time, see Contacting Spectra Logic on page Task Described on... - Page 216 Do not use any type of cartridge that has not been approved by Spectra Logic for use in the Spectra T50e library. Spectra Logic only supports cartridges produced by IBM, HP, Fuji, Maxell, Sony, Caution and TDK. For best results, purchase Certified Media from Spectra Logic.
-
Page 217: Library Option Upgrades
Contacting Spectra Logic on page 6). Selected options are also available for purchase from the Spectra Logic online store at www.spectralogic.com/shop. Before Purchasing an Option When purchasing options, you need to provide your library Hardware ID. After you receive an option, you must enable it as described in... -
Page 218: Firmware Upgrades
Capacity upgrades can be purchased at any time from the Spectra Logic Web site. Enable Purchased Options on page 79 for information about enabling newly purchased capacity. -
Page 219: Hardware Expansion And Upgrades
These expansion and upgrade options can be purchased through a sales representative (see Contacting Spectra Logic on page 6). Selected options are also available for purchase from the Spectra Logic online store at www.spectralogic.com/shop. Tape Drives The library accommodates one or two full-height tape drives and from one to four half-height tape drives. - Page 220 Appendix A — Cartridges and Upgrades Transporter The library is shipped with the transporter installed. You can replace the transporter at your site to save you the inconvenience of down time. Flash (SD) Card The library is shipped with the Flash (SD) card installed. You can replace the card at your site to save you the inconvenience of down time.
-
Page 221: Appendix B - Service And Support
SpectraGuard ™ Technical Support provides comprehensive on-site maintenance by Spectra Logic’s worldwide support team. Years in the industry have provided the technical support team with extensive experience in diagnosing and correcting problems with libraries, tape drives, operating systems, networks, and backup software packages. -
Page 222: Support Option Features
To use AutoSupport, see Use AutoSupport on page 141. If you need to open a ticket using telephone, email, or the Spectra Logic Web site, follow these steps: 1. Note the problem, including what happened just before the failure occurred. -
Page 223: Rma Returns
RMA R ETURNS Your Technical Support representative may ask you to return a problem component to Spectra Logic for servicing. To return a library component for service: 1. Place the prepaid red and white shipping label that was included with the replacement component in a visible location on the outside of the shipping carton. -
Page 224: Repair Policy: Warranty
OLICY ARRANTY Spectra Logic warrants the library to be in good working order for a period of one full year from the date of shipment from Spectra Logic or an authorized Spectra Logic dealer. Should this product fail to be in good... -
Page 225: Standard Service
United States and the European Union, is described here: Telephone access to a Technical Support representative from 8:00 a.m. to 5:00 p.m. local time Monday through Friday, excluding Spectra Logic holidays. If the SpectraGuard Technical Support representative determines that the library requires repair, an on-site service provider is dispatched. -
Page 226: Advanced Service Options
ASM can be purchased to supplement either Next Business Day On-Site Service or Four-Hour Response On-Site Service. ASM allows for a select group of parts to be stocked at the customer’s site, in turn allowing the customer to make immediate repairs with telephone assistance from Spectra Logic. User Guide 90970015... -
Page 227: Appendix C - Specifications
Specifications This appendix provides specifications for the Spectra T50e library and LTO tape drives, as well as the media (cartridges) used in the library: Task Described on... Library Specifications page 227 (below) Tape Drive Specifications page 233 LTO Media Specifications page 235 Note: The specifications in this chapter are subject to change without... -
Page 228: Size And Weight
Appendix C — Specifications Data Storage Capacity The T50e library provides flexible storage capacity that expands from a minimum of 10 slots to a maximum of 50 slots. The following table shows the compressed capacity for the library. See LTO Tape Media Specifications on page 235 for information about the capacity of individual cartridges. -
Page 229: Power Specifications
Library Specifications Power Specifications This section describes the power specifications for the library. Input Power Requirements The following table shows the input power requirements for the library with one to four LTO tape drives installed. Each input must be protected by a circuit breaker rated for 15 amps. -
Page 230: Environmental Specifications
Appendix C — Specifications Environmental Specifications This section describes environmental specifications for the library. The library is equipped with internal fans to keep the library’s internal temperature within specifications as long as the operating environment is within specifications. When the library is moved from a cold environment to a warm environment, it Caution should not be used for at least 24 hours. -
Page 231: Shock And Vibration
Library Specifications Shock and Vibration The library will operate normally after experiencing shock loads as specified in the following table. The operating shock levels indicate how much shock the library can withstand while the enclosed tape drives are reading and writing data. The non-operating and storage shock levels indicate how much shock the library can withstand when it is not operating. -
Page 232: Scsi Interface
SCSI Ultra-3 SCSI “LVD” Fast & Wide, 68-pin Micro D female connectors. Note: Although LVD SCSI is compatible with single-ended (SE) SCSI buses, Spectra Logic does not support operating the SCSI LTO tape drives in the library SE bus. VHDCI The LTO-4 SCSI tape drives have two VHDCI connectors. -
Page 233: Lto-4 Tape Drive Specifications
Tape Drive Specifications RIVE PECIFICATIONS This section provides specifications for the LTO tape drives and cartridges supported by the library. Note: LTO tape drives and cartridges are also referred to as Ultrium or LTO Ultrium tape drives and cartridges. The specifications in this section are subject to change without notice. - Page 234 Appendix C — Specifications The BlueScale Encryption and key management interface support for LTO- 4 tape drive encryption is documented in the Spectra Logic BlueScale Encryption User Guide. If you choose not to use BlueScale key management with LTO-4 encryption, you can only take advantage of LTO-4 drive-based encryption using a key management application that supports LTO-4 encryption (if any are available) that runs on a separate host.
-
Page 235: Lto Media Specifications
LTO Media Specifications LTO-3 Tape Drive Specifications Parameter Specification Sustained transfer rate 80 MB/sec native (160 MB/sec compressed) Average file access time 54 seconds Encryption capability WORM capability MTBF 250,000 hours at 100% duty cycle –17 Uncorrected error rate 1 x 10 bits Power consumption 28 watts typical (49 watts maximum) - Page 236 Appendix C — Specifications The following table shows the media read/write compatibility for each LTO tape drive generation supported by the library. LTO Tape Drive Generation LTO-4 Media LTO-3 Media LTO-2 Media LTO-4 Read/write Read/write Read only LTO-3 Unsupported Read/write Read/write LTO WORM Media Certain records retention and data security applications require a Write...
-
Page 237: Tape Media Environmental Specifications
The upper limit applies to the tape drive, not the library. Be sure there is adequate air flow around library at all times. Bar Code Label Specifications for Half-Inch Media The bar code labeling scheme used on Spectra Logic Certified Media uses the bar code symbology of USS-39. You can obtain a complete description... - Page 238 Appendix C — Specifications Figure 183 shows the dimensional specifications for labels with the alphanumeric characters above the bar code. All dimensions are in millimeters (mm). Alphanumeric Bar code start character Edge of cartridge characters Bar code label 16.993 11.1 +0/–.787 minimum 74.092...
- Page 239 LTO Media Specifications Bar Code Specification Details Minimum symbol height is 11.1 mm, measured to the inside of the label’s edge. The wide-to-narrow ratio is 2.75. The narrow element width is 0.432 mm +0.03 mm or –0.076 mm. The nominal width of the wide spaces and bars is 1.188 mm. The inter-character gap is 0.432mm +0.03/–0.076 mm.
- Page 240 Appendix C — Specifications Notes User Guide 90970015...
-
Page 241: Appendix D - Regulatory And Safety Standards
Appendix D Regulatory and Safety Standards When installed in accordance with this guide, the Spectra T50e Library complies with the safety and regulatory agency standards listed in this appendix. Task Described on... Safety Standards and Compliance page 241 below FCC Notice page 242 EU Declaration of Conformity page 242... -
Page 242: Fcc Notice
EU D ECLARATION OF ONFORMITY Spectra Logic Corporation 1700 North 55th Street Boulder, CO 80301 USA declare under sole responsibility that the Spectra T50e Library... - Page 243 EU Declaration of Conformity Directive Compliance (Continued) EN 61000-4-4 1995 + A1:2001, Electrical Fast Transient/Burst EN 61000-4-5 1995 + A1:2001 + A2:2001, Surge Immunity EN 61000-4-6 1996 + A1:2001 + A2:2001, Conducted RF Immunity EN 61000-4-8 1994 + A1:2001, Power Frequency H-field Immunity EN 61000-4-11 1994 + A1:2001, Voltage Dips and Interrupts EN 60950...
- Page 244 Waste of Electronic and Electrical Equipment (WEEE) Directive Note: For information on recycling your Spectra library, please check the Spectra Logic web site. The WEEE symbol on the back of this product indicates that this product meets the European Directive 2000/96/EC on Waste Electrical and Electronic Equipment, known as the WEEE directive.
-
Page 245: Appendix E - Best Practices
Appendix E Best Practices This appendix reviews best practices for operating the library and working with media. Task Described on... Library Metadata Backup page 245 below Media Use page 249 IBRARY ETADATA ACKUP Backing Up the Spectra Library Metadata To ensure the availability of your library and encrypted data, protect library metadata by following the procedures described in this section. - Page 246 Appendix E — Best Practices Email configuration data, encryption keys (which are sent in encrypted form), and your MLM database so you have a copy easily accessible. Save this same data to a USB storage device, using a different memory device each week. 5.
- Page 247 Library Metadata Backup Viewing Saved Configuration Files The following figures show examples of the files that display when you check your USB memory device/email. Encryption key data—T50e_SF2.bsk Note: The screen shown in Figure 185 also includes the SavedMLMDB and SavedConfigs folders T50e_SF2.bsk Figure 185 Encryption key data file.
-
Page 248: Creating Backups Of Your Library Metadata
Appendix E — Best Practices Saved configuration data with the CFG extension located in the folder, where in this \SavedConfigs\<date-time> <date-time> example is 2008-08-20 11_24_06. Figure 187 Saved configuration data files. Creating Backups of Your Library Metadata Use the following methods to create backup copies of all your library’s metadata. -
Page 249: Media Use
Spectra Logic. Selecting the Correct Media Use Only Spectra Logic Approved Tape Media Do not use any media that has not been approved by Spectra Logic for use in the Spectra T50e libraries. To ensure the best possible performance, use Spectra Logic Certified Media. - Page 250 Appendix E — Best Practices Storing Media While in use, cartridges are stored in magazines inside the library. When the cartridges are outside the library, Spectra Logic recommends storing them in TeraPacks. Cartridge bar code label Figure 188 TeraPack with bar code labeled cartridges.
- Page 251 If you plan to ship a TeraPack magazine, make sure that you have a proper shipping container and that you use adequate packing material. The TeraPack carrying cases available from Spectra Logic are designed for safely transporting TeraPack magazines off site and are compatible with Iron Mountain.
- Page 252 Appendix E — Best Practices Notes User Guide 90970015...
-
Page 253: Glossary Of Terms
AutoSupport to quickly and easily contact SpectraGuard. BlueScale• Software available on Spectra Logic libraries that supports library intelligence along with the Spectra Logic encryption solution and key management. A bus is a collection of wires through which data is transmitted from one part of a computer to another (or from one device to another). - Page 254 Glossary of Terms — D A capacity-on-demand feature of Spectra Logic libraries. Purchasing and entering a key code in the library enables additional slots in the Spectra T50e, which provides for additional storage capacity. Direct Attached Storage. DHCP Dynamic Host Configuration Protocol. A protocol for assigning dynamic IP addresses to devices on a network.
- Page 255 Glossary of Terms — H Fibre Channel The ANSI standard that defines an ultra high-speed, content independent, multi-level data transmission interface that can support multiple protocols simultaneously and provide connectivity to millions of devices over copper and/or fiber optic physical media. Fibre Channel provides the best characteristics of both networks and channels using SCSI and other Upper Level Protocols (ULP).
- Page 256 Glossary of Terms — L Local Area Network. A communications network that serves a confined geographical area. It attaches clients (users’ workstations) and servers that hold programs and data shared by the clients. Library Controller. The graphical user interface for the library, which can be accessed from the library’s touch screen or through a keyboard and monitor connected to the LCM.
- Page 257 Compare to partition. Remote Library Controller. Remote management for the library. Using a specific IP address, the library can be managed using a Web browser. Return Materials Authorization. Required by Spectra Logic for the repair or exchange of any library components. robot See transporter.
- Page 258 A small form-factor pluggable (SFP) is a compact optical transceiver used in optical communications for both telecommunication and data communications applications. Shared Library Services. A feature of Spectra Logic libraries that allows users to allocate the library’s resources across various platforms by creating distinct partitions. See partition.
- Page 259 Glossary of Terms — T TCP/IP Transmission Control Protocol/Internet Protocol. Provides transport functions to ensure that the total amount of bytes sent is received correctly at the other end. TCP/IP is a routable protocol; IP provides this capability. In a routable protocol, all messages contain not only the address of the destination station, but the address of a destination network.
- Page 260 Glossary of Terms — X Notes User Guide 90970015...
- Page 261 Index auto-save configuration file bar code labels description custom sequences using to restore placement on cartridges AC power library specifications cord and connector types AutoSupport bar code reader specifications about description status LED configure mail recipients location switch and configuring to 139, best practices switch and connector...
- Page 262 See also media auto save specifications, AC cautions power AutoSupport to 139, drive sled weight contacting Spectra Logic executing firmware updates backup using auto-save main offices during backups configuration sales library placement feature technical support media...
- Page 263 LC email enabling for automatic using soft keyboard configuration save environmental specifications file data library, operating Spectra Logic media sales compressing before library, shipping and encryption Spectra Logic sales storing library capacity technical support tape media restoring trace results...
- Page 264 Index – G firmware importing encryption keys in BlueScale Encryption Standard configuring a package Edition server handling media through the RLC copying from USB storage best practices, tape device importing media Hardware Health Monitoring current levels, individual individual components cartridges See HHM current levels, library importing media via Bulk...
- Page 265 Index – L keyboard library library continued touch screen AC power connectors saving the configuration to 91, using a web browser adding capacity using external auto save security, configuring configuration Knowledge Base users changing configuration about serial number location settings accessing settings changing logged in user...
- Page 266 Index – M location media continued menu options continued LCM USB port best practices Encryption lock (shipping) Born on Date report, General Status Log Forwarding Inventory carrying cases description Mail Users caution See also AutoSupport Metrics Certified Media log set forwarding environmental specifications, configuring MLM configuration...
- Page 267 MLM. See Media Lifecycle System Setup screen Management phone numbers viewing currently modes, encryption enabled Spectra Logic offices secure initialization, no Spectra Logic sales encryption on Spectra Logic technical startup support standard initialization, placing the library, caution...
- Page 268 Index – R power supplies continued regulatory agency compliance purchasing remaining capacity, MLM status LEDs safety agency remote access power switches, main AC, compliance description entering information sales, contacting privileges, security exporting encryption Save Library Configuration profiles in AutoSupport Utility importing encryption creating to backup library...
- Page 269 Index – T Shared Library Services (SLS) Spectra Logic superuser virtualization contacting sales default user See SLS main offices deleting last shipping manuals, obtaining privileges library environment technical support support shipping lock web shopping firmware packages shipping the library web site, main...
- Page 270 Index – U technical support continued troubleshooting continued user interface using Knowledge Base library problems attention required notification library, using Knowledge web site Base AutoSupport screen, description TeraPack messages command processing capacity typing progress bar cover using a web browser description 15, 20, description...
- Page 271 Save Library interoperability users Configuration interoperability tables adding new Knowledge Base Administrator shop changing logged in Spectra Logic home configuring Spectra Logic sales configuring library VCCI (Japan) security technical support vertical axis, description deleting web sites virtual library...
- Page 272 Index – W Notes User Guide 90970015...
Need help?
Do you have a question about the T-Series Spectra T50e and is the answer not in the manual?
Questions and answers