Spectra Logic T-Series Spectra T50 User Manual
Spectra logic t-series spectra t50: user guide
Hide thumbs
Also See for T-Series Spectra T50:
- Release note (22 pages) ,
- Quick start (2 pages) ,
- User manual (166 pages)
Table of Contents
Advertisement
Quick Links
Advertisement
Table of Contents

Related Manuals for Spectra Logic T-Series Spectra T50


Summary of Contents for Spectra Logic T-Series Spectra T50
- Page 1 Spectra T50 Library User Guide PN 90970000 Revision C...
-
Page 2: Spectra Logic Contact Information
If you do not agree to the above, do not use the Spectra library; instead, promptly contact Spectra Logic for instructions on how to return the library for a refund. - Page 3 License You have acquired a Spectra library that includes software owned or licensed by Spectra Logic from one or more software licensors (“Software Suppliers”). Such software products, as well as associated media, printed materials and “online” or electronic documentation (“SOFTWARE”) are protected by copyright laws and international copyright treaties, as well as other intellectual property laws and treaties.
-
Page 4: Warnings And Cautions
Warnings and Cautions AC Power Warning: Risk of electrical shock. Use caution when removing the library’s cover. Spectra Logic recommends turning off the power to the library before removing the cover. Battery Warning: There is a risk of explosion if the LCM battery is replaced by an incorrect type. -
Page 5: Table Of Contents
Contents Contents Chapter 1. Introduction About This Guide ..........7 Library Overview . - Page 6 Chapter 5. Configuring Library Settings Library Settings ..........28 Network Settings .
- Page 7 Contents Chapter 9. Best Practices Using the Library Controller ......... 73 Getting Library Information Quickly .
- Page 8 Contacting Spectra Logic Sales ........
- Page 9 Library Data Storage Capacity ........
- Page 10 Contents...
-
Page 11: Chapter 1. Introduction
• The Spectra T-Series Library Developer Guide provides detailed information about the SCSI and Fibre Channel commands used in the library. • The Spectra Logic BlueScale Encryption User Guide provides detailed information about how to use BlueScale Encryption with the library. -
Page 12: Library Overview
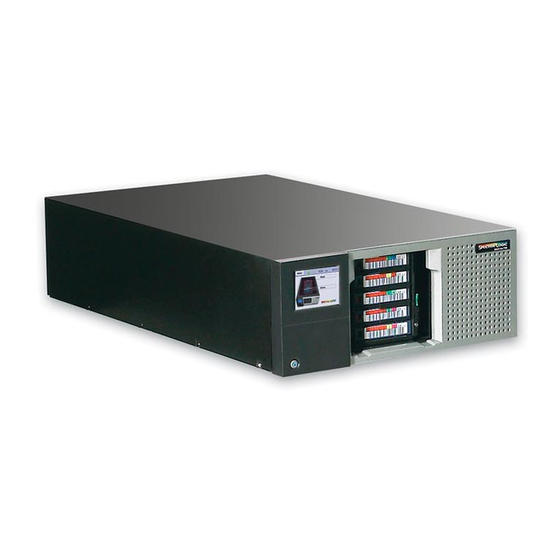
Library Overview This overview of the library includes information on The Physical Library, below, and Library Management on page 11. The Physical Library Figure 1-1 shows the components of the Spectra T50 library that are important in configuring and using the library. Power Library Controller Button... -
Page 13: Available Configurations
On the LC, each TeraPack magazine is referred to as a chamber. Adding Capacity Additional slots (in groups of five) can be added at any time using CoD, the library’s capacity-on-demand feature. Simply use Spectra Logic’s Web site to purchase a CoD option key and the appropriate number of TeraPack magazines. - Page 14 Air Filter The Spectra T50 library lets you install an optional air filter, as shown in Figure 1-2. Figure 1-2 The Spectra T50 air filter (left) shown installed on the library (right). To purchase air filters, contact your sales representative (see Contacting Spectra Logic Sales on page 126).
-
Page 15: Library Management
Library Management Library management in the Spectra T50 library provides maximum configurability and ease of use. To take full advantage of the library’s versatility, read the following overview of the library’s management features. Library Controller On the front of the library, the Library Controller (LC) is a color touch screen with an intuitive graphical user interface... - Page 16 When the library is set up with access to the Internet, the bottom portion of the RLC displays technical tips, allows one-click access to Spectra Logic’s Knowledge Base, streamlines the online ordering of media and capacity, and more. Online access can be enabled or disabled during any browser session;...
- Page 17 Chapter 1. Introduction Advanced Communication across the Environment: Simple Network Management Protocol (SNMP) allows the user to retrieve general information and messages and select the hosts to which notifications of new system messages are sent. Figure 1-4 An example of Observatory’s centralized remote management capabilities.
- Page 18 Storage Slots Figure 1-5 An example of how a library divides slots into storage slots and EE slots. Note that EE slots are not configured by default; these are configured by the user in five-slot increments.
- Page 19 Shared Library Services (SLS) technology simplifies storage consolidation with no external software or hardware. Each partition allows access to the drives and slots assigned to it. In some environments, partitioning is crucial to efficiency and growth.
-
Page 20: Chapter 2. Getting Started
2 Getting Started By following the directions on the Spectra T50 Library Quick-Install poster that accompanied your library, you have already completed most of these steps. The following sections describe the steps involved in first using the library: • Library Power, below •... -
Page 21: Logging In
Logging In As the library initializes, the LC’s main login screen appears, with the keyboard expanded at the bottom of the screen (Figure 2-2). Caution: Do not use sharp objects to navigate the LC. Use the stylus provided with your library. 1. -
Page 22: Interpreting The Library Controller
Interpreting the Library Controller The LC on the library’s front panel is a touch screen. Use the stylus included with your library to select menus and icons on the front panel. When using the Remote Library Controller (RLC), the same interface displays in a Web browser, where you select menus and options with a mouse. -
Page 23: Status Messages
Status Bar The status bar (Figure 2-6) at the top of the LC provides useful library information. Menu Status Figure 2-6 The status bar as it is displayed on the LC. Status Messages The Status icon shows the status of library components, using these designations: Symbol Description A check mark in green... -
Page 24: Progress Bars
Chapter 2. Getting Started Progress Bars If a horizontal progress bar displays along the bottom third of the screen (as shown in Figure 2-7), the library is busy processing a command. Do not use the touch screen until the progress bar disappears. Progress Bar Figure 2-7 Progress bar indicating that the library is busy. -
Page 25: Chapter 3. Library Security
The Security menu also enables you to protect your data from unauthorized access by setting up and using BlueScale Encryption. After configuration, BlueScale Encryption automatically encrypts data as it backs it up. For more information on BlueScale Encryption, see the Spectra Logic BlueScale Encryption User Guide. Locking the LC You can control access to the LC by logging out of the LC when you are done using it. -
Page 26: User Types And Privileges
Chapter 3. Library Security User Types and Privileges Assign each library user to one of the three groups, defined below. Each group has its own set of privileges, also referred to as permissions. One default user per group is already configured (as shown in Figure 3-2). No password is required for any of the three default users until the user and the user’s password have been configured, as described later in this chapter. -
Page 27: Adding A New User
Adding a New User To add a new user: 1. Make sure you are logged in as a member of the superuser group. 2. Select Security > Users. The Edit Users screen appears (Figure 3-2 on page 22). 3. Select New. The New User screen appears (Figure 3-3). Figure 3-3 The New User screen. -
Page 28: Editing An Existing User
Editing an Existing User To change settings for an existing user: 1. Make sure that you are logged in as a superuser. 2. Select Security > Users. The Edit Users screen appears (Figure 3-2 on page 22), showing a list of library user names. 3. -
Page 29: Chapter 4. Enabling Options
4 Enabling Options If you purchased options—that is, upgrades from the library’s standard configuration, such as encryption, CoD, Observatory, and AutoSupport Level Two—you must enter an option key in the library’s LC or RLC to activate them. Enabling Options To enable library options: 1. - Page 30 5. Enter your option key in the Enter Key field. 6. Select Save. The LC goes through a short series of progress screens, then refreshes to again show the New Option Key screen. 7. If you have more keys to add, repeat Step 4 through Step 6 for each key. The new option key(s) and description(s) appear in a list.
-
Page 31: Chapter 5. Configuring Library Settings
5 Configuring Library Settings Use the Configuration menu (Figure 5-1) to configure or re-configure the library’s system settings, described in the following sections: • Library Settings on page 28 • Network Settings on page 29 • Mail Users on page 31 •... -
Page 32: Library Settings
Note: You must power cycle the library after setting a new web server port. 6. Select whether you’d like the RLC to have online access to Spectra Logic. (For details on online access, see Online Access to Spectra Logic on page 12.) Note that online access can be turned on and off at any time as needed. -
Page 33: Network Settings
The library uses Dynamic Host Configuration Protocol (DHCP) by default. Follow these steps only to change or edit the network protocol. Note: If you plan to use RLC, Spectra Logic recommends setting a static IP address for the library. Before Setting the Static IP Address Make sure of the following: •... - Page 34 Chapter 5. Configuring Library Settings 3. Select Change to Static IP. The Network screen refreshes for the new information to be entered (Figure 5-4). Figure 5-4 The Network screen. • Enter the static address in the Address field. • Enter the subnet mask in the Subnet field. •...
-
Page 35: Mail Users
Mail Users About Mail Users Mail Users Can Receive On-Demand E-Mail Messages from the Library You can configure mail users to receive on-demand output generated by the library. This output may include the results of traces or utilities, for example. (See Figure 8-5 on page 61 or Figure 13-9 on page 115 for examples of how mail users can be used.) Observatory Option Allows Automatic E-Mail Notifications If you have Observatory enabled, you can configure mail users to receive library... - Page 36 Chapter 5. Configuring Library Settings 3. Select New. The New Mail User screen appears (Figure 5-6). Figure 5-6 Both types of New Mail User screens. 4. In the To field, enter the e-mail address of the party to receive messages. Use the full address with the @ symbol, and do not use any spaces in the e-mail address.
-
Page 37: Date And Time
Date and Time The date and time set on the library is used only for library messages; it is not written to tape. To set the date and time displayed on the library: 1. Log in as a user in either the superuser or administrator group. 2. -
Page 38: Iscsi
iSCSI To configure the iSCSI connection: 1. Log in as a user in either the superuser or administrator group. 2. Select Configuration > iSCSI. The iSCSI screen displays (Figure 5-9). Figure 5-9 The iSCSI screen. 3. Select Edit. The iSCSI Network screen displays (Figure 5-10, showing DHCP selected). - Page 39 Chapter 5. Configuring Library Settings 6. Select the frame size. 7. Select Next. The iSCSI CHAP screen displays (Figure 5-11). Figure 5-11 The iSCSI CHAP screen. 8. Configure the iSCSI Challenge Handshake Authentication Protocol (CHAP) settings as is appropriate. Note that the text in the Username field must be fewer than 64 characters in length;...
- Page 40 Chapter 5. Configuring Library Settings 12. Select Next. The iSCSI Summary screen displays (Figure 5-13). Figure 5-13 The iSCSI Summary screen. 13. Verify that the configuration is set up correctly. Select Previous to make any changes, repeating the steps above if necessary. 14.
-
Page 41: Chapter 6. Library Partitioning
6 Library Partitioning This chapter reviews how to add, edit, and delete partitions. When you install and configure the T50 for the first time, you have the option of accepting default partition creation. You can choose to accept it, or manually configure one or more partitions. You can add, edit, and delete partitions at any time after the library is installed and configured. -
Page 42: Creating A New Library Partition
Creating a New Library Partition Initial Partition Settings To examine and edit current partition settings, or to create the first library partition: 1. Log in as a superuser or administrator. 2. Select Configuration > Partitions. The Partitions screen appears (Figure 6-1). Figure 6-1 The Partitions screen. - Page 43 6. You may chose to change the drive that receives and processes robotic commands. Figure 6-3 The Exporter screen. 7. Note the emulation that is reported to the host system: the default SPECTRA PYTHON. Note: Although not recommended, you can create a custom emulation. If you do, work with SpectraGuard Technical Support.
- Page 44 Figure 6-4 The Chambers & Drives screen. 2. Use the - and + to edit the number of storage and EE chambers as well as any drives to add to the partition in addition to the exporting drive.
- Page 45 As long as the partition is using LTO-4 drives, users can enable encryption for the partition and assign one or more encryption keys to it. For more information on BlueScale Encryption, see the Spectra Logic BlueScale Encryption User Guide. To work with encryption: 1.
- Page 46 Specifying Partition Users To specify partition users: 1. In the Chambers and Drives screen or the Encryption screen, select Next. The Partition Users screen appears (Figure 6-7). Figure 6-7 The Partition Users screen. 2. Select the users who will have access to the partition. Note: The Allow only list is a list of operators only.
- Page 47 Assigning Drive IDs To assign drive IDs: 1. In the Drive IDs screen (Figure 6-8 and Figure 6-9), select a SCSI ID or a loop ID that corresponds to each drive’s type. Figure 6-8 The Drive IDs screen for SCSI drives. 2.
-
Page 48: Confirm And Save Partition Settings
Confirm and Save Partition Settings To confirm and save partition settings: 1. In the Save Library Configuration screen (Figure 6-11), select Next. The Summary screen appears (Figure 6-11). Figure 6-11 The Summary screen. 2. Confirm that all settings are correct for this partition’s configuration. •... -
Page 49: Editing An Existing Partition
4. To configure another partition, follow the directions in this section again, starting with Creating a New Library Partition on page 38. Note: You can create another partition only if the library is licensed for that number of partitions, and if there are drives and slots left to allot to another partition. -
Page 50: Deleting A Partition
3. Select Edit. The Name and Media Type screen displays (Figure 6-2 on page 38). This is the beginning of the series of configuration screens. Using information that displays in each screen about the existing partition, edit the settings as necessary. Note that the sequence of steps and screens matches those described in Creating a New Library Partition on page 38, except that you cannot edit the drive type. -
Page 51: Chapter 7. Loading And Unloading Media
Chambers & Drives screen (Figure 7-2) when you configured the library. For example, if you have two chambers in the EE pool and three in storage, then you should have two empty TeraPack magazines and three full TeraPack magazines ready to load into the library. - Page 52 When you first install the library, you may want to quickly fill the storage pool. However, if your backup software requires that it control media imports, proceed to Filling the EE Pool, below.
- Page 53 Entry/Exit Pools and Storage Pools on page 14. To fill the storage pool: 1. Have on hand the appropriate number full TeraPack magazines for the storage pool. These tapes are available for immediate use by the backup software. 2. Select General > Import/Export. The Import/Export screen appears (Figure 7-3).
- Page 54 Figure 7-4 Correct insertion of the TeraPack magazine. 7. Select Continue in the Feedback screen. 8. Repeat Step 6 and Step 7 as many times as is necessary to fill the storage pool. 9. Use your backup software to inventory the library when you are done.
-
Page 55: Exchanging Media
EE pool. You should always use the EE pool to import and export media. However, if you do not use EE pools, you can still exchange media from the storage pool. Follow these steps to exchange media. 1. Select General > Import/Export. The Import/Export screen appears (Figure 7-3). -
Page 56: Accessing Individual Tapes
Accessing Individual Tapes Typically, individual tape moves are handled through backup software. If, in a rare instance, you need to access single tapes through the LC, follow these procedures: • Importing Individual Tapes, below • Locating and Moving Individual Tapes on page 54 •... - Page 57 4. Select Next. The Destination screen appears (Figure 7-7). Figure 7-7 The Destination screen. Anything that shows in the destination list is empty and available, with storage slots indicated by Slot, and EE slots indicated by EE. Note that you can import tapes to storage slots, but it can cause problems with inventory synchronization.
- Page 58 The TAP closes and the Inventory screen reappears. 10. Use your backup software to inventory the library and move the new tapes from the EE pool to the storage pool. Locating and Moving Individual Tapes Note: To ensure that your backup software’s inventory stays synchronized with your library’s inventory, use the backup...
- Page 59 The TAP closes and the Inventory screen reappears. 8. Use your backup software to inventory the library and import the new tapes from the EE pool to the storage pool. Chapter 7. Loading and Unloading Media Figure 7-11 The Destination screen.
- Page 60 Exporting Individual Tapes To ensure that your backup software’s inventory stays synchronized with your library’s inventory, use the backup software to perform all media imports, exports, and moves. To remove one or more individual tape cartridges from the library: 1. Follow the steps under Locating a Tape on page 54. 2.
-
Page 61: Chapter 8. Autosupport
8 AutoSupport This chapter covers the following aspects of the library’s AutoSupport feature: • About AutoSupport, below • Configuring AutoSupport on page 58 • Using AutoSupport on page 67 About AutoSupport The AutoSupport feature helps you maintain your library by using email to automatically assemble data about the library and any of its messages or events. -
Page 62: Configuring Autosupport
• The system is set up with the library’s IP address, subnet, proxy server, etc. 2. You have on hand your Spectra Logic contract number, contact information for someone authorized to work on the library, and the names and versions of the systems and software that access the library. - Page 63 Configuring AutoSupport Before you can take advantage of AutoSupport features, you must configure the users who will be involved in AutoSupport issues. Creating AutoSupport Profiles Follow these steps to create profiles for data center staff who attend to the library— more specifically, for anyone who could be assigned to work with SpectraGuard Technical Support staff to troubleshoot problems.
- Page 64 4. Select Next. The Contact Info screen appears (Figure 8-3). Enter the information for your contact person in the fields provided; this information determines how Spectra Logic contacts this person. Note: Make sure to fill in all of the required fields. You cannot advance beyond these screens if required information is missing.
- Page 65 5. Select Next. The System Info screen appears (Figure 8-4). Complete the information for your library’s system in the fields provided. Note: These fields are not required, but it is important to fill them in. Technical Support needs this information before they can address any issues, so providing it here simply saves you time later.
- Page 66 7. Select the AutoSupport mail recipient(s) from the choices presented. Note: You must select autosupport@spectralogic.com for Spectra Logic to receive your ticket request. Other mail users you select here will receive copies of any ticket requests sent from the library by this contact person, as well as copies of the response(s) sent from Technical Support.
- Page 67 10. If it is correct, select Save. The AutoSupport Profiles screen appears, displaying the newly completed profile. To create another profile, repeat this process. Configuring Options for AutoSupport Level Two Select Manage Scheduled to change the interval at which ASLs and notices are automatically sent to users you’ve selected from the mail profiles.
- Page 68 3. Select Manage Scheduled. The Scheduled AutoSupport Configuration screen displays. Figure 8-8 The Scheduled AutoSupport Configuration screen for AutoSupport Level Two. 4. Set the time and day of the week, then select Save. AutoSend only works if: • A day of the week is selected on the Scheduled AutoSupport Configuration screen.
- Page 69 4. Select Next. The Critical Events: Drive Failures screen displays (Figure 8-10). Figure 8-10 The Critical Events: Drive Failures screen. 5. Select one of the percent values displayed. 6. Select Next. The AutoSupport Events Summary screen appears (Figure 8-11). Figure 8-11 The AutoSupport Events Summary screen. 7.
- Page 70 Editing AutoSupport Profiles, Events, and Schedules To edit profiles, events, and schedules that you have already created: 1. Log in as a superuser or administrator. 2. Select Maintenance > AutoSupport. 3. Select Manage Profiles, Manage Scheduled, or Manage Events. 4. Select any items to be changed and edit them, following prompts as is appropriate.
-
Page 71: Using Autosupport
Using AutoSupport AutoSupport automates the process of opening a support ticket. Along with the ticket request, it automatically sends the library’s serial number, site location, operating system and software information, current configuration, system logs, firmware information, and contact information for data center staff. This section covers how to use AutoSupport to open a support ticket and to update an existing support ticket. - Page 72 3. Select Send Log Set to create or update a support ticket. The Open Ticket screen appears (Figure 8-13). Figure 8-13 The Open Ticket screen. 4. Review the appropriate procedure: • To create a ticket, turn to Creating a New Support Ticket on page 69. •...
- Page 73 Creating a New Support Ticket 1. Select Create a new support ticket, then select Next. The Description screen appears (Figure 8-14). Figure 8-14 The Description screen. 2. Type in detailed information about the issue in the Description field, including what happened just before the failure occurred. 3.
- Page 74 Note: It may take a few minutes for the library to collect traces and then to send the e-mail. When Spectra Logic receives the request, a ticket is opened and an email response is sent to the user with a ticket number.
- Page 75 Updating an Existing Support Ticket To update a ticket that you have already opened with SpectraGuard Technical Support staff (this is particularly useful for mailing new logs to Technical Support), follow these steps. Note: You must have the reference number for the existing ticket, which you received when you opened the ticket.
- Page 76 A progress screen indicates that the ticket request (along with log information) is being sent. When completed, the AutoSupport profiles screen reappears. When Spectra Logic receives the request, the support technician handling that ticket reviews the information, then telephones the user.
-
Page 77: Chapter 9. Best Practices
Follow these guidelines to keep the library’s inventory synchronized with the backup software: • Use your backup software to move tapes between drives and storage/EE slots. • Only use the LC to import and export media through the TAP. • Use your backup software to inventory the library after all imports and exports. -
Page 78: External Keyboard
Entering Information in the LC To enter information requested by the LC, you need access to a keyboard. The Spectra T50 library has three keyboard options, described below. Soft Keyboard Bring up the soft keyboard on the library’s front panel by selecting the keyboard icon (Figure 9-1) in the lower right corner of the touch screen. -
Page 79: Getting Library Information Quickly
Getting Library Information Quickly The quickest way to important library information is through the status bar. Menu Status Figure 9-3 The status bar as it is displayed on the LC. Check the status of messages regularly by selecting the Status icon on the LC’s status bar. This displays the Messages screen (Figure 9-4). - Page 80 2. Display the Metric menu to review available options: you can select the units of power consumption measurement to display and the storage density metric. To determine the library’s storage density, select Storage Density, then select Go. Figure 9-7 Metric options.
-
Page 81: Keeping Firmware Levels Up-To-Date
Chapter 9. Best Practices 3. The Metric: Storage Density screen appears. Use the Unit menu to select units of measurement to use in displaying storage density. Figure 9-8 Metric storage density options. Keeping Firmware Levels Up-To-Date One of the very best practices you can follow is to keep library firmware updated to the most current level available. -
Page 82: Handling And Storing Media
Handling and Storing Media The information provided here is integral to understanding all aspects of media handling and storage. It includes very helpful information and instructions on: • Handling Media Inside and Outside the Library, below • Storing Media Outside the Library on page 79... -
Page 83: Media Quality
Use only approved media in the library. For a list of approved media, see Media and Media Accessories on page 119. Storing Media Outside the Library Spectra Logic recommends using specially-designed storage TeraPack containers to store your media outside the library. -
Page 84: Shipping The Library
Shipping the Library If you need to ship the library from one location to another, follow these steps: 1. Remove all TeraPack magazines from the library before powering down. For instructions on removing TeraPack magazines from the library, see Exporting TeraPack Magazines on page 81. - Page 85 6. Repeat this procedure as many times as necessary, making sure that you have removed all TeraPack magazines from: • All partitions • All storage pools • All EE pools 7. When finished, select Stop Exporting. Chapter 9. Best Practices...
-
Page 86: Chapter 10. Maintaining The Library And Drives
• Replacing the Air Filter on page 88 Cleaning the Front Panel Spectra Logic recommends microfiber cleaning cloths for cleaning the front panel of the Spectra T50 library. If a microfiber cleaning cloth is not available, you can use any clean, non-abrasive cloth or paper towel dampened with a window cleaning solution. -
Page 87: Cleaning Tape Drives
Chapter 10. Maintaining the Library and Drives Cleaning Tape Drives Spectra Logic recommends that drives be cleaned after every 100 hours of use in normal data center environments. Greater frequency—for example, cleaning the drives every 50 hours of drive use—is required in the following situations: •... - Page 88 Chapter 10. Maintaining the Library and Drives Importing the Cleaning Tape To import the cleaning tape: Use only certified cleaning cartridges to clean your tape drives. To import a cleaning tape into the library: 1. On the LC, select General > Inventory.
- Page 89 Find. When the results appear, select the cartridge. Note: CLN is unique to Spectra Logic’s bar-coded cleaning cartridges. Typing CLN in the search field shortens the search. 2. Select Next. The Destination screen appears.
- Page 90 Chapter 10. Maintaining the Library and Drives 3. Select the drive to be cleaned, then select Save. The Move Queue screen appears. Note: The Move Queue screen shown on this page displays the tape by barcode. You can also display it by location by selecting Show Slots.
- Page 91 Enter barcode text to find field and select Find. When the results appear, select the cartridge. Note: CLN is unique to Spectra Logic’s bar- coded cleaning cartridges. Typing CLN in the search field shortens the search. 2. Select Next. The Destination screen appears.
-
Page 92: Replacing The Air Filter
Chapter 10. Maintaining the Library and Drives 4. Select Start Moves. The TAP opens and a Feedback screen appears. 5. Remove the cleaning tape. 6. Place the magazine back inside the library. 7. Select Continue to close the TAP. Replacing the Air Filter If your library has a removable air filter, you should inspect the filter at least once every three months. - Page 93 Chapter 10. Maintaining the Library and Drives 3. Replace the filter element. 4. Replace the filter panel on the library, first snapping in the pegs into the bezel (Figure 10-2). 5. After replacing the filter, clean all tape drives. Figure 10-2 The filter being replaced. Pegs...
-
Page 94: Chapter 11. Library Firmware
11 Library Firmware Firmware packages are groupings of program code that are used to update the library and its components. This section covers the following information: • Firmware Package Support on page 91 • Checking Current Firmware Levels on page 92 •... -
Page 95: Firmware Package Support
One Release Prior to the Current Release Support strongly recommends that customers using the previous release of firmware upgrade to the current release. If the customer is unwilling or unable to do this, Spectra Logic provides patches to the previous release. -
Page 96: Checking Current Firmware Levels
Figure 11-1 The Package Update screen. 2. Compare the current package level (pointed out in Figure 11-1) to the latest firmware package available for the library on the Spectra Logic Web site. i. Go to http://www.spectralogic.com. ii. Select Support > Firmware & Drivers > Library Firmware. -
Page 97: Updating Library Firmware
• All backup processes are stopped before updating the library’s firmware; the LC always reboots after an update, which could affect backups. Spectra Logic recommends disabling the backup software services or daemons. • You have access to the most current library firmware package through one of the following sources: •... - Page 98 Selecting New Firmware to Upload To update the library with the latest firmware package: 1. Select Maintenance > Package Update. The Package Update screen appears (Figure 11-3). Figure 11-3 The Package Update screen. 2. Select Begin Package Update. The License Agreement screen displays. 3.
-
Page 99: Uploading Library Firmware
4. Select an available firmware package source: • Select Local for packages already stored on the library. • Select Spectra Logic to download a package from Spectra Logic’s server. This option is only available if the library has a configured Internet connection. - Page 100 3. Select Next. After some brief progress screens, the Package Details screen appears (Figure 11-7) with details on which components are affected and how. Figure 11-7 The Package Details screen. Note: Do not select Advanced unless you have been advised to do so by SpectraGuard Technical Support.
-
Page 101: Managing Firmware Packages
Remove them after the most recent package has been saved and installed. Deleting firmware files does not delete firmware already applied to library components; it simply removes the firmware package source from local storage on the library. To delete firmware package files from the library’s memory: 1. -
Page 102: Firmware Package Servers
To set up local package servers: 1. Identify the server or servers to locally store Spectra Logic library firmware packages. Make sure that these servers can access the Internet. 2. Select Maintenance > Package Update. The Package Update screen appears. -
Page 103: Editing Firmware Servers
4. Select New. The Package Server screen appears (Figure 11-13). Figure 11-13 The Package Server screen. 5. Fill in the Name, Address, Proxy, and Directory as is appropriate. Note: The name you give the package server is only to distinguish it from other package servers. -
Page 104: Chapter 12. Tape Drive Firmware
Using the Upgrade Drive Firmware Utility on page 106. Internet You can download tape drive firmware directly from Spectra Logic when the library has a connection to the Internet. This type of upgrade takes approximately 45 minutes per drive. To use this method, see Internet or USB Firmware Updates on page 102. - Page 105 USB port on the back of the library. To update drive firmware using a USB key, you must either: • Obtain a USB key from Spectra Logic • Download firmware onto a USB key yourself using a computer. This type of firmware upgrade takes approximately 45 minutes per drive. To use this method, see Internet or USB Firmware Updates on page 102.
-
Page 106: Internet Or Usb Firmware Updates
Internet or USB Firmware Updates Note: Backup software must remain disabled during the drive update. Selecting New Firmware to Upload To update the library with the latest firmware package: 1. Select Maintenance > Package Update. The Package Update screen appears (Figure 12-2). - Page 107 4. Select an available firmware package source: • Select Local for packages already stored on the library. • Select Spectra Logic to download a package from Spectra Logic’s server. This option is only available if the library’s Internet connection is configured and connected.
- Page 108 Uploading Drive Firmware 1. Select Next. The Package Select screen appears (Figure 12-5). Figure 12-5 The Package Select screen. 2. Select the package to which you want to upgrade. Note: You may only select one firmware package. 3. Select Next. After some brief progress screens, the Package Details screen appears (Figure 12-6) with details on which components are affected and how.
- Page 109 4. Select Update. When the update is complete, the Package Results screen appears. Figure 12-7 The Package Results screen. 5. Select Finish. The library reboots. Note that if you are using the RLC to update firmware, you must wait until the LC re-initializes, then re-enter the library’s IP address in your Web browser.
-
Page 110: Using The Upgrade Drive Firmware Utility
Using the Upgrade Drive Firmware Utility Before you begin, note that: • This procedure requires the use of a drive firmware code tape. • This procedure requires that the library be configured with EE slots. • Backup software must remain disabled during the entire drive update. Chapter 12. -
Page 111: Starting The Utility
Starting the Utility To start the utility: 1. Import the drive firmware code tape into an empty EE slot. 2. Select Maintenance > Utilities. The Basic Utilities screen appears. 3. Select Show Advanced. A Confirmation screen appears. 4. Select Yes. The Advanced Utilities screen appears. -
Page 112: Configuring The Utility
Configuring the Utility To configure the utility: 1. Select Next. The Entry 1 of 3 screen appears. 2. Select the partition (if you have more than one partition configured). 3. Select Next. The Entry 2 of 3 screen appears. 4. Select the drive number of the drive that you wish to upgrade, or select 0 for all drives in the selected partition. - Page 113 8. Select any of the following: • Send results to Mail User • Save to USB key (if there is a USB key installed) • Both e-mail and USB options • Neither option 9. Select Run. A progress screen appears while the drive firmware is being updated.
-
Page 114: Chapter 13. Troubleshooting
Use this chapter to find solutions to the most common problems encountered with the library. Note: For additional suggestions or for troubleshooting problems that are not covered in this guide, Spectra Logic recommends that you search the online Technical Support Knowledge Base located at http://www.spectralogic.com/support/kbase/index.cfm/. -
Page 115: Checking Messages
Checking Messages The first step in troubleshooting is to review the library’s messages, which provide important information about operational issues. To view messages: 1. Select the Messages icon on the status bar (Figure 13-1). Figure 13-1 The Messages icon on the status bar. If the green check mark (shown in Figure 13-1) is showing, all processes and components are running normally and there are no messages to be read. -
Page 116: Removing A Blockage Or Obstruction
Removing a Blockage or Obstruction Caution: Do not follow this procedure unless instructed to do so by SpectraGuard Technical Support. To check the inside of the library for a blockage or obstruction: 1. Turn off power to the library. 2. Put an anti-static strap on your wrist and connect it to the back of the library. Caution: Static damage is not covered by the library’s warranty. - Page 117 5. Place the cover in a safe place; do not set anything on top of the cover. 6. Examine the inside of the library (Figure 13-6) for blockages in and around: • The carousel • The TeraPack magazines • The robotic arm •...
-
Page 118: Capturing Traces
Capturing Traces Spectra Logic uses traces to help diagnose problems with the library. Traces should be run only when recommended by Spectra Logic Technical Support. E-Mailing Trace Results If you plan to e-mail trace results to a third party, make sure you have already set up mail users for e-mail notification (see Mail Users on page 31). - Page 119 3. Once you have chosen a trace to run, choose Select. The Trace screen appears for your choice (Figure 13-9 shows a Motion Trace). Figure 13-9 The Trace screen. 4. Choose either or both of the following: • Select Send results to Mail User, then select an e-mail recipient from the drop- down menu to e-mail results to the selected recipient.
-
Page 120: Restoring The Library's Configuration
Restoring the Library’s Configuration To restore the library’s configuration: 1. Select Maintenance > Utilities. The Utilities screen appears. Figure 13-10 The Utilities screen. 2. Select Show Advanced, then select Yes after the Advanced Utility Confirmation screen displays. 3. The Advanced Utilities screen displays; scroll as necessary to display options. Figure 13-11 The advanced utilities. - Page 121 4. Select one of the following, as applicable for your situation: • Restore Configuration from Checkpoint ... is used to get the configuration back after mistakenly running the Reset to Factory Defaults utility. • Restore Library Configuration from USB <in Utilities list> ...
-
Page 122: Appendix A. Media, Accessories, Options, And Upgrades
• How To Order Media and Media Accessories • Upgrades and Options on page 123 • Advanced AutoSupport • Air Filters • CoD • Drive Upgrades • Firmware Upgrades • Library Partitioning • Observatory • Contacting Spectra Logic Sales on page 126 Options, and Upgrades... -
Page 123: Media And Media Accessories
Every Certified Media cartridge and storage TeraPack is uniquely numbered with pre- applied sequential color bar code labels. This ensures that you will never have to deal with a duplicate bar code problem. Spectra Logic’s bar codes carry the same lifetime guarantee that protects each Certified Media cartridge. -
Page 124: Bar Code Labels
Appendix A. Media, Accessories, Options, and Upgrades Bar Code Labels Spectra Logic offers high-contrast, high-resolution labels for reliable operation. For bar code label specifications, see Bar Code Specifications for Half-Inch Media on page 120. Bar Code Specifications for Half-Inch Media... - Page 125 Appendix A. Media, Accessories, Options, and Upgrades The detailed bar code specifications for half-inch media are as follows: • Minimum symbol height is 11.1 mm, measured to the inside of the label’s edge. • The wide-to-narrow ratio is 2.75. • The narrow element width is 0.432 mm +0.03 mm or -0.076 mm. •...
-
Page 126: How To Order Media And Media Accessories
Appendix A. Media, Accessories, Options, and Upgrades How To Order Media and Media Accessories To purchase media and accessories, use the direct online access to Spectra Logic provided in the library’s RLC. If you do not have RLC configured, you can also access the Spectra Logic Web site (www.spectralogic.com) from any Web browser, or simply... -
Page 127: Upgrades And Options
These purchases can be made by using the direct online access to Spectra Logic provided in the library’s RLC. If you do not have RLC configured, you can also access the Spectra Logic Web site (www.spectralogic.com) from any Web browser, or simply contact your sales representative. -
Page 128: Firmware Upgrades
Upgrading the library’s drive type—for example, from LTO-2 to LTO-3 drives, or from LTO-3 to LTO-4 drives—requires that your library be sent in to Spectra Logic for the upgrade. If you are interested in upgrading your drive type, contact your sales representative. - Page 129 System Messages screens. This is a step above the RLC feature that is included with the library, however, because users can view the Spectra T50 library’s functions in combination with those of multiple other Spectra Logic libraries (see Figure A-3). Figure A-3 An example of Observatory’s centralized remote management capabilities.
-
Page 130: Contacting Spectra Logic Sales
Appendix A. Media, Accessories, Options, and Upgrades Contacting Spectra Logic Sales Web Site United States Office European Office Email for Media www.spectralogic.com (800) 833-1132 or (303) 449-6400 Phone (303) 939-8844 E-Mail sales@spectralogic.com +44 (0) 870 112 2150 Phone +44 (0) 870 112 2175 E-Mail eurosales@spectralogic.com... -
Page 131: Appendix B. Service And Support
SpectraGuard Technical Support provides comprehensive on-site maintenance by Spectra Logic’s worldwide support team. Years in the industry have provided the Spectra Logic Technical Support team with extensive experience in diagnosing and correcting problems with libraries, drives, operating systems, networks, and backup software packages. -
Page 132: If You Have A Problem With Your Library
If You Have a Problem With Your Library Before taking any action with SpectraGuard Technical Support, follow these steps. 1. Review the Messages, if possible (see Checking Messages on page 111), and take any action described in the message(s). 2. Review and follow any troubleshooting procedures applicable to your problem (see Troubleshooting on page 110). -
Page 133: Opening A Support Ticket
1. Note the problem, including what happened just before the failure occurred. 2. Gather the following information: • Your Spectra Logic contract number or customer number • Company name, contact name, phone number, and e-mail address • Library model and serial number •... -
Page 134: Rma Returns
RMA Returns If your Technical Support representative asks you to return the library to Spectra Logic for servicing, follow these steps: 1. Obtain a Return Materials Authorization (RMA) number from a Technical Support representative. IMPORTANT: Spectra Logic needs this number to identify the library on its arrival. -
Page 135: Repair Policy: Warranty
Spectra Logic has been advised of the possibility of such damages, or for any claim by any other party. -
Page 136: Advanced Service Options
Spectra Logic library can be replaced the next business day, shipping included. When dispatched by 4:00 p.m. (U.S. Mountain Time) on a business day, a Spectra Logic library will arrive on site the following business day. - Page 137 Four-Hour Response On-Site Service This service includes 24-hour telephone access to a Technical Support representative seven days a week, 365 days a year. Once a Spectra Logic Technical Support representative determines that the library requires repair, an on-site service provider will be dispatched.
-
Page 138: Appendix C. Regulatory And Safety Standards
Appendix C. Regulatory and Safety This chapter includes library regulatory and safety standards as follows: • Safety Standards, below • FCC Notice on page 134 • EU Declaration of Conformity on page 135 • WEEE Directive on page 136 • China on page 137 Safety Standards The Spectra T50 library complies with the following domestic and international product safety standards. -
Page 139: Eu Declaration Of Conformity
Appendix C. Regulatory and Safety Standards EU Declaration of Conformity Spectra Logic Corporation 1700 North 55th Street Boulder CO 80301 USA declare under sole responsibility that the Spectra T50 Library to which this declaration relates, meets the essential health and safety requirements and is in conformity... -
Page 140: Weee Directive
Appendix C. Regulatory and Safety Standards WEEE Directive The following symbol on the back of this product indicates that this product meets the European Directive 2000/96/EC on Waste Electrical and Electronic Equipment known as the WEEE directive. This directive, only applicable in European Union countries, indicates that this product should not be disposed of with normal unsorted municipal waste. -
Page 141: China
Appendix C. Regulatory and Safety Standards China China Measures for the Administration of the Control of Pollution by Electronic Information Products 铅 (Pb) 磁带库 磁带驱动器 IBM LTO-3 磁带驱动器 IBM LTO-4 磁带驱动器 1,5,6 HP LTO-2 半高 电路板焊料含有铅。服务器,存储器和存储阵列系统,用于转接、信号和传输的网络基础 设施设备,以及电信网络管理设备的焊料都含有铅。 2. 电气触点和镉镀层,不包括 76/769/ECC 指令的修订指令 91/338/EE 所禁止的应用,此等指令对某些危险物质的营销和使用列有若干限制条款。... -
Page 142: Appendix D. Specifications
• Power Specifications on page 139 • Library Environment on page 140 • Compatibility on page 141 • Library Data Storage Capacity on page 141 • Library Reliability on page 142 • Tape Drive Attachment Methods on page 142 • Tape Drive Specifications on page 142... -
Page 143: Power Specifications
Power Specifications Electrical Specifications Input Internal DC Voltages Maximum Wattage Power Cable The power cord included with this unit is considered part of this unit and cannot be used with any other equipment. The power cable is a standard three-conductor, 18 AWG power cord, safe for 120-volt use in the United States and Canada. -
Page 144: Library Environment
Library Environment Operating Environment Specifications Temperature Humidity Maximum Wet Bulb Temperature Altitude Storing and Shipping (Non-Operating) Environment Temperature Humidity Maximum Wet Bulb Temperature Altitude Caution: When the library is moved from a cold environment to a warm environment, it should not be used for at least 24 hours. This adjustment period prevents condensation damage. -
Page 145: Compatibility
Compatibility Interface Support You can find a complete interoperability listings in the Compatibility Matrices on Spectra Logic web site. Software Compatibility For the most current listing of the types of software that have been tested and proven compatible with the Spectra T50 library, visit the Compatibility Matrices on Spectra Logic’s web site. -
Page 146: Library Reliability
Library Reliability Reliability Specifications MTBF MCBF Tape Drive Attachment Methods The library has two methods of attaching drives. The table below shows the methods as well as the physical interface needed for each method. Drive Attachment Methods Method Fibre channel drive attach SCSI drive attach Tape Drive Specifications The following tables contain media and tape drive performance specifications for the... -
Page 147: Media Capacity
LTO-4 Media Capacity The tape capacity for LTO-4 media is: 800 GB native, 1600 GB compressed. Note that compression throughput and tape capacity depends on the type of data. Note: All specifications are subject to change without notice. LTO-4 Full-height Drives The Spectra T50 library can be configured with a maximum of two full-height LTO-4 4-Gb SCSI or Fibre Channel drives. - Page 148 LTO-3 Full-height Drives The library can be configured with a maximum of two full-height LTO-3 SCSI or LTO-3 2-Gb Fibre Channel drives. Note that both SCSI and Fibre Channel drives have the same physical specifications except for power consumption. Parameter MTBF Average file access time Uncorrectable error rate...
- Page 149 LTO-2 Media Capacity The tape capacity for LTO-2 media is: 200 GB native, 400 GB compressed. Note that compression throughput and tape capacity depends on the type of data. Note: All specifications are subject to change without notice. LTO-2 Half-height Drives The library can be configured with a maximum of four half-height LTO-2 SCSI drives.
-
Page 150: Glossary Of Terms
BlueScale Software available on Spectra Logic libraries that supports library intelligence along with the Spectra Logic encryption solution and key management. A bus is a collection of wires through which data is transmitted from... - Page 151 Decryption Process of decoding data that has been encrypted. Decryption requires the key that was used to encrypt the information. DHCP Dynamic Host Configuration Protocol. A protocol for assigning dynamic IP addresses to devices on a network. With dynamic addressing, a device can have a different IP address every time it connects to the network.
- Page 152 hardware ID A unique number for the library that is required to purchase options or upgrades. The Hardware ID is located on the New Option Key screen. Host Bus Adapter. It is a device that connects one or more peripheral units to a computer.
- Page 153 (that is, it may be configured to be viewed as one or more partitions). Compare to partition. pools Logical sections within a partition—a storage pool used for backups and restores, and an EE pool for importing and exporting media.
- Page 154 Small Computer System Interface. SCSI is an interface connection used to connect peripheral devices to computer systems. Shared Library Services. A feature of Spectra Logic libraries that allows users to allocate the library’s resources across various platforms by creating distinct partitions. See partition.
- Page 155 TeraPack Access Port. The TAP provides the means through which TeraPack magazines are loaded into and unloaded from the library. TeraPack A media handling element. The 5-slot TeraPack magazine holds cartridges inside the library; the 10-slot storage TeraPack safely stores tapes outside the library. Ticket See support ticket.
-
Page 156: Index
21 mail recipients 31 partitions 37, 38 robotics 39 security 22 users 21 Configuration menu 27 contacting Spectra Logic main offices 2 sales 126 technical support 129 conventions used in this guide 7 cover warnings 4 custom bar codes 120... - Page 157 EU compliance 135 exclamation point icon 19, 111 exporting cleaning cartridges 87 robotics commands 39 single tapes 56 fax Spectra Logic 2 FCC Notice 134 filter replacement 88 firmware current levels 77, 92, 110 on USB key 93, 95, 103...
- Page 158 31 mailing address, Spectra Logic 2 maintenance checking library status 75 cleaning tape drives 83 drive cleaning 83 firmware updates 90 replacing air filter 88 support options 133 management EE pools 78 firmware packages 97 media accessories 122...
- Page 159 139 warnings as conventions 7 components 19 library 4 warranty 131, 132 Web site interoperability tables 141 Knowledge Base 129 sense code lookup 110 shop 122, 123 Spectra Logic 2 technical support 129 X icon 19, 111...
Need help?
Do you have a question about the T-Series Spectra T50 and is the answer not in the manual?
Questions and answers