Spectra Logic T-Series Spectra T24 User Manual
Spectra logic t-series spectra t24: user guide
Hide thumbs
Also See for T-Series Spectra T24:
- Quick start manual (23 pages) ,
- Release note (9 pages) ,
- Product manual (24 pages)
Table of Contents
Advertisement
Quick Links
Advertisement
Table of Contents

Related Manuals for Spectra Logic T-Series Spectra T24


Summary of Contents for Spectra Logic T-Series Spectra T24
- Page 1 S pectra T24 L ® IBRARY User Guide PN 91000000 Revision B...
- Page 2 If you do not agree to this End User License Agreement (EULA), do not use the Spectra Logic product. Instead, promptly contact Spectra Logic for instruction on return of the product for a refund. Any use of the Software, including but not limited to use of the product, will constitute your agreement to this EULA (or ratification of any previous consent).
-
Page 3: Spectra Logic Contact Information
Spectra Logic Contact Information United States Office Spectra Logic Corporation Mailing 1700 N 55th Street Address Boulder CO 80301 Phone (800) 833-1132 or (303) 449-6400 (303) 939-8844 Notices European Office Mailing Address Phone Web Site http://www.SpectraLogic.com Spectra Logic Europe Limited... -
Page 4: Product Warnings
Product Warnings All safety and operating instructions should be read before this product is operated, and should be retained for future reference. This unit has been engineered and manufactured to assure your personal safety, but improper use can result in electrical shock or fire hazards. -
Page 5: Table Of Contents
Contents Chapter 1. Introduction About this Guide ..........9 Library Precautions . - Page 6 Contents Chapter 4. Configuring the Library Setting the IP Address to Start ........30 Logging in to the RLC .
- Page 7 Library Storage Capacity ........
- Page 8 Contents Appendix C. Regulatory & Safety Standards Device Standards ..........84 FCC (United States) .
-
Page 9: Chapter 1. Introduction
1 Introduction About this Guide This guide provides valuable information about the Spectra T24 library, including installation, configuration, operation, and troubleshooting. Intended Audience This guide is intended for system administrators and general users who need physical and functional knowledge of the Spectra T24 library. Conventions Used In This Guide Important information is called out as follows: Note: Provides additional points or suggestions. -
Page 10: Library Precautions
Service • The user should not attempt to service the library beyond the processes described in the instructions provided by Spectra Logic. All other servicing should be referred to qualified service personnel. Chapter 1. Introduction... -
Page 11: Chapter 2. Library Overview
2 Library Overview This chapter provides an overview of the Spectra T24 library, including: • Library Features, below • Library Layout on page 12 • Front Panel Buttons and LEDs on page 13 • Introduction to the RLC on page 14 Library Features Available Configurations The Spectra T24 library is available in configurations of 12 or 24 slots and with 1 or 2... -
Page 12: Library Layout
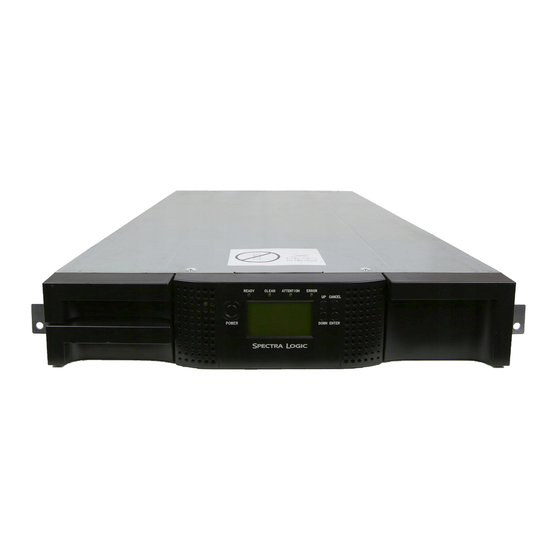
Library Layout Library Front The front of the Spectra T24 library provides access to the power button, the OCP and its buttons, the front panel, the left and right magazines, the LEDs, and the mailslot. READY Power Button Left Magazine Mailslot Figure 2-1 The front of the Spectra T24 library. -
Page 13: Front Panel Buttons And Leds
Front Panel Buttons and LEDs The front of the library consists of the operator control panel (OCP), four push buttons, a power button, and four LEDs that indicate status. Feature Power Turns the library on and off. This monochrome liquid crystal display (LCD) provides information Operator Control Panel about status and current activity, and also displays menus and (OCP) -
Page 14: Introduction To The Rlc
OCP (e.g., messages and logs); it also provides a more efficient means of configuring the library and performing day-to-day operations. Spectra Logic recommends using the RLC as much as possible. Accessing the RLC To access the RLC interface, log in with a password (Figure 2-3). - Page 15 RLC Users The three levels of Spectra T24 library RLC users are described below. Note: Access to certain library operations—like media exchanges and library service—can be controlled on a secondary level by requiring that users enter a PIN on the OCP before these operations can be performed.
- Page 16 RLC Functionality Multiple operations are available through the RLC. Users of all access levels can view library, drive, and inventory information, such as that shown in Figure 2-4. Figure 2-4 The Library Information screen of the RLC. RLC users with Admin or Service access, however, can also use the RLC to: •...
-
Page 17: Chapter 3. Installing The Library
3 Installing the Library This chapter covers the following information: • Library Requirements on page 18 • Preparing the Host on page 20 • Choosing a Location for the Library on page 21 • Unpacking the Library on page 22 •... -
Page 18: Library Requirements
SCSI bus, the library’s performance is limited to the maximum data transfer speed and maximum cable lengths of the SE bus. For these reasons, Spectra Logic strongly recommends that you do not use an SE SCSI bus with the library. -
Page 19: Multiple Lun Support
SCSI HBA for detailed information. Note: Use a SCSI-3 LVD HBA with the Spectra T24 library. To ensure optimum performance, Spectra Logic recommends an Ultra320 HBA for the LTO-3 library and an Ultra160 (or higher) HBA for the LTO-2 library. -
Page 20: Preparing The Host
Preparing the Host Note: Use proper procedures to prevent electro-static discharge (ESD). Use wrist-grounding straps and anti-static mats when handing internal components. Follow these general guidelines: • Make sure that your backup application supports the SCSI HBA. • If the host server is connected to a network, check with the system administrator before turning off power to the server. -
Page 21: Choosing A Location For The Library
Choosing a Location for the Library Choose a location that meets the following criteria. Location Criteria Back: Minimum of 6 inches (15.4 cm) Clearance Front: Minimum of 12 inches (30.8 cm) for mailslot Sides: Minimum of 2 inches (5.1 cm) AC power voltage: 100-127 VAC;... -
Page 22: Unpacking The Library
Unpacking the Library Before you begin, clear a work surface to use while you unpack and set up the library. If you are going to rack mount the library, select an open 2U rack location allowing easy access to the host server and the power outlet. Caution: If the temperature in the room where the library will be installed varies by 30º... -
Page 23: Rack Mounting The Library
Rack Mounting the Library The library easily installs into a standard 19-inch rack taking up 2U (7 inches) of space. Warning: The Spectra T24 library is heavy. To reduce the risk of personal injury or damage to the library: • Obtain adequate assistance to lift the library and stabilize the rack during installation or removal. -
Page 24: Removing The Shipping Lock
Figure 3-3 The label on top of the library; the shipping lock is below. 2. Store the lock and label on the right side of the library’s rear panel (Figure 3-4). Figure 3-4 The storage location of the shipping lock and label. Chapter 3. Installing the Library... -
Page 25: Connecting The Scsi And Power Cables
• An unapproved power cord could fracture, resulting in the internal contacts being exposed, which potentially could subject the user to a shock hazard. Spectra Logic disclaims all liability in the event that a non-approved power cord is used. To connect the SCSI and power cables to the tape library: 1. - Page 26 5. Attach the other end of the SCSI cable to the connector on the SCSI HBA or to the connector on the previous device on the SCSI bus. Note: The host bus adapter should be LVD. An SE SCSI host bus adapter will work for LTO-2 drives, but will severely degrade performance and limit cable length.
-
Page 27: Verifying The Connection
Chapter 3. Installing the Library Verifying the Connection Depending on the server configuration, you may need to change the pre-set SCSI IDs of the library. When the host server is powered on, install the software and/or driver(s) that are compatible with the library. Backup software packages may require additional software or licensing to communicate with the library robotics. -
Page 28: Powering On For The First Time
Magazines: Mailslot: Busy When the initialization sequence is complete, the home screen displays, showing the Spectra Logic logo and the general status. Robotic Busy 3. Plug in the host server or workstation and all attached devices. 4. Turn on any other devices you turned off earlier. -
Page 29: Chapter 4. Configuring The Library
4 Configuring the Library This chapter covers the following information: • Setting the IP Address to Start on page 30 • Logging in to the RLC on page 31 • Changing Passwords on page 32 • Configuring Network Settings on page 34 •... -
Page 30: Setting The Ip Address To Start
Setting the IP Address to Start Before you can use the Remote Library Controller (RLC), you must use the OCP to either note the DHCP address or set the IP address. Note: You can change the address or address method later with the RLC. 1. -
Page 31: Logging In To The Rlc
Logging in to the RLC 1. Open any web browser. 2. Enter the IP address of the library; the login screen appears (Figure 4-1). Figure 4-1 The RLC login screen. 3. Select Admin, as shown in Figure 4-1, and enter the password adm The Library Information screen appears (Figure 4-2). -
Page 32: Changing Passwords
Changing Passwords For security reasons, change the default RLC passwords as soon as you log in for the first time. Changing Passwords Using the RLC 1. While still logged in to the RLC as Admin, select Configuration > User. The User Configuration screen appears (Figure 4-3). - Page 33 4. If you want to secure front panel operations with a PIN code, proceed to Changing the OCP PIN Using the RLC, below. If you do not want to add PIN protection to the OCP, proceed to Step 5. 5. Select Submit, and the screen refreshes. A pop-up window indicates an error changing the OCP PIN, but that the password change was successful.
-
Page 34: Configuring Network Settings
Configuring Network Settings 1. If not already logged in, log in to the RLC as Admin. 2. Select Configuration > Network; the Network Configuration screen appears (Figure 4-4). Figure 4-4 The Network Configuration screen, showing DHCP addressing enabled. Enabling DHCP 1. -
Page 35: Configuring The Library
• Automatic - The library stays in Sequential Mode until the host talks to the library, at which point the library goes into Random Mode. Spectra Logic recommends the Automatic setting for most environments; this lets the library set its mode based on host communication. -
Page 36: Configuring The Drive Scsi Id
Configuring the Drive SCSI ID To change the SCSI ID(s) of the drive(s) in the library: 1. If not already logged in, log in to the RLC as Admin. 2. Select Configuration > Drive. The Drive Configuration screen appears (Figure 4-6). Figure 4-6 The Drive Configuration screen. -
Page 37: Configuring The Date And Time
Configuring the Date and Time To change the time and date used by the library, follow the steps below. Note: This is the date and time as seen on the library interfaces and in library logs and traces. This time is not used by the host or the backup software. -
Page 38: Setting The Error Log Mode
Setting the Error Log Mode 1. If not already logged in, log in to the RLC as Admin or Service. 2. Select Configuration > Log. The Log Configuration screen appears (Figure 4-8). Figure 4-8 The Log Configuration screen. 3. Change the log mode as desired, or turn it off. Note: The Trace Level and Trace Filter options are only changeable by users with a Service login. -
Page 39: Setting Event Notification Parameters
Setting Event Notification Parameters Event notification allows the library to automatically send e-mail notices in the event of a problem within the library. Note: Only one e-mail user can be configured to receive e-mail messages from the library. 1. If not already logged in, log in to the RLC as Admin or Service. 2. -
Page 40: Upgrading With License Keys
Upgrading with License Keys When you want to upgrade your library—for example, to increase the number of active slots—you purchase a license key from Spectra Logic. To begin using the upgrade, you must enter the license key. 1. If not already logged in, log in to the RLC as Admin. -
Page 41: Chapter 5. Using The Library
5 Using the Library This chapter contains the following information: • Powering Up and Down on page 42 • Getting Information on page 43 • Viewing Current Status on page 45 • Moving Media within the Library on page 48 •... -
Page 42: Powering Up And Down
Powering Up and Down Initialization Press the power button on the front of the library to power it on (Figure 5-1). When the library powers up, the OCP displays a Startup screen (Figure 5-2). Next, the home screen appears (Figure 5-3), showing basic status, including displaying with the current action (Act). -
Page 43: Getting Information
Getting Information There are two ways to get information from or about the library. See the following: • Getting Information from the Library LEDs, below • Getting Information from the RLC on page 44 Getting Information from the Library LEDs Initialization All LEDs are updated during power up and reset sequences. - Page 44 Getting Information from the RLC The Remote Library Controller (RLC) provides the most detailed information about the library—in general status information, detailed messages, and tools for gathering logs and traces. Note that the RLC always has an at-a-glance view of general library status in the System Status window (Figure 5-4), located on the right side of the RLC screen.
-
Page 45: Viewing Current Status
Chapter 5. Using the Library Viewing Current Status Use the Status menu to view the library, drive, and inventory status. Viewing Library Status Select Status > Library to view the Library Status screen (Figure 5-6). This screen displays the most current library information, including the status of cartridges, robotics, and magazines. -
Page 46: Viewing Drive Status
Chapter 5. Using the Library Viewing Drive Status Select Status > Drive to view the Drive Status screen (Figure 5-7). This screen displays the most current drive information, including load status, error codes, temperature(s), drive fan status, and current drive activity. Figure 5-7 The Drive Status screen. -
Page 47: Viewing Inventory
If a bar code label has more than eight characters, the last characters are ignored. Spectra Logic strongly recommends using bar code labels with eight characters or less, such as those that come on Spectra Logic Certified Media. Chapter 5. Using the Library... -
Page 48: Moving Media Within The Library
Moving Media within the Library Follow the steps below to move tape cartridges within the library. 1. Log in to the RLC as Admin. 2. Select Operations > Move Media. The Move Media screen appears (Figure 5-10). Figure 5-10 The Move Media screen. 3. -
Page 49: Using The Mailslot
Using the Mailslot Follow the steps below to import and export single tapes through the mailslot. Note: For safety reasons, you cannot use the RLC to access the mailslot. 1. If exporting a tape, follow the steps under Moving Media within the Library on page 48 to move the desired cartridge to the mailslot. -
Page 50: Loading And Unloading A Magazine
Loading and Unloading a Magazine To load or unload an entire magazine, release the magazine. See: • Releasing the Magazine with the RLC, below • Releasing the Magazine with the OCP on page 51 Releasing the Magazine with the RLC 1. - Page 51 Releasing the Magazine with the OCP 1. From the main screen on the front DOWN panel, press the The screen displays the Main menu. DOWN 2. Use the button to select Commands, then press The Commands menu appears. DOWN 3. Use the button to select Unlock Magazines, then press ENTER...
-
Page 52: Loading And Unloading Media
Loading and Unloading Media Once you have released the magazine from the library, you can unload and load tapes. If you need to replace tapes in specific slots, note the numbering scheme below. Note: For safety reasons, the robotics do not move while the magazine is out;... -
Page 53: Chapter 6. Maintenance
6 Maintenance This chapter contains the following information: • Updating Firmware, below • Cleaning Tape Drives on page 55 • Media Care and Use on page 57 Updating Firmware Note for Backup Exec Environments When you upgrade to the T24_2.90 firmware level, you must get the latest Backup Exec drivers. - Page 54 Updating Firmware through the RLC 1. Download the correct firmware package from Spectra Logic’s web site to a location accessible by the Spectra 24 library RLC. 2. Log on the RLC as Admin. 3. Select Service > Firmware; the Firmware screen appears (Figure 6-1).
-
Page 55: Cleaning Tape Drives
Cleaning Tape Drives To clean the tape drive(s) installed in the library, follow the steps below. Loading the Cleaning Cartridge 1. Go to the front of the library. 2. From the main screen on the front panel, press the The screen displays the Main menu. Mainmenu Idle DOWN... - Page 56 Using the RLC to Clean the Drive 1. Log in to the RLC as Admin. 2. Select Service > Clean Drive. The Clean Drive screen appears (Figure 6-2). Figure 6-2 The Clean Drive screen. 3. For the Slot #, select Mailslot (where you just imported the cleaning tape). 4.
-
Page 57: Media Care And Use
Prior to using media other than those listed as supported above, contact Spectra Logic technical support to understand the risk associated with use of unsupported media. Check the Spectra Logic Web site for the most up-to-date media availability. Chapter 6. Maintenance... -
Page 58: Certified Media
Certified Media Spectra Logic certifies only the highest quality data cartridges received directly from the manufacturer and provides a lifetime guarantee on all Certified Media. Each order includes 10 cartridges, a TeraPack container to hold the media inside and outside the library, and a fitted dust cover for use outside the library. -
Page 59: Bar Code Labels
If a bar code label has more than eight characters, the last characters are ignored. Spectra Logic strongly recommends using bar code labels with eight characters or less, such as those that come on Spectra Logic Certified Media. Bar code labels on tape cartridges enable the library and application software to identify the cartridge quickly, thereby speeding up inventory time. -
Page 60: Write-Protecting Media
Write-Protecting Media Note: This section does not apply to WORM media. All re-writable data cartridges have a write-protect switch to prevent the erasure or overwriting of data. Before loading a cartridge into the library, make sure that the write-protect switch on the front of the cartridge is in the desired position. To write-protect the data on the cartridge, slide the switch to the right. -
Page 61: Chapter 7. Troubleshooting
7 Troubleshooting This chapter contains information on troubleshooting some basic library problems, including: • Errors Displayed on the OCP, below • Installation Issues on page 62 • Power Issues on page 64 • Tape Movement Issues on page 65 • Media Issues on page 66 •... -
Page 62: Installation Issues
Installation Issues Problems encountered during the installation of the library are usually caused by improper SCSI bus configuration, application software configuration errors, or an incorrectly configured operating system. If the application software that you are using is not communicating with the library after installation, check the following: SCSI IDs The library uses a single SCSI ID. -
Page 63: Backup Application Installation
Ensure that the library is compatible with the HBA and backup application you plan to use. For a list of compatible SCSI adapters, check with your HBA manufacturer. For a list of compatible software applications, check Spectra Logic’s web site. Note: The host bus adapter for the library should be SCSI-3 LVD. -
Page 64: Power Issues
Chapter 7. Troubleshooting Power Issues Library Does Not Power On Check all power cord connections. Make sure that there is power to the outlet. Try another working outlet. Replace the power cord. No Display Messages Appear on the OCP Make sure that the power cord is connected. Make sure that the power switch is on. -
Page 65: Tape Movement Issues
Caution: Do not force the tape out of the drive. If the tape is still stuck, contact Spectra Logic Technical Support. Tape Stuck in Slot In the event of a severe mechanical problem with the library or if circumstances require you to remove tape cartridges by hand, follow these steps: 1. -
Page 66: Media Issues
Media Issues ATTENTION LED is Flashing Incompatible Media The drive automatically unloads tapes that are incompatible with the drive type. When it does, the ATTENTION LED flashes, and an exclamation mark (!) is displayed in the inventory display for the slot number. Export the media in order to clear this state. Expired Cleaning Cartridge An Ultrium universal cleaning cartridge is good for Ultrium up to 50 cleaning cycles;... - Page 67 Cannot Write To or Read From Tape Make sure that: • The cartridge is write-enabled (move the write-protect switch to the unlocked position). • You have the appropriate data cartridge for your drive type. • You are using an Ultrium cartridge that has not been degaussed. •...
-
Page 68: Scsi Issues
SCSI Issues SCSI ID Not Recognized by Host Server • Make sure that all SCSI devices on the same bus have unique ID numbers. • If the SCSI bus is narrow (50-pin) only SCSI IDs 0 through 7 are available. •... -
Page 69: Library Performance Issues
Library Performance Issues Library Is Not Backing Up Data Efficiently • Check the network bandwidth from the host computer. If you are backing up data over a network, consider trying a local-only backup. • Make sure that the library and tape drive each have its own SCSI bus; they should not be daisy-chained to another tape drive or to the hard drive being backed up. -
Page 70: Performing Library Diagnostics
Performing Library Diagnostics Diagnostics are used to verify the usability and reliability of the library. Note: Library diagnostics should only be performed under the direction of SpectraGuard Technical Support. 1. Log in to the RLC as Admin or Service. 2. Select Service > General Diagnostic. The General Diagnostic screen appears (Figure 7-1). -
Page 71: Capturing Traces
Capturing Traces Library traces provide information about the library’s history (since last restart); they can be very valuable in troubleshooting efforts. Note: Library traces should only be performed under the direction of SpectraGuard Technical Support. 1. Log in to the RLC as Admin or Service. 2. - Page 72 Chapter 7. Troubleshooting 6. Select Update. The results of the trace appear at the bottom of the Logs screen. Figure 7-3 The Logs screen. 7. Select Next to view the next page of trace results.
-
Page 73: Appendix A. Service And Support
Appendix A. Service and Support This chapter reviews the Spectra T24 warranty and Spectra Logic’s repair policies and processes: • Contacting SpectraGuard Support, below • RMA Returns on page 74 • Repair Policy on page 75 • Limited Warranty on page 76... -
Page 74: Rma Returns
RMA Returns Your SpectraGuard Support representative may ask you to return the library or a component to Spectra Logic for servicing. To make a return for service: 1. Obtain a Return Materials Authorization (RMA) number from a Technical Support representative; this number identifies the part on its arrival. -
Page 75: Repair Policy
Spectra Logic has been advised of the possibility of such damages, or for any claim by any other party. -
Page 76: Limited Warranty
Customers do not receive Next Business Day Onsite Service for replacement components. All replacement components are shipped to the customer. Spectra Logic is available during the hours listed for telephone support to assist with the installation of replacement components if needed. -
Page 77: Appendix B. Library Specifications
• Physical Specifications on page 78 • Environmental Specifications on page 78 • Configuration Specifications on page 79 • Operational Specifications on page 79 • Library Storage Capacity on page 80 • Data Transfer Rates on page 81 • Media Specifications on page 82... -
Page 78: Physical Specifications
Physical Specifications Measure Height Width Depth Approx. Weight a. As measured from rack mount ears. b. Library weight with one drive installed. c. Weight with one half-height drive installed, accessories in package, etc. d. Library weight with two drives installed. e. -
Page 79: Configuration Specifications
Configuration Specifications Characteristic Tape Drives Storage Slots Ports Operational Specifications Characteristic MSBF Drive Type LTO-3 Drive Interface LTO-2 Drive Interface Appendix B. Library Specifications Specification 1 or 2 Half-Height LTO-3 Drives 1 or 2 Half-Height LTO-2 Drives 12 Slots (11 with mailslot enabled) -
Page 80: Library Storage Capacity
Library Storage Capacity LTO-3 Library One Magazine Enabled 11 Data Cartridges 12 Data Cartridges Two Magazines Enabled 23 Data Cartridges 24 Data Cartridges LTO-2 Library One Magazine Enabled 11 Data Cartridges 12 Data Cartridges Two Magazines Enabled 23 Data Cartridges 24 Data Cartridges a. -
Page 81: Data Transfer Rates
Data Transfer Rates Maximum Transfer Rate LTO3 Library - Native One Drive 60 MB/sec (216 GB/hr) Tw0 Drives 120 MB/sec (432 GB/hr) a. Using 2:1 compression. Maximum Transfer Rate LTO2 Library - Native One Drive 24 MB/sec (86 GB/hr) Tw0 Drives 48 MB/sec (172 GB/hr) a. -
Page 82: Media Specifications
Media Specifications Environmental Specifications Characteristic Operating Temperature Storage Temperature Altitude (Operating) Relative Humidity Media Capacity Media Type LTO-3 LTO-2 a. Using 2:1 compression. Appendix B. Library Specifications Specification 50º to 95º F (10º to 35º C) -40º to 140º F (-40º to +60º C) 13,000 ft (4200 meters) at 25˚C ambient... -
Page 83: Appendix C. Regulatory & Safety Standards
Appendix C. Regulatory & Safety This appendix describes the Spectra T24 library’s compliance with safety and regulatory agency standards. • Device Standards on page 84 • FCC (United States) on page 84 • ICES (Canada) on page 85 • European Union (CE Notice) on page 85 •... -
Page 84: Device Standards
Device Standards • ANSI Small Computer System Interface-2 (SCSI-2), X3.131 – 1994 • ANSI SCSI-3 Primary Commands, X3.301 - 1997 • ANSI Information and Technology. SCSI-3 Medium Changer Commands (SMC), NCITS.314:1998 • ANSI SCSI Parallel Interface-2 (SIP-2), X3.302:1998 • IEC 60297 Rack Standards FCC (United States) The computer equipment described in this manual generates and uses radio frequency (RF) energy. -
Page 85: Ices (Canada)
ICES (Canada) This Class A digital apparatus (the Spectra T24 tape library) meets all requirements of the Canadian Interference-Causing Equipment Regulations (ICES-003, Class A). European Union (CE Notice) This Spectra T24 library conforms to the following European Directives and Standards: •... -
Page 86: Appendix D. Ocp Information
Appendix D. OCP Information This chapter contains the information specific to the operator control panel (OCP)— the user interface located on the front panel of the Spectra T24 library. This information includes: • OCP Operating Modes, below • OCP Architecture on page 87 •... -
Page 87: Ocp Architecture
Appendix D. OCP Information OCP Architecture Command Conflicts Any operational conflict between commands received over SCSI or from the RLC and those entered through the front panel are avoided with a reservation mechanism on a first-come, first-served basis. Any reservation by the OCP is canceled by an OCP logout or time-out, which cancels the user mode. -
Page 88: Error Codes
Error Codes If an error occurs during operation of the library, the library stops the current operation and displays an error code on the OCP. Try to resolve the error as noted in the error code tables starting on page 89. If the error persists, contact SpectraGuard Technical Support. - Page 89 First Level Error Codes Descriptions of first-level error codes and possible solutions are provided in the following table. For information on error sub-codes, see Error Sub-Codes on page 94. Error Code Description Barcode Reader Error: Cannot initialize bar code reader. Barcode Reader Error: No response from bar code reader.
- Page 90 Error Code Description Cannot find elevator block within the expected range Cannot find rotation block within the expected range. Cannot find sled block within the expected range. Gripper outside range. Gripper has reached a position beyond the expected range. Slider outside range. Slider has reached a position beyond the expected range.
- Page 91 Error Code Description Open mailslot (import/export element) failed. Robotic controller response time-out. A command did not complete in the required amount of time. NACK received from robotic controller. Robotic controller communication failed. Robotic controller urgent stop due to a released magazine. Cartridge did not transport completely.
- Page 92 Error Code Description ROM error. ROM checksum incorrect. RAM error. Initialization failed. NVRAM error. R/W operation to NVRAM has failed. CTC Error. Timer unit failed during initialization. UART Error. Frame overrun or parity error on serial interface. Display Error. Communication to display failed. Memory Error, Stack and heap overflow.
- Page 93 Error Code Description Drive Hardware Error Drive Load Time-out. Drive has time-out while loading a tape. Drive Unload Time-out. Drive has time-out while unloading a tape Appendix D. OCP Information User Action Cycle power. After several occurrences, contact Technical Support. Retry operation;...
- Page 94 Error Sub-Codes Sub-Code Description Mechanical initialization failure. Connection to slave robotic failed. Error during motor initialization. Error during gripper close. Error during slider home positioning. Error during elevator home movement. Error during sled movement to rotation position. Error during rotation initialization, get range failed. Error during elevator initialization.
- Page 95 Sub-Code Description Error during sled movement up to sensor. Error during slider pre-position backwards movement. Error during slot pre-position. Error during sled movement in FLMoveRotation function. Command sending to robotic failed. Error during elevator movement in FLMoveRotation function. Error during rotation in FLMoveRotation function. Error during elevator movement in FLMoveSled function.
-
Page 96: Ocp Menu Flowcharts
OCP Menu Flowcharts The following pages contain information on the various menus that users can navigate through on the OCP. Main Menu For flowcharts on the other menus, see their respective sections. • Information Menu Flowchart on page 97 • Commands Menu Flowchart on page 98 •... - Page 97 Appendix D. OCP Information Information Menu Flowchart The Information menus and screens provide just that—information. They display the status and identity of the library, network, and drives, as well as error logs, inventory status, and a list of enabled license keys. These screens cannot be used to enter or change information.
- Page 98 Commands Menu Flowchart The Commands menus and screens allow users to send commands to the library, robotics, and drives. These commands include opening the mailslot, moving media within the library, unlocking the magazine(s), and re-scanning inventory. Note: Since these screens are used to enter or change information, they may be locked with an access PIN.
-
Page 99: Configure Menu
PIN are able to view these screens. Note: This menu also includes access to restore library defaults. Take precautions before restoring library defaults so as not to lose data; contact Spectra Logic Technical Support for more information. Appendix D. OCP Information... -
Page 100: Service Menu
Service Menu The Service menus and screens allow users to run library/system tests, slot-to-slot tests, and drive tests. It also has menu options for cleaning drives and upgrading drive firmware (from a firmware tape), as well as turning drive power on and off and changing the OCP screen contrast. -
Page 101: Index
Index accessories 22 Admin login (RLC) 15 air quality 21 ANSI 84 ATTENTION LED 13, 43, 66 automatic mode 35 bar code labels 59 in RLC 47 CANCEL button 13 capacity 80 CE 85 changing passwords 32 CLEAN LED 13, 43, 58 cleaning drives 55 clearance 21 clock setting 37... - Page 102 LEDs behavior 43 location 12 legal notices 2 library configuration 35 features 11 layout 12 master drive 35 modes 35 name 35 precautions 10 status 45 unpacking 22 license keys 40 license, software 2 lock (shipping) 24 login (RLC) 15, 31 logs 71 LUN scanning troubleshooting 62...
- Page 103 52 software license 2 specifications configurations 79 environmental 78 media 82 operational 79 physical 78 rack 21 storage capacity 80 transfer rates 81 status drives 46 inventory 47 library 45 storage capacity 80 support 73 System Status window 44...
Need help?
Do you have a question about the T-Series Spectra T24 and is the answer not in the manual?
Questions and answers