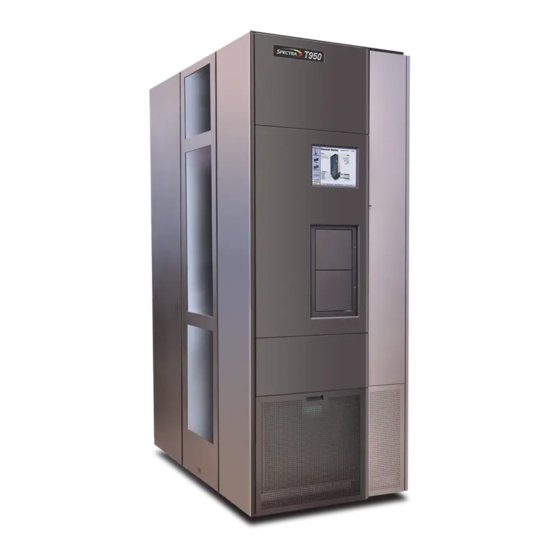
Spectra Logic T-Series Spectra T950 User Manual
Spectra logic t-series spectra t950: user guide
Hide thumbs
Also See for T-Series Spectra T950:
- Release note (222 pages) ,
- Supplementary manual (29 pages) ,
- Instructions manual (12 pages)
Table of Contents
Advertisement
Quick Links
Advertisement
Table of Contents
Troubleshooting

Related Manuals for Spectra Logic T-Series Spectra T950


Summary of Contents for Spectra Logic T-Series Spectra T950
- Page 1 Spectra T950 Library ® User Guide PN 90940000 Revision E...
- Page 2 LIMITED TO THE IMPLIED WARRANTIES OF MERCHANTABILITY OR FITNESS FOR A PARTICULAR PURPOSE, BOTH OF WHICH ARE EXPRESSLY DISCLAIMED. In no event shall Spectra Logic be liable for any loss of profits, loss of business, loss of use or data, interruption of business, or for indirect, special, incidental or consequential damages of any kind, even if Spectra Logic has been advised of the possibility of such damages arising from any defect or error.
-
Page 3: Warnings And Cautions
Warnings and Cautions AC Power Warning: Risk of electrical shock. Use caution when removing the library’s side panels. Spectra Logic recommends turning off the power to the library before removing the side panels. Warnung:Es besteht das Risiko eines Stromschlags. Gehen Sie äußerst vorsichtig vor, wenn Sie die seitlichen Panels der Library entfernen. -
Page 4: Spectra Logic Contact Information
Notices Spectra Logic Contact Information United States Headquarters European Office Mailing Spectra Logic Corporation Mailing Spectra Logic Europe Ltd. Address 1700 N 55th Street Address Magdalen Centre Boulder CO 80301 Robert Robinson Avenue Oxford Science Park OXFORD OX4 4GA United Kingdom... -
Page 5: Table Of Contents
Contents Chapter 1. Introduction Chapter 2. Architecture Overview Partitions ............14 QIP and Drive Architecture . - Page 6 Contents Chapter 5. Library Partitioning Creating a New Library Partition ........50 Editing an Existing Partition .
- Page 7 Contents Chapter 9. Best Practices for Tape Media Handling Tape Media ..........98 Handling Tape Media in Bulk .
- Page 8 Contacting Spectra Logic Sales ........
- Page 9 Contents Appendix B. Service and Support SpectraGuard Technical Support ........171 If You Have a Problem With Your Library .
- Page 10 Contents...
-
Page 11: About This Guide
Related Publications These publications are also available from Spectra Logic: • The Spectra T950 Library Release Notes (P.N. 90940002) provides the most up-to-date information about the library, drives, and media. -
Page 12: Chapter 1. Introduction
If you do not have a current support agreement and related documentation, contact Spectra Logic Technical Support before altering your library hardware. This way you can make sure that internal components, including drive covers, are re-installed correctly to ensure proper thermal control, air flow, and dust filtering. -
Page 13: Chapter 2. Architecture Overview
2 Architecture Overview Python architecture in the Spectra T950 library provides maximum configurability and ease of use in an enterprise-class system. To take full advantage of the library’s versatility, read this overview of the library’s technology and features: • Partitions on page 14 •... -
Page 14: Partitions
Chapter 2. Architecture Overview Partitions Partitions divide the library logically, so that the partitioned Spectra T950 library looks to the enterprise environment like one or more physical libraries—one library per configured partition. The Spectra T950 library is partitioned using Shared Library Services (SLS) technology that simplifies storage consolidation through the creation of virtual libraries, each with its own drives and media. -
Page 15: Qip And Drive Architecture
Drives, such as LTO and SAIT, ship on sleds that permit the drives to be easily added or replaced. The drives must be on sleds to work in the Spectra Library, and are available only from Spectra Logic. Theses drives can be connected to the library using QIP, or using direct-connect. - Page 16 Chapter 2. Architecture Overview Fibre Channel and Gigabit Ethernet QIPs Each Fibre Channel QIP (F-QIP) and Gigabit Ethernet QIP (E-QIP) provides Drive 4 connections to four drives and Port B has two external ports. The Drive 3 QIP also provides any-to-any connectivity, so that every Drive 2 Port A...
-
Page 17: Qip And Drive Naming Conventions
Chapter 2. Architecture Overview QIP and Drive Naming Conventions The library’s LC uses the following naming conventions to describe QIPs and drives. QIP Identifiers QIP identifiers appear as FRx/DBAx/Y-QIP1, where x is a number and Y is the QIP type. •... -
Page 18: Terapack Cases For Tape Media
This unique design requires the use of the bar-coded TeraPack case, only available from Spectra Logic. The TeraPack case lets you track tapes in the case through the case bar code; you can also track individual tapes, since each tape is also bar-coded. -
Page 19: Data Protection
The leading cause of tape damage is human error. Cartridges in TeraPack cases are exempt from errors that can be induced by an operator’s manipulation of individual tapes. Using Spectra Logic Certified Media, TeraPack cases can be purchased pre- loaded with bar-coded media. These cartridges are secure in a case before, during, and after import and export. -
Page 20: Integration Of Disk
Chapter 2. Architecture Overview Integration of Disk The Spectra T950 library’s TeraPack architecture allows for the addition of RAID eXchangeable TeraPack (RXT) drives and media. RXT drives use an internal RAID controller to write to RXT media packs, each made up of multiple Serial ATA (SATA) disks sealed in a sturdy protective enclosure. -
Page 21: Taps
Chapter 2. Architecture Overview TAPs The Spectra T950 library provides two TeraPack Access Ports (TAPs). You can use both TAPs when importing or exporting TeraPack containers or media packs. TAP 1 Loaded TeraPack container TAP 2 Figure 2-5 The two TAPs; TAP 2 is open. The function of each TAP, like that of an EE port, is to permit the operator to load and unload media. -
Page 22: Entry/Exit Pools And Storage Pools
Chapter 2. Architecture Overview Entry/Exit Pools and Storage Pools Inside the library, media is logically grouped through the use of pools. Just like the library is logically partitioned, media is logically grouped. The grouping depends on the state of the media—whether it is available for storing data, or whether it is newly imported or ready to be exported from the library. - Page 23 Chapter 2. Architecture Overview An example of two partitions of a fully configured library unit is shown in Figure 2-6. • Partition 1, a tape partition, has a 25-chamber storage pool, an EE pool with 6 empty TeraPack cases, and 4 LTO drives running on one QIP. •...
-
Page 24: Library Management
Chapter 2. Architecture Overview Library Management User Security Library users are configured by groups, each with its own level of privileges: • The superuser group has full permissions. • The administrator group has all permissions except to create or edit library users. •... -
Page 25: Partition Configuration
Chapter 2. Architecture Overview Partition Configuration Before configuring your library, review the following examples and diagrams. These are only a few examples of a partition configuration; an incredible number of configurations are possible. Partitions Using QIP-Attached Drives Figure 2-8 is a simple representation of how one QIP-based library partition is connected to a SAN, and how the QIPs in the partition connect to the drives assigned to that partition. - Page 26 Chapter 2. Architecture Overview Partitions Using Direct-Attached Drives Figure 2-9 is a simple representation of how one library partition using direct-attached drives is connected to a SAN, and how the QIP in the partition is present for the control of the robotic path. Port B F-QIP DBA 3...
- Page 27 Chapter 2. Architecture Overview Partition Configuration Checklist Before you start, make sure that you have identified the numbers of slots, drives, and QIPs to use in each partition, the robotic pathway, as well as network information. Component Description Action Only one media type can be used in Choose the partition’s media type.
-
Page 28: Modular Design
Chapter 2. Architecture Overview Modular Design The library is made up of multiple modules, which simplifies maintenance and upgrades. Chambers Transporter Chambers TAPs TAPs Drive Bay Fan Assembly Assembly Transporter Power Bay Electronics Covered by Air Filter Pathway Assembly Bay Assembly Figure 2-10 The Spectra T950 library: viewed from front (left), side (middle), and rear (right). -
Page 29: Expansion And Upgrades
TeraPack cases or RXT media packs to fill the added chambers. These purchases can be made through a sales representative or directly through the Spectra Logic Web site. The CoD feature lets operators use all available physical chambers in that physical library unit, also referred to as a frame;... - Page 30 Chapter 2. Architecture Overview...
-
Page 31: Chapter 3. Initial Configuration
3 Initial Configuration The following sections describe steps involved in configuring the library: • Library Power, below • Logging in for the First Time on page 32 • Interpreting the Library Controller on page 33 • Enabling Options on page 36 Library Power Note: The library must be set up so that the power socket-outlet is installed near the equipment and is easily accessible. -
Page 32: Logging In For The First Time
Chapter 3. Initial Configuration Powering Off Press and hold the soft power button (shown on page 31) for two to three seconds or until the blue light behind the button changes state. The power-down sequence takes just over one minute, while the library allows applications to shut down gracefully. Note: If you intend to leave the library powered down for an extended length of time, switch the breakers to the off position. -
Page 33: Interpreting The Library Controller
Chapter 3. Initial Configuration Interpreting the Library Controller After you log in and the library finishes initializing, the LC displays the library’s General Status screen (Figure 3-2). The LC on the library’s front panel is a touch screen. When accessed using the Remote Library Controller (RLC), you can select the toolbars and icons using the mouse and keyboard attached to your computer. -
Page 34: Status Bar
Chapter 3. Initial Configuration Status Bar In addition to providing a screen refresh button, the status bar (Figure 3-3) at the bottom of the LC provides the following information: • Whether there are any System Messages • When the screen was last refreshed •... - Page 35 Chapter 3. Initial Configuration Progress Bars If a horizontal progress bar displays along the bottom third of the screen (Figure 3-4), the library is busy processing a command. Do not use the touch screen or initiate any library action until the progress bar disappears. Figure 3-4 Progress bar indicating that the library is busy.
-
Page 36: Enabling Options
Chapter 3. Initial Configuration Enabling Options When you purchased the Spectra T950 library, you may have received some options. Enable these options so that you can configure the entire library. 1. Make sure that you have logged in as a superuser or administrator. To change user types, select Security >... -
Page 37: Chapter 4. Autosupport
AutoSupport; this way you have full use of a regular keyboard for the many text fields. If you have any questions on configuring AutoSupport, contact Spectra Logic Technical Support. Note: Some fields may display that cannot be selected; these are reserved... -
Page 38: Configuring Mail Users
Chapter 4. AutoSupport Configuring Mail Users You must create mail recipients to receive AutoSupport information. The first one you’ll want to configure is SpectraGuard Support; you can then follow that with any others you wish. See Mail Recipients on page 86. Note: You can still use AutoSupport without e-mail access by saving the information generated by AutoSupport to a USB key. - Page 39 Figure 4-4 System and Mail Information. 5. Enter the information for your library’s system in the fields provided. 6. Select this user’s mail recipient(s) from the choices presented. Note: You must select autosupport@spectralogic.com for Spectra Logic to receive your ticket request.
- Page 40 Chapter 4. AutoSupport 7. Select Next, and the Save Profile screen appears; verify that all of the information shown is correct for this contact person If any information needs to be changed, select Previous to display the screen in which the changes need to be made. If it is correct, select Save;...
-
Page 41: Using Autosupport
Chapter 4. AutoSupport 3. Select Edit Profile corresponding to the contact you want to edit. 4. Edit the information in the Company Information, Contact Information, and System and Mail Information screens as necessary, then select Next. 5. In the Save Profiles screen, verify that the information you changed has been updated. - Page 42 Chapter 4. AutoSupport Creating New Support Tickets Follow these steps to open a new ticket with SpectraGuard support staff. Note: SpectraGuard opens tickets during regular business hours—from 8:00 a.m. to 5:00 p.m. local time, Monday through Friday. If your problem needs attention outside of those hours, and you have an advanced service contract granting you 24-hour telephone support (see Advanced Service Options on page 177), call Technical Support after submitting the AutoSupport ticket.
- Page 43 Chapter 4. AutoSupport 4. Select Submit Ticket corresponding to the main contact person for the issue; the Ticket Type and Problem Description screen appears (Figure 4-8). Figure 4-8 The Ticket Type and Problem Description screen. If you do not need to make any changes to the contact person’s information for this support ticket, proceed to Step 5.
- Page 44 Chapter 4. AutoSupport 6. Fill in detailed information about the issue in the Problem Description field, including what happened just before the failure occurred. 7. Select Next; the Confirm and Submit Ticket screen appears (Figure 4-10). Figure 4-10 The Confirm and Submit Ticket screen. 8.
- Page 45 A progress screen indicates that the ticket request (with log information) is being sent. When completed, the AutoSupport Profiles screen appears. When Spectra Logic receives the request, a ticket is opened and an e-mail response is sent to the user with a ticket number. A support technician evaluates the ticket’s urgency as well as the level of the user’s service agreement, then...
- Page 46 Chapter 4. AutoSupport 5. Select Use existing support ticket. 6. Type the five-digit or six-digit ticket number in the Number field; this is the number you received when you originally opened the ticket. 7. Add any updated information in the Problem Description field. 8.
- Page 47 A progress screen indicates that the ticket request (along with log information) is being sent. When completed, the AutoSupport Profiles screen appears. When Spectra Logic receives the request, the support technician handling that ticket re-evaluates the ticket, then telephones the user.
- Page 48 Chapter 4. AutoSupport...
-
Page 49: Chapter 5. Library Partitioning
5 Library Partitioning The following sections describe steps involved in partitioning the library: • Creating a New Library Partition on page 50 • Editing an Existing Partition on page 71 • Deleting a Partition on page 73 General information about Python architecture and concepts—including chambers, pools, QIPs, drive visibility, and more—is discussed in Chapter 2. -
Page 50: Creating A New Library Partition
Chapter 5. Library Partitioning Creating a New Library Partition Partition Auto-Creation The first time that the library starts up after installation, the LC presents the opportunity to automatically configure the library into a single partition, using all of the library’s available resources. If you plan to create more than one partition, you can cancel the partition auto-creation and create multiple customized partitions later. - Page 51 Chapter 5. Library Partitioning Note: Partition names are displayed alphabetically; this includes ordering numbers alphabetically. As a result, partitions named numerically do not display in numerical order. For example, if you name partitions for numbered departments, then the partition list would display: Department 11 Department 223 Department 37...
- Page 52 Chapter 5. Library Partitioning 6. Proceed according to the type of connectivity you’ll be using for this partition: • Configuring a Gigabit Ethernet Partition on page 52 • Configuring a QIP-Attached Fibre Channel Partition on page 61 • Configuring a Direct-Attached Fibre Channel Partition on page 65 Configuring a Gigabit Ethernet Partition 1.
- Page 53 Chapter 5. Library Partitioning 4. Select Next. The Chambers and Drives screen appears (Figure 5-5). Figure 5-5 The Chambers and Drives screen. 5. Use the Chambers and Drives screen to: • Enter the number of storage chambers to assign to this Storage Pool. •...
- Page 54 Chapter 5. Library Partitioning 7. Select the users who are allowed access to this partition. 8. Select Next. The Robotic Path Visibility screen appears (Figure 5-7). Figure 5-7 The Robotic Path Visibility screen. 9. Select the port(s) to activate for robotic control on the QIP you just selected. Note: Both ports can be selected for failover purposes as long as the backup software can handle multiple robotic control paths.
- Page 55 Chapter 5. Library Partitioning Defining Drive Visibility 1. Select Next. The Drive Visibility screen appears (Figure 5-8). The QIP has an any-to-any relationship between the QIP’s drives and the QIP’s two ports. For each drive on the QIP, identify the port(s) through which the outside world communicates with each drive.
- Page 56 Chapter 5. Library Partitioning E-QIP Configuration 1. Select Next. The Exporting E-QIP Settings screen appears (Figure 5-9). Figure 5-9 The Exporting E-QIP Settings screen. 2. Enter the hostname; it must be less than 64 alphanumeric and hyphen characters. 3. Select either DHCP or Static Address. If you select DHCP, and your environment uses iSNS, be sure to read Configuration Note: Using DHCP in iSNS Environments on page 57.
- Page 57 Chapter 5. Library Partitioning Configuration Note: Using DHCP in iSNS Environments Use of any of these options requires communication to an external server over the network. If this server is unavailable or cannot be reached when the library powers up, the QIP may be unusable and may need to be reset after the server becomes ready.
- Page 58 Chapter 5. Library Partitioning Exporting iSCSI Settings 1. Select Next. The Exporting iSCSI Settings screen appears (Figure 5-10). Figure 5-10 The Exporting iSCSI Settings screen. 2. Enter the Listen Port for the E-QIP; it must be an integer between 1 and 65535 (the default setting is 3260).
- Page 59 Chapter 5. Library Partitioning 6. If you did not select to use CHAP authentication, skip to Step 10 on page 60. If you selected to use CHAP authentication, select Next. The Exporting CHAP Settings screen appears (Figure 5-11). Figure 5-11 The Exporting CHAP Settings screen. 7.
- Page 60 Chapter 5. Library Partitioning 9. Select Save. Note: Do not select Next before selecting Save, or you will lose the information you have typed. After selecting Save, the first CHAP entry appears at the top of the screen. Add as many CHAP entries as necessary, selecting Save after each. If necessary, you may also edit entries in this screen;...
- Page 61 Chapter 5. Library Partitioning Configuring a QIP-Attached Fibre Channel Partition 1. Select Next; the Robotic Control Path screen appears (Figure 5-12). 2. Review the Robotic Control Path screen, and select the F-QIP to receive and process robotic commands. Figure 5-12 The Robotic Control Path screen. 3.
- Page 62 Chapter 5. Library Partitioning 5. Select Next. The Partition Users screen appears (Figure 5-14). Figure 5-14 The Partition Users screen. 6. Select the users who are allowed access to this partition. 7. Select Next. The Robotic Path Visibility screen appears (Figure 5-15). Figure 5-15 The Robotic Path Visibility screen.
- Page 63 Chapter 5. Library Partitioning Defining Drive Visibility 1. Select Next. The Drive Visibility screen appears (Figure 5-16). The QIP has an any-to-any relationship between the QIP’s drives and the QIP’s two ports. For each drive on the QIP, identify the port(s) through which the outside world communicates with each drive.
- Page 64 Chapter 5. Library Partitioning F-QIP Configuration 1. Select Next. The Exporting F-QIP Configuration screen appears (Figure 5-17). Figure 5-17 The Exporting F-QIP Configuration screen. 2. Choose one of these combinations: • Select Use Soft Address and Fabric. • Select Use Loop ID and enter the loop ID hard address value between 0 and 125;...
- Page 65 Chapter 5. Library Partitioning Configuring a Direct-Attached Fibre Channel Partition 1. Select Next; the Robotic Control Path screen appears (Figure 5-18). 2. Review the Robotic Control Path screen, and select the F-QIP to receive and process robotic commands. Figure 5-18 The Robotic Control Path screen. 3.
- Page 66 Chapter 5. Library Partitioning 5. Select Next. The Fibre Channel Loop ID’s screen appears (Figure 5-20). Figure 5-20 The Fibre Channel Loop ID’s screen. 6. Select Soft Addressing or Hard Addressing for each of the drives shown. If you select Hard Addressing, also enter the loop ID. 7.
- Page 67 Chapter 5. Library Partitioning 9. Select Next. The Robotic Path Visibility screen appears (Figure 5-22). Figure 5-22 The Robotic Path Visibility screen. 10. Select the port(s) to activate for robotic control on the QIP you just selected. Note: Both ports can be selected for failover purposes as long as the backup software can handle multiple robotic control paths.
- Page 68 Chapter 5. Library Partitioning F-QIP Configuration for Direct-Attached Drives 1. Select Next. The Exporting F-QIP Configuration screen appears (Figure 5-23). Figure 5-23 The Exporting F-QIP Configuration screen. 2. Choose one of these combinations: • Select Use Soft Address and Fabric. •...
-
Page 69: Confirm And Save Partition Settings
Chapter 5. Library Partitioning Confirm and Save Partition Settings 1. Select Next. The Save Library Configuration screen appears (Figure 5-24). Figure 5-24 The Save Library Configuration screen. 2. Select whether to save the current library configuration. If you select to save it, choose whether to save it to USB or to e-mail it to an already-configured mail recipient. - Page 70 Chapter 5. Library Partitioning 4. Review the data and confirm that all settings are correct for this partition’s configuration. • If the configuration is correct, proceed to Step 5. • If the configuration is not correct, either: • Select Cancel to configure the partition again from the beginning. •...
-
Page 71: Editing An Existing Partition
Chapter 5. Library Partitioning Editing an Existing Partition Caution: If reducing the number of slots (TeraPack chambers) in the partition, physically export the TeraPack containers or RXT media packs before reducing the slots allotted to the partition. Reducing slots deletes chambers from the partition. The library knows to delete the empty chambers first, but if all chambers are full, the library is forced to delete populated chambers;... - Page 72 Chapter 5. Library Partitioning 2. Select either Summary or Edit; this procedure illustrates both, starting with Summary. i. Select Summary next to the partition that you want to edit. The Partition Settings screen appears (Figure 5-27), showing all information related to the selected partition.
-
Page 73: Deleting A Partition
Chapter 5. Library Partitioning Deleting a Partition After you delete a partition, the drives and chambers used by that partition can be reassigned to an existing partition, or used in a new partition. Caution: Before deleting a partition, either physically export the TeraPack containers or RXT media packs in that partition or have a plan to add those chambers to another partition. - Page 74 Chapter 5. Library Partitioning...
-
Page 75: Chapter 6. Loading Media For The First Time
6 Loading Media for the First Time The following sections describe steps involved in loading media into the library: • Loading a New Partition with Media, below • Inventorying the Library on page 78 General information about Python architecture and concepts—including chambers, pools, QIPs, drive visibility, and more—is discussed in Chapter 2. - Page 76 Chapter 6. Loading Media for the First Time Filling the Storage Pool Once the library is in use, you typically use only the backup software to move media within the library. However, when you first install the library and create a partition, you may want to quickly fill the storage pool.
- Page 77 Chapter 6. Loading Media for the First Time 4. Select Import Storage TeraPacks. Note: Import for Storage is used for initial library load; after this, you should typically use Import for Entry/Exit, and then move media into the storage pool through the backup software. Alternately, if your backup software needs to control all initial media imports, select Import for Entry/Exit here.
-
Page 78: Inventorying The Library
Chapter 6. Loading Media for the First Time Filling the EE Pool (for Tape Media Only) Note: This following process is specific to the initial loading of media; it does not address loading full EE TeraPacks to allow the software to perform the import process. -
Page 79: Chapter 7. Configuring The Library
7 Configuring the Library The following sections describe steps involved in configuring the library after it has been partitioned: • System Configuration Checklist, below • Configuring Library Users on page 80 • Configuring General Library Functions on page 83 System Configuration Checklist You may want to complete this checklist so that you have, readily available, the information you need to complete the procedures in this chapter: Component... -
Page 80: Configuring Library Users
Chapter 7. Configuring the Library Configuring Library Users Every library user is assigned to a group with its own set of pre- defined library privileges. Refer to the definitions of the various user types in Group Privileges/Security, below. Use the Security toolbar (shown in Figure 7-1) to configure library users;... -
Page 81: Adding A New User
Chapter 7. Configuring the Library Adding a New User To add a new user, follow these steps. 1. Make sure you are logged in as a member of the superuser group, such as su. If you are not logged in as a member of the superuser group, select Security > Switch User;... -
Page 82: Editing An Existing User
Chapter 7. Configuring the Library Editing an Existing User To change settings for an existing user, follow these steps. 1. Make sure that you are logged in as a superuser. If you are not logged in as a superuser, select Security > Switch User; then log in as a superuser. -
Page 83: Configuring General Library Functions
Chapter 7. Configuring the Library Configuring General Library Functions Use the Other Settings portion of the System Setup screen (Figure 7-3) to configure or re-configure the library’s system settings, described in the following sections: • Library Name on page 84 •... -
Page 84: Library Name
Chapter 7. Configuring the Library Library Name The library name is used to identify the library in library messages. 1. Log in as a user in either the superuser or administrator group. The General Status screen displays. 2. Select Configuration > System. The System Setup screen appears (Figure 7-3). Figure 7-3 The System Setup screen. -
Page 85: Network Settings
Chapter 7. Configuring the Library Network Settings Note: The LC automatically reboots when you save network settings. By default, the library is configured to use Dynamic Host Configuration Protocol (DHCP). Follow these steps to change or edit the network protocol. 1. - Page 86 Chapter 7. Configuring the Library Mail Recipients The library can send, to selected recipients, e-mail messages with system messages, traces, and diagnostic results. Recipients can be set up to receive messages automatically as they are generated by the library or ad hoc when traces are run. Note: Network settings must be configured before mail settings;...
- Page 87 Chapter 7. Configuring the Library 5. Select the type(s) of messages that the person in the To field should receive by selecting one or more of the message types listed. Note: Selecting message types automatically sends those messages to the recipient as messages are generated by the library. If no message type is selected, the recipient does not receive messages automatically, but can be sent messages on an individual basis when traces or utilities are run.
- Page 88 Simple Network Management Protocol (SNMP) is a widely used protocol for monitoring the health and welfare of your library by using integrated alerts. Customers can download MIB files from the Spectra Logic Web site to begin monitoring the status of their library using SNMP.
-
Page 89: Chapter 8. Best Practices For Using The Library
8 Best Practices for Using the Library This chapter reviews best practices for using the library, including: • Entering Information in Library Screens, below • Checking Messages on page 92 • Refreshing the LC on page 92 • Logging On and Off on page 93 •... - Page 90 Chapter 8. Best Practices for Using the Library Soft Keyboard Bring up the LC’s soft keyboard by selecting the keyboard icon in the lower right corner of the front panel. Use the optional Remote Library Controller (RLC) to manage the library from your computer.
- Page 91 Chapter 8. Best Practices for Using the Library External Keyboard You can plug a computer keyboard into the LCM, located on the back of the library. Make sure to run the cable up through the bottom of the back panel so that the library doors can remain closed for normal operation.
-
Page 92: Checking Messages
Figure 8-4 The System Messages screen. 2. Read the message(s), and follow any recommended steps. If you need assistance, contact Spectra Logic Technical Support. Refreshing the LC The LC refreshes different screens at different rates, depending on the type of data displayed. -
Page 93: Logging On And Off
Chapter 8. Best Practices for Using the Library Logging On and Off Any library user in any group—Superuser, Administrator, or Operator—can use the LC to perform the functions described in this chapter. Logging On In the main login screen, enter your user name and password, then select Login. Figure 8-5 The LC’s main login screen. -
Page 94: Media Types
Chapter 8. Best Practices for Using the Library Media Types Each library partition contains its own set of media, stored in TeraPack containers or RXT media packs. Each TeraPack container or RXT media pack is stored in its own chamber. Make sure that you import into a partition only the type of media for which the partition is configured. -
Page 95: Configuring The Ee Pool
Chapter 8. Best Practices for Using the Library Configuring the EE Pool The EE pool, along with the TAP, takes the place of the EE port on a traditional library. The combination of the TAPs and the EE pool is the same as a traditional library’s EE port, except that this combination lets you specify the size of the EE port. - Page 96 Chapter 8. Best Practices for Using the Library...
-
Page 97: Chapter 9. Best Practices For Tape Media
Maxell, Sony, TDK, and Spectra Logic. Prior to using media other than those listed as supported above, contact Spectra Logic technical support to understand the risk associated with use of unsupported media. Check the Spectra Logic Web site for the most up-to-date media availability. -
Page 98: Handling Tape Media
Chapter 9. Best Practices for Tape Media Handling Tape Media The following are best practices for handling tape media. 1. Make sure that empty TeraPack containers reside in the EE pool. This is particularly important when first using the library. If slots for exported media aren’t available, then the backup software must wait for these slots. -
Page 99: Handling Tape Media In Bulk
Chapter 9. Best Practices for Tape Media Handling Tape Media in Bulk The Spectra T950 library lets you import and export tape media many times faster than traditional automated libraries, because it uses grouped media in TeraPack containers and has two TeraPack container Access Ports (TAPs) that can each handle an entire TeraPack container. -
Page 100: Tape Media Rotation Example
Chapter 9. Best Practices for Tape Media Tape Media Rotation Example A simple example of the library’s media life cycle is described below and illustrated in the following pages. The example assumes: • The library has a total of 17 licensed chambers. •... - Page 101 Chapter 9. Best Practices for Tape Media Initial Installation of Library The library has a total of 17 licensed chambers, assigned to pools and filled with TeraPack containers as shown here. EE pool: 2 chambers Populated with empty TeraPack containers Storage pool: 15 chambers Populated with full TeraPack containers...
-
Page 102: Storage Pool
Chapter 9. Best Practices for Tape Media End of Week 2 Backup software exports 2 full TeraPack containers from the storage pool to the EE pool, ready to be removed from the library and stored off-site. Operator tasks: Results of operator tasks: Remove the 2 full TeraPack containers, and, at the Off-site storage: same time, import 2 empty TeraPack containers. -
Page 103: Chapter 10. Best Practices For Rxt Media
10 Best Practices for RXT Media The information provided in this chapter is integral to understanding all aspects of media handling and inventory management. It includes very helpful information on: • RAID Overview on page 103 • Optimizing Performance on page 104 •... -
Page 104: Optimizing Performance
RXT itself cannot be configured to alter performance; all performance tuning must be done with your operating system and backup software. To maximize performance with RXT, Spectra Logic recommends a 256KB block size (or larger) in your backup application. Block sizes smaller than this may show decreased performance. -
Page 105: Maintaining Rxt Drives And Media Packs
• For long-term storage, make sure that the RXT media packs are properly packed in its original shipping materials before sending off-site. • Spectra Logic recommends storing RXT media packs in the same type of environment in which it is used (see RXT Media Specifications on page 200). This way, the RXT media packs are always ready for immediate access. -
Page 106: Using In Daily Operation
Firmware Upgrades Keep RXT drives updated—just like the library—with the latest firmware version. You can download firmware packages directly from the Spectra Logic Web site. Write Protection You can write-protect RXT media just as you would a tape. This prevents accidental overwriting of crucial data. -
Page 107: Chapter 11. Loading And Unloading Media
11 Loading and Unloading Media The information provided in this chapter is integral to understanding all aspects of loading and unloading media. It includes very helpful information on: • Displaying Inventory on page 108 • Bulk Imports on page 109 •... -
Page 108: Displaying Inventory
Chapter 11. Loading and Unloading Media Displaying Inventory Use the Inventory screen to display inventory, and also to select and move specific media elements. To view a partition’s inventory, follow these steps. 1. Select General > Inventory. The Inventory screen appears (Figure 11-1). Figure 11-1 The Inventory screen. -
Page 109: Bulk Imports
Chapter 11. Loading and Unloading Media Bulk Imports To import TeraPack containers or RXT media packs from the TAP to the EE pool, follow these steps. You can also follow these steps to import one or more individual tapes loaded in a TeraPack container. - Page 110 Chapter 11. Loading and Unloading Media 4. Select Import or for either Storage or Entry/Exit. Note: Although you can directly import media from the TAP to the storage pool using Import to Storage, it is not recommended. If you do import media this way, be sure to synchronize the backup software inventory with the inventory of the library.
-
Page 111: Bulk Exports/Unloading A Partition
Chapter 11. Loading and Unloading Media Bulk Exports/Unloading a Partition In a traditional automated library, when the backup software exports tapes, you have to remove each tape from the EE port, then close the port while the library loads any additional tapes into the port, which you must again remove tape by tape. -
Page 112: Handling Individual Tapes
Chapter 11. Loading and Unloading Media 3. From the Partition drop-down menu, select the partition from which you are exporting the TeraPack container(s) or RXT media pack(s), then select Go. 4. Select Export/Exchange from Entry/Exit; the TAP opens and a Feedback Required screen appears. -
Page 113: Chapter 12. Maintaining The Library & Drives
12 Maintaining the Library & Drives This chapter describes recommended tasks for maintaining the Spectra T950 library and its drives. It reviews procedures for regular maintenance and troubleshooting, including: • Tips on Getting Library Information Quickly, below • Cleaning Drives on page 115 •... - Page 114 Chapter 12. Maintaining the Library & Drives Drive Performance Monitor The Drive Performance Monitor lets you get the most out of your library by ensuring that drives are performing at the highest possible throughput rate. It graphically shows the read/write performance of the drives in the library. The Drive Performance Monitor displays the following for the selected drive set: •...
-
Page 115: Cleaning Drives
Chapter 12. Maintaining the Library & Drives Cleaning Drives Caution: Use only certified cleaning cartridges to clean your tape drives. For information on ordering these cartridges, see Cleaning cartridges on page 167. Use your backup software to clean the library’s tape drives when one of the following occurs: •... -
Page 116: Replacing The Air Filter
Chapter 12. Maintaining the Library & Drives Replacing the Air Filter The library’s fan module is protected by a removable air filter, which catches contaminants as the fans pull cool air into the library. A clogged air filter can cause operational problems due to excessive temperatures inside the library. - Page 117 Chapter 12. Maintaining the Library & Drives 2. Use a flat head screwdriver to loosen the four captive screws on the air filter (Figure 12-3). Figure 12-3 The filter screws. 3. Remove the old air filter from the library. 4. Place the new air filter on the library in front of the fan assembly. 5.
- Page 118 Note: Spectra Logic recommends that you clean all of the library’s tape drives after replacing the air filter. Note: Spectra Logic recommends keeping a new fan filter on site to use for replacement as often as is necessary. To purchase a new fan filter, contact your sales representative or visit the Spectra Logic Web site.
-
Page 119: Library Firmware Packages
Technical Support as described on page 171. Firmware Package Support Spectra Logic provides complete support for the most currently shipped releases of firmware packages. Customers using previously released firmware packages are asked to upgrade to the current release. - Page 120 Chapter 12. Maintaining the Library & Drives Using a USB Device 1. Open the library’s rear door by lifting and turning the door lock, as illustrated in Figure 12-6. Turn Figure 12-6 The library’s rear doors. 2. Insert the USB device into the LCM (above the RCM), as shown in Figure 12-8: Figure 12-7 Location of the LCM.
- Page 121 (see Figure 12-8 on page 120). Note that there is a brief delay while the library recognizes the USB device. • Select Spectra Logic to download a package from Spectra Logic’s server. This option is only available if the library has a configured internet connection.
- Page 122 Chapter 12. Maintaining the Library & Drives 5. Select Next. The Select Package screen appears (Figure 12-11). Figure 12-11 The Select Package screen. 6. Select Next. The Select Package screen appears (Figure 12-11). Figure 12-12 The Select Package screen. 7. Select the firmware package to update. Note: You may only update to one firmware package at a time.
- Page 123 Chapter 12. Maintaining the Library & Drives 8. Select Details to display the Package Details screen, which shows how various components are affected (Figure 12-13), or else proceed directly to Step 9. Figure 12-13 The Package Details screen. Caution: Selecting Advanced allows you to customize the upgrade for individual components.
-
Page 124: Managing Firmware Packages
Chapter 12. Maintaining the Library & Drives Managing Firmware Packages Newly updated firmware packages reside on the LCM. Eventually, you may have multiple prior firmware packages (one per update). The library may prompt you to remove them in a rare circumstance, or you may choose to remove them at some point. Remove them using the LC or RLC after the most recent package has been saved and installed. -
Page 125: Chapter 13. Library Troubleshooting
Use this chapter to find solutions to the most common problems encountered with the library. Note: For additional suggestions or for troubleshooting problems that are not covered in this guide, Spectra Logic recommends that you search the online Technical Support Knowledge Base located at http://www.spectralogic.com/support/kbase/index.cfm/. -
Page 126: Checking Messages
Figure 13-1 The System Messages icon on the status bar. The System Messages screen appears (Figure 13-2). Figure 13-2 The System Messages screen. 2. Read the message(s), and follow any recommended steps. If you need assistance, contact Spectra Logic Technical Support. -
Page 127: Checking Firmware Levels
Figure 13-3 The Package Update screen. 2. Compare the current package level (circled in Figure 13-3) to the latest firmware package available for the library on the Spectra Logic Web site. i. Go to http://www.spectralogic.com. ii. Select Support > Firmware & Drivers > Library Firmware > Spectra T950 (Python) Firmware. - Page 128 Checking the Package Levels of Individual Components Note: This procedure is not necessary or helpful unless recommended by Spectra Logic Technical Support. 1. From the toolbar, select Maintenance > Tools->Utilities->Show Advanced. A warning message displays; select Next. the Utilities screen displays Advanced Utilities (Figure 13-4).
- Page 129 Chapter 13. Library Troubleshooting 4. Relay this information to Spectra Logic Technical Support for advanced troubleshooting. Managing TeraPack Sensors: Ignore Magazine Seated Sensor Caution: Only use this utility when you are directed to do so by SpectraGuard support staff. Use this the Ignore magazine Seated Sensor utility to temporarily override the magazine-seated sensor, which indicates if the TeraPack case is seated correctly in the TAP (TeraPack Access Port).
-
Page 130: Capturing Traces
9. After the replacement magazine-seated sensor is installed, select Check Sensor. Capturing Traces Spectra Logic uses traces to help diagnose problems with the library. Traces should be run only when recommended by Spectra Logic Technical Support. E-Mailing Trace Results If you plan to e-mail trace results directly from the library, make sure that you have already set up those recipients as e-mail users. - Page 131 Chapter 13. Library Troubleshooting New Feature: Saving the Library’s Configuration You can optionally store the library’s configuration, either by saving it to a USB device or by e-mailing it to one of the library’s configured mail users. To save the library’s configuration: 1.
-
Page 132: Robotics Diagnostics
After a brief delay, the Utility Results screen appears, showing that the configuration file was uploaded and/or the configuration restored. Robotics Diagnostics At the direction of Spectra Logic Technical Support, use diagnostics to troubleshoot problems. Do not use these diagnostics unless directed to do so by Spectra Logic Technical Support. - Page 133 Chapter 13. Library Troubleshooting These tests include: • All Motion Basic Tests • PAX Sensor Test • Snout Sensor Test • Bar Code Test • Put Magazine To TAP • TAX 50/50 Sensor Test Test • Exercise TAP Test • TAX Magazine Sensor •...
-
Page 134: Resetting Components
Chapter 13. Library Troubleshooting Resetting Components If instructed by Spectra Logic Technical Support or by error messages, you can reset certain library components. LCM/RCM Insert the tip of a toothpick into the reset access Reset on the module. The LCM is on... -
Page 135: Robotics Troubleshooting
7. Replace the library’s side panel and secure it with the screw. 8. Press the soft power button to power on the library again. 9. After the library initializes, try again to complete the move that failed. If the problem persists, contact Spectra Logic Technical Support. -
Page 136: Operating In Gigabit Ethernet Environments
Chapter 13. Library Troubleshooting Operating in Gigabit Ethernet Environments Best Practices for IP SANs IP SANs should be based on Gigabit Ethernet 1000BaseT network topography. Since backups and storage networks create a good deal of traffic, a dedicated subnet should be utilized. -
Page 137: Chapter 14. Drive Troubleshooting
Updating Drive Firmware The drives in the library may require firmware updates; as they do, Spectra Logic sends you information on when and how to update the drives. Spectra Logic recommends that you only update drives when notified; this ensures that the upgrade has been... -
Page 138: Lto Tape Drive Troubleshooting
Chapter 14. Drive Troubleshooting LTO Tape Drive Troubleshooting When drive power is cycled, LTO drives automatically run self-diagnostic tests, checking memory and sensors, performing motor and servo tests, and testing data channels to ensure that the drive is functioning within normal parameters. LTO drives have these troubleshooting tools, shown in Figure 14-1: •... - Page 139 3. Note the character in the SCD on the front of the suspect drive. 4. Refer to the following tables to interpret these indicators. If the drive is in an error state, contact Spectra Logic Technical Support. LTO LEDs When the LED is off, it means that the unit has no power, is powered off, or is not assigned to a partition.
- Page 140 2. Power the tape drive off and on, then retry the operation that produced the error. 3. If the problem persists, download new firmware and retry the operation. 4. If the problem persists, send the drive dump collected in Step 1 to Spectra Logic Technical Support.
- Page 141 Chapter 14. Drive Troubleshooting Code Cause and Solution Tape drive or media error. The tape drive determined that an error occurred, but it cannot isolate the error to faulty hardware or to the tape cartridge. Perform the following action: For Problems with Writing Data: If the problem occurred while the tape drive was writing data to the tape, and if you know the volume serial number (located on the cartridge label) of the tape cartridge that was loaded in the drive when the problem occurred, retry the operation with a different cartridge:...
- Page 142 Chapter 14. Drive Troubleshooting Code Cause and Solution No error or message assigned. See Error Code 0 in this table. The Fibre Channel port is offline. Drive of Fibre Channel error with no light; this is displayed if the drive’s dip switch has been set to 3 and the drive does not see the light, or if a fibre wrap diagnostic fails because the drive did not see the light.
- Page 143 2. Note the character in the SCD on the front of the suspect drive. 3. Refer to the following tables to interpret these indicators. If the drive is in an error state, contact Spectra Logic Technical Support. LTO-3 LEDs When the LED is off, it means that the unit has no power, is powered off, or is not assigned to a partition.
- Page 144 Chapter 14. Drive Troubleshooting LTO-3: SCDs/Error Conditions and Informational Messages If multiple errors occur, the code with highest priority (lowest number) displays first. Once corrected, the code with the next highest priority displays, until none remain. Code Cause and Solution No error occurred and no action is required.
- Page 145 Chapter 14. Drive Troubleshooting Code Cause and Solution Tape drive or media error. The tape drive determined that an error occurred, but it cannot isolate the error to faulty hardware or to the tape cartridge. Perform the following action: For Problems with Writing Data: If the problem occurred while the tape drive was writing data to the tape, and if you know the volume serial number (located on the cartridge label) of the tape cartridge that was loaded in the drive when the problem occurred, retry the operation with a different cartridge:...
- Page 146 Chapter 14. Drive Troubleshooting Code Cause and Solution A high probability of media error; an error occurred because of a faulty tape cartridge. Try another tape cartridge. If the problem occurs with multiple tape cartridges, use the following procedure: Attention: When you run the Test Cartridge & Media diagnostic, data on the suspect tape is overwritten.
- Page 147 Chapter 14. Drive Troubleshooting LTO-4 Tape Drive Troubleshooting LED Color Indication Green Amber Solid The drive is powered on. The drive is powering on or is in maintenance mode. If a solid appears in the single- character display in conjunction with the solid green LED, then the drive needs cleaning.
- Page 148 • Make sure that the power connector is properly seated. • Make sure that the proper DC voltages are being applied within the tolerances allowed. If the proper voltages are being applied but the problem persists, contact Spectra Logic Technical Support.
- Page 149 2. Power the tape drive off and on, then retry the operation that produced the error. 3. If the problem persists, contact Spectra Logic Technical Support. Note: The error code clears when you power cycle the drive or place it in maintenance mode.
- Page 150 • If the diagnostics fail, contact Spectra Logic Technical Support. • If the diagnostics succeed, run the Test Head diagnostic: • If the Test Head diagnostic fails, contact Spectra Logic Technical Support. • If the Test Head diagnostic succeeds, replace the cartridges that caused the problem.
- Page 151 The drive is usable, though the single-character display (SCD) continues to indicate an error and the status light flashes amber. The error code may clear when you cycle power to the tape drive. If the problem persists, contact Spectra Logic Technical Support. No error or message assigned. See Error Code 8 in this table.
- Page 152 SCD are lit. If they are all lit, you may have a down-level version of the tape drive’s o, u firmware; contact Spectra Logic Technical Support. The message display has lost communication with the tape drive. This message appears on Line 2 of …...
-
Page 153: Sait Tape Drive Troubleshooting
Chapter 14. Drive Troubleshooting SAIT Tape Drive Troubleshooting Each SAIT drive has four LEDs labeled as follows: • Tape Motion • Drive Error • Media Error • Cleaning Request All LEDs flash rapidly and simultaneously when the drive malfunctions. LED states and their meanings are included in Figure 14-1 The SAIT tape drive LEDs. -
Page 154: Sdlt Tape Drive Troubleshooting
2. Note the state and color of the LED on the front of the suspect drive. 3. Refer to the following tables to interpret the indicators. If the drive is in an error state, contact Spectra Logic Technical Support. SDLT Tape Drive LEDs All LEDs are located on the tape drive’s front panel (Figure 14-2). - Page 155 Chapter 14. Drive Troubleshooting SDLT Tape Drive LED Indicators See the table below for the meanings of various LED indications. Color Symbol Indication Explanation Orange or See The Drive Density LED, Drive Density Green below. The tape drive is in use, which includes functions such as: •...
-
Page 156: Sdlt Tape Drive Cleaning
Chapter 14. Drive Troubleshooting SDLT Tape Drive Cleaning The frequency of cleaning is dictated mostly by the amount of ambient pollution and particulates in the environment. The drive indicates when it needs cleaning (see SDLT Tape Drive LED Indicators on page 155). Your backup software may also notify you if you need to clean the drive. -
Page 157: Rxt Drive Troubleshooting
See the table on page 158 for detailed information on RXT drive flash codes. Note: For information on troubleshooting RXT media, see the RXT troubleshooting guide that is available on Spectra Logic’s web site at www.spectralogic.com. Caution: Before attempting to troubleshoot RXT media packs, first... - Page 158 Gather traces and debug files using diagnostics. RXT Drive Hardware Error RXT Media Hardware Error Spectra Logic recommends using the Web interface for these procedures, but you may also access them through the serial interface. RXT Drive or RXT Media Hardware Error Obtain the warning message and forward it to SpectraGuard Support.
-
Page 159: Chapter 15. Advanced Configuration & Use
Apache server work as package servers. To set up, add, or delete local package servers, follow these steps. 1. Identify the server or servers to locally store Spectra Logic library firmware packages. Make sure that these servers can access the Internet. - Page 160 Chapter 15. Advanced Configuration & Use 2. Select Maintenance > Package Update. The Package Update screen appears (Figure 15-1). Figure 15-1 The Package Update screen. 3. Select Manage Package Servers. The Manage Package Servers screen appears (Figure 15-2). Example of a local package server Figure 15-2 The Manage Package Servers screen.
-
Page 161: Advanced Configuration Settings
Use preset, select User Define, then enter the Vendor and Model in the appropriate fields. Note: Spectra Logic recommends using the preset SPECTRA PYTHON. 3. Select Next. The Drives and Chambers screen displays. 4. Proceed to Library Partitioning on page 49. -
Page 162: Using The Lc To Access Individual Tapes
Chapter 15. Advanced Configuration & Use Using the LC to Access Individual Tapes Typically, all individual tape moves are handled through the backup software. In rare instances, you may need to access one or a few tapes. Follow the steps in this section to handle these tasks. - Page 163 Chapter 15. Advanced Configuration & Use Locating and Moving Individual Tapes Normally, use your backup software to move media. You may need to use the LC to locate and move an individual tape, for example, to move a cleaning tape to a drive. Locating a Tape: Review Inventory 1.
- Page 164 Chapter 15. Advanced Configuration & Use Moving a Tape Inside the Library To move a tape using the LC, follow this process: To get to the Inventory screen, select General > Inventory. Select Partition, then Go. Select the Source type, then select Go.
-
Page 165: Appendix A. Media & Upgrades
Media and Media Accessories Certified Media Spectra Logic certifies only the highest quality data cartridges received directly from the manufacturer and provides a lifetime guarantee on all Certified Media. Each order includes 10 cartridges, a TeraPack container to hold the media inside and outside the library, and a fitted dust cover for use outside the library. -
Page 166: Approved Media
Maxell, Sony, TDK, and Spectra Logic. Prior to using media other than those listed as supported above, contact Spectra Logic technical support to understand the risk associated with use of unsupported media. Check the Spectra Logic Web site for the most up-to-date media availability. -
Page 167: Media Accessories
How To Order To purchase Certified Media and media accessories, contact your sales representative (see Contacting Spectra Logic Sales on page 170) or use the online store at Spectra Logic’s Web site. Reference the part numbers on page 166 when making your... -
Page 168: Upgrades
Upgrades available for purchase include library system upgrades, called options, as well as library hardware upgrades. You can purchase options and upgrades from your sales representative; you can also purchase some from the Spectra Logic Web site. Library Options Before Purchasing an Option When purchasing options, you need to provide your library Hardware ID. -
Page 169: Hardware Upgrades
Logic Web site. If you purchase chambers using CoD that exceed the amount of space left in the current library frame by a minimum of 20 chambers, Spectra Logic includes the next library frame for free, although its installation requires a visit from a field technician, priced separately. -
Page 170: Contacting Spectra Logic Sales
Appendix A. Media & Upgrades Contacting Spectra Logic Sales Web Site www.SpectraLogic.com United States Phone (800) 833-1132 or (303) 449-6400 Office (303) 939-8844 E-Mail sales@spectralogic.com European Office Phone +44 (0) 870 112 2150 +44 (0) 870 112 2175 E-Mail eurosales@spectralogic.com E-Mail for Media media@spectralogic.com... -
Page 171: Appendix B. Service And Support
™ Technical Support provides comprehensive on-site maintenance by Spectra Logic’s worldwide support team. Years in the industry have provided the Spectra Logic technical support team with extensive experience in diagnosing and correcting problems with libraries, drives, operating systems, networks, and backup software packages. -
Page 172: If You Have A Problem With Your Library
Appendix B. Service and Support If You Have a Problem With Your Library Before taking any action with SpectraGuard Technical Support, follow these steps. 1. Review the System Messages, if possible (see Checking Messages on page 126), and take any action described in the message(s). 2. -
Page 173: Opening A Support Ticket
• To configure AutoSupport, see Configuring AutoSupport Profiles on page 37. • To use AutoSupport, see Using AutoSupport on page 41. If you need to open a ticket using telephone, e-mail, or the Spectra Logic Web site, see the instructions below. -
Page 174: Rma Returns
Support representative. Spectra Logic needs this number to identify the part on its arrival. 2. Pack the component in special shipping materials as instructed by Spectra Logic. Note: If the component is improperly packed, the warranty is void. 3. Send the component to the following address:... -
Page 175: Repair Policy: Warranty
Appendix B. Service and Support Repair Policy: Warranty Spectra Logic warrants the library to be in good working order for a period of one full year from the date of shipment from Spectra Logic or an authorized Spectra Logic dealer. Should this product fail to be in good working order at any time during this one-year period, Spectra Logic will, at its option, repair or replace this product at no additional charge except as listed below. -
Page 176: Standard Service
• Telephone access to a Technical Support representative from 8:00 a.m. to 5:00 p.m. local time Monday through Friday, excluding Spectra Logic holidays. • If the Spectra Logic Technical Support representative determines that the library requires repair, an on-site service provider is dispatched. When dispatched by 4:00 p.m. -
Page 177: Advanced Service Options
Four-Hour Response On-Site Service This service includes 24-hour telephone access to a Technical Support representative seven days a week, 365 days a year. Once a Spectra Logic Technical Support representative determines that the library requires repair, an on-site service provider will be dispatched. - Page 178 Platinum coverage, currently available in the United States, provides customers: • Telephone Support • Toll free access to a Spectra Logic support representative 24 hours a day, 7 days a week, 365 days a year. • Call priority when contacting SpectraGuard support.
-
Page 179: Appendix C. Regulatory & Safety Standards
Appendix C. Regulatory & Safety Standards Safety Standards The Spectra T950 library complies with the following domestic and international product safety standards. • IEC 60950:91+A1:92, A2:92, A3:95, and A4:96 • UL 60950 Third Edition (“Safety of Information Technology Equipment” based on IEC 60950) •... -
Page 180: Eu Declaration Of Conformity
Appendix C. Regulatory & Safety Standards EU Declaration of Conformity Spectra Logic Corporation 1700 North 55th Street Boulder, CO 80301 USA declare under sole responsibility that the Spectra T950 Library to which this declaration relates, meets the essential health and safety requirements and is in conformity... -
Page 181: Germany
Appendix C. Regulatory & Safety Standards Germany The Spectra T950 library is certified by geprüfte Sicherheit through UL Demko International. This is a voluntary certification that complies with German safety regulations to meet the demands of the industry. This user guide complies with this certification by providing all safety-relevant information in the German language. -
Page 182: China
Appendix C. Regulatory & Safety Standards China Measures for the Administration of the Control of Pollution by Electronic Information Products T950有毒和有害物质及元素 铅 汞 镉 六价铬 多溴联苯 多溴联苯醚 (Pb) (Hg) (Cd) (Cr(VI)) (PBB) (PBDE) 磁带库 磁带驱动器 IBM LTO-3 磁带驱动器 IBM LTO-4 电路板焊料含有铅。服务器,存储器和存储阵列系统,用于转接、信号和传输的网络基础设... -
Page 183: Taiwan
Appendix C. Regulatory & Safety Standards Taiwan BSMI Class A WEEE Directive The following symbol on the back of this product indicates that this product meets the European Directive 2000/96/EC on Waste Electrical and Electronic Equipment, known as the WEEE directive. This directive, only applicable in European Union countries, indicates that this product should not be disposed of with normal unsorted municipal waste. - Page 184 Appendix C. Regulatory & Safety Standards...
-
Page 185: Appendix D. Specifications
Appendix D. Specifications This chapter includes library, drive, and media specifications as follows: • Library Specifications, below • Tape Drive Specifications on page 196 • RXT Specifications on page 200 Library Specifications Library specifications outlined in this chapter include the following: •... -
Page 186: Power Cable Specifications
Appendix D. Specifications Library Power and Cooling Requirements LTO Drives Standby Mode (Minimum) Power Consumption (Watts) Heat Dissipation (BTU/hour) 1161 1507 1853 2199 2545 2819 Read/Write/Seek Mode (Maximum) Power Consumption (Watts) 1231 1479 1705 Heat Dissipation (BTU/hour) 1662 2509 3356 4203 5050 5824... - Page 187 Appendix D. Specifications Power Cable Types and Plug Types The following table shows the Spectra T950 library power cables used in each country. Power Cables and Plugs Part Number Country of Use Plug Style North America 5500 L620P Korea North America 7029 L6/30P Korea...
- Page 188 Appendix D. Specifications Installing Cord Locks To install the cord locks, follow these steps: 1. Remove the dual AC assembly from the library by removing the six screws that attach the assembly to the library (circled in Figure D-1). Figure D-1 The screws on the dual AC assembly. 2.
- Page 189 Appendix D. Specifications Environmental Specifications for the Library Caution: The library should always be installed on a hard flooring, such as tile—never on carpeted flooring. Operating Environment Specifications Humidity 20% - 80% (non-condensing) Humidity Gradient Less than 10% per hour Temperature 50ºF - 90ºF (10ºC - 32ºC) Maximum Temperature Rate...
-
Page 190: Tape Drive Attachment Methods
• Third Party Copy • Gigabit Ethernet • iSCSI You can find a complete interoperability listings on the Spectra Logic Web site at http://www.spectralogic.com/index.cfm?fuseaction=support.document&CatID=244. Software Compatibility For the most current listing of the types of software that have been tested and proven compatible with the Spectra T950 library, visit the Spectra Logic Web site at http://www.spectralogic.com/index.cfm?fuseaction=support.document&CatID=244. -
Page 191: Data Storage Capacity
Appendix D. Specifications Data Storage Capacity The library’s capacity depends on the number of library frames in the cascade, the number of drives and slots inside, and the type(s) of drives and media used. The capacity of a frame depends on the type(s) of frame(s) in its configuration. Add the following capacities to that of the primary frame to calculate the capacity of the cascade. - Page 192 Appendix D. Specifications RXT Drive Expansion Frame Gold RXT Media - Native TB Silver RXT Media - Native TB RXT Media Drives Packs 1.2TB Option 500GB Option 1TB Option 2TB Option 1 - 10 1140TB 475TB 950TB 1.9PB 11 - 22 996TB 415TB 830TB...
-
Page 193: Bar Code Specifications For Half-Inch Media
Appendix D. Specifications Bar Code Specifications for Half-Inch Media The bar code labeling scheme uses the bar code symbology of USS-39, a description and definition of which is available from the Automatic Identification Manufacturers (AIM) specification Uniform Symbol Specification (USS-39) and the ANSI MH10.8M- 1993 ANSI Barcode specification. - Page 194 Appendix D. Specifications Label Specifications for Bar Codes with Alphanumeric Characters on Bottom Cassette Tape Quiet Starting Bar Code Character Zone Bar code label 2X 4.318 minimum 13.72mm minimum 11.1mm 16.993 +0/-.787 74.092 • 0.381 Alphanumeric 78.994 • 0.787 Characters Figure 2 The bar code specifications for half-inch media;...
- Page 195 Appendix D. Specifications Detailed Bar Code Specifications • Minimum symbol height is 11.1 mm, measured to the inside of the label’s edge. • The wide-to-narrow ratio is 2.75. • The narrow element width is 0.432 mm +0.03 mm or -0.076 mm. •...
-
Page 196: Tape Drive Specifications
Appendix D. Specifications Tape Drive Specifications LTO-4 Tape Media and Drive Specifications Parameter Specification Tape Capacity 800 GB native (1600 GB compressed) MTBF 250,000 hours at 100% duty cycle Average File Access Time 65 seconds Uncorrectable Error Rate 1 x 10 bits SCSI: 70 MB/sec native (140 MB/sec compressed);... - Page 197 Appendix D. Specifications LTO-4 drive-based encryption highlights: • AES-256 data encryption with a secret 256-bit encryption key, used to encrypt and decrypt data. The key is not retrievable from the encryption core and is automatically erased during the unload process; software is required to extract the key, keep it secure, and provide management tools to track, store, use, and delete keys as appropriate.
-
Page 198: Sait Tape Media And Drive Specifications
Appendix D. Specifications LTO-2 Tape Media and Drive Specifications Parameter Specification Tape capacity 200 GB native (400 GB compressed) MTBF 250,000 hours at 100% duty cycle Average file access time 65 seconds Uncorrectable error rate 1 x 10 bits Sustained transfer rate 35 MB/sec native (70 MB/sec compressed) Burst transfer rate 160 MB/sec synchronous maximum... -
Page 199: Sdlt 600 Tape Media And Drive Specifications
Appendix D. Specifications SDLT 600 Tape Media and Drive Specifications Parameter Specification Tape capacity 300 GB native (600 GB compressed) MTBF 250,000 hours at 100% duty cycle Average file access time 79 seconds Uncorrectable error rate 1 x 10 bits Sustained transfer rate 34 MB/sec native (68 MB/sec compressed) Burst transfer rate... -
Page 200: Rxt Specifications
Appendix D. Specifications RXT Specifications RXT Drive Specifications Parameter Specification Reliability 100,000 media insertion and removal cycles Ambient Operating Environment 32ºF - 104ºF (0ºC - 40ºC) Ambient Non-Operating Environment -40ºF - 140ºF (-40ºC - 60ºC) Ambient Operating Humidity 20% - 80% relative humidity (non-condensing) Operating Altitude 0 - 10,000 feet (0 - 3,048 meters) Non-operating Altitude... -
Page 201: Rxt Media Capacity And Performance Specifications
Appendix D. Specifications RXT Media Specifications Parameter Specification H x W x D Dimensions 2.4in x 4.6in x 10.1in 6.1cm x 21.1cm x 25.4cm Reliability 10,000 media insertion and removal cycles a. All specifications are subject to change without notice. RXT Media Capacity and Performance Specifications Media RAID Level... - Page 202 Appendix D. Specifications...
-
Page 203: Glossary Of Terms
Glossary of Terms administrator A type of library user who is allowed control of the library, but cannot control who else is allowed access to the library. Assisted Self-Maintenance. An advanced Technical Support option wherein certain library components can be stocked on site for faster library repair. - Page 204 Semi-enclosed locations where TeraPack containers or RXT media packs are stored inside the library. A capacity-on-demand feature of Spectra Logic libraries. Purchasing and entering a key code in the library enables additional slots—chambers in the Spectra T950 library—allowing for additional storage capacity.
- Page 205 Electronics Bay Assembly. The EBA houses the control modules for the library—the LCM and the RCM—as well as the 24V power supplies that control the robotics. Entry/Exit. EE pool Entry/exit pool. A configurable number of slots (as chambers) used by backup software for importing and exporting media.
- Page 206 hardware ID A unique number for the library that is required to purchase options or upgrades. The Hardware ID is located in the Option Enablement portion of the System Setup screen. Host Bus Adapter. It is a device that connects one or more peripheral units to a computer.
- Page 207 Local Area Network. A communications network that serves a confined geographical area. It attaches clients (users’ workstations) and servers that hold programs and data shared by the clients. Library Controller. The graphical user interface for the library, located on the library’s front panel. Library Control Module.
- Page 208 Number plus one. A way of configuring equipment to provide redundancy for protection in the event of failure. Network Attached Storage. A network environment that uses a dedicated file sharing device. The server processes the data, and the NAS device delivers the data to the user. A NAS device can exist outside the server in a LAN.
- Page 209 package A collection of firmware files that are bundled together to simplify the installation of firmware upgrades. partition An independently operating subset of the physical library. The subset behaves as though it were its own physical library, using only drives and slots assigned to that partition on its creation.
- Page 210 Remote Library Controller. Remote management for the library. Using a specific IP address, the library can be managed using a Web browser. Return Materials Authorization. Required by Spectra Logic for the repair or exchange of any library components. RAID eXchangeable TeraPack. RXT technology allows disk to be mobile, as well as able to be integrated into the same automated library as tape technology.
- Page 211 Small Computer System Interface. SCSI is an interface connection used to connect peripheral devices to computer systems. Shared Library Services. A feature of Spectra Logic libraries that allows users to allocate the library’s resources across various platforms by creating distinct partitions. See partition.
- Page 212 TeraPack Access Port. The TAP provides the means through which TeraPack containers or RXT media packs are loaded into and unloaded from the library. TCP/IP Transmission Control Protocol/Internet Protocol. Provides transport functions to ensure that the total amount of bytes sent is received correctly at the other end.
- Page 213 World Wide Name (specific to Fibre Channel). A unique 48-bit or 64-bit number that identifies a connection or a set of connections to the network. A WWN is assigned for the life of a connection (device). eXtensible Markup Language. A universal format for structured documents and data on the World Wide Web.
-
Page 215: Index
Index AutoSupport about 176 configuring 37 creating profiles 38 AC power cables (power) using 41 cables and plugs 187 specifications 186 cord locks 188 types 187 specifications 186 calibration of fans 117 warning 3 capacity accessories adding 169 bar code labels 165 backup software frames 29 cleaning cartridges 165... - Page 216 189 about 15 LTO LEDs 139 shipping and storing library upgrades 29 partition assignment 53, 61, 65 contacting Spectra Logic tape drives 98 SAIT LEDs 153 main offices 2, 4 SDLT LEDs 154 E-QIP configuration 56 sales 170...
- Page 217 General Status screen 33 Import/Export TeraPacks screen fans German translations 181 replacing the air filter 116 Gigabit Ethernet importing fax Spectra Logic 4 best practices 136 bulk media 109 FCC Notice 179 Gigabit Ethernet protocol support individual tapes 109 Fibre Channel...
- Page 218 Web site address 125, 137 definition 84 displayed on status bar 34 library users mail recipient configuration 86 adding new 81, 82 mailing address, Spectra Logic 4 configuration 80 labels maintenance deleting 82 ordering custom bar codes 165 best practices 105...
- Page 219 85 USB devices 29, 169 subnet mask 85 performance Python architecture 13 optimizing 104 new partitions 50 phone Spectra Logic 4 new users 81 sales 170 notes as conventions 11 technical support 173, 174 NVRAM 19 plugs (power) specifications 186...
- Page 220 Index returns security using an RMA 174 configuration 80 warranty policy 175 default users 80 groups 80 QIPs 15 RLC 24 privileges 80 architecture 15 entering information 90 toolbar 80 configuration example 16 interpreting 33 drive visibility 55, 63 self-maintenance RMA numbers Fibre Channel (F-QIPs) 16 checking library status 113...
- Page 221 95 SAIT tape drives 198 bulk imports 109 SDLT tape drives 199 switching library users 82, 93 capacity 99 Spectra Logic symbols covers 19 main offices 4 messages icons 34 data protection 19 sales 170...
- Page 222 Transporter 18 sense code lookup 125, 137 adding new 81 troubleshooting shop 29 deleting 82 error codes 125, 137 Spectra Logic 4 displayed on status bar 34 Knowledge Base 173 technical support 173 editing 82 library components 134 overview 80...
Need help?
Do you have a question about the T-Series Spectra T950 and is the answer not in the manual?
Questions and answers