Sign In
Upload
Manuals
Brands
YOKOGAWA Manuals
Recording Equipment
SMARTDAC+ GP10
YOKOGAWA SMARTDAC+ GP10 Manuals
Manuals and User Guides for YOKOGAWA SMARTDAC+ GP10. We have
10
YOKOGAWA SMARTDAC+ GP10 manuals available for free PDF download: User Manual
YOKOGAWA SMARTDAC+ GP10 User Manual (707 pages)
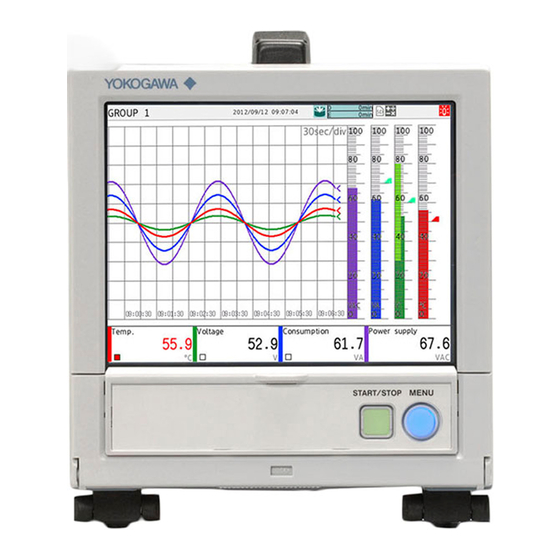
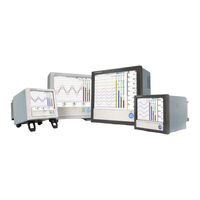
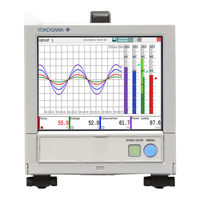
SmartDac Plus Paperless Recorder
Brand:
YOKOGAWA
| Category:
Recording Equipment
| Size: 22.28 MB
Table of Contents
Introduction
3
GX/GP Version and Functions Described in this Manual
5
How to Use this Manual
7
Conventions Used in this Manual
8
Table of Contents
9
Basic Functions of the GX/GP
15
Measurement
15
Recording
15
Display
17
Saving
19
Data Utilization
20
Control
20
Chapter 1 Configuring The Gx/Gp And Viewing The Settings
21
Setup Guide (Read this First)
21
Menu Screen
22
Setting Screen
23
Basic Setup
26
What Do You Want to Configure
33
Saving Data
37
Quick Setting Function (GP10/GP20, Release Number 3 (Version 3.02) and Later)
45
Setting the Date and Time
46
Configuring AI Channels (Analog (Including DI) Input) Channels and AI (Ma) Channels
47
Setting the Range
47
App
47
Setting Alarms
55
Setting the Display
60
Bar Graph Display
72
Setting Calibration Correction
73
Release Number 3 and Later))
73
Index
73
Setting the Range
77
Setting Alarms
78
Setting the Display
80
Configuring Pulse Input Channels (Release Number 3 and Later)
83
Setting the Range
83
Setting Alarms
85
Setting the Display
86
Configuring AO Channels (Analog Input Channels)
90
Setting the Range
90
Setting the Display
94
Configuring DO Channels (Digital Output Channels)
98
Setting the Display
100
Configuring Control Function and Configuring Program Control Function
102
Configuring Math Channels (/MT Option)
103
Setting Basic Computation Operations (Error Indications, Operation at Start, Overflow Handling, PSUM Overflow 1 Handling)
103
Setting Expressions
104
Writing Expressions
111
Setting Alarms
121
Setting the Display
122
Setting Variable Constants to Use in Computation
126
Configuring Logic Math (/MT Option)
127
Operating Conditions
128
1.10 Setting Display Conditions
130
Setting the Trend Interval
130
Setting Display Groups
131
Setting Messages
133
Setting Trend Display Conditions
134
Setting Basic Screen Items
137
Calendar Display
138
Setting Measurement Conditions (Scan Interval, A/D Integrate, Etc.)
139
Setting the Scan Interval
139
Setting the Over-Range Detection Method
140
Setting the Operation Mode of a Module
140
Setting the A/D Integral Time
142
Setting the Noise Rejection (High-Speed AI, PID Control Module) (Release Number 4 and Later)
143
Setting the Burnout Criteria (Release Number 2 and Later)
144
Setting the Chattering Filter (DI Module) for Pulse Input
144
Setting Recording Conditions (Recording Mode, Recording Interval, Saving Interval)
145
Setting the Type of Data to Record (Display or Event Data) and Recording Conditions
145
Data Length
148
Configuring Recording Channels
153
Configuring the Dual Interval Settings (Release Number 4 and Later)
157
Setting the Scan Interval
157
Setting the Scan Interval of each Module
158
Setting the Recording Conditions
158
Configuring Recording Channels
160
1.14 Setting the Conditions for Saving Data Files
161
Setting the Save Directory, File Header, and File Name
161
Setting the Save Method to Media (Auto Save or Manual Save) and Media FIFO
163
Auto Save
163
Setting the File Format of Display Data and Event Data
167
1.15 Configuring the Batch Function
168
Configuring the Batch Function (Lot-No. Digit and Auto Increment)
168
Setting Batch Text
168
Setting the Recording Start Screen (Release Number 3 and Later)
169
Configuring the Report Function (/MT Option)
171
Setting the Report Type, Creation Time, Data Type, Etc
171
Data Type
172
File Type
172
Setting the Channels to Output Reports
174
Using the Report Template Function (/MT Option)
176
Excel Report Files
176
PDF Report Files
177
Printing on a Printer over the LAN
177
Creating Template-Based Report Files
178
Loading and Saving Report Template Files
178
1.18 Setting the Timers
179
Setting the Match Time Timer
180
1.19 Configuring The Event Action Function
182
Setting Event Action Numbers and Actions
182
Alarm Level
183
Event Action Examples
190
Configuring Communication Channels (/MC Option)
193
Enabling Communication Channels and Setting the Span, Decimal Point, and Unit
193
Watchdog Timer
194
Setting Alarms
195
Setting the Display
196
Configuring the Ethernet Communication Function
200
Setting Basic Communication Conditions
200
Configuring the FTP Client Function
202
Configuring the SMTP Client Function
204
Setting E-Mail Transmission Conditions (When the SMTP Client Function Is On)
205
Alarm Settings
206
Report Settings
207
System Settings
207
Setting the SNTP Client Function
208
Configuring the Modbus Client Function (Option, Function Available When /MC Is Specified)
209
Configuring the Server Function
212
Limiting the Connection to the Modbus Server (GX/GP)
213
Ftp Server
213
Setting the Server Functions to Use (FTP, HTTP, SNTP, MODBUS, GENE, DARWIN Compatible Communication)
214
Setting the Web Content Selection Tree (Release Number 3 and Later)
217
Configuring the Serial Communication Function (/C2 and /C3 Options)
218
Setting Basic Communication Conditions
218
Enabling or Disabling the Modbus Master Function (/MC Option) and Setting Communication Conditions
220
Setting Modbus Master Transmission Commands
221
Configuring System Settings (Time Zone, Display Language, Status Relay, Etc.)
223
Setting the Display Language, Temperature Unit, Decimal Point Type, and Date Format
223
Setting the Interval for Calculating the Rate-Of-Change for Rate-Of-Change Alarms
224
Setting the Alarm Display Hold/Nonhold and Individual Alarm ACK Operation
225
Setting the Time Zone, Gradual Time Adjustment, and Daylight Saving Time
225
Time Zone
225
Daylight Saving Time
226
Start Time
226
Setting Internal Switches
228
Setting the FAIL Relay and Instrument Information Output (/FL Option)
229
Relay Operation
230
Setting the Printer Output Conditions
231
Setting Instrument Tags
232
Setting Comments to Setting Files
233
Setting USB Input Devices (/UH Option)
234
1.24 Configuring the Security Functions
238
Setting Items to Lock the Operation of (When Touch Operation Is Set to Operation Lock)
239
Setting Registered User Conditions (When Touch Operation or Communication Is Set to Login)
242
User Level
242
User Settings
242
1.25 Loading Settings
244
Loading Setting Parameters
244
Loading and Deleting Scale Images
246
Loading Report Templates (/MT Option)
248
Loading and Deleting Trusted Certificates (Release Number 2 and Later)
250
Loading and Deleting Program Patterns (/PG Option) (Release Number 4 and Later)
254
Loading Setting Parameters, Scale Images, Report Templates, Trusted Certificates
256
1.26 Saving Setting Parameters
258
Saving the Setting Parameters
258
Saving a Scale Image
259
Saving a Report Template
261
Saving Trusted Certificates (Release Number 2 and Later)
262
Saving Custom Displays (/CG Option) (Release Number 2 and Later)
262
Saving Program Patterns (/PG Option) (Release Number 4 and Later)
264
Saving Setting Parameters, Scale Images, Report Templates, Trusted Certificates
266
Index
267
Listing Files that Are on the External Storage Medium
267
1.28 Formatting The External Storage Medium
268
Internal Data
270
1.29 Initializing And Calibrating The System (Initialization, Reconfiguration, Touch Screen Calibration), Setting The Measurement Mode
271
Initializing Display Groups or Recording Channels Separately
273
Setting the Measurement Mode
274
Reconfiguring the GX/GP
276
Adjusting the Touch Screen
277
Configuring Key Creation, Certificate Management, and Encryption/Certificate (SSL Communication, PDF Electronic Signature) (Release Number 2 and Later)
278
Creating a Key
278
Enabling the Encryption Function
278
Configuring Certificate Management (Creating Self-Signed Certificates, Creating Certificate Signature Requests (Csrs), Installing Certificates, and Installing Intermediate Certificates)
279
Viewing Certificate Details and Removing Certificates
282
Configuring the Encryption of the Server Function and Client Function, and Applying PDF Electronic Signatures
284
Loading, Deleting, and Saving a Trusted Certificate
284
Verification Confirmation of Unverified Certificates
284
Using the DARWIN Compatible Communication Function (Release Number 2 and Later)
285
Overview
285
Supported Commands
287
Configuring the DARWIN Compatible Communication Function
291
Configuring the GX/GP IP Address, Subnet Mask, and the Like (for Ethernet)
291
Configuring the Gx/Gp's Basic Serial Communication Conditions (for RS-232, RS-422/485) (Version 2.02 and Later)
291
Using the Aerospace Heat Treatment (/AH Option) (Release Number 3 and Later)
292
Setting the Calibration Reminder
292
Displaying Reminders
296
Limitation of Function (When the Advanced Security Function (/AS) Is Enabled)
297
Chapter 2 Operating the GX/GP
299
Starting and Stopping Recording and Computation
299
Starting and Stopping Recording
299
Using the Batch Function
302
Applying a Record Start Trigger for Event Data
304
Starting, Stopping, and Resetting Computation
305
Clearing Computation Data Dropout Displays
307
Configuration of Measured Data Display
308
Displaying Measured Data Using Waveforms, Numeric Values, Bar Graph, or Custom Display (/CG Option) (Trend, Digital, Bar Graph, and Custom Displays)
308
Switching the Group to Display
317
Displaying the Statuses of All Channels on One Screen (Overview Display)
319
Displaying the Multi Panel (GX20/GP20 Only)
321
Writing Registered Messages and Free Messages
322
Writing Freehand Messages
327
Displaying Previously Measured Data (Historical Trend Display)
329
Switching to the Secondary Trend Interval
337
Registering and Showing the Standard Display
338
Loading and Displaying Display Data and Event Data from the External Storage Medium
338
Displaying Various Types of Information
339
Listing the Log of Alarm Occurrences and Releases ( Alarm Summary)
339
Displaying the Log of Written Messages (Message Summary)
341
Displaying a List of Data Files in the Internal Memory and Saving Data (Memory Summary)
343
Displaying Reports
347
Displaying Logs
349
Checking the Command Status of the Modbus Client and Modbus Master
356
Displaying the GX/GP System Information
359
Displaying Network Information
362
Displaying Reminders (/AH) (Release Number 3 and Later)
362
Executing Various Functions
363
Releasing Alarm Output (Alarm ACK and Individual Alarm ACK Operation)
363
Disabling and Enabling Operation (Operation Lock Function)
364
Resetting Timers (Relative Timers)
364
Resetting Match Time Timers
365
Generating a Record Start Trigger for Event Data
365
Using, Registering, and Deleting Favorite Screens
365
Performing a Test Print
366
Clearing the Buzzer Sound
366
Adjusting the Clock Manually
366
Using the User Function Keys (Release Number 2 and Later)
366
Verifying Unverified Certificates (Release Number 2 and Later)
367
Resetting the Calibration Reminder Due Date, Performing Calibration Correction (/AH) (Release Number 3 and Later)
367
Saving Various Types of Data
368
Automatically Saving Measured Data
368
Manually Saving Measured Data (Collectively Saving Unsaved Data)
368
Manually Saving Instantaneous Values of Measured Data (Manual Sample)
369
Saving and Printing Screen Image Data (Snapshot)
369
Saving Internal Memory Files to an SD Memory Card or USB Flash Memory
370
Saving Display Data or Event Data During Recording through Touch Operation
370
Removing the SD Memory Card or USB Flash Memory
371
Using USB Peripheral Devices
372
Using a Keyboard or Bar Code Reader
372
Using a Mouse
373
Executing Communication Commands with a USB Bar Code Reader (Release Number 2 and Later)
374
Performing Network Related Operations
375
Performing an Mail Transmission Test
375
Starting and Stopping Mail Transmission
375
Checking FTP File Transfers (FTP Transmission Test)
376
Adjusting the Clock Manually (SNTP Time Adjustment)
376
Outputting Snapshots or Report Data to a Network Printer
377
Displaying Network Connection Information
377
Obtaining and Releasing Network Information Received through DHCP
377
Performing File Operations
379
Initializing the Internal Memory
379
Loading and Displaying the Measured Data (Display Data and Event Data) from the Storage Medium
379
Formatting the External Storage Medium
380
Disabling Operation (Operation Lock Function)
381
Locking the Operation
381
Releasing the Operation Lock
381
2.10 Allowing Only Registered Users To Operate
382
Logging in and Logging out
382
Changing the Password
383
Chapter 3 Using Network Functions (Ethernet Interface)
385
Using the Web Application to Change the GX/GP Settings, Monitor Data, and Control the GX/GP (Web Server Function)
385
Connecting to a Network
385
Starting and Closing the Main Application
386
Pc System Requirements
386
Controlling the GX/GP
394
Monitoring the GX/GP Data and Controlling the GX/GP from the Monitor Screen
400
Alarm Display
408
Changing Settings
426
Saving and Loading Settings and Saving and Loading Various Files
439
Changing the Display Settings on the Browser
444
App
445
Transmitting E-Mail Messages
446
Configuring the SMTP Client Function
446
Setting the Mail Content
446
Performing an Mail Transmission Test
447
Starting and Stopping E-Mail Transmission
447
E-Mail Format
448
Accessing the Measurement Data File on the GX/GP from a PC (FTP Server Function)
455
Accessing the GX/GP from a PC
455
Configuring FTP Server Settings
455
Transferring Data Files from the GX/GP (FTP Client Function)
457
Configuring the FTP Client Function
457
Testing the FTP Transfer
459
Synchronizing the Time (SNTP Client Function)
460
Adjusting the Clock Manually
460
Configuring the SNTP Client Function
460
Transmitting Time Information from the GX/GP to SNTP Client Devices (SNTP Server Function)
461
Configuring the SNTP Server Function
461
Chapter 4 Using Modbus Functions (Communicating With Modbus Devices)
463
Using Modbus/Tcp to Enable Other Devices to Read Data from and Write Data to the GX/GP (Modbus Server Function)
463
Setting Basic Network Communication Conditions
463
Configuring the Modbus Server Function
463
Reading from and Writing to the GX/GP from Other Devices
464
Using Modbus/Tcp to Enable the GX/GP to Read Data from and Write Data to Other Devices (Modbus Client Function)
465
Setting Basic Network Communication Conditions
465
Configuring the Modbus Client Function
465
Configuring the Destination Server
466
Setting Commands
466
Checking the Modbus Operation Status
469
Using Modbus to Enable Other Devices to Read Data from and Write Data to the GX/GP (Modbus Slave Function)
470
Setting Serial Communication Conditions
470
Reading from and Writing to the GX/GP from Other Devices
470
Using Modbus to Enable the GX/GP to Read Data from and Write Data to Other Devices (Modbus Master Function)
471
Setting Serial Communication Conditions
471
Configuring the Modbus Master Function
471
Setting Commands
471
Checking the Modbus Operation Status
472
Modbus Function and Register Assignments
473
Modbus Client/Master Function
473
Modbus Server/Slave Function
475
Register Assignments (Shared with the Modbus Server/Slave Function)
475
Input Registers (Shared with the Modbus Server/Slave Function)
478
Hold Registers (Shared with the Modbus Server/Slave Function)
499
Coil
525
Input Relay
526
Property Area
528
Advertisement
YOKOGAWA SMARTDAC+ GP10 User Manual (590 pages)
Paperless Recorder
Brand:
YOKOGAWA
| Category:
Voice Recorder
| Size: 16.51 MB
Table of Contents
Introduction
3
GX/GP Version and Functions Described in this Manual
5
How to Use this Manual
7
Conventions Used in this Manual
8
Table of Contents
9
Basic Functions of the GX/GP
15
Measurement
15
Recording
15
Display
17
Saving
19
Data Utilization
20
Chapter 1 Configuring the GX/GP
21
What Do You Want to Configure
21
Setting the Date and Time
32
Configuring AI Channels (Analog (Including DI) Input) Channels and AI (Ma) Channels
33
Setting the Range
33
Setting Alarms
39
Setting the Display
43
Alarm Indication
52
Setting Calibration Correction (Linearizer Approximation, Linearizer Bias, Correction Factor* (Release Number 3 and Later))
56
Configuring DI Channels (Digital Input Channels)
60
Setting the Range
67
Configuring Pulse Input Channels (Release Number 3 and Later)
67
Setting the Display
70
Index
71
Setting the Display
78
Configuring Math Channels (/MT Option)
80
Setting Basic Computation Operations
80
Psum Overflow Handling
81
Setting Expressions
81
Writing Expressions
88
Setting Alarms
96
Setting the Display
97
Setting Constants to Use in Computation
100
Setting Display Conditions
101
Setting the Trend Interval
101
Setting Display Groups
102
Setting Messages
104
Setting Trend Display Conditions
105
Setting Basic Screen Items
108
Setting Measurement Conditions (Scan Interval, A/D Integrate, Etc.)
110
Setting the Scan Interval
110
Setting the Over-Range Detection Method
110
Setting the Operation Mode of a Module
111
Setting the A/D Integral Time
112
Setting the Burnout Criteria (Release Number 2 and Later)
113
Setting the Chattering Filter (DI Module) for Pulse Input
113
Setting Recording Conditions (Recording Mode, Recording Interval, Saving Interval)
114
Configuring Recording Channels
122
1.10 Setting the Conditions for Saving Data Files
125
Setting the Save Directory, File Header, and File Name
125
Setting the Save Method to Media (Auto Save or Manual Save) and Media FIFO
127
Internal Memory
128
Setting the File Format of Display Data and Event Data
131
1.11 Configuring the Batch Function
132
Configuring the Batch Function (Lot-No. Digit and Auto Increment)
132
Setting Batch Text
132
Setting the Recording Start Screen (Release Number 3 and Later)
133
Configuring the Report Function (/MT Option)
135
Setting the Report Type, Creation Time, Data Type, Etc
135
Setting the Channels to Output Reports
138
Using the Report Template Function (/MT Option)
139
Excel Report Files
139
PDF Report Files
140
Printing on a Printer over the LAN
140
Creating Template-Based Report Files
141
Loading and Saving Report Template Files
141
1.14 Setting the Timers
142
1.15 Configuring The Event Action Function
145
Setting Event Action Numbers and Actions
145
Event Action Examples
153
Other Settings
154
Configuring Communication Channels (/MC Option)
156
Setting Alarms
158
Setting the Display
159
Configuring the Ethernet Communication Function
163
Setting Basic Communication Conditions
163
Configuring the FTP Client Function
165
Configuring the SMTP Client Function
167
Setting E-Mail Transmission Conditions (When the SMTP Client Function Is On)
168
System Settings
170
Setting the SNTP Client Function
171
Configuring the Modbus Client Function (/MC Option)
172
Configuring the Server Function
175
Limiting the Connection to the Modbus Server (GX/GP)
176
Setting the Web Content Selection Tree (Release Number 3 and Later)
180
Configuring the Serial Communication Function (/C2 and /C3 Options)
181
Setting Basic Communication Conditions
181
Enabling or Disabling the Modbus Master Function (/MC Option) and Setting Communication Conditions
183
Setting Modbus Master Transmission Commands
184
Configuring System Settings (Time Zone, Display Language, Status Relay, Etc.)
186
Date Format
186
Setting Internal Switches
191
Setting the FAIL Relay and Instrument Information Output (/FL Option)
192
Setting the Printer Output Conditions
194
Configuring the Sound (Touch Sound and Warning Sound) and LED Settings
195
Setting Instrument Tags
195
1.19.10 Setting Comments to Setting Files
196
Setting USB Input Devices (/UH Option)
197
1.20 Configuring the Security Functions
199
Setting Registered User Conditions (When Touch Operation or Communication Is Set to Login)
202
1.21 Loading Settings
205
Loading Setting Parameters
205
Select File
205
Loading and Deleting Scale Images
207
Loading Report Templates (/MT Option)
209
Loading Setting Parameters, Scale Images, Report Templates, Trusted Certificates
211
Loading and Deleting Trusted Certificates (Release Number 2 and Later)
212
Select Folder
214
1.22 Saving Setting Parameters
216
Saving the Setting Parameters
216
Saving a Scale Image
217
Saving a Report Template
219
Saving Setting Parameters, Scale Images, Report Templates, Trusted Certificates
220
Saving Trusted Certificates (Release Number 2 and Later)
220
Saving Custom Displays (/CG Option) (Release Number 2 and Later)
221
Listing Files that Are on the External Storage Medium
223
1.24 Formatting The External Storage Medium
224
Initializing and Calibrating the System (Initialization, Reconfiguration, Touch Screen Calibration)
225
Initializing the Settings and the Internal Memory
225
Reconfiguring the GX/GP
227
Adjusting the Touch Screen
228
Configuring Key Creation, Certificate Management, and Encryption/Certificate (SSL Communication, PDF Electronic Signature) (Release Number 2 and Later)
229
Enabling the Encryption Function
229
Creating a Key
229
Configuring Certificate Management (Creating Self-Signed Certificates, Creating Certificate Signature Requests (Csrs), Installing Certificates, and Installing Intermediate Certificates)
230
Viewing Certificate Details and Removing Certificates
233
Configuring the Encryption of the Server Function and Client Function, and Applying PDF Electronic Signatures
235
Loading, Deleting, and Saving a Trusted Certificate
235
Verification Confirmation of Unverified Certificates
235
Using the DARWIN Compatible Communication Function (Release Number 2 and Later)
236
Overview
236
Index
237
Supported Commands
238
Configuring the DARWIN Compatible Communication Function
241
Configuring the GX/GP IP Address, Subnet Mask, and the Like (for Ethernet)
241
Configuring the Gx/Gp's Basic Serial Communication Conditions (for RS-232, RS-422/485) (Version 2.02 and Later)
241
Using the Aerospace Heat Treatment (/AH Option) (Release Number 3 and Later)
242
Setting the Calibration Reminder
242
Notification Screen Display
243
Displaying Reminders
245
Limitation of Function (When the Advanced Security Function (/AS) Is Enabled)
246
Chapter 2 Operating the GX/GP
248
Starting and Stopping Recording and Computation
248
Starting and Stopping Recording
248
Using the Batch Function
251
Applying a Record Start Trigger for Event Data
253
Starting, Stopping, and Resetting Computation
254
Clearing Computation Data Dropout Displays
256
Configuration of Measured Data Display
257
Displaying Measured Data Using Waveforms, Numeric Values, Bar Graph, or Custom Display (/CG Option) (Trend, Digital, Bar Graph, and Custom Displays)
257
Switching the Group to Display
262
Displaying the Statuses of All Channels on One Screen (Overview Display)
264
Displaying the Multi Panel (GX20/GP20 Only)
266
Writing Registered Messages and Free Messages
267
Writing Freehand Messages
271
Displaying Previously Measured Data (Historical Trend Display)
273
Switching to the Secondary Trend Interval
281
Registering and Showing the Standard Display
282
Loading and Displaying Display Data and Event Data from the External Storage Medium
282
Displaying Various Types of Information
283
Listing the Log of Alarm Occurrences and Releases ( Alarm Summary)
283
Displaying the Log of Written Messages (Message Summary)
285
Displaying a List of Data Files in the Internal Memory and Saving Data (Memory Summary)
286
Displaying Reports
290
Displaying Logs
292
Checking the Command Status of the Modbus Client and Modbus Master
299
Displaying the GX/GP System Information
302
Displaying Network Information
305
Displaying Reminders (/AH) (Release Number 3 and Later)
305
Executing Various Functions
306
Releasing Alarm Output (Alarm ACK and Individual Alarm ACK Operation)
306
Disabling and Enabling Operation (Operation Lock Function)
307
Resetting Timers (Relative Timers)
307
Resetting Match Time Timers
308
Generating a Record Start Trigger for Event Data
308
Using, Registering, and Deleting Favorite Screens
308
Performing a Test Print
309
Clearing the Buzzer Sound
309
Adjusting the Clock Manually
309
Using the User Function Keys (Release Number 2 and Later)
309
Verifying Unverified Certificates (Release Number 2 and Later)
310
Resetting the Calibration Reminder Due Date, Performing Calibration Correction (/AH) (Release Number 3 and Later)
310
Saving Various Types of Data
311
Automatically Saving Measured Data
311
Manually Saving Measured Data (Collectively Saving Unsaved Data)
311
Manually Saving Instantaneous Values of Measured Data (Manual Sample)
312
Saving and Printing Screen Image Data (Snapshot)
312
Removing the SD Memory Card or USB Flash Memory
314
Using USB Peripheral Devices
315
Using a Keyboard or Bar Code Reader
315
Using a Mouse
316
Executing Communication Commands with a USB Bar Code Reader (Release Number 2 and Later)
317
Performing Network Related Operations
318
Performing an Mail Transmission Test
318
Starting and Stopping Mail Transmission
318
Checking FTP File Transfers (FTP Transmission Test)
319
Adjusting the Clock Manually (SNTP Time Adjustment)
319
Outputting Snapshots or Report Data to a Network Printer
320
Displaying Network Connection Information
320
Obtaining and Releasing Network Information Received through DHCP
320
Performing File Operations
322
Initializing the Internal Memory
322
Loading and Displaying the Measured Data (Display Data and Event Data) from the Storage Medium
322
Formatting the External Storage Medium
323
Disabling Operation (Operation Lock Function)
324
Locking the Operation
324
Releasing the Operation Lock
324
2.10 Allowing Only Registered Users To Operate
325
Logging in and Logging out
325
Changing the Password
326
Chapter 3 Using Network Functions (Ethernet Interface)
327
Using the Web Application to Change the GX/GP Settings, Monitor Data, and Control the GX/GP (Web Server Function)
327
Connecting to a Network
327
Starting and Closing the Main Application
328
Start Screen
329
Controlling the GX/GP
335
Monitoring the GX/GP Data and Controlling the GX/GP from the Monitor Screen
341
Changing Settings
366
Saving and Loading Settings and Saving and Loading Various Files
380
Changing the Display Settings on the Browser
385
Changing the Password
386
Transmitting E-Mail Messages
387
Configuring the SMTP Client Function
387
Setting the Mail Content
387
Performing an Mail Transmission Test
388
Starting and Stopping E-Mail Transmission
388
E-Mail Format
389
Accessing the Measurement Data File on the GX/GP from a PC (FTP Server Function)
396
Configuring FTP Server Settings
396
Accessing the GX/GP from a PC
396
Transferring Data Files from the GX/GP (FTP Client Function)
398
Configuring the FTP Client Function
398
Testing the FTP Transfer
400
Synchronizing the Time (SNTP Client Function)
401
Configuring the SNTP Client Function
401
Adjusting the Clock Manually
401
Index
401
Transmitting Time Information from the GX/GP to SNTP Client Devices
402
Configuring the SNTP Server Function
402
Chapter 4 Using Modbus Functions (Communicating With Modbus Devices)
403
Using Modbus/Tcp to Enable Other Devices to Read Data from and Write Data to the GX/GP (Modbus Server Function)
403
Setting Basic Network Communication Conditions
403
Configuring the Modbus Server Function
403
Reading from and Writing to the GX/GP from Other Devices
404
Using Modbus/Tcp to Enable the GX/GP to Read Data from and Write Data to Other Devices (Modbus Client Function)
405
Setting Basic Network Communication Conditions
405
Configuring the Modbus Client Function
405
Configuring the Destination Server
406
Setting Commands
406
Checking the Modbus Operation Status
409
Using Modbus to Enable Other Devices to Read Data from and Write Data to the GX/GP (Modbus Slave Function)
410
Setting Serial Communication Conditions
410
Reading from and Writing to the GX/GP from Other Devices
410
Using Modbus to Enable the GX/GP to Read Data from and Write Data to Other Devices (Modbus Master Function)
411
Setting Serial Communication Conditions
411
Configuring the Modbus Master Function
411
Setting Commands
411
Checking the Modbus Operation Status
412
Modbus Function and Register Assignments
413
Modbus Client/Master Function
413
Modbus Server/Slave Function
415
Register Assignments (Shared with the Modbus Server/Slave Function)
415
Input Registers (Shared with the Modbus Server/Slave Function)
418
Hold Registers (Shared with the Modbus Server/Slave Function)
436
Coil
458
Input Relay
459
Property Area
461
YOKOGAWA SMARTDAC+ GP10 User Manual (216 pages)
GX Series; GP Series; GM Series; SmartDAC+ Communication Command
Brand:
YOKOGAWA
| Category:
Voice Recorder
| Size: 2.92 MB
Table of Contents
Introduction
3
Recorder Version and Functions Described in this Manual
4
Conventions Used in this Manual
5
How to Use this Manual
5
Table of Contents
7
Chapter 1 Using Dedicated Commands (General)
9
Operations over an Ethernet Network
9
Preparing the Instrument
10
Sending Commands and Receiving Responses
10
Operations over the Serial Interface (RS-232, RS-422/485, USB, Bluetooth)
10
Connection Procedure (GX/GP)
11
RS-422/485 Connection Procedure
14
USB Connection Procedure (GM)
17
Bluetooth Connection Procedure (GM, /C8 Option)
18
Chapter 2 Commands and Responses
19
Command Transmission and Recorder Responses
19
General Communication
19
Command Types and Functions
19
Command Syntax
19
Recorder Responses
22
List of Commands
23
Setting Commands
23
Output Commands
26
Operation Commands
27
Communication Control Commands
27
Instrument Information Commands
28
Conditions for Executing Commands
28
How to Use Commands
29
Device Nomenclature in Command Descriptions
29
Parameters
30
Measuring Range Parameters
30
Parameter Notation and Range
30
Specifying a Range
31
Setting Commands
32
Recording Mode
35
Date Format
67
Display Settings
109
Output Commands
112
Operation Commands
119
Communication Control Commands
131
Instrument Information Output Commands
133
Responses to Commands
135
Affirmative Response (for Commands Other than Output Request Commands)
135
Negative Response
135
Data Output Response
136
Output in Response to RS-422/485 Commands
138
2.10 ASCII Output Format
139
Most Recent Channel Data (Fdata)
139
Most Recent (DO Channel) Status (Frelay)
140
Internal Switch Status (Frelay)
142
Latest Re-Transmission Output (AO Channel) State (Ftransstatao)
142
Users Who Are Currently Logged in (Fuser)
144
All Users Who Are Currently Logged in (Fuser)
146
Instrument Address (Faddr)
148
Recorder Status (Fstat)
149
Alarm Summary (Flog)
152
Message Summary (Flog)
153
Event Log (Flog)
154
Error Log (Flog)
154
Address Setting Log (Flog)
155
General Communication Log (Flog)
156
Modbus Communication Log (Flog)
157
FTP Client Log (Flog)
158
SNTP (Time Adjustment) Client Log (Flog)
159
E-Mail Client Log (Flog)
160
Web Log (Flog)
161
SLMP Log (Flog)
162
Control Alarm Summary (Flog)
163
Control Summary (Flog)
164
Detail Event Log Output (Feventlog) (/AS)
166
External Storage Medium and Internal Memory File List (Fmedia)
175
External Storage Medium Free Space (Fmedia)
175
Setting Data (Fcnf)
176
Decimal Place and Unit Information (Fchinfo)
176
System Configuration (Fsysconf)
177
Bluetooth Device Information (Fbtdevinfo)
179
Reminder Information Output (Freminder)
180
Outputs the most Recent Control Data (Fctrldata)
181
SP Number and PID Number Output (Fctrlno.)
182
Control Mode Output (Fctrlmode)
183
Program Operation Mode Output (Fprgmode)
184
Program Pattern Information Output (Fprgptninfo)
185
PV Event and Time Event Information Output (Fprgevent)
186
Program Control End Signal Status Output (Fprgend)
187
Currently Running Program Pattern Number and Status Output (Fprgptncur)
187
Instrument Manufacturer (_MFG)
188
Instrument's Product Name (_INF)
188
Instrument's Basic Specifications (_COD)
189
Instrument's Firmware Version Information (_VER)
189
Instrument's Option Installation Information (_OPT)
190
Instrument's Temperature Unit and Daylight Saving Time Installation Information (_TYP)
191
Instrument's Error Number Information (_ERR)
191
Instrument's Unit Configuration Information (_UNS or
192
Instrument's Module Configuration Information (_MDS or MDR)
193
2.11 Format of the Data Block of Binary Output
195
Most Recent Channel Data (Fdata)
195
Channel FIFO Data (Ffifocur)
198
FIFO Data Read Range (Ffifocur)
198
The most Recent Control Data (Fctrldata)
199
Advertisement
YOKOGAWA SMARTDAC+ GP10 User Manual (82 pages)
SMARTDAC Plus, Advanced Security Function /AS
Brand:
YOKOGAWA
| Category:
Voice Recorder
| Size: 1.43 MB
Table of Contents
Introduction
3
Conventions Used in this Manual
5
Applicable Recorders
6
Revision History
6
What this Manual Explains
6
Table of Contents
7
Chapter 1 Explanation of the Advanced Security Function
9
Using the Advanced Security Function
9
Operation Overview
9
GX/GP Operation Range
10
PC Software
10
Terminology
11
Recording and Saving Data
12
Data Types
12
Data Recording and Storage Flowchart
13
Display, Event, and Setting File Encryption
13
Display and Event Data Recording Methods
14
Manual Sampled Data
15
Report Data (/MT Option)
15
Directories and File Saving on External Storage Medium
16
Saving Data to External Storage Medium
18
Other Types of Data that Can be Stored
24
Saving Data through an Ethernet Network
24
Login Function
25
Logging in and out Using Touch Operation
25
Logging in and out through Communication
25
User Levels
26
Login Restrictions
29
How the GX/GP Operates When the Login Function Is Not Used
29
Password Management
30
Audit Trail Function
31
Information that Is Saved to Measurement Data Files
31
Event Log
32
Login Information
32
Event Log and Setting File When Recording Is Not in Progress
33
Event Log and Setting File When Recording Is in Progress
34
SET0 Directory Operations
36
Signature Function
37
Signable Files
37
Signature Privileges and Signatures
37
Signing from the GX/GP
38
Signing Using the Standard PC Software (Universal Viewer)
38
Unique Specifications of GX/GP with Advanced Security
39
Functions that Differ from those of Gx/Gps Without Advanced Security or Gx/Gps Whose Advanced Security Is Disabled
39
Functions that Differ from those of the DX1000/DX1000N/DX2000
40
Advanced Security Limitations
41
Chapter 2 Logging In, Logging Out, and Signing
43
Enabling the Advanced Security Function
43
Registering Users and Setting the Signature Method
45
Configuring the Security Function, Logout, Password Management Function, Etc
45
Registering Users
48
Setting User Properties
50
Configuring the Sign in Settings
52
Setting Signature Restrictions
54
Comment Input Function for Setting Changes
54
Activating Modules (for Module Swapping)
55
Logging in and out
56
Logging in
56
Logging out
61
Signing Display and Event Data
62
Signing Process
62
Signing in
63
Viewing the Event Log
66
YOKOGAWA SMARTDAC+ GP10 User Manual (72 pages)
Paperless Recorder
Brand:
YOKOGAWA
| Category:
Voice Recorder
| Size: 13.54 MB
Table of Contents
Table of Contents
1
User Registration
3
Introduction
5
Handling Precautions of the GX/GP
9
SD Memory Card Handling Precautions
9
Checking the Package Contents
9
Standard Accessories
12
Conventions Used in this Manual
13
Protection of Environment
14
Functional Overview
15
Overview
15
A Variety of Source Signals
15
Expandable Module Construction
15
GX60 Connection and Multichannel Measurement
15
High-Speed Measurement, Dual Interval Measurement (Measurement Mode)
16
Loop Control and Program Control Function
16
Data Storage
16
A Variety of Display Functions
16
Touch Screen
17
Freehand Messages
17
Versatile Network Functions and Software
17
Other Functions
18
System Configuration
19
Component Names
20
Gx20/Gx10
20
Gp20/Gp10
21
Gx60/Gx90Ex
21
Gx90Xa/Gx90Xd/Gx90Yd/Gx90Wd/Gx90Xp/Gx90Ya/Gx90Ut
22
Operating Procedure
24
Installation and Wiring
26
Installation Location
26
Installation Procedure
27
External Dimensions and Panel Cut Dimensions
27
Connect an GX60
29
Installing and Removing I/O Modules
30
Wiring
32
Basic Operation
41
Turning the Power on and off
41
Setting and Removing SD Memory Cards
42
Viewing the Operation Screen (Trend)
42
Displaying the Menu Screen
43
Setting the Date and Time
43
Configuring the Inputs
44
Starting Measurement and Recording
44
Switching between Operation Screens
44
Saving Data to USB Memory
45
Switching the Quick Settings (GP Only)
45
Advanced Operation (Various Settings and Operation)
46
Setting Measurement and Recording Conditions
46
Setting Alarms
46
Alarm DO Output
47
Using the Scaling Function (Measuring a Flow Meter)
47
Using the Scaling Function (Measuring a Temperature)
48
Registering and Deleting Favorite Screens
48
Setting the Measurement Mode
49
Limitations
49
Reconfiguring the GX/GP (Module Identification)
50
Reconfiguring the GX/GP
50
Initializing the GX/GP (Initializing All Settings)
50
Saving and Loading Setting Parameters
51
Saving Setting Parameters
51
Loading Setup Parameters
51
YOKOGAWA SMARTDAC+ GP10 User Manual (44 pages)
EtherNet/IP Communication (/E1)
Brand:
YOKOGAWA
| Category:
Measuring Instruments
| Size: 1.92 MB
Table of Contents
Introduction
3
Conventions Used in this Manual
5
Assumption of Explanation
6
Table of Contents
7
Introduction of Features
9
Ethernet/Ip
9
What the Recorder Can Do
10
Settings of the Recorder
10
Access to the Recorder
10
Connection to a Network
11
Cable Connection
11
Settings of the Recorder
11
Preparation for PLC
12
EDS File
12
System Configuration
12
Explicit Message
13
System Configuration on PLC
13
Data on the Recorder
33
I/O Messages
34
System Configuration on PLC
34
Data on the Recorder
38
Communication Considerations
39
About Communication Interval
39
Access to Non-Existent Data
39
Special Data
39
Writing Data to the Recorder
39
Specifications
40
Example of an Explicit Message Using Rslogix 5000
41
Example of I/O Message Using Rslogix 5000
43
YOKOGAWA SMARTDAC+ GP10 User Manual (34 pages)
EtherNet/IP Communication (/E1)
Brand:
YOKOGAWA
| Category:
Measuring Instruments
| Size: 1.78 MB
Table of Contents
Introduction
3
Conventions Used in this Manual
5
Assumption of Explanation
6
Table of Contents
7
Introduction of Features
9
Ethernet/Ip
9
What the Recorder Can Do
10
Settings of the Recorder
10
Access to the Recorder
10
Connection to a Network
11
Cable Connection
11
Settings of the Recorder
11
Preparation for PLC
12
EDS File
12
System Configuration
12
Explicit Message
13
System Configuration on PLC
13
Data on the Recorder
24
I/O Messages
26
System Configuration on PLC
26
Data on the Recorder
29
Communication Considerations
30
About Communication Interval
30
Access to Non-Existent Data
30
Special Data
30
Writing Data to the Recorder
30
Specifications
31
Example of an Explicit Message Using Rslogix 5000
32
Example of I/O Message Using Rslogix 5000
34
YOKOGAWA SMARTDAC+ GP10 User Manual (24 pages)
WT Communication (/E2)
Brand:
YOKOGAWA
| Category:
Data Loggers
| Size: 1.62 MB
Table of Contents
Conventions Used in this Manual
6
Table of Contents
7
Using the WT Communication (/E2 Option)
9
Overview
9
Procedure up to Data Collection
10
Configuring the WT Connection Client Function
11
Basic Settings
11
WT Server Settings
12
Assigning WT Data to Communication Channel
13
Data Group Name and Data Name
14
Collected Data
20
Configuring Communication Channels, Recording Settings, and Display Settings
21
Communication Channel Settings
21
Recording Settings
21
Display Settings
21
Other Settings
21
Monitoring the WT Collection Status
22
YOKOGAWA SMARTDAC+ GP10 User Manual (22 pages)
SLMP Communication (/E4)
Brand:
YOKOGAWA
| Category:
Voice Recorder
| Size: 1.27 MB
Table of Contents
Introduction
3
Conventions Used in this Manual
5
Recorder Version and Functions Described in this Manual
6
Table of Contents
7
Introduction of Features
9
SLMP Communication
9
What the GX, GP, and GM Can Do
9
SLMP Communication (/E4) Specifications
10
GX, GP, or GM Configuration
11
Configuring IP Address, Host Information, DNS, and Other Settings
11
Configuring the SLMP Client
11
SLMP Communication Status Display
18
SLMP Communication Status Management
18
SLMP Communication Status Screen
19
SLMP Log Screen
22
YOKOGAWA SMARTDAC+ GP10 User Manual (24 pages)
Log Scale
Brand:
YOKOGAWA
| Category:
Data Loggers
| Size: 1.08 MB
Table of Contents
Introduction
3
Recorder Versions Described in this Manual
5
Conventions Used in this Manual
6
Table of Contents
7
Using the Log Scale Function
9
Log Scale Display Function
9
Restrictions
10
Setting the Log Scale
11
AI Channel Settings
11
Setup Examples
21
Advertisement
Related Products
YOKOGAWA SMARTDAC+ GX20
YOKOGAWA SMARTDAC+ GX10
YOKOGAWA SMARTDAC+ GP20
YOKOGAWA SMARTDAC+ GP20-1
YOKOGAWA SMARTDAC+ GP20-2
YOKOGAWA GS820
YOKOGAWA SMARTDAC+ GX20-2
YOKOGAWA GX90XD
YOKOGAWA GD402G /M1
YOKOGAWA GRVSW-673FA
YOKOGAWA Categories
Measuring Instruments
Test Equipment
Transmitter
Controller
Media Converter
More YOKOGAWA Manuals
Login
Sign In
OR
Sign in with Facebook
Sign in with Google
Upload manual
Upload from disk
Upload from URL