Sign In
Upload
Download
Table of Contents
Contents
Add to my manuals
Delete from my manuals
Share
URL of this page:
HTML Link:
Bookmark this page
Add
Manual will be automatically added to "My Manuals"
Print this page
×
Bookmark added
×
Added to my manuals
Manuals
Brands
Stratasys Manuals
3D Printers
K6 Series
User manual
Stratasys K6 Series User Manual
3d production system
Hide thumbs
1
2
3
4
Table Of Contents
5
6
7
8
9
10
11
12
13
14
15
16
17
18
19
20
21
22
23
24
25
26
27
28
29
30
31
32
33
34
35
36
37
38
39
40
41
42
43
44
45
46
47
48
49
50
51
52
53
54
55
56
57
58
59
60
61
62
63
64
65
66
67
68
69
70
71
72
73
74
75
76
77
78
79
80
81
82
83
84
85
86
87
88
89
90
91
92
93
94
95
96
97
98
99
100
101
102
103
104
105
106
107
108
109
110
111
112
113
114
115
116
117
118
119
120
121
122
123
124
125
126
127
128
129
130
131
132
133
134
135
136
137
138
139
140
141
142
143
144
145
146
147
148
149
150
151
152
153
154
155
156
157
158
159
160
161
162
163
164
165
166
167
168
169
170
171
172
173
174
175
176
177
178
179
180
181
182
183
184
185
186
187
188
189
190
191
192
193
194
195
196
197
198
199
200
201
202
203
204
205
206
207
208
209
210
211
212
213
214
215
216
217
218
219
220
221
222
223
224
225
226
227
228
229
230
231
232
233
234
235
236
237
238
239
240
241
242
243
244
245
246
247
248
249
250
251
252
253
254
255
256
257
258
259
260
261
262
263
264
265
266
267
268
269
270
271
272
273
page
of
273
Go
/
273
Contents
Table of Contents
Troubleshooting
Bookmarks
Table of Contents
Table of Contents
Service and Support
Service
Software Support
Safety Instructions
Lockout Tagout (LOTO)
Hazard Types
Product Safety Signs
Product Safety Label Locations
Emergency Stop
Potential Safety Hazard Areas
Door Locks
General Safety Practices
Environmental Requirements
Setup and Installation
General Information
Welcome Kit Contents
Prepare Your Facility for Installation
Identifying Your Printer
Basic Setup
Making the Network Connection
Connecting the Power Cable
AC Disconnect
AC Circuit Breaker
Configuring the Network
Setting the Printer's Date and Time
Licensing the Printer
System Components
Printer Overview
Access Doors and Panels
Touchscreen User Interface
Emergency Stop
Oven Components
Oven Door
Oven Lights
Platen
Tip Wipe Assembly
Canister Bay Enclosure Components
Canister Bay
Canister Drives and Canister Release Knobs
Canister Status LED Indicators
Tip Wipe Height Adjustment Wheels
Purge bin
Storage Area
Gantry
Gantry Assembly
Head Assembly
Head Maintenance Bracket
Vacuum and Air Dryer Systems
On Board Vacuum System
On Board Air Dryer System
Modeling Materials and Tips
Materials (380Mc Non-Carbon Fiber Edition)
Materials (380Mc Carbon Fiber Edition)
Canister Memory Chip
Liquefier Tips
Software
Controller Software
Insight Software
FDM Control Center Software
User Interface
Overview
Information Bar
Dashboard
Display Area
Navigation Bar
Working with the Build Page
Viewing Print Job Information
Selecting a Print Job from the Build Page
Print Job Status
Print Job Controls
Working with the Queue Page
About the Job Queue
About the Sample Queue
Working with the Tips Page
Tips/Materials Status
Canister Load Status
Material Load Controls
Tips Controls
Working with the Calibration Page
Viewing Calibration Status
Calibration Controls
XYZ Tip Offset Calibration
Touchscreen Calibration
Find Z Home
Find XY Home
Working with the Settings Page
Settings Page Navigation
Printer Settings
Network Settings
Display Settings
Mtconnect
Service Settings
Working with the Maintenance Page
Maintenance Page Navigation
Head Settings
Bay Settings
Gantry/Stage Settings
Chamber Settings
Fan Speeds
Voltages
System Settings
Operating the Printer
Basic User Operations
Powering on the Printer
Powering off the Printer
Material, Canisters, and Liquefier Tips
Loading Material to the Liquefier Tips
Unloading Material from the Liquefier Tips
Removing Canisters
Handling/Storing Canisters
Changing Tips or Material Type
Using the Tip Change Wizard
Changing Tips Within the Top Cover
Adjusting Tip Wipe Heights
Basic Job Build Tasks
Before a Build
Preparing the Printer
Selecting a Job to Build
Information Available During a Build
Build Warnings
Pausing a Build
Aborting a Build
After a Build Is Complete
Changing Printer Defaults
Display Units
Job Storage
Oven Temperature Control
Part Build Location
Touchscreen Display Brightness
Printer Status
Tip Odometer Status
Materials Status
Temperature Status
Software Version
Mtconnect System Activation
Calibration
XYZ Tip Offset Calibration
Touchscreen Calibration
XY Home Calibration
Z Zero Calibration
Maintenance
Add Printer to Control Center
Install/Update Material License
Controller Software
Updating Controller Software - Web Method
Updating Controller Software - CD Method
Maintenance Schedule
Daily Maintenance
Clean the Platen
Empty the Purge bin
Weekly Maintenance
Vacuum the Build Envelope
Clean/Inspect Tip Wipe Assembly
Quarterly Maintenance
Clean the Tip Sensor Plunger
As Needed Maintenance
Replace an Oven Bulb
Clean the Printer
Troubleshooting
Getting Help
Warnings and Errors
Warnings at Build Start
Errors Preventing a Build from Starting
Load Errors
Build Pause Warnings
Build Abort Warnings
Finding a Remedy
Supplementary Information
Declaration of Conformity
Regulatory and Environmental Information
EMC Class a Warning
FCC Statements (U.S.A.)
Canada Electromagnetic Compatibility (EMC)
MSDS (Material Safety Data Sheet)
Disposal of Waste Equipment by Users in Private Households in the European Union
Electrical Block Diagram
Power Distribution Diagrams
Safety Interlock Diagram
Electrical Panel Components
Air/Vacuum System Components
Advertisement
Quick Links
Download this manual
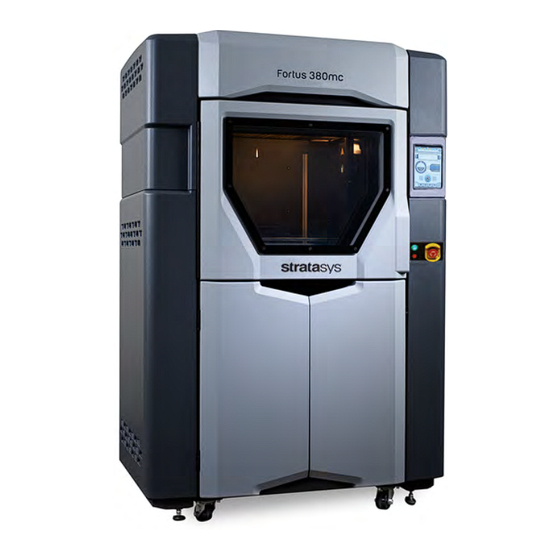
Fortus
380mc and
®
380mc Carbon Fiber Edition
3D Production System
K6 and K7 Series
USER GUIDE
Part No. 400224-0002_REV_J
Table of
Contents
Previous
Page
Next
Page
1
2
3
4
5
Advertisement
Table of Contents
Need help?
Do you have a question about the K6 Series and is the answer not in the manual?
Ask a question
Questions and answers
Related Manuals for Stratasys K6 Series
3D Printers Stratasys Fortus 380mc Operation And Maintenance Manual
(102 pages)
3D Printers Stratasys Fortus K5 Series Site Preparation Manual
(21 pages)
Printer Stratasys FORTUS 380mc Site Preparation Manual
(20 pages)
3D Printers Stratasys uPrint User Manual
Personal 3d printers (74 pages)
3D Printers Stratasys Fortus 450mc User Manual
3d production system (258 pages)
3D Printers Stratasys 180-00108 uPrint User Manual
(68 pages)
3D Printers Stratasys Dimension BST 1200 Troubleshooting Manual
(31 pages)
3D Printers Stratasys Dimension 768/Elite Service Manual
(713 pages)
3D Printers Stratasys Objet260 User Manual
3d printer system (200 pages)
3D Printers Stratasys Objet260 Connex User Manual
(198 pages)
3D Printers Stratasys Objet260 Connex User Manual
(202 pages)
3D Printers Stratasys Objet24 User Manual
(175 pages)
3D Printers Stratasys Objet30 User Manual
(219 pages)
3D Printers Stratasys Eden350V User Manual
(182 pages)
3D Printers Stratasys J750 User Manual
(173 pages)
3D Printers Stratasys Eden260V User Manual
(180 pages)
This manual is also suitable for:
K7 series
Fortus 380mc
Fortus 380mc carbon fiber
Fortus k6 series
Fortus k7 series
Fortus 380mc carbon fiber edition
Table of Contents
Print
Rename the bookmark
Delete bookmark?
Delete from my manuals?
Login
Sign In
OR
Sign in with Facebook
Sign in with Google
Upload manual
Upload from disk
Upload from URL


Need help?
Do you have a question about the K6 Series and is the answer not in the manual?
Questions and answers