Table of Contents
Advertisement
Quick Links
Advertisement
Table of Contents
Troubleshooting

Related Manuals for Stratasys 180-00108 uPrint


Summary of Contents for Stratasys 180-00108 uPrint
- Page 1 User Guide...
-
Page 2: Legal Notice
Legal Notice Trademark Credits The information in this document is subject to © Copyright 2008 Stratasys, Inc. All rights change without notice. reserved. STRATASYS, INC. MAKES NO WARRANTY Stratasys, Dimension and CatalystEX are OF ANY KIND WITH REGARD TO THIS registered trademarks of Stratasys, Inc. -
Page 3: Declaration Of Conformity
Stratasys, Inc. File maintained at: 7665 Commerce Way Eden Prairie, MN 55344-2080 Name of Authorized Signatory: S. Scott Crump Position Held in Company: Chief Executive Officer Signature: Stratasys, Inc. 7665 Commerce Way Eden Prairie, MN 55344 Phone: 952.937.3000 Fax: 952-937-0070 www.stratasys.com... - Page 4 Stratasys under this Limited Warranty. Stratasys will bear the cost of returned parts, as well as for shipping new or rebuilt replacement parts to you, provided that you report the warranty claim within the Limited Warranty period and obtain return instructions from Stratasys prior to return.
-
Page 5: Table Of Contents
Connecting Directly To Your PC (if no network is available) .................27 Connecting directly to the PC with a crossover cable: ................27 System Software ............................29 Updating System Software: ........................29 Installing a spool of material into the material carriers ...................29 Stratasys Document Number 206465-0001... - Page 6 Cancelling auto power down: ........................45 Powering off ..............................45 Resuming operations from Standby mode ....................45 Continue operation from Standby mode: ....................45 Preventive Maintenance Daily ................................46 Empty the purge bucket ..........................46 Inspect the tip wipe assembly .........................46 Inspect the tip shields ..........................46 Stratasys Document Number 206465-0001...
- Page 7 Tip Calibration: ............................62 Remove Debris Buildup ..........................63 Vacuum Build Chamber ..........................63 Clean Door ..............................63 Chamber Light Bar ............................64 Replace chamber light bar: ........................64 Support Registration ..............................65 Customer Support ............................65 Recycling Removing the EEproms from the material guides ..................67 Stratasys Document Number 206465-0001...
-
Page 8: Introduction
With Soluble Support Technology (SST), your completed parts are quickly available for review and test. uPrint is an innovative combination of proprietary hardware, software and material technology. Welcome to the new Dimension of 3D modeling! Stratasys Document Number 206465-0001... -
Page 9: How To Use This Guide
In the event your printer has any issues, a troubleshooting checklist, fault determination codes, diagnosing a Loss of Extrusion, recovering from a Loss of Extrusion, startup and networking issues resolutions are provided. This section also lists routine procedures that keep your printer functioning at its best. Stratasys Document Number 206465-0001... -
Page 10: Support
Guides you through getting technical support and/or service for your uPrint 3D Printer, as well as consumable products and ordering information. Recycling... This section will explain which materials for the uPrint system and packaging are recyclable. Stratasys Document Number 206465-0001... -
Page 11: Overview
Optional Material Bay, Support Side Guide Rods Material Bay, Support Side Lead Screw Door Interlock System Modeling Base Purge Bucket Z Platform Tip Wipe Assembly Modeling Base Retainers (2) Display Panel Material Bay, Model Side Power ON/OFF Switch Stratasys Document Number 206465-0001... - Page 12 203 x 152 x 152 mm (8 x 6 x 6 in). Each material carrier contains 492 cc (30 cu. in.) of usable material — enough to build continuously for about 48 hours without reloading. You can add an optional material bay that will automatically load more material as a carrier runs out. Stratasys Document Number 206465-0001...
-
Page 13: Finding More Information
CatalystEX Dynamic Help, which is included with CatalystEX and displayed in the Dynamic Help window. You can also see CatalystEX Help from the menu bar - Help>Contents World Wide Web Additional information is available at: http://www.uPrintDimension.com Stratasys Document Number 206465-0001... -
Page 14: Setup
BTU/hr 2550 BTU/hr dBA’s (Decibels) 55dBA MAX Idle and 62dBA MAX Operating Work Station Requirements: You must use a CAD software program that is capable of creating. STL files. For detailed information See Release Notes... http://www.uPrintDimension.com Stratasys Document Number 206465-0001... -
Page 15: Safety
Safety Glasses: Wear safety glasses to avoid injury to your eyes. Lifting Hazard: Lift with two or more people to avoid serious injury. Recycle: Use proper recycling techniques for materials and packaging. ESD: Use standard electrostatic discharge (ESD) precautions when working on or near electrical circuits. Stratasys Document Number 206465-0001... -
Page 16: Unpacking The Startup Kit
2. Remove the welcome kit box and open. 3. Remove the model and support material spools. 4. Remove the material guide tubes. 5. Remove the box of substrates. Figure 3: Startup Kit Figure 4 Figure 4: Welcome Kit Contents Stratasys Document Number 206465-0001... -
Page 17: Unpacking The Material Bay
1. Carefully cut the top of the box, open and lay it on its side. 2. Remove the material bay cable. 3. Remove the material bay. 4. Remove the model and support carriers. Figure 5: Material Bay Stratasys Document Number 206465-0001... -
Page 18: Unpacking The Printer
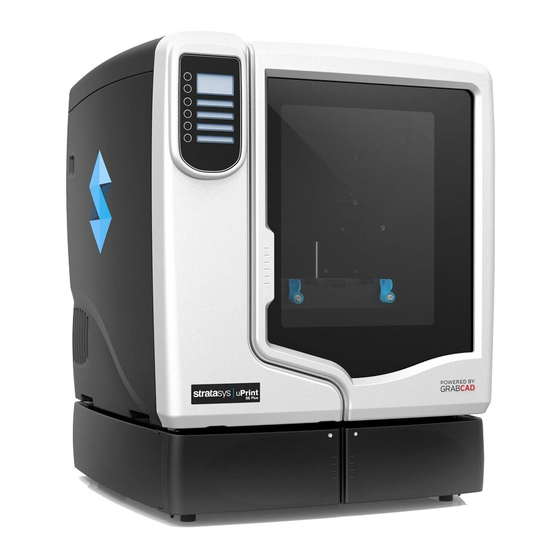
8. Remove the foam from the top of the printer. 9. Cut the top of the blue plastic bag the printer is enclosed in. 10. Lower the plastic bag, the printer should now be visible. Figure 6: uPrint 3D Printer Stratasys Document Number 206465-0001... -
Page 19: Set Up The Material Bay And Printer
4. Open the printer door and remove the substrate and VCI emitter and discard. See Figure 8. 5. Remove the shipping foam from the Z stage guide rods and recycle. See Figure 8. 6. Remove the belt retaining clips and recycle. See Figure 8. Stratasys Document Number 206465-0001... - Page 20 VCI emitter and discard WARNING The Lead Screw and Guide Rods are lubricated with a thin coat of Krytox grease. Krytox grease can cause skin irritation. Be careful not to get the grease on your hands or clothing. Stratasys Document Number 206465-0001...
-
Page 21: Inserting A Modeling Base
See Figure 10. Figure 10: Slide modeling base in place 4. Secure the modeling base with the two retainers by turning them up. See Figure Figure 11: Turn retainers to lock modeling base in place. Stratasys Document Number 206465-0001... -
Page 22: Connecting The Printer And Material Bay(S)
Figure 13: Material Bay Communication Cable Note: If you are using the optional second material bay, the longer material tubes are for the lower material bay and the shorter material tubes are for the upper material bay. Stratasys Document Number 206465-0001... -
Page 23: Power Cable
1. Connect the crossover cable (orange) to the network connection at the back of the printer. 2. Connect the crossover cable to the computer that will be sending the parts to the printer. Figure 15: Network connection Stratasys Document Number 206465-0001... -
Page 24: Powering On
4. Select the default language you will be using and press the corresponding button. • English • Spanish • Italian • German • French • Chinese • Japanese 5. The display panel will ask Are You Sure? Press Yes. Stratasys Document Number 206465-0001... -
Page 25: Software
A. From Idle (or Ready to Build), press Maintenance on the display panel. The display will show Maintenance and the software version. B. From the display panel press System. C. From the display panel press Set Network. The top window displays: Network Admin - Dynamic IP Address; UDN. Stratasys Document Number 206465-0001... -
Page 26: Setting The Static Network Address
11. From your PC, Start the CatalystEx application. A. From the General Tab, click the Manage 3D Printers button. B. Click the Add from Network button in the lower right corner of the pop-up window. Stratasys Document Number 206465-0001... -
Page 27: Connecting Directly To Your Pc (If No Network Is Available)
It may take up to 1 minute for your printer to appear in the pop-up window. D. Click “Add Printer” and you are ready to go. Close the “3D Printers” pop-up window. 4. If the printer does not appear in the pop-up window: Stratasys Document Number 206465-0001... - Page 28 After allowing your PC a minute or so to adjust to the new setting, your PC should connect to your printer. vii. If you are still unable to connect to your printer, recheck your connections and settings. Stratasys Document Number 206465-0001...
-
Page 29: System Software
2. Remove the material spool from the shipping box. Tear open the bag and discard (the bag will have a notch for tearing open). Note how the material and material guide are held in place under a clear mate- rial retaining band. See Figure Stratasys Document Number 206465-0001... - Page 30 8. Close the carrier with the material guide in place. Latch both buckles completely (the red tab must snap in to place on each buckle). See Figure Note: Material must protrude at least 1mm (0.04 inch) but not more than 30mm (1.18 inch) from the end of the material guide. Stratasys Document Number 206465-0001...
-
Page 31: Adding Material Carriers To The Single Material Bay
2. Add the model material carriers to the M1 and M2 material bays by inserting the carriers into the mate- rial bays and latching into place. 3. Add the support material carriers to the S1 and S2 material bays by inserting the carriers into the mate- rial bays and latching into place. Stratasys Document Number 206465-0001... -
Page 32: Building A Test Part
3. Press Test Parts and select the sample wrench. • The printer will automatically start to print the test part. When the part is finished, follow the steps under “Remove a completed part from the printer:” on page Stratasys Document Number 206465-0001... -
Page 33: Operation
The top line in the large display always shows the printer status. The display shows status information, menu’s and error codes. Note: Occasionally there will be an item blinking in the lower displays. The blinking item is usually the next, most logical selection. Stratasys Document Number 206465-0001... -
Page 34: System Software Overview
• Set Network • Lights Always On • Head • Test Parts • Disable UPnP • Tips • Load Upgrade • Select Language Building • Pause • Lights Off • Show Time • Auto Power Down Stratasys Document Number 206465-0001... -
Page 35: Catalystex Overview
For detailed information about the many file processing options available in CatalystEX, refer to CatalystEX Dynamic Help. For more information about STL files, CMB files, part orientation, modeling envelope placement, print “job” efficiency and other print controls, refer to the CatalystEX Dynamic Help. Stratasys Document Number 206465-0001... -
Page 36: Setting Up Your Stl File For Printing
Another factor affecting build speed is the axis orientation. The printer can build faster across the X-Y plane than it can along the Z axis. Therefore, orienting a part so that it is shorter within the modeling envelope will produce a quicker build. Stratasys Document Number 206465-0001... -
Page 37: Selecting The Model Interior Fill For Your Part
If the file in the model window has not been processed for print, processing will occur before the file is added to the pack. Each additional click will add another copy of the file to the pack. Printing your STL file: The Print button is found on the General tab, Orientation tab and Pack tab. Stratasys Document Number 206465-0001... -
Page 38: Building A Part
Figure 25: Display panel during build Printer status Model file name Support material Model material remaining remaining Note: If a material amount is flashing, it indicates that the remaining material will not be enough to complete the current build. Stratasys Document Number 206465-0001... -
Page 39: Chamber Lights
5. Remove the part and replace the modeling base. Once the chamber door has been opened and closed, the display will ask Part Removed? Press Yes ONLY after you have removed the part and replaced the modeling base. CAUTION If you press Yes before removing the part, the printer can be damaged. Stratasys Document Number 206465-0001... -
Page 40: Removing A Completed Part
2. Pull the part off of the modeling base or use a putty knife to completely remove the part. Note: Parts are easier to remove from the modeling base when it is still warm. Stratasys Document Number 206465-0001... -
Page 41: Removing Support Material
Wear gloves when emptying the purge bucket. 1. With a gloved hand, lift up on the purge bucket and pull it off of the 2 mounts. See Figure 26 Figure 26: Emptying the purge bucket Purge Bucket Mounts Purge Bucket Stratasys Document Number 206465-0001... -
Page 42: Replacing Material For Single Material Bay
After they are done loading and preparing, press Done... the display will show Wait for Part or Ready to Build (if a part is in the queue) and will also show the amount of material remaining in the model and support carriers. Stratasys Document Number 206465-0001... -
Page 43: Dual Material Bay Led's
In the event you power down the printer for more than a few days, you will want to unload the material and place it inside the storage bag that came with the material carrier. 1. Unload material from the printer. 2. Locate your 2 material retaining clips on the carrier. See Figure Stratasys Document Number 206465-0001... - Page 44 B. Push the material retaining clips down until they lock in place. Figure 29: Installing material retaining clips Place clip here and push down to lock in place 7. Remove the material spool from the material carrier. See Figure Stratasys Document Number 206465-0001...
-
Page 45: Auto Power Down
Resuming operations from Standby mode After several minutes of inactivity, the printer will enter Standby mode. During Standby, the head temperature will decrease to conserve energy. Continue operation from Standby mode: 1. From the display panel press Resume Stratasys Document Number 206465-0001... -
Page 46: Preventive Maintenance
At 500 hours it will be necessary to replace the tip shields. To replace the tip shields See “Tip Shield Replacement” on page 57. 2000 Hour maintenance Tip replacement At 2000 hours, it will be necessary to change the tips. See “Extrusion Tip Replacement and Calibration” on page 59. Stratasys Document Number 206465-0001... -
Page 47: Troubleshooting And Maintenance
CatalystEX has the same value as the address entered for the printer. Your system configuration may have changed. Contact your Network Administrator. Error Code displayed on Contact Technical Support. For more information, refer Display Panel to“Fault Determination Codes” on page 49 Stratasys Document Number 206465-0001... - Page 48 Remove the carrier and verify material is coming out of the material guide. Filament blocked Verify the material pulls freely from the carrier. Remove carrier Clear filament path Verify the material tubes are free of material. Stratasys Document Number 206465-0001...
-
Page 49: Fault Determination Codes
“Cycling Power” on page 55.); wait 60 seconds before switching power on again. In most cases you will be able to continue operation. However, if the printer continues to shut down and display the same error, contact technical support. Stratasys Document Number 206465-0001... -
Page 50: Welcome Kit Tools
3. From Idle, press Maintenance A. Press Machine. B. Press Head. The head will come to rest in the center of the chamber and the Z Platform will change position. The display will read: Model Drive Motor Stopped Stratasys Document Number 206465-0001... -
Page 51: Clogged Extrusion Tip
4. Remove the Head Cover and the Air Plenum. Move the material idler wheel out of the way on the side that is clogged. Use a 7/64 and 1/8 T-Handle as illustrated in Figure 32 (model side shown). Stratasys Document Number 206465-0001... - Page 52 9. Use the 7/64 T-Handle to hold pressure against the toggle spring and keep the idler wheel away from the material. Remove the 1/8 T-Handle. 10. Press Blower Off on the interface panel. With the head blower off the temperature of the extrusion tube will increase. Stratasys Document Number 206465-0001...
-
Page 53: Recovering From Loss Of Extrusion
Remove plastic head cover by squeezing raised pads on sides of cover. See Figure 3. Place the tip toggle bar in neutral position (bar will extend equally from both sides of head). This can be done manually - push on the extended bar end. Stratasys Document Number 206465-0001... - Page 54 Tip Toggle Bar so that it is extended to the same side of the head assembly as the one on which you are working. It is not necessary to keep Toggle Bar in a neutral position. Stratasys Document Number 206465-0001...
-
Page 55: Cycling Power
5. Turn the power switch to the ON position. The printer display will show that it is starting up. Once the display shows Idle or Ready to Print, you can send a file to the printer to be printed. Stratasys Document Number 206465-0001... -
Page 56: Tip Wipe Assembly
3. Remove the tip wipe assembly by lifting the assembly up and out of the printer. Discard this tip wipe assembly. Figure 34: Replacing the tip wipe assembly 4. Place the new tip wipe assembly over the two mounting posts making sure the assembly is fully seated. Stratasys Document Number 206465-0001... -
Page 57: Tip Shield Replacement
The head area is hot. Use gloves when working in this area of printer. 2. Position the blade of the small screwdriver between the Tip Shield and Tip Plate. 3. Use the blade of the small screwdriver to separate the Tip Shield from the Tip Plate. See Figure 36 Stratasys Document Number 206465-0001... - Page 58 Figure 37: Clean tips with wire brush Clean the tips using a wire brush. 5. Install a new Tip Shield by pushing it, by hand, over the exposed tip, keeping the slotted end towards the back of the tip. 6. Exit Maintenance. Stratasys Document Number 206465-0001...
-
Page 59: Extrusion Tip Replacement And Calibration
A. Use 7/64 T-Handle Allen wrench to loosen the tip screws three to four full turns counterclockwise - or until the top of the screws are flush with the metal cover. DO NOT remove the screws entirely. Figure 39. Stratasys Document Number 206465-0001... -
Page 60: Installing Tips
LEFT side of the head assembly. A MODEL tip must be used on the RIGHT side of the head assembly (See Figure 41). The Model tip comes in a red capped container. The Support tip comes in a black capped container. Stratasys Document Number 206465-0001... - Page 61 8. Use 7/64 T-Handle Allen wrench to firmly tighten the heater block clamp screws. Note: Make sure the tip remains all the way up against the heater block as you tighten the screws. Figure 42: Installing tips Tighten screws Tighten screws Push tips into position Stratasys Document Number 206465-0001...
-
Page 62: Tip Calibration
(shown in blue). C. Read the number closest to this location. This is the required X Tip Offset adjustment, in mils. If the number is on the -X side, a negative offset is required. Stratasys Document Number 206465-0001... -
Page 63: Remove Debris Buildup
Z Platform to jam at its upper limit. Vacuum Build Chamber Vacuum the build chamber to remove all debris and purged material. Clean Door Do not use glass cleaner on the door. It will damage the acrylic window. CAUTION ONLY use acrylic cleaner. Stratasys Document Number 206465-0001... -
Page 64: Chamber Light Bar
4. Remove the light bar by removing the 3 attachment screws (top, middle, bottom) - use the 7/64 T-han- dle wrench supplied in the Startup Kit. 5. Install a replacement light bar with the 3 attachment screws - do not overtighten the screws. 6. Re-attach the wiring harness lead. Stratasys Document Number 206465-0001... -
Page 65: Support
Your Name. • Your telephone number. • Detailed description of the problem you are experiencing. For advanced troubleshooting (provide by email): • System CFG file. • STL and/or CMB files. • Detailed photographs showing the issue. Stratasys Document Number 206465-0001... -
Page 66: Recycling
Material Carrier (clear top, black bottom and bottom cover. Latches, hinge pin and electronics not included) Material Spool & lid (gray) PS - HI EEproms Electronics All cardboard can be recycled per your local recycling guidelines. Stratasys Document Number 206465-0001... -
Page 67: Removing The Eeproms From The Material Guides
Figure 45: Pry the support material guide apart Pry apart with a small standard screwdriver 3. Recycle the EEPROM per your local electronics recycling guidelines. 4. Recycle the material guides per your local guidelines. See Table 1 on page Stratasys Document Number 206465-0001... - Page 68 Recycling 7665 Commerce Way Eden Prairie, MN 55344-2080 USA http://www.uPrintDimension.com Stratasys Document Number 206465-0001...
Need help?
Do you have a question about the 180-00108 uPrint and is the answer not in the manual?
Questions and answers