Table of Contents
Advertisement
Advertisement
Table of Contents

Related Manuals for Stratasys Fortus K5 Series


Summary of Contents for Stratasys Fortus K5 Series
- Page 1 Fortus 380/450mc ® K5/K0 Series SITE PREPARATION GUIDE Part No. 821465-0007_REV_A...
- Page 2 TRADEMARK ACKNOWLEDGMENTS Stratasys, Insight, FORTUS, and FDM are registered trademarks of Stratasys, Inc. FORTUS 380mc and 450mc are a registered trademark and service mark of Stratasys Inc. in the United States and other countries. ULTEM™ is a registered trademark of SABIC or affiliates or subsidiaries.
-
Page 3: Table Of Contents
TABLE OF CONTENTS ABOUT THE FORTUS 380MC & 450MC..........1 COMPONENTS.......................... 1 380mc Highlights ............................... 1 450mc Highlights ............................... 1 HOW TO USE THIS GUIDE....................... 1 SITE PREP TASKS .................. 2 SELECTING THE SITE......................2 SPACE REQUIREMENTS ......................2 Dimensions and Weights ........................... 2 Minimum Clearances ............................ - Page 4 Added Optional UPS information. SAFETY The following basic safety tips are given to ensure safe installation, operation, and maintenance of Stratasys equipment and are not to be considered as comprehensive on matters of safety. Although the Fortus 380mc and 450mc are designed to be safe and reliable printers, access to areas of the printer are potentially dangerous.
-
Page 5: About The Fortus 380Mc & 450Mc
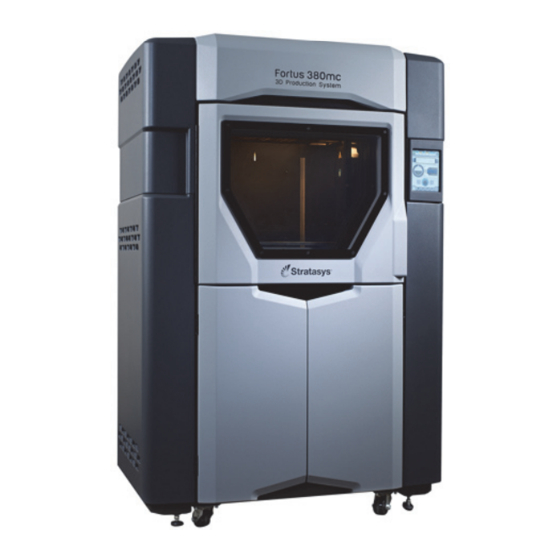
The 380mc and 450mc printers incorporate the latest in innovative technologies to provide you with precise prototypes from a CAD design. Stratasys’ Fused Deposition Modeling (FDM) technology provides prototype parts, including internal features, that can be used to field-test form, fit, and function. Direct Digital Manufacturing (DDM) allows for the creation of customized end-use parts straight from 3D CAD data. -
Page 6: Site Prep Tasks
SITE PREP TASKS SELECTING THE SITE Decide where to install the printer based on the following: 1. Space Requirements 2. Environmental Requirements 3. Electrical Requirements 4. LAN Requirements Note: The 380mc and 450mc are capable of generating vibrations depending mainly on part build geometry and material characteristics. This consideration will need to be taken into account if locating the printer near vibration sensitive equipment. -
Page 7: Minimum Clearances
MINIMUM CLEARANCES Side Clearance Minimum 30 inches (76.20 cm) on each side Rear Clearance Minimum 12 inches (30.48 cm) Front Clearance Minimum 36 inches (91.44 cm) Overhead Clearance Minimum 24 inches (60.96 cm) Figure 1: Minimum Clearances 24 inches (60.96 cm) minimum for overhead clearance 30 inches (76.20 cm) Rear... -
Page 8: Environmental Requirements
ENVIRONMENTAL REQUIREMENTS • The 380mc and 450mc are for indoor use only. • Air quality conditions with excessive solid particulates (conductive or non-conductive) may result in system damage. • Air quality conditions in which airborne oils are allowed to accumulate on or within the printer can damage the plastic components. -
Page 9: Optional Ups Connectivity
IEEE Standard *141-1993. Facilities who are unsure of their power quality should contact their service provider. * IEEE Standards licensing rules prohibit Stratasys from distributing the Standard. End users who wish to review the Standard are responsible for its individual purchase. - Page 10 Figure 3: Transformer Dimensions & Mounting Specifications (applicable to both transformers) When configuring the transformer for different input voltages, the internal tap 1 connection wires (typically colored yellow, red and orange) must be moved to the appropriate tap position (terminal block number) shown on the connection diagram attached to the inside cover of the transformer.
-
Page 11: Lan Requirements
Control Center software application. Refer to Insight’s user information for workstation requirements. RECEIVING THE PRINTER INSPECT CRATE FOR DAMAGE Before opening the shipping crate, inspect the crate for signs of exterior damage. Report evidence of excessive damage to Stratasys and the shipping company. -
Page 12: Preparing For Installation
PREPARING FOR INSTALLATION REQUIRED TOOLS AND EQUIPMENT • Basic hand tools (powered screwdriver or drill with Phillips bit). UNPACKING THE PRINTER Note: If you intend to remove the printer from its shipping base via the ramp, ensure that there is sufficient clearance for the ramp to be lowered before you begin the process of unpacking the printer. - Page 13 Warning: Shipping bands are very tight; when cutting shipping bands they may pop open with force. Wear safety glasses when removing the shipping bands. 3. Carefully cut the shipping bands (Figure 4. Remove the cardboard cover from the top of the crate and then remove the foam restraining insert (Figure 5.
-
Page 14: Remove Printer From Shipping Base - Fork Lift Instructions
Opening for forks 4. Gently lower the printer, until it rests on its casters. 5. Inspect the printer’s exterior for dents and scratches. Immediately report any damage to Stratasys and the shipping company. 6. Roll the printer into its approximate operating location. -
Page 15: Remove Printer From Shipping Base - Ramp Instructions
REMOVE PRINTER FROM SHIPPING BASE - RAMP INSTRUCTIONS Warning: Before removing the printer via the ramp, ensure that you have enough manpower to remove the printer from the shipping base, as the printer is heavy (see “Dimensions and Weights” on page 2). - Page 16 (to ensure that the oven door and canister bay doors do not open). 6. Inspect the printer’s exterior for dents and scratches. Immediately report any damage to Stratasys and the shipping company.
-
Page 17: Removal Of Rear Panels And Cover
REMOVAL OF REAR PANELS AND COVER The rear service access panels and top cover can be removed in order to reduce the printer depth to an absolute minimum of 34 inches (86.36 cm). If absolute minimum printer depth is not required, proceed to “Service Connections”... - Page 18 To remove the rear top cover: 1. Open the rear top cover. Disconnect the electrical wiring for the rear top cover cooling fans by pulling the connectors apart (Figure 11). 2. Using a 4 mm Allen wrench, remove the p-clamp mounting screws (2) from the upper p-clamps (Figure 11).
- Page 19 5. Close the rear top cover. Using a 5 mm Allen wrench, remove the hinge mounting screws (4) from the crossbar (Figure 13). Note: Only remove the hinge screws from the crossbar, which secure the top cover to the printer. Do not remove the hinge screws within the top cover itself. Figure 13: Hinge Mounting Screw Locations 6.
-
Page 20: Service Connections
SERVICE CONNECTIONS Warning: A licensed electrician must perform all AC electrical service connections to the printer. Consult a licensed electrician to comply with all applicable local and national electric codes. Do not apply power to the printer until the installation service representative has verified that AC service connections have been made correctly. - Page 21 Customers, resellers, and Stratasys employees are encouraged to send comments about our documentation and training to c-support@stratasys.com. We greatly value your comments, review all of them, and use them to improve subsequent releases of the documentation. In your email message please include the document title, part number (located on the front cover), and page number.
Need help?
Do you have a question about the Fortus K5 Series and is the answer not in the manual?
Questions and answers