Advertisement
Quick Links
Keysight
C-Series FieldFox Analyzers
- User's Guide (Unabridged)
This manual provides documentation for the
following models:
N9912C, N9913C, N9914, N9915C,
N9933C N9934C, N9935C
This is the unabridged version of the abridged FieldFox User's Guide. The abridged User's Guide can be found here:
http://rfmw.em.keysight.com/wireless/helpfiles/C_Series_FieldFox_WebHelp/home.htm
User's Guide (Unabridged)
Advertisement
Chapters

Related Manuals for Keysight Technologies C Series


Summary of Contents for Keysight Technologies C Series
- Page 1 Keysight C-Series FieldFox Analyzers - User's Guide (Unabridged) This manual provides documentation for the following models: N9912C, N9913C, N9914, N9915C, N9933C N9934C, N9935C This is the unabridged version of the abridged FieldFox User's Guide. The abridged User’s Guide can be found here: http://rfmw.em.keysight.com/wireless/helpfiles/C_Series_FieldFox_WebHelp/home.htm User's Guide (Unabridged)
- Page 2 THESE TERMS, THE WARRANTY Keysight shall be under no obligation TERMS IN THE SEPARATE to update, revise or otherwise modify © Keysight Technologies, Inc. the Software. With respect to any AGREEMENT WILL CONTROL. 2014-2023 technical data as defined by FAR Technology Licenses 2.101, pursuant to FAR 12.211 and...
- Page 3 Where to Find the Latest Information Documentation is updated periodically. For the latest information about these products, including instrument software upgrades, application information, and product information, browse to one of the following URLs, according to the name of your product: http://www.keysight.com/find/fieldfox To receive the latest updates by email, subscribe to Keysight Email Updates at the following URL: http://www.keysight.com/find/MyKeysight...
- Page 4 A.12.7x Firmware – Release C Series FieldFox For customers upgrading FieldFox firmware, the following is a list of changes from the previous release: — Initial N99xxC Series FieldFox firmware release – — Learn more, refer to https://www.keysight.com/us/en/assets/7018-06515/configuration-guides/5992-3701.pdf — SA mode – — Added: support for Baseband Path <...
- Page 5 Contacting Keysight Assistance with test and measurements needs and information on finding a local Keysight office are available https://www.keysight.com/find/assist/ on the Web at If you do not have access to the Internet, please contact your Keysight field engineer. In any correspondence or telephone conversation, refer to the Keysight product by its model number and full serial number.
- Page 7 1. Overview Models and Options ............25 Accessories .
- Page 8 Sweep Time .............56 Output Power.
- Page 9 Parameter Conversion ........... . 93 Receiver Measurements .
-
Page 10: Time Domain - Option
How to make Time Domain Gating settings ........123 Start, Stop, Center, and Span Gate Times . - Page 11 Preamplifier Control (Opt 235) ..........162 Check for Compressed Measurements .
- Page 12 (Option 233–Mixed Analyzers)) ..........230 EMF Features .
- Page 13 Record/Playback (RTSA Option) ..........283 About Sessions .
- Page 14 ..............336 Resolution Bandwidth (Res BW) .
- Page 15 Glossary (OTA)............. 417 14.
- Page 16 How to Record a Data Log (Outdoor Logging Only)......516 To change Data Logging Configuration settings: ......517 How to Play a Data Log.
- Page 17 Measurement Selection ..........558 Normalize .
- Page 18 24. Pulse Measurements Mode – Option 330 Supported Power Sensors ........... .593 Switching between Pulse Measurement Mode and Power Meter Mode .
- Page 19 A/B and B/A Measurements..........620 26.
- Page 20 Resolution Bandwidth (Res BW) ..........708 Alignments .
- Page 21 How to perform Trace Math ..........760 About Math Operations .
- Page 22 File Saving Naming Options ..........789 Quick Save Editing.
- Page 23 How to print the current screen or a saved file ....... 833 34.
- Page 24 Acoustic Statement (European Machinery Directive) ......866 A:.Connector Care Review Connector Care Table ............868 B:.Specifications/Data Sheet .
- Page 25 Keysight Handheld Analyzers N99xxC User’s Guide 1 Overview Models and Options Table 1-1 Models Model Max Freq Description (GHz) N9912C Vector Network Analyzer AND Spectrum RF Analyzer Vector Network Analyzer AND Spectrum RF Analyzer Vector Network Analyzer AND Spectrum Microwave Analyzer N9913C Vector Network Analyzer AND Spectrum RF Analyzer N9914C...
- Page 26 Overview Accessories Accessories The following accessories are included with every FieldFox. Spare accessories can be ordered at any time. Refer to Table 1-2. Some of the optional Table 1-3. For more, accessories—not included unless requested—are listed in refer to http://www.keysight.com/find/fieldfox. Table 1-2 Accessories Accessory Part...
- Page 27 Overview FieldFox Manuals, Software, and Supplemental Help FieldFox Manuals, Software, and Supplemental Help The following manuals and software are available for the FieldFox. To access all of these, visit: www.keysight.com/find/fieldfoxsupport — User’s Guide (Abridged) — This abridged manual, can be included as an option with shipment. —...
- Page 28 Overview FieldFox Manuals, Software, and Supplemental Help Safety Notes The following safety notes are used throughout this manual. Familiarize yourself with each of the notes and its meaning before operating this instrument. More pertinent safety notes for using this product are located in Chapter 35, “Safety Considerations”, on page 843.
- Page 29 Keysight Handheld Analyzers N99xxC User’s Guide 2 Preparing for Initial Use of Your New FieldFox Check the Shipment When you receive your FieldFox, check the shipment according to the following procedure: 1. Inspect the shipping container for damage. Signs of damage may include a dented or torn shipping container or cushioning material that indicates signs of unusual stress or compacting.
- Page 30 Preparing for Initial Use of Your New FieldFox Install the Lithium-Ion Battery Install the Lithium-Ion Battery Step Notes 1. Open the battery door Push the button on the battery compartment door while sliding the door outward. 2. Insert the battery. The terminals end of the battery is inserted into the compartment.
- Page 31 Preparing for Initial Use of Your New FieldFox FieldFox ON/OFF Settings — On the battery. Open the FieldFox battery compartment door to view the battery LCD. To conserve battery power: — Use Run/Hold to single-trigger a measurement when needed. Hold shown on the display.
- Page 32 Preparing for Initial Use of Your New FieldFox FieldFox High Temperature Protection — To turn Power OFF (very low battery drain), press the power button briefly and press the Shutdown softkey. Data and instrument state are NOT automatically saved when the FieldFox is powered OFF. Learn how to save data and instrument state in Chapter 33, “File Management”, on page 817.
- Page 33 Preparing for Initial Use of Your New FieldFox FieldFox High Temperature Protection — The average temperature that is displayed for the Internal Temperature is the average of the RF1, RF2, SB1, SB2 temperatures. These temperatures come from internal sensors embedded within the FieldFox. The average temperature does not include the CPU or the battery temperatures.
- Page 34 Preparing for Initial Use of Your New FieldFox FieldFox High Temperature Protection Entering Auto Protect (Maximum) Threshold Temperature Mode At above approximately 75°C, the FieldFox enters (Maximum) Auto Protect temperature control mode by displaying the “Entering Auto Protect mode...”. See also Table 2-1 on page When you enter the Auto Protect (Maximum) Threshold, the following message is displayed:...
- Page 35 Preparing for Initial Use of Your New FieldFox FieldFox High Temperature Protection High-Temp Shutdown Warning (RTSA Mode Only) In extreme situations, Temperature Control mode may not stop an increase in the FieldFox internal temperature. Just prior to shut down, the FieldFox will display a warning of imminent shut down and the instrument turns off.
- Page 36 Preparing for Initial Use of Your New FieldFox FieldFox High Temperature Protection Summary of FieldFox Average Internal Temperature Protection Behavior Table 2-1 Summary of FieldFox Temperature Protection Threshold Average Internal Description of Behavior Temperature Duty cycling ~64°C Duty cycling is enabled when the internal average temperature of the FieldFox reaches the duty cycling threshold of ~64°C.
- Page 37 Preparing for Initial Use of Your New FieldFox Avoid Overpowering the FieldFox Avoid Overpowering the FieldFox The FieldFox can be damaged with too much power or voltage applied. Exceeding the maximum RF power levels shown below will cause an ADC Over Range message to appear on the screen.
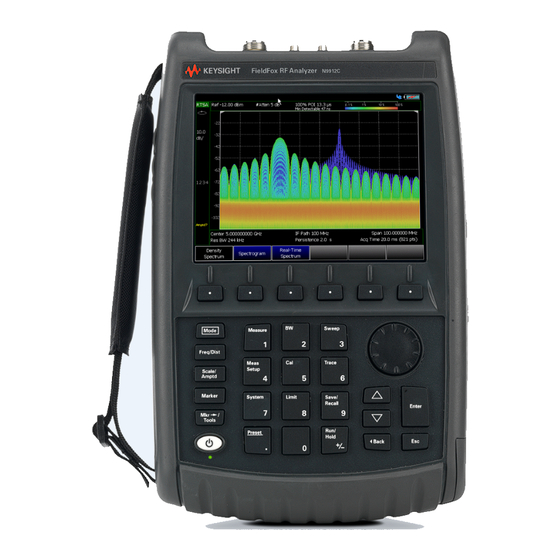
- Page 38 Preparing for Initial Use of Your New FieldFox Take the FieldFox Tour Take the FieldFox Tour Front Panel Keysight N9915-90020 User’s Guide...
- Page 39 Preparing for Initial Use of Your New FieldFox Take the FieldFox Tour Caption Description Learn More: “FieldFox Power ON: press momentarily. ON/OFF STAND BY: with FieldFox power ON, press briefly. Settings” OFF: press and hold until the FieldFox shuts off (about 4 seconds). page 31 Not lit: FieldFox OFF, not charging “Power...
- Page 40 Preparing for Initial Use of Your New FieldFox Take the FieldFox Tour Caption Description Learn More: Limit “All about Sets limit lines for quick Pass/Fail judgment Limit Lines” on page 749 Run/Hold Toggles between free Run and Hold/Single operation. “Run/Hol d”...
- Page 41 Preparing for Initial Use of Your New FieldFox Take the FieldFox Tour Top Panel Caption Descriptions Learn More: “CAT Mode Settings” Port 1 For CAT and NA measurements, use to make reflection measurements. RF Output Maximum: ±40 VDC, +25 dBm RF on page 51 “NA Mode Settings”...
- Page 42 Preparing for Initial Use of Your New FieldFox Take the FieldFox Tour Right Side Panel Connector Description Learn More: “LAN Settings” on Ethernet cable connector to read trace data using the FieldFox Data Link Software and connect to the FieldFox remotely. page 804 Download the latest version of the software at: www.keysight.com/find/fieldfoxsupport...
- Page 43 Preparing for Initial Use of Your New FieldFox Take the FieldFox Tour Left Side Panel Connector Description Learn More: Audio output jack for use with SA Mode Tune and Listen. “Tune & Listen (AM/FM)” on page 170 DC Voltage Source for use with external DC Bias. “Variable Voltage Source (Opt.
- Page 44 Preparing for Initial Use of Your New FieldFox Take the FieldFox Tour Screen Tour Caption Description Learn More: “Title” on page 770 Title – write your own text here Current Mode “Run/Hold” on Run / Hold page 766 Display Format Mode dependent Scale/division Mode dependent...
- Page 45 Preparing for Initial Use of Your New FieldFox Take the FieldFox Tour Caption Description Learn More: Bandpass / Lowpass setting (Fault Meas) “DTF Measurement Settings” on page 66 IF BW in NA Mode Output Power Level (CAT and NA) “Output Power” on page 57 Measurement Stop Freq or Distance Mode dependent...
- Page 46 Preparing for Initial Use of Your New FieldFox How to Enter Numeric Values How to Enter Numeric Values Many settings on the FieldFox require the entry of numeric values. How to enter numeric values Use any combination of the following keys: —...
- Page 47 Preparing for Initial Use of Your New FieldFox Connector Care Connector Care — Never store connectors, airlines, or calibration standards loose in a box. This is a common cause of connector damage. — Install protective end caps when connectors are not in use. —...
- Page 48 Preparing for Initial Use of Your New FieldFox Connector Care Keysight N9915-90020 User’s Guide...
-
Page 49: Table Of Contents
Keysight Handheld Analyzers N99xxC User’s Guide CAT (Cable and Antenna Test) Mode CAT Mode is typically used to test an entire transmission system, from the transmitter to the antenna. This process is sometimes referred to as Line Sweeping. CAT Mode is similar to NA (Network Analyzer) Mode. - Page 50 CAT (Cable and Antenna Test) Mode Procedures “Return Loss Measurements” on page 59 “1-Port Cable Loss Measurements” on page 60 “2-Port Insertion Loss Measurements” on page 61 See Also Chapter 8, “Calibration for NA, CAT, and VVM Modes”, on page 125 “All about Markers”...
-
Page 51: Measurement Selection
CAT (Cable and Antenna Test) Mode CAT Mode Settings CAT Mode Settings Select CAT Mode before making any setting in this chapter. How to select CAT Mode 1. Press Mode. 2. Then CAT/TDR. Measurement Selection How to select a CAT Mode Measurement Learn more in the Supplemental Online Help at: https://rfmw.em.keysight.com/wireless/helpfiles/FieldFoxOnlineSupplement alHelp/Home.htm. -
Page 52: Quick Settings Table
CAT (Cable and Antenna Test) Mode CAT Mode Settings DTF (VSWR) — Distance to Fault in VSWR format. — Cable Loss (1-Port) 1-port reflection measurement that displays the loss of “1-Port Cable Loss Measurements” on a transmission line. Learn more, see page Insertion Loss (2-Port) —... -
Page 53: Frequency Range
CAT (Cable and Antenna Test) Mode CAT Mode Settings Dock Window — Press to relocate the Settings table to a position relative to the trace window. The Dock Window setting persists through a Preset. Choose from the following: — Full (Default setting) Only the Settings table is shown on the screen. The trace window is temporarily not shown —... -
Page 54: Averaging
CAT (Cable and Antenna Test) Mode CAT Mode Settings Autoscale Automatically adjusts the Y-axis to comfortably fit the Minimum and Maximum amplitude of the trace on the screen. 2. Set Scale, acquisition, and Reference Position: — Scale Manually enter a scale per division to view specific areas of the trace —... -
Page 55: Smoothing
CAT (Cable and Antenna Test) Mode CAT Mode Settings This setting can be changed at any time without affecting calibration accuracy. Averaging is often used to increase the dynamic range of a measurement. To achieve the highest dynamic range, select NA mode and reduce the IF Bandwidth setting. -
Page 56: Resolution (Number Of Data Points)
CAT (Cable and Antenna Test) Mode CAT Mode Settings — Then choose one of the following: Single — Automatically sets Continuous OFF and causes FieldFox to make ONE sweep, then hold for the next Single key press. Hold is annotated in the upper left corner of the display when NOT sweeping, and changes to an arrow -->... -
Page 57: Output Power
CAT (Cable and Antenna Test) Mode CAT Mode Settings How to set Sweep Time — Press Sweep 3 > Min Swp Time. — Enter a value using the numeric keypad. “Multiplier Abbreviations” on page — Press a multiplier key. Learn more in Output Power Set the power level out of the FieldFox to High, Low, or manually set power level to a value between High and Low. -
Page 58: Interference Rejection
CAT (Cable and Antenna Test) Mode CAT Mode Settings Interference Rejection Use this setting when you suspect that other signals in the area are interfering with a measurement. Interference may look like a spike or lack of stability in the measurement trace. -
Page 59: Return Loss Measurements
CAT (Cable and Antenna Test) Mode Return Loss Measurements — The Return Loss measurement frequency settings are made in the usual manner. Learn how at “Frequency Range” on page 53. When a new Start or Stop frequency is selected, Coupled Frequency is automatically set to OFF. —... -
Page 60: 1-Port Cable Loss Measurements
CAT (Cable and Antenna Test) Mode 1-Port Cable Loss Measurements 1-Port Cable Loss Measurements While all cables have inherent loss, weather and time will deteriorate cables and cause even more energy to be absorbed by the cable. This makes less power available to be transmitted. -
Page 61: 2-Port Insertion Loss Measurements
CAT (Cable and Antenna Test) Mode 2-Port Insertion Loss Measurements 10. Connect a LOAD at the end of the cable to be tested. This limits the reflections to faults that are located in the cable under test. 11. Press Trace 6 then Math and Memory then Data->Mem... - Page 62 CAT (Cable and Antenna Test) Mode 2-Port Insertion Loss Measurements — Press Sweep 3, then select a Resolution setting. — Press Cal 5, then perform a calibration. Learn more on “How to Perform a Calibration” on page 127. — Connect the DUT and view the insertion loss measurement results. When measuring very long lengths of cable, it may be necessary to increase the sweep time.
- Page 63 Keysight Handheld Analyzers N99xxC User’s Guide DTF (Distance to Fault) Measurements CAT Mode Distance to Fault (DTF) measurements are generally used to locate problems, or faults, in a length of cable or transmission line. In this chapter, the cable to be tested is referred to as the DUT (Device Under Test). Settings that are NOT unique to DTF measurements are documented in the CAT Mode Chapter 3, “CAT (Cable and Antenna Test) Mode.”...
- Page 64 DTF (Distance to Fault) Measurements How to make DTF Measurements “Coupled Frequency” on page 68 “Cable (Correction) Specifications” on page 68 “Window Settings” on page 72 “DTF Units” on page 72 “Calculated DTF values” on page 72 “About Alias Faults” on page 73 Optional settings “All about Markers”...
- Page 65 DTF (Distance to Fault) Measurements How to make DTF Measurements 9. Either press Edit/Save/Recall Cables then Recall Cable, or directly enter the Velocity Factor/Cable Loss of the DUT using the Velocity Factor and Cable Loss keys. 10. Connect the start end of the DUT to the FieldFox. 11.
- Page 66 DTF (Distance to Fault) Measurements DTF Measurement Settings DTF Measurement Settings DTF Settings Table You can set and view all of the DTF settings, including some calculated values, on the DTF Settings table. Learn about the calculated values in “Calculated DTF values”...
- Page 67 DTF (Distance to Fault) Measurements DTF Measurement Settings — More then DTF (Lin) Faults are displayed on the Y-axis in linear (unitless) format. DTF Start and Stop Distance In DTF measurements, you set the physical length of cable or other device to be tested.
-
Page 68: Coupled Frequency
DTF (Distance to Fault) Measurements DTF Measurement Settings Typically, you will set the frequency range of the measurement to the passband of the filter. However, you may also want to test the ability of the filter to reject unwanted frequencies. In this case, set the frequency range to include those frequencies which the filter may not be adequately rejecting. - Page 69 DTF (Distance to Fault) Measurements DTF Measurement Settings About Velocity Factor and Cable Loss — Velocity Factor is a property of the physical material of a cable. A VF of 1.0 corresponds to the speed of light in a vacuum, or the fastest VF possible. A polyethylene dielectric cable has VF = 0.66 and a cable with PTFE dielectric has VF = 0.7.
- Page 70 DTF (Distance to Fault) Measurements DTF Measurement Settings 3. Then: — Velocity Factor Using the numeric keypad, enter a value between 0.01 and 1. Then press Enter. — Cable Loss Using the numeric keypad, enter a positive Cable Loss value in dB/m, then press Enter. How to Edit a Cable File The FieldFox includes many predefined cable files with the manufacturer’s specifications.
- Page 71 DTF (Distance to Fault) Measurements DTF Measurement Settings Recall Cable — Press to load a Cable file from the specified Storage Device — Storage Device Changes the device used to save or recall Cable files. This is a different setting from the Save/Recall Storage Device setting. Choose from Internal (default setting), USB (must be connected) or SD card.
-
Page 72: Window Settings
DTF (Distance to Fault) Measurements DTF Measurement Settings Window Settings Window settings provide the ability to choose between optimizing DTF measurements for resolving closely-spaced faults or for the ability to measure low-level faults. How to select Window settings 1. Press Meas Setup 4 > Settings 2. -
Page 73: About Alias Faults
DTF (Distance to Fault) Measurements DTF Measurement Settings Range Resolution. Indicates the accuracy of the distance to fault measurement. For example, with range resolution of 500 mm, if the distance to fault is 10 meters, this value could be inaccurate by +/- 500 mm or between 9.5 to 10.5 meters. - Page 74 DTF (Distance to Fault) Measurements DTF Measurement Settings Re-reflections are measured at the FieldFox as mirror images of the original faults. The largest fault is the open end of the cable. To avoid confusion, set the Stop distance shortly after that fault. Keysight N9915-90015 User’s Guide...
- Page 75 Keysight Handheld Analyzers N99xxC User’s Guide TDR (Time Domain Reflectometry) - Option 215 CAT Mode Time Domain Reflectometry (TDR) measurements are generally used to locate problems, and identify the type of problem, in a length of cable or transmission line. Settings that are NOT unique to TDR measurements are documented in Chapter 3, “CAT (Cable and Antenna Test) Mode”, on page In this chapter, the cable to be tested is referred to as the DUT (Device Under...
- Page 76 TDR (Time Domain Reflectometry) - Option 215 “Frequency Mode” on page 80 “Cable (Correction) Specifications” on page 81 “Window Settings” on page 84 “TDR Units” on page 85 “Calculated TDR values” on page 85 “About Alias Faults” on page 86 “How to Prevent Undersampling”...
-
Page 77: Tdr (Time Domain Reflectometry) - Option 215
TDR (Time Domain Reflectometry) - Option 215 9. Either press Edit/Save/Recall Cables then Recall Cable, or directly enter the Velocity Factor/Cable Loss of the DUT using the Velocity Factor and Cable Loss keys. 10. Connect the start end of the DUT to the FieldFox. 11. -
Page 78: Tdr Measurement (Format)
TDR (Time Domain Reflectometry) - Option 215 TDR Measurement Settings TDR Measurement Settings Select CAT Mode, then TDR before making any setting in this chapter. How to select CAT Mode — Press Mode. — Then CAT/TDR. TDR Measurement (Format) You can select from 3 different TDR Formats. —... -
Page 79: Tdr Start And Stop Distance
TDR (Time Domain Reflectometry) - Option 215 TDR Measurement Settings Dock Window — Press to relocate the Settings table to a position relative to the trace window. The setting persists through a Preset. Choose from the following: — Full (Default setting) Only the Settings table is shown on the screen. The trace window is temporarily not shown. -
Page 80: Frequency Mode
TDR (Time Domain Reflectometry) - Option 215 TDR Measurement Settings — Press Sweep 3 — Then TDR Sweep — Choose one of the following: Auto — Low pass frequency settings are calculated based on the current number of points. The Stop Frequency and Resolution settings can be changed to any value. -
Page 81: Cable (Correction) Specifications
TDR (Time Domain Reflectometry) - Option 215 TDR Measurement Settings Cable (Correction) Specifications By default, the FieldFox does NOT correct TDR measurements to account for the inherent loss of a cable. However, to make more accurate TDR measurements, the Cable Loss and Velocity Factor values should be considered. - Page 82 TDR (Time Domain Reflectometry) - Option 215 TDR Measurement Settings DTF Cable Specifications — Then — Select Cable Corr — Auto Use Cable Loss and Velocity Factor values from a Cable file. See “How to Edit, Save, and Recall a Cable File” below. This will overwrite a manually-entered value.
- Page 83 TDR (Time Domain Reflectometry) - Option 215 TDR Measurement Settings Clear All then Yes. Remove all Freq/Loss pairs from the table and — resets header information — Press Done to close the Cable Editor. How to Save or Recall a Cable Save Cable —...
-
Page 84: Window Settings
TDR (Time Domain Reflectometry) - Option 215 TDR Measurement Settings The Loss value for the measurement is interpolated from the Freq/Loss pairs at the Center Freq: 1 GHz = 0.1 dB/m 1.8 GHz = 0.18 dB/m 2 GHz = 0.2 dB/m The correction for loss at 5 meters in one direction: 0.18 dB/m * 5m = 0.9 dB. -
Page 85: Tdr Units
TDR (Time Domain Reflectometry) - Option 215 TDR Measurement Settings Network Analyzer Windows Frequency Span and TDR Window Selection for Step Rise Time (Approximated) The following table shows the approximated relationship between the frequency span and the window selection for impulse width and step rise time. Refer to Figure 5-1 on page Window... -
Page 86: About Alias Faults
TDR (Time Domain Reflectometry) - Option 215 TDR Measurement Settings Start Frequency – Start frequency that is used to calculate TDR. Stop Frequency – Stop frequency that is used to calculate TDR. Range Resolution. Indicates the accuracy of the distance to fault measurement. -
Page 87: How To Prevent Undersampling
TDR (Time Domain Reflectometry) - Option 215 TDR Measurement Settings An un-terminated cable (with NO perfect load at the end) will show faults that appear to be beyond the end of the cable. These are NOT alias faults. These faults appear as the signal reflects off the open at the end of the cable and travels back down the cable toward the connection at the FieldFox. - Page 88 TDR (Time Domain Reflectometry) - Option 215 TDR Measurement Settings Keysight N9915-90020 User’s Guide...
- Page 89 Keysight Handheld Analyzers N99xxC User’s Guide 6 NA (Network Analyzer) Mode Learn more about NA Mode measurements in the FieldFox Supplemental Online Help: https://rfmw.em.keysight.com/wireless/helpfiles/FieldFoxOnlineSupplement alHelp/Home.htm. In this Chapter “About S-parameters” on page 91 “Mixed-Mode S-Parameters” on page 92 “Parameter Conversion” on page 93 “Receiver Measurements”...
- Page 90 NA (Network Analyzer) Mode “Output Power” on page 107 “System Impedance (Z0)” on page 108 “Port Extensions” on page 108 “Velocity Factor” on page 109 “Increase Dynamic Range” on page 112 See Also “Why and When to Calibrate” on page 126 “All about Markers”...
-
Page 91: About S-Parameters
NA (Network Analyzer) Mode NA Mode Settings NA Mode Settings Select NA Mode before making any setting in this chapter. How to select NA Mode 1. Press Mode_. 2. Then NA. About S-parameters S-parameters (scattering parameters) are used to describe the way a device modifies a signal. -
Page 92: Mixed-Mode S-Parameters
NA (Network Analyzer) Mode NA Mode Settings S21 and S12 transmission measurements are used to measure the loss or gain through a DUT over a specified frequency range. Both ends of the DUT must be connected to the FieldFox. The FieldFox signal source is transmitted out one of the test port connectors, through the DUT, and into the other test port connector How to measure S-parameters... -
Page 93: Parameter Conversion
NA (Network Analyzer) Mode NA Mode Settings All FieldFox settings and features are supported (except Parameter Conversion) with mixed-mode S-parameters. Learn more about Balanced Measurements with the FieldFox in the FieldFox Supplemental Online Help: https://rfmw.em.keysight.com/wireless/helpfiles/FieldFoxOnlineSupplem entalHelp/Home.htm. How to make mixed-mode S-parameter measurements 1. -
Page 94: Receiver Measurements
NA (Network Analyzer) Mode NA Mode Settings ——Refl The displayed S-parameter is converted to Z or Y reflection, regardless of whether the S-parameter is reflection (S11 or S22) or transmission (S21 or S12). ——Trans The displayed S-parameter is converted to Z or Y transmission, regardless of whether the S-parameter is reflection (S11 or S22) or transmission (S21 or S12). -
Page 95: Multi-Trace Configurations
NA (Network Analyzer) Mode NA Mode Settings Multi-Trace Configurations In NA Mode you can display multiple traces on the FieldFox screen. The graphic above shows a x3H configuration. Tr2 is the ACTIVE trace as indicated by the highlighted Tr2. Trace Setting Notes —... -
Page 96: Quick Settings
NA (Network Analyzer) Mode NA Mode Settings How to select a multi-trace configuration 1. Press Trace 6 > Num of Traces 2. Then choose from the following: The default measurements depend on the options that are installed 1 trace standard configuration 2 traces overlayed on a single graticule 2 traces on separate graticules 3 traces on separate graticules... -
Page 97: Calibration Settings
NA (Network Analyzer) Mode NA Mode Settings How to view and change Quick Settings — Press Meas Setup 4 > Settings. Next Page Previous Page — Press to view all settings. If these softkeys are NOT available, then all available settings fit on one page. —... -
Page 98: Format
NA (Network Analyzer) Mode NA Mode Settings Format Select the display format in which to present measurement results. This setting can be changed at any time without affecting calibration accuracy. Learn more about Display Formats in the FieldFox Supplemental Online Help: https://rfmw.em.keysight.com/wireless/helpfiles/FieldFoxOnlineSupplem entalHelp/Home.htm. -
Page 99: Frequency Range
NA (Network Analyzer) Mode NA Mode Settings — Imaginary Displays only the reactive portion of the measured complex data. The Y-axis is Unitless. — Z Magnitude Displays the effective impedance in ohms. — Unwrap Phase Same as Phase, but without 180 degree wrapping. Phase is unwrapped by comparing the phase from one data point to the next. -
Page 100: Magnitude Offset
NA (Network Analyzer) Mode NA Mode Settings How to set Scale 1. Press Scale / Amptd. 2. Then choose from the following methods: — Autoscale Automatically adjusts the Y-axis to comfortably fit the Minimum and Maximum amplitude of the trace on the screen. —... -
Page 101: Electrical Delay
NA (Network Analyzer) Mode NA Mode Settings — Then Magnitude Offset - Offsets the entire data trace by the specified value. — Then enter a positive or negative offset value in dB using the numeric keypad, the arrows, or the rotary knob. Press a multiplier key. -
Page 102: Averaging
NA (Network Analyzer) Mode NA Mode Settings Emulate a projected phase shift in your measurement. For example, if you know that you need to add a cable and that the length of that cable will add a certain phase shift to your measurement, you can use phase offset to add that amount and simulate the complete device measurement. -
Page 103: If Bandwidth
NA (Network Analyzer) Mode NA Mode Settings — Point averaging is usually faster than sweep averaging. However, you may need to increase the Point Average count to obtain the same level of noise reduction as with sweep averaging. 6. While averaging is in process, press Sweep 3 then Restart to restart the averaging at 1. -
Page 104: Resolution (Number Of Data Points)
NA (Network Analyzer) Mode NA Mode Settings This setting can be changed at any time without affecting calibration accuracy. How to set Single or Continuous 1. Press Sweep 3. 2. Then choose one of the following: — Single Automatically sets Continuous OFF and causes FieldFox to make ONE sweep, then hold for the next Single key press. -
Page 105: Triggering (Na)
NA (Network Analyzer) Mode NA Mode Settings The actual sweep time is shown on the FieldFox screen. See the Screen Tour “Screen Tour” on page 44. To increase the sweep time, enter a value that is higher than the actual sweep time. The increase will not be exactly the amount that you enter, as the actual sweep time is the composite of many factors. - Page 106 NA (Network Analyzer) Mode NA Mode Settings — (Point) An external trigger type that acquires exactly one point per trigger input. IMPORTANT! If trigger signals come faster than the FieldFox can process them, some triggers may be ignored or lost. To ensure triggers are recognized and processed in order, use the external trigger output function to indicate when the FieldFox is ready for another input trigger.
-
Page 107: Output Power
NA (Network Analyzer) Mode NA Mode Settings Trigger Slope Determines which edge of an External trigger signal initiates a sweep. 1. Press Sweep 3 > Trigger > Trig Slope 2. Then choose from the following: — Positive Sweep is initiated by the rising edge of signal at about 1.7V. —... -
Page 108: System Impedance (Z0)
NA (Network Analyzer) Mode NA Mode Settings b. Then enter a value using the numeric keypad, the arrows, or the rotary knob. c. Press Enter. System Impedance (Z0) To accurately view data presented in Smith Chart format, first set the System Impedance. -
Page 109: Velocity Factor
NA (Network Analyzer) Mode NA Mode Settings — Electrical delay applies to a specific trace — Port extensions apply to specific hardware ports Port Extensions and Electrical Delay can be set independently. When both are “Electrical set, the delay adds together. Learn more about Electrical Delay in Delay”... - Page 110 NA (Network Analyzer) Mode NA Mode Settings You can also set Velocity Factor by pressing Meas Setup 4 then Calibration (Settings). Big Marker Display States (A and B) This feature, available ONLY in NA Mode, allows you to view up to three Big or Super Big marker readouts.
- Page 111 NA (Network Analyzer) Mode NA Mode Settings —Trace # - The marker# is created on this trace. Tr1 is selected by default. The corresponding Num Traces must first be selected. For example, to create a marker on Trace 3, first select Num Traces = x3. —Format –...
-
Page 112: Increase Dynamic Range
NA (Network Analyzer) Mode NA Mode Settings Increase Dynamic Range Dynamic range is the difference between maximum input power to the FieldFox receiver (without compressing the receiver), and the minimum measurable power (noise floor). Measurement accuracy is increased when the DUT response is at least 10 dB above the noise floor. - Page 113 Keysight Handheld Analyzers N99xxC User’s Guide Time Domain – Option 010 With NA Mode, Time Domain (Opt 010), frequency information is used to calculate and display measurements with time as the horizontal display axis. The response values appear separated in time allowing a different perspective of the test device's performance and limitations.
- Page 114 Time Domain – Option 010 Gating Settings “Start, Stop, Center, and Span Gate Times” on page 123 “Gating Type” on page 123 Keysight N9915-90020 User’s Guide...
- Page 115 Time Domain – Option 010 Overview Overview In normal NA Mode operation, the FieldFox measures the characteristics of a test device as a function of frequency. With Time Domain (opt 010), frequency information is used to calculate the inverse Fourier transform and display measurements with time on the horizontal display axis.
-
Page 116: Time Domain (Transform) Settings
Time Domain – Option 010 Time Domain (Transform) Settings Time Domain (Transform) Settings You can set and view most of the Time Domain settings on the Transform Settings table. Transform Settings Table The following settings (from Transform Stimulus Settings to Data Processing) are listed in the order they appear on the Transform Settings menu selection. -
Page 117: Stimulus (Mode)
Time Domain – Option 010 Time Domain (Transform) Settings Stimulus (Mode) — There are three variations on how the Time Domain transform algorithm is applied to the frequency domain measurement. Each method has a unique application. — Lowpass Impulse - Highest resolution. Most useful for seeing small responses in devices that pass low frequencies, such as cables. -
Page 118: Distance Units
Time Domain – Option 010 Time Domain (Transform) Settings — Then choose from: Start — Sets the transform start time. — Stop Sets the transform stop time. Zero (0) seconds is always the calibration reference plane. Negative values are useful if moving the reference plane. Distance Units When markers are present on a Time Domain trace, marker X-axis values are shown both in units of time (seconds) and distance. -
Page 119: Line Loss And Velocity Factor
Time Domain – Option 010 Time Domain (Transform) Settings The Window setting applies to ALL traces. How to make Window setting — Press Measure Setup 4 — Then Transform More — Then — Then Transform Window — A settings table appears that allows you to navigate and select the following settings. -
Page 120: Data Chain
Time Domain – Option 010 Time Domain (Transform) Settings About Velocity Factor and Line Loss — Velocity Factor is a property of the physical material of a cable. A VF of 1.0 corresponds to the speed of light in a vacuum, or the fastest VF possible. A polyethylene dielectric cable has VF = 0.66 and a cable with PTFE dielectric has VF = 0.7. -
Page 121: Trace Settings
Time Domain – Option 010 Trace Settings Trace Settings The following two settings apply to specific traces. Transform Enable Enable Time Domain transform for the specific trace. — Select the trace. — Press Measure Setup 4 Transform — Then — Then choose from: Transform On —... - Page 122 Time Domain – Option 010 Gating Gating Perhaps the most beneficial feature of Time Domain transform is the Gating function. When viewing the Time Domain response of a device, the gating function can be used to “virtually” remove undesired responses. You can then simultaneously view a frequency domain trace as if the undesired response did not exist.
-
Page 123: Gating Type
Time Domain – Option 010 Gating Trace 4 shows the frequency response with gating enabled. How to make Time Domain Gating settings — Press Measure Setup 4 — Then Transform Gating — Then — Then choose from: — Gating is being performed. —... - Page 124 Time Domain – Option 010 Gating Gating Shape This setting defines the filter characteristics of the gate function. Choose from Minimum, Normal, Wide, Maximum. Time domain Gate Shape setting is shown in the graphic above. Gate Shape Passband Sidelobe Cutoff Time Minimum Gate Ripple Levels...
-
Page 125: Chapter 8, "Calibration For Na, Cat, And Vvm Modes
Keysight Handheld Analyzers N99xxC User’s Guide Calibration for NA, CAT, and VVM ModesFUTURE Calibration removes the systematic errors that are associated with measurements in NA, CAT, and VVM Modes. Key presses are identical in all of these Modes. In this Chapter “Why and When to Calibrate”... -
Page 126: Why And When To Calibrate
Calibration for NA, CAT, and VVM ModesFUTURE See Also Learn How to Make 75 ohm Measurements at the FieldFox Supplemental Online Help: https://rfmw.em.keysight.com/wireless/helpfiles/FieldFoxOnlineSupplement alHelp/Home.htm. Why and When to Calibrate There are well-defined and understood systematic errors that are measured and calculated during the calibration process. These errors are caused by leakage signals inside the FieldFox, by the frequency response of the FieldFox receivers, and by reflections inside the FieldFox that interact with the DUT. -
Page 127: Calready
Calibration for NA, CAT, and VVM ModesFUTURE scope of this discussion. Although an OPEN standard is a precision component, simply leaving nothing connected at the end of a cable can be a reasonable substitute for an OPEN. — A LOAD standard absorbs almost ALL of the incident signal and very little signal is reflected back to the source. - Page 128 Calibration for NA, CAT, and VVM ModesFUTURE The following appears: Choose Calibration Method screen — Response Cal – Used to quickly calibrate ONE type of measurement using mechanical standards. Measurement accuracy is generally low. Learn more “Simple Response Cals” on page 133.
-
Page 129: Mechanical Cal
Calibration for NA, CAT, and VVM ModesFUTURE Mechanical Cal Mechanical Calibration is performed using discrete standards from a Cal Kit. Several Cal Kit definitions are built into the FieldFox. To learn about Cal Kit definitions, refer to the Application Note, “Specifying Calibration Standards and Kits for Keysight Vector Network Analyzers,”... - Page 130 Calibration for NA, CAT, and VVM ModesFUTURE 1. S-parameters – Verify that these are all of the S-parameters that you want calibrated. If not, press Esc to terminate the calibration process, then return to the Trace menu to display all of the traces to be calibrated. Learn how in “Multi-Trace Configurations”...
-
Page 131: Ecal
Calibration for NA, CAT, and VVM ModesFUTURE 1. Press Start Calibration. If an error appears (“Failure to compute calibration steps…”), check to ensure that the frequency range of the Cal Kit covers the frequency range of the measurement. You can verify the frequency range of your Cal Kit at: www.keysight.com/find/fieldfoxsupport. - Page 132 Calibration for NA, CAT, and VVM ModesFUTURE You can perform the following calibrations with ECal: — 1-Port Reflection calibration — Full 2-Port calibration Simple ECal ON: When choosing Full 2-port calibration, if you are able to connect your ECal simultaneously to both device ports, you should use Simple ECAL (i.e., this ensures that you are using the correct Thru calibration model).
- Page 133 Calibration for NA, CAT, and VVM ModesFUTURE 2. Connect the ECal module USB cable to the FieldFox USB. 3. Allow the module to warm up until it indicates READY. This may take several minutes. 4. Connect the ECal module ports to the FieldFox at the calibration reference plane (where the DUT will be connected).
-
Page 134: Simple Response Cals
Calibration for NA, CAT, and VVM ModesFUTURE 10.Press Start Calibration. When prompted, verify the ECal module connection, then press Measure. The standards within the ECal module are automatically connected and measured. ’Unknown THRU’: When prompted: “Connect port 1 to port 2", then connect port and port 2, using a coaxial cable or an appropriate thru adapter. - Page 135 Calibration for NA, CAT, and VVM ModesFUTURE 1-port response cals are also available from the Mechanical Cal menu. Learn more in “Calibration Type” on page 136. Normalize uses a THRU standard or cable between port 1 and port 2 to cal an S21 and S12 Transmission measurement (NA Mode) and a 2-port Insertion Loss measurement (CAT Mode).
-
Page 136: View Cal
Calibration for NA, CAT, and VVM ModesFUTURE View Cal From the Choose Calibration screen (see “How to Perform a Calibration” on page 127), press View Cal to see the following screen: The top box shows the properties of the current calibration that you performed and the displayed S-parameters that it is correcting. - Page 137 Calibration for NA, CAT, and VVM ModesFUTURE Definitions: Non-insertable DUT – A device whose Insertable DUT – A device whose connectors connectors could NOT mate together. They could mate together. They have the same type either do not have the same type of connector of connector and opposite or no gender.
- Page 138 Calibration for NA, CAT, and VVM ModesFUTURE Standards: OPEN, SHORT, LOAD on BOTH ports. Any THRU between ports. Based on the SOLR/Unknown THRU calibration. For more information on the Unknown THRU process, see the FieldFox Supplemental Online Help: https://rfmw.em.keysight.com/wireless/helpfiles/FieldFoxOnlineSupplem entalHelp/Home.htm. Sweeps in BOTH directions.
- Page 139 Calibration for NA, CAT, and VVM ModesFUTURE 1-port Response Cals (Open or Short) Calibrate the magnitude and phase of a measurement using ‘modeled’ mechanical standards. Measurement accuracy is better than Simple Response Cals (available on the main Cal page - see “Calibration Type”...
- Page 140 Calibration for NA, CAT, and VVM ModesFUTURE If the first calibration step does NOT prompt you to connect Load standards, then the Cal Kit probably does not contain an Isolation standard. You can use DataLink software to edit the Cal Kit and add an isolation standard using a Load standard.
-
Page 141: Enhanced Response Optimization
Calibration for NA, CAT, and VVM ModesFUTURE a. Select User Waveguide. Then press Done. b. Then DTF Cable Specifications > Edit/Save/Recall Cables > Edit Cable. c. Scroll to set Waveguide Definition. The default setting is VF Corr = Auto. d. Set the Min, Max, and Cutoff Frequencies. 6. -
Page 142: Interpolation
Calibration for NA, CAT, and VVM ModesFUTURE — NonReciprocal (default) An amplifier is a Non-Reciprocal device because it has gain in the forward direction, and very high loss (isolation) in the reverse direction. This choice provides the best correction for non-reciprocal devices, and reasonable correction for reciprocal devices. -
Page 143: Save The Calibration
Calibration for NA, CAT, and VVM ModesFUTURE Save the Calibration After performing any type of calibration, you can save the FieldFox settings along with the calibration into a STATE (*.sta) file. These settings and calibration can then be recalled as necessary. To learn how, see “Saving and Recalling Files”... -
Page 144: Apply Nearest (Na Mode Only)
Calibration for NA, CAT, and VVM ModesFUTURE Verifying Calibration and Jumper Cable Integrity Apply Nearest (NA Mode Only) When Apply Nearest is pressed, interpolation is turned off and the nearest calibration point is applied when the start stop frequencies are changed for the current sweep. -
Page 145: Test The Jumper Cable
Calibration for NA, CAT, and VVM ModesFUTURE Verifying Calibration and Jumper Cable Integrity — Because all LOAD standards have delay, you should see a small amount of phase rotation as a function of frequency. In general, the measurement result should agree with the characteristics of the calibration standard. Test the Jumper Cable With the LOAD standard still connected, move the jumper cable while observing the trace. - Page 146 Calibration for NA, CAT, and VVM ModesFUTURE Calibration Method Summary Calibration Method Summary — Mechanical Full 2-port Cal is ALWAYS the most accurate Cal method. The quality of a Mechanical Cal is completely dependent on the quality of the OPEN, SHORT, LOAD standards and the quality of the standard connections.
- Page 147 Keysight Handheld Analyzers N99xxC User’s Guide SA (Spectrum Analyzer) Mode (Option 233–Mixed Analyzers)FUTURE To better reflect the enhancements implemented during the alignment process, for firmware versions A.10.15 “IF Flatness Alignment” is now > referred to as “Channel Equalization” or “Channel Equalization Alignment” Alignment).
- Page 148 SA (Spectrum Analyzer) Mode (Option 233–Mixed Analyzers)FUTURE The graphic above shows an SA display with markers. Carrier with 5 kHz frequency modulation and deviation of 1 kHz. In this Chapter “Frequency Range” on page 151 “Baseband (N99xxC-Series FieldFox Models Only with Option 350 RTSA or Option 233 SA–Mixed Models)”...
- Page 149 SA (Spectrum Analyzer) Mode (Option 233–Mixed Analyzers)FUTURE “Points ” on page 203 “Trace Display States (SA Mode)” on page 203 “Average Type” on page 204 “Average Count” on page 205 “Alignments” on page 206 “RF Burst Amplitude Alignment” on page 211 “Detection Method”...
- Page 150 SA (Spectrum Analyzer) Mode (Option 233–Mixed Analyzers)FUTURE “Record/Playback (SA Option)” on page 542 Optional Settings: “All about Markers” on page 734 “All about Limit Lines” on page 749 “Saving and Recalling Files” on page 818 Keysight N9915-90020 User’s Guide...
-
Page 151: Frequency Range
SA (Spectrum Analyzer) Mode (Option 233–Mixed Analyzers)FUTURE SA Mode Settings SA Mode Settings Select SA Mode before making any setting in this chapter. Because there is no calibration, these settings can be made in any order. How to select SA Mode —... - Page 152 SA (Spectrum Analyzer) Mode (Option 233–Mixed Analyzers)FUTURE SA Mode Settings — Then choose from the following: Freq Span —Center frequencies. This is the most common method of entering frequency range. Enter the frequency of interest. The Center frequency is at the exact center of the X-axis. The Frequency Span places half of the frequency range on either side of center.
-
Page 153: Baseband (N99Xxc-Series Fieldfox Models Only With Option 350 Rtsa Or Option 233 Sa-Mixed Models)
SA (Spectrum Analyzer) Mode (Option 233–Mixed Analyzers)FUTURE SA Mode Settings How to change frequency step size When using the arrows to change any of the frequency settings, the size of the frequency step can be changed. — Press Freq/Dist More —... - Page 154 SA (Spectrum Analyzer) Mode (Option 233–Mixed Analyzers)FUTURE SA Mode Settings The baseband path, which is available to analyze signals up to 6.5 MHz, is disabled by default, and for Preset. When disabled, the SA Receiver maintains the standard analog mixing stages to analyze this low frequency (<6.5MHz) range.
-
Page 155: Radio Standard
SA (Spectrum Analyzer) Mode (Option 233–Mixed Analyzers)FUTURE SA Mode Settings Figure 9-2 Baseband Display Annotation When Enabled (SA Mode) Radio Standard A Radio Standard is a collection of settings that are applied to the FieldFox for specific RF protocols. When a Radio Standard is applied, the FieldFox frequency and channel settings change to that of the standard. -
Page 156: Channel Selection
SA (Spectrum Analyzer) Mode (Option 233–Mixed Analyzers)FUTURE SA Mode Settings Radio Standard — Then — Then select a standard using the arrows or rotary knob and press Enter. Custom Radio Standards Your own custom Radio Standards can be imported into the FieldFox. Custom standards are created in *.csv (spreadsheet) format. - Page 157 SA (Spectrum Analyzer) Mode (Option 233–Mixed Analyzers)FUTURE SA Mode Settings How to Enable Channel selection 1. Press Freq/Dist > More 2. Then Unit Freq Chan With Unit = Chan, Channel Direction becomes available and CF Step alters to Channel Step. How to change the Channel Number of the Measurement Chan With Unit =...
-
Page 158: Reverse Swap
SA (Spectrum Analyzer) Mode (Option 233–Mixed Analyzers)FUTURE SA Mode Settings Channel number X-axis annotation — Dn indicates Downlink channels. — Up (not shown) indicates Uplink channels — (−) indicates that the lowest frequency in the channel (128) is at the left edge of the screen. -
Page 159: Scale And Units
SA (Spectrum Analyzer) Mode (Option 233–Mixed Analyzers)FUTURE SA Mode Settings Scale and Units Adjust the Y-axis scale to see the relevant portions of the data trace. The Y-axis is divided into 10 graticules. A acquisition is shown on the screen as a solid horizontal bar that can be placed at any graticule. -
Page 160: External Gain
SA (Spectrum Analyzer) Mode (Option 233–Mixed Analyzers)FUTURE SA Mode Settings PSD Function — Enables/disables the Power Spectral Density Function (PSD Function) which is a way to normalize the SA measurement to a 1 Hz “Power Spectral Density Bandwidth. (Default == OFF). Learn more, see (PSD) Function (SA Mode Only)”... -
Page 161: Attenuation Control
SA (Spectrum Analyzer) Mode (Option 233–Mixed Analyzers)FUTURE SA Mode Settings Attenuation Control Both the RF Attenuation and Preamp functions control the power level into the When too much power is present at the RF Input port, ADC Over Range appears on the FieldFox screen. This does not necessarily mean that damage has occurred, but that the measurement is probably compressed. -
Page 162: Preamplifier Control (Opt 235)
SA (Spectrum Analyzer) Mode (Option 233–Mixed Analyzers)FUTURE SA Mode Settings — RF Attenuation is set manually. The default Attenuation setting is 10 dB. Enter a value between 0 to 30 dB in 5 dB steps using the numeric keypad, the arrows, or the rotary knob. -
Page 163: Field Strength Measurements
SA (Spectrum Analyzer) Mode (Option 233–Mixed Analyzers)FUTURE SA Mode Settings Field Strength Measurements To measure the strength of any signal transmitted through the air, an antenna must be connected to the FieldFox. The Field Strength feature allows you to enter the frequency response of the receiving antenna (the Antenna Factor) and associated cabling, and then have amplitude corrections automatically compensate the displayed trace for that response. - Page 164 SA (Spectrum Analyzer) Mode (Option 233–Mixed Analyzers)FUTURE SA Mode Settings Cable Off — – Opens a softkey menu to enable/disable a cable and edit, save, create a new cable description table, recall, and set a storage device location. — More –...
-
Page 165: Using The Antenna/Cable Editor
SA (Spectrum Analyzer) Mode (Option 233–Mixed Analyzers)FUTURE SA Mode Settings Save Antenna/Cable — – Save the modified Antenna/Cable to a file on the specified Storage Device. Recall Antenna/Cable — – Read an existing Antenna/Cable file from the specified Storage Device. Storage Device —... - Page 166 SA (Spectrum Analyzer) Mode (Option 233–Mixed Analyzers)FUTURE SA Mode Settings Figure 9-4 FieldFox Antenna Editors – Settings and Values How to use the Antenna/Cable Editor Before editing the antenna settings, it is important to know whether you are using a magnetic H-field (dB S/m) or electric E-field (dB /m) antenna.
- Page 167 SA (Spectrum Analyzer) Mode (Option 233–Mixed Analyzers)FUTURE SA Mode Settings setting) if you just want standard Amplitude units, with a simple dB offset supplied by the correction table. This makes the correction basically identical to a Cable correction. To get Field Strength units, you must choose either dB /m (E-field or dipole antenna), or dB S/m (H-field or loop antenna) to properly identify the Antenna Factors in the table.
- Page 168 SA (Spectrum Analyzer) Mode (Option 233–Mixed Analyzers)FUTURE SA Mode Settings 1. Press Done to close the Antenna/Cable Editor. 2. Press Antenna Off On > On. Then choose your final measurement amplitude unit, under Scale/more. If you selected either dB /m dB S/m for the Antenna Factor unit, you should see this list of available Field Strength units...
-
Page 169: Source Tracking Offset And Offset Reversal
SA (Spectrum Analyzer) Mode (Option 233–Mixed Analyzers)FUTURE SA Mode Settings — The FieldFox can also read *.ANT (Antenna) files that were created from older Keysight Spectrum Analyzers. — Cable and Antenna (*.csv or *.ANT) files canNOT be edited in Data Link software. -
Page 170: Tune & Listen (Am/Fm)
SA (Spectrum Analyzer) Mode (Option 233–Mixed Analyzers)FUTURE SA Mode Settings Tune & Listen (AM/FM) The Tune & Listen feature can be used to identify an interfering AM or FM signal. The demodulated AM or FM signal can be heard through the internal speaker or through headphones using the 3.5 mm jack located on the FieldFox side panel. - Page 171 SA (Spectrum Analyzer) Mode (Option 233–Mixed Analyzers)FUTURE SA Mode Settings “Audio Demod ON and OFF” on page 173 “Setting the Marker Counter Precision Softkey” on page 173 “Setting the Mkr->TuneFreq Softkey” on page 173 How to select Tune & Listen —...
- Page 172 SA (Spectrum Analyzer) Mode (Option 233–Mixed Analyzers)FUTURE SA Mode Settings The goal is to set the gain as high as possible (to take advantage of the range of the IF and audio paths) without distorting the audio signal. It is recommended that you keep increasing the gain until you hear distortion in the audio and then back off until you no longer hear any distortion.
- Page 173 SA (Spectrum Analyzer) Mode (Option 233–Mixed Analyzers)FUTURE SA Mode Settings To select Listen Time: — Press Meas Setup 4 > Listen Time — Enter a value using the numeric keypad, arrows, or the rotary knob. Then select a multiplier key. Learn about multiplier abbreviations. Volume Control To increase or decrease the Volume of the demodulated signal: —...
-
Page 174: Analog Demod
SA (Spectrum Analyzer) Mode (Option 233–Mixed Analyzers)FUTURE SA Mode Settings “How to use Marker Functions” on page 747. See also, Analog Demod The Tune & Listen feature can be used to identify an interfering AM or FM signal. Also, AM/FM Metrics displays the demodulated signal and the audio frequency spectrum. - Page 175 SA (Spectrum Analyzer) Mode (Option 233–Mixed Analyzers)FUTURE SA Mode Settings In the graphic above, Analog Demod ON and Demod Metrics is indicated above in the x2 displays of carrier spectrum content. For this example, AM Modulation Metrics are displayed in the lower half of the display. See also, Figure 9-7 on page 182, Figure 9-8 on page...
- Page 176 SA (Spectrum Analyzer) Mode (Option 233–Mixed Analyzers)FUTURE SA Mode Settings — – AM (double sideband). Displayed values for AM Modulation (metrics) – (i.e., includes AM Mod Depth, AM Demod Waveform, SINAD, THD, Carrier Power, Carrier Freq, Modulation rate). — AM SSB –...
- Page 177 SA (Spectrum Analyzer) Mode (Option 233–Mixed Analyzers)FUTURE SA Mode Settings If FM, choose from: FM Top Y — – Determines the Y axis frequency (1 kHz to 1 GHz) of the FM demodulation waveform is displayed (Default = 100 kHz). If FM Stereo / RDS, choose from: —...
- Page 178 SA (Spectrum Analyzer) Mode (Option 233–Mixed Analyzers)FUTURE SA Mode Settings Setting the Alternate Frequency (AF) Freq/Dist Softkeys When AM DSB, AM SSB, FM, FM Stereo / RDS, or PM are selected and Demod View = Freq, you can choose from the following: —...
- Page 179 SA (Spectrum Analyzer) Mode (Option 233–Mixed Analyzers)FUTURE SA Mode Settings Stop Press to stop the current capture of audio data and depending on the timing of pressing Stop, possibly prevent the audio data from being stored. — If you have previously stored an audio file: Press Playback then...
- Page 180 SA (Spectrum Analyzer) Mode (Option 233–Mixed Analyzers)FUTURE SA Mode Settings Timestamp OFF ON — – Enables/disables a timestamp label on your audio (.wav) filename. Storage Device — – Sets the storage device location for your audio (.wav) file. Select Internal (default), Card, or USB.
- Page 181 SA (Spectrum Analyzer) Mode (Option 233–Mixed Analyzers)FUTURE SA Mode Settings Highpass Filter None — – then choose: No highpass filter is selected. None 2-Pole Butterworth HPF with 3 dB cutoff frequency 20 Hz of 20 Hz. 2-Pole Butterworth HPF with 3 dB cutoff frequency 50 Hz of 50 Hz.
- Page 182 SA (Spectrum Analyzer) Mode (Option 233–Mixed Analyzers)FUTURE SA Mode Settings “How to use Marker Functions” on page 747. See also, Figure 9-7 AM DSB (Metrics) – Demodulation Waveform Keysight N9915-90020 User’s Guide...
- Page 183 SA (Spectrum Analyzer) Mode (Option 233–Mixed Analyzers)FUTURE SA Mode Settings Figure 9-8 FM Metrics – Demodulation Spectrum Figure 9-9 FM (Metrics) – Demodulation Waveform Keysight N9915-90020 User’s Guide...
- Page 184 SA (Spectrum Analyzer) Mode (Option 233–Mixed Analyzers)FUTURE SA Mode Settings Figure 9-10 FM (Metrics) - Counter Gate and FM Demodulation Waveform Keysight N9915-90020 User’s Guide...
- Page 185 SA (Spectrum Analyzer) Mode (Option 233–Mixed Analyzers)FUTURE SA Mode Settings Figure 9-11 Audio Capture with Annotation Examples Keysight N9915-90020 User’s Guide...
-
Page 186: Independent Source/Tracking Generator
SA (Spectrum Analyzer) Mode (Option 233–Mixed Analyzers)FUTURE SA Mode Settings Independent Source/Tracking Generator For best results, when using the independent source feature, InstAlign and the battery saver features should be turned off. Refer to “How to Access Individual Alignments” on page 210 “Preferences”... -
Page 187: Resolution Bandwidth (Res Bw)
SA (Spectrum Analyzer) Mode (Option 233–Mixed Analyzers)FUTURE SA Mode Settings Source Power — Sets the source power level. Choose from: Leveled — Enter a value from –60 dBm to 10 dBm using the numeric keypad, arrows, or the rotary knob . -
Page 188: Video Bandwidth (Video Bw)
SA (Spectrum Analyzer) Mode (Option 233–Mixed Analyzers)FUTURE SA Mode Settings — Enter a Res BW value using the numeric keypad, the arrows, or the rotary knob. Then press a multiplier if necessary or press Enter The current Res BW setting is shown at the bottom of the screen. #Res BW x.xx XHz (#) means manual setting. -
Page 189: Sweep Type
SA (Spectrum Analyzer) Mode (Option 233–Mixed Analyzers)FUTURE SA Mode Settings How to set AF RBW 1. Press BW 2 > AF RBW 2. Then choose from the following: — Auto Couples AF BW to the Resolution BW in a 1-to-1 ratio. —... -
Page 190: If Output
SA (Spectrum Analyzer) Mode (Option 233–Mixed Analyzers)FUTURE SA Mode Settings Oversweep In SA mode, the FieldFox uses Oversweep to quickly analyze input signals. Oversweep is meant to verify that your setup is correct, but Oversweep is not meant to be as accurate as FFT and Step sweeps. See also, “How to set Sweep Type”... - Page 191 SA (Spectrum Analyzer) Mode (Option 233–Mixed Analyzers)FUTURE SA Mode Settings Figure 9-12 IF Output Wide with CF=225 MHz (Requires Option B04 or Option B10) How to select IF Output The IF Output signal is useful only in Zero Span. Learn more about Zero Span in “Zero Span Measurements”...
- Page 192 SA (Spectrum Analyzer) Mode (Option 233–Mixed Analyzers)FUTURE SA Mode Settings Figure 9-13 SA Display Wide BW IF Out - Center Frequency 4 GHz (Requires Option B10) Keysight N9915-90020 User’s Guide...
-
Page 193: Sweep Acquisition
SA (Spectrum Analyzer) Mode (Option 233–Mixed Analyzers)FUTURE SA Mode Settings Figure 9-14 SA Display Wide BW IF Out - Center Frequency 10 GHz (Requires Option B10) Sweep Acquisition Available only in non-zero span measurements, when Sweep Acquisition is set to Auto, the fastest sweep rate is achieved while maintaining full amplitude accuracy. - Page 194 SA (Spectrum Analyzer) Mode (Option 233–Mixed Analyzers)FUTURE SA Mode Settings Figure 9-15 GSM Signal in Framed Data Format In the graphic above, a GSM signal in a framed data format; timeslot zero ON; all others OFF; PRF = 218 Hz, Duty Cycle = 12.5%. The pulsed signal becomes visible on every sweep update with SwpAcquisition = 50.
-
Page 195: Very Long Sweep Times
SA (Spectrum Analyzer) Mode (Option 233–Mixed Analyzers)FUTURE SA Mode Settings Some Detector and Video Bandwidth settings will raise the Auto Sweep Acquisition value greater than 1. In these cases, manually setting Sweep Acquisition lower than the Auto value may have NO effect. Measurement speed specifications do NOT apply in Temperature Control Mode. - Page 196 SA (Spectrum Analyzer) Mode (Option 233–Mixed Analyzers)FUTURE SA Mode Settings Figure 9-16 GSM Signal, Framed Data Format The graphic above shows a GSM signal, framed data format, with timeslot 0 and 3 “on”. Sweep Time is set to approximately the frame interval. Press Single several times until the waveform section of interest is viewable and stable.
-
Page 197: Triggering
SA (Spectrum Analyzer) Mode (Option 233–Mixed Analyzers)FUTURE SA Mode Settings Triggering STEP sweeps do not have trigger behavior. So, they are essentially always in FREERUN “ " mode. If you try to set a trigger (other than FREERUN) in SA Step sweep, the FieldFox displays the following popup message: "Note: Trig Type has no effect while in STEP sweep mode"... - Page 198 SA (Spectrum Analyzer) Mode (Option 233–Mixed Analyzers)FUTURE SA Mode Settings Sync This softkey is ONLY available when Trigger Type is set to Periodic. SA STEP sweeps do not have trigger behavior. So, they are essentially always in “FREERUN" mode. If you try to set a trigger (other than FREERUN) in SA Step sweep, the FieldFox displays the following popup message: "Note: Trig Type has no effect while in STEP sweep mode"...
- Page 199 SA (Spectrum Analyzer) Mode (Option 233–Mixed Analyzers)FUTURE SA Mode Settings 2. Enter a value using the numeric keypad, the arrows, or the rotary knob. 3. Then select a multiplier key or press Enter. Learn more in “Multiplier Abbreviations” on page In Zero span, you can use Trigger Position as an easy way to set Trigger Delay “Triggering”...
- Page 200 SA (Spectrum Analyzer) Mode (Option 233–Mixed Analyzers)FUTURE SA Mode Settings 3. Then select a multiplier key or press Enter. Learn more in “Multiplier Abbreviations” on page Auto Trigger Time While waiting for a valid trigger signal, Wait is annotated in the top left corner of the FieldFox screen.
-
Page 201: Fft Gating (Opt 238)
SA (Spectrum Analyzer) Mode (Option 233–Mixed Analyzers)FUTURE SA Mode Settings Trigger Settings Annotation Trigger settings are annotated on the FieldFox screen as highlighted in the following image: — Square: Trig Type (VidT), AutoTrigger (a), Pos Slope (/), Neg Delay (delay-) —... - Page 202 SA (Spectrum Analyzer) Mode (Option 233–Mixed Analyzers)FUTURE SA Mode Settings important when using RF Burst or Video triggering in wider spans, because the signal providing those triggers has limited bandwidth. Learn more about Auto “Auto Trigger Time” on page 200. trigger in For more conceptual information on this topic, please refer to Spectrum Analysis Basics (App Note 150), pages 31 - 35, at...
-
Page 203: Single / Continuous / Restart
SA (Spectrum Analyzer) Mode (Option 233–Mixed Analyzers)FUTURE SA Mode Settings Single / Continuous / Restart This setting determines whether the FieldFox measures continuously or only Single or Run / Hold +/- button is pressed. Use Hold / once each time the Single or to conserve battery power or to allow you to save or analyze a specific trace. -
Page 204: Average Type
SA (Spectrum Analyzer) Mode (Option 233–Mixed Analyzers)FUTURE SA Mode Settings A color-coded legend for displayed traces is visible in the left pane of the SA mode screen: W = Clear/Write; M = MaxHold; m = MinHold; A = Average; V = View How to display the Trace States 1. -
Page 205: Average Count
SA (Spectrum Analyzer) Mode (Option 233–Mixed Analyzers)FUTURE SA Mode Settings “Noise Marker” on page 215. — Noise Marker Averaging - Learn more in — Video BW filtering (for non-Zero Span measurements) - Learn more in “Video Bandwidth (Video BW)” on page 188. -
Page 206: Alignments
SA (Spectrum Analyzer) Mode (Option 233–Mixed Analyzers)FUTURE SA Mode Settings 2. Enter a value from 1 to 10,000 using the numeric keypad, the arrows, or the rotary knob. 3. Press Enter Alignments To better reflect the enhancements implemented during the alignment process, for firmware versions >... - Page 207 SA (Spectrum Analyzer) Mode (Option 233–Mixed Analyzers)FUTURE SA Mode Settings Individual Align. These are referred to as All three or a subset of the individual alignments are required for each specific mode, depending on the type of measurement supported by it: —...
- Page 208 SA (Spectrum Analyzer) Mode (Option 233–Mixed Analyzers)FUTURE SA Mode Settings For special cases, the individual alignments can be accessible via the front panel soft-keys using the Preference setting SA - Individual Alignment Control On/Off. This enables a soft-key for access to Individual Alignments >...
- Page 209 SA (Spectrum Analyzer) Mode (Option 233–Mixed Analyzers)FUTURE SA Mode Settings All Alignment and Align All Now IMPORTANT! It is recommended that you use Align All Now, because it Amptd Align Now, as well as, includes the individual alignment InstAlign Burst Align Now, and ChanEQ Align Now.
- Page 210 SA (Spectrum Analyzer) Mode (Option 233–Mixed Analyzers)FUTURE SA Mode Settings How to Access Individual Alignments This section assumes access to individual alignments was activated using the FieldFox’s system settings’ Preferences. Once enabled, an Individual Alignments softkey is displayed. Refer to “Preferences”...
-
Page 211: Rf Burst Amplitude Alignment
SA (Spectrum Analyzer) Mode (Option 233–Mixed Analyzers)FUTURE SA Mode Settings different FieldFox receiver frequency bands, so even if the temperature hasn't changed, an alignment may be required when one changes the Center frequency. If a needed alignment cannot be performed, the user is notified about questionable amplitude AMPTD?. - Page 212 SA (Spectrum Analyzer) Mode (Option 233–Mixed Analyzers)FUTURE SA Mode Settings — Auto (Default setting) SA measurement applications monitor changes in internal temperature and the time since last alignment update and trigger the need for a new update when the alignment becomes stale.
-
Page 213: Detection Method
SA (Spectrum Analyzer) Mode (Option 233–Mixed Analyzers)FUTURE SA Mode Settings different FieldFox receiver frequency bands, so even if the temperature hasn't changed, an alignment may be required when one changes the Center frequency. — Hold The alignment process is stopped, but the last alignment values are applied to subsequent sweeps. -
Page 214: Display Line
SA (Spectrum Analyzer) Mode (Option 233–Mixed Analyzers)FUTURE SA Mode Settings How to set Detection Method The current Detection method is labeled on the left edge of the screen. When a method is selected manually, a # precedes the label. For example: # Nrm means that Normal was selected from the softkeys. -
Page 215: Noise Marker
SA (Spectrum Analyzer) Mode (Option 233–Mixed Analyzers)FUTURE SA Mode Settings Figure 9-18 Display Line with Annotations How to create and move a Display Line 1. Press Limit 8 > Display Line OFF ON 2. Then enter a Y-axis value using the arrows or the rotary knob, then press Enter. -
Page 216: Power Spectral Density (Psd) Function (Sa Mode Only)
SA (Spectrum Analyzer) Mode (Option 233–Mixed Analyzers)FUTURE SA Mode Settings With a Noise Marker present, the Res BW can be changed and the displayed noise floor will also change, but the Noise Marker readout will remain about the same. Noise Markers can be used like regular markers. A Noise Marker is distinguished from a regular marker by (1Hz) after the marker readout value. -
Page 217: Logarithmic X-Axis Interpolation (Emi And Sa Modes Only)
SA (Spectrum Analyzer) Mode (Option 233–Mixed Analyzers)FUTURE SA Mode Settings Logarithmic X-axis Interpolation (EMI and SA modes Only) Normally, limit lines are interpolated linearly between the defined limit points (i.e., as a delta dB per Hz). Sometimes the user may want to change the limit line interpolation so that it is logarithmic vs. -
Page 218: Frequency Counter At Marker
SA (Spectrum Analyzer) Mode (Option 233–Mixed Analyzers)FUTURE SA Mode Settings Summary: — In Zero span, an Interval Power Marker yields the average power over the specified time interval. — In non-Zero span, a Band Power Marker yields the total power over the specified frequency range. -
Page 219: Audio Beep At Marker Power
SA (Spectrum Analyzer) Mode (Option 233–Mixed Analyzers)FUTURE SA Mode Settings 5. With Freq Count ON, you can scroll through the existing markers that are located on a discrete CW signal, and read the frequency of the signal peak. However, each frequency count update requires another sweep. If Single the FieldFox is in HOLD, press to update the frequency count... -
Page 220: Meas Uncal Error
SA (Spectrum Analyzer) Mode (Option 233–Mixed Analyzers)FUTURE Channel Measurements Meas UNCAL Error Meas UNCAL appears in the lower-left corner of the screen when the FieldFox can NOT display accurate measurement results with the current settings. Usually, the part of the trace that is inaccurate is shown at –200 dB. The following situation can produce Meas UNCAL: —... -
Page 221: Measurement Preset
SA (Spectrum Analyzer) Mode (Option 233–Mixed Analyzers)FUTURE Channel Measurements — With Units = CHAN selected, the FieldFox chooses either the uplink or downlink band, and displays that range of frequencies. You can then tune within that Standard using Start CHAN, Stop CHAN, or Center CHAN. The X-axis annotation indicates the frequency range. -
Page 222: Traces
SA (Spectrum Analyzer) Mode (Option 233–Mixed Analyzers)FUTURE Channel Measurements Traces Only one measurement trace can be displayed in Channel Measurements. Channel Power (CHP) Channel Power measures total power over the specified Integrated BW. The Integration Bandwidth (IBW) can be adjusted to measure the power over multiple channels. - Page 223 SA (Spectrum Analyzer) Mode (Option 233–Mixed Analyzers)FUTURE Channel Measurements When Channel Power is selected, the following settings are maintained from a previous measurement: Center Frequency, Preamp ON|OFF, and RF Attenuation. Integration Bandwidth When Channel Power is selected, vertical posts appear on the display to mark the current Integration Bandwidth setting.
- Page 224 SA (Spectrum Analyzer) Mode (Option 233–Mixed Analyzers)FUTURE Channel Measurements Figure 9-20 Occupied Bandwidth Measurement The graphic above shows an OBW measurement; Chan 190 Downlink; GSM850 Radio Standard How to Select Occupied Bandwidth 1. Press Measure_1 2. Then Channel Measurements 3. Then Occupied BW When Occupied Bandwidth is selected, the following settings are maintained from a previous measurement: Center Frequency, Preamp ON|OFF, and RF...
- Page 225 SA (Spectrum Analyzer) Mode (Option 233–Mixed Analyzers)FUTURE Channel Measurements 1. Press Freq/Dist > Freq Span Integration BW (IBW) is coupled to the Frequency Span setting. Frequency Span is 50% wider than the IBW (e.g., if the IBW value is 1 MHz, then the Frequency Span value is 1.5 MHz).
- Page 226 SA (Spectrum Analyzer) Mode (Option 233–Mixed Analyzers)FUTURE Channel Measurements Figure 9-21 GSM 850-Ch 251-Up with one Offset In the graphic above, frequencies (MHz) are added to illustrate offset and integ BW. Data in the ACPR graphical chart is always presented in dBm for the carrier, and dBc (dB below the carrier) for the offsets.
- Page 227 SA (Spectrum Analyzer) Mode (Option 233–Mixed Analyzers)FUTURE Channel Measurements Frequency Range/Channel When a Radio Standard is selected, the appropriate center frequency or channel and span is set automatically. The frequency or channel number can then be changed from the Freq/Dist menu. Learn how to select a Radio Standard and channels in “Radio Standard”...
- Page 228 SA (Spectrum Analyzer) Mode (Option 233–Mixed Analyzers)FUTURE Channel Measurements 1. Press Limit 8 > Offset (1,2,3) 2. Then choose from the following: — LowerOffsetLimit Sets a limit for the lower-frequency offset. — Upper OffsetLimit Sets a limit for the higher-frequency offset. 3.
- Page 229 SA (Spectrum Analyzer) Mode (Option 233–Mixed Analyzers)FUTURE Channel Measurements RRC Weighting RRC, or Root-Raised-Cosign weighting, is offered with Channel Power and ACPR measurements. When RRC Weighting is applied to transmitted and received power, the edges of the channel are ‘smoothed’ to help prevent interference. To accurately measure a channel that has RRC weighting, set the same value of RRC weighting as that used in the transmitter and receiver.
-
Page 230: How To Set Up Emf Settings (Requires Emf (Option 358), Gps (Option 307), And Sa Mode (Option 233-Mixed Analyzers))
SA (Spectrum Analyzer) Mode (Option 233–Mixed Analyzers)FUTURE How to Set Up EMF Settings (Requires EMF (Option 358), GPS (Option 307), and SA Mode (Option 233–Mixed Analyzers)) How to Set Up EMF Settings (Requires EMF (Option 358), GPS (Option 307), and SA Mode (Option 233–Mixed Analyzers)) If OTA or SA mode does not detect an EMF Option 358 license, then the EMF application and the USB antenna’s axes must be set up manually. - Page 231 SA (Spectrum Analyzer) Mode (Option 233–Mixed Analyzers)FUTURE How to Set Up EMF Settings (Requires EMF (Option 358), GPS (Option 307), and SA Mode (Option 233–Mixed Analyzers)) This section consists of: — “EMF Features” on page 231 — “EMF Setup Procedure” on page 233 EMF Features EMF has the following features: EMF Measurement Results:...
- Page 232 SA (Spectrum Analyzer) Mode (Option 233–Mixed Analyzers)FUTURE How to Set Up EMF Settings (Requires EMF (Option 358), GPS (Option 307), and SA Mode (Option 233–Mixed Analyzers)) Figure 9-23 Example of EMF with Triaxial Antenna Keysight N9915-90020 User’s Guide...
- Page 233 SA (Spectrum Analyzer) Mode (Option 233–Mixed Analyzers)FUTURE How to Set Up EMF Settings (Requires EMF (Option 358), GPS (Option 307), and SA Mode (Option 233–Mixed Analyzers)) EMF Setup Procedure When the USB antenna correction factors are imported, EMF (Option 358) couples many settings to ease setting up the EMF measurement (e.g., Apply Corrections is enabled, all X, Y, and Z antenna axes are enabled, and Amp Corr Select is set to TriAxial XYZ).
- Page 234 SA (Spectrum Analyzer) Mode (Option 233–Mixed Analyzers)FUTURE How to Set Up EMF Settings (Requires EMF (Option 358), GPS (Option 307), and SA Mode (Option 233–Mixed Analyzers)) See also, “How to Use the Manual EMF Channel Power” on page 237. — Optional: Press Antenna Axis the antenna axis should be set to Auto for default operation.
- Page 235 SA (Spectrum Analyzer) Mode (Option 233–Mixed Analyzers)FUTURE How to Set Up EMF Settings (Requires EMF (Option 358), GPS (Option 307), and SA Mode (Option 233–Mixed Analyzers)) — Default Receiver side only antenna measurements (Default – when no Tri Axial antenna is detected). —...
- Page 236 SA (Spectrum Analyzer) Mode (Option 233–Mixed Analyzers)FUTURE How to Set Up EMF Settings (Requires EMF (Option 358), GPS (Option 307), and SA Mode (Option 233–Mixed Analyzers)) — Save Cable Opens a menu to name and save the cable corrections data —...
- Page 237 SA (Spectrum Analyzer) Mode (Option 233–Mixed Analyzers)FUTURE How to Set Up EMF Settings (Requires EMF (Option 358), GPS (Option 307), and SA Mode (Option 233–Mixed Analyzers)) — Storage Device – to select the location to store your new antenna factor. See also Chapter 31, “System Settings.”...
- Page 238 SA (Spectrum Analyzer) Mode (Option 233–Mixed Analyzers)FUTURE How to Set Up EMF Settings (Requires EMF (Option 358), GPS (Option 307), and SA Mode (Option 233–Mixed Analyzers)) 7. Move the antenna to the correct physical location/position for your measurement. 8. Antenna corrections: Press Corrections X-Axis Antenna Off Antenna...
- Page 239 SA (Spectrum Analyzer) Mode (Option 233–Mixed Analyzers)FUTURE How to Set Up EMF Settings (Requires EMF (Option 358), GPS (Option 307), and SA Mode (Option 233–Mixed Analyzers)) 2. For this example, the X axis Antenna softkey menu has been selected: a. Then press Edit Antenna to edit the existing X axial antenna factor’s Frequency and Antenna Factor table values that are stored in the...
- Page 240 SA (Spectrum Analyzer) Mode (Option 233–Mixed Analyzers)FUTURE How to Set Up EMF Settings (Requires EMF (Option 358), GPS (Option 307), and SA Mode (Option 233–Mixed Analyzers)) c. Press Save Antenna to save your changes. See also Chapter , “File Saving Naming Options” and then to “Alpha Numeric Editing”...
- Page 241 SA (Spectrum Analyzer) Mode (Option 233–Mixed Analyzers)FUTURE How to Set Up EMF Settings (Requires EMF (Option 358), GPS (Option 307), and SA Mode (Option 233–Mixed Analyzers)) — Cable Off – to open a softkey menu to edit the cable factors for an antenna setup.
- Page 242 SA (Spectrum Analyzer) Mode (Option 233–Mixed Analyzers)FUTURE How to Set Up EMF Settings (Requires EMF (Option 358), GPS (Option 307), and SA Mode (Option 233–Mixed Analyzers)) — Back – To exit to previous softkey menu. — Press Done when finished editing to exit. c.
-
Page 243: Spectrum Emission Mask (Sem) - (Sa Mode Only)
SA (Spectrum Analyzer) Mode (Option 233–Mixed Analyzers)FUTURE Spectrum Emission Mask (SEM) — (SA Mode Only) Spectrum Emission Mask (SEM) — (SA Mode Only) This section explains how to make the spectrum emission mask, (SEM), measurement. SEM compares the total power level within the defined carrier bandwidth and offset channels on both sides of the carrier frequency, to levels allowed by standard. - Page 244 SA (Spectrum Analyzer) Mode (Option 233–Mixed Analyzers)FUTURE Spectrum Emission Mask (SEM) — (SA Mode Only) — Spectrum Emission Mask Pass/Fail – A PASS indicates the displayed SEM is within the current boundaries specified. A FAIL indicates the current signal fails with the specified parameters. Figure 9-27 SEM Example Keysight N9915-90020 User’s Guide...
- Page 245 SA (Spectrum Analyzer) Mode (Option 233–Mixed Analyzers)FUTURE Spectrum Emission Mask (SEM) — (SA Mode Only) Figure 9-28 SEM Example FAIL Data - Absolute Limit (Blue), Relative Limit (Violet), Trace (Yellow), and Tabular Data How to select Spectrum Emission Mask (SEM) Measurement —...
- Page 246 SA (Spectrum Analyzer) Mode (Option 233–Mixed Analyzers)FUTURE Spectrum Emission Mask (SEM) — (SA Mode Only) — Total Pwr Ref (Default is Total Pwr Ref) is the total integrated reference channel power (dBm) is measured and used as the Auto Power Ref value. Peaks found in Offset segments remain in (dBm) units for direct comparison with (dBm) limits.
- Page 247 SA (Spectrum Analyzer) Mode (Option 233–Mixed Analyzers)FUTURE Spectrum Emission Mask (SEM) — (SA Mode Only) — Ofst Freq Stop Sets the offset frequency stop value. (Default/Maximum = Value varies with model and options, Minimum = 0 Hz). — Res BW Auto/Manual (Default is Auto).
- Page 248 SA (Spectrum Analyzer) Mode (Option 233–Mixed Analyzers)FUTURE Spectrum Emission Mask (SEM) — (SA Mode Only) 4. Setting the Limit Lines Two Limit traces are available, an Absolute Limit and a Relative Limit. Both are defined and applied only over the Offset measurement regions. There is no Limit definition or application for the Reference Channel itself.
- Page 249 SA (Spectrum Analyzer) Mode (Option 233–Mixed Analyzers)FUTURE Spectrum Emission Mask (SEM) — (SA Mode Only) 5. Setting the Detectors The Trace menu shows that two Detector controls are available, one for the Reference Channel (default Auto is Average to facilitate the Power Integration), and another for all the Offset segments (default Auto is PEAK, to facilitate finding PEAK signal energy when comparing against Limits).
-
Page 250: Iq Analysis (Sa Mode Only)
SA (Spectrum Analyzer) Mode (Option 233–Mixed Analyzers)FUTURE IQ Analysis (SA Mode Only) IQ Analysis (SA Mode Only) This feature’s intended use is that the Streamed data will be sent to another computer. That computer or another one will act as a SCPI controller and is required for actually controlling the streaming, in particular setting up network configuration data and starting and stopping the streaming. - Page 251 SA (Spectrum Analyzer) Mode (Option 233–Mixed Analyzers)FUTURE IQ Analysis (SA Mode Only) How to Setup IQ Analysis General General setup for IQ Analysis: 1. Press Meas Setup 4 > IQ Analysis General > 2. Press IQE Sample Rate > Auto (default). 3.
- Page 252 SA (Spectrum Analyzer) Mode (Option 233–Mixed Analyzers)FUTURE IQ Analysis (SA Mode Only) c. Then to adjust receiver gain: Typically, the goal is to be able to see the desired signal that you want to capture as close as possible to the top of the display grid on the screen, without causing an ADC over range to be displayed.
-
Page 253: Effective Isotropic Radiated Power (Eirp) - (Sa Mode Only)
SA (Spectrum Analyzer) Mode (Option 233–Mixed Analyzers)FUTURE Effective Isotropic Radiated Power (EIRP) – (SA Mode Only) Effective Isotropic Radiated Power (EIRP) – (SA Mode Only) How to Select Effective Isotropic Radiated Power (EIRP) 1. Press Measure 1 2. Then Channel Measurements EIRP Off to open a menu of softkeys to set >... - Page 254 SA (Spectrum Analyzer) Mode (Option 233–Mixed Analyzers)FUTURE Effective Isotropic Radiated Power (EIRP) – (SA Mode Only) — Save Horizontal – Saves the current horizontal EIRP value (dBm). — Save Vertical – Saves the current vertical EIRP value (dBm). — Clear H & V –Clears the saved horizontal and vertical EIRP values (dBm).
- Page 255 Keysight Handheld Analyzers N99xxC User’s Guide 10 RTSA (Real-time Spectrum Analyzer) Mode—Option 350 RTSA Mode measures signals at the SA RF IN connector. For a comprehensive RTSA mode tutorial, see Understanding and Applying Probability of Intercept in Real-time Spectrum Analysis (App Note) at https://www.keysight.com/us/en/assets/7018-04381/application-notes/599 1-4317.pdf.
- Page 256 RTSA (Real-time Spectrum Analyzer) Mode—Option 350 Figure 10-2 The graphic above shows an RTSA display shows an RTSA display of an 80 MHz linear FM chirp with a center frequency of 1 GHz (requires Option B10). Keysight N9915-90020 User’s Guide...
- Page 257 RTSA (Real-time Spectrum Analyzer) Mode—Option 350 In this Chapter: “Frequency Range” on page 259 “Scale and Units” on page 261 “External Gain” on page 261 “Attenuation Control” on page 262 “Preamplifier Control (Opt 235)” on page 263 “Check for Compressed Measurements” on page 263 “Spectrum Selection”...
- Page 258 RTSA (Real-time Spectrum Analyzer) Mode—Option 350 “Saving and Recalling Files” on page 818 Keysight N9915-90020 User’s Guide...
-
Page 259: Frequency Range
RTSA (Real-time Spectrum Analyzer) Mode—Option 350 RTSA Mode Settings RTSA Mode Settings Select RTSA Mode before making any setting in this chapter. Because there is no calibration, these settings can be made in any order. How to select RTSA Mode —... - Page 260 RTSA (Real-time Spectrum Analyzer) Mode—Option 350 RTSA Mode Settings How to set Frequency Range — Press Freq/Dist. — Then choose from the following: —Center Freq Span frequencies. This is the most common method of entering frequency range. Enter the frequency of interest. The Center frequency is at the exact center of the X-axis.
-
Page 261: Scale And Units
RTSA (Real-time Spectrum Analyzer) Mode—Option 350 RTSA Mode Settings Scale and Units Adjust the Y-axis scale to see the relevant portions of the data trace. The Y-axis is divided into 10 graticules. A acquisition is shown on the screen as a solid horizontal bar that can be placed at any graticule. -
Page 262: Attenuation Control
RTSA (Real-time Spectrum Analyzer) Mode—Option 350 RTSA Mode Settings — Enter a value using the numeric keypad, the arrows, or the rotary knob (positive for gain; negative for loss). Values in increments less than 5 dB must be typed using the numeric keypad. Then press Enter ExtGain xx dB is shown at the top of the screen. -
Page 263: Preamplifier Control (Opt 235)
RTSA (Real-time Spectrum Analyzer) Mode—Option 350 RTSA Mode Settings Auto — RF Attenuation is set by adjusting the acquisition. As the acquisition is lowered, for example from –10 dBm to –40 dBm, the FieldFox assumes that you are looking at low-level signals. The RF Attenuation value is automatically lowered in 5 dB steps to allow low-level signals to be viewed. -
Page 264: Spectrum Selection
RTSA (Real-time Spectrum Analyzer) Mode—Option 350 RTSA Mode Settings —If the signal level DOES increase, then the receiver was compressed. Set the RF Attenuation value at the setting when further increases no longer result in an increase in the displayed power level. Spectrum Selection Density Spectrum and Spectrogram data is lost when you change modes, because the FieldFox optimizes the instrument’s resources during mode... - Page 265 RTSA (Real-time Spectrum Analyzer) Mode—Option 350 RTSA Mode Settings Figure 10-3 Density Spectrum (Histogram) FM Signal with 1 MHz FM Deviation & 400 Hz FM Rate Keysight N9915-90020 User’s Guide...
- Page 266 RTSA (Real-time Spectrum Analyzer) Mode—Option 350 RTSA Mode Settings Figure 10-4 Density Spectrum (Histogram) with 2 Pulses, 100 MHz Span (Blue color indicates pulse that occurs less frequently) Figure 10-5 Spectrogram (100 MHz Span) Keysight N9915-90020 User’s Guide...
- Page 267 RTSA (Real-time Spectrum Analyzer) Mode—Option 350 RTSA Mode Settings Figure 10-6 Real-time Spectrum Keysight N9915-90020 User’s Guide...
-
Page 268: Setting The If Path
RTSA (Real-time Spectrum Analyzer) Mode—Option 350 RTSA Mode Settings Setting the IF Path How to check or set the IF Path. By default the IF Path is set to Auto. — Press BW 2. — Then IF Path The underlined setting is the current setting. Choose Auto, MHz, or 100 MHz (100 MHz requires Option B04 or B10 and either... -
Page 269: Triggering
RTSA (Real-time Spectrum Analyzer) Mode—Option 350 RTSA Mode Settings Auto — Res BW is coupled to the frequency span. As the frequency span is narrowed, the Res BW is also narrowed providing increased ability to resolve signals. To change this setting from Man to Auto, press Res BW twice. —... - Page 270 RTSA (Real-time Spectrum Analyzer) Mode—Option 350 RTSA Mode Settings Video — A sweep is initiated when the amplitude of an incoming signal crosses the settable trigger level. The comparison is done in the time “Trigger Slope”, domain, before conversion to frequency domain. Refer to “Trigger Delay”, “Trigger Level”...
- Page 271 RTSA (Real-time Spectrum Analyzer) Mode—Option 350 RTSA Mode Settings Trigger Settings — Then — Then Trig Delay — Enter a value using the numeric keypad, the arrows, or the rotary knob. (0 to 10 seconds) — Then select a multiplier key or press Enter. Learn more in “Multiplier Abbreviations”...
-
Page 272: Single / Continuous / Restart / Time Per Div
RTSA (Real-time Spectrum Analyzer) Mode—Option 350 RTSA Mode Settings — Enter 0 to set Auto Trigger OFF or press the Auto Trigger softkey a second time to turn OFF Auto Trigger. Trigger Hold-Off Used with External, Video, and RF Burst triggering, sets the hold-off time between triggers. -
Page 273: Baseband (N99Xxc-Series Fieldfox Models Only With Option 350 Rtsa Or Option 233 Sa-Mixed Models)
RTSA (Real-time Spectrum Analyzer) Mode—Option 350 RTSA Mode Settings How to set Single or Continuous — Press Sweep 3. — Then choose one of the following: — Continuous ——ON Causes the RTSA to make continuous sweeps. This is the typical setting for making measurements. Each Run / Hold +/- press causes the RTSA to toggle between continuous sweep and Hold. - Page 274 RTSA (Real-time Spectrum Analyzer) Mode—Option 350 RTSA Mode Settings How to select Baseband 1. Press Freq/Dist > More 2. Then Baseband [Disabled] Press to Enabled (Default == Disabled). 3. To complete the Baseband enabling (activation) process: — The IF path must be Narrow 10 MHz. —...
-
Page 275: Points (Not User Settable)
RTSA (Real-time Spectrum Analyzer) Mode—Option 350 RTSA Mode Settings How to set Acq Time — Press Sweep 3. — Then choose: — Acq Time Acq Time affects the quantity of information being captured during a density or real-time spectrum measurement. ——Auto (default) the FieldFox chooses the optimum Acq Time based on the span setting (default is 20 ms, when span is set... -
Page 276: Detection Method
RTSA (Real-time Spectrum Analyzer) Mode—Option 350 RTSA Mode Settings —Clr /Wr [W] (Clear/Write) Displays the actual measured data for each sweep. —MaxHold [M] Displays the maximum response of the input signal at each data point over multiple sweeps. See also Average Count in “Average Count”... -
Page 277: Average Count, Show Density, Blue, And Red Percentage Limits
RTSA (Real-time Spectrum Analyzer) Mode—Option 350 RTSA Mode Settings Normal — [N] Provides a better visual display of random noise than Positive peak and avoids the missed-signal problem of the Sample Mode. Should the signal both rise and fall within the bucket interval, then the algorithm classifies the signal as noise. -
Page 278: Average Count
RTSA (Real-time Spectrum Analyzer) Mode—Option 350 RTSA Mode Settings Blue Limit dBm — – (Spectrogram Only) Changes the power level (dBm) of the trace that has a blue limit (–210 dBm to 30, default is –90 dBm). This setting is coupled to the color bar in the upper right corner of the FieldFox display. -
Page 279: Limit Lines
RTSA (Real-time Spectrum Analyzer) Mode—Option 350 RTSA Mode Settings Figure 10-8 Display Line with Annotations How to create and move a Display Line — Press Limit __8 Display Line OFF ON — Then — Then enter a Y-axis value using the arrows or the rotary knob, then press Enter. -
Page 280: Audio Beep At Marker Power
RTSA (Real-time Spectrum Analyzer) Mode—Option 350 RTSA Mode Settings Audio Beep at Marker Power When enabled, the Audio Beep feature emits a repetitive beep sound which varies in tone pitch and repetition rate to indicate the relative power level of the active marker. -
Page 281: Spectrogram Display (Rtsa Option)
RTSA (Real-time Spectrum Analyzer) Mode—Option 350 Spectrogram Display Spectrogram Display Spectrogram display provides a visual history of the measured spectrum. This display type can be used to locate intermittent signals or to view signal levels and frequencies over time. This display can NOT be used with Channel Measurements. Spectrogram Display (RTSA Option) Spectrogram draws the most recent trace record at the bottom of the stack of previously-drawn trace records. - Page 282 RTSA (Real-time Spectrum Analyzer) Mode—Option 350 Spectrogram Display — Displays the data trace below the spectrogram. Total trace records: 130. Bottom — Displays the data trace above the spectrogram. Total trace records: 130. Common Settings for Spectrogram Set Red and Blue Limits The colors displayed on the Waterfall and Spectrogram represent the various measured power levels: —...
-
Page 283: Record/Playback (Rtsa Option)
RTSA (Real-time Spectrum Analyzer) Mode—Option 350 Record/Playback (RTSA Option) Record/Playback (RTSA Option) Density Spectrum information is not recorded. Only the trace data is saved. See “How to Record a Session” on page 286 Record/Playback is only available in Density Spectrum and Real-time Spectrum measurements. - Page 284 RTSA (Real-time Spectrum Analyzer) Mode—Option 350 Record/Playback (RTSA Option) You can determine the length of time over which recording can occur by setting the Record Interval (the time between recorded traces) and other “Recording Configuration” on page 288. settings. Learn more in To view and edit the maximum number of records Just after opening or initiating a session: 1.
- Page 285 RTSA (Real-time Spectrum Analyzer) Mode—Option 350 Record/Playback (RTSA Option) Table 10-1 Summary of RTSA State Settings Option Settings RTSA Acquisition Time Detector(s) External Gain Frequency Range Preamp On/Off Resolution BW RF Attenuation Trace State(s) Trigger Settings Other display settings, such as Scale and acquisition, can also be changed during recording but are not saved with the session file.
- Page 286 RTSA (Real-time Spectrum Analyzer) Mode—Option 350 Record/Playback (RTSA Option) In addition, you can insert a ‘User Tag’ at any time during a recording session to indicate an external event, such as when an antenna is moved. During playback, you can move quickly to any of these tags, or scroll through these tags.
- Page 287 RTSA (Real-time Spectrum Analyzer) Mode—Option 350 Record/Playback (RTSA Option) — Recall Session then Open and select a session. 3. Press Recorder Player 4. Press Record is displayed in the left of screen graticules. During recording, choose from the following: Pause Resume —...
- Page 288 RTSA (Real-time Spectrum Analyzer) Mode—Option 350 Record/Playback (RTSA Option) the rotary knob. Active when playback is paused. Learn more in About State and User Tags in “About State and User Tags” on page 285. — Playback Trace Activated automatically when Paused. Allows you to continue playback from a specific trace, or scroll through traces manually.
- Page 289 RTSA (Real-time Spectrum Analyzer) Mode—Option 350 Record/Playback (RTSA Option) — Segment Count Sets the number of traces to record, after which the recording will automatically pause. Press Pause/Resume or Record to capture another N traces, or Stop to end recording. Default is OFF, which is NO limit to the number of traces to be recorded.
- Page 290 RTSA (Real-time Spectrum Analyzer) Mode—Option 350 Record/Playback (RTSA Option) Playback Configuration By default, trace sweeps are played back as fast as the trace can be drawn on the screen. The following setting allows you to slow playback. In addition, you can manually scroll through individual traces using Playback Trace, or scroll through State and User Tags using Playback State/Tag.
- Page 291 RTSA (Real-time Spectrum Analyzer) Mode—Option 350 Record/Playback (RTSA Option) — Sort Arrange the listing of sessions Name, Date, or Size. Sort can also be used during a Recall Session, before choosing a session to open. — Delete After a confirmation prompt, removes the contents of the selected session from the list.
- Page 292 RTSA (Real-time Spectrum Analyzer) Mode—Option 350 Record/Playback (RTSA Option) Keysight N9915-90020 User’s Guide...
- Page 293 Keysight Handheld Analyzers N99xxC User’s Guide 11 IQ Analyzer (IQA) – Option 351 IQA mode measures signals at the SA RF IN connector. IQA mode requires the FieldFox to have SA mode installed. IMPORTANT! 85571A-028 (28 GHz 5G Phased Array Antenna) accessories not suitable for use in wet locations.
- Page 294 IQ Analyzer (IQA) – Option 351 Figure 11-1 IQ Analyzer (IQA) Display - LTE–TDD signal captured using the FieldFox’s I/Q analyzer Keysight N9915-90020 User’s Guide...
- Page 295 IQ Analyzer (IQA) – Option 351 Figure 11-2 IQ Analyzer (IQA) Display - Window Shape Flat Top spur free 1 GHz center frequency (span=100 MHz) captured using the FieldFox’s I/Q analyzer (Requires Option B10) Keysight N9915-90020 User’s Guide...
- Page 296 IQ Analyzer (IQA) – Option 351 In this Chapter “About I/Q Analyzer (IQA) Measurements” on page 298 “Setting the IF Path” on page 298 — “I/Q Analyzer (IQA) Mode Settings” on page 299 “How to Make Measurements Using the I/Q Analyzer Mode” on —...
- Page 297 IQ Analyzer (IQA) – Option 351 Also “Why and When to Calibrate” on page 126 “All about Markers” on page 734 “All about Limit Lines” on page 749 “All about Trace Math” on page 760 Chapter 30, “Data Analysis Features.” Chapter 33, “File Management.”...
- Page 298 IQ Analyzer (IQA) – Option 351 About I/Q Analyzer (IQA) Measurements About I/Q Analyzer (IQA) Measurements The I/Q Analyzer Mode makes general purpose frequency domain and time domain measurements. The mode enables two types of I/Q measurements: — frequency domain and —...
- Page 299 IQ Analyzer (IQA) – Option 351 I/Q Analyzer (IQA) Mode Settings I/Q Analyzer (IQA) Mode Settings When you initially select I/Q Analyzer, Real-Time SA, or some of the other spectrum settings (such as center frequency) a factory channel Equalization measurement is applied to the signal. During channel equalization measurement, the FieldFox displays a “Start Channel Equalization”.
- Page 300 IQ Analyzer (IQA) – Option 351 I/Q Analyzer (IQA) Mode Settings — Log magnitude of the spectrum of the I/Q data versus frequency — Log magnitude of the I/Q data (RF Envelope) versus time — The real component of the I/Q data versus time —...
- Page 301 IQ Analyzer (IQA) – Option 351 I/Q Analyzer (IQA) Mode Settings If you do not have an external device connected and attempt to save your data, a warning message is displayed: "Warning: Only an external storage device can be used in multiple file mode."...
- Page 302 IQ Analyzer (IQA) – Option 351 I/Q Analyzer (IQA) Mode Settings Start Each time you press the softkey the I/Q data writes to the current filename (i.e., Single capture default is IQDataFile.csv or for Multiple format is IQDataFile_yyyymmdd hh.mm.ss.ffff.csv). To avoid overwriting your Single capture data or to add a unique filename for Measure 1 Capture Data Settings File...
- Page 303 IQ Analyzer (IQA) – Option 351 I/Q Analyzer (IQA) Mode Settings How to modify the I/Q data measurement parameters The following sections assume you have already selected your I/Q data measurement type (i.e., Spectrum, Waveform (RF Envelope or I/Q Waveform), or User Defined).
- Page 304 IQ Analyzer (IQA) – Option 351 I/Q Analyzer (IQA) Mode Settings FFT Window — Sets the FFT filtering window (spectrum analysis window) shape for the I/Q data. Default: Flat Top Then select one of the following: FFT Window Description Uniform No windowing Triangular Barlett windowing...
- Page 305 IQ Analyzer (IQA) – Option 351 I/Q Analyzer (IQA) Mode Settings FFT Window Description K-B (120 dB) This is a Kaiser-Bessel window whose maximum side-lobe level is -120 dB. Gaussian (60 dB) This is a Gaussian window whose maximum side-lobe level is -60 dB.
- Page 306 IQ Analyzer (IQA) – Option 351 I/Q Analyzer (IQA) Mode Settings Start Time (Waveform only) Sets the start time of the waveform — measurement (default: 0s, minimum: 0s, maximum: dynamic). In Waveform mode Setting the Start and stop time enables you to display a subset of the data on the display in order to speed up the refresh rate when the acquisition time is long.
- Page 307 IQ Analyzer (IQA) – Option 351 I/Q Analyzer (IQA) Mode Settings pts = points s = seconds Trigger Settings — Opens the Trigger Settings softkey menu. Then: ——Trig Type Then select one of the following: Softkey Description Free Run (Default.) – Triggering is provided by the FieldFox internal circuitry.
- Page 308 IQ Analyzer (IQA) – Option 351 I/Q Analyzer (IQA) Mode Settings Glitch Mask – Enables the glitch mask to reduce incorrect triggering due to fast changes/glitches in the signal level that can be mistaken to be the edge of the RF burst. This softkey is only active for RF Burst (default: 0 ms, minimum: 0s, maximum: 5 ms).
- Page 309 IQ Analyzer (IQA) – Option 351 I/Q Analyzer (IQA) Mode Settings Adjusting the Trace Settings The Trace menu is used to modify the existing predefined view, or create a customized view. Window and Win State softkeys are used to modify layout of view, the Data softkey is used to specify the displayed data results for the current window.
- Page 310 IQ Analyzer (IQA) – Option 351 I/Q Analyzer (IQA) Mode Settings — Trace 1 2 3 4 Pressing the Trace key enables you to select a different trace number. This softkey is active when Data is set to Spectrum or RF Envelope.
- Page 311 IQ Analyzer (IQA) – Option 351 I/Q Analyzer (IQA) Mode Settings are looking at low-level signals. The RF Attenuation value is automatically lowered in 5 dB steps to allow low-level signals to be viewed. The RF Attenuation value is never automatically lowered below 5 dB. How to set Scale/Amptd —...
- Page 312 IQ Analyzer (IQA) – Option 351 I/Q Analyzer (IQA) Mode Settings Ref Pos — Manually set the position of the reference line. Values must be between 0 (TOP line) and 10 (BOTTOM line). Default position is zero (top) (default: 0, minimum: 0, maximum: 10). —...
- Page 313 IQ Analyzer (IQA) – Option 351 I/Q Analyzer (IQA) Mode Settings Preamplifier Control (Opt 235) When very low-level signals are analyzed, an internal preamplifier can be used to boost the signal level by approximately 18 to 22 dB. The gain of the preamp is NOT adjustable.
- Page 314 IQ Analyzer (IQA) – Option 351 Using Markers (IQA) Using Markers (IQA) The markers described here are for I/Q Analyzer mode (exceptions are noted). For additional marker features, refer to “All about Markers” on page 734. IMPORTANT! When using I/Q markers, it is important to either be in Single acquisition mode or for Continuous acquisition mode, to set the measurement in advance on the FieldFox to Waveform or to Spectrum.
-
Page 315: How To Measure Band/Interval Power With A Marker
IQ Analyzer (IQA) – Option 351 Using Markers (IQA) Noise Markers can be used like regular markers. A Noise Marker is distinguished from a regular marker by (1Hz) after the marker readout value. “All about Markers” on page 734. Learn more about regular markers in How to measure Noise with a marker —... - Page 316 IQ Analyzer (IQA) – Option 351 Using Markers (IQA) Band Span Marker (Spectrum Only) Sets the width of the span (Hz) for the selected marker. How to measure with the Band Span marker — Press Marker to create or select a Normal or Delta marker to use to measure Band/Interval Power.
- Page 317 IQ Analyzer (IQA) – Option 351 Using Markers (IQA) Four windows are displayed (Spectrum, Waveform, Real, and Imaginary) 3. Using the arrows or the rotary knob, move so Window 2 Waveform is selected (green border). 4. Press Marker > Marker 1 >...
- Page 318 IQ Analyzer (IQA) – Option 351 Using Markers (IQA) Continuous Peak Search Marker When the Continuous Peak Search marker is on, a peak search is automatically performed for the selected marker after each acquisition. For additional marker functionality, refer to “All about Markers”...
- Page 319 IQ Analyzer (IQA) – Option 351 Alignments Alignments The IQA mode requires all three alignment types: amplitude, RF burst, and channel equalization. Refer to the SA chapter’s “Alignments” on page 206 information on all alignments. Trace Display States (IQA Mode) If you have Option 351 I/Q Analyzer option, you can directly save your data as MATLAB files (*.mat).
- Page 320 IQ Analyzer (IQA) – Option 351 Trace Display States (IQA Mode) —MinHold Displays the minimum response of the input signal at each data point over multiple acquisitions. See also Average Count in “Adjusting the Measurement Setup Settings” on page 308. —Average Each data point is averaged over multiple acquisitions as set “Adjusting the...
- Page 321 IQ Analyzer (IQA) – Option 351 Other Features Available Other Features Available — External Gain - Refer to refer to the SA chapter’s section, “External Gain” on page 160. — Limit Lines - For information on using Limit Lines, refer to “All about Limit Lines”...
- Page 322 IQ Analyzer (IQA) – Option 351 Other Features Available Keysight N9915-90020 User’s Guide...
- Page 323 Keysight Handheld Analyzers N99xxC User’s Guide 12 Electromagnetic Interference (EMI) Measurements – Option 361 Requirements — EMI mode measures signals at the SA RF Input Port 2 connector. — EMI mode requires the FieldFox to have SA mode (Option 233 on combination analyzers) installed.
- Page 324 Electromagnetic Interference (EMI) Measurements – Option 361 In this Chapter The following outline of this chapter is separated into two main sections: — “EMI Measurements” — “Chapter Overview of EMI Measurements” EMI Measurements “Using EMI Measurements (Option 361)” on page 327 “EMI Measurements Mode Settings”...
- Page 325 Electromagnetic Interference (EMI) Measurements – Option 361 Chapter Overview of EMI Measurements “Using EMI Measurements (Option 361)” on page 315 – see “EMI Measurements” on page 324 “EMI Measurements Mode Settings” on page 316 – see “EMI Measurements” on page 324 “How to Select EMI Measurements Mode”...
- Page 326 Electromagnetic Interference (EMI) Measurements – Option 361 “EMI Measurement Mode Setup Procedure” on page 335 – see “EMI — Measurements” on page 324 “Glossary (EMI)” on page 337 – see “EMI Measurements” on page 324 Other Features Available – Refer to Chapter 9, “SA (Spectrum Analyzer) Mode (Option 233–Mixed Analyzers)FUTURE”...
-
Page 327: Using Emi Measurements (Option 361)
Electromagnetic Interference (EMI) Measurements – Option 361 Using EMI Measurements (Option 361) Using EMI Measurements (Option 361) EMI enables you to do the following: Measure and display emission signals to verify your device/instrument’s pre-compliance performance Electromagnetic Interference Features (EMI) – (Option 361) —... -
Page 328: Emi Measurements Mode Settings
Electromagnetic Interference (EMI) Measurements – Option 361 EMI Measurements Mode Settings EMI Measurements Mode Settings This section contains content unique to EMI measurements mode and some features that are similar to SA mode settings. Unique Option 361 EMI measurements content can be found in this chapter. But, when EMI/SA mode’s shared feature content is referenced, you are referred to Chapter 9, “SA (Spectrum Analyzer) Mode (Option 233–Mixed Analyzers)FUTURE.”... - Page 329 Electromagnetic Interference (EMI) Measurements – Option 361 EMI Measurements Mode Settings How to set Frequency Range and Frequency Context For EMI mode, you are able to change the center, frequency span, start, and “CISPR stop frequencies or select a specific CISPR band. See also, (International Special Committee on Radio Interference) Control”...
-
Page 330: Scale And Units
Electromagnetic Interference (EMI) Measurements – Option 361 EMI Measurements Mode Settings ——Log Freq AxisX enables/disables the log frequency X-axis. Disabling the log frequency X-axis, enables the linear frequency X-axis (Default = ON). ——CF Step then type a step size value using the numeric keypad, then select a frequency unit terminator key (Default = Auto). -
Page 331: Cispr (International Special Committee On Radio Interference)
Electromagnetic Interference (EMI) Measurements – Option 361 EMI Measurements Mode Settings Attenuation Control Learn more, refer to “Attenuation Control” on page 161. CISPR (International Special Committee on Radio Interference) Control This section describes the FieldFox EMI measurement mode’s instrument controls for evaluating pre-compliance EMI of the equipment under test. After EMI mode is selected or after a Mode Preset, the Measure menu is displayed. - Page 332 Electromagnetic Interference (EMI) Measurements – Option 361 EMI Measurements Mode Settings When selected, CISPR Band and Zoom Scan measurements use one of the 5 CISPR band frequency ranges to set the frequency range (Start and Stop) on the FieldFox. CISPR Zoom Scan selects a limited fix span (<entire band range).
- Page 333 Electromagnetic Interference (EMI) Measurements – Option 361 EMI Measurements Mode Settings probability (i.e., a fraction from 0 to 1.0) on the Y axis, vs. Power on the X axis. Markers adapt correspondingly. Histogram and CCDF become the Input choices per trace, replacing Detector on the Trace menu.
- Page 334 Electromagnetic Interference (EMI) Measurements – Option 361 EMI Measurements Mode Settings Figure 12-2 CISPR Band C Zoom Example 1 – Response to Pulse Figure 12-3 CISPR Band C Example 2 – Response to CW Signal Keysight N9915-90020 User’s Guide...
- Page 335 Electromagnetic Interference (EMI) Measurements – Option 361 EMI Measurements Mode Settings Figure 12-4 APD Statistics Example 1 – Pulse 5µS/1mS Figure 12-5 APD Statistics Example 2 – CW Keysight N9915-90020 User’s Guide...
-
Page 336: Resolution Bandwidth (Res Bw)
Electromagnetic Interference (EMI) Measurements – Option 361 EMI Measurements Mode Settings Preamplifier Control (Opt 235) Learn more, see Chapter 9 refer to “Preamplifier Control (Opt 235)” on page 162. Resolution Bandwidth (Res BW) EMI mode has a different resolution bandwidth type for each type of EMI measurement: —... -
Page 337: Single / Continuous / Restart
Electromagnetic Interference (EMI) Measurements – Option 361 EMI Measurements Mode Settings c. The 75001 point limit is put in place, to keep the mode from trying to build traces that are any bigger than neces- sary. Basically, enough to cover CISPR Band E (1 GHz to 18 GHz) with its 1 MHz bandwidth, plus a little extra mar- gin. -
Page 338: Points
Electromagnetic Interference (EMI) Measurements – Option 361 EMI Measurements Mode Settings Dwell /Point (Active when the CISPR Measurement type == CISPR — Band Scan or CISPR Zoom Scan.) Specifies a settling time (in seconds) between sweeps. — SwpAcquisition – (Active only for Fast SA Scan) Specifies a the number of sweep acquisitions. - Page 339 Electromagnetic Interference (EMI) Measurements – Option 361 EMI Measurements Mode Settings How to set the EMI Traces When the EMI measurement type is set to CISPR Band Scan or CISPR Zoom Scan Trace 1, Trace 2, Trace 3 have default values assigned. The trace can be disabled under the Measure 1 (toggle to enable/disable) or the Trace 6 hardkeys or re-assigned to measure a different value on the trace by using the Trace 6 hardkey (e.g., you can re-assign trace 1 to measure Quasi-peak or EMI...
-
Page 340: Detection Method
Electromagnetic Interference (EMI) Measurements – Option 361 EMI Measurements Mode Settings Trace Averaging Within EMI mode, the detectors provide the critical necessary averaging (i.e., EMI Average and Quasi Peak), but similar to SA mode, if needed, you can perform Trace Averaging. Refer to “Average Type”... -
Page 341: Input - (Trace Input For Apd Measurements)
Electromagnetic Interference (EMI) Measurements – Option 361 EMI Measurements Mode Settings data point displays the minimum value encountered during its bucket. If the signal is NOT classified as noise (does NOT rise and fall) then Normal is equivalent to Positive Peak. —... - Page 342 Electromagnetic Interference (EMI) Measurements – Option 361 EMI Measurements Mode Settings Histogram — – Displays the power levels detected over the APD Dwell Time. Keysight N9915-90020 User’s Guide...
-
Page 343: About Electromagnetic Interference (Emi) Measurements
Electromagnetic Interference (EMI) Measurements – Option 361 About Electromagnetic Interference (EMI) Measurements About Electromagnetic Interference (EMI) Measurements EMI mode enables you to make the following types measurements: — Radiated – wireless EMI signals — Conducted – emissions from wires or other conducted paths. Some measurement parameters are auto-coupled and are not user-settable. - Page 344 Electromagnetic Interference (EMI) Measurements – Option 361 About Electromagnetic Interference (EMI) Measurements EMI has the following features: EMI Measurement Results: — Amplitude Probability Distribution Statistics (APD) — Histogram — CCDF traces displayed — Center frequency (active with APD Statistics) — Selectable CISPR Bands (A, B, C, D, or E) —...
-
Page 345: How To Set Up Electromagnetic Interference (Emi) Mode Settings
Electromagnetic Interference (EMI) Measurements – Option 361 How to Set Up Electromagnetic Interference (EMI) Mode Settings How to Set Up Electromagnetic Interference (EMI) Mode Settings IMPORTANT! See also, “Alignments” on page 206, in SA mode, Chapter 9, “SA (Spectrum Analyzer) Mode (Option 233–Mixed Analyzers)FUTURE.” This section reviews the steps in setting up an example EMI measurement. -
Page 346: Glossary (Emi)
Electromagnetic Interference (EMI) Measurements – Option 361 Glossary (EMI) 6. Setting the EMI resolution bandwidth state for the displayed trace: For this example, press EMI Res BW Manual (default = Auto). 120 kHz is > displayed, but you can set other fixed resolution bandwidths (i.e., 200 Hz, 9 kHz, and 1 MHz). - Page 347 Keysight Handheld Analyzers N99xxC User’s Guide 13 Over–the–Air Measurements (OTA) – LTE FDD Option 370, LTE TDD Option 371, 5G TF Option 377, 5G NR / 5G NR EVM Conducted Option 378 Some examples in this chapter include the electromagnetic field (EMF) mode.
- Page 348 Over–the–Air Measurements (OTA) – LTE FDD Option 370, LTE TDD Option 371, 5G TF Option 377, 5G NR / 5G NR EVM Conducted Option 378 In this Chapter “Using OTA (Options 370 – LTE FDD, 372 – TDD, 377 – 5G TF, and Option 378 –...
- Page 349 Over–the–Air Measurements (OTA) – LTE FDD Option 370, LTE TDD Option 371, 5G TF Option 377, 5G NR / 5G NR EVM Conducted Option 378 Also “Why and When to Calibrate” on page 126 Chapter 31, “System Settings.” (Changing display colors) Chapter 33, “File Management.”...
- Page 350 Over–the–Air Measurements (OTA) – LTE FDD Option 370, LTE TDD Option 371, 5G TF Option 377, 5G NR / 5G NR EVM Conducted Option 378 Using OTA (Options 370 – LTE FDD, 372 – TDD, 377 – 5G TF, and Option 378 – 5G NR / 5G NR Conducted) Using OTA (Options 370 –...
- Page 351 Over–the–Air Measurements (OTA) – LTE FDD Option 370, LTE TDD Option 371, 5G TF Option 377, 5G NR / 5G NR EVM Conducted Option 378 Using OTA (Options 370 – LTE FDD, 372 – TDD, 377 – 5G TF, and Option 378 – 5G NR / 5G NR Conducted) —...
- Page 352 Over–the–Air Measurements (OTA) – LTE FDD Option 370, LTE TDD Option 371, 5G TF Option 377, 5G NR / 5G NR EVM Conducted Option 378 About Over–the–Air (OTA) Measurements About Over–the–Air (OTA) Measurements OTA mode supports these standards: — LTE FDD —...
- Page 353 Over–the–Air Measurements (OTA) – LTE FDD Option 370, LTE TDD Option 371, 5G TF Option 377, 5G NR / 5G NR EVM Conducted Option 378 About Over–the–Air (OTA) Measurements — Table – Cell scan numeric results, including PCI, RSRP, RSRQ, RSSI, PSS, SSS, SINR and Freq Err, for up to 5 CCs or 6 cells —...
- Page 354 Over–the–Air Measurements (OTA) – LTE FDD Option 370, LTE TDD Option 371, 5G TF Option 377, 5G NR / 5G NR EVM Conducted Option 378 About Over–the–Air (OTA) Measurements Figure 13-2 LTE FDD Bar Chart – CC Example Figure 13-3 LTE FDD Bar Chart –...
- Page 355 Over–the–Air Measurements (OTA) – LTE FDD Option 370, LTE TDD Option 371, 5G TF Option 377, 5G NR / 5G NR EVM Conducted Option 378 About Over–the–Air (OTA) Measurements Figure 13-4 LTE FDD Bar Chart – Level Example Figure 13-5 Example of the 5G TF with Four Multiple Display Options Keysight N9915-90020 User’s Guide...
- Page 356 Over–the–Air Measurements (OTA) – LTE FDD Option 370, LTE TDD Option 371, 5G TF Option 377, 5G NR / 5G NR EVM Conducted Option 378 About Over–the–Air (OTA) Measurements Figure 13-6 Spectral Emission Mask Example Figure 13-7 SSB Index Example Keysight N9915-90020 User’s Guide...
- Page 357 Over–the–Air Measurements (OTA) – LTE FDD Option 370, LTE TDD Option 371, 5G TF Option 377, 5G NR / 5G NR EVM Conducted Option 378 About Over–the–Air (OTA) Measurements Figure 13-8 5G NR Center Frequency and SSB Offset, Before Multiple Cell IDs Example Figure 13-9 5G NR Center Frequency and SSB Offset and SSB Index and PCI Single With Multiple Cell IDs Example...
- Page 358 Over–the–Air Measurements (OTA) – LTE FDD Option 370, LTE TDD Option 371, 5G TF Option 377, 5G NR / 5G NR EVM Conducted Option 378 About Over–the–Air (OTA) Measurements Figure 13-10 5G NR EVM Constellation Example – Measure Data set to All Figure 13-11 5G NR EVM Constellation Example –...
- Page 359 Over–the–Air Measurements (OTA) – LTE FDD Option 370, LTE TDD Option 371, 5G TF Option 377, 5G NR / 5G NR EVM Conducted Option 378 About Over–the–Air (OTA) Measurements Figure 13-12 5G NR EVM Frame Summary Example Figure 13-13 5G NR EVM – Constellation and Frame Summary Example Keysight N9915-90020 User’s Guide...
- Page 360 Over–the–Air Measurements (OTA) – LTE FDD Option 370, LTE TDD Option 371, 5G TF Option 377, 5G NR / 5G NR EVM Conducted Option 378 About Over–the–Air (OTA) Measurements 5G TF Features (Option 377) IMPORTANT! LTE FDD, LTE TDD, and 5G TF only demodulate PSS and SSS signals using the FieldFox’s 10 MHz demodulation path.
- Page 361 Over–the–Air Measurements (OTA) – LTE FDD Option 370, LTE TDD Option 371, 5G TF Option 377, 5G NR / 5G NR EVM Conducted Option 378 About Over–the–Air (OTA) Measurements Figure 13-14 Example of 5G TF Single Carrier and Single Cell 5G NR Features (Option 378) IMPORTANT! 5G NR only demodulates PSS, SSS and PBCH DMRS signals using the FieldFox's 100 MHz demodulation path.
- Page 362 Over–the–Air Measurements (OTA) – LTE FDD Option 370, LTE TDD Option 371, 5G TF Option 377, 5G NR / 5G NR EVM Conducted Option 378 About Over–the–Air (OTA) Measurements — RSSI (Received Signal Strength Indicator) (dBm) — SINR (Signal to Interference & Noise Ratio) (dB) —...
- Page 363 Over–the–Air Measurements (OTA) – LTE FDD Option 370, LTE TDD Option 371, 5G TF Option 377, 5G NR / 5G NR EVM Conducted Option 378 About Over–the–Air (OTA) Measurements Figure 13-15 Example of 5G NR Single Carrier and Single Cell Figure 13-16 Example of 5G NR Multi-Beam –...
- Page 364 Over–the–Air Measurements (OTA) – LTE FDD Option 370, LTE TDD Option 371, 5G TF Option 377, 5G NR / 5G NR EVM Conducted Option 378 About Over–the–Air (OTA) Measurements 5G NR EVM Conducted Features (P/O: Option 378) IMPORTANT! 5G NR only demodulates PSS, SSS, PBCH and PBCH DMRS signals using the FieldFox's 100 MHz demodulation path.
- Page 365 Over–the–Air Measurements (OTA) – LTE FDD Option 370, LTE TDD Option 371, 5G TF Option 377, 5G NR / 5G NR EVM Conducted Option 378 How to Set Up Over–the–Air (OTA) Mode Settings How to Set Up Over–the–Air (OTA) Mode Settings IMPORTANT! See also, “Alignments”...
- Page 366 Over–the–Air Measurements (OTA) – LTE FDD Option 370, LTE TDD Option 371, 5G TF Option 377, 5G NR / 5G NR EVM Conducted Option 378 How to Set Up Over–the–Air (OTA) Mode Settings — And, refer to Figure 13-16 called, “Example of 5G NR Multi-Beam – Displaying Multiple Beams From Cell Site 378,”...
- Page 367 Over–the–Air Measurements (OTA) – LTE FDD Option 370, LTE TDD Option 371, 5G TF Option 377, 5G NR / 5G NR EVM Conducted Option 378 How to Set Up Over–the–Air (OTA) Mode Settings — Then CC CC0 (Default is CC0) – Selects the CC number to be displayed (LTE FDD/LTE TDD choices: CC0-CC4, 5G NR Choices: CC0-CC7).
- Page 368 Over–the–Air Measurements (OTA) – LTE FDD Option 370, LTE TDD Option 371, 5G TF Option 377, 5G NR / 5G NR EVM Conducted Option 378 How to Set Up Over–the–Air (OTA) Mode Settings — Then Channel Raster (Option 378 5G NR /5G NR EVM Only) opens the Channel Raster softkey menu.
- Page 369 Over–the–Air Measurements (OTA) – LTE FDD Option 370, LTE TDD Option 371, 5G TF Option 377, 5G NR / 5G NR EVM Conducted Option 378 How to Set Up Over–the–Air (OTA) Mode Settings — Then (select component carriers) — (Not applicable for Spectrum. When All is specified, for Spectrum, the FieldFox defaults to CC0) or —...
- Page 370 Over–the–Air Measurements (OTA) – LTE FDD Option 370, LTE TDD Option 371, 5G TF Option 377, 5G NR / 5G NR EVM Conducted Option 378 How to Set Up Over–the–Air (OTA) Mode Settings b. 5G NR Only: Press More — Then SSB Index All Single when the SSB value is set, the SSB Index mode is automatically set to single.
- Page 371 Over–the–Air Measurements (OTA) – LTE FDD Option 370, LTE TDD Option 371, 5G TF Option 377, 5G NR / 5G NR EVM Conducted Option 378 How to Set Up Over–the–Air (OTA) Mode Settings — Press Auto-Range Executes an auto-range, which determines the optimal RF attenuation and preamp settings for the current input signal.
- Page 372 Over–the–Air Measurements (OTA) – LTE FDD Option 370, LTE TDD Option 371, 5G TF Option 377, 5G NR / 5G NR EVM Conducted Option 378 How to Set Up Over–the–Air (OTA) Mode Settings — Ref Level Manually set the value of the reference line. Enter a negative value by pressing Run/Hold (+/-) either before or after typing a value.
- Page 373 Over–the–Air Measurements (OTA) – LTE FDD Option 370, LTE TDD Option 371, 5G TF Option 377, 5G NR / 5G NR EVM Conducted Option 378 How to Set Up Over–the–Air (OTA) Mode Settings — Then FreqError Th > 5 kHz (enables data with larger frequency error to be displayed) Extend Freq Lock...
- Page 374 Over–the–Air Measurements (OTA) – LTE FDD Option 370, LTE TDD Option 371, 5G TF Option 377, 5G NR / 5G NR EVM Conducted Option 378 How to Set Up Over–the–Air (OTA) Mode Settings — Then Lmax Sets the current half frame SS/PBCH blocks indexing in ascending order in time 0 to (L –...
- Page 375 Over–the–Air Measurements (OTA) – LTE FDD Option 370, LTE TDD Option 371, 5G TF Option 377, 5G NR / 5G NR EVM Conducted Option 378 How to Set Up Over–the–Air (OTA) Mode Settings SCS Common The signal sub-Carrier Spacing Common setting is coupled to the Bandwidth setting.
- Page 376 Over–the–Air Measurements (OTA) – LTE FDD Option 370, LTE TDD Option 371, 5G TF Option 377, 5G NR / 5G NR EVM Conducted Option 378 How to Set Up Over–the–Air (OTA) Mode Settings — Then Advanced Opens an Advanced softkey menu. ——Then Phase Comp- Enables/disables phase...
- Page 377 Over–the–Air Measurements (OTA) – LTE FDD Option 370, LTE TDD Option 371, 5G TF Option 377, 5G NR / 5G NR EVM Conducted Option 378 How to Set Up Over–the–Air (OTA) Mode Settings — Then Back b. Then press Record Save/Recall To set file settings choose Learn more about file settings, refer to Chapter 33, “File Management.”...
- Page 378 Over–the–Air Measurements (OTA) – LTE FDD Option 370, LTE TDD Option 371, 5G TF Option 377, 5G NR / 5G NR EVM Conducted Option 378 How to Set Up Over–the–Air (OTA) Mode Settings — Stop Immediately stops recording and a “Save the Log File” menu opens to rename and save your data log file.
- Page 379 Over–the–Air Measurements (OTA) – LTE FDD Option 370, LTE TDD Option 371, 5G TF Option 377, 5G NR / 5G NR EVM Conducted Option 378 How to Set Up Over–the–Air (OTA) Mode Settings Figure 13-17 Single cell selected, but other cells displayed when CC0 to CCn has been enabled.
- Page 380 Over–the–Air Measurements (OTA) – LTE FDD Option 370, LTE TDD Option 371, 5G TF Option 377, 5G NR / 5G NR EVM Conducted Option 378 How to Set Up Over–the–Air (OTA) Mode Settings Figure 13-19 Example of the 5G TF Scan Results Table (Two cc and one cell) Keysight N9915-90020 User’s Guide...
- Page 381 Over–the–Air Measurements (OTA) – LTE FDD Option 370, LTE TDD Option 371, 5G TF Option 377, 5G NR / 5G NR EVM Conducted Option 378 How to Set Up Over–the–Air (OTA) Mode Settings Additional LTE FDD Examples (LTE TDD is Similar) Figure 13-20 Example of LTE FDD with Single Carrier, Multiple Cell Sites, KPIs Keysight N9915-90020 User’s Guide...
- Page 382 Over–the–Air Measurements (OTA) – LTE FDD Option 370, LTE TDD Option 371, 5G TF Option 377, 5G NR / 5G NR EVM Conducted Option 378 How to Set Up Over–the–Air (OTA) Mode Settings Figure 13-21 Example of LTE FDD with Multiple Carriers, Single Cell Site, and KPI’s Keysight N9915-90020 User’s Guide...
- Page 383 Over–the–Air Measurements (OTA) – LTE FDD Option 370, LTE TDD Option 371, 5G TF Option 377, 5G NR / 5G NR EVM Conducted Option 378 How to Set Up Over–the–Air (OTA) Mode Settings Optional: Using RTSA to verify the signal quality (Requires Option 350 and Preamp Option 235) —...
- Page 384 Over–the–Air Measurements (OTA) – LTE FDD Option 370, LTE TDD Option 371, 5G TF Option 377, 5G NR / 5G NR EVM Conducted Option 378 How to Set Up Over–the–Air (OTA) Mode Settings How to Define a Cell or Cell(s) and Use OTA LTE FDD, LTE TDD, 5G TF, 5G NR, and 5G NR EVM Conducted have only one predefined view (Table).
- Page 385 Over–the–Air Measurements (OTA) – LTE FDD Option 370, LTE TDD Option 371, 5G TF Option 377, 5G NR / 5G NR EVM Conducted Option 378 How to Set Up Over–the–Air (OTA) Mode Settings 2. Selecting and OTA mode: Press Measure >...
- Page 386 Over–the–Air Measurements (OTA) – LTE FDD Option 370, LTE TDD Option 371, 5G TF Option 377, 5G NR / 5G NR EVM Conducted Option 378 How to Set Up Over–the–Air (OTA) Mode Settings then use Sync Raster, to open a softkey menu: Then Sync ARFCN,...
- Page 387 Over–the–Air Measurements (OTA) – LTE FDD Option 370, LTE TDD Option 371, 5G TF Option 377, 5G NR / 5G NR EVM Conducted Option 378 How to Set Up Over–the–Air (OTA) Mode Settings Repeat process as needed for additional Windows, Data, and CC settings. IMPORTANT! When you select multiple CCs (e.g., CC0, CC1, etcetera) and record data, you may actually see other cell signals that do not have sufficient power to be displayed, but are still detectable.
- Page 388 Over–the–Air Measurements (OTA) – LTE FDD Option 370, LTE TDD Option 371, 5G TF Option 377, 5G NR / 5G NR EVM Conducted Option 378 How to Set Up Over–the–Air (OTA) Mode Settings Then SSB Offset Detection OFF ON Enables/disables the SSB Offset Detection (Default = OFF).
- Page 389 Over–the–Air Measurements (OTA) – LTE FDD Option 370, LTE TDD Option 371, 5G TF Option 377, 5G NR / 5G NR EVM Conducted Option 378 How to Set Up Over–the–Air (OTA) Mode Settings Then LTE Duplex Mode FDD TDD Selects the type of LTE signal to be used in the LTE Coexistence measurement (LTE FDD or TDD).
- Page 390 Over–the–Air Measurements (OTA) – LTE FDD Option 370, LTE TDD Option 371, 5G TF Option 377, 5G NR / 5G NR EVM Conducted Option 378 How to Set Up Over–the–Air (OTA) Mode Settings Then Phase Comp OFF ON Enables/disables the phase compensation to compensate for phase differences between symbols during the upconversion or downconversion.
- Page 391 Over–the–Air Measurements (OTA) – LTE FDD Option 370, LTE TDD Option 371, 5G TF Option 377, 5G NR / 5G NR EVM Conducted Option 378 How to Set Up Over–the–Air (OTA) Mode Settings Figure 13-24 Table and Bar Chart Display Types – LTE FDD – (LTE TDD is similar) Figure 13-25 Spectrum and Strip Chart Display Type –...
- Page 392 Over–the–Air Measurements (OTA) – LTE FDD Option 370, LTE TDD Option 371, 5G TF Option 377, 5G NR / 5G NR EVM Conducted Option 378 How to Set Up Over–the–Air (OTA) Mode Settings Figure 13-26 Spectrum and Table Type (SSB Offset Detection Softkeys) – 5G NR Freq/Dist >...
- Page 393 Over–the–Air Measurements (OTA) – LTE FDD Option 370, LTE TDD Option 371, 5G TF Option 377, 5G NR / 5G NR EVM Conducted Option 378 How to Set Up Over–the–Air (OTA) Mode Settings Figure 13-27 Outdoor Display Colors Figure 13-28 Indoor Display Colors Step 4: Enable Data Logging and Playback the Results Spectrum and Strip Chart information is not recorded.
- Page 394 Over–the–Air Measurements (OTA) – LTE FDD Option 370, LTE TDD Option 371, 5G TF Option 377, 5G NR / 5G NR EVM Conducted Option 378 How to Set Up Over–the–Air (OTA) Mode Settings Data Logging creates a record of your data with a timestamp and GPS stamp (refer to “GNSS (GPS+) and GPS”...
- Page 395 Over–the–Air Measurements (OTA) – LTE FDD Option 370, LTE TDD Option 371, 5G TF Option 377, 5G NR / 5G NR EVM Conducted Option 378 How to Set Up Over–the–Air (OTA) Mode Settings ——Data Log-Play files are save-recalled to: "[CurrentDevice]:\RecordPlayback\ OTA\"...
- Page 396 Over–the–Air Measurements (OTA) – LTE FDD Option 370, LTE TDD Option 371, 5G TF Option 377, 5G NR / 5G NR EVM Conducted Option 378 How to Set Up Over–the–Air (OTA) Mode Settings — Data Selection Opens a softkey menu to set the active data channel, sort type, and sort order.
- Page 397 Over–the–Air Measurements (OTA) – LTE FDD Option 370, LTE TDD Option 371, 5G TF Option 377, 5G NR / 5G NR EVM Conducted Option 378 How to Set Up Over–the–Air (OTA) Mode Settings — Optional (Bar Chart and Spectrum only): To adjust the following, use the RPG (fine adjust) or the arrow keys (coarse adjust) to change the color bar.
- Page 398 Over–the–Air Measurements (OTA) – LTE FDD Option 370, LTE TDD Option 371, 5G TF Option 377, 5G NR / 5G NR EVM Conducted Option 378 How to Set Up Over–the–Air (OTA) Mode Settings Procedure: 1. Press When done press Stop. Immediately stops recording and a “Save the Log File”...
- Page 399 Over–the–Air Measurements (OTA) – LTE FDD Option 370, LTE TDD Option 371, 5G TF Option 377, 5G NR / 5G NR EVM Conducted Option 378 How to Set Up Over–the–Air (OTA) Mode Settings — Click on each color coded balloon to see the table of measurement results for that location.
- Page 400 Over–the–Air Measurements (OTA) – LTE FDD Option 370, LTE TDD Option 371, 5G TF Option 377, 5G NR / 5G NR EVM Conducted Option 378 How to Set Up EMF Mode Settings (Requires EMF (Option 358) and 5G NR (Option 378)) How to Set Up EMF Mode Settings (Requires EMF (Option 358) and 5G NR (Option 378))
- Page 401 Over–the–Air Measurements (OTA) – LTE FDD Option 370, LTE TDD Option 371, 5G TF Option 377, 5G NR / 5G NR EVM Conducted Option 378 How to Set Up EMF Mode Settings (Requires EMF (Option 358) and 5G NR (Option 378)) EMF uses the following data formats: —...
- Page 402 Over–the–Air Measurements (OTA) – LTE FDD Option 370, LTE TDD Option 371, 5G TF Option 377, 5G NR / 5G NR EVM Conducted Option 378 How to Set Up EMF Mode Settings (Requires EMF (Option 358) and 5G NR (Option 378)) Figure 13-30 Example of EMF with Triaxial Antenna...
- Page 403 Over–the–Air Measurements (OTA) – LTE FDD Option 370, LTE TDD Option 371, 5G TF Option 377, 5G NR / 5G NR EVM Conducted Option 378 How to Set Up EMF Mode Settings (Requires EMF (Option 358) and 5G NR (Option 378)) EMF Setup Procedure When the USB antenna correction factors are imported, EMF (Option 358)
- Page 404 Over–the–Air Measurements (OTA) – LTE FDD Option 370, LTE TDD Option 371, 5G TF Option 377, 5G NR / 5G NR EVM Conducted Option 378 How to Set Up EMF Mode Settings (Requires EMF (Option 358) and 5G NR (Option 378)) —...
- Page 405 Over–the–Air Measurements (OTA) – LTE FDD Option 370, LTE TDD Option 371, 5G TF Option 377, 5G NR / 5G NR EVM Conducted Option 378 How to Set Up EMF Mode Settings (Requires EMF (Option 358) and 5G NR (Option 378)) ii.
- Page 406 Over–the–Air Measurements (OTA) – LTE FDD Option 370, LTE TDD Option 371, 5G TF Option 377, 5G NR / 5G NR EVM Conducted Option 378 How to Set Up EMF Mode Settings (Requires EMF (Option 358) and 5G NR (Option 378)) Figure 13-32 Example Verifying EMF...
- Page 407 Over–the–Air Measurements (OTA) – LTE FDD Option 370, LTE TDD Option 371, 5G TF Option 377, 5G NR / 5G NR EVM Conducted Option 378 How to Use Data Logging (OTA Options 370, 372, 377, and 378) How to Use Data Logging (OTA Options 370, 372, 377, and 378) Spectrum and Strip Chart information is not recorded.
- Page 408 Over–the–Air Measurements (OTA) – LTE FDD Option 370, LTE TDD Option 371, 5G TF Option 377, 5G NR / 5G NR EVM Conducted Option 378 How to Use Data Logging (OTA Options 370, 372, 377, and 378) GPS R When GPS is enabled, is indicated at the bottom of the FieldFox display.
- Page 409 Over–the–Air Measurements (OTA) – LTE FDD Option 370, LTE TDD Option 371, 5G TF Option 377, 5G NR / 5G NR EVM Conducted Option 378 How to Use Data Logging (OTA Options 370, 372, 377, and 378) To change Data Logging Configuration settings: 1.
- Page 410 Over–the–Air Measurements (OTA) – LTE FDD Option 370, LTE TDD Option 371, 5G TF Option 377, 5G NR / 5G NR EVM Conducted Option 378 How to Use Data Logging (OTA Options 370, 372, 377, and 378) — Then Recall Log File.
- Page 411 Over–the–Air Measurements (OTA) – LTE FDD Option 370, LTE TDD Option 371, 5G TF Option 377, 5G NR / 5G NR EVM Conducted Option 378 Other Features Available Back — — PlayTrace ID Auto resume playing by selecting a trace number to playback between 1 and the record length (MAXimum = 2000 (multiple CC) and 1000 (single CC)).
- Page 412 Over–the–Air Measurements (OTA) – LTE FDD Option 370, LTE TDD Option 371, 5G TF Option 377, 5G NR / 5G NR EVM Conducted Option 378 About the Auto-Range Feature About the Auto-Range Feature Executing an auto-range, which determines the optimal RF attenuation and preamp settings for the current input signal.
- Page 413 Over–the–Air Measurements (OTA) – LTE FDD Option 370, LTE TDD Option 371, 5G TF Option 377, 5G NR / 5G NR EVM Conducted Option 378 About the Auto-Range Feature Figure 13-35 OTA 5G NR Signal Before Auto-Range – Spectrum Figure 13-36 OTA 5G NR Before Auto-Range –...
- Page 414 Over–the–Air Measurements (OTA) – LTE FDD Option 370, LTE TDD Option 371, 5G TF Option 377, 5G NR / 5G NR EVM Conducted Option 378 About the Auto-Range Feature Figure 13-37 OTA 5G NR Ongoing Auto-Range – Performing Auto-Range Figure 13-38 OTA 5G NR After Auto-Range, but RF Atten or Preamp Settings Changed Keysight N9915-90020 User’s Guide...
- Page 415 Over–the–Air Measurements (OTA) – LTE FDD Option 370, LTE TDD Option 371, 5G TF Option 377, 5G NR / 5G NR EVM Conducted Option 378 About the Auto-Range Feature Figure 13-39 OTA 5G NR After Auto-Range and Clean Sweep Keysight N9915-90020 User’s Guide...
- Page 416 Over–the–Air Measurements (OTA) – LTE FDD Option 370, LTE TDD Option 371, 5G TF Option 377, 5G NR / 5G NR EVM Conducted Option 378 Troubleshooting Troubleshooting If your OTA setup is not behaving as expected: — Verify setup is correct by referring to “How to Set Up Over–the–Air (OTA) Mode Settings”...
- Page 417 Over–the–Air Measurements (OTA) – LTE FDD Option 370, LTE TDD Option 371, 5G TF Option 377, 5G NR / 5G NR EVM Conducted Option 378 Glossary (OTA) Glossary (OTA) This section provides a description of some of the terms used in the FieldFox’s OTA mode.
- Page 418 Over–the–Air Measurements (OTA) – LTE FDD Option 370, LTE TDD Option 371, 5G TF Option 377, 5G NR / 5G NR EVM Conducted Option 378 Glossary (OTA) Table 13-1 OTA Abbreviations and Descriptions Abbreviation Description Cell ID (PCI Physical cell ID – The Primary Sync Signal and Secondary Sync Signal largely define the PCI. PCI is also (C-S-G)) referred to sometimes as Cell ID.
- Page 419 Over–the–Air Measurements (OTA) – LTE FDD Option 370, LTE TDD Option 371, 5G TF Option 377, 5G NR / 5G NR EVM Conducted Option 378 Glossary (OTA) Table 13-1 OTA Abbreviations and Descriptions Abbreviation Description 5G NR EMF Conducted Center The specified 5G NR carrier center frequency.
- Page 420 Over–the–Air Measurements (OTA) – LTE FDD Option 370, LTE TDD Option 371, 5G TF Option 377, 5G NR / 5G NR EVM Conducted Option 378 Glossary (OTA) Table 13-1 OTA Abbreviations and Descriptions Abbreviation Description SS-RSRQ (dB) Synchronization signal reference signal received quality (SS -RSRQ) is defined as the ratio of N x SS-RSRP/NR carrier RSSI.
- Page 421 Keysight Handheld Analyzers N99xxC User’s Guide - Option 360 Phased Array Antenna 14 5G Rapid Prototype Phased Array Antenna – Option 360 IMPORTANT! 85571A-028 (28 GHz 5G Phased Array Antenna) accessories not suitable for use in wet locations. PAA mode is compatible with the frequency converter heads, but cannot apply or edit the frequency head corrections.
- Page 422 5G Rapid Prototype Phased Array Antenna – Option 360 In this Chapter “Using the Phased Array Antenna (Option 360)” on page 423 “About Phased Array Antenna Measurements” on page 424 “Phased Array Antenna Features (Option 360)” on page 424 — “How to Set Up Phased Array Antenna Settings”...
- Page 423 5G Rapid Prototype Phased Array Antenna – Option 360 Using the Phased Array Antenna (Option 360) Using the Phased Array Antenna (Option 360) Option 360 enables you to do the following: Measure and display phased array antenna elevation and azimuth Four Display Types: —...
- Page 424 5G Rapid Prototype Phased Array Antenna – Option 360 About Phased Array Antenna Measurements About Phased Array Antenna Measurements Some measurement parameters are auto-coupled and are not user-settable. Phased Array Antenna Features (Option 360) IMPORTANT! Option 360 antenna requires a static IP address. If it is required to have available an IP address that can be accessed over your company’s network, work with your company’s IT team to set up a static IP that works over the network.
- Page 425 5G Rapid Prototype Phased Array Antenna – Option 360 About Phased Array Antenna Measurements Figure 14-1 Example of local point-to-point LAN connection Tripod not included. Keysight N9915-90020 User’s Guide...
- Page 426 5G Rapid Prototype Phased Array Antenna – Option 360 About Phased Array Antenna Measurements Figure 14-2 Bore-Sight Scan – CW RF Figure 14-3 Polar Scan with compass displayed Keysight N9915-90020 User’s Guide...
- Page 427 5G Rapid Prototype Phased Array Antenna – Option 360 About Phased Array Antenna Measurements Figure 14-4 Heat Map (Azimuth vs. Elevation) - Parked Antenna Keysight N9915-90020 User’s Guide...
- Page 428 5G Rapid Prototype Phased Array Antenna – Option 360 About Phased Array Antenna Measurements Figure 14-5 Heat Map and Undocked Active Entry – Parked Antenna Scan elevation angles ±90 degrees and azimuth ±60 degrees Keysight N9915-90020 User’s Guide...
- Page 429 5G Rapid Prototype Phased Array Antenna – Option 360 About Phased Array Antenna Measurements Figure 14-6 Polar Assign Orientation and Polar with Compass Orientation Keysight N9915-90020 User’s Guide...
- Page 430 5G Rapid Prototype Phased Array Antenna – Option 360 About Phased Array Antenna Measurements Figure 14-7 Polar Measurement with Compass with Recalled Image of Indoor Auditorium Keysight N9915-90020 User’s Guide...
- Page 431 5G Rapid Prototype Phased Array Antenna – Option 360 About Phased Array Antenna Measurements CW vs. Pulsed RF Measurements IMPORTANT! For pulsed RF measurements, increasing the Dwell Time is recommended for faster throughput and accurate signal capture in a single sweep.
- Page 432 5G Rapid Prototype Phased Array Antenna – Option 360 About Phased Array Antenna Measurements Figure 14-9 Bore-Site Measurement with Pulsed RF (Dwell Time=10 ms, Max Hold=OFF) Figure 14-10 Bore-Site Measurement with Pulsed RF (Dwell Time=100 ms, Max Hold=OFF) Keysight N9915-90020 User’s Guide...
- Page 433 5G Rapid Prototype Phased Array Antenna – Option 360 How to Set Up Phased Array Antenna Settings How to Set Up Phased Array Antenna Settings IMPORTANT! See also, “Alignments” on page 206, in NA mode,Chapter 9, “SA (Spectrum Analyzer) Mode (Option 233–Mixed Analyzers)FUTURE.” This section reviews the steps in setting up an Option 360 measurement.
- Page 434 5G Rapid Prototype Phased Array Antenna – Option 360 How to Set Up Phased Array Antenna Settings c. Press Done Edit > Done IMPORTANT! The LAN address for first 3 fields must match the Static IP address of FieldFox. For example, if the Ball Antenna IP address is 192.168.1.10, set FieldFox Static IP address to 192.168.1.xx.
- Page 435 5G Rapid Prototype Phased Array Antenna – Option 360 How to Set Up Phased Array Antenna Settings Figure 14-13 Site Wide LAN Configurations and Field Measurements Configurations Keysight N9915-90020 User’s Guide...
- Page 436 5G Rapid Prototype Phased Array Antenna – Option 360 How to Set Up Phased Array Antenna Settings Figure 14-14 Site Wide LAN Configurations and Field Measurements Configurations Azimuth and Elevation Alignment Orientation Diagram Keysight N9915-90020 User’s Guide...
- Page 437 5G Rapid Prototype Phased Array Antenna – Option 360 How to Set Up Phased Array Antenna Settings 5. Entering the phased array antenna measurement type: Refer to “Data Formats:” on page 424. Select Measure: — Measure—choose: — Bore-Sight — Heat Map —...
- Page 438 5G Rapid Prototype Phased Array Antenna – Option 360 How to Set Up Phased Array Antenna Settings — Clear Graphics If applicable, this clears the current displayed PNG graphic from the screen. If after making the setting changes in the steps below, no data is displayed, refer to “Troubleshooting”...
- Page 439 5G Rapid Prototype Phased Array Antenna – Option 360 How to Set Up Phased Array Antenna Settings Record Save/Recall (If you have previously stored data recordings.) — Save Log File — Recall Log File — User Folder Def System (Default = Default) or —...
- Page 440 5G Rapid Prototype Phased Array Antenna – Option 360 How to Set Up Phased Array Antenna Settings — Then Maps To enable map view and related features (e.g., Data Selection, Red/Blue Limits, Labels & Icons, Zoom). Then choose from the following: —...
- Page 441 5G Rapid Prototype Phased Array Antenna – Option 360 How to Set Up Phased Array Antenna Settings — Polar Orientation Aligns the antenna polar display to a selected direction. — Image Enable OFF ON (Optional to overlay antenna bore-sight direction. Only active if you have recalled a PNG image to display on the FieldFox as a map.
- Page 442 5G Rapid Prototype Phased Array Antenna – Option 360 How to Set Up Phased Array Antenna Settings Then choose: — Save to set the attenuator power (default: –10 dB). Set to 0 dB. — Recall change to ON. — Device to set the absolute power (dBm) —...
- Page 443 5G Rapid Prototype Phased Array Antenna – Option 360 How to Set Up Phased Array Antenna Settings Figure 14-15 Example of Phased Array Antenna and FieldFox Static IP Setup - First Three Static IP Fields Are the Same Setting the phased array antenna IP address Setting the FieldFox static IP address - First three fields the same as the antenna Keysight N9915-90020 User’s Guide...
- Page 444 5G Rapid Prototype Phased Array Antenna – Option 360 How to Set Up Phased Array Antenna Settings Figure 14-16 Example Antenna Settings Table Keysight N9915-90020 User’s Guide...
- Page 445 5G Rapid Prototype Phased Array Antenna – Option 360 How to Set Up Phased Array Antenna Settings Optional: Using RTSA to verify the signal quality (Requires Option 350 and Preamp Option 235) — Press Mode > RTSA — Then Density Spectrum (Default) —...
- Page 446 5G Rapid Prototype Phased Array Antenna – Option 360 How to Set Up Phased Array Antenna Settings How to Define a Set Up a Scan and Use Option You can define measurements by selecting which type of data to display. Data definitions consist of the following: —...
- Page 447 5G Rapid Prototype Phased Array Antenna – Option 360 How to Set Up Phased Array Antenna Settings 1. In the Setting screen, use the arrows, the rotary knob, or numeric keypad to highlight Obtain IP. 2. Press Obtain IP Static 3.
- Page 448 5G Rapid Prototype Phased Array Antenna – Option 360 How to Set Up Phased Array Antenna Settings — Array Antenna: Center frequency, Azimuth Ref, and Elevation — Polar Display: Ref See also “How to Set Up Phased Array Antenna Settings” on page 433.
- Page 449 5G Rapid Prototype Phased Array Antenna – Option 360 How to Set Up Phased Array Antenna Settings Step 4: Select Polar Settings Select one of the following display orientations: Select Trace 6—choose: For this step, refer to Figure 14-6 on page 429 and see also “How to Set Up Phased Array Antenna Settings”...
- Page 450 5G Rapid Prototype Phased Array Antenna – Option 360 How to Set Up Phased Array Antenna Settings — Storage Device 2. Press Scale/Amptd then choose: — Autoscale — Unit dBm — External Gain — External Gain Step 6: Enable Data Logging and Playback the Results Spectrum and Strip Chart information is not recorded.
- Page 451 5G Rapid Prototype Phased Array Antenna – Option 360 How to Set Up Phased Array Antenna Settings — Meas Interval — Interval Type Time or Distance — Time Interval — Distance Interval b. Then press Record Save/Recall — Then File Folder Default System —...
- Page 452 5G Rapid Prototype Phased Array Antenna – Option 360 How to Set Up Phased Array Antenna Settings — DCREC (Option 360 only) Three file types are supported for save or recall log results: KML file format — ——Files stored in this format can be imported into 3rd party applications like Google Earth or Google Maps.
- Page 453 5G Rapid Prototype Phased Array Antenna – Option 360 How to Set Up Phased Array Antenna Settings — Data Selection Opens a softkey menu to set the active data channel, sort type, and sort order. See also previous steps “How to Set Up Phased Array Antenna Settings”...
- Page 454 5G Rapid Prototype Phased Array Antenna – Option 360 How to Set Up Phased Array Antenna Settings 1. Press Pause Resume to pause or resume the log playing. 2. Press Stop to stop the log playing. Learn more, refer to Chapter 16 Mapping and “Setting up Data Logging”...
- Page 455 5G Rapid Prototype Phased Array Antenna – Option 360 How to Use Data Logging/Playback (Option 360) How to Use Data Logging/Playback (Option 360) Data log-Play files are saved to: If File Folder is set to Default then Data Log-Play files are save-recalled —...
- Page 456 5G Rapid Prototype Phased Array Antenna – Option 360 How to Use Data Logging/Playback (Option 360) Figure 15-18 Field Strength Annotation that can be Logged and Played Back If Data Logging or Playback is not occurring when you think it should, check the following: —...
- Page 457 5G Rapid Prototype Phased Array Antenna – Option 360 How to Use Data Logging/Playback (Option 360) How to Record a Data Log Data Log-Play files are saved to: If File Folder is set to Default then Data Log-Play files are save-recalled —...
- Page 458 5G Rapid Prototype Phased Array Antenna – Option 360 How to Use Data Logging/Playback (Option 360) Record Save/Recall — Then Device (Internal (default), SD Card, or USB) — Then — Then File Type (CSV, DREC (Option 360 only), or KML (default)) Learn more, refer to the Chapter 33, “File Management”.
- Page 459 5G Rapid Prototype Phased Array Antenna – Option 360 Using Mapping This softkey is only available in Channel Scanner and Phased Array Antenna modes (i.e., The Cursor Position softkey is not available for OTA mode). Red Limit — to edit the red limit dBm value. —...
- Page 460 5G Rapid Prototype Phased Array Antenna – Option 360 Troubleshooting Troubleshooting If your Phased Array Antenna setup is not behaving as expected: — Verify setup is correct by referring to “How to Set Up Phased Array Antenna Settings” on page 433.
- Page 461 5G Rapid Prototype Phased Array Antenna – Option 360 Glossary (Option 360) Glossary (Option 360) This section provides a description of some of the terms used in the FieldFox’s OTA mode. Table 15-1 Option 360 Abbreviations and Descriptions Abbreviation Description LTE FDD Center The specified LTE FDD carrier center frequency.
- Page 462 5G Rapid Prototype Phased Array Antenna – Option 360 Glossary (Option 360) Keysight N9915-90020 User’s Guide...
- Page 463 Keysight Handheld Analyzers N99xxC User’s Guide 15 USB Antennas – (Full Capability Requires Option 358, and either SA mode (Option 233 Mixed Analyzers) or OTA—5G NR / 5G NR EVM Conducted Option 378) Triaxial USB antennas (also, referred to as EMF antennas) can be used without EMF Option 358, but with limited capability and doing so is not recommended or supported by Keysight.
-
Page 464: Using Usb Antennas (Also, Known As Emf Antennas)
USB Antennas – (Full Capability Requires EMF Option 358, and either SA mode (Option 233 Mixed Analyzers) or OTA—5G NR / 5G NR EVM Conducted Option 378) With USB Antennas (p/o EMF measurements – Option 358): — Reduce measurement complexity with a triaxial antenna to capture energy radiated from gNB —... - Page 465 USB Antennas – (Full Capability Requires EMF Option 358, and either SA mode (Option 233 Mixed Analyzers) or OTA—5G NR / 5G NR EVM Conducted Option 378) In this Chapter “Using USB Antennas (Also, Known as EMF Antennas)” on page 464 “About USB Antenna (Also, Known as EMF Antenna) Measurements”...
- Page 466 USB Antennas – (Full Capability Requires EMF Option 358, and either SA mode (Option 233 Mixed Analyzers) or OTA—5G NR / 5G NR EVM Conducted Option 378) Using USB Antennas (Also, Known as EMF Antennas) Using USB Antennas (Also, Known as EMF Antennas) Triaxial USB antennas can be used without EMF Option 358, but with limited capability and doing so is not recommended by Keysight.
-
Page 467: How To Set Up A Usb Antenna (Also, Known As Emf Antenna)
USB Antennas – (Full Capability Requires EMF Option 358, and either SA mode (Option 233 Mixed Analyzers) or OTA—5G NR / 5G NR EVM Conducted Option 378) About USB Antenna (Also, Known as EMF Antenna) Measurements About USB Antenna (Also, Known as EMF Antenna) Measurements USB antenna feature supports these standards: —... - Page 468 USB Antennas – (Full Capability Requires EMF Option 358, and either SA mode (Option 233 Mixed Analyzers) or OTA—5G NR / 5G NR EVM Conducted Option 378) About USB Antenna (Also, Known as EMF Antenna) Measurements Figure 15-3 Example Verifying the Triaxial Values – Axis Y is Displayed Keysight N9915-90015 User’s Guide...
- Page 469 USB Antennas – (Full Capability Requires EMF Option 358, and either SA mode (Option 233 Mixed Analyzers) or OTA—5G NR / 5G NR EVM Conducted Option 378) How to Set Up a USB Antenna (Also, Known as EMF Antenna) How to Set Up a USB Antenna (Also, Known as EMF Antenna) IMPORTANT! See also, “Alignments”...
- Page 470 USB Antennas – (Full Capability Requires EMF Option 358, and either SA mode (Option 233 Mixed Analyzers) or OTA—5G NR / 5G NR EVM Conducted Option 378) How to Set Up a USB Antenna (Also, Known as EMF Antenna) — Then Import Antenna –...
- Page 471 USB Antennas – (Full Capability Requires EMF Option 358, and either SA mode (Option 233 Mixed Analyzers) or OTA—5G NR / 5G NR EVM Conducted Option 378) How to Set Up a USB Antenna (Also, Known as EMF Antenna) Figure 15-4 Example Summing of Triaxial Values Figure 15-5 Example Verifying EMF...
- Page 472 USB Antennas – (Full Capability Requires EMF Option 358, and either SA mode (Option 233 Mixed Analyzers) or OTA—5G NR / 5G NR EVM Conducted Option 378) How to Set Up a USB Antenna (Also, Known as EMF Antenna) Editing Antenna Correction Factors and Adding New Antenna Factors Keysight does recommend editing a USB antenna’s correction factors.
- Page 473 USB Antennas – (Full Capability Requires EMF Option 358, and either SA mode (Option 233 Mixed Analyzers) or OTA—5G NR / 5G NR EVM Conducted Option 378) Other Features Available Other Features Available — Alignments - For information on using alignments, refer to the SA chapter’s section, “Alignments”...
-
Page 474: Troubleshooting
USB Antennas – (Full Capability Requires EMF Option 358, and either SA mode (Option 233 Mixed Analyzers) or OTA—5G NR / 5G NR EVM Conducted Option 378) Troubleshooting Troubleshooting If your USB antenna setup is not behaving as expected: — Verify setup is correct by referring to “How to Set Up a USB Antenna (Also, Known as EMF Antenna)”... - Page 475 Keysight Handheld Analyzers N99xxC User’s Guide 16 Indoor and Outdoor Mapping – Option 352 (Requires Spectrum Analyzer Mode (Option 233), and GPS Receiver (Option 307)) IMPORTANT! B Model FieldFoxes measurements require an OML head . Refer to https://www.omlinc.com/. a. Requires external mixer to down convert millimeter wave frequency to intermediate frequency (IF). Recommend OML Inc.
- Page 476 Indoor and Outdoor Mapping – Option 352 (Requires Spectrum Analyzer Mode (Option 233), and GPS Receiver (Option 307)) — Over-the-Air (OTA) LTE TDD (Option 372) — Over-the-Air (OTA) 5G TF (Option 377) — Over-the-Air (OTA) 5G NR (Option 378) Using a direct wired LAN connection with access to a network and the internet, FieldFox will automatically access OSM once location coordinates (latitude and longitude) and zoom levels are entered the Map Explorer menu.
- Page 477 Indoor and Outdoor Mapping – Option 352 (Requires Spectrum Analyzer Mode (Option 233), and GPS Receiver (Option 307)) “Importing a .zip File to the FieldFox” on page 485 “How to Set Up Mapping Settings” on page 488 “How to Set Up Mapping When the FieldFox Is On The LAN” on —...
- Page 478 Indoor and Outdoor Mapping – Option 352 (Requires Spectrum Analyzer Mode (Option 233), and GPS Receiver (Option 307)) Option 352 enables you to do the following: Measure and display indoor and outdoor mapping Two Mapping Types: — Indoor Maps — Outdoor Maps (Requires Option 307) Color Coded Display Types: —...
- Page 479 Indoor and Outdoor Mapping – Option 352 (Requires Spectrum Analyzer Mode (Option 233), and GPS Receiver (Option 307)) Figure 16-2 Maps With Current Position Marker Displayed - (OpenStreetMaps) Figure 16-3 Using Mapping (Option 352) - Satellite View for Indoor Mapping Keysight N9915-90020 User’s Guide...
- Page 480 Indoor and Outdoor Mapping – Option 352 (Requires Spectrum Analyzer Mode (Option 233), and GPS Receiver (Option 307)) How to Install Node.js and Running the FieldFox Mapping Software How to Install Node.js and Running the FieldFox Mapping Software IMPORTANT! If your FieldFox is connected directly to the LAN, you can skip the section on downloading Node.js and go to “How to Set Up Mapping When the FieldFox Is On The LAN”...
- Page 481 Indoor and Outdoor Mapping – Option 352 (Requires Spectrum Analyzer Mode (Option 233), and GPS Receiver (Option 307)) How to Install Node.js and Running the FieldFox Mapping Software Figure 16-4 Downloading the Node.js Installer to a PC Figure 16-5 Default Download Path for Node.js Installer to a PC IMPORTANT! Do not change path.
- Page 482 Indoor and Outdoor Mapping – Option 352 (Requires Spectrum Analyzer Mode (Option 233), and GPS Receiver (Option 307)) Downloading and Using the FieldFox Map Support Tool Downloading and Using the FieldFox Map Support Tool 1. Download the FieldFox Mapping software (“FFMapSupportInstall.msi”) to a PC’s Downloads folder.
- Page 483 Indoor and Outdoor Mapping – Option 352 (Requires Spectrum Analyzer Mode (Option 233), and GPS Receiver (Option 307)) Downloading and Using the FieldFox Map Support Tool Figure 16-7 FieldFox Mapping Opens in HTML5 Compatible Browser (Overview) 4. If the FieldFox is connected directly to the LAN, begin here: Select Draw An Area to map and download the selected area: For this step and sub-steps, refer to Figure 16-8 on page...
- Page 484 Indoor and Outdoor Mapping – Option 352 (Requires Spectrum Analyzer Mode (Option 233), and GPS Receiver (Option 307)) Downloading and Using the FieldFox Map Support Tool — Select all Zoom levels of the map you wish to save. Hint: — To select Zoom levels, click the zoom boxes. —...
- Page 485 Indoor and Outdoor Mapping – Option 352 (Requires Spectrum Analyzer Mode (Option 233), and GPS Receiver (Option 307)) Downloading and Using the FieldFox Map Support Tool Figure 16-8 FieldFox Mapping Opens in HTML5 Compatible Browser (Zoom) 5. Saving your *.zip file to a storage device and importing your *.zip to the FieldFox: For FTP, refer to Refer to “Move (Copy) Files”...
- Page 486 Indoor and Outdoor Mapping – Option 352 (Requires Spectrum Analyzer Mode (Option 233), and GPS Receiver (Option 307)) Downloading and Using the FieldFox Map Support Tool b. Open the PC’s Downloads folder and find your *.zip file. (e.g., MapsZIP_Example_1). Refer to Figure 16-9 on page 484.
- Page 487 Indoor and Outdoor Mapping – Option 352 (Requires Spectrum Analyzer Mode (Option 233), and GPS Receiver (Option 307)) Importing a .zip File to the FieldFox Importing a .zip File to the FieldFox For FTP, refer to Refer to “Move (Copy) Files” on page 822 and to the :MMEM SCPI commands in the FieldFox Programming Help https://rfmw.em.keysight.com/wireless/helpfiles/FFProgrammingHelpWe...
- Page 488 Indoor and Outdoor Mapping – Option 352 (Requires Spectrum Analyzer Mode (Option 233), and GPS Receiver (Option 307)) Importing a .zip File to the FieldFox Figure 16-10 Example of a Maps *.zip Being Recalled From a USB Storage Device Keysight N9915-90020 User’s Guide...
- Page 489 Indoor and Outdoor Mapping – Option 352 (Requires Spectrum Analyzer Mode (Option 233), and GPS Receiver (Option 307)) Importing a .zip File to the FieldFox Figure 16-11 Example of Maps Folder Containing Imported Maps *.zip Files to the FieldFox’s InternalSD\UserData\Maps Folder Keysight N9915-90020 User’s Guide...
- Page 490 Indoor and Outdoor Mapping – Option 352 (Requires Spectrum Analyzer Mode (Option 233), and GPS Receiver (Option 307)) How to Set Up Mapping Settings How to Set Up Mapping Settings IMPORTANT! See also, “Alignments” on page 206, in SA mode. This section reviews the steps in setting up an Option 352 Mapping measurement.
- Page 491 Indoor and Outdoor Mapping – Option 352 (Requires Spectrum Analyzer Mode (Option 233), and GPS Receiver (Option 307)) How to Set Up Mapping Settings How to Set Up Mapping When the FieldFox Is On The LAN If your FieldFox is connected directly to the LAN, you can view your maps by using OpenStreetMaps directly (i.e., no need to use the FieldFox Map Support Tool to download the maps as a *.zip file).
- Page 492 Indoor and Outdoor Mapping – Option 352 (Requires Spectrum Analyzer Mode (Option 233), and GPS Receiver (Option 307)) How to Set Up Mapping Settings 5. Repeat step for Longitude. Figure 16-14 Example of Current Area Center Latitude and Longitude Values Keysight N9915-90020 User’s Guide...
- Page 493 Indoor and Outdoor Mapping – Option 352 (Requires Spectrum Analyzer Mode (Option 233), and GPS Receiver (Option 307)) How to Set Up Mapping Settings Option 352 Indoor Maps Setup Procedure IMPORTANT! 85571A-028 (28 GHz 5G Phased Array Antenna) accessories not suitable for use in wet locations.
- Page 494 Indoor and Outdoor Mapping – Option 352 (Requires Spectrum Analyzer Mode (Option 233), and GPS Receiver (Option 307)) How to Set Up Mapping Settings 3. If you are using an antenna with your measurements, then Connect your equipment similar to Figure 14-1 on page 425 Chapter 14, “5G Rapid Prototype Phased Array Antenna –...
- Page 495 Indoor and Outdoor Mapping – Option 352 (Requires Spectrum Analyzer Mode (Option 233), and GPS Receiver (Option 307)) How to Set Up Mapping Settings — Press Record Indoor Data – opens a menu of previously stored PNG files to select to record a new data log. a.
- Page 496 Indoor and Outdoor Mapping – Option 352 (Requires Spectrum Analyzer Mode (Option 233), and GPS Receiver (Option 307)) How to Set Up Mapping Settings Figure 16-15 Example of an Indoor Building Map with Single Icon and Bore Sight Pointer Keysight N9915-90020 User’s Guide...
- Page 497 Indoor and Outdoor Mapping – Option 352 (Requires Spectrum Analyzer Mode (Option 233), and GPS Receiver (Option 307)) How to Set Up Mapping Settings Option 352 Outdoor Maps Setup Procedure Outdoor mapping requires GPS Option 307. IMPORTANT! 85571A-028 (28 GHz 5G Phased Array Antenna) accessories not suitable for use in wet locations.
- Page 498 Indoor and Outdoor Mapping – Option 352 (Requires Spectrum Analyzer Mode (Option 233), and GPS Receiver (Option 307)) How to Set Up Mapping Settings — Set up the Record Settings (Outdoor Mapping only): Press Trace 6 > More (OTA mode) > Data Logging >...
- Page 499 Indoor and Outdoor Mapping – Option 352 (Requires Spectrum Analyzer Mode (Option 233), and GPS Receiver (Option 307)) How to Set Up Mapping Settings Figure 16-16 Example of England Displayed Text Import ZIP file using FieldFox Map Support Tool with Import Maps (ZIP) e.
- Page 500 Indoor and Outdoor Mapping – Option 352 (Requires Spectrum Analyzer Mode (Option 233), and GPS Receiver (Option 307)) How to Set Up Mapping Settings — For setting up a USB antenna, refer to Chapter 15, “USB Antennas – (Full Capability Requires EMF Option 358, and either SA mode (Option 233 Mixed Analyzers) or OTA—5G NR / 5G NR EVM Conducted Option 378).”...
- Page 501 Indoor and Outdoor Mapping – Option 352 (Requires Spectrum Analyzer Mode (Option 233), and GPS Receiver (Option 307)) How to Set Up Mapping Settings Figure 16-17 Using Maps Explorer to Set the Red and Blue Power Limits c. Optional: Then Preferences Discrete Colors Discrete Colors...
- Page 502 Indoor and Outdoor Mapping – Option 352 (Requires Spectrum Analyzer Mode (Option 233), and GPS Receiver (Option 307)) How to Set Up Mapping Settings ——List files (*.csv and *.kml) are save-recalled to: "[CurrentDevice]:\RecordPlayback\CS\" ——Record-Play files are save-recalled to: "[CurrentDevice]:\RecordPlayback\CS\" — System –...
- Page 503 Indoor and Outdoor Mapping – Option 352 (Requires Spectrum Analyzer Mode (Option 233), and GPS Receiver (Option 307)) How to Set Up Mapping Settings Figure 16-20 FieldFox Display with View Map ON and OFF Displayed Import and Play back KML Files into 3rd Party Software (Example: Google Earth with Animation Tool) Features Use the Playback Slider to replay measurement results.
- Page 504 Indoor and Outdoor Mapping – Option 352 (Requires Spectrum Analyzer Mode (Option 233), and GPS Receiver (Option 307)) How to Set Up Mapping Settings — Open the FieldFox *.KML file in Google Earth. The time slider appears in upper left of the map. —...
- Page 505 Indoor and Outdoor Mapping – Option 352 (Requires Spectrum Analyzer Mode (Option 233), and GPS Receiver (Option 307)) How to Set Up Mapping Settings Setting up Data Logging There are two types of data logging: “Enabling Outdoor Map Logging” on page 503 “Enabling and Setting Up Indoor Map Logging”...
- Page 506 Indoor and Outdoor Mapping – Option 352 (Requires Spectrum Analyzer Mode (Option 233), and GPS Receiver (Option 307)) How to Set Up Mapping Settings This softkey is only available in Channel Scanner and Phased Array Antenna modes (i.e., The Cursor Position softkey is not available for OTA mode).
- Page 507 Indoor and Outdoor Mapping – Option 352 (Requires Spectrum Analyzer Mode (Option 233), and GPS Receiver (Option 307)) How to Set Up Mapping Settings — To change your file settings or measurement interval. Learn more, refer to “To change Data Logging Configuration settings:”...
- Page 508 Indoor and Outdoor Mapping – Option 352 (Requires Spectrum Analyzer Mode (Option 233), and GPS Receiver (Option 307)) How to Set Up Mapping Settings Sets the type of icon that is used to display a Icons map’s data points. Flag Point Line ——...
- Page 509 Indoor and Outdoor Mapping – Option 352 (Requires Spectrum Analyzer Mode (Option 233), and GPS Receiver (Option 307)) How to Set Up Mapping Settings A KDAT file is the file FieldFox uses to recall an indoor mapping/data logging session (“Recall Indoor Log File”). It's an archive file that contains information about the original image file, the location of the recorded data on the image and the actual recorded data.
- Page 510 Indoor and Outdoor Mapping – Option 352 (Requires Spectrum Analyzer Mode (Option 233), and GPS Receiver (Option 307)) How to Set Up Mapping Settings To enable the Record Data softkey, move the cursor using the arrow hardkeys or the RPG to highlight the Location: Value cell in the table.
- Page 511 Indoor and Outdoor Mapping – Option 352 (Requires Spectrum Analyzer Mode (Option 233), and GPS Receiver (Option 307)) How to Set Up Mapping Settings Data Selection Opens a softkey menu to set the active data channel, sort type, and sort order. Channel 1 ——...
- Page 512 Indoor and Outdoor Mapping – Option 352 (Requires Spectrum Analyzer Mode (Option 233), and GPS Receiver (Option 307)) How to Set Up Mapping Settings — File Folder Default System (Default = Default) or — File Type (Default = CSV) KML or DREC (DREC applies to Option 360 only) —...
- Page 513 Indoor and Outdoor Mapping – Option 352 (Requires Spectrum Analyzer Mode (Option 233), and GPS Receiver (Option 307)) How to Use Data Logging (Option 352) How to Use Data Logging (Option 352) Data Log-Play files are saved to: If File Folder is set to Default then Record-Play files are save-recalled —...
- Page 514 Indoor and Outdoor Mapping – Option 352 (Requires Spectrum Analyzer Mode (Option 233), and GPS Receiver (Option 307)) How to Use Data Logging (Option 352) — Press Scale /Amptd > More Unit > then choose: — dBmV, dBuV, W, V, A, dBmA, or dbuA (Default Units: dBm) Figure 16-22 on page...
- Page 515 Indoor and Outdoor Mapping – Option 352 (Requires Spectrum Analyzer Mode (Option 233), and GPS Receiver (Option 307)) How to Use Data Logging (Option 352) How to Add Directional Finding (DF) Bearing IMPORTANT! You must be in Channel Scanner Mode to use this feature. DF Bearing adds the ability add points to the map at your current location indicating a signal emitter's strength and direction relative to your position.
- Page 516 Indoor and Outdoor Mapping – Option 352 (Requires Spectrum Analyzer Mode (Option 233), and GPS Receiver (Option 307)) How to Use Data Logging (Option 352) Line Length — Press – Enters a value for the line’s length. Adjusts the length of the line of bearing to extend it far enough to allow other points to cross, indicating a possible emitter location.
- Page 517 Indoor and Outdoor Mapping – Option 352 (Requires Spectrum Analyzer Mode (Option 233), and GPS Receiver (Option 307)) How to Use Data Logging (Option 352) Figure 16-23 Directional Finding (DF) Bearing – Outdoor Map Data Logging Example Keysight N9915-90020 User’s Guide...
- Page 518 Indoor and Outdoor Mapping – Option 352 (Requires Spectrum Analyzer Mode (Option 233), and GPS Receiver (Option 307)) How to Use Data Logging (Option 352) Figure 16-24 Directional Finding (DF) Bearing – Indoor Map Data Logging Example How to Record a Data Log (Outdoor Logging Only) For Indoor Logging, refer to “Enabling and Setting Up Indoor Map Logging”...
- Page 519 Indoor and Outdoor Mapping – Option 352 (Requires Spectrum Analyzer Mode (Option 233), and GPS Receiver (Option 307)) How to Use Data Logging (Option 352) is displayed in the left of screen graticules. During recording, choose from the following: Pause Resume —...
- Page 520 Indoor and Outdoor Mapping – Option 352 (Requires Spectrum Analyzer Mode (Option 233), and GPS Receiver (Option 307)) Troubleshooting Data Logging Record Save/Recall — Then > If these are large recordings on a device, it could take several seconds for the FieldFox to display the list.
- Page 521 Indoor and Outdoor Mapping – Option 352 (Requires Spectrum Analyzer Mode (Option 233), and GPS Receiver (Option 307)) Troubleshooting “Port 5000 in Use Error” on page 520 — — “Miscellaneous Mapping Errors” on page 523 IMPORTANT! Do not change the default name of the directory path for downloading the Node.js program, because FieldFox uses the default program path name to run the Mapping feature.
- Page 522 Indoor and Outdoor Mapping – Option 352 (Requires Spectrum Analyzer Mode (Option 233), and GPS Receiver (Option 307)) Troubleshooting General Troubleshooting If your Mapping setup is not behaving as expected: “How to Set Up Mapping Settings” on — Verify setup is correct by referring to page 488.
- Page 523 Indoor and Outdoor Mapping – Option 352 (Requires Spectrum Analyzer Mode (Option 233), and GPS Receiver (Option 307)) Troubleshooting Type Y and then press Enter The command window should display message confirming the termination of the batch job and close. Refer to Figure 16-25.
- Page 524 Indoor and Outdoor Mapping – Option 352 (Requires Spectrum Analyzer Mode (Option 233), and GPS Receiver (Option 307)) Troubleshooting Update Available Message — If you see this message after opening and running the Run.bat file, ignore it and follow the procedure listed in,“Downloading and Using the FieldFox Map Support Tool”...
- Page 525 Indoor and Outdoor Mapping – Option 352 (Requires Spectrum Analyzer Mode (Option 233), and GPS Receiver (Option 307)) Troubleshooting Miscellaneous Mapping Errors When you are you are on step 3. Save Map Images, you may see a “fetch” error or a ’checkerboard’ map displayed. Refer to Figure 16-28 Figure 16-29 on page...
- Page 526 Indoor and Outdoor Mapping – Option 352 (Requires Spectrum Analyzer Mode (Option 233), and GPS Receiver (Option 307)) Glossary (Option 360) Glossary (Option 360) This section provides a description of some of the terms used in the FieldFox’s OTA mode. Table 16-1 Option 360 Abbreviations and Descriptions Abbreviation...
- Page 527 Keysight Handheld Analyzers N99xxC User’s Guide 17 Direction Finding (Option 390 Time Difference of Arrival (TDoA)) – Requires Spectrum Analyzer Mode (Option 233), and GPS Receiver (Option 307) IMPORTANT! B model FieldFox units require S9910A Pathwave Keysight Signal Measurement Software KSMS software to use the TDoA Option 390. Learn more, refer to https://www.keysight.com/us/en/products/software/pathwave-test-soft ware/pathwave-measurements.html.
- Page 528 Direction Finding (Option 390 Time Difference of Arrival (TDoA)) – Requires Spectrum Analyzer Mode (Option 233), and GPS Receiver (Option 307) In this Chapter “Time Difference of Arrival (TDOA) – (Requires Option 390)” on page 527 “Troubleshooting” on page 528 “GPS lock Errors”...
- Page 529 Direction Finding (Option 390 Time Difference of Arrival (TDoA)) – Requires Spectrum Analyzer Mode (Option 233), and GPS Receiver (Option 307) Time Difference of Arrival (TDOA) – (Requires Option 390) Time Difference of Arrival (TDOA) – (Requires Option 390) The Time Difference of Arrival (TDOA) measurements are generally used for geo-locating RF sources.
- Page 530 Direction Finding (Option 390 Time Difference of Arrival (TDoA)) – Requires Spectrum Analyzer Mode (Option 233), and GPS Receiver (Option 307) Troubleshooting Troubleshooting GPS lock Errors — GNSS receiver must be locked for a successful test, but it may take some time to achieve lock condition.
- Page 531 Keysight Handheld Analyzers N99xxC User’s Guide 18 Remote Server Mode (Requires SA Hardware/SA Option 233) Remote server mode enables you to connect your FieldFox to compatible PC-based licensed software applications (e.g., 89600 VSA software ). Refer to https://www.keysight.com/find/assist/ https://www.keysight.com/us/en/products/software/pathwave-test-softwar e/89600-vsa-software.html. 89600 VSA (via the Remote Server feature) are compatible with the frequency converter heads, but cannot apply or edit the frequency head corrections.
- Page 532 Remote Server Mode (Requires SA Hardware/SA Option 233) In this Chapter: FieldFox with a Remote Server mode (available with FieldFox firmware ≥A.10.00) does not display a mode softkey, because Remote Server mode is only enabled when you have a SA Option 233 on the FieldFox, compatible 89600 VSA software license loaded and running on a remote PC, and connected via LAN to your FieldFox.
- Page 533 Remote Server Mode (Requires SA Hardware/SA Option 233) Connecting Using Remote Server Connecting Using Remote Server IMPORTANT! When using a frequency converter head with remote server and 89600A VSA software, first verify the head has been selected in SA mode, before connecting to the VSA using IO Libraries.
- Page 534 Remote Server Mode (Requires SA Hardware/SA Option 233) Connecting Using Remote Server Figure 18-2 FieldFox Display When Remotely Connected to a PC-based Software The graphic above shows the FieldFox successfully connected to a PC—with an example hostname “PC123”—and to a compatible licensed PC-based software.
- Page 535 Remote Server Mode (Requires SA Hardware/SA Option 233) 89600 VSA Software Overview (Requires N991xC/3xC and SA Option 233) 89600 VSA Software Overview (Requires N991xC/3xC and SA Option 233) IMPORTANT! The following is a description of the 89600 VSA Software’s overall capabilities. Your instrument may not have all of the hardware and firmware required to use all of the 89600 VSA Software’s listed features.
-
Page 536: Spectrogram Display (Sa Option)
Remote Server Mode (Requires SA Hardware/SA Option 233) 89600 VSA Software Overview (Requires N991xC/3xC and SA Option 233) — Easy-to-use Microsoft Windows graphical user interface For a comprehensive FieldFox VSA mode help, refer to http://rfmw.em.keysight.com/wireless/helpfiles/89600B/WebHelp/89600.ht For additional information on the 89600 VSA Software brochure, refer to https://www.keysight.com/us/en/assets/7018-02714/brochures/5990-6553. - Page 537 Keysight Handheld Analyzers N99xxC User’s Guide 19 Interference Analyzer (SA Mode) – Option 236 Option 236 provides Spectrogram display, Waterfall display, and Record/Playback. In this Chapter “Spectrogram Display (SA Option)” on page 536 “Common Settings for Waterfall and Spectrogram” on page 539 “Waterfall Display”...
- Page 538 Interference Analyzer (SA Mode) – Option 236 Spectrogram and Waterfall Displays Spectrogram and Waterfall Displays Spectrogram and Waterfall displays provide a visual history of the measured spectrum. Each display type can be used to locate intermittent signals or to view signal levels and frequencies over time. Spectrogram is a single horizontal line of color-coded power while Waterfall uses a 3-D color-coded display.
- Page 539 Interference Analyzer (SA Mode) – Option 236 Spectrogram and Waterfall Displays “Points ” on page 203. — Resolution (Number of Points). Learn more in How to select Spectrogram — Press Meas 1 > Interference Analysis Spectrogram > How to modify the Spectrogram You can change how the spectrogram is displayed relative to the data trace.
-
Page 540: Waterfall Display
Interference Analyzer (SA Mode) – Option 236 Spectrogram and Waterfall Displays — An invalid number (very large positive or negative) appears when a trace record is not available at either marker. 00:00:00 Sec appears when both markers are not available. Figure 19-2 Time marker display Keysight N9915-90020 User’s Guide... - Page 541 Interference Analyzer (SA Mode) – Option 236 Spectrogram and Waterfall Displays Figure 19-3 Delta marker display Common Settings for Waterfall and Spectrogram Waterfall settings only apply to the SA option. Set Red and Blue Limits The colors displayed on the Waterfall and Spectrogram represent the various measured power levels: —...
- Page 542 Interference Analyzer (SA Mode) – Option 236 Spectrogram and Waterfall Displays — Press Meas Setup 4. — Then Spectrogram Settings Waterfall Settings — Then choose from the following: Red Limit — Using the arrows, rotary knob, or keypad, select the HIGHEST power level that you expect to measure.
- Page 543 Interference Analyzer (SA Mode) – Option 236 Spectrogram and Waterfall Displays “Points ” on page 203. — Resolution (Number of Points). Learn more in Waterfall Angle This setting allows you to show more or less detail. More detail provides fewer (time) records.
- Page 544 Interference Analyzer (SA Mode) – Option 236 Record/Playback (SA Option) Record/Playback (SA Option) Record Playback allows you to record SA trace sweeps and play them back at a later time. Use this feature to monitor spectrum activity over a period of time. You can record traces continuously, record a specified number of traces (segments), or record when triggered by a specified power level.
- Page 545 Interference Analyzer (SA Mode) – Option 236 Record/Playback (SA Option) To view and edit the maximum number of records Just after opening or initiating a session... — Press Session Data TraceRecordLimit <n> — Then (n = Max number of traces that can be recorded).
-
Page 546: Frequency Counter At Marker
Interference Analyzer (SA Mode) – Option 236 Record/Playback (SA Option) Other display settings, such as Scale and acquisition, can also be changed during recording but are not saved with the session file. Think of these as settings that help YOU see the recording and playback activity. They do NOT change the data that is recorded. - Page 547 Interference Analyzer (SA Mode) – Option 236 Record/Playback (SA Option) AutoSession — is an auto-generated name for sessions. is the auto-generated number, incremented with each new session. The name “Manage Sessions” can be changed using Manage Sessions. Learn more in on page 553.
- Page 548 Interference Analyzer (SA Mode) – Option 236 Record/Playback (SA Option) Play — Press to start replaying the recording from the beginning. — Press Record to continue recording. How to Playback a Session — Press Trace 6 — If the session is already open, skip the following step. Otherwise: Record Playback —...
- Page 549 Interference Analyzer (SA Mode) – Option 236 Record/Playback (SA Option) Playback Ref Line Controls the placement of the pink line across the screen. The playback ref line is displayed 1 pixel under the trace identified by a Playback Trace Number. Said another way, the spectrogram trace identified by Playback Trace Number is drawn 1 pixel above the playback reference line.
- Page 550 Interference Analyzer (SA Mode) – Option 236 Record/Playback (SA Option) Figure 19-4 Spectrogram Measurement – Active Playback Ref Line Softkey Figure 19-5 Waterfall Analysis Measurement – Inactive Playback Ref Line Softkey Keysight N9915-90020 User’s Guide...
- Page 551 Interference Analyzer (SA Mode) – Option 236 Record/Playback (SA Option) Figure 19-6 Playback Trace Date/Time Dialog Box Recording Configuration To change Recording Configuration settings: — Press Trace 6 Record Playback — Then — Then New Session Recall an existing session. New Session is selected: —...
- Page 552 Interference Analyzer (SA Mode) – Option 236 Record/Playback (SA Option) Clear AllRecords — Then to clear all traces out of memory. — Then Back to return to previous menu. Recording Configuration — Then Then choose from the following: Record Time —...
- Page 553 Interference Analyzer (SA Mode) – Option 236 Record/Playback (SA Option) — To record only those traces that exceed the limit, set Segment Count to 1 — To record ALL traces after a limit is exceeded, set Segment Count OFF. When used with Record Time, the timer counts down even when traces are not being recorded (limits are not being exceeded).
- Page 554 Interference Analyzer (SA Mode) – Option 236 Record/Playback (SA Option) Record Source The RawMeas data setting only applies to SA Mode. For SA mode, the simplest way to use Record Playback is to record RawMeas data, which can then be played back into all of the current Trace States. However, for more complicated processing, refer to the following diagrams.
- Page 555 Interference Analyzer (SA Mode) – Option 236 Record/Playback (SA Option) Playback Configuration By default, trace sweeps are played back as fast as the trace can be drawn on the screen. The following setting allows you to slow playback. In addition, you can manually scroll through individual traces using Playback Trace, or scroll through State and User Tags using Playback State/Tag.
- Page 556 Interference Analyzer (SA Mode) – Option 236 Record/Playback (SA Option) — Delete After a confirmation prompt, removes the contents of the selected session from the list. — Copy Copies the selected session to a different storage device, or the same storage device with ‘Copy(n)_’ appended to the beginning of the name so that duplication is prevented.
- Page 557 Keysight Handheld Analyzers N99xxC User’s Guide 20 Reflection Mode (SA Models) - Option 320 Option 320 requires Option 220 Tracking Generator. N9938B models require Option 100 3.5 mm connectors and Option 220. Option 100 3.5 mm connectors must be installed by the factory. Option —...
- Page 558 Reflection Mode (SA Models) - Option 320 SA mode reflection measurements are CalReady. Learn more in “CalReady” on page 127. In addition, Normalization is available. Learn how “Normalize” on page 558. However, other calibration types are NOT offered. In this Chapter “How to select Reflection Mode”...
- Page 559 Reflection Mode (SA Models) - Option 320 The following settings are available exactly as they function in CAT mode: “Frequency Range” on page 53 “Scale Settings” on page 53 “Averaging” on page 54 “Single or Continuous Measure” on page 55 “Resolution (Number of Data Points)”...
- Page 560 Reflection Mode (SA Models) - Option 320 Reflection Mode Settings Reflection Mode Settings Select Reflection Mode before making any setting in this chapter. How to select Reflection Mode — Press Mode Reflection — Then Measurement Selection How to select a Reflection Mode Measurement Learn more about these two measurements in the Supplemental Online Help: https://rfmw.em.keysight.com/wireless/helpfiles/FieldFoxOnlineSupplement alHelp/Home.htm.
- Page 561 Reflection Mode (SA Models) - Option 320 Reflection Mode Settings How to perform Normalization To Port 1, connect a known device (usually an Open or Short) to which reflection measurements are to be normalized. — Press Trace 6 — Then Normalize The yellow data trace displays the current measurement with trace math applied.
- Page 562 Reflection Mode (SA Models) - Option 320 Reflection Mode Settings Keysight N9915-90020 User’s Guide...
- Page 563 Keysight Handheld Analyzers N99xxC User’s Guide 21 Built-in Power Meter Mode – Option 310 Built-in Power Meter (also known as Channel Power Meter) uses the SA input connector to make quick and simple power measurements over a selectable frequency band. A power sensor is NOT required. In this Chapter “Frequency/ Span / Step”...
- Page 564 Built-in Power Meter Mode – Option 310 “Limits” on page 577 The following Built-in Power Meter settings are identical to SA Mode settings: “Radio Standard” on page 564 “How to Access Individual Alignments” on page 210 Keysight N9915-90020 User’s Guide...
- Page 565 Built-in Power Meter Mode – Option 310 Built-in Power Meter Settings Built-in Power Meter Settings Select Built-in Power Meter Mode before making any setting in this section. How to select Built-in Power Meter Mode — Press Mode More — Then Power Meter (Built-in) —...
- Page 566 Built-in Power Meter Mode – Option 310 Built-in Power Meter Settings Radio Standard A Radio Standard can used to integrate power within specific radio channels. When a Radio Standard is selected, the Span setting is automatically coupled to the defined Channel Width for that standard. (Width is the same for all channels within a standard.) Also, Unit is set to Chan, and CF is set to the nearest specific Channel defined in the standard.
- Page 567 Keysight Handheld Analyzers N99xxC User’s Guide 22 Power Meter (USB/LAN) Mode - Option 302 Power Meter measurements, available with Option 302, are made with Keysight USB power sensors. Power readings are displayed on the FieldFox screen. In this Chapter “Supported Power Sensors” on page 567 “How to Connect a USB Power Sensor”...
- Page 568 Power Meter (USB/LAN) Mode - Option 302 “Resolution” on page 575 “Averaging” on page 576 “Single or Continuous Measure” on page 576 “Step Detection Mode” on page 577 “Limits” on page 577 “Troubleshooting” on page 578 See Also “FOPS Settings” on page 585 “All about Markers”...
- Page 569 Power Meter (USB/LAN) Mode - Option 302 Supported Power Sensors For a complete list of supported Keysight USB and LAN Power Sensors, please visit: www.keysight.com/find/usbsensorsforfieldfox The FieldFox does NOT support the following Keysight USB and LAN Power Sensor features: External Triggering (Time Gated Burst Power Measurement), Power Sweep Operation, and Frequency Sweep Operation.
- Page 570 Power Meter (USB/LAN) Mode - Option 302 — Red light indicates an error has occurred with the power sensor. Refer to power sensor documentation. — No light indicates the FieldFox is not communicating with the power sensor. This is the case when in Hold mode or when NOT in Power Meter Mode.
- Page 571 Power Meter (USB/LAN) Mode - Option 302 “USB and LAN Power Meter Settings” on page 570. Learn more, refer to To access the LAN Sensor Settings: — Press Meas Setup 4 > More > LAN Sensor Settings Using the LAN Sensor Settings —...
- Page 572 Power Meter (USB/LAN) Mode - Option 302 USB and LAN Power Meter Settings IMPORTANT! When a LAN power sensor is initially connected to the LAN, it may take ~10 seconds for the LAN power sensor to finish zeroing and for the FieldFox to recognize the LAN power sensor.
- Page 573 Power Meter (USB/LAN) Mode - Option 302 USB and LAN Power Meter Settings How to select a Sensor Type — Press Meas Setup 4. — Then Sensor Type USB LAN (Default = USB). Average / Peak — Press Measure 1 —...
- Page 574 Power Meter (USB/LAN) Mode - Option 302 USB and LAN Power Meter Settings In addition, once External Zeroing has started, the power source must be OFF for the entire time that the Zeroing message is present. Otherwise, the calibration will be compromised but NO warning is shown. Frequency A table of correction factors versus frequency is stored within Keysight Power Sensors.
- Page 575 Power Meter (USB/LAN) Mode - Option 302 USB and LAN Power Meter Settings How to Set Source Control and Power Level — Press Sweep 3 > Advanced When Option 208 (FOPS) is enabled, to access Source Control, press Sweep 3, then Power Setup Learn more about FOPS beginning on page Chapter 23, “Frequency Offset Using Power Sensor (FOPS) –...
- Page 576 Power Meter (USB/LAN) Mode - Option 302 USB and LAN Power Meter Settings Using Autoscale, the current reading is used for the center of the scale, and Min and Max values are set accordingly. — Press Scale / Amptd. — Then Autoscale. Source Power Measurements Before making a source power measurement, a calibration is required.
- Page 577 Power Meter (USB/LAN) Mode - Option 302 USB and LAN Power Meter Settings This softkey is not available when Rx Power is enabled. See also “Source Power Measurements” on page 574. Offset Off On — Toggles ON and OFF the displayed power level using the Offset value (default = Off (0.000 dB)).
- Page 578 Power Meter (USB/LAN) Mode - Option 302 USB and LAN Power Meter Settings Averaging Averaging is used to improve measurement accuracy in low power or noisy power situations. Increased averaging improves measurement accuracy, but also reduces measurement speed. How to set Power Meter Averaging —...
- Page 579 Power Meter (USB/LAN) Mode - Option 302 USB and LAN Power Meter Settings Step Detection Mode The FieldFox supports the Step Detection feature that is present in Keysight USB power sensors. When enabled, this feature reduces settling time after a significant step in the measured power.
- Page 580 Power Meter (USB/LAN) Mode - Option 302 Troubleshooting Troubleshooting This section contains the following: LAN Sensors — “If the FieldFox LAN is removed during the use of the LAN sensor, the following steps can be taken to re-establish control of the Sensor:” on page 578 “If the Sensor LAN is removed during the use of the LAN sensor, the —...
- Page 581 Power Meter (USB/LAN) Mode - Option 302 Troubleshooting b. The PWR LED will turn off when the Sensor is ready to be reconnected. The other LED next to it should be off as well. c. Then press, Meas Setup 4 > More LAN Sensor Settings >...
- Page 582 Power Meter (USB/LAN) Mode - Option 302 Troubleshooting Keysight N9915-90020 User’s Guide...
- Page 583 Keysight Handheld Analyzers N99xxC User’s Guide 23 Frequency Offset Using Power Sensor (FOPS) – Option FOPS is accessed through (and requires) Option 302 USB Power Meter Mode. With both options installed, you can send a signal with the FieldFox internal source at one frequency, and measure this signal with a Keysight U-Series USB Power Sensor at another frequency.
- Page 584 Frequency Offset Using Power Sensor (FOPS) – Option 208 “Amplitude Markers” on page 589 “Trace Math” on page 589 See Also “All about Trace Math” on page 760 Keysight N9915-90020 User’s Guide...
- Page 585 Frequency Offset Using Power Sensor (FOPS) – Option 208 Overview Overview This feature allows the FieldFox source frequency to be set independently from the power sensor (receiver) frequency. With frequency offset using power sensor (FOPS), the frequency of both the source and receiver are swept, and the two track each other.
- Page 586 Frequency Offset Using Power Sensor (FOPS) – Option 208 Overview The dynamic range with FOPS may be significantly different when using various power sensors. In general, the lower frequency range sensors have better dynamic range. Keysight N9915-90020 User’s Guide...
- Page 587 Frequency Offset Using Power Sensor (FOPS) – Option 208 FOPS Settings FOPS Settings The following settings are unique to FOPS. Standard USB Power Meter mode settings, which may be useful with FOPS, are documented in that chapter “USB and LAN Power Meter Settings” on page 570 starting in Select Power Meter (USB Sensor) before making any setting in this section.
- Page 588 Frequency Offset Using Power Sensor (FOPS) – Option 208 FOPS Settings Gain — Not available until source data is stored into memory. Displays the Output power / Source power (memory trace). Rx Power — Displays the raw received power at the USB power sensor. Sweep Type and Frequency Set the source and receiver frequencies for the FOPS measurements.
- Page 589 Frequency Offset Using Power Sensor (FOPS) – Option 208 FOPS Settings Freq Display. This determines how the receiver ——Then frequencies below the graticules are displayed. Choose from the following: ——Start Annotated as Start and Stop frequencies. ——Center Annotated as Center and Span frequencies. ——Then choose from the following two methods to determine the offset frequency (the frequency that the receiver is offset from the source).
- Page 590 Frequency Offset Using Power Sensor (FOPS) – Option 208 FOPS Settings Src = 2 GHz to 3 GHz Offset = 3.8 GHz Rx = 5.8 GHz to 6.8 GHz Power Sensor Settling The following two settings work together to allow you to choose the right compromise between measurement speed and accuracy.
-
Page 591: Press Marker
Frequency Offset Using Power Sensor (FOPS) – Option 208 FOPS Settings Num Points Freq Step Size — Both settings control the number of power sensor measurements between the Start and Stop frequencies. Enter one setting and the other will be changed automatically. There must be at least two data points. - Page 592 Frequency Offset Using Power Sensor (FOPS) – Option 208 FOPS Settings 3. View Data & Memory 4. Meas Src Power. Keysight N9915-90020 User’s Guide...
- Page 593 Keysight Handheld Analyzers N99xxC User’s Guide 24 Pulse Measurements Mode – Option 330 Pulsed power meter measurements, available with Option 330, are made with Keysight X-Series USB and LAN Peak Power Sensors. These sensors are capable of detecting, measuring, and storing data from a train of pulses at the RF input.
- Page 594 Pulse Measurements Mode – Option 330 “Triggering” on page 601 “Marker Settings” on page 604 “Amplitude Markers” on page 605 “How to Search with Markers” on page 605 “How to enable Auto Analysis” on page 607 “Pulse Top” on page 607 “Grid”...
- Page 595 Pulse Measurements Mode – Option 330 Supported Power Sensors USB and LAN Power Sensors — “Best Practices For Making The Most Accurate Radar Pulse Measurements” https://www.keysight.com/us/en/assets/7018-03483/application-notes/5991 -0434.pdf a. Learn more, refer to the User’s Guide and Programming Guide for your USB or LAN model power sensor.
- Page 596 Pulse Measurements Mode – Option 330 Supported Power Sensors How to Connect the USB Power Sensor Connect your Power Sensor to one of the FieldFox USB ports. Use an attenuator between the DUT and the power sensor when measuring power levels that are higher than +20 dBm. The attenuator value can be subtracted from the measurement using the Offset feature, discussed in “Relative and Offset Power Measurements”...
- Page 597 Pulse Measurements Mode – Option 330 Supported Power Sensors LAN Sensor Settings The LAN Sensor settings enable you to — Select your model of sensor — Enter your Sensor I.D. via DNS serial number or IP address “USB and LAN Power Meter Settings” on page 570.
- Page 598 Pulse Measurements Mode – Option 330 Supported Power Sensors IMPORTANT! When a LAN power sensor is initially connected to the LAN, it may take ~10 seconds for the LAN power sensor to finish zeroing and for the FieldFox to recognize the LAN power sensor. If your LAN power sensor is not operating as expected: Verify the latest firmware is loaded on the FieldFox.
- Page 599 Pulse Measurements Mode – Option 330 Pulse Measurement Settings Pulse Measurement Settings Select Pulse Measurement Mode before making any setting in this section. How to select Pulse Measurement Mode — Press Mode More — Then if your FieldFox contains more than five measurement modes. Pulse Measurements —...
- Page 600 Pulse Measurements Mode – Option 330 Pulse Measurement Settings Frequency — Sets the center frequency of the carrier on which pulse modulation resides. This is used to set amplitude correction of the USB Power Sensor. How to set Time Specify the time over which data will be acquired by the USB Power Sensor. When Trace Graph is selected, Tr 1 is annotated with these values.
- Page 601 Pulse Measurements Mode – Option 330 Pulse Measurement Settings Zoom Time/div — While monitoring the blue vertical posts on the primary trace, enter a value for the zoom window span using the numeric keypad, the ?|? arrows, or the rotary knob. —...
- Page 602 Pulse Measurements Mode – Option 330 Pulse Measurement Settings Averaging is performed in the USB and LAN Power Sensors before the data is sent to the FieldFox. Annotation in the left pane shows the state of the Average setting. When Manual is selected, the ‘Num of Averages’...
- Page 603 Pulse Measurements Mode – Option 330 Pulse Measurement Settings Single or Continuous Measure This setting determines whether the FieldFox continuously queries the USB Single Power Sensor for data, or only once each time the button is pressed. Single to conserve battery power or to allow you to save or analyze specific data.
- Page 604 Pulse Measurements Mode – Option 330 Pulse Measurement Settings Waiting for Trigger message on the FieldFox screen is posted on behalf of the USB Power Sensor when it is waiting for a pulse signal at the RF Input (Internal) or a TTL signal at the USB Sensor External Trigger input. How to make Trigger settings —...
- Page 605 Pulse Measurements Mode – Option 330 Pulse Measurement Settings — Then enter a value using the numeric keypad, the arrows, or the rotary knob. Auto Trigger Used ONLY when Trigger Type = Internal, this setting determines whether the trigger level is set manually or is set to the default level in the USB Power Sensor firmware.
- Page 606 Pulse Measurements Mode – Option 330 Pulse Measurement Settings Trigger — Then — Then Qualification — Then set the qualification value using the numeric keypad or the rotary knob (default: 100 ns, minimum: 25 ns, maximum: 50 µ Trigger Settings Annotation Trigger settings are annotated on the FieldFox screen as highlighted in the following image: In the previous graphic, the settings are: Trig Level = -10 dBm, Trig Type (Int),...
- Page 607 Pulse Measurements Mode – Option 330 Pulse Measurement Settings Up to six standard markers can be used to provide readouts of the Y-axis amplitude at the current X-axis location. The six standard markers can also be used as Delta Markers. Learn more about standard markers in “All about Markers”...
- Page 608 Pulse Measurements Mode – Option 330 Pulse Measurement Settings Zone Search — Then — Then choose from the following: — Available ONLY when the zoom window is enabled, the search is limited to the zone defined by the zoom window. —...
- Page 609 Pulse Measurements Mode – Option 330 Pulse Measurement Settings 6 - Fall Time The time it takes for a pulse to fall from 90% to 10% of its peak value. 7 - Pulse Width The time between the rising edge and falling edge of a pulse.
- Page 610 Pulse Measurements Mode – Option 330 Pulse Measurement Settings Grid — Then — Grid OFF — A grid of X/Y lines appears on the screen. Trace Memory A memory trace is a pulse measurement Tr 1 data trace (NOT the trace in the Zoom window) that has been stored in the FieldFox volatile memory.
- Page 611 Keysight Handheld Analyzers N99xxC User’s Guide 25 VVM (Vector Voltmeter) Mode - Option 308 VVM Mode (Option 308) measures the electrical length of cables and other devices. The 1-Port Cable Trimming and 2-Port Transmission measurement displays the electrical length in both Magnitude and Phase. Figure 25-1 Display for the 1-Port Cable Trimming measurement In this Chapter...
- Page 612 VVM (Vector Voltmeter) Mode - Option 308 Procedures “1-Port Cable Trimming Measurements ” on page 617 “2-Port Transmission Measurements” on page 619 “A/B and B/A Measurements” on page 620 Keysight N9915-90020 User’s Guide...
- Page 613 VVM (Vector Voltmeter) Mode - Option 308 Overview Overview In the FieldFox, both 1-port and 2-port measurement types use a different configuration setup from the HP/Keysight 8508A Vector Voltmeter. Figure 25-2 Typical 8508A measurement configuration –as shown in the 8508A manual. The above block diagram requires an external source and directional coupler to measure the electrical length of a DUT or cable to be trimmed.
- Page 614 VVM (Vector Voltmeter) Mode - Option 308 VVM Mode Settings VVM Mode Settings Select VVM Mode before making any setting in this section. How to select VVM Mode — Press Mode — Then Measurement Selection How to select a VVM Measurement —...
- Page 615 VVM (Vector Voltmeter) Mode - Option 308 VVM Mode Settings This setting survives a Preset and Mode Preset. How to set Resolution — Press Scale/Amptd — Then Resolution — Then choose: — 0.0 (default) — 0.00 IF Bandwidth Reducing the IF receiver bandwidth reduces the effect of random noise on a measurement.
- Page 616 VVM (Vector Voltmeter) Mode - Option 308 VVM Mode Settings How to set Output Power — Press Meas Setup 4. — Then More Output Power — Then — High Sets output power to the maximum achievable power at all displayed frequencies. Output power is NOT FLAT across the displayed FieldFox frequency span.
- Page 617 VVM (Vector Voltmeter) Mode - Option 308 VVM Mode Settings To restart the averaging process, press Meas Setup 4, then More, then Restart Single or Continuous Measure This setting determines whether the FieldFox measures continuously or only once each time the Single button is pressed.
- Page 618 VVM (Vector Voltmeter) Mode - Option 308 VVM Mode Settings — For 2-port measurements, Zero is typically pressed when a THRU connection is made in place of a DUT. Learn more in “2-Port Transmission Measurements” on page 619. Press Zero OFF before performing a Mechanical Cal (sets Zero to OFF). How to select Zeroing —...
- Page 619 VVM (Vector Voltmeter) Mode - Option 308 1-Port Cable Trimming Measurements 1-Port Cable Trimming Measurements A 1-Port Cable Trimming measurement is used in a cable fabrication procedure to validate proper electrical length. — The R receiver measures incident signal (green line) out of the source. —...
- Page 620 VVM (Vector Voltmeter) Mode - Option 308 1-Port Cable Trimming Measurements 9. Remove the reference cable from the FieldFox PORT 1 connector. 10.Connect an unterminated, longer cable to the FieldFox PORT 1 connector. 11.Observe the displayed phase difference between the reference cable and the untrimmed cable.
- Page 621 VVM (Vector Voltmeter) Mode - Option 308 2-Port Transmission Measurements 2-Port Transmission Measurements A 2-Port Transmission measurement is used for measuring electrical length, insertion loss, gain, or isolation of a DUT at a single CW frequency. The FieldFox signal source is transmitted out the port 1 connector, through the DUT, and into the port 2 connector.
- Page 622 VVM (Vector Voltmeter) Mode - Option 308 A/B and B/A Measurements A/B and B/A Measurements These measurements allow you to use the FieldFox A and B receivers, along with an external source, to make ratioed measurements. These measurements require the “Full 2-port S-parameters” option. The image below shows a typical configuration for a B/A magnitude and phase measurement of a 2-port DUT.
- Page 623 Keysight Handheld Analyzers N99xxC User’s Guide 26 ERTA (Extended Range Transmission Analysis) Mode - Option 209 ERTA (also known as FoxTrot) uses two FieldFox units to make long-distance scalar transmission measurements. One unit is the source and the other unit is the Receiver.
- Page 624 ERTA (Extended Range Transmission Analysis) Mode - Option 209 Overview Overview ERTA uses two FieldFox units to make long-distance scalar, tracking transmission measurements. One unit is the source and the other unit is the Receiver. Communication takes place between the two units with a LAN connection and hard-wired trigger signals.
- Page 625 ERTA (Extended Range Transmission Analysis) Mode - Option 209 Requirements and Limitations Requirements and Limitations Requirements — Two FieldFox units with option 209 installed. SA Mode is required for option 209. — Ethernet LAN cable(s). Either TWO cables that are used to connect both units to the internet or ONE cable that is long enough to connect the two FieldFox units.
- Page 626 ERTA (Extended Range Transmission Analysis) Mode - Option 209 Start Connection Wizard Start Connection Wizard Use the FieldFox Connection Wizard to guide you through the following physical setup. On the Receiver unit: — Press Mode then ERTA — Then Meas Setup 4 then Connection Wizard then Start.
- Page 627 ERTA (Extended Range Transmission Analysis) Mode - Option 209 Start Connection Wizard — On the Source unit, connect the Port 1 RF Output connector to the input of a power splitter. — Connect one power splitter output to the Source unit Port 2 RF Input. —...
- Page 628 ERTA (Extended Range Transmission Analysis) Mode - Option 209 Start Connection Wizard — Press Continue. STEP 5: Measure Jumper Cables These steps can be used to characterize an Input and Output jumper cable that may be connect the DUT to the FieldFox. The loss of the characterized jumper cables can then be removed from the DUT measurements.
- Page 629 ERTA (Extended Range Transmission Analysis) Mode - Option 209 Start Connection Wizard Re-measure or Continue. — Press — Press Apply Corrections Auto to remove the jumper cables from subsequent DUT measurements (Default = Auto). — Press Done to exit the Connection Wizard. Primary ERTA Partnership.
- Page 630 ERTA (Extended Range Transmission Analysis) Mode - Option 209 Configure Measurement Settings Configure Measurement Settings On the Receiver unit, select measurement settings such as Frequency range, Res Be, Points, and so forth. Zeros pan frequency is allowed even though the frequency is fixed and no stepping is required.
- Page 631 ERTA (Extended Range Transmission Analysis) Mode - Option 209 Configure Measurement Settings “Trace Display States (SA Mode)” on Learn more about Trace Display States in page 203. Normalize Normalize can be used to quickly provide ‘zeroing’ for any of the ERTA (B, R, or G) traces.
- Page 632 ERTA (Extended Range Transmission Analysis) Mode - Option 209 Configure Measurement Settings Improve Dynamic Range The following settings can be made to reduce measurement noise which improves Dynamic Range. Increase source power as much as possible while maintaining a leveled source. How to set Source Power —...
- Page 633 Keysight Handheld Analyzers N99xxC User’s Guide 27 AM/FM Metrics (SA Only and Option 355) The FieldFox assumes you have manually set up the CF, span, and amplitude settings. Refer to Chapter 9, “SA (Spectrum Analyzer) Mode (Option 233–Mixed Analyzers)FUTURE.” In this Chapter “Using AM/FM Metrics”...
- Page 634 AM/FM Metrics (SA Only and Option 355) Using AM/FM Metrics Table 27-1 Measurement Details Measurement details Modulation Rate The modulation rate quantifies how fast the modulation is and equates to the frequency of the baseband signal that modulates the carrier. SINAD (Signal to Noise Another commonly used distortion measure is signal to noise and distortion and Distortion Ratio)
- Page 635 AM/FM Metrics (SA Only and Option 355) Using AM/FM Metrics Table 27-1 Measurement Details Modulation Metrics FM deviation The FM deviation reflects the amount of the frequency modulation to which the baseband signal modulates the carrier signal. The quantity being measured is the peak frequency deviation that is the maximum frequency excursion from the carrier frequency.
- Page 636 AM/FM Metrics (SA Only and Option 355) Using AM/FM Metrics — Connect a test tone to the FieldFox SA Port 2 (Port 2) — Press Measure > Analog Demod Tune & Listen > Analog Demod Selecting FM Wide vs. FM Narrow does not effect the displayed waveforms or metrics.
- Page 637 AM/FM Metrics (SA Only and Option 355) Using AM/FM Metrics Figure 27-1 AM Metrics - Example 1 Keysight N9915-90020 User’s Guide...
- Page 638 AM/FM Metrics (SA Only and Option 355) Using AM/FM Metrics Figure 27-2 AM Metrics - Example 2 Keysight N9915-90020 User’s Guide...
- Page 639 AM/FM Metrics (SA Only and Option 355) Using AM/FM Metrics Figure 27-3 FM Metrics - Wide band Example Keysight N9915-90020 User’s Guide...
- Page 640 AM/FM Metrics (SA Only and Option 355) SINAD and THD Calculations SINAD and THD Calculations — FieldFox converts the audio waveform to the audio frequency spectrum using an FFT (i.e., The FFT result is not displayed). Refer to Figure 27-4 on page 638.
- Page 641 AM/FM Metrics (SA Only and Option 355) SINAD and THD Calculations Figure 27-5 SINAD and THD Results - Example 1 Keysight N9915-90020 User’s Guide...
- Page 642 AM/FM Metrics (SA Only and Option 355) SINAD and THD Calculations Figure 27-6 SINAD and THD Results - Example 2 Keysight N9915-90020 User’s Guide...
- Page 643 AM/FM Metrics (SA Only and Option 355) Interpreting AM/FM Metrics Error Messages Interpreting AM/FM Metrics Error Messages This section discusses possible AM/FM Metrics error messages and how to correct them. Test Tone Not Found A Test Tone Not Found message is displayed under the following circumstances: —...
- Page 644 AM/FM Metrics (SA Only and Option 355) Interpreting AM/FM Metrics Error Messages Test Tone Not Found - Example The following response had the following settings: — Source CF: 140 MHz — FM Deviation: 18 kHz — Modulation Rate: 1 kHz Reasons for error: —...
- Page 645 AM/FM Metrics (SA Only and Option 355) Interpreting AM/FM Metrics Error Messages Test Tone Not Found - Corrected Example The following response was corrected with these setting changes: — Frequency set to narrower frequency span of 50 kHz — Ideally the frequency span should show the modulation envelope down to –60 dB below the RF power level Response corrected, because: —...
- Page 646 AM/FM Metrics (SA Only and Option 355) Interpreting AM/FM Metrics Error Messages Keysight N9915-90020 User’s Guide...
- Page 647 Keysight Handheld Analyzers N99xxC User’s Guide 28 Channel Scanner (Option 312) In this Chapter: “Using Channel Scanner” on page 646 “How to Set Up Channel Scanner” on page 647 “Field Strength Measurements” on page 664 — “Using the Antenna/Cable Editor” on page 670 —...
- Page 648 Channel Scanner (Option 312) Using Channel Scanner Using Channel Scanner Channel Scanner enables you to do the following: Measure and display channel power vs. frequency for up to 20 channels simultaneously. Six Display Types: — Bar graph vertical display orientation —...
- Page 649 Channel Scanner (Option 312) How to Set Up Channel Scanner How to Set Up Channel Scanner This section briefly reviews the steps in setting up a channel scan measurement. If you are not familiar with this process or would like more “How to Define a Channel and Use Channel Scanner”.
- Page 650 Channel Scanner (Option 312) How to Set Up Channel Scanner — Meas Interval — Interval Type Time or Distance — Time Interval — Distance Interval — Then Back b. Then press Record Save/Recall — Then File Folder Default System — Default –...
- Page 651 Channel Scanner (Option 312) How to Set Up Channel Scanner — Record Indoor Data Recall Indoor Log File. Learn more, refer to Chapter 16 Mapping and “Option 352 Indoor Maps Setup Procedure” on page 491 “Setting up Data Logging” on page 503.
- Page 652 Channel Scanner (Option 312) How to Set Up Channel Scanner — Save Image (PNG) Saves the current displayed map to a *.png file (default filename is “MapImageFile”). Data Log-Play files are saved to: — If File Folder is set to Default then Data Log-Play files are save-recalled to: "[CurrentDevice]\RecordPlayback\CS"...
- Page 653 Channel Scanner (Option 312) How to Set Up Channel Scanner Figure 28-2 Channel Definition Step 1A: Scan Mode: Range Channel Defined 1. Define some channels: Press Measure > Scan Mode > Range 2. Press Edit Range and modify table items: —...
- Page 654 Channel Scanner (Option 312) How to Set Up Channel Scanner Figure 28-3 Range Table Settings 3. Press Done Step 1B: Scan Mode: Custom List Channel Defined 1. Define some channels: Press Measure > Scan Mode > Custom List 2. Press Edit Custom List and modify table items: —...
- Page 655 Channel Scanner (Option 312) How to Set Up Channel Scanner Figure 28-4 Custom List Table Settings 3. Press Done 4. Press Save Recall List > Save List to save a custom list. See also “How to use the FieldFox labeler ” on page 820.
- Page 656 Channel Scanner (Option 312) How to Set Up Channel Scanner Figure 28-5 Bar Chart Vertical Display Type Figure 28-6 Bar Chart Horizontal Display Type Keysight N9915-90020 User’s Guide...
- Page 657 Channel Scanner (Option 312) How to Set Up Channel Scanner Figure 28-7 Channel Power Display Type Figure 28-8 Strip Chart Display Type Keysight N9915-90020 User’s Guide...
- Page 658 Channel Scanner (Option 312) How to Set Up Channel Scanner Figure 28-9 Strip Chart Overlay Display Type Figure 28-10 Scan & Listen Display Type Keysight N9915-90020 User’s Guide...
- Page 659 Channel Scanner (Option 312) How to Set Up Channel Scanner Step 3. Modify Scale and the Display Color Bar Settings To assign colors to low and high power values: 1. Press Scale/Amptd > Red Limit to set high power values and to set the color.
- Page 660 Channel Scanner (Option 312) How to Set Up Channel Scanner Figure 28-12 Indoor Display Colors Step 4: Enable Data Logging and Play Results Data logging records your data with a timestamp and GPS stamp (refer to “GPS – Distance Settings” on page 787).
- Page 661 Channel Scanner (Option 312) How to Set Up Channel Scanner Outdoor Mapping Procedure Chapter 16 For Indoor Mapping and more on Outdoor Mapping, see also Mapping and “Option 352 Indoor Maps Setup Procedure” on page 491, “Option 352 Outdoor Maps Setup Procedure” on page 495, and “Setting up Data Logging”...
- Page 662 Channel Scanner (Option 312) How to Set Up Channel Scanner Playing a Data Log and Viewing the Spectrogram To play the log results: Refer to Figure 28-13 on page 661. 1. Press Data Logging > Play 2. Then choose: — Optional: Use the RPG (fine adjust) or the arrow keys (coarse adjust) to change the color bar.
- Page 663 Channel Scanner (Option 312) How to Set Up Channel Scanner Figure 28-13 Spectrogram View Step 5: Save the Log Results: Two file types are supported for save or recall log results: — KML file format — Files include bar color —...
- Page 664 Channel Scanner (Option 312) How to Set Up Channel Scanner Optional: Auto Save ON (OFF = default)—When Auto Save is on, during recording, the FieldFox stores intermediate results in a temporary file. If the power fails during recording you can retrieve the results. Select Recall File.
- Page 665 Channel Scanner (Option 312) How to Set Up Channel Scanner 7. When done press Back or Esc. The files save dialog is displayed. Edit the file name where the file results will be stored as a *.kdat file. 8. Press Done Chapter 16 “Setting up Data Logging”...
- Page 666 Channel Scanner (Option 312) How to Set Up Channel Scanner Field Strength Measurements To measure the strength of any signal transmitted through the air, an antenna must be connected to the FieldFox. The Field Strength feature allows you to enter the frequency response of the receiving antenna (the Antenna Factor) and associated cabling, and then have amplitude corrections automatically compensate the displayed trace for that response.
- Page 667 Channel Scanner (Option 312) How to Set Up Channel Scanner Figure 28-16 Editing Antenna Factor (See also, Figure 28-15 on page 664.) Keysight N9915-90020 User’s Guide...
- Page 668 Channel Scanner (Option 312) How to Set Up Channel Scanner Figure 28-17 Yellow Trace with Cable and Antenna Corrections Yellow trace: Cable correction, which is the sum of the antenna correction and the cable correction (These corrections are linearly interpolated). Field Strength Measurements Yellow Trace - Corrected trace with antenna factor.
- Page 669 Channel Scanner (Option 312) How to Set Up Channel Scanner View Corrections View Corrections ON OFF — > Turn ON and OFF Yellow Trace - Antenna/Cable corrections. This is a composite of all cable/antenna corrections that are currently applied. Available as a useful visual aid, the zero “dB”...
- Page 670 Channel Scanner (Option 312) How to Set Up Channel Scanner Figure 28-18 Apply Corrections Set to Auto Keysight N9915-90020 User’s Guide...
- Page 671 Channel Scanner (Option 312) How to Set Up Channel Scanner Figure 28-19 Apply Corrections Set to Disabled Keysight N9915-90020 User’s Guide...
- Page 672 Channel Scanner (Option 312) How to Set Up Channel Scanner Using the Antenna/Cable Editor To learn more, refer to Chapter 9, “SA (Spectrum Analyzer) Mode (Option 233–Mixed Analyzers)FUTURE.” and to “Using the Antenna/Cable Editor” on page 165. Using Mapping Channel Scanner mode has indoor and outdoor mapping capability. Refer to Chapter 16, “Indoor and Outdoor Mapping –...
- Page 673 Keysight Handheld Analyzers N99xxC User’s Guide 29 Noise Figure Mode (Option 356) IMPORTANT! Noise Figure mode uses DC variable voltage source (VVS) – (Option 309) during the measurements. The voltage might be as high as 28V during the measurement. During the noise figure measurement, always make sure there are no voltage sensitive devices connected to the DC SMB output port.
- Page 674 Noise Figure Mode (Option 356) Figure 29-1 Example of Jitter Uncertainty (21 points)—with Uncertainty Bars. Learn more “How to use Auto-Integration” on page 724. Figure 29-2 Example of Jitter Uncertainty (21 points)—with Uncertainty Bars Disabled. Learn more in “How to use Auto-Integration” on page 724.
- Page 675 Noise Figure Mode (Option 356) In this Chapter: “Using Noise Figure” on page 674 “How to Define a Noise Figure Measurement” on page 680 “Example: Typical Noise Figure Measurement Procedure” — on page 681 “Overview of Softkey Menus” on page 682 —...
- Page 676 Noise Figure Mode (Option 356) Using Noise Figure Using Noise Figure Noise Figure enables you to do the following: The FieldFox uses the Y-Factor technique to accurately verify and characterize the noise figure of devices. Option 356 has these features: Five Measurement Types —...
- Page 677 Noise Figure Mode (Option 356) Using Noise Figure Figure 29-3 Display Annotation—Overview 1. Variable Voltage Source (VVS) Status (appears when VVS is on. Refer to “Variable Voltage Source (Opt. 309)” on page 801. 2. Calibration Status 3. Excess Noise Ratio (ENR) Status 4.
- Page 678 Noise Figure Mode (Option 356) Using Noise Figure Figure 29-4 Dual Display Annotation Window 1. In the dual-window layout, non-trace-specific annotations are moved from the left of the traces to the bottom of the traces Figure 29-5 Calibration Annotation No Cal = No calibration applied 2.
- Page 679 Noise Figure Mode (Option 356) Using Noise Figure Figure 29-6 ENR Status and Mode Annotation ENR Status annotation ~ENR = Using ENR table, but it’s extrapolated (the sweep frequency range goes beyond the table frequency range) = Using ENR table and it’s not extrapolated (the sweep frequency range is within the table frequency...
- Page 680 Noise Figure Mode (Option 356) Using Noise Figure Figure 29-8 Smart Noise Source Annotations Top Figure: 1. Automatically loaded T Cold value from the USB Noise Source, measured in Kelvin. 2. “Smart (Auto)” under ENR Mode notation. – The device model will say “(None)”...
- Page 681 Noise Figure Mode (Option 356) Using Noise Figure Figure 29-9 Smart Noise Source – Source Menus ENR Mode: Smart (Auto) only: – T value gets cold automatically loaded into FieldFox when the USB Noise Source is connected. – This value is applied as the Default value for T Cold menu.
- Page 682 Noise Figure Mode (Option 356) How to Define a Noise Figure Measurement Figure 29-10 Smart Noise Source – Meas Setup > Noise Source > Noise Source Control ENR Mode: Smart (Auto) only: 1. Reconnect: Attempts to connect to USB Smart Noise Source.
- Page 683 Noise Figure Mode (Option 356) How to Define a Noise Figure Measurement “Example: Typical Noise Figure Measurement Procedure” on page 681 — — “Overview of Softkey Menus” on page 682 — “How to Use DUT Measurement Setups” on page 690 —...
- Page 684 Noise Figure Mode (Option 356) How to Define a Noise Figure Measurement — Amplifier (default), — Downconverter, — Upconverter, or — Multi-Stage Converter 8. Run a User Calibration (i.e., If you are using an external preamp). (Cal >Run User Cal and follow prompts).
- Page 685 Noise Figure Mode (Option 356) How to Define a Noise Figure Measurement b. Then modify the settings based on the selected noise figure type 2. Select Measure Setup—choose: — Noise Source “DUT or” on page 686, “Integration or” on page 686, or “Uncertainty”...
- Page 686 Noise Figure Mode (Option 356) How to Define a Noise Figure Measurement ——Off | Γ sets the Off value (cold) of the ENR spot value’s 50 Ω match, Γ (0.000 to 1.000). ——ENR Uncert. Cov. [2 Opens a menu to set the σ...
- Page 687 Noise Figure Mode (Option 356) How to Define a Noise Figure Measurement ——Recall ENR Table Opens a menu of file recall softkeys and displays a list of stored noise source files. ——Storage Device [Internal] Opens a menu of softkeys to set the storage location for your files. Then choose Internal (default),...
- Page 688 Noise Figure Mode (Option 356) How to Define a Noise Figure Measurement and this softkey is pressed, the data from the noise source is loaded into the ENR table overwriting any previous ENR table data. ——Source Output Norm OFF ON Controls the automatic noise source control (Default == Normal).
- Page 689 Noise Figure Mode (Option 356) How to Define a Noise Figure Measurement Opens a menu of softkeys to define the Integration’s Mode Auto or Fixed and Jitter values. For optimum speed and performance measurement results, it is recommended that auto-integration is used in all noise figure measurements.
- Page 690 Noise Figure Mode (Option 356) How to Define a Noise Figure Measurement ——DUT Spot Values (Only active when DUT Mode = Spot). Then choose: Input |Γ —— Sets the input value. Γ Output |Γ —— Sets the output Γ value. ——...
- Page 691 Noise Figure Mode (Option 356) How to Define a Noise Figure Measurement ——New DUT Table Opens a menu of softkeys to choose a new DUT table. IMPORTANT! The FieldFox displays Replace existing file?, because the displayed default filename is the one last saved. Enter a unique filename to avoid loss of table data.
- Page 692 Noise Figure Mode (Option 356) How to Define a Noise Figure Measurement ——Jitter Uncert. Enable/disable the Jitter Uncertainty. ——ENR Uncert. Enable/disable the ENR Uncertainty. ——Mismatch Uncert. Enable/disable the Mismatch Uncertainty. ——User Cal Uncert. Enable/disable the User Cal Uncertainty. ——Back to return to previous menu. —...
- Page 693 Noise Figure Mode (Option 356) How to Define a Noise Figure Measurement Type [Upconverter], see Figure 29-13 on page 694 — Setting > and for Smart Noise Source, see Figure 29-17 on page 698. Type [Multi-Stage Converter], see Figure 29-14 on —...
- Page 694 Noise Figure Mode (Option 356) How to Define a Noise Figure Measurement Figure 29-11 DUT – Measurement Setup – Type [Amplifier] Screen DUT – Measurement Setup – Type [Amplifier] Used for setting up DUT parameters without an external preamplifier (LNA) –...
- Page 695 Noise Figure Mode (Option 356) How to Define a Noise Figure Measurement Figure 29-12 DUT Measurement Setup – Type [Downconverter] Screen DUT – Measurement Setup – Type [Downconverter] Used for setting up DUT parameters without an external preamp – Type [Downconverter] ––Performs internal frequency downconversion (converts RF down to IF)
- Page 696 Noise Figure Mode (Option 356) How to Define a Noise Figure Measurement Figure 29-13 DUT Measurement Setup – Type [Upconverter] Screen DUT – Measurement Setup – Type [Upconverter] Used for setting up DUT parameters without an external preamp –Type [Upconverter] ––Performs internal frequency upconversion (technically, converts IF up...
- Page 697 Noise Figure Mode (Option 356) How to Define a Noise Figure Measurement Figure 29-14 DUT Measurement Setup – Type [Multi-Stage Converter] Screen DUT – Measurement Setup – Type [Multi-Stage Converter] Used for setting up DUT parameters – Type [Multi-Stage Converter] ––Multi-Stage Converter: Performs multi-stage frequency conversion...
- Page 698 Noise Figure Mode (Option 356) How to Define a Noise Figure Measurement ENR Mode: Smart (Auto) – Calibration Wizard (DUT) Figure 29-15 DUT – Measurement Setup – Type [Amplifier] Screen – ENR Mode: Smart (Auto) DUT – Measurement Setup – Type [Amplifier] with External Amplifier (LNA) – ENR Mode: Smart (Auto) USB Smart Mode DUT Wizard visibility:...
- Page 699 Noise Figure Mode (Option 356) How to Define a Noise Figure Measurement Figure 29-16 DUT – Measurement Setup – Type [Downconverter] Screen – ENR Mode: Smart (Auto) DUT – Measurement Setup – Type [Downconverter] with External Amplifier (LNA) – ENR Mode: Smart (Auto) USB Smart Mode DUT Wizard visibility: –...
- Page 700 Noise Figure Mode (Option 356) How to Define a Noise Figure Measurement Figure 29-17 DUT – Measurement Setup – Type [Upconverter] Screen – ENR Mode: Smart (Auto) DUT – Measurement Setup – Type [Upconverter] with External Amplifier (LNA) – ENR Mode: Smart (Auto) USB Smart Mode DUT Wizard visibility: 1.
- Page 701 Noise Figure Mode (Option 356) How to Define a Noise Figure Measurement Figure 29-18 DUT – Measurement Setup – Type [Multi-Stage Conv] Screen – ENR Mode: Smart (Auto) DUT – Measurement Setup – Type [Multi-Stage Conv] with External Amplifier (LNA) –...
- Page 702 Noise Figure Mode (Option 356) How to Define a Noise Figure Measurement DUT Type and Frequency Context Noise figure enables you to define the frequency context for your noise figure measurements: — RF (DUT In): — Start — Stop — Center —...
- Page 703 Noise Figure Mode (Option 356) How to Define a Noise Figure Measurement Frequency Context – RF (DUT In) The RF (DUT In) softkey can be used to define the DUT Type’s RF Start, Stop, Center, and Span frequencies. Refer to “Frequency Range and Frequency Context”...
- Page 704 Noise Figure Mode (Option 356) How to Define a Noise Figure Measurement Frequency Context – IF (DUT Out) – Inactive for Type [Amplifier] The IF (DUT Out) softkey can be used to define the DUT Type’s IF Start, Stop, Center, and Span frequencies. Refer to “Frequency Range and Frequency Context”...
- Page 705 Noise Figure Mode (Option 356) How to Define a Noise Figure Measurement DUT Type—Freq Context (IF or RF)—(Inactive for DUT Type [Amplifier]) Frequency context can be used to define the DUT Type’s RF Context IF (default) and RF values. Refer to “Frequency Range and Frequency Context”...
- Page 706 Noise Figure Mode (Option 356) How to Define a Noise Figure Measurement Frequency Range and Frequency Context Set the range of frequencies over which you would like to make DUT type measurements and frequency context for noise measurements. When the frequency range is changed after a calibration is performed, the cal “Interpolation *”...
- Page 707 Noise Figure Mode (Option 356) How to Define a Noise Figure Measurement Figure 29-22 DUT Type Loss Compensation For all of the DUT Types (Amplifier, Downconverter, Upconverter, and Multi-Stage Converter) the loss compensation, before the DUT (BeforeDUT) and after the DUT (AfterDUT) can be enabled or disabled for loss and for temperature.
- Page 708 Noise Figure Mode (Option 356) How to Define a Noise Figure Measurement Setting DUT Loss Compensation Figure 29-23 DUT Loss Compensation DUT – Measurement Setup – Type [Amplifier], [Downconverter], [Upconverter], and [Multi-Stage Converter] Used for setting up loss compensation for a DUT –...
- Page 709 Noise Figure Mode (Option 356) How to Define a Noise Figure Measurement Single / Continuous / Restart This setting determines whether the FieldFox measures continuously or only Single or Run / Hold +/- button is pressed. Use Hold / once each time the Single or to conserve battery power or to allow you to save or analyze a specific trace.
- Page 710 Noise Figure Mode (Option 356) How to Define a Noise Figure Measurement Resolution Bandwidth (Res BW) Avoid setting the resolution bandwidth (Res BW) greater than the bandwidth of the measured DUT. In NF Mode, the Res BW settings increase the measurement speed and quality of a measured noise figure.
- Page 711 Noise Figure Mode (Option 356) How to Define a Noise Figure Measurement Calculating Noise Figure Measurement Uncertainty The Noise Figure mode can calculate and display the uncertainty of the noise measurement, whether it is a Noise Figure, Noise Factor, or Noise Temperature measurement.
- Page 712 Noise Figure Mode (Option 356) How to Define a Noise Figure Measurement sources in the measurement and in the user calibration. And, in the case of very low power output DUTs (<15 dB gain + noise figure), by using an isolator on the input of the preamplifier.
- Page 713 Noise Figure Mode (Option 356) How to Define a Noise Figure Measurement Specifi Style (Spec Style): Following the GUM method for Type B evaluation of standard uncertainty described in Reference[1] , the uncertainty calculation takes into account not only the entered value of the reflection coefficient, but also the nature of this value.
- Page 714 Noise Figure Mode (Option 356) How to Define a Noise Figure Measurement — Noise Source Reflection Coefficient, ENR Uncertainties, and ENR values: “Overview of Softkey Menus” on page 682 For this section, see also (Noise Source page 683) and “Using ENR Tables” on page 714.
- Page 715 Noise Figure Mode (Option 356) How to Define a Noise Figure Measurement As in the case of the DUT, In addition to entering the magnitude reflection coefficient values, the uncertainty calculation takes into account the distribution ( Γ Distribution) and specified style (Spec Style) for the preamplifier reflection coefficient value.
- Page 716 Noise Figure Mode (Option 356) How to Define a Noise Figure Measurement Using ENR Tables ENR tables are used to define the noise source(s) used in DUT measurements, receiver, and user calibration(s). Additionally, ENR tables are used along with DUT tables, preamplifier tables, and information collected during the Figure 29-24 measurement to compute the measurement uncertainty.
- Page 717 Noise Figure Mode (Option 356) How to Define a Noise Figure Measurement Figure 29-24 Editing ENR Tables Uses existing ENR file format Refer https://www.keysight.com/us/en/a ssets/9018-01420/user-manuals/9 018-01420.pdf. 1. Three additional header fields (used for uncertainty calculations) —ENR Uncert Cov –Γ Spec Style –Γ...
- Page 718 Noise Figure Mode (Option 356) How to Define a Noise Figure Measurement Preamplifier (*.amp) Files — Preamplifier (*.amp) files are saved to, and recalled from, the NoiseFigure\Preamp folder. If the folder does not already exist on a USB or SD card, it is created automatically before storing the file. —...
- Page 719 Noise Figure Mode (Option 356) How to Define a Noise Figure Measurement Using Markers (Noise Figure) In addition to the features shown here, noise figure has many of the same marker features as other FieldFox modes. See also “All about Markers” on page 734.
- Page 720 Noise Figure Mode (Option 356) Calibration Wizard Calibration Wizard The Noise Figure mode has two types of calibration wizard softkeys: Receiver Cal and User Cal. A receiver calibration is required for a user calibration. On the Fieldfox, after you have completed a user calibration, the User Cal (User Cal) annotation overwrites the displayed Receiver Cal (Rcvr Cal) annotation.
- Page 721 Noise Figure Mode (Option 356) Calibration Wizard independent of the receiver bandwidth from the receiver calibration. The receiver calibration has virtually no influence on the noise figure measurement, either with or without a user calibration. The receiver calibration only effects the gain measurement, and only when there is no user calibration.
- Page 722 Noise Figure Mode (Option 356) Calibration Wizard Figure 29-27 DUT – Measurement Setup – Receiver Calibration Screen – ENR Mode: Smart (Auto) DUT – Measurement Setup – Receiver Calibration withOUT External Amplifier (LNA) – ENR Mode: Smart (Auto) USB Smart Mode DUT Wizard visibility: 1.
- Page 723 Noise Figure Mode (Option 356) Calibration Wizard User Calibration (User Cal): Performing a user calibration is recommended only when the measurement setup includes a preamplifier. The user calibration is unnecessary for accurate measurements when no preamplifier is used. In general, a user calibration should be performed whenever a preamplifier is used in the noise figure measurement.
- Page 724 Noise Figure Mode (Option 356) Calibration Wizard Figure 29-28 DUT – Measurement Setup – Run User Cal Screen – ENR Mode: Smart (Auto) DUT – Measurement Setup – Run User Cal with External Amplifier (LNA) – ENR Mode: Smart (Auto) USB Smart Mode DUT Wizard visibility: 1.
- Page 725 Noise Figure Mode (Option 356) Calibration Wizard Optimizing Measurement Accuracy: — Both gain and noise figure measurement accuracy will be enhanced by using a noise source with as low a reflection coefficient as possible for the user calibration. — When the DUT output noise power is relatively low (i.e., the gain plus noise figure of the DUT is less than 15 dB), measurement accuracy may also be improved by using a low loss isolator on the preamplifier input.
- Page 726 Noise Figure Mode (Option 356) How to use Auto-Integration How to use Auto-Integration For optimum speed and performance measurement results, it is recommended that auto-integration is used in all noise figure measurements. This section provides an example procedure for measuring a device using noise figures’...
- Page 727 Noise Figure Mode (Option 356) How to use Auto-Integration these cases, since the jitter goal has not been reached, a jitter warning marker will appear on the data trace (unless disabled by the user), indicating that the jitter goal could not be achieved within the selected time constraint. Due to the stability of the FieldFox receiver with its internal reference switch and the design of the auto integration feature, it is possible to achieve a stable, accurate, low jitter measurement results even under challenging measurement...
- Page 728 Noise Figure Mode (Option 356) How to use Auto-Integration ENR Table Edit/Save/Recall — — Edit ENR Table — Enter the serial number and model number of your noise source. If desired, enter other information (e.g., Options, Cal Date, etcetera). Enter a value using the numeric keypad, the arrows, or the rotary knob.
- Page 729 Noise Figure Mode (Option 356) How to use Auto-Integration Figure 29-29 Example of Jitter Uncertainty (401 points)—with Uncertainty Bars Keysight N9915-90020 User’s Guide...
- Page 730 Noise Figure Mode (Option 356) How to use Auto-Integration Figure 29-30 Example of Jitter Uncertainty (401 points)—without the Uncertainty Bars Keysight N9915-90020 User’s Guide...
- Page 731 Noise Figure Mode (Option 356) How to use Auto-Integration Figure 29-31 shows an example of a noise figure visual Jitter Warning elements that can be enabled/disabled (i.e, blue circles around points where the jitter goal was exceeded). — Press to toggle Jitter Warning OFF ON (default = ON) Figure 29-31...
- Page 732 Noise Figure Mode (Option 356) Other Features Available Other Features Available — Limit Lines - For information on using Limit Lines, refer to “All about Limit Lines” on page 749. — Display Lines - For information on using Limit Lines, refer to the SA “Display Line”...
- Page 733 Noise Figure Mode (Option 356) Troubleshooting Troubleshooting Some measurements can result in invalid results (NaNs). In these cases the FieldFox’s Noise Figure Option 356 displays the following: — Red X on the NaN point — Marker readout displays: “–––” — SCPI will return its NaN representation (i.e., 9.91E+37) Figure 29-32 Example of an invalid measurement Keysight N9915-90020 User’s Guide...
-
Page 734: All About Markers
Noise Figure Mode (Option 356) Troubleshooting Keysight N9915-90020 User’s Guide... - Page 735 Keysight Handheld Analyzers N99xxC User’s Guide Data Analysis FeaturesDELETE_IF The following features can be used after a measurement to analyze the results. In this Chapter “How to create Markers” on page 734 “How to move a Marker after it is created” on page 734 “About Delta Markers”...
- Page 736 Data Analysis FeaturesDELETE_IF All about Markers “How to Use Scale Settings” on page 762 “Averaging (CAT, NA, Power Meter, Channel Scanner, and Pulse Measurement Modes Only)” on page 763 All about Markers Markers move along the X-axis range of the measurement trace to provide a numerical readout of each measured data point.
- Page 737 Data Analysis FeaturesDELETE_IF All about Markers Figure 30-1 Marker 2 is Active, marker 1 is NOT active. About Delta Markers A Delta marker provides X-and Y-axis readout information that is relative to a ‘reference’ marker. A Delta marker is created with a Δ (delta symbol) to distinguish it from the reference marker. All six markers can be a Delta marker pair.
- Page 738 Data Analysis FeaturesDELETE_IF All about Markers How to Create a Delta Marker — Create a Normal marker and move it to the reference position. — Press Delta. The marker becomes the reference marker and fixed in its X-Axis position. Delta —...
- Page 739 Data Analysis FeaturesDELETE_IF All about Markers How to display the Marker table 1. Press Marker. 2. Then More 3. Then Marker Table On Off. Coupled Markers (NA Mode) I/Q Analyzer (IQA) mode has coupled markers. but the behavior is different than the NA mode Coupled Markers behavior.
- Page 740 Data Analysis FeaturesDELETE_IF All about Markers How to create Uncoupled Markers Markers are coupled by default. To create markers that are NOT coupled (move independently on each trace): 1. Press Marker 2. Then More 3. Then Coupled Markers OFF Marker Colors As shown in the above image, in NA and CAT Modes, markers are the same color as the trace to which they are assigned.
- Page 741 Data Analysis FeaturesDELETE_IF All about Markers How to move an IQ and SA mode marker between traces 1. With two or more traces present, press Marker and Enter to create a marker. The marker is created on the current Marker Trace selection (default setting is 1). 2.
- Page 742 Data Analysis FeaturesDELETE_IF All about Markers There are more trace formats available than marker formats. To display marker readouts in more formats than are shown here, change the trace format, then select Default. Learn how to change “Format” on page format in —...
- Page 743 Data Analysis FeaturesDELETE_IF All about Markers right to find the next occurrence of the Target value. When the marker reaches the end of the stimulus range, it “wraps around” and continues the search from the beginning of the stimulus range. —...
- Page 744 Data Analysis FeaturesDELETE_IF All about Markers Figure 30-5 S11 of the same filter with same search criteria: -3 dB. The same values would result from a search criteria of approximately +30.4 After pressing Bandwidth, four markers are automatically created to find the first negative or positive bandpass over the displayed frequency range.
- Page 745 Data Analysis FeaturesDELETE_IF All about Markers Peak Right — (Not IQA) Moves the active marker to the next data point to the right that meets the ‘Peak’ criteria. When no data points to the right meet the ‘Peak’ criteria, the marker does not move.
- Page 746 Data Analysis FeaturesDELETE_IF All about Markers If your Markers are positioned and in Normal marker mode, no changes are made to the Mkr1 through Mkr4 settings. If your Markers are not previously positioned and in Normal marker mode, when you select the Mkr5 and Mkr6 maximum and minimum setting, your markers are set as follows: Normal —...
- Page 747 Data Analysis FeaturesDELETE_IF All about Markers Figure 30-6 CAT Mode Mkr5 and Mkr6 Search Example What Is a ‘Peak’ You define what the FieldFox considers a “peak” by setting the Peak Threshold and Peak Excursion and for I/Q Analyzer Only Cont Peak Search. These two peak criteria settings are set individually for each trace and for each mode (CAT, SA, or NA).
- Page 748 Data Analysis FeaturesDELETE_IF All about Markers — In IQA (Spectrum) and SA mode: More — Then ——Then Mkr Properties ——Then Peak Criteria — In IQA (Waveform) mode: — Then Mkr Properties Peak Criteria ——Then Peak Criteria After selecting for CAT, IQA, NA, or SA mode: ——Then select the following: ——Peak Threshold Minimum amplitude (dB).
-
Page 749: All About Limit Lines
Data Analysis FeaturesDELETE_IF All about Markers Peak Excursion and Peak Threshold example—the settings for the trace in the following image are: ——Threshold: –10 dB ——Excursion: 1 dB ——Scale = 1 dB / Division. Peak A = Valid Peak (Above Threshold and Excursion Settings) Peak B = Invalid Peak (Below 1 dB Excursion Setting) Peak C = Invalid Peak (Below –10 dB Threshold Setting) Marker Functions... - Page 750 Data Analysis FeaturesDELETE_IF All about Markers The following applies to DTF Measurements ONLY: — More then: — Mkr->Start Distance The Start Distance of the measurement becomes the value of the active marker. Markers that would no longer appear on the screen are moved to the new Start Distance.
- Page 751 Data Analysis FeaturesDELETE_IF All about Limit Lines All about Limit Lines Limit lines are visual representations, drawn on the FieldFox screen, of the specified limits for a measurement. With this capability, you can easily compare measured data versus specifications. Optionally, you can enable an audible beep and display Pass or Fail information for each measurement.
- Page 752 Data Analysis FeaturesDELETE_IF All about Limit Lines 1. Build (limits) From a Trace. Learn how in “Build From Trace” on page 751. 2. Enter X/Y data points into the on-screen editor. The limit line is formed as the FieldFox ‘connects the dots’ on the screen. To create frequency gaps that are NOT tested, use separate limit lines.
- Page 753 Data Analysis FeaturesDELETE_IF All about Limit Lines — Press then choose from the following: — Add Point - Adds a blank X/Y data point below the cursor. — Add Limit - Adds a default limit line below the current limit. —...
- Page 754 Data Analysis FeaturesDELETE_IF All about Limit Lines Figure 30-7 A lower limit line (red) built from the trace (yellow) shifted down 5 dB. How to Build Limit Lines from a Trace Build from Trace is NOT allowed for traces with more than 1001 data points.
- Page 755 Data Analysis FeaturesDELETE_IF All about Limit Lines 3. Use the arrows to select ON. 4. Use Offset to shift the limit line UP or DOWN. Learn how below. Figure 30-9 Build From Trace (2 of 2) Limit Options The following are Limit Options for Limit Lines in CAT, NA, NF, RTSA, and SA.
- Page 756 Data Analysis FeaturesDELETE_IF All about Limit Lines — On Fail Audible beep sounds when a sweep fails. — No audible beep sounds. — Warning On Off Shows Pass or Fail indication on the display with each sweep. Data points that fail are highlighted. —...
- Page 757 Data Analysis FeaturesDELETE_IF All about Limit Lines Creating and Importing *.csv Limit Line Files This sections defines the procedure for creating a importable *.csv file that defines the limit lines for your current trace. Data delimiter Usage: – Data delimiters of “,” or “;” can be used. –...
- Page 758 Data Analysis FeaturesDELETE_IF All about Limit Lines Table 30-1 Example: Limit Line Formatting (*.csv) (Sheet 1 of 2) Description of Limit Line Notes #Comments start with “#” Any row that begins with # is ignored by the FieldFox. Description LimitExample Example “LimitExample”...
- Page 759 Data Analysis FeaturesDELETE_IF All about Limit Lines Table 30-1 Example: Limit Line Formatting (*.csv) (Continued) (Sheet 2 of 2) Description of Limit Line Notes 30000000000 –50.5 #Comment 4 (Example) Any row that begins with # is ignored by the FieldFox. a.
-
Page 760: All About Trace Math
Data Analysis FeaturesDELETE_IF All about Limit Lines Figure 30-11 Example: Table Limit Line Formatting in actually LimitExample.csv Keysight N9915-90020 User’s Guide... - Page 761 Data Analysis FeaturesDELETE_IF All about Limit Lines Figure 30-12 Example: Recalled Limit Line Formatting LimitExample.csv Keysight N9915-90020 User’s Guide...
- Page 762 Data Analysis FeaturesDELETE_IF All about Limit Lines Display Line (I/Q, NF, and SA Modes Only) A display line is a simple, horizontal line that can be placed at any amplitude level on the SA screen or set to any level in IQA. Use a display line as mental guide for visual feedback. A display line is similar to a Limit Line, except that no PASS/FAIL testing occurs.
- Page 763 Data Analysis FeaturesDELETE_IF All about Trace Math All about Trace Math Trace Math is available in CAT (excluding DTF measurements), NA Mode, and FOPS (under USB Power Meter mode). Noise Figure (NF—Option 356) does not have trace math, but does have the ability to display data and memory traces.
- Page 764 Data Analysis FeaturesDELETE_IF All about Trace Math — Data – Mem D-M] Current measurement data is subtracted from the data in memory. — Data / Mem [D/M] Current measurement data is divided by the data in memory. — Math Off [Data] Displays trace data with NO math applied.
- Page 765 Data Analysis FeaturesDELETE_IF All about Scale Settings All about Scale Settings IMPORTANT! Some of the scale settings do not apply to all of the modes. How to Use Scale Settings Adjust the Y-axis scale to see the relevant portions of the data trace. The Y-axis is divided into 10 graticules.
- Page 766 Data Analysis FeaturesDELETE_IF All about Scale Settings Averaging (CAT, NA, Power Meter, Channel Scanner, and Pulse Measurement Modes Only) Trace Averaging helps to smooth a trace to reduce the effects of random noise on a measurement. The FieldFox computes each data point based on the average of the same data point over several consecutive sweeps.
- Page 767 Data Analysis FeaturesDELETE_IF All about Scale Settings — Or set the current count, using the Num Averages softkey — CAT, NA: Average 1 change to a number >1 to enable/set averaging (Default = 1 (OFF)). 3. Enter a value using the numeric keypad. Enter 1 for NO averaging. 4.
- Page 768 Data Analysis FeaturesDELETE_IF All about Scale Settings Keysight N9915-90020 User’s Guide...
- Page 769 Keysight Handheld Analyzers N99xxC User’s Guide 31 System SettingsFUTURE In this Chapter “Run/Hold” on page 766 “Preset” on page 767 “User Preset” on page 768 “Audio (Volume) Control” on page 769 “Display (Settings)” on page 769 “Display Brightness” on page 769 “Display Colors”...
- Page 770 System SettingsFUTURE Run/Hold “Alpha Numeric Editing” on page 789 “File Saving Naming Options” on page 789 “Quick Save Editing” on page 789 “Group Save File Types Editing” on page 790 “CAT (Distance Units)” on page 791 “CAT/NA” on page 792 “SA”...
- Page 771 System SettingsFUTURE Preset — Continuous — Hold — is displayed while a single sweep occurs. How to perform a single sweep while in Hold 1. Press Sweep 3. 2. Then choose one of the following: — Single Automatically sets Continuous OFF (Hold) and causes FieldFox to make ONE measurement sweep, then hold for the next Single key press.
- Page 772 System SettingsFUTURE User Preset — Mode Preset Returns only the current Mode to the factory default settings. The current settings for all other Modes remain. User Preset User Preset allows you to store custom settings for each mode, then recall the settings when the Preset key is pressed.
- Page 773 System SettingsFUTURE Audio (Volume) Control Audio (Volume) Control System volume control is a FieldFox global setting which sets speaker volume for ALL success beeps, key press clicks, and individual features that use the FieldFox speaker, such as SA Mode Tune and Listen. The volume control setting remains through a FieldFox Preset.
- Page 774 System SettingsFUTURE Display (Settings) Display Colors Change Display Colors to alter the viewing scheme. How to set Display Colors 1. Press System 7 > Display Display Colors > 2. Then choose one of the following: Indoor Outdoor Dusk Outdoor Clouds Outdoor Sun Night Vision Trace Width...
- Page 775 System SettingsFUTURE Display (Settings) How to add or edit a Title 1. Press System 7 > Display Title > 2. Then enter or edit a title using the FieldFox labeler. This is the same labeler function that is used to name files. Learn how to use the labeler in “How to use the FieldFox labeler ”...
- Page 776 System SettingsFUTURE Utilities Utilities FieldFox utilities settings will not survive a shut down. When your FieldFox is turned OFF, then back ON, these settings default to their factory settings. For information on the Phase Array Antenna and EMF Antennas softkeys, refer to Chapter 14, “5G Rapid Prototype Phased Array Antenna –...
- Page 777 System SettingsFUTURE Utilities How to view and change the Frequency Extender (Freq Extnd) Settings The following are the only supported modes for the frequency extender feature: SA (Option 233), mixed analyzers, RTSA (Option 350), IQA (Option 351), OTA (Option 370/377/378), PAA (Option 360) modes, and VSA (via the Remote Server feature).
- Page 778 System SettingsFUTURE Utilities The frequency extender heads are an external down converter that extends the FieldFox's range. The frequency extender head makes use of the FieldFox's source and uses USB port for power. The FieldFox support for the frequency extender head includes: —...
- Page 779 System SettingsFUTURE Utilities 2. To select the frequency extender head, use the numeric keypad, arrows, or rotary knob to change the value. 3. Press Recall File to make the highlighted head the current selection. 4. Press Freq Extnd ON OFF to enable the frequency extender head.
- Page 780 System SettingsFUTURE Utilities To select a setting/value to edit, use the numeric keypad, arrows, or rotary knob to change the value. Refer to Figure 31-4 on page 779. It is important to save any changes that are made to the Settings table. If the Setup Corr softkey is reset to Auto, it will recall the last "...Default.csv"...
- Page 781 System SettingsFUTURE Utilities Figure 31-1 FieldFox with OML Downconverter Keysight N9915-90020 User’s Guide...
- Page 782 System SettingsFUTURE Utilities Figure 31-2 FieldFox Frequency Converter High Sensitivity (ON: Narrow—Lowest Noise Floor—Displayed) Figure 31-3 FieldFox Frequency Extender Select Frequency Extender Head Keysight N9915-90020 User’s Guide...
- Page 783 System SettingsFUTURE Utilities Figure 31-4 FieldFox Frequency Converter Corrections Table Figure 31-5 FieldFox Frequency Converter (Freq Extend) On And Corrections (eCorr) Enabled (SA mode shown; other compatible modes are similar.) Keysight N9915-90020 User’s Guide...
- Page 784 System SettingsFUTURE Preferences Figure 31-6 FieldFox Frequency Converter (Freq Extend) On And Corrections (eCorr) Enabled (RTSA mode shown; other compatible modes are similar.) Preferences FieldFox preferences are settings that survive a shut down. When your FieldFox is turned OFF, then back ON, these settings remain. All preference settings can be restored to their factory defaults.
- Page 785 System SettingsFUTURE Preferences How to view and change Preference Quick Settings 1. Press System 7 > Preferences Preferences > 2. Press Next Page Previous Page to view all settings. 3. To change a setting: a. Use the arrows ( ) to highlight a setting. b.
- Page 786 System SettingsFUTURE Preferences Settings “Quick Save Editing” on page 789 “Group Save File Types Editing” on page 790 “CAT (Distance Units)” on page 791 “CAT/NA” on page 792 “SA” on page 792 “Scripting” on page 751 “Discrete Colors Softkey Menu” on page 794 - Part of Preferences softkey menu.
- Page 787 System SettingsFUTURE Preferences How to select Global Settings: 1. Press System 7 > Preferences Preferences > 2. Then use arrow softkeys ( ) or the knob to select Global Settings 3. Then Edit for each of the following: — Language (see) —...
- Page 788 System SettingsFUTURE Preferences Battery Saver is the ONLY FieldFox setting that must be made as a Preference from the Quick Settings table. This setting remains until you change it again. The FieldFox internal temps will run 2°C – 5°C cooler with the Battery Saver on (the temperature range is dependent on the ambient temp).
- Page 789 System SettingsFUTURE Preferences Startup Option The Startup Option setting determines the behavior of the FieldFox after a restart. An instrument can never power up for the first time in LAST. If line power to the instrument is interrupted, by any of the following, Last Power Off State may not work properly: –...
- Page 790 System SettingsFUTURE Preferences — Night Vision — Outdoor Sun — Outdoor Dusk — Outdoor Clouds 4. Trace Width — Normal (default) — Wide Setting trace width to Wide, will result in slower trace refresh rates. 5. Brightness — 0 to 100% (80% default) 6.
- Page 791 System SettingsFUTURE Preferences Date and Time Choose the Date and Time values (Date and Time, Time Format, Date Format, and Time Zone). See also “Date and Time, Format, and Time Zone Settings” on page 803. How to select Date and Time units: 1.
- Page 792 System SettingsFUTURE Preferences — Off (default) — Internal — External — Display — On — Off — Lat/Lon Format — dddº mm’ ss.sss” — ddd.dddddddº — dddº mm.mmmmm’ — Brit. Natl. Grid — Then Done Edit (for each change in setting) Frequency Reference When Internal or External is selected, a search is made for satellites overhead.
- Page 793 System SettingsFUTURE Preferences automatically when Frequency Reference Source is set to GPS. Learn more in “Frequency Reference Source” on page 800. File folders When enabled, FieldFox uses the last selected Device and Folder location as the default device location after instrument power cycle. Before setting the preferences for the File Folders, you must select the Device and Folder locations.
- Page 794 System SettingsFUTURE Preferences To save the User Device storage location, refer to Chapter 33, “File Management.” IMPORTANT! To avoid losing data, before using the Quick Save feature, verify that you have all of the correct data file types enabled for saving. 1.
- Page 795 System SettingsFUTURE Preferences 3. Use arrow keys or knob to scroll down to until your choice is highlighted then: 4. Press Edit then 5. Press ’file type’ Data (.xxx) to enable/disable the data file type (default = Off). (e.g., Image (.png) ON OFF, CSV Data (.csv) ON OFF, etcetera).
- Page 796 System SettingsFUTURE Preferences — Distance Units: — Meters (default) — Feet — Inches — TDR Sweep: — Cable (default and the most accurate) — Auto 3. Then Done Edit (after each change in setting) CAT/NA Choose the CAT/NA settings for SnP file save, default factory error corrections, extended cal default.
- Page 797 System SettingsFUTURE Preferences 1. Press System 7 > Preferences Preferences Next Page until the > > setting is visible. 2. Then use arrow softkeys or the knob to select the Setting. 3. Then Edit for each of the following: — Individual measurement Control —...
- Page 798 System SettingsFUTURE Preferences See also, http://na.support.keysight.com/fieldfox/help/Programming/webhelp/FFProg rammingHelp.htm. Lua-Related Script Links https://keplerproject.github.io/luafilesystem/manual.html#reference http://w3.impa.br/~diego/software/luasocket/socket.html The Lua language and runtime are a mature and proven system used widely in industry. Lua’s strengths including execution speed, small footprint, embeddability, and robust security (sandboxing) make it a great fit for use in FieldFox.The Lua language provides all expected usual and useful features in a modern structured programming language, such as variable storage, looping, dynamic typing, automatic memory management, extensibility mechanisms,...
- Page 799 System SettingsFUTURE Preferences Figure 31-7 Preference Table With Script Enabled and Startup Script Selected Keysight N9915-90020 User’s Guide...
- Page 800 System SettingsFUTURE Preferences Figure 31-8 Choosing a Lua Script Keysight N9915-90020 User’s Guide...
- Page 801 System SettingsFUTURE Discrete Colors Softkey Menu Discrete Colors Softkey Menu The discrete colors softkey menu can be used to increase the choice of colors displayed from two to up to six colors, for easier measurement readings. Refer Figure 31-7. Figure 31-9 Display Example: Color Coded Bar Scale (x6 Colors) Using the Discrete Colors Softkey Menu 1.
- Page 802 System SettingsFUTURE System Configuration 1. Insert the USB Flash Drive in the FieldFox. 2. Press System 7 > System Configuration Options (Licensing) > 3. Then Install Options The FieldFox reads, validates, then installs the options. 4. Press and hold the power button to shut down, then restart the FieldFox. How to Delete ALL Options Deleting individual options is NOT supported.
- Page 803 System SettingsFUTURE System Configuration — Without Option 307, GPS is usable ONLY with an external GPS receiver that is shipped with Microsoft “Streets and Trips” and “AutoRoute”. The GPS receiver is NOT available from Keysight. Only the GPS USB receiver is used with the FieldFox.
- Page 804 System SettingsFUTURE System Configuration Figure 31-10 GPS Display — The left portion of the screen displays satellites and the corresponding number on the adjacent Satellite Power chart. — The right portion of the screen displays Satellite Power Carrier to Noise (C/No) dBHz values on the tops of the satellite power chart.
- Page 805 System SettingsFUTURE System Configuration — Ant: OK – antenna present and working. — Ant: OPEN – antenna is not drawing DC bias current. This could occur when an active antenna is not connected properly or the antenna does not require DC bias current.
- Page 806 System SettingsFUTURE System Configuration Antenna Voltage — Choose from: 3.3V 5V — – Settable to: 3.5 VDC or 5 VDC. When the bias voltage is set to ON and when the GPS is set to Internal. This system was designed for an active antenna such as the Keysight N9910X-825 Saving Data with GPS Enabled GPS position and clock data are included when data is saved with the following files types: *.csv, *.SnP, State, State+Trace data save.
- Page 807 System SettingsFUTURE System Configuration GNSS and GPS Freq Ref Source Settings For convenience, the GNSS Settings menu includes the Freq Ref Source softkey. 1. Press System > System Configuration GNSS (GPS+) Freq Ref Source > > [GPS] then 2. Choose one of the following: —...
- Page 808 System SettingsFUTURE System Configuration — when Reference Source is set to Internal. — when the FieldFox resumes from Standby mode or shut down. Frequency Reference Status When switched to Ext or GPS, one of the following annotations appears in the lower-left corner of the screen: EXT R —...
- Page 809 System SettingsFUTURE System Configuration The voltage is output through an SMB (m) output connector located on the left-side panel. See the connector in “Left Side Panel” on page An optional SMB (f) to BNC (m) bias-tee power cable is available with Keysight part number: N9910X-713.
- Page 810 System SettingsFUTURE System Configuration 2. Then choose from the following: — None All frequency settings are visible. — High Frequency information is blanked from the following: — Display annotation — Softkeys — Marker display and marker table — Calibration properties —...
- Page 811 System SettingsFUTURE System Configuration How to MANUALLY set Date and Time, Format, and Time Zone Because of licensing security, the manual and GPS Sync methods to set Date and Time are restricted as follows: – Can be set backward no more than 5 hours at a time. –...
- Page 812 System SettingsFUTURE System Configuration Table 31-1 LAN LEDs LAN LEDs When FieldFox is connected to the LAN, the flashing LAN LEDs have the following definitions: Green: Flashing indicates packets are being transferred. Yellow: — Flash, pause = 10 Mbit link speed —...
- Page 813 System SettingsFUTURE System Configuration — Static IP Address - Enter the IP Address – including periods - in the format nnn.nnn.nnn.nnn For all FieldFoxes with firmware ≤A.08.18 and ≤A.09.50 FW, when using Static IP addresses: – Either a valid Static Gateway is required or 0.0.0.0. –...
- Page 814 System SettingsFUTURE System Configuration FieldFox Package Installer The FieldFox Package Installer enables you to download new versions of firmware from either a USB memory or SD Card. Additionally, the Utility softkey enables you to backup user files or restore user files. How to run the Installer Before running the Installer to update your firmware, you might want to back up your user data.
- Page 815 System SettingsFUTURE Service Diagnostics 3. Press Cancel to exit without backing up your files and returning to the initial Installer menu. How to restore files “How to backup This procedure restores user files from a USB or SD card. See also files”...
- Page 816 System SettingsFUTURE Service Diagnostics — The Service diagnostics menu is generally used to display service-related information. To access these menu items, press System 7 then Service Diagnostics. System Information The System information table shows important information about your FieldFox. The following is the most useful information: —...
- Page 817 System SettingsFUTURE Service Diagnostics Erase User Data IMPORTANT! The process in this section erases all User Data from the FieldFox. Before proceeding, Keysight strongly recommends that you back up all of your User Data to an external storage device. refer to “How to backup files”...
-
Page 818: Saving And Recalling Files
System SettingsFUTURE Understanding the Fan Controls Understanding the Fan Controls If the FieldFox displays a “Fan Stuck” or “Error: Internal Fan has stopped spinning”, to avoid incorrect measurements and possibly damaging your FieldFox, shut your FieldFox down and contact Keysight. Refer to “Contacting Keysight”... - Page 819 System SettingsFUTURE Understanding the Fan Controls Fan Error Messages The FieldFox displays fan error messages, when the fan is not functioning properly. Refer to Figure 31-11, Figure 31-12 on page 813, and Figure 31-13 on page 813. If the FieldFox displays a “FanStuck” or “Error: Internal Fan has stopped spinning”...
- Page 820 System SettingsFUTURE Understanding the Fan Controls Figure 31-14 Persistent Fan Stuck Error Message Figure 31-15 Fan: Service Message Keysight N9915-90020 User’s Guide...
- Page 821 Keysight Handheld Analyzers N99xxC User’s Guide 32 Using the Mini-USB Port to send SCPI Commands and Queries IMPORTANT! It is recommended that only USB certified cables are used with the FieldFox. In this Chapter “Mini-USB Connection to PC with IO Libraries” on page 815 Mini-USB Connection to PC with IO Libraries The FieldFox comes with a mini-USB port that can be used to connect to your PC’s standard USB 2.0 port.
- Page 822 Using the Mini-USB Port to send SCPI Commands and Queries Mini-USB Connection to PC with IO Libraries — In the Keysight Interactive IO window: Type in your SCPIs on the Command line and click Send Command, Read Response, or Send & Read. Refer to Figure 32-1 on page 816.
- Page 823 Keysight Handheld Analyzers N99xxC User’s Guide 33 File ManagementFUTURE The FieldFox can save any of the following types of files: — Current settings and calibration — Trace data (*.csv, *.S1P, *.S2P) — Picture of the FieldFox screen In addition, files can be saved to the internal memory, a USB Flash drive, or a standard SD card.
- Page 824 File ManagementFUTURE Saving and Recalling Files Saving and Recalling Files FieldFox State files are intended to be recalled on the same instrument model on which they were saved. Sometimes you may able to recall them within model families. An error will result when trying to recall a state file that was saved on a different model family.
- Page 825 File ManagementFUTURE Saving and Recalling Files If you are having difficulty saving to a USB flash drive, it may be a timing issue. The turn-around time for “file open, write data, file close” to a USB drive is much longer than to FieldFox’s internal memory. Alternative methods are: –...
- Page 826 File ManagementFUTURE Saving and Recalling Files Figure 33-1 I/Q Analyzer Mode (IQA) MATLAB File Save Keysight N9915-90020 User’s Guide...
- Page 827 File ManagementFUTURE Saving and Recalling Files Figure 33-2 VSA Software MATLAB File Save How to use the FieldFox labeler The FieldFox labeler is used to edit or change the current filename. It is also used for many other labeling functions, such as creating a title, prefix, and “How to keyword to display on the FieldFox screen.
- Page 828 File ManagementFUTURE Saving and Recalling Files The preselected keywords (File, Site, and so forth) can be selected just like a single character. These keywords can also be edited. Learn more in “Edit Keywords” on page 828. Figure 33-3 The FieldFox labeler In the graphic above, the current filename is File_0.
- Page 829 File ManagementFUTURE Saving and Recalling Files — If the filename already exists, you are prompted to choose from the following: — Press to overwrite the existing file. Cancel — Press to return to edit the filename. Recall Files The FieldFox can recall State files, Trace + State files, and image files. State Files ALL FieldFox instrument settings for ALL Modes are saved and recalled in a *.sta file.
- Page 830 File ManagementFUTURE Saving and Recalling Files How to move a file 1. Press Save/Recall 9 2. Then Device to be copied from (i.e., Internal, SD, or USB). Refer to “Set File Type and Select Device” on page 823. 3. Then More Manage Files Select Files...
- Page 831 File ManagementFUTURE Saving and Recalling Files — Saves/Recalls/Moves (Copies) files to or from a USB Flash drive (not included) that is inserted in one of the USB connectors. Only the root folder is available. Insert only ONE USB Flash Drive in the FieldFox when saving or copying files.
- Page 832 File ManagementFUTURE Saving and Recalling Files Group — Saves a group of file types that have been selected in the Preferences menu. Learn more, see “Group Save File Types Editing” on page 790. — Data (S1P) / (S2P) Saves CAT and NA Mode trace data to an *.S1P or *.S2P file, depending on the active measurement.
- Page 833 File ManagementFUTURE Saving and Recalling Files > What Data Processing functions are included in saved SNP Data: In NA Mode, the data processing functions (such as trace math) that are included in the SNP data depends on a Preference setting. Click System, then Preferences, then Preferences, then scroll to NA, SNP File Save, then select from the following: Default...
- Page 834 File ManagementFUTURE Saving and Recalling Files Copy to Internal, Copy — Then select a device to copy the file to. Choose from to USB (must be inserted), or Copy to SD Card (must be inserted). Do Copy — to complete the file copy to the media/folder selected. Copy can be done to any FieldFox internal folder, standard SD folder, or USB storage device.
- Page 835 File ManagementFUTURE Saving and Recalling Files Manage Folders You can create new folders, delete old folders, and select the active folder to which files can be saved. The Parent folder [..] is listed when not in the root directory. Creating and Managing Folders 1.
- Page 836 File ManagementFUTURE Saving and Recalling Files How to edit keywords 1. Press Save/Recall 9 > More Edit Keywords > 2. Then Next Page Previous Page to view all keywords. — Use the arrows to select a keyword to edit. — When a keyword is selected, then press Edit. —...
- Page 837 File ManagementFUTURE Saving and Recalling Files “How to move the cursor” on page 821. — — “When the Prefix is complete” on page 831. — “How to enable/disable Auto Append (Number and Date)” on page 832. How to edit the Prefix and Suffix (Auto Append) If you want to edit a prefix on a finite set of files one time, refer to “Manage Files”...
- Page 838 File ManagementFUTURE Saving and Recalling Files ——Cancel to cancel edits and return to the previous menu. —— Done to save changes and return to previous softkey menu. Edit Number Suffix — – Sets the Auto Append number suffix formatting (e.g., “0001”).
- Page 839 File ManagementFUTURE Saving and Recalling Files How to enable/disable Auto Append (Number and Date) 1. Press Save/Recall 9 > More Prefix Suffix > 2. Then Auto Append — (default) to disable the Auto Append (number suffix) on subsequently saved files. The Edit Number Suffix softkey is grayed out (inactive).
- Page 840 File ManagementFUTURE Press Printing Press Printing The current screen or selected files can be printed using a PCL-compatible printer (like older HP Deskjet printer) connected to one of the FieldFox USB ports. Newer PCL3GUI photo and all-in-one printers are NOT supported. Measurements can also be printed using the FieldFox Data Link software.
- Page 841 Keysight Handheld Analyzers N99xxC User’s Guide 34 Working with the Lithium-Ion Battery In this Chapter “Viewing the Battery Charge Status” on page 835 “Charging the Battery” on page 837 “Reconditioning Battery” on page 840 “Battery Care” on page 840 “Maximizing Battery Life” on page 840 “Lithium-Ion Battery Disposal”...
- Page 842 Working with the Lithium-Ion Battery Viewing the Battery Charge Status Table 34-1 Front Panel Icons Icon Status Battery not charging with 84% battery life remaining. Battery fully charged. A fully charged battery MAY NOT read 100%. Service Diagnostics—Battery Screen The Battery screen displays the following information. To access the screen, select System then Service Diagnostics then Battery.
- Page 843 Working with the Lithium-Ion Battery Charging the Battery The battery in your FieldFox will have either 4 or 5 LED segments. 5-segment Charge 4-segment Gauge Charge Remaining Gauge Remaining ≥80% ≥75% 5 segments 4 segments 4 segments 60% to 79% 3 segments 50%,to 74% 3 segments...
- Page 844 Working with the Lithium-Ion Battery Charging the Battery Figure 34-1 AC/DC Adapter To charge a battery inside the FieldFox, insert the AC/DC adapter plug into the Power connector on the FieldFox side panel, then plug the adapter into an AC outlet.
- Page 845 Working with the Lithium-Ion Battery Charging the Battery Using the External Battery Charger (N9910X–872) Read the safety information in “For the External Battery Charger (N9910X-872)” on page 847 Figure 34-2 External Battery Charger (N9910X-872) The external battery charger (N9910X–872), lets you charge a fully depleted battery in approximately three hours.
- Page 846 Working with the Lithium-Ion Battery Reconditioning Battery Reconditioning Battery Reconditioning a battery can be performed ONLY with the External Battery Charger (N9910X–872). 1. Insert a battery into the left bay of the external charger. 2. Press the button labeled Push to Recalibrate Left Battery Bay 3.
- Page 847 Regulations vary for different countries. Dispose of the battery in accordance with local regulations. Keysight Technologies, through Rechargeable Battery Recycling Corporation (RBRC), offers free and convenient battery recycling options in the U.S. and Canada.
- Page 848 Working with the Lithium-Ion Battery Lithium-Ion Battery Disposal Keysight N9915-90020 User’s Guide...
- Page 849 Keysight Handheld Analyzers N99xxC User’s Guide 35 Safety Considerations Keysight has designed and tested the FieldFox in accordance with IEC Publication 61010-1Safety Requirements for Electrical Equipment for Measurement, Control and Laboratory Use, and the FieldFox is supplied in a safe condition. The FieldFox is also designed for use in Installation Category II and pollution Degree 2 per IEC 61010-1.
- Page 850 Safety Considerations For the FieldFox For the FieldFox No operator serviceable parts inside except for the lithium-ion battery. Refer servicing to qualified personnel. To prevent electrical shock do not remove covers. If this product is not used as specified, the protection provided by the equipment could be impaired.
- Page 851 Safety Considerations For the FieldFox When performing a measurement, ensure that the right safety and performance ratings of the instrument and accessories are used. Do not expose the circuit or operate the instrument without its cover or while power is being supplied. Do not operate the instrument in any environment at risk of explosion.
- Page 852 Safety Considerations For the AC/DC Adapter For the AC/DC Adapter Use only the designated AC/DC adapter supplied with the instrument. Use only the designated power cord supplied with the AC/DC adapter. Operated at an ambient temperature: 0 to 40°C; full power rating; derate linearly at a rate of 3 watts per degree C, from 90W at 40°C to 45W at 55°C, 30W at –20°C.
- Page 853 Safety Considerations For the External Battery Charger (N9910X-872) AC/DC adapter has an auto–ranging line voltage input – be sure the supply voltage is within the specified range and voltage fluctuations do not to exceed 10 percent of the nominal su pply voltage.
- Page 854 High Capacity Lithium Battery (N9910X-876) Lithium battery (High Capacity): N9910X-876 (battery Keysight part number: 1420-0937) is used to provide power to a family of portable microwave test instruments produced by Keysight Technologies. Be sure to follow these safety warnings: External battery, U.S.
- Page 855 Safety Considerations For the Battery Do not solder directly onto the battery. Do not expose the battery to water or salt water, or allow the battery to get wet. Do not disassemble or modify the battery. The battery contains safety and protection devices, which if damaged, may cause the battery to generate heat, explode, or ignite.
- Page 856 Safety Considerations For the Battery Standard Capacity Battery (N9910X-870) Lithium–ion batteries: — Must not be exposed to high temperatures (>70°C) or fire. — Must be kept away from children. — Must not be short circuited. — Must be replaced only with Keysight qualified Li–ion batteries. —...
- Page 857 Safety Considerations For the Battery Do not discharge the battery using any device except the FieldFox or the external battery charger (N9910X–872). When the battery is used in a device other than those specified, it may damage the battery or reduce its life expectancy. If the device causes an abnormal current to flow, it may cause the battery to become hot, explode, or ignite and cause serious injury.
- Page 858 Safety Considerations Battery Protective Functions Battery Protective Functions This section contains the following: — “Battery Protective Functions (N9910X-876)” — “Battery Protective Functions (N9910X-870)” on page 854 Battery Protective Functions (N9910X-876) The following protective functions are designed into the lithium-ion rechargeable battery system used in FieldFox. The protective functions can be divided between two categories: active and passive.
- Page 859 Safety Considerations Battery Protective Functions Overtemperature Discharging: The system microcontroller prevents the battery from being discharged if the cell temperature exceeds 67C. Once the overtemperature discharging protection is tripped, the battery is automatically shut off which results in turning off the instrument as well. Passive Protection Reverse Charging: A reverse protection diode prevents against damage or lost data due to a reverse charge polarity applied to the battery terminals.
- Page 860 Safety Considerations Battery Protective Functions Battery Protective Functions (N9910X-870) The following protective functions are designed into the lithium-ion rechargeable battery system used in FieldFox. The protective functions can be divided between two categories: active and passive. Active protection refers to the type of protection that depends on at least two or more protection devices working together to enable the protection Passive protection refers to the type of protection that is always enabled independent of any other protection device.
- Page 861 Safety Considerations Batteries: Safe Handling and Disposal Overtemperature Charging: The system microcontroller prevents the battery from being charged if the cell temperature exceeds 46C. Once the overtemperature charging protection is tripped, the cell temperature has to drop to or below 45C to reset the protection and permit charging. Overtemperature Discharging: The system microcontroller prevents the battery from being discharged if the cell temperature exceeds 65C.
- Page 862 Safety Considerations Environmental Requirements Environmental Requirements Refer to the FieldFox Specifications in Appendix B:, “Specifications/Data Sheet,” on page 869. Electrical Requirements The FieldFox allows you to use either the lithium-ion battery or the AC/DC adapter - both are included. Electrostatic Discharge (ESD) Precautions The FieldFox was constructed in an ESD protected environment.
- Page 863 Safety Considerations FieldFox Markings This symbol marks the OFF position of the power line switch. This symbol indicates that the input power required is AC. This symbol indicates DC voltage This symbol indicates a three-phase alternating current. This symbol indicates Frame or chassis Terminal. The instruction documentation symbol.
- Page 864 Safety Considerations FieldFox Markings Two person lift required. Canada EMC label. Interference-Causing Equipment Standard for industrial, scientific and medical (ISM) equipment. Matériel industriel, scientifique et médical (ISM). CE/ICES/ISM label. (Old mark for reference only.) This is a space saver label that combines three markings - CE with CAN ICES and ISM (see above) and ISM (see below).
- Page 865 Safety Considerations Battery Markings Battery Markings The table below lists the definitions of markings that may be on or with the product. Familiarize yourself with each marking and its meaning before operating the instrument. All labels and symbols may not apply to the instrument. The CE marking is a registered trademark of the European Community (if accompanied by a year, it is the year when the design was proven).
- Page 866 Safety Considerations Battery Markings The UL Marks are registered certification marks of Underwriters Laboratories Inc. (UL). It means that UL has tested and evaluated representative samples of that product and determined that it meets UL's safety requirements. When accompanied by a 'C' and 'US', it indicates compliance to both Canadian and US requirements.
- Page 867 Safety Considerations Battery Markings This symbol marks the standby position of the power line switch. This symbol marks the ON position of the power line switch. This symbol marks the OFF position of the power line switch. This symbol indicates the input power required is AC. This symbol indicates DC voltage.
- Page 868 Safety Considerations Packaging Markings Packaging Markings Universal recycling symbol. This symbol indicates compliance with the China standard GB 18455–2001 as required by the China RoHS regulations for paper/fiberboard packaging. AC/DC Adapter Markings The table below lists the definitions of markings that may be on or with the product.
- Page 869 Safety Considerations AC/DC Adapter Markings Korean Certification (KC) mark; includes the marking’s identifier code. GOST, Russia’s safety and EMC mark. AC (Alternating Current). Direct current (DC) equipment CAUTION, risk of danger, refer to safety information in manual. DC connector polarity Ingress Protection Code Operating instructions should be considered when operating the device.
- Page 870 Safety Considerations AC/DC Adapter Markings India mark from the Bureau of Indian standards. IS 13252 is the equivalent India standard to IEC 60950-1. IRAM/S-mark is the safety mark for Argentina. The crossed out wheeled bin symbol indicates that separate collection for waste electric and electronic equipment (WEEE) is required, as obligated by the EU DIRECTIVE and other National legislation.
- Page 871 Certification Keysight Technologies, Inc. certifies that this product met its published specifications at the time of shipment from the factory. Keysight Technologies, Inc. further certifies that its calibration measurements are traceable to the United States National Institute of Standards and Technology, to the extent allowed by the Institute's calibration facility, and to the calibration facilities of other International Standards Organization members.
- Page 872 Safety Considerations Certification and Compliance Statements Manufacturer’s Declaration This product has been designed and tested in accordance with accepted industry standards, and has been supplied in a safe condition. The documentation contains information and warnings that must be followed by the user to ensure safe operation and to maintain the product in a safe condition.
- Page 873 Proper connector care and connection techniques are critical for accurate and repeatable measurements. The following table contains for tips on connector care. Prior to making connections to your analyzer, carefully review the information about inspecting, cleaning, and gauging connectors. For course numbers about additional connector care instruction, contact Keysight Technologies.
- Page 874 Connector Care Review Connector Care Table Connector Care Table Handling and Storage Do Not — Keep connections clean — Touch mating-plane surfaces — Extend sleeve or connector nut — Set connectors contact-end down — Use plastic end-caps during storage — Store connectors or adapters loose Visual Inspection Do Not —...
- Page 875 Keysight Handheld Analyzers N99xxC User’s Guide Specifications/Data Sheet To ensure the highest accuracy and consistency, the FieldFox Specifications are now stored ONLY at: https://www.keysight.com/us/en/products/network-analyzers/fieldfox-hand held-rf-microwave-analyzers.html (Under Featured Resources section)
- Page 876 Specifications/Data Sheet Keysight N9915-90020 User’s Guide...
- Page 877 Keysight Handheld Analyzers N99xxC User’s Guide Instrument Calibration Over time, the active components in the FieldFox age and the performance may degrade or drift. To ensure that the FieldFox is performing to the published specifications, you should have an instrument calibration performed periodically.
- Page 878 Instrument Calibration What Are My Choices of Instrument Calibration? What Are My Choices of Instrument Calibration? The following types of instrument calibration are available from Keysight Technologies service center: Includes the test data from the calibration and the Keysight Calibration certificate of calibration, stating the instrument has been calibrated and is operating within the published specifications.
- Page 879 Keysight Handheld Analyzers N99xxC User’s Guide Korean Battery Safety Translation...
- Page 880 Korean Battery Safety Translation Keysight N9915-90020 User’s Guide...
- Page 881 Korean Battery Safety Translation Keysight N9915-90020 User’s Guide...
- Page 882 Korean Battery Safety Translation Keysight N9915-90020 User’s Guide...
- Page 883 Korean Battery Safety Translation Keysight N9915-90020 User’s Guide...
- Page 884 Korean Battery Safety Translation Keysight N9915-90020 User’s Guide...
- Page 885 Korean Battery Safety Translation Keysight N9915-90020 User’s Guide...
- Page 886 Korean Battery Safety Translation Keysight N9915-90020 User’s Guide...
- Page 887 Korean Battery Safety Translation Keysight N9915-90020 User’s Guide...
- Page 888 Korean Battery Safety Translation Keysight N9915-90020 User’s Guide...
- Page 889 Keysight Handheld Analyzers N99xxC User’s Guide Russian Battery Safety Translation...
- Page 890 Russian Battery Safety Translation Keysight N9915-90020 User’s Guide...
- Page 891 Russian Battery Safety Translation Keysight N9915-90020 User’s Guide...
- Page 892 Russian Battery Safety Translation Keysight N9915-90020 User’s Guide...
- Page 893 Russian Battery Safety Translation Keysight N9915-90020 User’s Guide...
- Page 894 Russian Battery Safety Translation Keysight N9915-90020 User’s Guide...
- Page 895 Russian Battery Safety Translation Keysight N9915-90020 User’s Guide...
- Page 896 Russian Battery Safety Translation Keysight N9915-90020 User’s Guide...
- Page 897 Russian Battery Safety Translation Keysight N9915-90020 User’s Guide...
- Page 898 Russian Battery Safety Translation Keysight N9915-90020 User’s Guide...
- Page 899 Russian Battery Safety Translation Keysight N9915-90020 User’s Guide...
- Page 900 Russian Battery Safety Translation Keysight N9915-90020 User’s Guide...
- Page 901 Keysight Handheld Analyzers N99xxC User’s Guide Keysight Software End-User Licensing Agreement (EULA)
- Page 902 Keysight Software End-User Licensing Agreement (EULA) Keysight N9915-90020 User’s Guide...
- Page 903 Keysight Software End-User Licensing Agreement (EULA) Keysight N9915-90020 User’s Guide...
- Page 904 Keysight Software End-User Licensing Agreement (EULA) Keysight N9915-90020 User’s Guide...
- Page 905 Index Numerics AM FM Tune & Listen , 170, AM/FM Metrics, error markings 1-port cable loss messages maximizing life measurements AM/FM Metrics, Option protective functions , 852, CAT mode safe handling 1-port cable loss, CAT AM/FM Metrics,error saver mode messages service diagnostics 1-Port Cable Trimming VVM Amplitude Alignment...
- Page 906 Index 2-port insertion loss display error measurements brightness meas UNCAL , 188, 189, calibration colors red flashing LED, external DTF settings front panel battery charger , 66, 78, 91, 115, return loss measurements preferences red red flashing LED, external settings settings battery , 51, 557,...
- Page 907 Index range, setting resolution , 53, , 56, range, step size 2-port insertion loss scale , 53, step size measurement sweep time , 56, Frequency Counter at SA sweep type , 55, 103, Marker , 218, DTF measurements trace averaging , 64, , 54, 55, frequency extender...
- Page 908 Index markers,using settings , 488, measurement,parameters Mapping, Option 352 Phased Array Antenna Mapping,Record/Playback USB antenna measurements,about marker measurements measurements,how to table 1-port cable loss make markers measurements, CAT trace display states Coupled (NA Mode) mode IQA mode creating 1-port cable loss, CAT settings delta mode...
- Page 909 Index multiplier abbreviations OTA troubleshooting Power Spectral Density , 222, multipliers Output Power Multi-Trace Configurations NA Mode power, maximum , 107, multi-trace configurations output power Preferences , 57, 58, 107, overpowering, avoid preferences Over-The-Air prefixes for file names , 829, overview preparing for initial use NA Factory Cal...
- Page 910 Index resolution bandwidth, EMI screen front panel spectrum analyzer mode , 147, mode Security Level 255, 535, 555, 565, resolution bandwidth, NF select Spectrum Emission Mask mode language (SEM) - (SA Mode Only) resolution bandwidth, RTSA sending SCPI commands, stand-by mode mode mini-USB port Startup Mode...
- Page 911 Index transform charge status, battery , 766, Transform Window transform window installed options , 782, triggering - RTSA mode viewing and changing Triggering - SA Mode frequency extender , 197, triggering - SA mode Volume Control , 105, volume control troubleshooting sensors,LAN troubleshooting,OTA...
- Page 912 Index Keysight N9915-90020 User’s Guide...
- Page 914 This information is subject to change without notice. 4-2023 © Keysight Technologies 201 August Edition www.keysight.com...
Need help?
Do you have a question about the C Series and is the answer not in the manual?
Questions and answers