Keysight Technologies UXA N9040B Getting Started And Troubleshooting Manual
X-series signal analyzer
Hide thumbs
Also See for UXA N9040B:
- Manual (88 pages) ,
- Installation note (11 pages) ,
- Installation notes (27 pages)
Table of Contents
Advertisement
Quick Links
Keysight X-Series
Signal Analyzer
This manual provides documentation for the following X-Series
Analyzers running the Microsoft Windows 10 operating system:
UXA Signal Analyzer N9040B
PXA Signal Analyzer N9030B
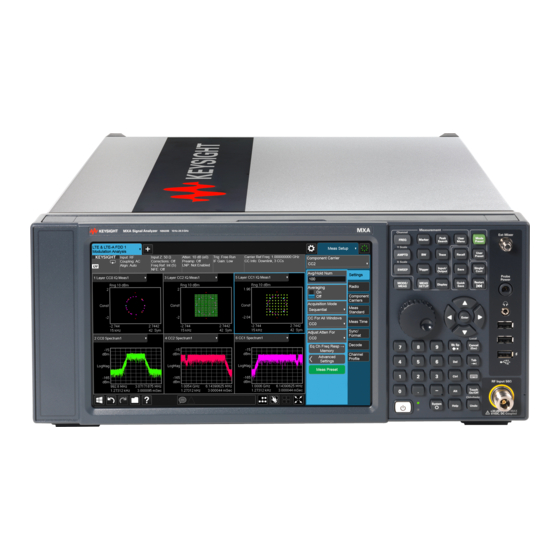
MXA Signal Analyzer N9020B
EXA Signal Analyzer N9010B
CXA Signal Analyzer N9000B
Getting Started and
Troubleshooting
Guide
Advertisement
Table of Contents

Related Manuals for Keysight Technologies UXA N9040B


Summary of Contents for Keysight Technologies UXA N9040B
- Page 1 Keysight X-Series Signal Analyzer This manual provides documentation for the following X-Series Analyzers running the Microsoft Windows 10 operating system: UXA Signal Analyzer N9040B PXA Signal Analyzer N9030B MXA Signal Analyzer N9020B EXA Signal Analyzer N9010B CXA Signal Analyzer N9000B Getting Started and Troubleshooting Guide...
- Page 2 Notices © Keysight Technologies, Inc. display, or disclose commercial WITH WARRANTY TERMS COVERING THE MATERIAL IN THIS 2018 computer software or DOCUMENT THAT CONFLICT WITH commercial computer software No part of this manual may be THESE TERMS, THE WARRANTY documentation. No additional...
- Page 3 In This Guide… This guide contains the following information: 1 Quick-Start This chapter explains how to initialize the signal analyzer and view a signal. 2 Front and Rear Panel Features Refer to this chapter for information on front- and rear-panel key functionality, and display annotations. 3 Instrument Operating System This chapter describes the Microsoft Windows 10 configuration and the settings used with the Keysight instrument software.
- Page 4 Where to Find the Latest Information Documentation is updated periodically. For the latest information about these products, including instrument software upgrades, application information, and product information, browse to one of the following URLs, according to the name of your product: http://www.keysight.com/find/N9040B http://www.keysight.com/find/N9030B http://www.keysight.com/find/N9020B...
-
Page 5: Table Of Contents
Contents Contents 1 Quick Start Initial Inspection Verify the Contents Shipping Problems? Instrument Location and Rack Mounting Requirements Locating the analyzer Cooling and rack mounting Turning on the Analyzer the First Time Initializing the analyzer Anti-Virus Software and Firewalls Instrument Information Power requirements Protecting Against Overpowering Instrument Maintenance... - Page 6 Contents Microsoft Windows Installed Software Signal analyzer software Vector signal analyzer software Customer installation of software 3rd Party Software verified by Keysight Installation of other 3rd Party Software User Accounts Administrator account Instrument accounts KeysightOnly user account Service user accounts Customer creation of accounts Keysight X-Series Analyzer Licensing Options Fixed Licenses...
- Page 7 Contents Windows Firewall Automatic Updates Virus Protection Spyware Protection System Maintenance Backup System Restore Disk Defragmenting USB Connections Disk Drive Partitioning and Use Backing-up the factory calibration data Disk Drive Recovery Process Updating the software (required after a recovery) 4 Using Windows Tools Navigating Windows Without a Mouse Remote Desktop: Using the X-Series Signal Analyzers Remotely Overview of Remote Desktop operation...
- Page 8 Contents Windows shortcuts (key combinations) Windows taskbar auto-hide feature 5 Troubleshooting Check the Basics Problems with Microsoft Windows 10 Returning an Analyzer for Service Calling Keysight Technologies Locations for Keysight Technologies Read the Warranty Service Options Packaging the Instrument...
-
Page 9: Quick Start
Keysight X-Series Signal Analyzers N9040B, N9030B, N9020B, N9010B, N9000B Getting Started and Troubleshooting Guide Quick Start This section explains how to initialize the Signal Analyzer and view a signal. The following topics can be found in this section: “Initial Inspection” on page 10 “Instrument Location and Rack Mounting Requirements”... -
Page 10: Initial Inspection
— Contact the nearest Keysight Technologies office. — Keep the shipping materials for the carrier’s inspection. — If you must return an analyzer to Keysight Technologies, use the original (or comparable) shipping materials. See “Returning an Analyzer for Service”... -
Page 11: Instrument Location And Rack Mounting Requirements
Quick Start Instrument Location and Rack Mounting Requirements Instrument Location and Rack Mounting Requirements Locating the analyzer Make sure that the fan inlet and exhaust vent areas on the sides of the analyzer are not obstructed. The minimal required clearance is 2 inches. Airflow restrictions cause additional airflow noise and cause the fans to speed up so they can draw in enough air for the required cooling. -
Page 12: Turning On The Analyzer The First Time
The analyzer can require more than 5 minutes to (located in the lower left power-on. corner of the analyzer’s The Keysight Technologies screen appears followed by a front panel) to turn the screen that allows you to select Windows10 or the analyzer on. - Page 13 Quick Start Turning on the Analyzer the First Time Steps Actions Notes This window appears and covers the Launch window. If you do not check the “Do not show this message again” check box, this message will be displayed each time the analyzer is turned on. No application will start while this message is displayed. Before continuing, make sure that you carefully read the Anti-Virus message and determine what action is appropriate.
- Page 14 Quick Start Turning on the Analyzer the First Time Steps Actions Notes 7. Verify the installation a. On the instrument, press If you require further assistance, contact the Keysight System Show support team. Online assistance: http://www.keysight.com/find/assist System b. Verify that the purchased application(s) appear in the list or have an...
- Page 15 Quick Start Turning on the Analyzer the First Time Steps Actions Notes The 50 MHz reference signal appears on the display. X-Series Signal Analyzers Getting Started and Troubleshooting Guide...
-
Page 16: Anti-Virus Software And Firewalls
Quick Start Anti-Virus Software and Firewalls Anti-Virus Software and Firewalls No third-party anti-virus software is shipped with the analyzer. It is recommended that you install anti-virus software if your analyzer is connected to the LAN. Check with your IT department to see what they recommend. Do not modify the default network settings as this may cause problems with the operating system of the analyzer. -
Page 17: Instrument Information
Quick Start Instrument Information Instrument Information Power requirements The only physical installation of your Keysight signal analyzer is a connection to a power source. Line voltage does not need to be selected. This analyzer does not contain customer serviceable fuses. The instruments can operate with mains supply voltage fluctuations up to ±10% of the nominal voltage. -
Page 18: Protecting Against Overpowering
Quick Start Instrument Information If this prod uct is not used as specified, the protection provided by the equipment could be impaired. This prod uct must be used in a normal cond ition (in which all means for protection are intact) only. Install the instrument so that the detachable power cord is read ily identifiable and easily reached by the operator. - Page 19 Quick Start Instrument Information Cleaning Connectors Cleaning connectors with alcohol shall only be done with the instrument power cord removed, and in a well-ventilated area. Allow all residual alcohol moisture to evaporate, and the fumes to dissipate prior to energizing the instrument. Keep isopropyl alcohol away from heat, sparks, and flame.
-
Page 20: Protecting Against Electrostatic Discharge
Quick Start Instrument Information Protecting against electrostatic discharge Electrostatic discharge (ESD) can damage or destroy electronic components (the possibility of unseen damage caused by ESD is present whenever components are transported, stored, or used). Test equipment and ESD To help reduce ESD damage that can occur while using test equipment: Do not use these first three techniques when working on circuitry with a voltage potential greater than 500 volts. -
Page 21: Front And Rear Panel Features
Keysight X-Series Signal Analyzers N9040B, N9030B, N9020B, N9010B, N9000B Getting Started and Troubleshooting Guide Front and Rear Panel Features This section describes the following features: “Front-Panel Features” on page 22 “Display Features” on page 25 “Rear-Panel Features” on page 32 “Front and Rear Panel Symbols”... -
Page 22: Front-Panel Features
Front and Rear Panel Features Front-Panel Features Front-Panel Features PXA, MXA, EXA, CXA X-Series Signal Analyzers Getting Started and Troubleshooting Guide... - Page 23 Front and Rear Panel Features Front-Panel Features Item Description Name Measurement Keys These keys (in the shaded area) enable you to set the parameters used for making measurements in the current Mode and Measurement. Preset Keys Mode Preset - local to the current mode, global to all measurements in the mode, affects most but not all parameters in the mode, does not affect Input/Output or System variables User Preset - local to the current mode, global to all measurements in the mode,...
- Page 24 Front and Rear Panel Features Front-Panel Features Item Description Name USB Connectors Standard USB 2.0 ports, Type A. Connect to external peripherals such as a mouse, keyboard, DVD drive, or hard drive. Headphones Output Headphones can be used to hear any available audio output. Probe Power Supplies power for external high frequency probes and accessories.
-
Page 25: Display Features
Front and Rear Panel Features Display Features Display Features This section describes the regions of the display. Invalid Data Indicator The invalid data indicator is displayed whenever the data on the display does not match the settings of the analyzer. The most common example of this is when instrument settings have changed in the time since the data in the traces on the display was taken. -
Page 26: Screen Tabs
Front and Rear Panel Features Display Features — When a trace is imported from mass storage and the trace’s parameters do not match the current analyzer settings — When a trace is sent to the analyzer from a remote interface (since there is no way to know if its settings match) he Data Invalid Indicator has an associated status bit that can be checked at any time to see if it is on. -
Page 27: Meas Bar
Front and Rear Panel Features Display Features Meas Bar The Meas Bar shows general measurement settings and information. The annotations on this bar can be used to change settings. Tap anywhere in the annotation box to access the drop-down panel that contains relevant parameters. -
Page 28: Measurement Display
Front and Rear Panel Features Display Features Measurement Display This area shows the measurement results in graphical and tabular form. You can interact with this area using pinch, drag, scroll and tap gestures. On the signal: Horizontal pinch - changes the span of the analyzer Horizontal drag - changes the center frequency Vertical pinch - changes the vertical scaling Vertical drag - changes the reference level... -
Page 29: Menu Panel
Front and Rear Panel Features Display Features Menu Panel At the top of the menu panels are two icons: The Preset icon accesses the following control menu: The System icon accesses the following dialog: X-Series Signal Analyzers Getting Started and Troubleshooting Guide... - Page 30 Front and Rear Panel Features Display Features The hardkey drop-down panel contains the measurement controls. These are the same as the hardkeys in the shaded area of the keypad: You can select functions using either the keypad or the drop-down menu. X-Series Signal Analyzers Getting Started and Troubleshooting Guide...
-
Page 31: Bottom Bar
Front and Rear Panel Features Display Features Notice that the Frequency panel has a Settings tab on the right side. Other panels may have multiple tabs. The tabs access controls for the particular parameter noted on the tab. Bottom Bar The bottom bar contains several icons that access various controls. -
Page 32: Rear-Panel Features
Front and Rear Panel Features Rear-Panel Features Rear-Panel Features PXA, MXA and EXA X-Series Signal Analyzers Getting Started and Troubleshooting Guide... - Page 33 Front and Rear Panel Features Rear-Panel Features Item Description Name EXT REF IN Input for an external frequency reference signal. WIDEBAND DIGITAL BUS LVDS output for I and Q. 10 MHz OUT An output of the analyzer internal 10 MHz frequency reference signal. It is used to lock the frequency reference of other test equipment to the analyzer.
- Page 34 Front and Rear Panel Features Rear-Panel Features Item Description Name USB Connector USB 3.0 port, Type B. USB TMC (test and measurement class) connects to an external PC controller to control the instrument and for data transfers over a 480 Mbps link.
- Page 35 Front and Rear Panel Features Rear-Panel Features Item Description Name USB Connector USB 2.0 port, Type B. USB TMC (test and measurement class) connects to an external pc controller to control the instrument and for data transfers over a 480 Mbps link.
-
Page 36: Front And Rear Panel Symbols
Front and Rear Panel Features Front and Rear Panel Symbols Front and Rear Panel Symbols This symbol is used to indicate power ON (green LED). This symbol is used to indicate power STANDBY mode (yellow LED). This symbol indicates the input power required is AC. The instruction documentation symbol. -
Page 37: Instrument Operating System
Keysight X-Series Signal Analyzers N9040B, N9030B, N9020B, N9010B, N9000B Getting Started and Troubleshooting Guide Instrument Operating System This chapter describes the Microsoft Windows 10, configuration and the settings used with the Keysight instrument software. It includes information about changing some of the system settings. And it describes the Windows operating system configuration and the software installations that are present on the Disk Drive when the instrument leaves the factory. -
Page 38: Microsoft Windows
Instrument Operating System Microsoft Windows Microsoft Windows Your instrument has Microsoft Windows installed at the factory. Keysight has already configured many of the settings in Microsoft Windows for optimal behavior in your instrument. This chapter contains details about many of these settings. -
Page 39: Customer Installation Of Software
Instrument Operating System Customer installation of software Customer installation of software 3rd Party Software verified by Keysight Keysight has verified that the following programs are compatible with the instrument's applications: — MathWorks MATLAB Installation of other 3rd Party Software The X-Series Signal Analyzer platform is an Open Windows environment, so you can install software on the instrument. -
Page 40: User Accounts
Instrument Operating System User Accounts User Accounts The instrument ships with a number of different accounts already set up. In addition you can create your own accounts if you desire. The privileges associated with each account determine what you can and cannot do from that account. - Page 41 Instrument Operating System User Accounts It is Keysight’s expectation that each user’s My Documents folder is mapped to the D: drive. This is to avoid overwriting the user’s data in the event the Instrument Recovery must be performed. Also, this facilitates convenient backup by copying the contents of the D: drive to external media.
-
Page 42: Keysight X-Series Analyzer Licensing Options
Instrument Operating System Keysight X-Series Analyzer Licensing Options Keysight X-Series Analyzer Licensing Options The Keysight X-Series Signal Analyzers have four licensing types that have one of two terms attached. The terms are P (Perpetual) and L (1 year). These licensing types and terms are available on all existing measurement applications except the Spectrum Analyzer Measurement Application, which requires a fixed perpetual license (shipped Standard). -
Page 43: Network Licenses
Instrument Operating System Keysight X-Series Analyzer Licensing Options Network Licenses Network licenses are available over the customer’s network from a server the customer configures. Network licenses are identified in the product structure by an "N" in the second character and either a "P" or an "L" in the third character, indicating a term of either Perpetual or 1 year (12 months), respectively. -
Page 44: Configuring Network And Usb Licenses
Instrument Operating System Keysight X-Series Analyzer Licensing Options With USB portable licenses, the pre-installed Keysight Floating License Manager is used to add licenses to the instrument’s server. USB Portable licenses with a limited count are checked out and in like Network licenses. -
Page 45: Licensing New Measurement Application Software - After Initial Purchase
Instrument Operating System Licensing New Measurement Application Software - After Initial Purchase Licensing New Measurement Application Software - After Initial Purchase Additional measurement application software can be ordered after your initial purchase of the signal analyzer. Software upgrades are provided in a kit that includes an option based Entitlement Certificate and a license agreement. - Page 46 Online assistance: http://www.keysight.com/find/as sist If you do not have access to the Internet, contact your local Keysight Technologies Sales and Service Office, or if in the United States, call 1-800-829-4444. For other license types: — Transportable licenses use the Keysight License Manager to perform a transport —...
-
Page 47: Windows Configuration
Instrument Operating System Windows Configuration Windows Configuration The Windows settings have been optimized for the best measurement performance. Any modifications to these settings may degrade instrument performance and measurement speed. In general, most Windows System settings (typically set through the Windows Control Panel) should not be modified. -
Page 48: Settings That Must Not Be Changed
Instrument Operating System Windows Configuration Table 3-2 You May Use This Feature: To Do This… If you click on “Advanced System Settings” a dialog will open called “System Properties.” On this dialog there is an “Advanced” tab, which opens up a dialog with a number of settings options. One of these is “Performance”, and if you click on the “Settings”... -
Page 49: Autoplay/Autorun
Instrument Operating System Windows Configuration In addition, Do Not: — Add, delete, or modify disk drive partitions. — Delete or modify Keysight registry entries. — Change the contents of any directories containing the name "Keysight". — Stop the IIS server —... -
Page 50: Configuring Printers
Instrument Operating System Configuring Printers Configuring Printers Printers are configured using the Microsoft Windows Control Panel. It is easily accessed from the Windows Start menu or from under the front panel System key. This setup process can be done using the touch screen and front-panel keys. -
Page 51: Configuring Lan
Instrument Operating System Configuring LAN Configuring LAN Hostname The Computer Name, or Hostname, is preconfigured from the factory. It must be a unique name such that it does not conflict with other equipment on your LAN. The preconfigured Computer Name is A-<model number>-xxxxx, where xxxxx is the last 5 digits of the instrument’s serial number. - Page 52 Instrument Operating System Configuring LAN When the Map Network Drive window appears, browse to the correct folder, and click Finish. In Windows 10 there is no visual indication that authentication is in progress. X-Series Signal Analyzers Getting Started and Troubleshooting Guide...
-
Page 53: Windows Security
Instrument Operating System Windows Security Windows Security Microsoft recommends the following to ensure the instrument's Windows operating system is protected: — Use an internet firewall. — Get the latest critical Windows updates. — Use up-to-date antivirus software. Windows Firewall The instrument is shipped with the Windows Firewall enabled. You can verify the status of Windows Firewall by going to the Control Panel and clicking on System and Security, Windows Firewall. -
Page 54: Virus Protection
Instrument Operating System Windows Security Virus Protection There is no antivirus software included with your instrument. To find information regarding recommended antivirus software, visit the following website: http://www.keysight.com/find/x-series and select FAQs under Support. Having antivirus software installed may have a slight impact on the instrument performance. -
Page 55: System Maintenance
Instrument Operating System System Maintenance System Maintenance Backup It is recommended that you have a regular backup strategy. Your IT department may already have a backup strategy in place that is suitable for the instrument and its data. Using the Instrument Recovery system in conjunction with a regular backup strategy should allow full recovery of the instrument data. -
Page 56: Usb Connections
USB Host drivers that allow control of other instruments connected to the USB ports. Keysight Technologies does not support or warrant correct instrument operation if additional USB drivers from third parties are installed in the instrument. It is possible that additional drivers could break the normal USB operation. -
Page 57: Disk Drive Partitioning And Use
Instrument Operating System Disk Drive Partitioning and Use Disk Drive Partitioning and Use The drive is partitioned into 3 sections: C:, D: and E: — The C: partition contains the Windows 10 operating system and software installed by Keysight. This is an Open System which means you can install additional software, and these should be installed on the C: drive. - Page 58 Instrument Operating System Disk Drive Partitioning and Use Table 3-4 Step Notes 2. Select OK. The Alignment Data Wizard will appear: 3. Follow the on screen instructions to The default location is an backup the calibration data to the internal flash SD card, if USB drive and save the file.
-
Page 59: Disk Drive Recovery Process
Notes 1. Make sure the instrument is turned off. 2. Turn on the instrument. After the Keysight Technologies screen is displayed, — Press the down arrow key to move This screen is displayed for five seconds. the highlight to Instrument... - Page 60 Instrument Operating System Disk Drive Recovery Process Table 3-5 Recovery Process Step Notes 3. When the Instrument Recovery System has booted, follow the on-screen instructions to recover the image of the C: drive. Enter — Press , then press to select the recovery.
-
Page 61: Updating The Software (Required After A Recovery)
Instrument Operating System Disk Drive Recovery Process Additional recovery steps may be required to fully recover the system to a more current working state. This could involve restoring your own backups of the instrument information or re-installing applications, data and performing system customizations. Updating the software (required after a recovery) To install the latest software version, the software and installation instructions are available at:... - Page 62 Instrument Operating System Disk Drive Recovery Process Table 3-6 Installing the Software Step The installation process can take up to 45 minutes. Do not turn the instrument power off or serious damage may occur. If any pop up windows appear, click Ignore to proceed.
-
Page 63: Using Windows Tools
Keysight X-Series Signal Analyzers N9040B, N9030B, N9020B, N9010B, N9000B Getting Started and Troubleshooting Guide Using Windows Tools The capabilities described in this section are Microsoft Windows 10 features. The discussion provided here gives some guidelines for using the capabilities with the instrument. You need to refer to the Windows 10 help documentation for more information. -
Page 64: Navigating Windows Without A Mouse
Using Windows Tools Navigating Windows Without a Mouse Navigating Windows Without a Mouse Table 4-1 Key Presses Actions Exits/closes a Windows dialog box (does not exit an Application window) Enter Does the current "default action". If a menu item or a button is currently highlighted, then the Enter key activates that menu item or button. -
Page 65: Remote Desktop: Using The X-Series Signal Analyzers Remotely
Using Windows Tools Remote Desktop: Using the X-Series Signal Analyzers Remotely Remote Desktop: Using the X-Series Signal Analyzers Remotely Windows Remote Desktop is recommended for remote control of the instrument. It offers fully-interactive control that is almost identical to direct face-to-face control of the instrument. -
Page 66: Setting Up Remote Desktop Operation
Using Windows Tools Remote Desktop: Using the X-Series Signal Analyzers Remotely Setting up Remote Desktop operation Figure 4-1 Basic setup for remote desktop operation To perform this operation successfully, you must have Administrator level access to the instrument. Table 4-2 Setting up a remote desktop connection Step Action... -
Page 67: How To Locate The Computer Name Of The Instrument
Using Windows Tools Remote Desktop: Using the X-Series Signal Analyzers Remotely Remote computer running another version of Windows You can use any version of Windows to install and run the Client software for Remote Desktop Connectivity. However, you need to have available a Windows installation CD-ROM, because that contains the Client software. -
Page 68: Running A Remote Desktop Session
Using Windows Tools Remote Desktop: Using the X-Series Signal Analyzers Remotely Table 4-5 Locating the name from the Windows desktop (with a mouse): Step Notes System The Computer name is listed in the Computer 2. Double-click name, domain, and workgroup settings section. - Page 69 Using Windows Tools Remote Desktop: Using the X-Series Signal Analyzers Remotely The instrument display appears on the screen of the remote computer. Because the instrument front-panel keys are not available when using the instrument remotely, three alternative methods are available to perform the functions of the front-panel keys.
- Page 70 Using Windows Tools Remote Desktop: Using the X-Series Signal Analyzers Remotely Table 4-7 Setting Remote Desktop options Step Notes Display 3. Click the tab. Remote — Under desktop size , you may select the size of the window in which the instrument display appears.
- Page 71 Using Windows Tools Remote Desktop: Using the X-Series Signal Analyzers Remotely Table 4-7 Setting Remote Desktop options Step Notes Local Resources 4. Click the tab. Disk — Selecting the Drives checkbox enables you to transfer data between the remote desktop and the local PC.
- Page 72 Using Windows Tools Remote Desktop: Using the X-Series Signal Analyzers Remotely Ending a Remote Desktop session There are two ways to disconnect the remote computer from the instrument, ending the session: Table 4-8 Step Notes For full-screen, the X appears at the top center of 1.
-
Page 73: Embedded Web Server: Using The X-Series Signal Analyzers Remotely
Using Windows Tools Embedded Web Server: Using the X-Series Signal Analyzers Remotely Embedded Web Server: Using the X-Series Signal Analyzers Remotely The instrument can be controlled using either the Embedded Web Server or Windows Remote Desktop. The Embedded Web Server is a good solution when you do not want to log into the instrument's user account. - Page 74 Using Windows Tools Embedded Web Server: Using the X-Series Signal Analyzers Remotely Table 4-9 Accessing the instrument Step Notes 1. Enter a URL corresponding to the This functionality is only fully instrument hostname or IP Address. supported when using Internet Explorer.
-
Page 75: Controlling The Instrument
Using Windows Tools Embedded Web Server: Using the X-Series Signal Analyzers Remotely Controlling the Instrument Selecting this tab enables you to view, control and interact with the instrument through the web server. Table 4-10 Selecting the Control Instrument tab Step Notes Control Instrument A password entry dialog appears. -
Page 76: Enabling Scpi Control Of The Instrument
Using Windows Tools Embedded Web Server: Using the X-Series Signal Analyzers Remotely Enabling SCPI Control of the instrument Selecting this tab enables you to control the instrument via SCPI. Selecting the Get Image tab Selecting the Get Image tab captures a screen image from the Instrument display. -
Page 77: Selecting The Transfer Data Tab
Using Windows Tools Embedded Web Server: Using the X-Series Signal Analyzers Remotely Selecting the Transfer Data tab Selecting the Transfer Data tab enables you to capture results from the instrument’s currently active measurement. Depending on the current measurement type, captured results consist of either Trace Data or Measurement Results. -
Page 78: Selecting The Docs/Links Tab
Using Windows Tools Embedded Web Server: Using the X-Series Signal Analyzers Remotely Selecting the Docs/Links tab Selecting this tab enables access links to the instrument documentation and application software. X-Series Signal Analyzers Getting Started and Troubleshooting Guide... -
Page 79: Windows Shortcuts And Miscellaneous Tasks
Using Windows Tools Windows Shortcuts and Miscellaneous Tasks Windows Shortcuts and Miscellaneous Tasks This section provides a list of windows shortcuts (key combinations) that are useful when you operate the instrument without an attached mouse and keyboard. (See also “Navigating Windows Without a Mouse” on page 64.) Although these shortcuts are available in any Windows 10 system, they are not commonly used when a mouse and keyboard are attached. -
Page 80: Windows Taskbar Auto-Hide Feature
Using Windows Tools Windows Shortcuts and Miscellaneous Tasks Windows taskbar auto-hide feature The Windows taskbar should always be in the auto-hide mode when using the instrument application. If the taskbar is not set to auto-hide, the lower part of the instrument display is obscured by the taskbar. If at any time the Windows taskbar is inadvertently set to the non-auto-hide mode, you can restore the auto-hide behavior by doing the following: Table 4-12... -
Page 81: Troubleshooting
Keysight X-Series Signal Analyzers N9040B, N9030B, N9020B, N9010B, N9000B Getting Started and Troubleshooting Guide Troubleshooting “Check the Basics” on page 82 “Problems with Microsoft Windows 10” on page 84 “Returning an Analyzer for Service” on page 85 No operator serviceable parts inside. Refer servicing to qualified personnel. To prevent electrical shock do not remove covers. -
Page 82: Check The Basics
Troubleshooting Check the Basics Check the Basics — Is there power at the receptacle? — Is the analyzer turned on? Check to see if the green LED beside the power switch is on. Also, listen for internal fan noise to determine if the analyzer cooling fans are running. - Page 83 You can get automatic electronic notification of new instrument software releases and other product updates/information by subscribing to the Keysight Technologies Test & Measurement E-Mail Notification Service for your signal analyzer at http://keysight.com/find/MyKeysight X-Series Signal Analyzers Getting Started and Troubleshooting Guide...
-
Page 84: Problems With Microsoft Windows 10
Troubleshooting Problems with Microsoft Windows 10 Problems with Microsoft Windows 10 The Microsoft Windows 10 operating system settings have been optimized for the best performance. Modification of these settings may degrade instrument performance and measurement speed. Those that can be safely modified are described in “Settings that can be changed”... -
Page 85: Returning An Analyzer For Service
Returning an Analyzer for Service Calling Keysight Technologies Keysight Technologies has offices around the world to provide you with complete support for your analyzer. To obtain servicing information or to order replacement parts, contact the nearest Keysight Technologies office listed below. -
Page 86: Locations For Keysight Technologies
Troubleshooting Returning an Analyzer for Service Locations for Keysight Technologies http://www.keysight.com/find/assist Online assistance: Americas Canada Latin America United States 1 877 894 4414 (305) 269 7500 1 800 829 4444 Asia Pacific Australia China Hong Kong 1 800 629 485... -
Page 87: Service Options
Service Options Keysight Technologies offers several optional maintenance plans to service your analyzer after the warranty has expired. Call your Keysight Technologies office for full details. If you want to service the analyzer yourself after the warranty expires, you can download the service documentation that provides all necessary troubleshooting and maintenance information from the Keysight web page. -
Page 88: Packaging The Instrument
Troubleshooting Returning an Analyzer for Service Packaging the Instrument Use original packaging or comparable. It is best to pack the unit in the original factory packaging materials if they are available. Analyzer damage can result from using packaging materials other than those specified. - Page 89 Keycode Commands remote operation, mouse, Windows, embedded web server, cooling the instrument, keys, internet access, Keysight Technologies, calling, replacing battery, running Windows without a mouse, D drive data storage, data storage, line voltage, disk drive recovery process, locating the instrument,...
- Page 90 Index verifying contents, warranty, Windows, Control Panel, Remote Desktop Installing, Setting up, Screen Capture, Shortcut keys, taskbar auto-hide, Windows Remote Desktop, options, Options Dialog Experience Tab, General Tab, running, Setting up Remote Computer, setting up the N90x0B, Setting up Windows Systems X-Series Signal Analyzer Getting Started and Troubleshooting Guide...
- Page 91 This information is subject to change without notice. © Keysight Technologies 2018 Edition 1, March 2018 N9040-90049 www.keysight.com...
Need help?
Do you have a question about the UXA N9040B and is the answer not in the manual?
Questions and answers