Keysight Technologies PXA N9030A Getting Started Manual
Hide thumbs
Also See for PXA N9030A:
- Installation note (9 pages) ,
- Measurement manual (83 pages) ,
- Manual (56 pages)
Table of Contents
Advertisement
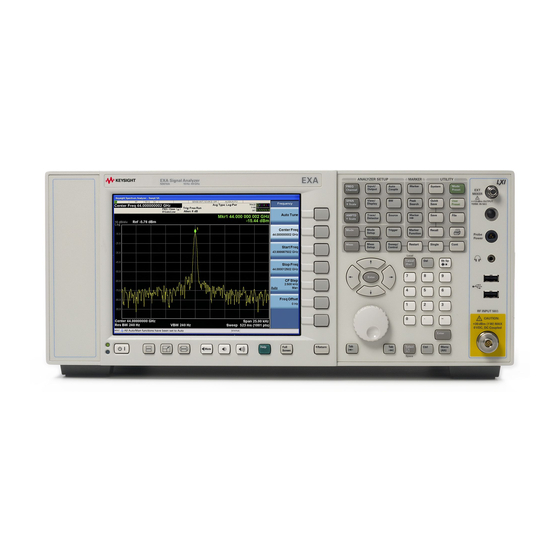
Keysight X-Series Signal Analyzers
This manual provides documentation for the following Analyzers:
PXA Signal Analyzer N9030A
EXA Signal Analyzer N9010A
Notice: This document contains references to Agilent.
Please note that Agilent's Test and Measurement
business has become Keysight Technologies. For
more information, go to www.keysight.com.
MXA Signal Analyzer N9020A
CXA Signal Analyzer N9000A
Getting Started
Guide
Advertisement
Table of Contents

Related Manuals for Keysight Technologies PXA N9030A


Summary of Contents for Keysight Technologies PXA N9030A
- Page 1 MXA Signal Analyzer N9020A EXA Signal Analyzer N9010A CXA Signal Analyzer N9000A Notice: This document contains references to Agilent. Please note that Agilent’s Test and Measurement business has become Keysight Technologies. For more information, go to www.keysight.com. Getting Started Guide...
- Page 2 No additional OR FOR INCIDENTAL OR government requirements beyond CONSEQUENTIAL DAMAGES IN those set forth in the EULA shall apply, © Keysight Technologies, Inc. CONNECTION WITH THE except to the extent that those terms, 2008-2015 FURNISHING, USE, OR rights, or licenses are explicitly required...
- Page 3 In This Guide… This guide contains the following information: Quick-Start This chapter explains how to initialize the signal analyzer and view a signal. Front and Rear Panel Features Refer to this chapter for information on front- and rear-panel key functionality, and display annotations. Instrument Operating System This chapter describes the Microsoft Windows 7 configuration and the settings used with the Keysight instrument software.
- Page 4 Where to Find the Latest Information Documentation is updated periodically. For the latest information about these products, including instrument software upgrades, application information, and product information, browse to one of the following URLs, according to the name of your product: http://www.keysight.com/find/pxa http://www.keysight.com/find/mxa http://www.keysight.com/find/exa...
-
Page 5: Table Of Contents
Contents Table of Contents 1 Quick Start Initial Inspection Verify the Contents Shipping Problems? Instrument Location and Rack Mounting Requirements Locating the analyzer Cooling and rack mounting Turning on the Analyzer the First Time Initializing the analyzer using a USB mouse Initializing the analyzer using front-panel navigation Anti-Virus Software and Firewalls Shortening the Instrument Power-On Time... - Page 6 Contents VSA 89601B Pulse Measurement N9051B Customer installation of software 3rd Party Software verified by Keysight Installation of other 3rd Party Software User Accounts Administrator account Instrument accounts Power Users accounts KeysightOnly user account Service user accounts Customer creation of accounts Keysight X-Series Analyzer Licensing Options Licensing New Measurement Application Software - After Initial Purchase...
- Page 7 Contents Spyware Protection System Maintenance Backup System Restore Disk Defragmenting USB Connections Disk Drive Partitioning and Use Backing-up the factory calibration data Disk Drive Recovery Process Updating the software 4 Using Windows Tools Navigating Windows Without a Mouse Remote Desktop: Using the X-Series Signal Analyzers Remotely Overview of Remote Desktop operation Setting up Remote Desktop operation How to locate the computer name of the instrument...
- Page 8 Contents Check the Basics Problems with Microsoft Windows 7 Returning an Analyzer for Service Calling Keysight Technologies Locations for Keysight Technologies Read the Warranty Service Options Packaging the Instrument...
-
Page 9: Quick Start
Keysight X-Series Signal Analyzers PXA N9030A, MXA N9020A, EXA N9010A, and CXA N9000A Getting Started Guide Quick Start This section explains how to initialize the Signal Analyzer and view a signal. The following topics can be found in this section: “Initial Inspection”... -
Page 10: Initial Inspection
— Contact the nearest Keysight Technologies office. — Keep the shipping materials for the carrier’s inspection. — If you must return an analyzer to Keysight Technologies, use the original (or comparable) shipping materials. See “Returning an Analyzer for Service”... -
Page 11: Instrument Location And Rack Mounting Requirements
Quick Start Instrument Location and Rack Mounting Requirements Instrument Location and Rack Mounting Requirements Locating the analyzer Make sure that the fan inlet and exhaust vent areas on the sides of the analyzer are not obstructed. The minimal required clearance is 2 inches. Airflow restrictions cause additional airflow noise and cause the fans to speed up so they can draw in enough air for the required cooling. -
Page 12: Turning On The Analyzer The First Time
The analyzer can require more than 5 minutes to (located in the lower left power-on. corner of the analyzer’s The Keysight Technologies screen appears followed by a front panel) to turn the screen that allows you to select the operating system. analyzer on. - Page 13 Quick Start Turning on the Analyzer the First Time Steps Actions Notes The analyzer performs the following steps: — Windows 7 Startup window — Black screen — Windows Please wait message window — Blue window — The following window appears giving you information about the End-User License Agreement.
- Page 14 Quick Start Turning on the Analyzer the First Time Steps Actions Notes NOTE If you do not check the “Do not show this message again” check box, this message will be displayed each time the analyzer is turned on. No application will start while this message is displayed.
- Page 15 Quick Start Turning on the Analyzer the First Time Steps Actions Notes The 50 MHz reference signal appears on the display.
-
Page 16: Initializing The Analyzer Using Front-Panel Navigation
The analyzer can require more than 5 minutes to (located in the lower left power-on. corner of the analyzer’s The Keysight Technologies screen appears followed by a front panel) to turn the screen that allows you to select the operating system. analyzer on. - Page 17 Quick Start Turning on the Analyzer the First Time Steps Actions Notes The analyzer performs the following steps: • Windows 7 Startup window • Black screen • Windows Please wait message window • Blue window • The following window appears giving you information about the End-User License Agreement.
- Page 18 Quick Start Turning on the Analyzer the First Time Steps Actions Notes NOTE If you do not check the “Do not show this message again” check box, this message will be displayed each time the analyzer is turned on. No application will start while this message is displayed.
-
Page 19: Anti-Virus Software And Firewalls
Quick Start Anti-Virus Software and Firewalls Anti-Virus Software and Firewalls No anti-virus software is shipped with the analyzer. It is recommended that you install anti-virus software if your analyzer is connected to the LAN. Check with your IT department to see what they recommend. The analyzer is shipped with the Windows 7 firewall enabled. -
Page 20: Shortening The Instrument Power-On Time
Quick Start Shortening the Instrument Power-On Time Shortening the Instrument Power-On Time The instrument desktop includes a shortcut to the ConfigureApplications.exe application that lets you control your instrument power-on configuration. You can set the configuration to pre-load only the applications that you typically run. -
Page 21: Instrument Information
Quick Start Instrument Information Instrument Information Power requirements The only physical installation of your Keysight signal analyzer is a connection to a power source. Line voltage does not need to be selected. This analyzer does not contain customer serviceable fuses. This is a Safety Class 1 Prod uct (provided with a protective earthing WARNING ground incorporated in the power cord). -
Page 22: Protecting Against Overpowering
Quick Start Instrument Information Always use the three-prong AC power cord supplied with this product. Failure CAUTION to ensure adequate earth grounding by not using this cord can cause product damage. If this product is not used as specified, the protection provided by the WARNING equipment could be impaired. - Page 23 Quick Start Instrument Information Cleaning Connectors Cleaning connectors with alcohol shall only be done with the instrument power cord removed, and in a well-ventilated area. Allow all residual alcohol moisture to evaporate, and the fumes to dissipate prior to energizing the instrument. Keep isopropyl alcohol away from heat, sparks, and flame.
-
Page 24: Protecting Against Electrostatic Discharge
Quick Start Instrument Information Protecting against electrostatic discharge Electrostatic discharge (ESD) can damage or destroy electronic components (the possibility of unseen damage caused by ESD is present whenever components are transported, stored, or used). Test equipment and ESD To help reduce ESD damage that can occur while using test equipment: Do not use these first three techniques when working on circuitry with WARNING a voltage potential greater than 500 volts. -
Page 25: Front And Rear Panel Features
Keysight X-Series Signal Analyzers PXA N9030A, MXA N9020A, EXA N9010A, and CXA N9000A Getting Started Guide Front and Rear Panel Features This section describes the following features: “Front-Panel Features” on page 26 “Display Annotations” on page 34 “Rear-Panel Features” on page 36... -
Page 26: Front-Panel Features
Front and Rear Panel Features Front-Panel Features Front-Panel Features PXA, MXA, and EXA Item Description Name Menu Keys Key labels appear to the left of the menu keys to identify the current function of each key. The displayed functions are dependent on the currently selected Mode and Measurement, and are directly related to the most recent key press. - Page 27 Front and Rear Panel Features Front-Panel Features Item Description Name Analyzer Setup Keys These keys set the parameters used for making measurements in the current Mode and Measurement. Measurement Keys These keys select the Mode and the Measurement within the mode. They also control the initiation and rate of recurrence of measurements.
- Page 28 Front and Rear Panel Features Front-Panel Features Item Description Name Enter and Arrow Keys The Enter key terminates data entry when either no unit of measure is needed, or you want to use the default unit. The arrow keys: — Increment and decrement the value of the current measurement selection.
-
Page 29: Overview Of Key Types
Front and Rear Panel Features Front-Panel Features Item Description Name Q Input Input port for the Q channel for either single or differential mode. * I Input Input port for the I channel when in differential mode. * I Input Input port for the I channel for either single or differential mode. - Page 30 Front and Rear Panel Features Front-Panel Features Some menu keys have multiple choices on their label, such as On/Off, Auto/Man, or Log/Lin (as shown above). The different choices are selected by pressing the key multiple times. For example, the Auto/Man type of key. To select the function, press the menu key and notice that Auto is underlined and the key becomes highlighted.
- Page 31 Front and Rear Panel Features Front-Panel Features When a menu first appears, one key label is highlighted to show which key is the default selection. If you press Marker Function, the Marker Function Off key is the menu default key, and is highlighted. Some of the menu keys are grouped together by a yellow bar running behind the keys near the left side or by a yellow border around the group of keys.
- Page 32 Front and Rear Panel Features Front-Panel Features In some key menus, a key label is highlighted to show which key has been selected from multiple available choices. And the menu is immediately exited when you press one of the other keys. For example, when you press the Select Trace key (in the Trace/Detector menu), it brings up its own menu of keys.
- Page 33 Front and Rear Panel Features Front-Panel Features If a displayed key label shows a small solid-black arrow tip pointing to the right, it indicates that additional key menus are available. If the arrow tip is not filled in solid then pressing the key the first time selects that function. Now the arrow is solid and pressing it again brings up an additional menu of settings.
-
Page 34: Display Annotations
Front and Rear Panel Features Display Annotations Display Annotations This section describes the display annotation as it is on the Spectrum Analyzer Measurement Application display. Other measurement application modes have some annotation differences. Item Description Function Keys Measurement bar - Shows general measurement settings All the keys in the Analyzer Setup part and information. - Page 35 Front and Rear Panel Features Display Annotations Item Description Function Keys Local System, I/O Config Settings panel - displays system information that is not specific to any one application. Input/Output Amplitude System and others. — Input/Output status - green LXI indicates the LAN is connected.
-
Page 36: Rear-Panel Features
Front and Rear Panel Features Rear-Panel Features Rear-Panel Features Current PXA, MXA and EXA Older MXA and EXA Item Description Name EXT REF IN Input for an external frequency reference signal: For PXA – 1 to 50 MHz For MXA – 1 to 50 MHz For EXA –... - Page 37 Front and Rear Panel Features Rear-Panel Features Item Description Name USB Connector USB 2.0 port, Type B. USB TMC (test and measurement class) connects to an external pc controller to control the instrument and for data transfers over a 480 Mbps link.
- Page 38 Front and Rear Panel Features Rear-Panel Features CXA with Option PC3 (S/N MY/US/SG49370546 or higher) CXA (for S/N less than MY/US/SG49370546) Item Description Name EXT REF IN Input for an external frequency reference signal: For CXA – 10 MHz. GPIB A General Purpose Interface Bus (GPIB, IEEE 488.1) connection that can be used for remote analyzer operation.
- Page 39 Front and Rear Panel Features Rear-Panel Features Item Description Name MONITOR Allows connection of an external VGA monitor. NOTE The external VGA monitor must be attached prior to power on to enable the external VGA port. A TCP/IP Interface that is used for remote analyzer operation. Line power input The AC power connection.
-
Page 40: Front And Rear Panel Symbols
Front and Rear Panel Features Front and Rear Panel Symbols Front and Rear Panel Symbols This symbol is used to indicate power ON (green LED). This symbol is used to indicate power STANDBY mode (yellow LED). This symbol indicates the input power required is AC. The instruction documentation symbol. - Page 41 Front and Rear Panel Features Front and Rear Panel Symbols To return unwanted products, contact your local Keysight office, or see http://www.keysight.com/environment/product/ more information.
- Page 42 Front and Rear Panel Features Front and Rear Panel Symbols...
-
Page 43: Instrument Operating System
Keysight X-Series Signal Analyzers PXA N9030A, MXA N9020A, EXA N9010A, and CXA N9000A Getting Started Guide Instrument Operating System This chapter describes the Microsoft Windows Embedded Standard 7, referred to as Windows 7 or WES7, configuration and the settings used with the Keysight instrument software. -
Page 44: Microsoft Windows
Instrument Operating System Microsoft Windows Microsoft Windows Your instrument has Microsoft Windows installed at the factory. Keysight has already configured many of the settings in Microsoft Windows for optimal behavior in your instrument. This chapter contains details about many of these settings. -
Page 45: Installed Software
Instrument Operating System Installed Software Installed Software Signal analyzer software The N9060BSpectrum Analyzer Measurement Application software is installed in the signal analyzer. Additional measurement applications are available. Each application requires a license to execute the software. All of these applications are installed by the factory at the time of manufacture, even if the licenses have not been purchased. -
Page 46: Customer Installation Of Software
Instrument Operating System Customer installation of software Customer installation of software 3rd Party Software verified by Keysight Keysight has verified that the following programs are compatible with the instrument's applications: — MathWorks MATLAB Installation of other 3rd Party Software The X-Series Signal Analyzer platform is an Open Windows environment, so you can install software on the instrument. -
Page 47: User Accounts
Instrument Operating System User Accounts User Accounts The instrument ships with a number of different accounts already set up. In addition you can create your own accounts if you desire. The privileges associated with each account determine what you can and cannot do from that account. -
Page 48: Keysightonly User Account
Customer Support in the event that the customer has changed the Administrator password and has forgotten the password. For instruments with a Keysight Technologies disk image, the account is "KeysightOnly". You must not remove or modify the KeysightOnly account. -
Page 49: Keysight X-Series Analyzer Licensing Options
Instrument Operating System Keysight X-Series Analyzer Licensing Options Keysight X-Series Analyzer Licensing Options The Keysight X-Series Analyzers use three licensing types: Fixed Perpetual, Transportable Perpetual (PXA, MXA and EXA only), and Trial. These licensing types are available on all existing measurement applications except the Spectrum Analyzer Measurement Application (N9060A/B), which requires a fixed perpetual license, and the Remote Language Compatibility Application (N9061A), which does not support transportable licenses. - Page 50 Instrument Operating System Keysight X-Series Analyzer Licensing Options Trial licenses Trial licenses are available so that you may try applications before you buy the full applications. These licenses are time limited for a 30 day period, and are restricted to one trial for an individual application per instrument. The restriction is enforced through the license redemption process of the Keysight Software Licensing system.
-
Page 51: Licensing New Measurement Application Software - After Initial Purchase
Instrument Operating System Licensing New Measurement Application Software - After Initial Purchase Licensing New Measurement Application Software - After Initial Purchase Additional measurement application software can be ordered after your initial purchase of the signal analyzer. Software upgrades are provided in a kit that includes an option based Entitlement Certificate and a license agreement. - Page 52 If you require further assistance, please contact the Keysight support team. Online assistance: http://www.keysight.com/find/as sist If you do not have access to the Internet, contact your local Keysight Technologies Sales and Service Office, or if in the United States, call 1-800-829-4444.
-
Page 53: Transporting A License Between X-Series Analyzers
Instrument Operating System Transporting a License Between X-Series Analyzers Transporting a License Between X-Series Analyzers Transportable licenses can be identified by the letters "TP" in their option designator. For example, N9068A-2TP indicates the license is transportable and perpetual. To transport this license from one X-Series analyzer to another, it is recommended that both analyzers be at the same instrument software release. - Page 54 Instrument Operating System Transporting a License Between X-Series Analyzers Procedure for Transporting a License, Neither Analyzer Connected to the Internet Step Action Notes 1 Connect the USB Connect the USB flash drive, USB keyboard, It will be necessary to use one or more of and USB mouse to the USB ports on the the rear panel ports to connect the USB devices to the source...
- Page 55 Instrument Operating System Transporting a License Between X-Series Analyzers Step Action Notes 6 Get New License from a. Insert USB flash drive into PC that is The PC must have an internet connection and an available USB port. ASL Transportation Web connected to the internet page b.
-
Page 56: Firewall Configuration For Transporting Licenses Via Lan
Instrument Operating System Transporting a License Between X-Series Analyzers Firewall configuration for transporting licenses via LAN If you are attempting to transport licenses between two instruments that are connected to the LAN and the Internet through a firewall, your system administrator may need to allow a limited range of port numbers to pass through the firewall. -
Page 57: Windows Configuration
Instrument Operating System Windows Configuration Windows Configuration The Windows settings have been optimized for the best measurement performance. Any modifications to these settings may degrade instrument performance and measurement speed. In general, most Windows System settings (typically set through the Windows Control Panel) should not be modified. -
Page 58: Settings That Must Not Be Changed
Instrument Operating System Windows Configuration You May Use This Feature: To Do This… Add the Instrument to a network Install and configure a printer Set the time and date If you click on “Advanced System Settings” a dialog will open called “System Properties.”... - Page 59 Instrument Operating System Windows Configuration Do NOT Use This Feature: To Do This… Do not change the following Display Settings: — Screen Saver settings (under “Personalization) — Screen resolution, 1024 x 768 (under “Adjust Resolution”) — DPI setting (under “Set custom text size”) Do not change any settings under “Region and Language”...
-
Page 60: Autoplay/Autorun
Instrument Operating System Windows Configuration Autoplay/Autorun Since the introduction of Windows XP, the term Autoplay (sometimes also called Autorun) has come to be associated with the feature which assists users in selecting appropriate actions when new media and devices are detected. The Autoplay/Autorun feature is turned off in the instrument, by default, for heightened security, unless the Administrator account is running. -
Page 61: Configuring Printers
Instrument Operating System Configuring Printers Configuring Printers Printers are configured using the Microsoft Windows Control Panel. It is easily accessed from the Windows Start menu or from under the front panel System key. This setup process is most easily done using a USB mouse and an external keyboard. -
Page 62: Configuring Lan
Instrument Operating System Configuring LAN Configuring LAN Hostname The Computer Name, or hostname, is preconfigured from the factory. It must be a unique name such that it does not conflict with other equipment on your LAN. The preconfigured Computer Name is A-N90yyA-xxxxx, where xxxxx is the last 5 digits of the instrument’s serial number, and yy is 20 for MXA, 10 for EXA, or 30 for PXA. -
Page 63: Connecting To A Network Shared Folder
Instrument Operating System Configuring LAN Connecting to a Network Shared Folder The instrument contains standard Windows networking. The time required to authenticate is dependent on your LAN infrastructure. You may have improved performance by mapping a network drive to the shared folder that you need to access. -
Page 64: Windows Security
Instrument Operating System Windows Security Windows Security Microsoft recommends the following to ensure the instrument's Windows operating system is protected: — Use an internet firewall. — Get the latest critical Windows updates. — Use up-to-date antivirus software. Windows Firewall The instrument is shipped with the Windows Firewall enabled. You can verify the status of Windows Firewall by going to the Control Panel and clicking on System and Security, Windows Firewall. -
Page 65: Virus Protection
Instrument Operating System Windows Security Virus Protection There is no antivirus software included with your instrument. To find information regarding recommended antivirus software, visit the PXA, MXA, EXA or CXA website: http://www.keysight.com/find/pxa http://www.keysight.com/find/mxa http://www.keysight.com/find/exa http://www.keysight.com/find/cxa and click FAQs under Technical Support. Having antivirus software installed may have a slight impact on the NOTE instrument performance. -
Page 66: System Maintenance
Instrument Operating System System Maintenance System Maintenance Backup It is recommended that you have a regular backup strategy. Your IT department may already have a backup strategy in place which is suitable for the instrument and its data. Using the Instrument Recovery system in conjunction with a regular backup strategy should allow full recovery of the instrument data. -
Page 67: Usb Connections
USB Host drivers that allow control of other instruments connected to the USB ports. Keysight Technologies does not support or warrant correct instrument operation if additional USB drivers from third parties are installed in the instrument. It is possible that additional drivers could break the normal USB operation. -
Page 68: Disk Drive Partitioning And Use
Instrument Operating System Disk Drive Partitioning and Use Disk Drive Partitioning and Use The drive is partitioned into 3 sections: C:, D: and E: — The C: partition contains the Windows 7 operating system and software installed by Keysight. This is an Open System which means you can install additional software, and these should be installed on the C: drive. - Page 69 Instrument Operating System Disk Drive Partitioning and Use Step Notes 3 Press System, Alignments, The Alignment Data Wizard will appear: Backup or Restore Align Data... 4 Follow the on screen instructions to backup the calibration data to the USB drive and save the file.
-
Page 70: Disk Drive Recovery Process
Instrument Operating System Disk Drive Recovery Process Disk Drive Recovery Process The Instrument Recovery System can be used to repair errors on the instrument's C: drive partition or to restore the original factory configuration of the system software on the disk drive. The Instrument Recovery System is stored in a separate hidden disk drive partition. - Page 71 Disk Drive Recovery Process Table 3-1 Recovery Process Step Notes 2 Turn on the instrument. After the Keysight Technologies screen is displayed, — Press the down arrow key to move the highlight to Instrument Enter Recovery System, then press This screen is displayed for five seconds.
-
Page 72: Updating The Software
Instrument Operating System Disk Drive Recovery Process Table 3-1 Recovery Process Step Notes 5 Press Enter to exit and reboot the instrument once this portion of the recovery has completed. Additional recovery steps may be required to fully recover the system to a NOTE more current working state. - Page 73 Instrument Operating System Disk Drive Recovery Process — To re-install the software version you recovered to, follow the process below. The following steps load a copy of the instrument software that forces the program code resident in the instrument’s various programmable gate arrays to be in sync with the restored system software.
- Page 74 Instrument Operating System Disk Drive Recovery Process Table 3-2 Installing the Software Step Notes NOTE The installation process can take up to 45 minutes. Do not turn the instrument power off or serious damage may occur. If any pop up Ignore windows appear, click to proceed.
-
Page 75: Using Windows Tools
Keysight X-Series Signal Analyzers PXA N9030A, MXA N9020A, EXA N9010A, and CXA N9000A Getting Started Guide Using Windows Tools The capabilities described in this section are Microsoft Windows 7 features. NOTE The discussion provided here gives some guidelines for using the capabilities with the instrument. -
Page 76: Navigating Windows Without A Mouse
Using Windows Tools Navigating Windows Without a Mouse Navigating Windows Without a Mouse Key Presses Actions Exits/closes a Windows dialog box (does not exit an Application window) Enter Does the current "default action". If a menu item or a button is currently highlighted, then the Enter key activates that menu item or button. - Page 77 Using Windows Tools Navigating Windows Without a Mouse Table 4-1 Using the interactive Help system without a mouse To open the Help window for any menu Choose the desired menu, then press the front panel green Help key. Help Navigation Navigation Tabs Topic Window...
- Page 78 Using Windows Tools Navigating Windows Without a Mouse Table 4-2 Navigating Acrobat (PDF) without a mouse When you open an Acrobat (PDF) document, it is d isplayed in the Adobe Reader Window, which appears as shown below. Navigation Pane Navigation Document Pane Pane...
- Page 79 Using Windows Tools Navigating Windows Without a Mouse In the navigation pane In the document pane To select Thumbnails, To go to a specific page: and Display pages Next Window Press the key to open (from Pages Tab): Go to Page dialog, then enter the Left Right...
-
Page 80: Remote Desktop: Using The X-Series Signal Analyzers Remotely
Using Windows Tools Remote Desktop: Using the X-Series Signal Analyzers Remotely Remote Desktop: Using the X-Series Signal Analyzers Remotely Windows Remote Desktop is recommended for remote control of the instrument. It offers fully-interactive control that is almost identical to direct face-to-face control of the instrument. - Page 81 Using Windows Tools Remote Desktop: Using the X-Series Signal Analyzers Remotely Figure 4-1 Basic setup for remote desktop operation To perform this operation successfully, you must have Administrator level NOTE access to the instrument. Table 4-3 Setting up a remote desktop connection Step Action 1.
-
Page 82: How To Locate The Computer Name Of The Instrument
Using Windows Tools Remote Desktop: Using the X-Series Signal Analyzers Remotely Remote computer running another version of Windows You can use any version of Windows to install and run the Client software for Remote Desktop Connectivity. However, you need to have available a Windows installation CD-ROM, because that contains the Client software. -
Page 83: Running A Remote Desktop Session
Using Windows Tools Remote Desktop: Using the X-Series Signal Analyzers Remotely Table 4-6 Locating the name from the Windows desktop (with a mouse): Step Notes Start Control Panel 1. Click System The Computer name is listed in the Computer 2. Double-click name, domain, and workgroup settings section. - Page 84 Using Windows Tools Remote Desktop: Using the X-Series Signal Analyzers Remotely Table 4-7 Starting a session Step Notes 4. Enter the login account name and The default account name is Instrument and the password. default password is measure4u, but these parameters may be changed by instrument users.
- Page 85 Using Windows Tools Remote Desktop: Using the X-Series Signal Analyzers Remotely Table 4-8 Setting Remote Desktop options Step Notes 1. On the Remote Desktop Connection menu, click Options The Options dialog has several tabs. Generally, the default settings are correct. General You may choose to enter the password and save it for 2.
- Page 86 Using Windows Tools Remote Desktop: Using the X-Series Signal Analyzers Remotely Table 4-8 Setting Remote Desktop options Step Notes Display 3. Click the tab. Remote — Under desktop size , you may select the size of the window in which the instrument display appears.
- Page 87 Using Windows Tools Remote Desktop: Using the X-Series Signal Analyzers Remotely Table 4-8 Setting Remote Desktop options Step Notes Local Resources 4. Click the tab. Disk — Selecting the Drives checkbox enables you to transfer data between the remote desktop and the local PC.
- Page 88 Using Windows Tools Remote Desktop: Using the X-Series Signal Analyzers Remotely Accessing menus for Remote Desktop operation Using the mouse, right-click the application display window to access the following remote desktop menus, which may be used as an alternative to the front-panel keys:.
- Page 89 Using Windows Tools Remote Desktop: Using the X-Series Signal Analyzers Remotely Keycode commands for Remote Desktop operation When using the instrument in remote desktop mode, the following combinations of remote keyboard keys can be used to perform the operation of the instrument front-panel keys.
- Page 90 Using Windows Tools Remote Desktop: Using the X-Series Signal Analyzers Remotely Table 4-9 Keycode commands To initiate the following front-panel key: Press these keys on the remote computer keyboard: Cancel (Esc) Ctrl Cont Ctrl Ctrl Decrease Audio Volume the Volume Control slider Delete Down Arrow Down Arrow...
- Page 91 Using Windows Tools Remote Desktop: Using the X-Series Signal Analyzers Remotely Table 4-9 Keycode commands To initiate the following front-panel key: Press these keys on the remote computer keyboard: Ctrl Recall Ctrl Restart Ctrl Shift Return Right Arrow Right Arrow Ctrl Save Select...
- Page 92 Using Windows Tools Remote Desktop: Using the X-Series Signal Analyzers Remotely Table 4-9 Keycode commands To initiate the following front-panel key: Press these keys on the remote computer keyboard: – – Use the key to enter a negative value, as appropriate * .
-
Page 93: The Virtual Front Panel
Using Windows Tools Remote Desktop: Using the X-Series Signal Analyzers Remotely Step Notes 2. When the remote desktop is full screen, move the cursor to the bottom left of the window: You are asked to confirm that you want to Start Disconnect —... - Page 94 Using Windows Tools Remote Desktop: Using the X-Series Signal Analyzers Remotely When you click a button in the Virtual Front Panel, it performs the operation of the corresponding instrument front-panel key. The buttons at the left of the panel, named Key 1 through Key 7, perform the operation of the respective softkeys.
-
Page 95: Embedded Web Server: Using The X-Series Signal Analyzers Remotely
Using Windows Tools Embedded Web Server: Using the X-Series Signal Analyzers Remotely Embedded Web Server: Using the X-Series Signal Analyzers Remotely The instrument can be controlled using either the Embedded Web Server or Windows Remote Desktop. The Embedded Web Server is a good solution when you do not want to log into the instrument's user account. - Page 96 Using Windows Tools Embedded Web Server: Using the X-Series Signal Analyzers Remotely Table 4-10 Accessing the instrument Step Notes When the connection is made, the welcome page appears. Ad vanced information This displays further settings and configuration 2. Click information. about this Web-Enabled Keysight MXA At the left side...
- Page 97 Using Windows Tools Embedded Web Server: Using the X-Series Signal Analyzers Remotely Table 4-11 Selecting the View & Modify Configuration tab Step Notes View & Mod ify This displays a web page, which shows the instrument’s 1. Click currently-assigned IP address and other TCP/IP Configuration parameters.
- Page 98 Using Windows Tools Embedded Web Server: Using the X-Series Signal Analyzers Remotely Table 4-11 Selecting the View & Modify Configuration tab Step Notes Undo Changes 3. Enter new settings as required, Before clicking Apply, you may use the Apply then click to cause the button to revert all settings to their previous values.
-
Page 99: Accessing The Web Control Sa Tab
Using Windows Tools Embedded Web Server: Using the X-Series Signal Analyzers Remotely Accessing the Web Control SA tab Selecting this tab lets you view, control and interact with the instrument through the web server. Step Notes Web Control SA A password entry dialog appears. 1. -
Page 100: Selecting The Get Data Tab
Using Windows Tools Embedded Web Server: Using the X-Series Signal Analyzers Remotely Step Notes Selecting the Get Data tab Selecting the Get Data tab allows you to capture results from the instrument’s currently active measurement. Depending on the current measurement type, captured results consist of either Trace Data or Measurement Results. - Page 101 Using Windows Tools Embedded Web Server: Using the X-Series Signal Analyzers Remotely To capture data using the web server, the instrument application must be NOTE running. The captured data is formatted as a Comma Separated Value (CSV) file, which may be saved on the client computer’s disk drive, or opened with a spreadsheet application such as Microsoft Excel, or imported into a database application such as Microsoft Access.
-
Page 102: Selecting The Get Image Tab
Using Windows Tools Embedded Web Server: Using the X-Series Signal Analyzers Remotely Selecting the Get Image tab Selecting the Get Image tab captures a screen image from the Instrument display. To capture a screen image using the web server, the Instrument Application NOTE must be running. -
Page 103: Selecting The Scpi Telnet Tab
Using Windows Tools Embedded Web Server: Using the X-Series Signal Analyzers Remotely Selecting the SCPI Telnet tab Selecting the SCPI Telnet tab opens a Telnet session between the instrument and the client computer. The instrument TCP/IP port used for SCPI access is 5023. -
Page 104: Selecting The Help Tab
Using Windows Tools Embedded Web Server: Using the X-Series Signal Analyzers Remotely Step Notes SCPI commands and queries may be entered using the command line interface. 3. To exit the telnet session, Ctrl+] press on the client computer keyboard. Selecting the Help tab Selecting the Help tab displays basic help information about each of the other tabs, plus performance tips, as shown:... -
Page 105: Capturing/Printing Displays And Windows
Using Windows Tools Capturing/Printing Displays and Windows Capturing/Printing Displays and Windows You need an external keyboard and mouse to use this feature. Save the desktop: Step Notes Print Screen This captures the desktop and saves it on the Windows 1. Press on the clipboard. -
Page 106: Windows Shortcuts And Miscellaneous Tasks
Using Windows Tools Windows Shortcuts and Miscellaneous Tasks Windows Shortcuts and Miscellaneous Tasks This section provides a list of windows shortcuts (key combinations) that are useful when you operate the instrument without an attached mouse and keyboard. (See also “Navigating Windows Without a Mouse” on page 76.) Although these shortcuts are available in any Windows 7 system, they are not commonly used when a mouse and keyboard are attached. - Page 107 Using Windows Tools Windows Shortcuts and Miscellaneous Tasks Navigating an application menu without a mouse or keyboard This example uses Microsoft Excel, but you can use a similar sequence of operations to select and execute any menu item of any application. To select and execute the item Sheet >...
-
Page 108: Windows Taskbar Auto-Hide Feature
Using Windows Tools Windows Shortcuts and Miscellaneous Tasks Windows taskbar auto-hide feature The Windows taskbar should always be in the auto-hide mode when using the instrument application. If the taskbar is not set to auto-hide, the lower part of the instrument display is obscured by the taskbar. If a mouse is attached to the instrument, and you move the mouse cursor to the bottom of the display (either deliberately or accidentally), the taskbar automatically appears. -
Page 109: Troubleshooting
Keysight X-Series Signal Analyzers PXA N9030A, MXA N9020A, EXA N9010A, and CXA N9000A Getting Started Guide Troubleshooting “Check the Basics” on page 110 “Problems with Microsoft Windows 7” on page 112 “Returning an Analyzer for Service” on page 113 No operator serviceable parts inside. Refer servicing to qualified WARNING personnel. -
Page 110: Check The Basics
Troubleshooting Check the Basics Check the Basics — Is there power at the receptacle? — Is the analyzer turned on? Check to see if the green LED beside the power switch is on. Also, listen for internal fan noise to determine if the analyzer cooling fans are running. - Page 111 Troubleshooting Check the Basics http://www.keysight.com/find/cxa_manuals — If the analyzer is not communicating via the LAN connection, check for the presence of blinking yellow LEDs on the rear panel LAN connector. If the ACT LED is not blinking, check the LAN cable and LAN integrity. —...
-
Page 112: Problems With Microsoft Windows 7
Troubleshooting Problems with Microsoft Windows 7 Problems with Microsoft Windows 7 The Microsoft Windows 7 operating system settings have been optimized for the best performance. Modification of these settings may degrade instrument performance and measurement speed. Those that can be safely modified are described in “Settings that can be changed”... -
Page 113: Returning An Analyzer For Service
Returning an Analyzer for Service Calling Keysight Technologies Keysight Technologies has offices around the world to provide you with complete support for your analyzer. To obtain servicing information or to order replacement parts, contact the nearest Keysight Technologies office listed below. -
Page 114: Locations For Keysight Technologies
Troubleshooting Returning an Analyzer for Service Locations for Keysight Technologies Table 5-1 Contacting Keysight www.keysight.com/find/contactus Online assistance: Americas Country Phone Number Canada (877) 894 4414 Brazil 55 11 3351 7010 Mexico 001 800 254 2440 United States 1 800 829-4444... -
Page 115: Read The Warranty
Service Options Keysight Technologies offers several optional maintenance plans to service your analyzer after the warranty has expired. Call your Keysight Technologies office for full details. If you want to service the analyzer yourself after the warranty expires, you can purchase the service documentation that provides all necessary test and maintenance information. -
Page 116: Packaging The Instrument
Troubleshooting Returning an Analyzer for Service Packaging the Instrument Use original packaging or comparable. It is best to pack the unit in the original factory packaging materials if they are available. Analyzer damage can result from using packaging materials other than those CAUTION specified. - Page 117 Embedded Web Server shortcut, program storage, Get Data Page, Keysight Technologies, calling, Get Data Tab, Get Image Page, Get Image Tab, Help Page, Help Tab, rack mounting, line voltage, SCPI Telnet Page,...
- Page 118 Index reduce power-on time, Control Panel, Remote Desktop print screen, keycodes, Remote Desktop Installing running, Remote Operation Setting up Connection Speed, Screen Capture, remote operation, screen capture, embedded web server, Shortcut keys, internet access, taskbar replacing battery, auto-hide running Windows without a mouse, Windows Remote Desktop, keycodes,...
- Page 119 This information is subject to change without notice. © Keysight Technologies 2008-2015 Second Edition, June 2015 N9020-90246 www.keysight.com...
Need help?
Do you have a question about the PXA N9030A and is the answer not in the manual?
Questions and answers