Table of Contents
Advertisement
Quick Links
Advertisement
Table of Contents

Subscribe to Our Youtube Channel
Related Manuals for Digi Connect EZ Mini


Summary of Contents for Digi Connect EZ Mini
- Page 1 Connect EZ Mini User Guide Firmware version 22.2...
- Page 2 Revision history—90002409 Revision Date Description Release of Digi Connect EZ firmware version 22.2: March 2022 VPN enhancements: Renamed VPN > IPsec > Tunnels > Policies > Local network setting to Local traffic selector and added Remote traffic selector. Added a Dynamic option to the Local traffic selector to configuration of a local network by protocol and/or port instead of a network address range.
- Page 3 Initial release. 2021 Trademarks and copyright Digi, Digi International, and the Digi logo are trademarks or registered trademarks in the United States and other countries worldwide. All other trademarks mentioned in this document are the property of their respective owners.
- Page 4 Feedback To provide feedback on this document, email your comments to techcomm@digi.com Include the document title and part number (Digi Connect EZ Mini User Guide, 90002409 A) in the subject line of your email. Digi Connect EZ Mini User Guide...
-
Page 5: Table Of Contents
Step 2: Connect the power supply Step 3: Connect to site network using an Ethernet LAN Step 4: Discover the IP address using the Digi Navigator Step 5: Configure RealPort from the Digi Navigator Step 6: Connect to the web UI and update the Connect EZ firmware... - Page 6 View serial port information Default serial port configuration Configure Login mode Configure Remote Access mode Configure Application mode Configure RealPort mode Install RealPort on a Windows computer Configure the serial port for RealPort mode Digi Connect EZ Mini User Guide...
- Page 7 Show serial status and statistics Log serial port messages Digi Navigator application Step 5: Configure RealPort from the Digi Navigator Step 4: Discover the IP address using the Digi Navigator Install the Digi Navigator Digi Navigator features Connect to and access the Digi Navigator...
- Page 8 Run a Python application at the shell prompt Start an interactive Python session Digidevice module Use digidevice.cli to execute CLI commands Use digidevice.datapoint to upload custom datapoints to Digi Remote Manager Use digidevice.config for device configuration Digi Connect EZ Mini User Guide...
- Page 9 Use Python to respond to Digi Remote Manager SCI requests Use digidevice runtime to access the runtime database Use Python to upload the device name to Digi Remote Manager Use Python to access the device location data Use Python to set the maintenance window...
- Page 10 Collect device health data and set the sample interval Enable event log upload to Digi Remote Manager Log into Digi Remote Manager Use Digi Remote Manager to view and manage your device Add a device to Digi Remote Manager View Digi Remote Manager connection status...
- Page 11 Ping to check internet connection Stop ping commands Use the traceroute command to diagnose IP routing problems Digi Connect EZ regulatory and safety statements RF exposure statement Federal Communication (FCC) Part 15 Class A European Community - CE Mark Declaration of Conformity (DoC)
- Page 12 Example: Create a new user by using the command line Command line reference analyzer clear analyzer save analyzer start analyzer stop clear dhcp-lease ip-address clear dhcp-lease mac help mkdir modem at-interactive modem puk unlock modem sim-slot monitoring monitoring metrics upload more ping reboot Digi Connect EZ Mini User Guide...
- Page 13 Digi Connect EZ Mini User Guide...
- Page 14 Digi Connect EZ Mini User Guide...
-
Page 15: Digi Connect Ez Mini User Guide
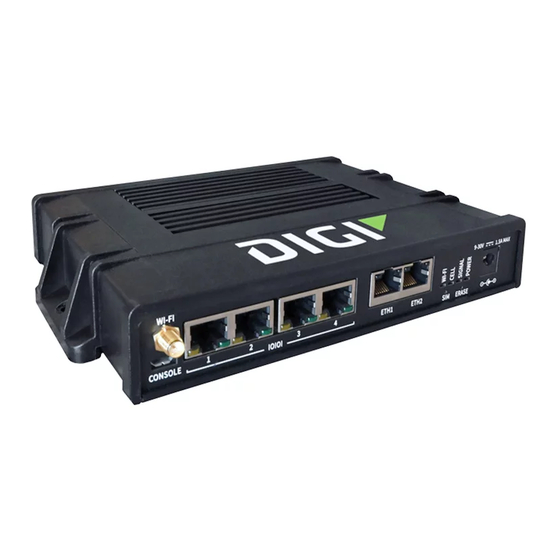
The Connect EZ Mini offers a small form factor that can be easily deployed on a DIN rail, mounted on a wall or panel, or as a "bump in the cable". The Connect EZ Mini leverages Digi’s DAL firmware and TrustFence security framework to extend Digi’s critical infrastructure management offerings with... -
Page 16: Get Started With Connect Ez
Step 2: Connect the power supply Step 3: Connect to site network using an Ethernet LAN Step 4: Discover the IP address using the Digi Navigator Step 5: Configure RealPort from the Digi Navigator Step 6: Connect to the web UI and update the Connect EZ firmware... -
Page 17: Step 2: Connect The Power Supply
The power supply is included with the device. The power supply is a Direct Plugin Class 2 output transformer rated 18 W, 12 VDC, with 1.5 A output. 1. Orient the device so the top of the device is facing you. Digi Connect EZ Mini User Guide... -
Page 18: Step 3: Connect To Site Network Using An Ethernet Lan
Ethernet cable. See Connect to and access the Digi Navigator. Note If you don't have access to the Digi Navigator, you can use a manual method to discover the IP address. See Discover the device's IP address: Additional methods. Download and install the Digi Navigator. -
Page 19: Step 5: Configure Realport From The Digi Navigator
Specify a device: Expand the Specify a device section and enter the IP address or host name for the device. Select a device: From the list of devices shown in the Digi Navigator, expand the device that you want to configure. -
Page 20: Step 6: Connect To The Web Ui And Update The Connect Ez Firmware
COM ports on your computer that are configured for RealPort from within the Digi Navigator. a. Launch the Digi Navigator if it is not currently open. A list of Connect EZ devices that have RealPort enabled and configured displays in the RealPort Devices section at the bottom of the application screen. -
Page 21: Update The Firmware On The Connect Ez
Get started with Connect EZ Step 6: Connect to the web UI and update the Connect EZ firmware Note You can also use the Digi Navigator to access the web UI and configure the device. See Access the web UI from the Digi Navigator. -
Page 22: Step 7: Connect To Digi Remote Manager
Manager. Step 7: Connect to Digi Remote Manager Make user to connect your device to Digi Remote Manager to ensure that you receive automatic notification of firmware updates and security notices. From Remoter Manager, you can also easily update firmware, ensure consistent configuration across a large group of devices, and manage and monitor cellular connectivity. -
Page 23: Connect Equipment To The Connect Ez Serial Port
To get to this page, choose Status > Connections > Serial. Serial Status page for more information. Serial connector pinout: Connect EZ Mini The Connect EZ Mini has a DB9 serial connector. The table below contains the pinout information. DB-9 pin EIA-232 EIA-422... -
Page 24: Serial Status Page
User When the port is connected to a terminal, SSH, TCP, or Telnet connection the name of the user logged into the device displays. See the description for Port (above) for more information. Digi Connect EZ Mini User Guide... - Page 25 Displays the total number of bytes that have been transmitted and received. Signals Indicates the types of communication that the device is ready to send. DCD: Carrier Detected CTS: Clear to Send DTR: Data Terminal Ready RTS: Ready to Dend Digi Connect EZ Mini User Guide...
-
Page 26: Hardware
The serial port LED shows the status of the connection. Off: The port is not in use. Solid Green: A device is connected to the port. Blinking Green: The port is in use and there is activity on the port. Digi Connect EZ Mini User Guide... -
Page 27: Bottom Panel
Right (green): The port is in use. Bottom panel Name Description Connect equipment to a serial port to provide console access to Serial port the equipment through a connected Ethernet WAN. See Connect equipment to the Connect EZ serial port. Digi Connect EZ Mini User Guide... -
Page 28: Back Panel
Use to reset the device to factory defaults. Reset button You can attach a DIN rail clip to the back DIN rail clip of the device and then mount the device to a DIN rail. Digi Connect EZ Mini User Guide... -
Page 29: Change The Password On The Connect Ez
Attach to a mounting surface using the two mounting tabs Attach the device to a surface using the two tabs on the device. The type and length are dependent on the mounting surface type. Digi Connect EZ Mini User Guide... -
Page 30: Attach To Din Rail With Clip
3. In each hole, use a Phillips-head screw driver to screw in a screw. 4. Tighten the screws as needed to securely fasten the DIN rail clip to the device. 5. Set the device onto a DIN rail and gently press until the clip snaps into the rail. Digi Connect EZ Mini User Guide... -
Page 31: Use The Erase Button To Reset Your Device To The Factory Defaults
Manually configure the PC and assign an IP address to the device Discover the IP address using a Micro USB cable You can use a Micro USB cable and a terminal emulation application to determine the device's IP address. Digi Connect EZ Mini User Guide... -
Page 32: Manually Configure The Pc And Assign An Ip Address To The Device
Determine the IP address that you want to assign to the device. To configure your laptop and assign an IP address: 1. On your PC, navigate to the Ethernet network settings dialog. 2. Click the Internet Protocol Version 4 (TCP/IPv4) parameter. Digi Connect EZ Mini User Guide... - Page 33 8. Enter the default gateway IP address: 192.168.201.1 9. Log into the device using the default user name and password. The default user name is admin and the default password is the unique password printed on the label packaged with your Digi Connect EZ Mini User Guide...
-
Page 34: Loose Label Sample
Label part number and revision level. number Product name Product name, such as Connect EZ Mini, Connect EZ 2, or Connect EZ 4i. Device part number (SKU number) and revision. For example, EZ02-C000 A Device part number (SKU) and revision Digi Connect EZ Mini User Guide... - Page 35 The unique serial number assigned to the device. The SN is needed when submitting a Digi support ticket. Device kit part The part number and revision level of the device kit. number and revision level Digi Connect EZ Mini User Guide...
- Page 36 Use the local REST API to configure the Connect EZ device Access the terminal screen from the web UI Using the command line Access the command line interface Log in to the command line interface Exit the command line interface Digi Connect EZ Mini User Guide...
-
Page 37: Configuration And Management
Configuration and management Review Connect EZ default settings Review Connect EZ default settings You can review the default settings for your Connect EZ device by using the local WebUI or Digi Remote Manager: Local WebUI 1. Log into the Connect EZ WebUI as a user with Admin access. -
Page 38: Change The Default Password For The Admin User
Packet filtering allows all outbound traffic. Security policies SSH and web administration: Enabled for local administration Firewall zone: Set up Device heath metrics uploaded to Digi Remote Manager at 60 minute Monitoring interval. SNMP: Disabled Change the default password for the admin user The unique, factory-assigned password for the default admin user account is printed on the bottom label of the device and on the loose label included in the package. -
Page 39: Configuration Methods
Web interface. The web interface can be accessed in two ways: Central management using the Digi Remote Manager, a cloud-based device management and data enablement platform that allows you to connect any device to any application, anywhere. With the Remote Manager, you can configure your Connect EZ device and use the configuration as a basis for a profile which can be applied to other similar devices. - Page 40 Note Changes made to the device's configuration by using the local web interface will not be automatically reflected in Digi Remote Manager. You must manually refresh Remote Manager for the changes to be displayed. Web-based instructions in this guide are applicable to both the Remote Manager and the local web interface.
-
Page 41: Using Digi Remote Manager
Using Digi Remote Manager Using Digi Remote Manager By default, your Connect EZ device is configured to use Digi Remote Manager as its central management server. No configuration changes are required to begin using the Remote Manager. For information about configuring central management for your Connect EZ device, see Central management. -
Page 42: Log Out Of The Web Interface
2. At the command line, type config to enter configuration mode: > config (config)> 3. At the config prompt, type ? (question mark): (config)> ? auth Authentication cloud Central management firewall Firewall monitoring Monitoring network Network serial Serial service Services system System Digi Connect EZ Mini User Guide... - Page 43 $ curl -k -u admin https://192.168.210.1/cgi-bin/config.cgi/value/service/ssh - X GET Enter host password for user 'admin': ok": true, "result": { "type": "object", "path": "service.ssh" "collapsed": { "acl.zone.0": "internal" "acl.zone.1": "edge" "acl.zone.2": "ipsec" "acl.zone.3": "setup" "enable": "true" "key": "" "mdns.enable": "true" Digi Connect EZ Mini User Guide...
-
Page 44: Use The Post Method To Modify Device Configuration Parameters And List Arrays
To add items to a list array, use the POST method with the path and append parameters. For example, to add the external firewall zone to the ssh service: $ curl -k -u admin "https://192.168.210.1/cgi- bin/config.cgi/value?path=service.ssh.acl.zone&append=true&value=external" -X POST Enter host password for user 'admin': { "ok": true, "result": "service.ssh.acl.zone.4" } Digi Connect EZ Mini User Guide... -
Page 45: Use The Delete Method To Remove Items From A List Array
"2": "ipsec" "3": "setup" "4": "external" 2. Use the DELETE method to remove the external zone (list item 4). $ curl -k -u admin https://192.168.210.1/cgi- bin/config.cgi/value?path=service.ssh.acl.zone.4 -X DELETE Enter host password for user 'admin': Digi Connect EZ Mini User Guide... -
Page 46: Access The Terminal Screen From The Web Ui
6. Enter ~b? to display additional commands. Command Description Disconnect from the port. Send a BREAK sequence. Clear the history buffer. Send a DTR reset sequence. Display a list of commands. 7. Enter ~b. to disconnect from the port. Digi Connect EZ Mini User Guide... -
Page 47: Using The Command Line
You can use an open-source terminal software, such as PuTTY or TeraTerm, to access the device through one of these mechanisms. You can also access the command line interface in the WebUI by using the Terminal, or the Digi Remote Manager by using the Console. -
Page 48: Exit The Command Line Interface
2. Depending on the device configuration, you may be presented with another menu, for example: Access selection menu: a: Admin CLI q: Quit Select access or quit [admin] : Type q or quit to exit. Digi Connect EZ Mini User Guide... -
Page 49: Interfaces
Configure SureLink active recovery to detect WAN failures Configure the device to reboot when a failure is detected Disable SureLink Configure a Wide Area Network (WAN) Show WAN status and statistics Delete a WAN Digi Connect EZ Mini User Guide... -
Page 50: Wide Area Networks (Wans)
2. On the menu, click System. Under Configuration, click Device Configuration. The Configuration window is displayed. 3. Set the metrics for Modem: a. Click Network > Interfaces > Modem > IPv4. b. For Metric, type 1. Digi Connect EZ Mini User Guide... - Page 51 3. Set the metrics for Modem: a. Set the IPv4 metric for Modem to 1. For example: (config)> network interface modem ipv4 metric 1 (config)> b. Set the IPv6 metric for Modem to 1: Digi Connect EZ Mini User Guide...
-
Page 52: Configure Surelink Active Recovery To Detect Wan Failures
WAN has failed, because the connection continues to work while the core problem exists somewhere else in the network. Using Digi SureLink, you can configure the Connect EZ device to regularly probe connections through the WAN to determine if the WAN has failed. - Page 53 4. Click Network > Interfaces. 5. Create a new WAN or select an existing one: To create a new WAN, see Configure a Wide Area Network (WAN). To edit an existing WAN, click to expand the appropriate WAN. Digi Connect EZ Mini User Guide...
- Page 54 Allowed values are any number of weeks, days, hours, minutes, or seconds, and take the format number{w|d|h|m|s}. For example, to set parameter name to ten minutes, enter 10m or 600s. Digi Connect EZ Mini User Guide...
- Page 55 1. Log into the Connect EZ command line as a user with full Admin access rights. Depending on your device configuration, you may be presented with an Access selection menu. Type admin to access the Admin CLI. Digi Connect EZ Mini User Guide...
- Page 56 (config network interface my_wan ipv4 surelink target 0)> dns: Tests connectivity by sending a DNS query to the specified DNS server. Specify the DNS server. Allowed value is the IP address of the DNS server. Digi Connect EZ Mini User Guide...
- Page 57 For example, to set interface_timeout to ten minutes, enter either 10m or 600s: (config network interface my_wan ipv4 surelink target 0)> interface_timeout 600s (config network interface my_wan ipv4 surelink target 0)> The default is 60 seconds. (Optional) Repeat to add additional test targets. Digi Connect EZ Mini User Guide...
- Page 58 (config network interface my_wan ipv4 surelink> The default is 3. g. Set the amount of time that the device should wait for a response to a probe attempt before considering it to have failed: Digi Connect EZ Mini User Guide...
-
Page 59: Configure The Device To Reboot When A Failure Is Detected
Additional configuration items See for Configure SureLink active recovery to detect WAN failures optional SureLink configuration parameters. Digi Connect EZ Mini User Guide... - Page 60 Initial connection time: The amount of time to wait for an initial connection to the interface before this test is considered to have failed. Allowed values are any number of weeks, days, hours, minutes, or seconds, and take the format number{w|d|h|m|s}. Digi Connect EZ Mini User Guide...
- Page 61 1. Log into the Connect EZ command line as a user with full Admin access rights. Depending on your device configuration, you may be presented with an Access selection menu. Type admin to access the Admin CLI. Digi Connect EZ Mini User Guide...
- Page 62 Specify the hostname or IP address: (config network interface my_wan ipv4 surelink target 0)> ping_ host host (config network interface my_wan ipv4 surelink target 0)> (Optional) Set the size, in bytes, of the ping packet: Digi Connect EZ Mini User Guide...
- Page 63 (config network interface my_wan ipv4 surelink target 0)> where value is any number of weeks, days, hours, minutes, or seconds, and takes the format number{w|d|h|m|s}. For example, to set parameter name to ten minutes, enter either 10m or 600s: Digi Connect EZ Mini User Guide...
- Page 64 (config network interface my_wan ipv4 surelink)> success_condition value (config network interface my_wan ipv4 surelink> Where value is either one or all. Digi Connect EZ Mini User Guide...
-
Page 65: Disable Surelink
1. Log into the Connect EZ WebUI as a user with full Admin access rights. 2. On the menu, click System. Under Configuration, click Device Configuration. The Configuration window is displayed. 3. Click Network > Interfaces. 4. Select the appropriate WAN on which SureLink should be disabled.. Digi Connect EZ Mini User Guide... - Page 66 (config network interface modem)> 4. Disable SureLink: (config network interface modem> ipv4 surelink enable false (config network interface modem)> 5. Save the configuration and apply the change: (config network interface my_wwan ipv4 surelink)> save Configuration saved. > Digi Connect EZ Mini User Guide...
- Page 67 5. After selecting the WAN, click IPv4 > SureLink. 6. Click to expand Test targets. 7. Click to expand the second test target. This test target has its Test type set to Test DNS servers configured for this interface. Digi Connect EZ Mini User Guide...
- Page 68 (config)> network interface my_wan (config network interface my_wan)> 4. Determine the index number of the target: (config network interface my_wan)> show ipv4 surelink target interface_down_time 600s interface_timeout 120s test interface_up test dns_configured (config network interface my_wan)> Digi Connect EZ Mini User Guide...
-
Page 69: Configure A Wide Area Network (Wan)
The relative weight for IPv4 routes associated with the WAN. The IPv4 management priority of the WAN. The active interface with the highest management priority will have its address reported as the preferred contact address for central management and direct device access. Digi Connect EZ Mini User Guide... - Page 70 Always: DNS will always be used for this WAN; when multiple interfaces have the same DNS server, the interface with the lowest metric will be used for DNS requests. When primary default route: Only use the DNS servers provided for this Digi Connect EZ Mini User Guide...
- Page 71 DHCP requests as the Client FQDN option. The DHCP server can then be configured to register the device's hostname and IP address with an associated DNS server. RFC4702 for further information about DHCP server support for the Client FQDN option. Digi Connect EZ Mini User Guide...
- Page 72 To edit an existing WAN named my_wan, change to the my_wan node in the configuration schema: (config)> network interface my_wan (config network interface my_wan)> 4. Set the appropriate firewall zone: (config network interface my_wan)> zone zone (config network interface my_wan)> Firewall configuration for further information. Digi Connect EZ Mini User Guide...
- Page 73 The interface with the highest number will be used. (config network interface my_wan)> ipv4 mgmt num (config network interface my_wan)> iv. Set the MTU: (config network interface my_wan)> ipv4 mtu num (config network interface my_wan)> Digi Connect EZ Mini User Guide...
- Page 74 ---------- dhcp_hostname false DHCP Hostname enable true Enable metric Metric mgmt Management priority 1500 type dhcpv6 Type use_dns always Use DNS weight Weight Additional Configuration --------------------------------------------------------------------- ---------- connection_monitor Active recovery (config network interface my_wan)> Digi Connect EZ Mini User Guide...
-
Page 75: Show Wan Status And Statistics
Admin CLI prompt: > show network Interface Proto Status Address ---------------- ----- ------- ------------------------------- defaultip IPv4 192.168.210.1/24 defaultlinklocal IPv4 169.254.100.100/16 eth1 IPv4 10.10.10.10/24 eth1 IPv6 fe00:2404::240:f4ff:fe80:120/64 loopback IPv4 127.0.0.1/8 > Digi Connect EZ Mini User Guide... - Page 76 IPv6 DNS Server(s) : fd00:244::1, fe80::234:f3f4:fe0e:4320 > 5. Type exit to exit the Admin CLI. Depending on your device configuration, you may be presented with an Access selection menu. Type quit to disconnect from the device. Digi Connect EZ Mini User Guide...
-
Page 77: Delete A Wan
(config)> save Configuration saved. > 5. Type exit to exit the Admin CLI. Depending on your device configuration, you may be presented with an Access selection menu. Type quit to disconnect from the device. Digi Connect EZ Mini User Guide... -
Page 78: Show Surelink Status And Statistics
Surelink status of a specific interface, for example: > show surelink interface name eth1 Interface Test Proto Last Response Status --------- ----------------------------- ----- ------------- ------- eth1 Interface is up IPv4 32 seconds Passing Digi Connect EZ Mini User Guide... -
Page 79: Show Surelink Status For All Ipsec Tunnels
Surelink status of a specific tunnel, for example: > show surelink ipsec tunnel test IPsec Test Last Response Status ------ -------------------- ------------- ------------------ test 194.43.79.74 (Ping) 29 seconds Passed Digi Connect EZ Mini User Guide... -
Page 80: Show Surelink Status For All Openvpn Clients
Surelink status of a specific OpenVPN client, for example: > show surelink openvpn client test_client1 OpenVPN Client Test Last Response Status -------------- -------------------- ------------- ------------------ test_client1 194.43.79.74 (Ping) 29 seconds Passed test_client1 194.43.79.75 (Ping) 5 seconds Passed Digi Connect EZ Mini User Guide... - Page 81 Show Surelink status and statistics > 3. Type exit to exit the Admin CLI. Depending on your device configuration, you may be presented with an Access selection menu. Type quit to disconnect from the device. Digi Connect EZ Mini User Guide...
-
Page 82: Serial Port
Access: Provides socket level access to ports. Application: Provides access to the serial device from Python applications. RealPort: Used in conjunction with the Digi RealPort driver. RealPort can also be configured using the Digi Navigator. For more information about configuring RealPort, see Digi Navigator application. -
Page 83: Configure Login Mode
DCD is not required, and DSR is needed instead. 6. (Optional) For Label, enter a label that will be used when referring to this port. 7. For Signalling, select the electrical signaling interface type used on this serial port: Digi Connect EZ Mini User Guide... - Page 84 9. Click Apply to save the configuration and apply the change. The Apply button is located at the top of the WebUI page. You may need to scroll to the top of the page to locate it. Command line Digi Connect EZ Mini User Guide...
- Page 85 For rts_post_delay, enter the amount of time RTS is deasserted before completing data transmission. The time is measured in milliseconds. The default is 0ms: (config)> serial port1 rts_post_delay value (config)> rs-422 Enable Termination if you want to enable electrical termination on this serial port. Digi Connect EZ Mini User Guide...
- Page 86 The default is none. 11. Set the stop bits used by the device to which you want to connect: (config)>path-paramstopbits bits (config)> 12. Save the configuration and apply the change: (config)> save Configuration saved. > Digi Connect EZ Mini User Guide...
-
Page 87: Configure Remote Access Mode
Enable RTS Toggle if you want to enable RTS toggling during transmission on this serial port. If enabled, this setting overrides RTS\CTS flow control. For RTS Pre-delay, enter the amount of time RTS is asserted before starting data transmission. The time is measured in milliseconds. The default is 0ms. Digi Connect EZ Mini User Guide... - Page 88 13. Click Strip End Pattern if you want to remove the end pattern from the packet before it is sent. 14. Expand Service Settings. All service settings are disabled by default. Click available options to toggle them to enabled, and set the IP ports as appropriate. 15. Expand Autoconnect Settings. Digi Connect EZ Mini User Guide...
- Page 89 1. Log into the Connect EZ command line as a user with full Admin access rights. Depending on your device configuration, you may be presented with an Access selection menu. Type admin to access the Admin CLI. Digi Connect EZ Mini User Guide...
- Page 90 Enable Termination if you want to enable electrical termination on this serial port. rs-485 Enable termination if you want to enable electrical termination on this serial port: (config)> serial port1 termination true (config)> Digi Connect EZ Mini User Guide...
- Page 91 Limit access to the serial port to a single active session: (config)>path-paramexclusive true (config) c. Set the number of bytes of output from the serial port that are written to buffer. These bytes are redisplayed when a user connects to the serial port. Digi Connect EZ Mini User Guide...
-
Page 92: Configure Application Mode
Configure Application mode Application mode provides access to the serial device from Python applications. To change the configuration to match the serial configuration of the device to which you want to connect: WebUI Digi Connect EZ Mini User Guide... - Page 93 Enable Termination if you want to enable electrical termination on this serial port. RS-485 Enable Termination if you want to enable electrical termination on this serial port. Enable Full Duplex if you want to enable full duplex communication on this serial port. The default is RS-232. Digi Connect EZ Mini User Guide...
- Page 94 DCD is not required, and DSR is needed instead. rs-232 Enable rts_toggle if you want to enable RTS toggling during transmission on this serial port. If enabled, this setting overrides RTS\CTS flow control: (config)> serial port1 rts_toggle true (config)> Digi Connect EZ Mini User Guide...
-
Page 95: Configure Realport Mode
You can configure the Connect EZ to communicate with your computer using RealPort. Note If you are using the Windows OS, you can also enable and configure RealPort mode for the Connect EZ device and your computer from the Digi Navigator. See Digi Navigator application. -
Page 96: Install Realport On A Windows Computer
3. Click the desired RealPort for Windows version. The file is downloaded, and a Windows Explorer window launches, showing the RealPort files. 4. When the download is complete, open the .zip file and click the setup.exe file. The Digi RealPort Setup Wizard appears. -
Page 97: Configure The Serial Port For Realport Mode
Configure the serial port for RealPort mode RealPort mode allows you to use Realport. To change the configuration to match the serial configuration of the device to which you want to connect: WebUI Digi Connect EZ Mini User Guide... - Page 98 Enable Termination if you want to enable electrical termination on this serial port. RS-485 Enable Termination if you want to enable electrical termination on this serial port. Enable Full Duplex if you want to enable full duplex communication on this serial port. The default is RS-232. Digi Connect EZ Mini User Guide...
- Page 99 The time is measured in milliseconds. The default is 0ms: (config)> serial port1 "rts_pre_delay value (config)> For rts_post_delay, enter the amount of time RTS is deasserted before completing data transmission. The time is measured in milliseconds. The default is 0ms: Digi Connect EZ Mini User Guide...
-
Page 100: Configure The Realport Service
After you have configured RealPort mode on the Connect EZ, you must enable and configure the RealPort service. When this step is complete, all of the serial ports on the Connect EZ are configured to use the RealPort service. Digi Connect EZ Mini User Guide... -
Page 101: Configure Udp Serial Mode
The Serial Configuration page is displayed. Note You can also configure the serial port by using Device Configuration > Serial. Changes made by using either Device Configuration or Serial Configuration will be reflected in both. Digi Connect EZ Mini User Guide... - Page 102 For Stop bits, select the number of stop bits used by the device to which you want to connect. e. For Flow control, select the type of flow control used by the device to which you want to connect. Digi Connect EZ Mini User Guide...
- Page 103 For Hostname, enter the host name or IP address of the remote site to which data should be sent. iv. For Port, enter the port number of the remote site to which data should be sent. Digi Connect EZ Mini User Guide...
- Page 104 DCD is not required, and DSR is needed instead. rs-232 Enable rts_toggle if you want to enable RTS toggling during transmission on this serial port. If enabled, this setting overrides RTS\CTS flow control: (config)> serial port1 rts_toggle true (config)> Digi Connect EZ Mini User Guide...
- Page 105 9. Set the number of data bits used by the device to which you want to connect: (config)>serial port1 label databits bits (config)> 10. Set the type of parity used by the device to which you want to connect: (config)>serial port1 label parity parity (config)> Allowed values are: even none Digi Connect EZ Mini User Guide...
- Page 106 17. Set the strip end pattern if you want to remove the end pattern from the packet before it is sent: (config)>serial port1 framing strip_pattern true (config) 18. Set the UDP port: (config)> serial port1 udp port port (config)> The default is 4001. Digi Connect EZ Mini User Guide...
-
Page 107: Configure Modbus Mode
Modbus mode allows you to use the serial port for Modbus. See Modbus gateway. To change the configuration to match the serial configuration of the device to which you want to connect: WebUI Digi Connect EZ Mini User Guide... - Page 108 Enable Termination if you want to enable electrical termination on this serial port. Enable Full Duplex if you want to enable full duplex communication on this serial port. The default is RS-232. 8. Expand Serial Settings. Digi Connect EZ Mini User Guide...
- Page 109 9. Click Apply to save the configuration and apply the change. The Apply button is located at the top of the WebUI page. You may need to scroll to the top of the page to locate it. Digi Connect EZ Mini User Guide...
- Page 110 If enabled, this setting overrides RTS\CTS flow control: (config)> serial port1 rts_toggle true (config)> For rts_pre_delay, enter the amount of time RTS is asserted before starting data transmission. The time is measured in milliseconds. The default is 0ms: Digi Connect EZ Mini User Guide...
- Page 111 Flow control: For Flow control, select the type of flow control used by the device to which you want to connect. The default is None. 1. Set the baud rate used by the device to which you want to connect: (config)>path-parambaudrate rate (config)> Digi Connect EZ Mini User Guide...
-
Page 112: Show Serial Status And Statistics
1. Log into the Connect EZ command line as a user with Admin access. Depending on your device configuration, you may be presented with an Access selection menu. Type admin to access the Admin CLI. 2. Use the show serial command: > show serial Digi Connect EZ Mini User Guide... -
Page 113: Log Serial Port Messages
9. (Optional) For Log size, configure the maximum allowed log size for the serial port log. The default is 65536. Digi Navigator application You can use the Digi Navigator application with the Connect EZ device to discover device IP addresses, install and configure RealPort, and verify connection to the network. Before you begin... -
Page 114: Step 5: Configure Realport From The Digi Navigator
Specify a device: Expand the Specify a device section and enter the IP address or host name for the device. Select a device: From the list of devices shown in the Digi Navigator, expand the device that you want to configure. - Page 115 COM ports on your computer that are configured for RealPort from within the Digi Navigator. a. Launch the Digi Navigator if it is not currently open. A list of Connect EZ devices that have RealPort enabled and configured displays in the RealPort Devices section at the bottom of the application screen.
-
Page 116: Step 4: Discover The Ip Address Using The Digi Navigator
Note Microsoft Visual C++ must be installed to ensure that Realport can be installed. Microsoft Visual C++ is installed by default during the Digi Navigator install process, if it is not already installed on your computer. 1. Navigate to the Digi Connect EZ drivers support page. -
Page 117: Connect To And Access The Digi Navigator
RealPort. Connect to and access the Digi Navigator Your device must be connected to your network or a laptop before you can access the Digi Navigator. 1. Connect a power supply to the device and power it on. -
Page 118: Discover The Ip Address When Connected To A Network
Digi Navigator application Discover the IP address when connected to a network To discover the IP address for a Connect EZ device connected to your network, the Digi Navigator uses the HTTPS service by default. Other services can be used, if needed. -
Page 119: Manage The Realport Device List
After you have enabled and configured RealPort on at least one Connect EZ device, a list of configured devices displays at the bottom of the Digi Navigator application screen. Using the available buttons, you can refresh the list and easily access the COM port configuration on your computer. -
Page 120: Filter Devices For Display In The Digi Navigator
Navigator. 2. Launch the Digi Navigator. 3. From the list of devices shown in the Digi Navigator, expand the device that you want to configure. 4. Click Open next to the IP address you want to use. The login screen for the web UI launches. -
Page 121: Access Digi Remote Manager From The Digi Navigator
Access Digi Remote Manager from the Digi Navigator You can access Digi Remote Manager from the Digi Navigator. Within the Remote Manager, you can configure and monitor your Connect EZ. For information about using Digi Remote Manager, refer to the Digi Remote Manager User Guide. -
Page 122: Virtual Private Networks (Vpn)
Virtual Private Networks (VPNs) are used to securely connect two private networks together so that devices can connect from one network to the other using secure channels. This chapter contains the following topics: IPsec OpenVPN Generic Routing Encapsulation (GRE) L2TP L2TPv3 Ethernet Digi Connect EZ Mini User Guide... -
Page 123: Ipsec
Diffie-Hellman key exchange. This creates the IKE SAs that are used to encrypt further IKE communications. For IKEv1, there are two modes for the phase 1 negotiation: Main mode and Aggressive mode. IKEv2 does not use these modes. Digi Connect EZ Mini User Guide... -
Page 124: Authentication
Configuring an IPsec tunnel with a remote device involves configuring the following items: Required configuration items IPsec tunnel configuration items: The mode: either tunnel or transport. Enable the IPsec tunnel. The IPsec tunnel is enabled by default. Digi Connect EZ Mini User Guide... - Page 125 Disable the padding of IKE packets. This should normally not be done except for compatibility purposes. Destination networks that require source NAT. Depending on your network and firewall configuration, you may need to add a packet filtering rule to allow incoming IPsec traffic. Digi Connect EZ Mini User Guide...
- Page 126 The new IPsec tunnel configuration is displayed. 6. The IPsec tunnel is enabled by default. To disable, click Enable. 7. (Optional) Preferred tunnel provides an optional mechanism for IPsec failover behavior. See Configure IPsec failover for more information. Digi Connect EZ Mini User Guide...
- Page 127 AH (Authentication Header): Provides authentication and integrity only. 14. Click to expand Authentication. a. For Authentication type, select one of the following: Pre-shared key: Uses a pre-shared key (PSK) to authenticate with the remote peer. i. Type the Pre-shared key. Digi Connect EZ Mini User Guide...
- Page 128 16. (Optional) To configure the device to connect to its remote peer as an XAUTH client: a. Click to expand XAUTH client. b. Click Enable. c. Type the Username and Password that the device will use to authenticate as an XAUTH client with the peer. Digi Connect EZ Mini User Guide...
- Page 129 Round robin: Attempts to connect to hostnames sequentially based on the list order. Random: Randomly selects an IPsec peer to connect to from the hostname list. Priority ordered: Selects the first hostname in the list that is resolvable. c. Click to expand Hostname. Digi Connect EZ Mini User Guide...
- Page 130 Serial number: The device's serial number will be used as the ID and sent as a ID_KEY_ID IKE identity. 20. Click to expand Policies. Policies define the network traffic that will be encapsulated by this tunnel. a. Click to create a new policy. The new policy configuration is displayed. Digi Connect EZ Mini User Guide...
- Page 131 Any: Matches any protocol. TCP: Matches TCP protocol only. UDP: Matches UDP protocol only. ICMP: Matches ICMP requests only. Other protocol: Matches an unlisted protocol. If Other protocol is selected, type the number of the protocol. Digi Connect EZ Mini User Guide...
- Page 132 Allowed values are any number of weeks, days, hours, minutes, or seconds, and take the format number{w|d|h|m|s}. For example, to set Phase 2 lifetime to ten minutes, enter 10m or 600s. Digi Connect EZ Mini User Guide...
- Page 133 Configure SureLink active recovery for IPsec for information about IPsec Active recovery. 25. (Optional) Click Advanced to set various IPsec-related time out, keep alive, and related values. 26. Click Apply to save the configuration and apply the change. Digi Connect EZ Mini User Guide...
- Page 134 Format: dynamic_routes edge external internal ipsec loopback setup Default value: ipsec Current value: ipsec (config vpn ipsec tunnel ipsec_example)> Digi Connect EZ Mini User Guide...
- Page 135 Only the payload of the IP packet is encrypted and/or authenticated. The IP header is unencrypted. The default is tunnel. 8. Set the protocol: (config vpn ipsec tunnel ipsec_example)> type protocol (config vpn ipsec tunnel ipsec_example)> where protocol is either: Digi Connect EZ Mini User Guide...
- Page 136 (config vpn ipsec tunnel ipsec_example)> auth private_key_ passphrase passphrase (config vpn ipsec tunnel ipsec_example)> c. For the peer_public_key parameter, paste the peer's public RSA key in PEM format: Digi Connect EZ Mini User Guide...
- Page 137 (config vpn ipsec tunnel ipsec_example)> 11. (Optional) Configure the device to connect to its remote peer as an XAUTH client: a. Enable XAUTH client functionality: (config vpn ipsec tunnel ipsec_example)> xauth_client enable true (config vpn ipsec tunnel ipsec_example)> Digi Connect EZ Mini User Guide...
- Page 138 Any ID will be accepted. ipv4: The ID will be interpreted as an IPv4 address and sent as an ID_IPV4_ADDR IKE identity. Set an IPv4 formatted ID. This can be a fully-qualified domain name or an IPv4 address. Digi Connect EZ Mini User Guide...
- Page 139 Repeat for additional hostnames. b. Set the hostname selection type: (config vpn ipsec tunnel ipsec_example)> remote hostname_selection value (config vpn ipsec tunnel ipsec_example)> where value is one of: Digi Connect EZ Mini User Guide...
- Page 140 (config vpn ipsec tunnel ipsec_example)> remote id type rfc822_ id id (config vpn ipsec tunnel ipsec_example)> fqdn: The ID will be interpreted as FQDN (Fully Qualified Domain Name) and sent as an ID_FQDN IKE identity. Digi Connect EZ Mini User Guide...
- Page 141 Do not send oversized IKE messages in fragments, but announce support for fragmentation to the peer. The default is always. e. Padding of IKE packets is enabled by default and should normally not be disabled except for compatibility purposes. To disable: Digi Connect EZ Mini User Guide...
- Page 142 Configure the types of encryption, hash, and Diffie-Hellman group to use during phase 1: i. Add a phase 1 proposal: (config vpn ipsec tunnel ipsec_example)> add ike phase1_proposal (config vpn ipsec tunnel ipsec_example ike phase1_proposal 0)> Digi Connect EZ Mini User Guide...
- Page 143 (config vpn ipsec tunnel ipsec_example ike phase1_proposal 1)> Repeat the above steps to set the type of encryption, hash, and Diffie-Hellman group for the additional proposal. iii. Repeat to add more phase 1 proposals. Digi Connect EZ Mini User Guide...
- Page 144 Set the Diffie-Hellman group type: (config vpn ipsec tunnel ipsec_example ike phase2_proposal 0)> dh_group value (config vpn ipsec tunnel ipsec_example ike phase2_proposal 0)> The default is modp2048. vi. (Optional) Add additional phase 2 proposals: Digi Connect EZ Mini User Guide...
- Page 145 Set the IPv4 address and optional netmask of a destination network that requires source NAT. You can also use any, meaning that any destination network connected to the tunnel will use source NAT. Digi Connect EZ Mini User Guide...
- Page 146 (config vpn ipsec tunnel ipsec_example policy 0)> where value is the IPv4 address and optional netmask. The keyword any can also be used. request: Requests a network from the remote peer. dynamic: Uses the address of the local endpoint. Digi Connect EZ Mini User Guide...
- Page 147 (config vpn ipsec tunnel ipsec_example policy 0)> remote protocol value (config vpn ipsec tunnel ipsec_example policy 0)> where value is one of: any: Matches any protocol. tcp: Matches TCP protocol only. udp: Matches UDP protocol only. icmp: Matches ICMP requests only. Digi Connect EZ Mini User Guide...
- Page 148 Generally, the default settings for these should be sufficient. c. You can also enable debugging for IPsec: (config)> vpn ipsec advanced debug value (config)> where value is one of: none basic_auditing detailed_control generic_control raw_data sensitive_data Digi Connect EZ Mini User Guide...
- Page 149 (config)> save Configuration saved. > 21. Type exit to exit the Admin CLI. Depending on your device configuration, you may be presented with an Access selection menu. Type quit to disconnect from the device. Digi Connect EZ Mini User Guide...
-
Page 150: Configure Ipsec Failover
For example: Tunnel_1: Metric: 10 Local endpoint > Interface: ETH2 Remote endpoint > Hostname: 192.168.10.1 SureLink configuration: Restart Interface enabled Test target: Test type: Ping test Ping host: 192.168.10.2 Tunnel_2: Digi Connect EZ Mini User Guide... - Page 151 Configure an IPsec tunnel for instructions. During configuration of the IPsec tunnel, set the metric to a value that is higher than the metric of the primary tunnel (for example, 20). Command line Digi Connect EZ Mini User Guide...
- Page 152 Use the ? to view a list of available tunnels: (config vpn ipsec tunnel backup_ipsec_tunnel)> ipsec_failover ? Preferred tunnel: This tunnel will not start until the preferred tunnel has failed. It will continue to operate until the preferred tunnel returns to full operation Digi Connect EZ Mini User Guide...
-
Page 153: Configure Surelink Active Recovery For Ipsec
The amount of time that the device should wait for a response to a probe attempt before considering it to have failed. To configure the Connect EZ device to regularly probe the IPsec connection: WebUI Digi Connect EZ Mini User Guide... - Page 154 10. For Success condition, determine whether the interface should fail over based on the failure of one of the test targets, or all of the test targets. 11. For Attempts, type the number of probe attempts before the WAN is considered to have failed. Digi Connect EZ Mini User Guide...
- Page 155 For example, to set Down time to ten minutes, enter 10m or 600s. The default is 60 seconds. Initial connection time: The amount of time to wait for an initial connection to the interface before this test is considered to have failed. Digi Connect EZ Mini User Guide...
- Page 156 This is useful for interfaces that may regain connectivity after restarting. 6. To configure the device to reboot when the interface is considered to have failed: (config vpn ipsec tunnel ipsec_example)> surelink reboot enable (config vpn ipsec tunnel ipsec_example)> Digi Connect EZ Mini User Guide...
- Page 157 (config vpn ipsec tunnel ipsec_example)> add surelink target end (config vpn ipsec tunnel ipsec_example surelink target 0)> b. Set the test type: (config vpn ipsec tunnel ipsec_example surelink target 0)> test value (config vpn ipsec tunnel ipsec_example surelink target 0)> Digi Connect EZ Mini User Guide...
- Page 158 (config vpn ipsec tunnel ipsec_example surelink target 0)> where value is any number of weeks, days, hours, minutes, or seconds, and takes the format number{w|d|h|m|s}. For example, to set timeout to ten minutes, enter either 10m or 600s: Digi Connect EZ Mini User Guide...
- Page 159 (config vpn ipsec tunnel ipsec_example surelink target 0)> other_ip_version value (config vpn ipsec tunnel ipsec_example surelink target 0)> where value is one of: any, both, ipv4, or ipv6. Set the expected status of the alternate interface: Digi Connect EZ Mini User Guide...
-
Page 160: Show Ipsec Status And Statistics
> show ipsec all Name Enable Status Hostname ------ ------ ------- --------------- ipsec1 true 192.168.2.1 vpn1 false pending 192.168.3.1 > 3. To display details about a specific tunnel: > show ipsec tunnel ipsec1 Tunnel : ipsec1 Digi Connect EZ Mini User Guide... -
Page 161: Debug An Ipsec Configuration
Raw data: Includes raw data dumps in hexadecimal format. Sensitive material: Also includes sensitive material in dumps (for example, encryption keys). 6. Click Apply to save the configuration and apply the change. Command line Digi Connect EZ Mini User Guide... -
Page 162: Configure A Simple Certificate Enrollment Protocol Client
The challenge password provided by the SCEP server that the SCEP client will use when making SCEP requests. The distinguished name to be used for the CSR. The file name of the Certificate Revocation List (CRL) from the Certificate Authority (CA). Digi Connect EZ Mini User Guide... - Page 163 7. (Optional) For CRL file name, type the filename of the Certificate Revocation List (CRL) from the The CRL is stored on the Connect EZ device in the /etc/config/scep_client/client_name directory. 8. Click to expand SCEP server. Digi Connect EZ Mini User Guide...
- Page 164 Type admin to access the Admin CLI. 2. At the command line, type config to enter configuration mode: > config (config)> 3. Add a new SCEP client: (config)> add network scep_client scep_client_name (config network scep_client scep_client_name )> Digi Connect EZ Mini User Guide...
- Page 165 Set the two letter Country Code: (config network scep_client scep_client_name)> distinguished_name c value (config network scep_client scep_client_name)> c. Set the State or Province: (config network scep_client scep_client_name)> distinguished_name st value (config network scep_clientscep_client_name )> d. Set the Locality: Digi Connect EZ Mini User Guide...
-
Page 166: Example: Scep Client Configuration With Fortinet Scep Server
Example: SCEP client configuration with Fortinet SCEP server In this example configuration, we will configure the Connect EZ device as a SCEP client that will connect to a Fortinet SCEP server. Fortinet configuration On the Fortinet server: Digi Connect EZ Mini User Guide... - Page 167 Renewable Time setting on the Connect EZ device must match the setting of this parameter. g. The remaining fields can be left at their defaults or changed as appropriate. h. Click OK. Connect EZ configuration On the Connect EZ device: Digi Connect EZ Mini User Guide...
- Page 168 9. For FQDN, type the fully qualified domain name or IP address of the Fortinet server. 10. For Password, type the challenge password. This corresponds to the Default enrollment password on the Fortinet server. Digi Connect EZ Mini User Guide...
- Page 169 12. Type the value for each appropriate Distinguished Name attribute. The values entered here must correspond to the DN attributes in the Enrollment Request on the Fortinet server. 13. Click Apply to save the configuration and apply the change. Digi Connect EZ Mini User Guide...
- Page 170 Set the two letter Country Code: (config network scep_client Fortinet_SCEP_client)> distinguished_name c value (config network scep_client Fortinet_SCEP_client)> c. Set the State or Province: (config network scep_client Fortinet_SCEP_client)> distinguished_name st value (config network scep_client Fortinet_SCEP_client)> Digi Connect EZ Mini User Guide...
-
Page 171: Disable Hardware Cryptographic Acceleration
Type quit to disconnect from the device. Disable hardware cryptographic acceleration If you are experiencing problems when using IPSEC, such as the kernel crashing or unexpected package loss, disabling hardware cryptographic acceleration may correct the problem. WebUI Digi Connect EZ Mini User Guide... - Page 172 Depending on your device configuration, you may be presented with an Access selection menu. Type quit to disconnect from the device. The device must be rebooted for the change to take effect. See Reboot your Connect EZ device. Digi Connect EZ Mini User Guide...
-
Page 173: Openvpn
OpenVPN clients are on the same IP subnet as the OpenVPN server’s LAN interface. This means that devices connected to the OpenVPN client’s LAN interface are on the same IP subnet as devices. The Connect EZ device supports two mechanisms for configuring an OpenVPN server in TAP mode: Digi Connect EZ Mini User Guide... -
Page 174: Configure An Openvpn Server
If username and password authentication is used, you must create an OpenVPN authentication group and user. See Configure an OpenVPN Authentication Group and User for instructions. Certificates and keys: The CA certificate (usually in a ca.crt file). The Public key (for example, server.crt) Digi Connect EZ Mini User Guide... - Page 175 3. Click VPN > OpenVPN > Servers. 4. For Add, type a name for the OpenVPN server and click . The new OpenVPN server configuration is displayed. The OpenVPN server is enabled by default. To disable, click Enable. Digi Connect EZ Mini User Guide...
- Page 176 For Address, enter the IPv4 address or network that can access the device's service-type. Allowed values are: A single IP address or host name. A network designation in CIDR notation, for example, 192.168.1.0/24. any: No limit to IPv4 addresses that can access the service-type. Digi Connect EZ Mini User Guide...
- Page 177 1. Log into the Connect EZ command line as a user with full Admin access rights. Depending on your device configuration, you may be presented with an Access selection menu. Type admin to access the Admin CLI. Digi Connect EZ Mini User Guide...
- Page 178 LAN devices. (config vpn openvpn server name)> zone value (config vpn openvpn server name)> To view a list of available zones: (config vpn openvpn server name)> firewall zone ? Digi Connect EZ Mini User Guide...
- Page 179 99, the last client IP address will be 192.168.1.80. The default is from 80. 6. (Optional) Set the port that the OpenVPN server will use: (config vpn openvpn server name)> port port (config vpn openvpn server name)> The default is 1194. Digi Connect EZ Mini User Guide...
- Page 180 Paste the contents of the private key (for example, server.key) into the value of the server_key parameter: (config vpn openvpn server name)> server_key value (config vpn openvpn server name)> v. Paste the contents of the Diffie Hellman key (usually in dh2048.pem) into the value of the diffie parameter: Digi Connect EZ Mini User Guide...
- Page 181 Display a list of available firewall zones: Type ... firewall zone ? at the config prompt: (config vpn openvpn server name)> ... firewall zone ? Zones: A list of groups of network interfaces that can be referred to by packet Digi Connect EZ Mini User Guide...
-
Page 182: Configure An Openvpn Authentication Group And User
OpenVPN authentication group and user. Configure an OpenVPN server for information about configuring an OpenVPN server to use username and password authentication. See Connect EZ user authentication for more information about creating authentication groups and users. WebUI Digi Connect EZ Mini User Guide... - Page 183 Click to expand the OpenVPN node. e. Click to add a tunnel. f. For Tunnel, select an OpenVPN tunnel to which users of this group will have access. g. Repeat to add additional OpenVPN tunnels. Digi Connect EZ Mini User Guide...
- Page 184 Click to expand the Groups node. e. Click to add a group to the user. f. Select a Group with OpenVPN access enabled. 5. Click Apply to save the configuration and apply the change. Digi Connect EZ Mini User Guide...
- Page 185 (config)> save Configuration saved. > 7. Type exit to exit the Admin CLI. Depending on your device configuration, you may be presented with an Access selection menu. Type quit to disconnect from the device. Digi Connect EZ Mini User Guide...
-
Page 186: Configure An Openvpn Client By Using An .Ovpn File
2. On the menu, click System. Under Configuration, click Device Configuration. The Configuration window is displayed. 3. Click VPN > OpenVPN > Clients. 4. For Add, type a name for the OpenVPN client and click . The new OpenVPN client configuration is displayed. Digi Connect EZ Mini User Guide... - Page 187 (config vpn openvpn client name)> zone value (config vpn openvpn client name)> To view a list of available zones: (config vpn openvpn client name)> zone ? Zone: The zone for the openvpn client interface. Format: Digi Connect EZ Mini User Guide...
-
Page 188: Configure An Openvpn Client Without Using An .Ovpn File
The OpenVPN client is enabled by default. The mode used by the OpenVPN server, either routing (TUN), or bridging (TAP). The firewall zone to be used by the OpenVPN client. The IP address of the OpenVPN server. Digi Connect EZ Mini User Guide... - Page 189 2. On the menu, click System. Under Configuration, click Device Configuration. The Configuration window is displayed. 3. Click VPN > OpenVPN > Clients. 4. For Add, type a name for the OpenVPN client and click . The new OpenVPN client configuration is displayed. Digi Connect EZ Mini User Guide...
- Page 190 For OpenVPN parameters, type the additional OpenVPN parameters. For example, to override the configuration by using a configuration file, enter --config filename, for example, --config /etc/config/openvpn_config. 15. Click Apply to save the configuration and apply the change. Digi Connect EZ Mini User Guide...
- Page 191 (config vpn openvpn client name)> To view a list of available zones: (config vpn openvpn client name)> zone ? Zone: The zone for the openvpn client interface. Format: dynamic_routes edge external internal ipsec loopback setup Digi Connect EZ Mini User Guide...
- Page 192 (config vpn openvpn client name)> private_key value (config vpn openvpn client name)> 14. (Optional) Set additional OpenVPN parameters. a. Enable the use of additional OpenVPN parameters: (config vpn openvpn client name)> advanced_options enable true (config vpn openvpn client name)> Digi Connect EZ Mini User Guide...
-
Page 193: Configure Surelink Active Recovery For Openvpn
The amount of time that the device should wait for a response to a probe attempt before considering it to have failed. To configure the Connect EZ device to regularly probe the OpenVPN connection: WebUI Digi Connect EZ Mini User Guide... - Page 194 For example, to set Interval to ten minutes, enter 10m or 600s. The default is 15 minutes. 10. For Success condition, determine whether the interface should fail over based on the failure of one of the test targets, or all of the test targets. Digi Connect EZ Mini User Guide...
- Page 195 Allowed values are any number of weeks, days, hours, minutes, or seconds, and take the format number{w|d|h|m|s}. For example, to set Down time to ten minutes, enter 10m or 600s. The default is 60 seconds. Digi Connect EZ Mini User Guide...
- Page 196 This is useful for interfaces that may regain connectivity after restarting. 6. To configure the device to reboot when the interface is considered to have failed: (config vpn openvpn client openvpn_client1)> surelink reboot enable (config vpn openvpn client openvpn_client1)> Digi Connect EZ Mini User Guide...
- Page 197 The default is 15 seconds. 11. Configure test targets: a. Add a test target: (config vpn openvpn client openvpn_client1)> add surelink target end (config vpn openvpn client openvpn_client1 surelink target 0)> b. Set the test type: Digi Connect EZ Mini User Guide...
- Page 198 (Optional) Set the amount of time that the interface can be down before this test is considered to have failed: Digi Connect EZ Mini User Guide...
- Page 199 If other is set: Set the alternate interface to be tested: i. Use the ? to determine available interfaces: ii. Set the interface. For example: (config vpn openvpn client openvpn_client1 surelink target 0)> other_interface /network/interface/eth1 Digi Connect EZ Mini User Guide...
-
Page 200: Show Openvpn Server Status And Statistics
2. On the menu, select Status > OpenVPN > Servers. The OpenVPN Servers page appears. 3. To view configuration details about an OpenVPN server, click the (configuration) icon in the upper right of the OpenVPN server's status pane. Command line Digi Connect EZ Mini User Guide... -
Page 201: Show Openvpn Client Status And Statistics
2. On the menu, select Status > OpenVPN > Clients. The OpenVPN Clients page appears. 3. To view configuration details about an OpenVPN client, click the (configuration) icon in the upper right of the OpenVPN client's status pane. Command line Digi Connect EZ Mini User Guide... - Page 202 : 1194 Type : tun > 4. Type exit to exit the Admin CLI. Depending on your device configuration, you may be presented with an Access selection menu. Type quit to disconnect from the device. Digi Connect EZ Mini User Guide...
-
Page 203: Generic Routing Encapsulation (Gre)
New interfaces are enabled by default. To disable, or to enable if it has been disabled, click Enable. 6. For Interface type, select Ethernet. 7. For Zone, select Internal. 8. For Device, select Ethernet: Loopback. Digi Connect EZ Mini User Guide... - Page 204 (config network interface gre_interface)> save Configuration saved. > 8. Type exit to exit the Admin CLI. Depending on your device configuration, you may be presented with an Access selection menu. Type quit to disconnect from the device. Digi Connect EZ Mini User Guide...
- Page 205 2. At the command line, type config to enter configuration mode: > config (config)> 3. Add the GRE endpoint tunnel. For example, to add a tunnel named gre_example: (config)> add vpn iptunnel gre_example (config vpn iptunnel gre_example)> Digi Connect EZ Mini User Guide...
- Page 206 (config vpn iptunnel gre_example)> save Configuration saved. > 9. Type exit to exit the Admin CLI. Depending on your device configuration, you may be presented with an Access selection menu. Type quit to disconnect from the device. Digi Connect EZ Mini User Guide...
-
Page 207: Show Gre Tunnels
2. On the menu, click Status > IP tunnels. The IP Tunnelspage appears. 3. To view configuration details about a GRE tunnel, click the (configuration) icon in the upper right of the tunnel's status pane. Digi Connect EZ Mini User Guide... -
Page 208: Example: Gre Tunnel Over An Ipsec Tunnel
Remote network set to the IP address of the remote GRE tunnel, 172.30.0.1/32. 2. Create an IPsec endpoint interface named ipsec_endpoint2: a. Zone set to Internal. b. Device set to Ethernet: Loopback. c. IPv4 Address set to the IP address of the local GRE tunnel, 172.30.0.2/32. Digi Connect EZ Mini User Guide... - Page 209 5. Click to expand Authentication. 6. For Pre-shared key, type testkey. 7. Click to expand Remote endpoint. 8. For Hostname, type public IP address of the Connect EZ-2 device. 9. Click to expand Policies. Digi Connect EZ Mini User Guide...
- Page 210 (config vpn ipsec tunnel ipsec_gre1)> auth secret testkey (config vpn ipsec tunnel ipsec_gre1)> 5. Set the remote endpoint to public IP address of the Connect EZ-2 device: (config vpn ipsec tunnel ipsec_gre1)> remote hostname 192.168.101.1 (config vpn ipsec tunnel ipsec_gre1)> Digi Connect EZ Mini User Guide...
- Page 211 (config vpn ipsec tunnel ipsec_gre1 policy 0)> remote network 172.30.0.2/32 (config vpn ipsec tunnel ipsec_gre1 policy 0)> 10. Save the configuration and apply the change: (config ipsec tunnel ipsec_gre1 policy 0)> save Configuration saved. > Digi Connect EZ Mini User Guide...
- Page 212 4. For Device, select Ethernet: loopback. 5. Click to expand IPv4. 6. For Address, type the IP address of the local GRE tunnel, 172.30.0.1/32. 7. Click Apply to save the configuration and apply the change. Digi Connect EZ Mini User Guide...
- Page 213 WebUI 1. Click VPN > IP Tunnels. 2. For Add IP Tunnel, type gre_tunnel1 and click . 3. For Local endpoint, select the IPsec endpoint interface created in Task two (Interface: ipsec_ endpoint1). Digi Connect EZ Mini User Guide...
- Page 214 4. Set the remote endpoint to the IP address of the GRE tunnel on Connect EZ-2, 172.30.0.2: (config vpn iptunnel gre_tunnel1)> remote 172.30.0.2 (config vpn iptunnel gre_tunnel1)> 5. Save the configuration and apply the change: (config vpn iptunnel gre_tunnel1)> save Configuration saved. > Digi Connect EZ Mini User Guide...
- Page 215 Task three (IP tunnel: gre_tunnel1). 5. Click to expand IPv4. 6. For Address, type 172.31.0.1/30 for a virtual IP address on the GRE tunnel. 7. Click Apply to save the configuration and apply the change. Digi Connect EZ Mini User Guide...
- Page 216 1. Log into the Connect EZ WebUI as a user with full Admin access rights. 2. On the menu, click System. Under Configuration, click Device Configuration. The Configuration window is displayed. 3. Click VPN > IPsec > Tunnels. Digi Connect EZ Mini User Guide...
- Page 217 13. For Address, type the IP address and subnet of the local GRE tunnel, 172.30.0.2/32. 14. For Remote network, type the IP address and subnet of the remote GRE tunnel, 172.30.0.1/32. 15. Click Apply to save the configuration and apply the change. Command line Digi Connect EZ Mini User Guide...
- Page 218 172.30.0.1/32 (config vpn ipsec tunnel ipsec_gre2 policy 0)> 10. Save the configuration and apply the change: (config vpn ipsec tunnel ipsec_gre2 policy 0)> save Configuration saved. > Task two: Create an IPsec endpoint interface Digi Connect EZ Mini User Guide...
- Page 219 6. For Address, type the IP address of the local GRE tunnel, 172.30.0.2/32. 7. Click Apply to save the configuration and apply the change. Command line 1. At the command line, type config to enter configuration mode: > config (config)> Digi Connect EZ Mini User Guide...
- Page 220 3. For Local endpoint, select the IPsec endpoint interface created in Task two (Interface: ipsec_ endpoint2). 4. For Remote endpoint, type the IP address of the GRE tunnel on Connect EZ-1, 172.30.0.1. 5. Click Apply to save the configuration and apply the change. Digi Connect EZ Mini User Guide...
- Page 221 Configuration saved. > Task four: Create an interface for the GRE tunnel device WebUI 1. Click Network > Interfaces. 2. For Add Interface, type gre_interface2 and click . 3. For Zone, select Internal. Digi Connect EZ Mini User Guide...
- Page 222 (config network interface gre_interface2)> zone internal (config network interface gre_interface2)> 4. Set the device to the GRE tunnel created in Task three (/vpn/iptunnel/gre_tunnel2): (config network interface gre_interface2)> device /vpn/iptunnel/gre_ tunnel2 (config network interface gre_interface2)> Digi Connect EZ Mini User Guide...
-
Page 223: L2Tp
Enable custom PPP configuration options for the tunnel. Whether to override the default configuration and only use the custom options. Optional configuration data in the format of a pppd options file. SureLink options for the tunnel. Digi Connect EZ Mini User Guide... - Page 224 No limit to IPv6 addresses that can access the service-type. d. Click again to list additional IP addresses or networks. To limit access to hosts connected through a specified interface on the Connect EZ device: Digi Connect EZ Mini User Guide...
- Page 225 The keyword any, which means that the server will accept connections from any IP address. e. For Local IP address, type the IP address of the L2TP virtual network interface. f. For Remote IP address, type the IP address to assign to the remote peer. Digi Connect EZ Mini User Guide...
- Page 226 Depending on your device configuration, you may be presented with an Access selection menu. Type admin to access the Admin CLI. 2. At the command line, type config to enter configuration mode: > config (config)> Digi Connect EZ Mini User Guide...
- Page 227 To limit access based on firewall zones: (config)> add vpn l2tp acl zone end value Where value is a firewall zone defined on your device, or the any keyword. Display a list of available firewall zones: Digi Connect EZ Mini User Guide...
- Page 228 (Optional) Set the UDP port to use to connect to the L2TP network server: (config vpn l2tp lac lac_tunnel)> port int (config vpn l2tp lac lac_tunnel)> where int is an integer between 1 and 65535. The default is 1701. Digi Connect EZ Mini User Guide...
- Page 229 (config vpn l2tp lac lac_tunnel)> zone zone (config vpn l2tp lac lac_tunnel)> h. (Optional): Custom PPP configuration: i. Enable custom PPP configuration: (config vpn l2tp lac lac_tunnel)> custom enable true (config vpn l2tp lac lac_tunnel)> Digi Connect EZ Mini User Guide...
- Page 230 (config vpn l2tp lns lns_server)> d. Set the IP address to assign to the remote peer: (config vpn l2tp lns lns_server)> remote_address IP_address (config vpn l2tp lns lns_server)> e. (Optional) Set the authentication method: Digi Connect EZ Mini User Guide...
- Page 231 Zone: The firewall zone assigned to this tunnel. This can be used by packet filtering rules and access control lists to restrict network traffic on this tunnel. Format: dynamic_routes edge external internal ipsec loopback setup Current value: (config vpn l2tp lns lns_server)> Digi Connect EZ Mini User Guide...
-
Page 232: Configure Surelink Active Recovery For Ppp-Over-L2Tp
Reboot the device. Additional configuration items The interval between connectivity tests. Whether the interface should be considered to have failed if one of the test targets fails, or all of the test targets fail. Digi Connect EZ Mini User Guide... - Page 233 This is useful for interfaces that may regain connectivity after restarting. 8. For Reboot device, enable to instruct the device to reboot when the WAN connection is considered to have failed. Digi Connect EZ Mini User Guide...
- Page 234 URL specified in Web servers. The URL should take the format of http [s]://hostname/[path]. Test DNS servers configured for this interface: Tests connectivity by sending a DNS query to the DNS servers configured for this interface. Digi Connect EZ Mini User Guide...
- Page 235 4. Enable active recovery: (config vpn l2tp lac lac_tunnel)> surelink enable true (config vpn l2tp lac lac_tunnel)> 5. To configure the device to restart the interface when its connection is considered to have failed: Digi Connect EZ Mini User Guide...
- Page 236 For example, to set interval to ten minutes, enter either 10m or 600s: (config vpn l2tp lac lac_tunnel)> surelink timeout 600s (config vpn l2tp lac lac_tunnel)> The default is 15 seconds. Digi Connect EZ Mini User Guide...
- Page 237 (Optional) Set the amount of time that the interface can be down before this test is considered to have failed: Digi Connect EZ Mini User Guide...
- Page 238 (config vpn l2tp lac lac_tunnel surelink target 0)> other_interface /network/interface/eth1 (config vpn l2tp lac lac_tunnel surelink target 0)> Set the alternate interface's IP version. This allows you to determine the alternate interface's status for a particular IP version. Digi Connect EZ Mini User Guide...
-
Page 239: L2Tp With Ipsec
2. On the menu, select Status. Under VPN, select L2TP > Access Connectors. The L2TP Access Connectors page appears. 3. To view configuration details about an L2TP access connector, click the (configuration) icon in the upper right of the tunnel's status pane. Digi Connect EZ Mini User Guide... - Page 240 Depending on your device configuration, you may be presented with an Access selection menu. Type admin to access the Admin CLI. 2. To display details about all configured L2TP access connectors, type the following at the prompt: Digi Connect EZ Mini User Guide...
-
Page 241: L2Tpv3 Ethernet
The session ID. The peer session ID. Additional configuration items Encapsulation type. If UDP is selected: The ID for the tunnel. The ID of the peer's tunnel. Determine whether to enable UDP checksum. The session cookie. Digi Connect EZ Mini User Guide... - Page 242 For Sequence numbering control, determine the sequence number control to prevent or detect out of order packets. Allowed values are: None: No sequence numbering. Send: Add a sequence number to each outgoing packet. Receive: Reorder packets if they are received out of order. Digi Connect EZ Mini User Guide...
- Page 243 6. Set the tunnel identifier for this tunnel. This must match the value for peer tunnel ID on the remote peer. (config vpn l2tpeth L2TPv3_example)> tunnel_id value (config vpn l2tpeth L2TPv3_example)> where value is any integer between 1 and 4294967295. Digi Connect EZ Mini User Guide...
- Page 244 1 and 4294967295. 12. (Optional) Set the cookie value to be assigned to the session. (config vpn l2tpeth L2TPv3_example session_example)> cookie value (config vpn l2tpeth L2TPv3_example session_example)> Allowed value is 8 or 16 hex digits. Digi Connect EZ Mini User Guide...
-
Page 245: Show L2Tpv3 Tunnel Status
2. On the menu, select Status. Under VPN, select L2TPv3 Ethernet. The L2TPv3 Ethernet page appears. 3. To view configuration details about an L2TPV3 tunnel, click the (configuration) icon in the upper right of the tunnel's status pane. Command line Digi Connect EZ Mini User Guide... - Page 246 TX Byptes : 3,120 > 4. Type exit to exit the Admin CLI. Depending on your device configuration, you may be presented with an Access selection menu. Type quit to disconnect from the device. Digi Connect EZ Mini User Guide...
- Page 247 Configure telnet access Configure DNS Simple Network Management Protocol (SNMP) Location information Modbus gateway System time Network Time Protocol Configure a multicast route Enable service discovery (mDNS) Use the iPerf service Configure the ping responder service Digi Connect EZ Mini User Guide...
-
Page 248: Allow Remote Access For Web Administration And Ssh
The Configuration window is displayed. 3. Click Services > Web administration > Access Control List > Zones. 4. For Add Zone, click . 5. Select External. 6. Click Apply to save the configuration and apply the change. Digi Connect EZ Mini User Guide... - Page 249 1. Log into the Connect EZ WebUI as a user with full Admin access rights. 2. On the menu, click System. Under Configuration, click Device Configuration. The Configuration window is displayed. 3. Click Configuration > Services > SSH > Access Control List > Zones. Digi Connect EZ Mini User Guide...
- Page 250 Services Allow remote access for web administration and SSH 4. For Add Zone, click . 5. Select External. 6. Click Apply to save the configuration and apply the change. Digi Connect EZ Mini User Guide...
-
Page 251: Configure The Web Administration Service
An SSL certificate to use for communications with the service. Support for legacy encryption protocols. Set the idle timeout for Connect EZ users for information about setting the inactivity timeout for the web administration services. Digi Connect EZ Mini User Guide... - Page 252 3. Enable or disable the web administration service: To enable the service: (config)> service web_admin enable true (config)> To disable the sevice: (config)> service web_admin enable false (config)> 4. Save the configuration and apply the change: (config)> save Configuration saved. > Digi Connect EZ Mini User Guide...
- Page 253 To limit access to hosts connected through a specified interface on the Connect EZ device: a. Click Interfaces. b. For Add Interface, click . c. For Interface, select the appropriate interface from the dropdown. d. Click again to allow access through additional interfaces. Digi Connect EZ Mini User Guide...
- Page 254 For example: 8. For Allow legacy encryption protocols, enable this option to allow clients to connect to the HTTPS session by using encryption protocols older than TLS 1.2, in addition to TLS 1.2 and Digi Connect EZ Mini User Guide...
- Page 255 No limit to IPv6 addresses that can access the web administratrion service. Repeat this step to list additional IP addresses or networks. To limit access to hosts connected through a specified interface on the Connect EZ device: Digi Connect EZ Mini User Guide...
- Page 256 Enclose the certificate and private key contents in quotes ("). (config)> service web_admin cert "ssl-cert-and-private-key" (config)> If SSL certificate is blank, the device will use an automatically-generated, self-signed certificate. The SSL certificate and private key must be in PEM format. Digi Connect EZ Mini User Guide...
- Page 257 BQAwgYcxCzAJBgNVBAYTAlVTMQ8wDQYDVQQIDAZPcmVnb24xDjAMBgNVBAcMBUFs b2hhMRMwEQYDVQQKDApNY0JhbmUgSW5jMRAwDgYDVQQLDAdTdXBwb3J0MQ8wDQYD VQQDDAZtY2JhbmUxHzAdBgkqhkiG9w0BCQEWEGptY2JhbmVAZGlnaS5jb20wHhcN MjAwOTIyMTY1OTUyWhcNMjEwOTIyMTY1OTUyWjCBhzELMAkGA1UEBhMCVVMxDzAN BgNVBAgMBk9yZWdvbjEOMAwGA1UEBwwFQWxvaGExEzARBgNVBAoMCk1jQmFuZSBJ bmMxEDAOBgNVBAsMB1N1cHBvcnQxDzANBgNVBAMMBm1jYmFuZTEfMB0GCSqGSIb3 DQEJARYQam1jYmFuZUBkaWdpLmNvbTCCASIwDQYJKoZIhvcNAQEBBQADggEPADCC AQoCggEBAOBn19AX01LO9plYtfRZq0bETwNwSCYGeEIOGJ7gHt/rihLVBJS1woYv u1Oq1ohYxIawBY1iIPBD2GtzyEJXzBZdQRhwi/dRyRi4vr7EkjGDr0Vb/NVT0L5w UzcMeT+71DYvKYm6GpcWx+LoKqFTjbMFBIze5pbBfru+SicId6joCHIuYq8Ehflx 6sy6s4MDbyTUAEN2YhsBaOljej64LNzcsHeISbAWibXWjOSsK+N1MivQq5uwIYw/ 1fsnD8KDS43Wg57+far9fQ2MIHsgnoAGz+w6PIKJR594y/MfqQffDFNCh2lJY49F hOqEtA5B9TyXRKwoa3j/lIC/t5cpIBcCAwEAAaNTMFEwHQYDVR0OBBYEFDVtrWBH E1ZcBg9TRRxMn7chKYjXMB8GA1UdIwQYMBaAFDVtrWBHE1ZcBg9TRRxMn7chKYjX MA8GA1UdEwEB/wQFMAMBAf8wDQYJKoZIhvcNAQELBQADggEBALj/mrgaKDNTspv9 ThyZTBlRQ59wIzwRWRYRxUmkVcR8eBcjwdBTWjSBLnFlD2WFOEEEnVz2Dzcixmj4 /Fw7GQNcYIKj+aIGJzbcKgox10mZB3VKYRmPpnpzHCkvFi4o81+bC8HJQfK9U80e vDV0/vA5OB2j/DrjvlOrapCTkuyA0TVyGvgTASx2ATu9U45KZofm4odThQs/9FRQ +cwSTb5v47KYffeyY+g3dyJw1/KgMJGpBUYNJDIsFQC9RfzPjKE2kz41hx4VksT/ q81WGstDXH++QTu2sj7vWkFJH5xPFt80HjtWKKpIfeOIlBPGeRHvdH2PQibx0OOt Sa+P5O8= -----END CERTIFICATE----- -----BEGIN PRIVATE KEY----- MIIEvQIBADANBgkqhkiG9w0BAQEFAASCBKcwggSjAgEAAoIBAQDgZ9fQF9NSzvaZ WLX0WatGxE8DcEgmBnhCDhie4B7f64oS1QSUtcKGL7tTqtaIWMSGsAWNYiDwQ9hr c8hCV8wWXUEYcIv3UckYuL6+xJIxg69FW/zVU9C+cFM3DHk/u9Q2LymJuhqXFsfi 6CqhU42zBQSM3uaWwX67vkonCHeo6AhyLmKvBIX5cerMurODA28k1ABDdmIbAWjp Y3o+uCzc3LB3iEmwFom11ozkrCvjdTIr0KubsCGMP9X7Jw/Cg0uN1oOe/n2q/X0N jCB7D56ABs/sOjyCiUefeMvzH6kH3wxTQodpSWOPRYTqhLQOQfU8l0SsKGt4/5SA v7eXKSAXAgMBAAECggEBAMDKdi7hSTyrclDsVeZH4044+WkK3fFNPaQCWESmZ+AY i9cCC513SlfeSiHnc8hP+wd70klVNNc2coheQH4+z6enFnXYu2cPbKVAkx9x4eeI Digi Connect EZ Mini User Guide...
- Page 258 TLS 1.2 and later encryption protocols are allowed with HTTPS connections. To enable legacy encryption protocols: (config)> service web_admin legacy_encryption true (config)> 8. (Optional) Disable legacy port redirection. Digi Connect EZ Mini User Guide...
- Page 259 (config)> save Configuration saved. > 10. Type exit to exit the Admin CLI. Depending on your device configuration, you may be presented with an Access selection menu. Type quit to disconnect from the device. Digi Connect EZ Mini User Guide...
-
Page 260: Configure Ssh Access
2. On the menu, click System. Under Configuration, click Device Configuration. The Configuration window is displayed. 3. Click Services > SSH. 4. Click Enable. 5. Click Apply to save the configuration and apply the change. Command line Digi Connect EZ Mini User Guide... - Page 261 4. (Optional) For Port, enter the port number for the service. Normally this should not be changed. 5. Click Access control list to configure access control: To limit access to specified IPv4 addresses and networks: a. Click IPv4 Addresses. b. For Add Address, click . Digi Connect EZ Mini User Guide...
- Page 262 For Override: If Override is enabled, entries in Configuration file will be used in place of the standard SSH configuration. If Override is not enabled, entries in Configuration file will be added to the standard SSH configuration. Digi Connect EZ Mini User Guide...
- Page 263 A single IP address or host name. A network designation in CIDR notation, for example, 2001:db8::/48. any: No limit to IPv6 addresses that can access the SSH service. Repeat this step to list additional IP addresses or networks. Digi Connect EZ Mini User Guide...
- Page 264 DNS server. mDNS is enabled by default. To disable mDNS, or enable it if it has been disabled: Digi Connect EZ Mini User Guide...
- Page 265 OpenSSH sshd_config file. For example, to enable the diffie-helman-group-sha-14 key exchange algorithm: (config)> service ssh custom config_file "KexAlgorithms +diffie- hellman-group14-sha1" (config)> 8. Save the configuration and apply the change: (config)> save Configuration saved. > Digi Connect EZ Mini User Guide...
- Page 266 Services Configure SSH access 9. Type exit to exit the Admin CLI. Depending on your device configuration, you may be presented with an Access selection menu. Type quit to disconnect from the device. Digi Connect EZ Mini User Guide...
-
Page 267: Use Ssh With Key Authentication
2. On the menu, click System. Under Configuration, click Device Configuration. The Configuration window is displayed. 3. Click Authentication > Users. 4. Select an existing user or create a new user. See User authentication for information about creating a new user. Digi Connect EZ Mini User Guide... - Page 268 (config)> save Configuration saved. > 5. Type exit to exit the Admin CLI. Depending on your device configuration, you may be presented with an Access selection menu. Type quit to disconnect from the device. Digi Connect EZ Mini User Guide...
-
Page 269: Configure Telnet Access
1. Log into the Connect EZ command line as a user with full Admin access rights. Depending on your device configuration, you may be presented with an Access selection menu. Type admin to access the Admin CLI. Digi Connect EZ Mini User Guide... - Page 270 No limit to IPv4 addresses that can access the telnet service. d. Click again to list additional IP addresses or networks. To limit access to specified IPv6 addresses and networks: a. Click IPv6 Addresses. b. For Add Address, click . Digi Connect EZ Mini User Guide...
- Page 271 2. At the command line, type config to enter configuration mode: > config (config)> 3. Configure access control: To limit access to specified IPv4 addresses and networks: (config)> add service telnet acl address end value (config)> Where value can be: Digi Connect EZ Mini User Guide...
- Page 272 Type ... firewall zone ? at the config prompt: (config)> ... firewall zone ? Zones: A list of groups of network interfaces that can be referred to by packet filtering rules and access control lists. Additional Configuration -------------------------------------------------------- ----------------------- dynamic_routes edge external Digi Connect EZ Mini User Guide...
-
Page 273: Configure Dns
Whether the device should always perform DNS queries to all available DNS servers. Whether to prevent upstream DNS servers from returning private IP addresses. Additional DNS servers, in addition to the ones associated with the device's network interfaces. Digi Connect EZ Mini User Guide... - Page 274 Services Configure DNS Specific host names and their IP addresses. The device is configured by default with the hostname digi.device, which corresponds to the 192.168.210.1 IP address. To configure the DNS server: WebUI 1. Log into the Connect EZ WebUI as a user with full Admin access rights.
- Page 275 Depending on your device configuration, you may be presented with an Access selection menu. Type admin to access the Admin CLI. 2. At the command line, type config to enter configuration mode: > config (config)> Digi Connect EZ Mini User Guide...
- Page 276 Type ... firewall zone ? at the config prompt: (config)> ... firewall zone ? Zones: A list of groups of network interfaces that can be referred to by packet filtering rules and access control lists. Digi Connect EZ Mini User Guide...
- Page 277 Real-time Black List (RBL) servers. To disable: (config)> service dns rebind_localhost_ok false (config)> 8. (Optional) Add additional DNS servers a. Add a DNS server: (config)> add service dns server end (config service dns server 0)> Digi Connect EZ Mini User Guide...
-
Page 278: Show Dns Server
Depending on your device configuration, you may be presented with an Access selection menu. Type quit to disconnect from the device. Show DNS server You can display status for DNS servers. This command is available only at the Admin CLI. Command line Digi Connect EZ Mini User Guide... - Page 279 > 3. Type exit to exit the Admin CLI. Depending on your device configuration, you may be presented with an Access selection menu. Type quit to disconnect from the device. Digi Connect EZ Mini User Guide...
-
Page 280: Simple Network Management Protocol (Snmp)
1. Log into the Connect EZ WebUI as a user with full Admin access rights. 2. On the menu, click System. Under Configuration, click Device Configuration. The Configuration window is displayed. 3. Click Services > SNMP. 4. Click Enable. 5. Click Access control list to configure access control: Digi Connect EZ Mini User Guide... - Page 281 12. (Optional) Select the Privacy protocol, either DES or AES. The default is DES. 13. (Optional) Click Enable version 2c access to enable read-only access to SNMP version 2c. 14. Click Apply to save the configuration and apply the change. Digi Connect EZ Mini User Guide...
- Page 282 Repeat this step to list additional IP addresses or networks. To limit access to hosts connected through a specified interface on the Connect EZ device: (config)> add service snmp acl interface end value (config)> Where value is an interface defined on your device. Digi Connect EZ Mini User Guide...
- Page 283 8. (Optional) Configure Multicast DNS (mDNS) mDNS is a protocol that resolves host names in small networks that do not have a DNS server. For the SNMP agent, mDNS is disabled by default. To enable: Digi Connect EZ Mini User Guide...
-
Page 284: Download Mibs
1. Log into the Connect EZ WebUI as a user with Admin access. 2. Enable SNMP. Configure Simple Network Management Protocol (SNMP) for information about enabling and configuring SNMP support on the Connect EZ device. Digi Connect EZ Mini User Guide... - Page 285 3. On the main menu, click Status. Under Services, click SNMP. Note If you have recently enabled SNMP and the SNMP option is not visible, refresh your browser. The SNMP page is displayed. 4. Click Download. Digi Connect EZ Mini User Guide...
-
Page 286: Location Information
Configure the location service Configure the device to use a user-defined static location Configure the device to accept location messages from external sources Forward location information to a remote host Configure geofencing Show location information Digi Connect EZ Mini User Guide... -
Page 287: Configure The Location Service
7. For information about configuring Destination servers, see Forward location information to a remote host. 8. For information about configuring Geofence, see Configure geofencing. 9. Click Apply to save the configuration and apply the change. Digi Connect EZ Mini User Guide... -
Page 288: Configure The Device To Use A User-Defined Static Location
Depending on your device configuration, you may be presented with an Access selection menu. Type quit to disconnect from the device. Configure the device to use a user-defined static location You can configured your Connect EZ device to use a user-defined static location. WebUI Digi Connect EZ Mini User Guide... - Page 289 (config)> 3. Add a location source: (config)> add service location source end (config service location source 0)> 4. (Optional) Set a label for this location source: (config service location source 0)> label "label" (config)> Digi Connect EZ Mini User Guide...
-
Page 290: Configure The Device To Accept Location Messages From External Sources
UDP port that the Connect EZ device will listen to for incoming location messages. Access control list configuration to provide access to the port through the firewall. To configure the device to accept location messages from external sources: WebUI Digi Connect EZ Mini User Guide... - Page 291 For Interface, select the appropriate interface from the dropdown. d. Click again to allow access through additional interfaces. To limit access based on firewall zones: a. Click Zones. b. For Add Zone, click . Digi Connect EZ Mini User Guide...
- Page 292 A single IP address or host name. A network designation in CIDR notation, for example, 192.168.1.0/24. any: No limit to IPv4 addresses that can access the location server UDP port. Repeat this step to list additional IP addresses or networks. Digi Connect EZ Mini User Guide...
- Page 293 (config)> ... firewall zone ? Zones: A list of groups of network interfaces that can be referred to by packet filtering rules and access control lists. Additional Configuration -------------------------------------------------------- ----------------------- dynamic_routes edge external internal ipsec loopback setup (config)> Digi Connect EZ Mini User Guide...
-
Page 294: Forward Location Information To A Remote Host
Configure the Connect EZ device to forward location information: WebUI 1. Log into the Connect EZ WebUI as a user with full Admin access rights. 2. On the menu, click System. Under Configuration, click Device Configuration. Digi Connect EZ Mini User Guide... - Page 295 CP: Compact position: reports time, latitude, and longitude. ID: Reports the vehicle ID. LN: Long navigation: reports the latitude, longitude, and altitude, the horizontal and vertical speed, and heading. PV: Position/velocity: reports the latitude, longitude, and heading. Digi Connect EZ Mini User Guide...
- Page 296 (config service location forward 0)> server host (config service location forward 0)> 5. Set the communication protocol to either upd or tcp: (config service location forward 0)> protocol protocol (config service location forward 0)> Digi Connect EZ Mini User Guide...
- Page 297 Set the talker ID: (config service location forward 0)> talker_id value (config service location forward 0)> The default setting is Default, which means that the talker ID provided by the source will be used. Digi Connect EZ Mini User Guide...
- Page 298 Use the index number to delete the message type. For example, to delete the gsa (index number 2) message type: (config service location forward 0)> del filter_nmea 2 (config service location forward 0)> Digi Connect EZ Mini User Guide...
- Page 299 (config service location forward 0 filter_taip)> b. Use the add command to add the message type. For example, to add the id message type: (config service location forward 0 filter_taip)> add id end (config service location forward 0 filter_taip)> Digi Connect EZ Mini User Guide...
- Page 300 (config)> save Configuration saved. > 14. Type exit to exit the Admin CLI. Depending on your device configuration, you may be presented with an Access selection menu. Type quit to disconnect from the device. Digi Connect EZ Mini User Guide...
-
Page 301: Configure Geofencing
Whether the script should be executed within a sandbox that will prevent the script from affecting the system itself. Additional configuration items Update interval, which determines the amount of time that the geofence should wait between polling for updated location data. WebUI Digi Connect EZ Mini User Guide... - Page 302 Click to add a point that represents a vertex of the polygon. A vertex is the point at which two sides of a polygon meet. c. Type the Latitude and Longitude of one of the vertices of the polygon. Allowed values are: Digi Connect EZ Mini User Guide...
- Page 303 Click again to add an additional point, and continue adding points to create the desired polygon. For example, to configure a square polygon around the Digi headquarters, configure a polygon with four points: This defines a square-shaped polygon equivalent to the following: 7.
- Page 304 Click to expand On exit. b. (Optional) Enable Bootup action to configure the device to perform the On exit actions if the device is inside the geofence when it boots. Digi Connect EZ Mini User Guide...
- Page 305 1. Log into the Connect EZ command line as a user with full Admin access rights. Depending on your device configuration, you may be presented with an Access selection menu. Type admin to access the Admin CLI. Digi Connect EZ Mini User Guide...
- Page 306 Set the latitude and longitude of the center point of the circle: (config service location geofence test_geofence)> center latitude int (config service location geofence test_geofence)> center longitude int (config service location geofence test_geofence)> where int is: Digi Connect EZ Mini User Guide...
- Page 307 (config service location geofence test_geofence coordinates)> add end (config service location geofence test_geofence coordinates 1)> latitude int (config service location geofence test_geofence coordinates 1)> longitude int (config service location geofence test_geofence coordinates 1)> where int is: Digi Connect EZ Mini User Guide...
- Page 308 For longitude, any integer between -180 and 180, with up to six decimal places. Repeat for each vortex of the polygon. For example, to configure a square polygon around the Digi headquarters, configure a polygon with four points: (config service location geofence test_geofence)> add...
- Page 309 (config)> add service location geofence test_geofence on_ entry action end (config service location geofence test_geofence on_entry action 0)> d. Set the type of action: (config service location geofence test_geofence on_entry action 0)> type value Digi Connect EZ Mini User Guide...
- Page 310 For example. the allocate one megabyte of memory to the script and its spawned processes: (config service location geofence test_geofence on_entry action 0)> max_memory 1MB (config service location geofence test_geofence on_entry action 0)> Digi Connect EZ Mini User Guide...
- Page 311 (config service location geofence test_geofence on_exit action 0)> d. Set the type of action: (config service location geofence test_geofence on_exit action 0)> type value (config service location geofence test_geofence on_exit action 0)> Digi Connect EZ Mini User Guide...
- Page 312 (config service location geofence test_geofence on_exit action 0)> max_memory 1MB (config service location geofence test_geofence on_exit action 0)> v. A sandbox is enabled by default to prevent the script from adversely affecting the system. To disable the sandbox: Digi Connect EZ Mini User Guide...
-
Page 313: Show Location Information
> show location Location Status --------------- State : enabled Source : 192.168.2.3 Latitude : 44* 55' 14.809" N (44.92078) Longitude : 93* 24' 47.262" w (-93.413128) Altitude : 279 meters Velocity : 0 meters per second Digi Connect EZ Mini User Guide... -
Page 314: Modbus Gateway
Connect EZ gateway allows for communication between buses and and networks that use the Modbus protocol. This section contains the following topics: Configure the Modbus gateway Show Modbus gateway status and statistics Digi Connect EZ Mini User Guide... -
Page 315: Configure The Modbus Gateway
Whether to send broadcast messages. Response timeout If connection type is set to socket: The port to use. The inactivity timeout. If connection type is set to serial: Whether to use half duplex (two wire) mode. Digi Connect EZ Mini User Guide... - Page 316 3. The new Modbus gateway server is enabled by default. Toggle off Enable the server to disable. 4. For Connection type, select Socket or Serial. Available options in the gateway server configuration vary depending on this setting. Digi Connect EZ Mini User Guide...
- Page 317 No limit to IPv6 addresses that can access the web administration service. d. Click again to list additional IP addresses or networks. To limit access to hosts connected through a specified interface on the Connect EZ device: Digi Connect EZ Mini User Guide...
- Page 318 For Remote host, type the hostname or IP address of the remote host on which the Modbus server is running. If Serial is selected for Connection type: a. For Serial port, select the appropriate serial port on the Connect EZ device. Digi Connect EZ Mini User Guide...
- Page 319 To limit access to hosts connected through a specified interface on the Connect EZ device: a. Click Interfaces. b. For Add Interface, click . c. For Interface, select the appropriate interface from the dropdown. d. Click again to allow access through additional interfaces. Digi Connect EZ Mini User Guide...
- Page 320 Modbus address of 10, you can create two clients on the gateway: Client one: Modbus address filter set to 10. This will configure the gateway to deliver all messages that have the Modbus server address of 10 to this device. Digi Connect EZ Mini User Guide...
- Page 321 The Modbus server is enabled by default. To disable: (config service modbus_gateway server test_modbus_server)> enable false (config service modbus_gateway server test_modbus_server)> b. Set the connection type: (config service modbus_gateway server test_modbus_server)> connection_ type type (config service modbus_gateway server test_modbus_server)> Digi Connect EZ Mini User Guide...
- Page 322 15 minutes, and takes the format number{m|s}. For example, to set inactivity_timeout to ten minutes, enter either 10m or 600s: (config service modbus_gateway server test_modbus_server)> inactivity_timeout 600s (config service modbus_gateway server test_modbus_server)> Digi Connect EZ Mini User Guide...
- Page 323 For example, to set idle_gap to one second, enter 1000ms or 1s. iv. (Optional) Enable half-duplex (two wire) mode: (config service modbus_gateway server test_modbus_server)> serial half_duplex true (config service modbus_gateway server test_modbus_server)> c. Repeat the above instructions for additional servers. Digi Connect EZ Mini User Guide...
- Page 324 1 and 65535. The default is 502. iii. Set the packet mode: (config service modbus_gateway client test_modbus_client)> socket packet_mode value (config service modbus_gateway client test_modbus_client)> where value is either rtu or ascii. The default is rtu. Digi Connect EZ Mini User Guide...
- Page 325 Set the serial port: i. Use the ? to determine available serial ports: (config service modbus_gateway client test_modbus_ client)> ... serial port ? Serial Additional Configuration ------------------------------------------------------- ------------------------ port1 Port 1 (config service modbus_gateway client test_modbus_ client)> Digi Connect EZ Mini User Guide...
- Page 326 Allowed values are between 1 millisecond and 700 milliseconds, and take the format numberms. For example, to set response_timeout to 100 milliseconds: (config service modbus_gateway client test_modbus_client)> response_ timeout 100ms (config service modbus_gateway client test_modbus_client)> The default is 700ms. Digi Connect EZ Mini User Guide...
- Page 327 This allows you to configure clients on the gateway that will forward messages to remote devices with the same Modbus address on different buses. For example, if there are two devices on two Digi Connect EZ Mini User Guide...
-
Page 328: Show Modbus Gateway Status And Statistics
1. Log into the Connect EZ command line as a user with Admin access. Depending on your device configuration, you may be presented with an Access selection menu. Type admin to access the Admin CLI. Digi Connect EZ Mini User Guide... - Page 329 Client Configuration Failure Server Configuration Failure Configuration Load Failure Incoming Connections Internal Error Resource Shortages Servers ------- modbus_socket ------------- Client Lookup Errors Incoming Connections Packet Errors RX Broadcasts RX Requests : 12 TX Exceptions Digi Connect EZ Mini User Guide...
- Page 330 TX Broadcasts TX Requests > 4. Type exit to exit the Admin CLI. Depending on your device configuration, you may be presented with an Access selection menu. Type quit to disconnect from the device. Digi Connect EZ Mini User Guide...
-
Page 331: System Time
Services System time System time By default, the Connect EZ device synchronizes the system time by periodically connecting to the Digi NTP server, time.devicecloud.com. In this mode, the device queries the time server based on following events and schedule: At boot time. - Page 332 (config)> system time timezone ? Timezone: The timezone for the location of this device. This is used to adjust the time for log messages. It also affects actions that occur at a specific time of day. Digi Connect EZ Mini User Guide...
- Page 333 Type quit to disconnect from the device. Test the connection to the NTP servers The following procedure tests the configured NTP servers for connectivity. This test does not affect the device's current local date and time. Command line Digi Connect EZ Mini User Guide...
-
Page 334: Manually Set The System Date And Time
Manually set the system date and time If your network restricts access to NTP servers, use this procedure to set the local date and time. This procedure is available at the Admin CLI only. Command line Digi Connect EZ Mini User Guide... -
Page 335: Network Time Protocol
Configure the device as an NTP server Required Configuration Items Enable the NTP service. At least one upstream NTP server for synchronization. The default setting is the Digi NTP server, time.devicecloud.com. Additional Configuration Options Additional upstream NTP servers. Access control list to limit downstream access to the Connect EZ device's NTP service. - Page 336 For Add Zone, click . c. For Zone, select the appropriate firewall zone from the dropdown. Firewall configuration for information about firewall zones. d. Click again to allow access through additional firewall zones. Digi Connect EZ Mini User Guide...
- Page 337 Depending on your device configuration, you may be presented with an Access selection menu. Type admin to access the Admin CLI. 2. At the command line, type config to enter configuration mode: > config (config)> 3. Enable the ntp service: (config)> service ntp enable true (config)> Digi Connect EZ Mini User Guide...
- Page 338 No limit to IPv4 addresses that can access the NTP server agent. Repeat this step to list additional IP addresses or networks. To limit access to specified IPv6 addresses and networks: (config)> add service ntp acl address6 end value (config)> Where value can be: Digi Connect EZ Mini User Guide...
- Page 339 By default, the access control list for the NTP service is empty, which means that all downstream hosts connected to the Connect EZ device can use the NTP service. 7. (Optional) Set the timezone for the location of your Connect EZ device. The default is UTC. Digi Connect EZ Mini User Guide...
-
Page 340: Show Status And Statistics Of The Ntp Server
1. Log into the Connect EZ command line as a user with Admin access. Depending on your device configuration, you may be presented with an Access selection menu. Type admin to access the Admin CLI. Digi Connect EZ Mini User Guide... -
Page 341: Configure A Multicast Route
6. Type the Source address for the route. This must be a multicast IP address between 224.0.0.1 and 239.255.255.255. 7. Select a Source interface where multicast packets will arrive. 8. To add one or more destination interface that the Connect EZ device will send mutlicast packets to: Digi Connect EZ Mini User Guide... - Page 342 (config service multicast test)> src_interface /network/interface/eth1 (config service multicast test)> 7. Set a destination interface that the Connect EZ device will send mutlicast packets to: a. Use the ? to determine available interfaces: b. Set the interface. For example: Digi Connect EZ Mini User Guide...
- Page 343 (config)> save Configuration saved. > 9. Type exit to exit the Admin CLI. Depending on your device configuration, you may be presented with an Access selection menu. Type quit to disconnect from the device. Digi Connect EZ Mini User Guide...
-
Page 344: Enable Service Discovery (Mdns)
To limit access to hosts connected through a specified interface on the Connect EZ device: a. Click Interfaces. b. For Add Interface, click . c. For Interface, select the appropriate interface from the dropdown. d. Click again to allow access through additional interfaces. Digi Connect EZ Mini User Guide... - Page 345 (config)> add service mdns acl address6 end value (config)> Where value can be: A single IP address or host name. A network designation in CIDR notation, for example, 2001:db8::/48. any: No limit to IPv6 addresses that can access the mDNS service. Digi Connect EZ Mini User Guide...
- Page 346 (config)> save Configuration saved. > 6. Type exit to exit the Admin CLI. Depending on your device configuration, you may be presented with an Access selection menu. Type quit to disconnect from the device. Digi Connect EZ Mini User Guide...
-
Page 347: Use The Iperf Service
Using iPerf clients that are at a version earlier than iPerf3 to connect to the Connect EZ device's iPerf3 server may result in unpredictable results. As a result, Digi recommends using an iPerf client at version 3 or newer to connect to the Connect EZ device's iPerf3 server. - Page 348 To limit access to hosts connected through a specified interface on the Connect EZ device: a. Click Interfaces. b. For Add Interface, click . c. For Interface, select the appropriate interface from the dropdown. d. Click again to allow access through additional interfaces. Digi Connect EZ Mini User Guide...
- Page 349 No limit to IPv4 addresses that can access the service-type. Repeat this step to list additional IP addresses or networks. To limit access to specified IPv6 addresses and networks: (config)> add service iperf acl address6 end value (config)> Digi Connect EZ Mini User Guide...
- Page 350 Zones: A list of groups of network interfaces that can be referred to by packet filtering rules and access control lists. Additional Configuration -------------------------------------------------------- ----------------------- dynamic_routes edge external internal ipsec loopback setup (config)> Repeat this step to list additional firewall zones. Digi Connect EZ Mini User Guide...
-
Page 351: Example Performance Test Using Iperf3
You can disable the service, or you can configure the service to use an access control list to limit the service to specified IP address, interfaces, and/or zones. To enable the iPerf3 server: WebUI Digi Connect EZ Mini User Guide... - Page 352 To limit access based on firewall zones: a. Click Zones. b. For Add Zone, click . c. For Zone, select the appropriate firewall zone from the dropdown. Firewall configuration for information about firewall zones. Digi Connect EZ Mini User Guide...
- Page 353 A single IP address or host name. A network designation in CIDR notation, for example, 2001:db8::/48. any: No limit to IPv6 addresses that can access the service-type. Repeat this step to list additional IP addresses or networks. Digi Connect EZ Mini User Guide...
- Page 354 (config)> save Configuration saved. > 7. Type exit to exit the Admin CLI. Depending on your device configuration, you may be presented with an Access selection menu. Type quit to disconnect from the device. Digi Connect EZ Mini User Guide...
-
Page 355: Example Performance Test Using Iperf3
- - - - - - - - - - - - - - - - - - - - - - - - - [ ID] Interval Transfer Bandwidth Retr 0.00-10.00 315 MBytes 264 Mbits/sec sender 0.00-10.00 313 MBytes 262 Mbits/sec receiver iperf Done. Digi Connect EZ Mini User Guide... - Page 356 Stop a script that is currently running Show script information Run a Python application at the shell prompt Start an interactive Python session Digidevice module Use Python to access serial ports Use the Paho MQTT python library Digi Connect EZ Mini User Guide...
-
Page 357: Configure Scripts To Run Automatically
Whether the script should run one time only. Task one: Upload the application WebUI 1. Log into the Connect EZ WebUI as a user with Admin access. 2. On the menu, click System. Under Administration, click File System. Digi Connect EZ Mini User Guide... - Page 358 Depending on your device configuration, you may be presented with an Access selection menu. Type quit to disconnect from the device. Note You can also create scripts by using the vi command when logged in with shell access. Digi Connect EZ Mini User Guide...
-
Page 359: Task Two: Configure The Application To Run Automatically
Restart script: Runs the script repeatedly. Reboot: The device will reboot when the script completes. Interval: The script will start running at the specified interval, within 30 seconds after the configuration change is saved. Digi Connect EZ Mini User Guide... - Page 360 1. Log into the Connect EZ command line as a user with full Admin access rights. Depending on your device configuration, you may be presented with an Access selection menu. Type admin to access the Admin CLI. Digi Connect EZ Mini User Guide...
- Page 361 For example, to set on_interval to ten minutes, enter either 10m or 600s: (config system schedule script 0)> on_interval 600s (config system schedule script 0)> Digi Connect EZ Mini User Guide...
- Page 362 (config system schedule script 0)> once true (config system schedule script 0)> If once is enabled, rebooting the device will cause the script to run again. The only way to re- run the script is to: Digi Connect EZ Mini User Guide...
-
Page 363: Configure Scripts To Run Manually
Whether to write the script output and errors to the system log. The memory available to be used by the script. Whether the script should run one time only. Task one: Upload the application WebUI Digi Connect EZ Mini User Guide... - Page 364 Connect EZ device where the copied file will be placed. For example: To upload a script from a remote host with an IP address of 192.168.4.1 to the /etc/config/scripts directory on the Connect EZ device, issue the following command: Digi Connect EZ Mini User Guide...
-
Page 365: Task Two: Configure The Application To Run Automatically
2. On the menu, click System. Under Configuration, click Device Configuration. The Configuration window is displayed. 3. Click System > Scheduled tasks > Custom scripts. 4. For Add Script, click . The script configuration window is displayed. Digi Connect EZ Mini User Guide... - Page 366 Type admin to access the Admin CLI. 2. At the command line, type config to enter configuration mode: > config (config)> 3. Add a script: (config)> add system schedule script end (config system schedule script 0)> Digi Connect EZ Mini User Guide...
- Page 367 (config system schedule script 0)> once true (config system schedule script 0)> If once is enabled, rebooting the device will cause the script to run again. The only way to re- run the script is to: Digi Connect EZ Mini User Guide...
-
Page 368: Start A Manual Script
1. Log into the Connect EZ command line as a user with Admin access. Depending on your device configuration, you may be presented with an Access selection menu. Type admin to access the Admin CLI. Digi Connect EZ Mini User Guide... -
Page 369: Stop A Script That Is Currently Running
1. Log into the Connect EZ command line as a user with Admin access. Depending on your device configuration, you may be presented with an Access selection menu. Type admin to access the Admin CLI. Digi Connect EZ Mini User Guide... -
Page 370: Show Script Information
You can view status and statistics about location information from either the WebUI or the command line. WebUI 1. Log into the Connect EZ WebUI as a user with Admin access. 2. At the Status page, click Scripts. The Scripts page displays: Command line Digi Connect EZ Mini User Guide... -
Page 371: Run A Python Application At The Shell Prompt
1. Upload the Python application to the Connect EZ device: WebUI a. Log into the Connect EZ WebUI as a user with Admin access. b. On the menu, click System. Under Administration, click File System. The File System page appears. Digi Connect EZ Mini User Guide... - Page 372 Type shell to access the device shell. 3. Use the python command to run the Python application. In the following example, the Python application, test.py, takes 3 parameters: 120, ports and storage: # python /etc/config/scripts/test.py 120 ports storage Digi Connect EZ Mini User Guide...
-
Page 373: Start An Interactive Python Session
This module includes various extensions that allow Python to interact with additional features offered by the device. 4. Use Ctrl-D to exit the Python session. You can also exit the session using exit() or quit(). Digi Connect EZ Mini User Guide... -
Page 374: Digidevice Module
Use Python to respond to Digi Remote Manager SCI requests Use digidevice runtime to access the runtime database Use Python to upload the device name to Digi Remote Manager Use Python to access the device location data Use Python to set the maintenance window... -
Page 375: Use Digidevice.cli To Execute Cli Commands
: 1.4% Uptime : 6 days, 6 hours, 21 minutes, 57 seconds (541317s) Temperature : 40C >>> 5. Use Ctrl-D to exit the Python session. You can also exit the session using exit() or quit(). Digi Connect EZ Mini User Guide... -
Page 376: Use Digidevice.datapoint To Upload Custom Datapoints To Digi Remote Manager
5. Use Ctrl-D to exit the Python session. You can also exit the session using exit() or quit(). Use digidevice.datapoint to upload custom datapoints to Digi Remote Manager Use the datapoint Python module to upload custom datapoints to Digi Remote Manager. The following characteristics can be defined for a datapoint: Stream ID... - Page 377 2. At the shell prompt, use the python command with no parameters to enter an interactive Python session: # python Python 3.6.13 (default, May 9 2021, 22:49:59) [GCC 8.3.0] on linux Type "help", "copyright", "credits" or "license" for more information. >>> Digi Connect EZ Mini User Guide...
- Page 378 Help for using Python to upload custom datapoints to Remote Manager Get help for uploading datapoints to your Digi Remote Manager account by accessing help for datapoint.upload and datapoint.upload_multiple: 1. Log into the Connect EZ command line as a user with shell access.
-
Page 379: Use Digidevice.config For Device Configuration
Return the entire configuration: >>> from pprint import pprint # use pprint vs. print to make the output easier to read >>> cfg = config.load() >>> pprint(cfg.dump().splitlines()) This returns the device configuration: network.interface.lan1.device=/network/bridge/lan1 Digi Connect EZ Mini User Guide... - Page 380 Type "help", "copyright", "credits" or "license" for more information. >>> 3. Import the config submodule: >>> from digidevice import config >>> 4. Use config.load(writable=True) to enable write mode for the configuration: >>> cfg = config.load(writable=True) >>> Digi Connect EZ Mini User Guide...
-
Page 381: Use Python To Respond To Digi Remote Manager Sci Requests
5. Use Ctrl-D to exit the Python session. You can also exit the session using exit() or quit(). Use Python to respond to Digi Remote Manager SCI requests The device_request Python module allows you to interact with Digi Remote Manager by using Remote Manager's Server Command Interface (SCI), a web service that allows users to access information and perform commands that relate to their devices. - Page 382 Ctrl-D. You can also exit the session using exit() or quit(). Task two: Create and send an SCI request from Digi Remote Manager The second step in using the device_request module is to create an SCI request that Remote Manager will forward to the device.
- Page 383 </requests> </device> </data_service> </sci_request> Example: Use digidevice.cli with digidevice.device_request In this example, we will use the digidevice.cli module in conjunction with the digidevice.device_ request module to return information about multiple devices to Remote Manager. Digi Connect EZ Mini User Guide...
- Page 384 True: time.sleep(10) 2. Upload the showsystem.py application to the /etc/config/scripts directory on two or more Digi devices. In this example, we will upload it to two devices, and use the same request in Remote Manager to query both devices.
- Page 385 Type admin to access the Admin CLI. ii. At the command line, type config to enter configuration mode: > config (config)> iii. Add an application entry: (config)> add system schedule script end (config system schedule script 0)> Digi Connect EZ Mini User Guide...
- Page 386 Log into the Connect EZ command line as a user with shell access. Depending on your device configuration, you may be presented with an Access selection menu. Type shell to access the device shell. ii. Type the following at the shell prompt: # python /etc/config/scripts/showsystem.py & Digi Connect EZ Mini User Guide...
- Page 387 <sci_reply version="1.0"> <data_service> <device id="00000000-00000000-0000FFFF-A83CF6A3"/> <requests> <device_request target_name="showSystem" status="0">Model : Digi Connect EZ Serial Number : Connect EZ-000068 Hostname : Connect EZ : 00:40:D0:13:35:36 Hardware Version : 50001959-01 A Firmware Version : 22.2.9.85 Bootloader Version Digi Connect EZ Mini User Guide...
- Page 388 : 0.10, 0.05, 0.00 RAM Usage : 85.176MB/250.484MB(34%) Disk /etc/config Usage : 0.068MB/13.416MB(1%) Disk /opt Usage : 47.724MB/5309.752MB(1%) Disk /overlay Usage : MB/MB(%) Disk /tmp Usage : 0.004MB/40.96MB(0%) Disk /var Usage : 0.820MB/32.768MB(3%)</device_ request> </requests> Digi Connect EZ Mini User Guide...
- Page 389 </sci_request> Help for using Python to respond to Digi Remote Manager SCI requests Get help for respond to Digi Remote Manager Server Command Interface (SCI) requests by accessing help for digidevice.device_request: 1. Log into the Connect EZ command line as a user with shell access.
-
Page 390: Use Digidevice Runtime To Access The Runtime Database
['advanced', 'drm', 'firmware', 'location', 'manufacture', 'metrics', 'mm', 'network', 'pam', 'serial', 'system'] b. Print available keys for the system key: >>> print(runt.keys("system")) This will return the following: ['boot_count', 'chassis', 'cpu_temp', 'cpu_usage', 'disk', 'load_avg', 'local_time', 'mac', 'mcu', 'model', 'ram', 'serial', 'uptime'] Digi Connect EZ Mini User Guide... - Page 391 6. Use the get() method to verify the change: >>> print(runt.get("my-variable")) my-variable >>> 7. Close the runtime database: >>> runt.stop() >>> 8. Use Ctrl-D to exit the Python session. You can also exit the session using exit() or quit(). Digi Connect EZ Mini User Guide...
-
Page 392: Use Python To Upload The Device Name To Digi Remote Manager
Use Python to upload the device name to Digi Remote Manager The name submodule can be used to upload a custom name for your device to Digi Remote Manager. When you use the name submodule to upload a custom device name to Remote Manager, the... - Page 393 5. Use Ctrl-D to exit the Python session. You can also exit the session using exit() or quit(). Help for uploading the device name to Digi Remote Manager Get help for uploading the device name to Digi Remote Managerby accessing help for digidevice.name: 1.
-
Page 394: Use Python To Access The Device Location Data
Python session: # python Python 3.6.13 (default, May 9 2021, 22:49:59) [GCC 8.3.0] on linux Type "help", "copyright", "credits" or "license" for more information. >>> 3. Import the location submodule: >>> from digidevice import location Digi Connect EZ Mini User Guide... - Page 395 Type shell to access the device shell. 2. At the shell prompt, use the python command with no parameters to enter an interactive Python session: # python Python 3.6.13 (default, May 9 2021, 22:49:59) [GCC 8.3.0] on linux Digi Connect EZ Mini User Guide...
- Page 396 >>> import json 4. Import the location submodule: >>> from digidevice import location 5. Print the location data in json format: >>> geojson_data = location.Location().geojson >>> print(json.dumps(geojson_data, indent=4)) "type": "Feature", "geometry": { "type": "Point", "coordinates" [ Digi Connect EZ Mini User Guide...
- Page 397 Type shell to access the device shell. 2. At the shell prompt, use the python command with no parameters to enter an interactive Python session: # python Python 3.6.13 (default, May 9 2021, 22:49:59) [GCC 8.3.0] on linux Digi Connect EZ Mini User Guide...
-
Page 398: Use Python To Set The Maintenance Window
Type "help", "copyright", "credits" or "license" for more information. >>> 3. Import the maintenance module: >>> from digidevice import maintenance >>> 4. To determine the current service state of the device: >>> maintenance.state() 'IN_SERVICE' >>> Digi Connect EZ Mini User Guide... - Page 399 4. Use the help command with maintenance : >>> help(maintenance ) Help on module digidevice.maintenance in digidevice: NAME digidevice.maintenance DESCRIPTION API for setting the device's service state. The service state is stored in runt. Digi Connect EZ Mini User Guide...
-
Page 400: Use Python To Send And Receive Sms Messages
You can create Python scripts that send and receive SMS message in tandem with the Digi Remote Manager or Digi aView by using the digidevice.sms module. To use a script to send or receive SMS messages, you must also enable the ability to schedule SMS scripting. - Page 401 > 1: dest = sys.argv[1] else: dest = '+15005550006' my_callback = Callback(sms_test_callback, metadata=True) send_sms(dest, 'Hello World!') print("Please send an SMS message now.") print("Execution halted until a message is received or 60 seconds have Digi Connect EZ Mini User Guide...
-
Page 402: Use Python To Access Serial Ports
5. You can now perform operations on the serial port. For example, to write a message to the serial port: >>> s = serial.Serial("/dev/serial/port1", 115200) >>> s.write(b"Hello from serial port") >>> 6. Use Ctrl-D to exit the Python session. You can also exit the session using exit() or quit(). Digi Connect EZ Mini User Guide... -
Page 403: Use The Paho Mqtt Python Library
URI not passed") return HTTPStatus.BAD_REQUEST print("Request to update firmware with URI: {}".format(fw_uri)) try: fd, fname = tempfile.mkstemp() os.close(fd) try: urllib.request.urlretrieve(fw_uri, fname) except: print("Failed to download FW file from URI {}".format(fw_uri)) return HTTPStatus.NOT_FOUND try: Digi Connect EZ Mini User Guide... - Page 404 """ Supporting only a single topic for now, no need for filters Expects the following message format: "cid": "<client-id>", "cmd": "<command>", "params": { <optional_parameters> Supported commands: - "fw-update" params: - "uri": "<firmware_file_URL>" - "reboot" params: Digi Connect EZ Mini User Guide...
- Page 405 = runt.get("system.load_avg").split(', ') ram_used = runt.get("system.ram.per") disk_opt = runt.get("system.disk./opt.per") disk_config = runt.get("system.disk./etc/config.per") msg = json.dumps({ "load_avg": { "1min": avg1, "5min": avg5, "15min": avg15 "disk_usage": { "/opt": disk_opt, "/etc/config:": disk_config, "ram": ram_used Digi Connect EZ Mini User Guide...
- Page 406 PREFIX_CMD = "cmd/" + PREFIX PREFIX_RSP = "rsp/" + PREFIX client = mqtt.Client() client.on_connect = on_connect client.on_message = on_message try: client.connect("192.168.1.100", 1883, 60) client.loop_start() except: print("Failed to connect to MQTT server") sys.exit(1) while True: publish_dhcp_leases() publish_system() time.sleep(POLL_TIME) Digi Connect EZ Mini User Guide...
- Page 407 Authentication groups Local users Terminal Access Controller Access-Control System Plus (TACACS+) Remote Authentication Dial-In User Service (RADIUS) LDAP Configure serial authentication Disable shell access Set the idle timeout for Connect EZ users Example user configuration Digi Connect EZ Mini User Guide...
-
Page 408: Connect Ez User Authentication
Configures support for LDAP (Lightweight Directory Access Protocol) servers and users. Serial Configures authentication for serial TCP and autoconnect services. configured. User authentication methods Authentication methods determine how users of the Connect EZ device are authenticated. Available authentication methods are: Digi Connect EZ Mini User Guide... - Page 409 TACACS+: Users authenticated by using a remote TACACS+ server for authentication. Terminal Access Controller Access-Control System Plus (TACACS+) for information about configuring TACACS+ authentication. LDAP: Users authenticated by using a remote LDAP server for authentication. LDAP for information about configuring LDAP authentication. Digi Connect EZ Mini User Guide...
-
Page 410: Add A New Authentication Method
Rearrange the position of authentication methods for information about how to reorder the authentication methods. 6. Repeat these steps to add additional methods. 7. Click Apply to save the configuration and apply the change. Command line Digi Connect EZ Mini User Guide... - Page 411 To add the new authentication in another location in the list, use an index value to indicate the appropriate position. For example: (config)> add auth method 1 auth_type (config)> where auth_type is one of local, radius, tacacs+, or ldap. Digi Connect EZ Mini User Guide...
-
Page 412: Delete An Authentication Method
1. Log into the Connect EZ command line as a user with full Admin access rights. Depending on your device configuration, you may be presented with an Access selection menu. Type admin to access the Admin CLI. Digi Connect EZ Mini User Guide... -
Page 413: Rearrange The Position Of Authentication Methods
For example, the following configuration has Local users as the first method, and RADIUS as the second. To reorder these so that RADIUS is first and Local users is second: Digi Connect EZ Mini User Guide... - Page 414 3. Use the show command to display current configuration: (config)> show auth method 0 local 1 radius (config)> 4. Use the move command to rearrange the methods: (config)> move auth method 1 0 (config)> Digi Connect EZ Mini User Guide...
-
Page 415: Authentication Groups
The preconfigured authentication groups cannot be deleted, but the access rights defined for the group are configurable. This section contains the following topics: Change the access rights for a predefined group Add an authentication group Delete an authentication group Digi Connect EZ Mini User Guide... -
Page 416: Change The Access Rights For A Predefined Group
The default is Full access. Interactive shell access Shell access is not available if the Allow shell parameter has been disabled. See Disable shell access for more information about the Allow shell parameter. Serial access Digi Connect EZ Mini User Guide... - Page 417 Connect EZ device by using the WebUI or the Admin CLI. read-only: provides users of this group with read-only access to the WebUI and Admin CLI. The default is full. Digi Connect EZ Mini User Guide...
-
Page 418: Add An Authentication Group
Access rights to OpenVPN tunnels, and the tunnels to which they have access. Access rights to captive portals, and the portals to which they have access. Access rights to query the device for Nagios monitoring. To add an authentication group: WebUI Digi Connect EZ Mini User Guide... - Page 419 Shell access is not available if the Allow shell parameter has been disabled. See Disable shell access for more information about the Allow shell parameter. Serial access 6. (Optional) Configure OpenVPN access. See for further information. 7. (Optional) Configure captive portal access: Digi Connect EZ Mini User Guide...
- Page 420 (config)> auth group admin acl admin level value (config)> where value is either: full: provides users of this group with the ability to manage the Connect EZ device by using the WebUI or the Admin CLI. Digi Connect EZ Mini User Guide...
- Page 421 24h no title (config)> ii. Add a captive portal: (config)> add auth group test acl portal portals end portal1 (config)> 6. (Optional) Configure Nagios monitoring: (config)> auth group test acl nagios enable true (config)> Digi Connect EZ Mini User Guide...
-
Page 422: Delete An Authentication Group
3. Click Authentication > Groups. 4. Click the menu icon (...) next to the group to be deleted and select Delete. 5. Click Apply to save the configuration and apply the change. Command line Digi Connect EZ Mini User Guide... - Page 423 (config)> save Configuration saved. > 5. Type exit to exit the Admin CLI. Depending on your device configuration, you may be presented with an Access selection menu. Type quit to disconnect from the device. Digi Connect EZ Mini User Guide...
-
Page 424: Local Users
The default admin user is preconfigured with both Admin and Serial access. You can configure the admin user account to fit with the needs of your environment. This section contains the following topics: Change a local user's password Configure a local user Delete a local user Digi Connect EZ Mini User Guide... -
Page 425: Change A Local User's Password
You can also change the password for the active user by clicking the user name in the menu bar: The active user must have full Admin access rights to be able to change the password. Digi Connect EZ Mini User Guide... - Page 426 User authentication Local users 6. Click Apply to save the configuration and apply the change. Digi Connect EZ Mini User Guide...
-
Page 427: Configure A Local User
(-) or periods (.), an alias allows the user to log in using a name that contains special characters. The number of unsuccessful login attempts before the user is locked out of the system. Digi Connect EZ Mini User Guide... - Page 428 3. Click Authentication > Users. 4. In Add User, type a name for the user and click . The user configuration window is displayed. The user is enabled by default. To disable, click to toggle off Enable. Digi Connect EZ Mini User Guide...
- Page 429 In Add SSH key, paste or type a public encryption key that this user can use for passwordless SSH login and click . 10. (Optional) Configure two-factor authentication for SSH, telnet, and serial console login: a. Click Two-factor authentication. b. Check Enable to enable two-factor authentication for this user. Digi Connect EZ Mini User Guide...
- Page 430 For Code, enter the scratch code. The code must be eight digits, with a minimum of 10000000. iv. Click again to add additional scratch codes. 11. Click Apply to save the configuration and apply the change. Digi Connect EZ Mini User Guide...
- Page 431 The minimum value is 1, and the default value is 5. b. Set the amount of time that the user is locked out after the number of unsuccessful login attempts defined in lockout tries: Digi Connect EZ Mini User Guide...
- Page 432 (config auth user new_user)> 8. (Optional) Add SSH keys for the user to use passwordless SSH login: a. Change to the user's ssh_key node: (config auth user new_user)> ssh_key (config auth user new_user ssh_key)> Digi Connect EZ Mini User Guide...
- Page 433 For example, to set refresh_interval to ten minutes, enter either 10m or 600s: (config auth user name 2fa)> refresh_interval 600s (config auth user name 2fa)> Digi Connect EZ Mini User Guide...
- Page 434 Where code is an digit number, with a minimum of 10000000. iii. To add additional scratch codes, use the add end code command again. 10. Save the configuration and apply the change: (config auth user new 2fa scratch_code)> save Configuration saved. > Digi Connect EZ Mini User Guide...
-
Page 435: Delete A Local User
3. Click Authentication > Users. 4. Click the menu icon (...) next to the name of the user to be deleted and select Delete. 5. Click Apply to save the configuration and apply the change. Digi Connect EZ Mini User Guide... - Page 436 (config)> save Configuration saved. > 5. Type exit to exit the Admin CLI. Depending on your device configuration, you may be presented with an Access selection menu. Type quit to disconnect from the device. Digi Connect EZ Mini User Guide...
-
Page 437: Terminal Access Controller Access-Control System Plus (Tacacs+)
Connect EZ device prior to configuration. The process of setting up a TACACS+ server varies by the server environment. This section contains the following topics: TACACS+ user configuration TACACS+ server failover and fallback to local authentication Configure your Connect EZ device to use a TACACS+ server Digi Connect EZ Mini User Guide... -
Page 438: Tacacs+ User Configuration
4. Verify that your changes did not introduce any syntax errors: $ sudo tac_plus -C /etc/tacacs+/tac_plus.conf -P If successful, this command will echo the configuration file to standard out. If the command encounters any syntax errors, a message similar to this will display: Digi Connect EZ Mini User Guide... -
Page 439: Tacacs+ Server Failover And Fallback To Local Authentication
Enable command authorization, so that the device will communicate with the TACACS+ server to determine if the user is authorized to execute a specific command. Enable command accounting, so that the device will communicate with the TACACS+ server to log commands that the user executes. Digi Connect EZ Mini User Guide... - Page 440 7. (Optional) For Service, type the value of the service attribute in the the TACACS+ server's configuration. For example, in TACACS+ user configuration, the value of the service attribute in the sample tac_plus.conf file is system, which is also the default setting in the Connect EZ configuration. Digi Connect EZ Mini User Guide...
- Page 441 (config)> auth tacacs+ authoritative true (config)> 4. (Optional) Configure the group_attribute. This is the name of the attribute used in the TACACS+ server's configuration to identify the Connect EZ authentication group or groups that the user Digi Connect EZ Mini User Guide...
- Page 442 This example will add TACACS+ to the end of the list. See User authentication methods for information about adding methods to the beginning or middle of the list. Digi Connect EZ Mini User Guide...
- Page 443 (config)> save Configuration saved. > 11. Type exit to exit the Admin CLI. Depending on your device configuration, you may be presented with an Access selection menu. Type quit to disconnect from the device. Digi Connect EZ Mini User Guide...
-
Page 444: Remote Authentication Dial-In User Service (Radius)
An example of a RADIUS server is FreeRADIUS. This section contains the following topics: RADIUS user configuration RADIUS server failover and fallback to local configuration Configure your Connect EZ device to use a RADIUS server Digi Connect EZ Mini User Guide... -
Page 445: Radius User Configuration
With user authentication methods, you can configure your Connect EZ device to use multiple types of authentication. For example, you can configure both RADIUS authentication and local authentication, so that local authentication can be used as a fallback mechanism if the primary and backup RADIUS Digi Connect EZ Mini User Guide... -
Page 446: Configure Your Connect Ez Device To Use A Radius Server
1. Log into the Connect EZ WebUI as a user with full Admin access rights. 2. On the menu, click System. Under Configuration, click Device Configuration. The Configuration window is displayed. 3. Click Authentication > RADIUS > Servers. Digi Connect EZ Mini User Guide... - Page 447 If you are accessing the Connect EZ device by using ssh, the default value is sshd. 8. Add RADIUS to the authentication methods: a. Click Authentication > Methods. b. For Add method, click . Digi Connect EZ Mini User Guide...
- Page 448 If you are accessing the Connect EZ device by using the WebUI, the default value is for NAS ID is httpd. If you are accessing the Connect EZ device by using ssh, the default value is sshd. (config)> auth radius nas_id id (config)> Digi Connect EZ Mini User Guide...
-
Page 449: Ldap
To use LDAP authentication, you must set up a LDAP server that is accessible by the Connect EZ device prior to configuration. The process of setting up a LDAP server varies by the server environment. Digi Connect EZ Mini User Guide... - Page 450 User authentication LDAP This section contains the following topics: LDAP user configuration LDAP server failover and fallback to local configuration Configure your Connect EZ device to use an LDAP server Digi Connect EZ Mini User Guide...
-
Page 451: Ldap User Configuration
$ ldapadd -x -H 'ldap:///' -D 'cn=admin,dc=example,dc=com' -W -f add_ user.ldif adding new entry "uid=john,dc=example,dc=com" 5. Verify that the user has been added by performing an LDAP search: $ ldapsearch -x -LLL -H 'ldap:///' -b 'dc=example,dc=com' uid=john dn: uid=john,dc=example,dc=com objectClass: inetOrgPerson Digi Connect EZ Mini User Guide... -
Page 452: Ldap Server Failover And Fallback To Local Configuration
The distinguished name used to search to user base. The group attribute. The number of seconds to wait to receive a message from the server. Add additional LDAP servers in case the first LDAP server is unavailable. WebUI Digi Connect EZ Mini User Guide... - Page 453 8. (Optional) For Server login, type a distinguished name (DN) that is used to bind to the LDAP server and search for users, for example cn=user,dc=example,dc=com. Leave this field blank if the server allows anonymous connections. Digi Connect EZ Mini User Guide...
- Page 454 Depending on your device configuration, you may be presented with an Access selection menu. Type admin to access the Admin CLI. 2. At the command line, type config to enter configuration mode: > config (config)> Digi Connect EZ Mini User Guide...
- Page 455 (config)> auth ldap bind_password password (config)> 8. Set the distinguished name (DN) on the server to search for users. This can be the root of the directory tree (for example, dc=example,dc=com) or a sub-tree (for example. ou=People,dc=example,dc=com). Digi Connect EZ Mini User Guide...
- Page 456 This example will add LDAP to the end of the list. See User authentication methods for information about adding methods to the beginning or middle of the list. Digi Connect EZ Mini User Guide...
-
Page 457: Configure Serial Authentication
8. Click to expand Peer certificates to add the public certificates of trusted peers. a. For Add Peer certificate, type the name of a trusted peer and click . b. Paste the public certificate for the trusted peer in PEM format. c. Repeat for additional trusted peer certificates. Digi Connect EZ Mini User Guide... - Page 458 CA-cert-name is the name of the certificate for the custom certificate authority. cert-and-private-key is the certificate and private key for the custom certificate authority. Repeat for additional custom certificate authorities. 7. Save the configuration and apply the change: (config)> save Configuration saved. > Digi Connect EZ Mini User Guide...
-
Page 459: Disable Shell Access
4. Click to disable Allow shell. Note If shell access is disabled, re-enabling it will erase the device's configuration and perform a factory reset. 5. Click Apply to save the configuration and apply the change. Command line Digi Connect EZ Mini User Guide... -
Page 460: Set The Idle Timeout For Connect Ez Users
Allowed values are any number of weeks, days, hours, minutes, or seconds, and take the format number{w|d|h|m|s}. For example, to set Idle timeout to ten minutes, enter 10m or 600s. Digi Connect EZ Mini User Guide... - Page 461 (config)> save Configuration saved. > 5. Type exit to exit the Admin CLI. Depending on your device configuration, you may be presented with an Access selection menu. Type quit to disconnect from the device. Digi Connect EZ Mini User Guide...
-
Page 462: Example User Configuration
Verify that the admin group has full administrator rights: i. Click Authentication > Groups. ii. Click admin. iii. Verify that the admin group has Admin access enabled. If not, click Admin access to enable. Digi Connect EZ Mini User Guide... - Page 463 If admin > level is set to read-only: (config)> auth group admin acl admin level full (config)> 4. Verify that local is one of the configured authentication methods: (config)> show auth method 0 local (config)> If local is not listed: Digi Connect EZ Mini User Guide...
-
Page 464: Example 2: Radius, Tacacs+, And Local Authentication For One User
3. The user is authenticated by the Connect EZ device using local authentication. This example uses a FreeRadius 3.0 server running on ubuntu, and a TACACS+ server running on ubuntu. Server configuration may vary depending on the platforms or type of servers used in your environment. Digi Connect EZ Mini User Guide... - Page 465 Save and close the tac_plus.conf file. 3. Log into the Connect EZ WebUI as a user with full Admin access rights. 4. On the menu, click System. Under Configuration, click Device Configuration. Digi Connect EZ Mini User Guide...
- Page 466 Click Groups. ii. For Add Group, click . iii. For Group, select the admin group. a. Verify that the admin group has full administrator rights: i. Click Authentication > Groups. ii. Click admin. Digi Connect EZ Mini User Guide...
- Page 467 Add a TACACS+ user to the tac_plus.conf file: user = admin1 { name ="Admin1 for TX64" pap = cleartext password1 service = system { groupname = admin In this example: The user's username is admin1. The user's password is password1. Digi Connect EZ Mini User Guide...
- Page 468 6. Verify that the admin group has full administrator rights: (config)> show auth group admin acl admin enable true level full (config)> If admin > enable is set to false: (config)> auth group admin acl admin enable true (config)> Digi Connect EZ Mini User Guide...
- Page 469 (config auth user adminuser)> save Configuration saved. > 9. Type exit to exit the Admin CLI. Depending on your device configuration, you may be presented with an Access selection menu. Type quit to disconnect from the device. Digi Connect EZ Mini User Guide...
-
Page 470: Firewall
Firewall This chapter contains the following topics: Firewall configuration Port forwarding rules Packet filtering Configure custom firewall rules Configure Quality of Service options Digi Connect EZ Mini User Guide... -
Page 471: Firewall Configuration
1. Log into the Connect EZ WebUI as a user with full Admin access rights. 2. On the menu, click System. Under Configuration, click Device Configuration. The Configuration window is displayed. 3. Click Firewall > Zones. Digi Connect EZ Mini User Guide... - Page 472 (config firewall zone my_zone)> 4. (Optional) Enable Network Address Translation (NAT): (config firewall zone my_zone)> src_nat true (config firewall zone my_zone)> 5. Save the configuration and apply the change: (config firewall zone my_zone)> save Configuration saved. > Digi Connect EZ Mini User Guide...
-
Page 473: Configure The Firewall Zone For A Network Interface
Type admin to access the Admin CLI. 2. At the command line, type config to enter configuration mode: > config (config)> 3. At the config prompt, type: (config)> network interface eth2 zone my_zone (config)> Digi Connect EZ Mini User Guide... -
Page 474: Delete A Custom Firewall Zone
The Configuration window is displayed. 3. Click Firewall > Zones. 4. Click the menu icon (...) next to the appropriate custom firewall zone and select Delete. 5. Click Apply to save the configuration and apply the change. Digi Connect EZ Mini User Guide... -
Page 475: Port Forwarding Rules
The port or range of ports to which traffic should be forwarded. Additional configuration items A label for the port forwarding rule. The IP version (either IPv4 or IPv6) that incoming network connections must match. The protocols that incoming network connections must match. Digi Connect EZ Mini User Guide... - Page 476 9. For Incoming port(s), type the public-facing port number that network connections must use for their traffic to be forwarded. 10. For To Address, type the IP address of the server to which traffic should be forwarded. Digi Connect EZ Mini User Guide...
- Page 477 4. Set the network interface for the rule. (config firewall dnat 0)> interface (config firewall dnat 0)> Network connections will only be forwarded if their destination address matches the IP address of this network interface. Digi Connect EZ Mini User Guide...
- Page 478 10. (Optional) To create a white list of devices that are authorized to leverage this forwarding rule, based on either the IP address or firewall zone, change to the acl node: (config firewall dnat 0)> acl (config firewall dnat 0 acl)> Digi Connect EZ Mini User Guide...
-
Page 479: Delete A Port Forwarding Rule
12. Type exit to exit the Admin CLI. Depending on your device configuration, you may be presented with an Access selection menu. Type quit to disconnect from the device. Delete a port forwarding rule To delete a port forwarding rule: Digi Connect EZ Mini User Guide... - Page 480 3. Determine the index number of the port forwarding rule you want to delete: (config)> show firewall dnat no address no zone enable true interface ip_version ipv4 label IPv4 port forwarding rule port 10000 protocol tcp to_address6 10.10.10.10 Digi Connect EZ Mini User Guide...
- Page 481 (config)> save Configuration saved. > 6. Type exit to exit the Admin CLI. Depending on your device configuration, you may be presented with an Access selection menu. Type quit to disconnect from the device. Digi Connect EZ Mini User Guide...
-
Page 482: Packet Filtering
To configure a packet filtering rule: WebUI 1. Log into the Connect EZ WebUI as a user with full Admin access rights. 2. On the menu, click System. Under Configuration, click Device Configuration. The Configuration window is displayed. Digi Connect EZ Mini User Guide... - Page 483 1. Log into the Connect EZ command line as a user with full Admin access rights. Depending on your device configuration, you may be presented with an Access selection menu. Type admin to access the Admin CLI. Digi Connect EZ Mini User Guide...
- Page 484 3. (Optional) Set the label for the rule. (config firewall filter 1)> label "My filter rule" (config firewall filter 1)> 4. Set the action to be performed by the filter rule. (config firewall filter 1)> action value (config firewall filter 1)> Digi Connect EZ Mini User Guide...
- Page 485 (config firewall filter 1)> protocol value (config firewall filter 1)> where value is one of: icmp icmpv6 The default is any. 9. Save the configuration and apply the change: (config)> save Configuration saved. > Digi Connect EZ Mini User Guide...
-
Page 486: Enable Or Disable A Packet Filtering Rule
Depending on your device configuration, you may be presented with an Access selection menu. Type admin to access the Admin CLI. 2. At the command line, type config to enter configuration mode: > config (config)> Digi Connect EZ Mini User Guide... -
Page 487: Delete A Packet Filtering Rule
Depending on your device configuration, you may be presented with an Access selection menu. Type quit to disconnect from the device. Delete a packet filtering rule To delete a packet filtering rule: WebUI Digi Connect EZ Mini User Guide... - Page 488 (config)> show firewall filter action accept dst_zone any enable true ip_version any label Allow all outgoing traffic protocol any src_zone internal action drop dst_zone internal enable true ip_version any label My packet filter protocol any Digi Connect EZ Mini User Guide...
-
Page 489: Configure Custom Firewall Rules
4. Enable the custom rules. 5. (Optional) Enable Override to override all preconfigured firewall behavior and rely solely on the custom firewall rules. 6. For Rules, type the shell command that will execute the custom firewall rules script. Digi Connect EZ Mini User Guide... - Page 490 Firewall Configure custom firewall rules 7. Click Apply to save the configuration and apply the change. Digi Connect EZ Mini User Guide...
-
Page 491: Configure Quality Of Service Options
Outbound provides an example of matching packets as they are routed from the device onto the WAN interface. Inbound provides an example of matching packets as they are routed from the device onto a LAN interface. These example bindings are disabled by default. Digi Connect EZ Mini User Guide... - Page 492 To enable the Inbound binding: (config)> firewall qos 1 enable true (config)> 4. Set the interface for the binding. Use the index number of the binding; for example, to set the interface for the Outbound binding: Digi Connect EZ Mini User Guide...
- Page 493 3. Click Firewall > Quality of Service. 4. For Add Binding, click . The quality of service binding configuration window is displayed. 5. Enable the binding. 6. (Optional) Type a Label for the binding. Digi Connect EZ Mini User Guide...
- Page 494 Select Default to identify this policy as a fall-back policy. The fall-back policy will be used for traffic that is not matched by any other policy. If there is no default policy associated with this binding, packets that do not match any policy rules will be dropped. Digi Connect EZ Mini User Guide...
- Page 495 Interface: Only traffic destined for the selected Interface will be matched. IPv4 address: Only traffic destined for the IP address typed in IPv4 address will be matched. Use the format IPv4_address[/netmask], or use any to match any IPv4 address. Digi Connect EZ Mini User Guide...
- Page 496 Use the format IPv6_address[/prefix_length], or use any to match any IPv6 address. Repeat to add a new rule. Up to 30 rules can be configured. 10. Click Apply to save the configuration and apply the change. Digi Connect EZ Mini User Guide...
- Page 497 At least one policy is required for each binding. Each policy can contain up to 30 rules. a. Change to the policy node of the configuration: (config firewall qos 2)> policy (config firewall qos 2 policy)> Digi Connect EZ Mini User Guide...
- Page 498 (config firewall qos 2 policy 0)> rule (config firewall qos 2 policy 0 rule)> ii. Add a rule: (config firewall qos 2 policy 0 rule)> add end (config firewall qos 2 policy 0 rule 0)> Digi Connect EZ Mini User Guide...
- Page 499 Source traffic from any address will be matched. Firewall configuration for more information about firewall zones. interface: Only traffic from the selected interface will be matched. Set the interface: Digi Connect EZ Mini User Guide...
- Page 500 (config network qos 2 policy 0 rule 0)> dst interface /network/interface/eth1 (config network qos 2 policy 0 rule 0)> address: Only traffic destined for the IP address typed in IPv4 address will be matched. Set the address that will be matched: Digi Connect EZ Mini User Guide...
- Page 501 (config)> save Configuration saved. > 9. Type exit to exit the Admin CLI. Depending on your device configuration, you may be presented with an Access selection menu. Type quit to disconnect from the device. Digi Connect EZ Mini User Guide...
- Page 502 Reboot your Connect EZ device Erase device configuration and reset to factory defaults Locate the device by using the Find Me feature Configuration files Schedule system maintenance tasks Disable device encryption Configure the speed of your Ethernet port Digi Connect EZ Mini User Guide...
-
Page 503: Review Device Status
Alt. Firmware Build Date : Thurs, 03 March 2022 10:16:23 Bootloader Version : 19.7.23.0-15f936e0ed Current Time : Thurs, 03 March 2022 10:16:23 +0000 : 1.4% Uptime : 6 days, 6 hours, 21 minutes, 57 seconds (541317s) Temperature : 40C > Digi Connect EZ Mini User Guide... -
Page 504: Configure System Information
You can configure information related to your Connect EZ device, such as providing a name and location for the device. Configuration items A name for the device. The name of a contact for the device. Digi Connect EZ Mini User Guide... - Page 505 2. At the command line, type config to enter configuration mode: > config (config)> 3. Set a name for the device. This name will appear in log messages and at the command prompt. (config)> system name 192.168.3.1 192.168.3.1(config)> Digi Connect EZ Mini User Guide...
-
Page 506: Update System Firmware
For example, Connect EZ-22.2.9.85.bin. Manage firmware updates using Digi Remote Manager If you have a network of many devices, you can use Digi Remote Manager Profiles to manage firmware updates. Profiles ensure all your devices are running the correct firmware version and that all newly installed devices are updated to that same version. - Page 507 Beginning with firmware version 22.2.9.x, the Connect EZ device uses certificate-based communication for enhanced security when connecting to Digi Remote Manager. If you downgrade your firmware from version 22.2.9.x to version 21.11.x or previous, your device will no longer be able to communicate with Remote Manager.
- Page 508 System administration Update system firmware Device firmware update from '21.11.60.63' to '22.2.9.85' is needed > 3. Use the modem firmware ota list command to list available firmware on the Digi firmware repository. > system firmware ota list 21.11.60.63 22.2.9.85 >...
- Page 509 Update firmware from a local file WebUI 1. Download the Connect EZ operating system firmware from the Digi Support FTP site to your local machine. 2. Log into the Connect EZ WebUI as a user with Admin access. 3. On the main menu, click System. Under Administration, click Firmware Update.
-
Page 510: Dual Boot Behavior
By default, the Connect EZ device stores two copies of firmware in two flash memory banks: The current firmware version that is used to boot the device. A copy of the firmware that was in use prior to your most recent firmware update. Digi Connect EZ Mini User Guide... -
Page 511: Reboot Your Connect Ez Device
Type admin to access the Admin CLI. 2. Duplicate the firmware: > system duplicate-firmware > Reboot your Connect EZ device You can reboot the Connect EZ device immediately or schedule a reboot for a specific time every day. Digi Connect EZ Mini User Guide... -
Page 512: Reboot Your Device Immediately
3. Select System > Scheduled tasks. 4. For Reboot time, enter the time of the day that the device should reboot, using the format HH:MM. The device will reboot at this time every day. Digi Connect EZ Mini User Guide... - Page 513 (config>> system schedule reboot_window value (config)> where value is any number of hours, minutes, or seconds, and takes the format number {h|m|s}. For example, to set reboot_window to ten minutes, enter either 10m or 600s: Digi Connect EZ Mini User Guide...
-
Page 514: Erase Device Configuration And Reset To Factory Defaults
With firmware release 22.2.9.x and newer, erases the client-side certificate used for communication with Digi Remote Manager. If you are using Digi Remote Manager with firmware release 22.2.9.x and newer, by default the device uses a client-side certificate for communication with Remote Manager. If the client-side certificate is erased, you must use the Remote Manager interface to reset the certificate. - Page 515 (Optional) Reset the default password for the admin account. See Change the default password for the admin user for further information. Reset the device by using the RESET button. Digi Connect EZ Mini User Guide...
- Page 516 (config)> 4. Set the password for the admin user prior to saving the changes: (config)> auth user admin password pwd (config)> 5. Save the configuration and apply the change: (config)> save Configuration saved. > Digi Connect EZ Mini User Guide...
-
Page 517: Configure The Connect Ez Device To Use Custom Factory Default Settings
3. On the main menu, click System. Under Configuration, click Configuration Maintenance. The Configuration Maintenance windows is displayed. Digi Connect EZ Mini User Guide... -
Page 518: Locate The Device By Using The Find Me Feature
Use the Find Me feature to cause LEDs on the device to blink, which can help you to identify the specific device. For the Connect EZ, the Power LED blinks when the Find Me feature is in use. To use this feature: WebUI Digi Connect EZ Mini User Guide... - Page 519 3. To deactivate the Find Me feature, type the following at the command prompt: > system find-me off > 4. To determine the status of the Find Me feature, type the following at the command prompt: > system find-me status > Digi Connect EZ Mini User Guide...
-
Page 520: Configuration Files
Type admin to access the Admin CLI. 2. At the command line, type config to enter configuration mode: > config (config)> 3. Make any necessary configuration changes. 4. Save the configuration and apply the change: (config)> save Configuration saved. > Digi Connect EZ Mini User Guide... -
Page 521: Save Configuration To A File
1. Log into the Connect EZ command line as a user with Admin access. Depending on your device configuration, you may be presented with an Access selection menu. Type admin to access the Admin CLI. 2. Enter the following: > system backup path [passphrase passphrase] type type Digi Connect EZ Mini User Guide... -
Page 522: Restore The Device Configuration
WebUI 1. Log into the Connect EZ WebUI as a user with Admin access. 2. On the main menu, click System. Under Configuration, click Configuration Maintenance. The Configuration Maintenance windows is displayed. Digi Connect EZ Mini User Guide... - Page 523 Connect EZ device where the copied file will be placed. For example: > scp host 192.168.4.1 user admin remote /home/admin/bin/backup-archive- 0040FF800120-22.2.9.85-19.23.42.bin local /opt to local 3. Enter the following: > system restore filepath [passphrase passphrase] where Digi Connect EZ Mini User Guide...
- Page 524 EZ's filesystem (local-path in the previous step). passphrase (optional) is the passphrase to restore the configuration backup, if a passphrase was used when the backup was created. For example: > system restore /opt/backup-archive-0040FF800120-22.2.9.85- 19.23.42.bin Digi Connect EZ Mini User Guide...
-
Page 525: Schedule System Maintenance Tasks
Schedule system maintenance tasks You can configure tasks to be run during a specified maintenance window. When the device is within its maintenance window, firmware updates and Digi Remote Manager configuration checks will be performed. You can also schedule custom scripts to run during the maintenance window. See... - Page 526 Note If your device is managed by a Digi Remote Manager configuration, the configuration manages the device's firmware version. You should not enable this option. 8. The Modem firmware update option is not used with theConnect EZ.
- Page 527 (config system schedule maintenance trigger 0)> interface /network/interface/eth1 (config system schedule maintenance trigger 0)> out_of_service: The maintenance window will only start if the Python Out-of- Service is set. See Use Python to set the maintenance window for further Digi Connect EZ Mini User Guide...
- Page 528 WAN connection. (config)> system schedule maintenance device_fw_update value (config)> where value is either true or false. yes or no, and 1 or 0 are also allowed. Digi Connect EZ Mini User Guide...
-
Page 529: Disable Device Encryption
System administration Disable device encryption Note If your device is managed by a Digi Remote Manager configuration, the configuration manages the device's firmware version. You should not enable this option. 5. (Optional) Configure automated checking for device and modem firmware updates: a. -
Page 530: Re-Enable Cryptography After It Has Been Disabled
Type quit to disconnect from the device. Re-enable cryptography after it has been disabled. To re-enable cryptography: 1. Configure your PC network to connect to the 192.168.210 subnet. For example, on a Windows Digi Connect EZ Mini User Guide... - Page 531 Click the Internet Protocol Version 4 (TCP/IPv4) parameter. c. Click Properties. The Internet Protocol Version 4 (TCP/IPv4) Properties dialog appears. d. Configure with the following details: IP address for PC: 192.168.210.2 Subnet: 255.255.255.0 Gateway: 192.168.210.1 Digi Connect EZ Mini User Guide...
-
Page 532: Configure The Speed Of Your Ethernet Port
This will re-enable encryption and leave the device at its factory default setting. Configure the speed of your Ethernet port You can configure the speed of your Connect EZ device's Ethernet port. WebUI Digi Connect EZ Mini User Guide... - Page 533 1000—Sets the speed to 1 Gbps. Available only for devices with Gigabit Ethernet ports. auto—Configures the device to automatically determine the best speed for the Ethernet port. The default is auto. 4. Save the configuration and apply the change: (config)> save Configuration saved. > Digi Connect EZ Mini User Guide...
- Page 534 Configure the speed of your Ethernet port 5. Type exit to exit the Admin CLI. Depending on your device configuration, you may be presented with an Access selection menu. Type quit to disconnect from the device. Digi Connect EZ Mini User Guide...
-
Page 535: Monitoring
Monitoring This chapter contains the following topics: intelliFlow Configure NetFlow Probe Digi Connect EZ Mini User Guide... -
Page 536: Intelliflow
Note When intelliFlow is enabled and the device is connected to Digi aView, it adds an estimated 50MB of data usage for the device by reporting the metrics to aView. intelliflow does not currently work with Digi Remote Manager. - Page 537 Zone: The firewall zone which is assigned to the network interface(s) that intelliFlow will see as internal clients. intelliFlow relies on an internal to external relationship, where the internal clients are present on the zone specified. Format: dynamic_routes edge external internal ipsec loopback Digi Connect EZ Mini User Guide...
- Page 538 (config)> save Configuration saved. > 6. Type exit to exit the Admin CLI. Depending on your device configuration, you may be presented with an Access selection menu. Type quit to disconnect from the device. Digi Connect EZ Mini User Guide...
-
Page 539: Use Intelliflow To Display Average Cpu And Ram Usage
Display more granular information: 1. Click and drag over an area in the chart to zoom into that area and provide more granular information. 2. Release to display the selected portion of the chart: Digi Connect EZ Mini User Guide... -
Page 540: Use Intelliflow To Display Top Data Usage Information
1. Log into the Connect EZ WebUI as a user with Admin access. 2. If you have not already done so, enable intelliFlow. See Enable intelliFlow. 3. From the menu, click Status > intelliFlow. Digi Connect EZ Mini User Guide... - Page 541 5. Change the type of chart that is used to display the data: a. Click the menu icon (). b. Select the type of chart. 6. Change the number of top users displayed. You can display the top five, top ten, or top twenty data users. Digi Connect EZ Mini User Guide...
-
Page 542: Use Intelliflow To Display Data Usage By Host Over Time
3. From the menu, click Status > intelliFlow. 4. Click Host Data Usage Over Time. Display more granular information: a. Click and drag over an area in the chart to zoom into that area and provide more granular information. Digi Connect EZ Mini User Guide... -
Page 543: Configure Netflow Probe
The number of seconds that a flow is active before it is exported to the NetFlow collectors. The maximum number of simultaneous flows. A label for the NetFlow collector. The port of the NetFlow collector. Additional NetFlow collectors. To probe network traffic and export statistics to NetFlow collectors: Digi Connect EZ Mini User Guide... - Page 544 Allowed value is any number between 1 and 1800. The default is 1800. 10. For Maximum flows, type the maximum number of flows to probe simultaneously. Allowed value is any number between 0 and 2000000. The default is 2000000. Digi Connect EZ Mini User Guide...
- Page 545 The default is v10. 1. Enable flow sampling by selecting a sampling technique. Flow sampling can reduce flow processing and transmission overhead by providing a representative subset of all flows. (config)> monitoring netflow sampler type (config)> Digi Connect EZ Mini User Guide...
- Page 546 Set the IP address of the collector: (config monitoring netflow collector 0)> address ip_address (config monitoring netflow collector 0)> c. (Optional) Set the port used by the collector: (config monitoring netflow collector 0)> port port (config monitoring netflow collector 0)> Digi Connect EZ Mini User Guide...
- Page 547 (config monitoring netflow collector 0)> save Configuration saved. > 11. Type exit to exit the Admin CLI. Depending on your device configuration, you may be presented with an Access selection menu. Type quit to disconnect from the device. Digi Connect EZ Mini User Guide...
-
Page 548: Central Management
Collect device health data and set the sample interval Enable event log upload to Digi Remote Manager Log into Digi Remote Manager Use Digi Remote Manager to view and manage your device Add a device to Digi Remote Manager View Digi Remote Manager connection status... -
Page 549: Digi Remote Manager Support
This URL is required to utilize the client-side certificate support. Prior to release 22.2.9.x, the default URL was my.devicecloud.com. If your Digi device is configured to use a non-default URL to connect to Remote Manager, updating the firmware will not change your configuration. However, if you erase the device's configuration, the Remote Manager URL will change to the default of edp12.devicecloud.com. - Page 550 To configure Digi Remote Manager: WebUI 1. Log into the Connect EZ WebUI as a user with full Admin access rights. 2. On the menu, click System. Under Configuration, click Device Configuration. The Configuration window is displayed. Digi Connect EZ Mini User Guide...
- Page 551 Digi Remote Manager support is enabled by default. To disable, click Enable central management. 4. (Optional) For Service, select either Digi Remote Manager or Digi aView. The default is Digi Remote Manager. 5. (Optional) For Management server, type the URL for the central management server.
- Page 552 For Port, type or select the port number on the HTTP proxy server that the device should connect to. The default is 2138. 15. Click Apply to save the configuration and apply the change. Command line Digi Connect EZ Mini User Guide...
- Page 553 Digi Remote Manager aview: Digi aView The default is Digi Remote Manager. 5. (Optional) Set the URL for the central management server. The default is the Digi Remote Manager server, my.devicecloud.com. (config)> cloud drm drm_url url (config)>...
- Page 554 CLI: (config)> cloud drm cli_local_auth true (config)> If set to false, no login prompt will be presented and the user will be logged in as admin. The default is false. Digi Connect EZ Mini User Guide...
-
Page 555: Collect Device Health Data And Set The Sample Interval
Collect device health data and set the sample interval You can enable or disable the collection of device health data to upload to Digi Remote Manager, and configure the interval between health sample uploads. By default, device health data upload is enabled, and the health sample interval is set to 60 minutes. - Page 556 3. Click Monitoring > Device Health. 4. (Optional) Click to expand Data point tuning. Data point tuning options allow to you configure what data are uploaded to the Digi Remote Manager. All options are enabled by default. 5. Only report changed values to Digi Remote Manager is enabled by default.
- Page 557 1, 5, 15, 30, or 60, and represents the number of minutes between uploads of health sample data. 5. By default, the device will only report health metrics values to Digi Remote Manager that have changed health metrics were last uploaded. This is useful to reduce the bandwidth used to report health metrics.
-
Page 558: Enable Event Log Upload To Digi Remote Manager
Type quit to disconnect from the device. Enable event log upload to Digi Remote Manager You can configure your device to upload the event log to Digi Remote Manager, and configure the interval between event log uploads. To enable the event log upload, or disable it if it has been disabled, and to change the upload interval: ... -
Page 559: Log Into Digi Remote Manager
6. Type exit to exit the Admin CLI. Depending on your device configuration, you may be presented with an Access selection menu. Type quit to disconnect from the device. Log into Digi Remote Manager To start Digi Remote Manager Digi Connect EZ Mini User Guide... - Page 560 1. If you have not already done so, click here to sign up for a Digi Remote Manager account. 2. Check your email for Digi Remote Manager login instructions. 3. Go to remotemanager.digi.com. 4. Log into your Digi Remote Manager account.
-
Page 561: Use Digi Remote Manager To View And Manage Your Device
Use Digi Remote Manager to view and manage your device To view and manage your device: 1. If you have not already done so, connect to your Digi Remote Manager account. 2. Click Device Management to display a list of your devices. -
Page 562: Add A Device To Digi Remote Manager
The same default password is also shown on the label affixed to the bottom of the device. 6. Click Add. 7. Click OK. Digi Remote Manager adds your Connect EZ device to your account and it appears in the Device Management view. View Digi Remote Manager connection status To view the current Digi Remote Manager configuration: ... -
Page 563: Configure Multiple Devices Using Profiles
The Device ID is the unique identifier for the device, as used by the Remote Manager. Configure multiple devices using profiles Digi recommends you take advantage of Digi Remote Manager profiles to manage multiple Connect EZ routers. Typically, if you want to provision multiple Connect EZ routers: 1. - Page 564 The Connect EZ local file system Display directory contents Create a directory Display file contents Copy a file or directory Move or rename a file or directory Delete a file or directory Upload and download files Digi Connect EZ Mini User Guide...
-
Page 565: File System
Depending on your device configuration, you may be presented with an Access selection menu. Type admin to access the Admin CLI. 2. At the Admin CLI prompt, type ls /path/dir_name. For example, to display the contents of the /etc/config directory: Digi Connect EZ Mini User Guide... -
Page 566: Create A Directory
160 Aug 25 17:49 temp > 4. Type exit to exit the Admin CLI. Depending on your device configuration, you may be presented with an Access selection menu. Type quit to disconnect from the device. Digi Connect EZ Mini User Guide... -
Page 567: Display File Contents
1. Log into the Connect EZ command line as a user with Admin access. Depending on your device configuration, you may be presented with an Access selection menu. Type admin to access the Admin CLI. 2. At the Admin CLI prompt, type cp /path/filename|dir_name /path[filename]|dir_name. For example: Digi Connect EZ Mini User Guide... -
Page 568: Move Or Rename A File Or Directory
> mv /etc/config/scripts/test.py /opt/ > 3. Type exit to exit the Admin CLI. Depending on your device configuration, you may be presented with an Access selection menu. Type quit to disconnect from the device. Digi Connect EZ Mini User Guide... -
Page 569: Delete A File Or Directory
1. Log into the Connect EZ command line as a user with Admin access. Depending on your device configuration, you may be presented with an Access selection menu. Type admin to access the Admin CLI. Digi Connect EZ Mini User Guide... -
Page 570: Upload And Download Files
3. Highlight the directory to which the file will be uploaded and click to open the directory. 4. Click (upload). 5. Browse to the location of the file on your local machine. Select the file and click Open to upload the file. Digi Connect EZ Mini User Guide... -
Page 571: Upload And Download Files By Using The Secure Copy Command
To copy firmware from a remote host with an IP address of 192.168.4.1 to the /etc/config directory on the Connect EZ device, issue the following command: > scp host 192.168.4.1 user admin remote /home/admin/bin/Connect EZ- 22.2.9.85.bin local /etc/config/scripts to local admin@192.168.4.1's password: adminpwd Connect EZ-22.2.9.85.bin 100% 36MB 11.1MB/s 00:03 > Digi Connect EZ Mini User Guide... -
Page 572: Upload And Download Files Using Sftp
Transfer a file from the Connect EZ device to a remote host This example downloads a file named test.py from the Connect EZ device at the IP address of 192.168.2.1 with a username of ahmed to the local directory on the remote host: Digi Connect EZ Mini User Guide... - Page 573 File system Upload and download files $ sftp ahmed@192.168.2.1 Password: Connected to 192.168.2.1 sftp> get test.py Fetching test.py to test.py test.py 100% 0.3KB/s 00:00 sftp> exit Digi Connect EZ Mini User Guide...
- Page 574 View system and event logs Configure syslog servers Configure options for the event and system logs Analyze network traffic Use the ping command to troubleshoot network connections Use the traceroute command to diagnose IP routing problems Digi Connect EZ Mini User Guide...
-
Page 575: Perform A Speedtest
Depending on your device configuration, you may be presented with an Access selection menu. Type quit to disconnect from the device. Generate a support report To generate and download a support report: WebUI Digi Connect EZ Mini User Guide... - Page 576 > 4. Type exit to exit the Admin CLI. Depending on your device configuration, you may be presented with an Access selection menu. Type quit to disconnect from the device. Digi Connect EZ Mini User Guide...
-
Page 577: View System And Event Logs
2. On the main menu, click System > Logs. The system log displays: 3. Limit the display in the system log by using the Find search tool. 4. Use filters to configure the types of information displayed in the system logs. Digi Connect EZ Mini User Guide... - Page 578 Allowed values are critical, warning, info, and debug. For example, to limit the event list to only info messages: > show log filter info Timestamp Type Category Message ---------------- ------- --------- -------------------------------------- ----- Nov 26 22:01:26 info user name=admin~service=cli~state=opened~remote=192.168.1.2 Nov 26 22:01:25 info user name=admin~service=cli~state=closed~remote=192.168.1.2 Digi Connect EZ Mini User Guide...
-
Page 579: View Event Logs
4. Click Events to expand the event viewer. 5. Limit the display in the event log by using the Find search tool. 6. Click to download the event log. Command line Digi Connect EZ Mini User Guide... - Page 580 Nov 26 22:01:25 info user name=admin~service=cli~state=closed~remote=192.168.1.2 > 5. Type exit to exit the Admin CLI. Depending on your device configuration, you may be presented with an Access selection menu. Type quit to disconnect from the device. Digi Connect EZ Mini User Guide...
-
Page 581: Configure Syslog Servers
For Add Server, click . The log server configuration window is displayed. Log servers are enabled by default. To disable, click to toggle off Enable. c. Type the host name or IP address of the Server. Digi Connect EZ Mini User Guide... - Page 582 The event categories that will be sent to the server are automatically enabled when the server is enabled. To disable informational event messages: (config system log remote 0)> info false (config system log remote 0)> Digi Connect EZ Mini User Guide...
-
Page 583: Configure Options For The Event And System Logs
30 minutes. All event categories are enabled. To change or disable the heartbeat interval, or to disable event categories, and to perform other log configuration: WebUI Digi Connect EZ Mini User Guide... - Page 584 You should only enable Preserve system logs temporarily to debug issues. Once you are finished debugging, immediately disable Preserve system logs to avoid unnecessary wear to the flash memory. 8. Click Apply to save the configuration and apply the change. Digi Connect EZ Mini User Guide...
- Page 585 5. (Optional) To disable event categories, or to enable them if they have been disabled: a. Use the question mark (?) to determine available event categories: (config)> system log event ? Event categories: Settings to enable individual event categories. Additional Configuration Digi Connect EZ Mini User Guide...
- Page 586 Status events report the current list of leases. Parameters Current Value ----------------------------------------------------------------- -------------- info true Enable informational events status true Enable status events status_interval Status interval (config)> system log event dhcpserver Digi Connect EZ Mini User Guide...
- Page 587 (config)> save Configuration saved. > 8. Type exit to exit the Admin CLI. Depending on your device configuration, you may be presented with an Access selection menu. Type quit to disconnect from the device. Digi Connect EZ Mini User Guide...
-
Page 588: Analyze Network Traffic
Example filters for capturing data traffic Capture packets from the command line Stop capturing packets Show captured traffic data Save captured data traffic to a file Download captured data to your PC Clear captured data Digi Connect EZ Mini User Guide... -
Page 589: Configure Packet Capture For The Network Analyzer
2. On the menu, click System. Under Configuration, click Device Configuration. The Configuration window is displayed. 3. Click Network > Analyzer. 4. For Add Capture settings, type a name for the capture filter and click . The new capture filter configuration is displayed. Digi Connect EZ Mini User Guide... - Page 590 Click to add a TCP /UDP port. iii. For IP TCP/UDP port to capture or ignore, type the number of the port to be captured or ingored. iv. For TCP or UDP port, select the type of transport protocol. Digi Connect EZ Mini User Guide...
- Page 591 Example filters for capturing data traffic for examples of filters using BPF syntax. 8. (Optional) Schedule the analyzer to run, using this capture filter, based on a specified event or at a particular time: Digi Connect EZ Mini User Guide...
- Page 592 Type admin to access the Admin CLI. 2. At the command line, type config to enter configuration mode: > config (config)> 3. Add a new capture filter: (config)> add network analyzer name (config network analyzer name)> Digi Connect EZ Mini User Guide...
- Page 593 By default, is option is set to false, which means that the filter will capture packets from this IP address/network. v. Repeat these steps to add additional IP address filters. b. To create a filter that either captures or ignores packets that use a particular IP protocol: Digi Connect EZ Mini User Guide...
- Page 594 By default, is option is set to false, which means that the filter will capture packets from this protocol. vi. Repeat these steps to add additional protocol filters. c. To create a filter that either captures or ignores packets from a particular port: Digi Connect EZ Mini User Guide...
- Page 595 Set whether the filter should apply to packets when the MAC address is the source, the destination, or both: (config network analyzer name filter mac_address 0)> match value (config network analyzer name filter mac_address 0)> where value is one of: Digi Connect EZ Mini User Guide...
- Page 596 6. (Optional) Schedule the analyzer to run, using this capture filter, based on a specified event or at a particular time: a. Enable scheduling for this capture filter: (config network analyzer name)> schedule enable true (config network analyzer name)> Digi Connect EZ Mini User Guide...
- Page 597 (config network analyzer name)> where value is any number of weeks, days, hours, minutes, or seconds, and takes the format number{w|d|h|m|s}. For example, to set save_interval to ten minutes, enter either 10m or 600s: Digi Connect EZ Mini User Guide...
-
Page 598: Example Filters For Capturing Data Traffic
Capture traffic from UDP port 53: ip proto udp and src port 53 Capture to and from IP host 10.0.0.1 but filter out ports 22 and 80: ip host 10.0.0.1 and not (port 22 or port 80) Digi Connect EZ Mini User Guide... -
Page 599: Capture Packets From The Command Line
Configure packet capture for the network analyzer for more information. To determine available packet capture configurations, use the ?: > analyzer start name ? name: Name of the capture filter to use. Format: test_capture Digi Connect EZ Mini User Guide... -
Page 600: Stop Capturing Packets
The timestamp for when the packet was captured. The length of the packet and the amount of data captured. Whether the packet was sent or received by the device. The interface on which the packet was sent or received. Digi Connect EZ Mini User Guide... - Page 601 Source IP Address : 10.10.74.130 Dest. IP Address : 10.10.74.72 TCP Header Source Port : 52654 Destination Port : 22 Sequence Number : 2756443999 Ack Number : 3995064355 Data Offset Flags : ACK Window : 2050 Digi Connect EZ Mini User Guide...
-
Page 602: Save Captured Data Traffic To A File
> analyzer save name capture_filter is the name of a packet capture configuration. See Configure packet capture for the network analyzer for more information. To determine available packet capture configurations, use the ?: Digi Connect EZ Mini User Guide... -
Page 603: Download Captured Data To Your Pc
1. Log into the Connect EZ command line as a user with Admin access. Depending on your device configuration, you may be presented with an Access selection menu. Type admin to access the Admin CLI. Digi Connect EZ Mini User Guide... -
Page 604: Clear Captured Data
To determine available packet capture configurations, use the ?: > anaylzer clear name ? name: Name of the capture filter to use. Format: test_capture capture_ping > anaylzer clear name Note You can remove data traffic saved to a file using the command. Digi Connect EZ Mini User Guide... -
Page 605: Use The Ping Command To Troubleshoot Network Connections
Enable socket level debugging. dontfragment: Do not fragment probe packets. first_ttl: Specifies with what TTL to start. (Default: 1) gateway: Route the packet through a specified gateway. icmp: Use ICMP ECHO for probes. interface: Specifies the interface. Digi Connect EZ Mini User Guide... - Page 606 1. 192/8: The local network of the Connect EZ device. 2. 192.168.8.1: The local network gateway to the Internet. 3. 96/8: Charter Communications, the network provider. 4. 216/8: Google Inc. Stop the traceroute process To stop the traceroute process, enter Ctrl-C. Digi Connect EZ Mini User Guide...
-
Page 607: Digi Connect Ez Regulatory And Safety Statements
European Community - CE Mark Declaration of Conformity (DoC) Digi has issued Declarations of Conformity for the Connect EZ concerning emissions, EMC, and safety. For more information, see www.digi.com/resources/certifications. Important note Digi customers assume full responsibility for learning and meeting the required guidelines for each country in their distribution market. -
Page 608: Uk Conformity Assessed (Ukca) Labeling Requirements
Digi Connect EZ regulatory and safety statements CE and UKCA OEM labeling requirements The CE mark shall consist of the initials “CE” taking the following form: If the CE marking is reduced or enlarged, the proportions given in the above graduated drawing must be respected. -
Page 609: Innovation, Science, And Economic Development Canada (Ic) Certifications
Communications du Canada. RoHS compliance statement All Digi International Inc. products that are compliant with the RoHS Directive (EU Directive 2002/95/EC and subsequent amendments) are marked as RoHS COMPLIANT. RoHS COMPLIANT means that the substances restricted by the EU Directive 2002/95/EC and subsequent amendments of... -
Page 610: Product Disposal Instructions
Digi Connect EZ regulatory and safety statements Product disposal instructions Product disposal instructions The WEEE (Waste Electrical and Electronic Equipment: 2002/96/EC) directive has been introduced to ensure that electrical/ electronic products are recycled using the best available recovery techniques to minimize the impact on the environment. - Page 611 Available commands Use the scp command Display status and statistics using the show command Device configuration using the command line interface Execute configuration commands at the root Admin CLI prompt Configuration mode Command line reference Digi Connect EZ Mini User Guide...
-
Page 612: Access The Command Line Interface
You can use an open-source terminal software, such as PuTTY or TeraTerm, to access the device through one of these mechanisms. You can also access the command line interface in the WebUI by using the Terminal, or the Digi Remote Manager by using the Console. -
Page 613: Exit The Command Line Interface
3. Log into the Connect EZ command line as a user with Admin access. Depending on your device configuration, you may be presented with an Access selection menu. Type admin to access the Admin CLI. The Admin CLI prompt appears. > Digi Connect EZ Mini User Guide... -
Page 614: Display Help For Commands And Parameters
Move a file or directory. ping Ping a host. reboot Reboot the system. Remove a file or directory. Copy a file or directory over SSH. show Show instance statistics. SSH login to a remote server system System commands. Digi Connect EZ Mini User Guide... -
Page 615: Display Help For Individual Commands
Show network interface statistics. Show NTP information. openvpn Show OpenVPN statistics. route Show IP routing information. serial Show serial statistics. surelink Show Surelink statistics. system Show system statistics. version Show firmware version. > show Digi Connect EZ Mini User Guide... -
Page 616: Use The Tab Key Or The Space Bar To Display Abbreviated Help
(config)> serial port1 enable t<Tab> auto-completes to (config)> serial port1 enable true Auto-complete does not function for: Parameter values that are string types. Integer values. File names. Select parameters passed to commands that perform an action. Digi Connect EZ Mini User Guide... -
Page 617: Available Commands
Display status and statistics using the show command for more information about the show command. system Issues commands related to system functionality. traceroute Sends and tracks route packets to a destination host. update Updates the device firmware. Digi Connect EZ Mini User Guide... -
Page 618: Use The Scp Command
To copy firmware from a remote host with an IP address of 192.168.4.1 to the /etc/config directory on the Connect EZ device, issue the following command: > scp host 192.168.4.1 user admin remote /home/admin/bin/Connect EZ- 22.2.9.85.bin local /etc/config/scripts to local admin@192.168.4.1's password: adminpwd Connect EZ-22.2.9.85.bin 100% 36MB 11.1MB/s 00:03 > Digi Connect EZ Mini User Guide... -
Page 619: Display Status And Statistics Using The Show Command
> show config auth tacacs+ service "login" auth user admin password "$2a$05$WlJQhquI7BgsytkpobKhaeLPtWraGANBcrlEaJX/wJv63JENW/HOu" add auth user test add auth user test group end "admin" add auth user test group end "serial" auth user test password "$2a$05$RdGYz1sLKbWrqe6cZjlsd.otg03JZR6n9939XV6EYWUSP0tMAzO5W" Digi Connect EZ Mini User Guide... -
Page 620: Show System
The config command allows for device configuration from the command line. All configuration tasks that can be performed by using the WebUI can also be performed by using the config command. There are two ways to invoke the config command from the CLI: Digi Connect EZ Mini User Guide... -
Page 621: Execute Configuration Commands At The Root Admin Cli Prompt
Additional Configuration ------------------------------------------------------------------------- application Custom scripts auth Authentication cloud Central management firewall Firewall monitoring Monitoring network Network serial Serial service Services system System Run "config" with no arguments to enter the configuration editing mode. Digi Connect EZ Mini User Guide... - Page 622 > config service ssh 4. Lastly, display the allowed values and other information for the enable parameter: > config service ssh enable ? Enable: Enable the service. Format: true, false, yes, no, 1, 0 Default value: true Digi Connect EZ Mini User Guide...
-
Page 623: Configuration Mode
(config service)> ssh (config service ssh)> 3. Enter enable false to disable the ssh service: (config service ssh)> enable false (config service ssh)> Move within the configuration schema for more information about moving within the configuration. Digi Connect EZ Mini User Guide... -
Page 624: Save Changes And Exit Configuration Mode
Adds a named element, or an element in a list. See Manage elements in lists for information about using the add command with lists. Deletes a named element, or an element in a list. See Manage elements Digi Connect EZ Mini User Guide... -
Page 625: Display Command Line Help In Configuration Mode
At the config prompt, enter service ?: (config)> service ? At the config prompt: a. Enter service to move to the service node: (config)> service (config service)> b. Enter ? to display help for the service node: (config service)> ? Digi Connect EZ Mini User Guide... - Page 626 (config service ssh)> ? Either of these methods will display the following information: (config)> service ssh ? SSH: An SSH server for managing the device. Parameters Current Value ------------------------------------------------------------------------ enable true Enable [private] Private key Digi Connect EZ Mini User Guide...
-
Page 627: Move Within The Configuration Schema
Move within the configuration schema You can perform configuration tasks at the CLI by moving within the configuration. Move forward one node in the configuration by entering the name of an Additional Configuration option: Digi Connect EZ Mini User Guide... -
Page 628: Manage Elements In Lists
Add elements to a list When used with parameters that contains lists of elements, the add command is used to add an element to the list. For example, to add an authentication method: Digi Connect EZ Mini User Guide... - Page 629 (config)> Delete elements from a list When used with parameters that contains lists of elements, the del command is used to delete an element in the list. For example, to delete an authentication method: Digi Connect EZ Mini User Guide...
-
Page 630: The Revert Command
The revert command is used to revert changes to the Connect EZ device's configuration and restore default configuration settings. The behavior of the revert command varies depending on where in the configuration hierarchy the command is executed, and whether the optional path parameter is used. Digi Connect EZ Mini User Guide... - Page 631 (config)> save Configuration saved. > 3. Type exit to exit the Admin CLI. Depending on your device configuration, you may be presented with an Access selection menu. Type quit to disconnect from the device. Digi Connect EZ Mini User Guide...
-
Page 632: Enter Strings In Configuration Commands
Example: Create a new user by using the command line In this example, you will use the Connect EZ command line to create a new user, provide a password for the user, and assign the user to authentication groups. Digi Connect EZ Mini User Guide... - Page 633 (config auth user user1)> 5. List available authentication groups: (config auth user user1)> show ..group admin admin enable true nagios enable false openvpn enable false no tunnels portal enable false no portals Digi Connect EZ Mini User Guide...
- Page 634 (config auth user user1)> save Configuration saved. > 8. Type exit to exit the Admin CLI. Depending on your device configuration, you may be presented with an Access selection menu. Type quit to disconnect from the device. Digi Connect EZ Mini User Guide...
-
Page 635: Command Line Reference
Digi Connect EZ Mini User Guide... -
Page 636: Analyzer Clear
Syntax analyzer save <name> <filename> Parameters name: Name of the capture filter to use. filename: The filename to save captured traffic to. The file will be saved to the device's /etc/config/analyzer directory. analyzer start Digi Connect EZ Mini User Guide... -
Page 637: Analyzer Stop
Clear the DHCP lease for the specified MAC address. Syntax clear dhcp-lease mac ADDRESS Parameters address: 12-digit, colon-delimited MAC address [00:11:22:AA:BB:CC] Copy a file or directory. Syntax cp <source> <destination> [force] Parameters source: The source file or directory to copy. Digi Connect EZ Mini User Guide... -
Page 638: Help
The destination path to copy the source file or directory to. force: Do not ask to overwrite the destination file if it exists. help Show CLI editing and navigation commands. Syntax help Parameters None Digi Connect EZ Mini User Guide... - Page 639 Command line interface Command line reference List a directory. Syntax ls <path> [show-hidden] Parameters path: List files and directories under this path. show-hidden: Show hidden files and directories. Hidden filenames begin with '.'. Digi Connect EZ Mini User Guide...
-
Page 640: Mkdir
<slot> [name STRING] [imei STRING] Parameters slot: The SIM slot to change to. name: The configured name of the modem to execute this CLI command on. imei: The IMEI of the modem to execute this CLI command on. Digi Connect EZ Mini User Guide... -
Page 641: Monitoring
The source file or directory to move. destination: The destination path to move the source file or directory to. force: Do not ask to overwrite the destination file if it exists. ping Ping a host using ICMP echo. Digi Connect EZ Mini User Guide... - Page 642 The number of bytes sent in the ICMP ping request. (Minimum: 0, Default: 56) count: The number of ICMP ping requests to send before terminating. (Minimum: 1, Default: 100) broadcast: Enable broadcast ping functionality. Digi Connect EZ Mini User Guide...
-
Page 643: Reboot
Command line interface Command line reference reboot Reboot the system. Parameters None Digi Connect EZ Mini User Guide... - Page 644 Command line interface Command line reference Remove a file or directory. Syntax rm <path> [force] Parameters path: The path to remove. force: Force the file to be removed without asking. Digi Connect EZ Mini User Guide...
-
Page 645: Scp
Display IPv6 routes. If no IP version is specified IPv4 & IPV6 will be displayed. verbose: Display more information (less concise, more detail). show cloud Show drm status & statistics. Syntax show cloud Parameters None Digi Connect EZ Mini User Guide... -
Page 646: Show Config
[table <status|error|info>] [number INTEGER] Parameters table: Type of event log to be displayed (status, error, info). number: Number of lines to retrieve from log. (Minimum: 1, Default: 20) show hotspot Show hotspot statistics. Digi Connect EZ Mini User Guide... -
Page 647: Show Ipsec
Show L2TP network server status & statistics. Syntax show l2tp lns [name STRING] Parameters name: Display more details for a specific L2TP network server. show l2tpeth Show L2TPv3 ethernet tunnel session status and statistics. Syntax show l2tpeth [name STRING] Digi Connect EZ Mini User Guide... -
Page 648: Show Location
[verbose] Parameters verbose: Display more information (less concise, more detail). show modbus-gateway Show modbus gateway status & statistics. Syntax show modbus-gateway [verbose] Parameters verbose: Display more information (less concise, more detail). show nemo Digi Connect EZ Mini User Guide... -
Page 649: Show Network
[name STRING] [all] Parameters name: Display more details and config data for a specific OpenVPN client. all: Display all clients including disabled clients. show openvpn server Show OpenVPN server status & statistics. Digi Connect EZ Mini User Guide... -
Page 650: Show Route
Display more details and config data for a specific serial port. show scripts Show scheduled system scripts. Syntax show scripts Parameters None show surelink interface Show SureLink status & statistics for network interfaces. Syntax show surelink interface [name STRING] [all] Digi Connect EZ Mini User Guide... -
Page 651: Show Surelink Ipsec
Show all OpenVPN clients. show system Show system status & statistics. Syntax show system [verbose] Parameters verbose: Display more information (disk usage, etc). show usb Show USB information. Syntax show usb Parameters None Digi Connect EZ Mini User Guide... -
Page 652: Show Version
The number of kilobytes sent in the speed test packets. (Minimum: 0, Default: 1000) mode: The type of speed test protocol to run. (Default: nuttcp) output: The format of output to display the speed test results as. (Default: text) Digi Connect EZ Mini User Guide... -
Page 653: Ssh
ERASE button twice consecutively. Syntax system disable-cryptography Parameters None system duplicate-firmware Duplicate the running firmware to the alternate partition so that the device will always boot the same firmware version. Digi Connect EZ Mini User Guide... -
Page 654: System Factory-Erase
Query the Digi firmware server for the latest device firmware version. Syntax system firmware ota check Parameters None system firmware ota list Query the Digi firmware server for a list of device firmware versions. Syntax system firmware ota list Parameters None Digi Connect EZ Mini User Guide... -
Page 655: System Firmware Ota Update
The path to the backup file. passphrase: Decrypt the archive with a passphrase. system script start Run a manual script. Scripts that are disabled, not a manual script, or already running can not be run. Digi Connect EZ Mini User Guide... -
Page 656: System Script Stop
Serial port. filename: The filename to save the serial log. The file will be saved to the device's /etc/config/serial directory. system serial show Displays the serial log on the screen. Syntax system serial show <port> Digi Connect EZ Mini User Guide... -
Page 657: System Serial Start
<datetime> Parameters datetime: The date in year-month-day hour:minute:second format (e.g "2021-09-26 12:24:48"). system time sync Perform a NTP query to the configured server(s) and set the local time to the first server that responds. Digi Connect EZ Mini User Guide... - Page 658 Specifies the interface through which traceroute should send packets. By default, the interface is selected according to the routing table. first_ttl: Specifies with what TTL to start. (Minimum: 1, Default: 1) Digi Connect EZ Mini User Guide...
- Page 659 Use ICMP ECHO for probes. nomap: Do not try to map IP addresses to host names when displaying them. bypass: Bypass the normal routing tables and send directly to a host on an attached network. Digi Connect EZ Mini User Guide...
Need help?
Do you have a question about the Connect EZ Mini and is the answer not in the manual?
Questions and answers