Advertisement
Quick Links
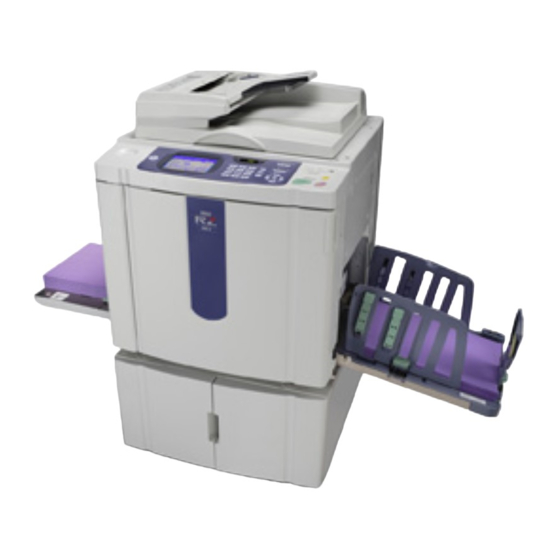
TECHNICAL MANUAL
Copyright : 2005 Riso Kagaku Corporation
All Rights Reserved. This Technical Manual was prepared and
written for the exclusive use of RISO International Group Certified
Dealers. Reproduction and/or transmittal of this material in any form
or by any means, including photocopying or recording of the
information is strictly prohibited without the consent of a member of
RISO International Group.
RISO KAGAKU CORPORATION (JAPAN)
RISO, INC. (U.S.A.)
RISO EUROPE LIMITED (U.K.)
RISO HONG KONG (HONG KONG)
RISO UK (U.K.)
RISO THAILAND LIMITED (THAILAND)
RISO KOREA LIMITED (KOREA)
DANKA AUSTRALIA PTY. LTD.
RZ9xx
RV9xx
SERIES
REVISION 0.2
DECEMBER 2005
RISO INTERNATIONAL GROUP
RISO DEUTSCHLAND GMBH (GERMANY)
RISO FRANCE (FRANCE)
RISO IBERICA (SPAIN)
RISO CANADA (CANADA)
ZHUHAI RISO TECHNOLOGY (CHINA)
RISO AFRICA (SOUTH AFRICA)
RISOGRAPH ITALIA (ITALY)
Advertisement
Chapters

Related Manuals for Riso RZ9 Series


Summary of Contents for Riso RZ9 Series
- Page 1 Copyright : 2005 Riso Kagaku Corporation All Rights Reserved. This Technical Manual was prepared and written for the exclusive use of RISO International Group Certified Dealers. Reproduction and/or transmittal of this material in any form or by any means, including photocopying or recording of the information is strictly prohibited without the consent of a member of RISO International Group.
- Page 2 DANKA AUSTRALIA PTY. LTD. [ Blank Page ] RZ9 Series...
- Page 3 CHAPTER 14 : DUPLEX AF SCANNING SECTION CHAPTER 15 : MASTER MAKING SECTION CHAPTER 16 : PANEL MESSAGES CHAPTER 17 : TEST MODE CHAPTER 18 : OTHER PRECAUTIONS CHAPTER 19 : PCBs (WIRING DIAGRAMS) CHAPTER 20 : ELECTRICAL COMPONENTS [ Rev. 0.2 ] RZ9 Series...
- Page 4 DANKA AUSTRALIA PTY. LTD. [ Blank Page ] [ Rev. 0.2 ] RZ9 Series...
- Page 5 10. Sound Reduction Cover Kit RZ/RV ................1-45 11. Wide Stacking Tray ..................... 1-48 12. TM2500 Sorter ......................1-49 13. TM5000 Sorter ......................1-60 5. Exterior Cover Removal ..................... 1-65 6. Opening the PCB Brackets ....................1-69 [ 1 - 1 ] - Rev. 0.2 RZ9 Series...
- Page 6 DANKA AUSTRALIA PTY. LTD. Preface This manual provides Technical Service Information for the RISO PRINTER model RZ9 series. This manual provides procedures for removing and installing major components. Following these procedures will minimize machine malfunctions. This information and format will also increase technical representatives' awareness and experience regarding repairs necessary to insure end-user satisfaction.
- Page 7 1. The lithium battery must be replaced by a trained and authorized service technician. 2. The battery must be replaced only with the same or equivalent type recommended by the manufacturer. 3. Discard used batteries according to the manufacturer’s instructions. [ 1 - 3 ] - Rev. 0.2 RZ9 Series...
- Page 8 II. Protection of the electrical components: The electrical components may be damaged due to short circuits caused by a loose connector. Wire harness connector FIRST Press the ends. THEN Press the center, firmly. 0116 [ 1 - 4 ] - Rev. 0.2 RZ9 Series...
- Page 9 8 mm 10 mm 13 mm Monkey 5.0 mm 4.0 mm 3.0 m m Hex wrenches 2.5 mm 2.0 mm 1.5 m m (For 3.0m m, 2 pieces required ) 0102 [ 1 - 5 ] - Rev. 0.2 RZ9 Series...
- Page 10 The machine is comprised of many gears. When inspecting or replacing parts, apply grease to the gears. If they are not properly greased, the gears may make abnormal sounds, and malfunctions or mechanical problems may occur. [ 1 - 6 ] - Rev. 0.2 RZ9 Series...
- Page 11 Do not allow any other machine to stand on or crush the power cord. Ground connection Always ground this machine to prevent electrical shock in case of an electrical leakage. [ 1 - 7 ] - Rev. 0.2 RZ9 Series...
- Page 12 0109 016-16141-003 8mm Dia. x 160mm Shaft (JIG) Jig: 4 mm (Dia.) x 120 mm (Length) 024-75064-006 (2 pieces required) Note: The part numbers are subject to change without notice. [ 1 - 8 ] - Rev. 0.2 RZ9 Series...
- Page 13 CHAPTER 1: MAINTENANCE DANKA AUSTRALIA PTY. LTD. 3. Installation Procedures [ 1 - 9 ] - Rev. 0.2 RZ9 Series...
- Page 14 CHAPTER 1: MAINTENANCE DANKA AUSTRALIA PTY. LTD. [ 1 - 10 ] - Rev. 0.2 RZ9 Series...
- Page 15 CHAPTER 1: MAINTENANCE DANKA AUSTRALIA PTY. LTD. [ 1 - 11 ] - Rev. 0.2 RZ9 Series...
- Page 16 CHAPTER 1: MAINTENANCE DANKA AUSTRALIA PTY. LTD. [ 1 - 12 ] - Rev. 0.2 RZ9 Series...
- Page 17 CHAPTER 1: MAINTENANCE DANKA AUSTRALIA PTY. LTD. [ 1 - 13 ] - Rev. 0.2 RZ9 Series...
- Page 18 CHAPTER 1: MAINTENANCE DANKA AUSTRALIA PTY. LTD. [ 1 - 14 ] - Rev. 0.2 RZ9 Series...
- Page 19 CHAPTER 1: MAINTENANCE DANKA AUSTRALIA PTY. LTD. [ 1 - 15 ] - Rev. 0.2 RZ9 Series...
- Page 20 CHAPTER 1: MAINTENANCE DANKA AUSTRALIA PTY. LTD. [ 1 - 16 ] - Rev. 0.2 RZ9 Series...
- Page 21 CHAPTER 1: MAINTENANCE DANKA AUSTRALIA PTY. LTD. [ 1 - 17 ] - Rev. 0.2 RZ9 Series...
- Page 22 CHAPTER 1: MAINTENANCE DANKA AUSTRALIA PTY. LTD. [ 1 - 18 ] - Rev. 0.2 RZ9 Series...
- Page 23 CHAPTER 1: MAINTENANCE DANKA AUSTRALIA PTY. LTD. [ 1 - 19 ] - Rev. 0.2 RZ9 Series...
- Page 24 DANKA AUSTRALIA PTY. LTD. CHAPTER 1: MAINTENANCE [ 1 - 20 ] - Rev. 0.2 RZ9 Series...
- Page 25 DANKA AUSTRALIA PTY. LTD. CHAPTER 1: MAINTENANCE [ 1 - 21 ] - Rev. 0.2 RZ9 Series...
- Page 26 CHAPTER 1: MAINTENANCE DANKA AUSTRALIA PTY. LTD. [ 1 - 22 ] - Rev. 0.2 RZ9 Series...
- Page 27 CHAPTER 1: MAINTENANCE DANKA AUSTRALIA PTY. LTD. [ 1 - 23 ] - Rev. 0.2 RZ9 Series...
- Page 28 CHAPTER 1: MAINTENANCE DANKA AUSTRALIA PTY. LTD. [ 1 - 24 ] - Rev. 0.2 RZ9 Series...
- Page 29 CHAPTER 1: MAINTENANCE DANKA AUSTRALIA PTY. LTD. [ 1 - 25 ] - Rev. 0.2 RZ9 Series...
- Page 30 CHAPTER 1: MAINTENANCE DANKA AUSTRALIA PTY. LTD. [ 1 - 26 ] - Rev. 0.2 RZ9 Series...
- Page 31 CHAPTER 1: MAINTENANCE DANKA AUSTRALIA PTY. LTD. [ 1 - 27 ] - Rev. 0.2 RZ9 Series...
- Page 32 CHAPTER 1: MAINTENANCE DANKA AUSTRALIA PTY. LTD. [ 1 - 28 ] - Rev. 0.2 RZ9 Series...
- Page 33 CHAPTER 1: MAINTENANCE DANKA AUSTRALIA PTY. LTD. [ 1 - 29 ] - Rev. 0.2 RZ9 Series...
- Page 34 CHAPTER 1: MAINTENANCE DANKA AUSTRALIA PTY. LTD. [ 1 - 30 ] - Rev. 0.2 RZ9 Series...
- Page 35 CHAPTER 1: MAINTENANCE DANKA AUSTRALIA PTY. LTD. [ 1 - 31 ] - Rev. 0.2 RZ9 Series...
- Page 36 CHAPTER 1: MAINTENANCE DANKA AUSTRALIA PTY. LTD. [ 1 - 32 ] - Rev. 0.2 RZ9 Series...
- Page 37 CHAPTER 1: MAINTENANCE DANKA AUSTRALIA PTY. LTD. [ 1 - 33 ] - Rev. 0.2 RZ9 Series...
- Page 38 DANKA AUSTRALIA PTY. LTD. CHAPTER 1: MAINTENANCE [ 1 - 34 ] - Rev. 0.2 RZ9 Series...
- Page 39 CHAPTER 1: MAINTENANCE DANKA AUSTRALIA PTY. LTD. [ 1 - 35 ] - Rev. 0.2 RZ9 Series...
- Page 40 CHAPTER 1: MAINTENANCE DANKA AUSTRALIA PTY. LTD. [ 1 - 36 ] - Rev. 0.2 RZ9 Series...
- Page 41 CHAPTER 1: MAINTENANCE DANKA AUSTRALIA PTY. LTD. [ 1 - 37 ] - Rev. 0.2 RZ9 Series...
- Page 42 CHAPTER 1: MAINTENANCE DANKA AUSTRALIA PTY. LTD. [ 1 - 38 ] - Rev. 0.2 RZ9 Series...
- Page 43 CHAPTER 1: MAINTENANCE DANKA AUSTRALIA PTY. LTD. [ 1 - 39 ] - Rev. 0.2 RZ9 Series...
- Page 44 CHAPTER 1: MAINTENANCE DANKA AUSTRALIA PTY. LTD. [ 1 - 40 ] - Rev. 0.2 RZ9 Series...
- Page 45 CHAPTER 1: MAINTENANCE DANKA AUSTRALIA PTY. LTD. [ 1 - 41 ] - Rev. 0.2 RZ9 Series...
- Page 46 CHAPTER 1: MAINTENANCE DANKA AUSTRALIA PTY. LTD. [ 1 - 42 ] - Rev. 0.2 RZ9 Series...
- Page 47 CHAPTER 1: MAINTENANCE DANKA AUSTRALIA PTY. LTD. [ 1 - 43 ] - Rev. 0.2 RZ9 Series...
- Page 48 CHAPTER 1: MAINTENANCE DANKA AUSTRALIA PTY. LTD. [ 1 - 44 ] - Rev. 0.2 RZ9 Series...
- Page 49 DANKA AUSTRALIA PTY. LTD. CHAPTER 1: MAINTENANCE [ 1 - 45 ] - Rev. 0.2 RZ9 Series...
- Page 50 DANKA AUSTRALIA PTY. LTD. CHAPTER 1: MAINTENANCE [ 1 - 46 ] - Rev. 0.2 RZ9 Series...
- Page 51 CHAPTER 1: MAINTENANCE DANKA AUSTRALIA PTY. LTD. [ 1 - 47 ] - Rev. 0.2 RZ9 Series...
- Page 52 DANKA AUSTRALIA PTY. LTD. CHAPTER 1: MAINTENANCE [ 1 - 48 ] - Rev. 0.2 RZ9 Series...
- Page 53 CHAPTER 1: MAINTENANCE DANKA AUSTRALIA PTY. LTD. [ 1 - 49 ] - Rev. 0.2 RZ9 Series...
- Page 54 CHAPTER 1: MAINTENANCE DANKA AUSTRALIA PTY. LTD. [ 1 - 50 ] - Rev. 0.2 RZ9 Series...
- Page 55 CHAPTER 1: MAINTENANCE DANKA AUSTRALIA PTY. LTD. [ 1 - 51 ] - Rev. 0.2 RZ9 Series...
- Page 56 CHAPTER 1: MAINTENANCE DANKA AUSTRALIA PTY. LTD. [ 1 - 52 ] - Rev. 0.2 RZ9 Series...
- Page 57 CHAPTER 1: MAINTENANCE DANKA AUSTRALIA PTY. LTD. [ 1 - 53 ] - Rev. 0.2 RZ9 Series...
- Page 58 CHAPTER 1: MAINTENANCE DANKA AUSTRALIA PTY. LTD. [ 1 - 54 ] - Rev. 0.2 RZ9 Series...
- Page 59 CHAPTER 1: MAINTENANCE DANKA AUSTRALIA PTY. LTD. [ 1 - 55 ] - Rev. 0.2 RZ9 Series...
- Page 60 CHAPTER 1: MAINTENANCE DANKA AUSTRALIA PTY. LTD. [ 1 - 56 ] - Rev. 0.2 RZ9 Series...
- Page 61 CHAPTER 1: MAINTENANCE DANKA AUSTRALIA PTY. LTD. [ 1 - 57 ] - Rev. 0.2 RZ9 Series...
- Page 62 CHAPTER 1: MAINTENANCE DANKA AUSTRALIA PTY. LTD. [ 1 - 58 ] - Rev. 0.2 RZ9 Series...
- Page 63 CHAPTER 1: MAINTENANCE DANKA AUSTRALIA PTY. LTD. [ 1 - 59 ] - Rev. 0.2 RZ9 Series...
- Page 64 CHAPTER 1: MAINTENANCE DANKA AUSTRALIA PTY. LTD. [ 1 - 60 ] - Rev. 0.2 RZ9 Series...
- Page 65 CHAPTER 1: MAINTENANCE DANKA AUSTRALIA PTY. LTD. [ 1 - 61 ] - Rev. 0.2 RZ9 Series...
- Page 66 CHAPTER 1: MAINTENANCE DANKA AUSTRALIA PTY. LTD. [ 1 - 62 ] - Rev. 0.2 RZ9 Series...
- Page 67 CHAPTER 1: MAINTENANCE DANKA AUSTRALIA PTY. LTD. [ 1 - 63 ] - Rev. 0.2 RZ9 Series...
- Page 68 CHAPTER 1: MAINTENANCE DANKA AUSTRALIA PTY. LTD. [ 1 - 64 ] - Rev. 0.2 RZ9 Series...
- Page 69 (1) With the machine power on, press the green release button to release the master-making unit and pull out the unit. (2) Remove screws (M4x8: 4 pcs) from the master-making unit front cover and remove the cover. Front door Master-making unit front cover 0117 Front cover [ 1 - 65 ] - Rev. 0.2 RZ9 Series...
- Page 70 - Scanner rear cover - Scanner cover;paper ejection (2) Remove screws (M4x8: 2pcs), and dismount the rear side cover;paper ejection. Side cover; paper ejection Stage cover 0118 Rear side cover; paper ejection [ 1 - 66 ] - Rev. 0.2 RZ9 Series...
- Page 71 - Scanner cover; paper feed (2) Remove screws ( M4x8: 2pcs), and dismount the rear side cover;paper feed. Side cover;paper feed 0119 Rear cover ; ML Rear side cover; paper feed [ 1 - 67 ] - Rev. 0.2 RZ9 Series...
- Page 72 (2) Lift up the operation panel after sliding to the front, unplug the connector, and then remove the operation panel. Scanner cover; paper ejection Scanner cover; rear Scanner cover; paper feed Operation panel 0120 [ 1 - 68 ] - Rev. 0.2 RZ9 Series...
- Page 73 (2) Remove screws (M4x8: 4pcs) and slowly swing open the PCB bracket on which the SH4F PCB is mounted. PCB bracket on which the power supply and PCB bracket on which the SH4F PCB is mounted. mechanical control PCBs are mounted. 0115 [ 1 - 69 ] - Rev. 0.2 RZ9 Series...
- Page 74 CHAPTER 1: MAINTENANCE DANKA AUSTRALIA PTY. LTD. MEMO [ 1 - 70 ] - Rev. 0.2 RZ9 Series...
- Page 75 5. Optional Accessories (USA, EUROPE & ASIA Market Models) ........... 2-7 6. Machine Specifications ....................... 2-8 RISO RZ 997 < USA Model > .................... 2-8 RISO RZ 990 <USA Model > ................... 2-10 RISO RZ 977 <EUROPE Model > ..................2-11 RISO RZ 970 <EUROPE Model >...
- Page 76 Compressing plate Cutter Master disposal box Thermal print head Scraper roller Write roller Pickup roller Paper feed tray Suction unit Paper receiving tray Guide roller Pressure roller Timing roller 0201 [ 2 - 2 ] - Rev. 0.2 RZ9 Series...
- Page 77 Feeds one sheet at a time from the specified paper tray. Multi-tray paper-feed section (where equipped) Feeds paper between the multi-tray paper-feed section and the second Multi-tray transfer unit paper-feed section. (where equipped) [ 2 - 3 ] - Rev. 0.2 RZ9 Series...
- Page 78 The proof-print is printed. Printing operation Paper is fed from the paper-feed tray one sheet at a time for printing. The printed paper is ejected out onto the paper-receiving tray. [ 2 - 4 ] - Rev. 0.2 RZ9 Series...
- Page 79 (7) The next sheet of paper is sent to the first paper-feed area, and the guide roller lowers. 0202 [ 2 - 5 ] - Rev. 0.2 RZ9 Series...
- Page 80 Cutter (2) The print drum rotates to wind the master around it. (3) The cutter cuts the master. 0203 [ 2 - 6 ] - Rev. 0.2 RZ9 Series...
- Page 81 CHAPTER 2: MACHINE SUMMARY DANKA AUSTRALIA PTY. LTD. < USA, EUROPE & ASIA Models > [ 2 - 7 ] - Rev. 0.2 RZ9 Series...
- Page 82 CHAPTER 2: MACHINE SUMMARY DANKA AUSTRALIA PTY. LTD. < USA Model > [ 2 - 8 ] - Rev. 0.2 RZ9 Series...
- Page 83 CHAPTER 2: MACHINE SUMMARY DANKA AUSTRALIA PTY. LTD. [ 2 - 9 ] - Rev. 0.2 RZ9 Series...
- Page 84 CHAPTER 2: MACHINE SUMMARY DANKA AUSTRALIA PTY. LTD. < USA Model > [ 2 - 10 ] - Rev. 0.2 RZ9 Series...
- Page 85 CHAPTER 2: MACHINE SUMMARY DANKA AUSTRALIA PTY. LTD. < EUROPE Model > [ 2 - 11 ] - Rev. 0.2 RZ9 Series...
- Page 86 CHAPTER 2: MACHINE SUMMARY DANKA AUSTRALIA PTY. LTD. < EUROPE Model > [ 2 - 12 ] - Rev. 0.2 RZ9 Series...
- Page 87 CHAPTER 2: MACHINE SUMMARY DANKA AUSTRALIA PTY. LTD. < ASIA Model > [ 2 - 13 ] - Rev. 0.2 RZ9 Series...
- Page 88 CHAPTER 2: MACHINE SUMMARY DANKA AUSTRALIA PTY. LTD. [ 2 - 14 ] - Rev. 0.2 RZ9 Series...
- Page 89 CHAPTER 2: MACHINE SUMMARY DANKA AUSTRALIA PTY. LTD. < ASIA Model > [ 2 - 15 ] - Rev. 0.2 RZ9 Series...
- Page 90 CHAPTER 2: MACHINE SUMMARY DANKA AUSTRALIA PTY. LTD. < CHINA Model > [ 2 - 16 ] - Rev. 0.2 RZ9 Series...
- Page 91 CHAPTER 2: MACHINE SUMMARY DANKA AUSTRALIA PTY. LTD. < CHINA Model > [ 2 - 17 ] - Rev. 0.2 RZ9 Series...
- Page 92 CHAPTER 2: MACHINE SUMMARY DANKA AUSTRALIA PTY. LTD. < CHINA Model > [ 2 - 18 ] - Rev. 0.2 RZ9 Series...
-
Page 93: Table Of Contents
[Piston assemblies of the Separation pump and Air Dumper] .......... 3-15 [Piston] ........................... 3-17 6. Removing the Rear Cover Safety SW ................3-18 ADJUSTMENT 1. Print-Drum <Position-A> Adjustment ................3-19 2. Print-Drum <Position-B> Stop Position Adjustment ............3-19 [ 3 - 1 ] - Rev. 0.2 RZ9 Series... -
Page 94: Mechanism
SW1 on the mechanical control PCB must not be pushed by mistake. (Ref: Chapter 18) Main pulley 0323 Main belt Main motor FG sensor Main motor Motor pulley 0324 < Main motor > [ 3 - 2 ] - Rev. 0.2 RZ9 Series... -
Page 95: Print Drum Angle Detection
0 (zero) degrees and is called position-A of the print drum and this is the position in which the clamp plate is on the top and clamps the master during the master making operation. Position-B actuator plate 0303 Position-B sensor Main cover assembly 0325 [ 3 - 3 ] - Rev. 0.2 RZ9 Series... -
Page 96: Main Motor Safety Mechanism
Rear cover safety SW Master disposal box safety SW FL-Transfer unit door safety SW (only for the machines with Multi-Tray Feeder) Master making unit safety SW Print drum safety SW 0326 [ 3 - 4 ] - Rev. 0.2 RZ9 Series... -
Page 97: Air Dumper Mechanism
The noise is due to the strong pressure spring used on RZ9 series. When the cam follower rides down the high portion of the pressure cam, it tends to accelerate the print drum too suddenly, creating a metalic noise. The air dumper unit applies brake on the main motor at that timing to prevent the sudden accelerated movement, erasing the mechanical noise. -
Page 98: Disassembly
Make sure that the holes on the Inner and Outer vertical positioning gears are alighned. < Power to the machine should never be applied when the JIG shaft is inserted in the machine. > 0329 [ 3 - 6 ] - Rev. 0.2 RZ9 Series... -
Page 99: Removing The Pressure Spring
Note that the pressure spring used on RZ9 is different from that of RZ2 & 3, RZ5 and MZ machines. Pressure lever Pressure solenoid lever Pressure lever 0330 Pressure spring Pressure spring tention plate 0331 [ 3 - 7 ] - Rev. 0.2 RZ9 Series... -
Page 100: Removing The Main Belt
(7) Dismount the main cover assembly (M4x8 : 5pcs). - continued on next page - Detachable wire band Position B sensor Main shaft assembly Main cover assembly 0333 0332 Tension lever DSC05350 Main motor bearing assembly [ 3 - 8 ] - Rev. 0.2 RZ9 Series... - Page 101 When putting the Main cover assembly back on the machine, push it firmly against the machine. Tighten the screw on the far top right on the Main cover assembly first. [ 3 - 9 ] - Rev. 0.2 RZ9 Series...
-
Page 102: Removing The Main Motor Pulley Assembly
Align the groove made on the back of the Main motor pulley assembly against the Parallel pin on the Main motor shaft. 0314 0336 Parallel pin on the Main motor shaft. Groove on the back of the Main motor pulley. [ 3 - 10 ] - Rev. 0.2 RZ9 Series... -
Page 103: Removing The Main Shaft Assembly
Position-B, and then mount the Main shaft assembly back on the machine, aligning the markings between the Main gear and the Inner vertical positioning gear. Inner vertical positioning gear Markings on two gears Main gear 0322 [ 3 - 11 ] - Rev. 0.2 RZ9 Series... - Page 104 (3) Unplug the connector and detach the Separation Pump Assembly(M4x8: 5pcs). (4) Move the Power band out of the way and disconnect the Air hose from the separation pump assembly. 0338 Connector Power band Air hose 0339 [ 3 - 12 ] - Rev. 0.2 RZ9 Series...
-
Page 105: Separation Pump Assembly
Position-B alignment hole of the Air Dumper Assembly Position-B alignment hole of the Separation Pump Assembly 0340 0341 < Separation Pump Assembly > Separation Pump Solenoid [ 3 - 13 ] - Rev. 0.2 RZ9 Series... -
Page 106: Air Dumper Assembly
Position-B. Connector Separation Spring 0342 < Air Dumper Assembly > 0340 0343 < Pressure Solenoid Assembly > Position-B alignment hole of the Air Dumper Assebbly [ 3 - 14 ] - Rev. 0.2 RZ9 Series... - Page 107 (4) Remove the E-ring on the air pump gear assembly and detach the gear assembly from the machine. (5) Pull the piston assembly out from the air pump cylinder. E-ring 0344 Cylinder Air pump gear assembly E-ring 0345 < Piston Assembly > [ 3 - 15 ] - Rev. 0.2 RZ9 Series...
- Page 108 [ Removing the O-ring ] (1) Remove the E-ring from the piston assembly. Piston assembly O-ring 0347 < Precautions in assembly > Apply white plastic grease on the piston and O-ring. [ 3 - 16 ] - Rev. 0.2 RZ9 Series...
-
Page 109: Piston
Piston 0349 Air intake hole on the pistonshould Concave side of the rib faces ourt. be on the concave sideof the rib on the arm. [ 3 - 17 ] - Rev. 0.2 RZ9 Series... -
Page 110: Removing The Rear Cover Safety Sw
Switch connectors 0317 0318 < Paper receiving side > < Paper feed side > 0350 Rear cover safety SW Torsion spring 0320 E-ring < Rear cover safety SW assembly > [ 3 - 18 ] - Rev. 0.2 RZ9 Series... -
Page 111: Adjustment
This adjustment does not affect the print drum position-A. NOTE: The print drum position-B stop position is calculated from the position-B of the machine by the pulse count of the main motor FG sensor (refer to page 3-3). [ 3 - 19 ] - Rev. 0.2 RZ9 Series... - Page 112 CHAPTER 3: MAIN DRIVE DANKA AUSTRALIA PTY. LTD. MEMO [ 3 - 20 ] - Rev. 0.2 RZ9 Series...
- Page 113 2. Stripper Pad Adjustment ....................4-33 3. Paper Feed Clutch ON Angle Adjustment ................4-34 4. Paper Feed Clutch OFF Angle Adjustment ................ 4-34 5. Paper-Width Potentiometer Adjustment ................4-34 [ 4 - 1 ] - Rev. 0.2 RZ9 Series...
-
Page 114: Mechanism
Because the horizontal print position is adjusted on the print drum side, the paper feed tray does not move horizontally. 0401 Paper feed tray Paper width potentiometer Paper size detection sensor [ 4 - 2 ] - Rev. 0.2 RZ9 Series... -
Page 115: Paper Feed Tray Elevation Mechanism
Paper feed tray button Upper limit sensor A Upper limit sensor B Elevator motor Upper-limit actuator plate (Card & Custom Paper) Upper-limit actuator plate (Standard Paper) 0402 Lower limit sensor Paper detection sensor [ 4 - 3 ] - Rev. 0.2 RZ9 Series... -
Page 116: Upper Limit Position Of The Paper Feed Tray
Selecting this to <+1> stops the paper feed tray at the Card position. Selecting <-1> stops the paper feed tray at the Custom position. Upper limit position Feed tray down Blocked Upper limit sensor A Open Blocked Upper limit sensor B Open 0403 Custom Normal Card [ 4 - 4 ] - Rev. 0.2 RZ9 Series... -
Page 117: Paper Feed Tray Safety Mechanism
If either of the two safety switches opens, a paper feed tray error is detected and the elevator motor switches OFF. Paper feed tray upper safety switch Paper feed cover 0406 Lower limit frame Paper feed tray lower safety switch [ 4 - 5 ] - Rev. 0.2 RZ9 Series... -
Page 118: Paper Volume Detection Mechanism
Paper volum e sensor A Paper volum e sensor B 100% to 50% 50% to 30% 30% to 10% Less than 10% 0405 Paper volume sensor B 0406 Paper volume sensor A [ 4 - 6 ] - Rev. 0.2 RZ9 Series... -
Page 119: Paper Feed Pressure Adjustment Mechanism
OFF angle, switches the paper feed reverse-rotation prevention solenoid ON-OFF, and adjusts the paper wing position. Paper feed pressure sensor First paper feed stay assembly 0407 Pickup frame unit Paper feed pressure lever (scraper located within) [ 4 - 7 ] - Rev. 0.2 RZ9 Series... -
Page 120: Paper Feed Reverse-Rotation Prevention Mechanism
Paper feed reverse-rotation 0408 prevention hook assembly Paper feed reverse-rotation prevention solenoid << Paper feed pressure lever set to <Normal> > 0409 << Paper feed pressure lever set to <Card> >> [ 4 - 8 ] - Rev. 0.2 RZ9 Series... -
Page 121: First Paper Feed Operation
Paper feed clutch Pickup roller Scraper roller 0410 Main motor Guide roller Pickup roller Paper sensor 0411 Scraper roller Timing roller Stripper pad [ 4 - 9 ] - Rev. 0.2 RZ9 Series... -
Page 122: Paper Feed Adjustment (From The Function Tab Of The Operation Panel)
ON timing adjustment) and No. 742 (Paper feed clutch OFF timing adjustment) will change the pre- programmed print drum angle and therefore affects the above adjusted clutch ON and OFF timing. 0451 [ 4 - 10 ] - Rev. 0.2 RZ9 Series... -
Page 123: Paper Stripping Mechanism
Pickup roller Stripper angle adjuster Stripper pad Stripper pad spring 0412 Stripper pressure adjuster 0414 0413 << Adjustment of the stripper angle >> << Adjustment of the stripper pressure >> [ 4 - 11 ] - Rev. 0.2 RZ9 Series... -
Page 124: Disassembly
(4) Remove the E-rings (one each) from the front and rear sides and detach the paper feed tray retaining plates (one each). Dismount the paper feed tray unit. 0415 Paper feed tray unit Ribbon cable cover 0416 [ 4 - 12 ] - Rev. 0.2 RZ9 Series... - Page 125 CHAPTER 4: FIRST PAPER FEED SECTION DANKA AUSTRALIA PTY. LTD. Ribbon cable holder 0418 0417 Ribbon cable Connector Paper feed tray retaining Paper feed tray retaining plate plate 0420 0419 Paper feed tray frame (rear) [ 4 - 13 ] - Rev. 0.2 RZ9 Series...
-
Page 126: Removing The Paper Detection Sensor, Paper Size Detection Sensor, And Paper Width
Paper width potentiometer E-ring 0421 Paper feed tray table S Paper feed guide (rear) Paper feed guide (front) Paper feed tray table L 0422 << Paper feed tray unit >> [ 4 - 14 ] - Rev. 0.2 RZ9 Series... - Page 127 (4) Remove the mounting screws (bind, M3 x 6, 8 pcs) and dismount paper feed tray table S. (5) Unplug the connector and remove the paper detection sensor. Paper detection sensor Connector 0423 0424 [ 4 - 15 ] - Rev. 0.2 RZ9 Series...
- Page 128 (5) Unplug the connector and remove the mounting screws (P tight, 3 x 8, 3 pcs). Dismount the paper width potentiometer assembly. 0425 0426 Connector for paper width Paper width potentiometer potentiometer assembly Paper size detection sensor Connector for paper size detection sensor [ 4 - 16 ] - Rev. 0.2 RZ9 Series...
- Page 129 - Align the mark (projection line) on the paper guide rack with the mark (projection line) on the spur gear when installing the paper width potentiometer assembly. 0427 Paper width potentiometer assembly Paper guide rack Paper guide rack 0428 Spur gear [ 4 - 17 ] - Rev. 0.2 RZ9 Series...
-
Page 130: Removing The Scraper And Pickup Roller
The paper feed roller of the pickup roller is also a consumable part. Pickup frame unit 0429 Retaining ring Scraper shaft Scraper Bearing metal Retaining ring 0430 Scraper Scraper shaft [ 4 - 18 ] - Rev. 0.2 RZ9 Series... - Page 131 (4) Remove the pickup roller from the Pickup shaft. Bearing metal 0431 0432 Retaining ring Pickup extension shaft assembly 0433 Pickup extension shaft Bearing metal Retaining ring Pickup shaft 0434 Pickup roller Retaining ring [ 4 - 19 ] - Rev. 0.2 RZ9 Series...
-
Page 132: Removing The Paper Feed Roller Assembly
(4) Remove the mounting screw (double-washer cap screw, M4 x 8, 1 pc) and dismount the paper feed roller assembly. Paper feed cover 0435 Pickup extension shaft assembly Paper feed roller assembly 0436 [ 4 - 20 ] - Rev. 0.2 RZ9 Series... -
Page 133: Removing The Paper Feed Tray Button And Paper Feed Tray Upper Safety Switch
(5) Remove the mounting screws (RS tight with round tip, M3 x 6, 3 pcs) and dismount the first paper feed stay assembly. 0437 Upper safety switch spring 0439 0438 Connectors 0440 << First paper feed stay assembly >> [ 4 - 21 ] - Rev. 0.2 RZ9 Series... - Page 134 (6) Unplug the connector, remove the mounting screws (with double-washer, M3 x 14, 2 pcs), and dismount the paper feed tray upper safety switch. 0441 Feed tray button 0442 Paper feed tray upper safety switch [ 4 - 22 ] - Rev. 0.2 RZ9 Series...
-
Page 135: Removing The Elevator Upper-Limit Sensors And Paper Feed Pressure Sensor
(5) Unplug the connector and dismount the paper feed pressure sensor. 0441 0445 0444 <Normal> position Elevator upper-limit Elevator upper-limit sensor B sensor A Paper feed pressure sensor Paper feed pressure lever [ 4 - 23 ] - Rev. 0.2 RZ9 Series... -
Page 136: Removing The Paper Feed Reverse-Rotation Prevention Solenoid
(4) Remove the mounting screws (with double-washer, M3 x 6, 2 pcs) and dismount the paper feed reverse- rotation prevention solenoid. connector Paper feed reverse-rotation prevention solenoid 0446 Paper feed reverse-rotation prevention solenoid 0447 << Paper feed reverse-rotation prevention assembly >> [ 4 - 24 ] - Rev. 0.2 RZ9 Series... -
Page 137: Removing The Paper Feed Clutch
(4) Remove the mounting screws (M4 x 8, 2 pcs) and dismount the Pickup clutch bracket. (5) Unplug the connector and dismount the paper feed clutch. Bearing metal Paper feed reverse-rotation prevention core assembly 0448 Pickup clutch bracket 0449 << Paper feed clutch>> [ 4 - 25 ] - Rev. 0.2 RZ9 Series... - Page 138 CHAPTER 4: FIRST PAPER FEED SECTION DANKA AUSTRALIA PTY. LTD. Rotation stopper on paper feed clutch 0449 0450 Projection on paper feed clutch Indentation on pickup shaft Bent portion on pickup clutch bracket 0451 [ 4 - 26 ] - Rev. 0.2 RZ9 Series...
-
Page 139: Removing Paper Volume Sensors A And B
(2) Unplug the connector and dismount paper volume sensors A and B from the paper feed relay PCB bracket. 0452 Paper feed relay PCB bracket Paper volume sensor B Paper volume sensor A 0453 [ 4 - 27 ] - Rev. 0.2 RZ9 Series... -
Page 140: Removing The Elevator Motor
(10) Unplug the connector, remove the mounting screws (with washer, M3 x 5, 2 pcs), and dismount the elevator motor. Elevator spring Ground wire Reusable band Elevator motor cover Elevator motor 0454 Motor cover Elevator motor unit Helical/spur gears 0455 [ 4 - 28 ] - Rev. 0.2 RZ9 Series... -
Page 141: Removing The Elevator Lower-Limit Sensor And Paper Feed Tray Lower Safety Switch
(4) Unplug the connector, remove the mounting screw (RS tight with round tip, M4 x 8, 1 pc), and dismount the paper feed tray lower safety switch together with the bracket. 0456 Elevator lower-limit sensor spring Bracket 0457 Paper feed tray lower safety switch [ 4 - 29 ] - Rev. 0.2 RZ9 Series... -
Page 142: Removing The Stripper Pad Unit
(2) Lower the lock knob and release the lock for the stripper pad unit. (3) Press the stripper pad release lever and dismount the stripper pad unit. Lock knob 0458 Stripper pad release lever Stripper pad unit [ 4 - 30 ] - Rev. 0.2 RZ9 Series... -
Page 143: Removing The Stripper Pad Assembly
(indicated by the arrows) when attaching the stripper pad. Stripper pad assembly Stripper pad 0460 Stripper base 0459 0461 Stripper pad cover Stripper pad unit Stripper pad 0462 Stripper base [ 4 - 31 ] - Rev. 0.2 RZ9 Series... -
Page 144: Adjustment
Setting the sensor position too low can reduce paper feed pressure until paper frequently fails to feed at all. Paper feed pressure lever Paper feed cover Upper limit adjusting shaft 0464 Pickup roller 0463 Upper limit sensor assembly Paper feed tray 0465 [ 4 - 32 ] - Rev. 0.2 RZ9 Series... -
Page 145: Stripper Pad Adjustment
- Turn the stripper pad pressure adjuster counterclockwise to reduce stripper pad pressure. Raises stripper pad toward vertical position. Stripper pad angle adjuster Normal position Normal position Reduces stripper pad pressure. 0466 Stripper pad pressure adjuster [ 4 - 33 ] - Rev. 0.2 RZ9 Series... -
Page 146: Paper Feed Clutch On Angle Adjustment
If the adjustment is incorrect, the machine judges the paper on the tray to be in a different size. This would result in either reduced master-making area, or increased master-making area, and may cause the Pressure roller to become dirty with ink. [ 4 - 34 ] - Rev. 0.2 RZ9 Series... - Page 147 4. Paper Buckle Amount Adjustment ..................5-26 5. Assist Paper Feed Adjustment (For TRAY NO. 1 only) ............. 5-27 6. Lateral Image Position Adjustment ..................5-27 7. Vertical Transfer Unit Nip Pressure Adjustment ..............5-28 [ 5 - 1 ] - Rev. 0.2 RZ9 Series...
-
Page 148: Mechanism
Transport of paper from Second paper feed section standard paper feed tray Vertical transfer unit Pickup roller Scraper Paper transport unit Paper feed tray No.1 Stripper unit Paper feed tray No.2 0501 [ 5 - 2 ] - Rev. 0.2 RZ9 Series... - Page 149 FL feed sensor 3 Paper feed roller 3 FL multi-tray 1 pickup sensor FL transfer motor FL feed sensor 2 Paper feed roller 2 FL feed sensor 1 Paper feed roller 1 0502 [ 5 - 3 ] - Rev. 0.2 RZ9 Series...
- Page 150 [Unable to detect] is displayed on the panel if the paper-feed tray is not at the upper-limit position (the paper-feed-tray is pulled out). Sensor status Paper volume detected Sensor 1 Sensor 2 100-50% 50-30% 30-10% 0561 [ 5 - 4 ] - Rev. 0.2 RZ9 Series...
-
Page 151: Feed Tray Elevating Mechanism
When the feed tray is pulled out, the joint disengages. The bottom plate of the feed tray drops due to its own weight. winds a wire FL feed tray elevator motor Pulley shaft Joint 0503 [ 5 - 5 ] - Rev. 0.2 RZ9 Series... -
Page 152: Paper Transport Mechanism
3 pickup clutch for tray 1 transfer clutch 2 FL feed sensor 2 FL feed sensor 1 0504 FL transfer motor transfer clutch 1 pickup clutch for tray 2 [ 5 - 6 ] - Rev. 0.2 RZ9 Series... -
Page 153: Vertical Transfer Unit
225.5 degrees to push the paper up. The transfer clutch 4 is disengaged when the print drum rotates to 257.5 degrees to end the assist transport operation. 0505 FL feed sensor 4 Nip release solenoid Multi feed tray pickup motor transfer clutch 4 [ 5 - 7 ] - Rev. 0.2 RZ9 Series... -
Page 154: Disassembly
(1) Remove the MTPF rear cover. (2) Remove the screws (M4 x 10, 6 pc), and then remove the MTPF right-hand cover by lifting it slightly. 0506 MTPF Right-Hand Cover MTPF Rear Cover [ 5 - 8 ] - Rev. 0.2 RZ9 Series... - Page 155 (1) Remove the screws (right side:M4 x 8, 2 pc left side:M4 x 8, 2 pc), and then remove the MTPF paper Feed Tray cover. 0507 MTPF left-hand cover Multi-tray transfer-unit cover 0508 MTPF Paper Feed Tray cover [ 5 - 9 ] - Rev. 0.2 RZ9 Series...
-
Page 156: Removing The Paper-Feed Trays
While holding the feed tray on the rail to keep it from falling, lift it slightly and align the projections with the indentations. Do not over tighten the tapping screws on the cover. Paper feed tray 0509 Slide rail [ 5 - 10 ] - Rev. 0.2 RZ9 Series... -
Page 157: Removing The Parts Of The Paper-Feed Tray Section
(5) Lift the bottom plate and remove from the tray assembly. 0510 Wire hanging fixture 0511 Remove these screws Remove these screws 0512 0513 Connector FL tray volume sensor 2 FL tray volume sensor 1 [ 5 - 11 ] - Rev. 0.2 RZ9 Series... - Page 158 , and then remove sensors with one screw (M4 x 8) together with the bracket. Connector (Paper detection sensor) Paper detection sensor Connector (Paper-Size detection sensor) Paper-Size detection sensor 0516 [ 5 - 12 ] - Rev. 0.2 RZ9 Series...
-
Page 159: Removing The Pickup Roller And Scraper
The scraper and pickup rollers contain one-way brearing. When mounted correctly, the rollers spin freely in the clockwise direction (with the roller markings at the front). Pickup Roller Scraper 0517 Lock rings [ 5 - 13 ] - Rev. 0.2 RZ9 Series... -
Page 160: Removing The Parts On The Rear
(3) Unplug the connector and rebove the elevator motor cover (M3 x 6 screw; 1pc). [Precautions on Reassembly] Insert the elevator-motor-shaft assembly into the D-cut hole of the motor. connector E-ring Elevator motor cover 0518 MTPF elevator motor 《モータユニット》 0519 [ 5 - 14 ] - Rev. 0.2 RZ9 Series... - Page 161 (1) Disconnect one connector and remove the switch together with the metal bracket. (M4x8 screw; 1 pc). (2) Remove the switch from the metal bracket (M3x20 screw; 1 pc). 0523 Connector Metal bracket Tray set safty switch [ 5 - 15 ] - Rev. 0.2 RZ9 Series...
-
Page 162: Removing The Transfer Unit
5) Stripper adjust shaft [ total 4 pcs ] Stripper adjust shafts Stripper adjust cover (top) Stripper pad angle adjust knob Stripper pressure adjust knob Stripper adjust cover (bottom) 0526 0527 Stripper adjust shafts [ 5 - 16 ] - Rev. 0.2 RZ9 Series... - Page 163 2) Rail-stay left upper and sound absorbing sponge should be detached when mounting the FL transfer unit back on the machine, and then assemble them on after the FL transfer unit is mounted on the machine. 0528 FL transfer motor Sound absorbing sponge Rail-stay left upper [ 5 - 17 ] - Rev. 0.2 RZ9 Series...
-
Page 164: Removing The Parts On The Transfer Unit
(2) For Tray No.2, just disconnect the sensor connector and detach the upper limit sensor. 0530 Connector Upper limit sensor Paper feed upper cover 0531 [ 5 - 18 ] - Rev. 0.2 RZ9 Series... - Page 165 (1) Detach the safety switch from the machine with the metal bracket attached. (2) Disconnect the switch connector and detach the switch from the metal bracket (M3x14 screw; 1 pc). 0533 Connector Bracket FL Transfer unit door safety switch [ 5 - 19 ] - Rev. 0.2 RZ9 Series...
- Page 166 (2) Uplug the solenoid connector and detach the solenoid (M3x8 screw; 2 pcs) (3) Detach the plunger by removing E-ring. Connector Nip release solenoid 0537 0530 Paper feed upper cover [ 5 - 20 ] - Rev. 0.2 RZ9 Series...
-
Page 167: Vertical Transfer Unit
3) Detach elevator support beam by removing screws (M4x8; 2 pcs). 4) Detach guide plate (lower) by removing screws (M4x8; 8 pcs). (5) Remove rear cover and open the SH-PCB bracket. 0540 Elevator support beam Guide plate (lower) [ 5 - 21 ] - Rev. 0.2 RZ9 Series... - Page 168 (10) On front of the machine, disconnect one connector leading to the vertical transfer unit and release two wire bands from the machine frame. Front support pin Unplug connector of this assemblies line and release the wire bands. 0543 [ 5 - 22 ] - Rev. 0.2 RZ9 Series...
- Page 169 (12)The vertical tansfer unit is hooked at the top. Lift it a little bit to unhook the hook, and then remove it from the machine out through the opening above the paper feed tray. 0544 Guide plate stay Vertical transfer unit [ 5 - 23 ] - Rev. 0.2 RZ9 Series...
-
Page 170: Adjustment
In contrast, if the sensor is positioned too low, the paper feeding process may fail to feed paper Scale Height adjustment dial 0545 Scraper roller Pickup roller 0546 Read the scale against the surface of this part. Table [ 5 - 24 ] - Rev. 0.2 RZ9 Series... -
Page 171: Stripper Adjustment
Making the stripper pad pressure weaker by rotating the stripper pressure lever will also help correct the no paper feed problem. Stripper pad angle adjustment mechanism 0526 Stripper pad pressure adjustment mechanism [ 5 - 25 ] - Rev. 0.2 RZ9 Series... -
Page 172: Paper-Width Potentiometer Adjustment
(1) Use test mode No. 3943 [FL Tray-2 Registration Loop Amount] to adjust the amount of the paper buckle made on the leading edge of the paper in front of the Timing roller. [ 5 - 26 ] - Rev. 0.2 RZ9 Series... -
Page 173: Assist Paper Feed Adjustment (For Tray No. 1 Only)
(6) Tighten the two screws to fix the paper fence assembly in the new position. (7) Make the prints again to confirm the result of the adjustment. 0547 Scale 0548 Screws [ 5 - 27 ] - Rev. 0.2 RZ9 Series... -
Page 174: Vertical Transfer Unit Nip Pressure Adjustment
The levers on the right and left must be set to the same pressure position, or the paper will skew during the paper feeding action due to the difference in the roller nip pressure on the right and left. 0549 0550 Roller nip pressure ajdustment lever [ 5 - 28 ] - Rev. 0.2 RZ9 Series... - Page 175 1. G-lever Mounting Position Adjustment ................6-21 2. Paper Feed Skew Adjustment ................... 6-22 3. Print Start Position Adjustment ..................6-23 4. Auto-adjustment of Multiple Paper Feed Detection ............6-24 [ 6 - 1 ] - Rev. 0.2 RZ9 Series...
-
Page 176: Mechanism
Sector gear cam Guide roller Timing Cam Sector gear assembly Load spring Sector gear spring Timing roller Timing gear 0601 G-lever assembly Guide roller pressure spring [ 6 - 2 ] - Rev. 0.2 RZ9 Series... - Page 177 The timing roller drives the guide roller with the paper clamped in between, sending the paper onto the printing area. 0604 Sector gear assembly [ 6 - 3 ] - Rev. 0.2 RZ9 Series...
-
Page 178: Vertical Print Position Control
The vertical default (home) position is checked by the vertical centering sensor. Planetary gear Print positioning pulse motor Vertical print positioning assembly Cam shaft Outer vertical positioning gear Vertical centering sensor Sector gear cam Timing cam 0605 [ 6 - 4 ] - Rev. 0.2 RZ9 Series... - Page 179 The timing of the paper feeding into the printing area starts early and the print position on the paper goes down. 0607 [ 6 - 5 ] - Rev. 0.2 RZ9 Series...
-
Page 180: Multiple Paper Feed Detection
The multiple paper feed detection is active also for the test-prints made by pressing the test-print button. Whether to activate or deactivate the multiple paper feed detection is done by the ON/OFF selection by the user-mode setting. [ 6 - 6 ] - Rev. 0.2 RZ9 Series... -
Page 181: Extended Paper Mode
In the opposite, if the extended paper mode is applied on normal sized papers, the machine keeps on printing, but feeds only one sheet for every two print drum rotations. Guide roller 0608 G-lever assembly Guide roller release solenoid [ 6 - 7 ] - Rev. 0.2 RZ9 Series... -
Page 182: Disassembly
Make sure that the snap ring fits in the groove in the guide roller shaft, otherwise the snap ring gets deformed and may require replacement. Guide roller 0609 Guide roller adjusting plate Snap ring Bearing metal 0610 [ 6 - 8 ] - Rev. 0.2 RZ9 Series... -
Page 183: Removing The Paper Sensor
(5) Detach the paper sensor (receive) from the paper guide plate (upper) by removing screws (M3x8; 2 pcs). 0611 Multiple paper feed sensor shield Paper sensor (receive) < Paper guide plate (upper) > 0612 [ 6 - 9 ] - Rev. 0.2 RZ9 Series... - Page 184 Jam release lever 0613 Connector 0614 < Paper sensor (send) > [ 6 - 10 ] - Rev. 0.2 RZ9 Series...
-
Page 185: Removing The Timing Roller
Sector gear spring removed first, and put on the last. Guide roller pressure spring Do not put them back on unless the Paper feed drive cover is firmly mounted back. [ 6 - 11 ] - Rev. 0.2 RZ9 Series... - Page 186 (12) Make a little timing roller slide to rear side, and then remove the timing roller from the bottom. Timing roller Load spring Load spring collar adjusting plate Bearing Washer 0619 0620 [ 6 - 12 ] - Rev. 0.2 RZ9 Series...
-
Page 187: Removing The Vertical Centering Sensor
(2) Unplug the sensor connector, and by removing a screw (M4x8: 1pc), detach the vertical centering sensor off the machine together with the sensor bracket. Vertical centering sensor Connector 0621 0622 [ 6 - 13 ] - Rev. 0.2 RZ9 Series... -
Page 188: Removing The Print-Positioning Intermediate Gear
Mount the print-positioning intermediate gear back on the machine after inserting the 8mm diameter Jig shaft into the position-B phase alignment hole on the paper feed area so all other gears are aligned in position-B. Print positioning intermediate gear 0623 [ 6 - 14 ] - Rev. 0.2 RZ9 Series... -
Page 189: Removing The Idler Gear
Finally hook the longer end of the idler spring onto the hole on the base plate. Idler gear Idler spring Idler gear Base plate 0624 Idler spring Vertical print positioning assembly Cam shaft 0625 [ 6 - 15 ] - Rev. 0.2 RZ9 Series... -
Page 190: Removing The Paper Feed Drive Unit
- Timing roller bearing assembly - Paper feed drive cover - Sector gear assembly - Continues on next page - Timing roller bearing assembly 0627 Sector gear spring Guide roller pressure spring [ 6 - 16 ] - Rev. 0.2 RZ9 Series... - Page 191 - Precausion on assembly continues on next page - Hook on vertical base bracket Vertical pulse motor Paper feed drive unit Vertical centering sensor Reusable band 0628 G-lever assembly [ 6 - 17 ] - Rev. 0.2 RZ9 Series...
- Page 192 Alignment marks Paper feed drive unit 8 mm dia. jig shaft 8 mm dia. jig shaft Outer vertical positioning gear Main gear Inner vertical positioning gear 0629 Alignment marks [ 6 - 18 ] - Rev. 0.2 RZ9 Series...
-
Page 193: Removing The Print Positioning Pulse Motor
(4) Remove screws (M3x6: 2pcs) and remove the vertical pulse motor. Vertical print positioning assembly Print positioning pulse motor Idler spring Inner vertical positioning gear Outer vertical positioning gear 8mm dia. jig shaft < Paper Feed Drive Unit > 0630 [ 6 - 19 ] - Rev. 0.2 RZ9 Series... -
Page 194: Removing The Guide Roller Release Solenoid
(3) Unplug the connector of the guide roller release solenoid and then remove the brancket of the sorenoid (M4x8: 3pcs) . (4) Remove the guide roller release solenoid. Sector gear spring 0631 Brancket of the sorenoid Guide roller pressure spring Guide roller release solenoid 0632 [ 6 - 20 ] - Rev. 0.2 RZ9 Series... -
Page 195: Adjustment
(Removing the Paper feed cover will shift the position of the shaft on which the Timing cam is attached onto.) Timing cam 0615 Paper feed drive cover (Do not remove for the adjsutment) G-lever cam follower 0633 Release base G-lever [ 6 - 21 ] - Rev. 0.2 RZ9 Series... -
Page 196: Paper Feed Skew Adjustment
R imprint direction moves the image at the bottom of the sheet to the left. Guide roller adjusting plate 0635 Timing roller adjusting plate BOTTOM 0634 0636 [ 6 - 22 ] - Rev. 0.2 RZ9 Series... -
Page 197: Print Start Position Adjustment
Adjustable range: -50 to +50 (-5mm to +5mm) Adjustable in units of 1 (1 = 0.1 mm) Default setting = 0 Plus (+) number brings the image up. Leading edge of the paper of the paper 0637 [ 6 - 23 ] - Rev. 0.2 RZ9 Series... -
Page 198: Auto-Adjustment Of Multiple Paper Feed Detection
(4) Activate test mode No.722 and confirm that the panel display shows a number between 484 and 508 (496 plus/minus 12). (5) If correct number is achieved, the adjustment is finished. Remove the paper out from the machine. [ 6 - 24 ] - Rev. 0.2 RZ9 Series... - Page 199 3. Removing the Pressure Lever Shock Absorber ..............7-7 4. Removing the Pressure HP Sensor ..................7-8 5. Removing the Pressure Control Motor ................. 7-9 ADJUSTMENT 1. Mounting Position of the Pressure Lever ................7-10 [ 7 - 1 ] - Rev. 0.2 RZ9 Series...
-
Page 200: Mechanism
Clamp plate base Print drum Pressure cam Pressure lever;spring Pressure spring Pressure lever;cam Pressure solenoid Pressure shaft Solenoid lever 0701 Main motor [ 7 - 2 ] - Rev. 0.2 RZ9 Series... - Page 201 DANKA AUSTRALIA PTY. LTD. Pressure roller is raised Print drum Pressure cam Pressure lever;spring Pressure roller Pressure lever;cam 0702 Pressure shaft Pressure roller is lowered Print drum Clamp plate base 0703 [ 7 - 3 ] - Rev. 0.2 RZ9 Series...
-
Page 202: Pressure Control Mechanism
The print pressure HP sensor detects the home position of the printing pressure. Pressure control pulse motor Pressure lever ;spring 0704 Pressure spring tension plate Pressure spring Pressure HP sensor [ 7 - 4 ] - Rev. 0.2 RZ9 Series... -
Page 203: Disassembly
(3) Pull the pressure roller forward until the bearing disengages from the roller adjustment plate, and then lift the roller up to remove. Pressure roller Roller adjustment plate Bearing Shouldered screw 0705 The hole to insert the screw driver [ 7 - 5 ] - Rev. 0.2 RZ9 Series... -
Page 204: Removing The Pressure Lever:spring & Pressure Lever;Cam
<< Precaution in reassembly >> Make sure to adjust the mounting position of the pressure lever;spring. (Refer to end of this chapter) Pressure lever;cam Pressure lever;pring 0706 Pressure shaft Follower spring [ 7 - 6 ] - Rev. 0.2 RZ9 Series... -
Page 205: Removing The Pressure Lever Shock Absorber
3. Removing the Pressure Lever Shock Absorber (1) Remove the main cover assembly. (2) Remove the two screws and then remove the pressure lever shock absorber. 0707 Pressure lever shock absorber 0708 [ 7 - 7 ] - Rev. 0.2 RZ9 Series... -
Page 206: Removing The Pressure Hp Sensor
(2) Remove the pressure HP sensor from the machine together with the sensor bracket by disconnecting the sensor connector and a screw (M3x6: 1pc). Pressure HP sensor 0709 Screw Connector [ 7 - 8 ] - Rev. 0.2 RZ9 Series... -
Page 207: Removing The Pressure Control Motor
(6) Remove the pressure control pulse motor from the pressure control unit by removing screws (M3x6: 2pcs). Pressure control pulse motor Pressure control unit Reusable band Pressure HP sensor Pressure control pulse motor 0710 0711 < Pressure Control Unit > [ 7 - 9 ] - Rev. 0.2 RZ9 Series... -
Page 208: Adjustment
Pressure cam Pressure lever; cam Pressure lever; spring 0712 Solenoid lever Pressure spring Pressure lever;cam Pressure lever;spring 0713 [ 7 - 10 ] - Rev. 0.2 RZ9 Series... - Page 209 In addition to the too much pressure, the up-and-down motion of the pressure roller becomes out of timing, and may result in ink leakage from the print drum. [ 7 - 11 ] - Rev. 0.2 RZ9 Series...
- Page 210 CHAPTER 7: PRESS SECTION DANKA AUSTRALIA PTY. LTD. MEMO [ 7 - 12 ] - Rev. 0.2 RZ9 Series...
- Page 211 13. Removing the Paper Stopper Fence Belt from Auto-control Paper Receiving Tray ....8-27 14. Removing the paper stopper drive motor ................8-28 ADJUSTMENT 1. Separator Mounting Position ..................... 8-29 2. Adjusting the Paper Ejection Suction Plate ............... 8-31 [ 8 - 1 ] - Rev. 0.2 RZ9 Series...
-
Page 212: Mechanism
Paper ejection sensor Separation fan FLOW OF PRINTING PAPERS Pre-Suction fan Suction fan FG sensor disc 0801 Transfer belt Paper ejection FG sensor Paper ejection motor Paper ejection wing pulse motor [ 8 - 2 ] - Rev. 0.2 RZ9 Series... -
Page 213: Paper Separator Mechanism
Main gear Separator lever assembly Separator DOWN Separator UP 0803 0802 Separator Print drum Slid rail Release arm 0804 Release lever Separator shaft Separator [ 8 - 3 ] - Rev. 0.2 RZ9 Series... -
Page 214: Paper-Ejection-Wing Mechanism
0805 Wing-M Wing-S Paper ejection wing pulse motor Joint plate-S Joint plate-M Paper ejection wing pulse motor M-wing cam S-wing cam Paper ejection wing HP sensor 0806 [ 8 - 4 ] - Rev. 0.2 RZ9 Series... - Page 215 When the serviceman inputs values on Test Mode No. 780, the machine operator will be able to select this fixed wing position from the operation panel from the [Jump Wing Control] key. [ 8 - 5 ] - Rev. 0.2 RZ9 Series...
-
Page 216: Paper Receiving Tray Angle Mechanism
The operator can select either 3.5 degrees or 10.5 degrees position with the tray mounting brackets attached in the default position. If a serviceman changes the tray mounting bracket position, the operator can then choose either 0 degrees (horizontal) position or 7 degrees position. [ 8 - 6 ] - Rev. 0.2 RZ9 Series... -
Page 217: Auto-Control Paper Receiving Tray Mechanism
Paper stopper Paper guide Exit paper stopper Paper-settling cushion plate Paper-settling plate knob Damper Exit tray paper Paper fence HP button detection sensor 0810 [ 8 - 7 ] - Rev. 0.2 RZ9 Series... - Page 218 If the fences are folded but not all paper guide base switches are pressed, sliding operations are disabled and an error is indicated. Paper guide base SW for paper stopper Paper guide base SW for paper guide 0811 [ 8 - 8 ] - Rev. 0.2 RZ9 Series...
-
Page 219: Fence Sliding Mechanism
The paper guides on the front and rear sides are operated by linked gears and belts. Paper guide on the rear side Paper guide on the front side 0812 Paper guide HP sensor Paper guide limit Paper guide pulse sensor motor [ 8 - 9 ] - Rev. 0.2 RZ9 Series... - Page 220 2) Paper stopper HP sensor: Detects the slide reference position. Widest position. 3) Paper stopper limit sensor: Detects the narrowest position. Prevents overruns due to malfunctions. Paper stopper Paper stopper HP sensor Paper stopper pulse motor 0813 Paper stopper limit sensor [ 8 - 10 ] - Rev. 0.2 RZ9 Series...
-
Page 221: Sliding Operations At The Beginning Of The Print Operation
(The settings must be entered in Test mode.) If the machine fails to operate due to a problem in the auto exit tray mechanism, disconnect the connection cable to enable machine operations. [ 8 - 11 ] - Rev. 0.2 RZ9 Series... -
Page 222: Disassembly
1. Removing the Paper Receiving Tray (1) Open the paper receiving tray to an angle of about 45 degrees and lift it vertically upwards to detach from the machine. Paper receiving tray Connector 0814 [ 8 - 12 ] - Rev. 0.2 RZ9 Series... -
Page 223: Removing The Suction Unit
(4) Remove the paper ejection cover by removing screws (M4x8: 4pcs) (5) Remove the sponge parts. 0815 Paper ejection cover Paper receiving tray Paper receiving tray bracket (Rear side) bracket (Front side) 0816 Sponge parts [ 8 - 13 ] - Rev. 0.2 RZ9 Series... - Page 224 CHAPTER 8: PAPER EJECTION SECTION DANKA AUSTRALIA PTY. LTD. (6) Disconnect two connectors, remove screws (M4x8: 2pcs) and pull the suction unit out while lifting it up a little. 0817 Conectors 0818 [ 8 - 14 ] - Rev. 0.2 RZ9 Series...
-
Page 225: Removing The Paper Ejection Motor And Paper Ejection Fg Sensor
< Bottom View of Suction Unit > Connector of the paper Connector of the paper ejection FGF sensor ejection motor Paper ejection FG sensor Paper ejection motor 0819 Gear Timing belt [ 8 - 15 ] - Rev. 0.2 RZ9 Series... -
Page 226: Removing The Paper Ejection Wing Hp Sensor
Paper ejection cover Suction unit (2) Detach the reusable cable band, disconnect the connector, and detach the Paper ejection wing HP sensor. 0818 0820 Paper ejection wing HP sensor Connector [ 8 - 16 ] - Rev. 0.2 RZ9 Series... -
Page 227: Removing The Paper Ejection Wing Pulse Motor
(4) Disconnect the connector of the motor and remove the screw ,and then remove the paper ejection wing pulse motor (M3 x 8 ,2pc). W-cam shaft E-ring Screw Connector 0821 Paper ejection wing pulse motor [ 8 - 17 ] - Rev. 0.2 RZ9 Series... -
Page 228: Removing The Paper Ejection Sensor And The Transfer Belts
In mounting the suction center plate back on the suction unit, make sure that it does not pinch the transfer belts. Suction center plate 0823 Suction upper assembly Driven shaft assembly [ 8 - 18 ] - Rev. 0.2 RZ9 Series... - Page 229 (5) Detach the shaft, shown on the photograph below, by by removing the timing belt, E-ring and bearing, and sliding the shaft towards the pulley (6) Remove the transfer belts. Bearing E-ring Timing belt Transfer belts 0824 Paper ejection sensor [ 8 - 19 ] - Rev. 0.2 RZ9 Series...
-
Page 230: Removing The Separation Fan Unit
(2) Remove screws (M4x8: 2pcs), unplug the connector, and remove the separation fan. - Precaution in assembly continues on next page - Separation fan unit 0825 Connector 0826 < Separation Fan Unit > [ 8 - 20 ] - Rev. 0.2 RZ9 Series... - Page 231 < U-shaped hook > ( Side View ) 0829 < Separation Fan Unit > 0826 Flat pins on the machine frame inserted through the rectangular slits on the separation fan unit. 0830 [ 8 - 21 ] - Rev. 0.2 RZ9 Series...
-
Page 232: Removing The Separator
< Precaution in reassembly > The pinch knobs on the power-band should face towards you, as shown on the photograph when mounting it on the air-hose. Separator 0831 Air-hose Power-band [ 8 - 22 ] - Rev. 0.2 RZ9 Series... -
Page 233: Removing The Separation Lever
9. Removing the Separation Lever (1) Remove the main shaft assembly. (Refer to chapter 3) (2) Remove the cap screw (M3x10: 1pc) and detach the separator lever assembly. 0832 Pressure lever;spring Separator lever assembly [ 8 - 23 ] - Rev. 0.2 RZ9 Series... -
Page 234: Removing The Auto-Control Paper Receiving Tray
(1) Disconnect the connector for the bundled wires from the machine. (2) Remove the front and rear side flanges (M4 x 6 ,1pc each). (3) Remove the auto exit tray unit. Auto exit tray unit 0833 connector Flange 0834 [ 8 - 24 ] - Rev. 0.2 RZ9 Series... -
Page 235: Removing The Right/Left Fence Belts From Auto-Control Paper Receiving Tray
With the sliders of both fences moved all the way toward the center, place a mark on the belt to indicate the installation position of the clamp and belt. Rear cover 0835 Idler spring Right / left fence belt Detach this flange from the pulley Tensioner Clamp ; belt 0836 [ 8 - 25 ] - Rev. 0.2 RZ9 Series... -
Page 236: Removing The Paper Guide Pulse Motor From Auto-Control Paper Receiving Tray
(Be careful to avoid dropping the pin located inside the pulley.) (5) Dismount the motor (three M4x8 ,3pc). Paper guide pulse motor 0837 Detach this flange from the pulley Reuse wire band Paper guide pulse motor 0838 Connector [ 8 - 26 ] - Rev. 0.2 RZ9 Series... -
Page 237: Removing The Paper Stopper Fence Belt From Auto-Control Paper Receiving Tray
(3) Detach the retaining ring and flange from the pulley and dismount the belt from the tensioner. (4) Remove the clamp ;belt (M3 x 8 ,1pc). (5) Detach the belt. Clamp ; belt Paper stopper fence belt 0839 Detach this flange from the pulley [ 8 - 27 ] - Rev. 0.2 RZ9 Series... -
Page 238: Removing The Paper Stopper Drive Motor
(4) Dismount the reuse wire band and disconnect the connector, and then remove the paper stopper drive motor (M4 x 8,3pc). 0840 Paper stopper drive motor Connector Connector 0841 Reuse wire band [ 8 - 28 ] - Rev. 0.2 RZ9 Series... -
Page 239: Adjustment
(refer to the photographs on next page). Aim with a flash light from the paper receiving side of the machine if necessary. Screw - Continues to next page - 0843 0842 Screw Separator adjusting plate 0845 0844 Graduation scale [ 8 - 29 ] - Rev. 0.2 RZ9 Series... - Page 240 (2) If the gap is too wide, the separator does not lift the paper off the print drum and causes paper jam on the print drum. [ 8 - 30 ] - Rev. 0.2 RZ9 Series...
-
Page 241: Adjusting The Paper Ejection Suction Plate
When the roller adjusting plate is moved one increment mark (1 mm) on the scale, also move paper ejection suction plate one increment mark (1 mm). Paper ejection suction plate Transport plate 0822 0850 [ 8 - 31 ] - Rev. 0.2 RZ9 Series... - Page 242 CHAPTER 8: PAPER EJECTION SECTION DANKA AUSTRALIA PTY. LTD. MEMO [ 8 - 32 ] - Rev. 0.2 RZ9 Series...
- Page 243 13. Removing the Flange-F ..................... 9-23 14. Removing the Squeegee Roller ..................9-24 ADJUSTMENT 1. Squeegee Gap Adjustment ....................9-28 2. Squeegee Pressure Balance Adjustment ................9-30 3. Master Skew Adjustment ....................9-32 [ 9 - 1 ] - Rev. 0.2 RZ9 Series...
-
Page 244: Mechanism
OFF. Print drum at 40 degrees from position-A. Reflection preventing cloth Master sensor 0901 [ 9 - 2 ] - Rev. 0.2 RZ9 Series... -
Page 245: Print Drum Set Mechanism
The main motor, clamp motor, master removal vertical transport motor, master compression motor, print drum horizontal pulse motor, separation fan, and separation pump solenoid. 0902 Drawer connector Print drum lock sensor Print drum safety SW [ 9 - 3 ] - Rev. 0.2 RZ9 Series... -
Page 246: Print Drum Lock Mechanism
(print drum in unlocked condition). Print drum lever Movable plate Print drum lock plate Lock lever Print drum lock solenoid 0903 [ 9 - 4 ] - Rev. 0.2 RZ9 Series... -
Page 247: Print Drum Horizontal Sliding Mechanism
The horizontal home position sensor checks the horizontal reference position. Gray parts in the diagram on the right move. 0904 Horizontal pulse motor Horizontal home position sensor [ 9 - 5 ] - Rev. 0.2 RZ9 Series... -
Page 248: Print Drum Rotation Mechanism
The doctor roller is fixed in position and does not rotate. Flange-R Drum joint Flange-R Flange gear 0905 Drive joint Doctor roller Driven shaft 0906 Squeegee idle gear Squeegee drive gear Driven shaft gear Squeegee roller Squeegee gear [ 9 - 6 ] - Rev. 0.2 RZ9 Series... -
Page 249: Inking Mechanism
The overflow sensor is located in the print drum to stop the machine to prevent ink overflow in the case the bead of ink for some reasons becomes too large. Inking motor Ink sensor Overflow sensor Doctor roller 0907 Ink distributor Squeegee roller Driven shaft [ 9 - 7 ] - Rev. 0.2 RZ9 Series... -
Page 250: Disassembly
(red color cable), and dismount the print drum horizontal sliding unit. (Turn the unit slightly clockwise when pulling out.) 0909 Print drum horizontal sliding unit coaxial cable(red color cable) 0910 [ 9 - 8 ] - Rev. 0.2 RZ9 Series... -
Page 251: Removing The Screen Assembly
Caution: Do not fold or bend the screen assembly during the removal or installation. Refer to the next page for the precautions in reassembly. Screen assembly 0911 End hangers Top hangers 0913 0912 [ 9 - 9 ] - Rev. 0.2 RZ9 Series... - Page 252 << Screen jig >> End hanger Top hanger Screen jig Screen assembly 0915 << Rear side >> Screen jig Top hanger End hanger Screen assembly 0916 << Front side >> [ 9 - 10 ] - Rev. 0.2 RZ9 Series...
-
Page 253: Removing The Master Clamp Base Assembly
(2) Remove screws (M3x6: 4pcs) and detach the master clamp base assembly from the print drum. Clamp plate base assembly 0917 0918 0919 << Clamp plate base assembly >> 0920 [ 9 - 11 ] - Rev. 0.2 RZ9 Series... -
Page 254: Removing The Drum Body
(5) Slide the drum body and unhook the potbelly-shaped holes from the two loosened screws, and then remove the drum body. - Precautions in assembly continues on next page - Drum body Tape 0921 Joint section of the drum body. 0922 < Enlarged View > [ 9 - 12 ] - Rev. 0.2 RZ9 Series... - Page 255 Drum body Screen JIG Screen JIG 0926 0925 Flange-R Flange-F [ 9 - 13 ] - Rev. 0.2 RZ9 Series...
- Page 256 If the joint section of the drum is lifted during the taping, it may result in master-wrinkling during master loading or causes mechanical noise during printing. Tape (8) Remove the two screws used by above step (6). 0929 [ 9 - 14 ] - Rev. 0.2 RZ9 Series...
-
Page 257: Removing The Ink Scraper Plate Assembly F & R
Markings are make for where the cross-beams to be mounted. For A3 print drum, attach the cross-beam where an A3 marking is engraved. B4 marking is engraved for B4 size print drum, etc. [ 9 - 15 ] - Rev. 0.2 RZ9 Series... -
Page 258: Removing The Ink Pump Assembly
(3) Disconnect the inking motor FG sensor connector and the inking motor connector. Then remove screws (M4x8: 2pcs) and detach the ink pump assembly. Inking motor connector 0934 Inking motor FG sensor connector Inking pump [ 9 - 16 ] - Rev. 0.2 RZ9 Series... -
Page 259: Removing The Ink Bottle Guide Assembly
(5) Remove screws(M3x8: 4pcs), and lift out the ink bottle guide assembly from the print drum after sliding it towards the center of the drum. Antenna PCB Antenna connector 0936 0935 Inspection cap Ink bottle guide assembly 0934 Reusable bands 0937 Bottle set SW connector [ 9 - 17 ] - Rev. 0.2 RZ9 Series... -
Page 260: Removing The Ink Bottle Lock Assembly & Antenna Pcb
(3) Separate the ink bottle guide (top) from the ink bottle guide (bottom) by unhooking the claws. (4) Remove the antenna PCB from the PCB holder. Ink bottle guide assembly PCB holder Antenna PCB Ink bottle guide (top) 0939 Ink bottle guide (bottom) 0941 0940 [ 9 - 18 ] - Rev. 0.2 RZ9 Series... -
Page 261: Removing The Ink Sensor Pcb
Ink bottle guide assembly (3) Disconnect the ink sensor PCB connector, remove screws (M3x8: 2pcs) and detach the ink sensor PCB. Connector Ink sensor PCB 0942 0943 < Ink Sensor PCB > [ 9 - 19 ] - Rev. 0.2 RZ9 Series... -
Page 262: Removing The Print Drum Pcb
(2) Disconnect wire harness connectors (6 locations), remove screws (M3x8: 2pcs) and detach the print drum PCB. < Precaution in assembly > Refer to Chapter-18 for special instructions on the replacement of the Print Drum PCB. Print drum PCB 0945 [ 9 - 20 ] - Rev. 0.2 RZ9 Series... -
Page 263: Removing The Drum Joint
(4) Remove screws (M4x8: 3pcs) and remove the drum joint. Drum side frame Drum side frame Drum rear frame assembly 0946 Drum side frame Drum side frame < Front > < Rear > 0948 0947 Drum joint 0949 [ 9 - 21 ] - Rev. 0.2 RZ9 Series... -
Page 264: Removing The Flange-R
Screen assembly Master clamp base assembly Drum body Drum side frames (2pcs) Drum rear frame assembly Drum joint (3) Remove the C-ring and detach the flange-R. 0950 C-ring Flange-R 0951 [ 9 - 22 ] - Rev. 0.2 RZ9 Series... -
Page 265: Removing The Flange-F
< Precaution in reassembly > Push down on the Position-B lock-lever when attaching Flange-F, so that the lock-lever slides into the correct slit, instead of locking into one of the spaces around Flange-F. [ 9 - 23 ] - Rev. 0.2 RZ9 Series... -
Page 266: Removing The Squeegee Roller
(7) Also from the rear of the print drum, remove the squeegee drive gear by detaching an E-ring. - continues on next page - 0955 Squeegee drive gear Squeegee idle gear [ 9 - 24 ] - Rev. 0.2 RZ9 Series... - Page 267 Shoulder screw (9) Remove screws (M4x8: 2pcs) and also the shoulder screw from the rear of the print drum. - continues on next page - < REAR > 0957 Shoulder screw [ 9 - 25 ] - Rev. 0.2 RZ9 Series...
- Page 268 - continues on next page - < FRONT > Squeegee-gap cam Squeegee side frame-F 0958 < REAR > squeegee-gap cam Squeegee side frame-R 0959 < SQUEEGEE UNIT > Squeegee side frame-R Squeegee side frame-F 0960 [ 9 - 26 ] - Rev. 0.2 RZ9 Series...
- Page 269 * The doctor roller, pressed tightly fit into the ink block F & R, will also come loose. Squeegee side frame-R Ink block-R 0961 REAR Doctor roller Squeegee roller 0960 FRONT Driven shaft 0963 Squeegee side frame-F Ink block-F [ 9 - 27 ] - Rev. 0.2 RZ9 Series...
-
Page 270: Adjustment
- Refer to the next page for the photograph of the rear side. < FRONT > Drum handle Drum handle lever (inside) 0945 Squeegee-gap adjustment plate 0964 Squeegee-gap adjustment plate Narrower 0965 0966 Securing screw on the Squeegee-gap adjustment plate. Wider [ 9 - 28 ] - Rev. 0.2 RZ9 Series... - Page 271 [ 9 - 29 ] - Rev. 0.2 RZ9 Series...
-
Page 272: Squeegee Pressure Balance Adjustment
- the adjusting procedure for the rear side of the print drum continues on the next page - Narrower Squeegee gap cam 0969 Wider 0964 < FRONT > Squeegee gap cam Drum front frame assembly 0970 [ 9 - 30 ] - Rev. 0.2 RZ9 Series... - Page 273 [ 9 - 31 ] - Rev. 0.2 RZ9 Series...
-
Page 274: Master Skew Adjustment
The adjustment can be made in three steps. this reset plate in the default position. Moving the roller adjusting plate one step to the left moves the master 1 mm. [ 9 - 32 ] - Rev. 0.2 RZ9 Series... - Page 275 4. Clamp Plate Master Clamp Mechanism ................10-5 DISASSEMBLY 1. Removing the Clamp Unit ....................10-6 2. Removing the Clamp Motor ....................10-7 3. Removing the Clamp Sensors A & B ................. 10-8 [ 10 - 1 ] - Rev. 0.2 RZ9 Series...
-
Page 276: Mechanism
Clamp sensor-A Position-A compensation plate Clamp opening cam 1001 Clamp motor Clamp sensor-B 1002 [ 10 - 2 ] - Rev. 0.2 RZ9 Series... -
Page 277: Clamp Plate Opening Mechanism
Clamp sensor-B Clamp cam Clamp opening cam Clamp plate Master ejection plate Master 1003 1004 1005 [ 10 - 3 ] - Rev. 0.2 RZ9 Series... -
Page 278: Drum Position-A Compensation
Clamp sensor-B Clamp cam Position-A compensation plate Clamp opening cam Compensator pin Master ejection plate Clamp plate 1006 1007 [ 10 - 4 ] - Rev. 0.2 RZ9 Series... -
Page 279: Clamp Plate Master Clamp Mechanism
At this stage both the clamp opening cam and position-A compensation plate are brought up back to their home position. Clamp sensor-A Clamp sensor-B Position-A compensation plate Clamp cam Clamp opening cam Clamp plate Master ejection plate Master 1008 1009 1010 [ 10 - 5 ] - Rev. 0.2 RZ9 Series... -
Page 280: Disassembly
(2) Disconnect the clamp motor connector and relay connector. Remove screws (M4x8: 3pcs) and remove the clamp unit from the machine. Relay connector Clamp motor connector 1011 Clamp unit 1002 < Clamp Unit > [ 10 - 6 ] - Rev. 0.2 RZ9 Series... -
Page 281: Removing The Clamp Motor
(3) Detach the helical/spur gear and spur gear by removing an E-ring on the helical/spur gear. (4) Detach the clamp motor by unplugging the connector and removing the screws (M3x5: 2pcs). Spur gear Connector Clamp motor 1002 Helical / spur gear [ 10 - 7 ] - Rev. 0.2 RZ9 Series... -
Page 282: Removing The Clamp Sensors A & B
(4) Remove a screw (M3x6: 1pc) and detach the clamp sensor plate with the two sensors attached. (5) Unplug the connectors and unhook and remove each sensor from the clamp sensor plate. Reusable band Clamp sensor-A 1014 Clamp sensor-B Clamp sensor plate [ 10 - 8 ] - Rev. 0.2 RZ9 Series... - Page 283 11. Removing the Pulley Shaft ....................11-19 12. Removing the Master Removal Roller (Upper) ..............11-20 13. Removing the Round Belts ....................11-21 14. Removing the Master Removal Housing Assembly ............11-22 [ 11 - 1 ] - Rev. 0.2 RZ9 Series...
-
Page 284: Mechanism
Master sensor 1101 Master release bar 1102 Master disposal box Master compression plate Master-guiding-plate 1103 Tail edge of the master being wrapped around the print drum. Master disposal box [ 11 - 2 ] - Rev. 0.2 RZ9 Series... -
Page 285: Master On The Drum Check Mechanism (Before Master Removal)
Drum angle 40 degrees Anti-reflection cloth Master sensor 1104 [ 11 - 3 ] - Rev. 0.2 RZ9 Series... -
Page 286: Removed Master Vertical Transport Mechanism
Master removal motor FG sensor Pulley shaft Master compression plate Master removal roller (upper) Master removal 1106 pulley Master-guiding-plate B Master removal sensor Master-guiding-plate A Master-guiding-plate B Master removal roller (bottom) [ 11 - 4 ] - Rev. 0.2 RZ9 Series... -
Page 287: Disposed Master Compression Mechanism
(adjustable by test mode No.576), the master disposal box is detected to be full. The LED lamp on the operation panel lights to give the FULL message. Master compression plate HP sensor Master compression plate 1107 1109 1108 Maximum compressing position Master disposal box FULL position [ 11 - 5 ] - Rev. 0.2 RZ9 Series... -
Page 288: Master Disposal Box Safety Sw
OFF the master disposal box safety switch for 5 seconds to reset and clear the LED indication. 1110 Master disposal box safety SW [ 11 - 6 ] - Rev. 0.2 RZ9 Series... -
Page 289: Protect Function
Even with the protect function OFF, the master disposal box can be locked in position by using a padlock. 11s1 The master disposal box can be locked in the machine using a padlock through this device. [ 11 - 7 ] - Rev. 0.2 RZ9 Series... -
Page 290: Disassembly
Rotate the compression gear all the way in the counterclockwise direction to raise the master compression plate, and remove the master disposal box out of the machine. Compression gear Spur gear Compression gear cover 1113 [ 11 - 8 ] - Rev. 0.2 RZ9 Series... -
Page 291: Removing The Master Compression Fg Sensor
(2) Disconnect the connector to the sensor and unplug the reusable band from the sensor bracket. (3) Remove a screw (M3x6: 1pc) and detach the master compression FG sensor together with the bracket. Reusable band Compression FG sensor 1111 1112 [ 11 - 9 ] - Rev. 0.2 RZ9 Series... -
Page 292: Removing The Master Compression Motor
* Be careful not to lose the white thin plastic spacer on the tip of the worm-gear on the motor shaft. Compression gear Spur gear Compression gear cover Helical/spur gear Master compression motor Motor mounting plate 1113 1114 Compression motor Motor bracket Plastic spacer [ 11 - 10 ] - Rev. 0.2 RZ9 Series... -
Page 293: Removing The Master Removal Unit
1pc) located on the top right, and slide the master removal unit out toward the operators side of the machine. Master disposal box 1115 Master removal cover R Master removal cover F SCREW SCREW 1116 SCREW Connector Master removal unit 1117 Connector [ 11 - 11 ] - Rev. 0.2 RZ9 Series... -
Page 294: Removing The Master Removal Sensor & Master Sensor
(2) Disconnect the sensor connector, remove a screw (M3x6: 1pc) by inserting a screwdriver through a hole on the master disposal housing, and detach the master sensor. Master sensor Master disposal housing Master removal sensor 1118 1119 1120 < Master Removal Unit > [ 11 - 12 ] - Rev. 0.2 RZ9 Series... -
Page 295: Removing The Master Removal Motor & Master Removal Motor Fg Sensor
Removing the master removal motor FG sensor (5) Disconnect the sensor connector and detach the master removal motor FG sensor. Spur gear 1121 Master removal motor 1123 Master removal motor FG sensor 1122 Timing belt [ 11 - 13 ] - Rev. 0.2 RZ9 Series... -
Page 296: Removing The Master Compression Plate Hp Sensor
Compression gear cover Master compression plate 1124 1125 < Master Compression Plate at HP position > 1126 Master compression plate HP sensor 1127 < Master Compression Plate at its lowered position > [ 11 - 14 ] - Rev. 0.2 RZ9 Series... -
Page 297: Removing The Master Disposal Box Safety Sw
SW together with switch bracket. 1129 1128 Master disposal box guiding plate Master removal roller lock lever Switch spring 1131 < View from > 1130 Master disposal box safety SW [ 11 - 15 ] - Rev. 0.2 RZ9 Series... -
Page 298: Removing The Master Removal Roller (Bottom)
< Master Removal Roller (bottom) in raised position > Master removal roller (bottom) Master removal roller release lever 1133 1134 < Master Removal Roller (bottom) in dropped position > Master removal roller (bottom) [ 11 - 16 ] - Rev. 0.2 RZ9 Series... - Page 299 Detach the master removal roller (bottom) from the assembly. Spur gear Master removal roller (Bottom) Joint arm 1139 1138 1140 < Master Removal Roller (Bottom) Assembly > Spur gear [ 11 - 17 ] - Rev. 0.2 RZ9 Series...
-
Page 300: Removing The Master Compression Plate
(5) Remove an E-ring and metal bushing from the front of the unit and detach the master compression plate. 1141 < REAR > < FRONT > Master compression plate Compression gear 1142 1143 1144 1145 < Master Compression Plate > [ 11 - 18 ] - Rev. 0.2 RZ9 Series... -
Page 301: Removing The Pulley Shaft
Remove the pulley shaft from the unit by pulling it out though the round belts. 1146 Pulley-shaft gear Pulley shaft Round belt 1147 Round belt Pulley shaft Snap ring Snap ring Flanged gear Metal bushing 1148 [ 11 - 19 ] - Rev. 0.2 RZ9 Series... -
Page 302: Removing The Master Removal Roller (Upper)
* Do not lose the two flat-washers, and do not forget to put them during the assembly. 1151 Flat-washer AF-spring AR-spring Flat-washer 1149 1150 Snap ring Master removal roller (upper) Round belt Round belt Master removal roller (upper) [ 11 - 20 ] - Rev. 0.2 RZ9 Series... -
Page 303: Removing The Round Belts
(2) Press the master removal roller release lever to release the master removal roller (bottom). (3) Removing the following two components enable the round belts to be removed. Pulley-shaft Master removal roller (upper) [ 11 - 21 ] - Rev. 0.2 RZ9 Series... -
Page 304: Removing The Master Removal Housing Assembly
- Fit the boss on the release lever into the groove on the roller hook-F. Roller hook spring-R Release lever spring 1153 1152 Master removal housing assembly Connector Side plate-F 1154 [ 11 - 22 ] - Rev. 0.2 RZ9 Series... - Page 305 CHAPTER 11: MASTER REMOVAL SECTION DANKA AUSTRALIA PTY. LTD. 1155 < Master Removal Housing Assembly > Boss on the release lever 1157 Groove on the roller hook-F 1156 [ 11 - 23 ] - Rev. 0.2 RZ9 Series...
- Page 306 CHAPTER 11: MASTER REMOVAL SECTION DANKA AUSTRALIA PTY. LTD. MEMO [ 11 - 24 ] - Rev. 0.2 RZ9 Series...
- Page 307 1. FB Read Pulse Motor Speed Adjustment (Image Elongation & Shrinkage in Scanning) ..12-15 2. FB Scan Start Position Adjustment .................. 12-15 3. FB Horizontal Scan Position Adjustment ................12-15 [ 12 - 1 ] - Rev. 0.2 RZ9 Series...
-
Page 308: Mechanism
The original on the scanner table illuminated by the lamp is reflected via mirrors No.1, 2, and 3, and the scanned image is then focused onto the CCD by the lens on the CCD assembly. FB read pulse motor Pulley 2 1201 Mirror carriage Lamp carriage [ 12 - 2 ] - Rev. 0.2 RZ9 Series... - Page 309 Mirror carriage Wire Pulley Pulley 2 Wire spool pulley Optical system diagram Reflector Original illumination lamp Mirror No.2 Lamp carriage CCD assembly Mirror Carriage Mirror No.1 1203 Mirror No.3 Lens [ 12 - 3 ] - Rev. 0.2 RZ9 Series...
-
Page 310: Flatbed Initialization Movement
HP sensor detects the carriage and stops after the carriage moves 7mm from the detected position (home position). FB/AF HP sensor 1204 Lamp carriage FB read pulse motor 1205 [ 12 - 4 ] - Rev. 0.2 RZ9 Series... -
Page 311: Stage-Glass Original Detection Mechanism
The FB read pulse motor then rotates in the reverse direction to bring the lamp carriage back to the standby position and starts the original scanning. Shading compensating area Auto-base-control scanning (3 times) 2.5mm 2.5mm 10mm 1206 3.5mm 6.5mm 35mm 12mm Home position Standby position FB/AF HP sensor [ 12 - 5 ] - Rev. 0.2 RZ9 Series... -
Page 312: Fb Scanning Mechanism
[ 0 ] indicates sensor light not reflected back (no original). * The original size will not be identified for combinations other than those listed. Flatbed original det. sensor ④ Flatbed original size sensor [ 12 - 6 ] - Rev. 0.2 RZ9 Series... -
Page 313: Disassembly
(2) Prior to reassembly, memo down the information label located on the top right of the scanner unit, listing the necessary Test Mode adjustments for the scanner unit. [ 12 - 7 ] - Rev. 0.2 RZ9 Series... -
Page 314: Removing The Stage Glass
(3) Push and slide the stage glass against the original stopper. (4) Install the plate springs F & R, pushing tightly against the stage glass, and secure with screws. (5) Reinstall the covers. [ 12 - 8 ] - Rev. 0.2 RZ9 Series... -
Page 315: Removing The Fb Original Detection Sensor
(3) Disengage the claws (3 locations) on the FB original detection sensor from the sensor cover to detach the sensor. FB original detection sensor Sensor cover 1210 Sensor cover Connector FB original detection sensor 1211 Sensor claws Sensor claw 1212 < FB Original Detection Sensor > [ 12 - 9 ] - Rev. 0.2 RZ9 Series... -
Page 316: Removing The Original Size Detection Sensors
CCD PCB 1226 Original size detection sensor mounting plate 1227 Connector Sensor No.5 Sensor No.7 Slit for sensor No.1 Sensor No.3 1228 Slit for sensor No.2 Sensor No.4 Sensor No.6 [ 12 - 10 ] - Rev. 0.2 RZ9 Series... -
Page 317: Removing The Scanner Lamp
Scanner lamp Inverter cover Cutout section Cutout section 1213 Connector Cord clamps Cutout section Scanner lamp Clear plastic sheet 1214 Wire harness 1215 [ 12 - 11 ] - Rev. 0.2 RZ9 Series... -
Page 318: Removing The Ccd Unit
To prevent damages to the CCD PCB, firmly support the PCB by hand while connecting or disconnecting the CCD cable to the PCB. CCD PCB 1216 CCD cover 1217 Positioning bracket CCD PCB CCD cable CCD Unit Positioning bracket 1218 CCD cable CCD Unit [ 12 - 12 ] - Rev. 0.2 RZ9 Series... -
Page 319: Removing The Fb/Af Hp Sensor
For the machines with the duplex AF unit, the metal cover shown on the photograph at the bottom of the page needs to be removed first. Sensor bracket Connector 1219 Metal cover For the machines with the duplex AF unit, this metal cover needs to be removed first. 1220 [ 12 - 13 ] - Rev. 0.2 RZ9 Series... -
Page 320: Removing The Fb Read Pulse Motor
FB read pulse motor bracket onto the scanner unit. Motor bracket FB read pulse motor Bent edge 1221 FB read pulse motor Timing belt 1222 [ 12 - 14 ] - Rev. 0.2 RZ9 Series... -
Page 321: Adjustment
(2) Look at the master made on the print drum. Confirm that all the [e] images are made on the right and left of the master on the print drum. (3) If any of the [e] images are omitted, make an adjustment using Test Mode No. 380 (FB Horizontal Scan Position Adjustment). [ 12 - 15 ] - Rev. 0.2 RZ9 Series... - Page 322 CHAPTER 12: FB ORIGINAL SCANNING SECTION DANKA AUSTRALIA PTY. LTD. MEMO [ 12 - 16 ] - Rev. 0.2 RZ9 Series...
- Page 323 2. AF Horizontal-Scan Position Adjustment ................13-23 3. AF Read Pulse-Motor Speed Adjustment (Elongation & Shrinkage) ......... 13-23 4. AF Original Guide Fence Potentiometer Adjustment ............13-24 5. AF Original IN Sensor Sensitivity Adjustment ..............13-24 [ 13 - 1 ] - Rev. 0.2 RZ9 Series...
-
Page 324: Mechanism
White roller Shading-compensation Original stopper (AF) AF-ABC position operation area 3 mm 1301 8 mm Home position AF scanning position [ 13 - 2 ] - Rev. 0.2 RZ9 Series... - Page 325 Original stripper roller AF Original detection sensor AF original registration sensor Pickup roller White roller Original ejection roller Lead roller 1 1303 Registration roller Original stopper gate Original guide fence [ 13 - 3 ] - Rev. 0.2 RZ9 Series...
-
Page 326: Af Original Size-Detection Mechanism
Whether the AF is closed over the stage glass or not is checked by the AF cover set sensor. The AF cover set sensor is attached on the AF unit. AF cover set sensor 1340 [ 13 - 4 ] - Rev. 0.2 RZ9 Series... -
Page 327: Af Original Scanning Mechanism (With Automatic Base Control)
The lamp carriage returns to the home position, and the AF read operation ends. The auto-base control function is inactive in the Photo, mixed Text/Photo, and Dot-screening modes. [ 13 - 5 ] - Rev. 0.2 RZ9 Series... -
Page 328: Af Original Scanning Mechanism
The lamp carriage returns to the home position, and the AF read operation ends. AF original registration sensor Lead roller 2 Original ejection roller Original feed 1302 Lead roller 1 AF original ejection sensor White roller [ 13 - 6 ] - Rev. 0.2 RZ9 Series... - Page 329 CHAPTER 13: Simplex AF Unit DANKA AUSTRALIA PTY. LTD. Registration roller AF read pulse motor AF original ejection sensor Paper ejection roller 1305 Lead roller 1 AF original IN sensor White roller [ 13 - 7 ] - Rev. 0.2 RZ9 Series...
-
Page 330: Removing The Original Pickup Asembly
(2) Disconnect the two connectors and the reusable band, remove the screws (M3 x 4: 2 pcs), and detach the sensor-bracket assembly. Top cover 1306 1307 Reusable band Sensor-bracket assembly [ 13 - 8 ] - Rev. 0.2 RZ9 Series... - Page 331 Bearing metal Resin clip Bearing metal Resin clip 1308 1309 Original pickup assembly Rear Front 1310 Original pickup assembly 1311 [ 13 - 9 ] - Rev. 0.2 RZ9 Series...
-
Page 332: Removing The Original Pickup Roller
(2) Remove the resin clip, open the end of the K holder, and remove the pickup roller. (Note that the K holder C and parallel pin may fall during disassembly.) Original pickup roller Resin clip K holder K holder 1312 K holder C Parallel pin 1313 Original pickup assembly [ 13 - 10 ] - Rev. 0.2 RZ9 Series... -
Page 333: Removing The Original Stripper Roller
Original stripper roller K holder F assembly Resin clip 1314 Front Rear K holder F assembly E-ring Parallel pin 1315 View of the K holder F assembly and parallel pin [ 13 - 11 ] - Rev. 0.2 RZ9 Series... -
Page 334: Removing The Original Stripper Pad Assembly
Remove the adhesive tape once the original stripper pad assembly is fixed in its position. 1341 1342 Stripper sheet Original stopper Original release lever Original stripper pad assembly Original stopper bracket 1343 1345 Adhesive tape 1344 Original stripper pad assembly Stripper sheet [ 13 - 12 ] - Rev. 0.2 RZ9 Series... -
Page 335: Removing The Af Original In Sensorr
(2) Remove the screw (M3 x 8: 1 pc), disconnect the connector, and remove the AF original IN sensor. [Precautions in Reassembly] Following reassembly, adjust the AF original IN sensor by using Test Mode No. 3044 (Original-IN-Sensor Sensitivity Adjustment). AF original IN sensor 1316 [ 13 - 13 ] - Rev. 0.2 RZ9 Series... -
Page 336: Removing The Af Read Pulse Motor
AF read pulse motor Open lever 1317 Harness-bracket assembly Open-lever spring 1318 Motor tension bracket Tension spring 1319 AF read pulse motor [ 13 - 14 ] - Rev. 0.2 RZ9 Series... -
Page 337: Removing Other Rollers
(PM4 x 10: 7 pcs; M4 x 10 + Washer: 2 pcs on the front), and detach the AF mechanism unit. AF Control PCB 1320 1321 AF mechanism unit [ 13 - 15 ] - Rev. 0.2 RZ9 Series... - Page 338 Ground wire from the Reusable band harness-bracket assembly Motor-bracket assembly AF read pulse motor connector AF cover set sensor connector Ground wire 1322 Harness-bracket assembly Actuator disc spring Sensor actuator disc [ 13 - 16 ] - Rev. 0.2 RZ9 Series...
- Page 339 Timing belt No.1 Gear assembly 1323 Read roller No. 1 Original ejection roller White roller Read roller No. 2 1324 < Layout of the rollers > Front Rear Registration roller [ 13 - 17 ] - Rev. 0.2 RZ9 Series...
-
Page 340: Removing The Registration Roller
(15)Remove the resin clip from the front side of the roller, and detach the bearing metal. (16)Remove the registration roller. Timing pulley Registration roller Registration roller Resin clip 1325 1326 Rear Front 1327 Registration roller Timing pulley Parallel pin Resin clip [ 13 - 18 ] - Rev. 0.2 RZ9 Series... -
Page 341: Removing The Read Roller No. 1
Timing pulley Read roller No.1 Dial Resin clip 1329 1328 Read roller No.1 Rear Front 1330 Dial Parallel pin Resin clip Read roller No.1 Timing pulley Parallel pin Timing-pulley assembly [ 13 - 19 ] - Rev. 0.2 RZ9 Series... -
Page 342: Removing The Read Roller No. 2
Timing pulley Read roller No. 2 Read roller No. 2 Resin clip Resin clip 1332 1331 Rear Front 1333 Resin clip Read roller No. 2 Resin clip Parallel pin Timing pulley [ 13 - 20 ] - Rev. 0.2 RZ9 Series... -
Page 343: Removing The Original Ejection Roller
(16)Remove the original ejection roller. Original ejection roller Timing pulley Original ejection roller Resin clip Resin clip 1335 1334 Rear Front 1336 Resin clip Original ejection roller Parallel pin Resin clip Timing pulley [ 13 - 21 ] - Rev. 0.2 RZ9 Series... - Page 344 2. Rotate the potentiometer in the counterclockwise direction all the way. 3. Then return it in the clockwise direction for one tooth and join the gears, and screw it back on the AF unit. [ 13 - 22 ] - Rev. 0.2 RZ9 Series...
-
Page 345: Adjustment
No.3074 (AF Scanning Speed Adjustment). 1350 Prior to adjustment, adjust the image elongation and shrinkage by first adjusting the write pulse-motor speed (see chapter 15). [ 13 - 23 ] - Rev. 0.2 RZ9 Series... -
Page 346: Af Original Guide Fence Potentiometer Adjustment
(1) Without an original, execute Test Mode No. 3044 [AF Original IN Sensor Sensitivity Adjustment] . This will automatically adjust the sensitivity of the sensor. * This adjustment must be made when the sensor is replaced with a new one. [ 13 - 24 ] - Rev. 0.2 RZ9 Series... - Page 347 Sensor ..........................14-10 4. Removing the Covers ......................14-11 6. Removing the Left Cover ....................14-12 7. Removing the Registration Sensor ................... 14-12 8. Removing the Original Exit Sensor ................... 14-13 [ 14 - 1 ] - Rev. 0.2 RZ9 Series...
-
Page 348: Mechanism
2nd transported roller and exit roller. Pick-Up Roller Reverse Roller Reverse Table Paper Feed Belt Original Table 1st Transport 1401 Junction Gate Exit Roller Roller Scanning Area Exit Table 2nd Transport Roller [ 14 - 2 ] - Rev. 0.2 RZ9 Series... -
Page 349: Original Size Detection Mechanism
Note that the width sensor’s terminal plate is attached to the original guide, so the widths of the originals must all be the same. Original Length Sensor 1 Original Width Sensor Original Length Sensor 2 Board Terminal Plate 1402 1403 [ 14 - 3 ] - Rev. 0.2 RZ9 Series... -
Page 350: Electrical Component Description
Transfers transport motor drive to the pick-up roller and feed belt. Transport Motor Drives the transport and exit rollers. Pick-up Solenoid Controls the up-down movement of the original table. Junction Gate Solenoid Opens and closes the junction gate. [ 14 - 4 ] - Rev. 0.2 RZ9 Series... - Page 351 Original Reverse Pick-Up Solenoid Sensor Original Set Sensor Original Length Sensor 2 Original Trailing Edge Sensor 1404 DF Position Sensor Original Exit Sensor Junction Gate Solenoid Transport Motor Feed Motor [ 14 - 5 ] - Rev. 0.2 RZ9 Series...
-
Page 352: Original Feeding And Transporting Mechanism
6) After scanning , the original is fed out by the 2nd transport roller and exit roller. Pick-Up Roller Separation roller Paper Feed Belt 1st Transport Roller 1406 Registration Sensor Scanning Area Exit Roller 2nd Transport roller [ 14 - 6 ] - Rev. 0.2 RZ9 Series... - Page 353 11) The original is then sent to the reverse table a second time to be turned over. this is done so that the copies will be properly stacked front side down in the exit tray in the correct order. Exit Table 1409 [ 14 - 7 ] - Rev. 0.2 RZ9 Series...
-
Page 354: Disassembly
(4) Remove the original feed unit. (5) Open the paper feed guide. (6) Remove the belt holders (7) Remove the feed belt. Original feed unit Paper feed guide Belt holders 1412 Feed belt 1413 [ 14 - 8 ] - Rev. 0.2 RZ9 Series... -
Page 355: Removing The Original Set Sensor And The Original Reverse Sensor
(3) Disconnect the connector and remove the original set sensor. (4) Disconnect the connector and remove the original reverse sensor. pawl Original set sensor Original feed guide Original reverse sensor plate 1415 [ 14 - 9 ] - Rev. 0.2 RZ9 Series... -
Page 356: Removing The Original Width Sensor Board , The Original Length Sensor , And Trailing Edge Sensor
(or cloth with alcohol) , apply silicone grease(KS-660) to the terminal plate. Original Table Original Width Sensor Board Original Length Sensor 1 1416 Original Length Sensor 2 Terminal Plate Original Trailing Edge 1417 Sensor 1403 [ 14 - 10 ] - Rev. 0.2 RZ9 Series... -
Page 357: Removing The Covers
(4) Remove the bracket of the motor unit ( 1 spring , 1 connector , 2 screws ) (5) Remove the feed motor (1 connector , 2 screws ) Pick-UP Sorenoid Feed Clutch Motor Unit Feed Motor 1420 transport Motor [ 14 - 11 ] - Rev. 0.2 RZ9 Series... -
Page 358: Removing The Left Cover
(1) Remove the front and rear covers. (2) Remove the left cover. (3) Remove the transport guide plate. (4) Remove the registration sensor ( 1 connector ). 1422 Registration sensor Transport Guide Plate [ 14 - 12 ] - Rev. 0.2 RZ9 Series... -
Page 359: Removing The Original Exit Sensor
(4) Remove the original exit sensor ( 1 connector ). Exit guide plate Small openings 1423 Original Exit Sensor 1424 [ 14 - 13 ] - Rev. 0.2 RZ9 Series... - Page 360 CHAPTER 14: Duplex AF Unit DANKA AUSTRALIA PTY. LTD. MEMO [ 14 - 14 ] - Rev. 0.2 RZ9 Series...
- Page 361 5. Master cut length adjustment ................... 15-34 6. Master making image Elongation and Shrinkage adjustment ..........15-34 7. Master making length adjustment ..................15-34 8. Master Positioning Sensor sensitivity adjustment ............15-35 [ 15 - 1 ] - Rev. 0.2 RZ9 Series...
-
Page 362: Mechanism
Master positioning sensor Load roller Master-making unit upper cover set sensor 1501 Load pulse motor Master roll Cutter Cutter motor Write pulse motor Master detection sensor & Master end sensor (send) [ 15 - 2 ] - Rev. 0.2 RZ9 Series... -
Page 363: Set Detection Mechanism
The master end sensor checks every 10 ms while the master is being transported, and the master roll replace message is indicated when the end mark is detected twice in succession. [ 15 - 3 ] - Rev. 0.2 RZ9 Series... -
Page 364: Master Cutting Mechanism
HP SW and after one rotation of the cam the switch actuator arrives back to the flat-cut on the cam. The switch actuator is no longer pressed by the cam and the cutter motor stops. Cutter HP SW 1504 Rotary blade 1505 Cutter motor [ 15 - 4 ] - Rev. 0.2 RZ9 Series... -
Page 365: Tph (Thermal Print Head) Elevation Mechanism
Thermal pressure sensor TPH (Print Thermal Head) Thermal pressure motor Write roller 1509 < TPH at elevated position > 1510 < TPH at lowered position, touching against the Write roller > [ 15 - 5 ] - Rev. 0.2 RZ9 Series... -
Page 366: Master Set Mechanism
Master positioning sensor TPH (Thermal Print Head) 1511 Master stocker roller (bottom) Write roller Master roll [ 15 - 6 ] - Rev. 0.2 RZ9 Series... -
Page 367: Master Making Movement
The master making still continues. (6) As the master making ends, the TPH elevates up and the print drum starts to rotate, wrapping the master material around the print drum. 1512 [ 15 - 7 ] - Rev. 0.2 RZ9 Series... -
Page 368: Disassembly
(2) Detach the safety SW cover by removing a screw (M4x8: 1pc). (3) Unplug the connector, remove a screw (M3x6: 1pc) and detach the master making U lock sensor. 1513 Safety SW cover Connector Master making U lock sensor 1514 [ 15 - 8 ] - Rev. 0.2 RZ9 Series... -
Page 369: Removing The Print Drum, Master Making U Release Button, Lock Solenoid, And Safety Switch
Removing the master making U lock solenoid (5) Remove screws (M3x6: 2pcs) and detach the master making U lock solenoid. 1516 Master making U release button Master making U lock solenoid Print drum release button [ 15 - 9 ] - Rev. 0.2 RZ9 Series... - Page 370 (6) Unhook the torsion spring, remove an E-ring and detach the master making U safety SW together with the bracket. Remove the switch from the bracket. Master making U Safety SW assembly 1517 E ring Master making U Safety SW 1518 Torsion spring [ 15 - 10 ] - Rev. 0.2 RZ9 Series...
-
Page 371: Removing The Print Thermal Head Assembly
(5) Detach the connector cover by removing one screw (M3x6: 1pc). - Continues on next page - Master making unit upper cover 1519 Master making unit bottom cover 1520 Ground wire 1521 1522 Connector cover [ 15 - 11 ] - Rev. 0.2 RZ9 Series... - Page 372 (7) Slide off the metal bushing from the TPH bracket and remove the print thermal head assembly. 1523 Snap ring Spring Metal bushing Metal bushing TPH bracket 1524 1525 < Print Thermal Head Assembly > [ 15 - 12 ] - Rev. 0.2 RZ9 Series...
-
Page 373: Removing The Thermal Pressure Motor Assembly And The Capacitor Pcb
(5) Remove E-rings and metal bushings from both ends of the TPH support shaft, and remove the shaft. - Continues on next page - 1526 Thermal pressure gear cover Thermal pressure spring Thermal pressure spring 1527 TPH support shaft [ 15 - 13 ] - Rev. 0.2 RZ9 Series... - Page 374 (7) Disconnect two connectors of capacitor PCB and remove the gland wire, and then remove the capacitor PCB (M3 x 6,2pc). Thermal pressure motor assembly 1528 Connectors Capacitor PCB 1529 < Thermal Pressure Motor Assembly > [ 15 - 14 ] - Rev. 0.2 RZ9 Series...
-
Page 375: Removing The Master End Sensor (Receive) Assembly
(3) Remove a screw (M3x6: 1pc), unplug the sensor connector and detach the master end sensor (receive) assembly. Master End sensor (receive) assembly 1530 Master End sensor (receive) assembly 1532 1531 < Master End Sensor (receive) Assembly > [ 15 - 15 ] - Rev. 0.2 RZ9 Series... -
Page 376: Removing The Master Detection Sensor And Master End Sensor (Send) Assembly
- Continues on next page - 1533 Set guide plate-B Set guide plate shaft Master detection sensor and Master end sensor (send) Master making PCB Master making PCB bracket 1585 1584 [ 15 - 16 ] - Rev. 0.2 RZ9 Series... - Page 377 Stopper plate (rear) Stopper plate (front) Set guide plate-B 1535 1534 SCREW SCREW 1587 1588 Mounting screw of Set guide plate shaft Master flange assembly (rear): Remove 2 screws and hang loose. [ 15 - 17 ] - Rev. 0.2 RZ9 Series...
- Page 378 - The stopper plates (front and rear) are assembled back on the machine after the set guide plate-B springs. Therefore, the set guide plate-B must be pushed down when attaching the stopper plates on the machine. [ 15 - 18 ] - Rev. 0.2 RZ9 Series...
-
Page 379: Removing The Antenna Pcb
(4) Gently pull out the antenna connector, and detach the antenna PCB from the master holder (front) by unhooking from the three plastic claws of the master holder. Master making PCB 1539 Master holder (front) Antenna PCB 1540 [ 15 - 19 ] - Rev. 0.2 RZ9 Series... -
Page 380: Removing The Write Pulse Motor Assembly
Then rotate the whole motor assembly in clockwise direction to apply tension on the timing belt. With adequate tension applied on the timing belt, securely tighten the mounting screws. [ 15 - 20 ] - Rev. 0.2 RZ9 Series... -
Page 381: Removing The Write Roller
(4) Detach the bearing support bracket (front) by removing screws (M3x6: 2pcs). (5) Pull out the write roller through the hole on the side frame. Write roller 1545 Pulley Bearing support bracket (front) 1546 < Write roller > [ 15 - 21 ] - Rev. 0.2 RZ9 Series... -
Page 382: Removing The Load Pulse Motor Assembly
(3) Detach the reusable bands (3 locations) from the bracket of the load pulse motor and unplug the load pulse motor connector. (4) Remove screws (M3x6: 2pcs) and detach the load pulse motor assembly. Load pulse motor assembly Reusable bands 1547 Reusable band [ 15 - 22 ] - Rev. 0.2 RZ9 Series... -
Page 383: Removing The Cutter Cover Assembly
1548 Cutter cover assembly 1549 < Cutter cover assembly > Master making unit upper cover set sensor Master positioning sensor 1550 < Cutter cover assembly > ( Under view ) [ 15 - 23 ] - Rev. 0.2 RZ9 Series... -
Page 384: Removing The Clamping Guide Roller
Clamping guide roller Master loading guide 1553 Snap ring Spur gear Clamping guide roller 1554 < Rear > < Front > 1555 Metal bushing Metal bushing behind the snap ring [ 15 - 24 ] - Rev. 0.2 RZ9 Series... -
Page 385: Removing The Cutter Guide Assembly
Cutter cover assembly Master loading guide Clamping guide roller (3) Detach the cutter guide assembly by removing screws (M3x6: 2pcs). 1556 Cutter guide assembly 1557 < Cutter guide assembly > [ 15 - 25 ] - Rev. 0.2 RZ9 Series... -
Page 386: Removing The Cutter Unit
(3) Detach the cutter unit by unplugging the connectors (2 locations) and removing two shoulder screws. Master stocker roller pulley Connector Connector Cutter unit 1558 Write roller pulley 1559 1560 < Cutter unit > [ 15 - 26 ] - Rev. 0.2 RZ9 Series... -
Page 387: Removing The Load Roller (Bottom)
* The assembly is easier if the metal busings on the ends of the shaft are not removed when detaching the load roller (bottom).. 1563 1565 1564 Bearing metal Load roller (bottom) Bearing metal Spur gear [ 15 - 27 ] - Rev. 0.2 RZ9 Series... -
Page 388: Removing The Master Making Unit
- continues on next page - 1566 Master making PCB Master making unit side frame (front) 1567 Flat cable bracket Master making unit flat cable Flat cable support plate 1568 [ 15 - 28 ] - Rev. 0.2 RZ9 Series... - Page 389 1569 1570 Flat cable guiding box < Rear > Shoulder screws Shoulder screws 1572 Shoulder screws Shoulder screws 1573 < Front > < Master making unit > 1571 [ 15 - 29 ] - Rev. 0.2 RZ9 Series...
- Page 390 Rectangular hole to hook the flat cable bracket Catch on the flat cable bracket to hook into the rectangular hole on the master making unit. 1576 Hooks at the tip of the flat cable support plate 1577 [ 15 - 30 ] - Rev. 0.2 RZ9 Series...
-
Page 391: Removing The Master Stocker Roller (Bottom)
- continues on next page - 1578 < Rear of the master making unit > Master stocker lever Master stocker spring 1580 < Master stocker solenoid assembly > 1579 Connector [ 15 - 31 ] - Rev. 0.2 RZ9 Series... - Page 392 Master stocker lever Master stocker hook spring Master stocker guide plate 1582 Master stocker solenoid [ 15 - 32 ] - Rev. 0.2 RZ9 Series...
-
Page 393: Adjustment
* Increasing the settings by the test mode decreases the distance, moving the image up on the master material. * Master Clamp Range Adjustment must be made before the Write Start Position Adjustment. [ 15 - 33 ] - Rev. 0.2 RZ9 Series... -
Page 394: Horizontal Write Position Adjustment
(3) If the measured length is not 413mm, make an adjustment using test mode No.542 (master making length adjustment). * Increasing the setting by the test mode increases the master making length. [ 15 - 34 ] - Rev. 0.2 RZ9 Series... -
Page 395: Master Positioning Sensor Sensitivity Adjustment
(7) Then slowly rotate the dial VR2 (fine adjustment dial) in the counterclockwise direction until the voltage comes down to the correct voltage setting within 0.8 volt to 1.2 volts. (If possible, aim for 1.0 volt.) Connector (CN6) 1590 Master Making PCB 1589 [ 15 - 35 ] - Rev. 0.2 RZ9 Series... - Page 396 CHAPTER 15: MASTER MAKING SECTION DANKA AUSTRALIA PTY. LTD. MEMO [ 15 - 36 ] - Rev. 0.2 RZ9 Series...
- Page 397 F92 , F93 , F94 , F95 ....................16-42 H1 , H2 , H3 , H4 , H5 , H6 ...................16-43 J** ............................ 16-44 4. Errors Requiring Special Attention ................16-45 [ 16 - 1 ] - Rev. 0.2 RZ9 Series...
-
Page 398: Explanation Of Panel Messages
Master making section O O O Master-disposal section O O O Paper-feed/ejection section O O O Print-drum area O O O Printing adjustment section (vertical, horizontal, density) O O O Optional accessories [ 16 - 2 ] - Rev. 0.2 RZ9 Series... -
Page 399: List Of Error Types
O O O Awaiting for the master to be removed O O O from the drum Cutter error O O O Requesting for master to be reset O O O [ 16 - 3 ] - Rev. 0.2 RZ9 Series... - Page 400 Master making unit is ready for removal O O O Print drum removal command O O O AF cover not closed Error type Description Replace battery O O O Maintenance call O O O [ 16 - 4 ] - Rev. 0.2 RZ9 Series...
- Page 401 O O Original size: Larger than the master-making size Reproduction size: Larger than the master-making size Protect mode: Discard current master x O O Protect mode: Confirmation x O O [ 16 - 5 ] - Rev. 0.2 RZ9 Series...
- Page 402 Print density fine adjustment O O O Proof-print density adjustment (ink) O O O Master-making density O O O Print density fine adjustment O O O Proof-print density adjustment (master) O O O [ 16 - 6 ] - Rev. 0.2 RZ9 Series...
-
Page 403: Detailed List Of Panel Messages
The upper-limit sensor is OFF continuously for over 2 seconds during operation of the O O O elevator servo action to raise the feed tray. [ 16 - 7 ] - Rev. 0.2 RZ9 Series... - Page 404 Error Point Error Conditions 3 5 9 The overflow sensor is ON for a set number of times in succession during the 10- O O O millisecond-interval overflow-sensor check. [ 16 - 8 ] - Rev. 0.2 RZ9 Series...
- Page 405 The horizontal positioning pulse motor does not end its operation within the set period in the pulse count stop mode, or in the sensor stop mode after the actuator is detected by the sensor. [ 16 - 9 ] - Rev. 0.2 RZ9 Series...
- Page 406 Communication error was received from MTPF. Overload current detected on MTPF Tray-1 elevator motor. Overload current detected on MTPF Tray-2 elevator motor. Elevator motor lock on MTFP Tray-1. Elevator motor lock on MTFP Tray-2. [ 16 - 10 ] - Rev. 0.2 RZ9 Series...
- Page 407 The print pressure pulse motor does not end its operation within the set period in the pulse count stop mode, or in the sensor stop mode after the actuator after the actuator is O O O detected by the sensor. [ 16 - 11 ] - Rev. 0.2 RZ9 Series...
- Page 408 Master-positioning sensor is ON when the print drum rotates through the preset angle O O O following master cutting. Cutter HP switch does not go ON within 450 milliseconds after the cutter home O O O positioning operation started. [ 16 - 12 ] - Rev. 0.2 RZ9 Series...
- Page 409 O O O Communication error with AF unit (ACK, NAK, or receiving channel error). O O O Riso printer could not send command to the AF unit within the set time. O O O AF unit not connected. O O O...
- Page 410 The paper ejection pulse motor does not end its operation within the set period in the pulse count stop mode, or in the sensor stop mode after the actuator is detected by the sensor. [ 16 - 14 ] - Rev. 0.2 RZ9 Series...
- Page 411 Press Reset Key display Error Point Error Conditions EEPROM on the print drum PCB is being accessed while the print drum is in releasing O O O action from the machine. [ 16 - 15 ] - Rev. 0.2 RZ9 Series...
- Page 412 O O O MTPF Tray-1 paper width potentiometer value is not input. MTPF Tray-2 paper width potentiometer value is not input. REv data storage area is not initialized. O O O [ 16 - 16 ] - Rev. 0.2 RZ9 Series...
- Page 413 Communication error between SH PCB and MCTL PCB (09) - on MCTL PCB side. O O O Communication error between SH PCB and MCTL PCB (10) - on SH PCB side. O O O [ 16 - 17 ] - Rev. 0.2 RZ9 Series...
- Page 414 !!System Error!! Description Press Reset Key If Recovery has Failed, Call Service To reset Turn power OFF and ON. display Error Point Error Conditions Timeout on Image processing time. Wrong loader. [ 16 - 18 ] - Rev. 0.2 RZ9 Series...
- Page 415 Error Conditions Either the upper or lower safety switch of the paper-feed-tray is OFF. O O O Note: This detection is not made when the machine is in low-power-mode (24V OFF). [ 16 - 19 ] - Rev. 0.2 RZ9 Series...
- Page 416 Open the Master making unit, re-insert the master material into the master making unit. display Error Point Error Conditions Reqesting for the master material to be reset into the master making unit. O O O [ 16 - 20 ] - Rev. 0.2 RZ9 Series...
- Page 417 Duplex AF: Original reverse sensor does not go ON after the original feeds. Original Jam at Original reverse sensor. Duplex AF: Original reverse sensor does not go OFF after the original feeds. Duplex AF: Original multiple feed [ 16 - 21 ] - Rev. 0.2 RZ9 Series...
- Page 418 B05 [Soter Error - Other errors] B05-xxx Description Check Soter panel Display To reset Check the sorter. display Error Point Error Conditions Other error command was received from the sorter. [ 16 - 22 ] - Rev. 0.2 RZ9 Series...
- Page 419 Close Feed Joint Passage Cover To reset Close the feed joint passage cover. display Error Point Error Conditions Feed joint passage cover open error singal is received from MTPF unit. [ 16 - 23 ] - Rev. 0.2 RZ9 Series...
- Page 420 The mult-tray 1 pickup sensor is ON at the start of a printing job from Tray No.1. * If any of the FL feed sensor is ON at the same time, the error message on those sensors w ill be displayed. [ 16 - 24 ] - Rev. 0.2 RZ9 Series...
- Page 421 Switch OFF the power and then switch ON the power back. display Error Point Error Conditions File name error on the Hold Memory. Access error on the Hold Memory. Other error on the Hold Memory. [ 16 - 25 ] - Rev. 0.2 RZ9 Series...
- Page 422 B27 [Sorter - Stapler Error] B27-xxx Description Check Sorter Panel Display To reset Check the stapler and correct the stapler problem. display Error Point Error Conditions Stapler error command is received from the sorter. [ 16 - 26 ] - Rev. 0.2 RZ9 Series...
- Page 423 Linked Printer in Error To reset Press Reset Key, and correct the error on the linked printer. display Error Point Error Conditions Error in the linked printer. x O O [ 16 - 27 ] - Rev. 0.2 RZ9 Series...
- Page 424 C06 [MTPF - No Paper in Tray No.1] C06-xxx Description Load Paper in Feed Tray 1 To reset Fill Tray No.1 with paper. display Error Point Error Conditions No paper in Tray No.1 [ 16 - 28 ] - Rev. 0.2 RZ9 Series...
- Page 425 Press [Reset] Key and load interposal paper in Tray No.2 display Error Point Error Conditions No paper is set in Tray No.2 while the tray is specified as interposer tray by the Admin. Tab on the operation panel. [ 16 - 29 ] - Rev. 0.2 RZ9 Series...
- Page 426 O O O Error Type D04 [Incorrect ink cartridge] D04-xxx Description Wrong-type Ink Cartridge Installed or Cannot Read Ink Info Replace Ink Cartridge or Contact dealer/Riso office To reset Replace with correct ink cartridge. display Error Point Error Conditions Incorrect ink cartridge is used.
- Page 427 Close the rear cover of the machine to activate the rear cover (serviceman safety) display switch. [Field serviceman has to close and screw-on the rear cover] Error Point Error Conditions The rear cover is opened (serviceman safety switch is OFF). O O O [ 16 - 31 ] - Rev. 0.2 RZ9 Series...
- Page 428 DANKA AUSTRALIA PTY. LTD. Error Type D17 [Incorrect master roll] D17-xxx Description Wrong-type Master Installed or Cannot Read Master Info Replace Master Roll or Contact dealer/Riso office To reset Set correct master roll in the machine. display Error Point Error Conditions Incorrect master roll.
- Page 429 Maintenance counter inside the print drum reached the value set for the maintenance call (value set by test mode). [The message appears when either the power is turned ON, the O O O unit is reset, or when the machine operation ended.] [ 16 - 33 ] - Rev. 0.2 RZ9 Series...
- Page 430 Press Cancel key to cancel, or press Proof key to continue. display Error Point Error Conditions Paper size does not match with the size of image on the print drum when test print is x O O selected and activated. [ 16 - 34 ] - Rev. 0.2 RZ9 Series...
- Page 431 Set origial on the FB and press START key. display Or press STOP key (Time-out exists for pressing the STOP key) Error Point Error Conditions Next Original not placed on FB for Multi-Up scanning. [ 16 - 35 ] - Rev. 0.2 RZ9 Series...
- Page 432 Place Original on Stage Glass To reset Place original on the stage glass. display Error Point Error Conditions Original was set on the AF with book mode selected in master making. O O O [ 16 - 36 ] - Rev. 0.2 RZ9 Series...
- Page 433 Master making or print to a linked printer is started with original undetected. x O O The original not detected when [NEXT] button was pressed in Multi-Up Wizard display. [ 16 - 37 ] - Rev. 0.2 RZ9 Series...
- Page 434 Printing Operation will Start on this Printer To reset Press either [OK] or [Cancel] button. display Error Point Error Conditions Auto-printer-selection is disabled with print quantity selected as Zero. x O O [ 16 - 38 ] - Rev. 0.2 RZ9 Series...
- Page 435 Error Point Error Conditions Specified tray does not have any A3 (Ledger), B4 (Legal), A4 (Letter) or x O O A4L (Letter-L) when printing from linked printer with saddle stitching selected. [ 16 - 39 ] - Rev. 0.2 RZ9 Series...
- Page 436 External CI is not Connected or Processing Connection Check Cable Connection To reset Press [CLOSE] button or press [START] key. display Error Point Error Conditions Either the PS7R is not connected or improperly connect. [ 16 - 40 ] - Rev. 0.2 RZ9 Series...
- Page 437 Press [CLOSE] button. display Error Point Error Conditions Set quantity of the specified master roll stock quantity is equal to or less than x O O the calculated stock quantity. [ 16 - 41 ] - Rev. 0.2 RZ9 Series...
- Page 438 To reset Press [START] key, or press [STOP] key. display Error Point Error Conditions The job completes when the protect mode is selected active by the Admin. display. x O O [ 16 - 42 ] - Rev. 0.2 RZ9 Series...
- Page 439 Message H6 [First print density adjustment] Description Select a Print Density level of the first print (proof-read copy) to match the master. To reset Enter the required parameter value. display [ 16 - 43 ] - Rev. 0.2 RZ9 Series...
-
Page 440: B09 , B11
MTPF: Tray-1 paper jam error MTPF: Tray-2 paper jam error Sorter: Jam error Example: If A10 and A08 jam errors occur at the same time, the panel message will show error J05. [ 16 - 44 ] - Rev. 0.2 RZ9 Series... -
Page 441: Errors Requiring Special Attention
Error Type Error Description Cutter motor lock Master loading error Master removal error Paper jam on print drum Waiting for the master to be removed from the drum Cutter error [ 16 - 45 ] - Rev. 0.2 RZ9 Series... - Page 442 CHAPTER 16: PANEL MESSAGE DANKA AUSTRALIA PTY. LTD. MEMO [ 16 - 46 ] - Rev. 0.2 RZ9 Series...
- Page 443 11. Options (Memory) Test Mode ..................17-31 12. Options (Linked-Printer) Test Mode ................. 17-32 13. Options (Auto-Stacker) Test Mode ...................17-33 14. Options (Vendor) Test Mode ....................17-33 15. Multi-Tray Paper Feeder Test Mode ................. 17-34 [ 17 - 1 ] - Rev. 0.2 RZ9 Series...
-
Page 444: Test Mode Procedures
[Stop] key to cancel the settings before returning to standby mode. 3) Ending Procedure To exit the Test mode, press the [Reset] key for at least 1 second during test mode standby mode or test mode operation standby mode. [ 17 - 2 ] - Rev. 0.2 RZ9 Series... -
Page 445: Individual Test Procedures
* The settings will be set to their default values if values beyond the specified setting ranges are entered. The settings are also set to their default values if values are entered in units other than the units specified. [ 17 - 3 ] - Rev. 0.2 RZ9 Series... -
Page 446: System & Control Panel Test Mode
No. 0171 through No.0173 will not be activated unless this test mode No. 0101 is activated. Pressing the Start key begins the operation and automatically stops it after 0.5 seconds. [ 17 - 4 ] - Rev. 0.2 RZ9 Series... - Page 447 (Most recent 64 items) Displays all the maintenance counter values (master- 0123 Maintenance Count making, printing, and print-drum). 0124 Machine Serial Number 1 Displays the left 4 digits of the machine serial number. [ 17 - 5 ] - Rev. 0.2 RZ9 Series...
- Page 448 Setting 0 : Together (default) 1 : Independent Counter Display Control 0141 Description Selection to display or not display the counter. Setting 0 : Not displayed (default) 1 : Displayed [ 17 - 6 ] - Rev. 0.2 RZ9 Series...
- Page 449 Selects whether to keep the Multi-Up selection active or to Description 0160 change to inactive after a Multi-Up operation is finished. 0: Changes to inactive (default) Setting 1: Stays active [ 17 - 7 ] - Rev. 0.2 RZ9 Series...
- Page 450 1 = 1 month, 1 = 1 day Setting Default: 0101 (January 1) Test Mode No. 0101 must be activated after inputting test modes No. 0171 through No. 0173 to activate the new setting. [ 17 - 8 ] - Rev. 0.2 RZ9 Series...
- Page 451 The software option is enabled when the key code (8 digits) Description is entered and the Start key is pressed. 0199 Range : 00000000 to 99999999 Setting Unit : Default : 00000000 [ 17 - 9 ] - Rev. 0.2 RZ9 Series...
-
Page 452: Image Processing / Scanning Test Mode
Setting (RZ9) 3: Dot-Screen-3 4: Dot-Screen-4 Halftone Curve Selection (Photo) Description Selects the matrix forming the halftone-curve base for photo mode. 0350 Range: 0 to 8 Setting Unit : Default : [ 17 - 10 ] - Rev. 0.2 RZ9 Series... - Page 453 1: Adds center dotted line Edge Emphasis Threshold Offset Description Sets the offset for the following Test Mode setting value. 0399 Range : –128 to 127 Setting Unit : Defaul t: [ 17 - 11 ] - Rev. 0.2 RZ9 Series...
-
Page 454: Master-Making / Master-Disposal Test Mode
[This test mode is for checking the motor as one independent part. Disconnect the motor from the 0494 cutter unit before activation.] Rotates the cutter motor in the cut direction (maximum 10 seconds) [ 17 - 12 ] - Rev. 0.2 RZ9 Series... - Page 455 Description pulse motor.) 0547 Range : -100 to +100 (-10.0% to +10.0%) ( + values elongate the image in master making.). Setting Unit : 1 (0.1%) Default : 0 (0%) [ 17 - 13 ] - Rev. 0.2 RZ9 Series...
- Page 456 Compacting Completion Position Default Adjustment Selection Enables/disables automatic adjustment to correct the default value of the compacting 0579 Description completion position. Setting Range : 0 (Disable) / 1 (Enable : Default)) [ 17 - 14 ] - Rev. 0.2 RZ9 Series...
-
Page 457: Paper-Feeding / Paper-Ejection Test Mode
Turns the solenoid ON when the Start key is pressed. The solenoid automatically switches OFF after 10 seconds. Paper-feed clutch ON/OFF action 0688 Presses START key to turn ON the clutch. The clutch automatically switches off after 10 seconds. [ 17 - 15 ] - Rev. 0.2 RZ9 Series... - Page 458 Fixes the paper wing position to the position selected by test mode No. 0780. Automatic Multiple Paper Feed Adjustment 0705 One sheet of thin RISO paper must be set at the multiple paper feed sensor position during this procedure. Elevator motor ON action 0708 Rotates the elevator motor for 10 seconds.
- Page 459 1 : 3.4 times the drum speed. (default) Setting 2 : 3.7 times the drum speed. 3 : 4.0 times the drum speed. 4: 4.5 times the drum speed. [ 17 - 17 ] - Rev. 0.2 RZ9 Series...
- Page 460 0 (1.1 times the circumferential speed), 1 (1.3 times the 0761 circumferential speed) Setting 2 (1.4 times the circumferential speed), 3 (1.5 times the circumferential speed) 4 (1.6 times the circumferential speed) Default: 1 (1.3 times the circumferential speed) [ 17 - 18 ] - Rev. 0.2 RZ9 Series...
- Page 461 3) 0769 0 : High (paper feed pressure is higher) Setting 1 : Middle (paper feed pressure is middle) <default> 2 : Low (paper feed pressure is lower) [ 17 - 19 ] - Rev. 0.2 RZ9 Series...
- Page 462 0780 x o o applies to test mode No.0704. Range : 0 to 2150 (0 pulse to 2150 pulses) Setting Unit : 1 (1 pulse) Default : 1434 (1434 pulses) [ 17 - 20 ] - Rev. 0.2 RZ9 Series...
-
Page 463: Print-Drum / Printing Test Mode
3. From the time the ink sensor detects the ink again, the print drum makes 10 rotations with the Pressure Roller pressing against the print drum. 4. The print drum stops at Position-B. [ 17 - 21 ] - Rev. 0.2 RZ9 Series... - Page 464 Adjusts the angle to detect master on the print drum by master loading sensor. Range : -200 to +100 (-20.0° to +10°) 0940 o o o (+ delays the detection timing)) Setting Unit : 5 (0.5°) Default : 0 (0°) [ 17 - 22 ] - Rev. 0.2 RZ9 Series...
- Page 465 Selects print pressure for printing the proof-read print after each master-making. Description 0949 o o o (Black Ink) 0 : extra light 1: light 2: normal (default) Setting 3: dark 4: extra dark [ 17 - 23 ] - Rev. 0.2 RZ9 Series...
- Page 466 Sets the offset value for the print pressure position. 0975 x x o Range: –500 to +500 (–5000 to +5000 pulses) * (<+> for increased print Setting pressure) Unit: 1 (10 pulses) [ 17 - 24 ] - Rev. 0.2 RZ9 Series...
- Page 467 Unit: 1 (0.1 mm) Default: 0 (0.5 mm) Number of Idling Selection Selection of the print drum rotation quantity table between Japan and Overseas. Description 0978 Range: 0: Japan 1: Overseas (default) Setting [ 17 - 25 ] - Rev. 0.2 RZ9 Series...
-
Page 468: Protected Area Test Mode
Drum Serial Code Entry 2 Description Inputs the last 4 -digits of the print drum serial number 1212 o o o Range : 0 to 9999 Setting Unit : Default : [ 17 - 26 ] - Rev. 0.2 RZ9 Series... - Page 469 16: Flourescence Pink 4: Red 17: Flourescence Orange 1214 o o o 5: Bright Red 18: Orange Setting 6: Riso Federal Blue 19: Flat Gold 7: Purple 20: Hunter Green 8: Riso Marine Red 21: Crimson 9: Burgundy 30: Custom...
- Page 470 Unit : 1 (1 ohm) Default : 1200 (1200 ohm) Range : 1200 to 5920 (1200 ohm to 5920 ohm) Setting Unit : 1 (1 ohm) Default : 1200 (1200 ohm) [ 17 - 28 ] - Rev. 0.2 RZ9 Series...
-
Page 471: Options (Af) Test Mode
02: B4 03: A4 04:A4R 05: B5 06: B5R 07:A5 08: A5R AF Original Size Code 3061 (09:B6* 10: Postcard* 53: Custom*) - * Not detected by Duplex AF Unit. [ 17 - 29 ] - Rev. 0.2 RZ9 Series... - Page 472 Description x x o Selects the original feed action when 1 cycle action is selected by Test Mode. Setting Range: 0: Simplex (default) 1: Duplex 2: Duplex in separate sheets [ 17 - 30 ] - Rev. 0.2 RZ9 Series...
-
Page 473: Options (Job-Separator) Test Mode
Data check Details Dis plays the volum e label, capacity, area used, and available Storage Mem ory Inform ation 3361 s torage area. [ 17 - 31 ] - Rev. 0.2 RZ9 Series... -
Page 474: Options (Linked-Printer) Test Mode
The selection to keep the duplex printing mode activated or to deactivate the mode Description 3579 after the duplex print job is finished on a linked printer. 0: Deactivate Setting 1: Keep activated (default) [ 17 - 32 ] - Rev. 0.2 RZ9 Series... -
Page 475: Options (Auto-Stacker) Test Mode
14. Options (Vendor) Test Mode Data setting 3 5 9 Vender Selection (Japanese machine only) Selection between coin vender or card vender. Description 3770 Range: 0: Coin vender (default) 1: Card vender Setting [ 17 - 33 ] - Rev. 0.2 RZ9 Series... -
Page 476: Multi-Tray Paper Feeder Test Mode
Adjustment of paper buckle in front of Timing Roller for Tray Description No.1 3942 Range: 0 to 99 (0.0 mm to 9.9 mm) Setting Unit: 1 (0.1 mm) Default: 18 (1.8 mm) [ 17 - 34 ] - Rev. 0.2 RZ9 Series... - Page 477 Default: 105 (105%) Joint Paper Separation Sensor ON/OFF ON or OFF selection of drag multi-feed detection by FL Multi 3960 Description Tray-1 pickup sensor. Setting Range: 0: OFF 1: ON (default) [ 17 - 35 ] - Rev. 0.2 RZ9 Series...
- Page 478 CHAPTER 17: TEST MODE DANKA AUSTRALIA PTY. LTD. MEMO [ 17 - 36 ] - Rev. 0.2 RZ9 Series...
- Page 479 8. Replacement of the MTPF PCB ..................18-7 9. Replacement of the SH4F PCB ..................18-7 10. Battery Replacement ....................... 18-7 11. Replacement of the Print drum PCB ................. 18-8 12. Print position adjustment procedures ................18-8 [ 18 - 1 ] - Rev. 0.2 RZ9 Series...
-
Page 480: Machine Setup During The Installation
Set-up wizard is deeply related in providing maximum functionality with the RISO i Quality System benefits. In order to take the maximum advantage of the RISO i Quality System, the [setting of the machine clock] is essential. [ 18 - 2 ] - Rev. 0.2... -
Page 481: Sales Test Mode
0977 Vertical and Horizontal Motion Distance Switching 1201 Standard of Measurement Unit Selection 1229 RLP Mode Enable control 3572 Zero Print Master Making Warning 3579 Link Duplex Print Auto-Repeat 1604 [ 18 - 3 ] - Rev. 0.2 RZ9 Series... -
Page 482: Power-Saving (Low-Power) Mode
Pressing wrong button may cause the Mechanical Control PCB to break. Make sure to press the correct push button for the main motor free-rotation. [SW2] is the correct push button. Do not push [SW1] button. [ 18 - 4 ] - Rev. 0.2 RZ9 Series... -
Page 483: Firmware Downloading Procedure
(6) Start up the machine once again in Test Mode and activate test mode No.126 and check that the version number has upgraded. (7) If error message is displayed, start from the beginning again. [ 18 - 5 ] - Rev. 0.2 RZ9 Series... -
Page 484: Replacement Of The Mechanical Control Pcb
In that case, make sure to input the correct date and time from the user-mode at the very end. < EEPROM > < Mechanical cotrol PCB > < Battery > [ 18 - 6 ] - Rev. 0.2 RZ9 Series... -
Page 485: Replacement Of The Mtpf Pcb
* If the battery is removed from the machine with the machine power OFF, in certain conditions the internal clock of the machine initializes to programmed default and clock adjustment becomes necessary. [ 18 - 7 ] - Rev. 0.2 RZ9 Series... -
Page 486: Replacement Of The Print Drum Pcb
If the machine is equipped with the optional Auto Document Feeder (AF), the test mode adjustment on the AF unit should be made after the adjustments on the FB (flatbed) scanning is made. [ 18 - 8 ] - Rev. 0.2 RZ9 Series... - Page 487 13) Options (2 of 2) ...................... 19-14 14) Multi-Tray Paper Feeder Section (1 of 2) ..............19-15 15) Multi-Tray Paper Feeder Section (2 of 2) ..............19-16 2. Power Supply PCB Fuse List ................... 19-17 [ 19 - 1 ] - Rev. 0.2 RZ9 Series...
- Page 488 Main Unit Area CN24 CN99 CN21 CN23 Paper Ejection Separation fan Master making unit Front Bottom Rear Cover Press solenoid lock solenoid & Drum Safety SW Safety SW Print pressure motor lock solenoid Paper ejection motor Suction fan Read Pulse Motor, Paper Feed Clutch, Paper ejection wing motor Print Positioning Motor, Clamp Motor.
- Page 489 (24V) +24V-C (35V) (35V) DF1B20P (35V) +35V GND(V-TPH) +35V Main Motor +35V GND(V-TPH) GND(V-TPH) Drive Power Wire Harness;M Drive PCB GND(V-TPH) 045-53010-xxx GND(V-TPH) 045-50002-xxx GND(V-TPH) GND(V-TPH) GND(V-TPH) FGND-1 18V-1 GND(V-TPH) To Master Making Unit CN12 FGND-2 18V-2 (page 19-4) Drive Power Wire Harness;M V-TPH(12-24V) V-TPH(12-24V) 045-53010-xxx...
- Page 490 Mini CT38PIN CT3P MASTER MAKING UNIT To Main Motor M.-M. Unit FE30P FE30P 1(A1) GND(5V) Master Making PCB2 Mini CT5P Drive PCB Mechanical +5V (Interrupt) 2(A2) Main Motor FG Sensor (page 19-4) Relay PCB CT3P 045-28001-xxx Control PCB;M 3(A3) +5V (interrupt) +5V (Interrupt) GND(5V) Position-B Sensor...
- Page 491 PAPER FEED TRAY Mini CT9P PF-TRAY-PCB CT3P Paper Feed Mechanical (purple) GND(5V) 024-12602 Relay PCB;M Paper Length (purple) Paper Length Sensor SENSOR Control PCB;M (purple) Sensor 045-50003-xxx 045-50001-xxx Mini CT26P Mini CT26P FE5P FE5P CT3P (purple) GND(5V) +5V (interrupt) (white) Paper Detection 1(A1) GND(5V)
- Page 492 NOTE: Stage Cover Set Sensor & Read Pulse Motor are on the Main Unit wiring diagram (page 19-8). Mechanical Control PCB;M 045-50001-xxx Mini CT4P Mini CT4P (20P Double) +24VA 1(A1) SPARE Scanner Lamp Signal To Main Unit (Scanner Lamp Control Signal Output) (Page 19-8) Mini CT7P Relay PCB...
- Page 493 Mini CT2P To Main Motor drive PCB (page 19-12) CT4P CT4P Panel Mount Mini CT30P Relay Connector Pre-Suction Fan CT14P 1(A1) 2(A2) Pre-Suction Fan +24V-A 3(A3) Pre-Suction Fan GND (24V) Pre-Suction Fan Wire Harness 045-21704-xxx 4(A4) 5(A5) Pre-Suction Fan PWM CT4P 6(A6) Suction Fan +24V-A...
- Page 494 CAUTION: The wire is crossed. Watch the pin locations. Mechanical FB Upper relay connector Control PCB PH11P Mini CT16P CT6P 045-50001-xxx Read Pulse Motor COMMON_A Read Pulse Motor COMMON_B Read Pulse Motor +24V-B Mini CT12P Relay Connector Read Pulse Motor B Read Pulse Motor Mini CT12P Read Pulse Motor /A...
- Page 495 Master Removal Unit Upper Relay Connector MASTER REMOVAL UNIT Mini CT30P Mechanical Control PCB;M 045-50001-xxx CT3P Mini CT15P Mini CT15P Mini CT15P GND(5V) (A15) (A1) GND(5V) Master Compression Master Compression FG Sensor Master Compression FG Sensor SENSOR +5V(G2) +5V(G2) FG Sensor GND(5V) GND(5V) Master Removal Jam Sensor...
- Page 496 PANEL UNIT Mini CT40P (Double Holder) LCD-CTL-PCB SW-PCB-M Mechanical SH4F-PCB CT13P CT13P 023-37138-xxx 045-37001-xxx Control PCB;M GND(5V) Mini CT16P 045-50001-xxx SUB-SW-PCB-M WUP_LED 024-50502-xxx PULL-DOWN /WAKEUP 045-37028-xxx /SLEEP LATCH Mini CT16P Mini CT16P GND(5V) SOUT FE30P GND(5V) /RTS COM0 GND(5V) COM3 COM1 COM2 SEG08...
- Page 497 Bottom Wire Harness R;M 045-53005-xxx HORIZONTAL MOVEMENT UNIT Relay Connector Master Antenna Wire Harness Mini CT20P Mini CT18P Bottom Wire Harness R;M Bottom Wire Harness F;M 023-53003-xxx RF-PCB;3ch 045-53005-xxx 045-53004-xxx Auto-Shut OFF +24V-B CT2P 045-50007-xxx Master-Making Auto-Shut OFF Drum Lock Mini CT8P Mini CT8P Mini CT8P...
- Page 498 Mechanical Power Supply Unit Main Motor Drive PCB;M Control PCB 045-50005-xxx VH8P VH8P GND(24V) 045-50002-xxx Mini CT4P 045-50001-xxx CT4P +24V-C IL-RL GND(35V) GND(35V) CN26 GND(35V) IL- +24V-B +35V +35V Mechanical Control - Main Motor Drive +35V Wire Harness;M 045-53011-xxx Main Motor Drive Power Supply Wire Harness;M 045-53010-xxx Mini CT8P CT10P...
- Page 499 Mechanical Control SH4F-PCB NET-D PCB PCB-M 024-50502-xxx CT15P CT15P FX2BA52P FX2BA52P 045-50001-xxx GND(3.3V) TM2500/5000 1(A1) 27(B1) GND(5V) 2(A2) 28(B2) GND(5V) OPTION-PCB /IRQ 3(A3) 29(B3) 045-50004-xxx RXD-IN 4(A4) GND(5V) 30(B4) 5(A5) 31(B5) +3.3V TXD-OUT 6(A6) 32(B6) /RTS +3.3V 7(A7) 33(B7) /CTS 8(A8) 34(B8) Connection Signal...
- Page 500 Mechanical Control Auto Stacking PCB-M Paper Receiving Tray 045-50001-xxx PH5P AS-Paper Detection Sensor 53253-1010 MI2-8P MI2-8P AF6 Inner Wire Harness AS-Paper Detection GND(5V) SENSOR 045-50200-xxx Sensor AF Wire Harness 1 XH3P GND(5V) 045-22202-xxx Mini CT10P Mini CT10P Mini CT11P WU +5V WU +5V GND(5V) GND(5V)
- Page 501 Relay Connector CT2P MTPF PCB MTPF PCB 045-50006-xxx Relay Connector 045-50006-xxx FL Tray 1 Elevator Motor Mini CT20P Mini CT40P CT5P CT3P 20 (A20) 1 (A1) GND(5V) GND(5V) +24V-C Relay Connector 19 (A19) 2 (A2) FL Tray 1 U-Limit S GND(24V) CT2P FL Tray 1 U-Limit S...
- Page 502 Relay Connector CT4P MTPF PCB CT9P Ground Wire Ground Wire GND(5V) (FL Tray-1 Frame) (FL Tray-1 Table) 045-50006-xxx FL Transfer Motor SENSOR FL Transfer Motor FG Sensor Ground Wire FG Sensor (MTPF Frame) MTPF PCB CT3P MTPF Wire Harness K 045-50006-xxx 045-53016-xxx Mini CT24P...
- Page 503 Nip Release Solenoid 4 FL Tray-1 Elevator Motor FL Tray-2 Elevator Motor FL Transfer Motor FL Multi-Feed Tray Pickup Motor 24 V - OP None (OPTION) 250 V 3.15 A [ 19 - 17 ] - Rev. 0.2 RZ9 Series...
- Page 504 CHAPTER 19: PCBs (WIRING DIAGRAMS) DANKA AUSTRALIA PTY. LTD. MEMO [ 19 - 18 ] - Rev. 0.2 RZ9 Series...
- Page 505 8. Electric parts particular to RZ 9 (3) - Multi-Tray Paper Feed-1 ......... 20-14 9. Electric parts particular to RZ 9 (4) - Multi-Tray Paper Feed-2 ......... 20-16 10. Electric parts particular to RZ 9 (5) - Others ..............20-18 [ 20 - 1 ] - Rev. 0.2 RZ9 Series...
-
Page 506: Motors
CHAPTER 20: ELECTRICAL COMPONENTS DANKA AUSTRALIA PTY. LTD. Motors 2001 2002 [ 20 - 2 ] - Rev. 0.2 RZ9 Series... - Page 507 0901 Master compression motor Drives the Master compression plate. 0493 Master removal motor Drives the Master disposal rollers. 0470 0460 Thermal pressure motor Elevates the TPH up and down. 0461 [ 20 - 3 ] - Rev. 0.2 RZ9 Series...
-
Page 508: Fans, Solenoids, Solenoid Clutches
CHAPTER 20: ELECTRICAL COMPONENTS DANKA AUSTRALIA PTY. LTD. Fans, Solenoids, Solenoid Clutches 2003 2004 [ 20 - 4 ] - Rev. 0.2 RZ9 Series... - Page 509 Up-down motion of the Master stocker guide plate. 0489 Pressure solenoid ON/OFF of the Pressure roller UP/DOWN motion. 0886 Paper feed clutch Drive transfer to the Scraper and Pickup rollers. 0688 [ 20 - 5 ] - Rev. 0.2 RZ9 Series...
-
Page 510: Photoelectric Sensors
CHAPTER 20: ELECTRICAL COMPONENTS DANKA AUSTRALIA PTY. LTD. Photoelectric Sensors 2005 2006 [ 20 - 6 ] - Rev. 0.2 RZ9 Series... - Page 511 (prism) the master cut status. Master detection sensor Reflective Looks for master set in the Master-making unit. 0401 Master end sensor Transmittive Detects the end of the master material. 0402 [ 20 - 7 ] - Rev. 0.2 RZ9 Series...
-
Page 512: Other Sensor, Switches, Volume Dial
CHAPTER 20: ELECTRICAL COMPONENTS DANKA AUSTRALIA PTY. LTD. Other Sensor, Switches, Volume Dial 2007 2008 [ 20 - 8 ] - Rev. 0.2 RZ9 Series... - Page 513 0608 Paper feed tray button Elevates the Paper feed tray up or down by pressing this 0609 Paper feed tray upper safety switch Immediate stop of the Elevator motor. 0607 [ 20 - 9 ] - Rev. 0.2 RZ9 Series...
-
Page 514: Af (Auto-Document Feeder) - Option
Detects if the AF Unit is opened or closed. 3005 3045 AF Guide potentiometer Detects the original size (width). 3046 AF Unit Control PCB PCB to control the AF operation. [ 20 - 10 ] - Rev. 0.2 RZ9 Series... -
Page 515: Electric Parts Particular To Rz 9 (1) - Duplex Af
Transport Motor Drives the transport and exit rollers. 3033 Pick-Up Solenoid Controls the up-down movement of the original table. 3035 Junction Gate Solenoid Opens and closes the junction gate. 3036 [ 20 - 11 ] - Rev. 0.2 RZ9 Series... -
Page 516: Electric Parts Particular To Rz 9 (2) - Auto-Stacking Tray
CHAPTER 20: ELECTRICAL COMPONENTS DANKA AUSTRALIA PTY. LTD. Electric parts particular to RZ 9 (2) - Auto-Stacking Tray 2011 2012 [ 20 - 12 ] - Rev. 0.2 RZ9 Series... - Page 517 Paper guide base SW (Rear) Detects the paper guide(Rear) falling. Paper stopper base SW Detects the paper stopper falling. Paper guide motor Slides the paper guides. Paper stopper motor Slides the paper stopper. [ 20 - 13 ] - Rev. 0.2 RZ9 Series...
-
Page 518: Electric Parts Particular To Rz 9 (3) - Multi-Tray Paper Feed-1
CHAPTER 20: ELECTRICAL COMPONENTS DANKA AUSTRALIA PTY. LTD. Electric parts particular to RZ 9 (3) - Multi-Tray Paper Feed-1 2013 2014 [ 20 - 14 ] - Rev. 0.2 RZ9 Series... - Page 519 Detects whether the pass cover is closed or not. Multi-Tray 1 Paper width potentiometer Detects the paper width of tray 1. Multi-Tray 2 Paper width potentiometer Detects the paper width of tray 2. [ 20 - 15 ] - Rev. 0.2 RZ9 Series...
-
Page 520: Electric Parts Particular To Rz 9 (4) - Multi-Tray Paper Feed-2
CHAPTER 20: ELECTRICAL COMPONENTS DANKA AUSTRALIA PTY. LTD. Electric parts particular to RZ 9 (4) - Multi-Tray Paper Feed-2 2015 2016 [ 20 - 16 ] - Rev. 0.2 RZ9 Series... - Page 521 FL tray-2 upper limit sensor 3812 FL tray-2 paper det. sensor 3813 FL tray-2 paper size sensor 3814 FL tray-2 paper volume sensor 1 3815 FL tray-2 paper volume sensor 2 3816 [ 20 - 17 ] - Rev. 0.2 RZ9 Series...
-
Page 522: Electric Parts Particular To Rz 9 (5) - Others
CHAPTER 20: ELECTRICAL COMPONENTS DANKA AUSTRALIA PTY. LTD. 10. Electric parts particular to RZ 9 (5) - Others 2017 2018 [ 20 - 18 ] - Rev. 0.2 RZ9 Series... - Page 523 Flat bed original size sensor 5 0206 Flat bed original size sensor 6 0207 Flat bed original size sensor 7 0208 Paper volume sensor A 0610 Paper volume sensor B 0611 [ 20 - 19 ] - Rev. 0.2 RZ9 Series...
- Page 524 CHAPTER 20: ELECTRICAL COMPONENTS DANKA AUSTRALIA PTY. LTD. MEMO [ 20 - 20 ] - Rev. 0.2 RZ9 Series...
- Page 525 DANKA AUSTRALIA PTY. LTD. MEMO RZ9 Series...
- Page 526 DANKA AUSTRALIA PTY. LTD. RZ9xx / RV9xx Series Technical Manual (Revision 0.2) Published December 2005 Reproduction and duplication prohibited Edited and published by: Technical Training Center, Riso Kagaku Corporation The contents of this manual are subject to change without notice...
Need help?
Do you have a question about the RZ9 Series and is the answer not in the manual?
Questions and answers