
Related Manuals for Thermo Scientific APEX 100


Summary of Contents for Thermo Scientific APEX 100
-
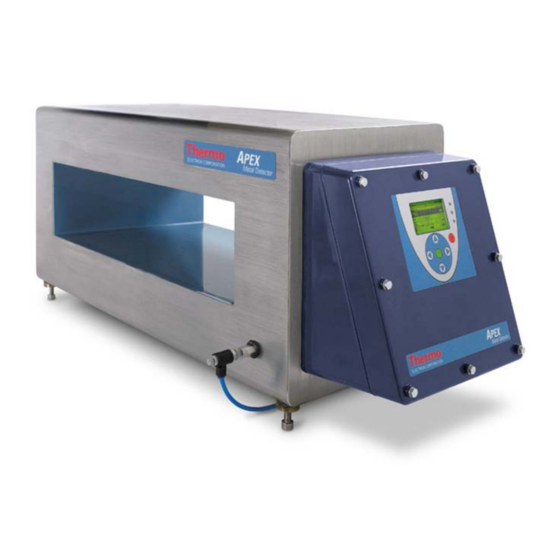
Page 1: Metal Detector
Thermo Scientific APEX Metal Detector User’s Guide REC 4248 Rev K Part number 085381—English... - Page 2 © 2009 Thermo Fisher Scientific, Inc. All rights reserved For future reference, write your APEX serial number below. APEX serial # = __________________________________ Page 2 Thermo Scientific APEX User’s Guide...
-
Page 3: Table Of Contents
Setting the Reject-Duration Time ..............67 Setting Contaminant-Detection Parameters ........69 Establishing a Baseline with No Product Present ..........69 Calibrating the Speed Filter Using a Ferrous Test Ball ........72 Establishing Basic Product Parameters ............73 Thermo Scientific APEX User’s Guide Page 3... - Page 4 Setting the No-Pack Distance ............... 117 Rejects Menu—Page 1 ..............118 Resetting the Counts for Reject 1 ..............118 Setting the Distance to the Reject-1 Device ........... 119 Changing the Units of Measure ..............119 Page 4 Thermo Scientific APEX User’s Guide...
-
Page 5: Thermo Scientific Apex User's Guide Page
Setting Multi-Zone Detection ................ 165 Locking the Detect Level ................166 Calibrating the X and R Noise Thresholds ............166 Changing the Noise Threshold for X .............. 167 Changing the Noise Threshold for R .............. 167 Thermo Scientific APEX User’s Guide Page 5... - Page 6 Error Messages (WAFs) ..............214 Defining Warnings, Alarms, and Faults (WAFs) ..........214 WAFs Are Not Mutually Exclusive ..............215 Setting a WAF for a Particular Function ............215 Learning About Other WAFs ................. 217 Page 6 Thermo Scientific APEX User’s Guide...
-
Page 7: Thermo Scientific Apex User's Guide Page
List of Included Components ................ 272 APEX Specifications ..............272 Theory of Operation ..............276 Definition of Various Product Effects .............. 276 Understanding Some Basic Detector Vocabulary ..........279 Safety Precautions ................ 280 Thermo Scientific APEX User’s Guide Page 7... - Page 8 Understanding the Status LEDs ..............344 Configuring the RTU RS-485 Card ........... 345 Card Schematic ..................345 Installing the Card ..................345 Setting the Configuration Switches ............... 346 Pin Assignments for a DB-9 Connector ............347 Page 8 Thermo Scientific APEX User’s Guide...
-
Page 9: Thermo Scientific Apex User's Guide Page
Using the IXR Detect-Level Calibration Function ..........385 IXR Tracking ....................387 Understanding the IXR Display ............388 Troubleshooting ................391 Glossary ................... 393 Contacting Thermo Fisher Scientific ......... 399 Supplemental Information ............403 Thermo Scientific APEX User’s Guide Page 9... - Page 10 Page 10 Thermo Scientific APEX User’s Guide...
-
Page 11: Getting Started
Getting Started Congratulations on the purchase of your new Thermo Scientific APEX metal detector! The first thing to do is unpack your detector and complete the electrical installation and application-specific mechanical set-up. For instructions on how to do this, go to page 283. -
Page 12: Managing Product-Rejection Parameters
Find the relevant section as follows. • Conveyor applications—Go to the page that follows this one (page 13). • Gravity-feed applications—Go to page 63. • Pipeline applications—Go to page 79. • Pharmaceutical (Rx) applications—Go to page 95. Page 12 Thermo Scientific APEX User’s Guide... -
Page 13: Setting Up Conveyor Applications
Glossary on page 393. For example, the word “product” means anything the detector is testing for the presence of metal contaminants, and is a word you will encounter often in this manual. Let’s get started! Thermo Scientific APEX User’s Guide Page 13... -
Page 14: Understanding Your Detector
• The three (red, green, and yellow) indicator lights • The green Go button • The red Back button • The four blue triangular-shaped navigation buttons The detector’s control panel looks like this. Page 14 Thermo Scientific APEX User’s Guide... -
Page 15: Using The Detector's Buttons
For most people, this to- and-away motion is not intuitive but, with a little practice, you will find this is the best way to activate the detector’s buttons. Thermo Scientific APEX User’s Guide Page 15... -
Page 16: Understanding The Screen Shots Used In This Manual
Use the Back button to back out of any function or menu you are not interested in. Note, too, that pressing the Back button allows you to exit a function without making any changes. Pressing the Back button repeatedly will always take you back to the Main Menu. Page 16 Thermo Scientific APEX User’s Guide... -
Page 17: Understanding The Detector's Main Menu
• French • German • Italian • Spanish • Dutch • Chinese • Czech • Russian • Polish If you want to use a language other than English, follow the instructions below. (continued…) Thermo Scientific APEX User’s Guide Page 17... - Page 18 3) Press the Go button, and page 1 of the system and tools menu appears. Notice the notation “1/5” in the screen above. This tells you that you are currently on page 1 in the system and tools menu, which is five pages long. Page 18 Thermo Scientific APEX User’s Guide...
- Page 19 6) Press the Go button repeatedly to scroll through the available languages, and select the language you want displayed. 7) To exit (and have the detector use the language you chose in Step 6), press the Back button repeatedly until you return to the Main Menu. Thermo Scientific APEX User’s Guide Page 19...
-
Page 20: Clearing The Speed-Filter Warning Screen
1) Make sure the detector’s Main Menu is displayed. 2) Use the navigation buttons to select the system and tools menu. 3) Press the Go button and page 1 of the system and tools menu appears. Page 20 Thermo Scientific APEX User’s Guide... - Page 21 Help Text setting). Notice that descriptive Help Text is now displayed at the top of the screen (and will continue to be displayed until you change this setting). Bargraph and Help Setup 7) Press the Back button repeatedly to return to the Main Menu. Thermo Scientific APEX User’s Guide Page 21...
-
Page 22: Choosing Your Preferred Units Of Measure
3) Press the Go button and page 1 of the system and tools menu appears. System and Tools Page 1 4) Press the down-navigation key and page 2 of the system and tools menu appears. System and Tools Page 2 (continued…) Page 22 Thermo Scientific APEX User’s Guide... - Page 23 (meters, or feet and inches) you prefer to use. 7) To exit (and select the units you chose in Step 6), press the Back button repeatedly until you get back to the Main Menu. Thermo Scientific APEX User’s Guide Page 23...
-
Page 24: Naming The Product
2) Press the Go button and page 1 of the product menu appears. Product Calibrate and Name 3) Navigate to the “Edit Product Name” function and make sure it is highlighted. Edit Product Name Page 24 Thermo Scientific APEX User’s Guide... - Page 25 (as shown by its black highlight). If you change the active key (by using the navigation buttons in the detector’s control panel), the heading in the keyboard screen will change. Thermo Scientific APEX User’s Guide Page 25...
- Page 26 7) Highlight the exit-and-save key (using the navigation buttons on the detector’s control panel), and press the Go button (on the detector’s control panel) to save the name of the product you are testing—in our example, “SALTED BUTTER.” Page 26 Thermo Scientific APEX User’s Guide...
-
Page 27: Setting Up The Conveyor And Photo-Eye
For more information about your setting your preferred units of measure, see page 22. 1) Make sure the detector’s Main Menu is displayed. Product Name 2) Select the product speed menu. Product Speed (continued…) Thermo Scientific APEX User’s Guide Page 27... -
Page 28: Keying In The Photo-Eye-To-Detector Distance
“in-feed” side of the detector) to the in-feed side of the detector’s search head. 2) Make sure the Main Menu is displayed. Product Name 3) Navigate to the system and tools menu. System and Tools Page 28 Thermo Scientific APEX User’s Guide... - Page 29 6) Press the Go button, and page 1 of the “Photo-Eye Distance and Head Width” menu appears. PE distance and head width 7) Press the right-navigation button to select the “In-Feed Photo-Eye Distance” menu. Infeed Photo-Eye Distance Thermo Scientific APEX User’s Guide Page 29...
-
Page 30: Checking The Polarity Of The Photo-Eye Input
1) Follow steps 1–4 in the “Choosing Your Preferred Units of Measure” section on page 22 to get to the menu shown below—page 2 of the system and tools menu. System and Tools Page 2 2) Navigate to the inputs and outputs menu. Input and Outputs Page 30 Thermo Scientific APEX User’s Guide... - Page 31 Look carefully at the “+2” notation in this menu, which tells you two things: • The in-feed photo-eye is connected to Input 2 on the detector’s wiring board. • The input voltage has a positive (+) polarity. Thermo Scientific APEX User’s Guide Page 31...
-
Page 32: Selecting The Correct Photo Registration For Rejects
When testing products longer than six inches, using a photo eye (and the appropriate parameters for the photo-registration function) allows you to accurately reject contaminated products— Page 32 Thermo Scientific APEX User’s Guide... - Page 33 Setting Photo-Registration Parameters 1) Make sure the detector’s Main Menu is displayed. Product Name 2) Navigate to the reject-totals menu. Reject Totals (continued…) Thermo Scientific APEX User’s Guide Page 33...
- Page 34 Reject is triggered by the product’s leading edge. Reject is triggered by the center of the product. This is the recommended setting for conveyor applications. Reject is triggered by the entire length of the product. Page 34 Thermo Scientific APEX User’s Guide...
-
Page 35: Setting Product Parameters
2) Press the Go button and page 1 of the product menu appears. Product Calibrate and Name 3) Press the down-navigation button to highlight page 2, the “Product Shape and Flow” menu. Product Shape and Flow Thermo Scientific APEX User’s Guide Page 35... - Page 36 12.4 centimeters in length, and have keyed in this number into the input screen, as shown below. Pack Length 7) Press the Go button to save your pack-length setting and exit the input screen. Page 36 Thermo Scientific APEX User’s Guide...
-
Page 37: Keying In The No-Pack Distance
12.4 cm for the no-pack distance.) 4) Press the Go button to save your setting and exit the input screen. Thermo Scientific APEX User’s Guide Page 37... -
Page 38: Disabling The Detection No-Pack Function
2) Navigate to the systems and tools menu and make sure it is highlighted. System and Tools 3) Press the Go button and page 1 of the system and tools menu appears. System and Tools Page 1 (continued…) Page 38 Thermo Scientific APEX User’s Guide... - Page 39 7) Navigate to the “detection no-pack” function and make sure it is highlighted. Detection, no-Pack Note that, currently, when the APEX detects a contaminant that is not associated with a package, a fault results—as shown by the presence of the fault symbol in the menu. Thermo Scientific APEX User’s Guide Page 39...
-
Page 40: Keying In The Pack Gap
Pack 1 (the first packet entering the search head), it may be hard for the detector to distinguish whether the contamination is in Pack 1, or the next pack that enters the search head, Pack 2. Page 40 Thermo Scientific APEX User’s Guide... - Page 41 Pack gap Pack rejected when contaminant in the following position (A–F) 100% 1 and 2 1 and 2 1 and 2 1 and 2 1 and 2 1 and 2 1 and 2 Thermo Scientific APEX User’s Guide Page 41...
- Page 42 4) Key in an appropriate value for pack gap. (In our example, we have keyed in a value of 50%.) Pack Gap 5) Press the Go button to save your pack-gap setting and exit the input screen. Page 42 Thermo Scientific APEX User’s Guide...
-
Page 43: Setting Reject Parameters
With this information in hand, you are now ready to key in the needed values. In our salted butter example, we are going to use the following values. • Reject distance = 1.17 meters • Reject-signal duration = 2.02 seconds Thermo Scientific APEX User’s Guide Page 43... -
Page 44: Keying In The Distance To The Reject Device
To do so, press the right-navigation button and highlight the change-units function, as shown below. Reject 1 Distance/Delay Units Page 44 Thermo Scientific APEX User’s Guide... - Page 45 (In our salted butter example, we have entered our reject distance of 1.17 meters.) Reject 1 Distance/Delay 5) Press the Go button to save your settings and exit the input screen. Thermo Scientific APEX User’s Guide Page 45...
-
Page 46: Keying In The Signal Duration For The Reject Device
2.02 seconds.) Reject 1 Duration 4) Press the Go button to save your settings and exit the input screen. 5) Press the Back button repeatedly to return to the Main Menu. Page 46 Thermo Scientific APEX User’s Guide... -
Page 47: Setting Contaminant-Detection Parameters
Now that the conveyor is running and no product is present in the search head, follow the instructions below to calibrate the detector’s settings for the X and R noise thresholds. 1) Make sure the Main Menu is displayed. Product Name (continued…) Thermo Scientific APEX User’s Guide Page 47... - Page 48 4) Press the down-navigation key to select page 2 of the frequency and gain menu. Detection level and Noise 5) Navigate to the “Calibrate Noise Thresholds” menu. (Note: The background of the calibrate function is now highlighted in black.) Calibrate Noise Thresholds Page 48 Thermo Scientific APEX User’s Guide...
- Page 49 “Calibrate Noise Thresholds” menu (shown in step 5) is displayed. Navigate to the appropriate menu (X or R) and press the Go button. An input screen appears, allowing you to manually enter a value. Thermo Scientific APEX User’s Guide Page 49...
-
Page 50: Calibrating The Speed Filter Using A Ferrous Test Stick
Page 50 Thermo Scientific APEX User’s Guide... - Page 51 7) When the calibration is complete, the following screen appears showing the new setting for the speed filter. The value shown in your screen will probably be different because the setting depends on belt speed and aperture size of the search head. Speed Filter Setup Thermo Scientific APEX User’s Guide Page 51...
-
Page 52: Establishing Basic Product Parameters
Before doing a full-product calibration, it is best to set the detector’s frequency and gain settings to high. To do this, follow the instructions below. 1) Make sure the Main Menu is displayed. Product Name Or, like this when IXR is enabled. Product Name (continued…) Page 52 Thermo Scientific APEX User’s Guide... - Page 53 Frequency and Gain 3) Press the Go button and page 1 of the frequency and gain menu appears. Frequency, Gain & Inhibit 4) Press the right-navigation button to highlight the gain menu. Low/High Gain Thermo Scientific APEX User’s Guide Page 53...
- Page 54 Note: If the checkmark is next to the low-frequency icon, press the Go button to select the high-frequency setting. 9) Press the Back button repeatedly to save your settings, exit the menu, and return to the Main Menu. Page 54 Thermo Scientific APEX User’s Guide...
- Page 55 2) Highlight your product name in the Main Menu. (Your screen will look different if IXR is enabled.) Product Name 3) Press the Go button and page 1 of the product menu appears. Product Calibrate and Name (continued…) Thermo Scientific APEX User’s Guide Page 55...
- Page 56 Learn the detect level. • Conduct an AuditCheck, if this optional hardware is installed on your APEX. 5) Press the Go button and the “Performing Full Learn” monitor screen appears. Performing Full Learn (continued…) Page 56 Thermo Scientific APEX User’s Guide...
- Page 57 The APEX software will take you to page 2 of the frequency and gain menu. Follow the directions on page 166 to calibrate the X and R noise thresholds. Then return to the full calibration and continue. Thermo Scientific APEX User’s Guide Page 57...
- Page 58 When this happens, please contact Thermo Fisher Scientific—as described in the “Contacting Thermo Fisher Scientific” section at the end of the manual. Saturation g. Press the Back button to exit the calibration menu. (continued…) Page 58 Thermo Scientific APEX User’s Guide...
- Page 59 53, will be rejected. And, because the phase angle is 2.24 degrees, the detector is monitoring a wet product (in our example, jars of spaghetti sauce). Thermo Scientific APEX User’s Guide Page 59...
-
Page 60: Changing The Current Product
Once you have selected the product you want to change to, press the Go button. The product name-bar stops flashing to show you the product has changed. The APEX will now apply the new product’s settings. The product settings for the new product can now be modified. Page 60 Thermo Scientific APEX User’s Guide... -
Page 61: Set-Up Check List For Conveyor Applications
Distance to the reject device • Signal duration for the reject device Contaminant-Detection Parameters (Set by the Detector’s Calibrate Functions) • X and R noise thresholds • Speed-filter setting • Detect level • Phase-angle setting Thermo Scientific APEX User’s Guide Page 61... -
Page 62: Additional Parameters You May Want To Set Up
For more details, see page 173. Page 62 Thermo Scientific APEX User’s Guide... -
Page 63: Setting Up Gravity-Feed Applications
Glossary on page 393. For example, the word “product” means anything the detector is testing for the presence of metal contaminants, and is a word you will encounter often in this manual. Let’s get started! Thermo Scientific APEX User’s Guide Page 63... - Page 64 The Next Step Now that detour is over, welcome back! You are now ready to set up the specific parameters you will need to run your gravity-feed application. Read on for more details. Page 64 Thermo Scientific APEX User’s Guide...
-
Page 65: Setting Reject Parameters
Once you have set the reject-delay time and reject-duration time parameters, you must test the reject process. Then, if needed, you may want to fine-tune the detector’s response to vibration caused by the gate opening and closing by enabling the reject suppression feature. Thermo Scientific APEX User’s Guide Page 65... -
Page 66: Setting The Reject-Delay Time
For a typical gravity-feed application, key in a value of 0.00 seconds. This allows the reject gate to close immediately, when metallic contaminants are detected. Reject 1 Distance/Delay Page 66 Thermo Scientific APEX User’s Guide... -
Page 67: Setting The Reject-Duration Time
1) From the Main Menu navigate to the rejects menu. Reject Totals 2) Press the Go button and page 1 of the rejects menu appears. Reject 1… 3) Navigate to the reject-1 duration menu shown below. Reject 1 Duration (continued…) Thermo Scientific APEX User’s Guide Page 67... - Page 68 5) Key in a value for the reject-1 duration parameter. For a typical gravity-feed application, key in a value of 1.00. 6) Press the Go button to save your setting. 7) Press the Back button repeatedly to return to the Main Menu. Page 68 Thermo Scientific APEX User’s Guide...
-
Page 69: Setting Contaminant-Detection Parameters
1) Make sure the Main Menu is displayed. Product Name 2) Navigate to the frequency and gain menu. Frequency and Gain Thermo Scientific APEX User’s Guide Page 69... - Page 70 4) Press the down-navigation key to select page 2 of the frequency and gain menu. Detection level and Noise 5) Navigate to the “Calibrate Noise Thresholds” menu. (Note: The background of the calibrate function is now highlighted in black.) Calibrate Noise Thresholds (continued…) Page 70 Thermo Scientific APEX User’s Guide...
- Page 71 “Calibrate Noise Thresholds” menu (shown in step 5) is displayed. Navigate to the appropriate menu (X or R) and press the Go button. An input screen appears, allowing you to manually enter a value. X Threshold Thermo Scientific APEX User’s Guide Page 71...
-
Page 72: Calibrating The Speed Filter Using A Ferrous Test Ball
Speed Filter 3) Press the Go button and the calibrate-filter menu appears. Calibrate Speed Filter 4) Press the Go button and the following monitor screen appears. Pass test stick to calibrate Speed Filter Page 72 Thermo Scientific APEX User’s Guide... -
Page 73: Establishing Basic Product Parameters
To do a full-product calibration, follow the instructions below. 1) Make sure product is falling through the duct. 2) Highlight your product name in the Main Menu. Product Name Or, like this when IXR is enabled. Product Name Thermo Scientific APEX User’s Guide Page 73... - Page 74 • Learn the phase angle • Learn the detect level • Conduct an AuditCheck, if this optional hardware is installed on your APEX. (continued…) Page 74 Thermo Scientific APEX User’s Guide...
- Page 75 The Main Menu screen is now telling you that, once the detector is monitoring your product stream, any contaminated product that exceeds the detect limit of 140, will be rejected. And, because the phase angle is 89.31 degrees, the detector is monitoring a dry product. Thermo Scientific APEX User’s Guide Page 75...
-
Page 76: Set-Up Check List For Gravity-Feed Applications
Product name Reject Parameters • Reject-delay time • Reject-duration time Contaminant-Detection Parameters (Set by the Detector’s Calibrate Functions) • X and R noise thresholds • Speed-filter setting • Detect level • Phase-angle setting Page 76 Thermo Scientific APEX User’s Guide... -
Page 77: Additional Parameters You May Want To Set Up
For more details, see page 173. Thermo Scientific APEX User’s Guide Page 77... - Page 78 Page 78 Thermo Scientific APEX User’s Guide...
-
Page 79: Setting Up Pipeline Applications
Glossary on page 393. For example, the word “product” means anything the detector is testing for the presence of metal contaminants, and is a word you will encounter often in this manual. Let’s get started! Thermo Scientific APEX User’s Guide Page 79... - Page 80 The Next Step Now that detour is over, welcome back! You are now ready to set up the specific parameters you will need to run your pipeline application. Read on for more details. Page 80 Thermo Scientific APEX User’s Guide...
-
Page 81: Setting Reject Parameters
Once you have set the reject-delay time and reject-duration time parameters, you must test the reject process. Then, if needed, you may want to fine-tune the detector’s response to vibration caused by the diverter valve opening and closing by enabling the reject-suppression feature. Thermo Scientific APEX User’s Guide Page 81... -
Page 82: Setting The Reject-Delay Time
For a typical pipeline application, key in a value of 0.00 seconds. This allows the reject gate to close immediately, when metallic contaminants are detected. Reject 1 Distance/Delay Page 82 Thermo Scientific APEX User’s Guide... -
Page 83: Setting The Reject-Duration Time
1) From the Main Menu navigate to the rejects menu. Reject Totals 2) Press the Go button and page 1 of the rejects menu appears. Reject 1… 3) Navigate to the reject-1 duration menu shown below. Reject 1 Duration (continued…) Thermo Scientific APEX User’s Guide Page 83... - Page 84 5) Key in a value for the reject-1 duration parameter. For a typical pipeline application, key in a value of 3.00 seconds. 6) Press the Go button to save your setting. 7) Press the Back button repeatedly to return to the Main Menu. Page 84 Thermo Scientific APEX User’s Guide...
-
Page 85: Setting Contaminant-Detection Parameters
1) Make sure the Main Menu is displayed. Product Name 2) Navigate to the frequency and gain menu. Frequency and Gain Thermo Scientific APEX User’s Guide Page 85... - Page 86 4) Press the down-navigation key to select page 2 of the frequency and gain menu. Detection level and Noise 5) Navigate to the “Calibrate Noise Thresholds” menu. (Note: The background of the calibrate function is now highlighted in black.) Calibrate Noise Thresholds (continued…) Page 86 Thermo Scientific APEX User’s Guide...
- Page 87 “Calibrate Noise Thresholds” menu (shown in step 5) is displayed. Navigate to the appropriate menu (X or R) and press the Go button. An input screen appears, allowing you to manually enter a value. X Threshold Thermo Scientific APEX User’s Guide Page 87...
-
Page 88: Choosing The Appropriate Wide-Band Speed Filter
This is the default setting and is used typically for products flowing from 10 to 75 meters per minute. Slow Product Speed • Speed filter #2—Medium This is used typically for products flowing from 75 to 300 meters per minute. Medium Product Speed Page 88 Thermo Scientific APEX User’s Guide... - Page 89 3) Press the Go button repeatedly to scroll through the speed filter options (slow, medium, and fast) and select the one you want. 4) Press the Back button repeatedly to save your setting and return to the Main Menu. Thermo Scientific APEX User’s Guide Page 89...
-
Page 90: Establishing Basic Product Parameters
2) Highlight your product name in the Main Menu. (Your screen will look different if IXR is enabled.) Product Name 3) Press the Go button and page 1 of the product menu appears. Product Calibrate and Name (continued…) Page 90 Thermo Scientific APEX User’s Guide... - Page 91 Learn the detect level • Conduct an AuditCheck, if this optional hardware is installed on your APEX. 5) Press the Go button and the “Performing Full Learn” monitor screen appears. Performing Full Learn (continued…) Thermo Scientific APEX User’s Guide Page 91...
- Page 92 The Main Menu screen is now telling you that, once the detector is monitoring your product stream, any contaminated product that exceeds the detect level of 202, will be rejected. And, because the phase angle is 1.46 degrees, the detector is monitoring a wet product. Page 92 Thermo Scientific APEX User’s Guide...
-
Page 93: Set-Up Check List For Pipeline Applications
Product name Reject Parameters • Reject-delay time • Reject-duration time Contaminant-Detection Parameters (Set by the Detector’s Calibrate Functions) • X and R noise thresholds • Speed-filter setting • Detect level • Phase-angle setting Thermo Scientific APEX User’s Guide Page 93... -
Page 94: Additional Parameters You May Want To Set Up
For more details, see page 173. Page 94 Thermo Scientific APEX User’s Guide... -
Page 95: Setting Up Pharmaceutical (Rx) Applications
Glossary on page 393. For example, the word “product” means anything the detector is testing for the presence of metal contaminants, and is a word you will encounter often in this manual. Let’s get started! Thermo Scientific APEX User’s Guide Page 95... - Page 96 The Next Step Now that detour is over, welcome back! You are now ready to set up the specific parameters you will need to run your pharmaceutical application. Read on for more details. Page 96 Thermo Scientific APEX User’s Guide...
-
Page 97: Setting Reject Parameters
A typical time for a normal pharmaceutical application is 0.50 seconds. Once you have set the reject-delay time and reject-duration time parameters, you must test the reject process. Thermo Scientific APEX User’s Guide Page 97... -
Page 98: Setting The Reject-Delay Time
For a typical pharmaceutical application, key in a value of 0.00 seconds. This allows the reject gate to close immediately, when metallic contaminants are detected. Reject 1 Distance/Delay Page 98 Thermo Scientific APEX User’s Guide... -
Page 99: Setting The Reject-Duration Time
1) From the Main Menu navigate to the rejects menu. Reject Totals 2) Press the Go button and page 1 of the rejects menu appears. Reject 1… 3) Navigate to the reject-1 duration menu shown below. Reject 1 Duration (continued…) Thermo Scientific APEX User’s Guide Page 99... - Page 100 5) Key in a value for the reject-1 duration parameter. For a typical pharmaceutical application, key in a value of 0.50. 6) Press the Go button to save your setting. 7) Press the Back button repeatedly to return to the Main Menu. Page 100 Thermo Scientific APEX User’s Guide...
-
Page 101: Setting Contaminant-Detection Parameters
1) Make sure the Main Menu is displayed. Product Name 2) Navigate to the frequency and gain menu. Frequency and Gain Thermo Scientific APEX User’s Guide Page 101... - Page 102 4) Press the down-navigation key to select page 2 of the frequency and gain menu. Detection level and Noise 5) Navigate to the “Calibrate Noise Thresholds” menu. (Note: The background of the calibrate function is now highlighted in black.) Calibrate Noise Thresholds (continued…) Page 102 Thermo Scientific APEX User’s Guide...
- Page 103 “Calibrate Noise Thresholds” menu (shown in step 5) is displayed. Navigate to the appropriate menu (X or R) and press the Go button. An input screen appears, allowing you to manually enter a value. X Threshold Thermo Scientific APEX User’s Guide Page 103...
-
Page 104: Choosing The Correct Speed-Filter Settings For The Rx
This is used typically for products flowing at a shallow angle (25°) Slow Product Speed • Speed filter #3—Fast This is used typically for products flowing at a steep angle (45°). Fast Product Speed Page 104 Thermo Scientific APEX User’s Guide... -
Page 105: Establishing Basic Product Parameters
1) Make sure product is falling through the chute. 2) Highlight your product name in the Main Menu. Product Name 3) Press the Go button and page 1 of the product menu appears. Product Calibrate and Name Thermo Scientific APEX User’s Guide Page 105... - Page 106 Learn the detect level • Conduct an AuditCheck, if this optional hardware is installed on your APEX. 5) Press the Go button and the “Performing Full Learn” monitor screen appears. Performing Full Learn (continued…) Page 106 Thermo Scientific APEX User’s Guide...
- Page 107 The Main Menu screen is now telling you that, once the detector is monitoring your product stream, any contaminated product that exceeds the detect level of 64, will be rejected. And, because the phase angle is 91.23 degrees, the detector is monitoring a dry product. Thermo Scientific APEX User’s Guide Page 107...
-
Page 108: Set-Up Check List For Pharmaceutical Applications
Product name Reject Parameters • Reject-delay time • Reject-duration time Contaminant-Detection Parameters (Set by the Detector’s Calibrate Functions) • X and R noise thresholds • Speed-filter setting • Detect level • Phase-angle setting Page 108 Thermo Scientific APEX User’s Guide... -
Page 109: Additional Parameters You May Want To Set Up
For more details, see page 173. Thermo Scientific APEX User’s Guide Page 109... - Page 110 Page 110 Thermo Scientific APEX User’s Guide...
-
Page 111: Apex Menu Structure
Glossary on page 393 for an explanation. Main Menu—Page 1 This is the starting point from which all the detector’s menus and functions are accessed. Product Name See page 24. Product Name Product Speed See page 27. Product Speed Thermo Scientific APEX User’s Guide Page 111... -
Page 112: Reject-Totals Menu
Number of rejects (A) made by the AuditCheck function. Top-left-side number = Total number of rejects (P+A+Q). Top-right-side number = Total number of products assessed. Bottom number = Number of rejects (Q) made by the Quality Test function. Page 112 Thermo Scientific APEX User’s Guide... -
Page 113: Detect Level
(as shown above). Press the Go button and an input screen appears. Key in a value for detect level. Press the Back button to save your setting and exit the menu. Phase-Angle Menu See page 150. Phase Angle Thermo Scientific APEX User’s Guide Page 113... -
Page 114: Peak Signal
24-hour day, a week, and so on. • Monitor the long-term trends in the detector’s signal-to-noise ratio. Frequency and Gain Menu See page 160. Frequency and Gain Page 114 Thermo Scientific APEX User’s Guide... -
Page 115: System And Tools Menu
Page 1 of the Main Menu allows you to do a full product calibration and give the product you are testing a name. 1) Start at the Main Menu. Product Name 2) Press the Go button and navigate to page 1 of the detector’s main sub-menu. Product Calibrate and Name Thermo Scientific APEX User’s Guide Page 115... -
Page 116: Starting A Complete Product Calibration
Edit Product Name Main Sub-Menu—Page 2 1) Start at the Main Menu. Product Name 2) Press the Go button. 3) Navigate to page 2 of the detector’s main sub-menu. Product Shape and Flow Page 116 Thermo Scientific APEX User’s Guide... -
Page 117: Setting The Pack Length
See page 40. (This is used only in conveyor applications with a product photo eye, and in pharmaceutical applications.) Pack Gap Setting the No-Pack Distance See page 37. (This is used only in conveyor applications with a product photo eye, and in pharmaceutical applications.) Detection no-Pack distance Thermo Scientific APEX User’s Guide Page 117... -
Page 118: Rejects Menu
(PE disabled). Please refer to the appropriated section listed below. Resetting the Counts with the PE Enabled See page 119. (This function is used only in conveyor applications with a product photo eye.) Reject Counts Reset Page 118 Thermo Scientific APEX User’s Guide... -
Page 119: Setting The Distance To The Reject-1 Device
See the small screen shot at the top of page 45 and the text at the bottom of page 44. Reject 1 Distance/Delay Setting the Signal Duration for the Reject-1 Device See page 46. Reject 1 Duration Thermo Scientific APEX User’s Guide Page 119... -
Page 120: Displaying The Number Of Quality Test Rejects
(Note: In a real application, when the AuditCheck function has been enabled, the X shown below is replaced by a number.) To learn more about the AuditCheck function, see page 206. AuditCheck Rejects Page 120 Thermo Scientific APEX User’s Guide... -
Page 121: Rejects Menu
3) Navigate to page 2. Reject Registration and Type Setting the Type of Photo Registration Used See page 32. (This function is used only in conveyor applications with a product photo eye.) Photo Registration Thermo Scientific APEX User’s Guide Page 121... -
Page 122: Setting The Latching-Reject Function (Reject 1)
1) Make sure the latching-reject function is highlighted, as shown above. 2) Press the Go button and a check mark appears. The latching-reject function is now active. Latching Reject 3) Press the Back button to exit the function. Page 122 Thermo Scientific APEX User’s Guide... -
Page 123: Inverting The Reject Function (Reject 1)
(In this example, as a precaution, the packets of cereal were tested for the presence of metallic contaminants immediately up-stream, that is, just before the toy was added to the product.) Thermo Scientific APEX User’s Guide Page 123... -
Page 124: Calibrating The Speed-Encoder Function
Thus, you can monitor Product 1 with the speed-encoder parameter enabled, and Product 2 with the parameter disabled. The speed-encoder function is a product-specific parameter. Page 124 Thermo Scientific APEX User’s Guide... - Page 125 2) Go to the product-speed function in the Main Menu, as described on page 27, and key in the reading for maximum belt speed. (We keyed in 100 feet per minute.) Product Speed Thermo Scientific APEX User’s Guide Page 125...
- Page 126 5) When the calibration is completed, the detector displays the following screen. (The value shown in your screen, however, may be different.) Speed Encoder 6) Press the Back button repeatedly to return to the Main Menu. Page 126 Thermo Scientific APEX User’s Guide...
-
Page 127: Understanding The Photo-Queue Pack Count
This allows you to verify that the photo eye is working properly. For example, when product passes the photo eye, the queue-size increases and, as product passes the reject device, the queue-size decreases. Photo Queue Pack Count Thermo Scientific APEX User’s Guide Page 127... -
Page 128: Rejects Menu
1) From the Main Menu, navigate to the rejects menu. Reject Totals 2) Press the Go button and page 1 of the rejects menu appears. Reject 1… 3) Navigate to page 3. Reject Suppression Page 128 Thermo Scientific APEX User’s Guide... -
Page 129: Suppressing Rejection Using An External Trigger (Reject 1)
Suppression External Trigger 2) Press the Go button and a check mark appears. The suppress-rejection external trigger function is now enabled. Suppression External Trigger 3) Press the Back button to exit the menu. Thermo Scientific APEX User’s Guide Page 129... -
Page 130: Activating Reject Suppression (Reject 1)
To prevent this occurring, any reject signal from the detector is suppressed for a period of time—in our example, 3.0 seconds—after contamination is first detected. Page 130 Thermo Scientific APEX User’s Guide... -
Page 131: Activating Reject Suppression (Reject 1)
2) Press the Go button and page 1 of the rejects menu appears. Reject 1… 3) Navigate to page 3 of the rejects menu. Reject Suppression 4) Navigate to the reject-trigger function. Suppression Reject Trigger (continued…) Thermo Scientific APEX User’s Guide Page 131... -
Page 132: Setting Suppression Time (Reject 1)
To enable the suppression-time function, do the following. 1) From the Main Menu navigate to the rejects menu. Reject Totals 2) Press the Go button and page 1 of the rejects menu appears. Reject 1… (continued…) Page 132 Thermo Scientific APEX User’s Guide... - Page 133 (in seconds and hundredths of a second). In our example, we accepted the current suppression time of 3.00 seconds. Suppression Time 6) Press the Go button to save your setting and exit the menu. Thermo Scientific APEX User’s Guide Page 133...
-
Page 134: Setting Amplitude Suppression (Reject 1)
1) Follow steps 1–3 in the section above to get to page 3 of the rejects menu. Reject Suppression 2) Navigate to the amplitude-suppression function and make sure it is highlighted. Suppression Amplitude (continued…) Page 134 Thermo Scientific APEX User’s Guide... - Page 135 (In the example below, we settled on a value of 75% after several tests under normal operating conditions at our facility.) Suppression Amplitude 5) Press the Go button to save your setting and exit the menu. Thermo Scientific APEX User’s Guide Page 135...
-
Page 136: Rejects Menu
1) From the Main Menu, navigate to the rejects menu. Reject Totals 2) Press the Go button and page 1 of the rejects menu appears. Reject 1… 3) Navigate to page 4. Reject Confirm Page 136 Thermo Scientific APEX User’s Guide... -
Page 137: Calibrating Reject-Confirm Times
The auto calibration, however, works whether you have one or two reject-confirmation sensors active. To calibrate the reject-confirmation process, do the following. 1) Make sure the calibration menu is highlighted. Calibrate Reject Confirm Time Thermo Scientific APEX User’s Guide Page 137... -
Page 138: Manually Setting The Timing For A Reject-1 Confirm
If a reject does not occur within this time window, the detector issues a warning, alarm, or fault that notifies you an error has occurred during the reject process. Reject 1 Confirm Time 1) Make sure the reject-confirm function is highlighted, as shown above. (continued…) Page 138 Thermo Scientific APEX User’s Guide... -
Page 139: Manually Setting The Timing For A Reject-1 Complete
(not stuck halfway open or closed). During a normal reject cycle, the gate first opens, then closes—actions that the reject-complete function verifies has occurred. However, if the gate gets stuck half-way open or closed during the reject Thermo Scientific APEX User’s Guide Page 139... - Page 140 4) Key in an appropriate time window (in seconds and hundredths of a second) in which the reject must occur. Typically the calibration function will set the appropriate value and no manual adjustment is necessary. 5) Press the Go button to save your setting and exit the menu. Page 140 Thermo Scientific APEX User’s Guide...
-
Page 141: Rejects Menu
1) From the Main Menu, navigate to the rejects menu. Reject Totals 2) Press the Go button and page 1 of the rejects menu appears. Reject… 3) Navigate to page 5. Reject 2 Distance and Duration Thermo Scientific APEX User’s Guide Page 141... -
Page 142: Keying In The Distance To The Reject-2 Device
45 and the text at the bottom of page 44. Reject 2 Distance/Delay Units Keying In the Signal Duration for the Reject-2 Device This is set up in exactly the same way as the reject-1 device. See page 46. Reject 2 Duration Page 142 Thermo Scientific APEX User’s Guide... -
Page 143: Assigning Tasks To The Reject-2 Device
3) Press the Back button to activate your reject-2 device and exit the menu. Enabling AuditCheck and Quality Test Rejects Using the Reject-2 Device For more details, see the AuditCheck section (page 206) and the Quality Test section (page 196). Thermo Scientific APEX User’s Guide Page 143... -
Page 144: Setting The Latching-Reject Function For Reject 2
This is set up in exactly the same way as the reject-1 device. See page 122. Latching Reject Inverting the Reject Function for Reject 2 This is set up in exactly the same way as the reject-1 device. See page 123. Inverting Reject Page 144 Thermo Scientific APEX User’s Guide... -
Page 145: Rejects Menu
Entering a Reject-Confirm Time for the Reject-2 Device To enter a reject-confirm time for your reject-2 device, do the following. 1) From the Main Menu, navigate to the rejects menu. Reject Totals (continued…) Thermo Scientific APEX User’s Guide Page 145... - Page 146 5) Press the Go button and an input screen appears. Enter the appropriate time interval. In the example below, we entered 0.5 seconds. Reject 2 Confirm Time 6) Press the Go button to save your setting and exit the menu. Page 146 Thermo Scientific APEX User’s Guide...
-
Page 147: Calibrating The Reject-2 Confirm Time
Turn your reject-1 device back on, which is a critical step! (Described below.) Calibration Procedure To calibrate the reject-2 confirm time, do the following. 1) Navigate to page 5 of the rejects menu, and highlight the “Reject 2 Contaminant” menu. Reject 2 Contaminant (continued…) Thermo Scientific APEX User’s Guide Page 147... - Page 148 6) Pass a contaminated package, so the reject-2 device can reject it, allowing the APEX to set the reject-2 confirm time. When the calibration is complete the APEX closes this screen and displays the appropriate reject-2 confirm time. (continued…) Page 148 Thermo Scientific APEX User’s Guide...
- Page 149 For example, if the reject-2 confirm input is set to –3, the voltage on the input cannot be zero volts until after the reject-2 device has fired. • So, change the polarity, highlight the reject-2 confirm-time calibrate icon, then press the Go button to redo the calibration. Thermo Scientific APEX User’s Guide Page 149...
-
Page 150: Phase Angle
1) From the Main Menu, use the navigation buttons to select the phase-angle menu. Phase Angle 2) Press the Go button and page 1 of the phase-angle menu appears. Phase Angle and Tracking Page 150 Thermo Scientific APEX User’s Guide... -
Page 151: Calibrating The Phase-Angle Setting
Pass Product to Calibrate Phase Angle 3) Pass the product through the search head. When the green indicator light in the control panel flashes or stays on, the phase-angle setting in the screen above has been updated. Thermo Scientific APEX User’s Guide Page 151... -
Page 152: Locking The Phase-Angle Setting
1) Make sure the padlock icon is highlighted. 2) Press the Go button and the X changes to a check mark—indicating the phase-angle setting is now locked. Phase Angle Lock 3) Press the Back button to exit the menu. Page 152 Thermo Scientific APEX User’s Guide... -
Page 153: Enabling The Detector's Phase-Tracking Function
(the default or user-defined “acceptable change” limit), it accepts the value and updates the running average. However, if the running average exceeds the phase- tracking fault limits, the detector notifies you a fault has occurred. Thermo Scientific APEX User’s Guide Page 153... - Page 154 2) Press the Go button and a check mark appears, verifying phase tracking is now enabled. Phase Tracking 3) To set “acceptable change” and “unacceptable change” limits for the phase-tracking function, see the next two sections. Page 154 Thermo Scientific APEX User’s Guide...
-
Page 155: Setting Acceptable Limits For Phase Tracking
3) Key in your new setting for an acceptable change in phase angle (in degrees and hundredths of a degree). 4) Press the Go button to save your setting and exit the menu. Thermo Scientific APEX User’s Guide Page 155... -
Page 156: Setting Limits For A Phase-Tracking Fault Notification
3) Key in a value (in degrees and hundredths of a degree) for an “unacceptable change” fault notification to occur. 4) Press the Go button to save your setting. 5) Press the Back button to exit the menu. Page 156 Thermo Scientific APEX User’s Guide... -
Page 157: Phase Angle
The CLX filter can be used in conjunction with the PNR and QNR filters, if needed. Use this filter only for wet products! Wet Application Noise Filter Please note the “0x” notation in the screen above. This tells you that, currently, the CLX filter is not active. Thermo Scientific APEX User’s Guide Page 157... -
Page 158: Selecting The Phased-Noise Reduction Filter
The PNR filter can be used in conjunction with the CLX and QNR filters, if needed. Phased Noise Reduction Page 158 Thermo Scientific APEX User’s Guide... -
Page 159: Selecting The Quadrature Noise-Reduction Filter
1) Make sure the QNR filter menu is highlighted, as shown above. 2) Press the Go button and the X changes to a check mark. Quadrature Noise Reduction 3) Press the Back button to exit the menu. The QNR filter is now on. Thermo Scientific APEX User’s Guide Page 159... -
Page 160: Frequency And Gain
Accessing the Frequency and Gain Menu To access the frequency and gain menu, do the following. 1) From the Main Menu, use the navigation buttons to select the frequency and gain menu. Frequency and Gain (continued…) Page 160 Thermo Scientific APEX User’s Guide... -
Page 161: Setting High Or Low Frequency
As indicated in the figure below, the detector is currently set on high frequency. Low/High Frequency 1) To change to low frequency, press the Go button and a check mark appears next to the low-frequency icon (and an X appears next to the high-frequency icon). Thermo Scientific APEX User’s Guide Page 161... -
Page 162: Setting High Or Low Gain
Detection Inhibit 1) To inhibit the reject signal, press the Go button and the X changes to a check mark. 2) Press the Back button to save your setting and exit the menu. Page 162 Thermo Scientific APEX User’s Guide... -
Page 163: Frequency And Gain
To calibrate only the detect level (typically used in a conveyor application), do the following. 1) Turn the conveyor on and have some samples of uncontaminated (metal-free) product ready to pass through the search head. (continued…) Thermo Scientific APEX User’s Guide Page 163... -
Page 164: Changing The Detect Level
Main Menu’s auto-calibration function. This menu allows you to key in a new value for the detect level. Detect Level 1) Make sure the detect-level menu is highlighted, as shown above. (continued…) Page 164 Thermo Scientific APEX User’s Guide... -
Page 165: Setting Multi-Zone Detection
1) To allow the detector to tag contamination using only one peak, press the Go button and an X appears next to the letters, MZ. 2) Press the Back button to save this “one peak to verify contamination” setting and exit the menu. Thermo Scientific APEX User’s Guide Page 165... -
Page 166: Locking The Detect Level
3) Press the Go button and a monitor screen appears. 4) Wait for the calibration function to finish. (The detector will close the menu and assign values for the X and R noise thresholds.) Page 166 Thermo Scientific APEX User’s Guide... -
Page 167: Changing The Noise Threshold For X
2) Press the Go button and an input screen appears. 3) Key in a new setting for the R noise threshold. 4) Press the Go button to save your setting. 5) Press the Back button to exit the menu. Thermo Scientific APEX User’s Guide Page 167... -
Page 168: System And Tools
System and Tools 2) Press the Go button and page 1 of the system and tools menu appears. System and Tools Page 1 Quality Test See page 196. Quality Test AuditCheck See page 206. AuditCheck Page 168 Thermo Scientific APEX User’s Guide... -
Page 169: Error Messages (Wafs)
Enter your password. Then highlight the exit-and-save key, press the Go button, and printing starts.) Manual Print Bar-Graph/Help-Text Set-Up for the Display Panel See page 20. Bargraph and Help Setup IntelliTrack (IXR) See page 367. IntelliTrack XR Menu Thermo Scientific APEX User’s Guide Page 169... -
Page 170: System And Tools
Speed Filter Calibrating the Speed Filter The speed-filter calibration process differs, depending on which type of application you are running—conveyor, gravity-feed, pipeline, or pharmaceutical. 1) Make sure the speed-filter menu is highlighted. Speed Filter Page 170 Thermo Scientific APEX User’s Guide... - Page 171 Speed Filter Frequency Shown below is a typical narrow-band filter screen. Your screen, however, may look different, depending on the type of application you are running—conveyor, gravity-feed, pipeline, or pharmaceutical. Speed Filter Frequency Thermo Scientific APEX User’s Guide Page 171...
-
Page 172: Inputs And Outputs Menu
• One customizable wide-band speed filter (SF-WB band #4). • A finite impulse-response (FIR) filter. • Access to all other speed-filter settings. Inputs and Outputs Menu See page 220. Inputs and Outputs Page 172 Thermo Scientific APEX User’s Guide... -
Page 173: Copying And Pasting Product Parameters
2) Currently you are testing the output from the morning (a.m.) shift, so your Main Menu and detector settings look like this. Product Name 3) Navigate to the copy-product function and make sure it is highlighted. Copy Product Thermo Scientific APEX User’s Guide Page 173... - Page 174 Notice that the detect-level and phase-angle settings are currently set to their default values of 40 and 90. 7) Navigate to the paste-product function. Paste Product 8) Press the Go button and the following confirmation screen appears. Decline (continued…) Page 174 Thermo Scientific APEX User’s Guide...
- Page 175 All “MILK—A.M. SHIFT” parameters have now been copied to the “MILK—P.M. SHIFT.” Clearly, by using copy and paste, you have made a substantial saving in time and effort in comparison to the alternative—re-entering the product parameters, re-running the calibrations, and so on. Thermo Scientific APEX User’s Guide Page 175...
-
Page 176: Setting The Time And Date
Date & Time Setting the Correct Time 1) Press the right-navigation button to highlight the time function. (The figures in your display panel will differ from the example shown below.) Time, 24 hour format (continued…) Page 176 Thermo Scientific APEX User’s Guide... - Page 177 13 hours, 40 minutes, and 24 seconds.) 4) Press the Go button to save your setting and exit the menu. Setting the Correct Date 1) Follow the instructions above to navigate to the date function. Date, YYYY/MM/DD (continued…) Thermo Scientific APEX User’s Guide Page 177...
-
Page 178: Setting Metric Or Imperial Units
28 February, 2008—please be careful keying in these numbers. 4) Press the Go button to save your setting and exit the menu. Setting Metric or Imperial Units See page 22. Metric/Imperial Units Page 178 Thermo Scientific APEX User’s Guide... -
Page 179: System And Tools
2) Press the Go button and page 1 of the system and tools menu appears. Press the down-navigation button to get to page 3. System and Tools Page 3 Setting the Photo-Eye-to-Detector Distance See page 28. (This function is used only in conveyor applications.) PE distance… Thermo Scientific APEX User’s Guide Page 179... -
Page 180: Setting Reject Duration (Time Or Distance) For Your Reject Devices
Please note that, in a conveyor system that is setup to stop the conveyor if there is a reject, this will never expire using a distance-based reject duration, because the belt is stopped and there are no encoder pulses. Reject Settings Page 180 Thermo Scientific APEX User’s Guide... - Page 181 (reject-1 and reject-2) using time units, as shown by the check mark beside the clock icons. 3) Highlight the reject-1 menu or the reject-2 menu—as appropriate to your situation. (In the screen below, the reject-1 menu is highlighted.) Reject 1 Duration – Time (continued…) Thermo Scientific APEX User’s Guide Page 181...
-
Page 182: Setting The "Reject Packs During Learn" Function
Reject Packs During Learn 2) Press the Go button. A checkmark appears, showing this function is now enabled. Reject Packs During Learn 3) Press the Back button to save your setting and exit the menu. Page 182 Thermo Scientific APEX User’s Guide... -
Page 183: Resetting The Counts When Products Change
1) Make sure the statistics settings menu is highlighted, as shown above. 2) Press the Go button and the following menu appears. Statistics Settings 3) Press the right-navigation button to highlight the reset-counts menu. Reset Counts on Product Change (continued…) Thermo Scientific APEX User’s Guide Page 183... -
Page 184: Resetting Product Parameters To The Default Settings
You have been testing three products recently (named “SALTED BUTTER”, “ICE CREAM”, and “MILK”), and now want to reset the product parameters for “MILK” to the detector’s defaults settings. (continued…) Page 184 Thermo Scientific APEX User’s Guide... - Page 185 2) Navigate to the reset-product-parameters function and make sure it is highlighted. 3) Press the Go button and a confirmation screen appears. Decline 4) Press the left-navigation button to select the “Accept” check mark. Accept (continued…) Thermo Scientific APEX User’s Guide Page 185...
-
Page 186: Resetting The Nvram Parameters To The Default Settings
3) Type in your supervisor password. If you have not assigned a unique password to yourself, you should use the default password “SUPE” here (that is, enter only the four upper-case letters, SUPE). 4) In the keyboard screen, highlight the exit-and-save key. (continued…) Page 186 Thermo Scientific APEX User’s Guide... -
Page 187: Oscilloscope
“signal path.” Oscilloscope Navigating to the Oscilloscope Function 1) From the Main Menu navigate to the system and tools menu. System and Tools (continued…) Thermo Scientific APEX User’s Guide Page 187... - Page 188 Currently, neither analog signal channel has been assigned but, in the example below, you will learn how to assign the X-input signal to Channel 1 and the R-input signal to Channel 2. Page 188 Thermo Scientific APEX User’s Guide...
- Page 189 2) Press the Go button and page 1 of the scope-configuration menu appears. Scope Configuration 1/2 3) Press the down-navigation button repeated until page 2 of the scope-configuration menu appears, as shown below. Scope Configuration 2/2 Thermo Scientific APEX User’s Guide Page 189...
- Page 190 However, if you need additional help understanding or using any of the oscilloscope’s functions, please contact Thermo Fisher Scientific—as described in the “Contacting Thermo Fisher Scientific” section at the end of the manual. Page 190 Thermo Scientific APEX User’s Guide...
- Page 191 DETECTION” and tells the oscilloscope to wait until a signal is detected, and then freeze the display, so the signal does not scroll off the screen. Thus, when using this function, the screen is static, making captured signals easy to see and study. Thermo Scientific APEX User’s Guide Page 191...
-
Page 192: System And Tools
2) Press the Go button and page 1 of the system and tools menu appears. Press the down-navigation button to get to page 4. System and Tools Page 4 Selecting the Language for the Display Panel’s Help Text See page 17. Language Page 192 Thermo Scientific APEX User’s Guide... -
Page 193: System And Tools
2) Press the Go button and page 1 of the system and tools menu appears. Press the down-navigation button to get to page 5. System and Tools Page 4 Displaying Your Software Version This screen displays the current version of the software you are using. Software Version Thermo Scientific APEX User’s Guide Page 193... -
Page 194: Displaying Your Apex Model Type
To display your system set-up code, do the following. 1) Make sure the system set-up code function is highlighted. 2) Press the Go button, and a display screen appears showing a code similar to the example below. System Setup Code Page 194 Thermo Scientific APEX User’s Guide... -
Page 195: Displaying Your Product Set-Up Code
2) Press the Go button, and a display screen appears showing a code similar to the example below. Product Setup Code 3) Make a note of the character stream, then press the Back button to exit the screen. Thermo Scientific APEX User’s Guide Page 195... -
Page 196: Quality Test
2) Press the Go button and page 1 of the system and tools menu appears. System and Tools Page 1 3) Navigate to the Quality Test function and make sure it is highlighted. Quality Test Page 196 Thermo Scientific APEX User’s Guide... -
Page 197: Overview Of How The Quality Test Function Works
• Assign the reject device (Reject 1 or Reject 2) used to remove contaminated test products from the conveyor during the QA test. The default setting is to use the Reject-1 device. Thermo Scientific APEX User’s Guide Page 197... -
Page 198: Testing The Detector Using Qa Test Samples
2) Press the Go button and page 1 of the quality-assurance-test (QAT) menu appears. QA Test – Calibrate test samples This screen shows icons representing the three test samples (Sample A, Sample B, and Sample C) that you will use during the testing process. (continued…) Page 198 Thermo Scientific APEX User’s Guide... - Page 199 (in this example = 1). In addition, the average peak-signal value is also updated (in this example = 1150) as well as the average phase-angle value (in this example = 65.00). (continued…) Thermo Scientific APEX User’s Guide Page 199...
-
Page 200: Setting The Time Interval Between Qa Tests
QA Test – calibrate… Note: The detector’s display panel will show actual values, not zeros. 2) Press the down-navigation button and page 2 of the quality-test menu appears. QA Test – Timers and Reject (continued…) Page 200 Thermo Scientific APEX User’s Guide... -
Page 201: Setting The Time Window For Doing A Qa Test
3) Press the Go button to save your setting and exit the menu. Thermo Scientific APEX User’s Guide Page 201... -
Page 202: Setting The Reject Device Used For The Qa Test
3) When the option you want is shown in the screen, press the Back button to save your selection and exit the menu. (We have chosen to use our reject-1 device for our quality testing.) Reject Device Page 202 Thermo Scientific APEX User’s Guide... -
Page 203: Doing A Manual Qa Test
2) Press the Go button and the following screen appears. Pass QA Test packs in sequence 3) Pass your quality test samples through the search head. 4) The detector will exit the menu when the test is complete. Thermo Scientific APEX User’s Guide Page 203... -
Page 204: Setting Limits For Peak Signal And Phase Angle
QA Test – Warning, Alarm, Fault The icons in this screen are as follows. Icon Description Peak-signal icon Phase-angle icon Warning icon Alarm icon Fault icon For more information on warnings, alarms, and faults (WAFs), see page 214. Page 204 Thermo Scientific APEX User’s Guide... - Page 205 Note that for a warning, alarm, or fault (WAF) to occur, the appropriate external devices must be connected to the detector’s wiring board, and the WAF devices assigned to the appropriate output (Output 1–6). For more information, see pages 232 and 290. Thermo Scientific APEX User’s Guide Page 205...
-
Page 206: Auditcheck
1) From the Main Menu navigate to the system and tools menu. System and Tools 2) Press the Go button and page 1 of the system and tools menu appears. System and Tools Page 1 Page 206 Thermo Scientific APEX User’s Guide... -
Page 207: Performing An Auditcheck Test
3) Press the Go button and, if the photo-registration function is disabled, the shuttle will fire immediately. However, if the photo-registration function is enabled, the shuttle will wait until the next package enters the search head, then fire. Thermo Scientific APEX User’s Guide Page 207... -
Page 208: Displaying The Average Phase Angle
Average Peak Setting the Lock-Values Function This function locks the AuditCheck phase-angle and peak-signal values, so they cannot be changed when running the detector’s auto-calibration function. AuditCheck Lock (continued...) Page 208 Thermo Scientific APEX User’s Guide... -
Page 209: Setting Manual-Start, Timing-Limits, And Reject-Device Parameters
Quality Test section, starting on page 196—so please refer to the appropriate sections in the Quality Test write-up for detailed instructions, as the Timing-Limits, and Reject Device Parameters are very similar for AuditCheck and the Quality Test function. AuditCheck – Timers and Reject (continued…) Thermo Scientific APEX User’s Guide Page 209... -
Page 210: Setting Limits For Peak Signal And Phase Angle
Setting the AuditCheck Overhang Distance This function allows the filter delay to be accurately tracked, when an AuditCheck test is performed. 1) Navigate to page 4 of the AuditCheck menu. AuditCheck - Setup Page 210 Thermo Scientific APEX User’s Guide... -
Page 211: Setting The Auditcheck Pulse Length
(60 * Search-Head Width) + (2 * Overhang Distance) Pulse Length (ms) = Product Speed Where: Search-Head Width is in mm, Overhang Distance is in mm, and Product Speed is in m/min. Thermo Scientific APEX User’s Guide Page 211... -
Page 212: Setting The Auditcheck Signal Time-Out
AuditCheck tube, plus the speed-filter delay. However, if the internally generated signal time-out pulse—for some reason— does not give the exact result you want, you can manually enter a value. Page 212 Thermo Scientific APEX User’s Guide... - Page 213 3) Press the Go button and an input screen appears. AuditCheck Signal Timeout 4) Key in your signal time-out in milliseconds. 5) Press the Go button to save your setting and exit the function. Thermo Scientific APEX User’s Guide Page 213...
-
Page 214: Error Messages (Wafs)
1) From the Main Menu, navigate to the system and tools menu. System and Tools 2) Press the Go button and page 1 of the systems and tools menu appears. System and Tools Page 1 Page 214 Thermo Scientific APEX User’s Guide... -
Page 215: Wafs Are Not Mutually Exclusive
(or other error-notification device of your choice) to the default alarm output—Output 5—on the detector’s output-wiring board. 1) Make sure the WAF menu is highlighted. Warnings, Alarms & Faults Thermo Scientific APEX User’s Guide Page 215... - Page 216 5) Now, in our example, when the reject bin is full, the detector lights the small red lamp you connected to Output 5. This alarm notifies you the reject bin is full. Page 216 Thermo Scientific APEX User’s Guide...
-
Page 217: Learning About Other Wafs
This function allows you to set up a WAF (in this example, an alarm), when an excessive number of consecutive rejects occur. (To key in parameters for the excess rejects function, see page 4 of the WAF menu below.) Thermo Scientific APEX User’s Guide Page 217... - Page 218 The battery attached to the detector’s CPU is getting low and needs to be replaced. • The detector’s CPU memory has been corrupted and should be reset to its factory defaults. See page 186 for details. Page 218 Thermo Scientific APEX User’s Guide...
- Page 219 Navigate to the relevant number in this menu, press the Go button, and an input screen appears. Key in your new setting and press the Back button to save your setting and exit. Thermo Scientific APEX User’s Guide Page 219...
-
Page 220: Inputs And Outputs
1) From the Main Menu navigate to the system and tools menu. System and Tools 2) Press the Go button and page 1 of the systems and tools menu appears. System and Tools Page 1 Page 220 Thermo Scientific APEX User’s Guide... - Page 221 For more information Inputs— See the section following this one (page 222) Outputs— See page 232 Printer set-up— See page 238 Communications See page 319 (Icon only appears, if the set-up— communications option is installed.) Thermo Scientific APEX User’s Guide Page 221...
-
Page 222: Inputs
To navigate to page 1 of the inputs menu, do the following. 1) Follow steps 1–4 in the “Inputs and Outputs” section above (pages 220–21). 2) Press the right-navigation button to highlight the inputs menu. Inputs (continued…) Page 222 Thermo Scientific APEX User’s Guide... -
Page 223: Viewing The Speed-Encoder Input
1) Press the Go button and an input screen appears. 2) Make the appropriate assignments for input (Input 1–6) and polarity (+ or –). 3) Press the Go button to save your settings. 4) Press the Back button to exit the menu. Thermo Scientific APEX User’s Guide Page 223... -
Page 224: Assigning The Input For The Reject-Confirm-1 Photo Eye (Reject 1)
1) Press the Go button and an input screen appears. 2) Make the appropriate assignments for input (Input 1–6) and polarity (+ or –). 3) Press the Go button to save your settings. 4) Press the Back button to exit the menu. Page 224 Thermo Scientific APEX User’s Guide... -
Page 225: Inputs
Input Setup 4) Press the down-navigation button and page 2 appears. Input Setup Note: The zeros in the screen above indicate that, currently, no inputs have been assigned for any of these functions. Thermo Scientific APEX User’s Guide Page 225... -
Page 226: Using An External Device To Switch Products
No change False False Product 1 True False Product 2 False True Product 3 True True Note: A product-select input that is not assigned (input = 0), will always be treated as false. Page 226 Thermo Scientific APEX User’s Guide... -
Page 227: Setting The Product-Select Inputs
Select an input number and a polarity for these inputs. The polarity will determine whether the input is true when the input voltage is positive. Thermo Scientific APEX User’s Guide Page 227... -
Page 228: Locking The Detector's Key Pad
1) Press the Go button and an input screen appears. 2) Make the appropriate assignments for input (Input 1–6) and polarity (+ or –). 3) Press the Go button to save your settings. 4) Press the Back button to exit the menu. Page 228 Thermo Scientific APEX User’s Guide... -
Page 229: Inputs
2) Press the right-navigation button to highlight the inputs menu. Inputs 3) Press the Go button and page 1 of the inputs menu appears. Input Setup 4) Press the down-navigation button twice and page 3 appears. Input Setup Thermo Scientific APEX User’s Guide Page 229... -
Page 230: Assigning The Input For Verification Of A Reject Using Photo-Eye 2
1) Press the Go button and an input screen appears. 2) Make the appropriate assignments for input (Input 1–6) and polarity (+ or –). 3) Press the Go button to save your settings. 4) Press the Back button to exit the menu. Page 230 Thermo Scientific APEX User’s Guide... -
Page 231: Clearing All Waf Inputs
1) Press the Go button and an input screen appears. 2) Make the appropriate positive (+) assignments for the input (Input 1–6). 3) Press the Go button to save your settings. 4) Press the Back button to exit the menu. Thermo Scientific APEX User’s Guide Page 231... -
Page 232: Outputs
To navigate to the outputs menu, do the following. 1) Follow steps 1–4 in the “Inputs and Outputs” section above (pages 220–21). 2) Press the right-navigation button to highlight the outputs menu. Outputs (continued…) Page 232 Thermo Scientific APEX User’s Guide... - Page 233 (where all polarities are currently set to plus), and below are shown the default logical (software-based) assignments for these output devices. Because all of these assignments (polarity/device) are logical, they can be changed by you, the user. How you do this is described in the following section. Thermo Scientific APEX User’s Guide Page 233...
- Page 234 This screen warns you that no output has been assigned. Output Unassigned • Reject-2 Screen This screen allows you to assign a physical output (Output 1–6) for the logical output, reject-2. Reject 2 Output Page 234 Thermo Scientific APEX User’s Guide...
-
Page 235: Changing The Assignment Of An Output Device
4) Press the left-navigation button to select the X (to un-assign the reject device from Output 1), and press the Go button. The detector returns you to the original output screen, which now looks like this. Output 1 Function Thermo Scientific APEX User’s Guide Page 235... -
Page 236: Changing The Polarity Of An Output Device
Output 1 on the detector’s wiring board.) • To trigger the reject device, the detector sends a positive (+) voltage signal to the reject device. Output 1 Polarity (continued…) Page 236 Thermo Scientific APEX User’s Guide... - Page 237 2) Press the Go button and the icon changes to “–4,” indicating the polarity of Output 4 in now negative (–). Output 4 Polarity 3) Press the Back button to save your changes and exit the menu. Thermo Scientific APEX User’s Guide Page 237...
-
Page 238: Printer Set-Up
Attaching a Printer to the Detector Make sure the power to both your printer and the APEX is turned off. Then, connect your printer to the detector’s serial printer (COM) port—see the wiring diagram below. Page 238 Thermo Scientific APEX User’s Guide... -
Page 239: Navigating To The Printer Set-Up Menu
2) Press the Go button and page 1 of the systems and tools menu appears. System and Tools Page 1 3) Press the down-navigation button to get to page 2 and highlight the inputs and outputs menu. Inputs and Outputs (continued…) Thermo Scientific APEX User’s Guide Page 239... - Page 240 And second, the detector’s end-of-day print- out function will only work if the time function is set for the detector. For instructions on how to set the detector’s time and date function, see page 176. Page 240 Thermo Scientific APEX User’s Guide...
-
Page 241: Activating The Printer
Note: The X shows that the printer is currently inactivated. 3) Press the Go button and the X changes to a check mark. The printer is now activated and ready to print. 4) Press the Back button to exit the menu. Thermo Scientific APEX User’s Guide Page 241... -
Page 242: Manual Printing
2008/11/02/ 11:56:34 PRODUCT: ICECREAM PHASE: 2.28 DETECT LEVEL REJECT COUNT: *********************************************** QUALITY TEST RESULTS *********************************************** DATE TIME RESULT *********************************************** AUDITCHECK TEST RESULTS *********************************************** DATE TIME RESULT *********************************************** FAULTS ALARMS WARNINGS *********************************************** DATE TIME TYPE Page 242 Thermo Scientific APEX User’s Guide... -
Page 243: Naming Your Detector
3) Highlight the exit-and-save key in the keyboard screen. 4) Press the Go button and the name of your detector appears in the menu, as shown in the example below. (Our APEX is working at the DG DAIRY.) Machine Identification Thermo Scientific APEX User’s Guide Page 243... -
Page 244: Naming Your Product Batches
3) Highlight the exit-and-save key in the keyboard screen. 4) Press the Go button and your batch code appears in the menu, as shown in the example below. (We are testing batch 01-123456.) Batch Code Page 244 Thermo Scientific APEX User’s Guide... -
Page 245: Printer Set-Up
1) Make sure the end-of-day function is highlighted. 2) Press the Go button and the X is replaced by a check mark. End-of-day printing is now activated. 3) Press the Back button to exit the function. Thermo Scientific APEX User’s Guide Page 245... -
Page 246: Activating A Reject Print-Out
1) Make sure the reject function is highlighted. 2) Press the Go button and the X is replaced by a check mark. Reject printing is now activated. 3) Press the Back button to exit the function. Page 246 Thermo Scientific APEX User’s Guide... -
Page 247: Activating A Print-Out On Power-Up
1) Make sure the power-up function is highlighted. 2) Press the Go button and the X is replaced by a check mark. Power-up printing is now activated. 3) Press the Back button to exit the function. Thermo Scientific APEX User’s Guide Page 247... -
Page 248: Thermo Scientific Apex User's Guide
QUALITY TEST RESULTS *********************************************** DATE TIME RESULT *********************************************** AUDITCHECK TEST RESULTS *********************************************** DATE TIME RESULT *********************************************** FAULTS ALARMS WARNINGS *********************************************** DATE TIME TYPE 2008/05/21 11:47:23 INFO POWER OFF 2008/05/21 13:12:52 INFO POWER ON Page 248 Thermo Scientific APEX User’s Guide... -
Page 249: Security Level
Reset reject counts Engineer ENGI Everything except Passwords password changes NVRAM reset Supervisor SUPE Everything Set APEX model or machine type SF factory menu Factory – Model/machine Password required for SF factory menu every change Thermo Scientific APEX User’s Guide Page 249... -
Page 250: Entering A Supervisor Password
1) Make sure the security level menu is highlighted, as shown above. Press the Go button and page 2 of the security menu appears. Password 2) Press the right-navigation button to highlight the passwords menu. Activate Passwords Page 250 Thermo Scientific APEX User’s Guide... - Page 251 5) Key in your default supervisor password (“SUPE”) and navigate to the exit-and-save key. Your screen should now look like this. (If you are not sure how to use the keyboard screen, see page 25.) Exit & Save (continued…) Thermo Scientific APEX User’s Guide Page 251...
- Page 252 Key in your new password again, navigate to the exit-and-save key, and press the Go button. The screen shown in step 7 above reappears. Page 252 Thermo Scientific APEX User’s Guide...
-
Page 253: Setting Engineer And Operator Passwords
6) See page 256 for log-out instructions. Retrieving a Forgotten Password This can only be done by a supervisor. 1) Log in and navigate to the screen below. Forgotten Password? (continued…) Thermo Scientific APEX User’s Guide Page 253... -
Page 254: Undoing The Need For Passwords
Passwords are now no longer required, and all personnel have full access to all of the detector’s functions. 3) Press the Back button to exit the menu. The X next to the key icon tells you passwords are no longer required. Security Level Page 254 Thermo Scientific APEX User’s Guide... -
Page 255: Logging In
2) Press the Go button and the log-in screen appears. Login 3) Press the Go button and the keyboard screen appears—complete with a key icon in the entry field as a reminder you are now entering a password. Exit & Save (continued..) Thermo Scientific APEX User’s Guide Page 255... -
Page 256: Logging Out
Always log out, when you have finished using the detector, because this prevents unauthorized personnel from accessing the APEX. 1) In the Main Menu screen, navigate to the security menu. Security Level 2) Press the Go button and the log screen appears. Login (continued…) Page 256 Thermo Scientific APEX User’s Guide... - Page 257 3) Press the right-navigation button to highlight the log-out menu. Logout 4) Press the Go button. The detector returns you to the Main Menu, which indicates you are now logged out. Security Level Thermo Scientific APEX User’s Guide Page 257...
- Page 258 Page 258 Thermo Scientific APEX User’s Guide...
-
Page 259: Maintenance And Troubleshooting
Please check for signs of corrosion on a regular basis and take preventative measures to stop corrosion occurring. Any sign of corrosion should be investigated. Please report any incidents of corrosion to Thermo Fisher Scientific. Thermo Scientific APEX User’s Guide Page 259... - Page 260 Non-ferrous metals—any good electricity-conducting metals such as aluminum, copper, brass, and so forth. • Stainless steel—any of the 300-series stainless steels, which are non-magnetic. These are often the most difficult metals to detect. Page 260 Thermo Scientific APEX User’s Guide...
- Page 261 If the optional AuditCheck hardware is installed on your detector, set up the AuditCheck function. When the AuditCheck function is enabled, the detector’s performance is automatically tested at regular intervals—without the need for operator intervention. Thermo Scientific APEX User’s Guide Page 261...
-
Page 262: Troubleshooting Guide
Retest APEX using a test sample and with the belt signal or a properly pulsed running. This may clear the fault. If not, check the signal from the external functioning of the external speed encoder. speed encoder. Page 262 Thermo Scientific APEX User’s Guide... - Page 263 This type of fault only occurs in conveyor applications using a photo eye. Problem Solution This fault indicates that the Check the photo-eye for proper operation and photo eye has been blocked alignment. for an excessive amount of time. Thermo Scientific APEX User’s Guide Page 263...
- Page 264 Alarm Limit and Fault Limit have not produced by the AuditCheck been inadvertently misapplied. metal ball as it passes through the search head with your product. Page 264 Thermo Scientific APEX User’s Guide...
-
Page 265: Service, Repair, And Replacement Parts
Form, which are shown on the following pages, before returning any equipment to Thermo Fisher Scientific. Contacting Thermo Fisher Scientific Please refer to the “Contacting Thermo Fisher Scientific” section on page 399 of the manual. Thermo Scientific APEX User’s Guide Page 265... -
Page 266: Contact Information
Thermo Ramsey Inc. does not accept credit-card numbers via email or fax. Purchase order—If you wish to pay via PO, please send an official hard copy with this form. Warranty Page 266 Thermo Scientific APEX User’s Guide... - Page 267 Description of part Description of problem Problem Part #2 APEX serial number Part number Description of part Description of problem Problem Part #3 APEX serial number Part number Description of part Description of problem Thermo Scientific APEX User’s Guide Page 267...
- Page 268 I understand that if the equipment is found to be contaminated, regardless of the signature on this document, the equipment will be returned at my company's expense or may be subject to an additional decontamination fee of $300. Signature Title Date Page 268 Thermo Scientific APEX User’s Guide...
-
Page 269: Ordering Parts
Bussmann 3.15 A Fast acting BK/EFF type Wickmann 3.15 A Anti-surge TR5 type Wickmann 3.15 A Fast acting TR5 type Bussmann PC-Tron 3A type • F1 to F6 (Relay PCB) 250v AC, 2A. Thermo Scientific APEX User’s Guide Page 269... - Page 270 Page 270 Thermo Scientific APEX User’s Guide...
-
Page 271: Installing Your Apex Detector
Included with each APEX metal detector are the following. • APEX Metal Detector User’s Guide—the manual you are currently reading. • Quick-Start manual. • Installation and mounting parts. • Metal test samples. Thermo Scientific APEX User’s Guide Page 271... -
Page 272: List Of Included Components
-10 to 50° C (14 to 122° F) with a non-condensing humidity of 80%. APEX Specifications There are three models of APEX—the APEX 500, APEX 300, and APEX 100. The principal difference between the three models has to do with aperture size—the size of the opening through which the product passes to be analyzed for metallic contaminants. - Page 273 Up to 2000 m (1.2 miles) Location Indoor or outdoor use. Direct sunlight on the aperture could cause problems. Protect the equipment from direct sunlight. Environmental Protection IP69K TYPE 3 Enclosure Ventilation None required Thermo Scientific APEX User’s Guide Page 273...
- Page 274 Number of units of product rejected by the quality test. • Number of units of product rejected by AuditCheck. • Number of units of product passed (when in package mode). • Error messages using LEDs and warning screens. Page 274 Thermo Scientific APEX User’s Guide...
- Page 275 Field compression flanges, which reduce the metal-free zone. Printer Options A local rewind or remote printer option is available. In addition, the printer is able to print batch reports. Printouts are available in one of ten languages. Thermo Scientific APEX User’s Guide Page 275...
-
Page 276: Theory Of Operation
Resistive Effect Electrically conductive materials and many food products by nature are electrically conductive. Salt and moisture content combine to produce resistive effects that must be overcome in order to detect small metal contaminants. Page 276 Thermo Scientific APEX User’s Guide... - Page 277 Wet products produce a larger product effect. Examples of wet products are bread, buns, cakes, meat, and dairy products. Metal Film Products Products packaged using metallic wrappers usually require a low search-head frequency such as 50 kHz. Thermo Scientific APEX User’s Guide Page 277...
- Page 278 Metallic (ferrous) contaminants, such as iron. Dry, non-conductive products, such as grains and cereals. Non-ferrous metallic contaminants, such as copper. 20–30 Metallic contaminants, such as stainless steel. Wet, conductive products, such as fresh meats and breads. Page 278 Thermo Scientific APEX User’s Guide...
-
Page 279: Understanding Some Basic Detector Vocabulary
Thresholds are maintained for resistive and reactive effects and, if exceeded, usually indicate a product is present. Detect level If the signal from metal or noise exceeds the detect level, then the reject output activates. Thermo Scientific APEX User’s Guide Page 279... -
Page 280: Safety Precautions
Use only the procedures and new parts specifically referenced in this manual to ensure specification performance and certification compliance. Unauthorized procedures or parts can render the instrument dangerous to life, limb, or property. Warning Keep hands and clothing away from all moving or rotating parts. Page 280 Thermo Scientific APEX User’s Guide... - Page 281 Ensure “hot” products passing through the aperture do not raise the surface temperature of the resin above +60° C (140° F). An aperture liner that protects the resin may be required if the product temperature is too high. Thermo Scientific APEX User’s Guide Page 281...
- Page 282 Page 282 Thermo Scientific APEX User’s Guide...
-
Page 283: Electrical Set-Up
A loop effect may be created when a conductive path that varies in time, lies in close proximity to the detector. When a loop effect is created, the X-channel is the one most likely to be affected. Thermo Scientific APEX User’s Guide Page 283... - Page 284 Check that all wires are tight in their connections. • Never use a “megger” to check the wiring. • All conduits should enter the bottom of the enclosure. Do not run conduit through the top or sides of the enclosure. Page 284 Thermo Scientific APEX User’s Guide...
- Page 285 “Contacting Thermo Fisher Scientific” section at the end of the manual—for recommendations about a suitable isolation transformer or power-line filter. Note: Do not use loads requiring power sources not generated or used by the APEX, unless approved by Thermo Fisher Scientific. Thermo Scientific APEX User’s Guide Page 285...
-
Page 286: Removing The Control Panel
If this is not possible, and the line noise triggers the detector, contact Thermo Fisher Scientific—as described in the “Contacting Thermo Fisher Scientific” section at the end of the manual—for recommendations of a suitable isolation transformer or power-line filter. Page 286 Thermo Scientific APEX User’s Guide... - Page 287 DC voltages not exceeding 24 VDC nominal. Do not use these outputs unless you have specialized knowledge. If you need volt-free relay outputs, please use the PCB–A mounted on the PSU. Thermo Scientific APEX User’s Guide Page 287...
-
Page 288: Installing Cable And Conduit To Your Apex
This feature requires a locking nut sufficiently tightened on the inside of the front panel. Ensure that cable entry manufacturer’s guidelines are followed when mounting these parts. Pay particular attention to maintaining a high-integrity seal. Page 288 Thermo Scientific APEX User’s Guide... -
Page 289: Input-Wiring Board-Pin Assignments
Reject Confirm/Bin Full Input 4 Not assigned Input 5 Not assigned Input 6 Not assigned Note: Inputs can also be assigned to Bin Full, Product Select 1, Product Select 2, Key Lock, and Reject Suppression. Thermo Scientific APEX User’s Guide Page 289... -
Page 290: Output-Wiring Board-Relay Settings And Fuses
Relay 2 2 amp, 250 volt, fast-acting fuse Relay 3 2 amp, 250 volt, fast-acting fuse Relay 4 2 amp, 250 volt, fast-acting fuse Relay 5 2 amp, 250 volt, fast-acting fuse Relay 6 Page 290 Thermo Scientific APEX User’s Guide... -
Page 291: Mechanical Set-Up Instructions For Specific Applications
Find the relevant mechanical set-up instructions as follows. • Conveyor applications—Go to the page that follows this one (page 292). • Gravity-feed and pharmaceutical applications—Go to page 299. • Pipeline applications—Go to page 307. Thermo Scientific APEX User’s Guide Page 291... -
Page 292: Mechanical Set-Up For Conveyor Applications
1.5 times the smallest aperture height, measured outward from the center of the aperture. Moving metal should be allowed no closer to the aperture opening than 2.0 times the smallest aperture height, measured outward from the center Page 292 Thermo Scientific APEX User’s Guide... - Page 293 APEX. This structure must be flat and parallel. This minimizes possible twisting torques to the case of the detector, which will distort the electromagnetic field and cause false triggering. Thermo Scientific APEX User’s Guide Page 293...
- Page 294 If the APEX vibrates or is accidentally bumped, it will cause relative movement between the detector and the offending metal, which could trigger the detector. Page 294 Thermo Scientific APEX User’s Guide...
- Page 295 A photo eye is used for conveyor systems inspecting discrete products or packages. Refer to the specific photo-eye installation manual for installation procedures. A photo- eye is necessary to use the following APEX features. • Automatic product tracking • Reverse detection • Photo-registered reject timing Thermo Scientific APEX User’s Guide Page 295...
- Page 296 Rollers whose bearings make an intermittent connection. • Any metal that crosses the conveyor frame and is not securely fastened—such as the transfer plate, loose cross members, electrical conduit, and retracting-reject or flap-gate reject devices. Page 296 Thermo Scientific APEX User’s Guide...
- Page 297 Stub Shaft Method With this design, the roller shaft does not continue through the roller. This separation removes the electrical loop within the roller, as shown below. Note: The roller must be non-metallic. Thermo Scientific APEX User’s Guide Page 297...
- Page 298 Now that you have completed the electrical and mechanical set up for your conveyor application, please go to the “Getting Started” section on page 11 to learn how to operate your newly installed APEX detector. Page 298 Thermo Scientific APEX User’s Guide...
-
Page 299: Mechanical Set-Up For Gravity-Feed And Rx Applications
1.5 times the smallest aperture height, measured outward from the center of the aperture. Moving metal should be allowed no closer to the aperture opening than 2.0 times the smallest aperture height, measured outward from the center Thermo Scientific APEX User’s Guide Page 299... - Page 300 This field can cause very small electrical currents to flow in nearby metal structures. This causes no problem if the loops are completely closed, but, if the electrical path is intermittent, then false triggering of the detector is likely. Page 300 Thermo Scientific APEX User’s Guide...
- Page 301 Connect incoming air to the detector’s air-regulator fittings using a coiled copper tube or air hose. Adjust the incoming air pressure to 30–40 PSI (2.1–2.5 kg/cm ) for pneumatic devices, or 40–80 PSI (2.8–5.6 kg/cm ) for air rejects. Thermo Scientific APEX User’s Guide Page 301...
- Page 302 The reject valve and support structure are used on gravity applications. The structure supports the metal detector; reject valve and product inspection tube. The control unit and power supply may be mounted directly to the structure. Page 302 Thermo Scientific APEX User’s Guide...
- Page 303 If you have any questions about installation requirements and restrictions, please contact Thermo Fisher Scientific—as described in the “Contacting Thermo Fisher Scientific” section at the end of the manual. Thermo Scientific APEX User’s Guide Page 303...
- Page 304 If the test sample is run at the side of the product tube or between the product tube and the detector, this will produce a larger signal than through the centerline. Page 304 Thermo Scientific APEX User’s Guide...
- Page 305 Testing Schedule The user must decide how often the detector should be tested. If the test procedure can be designed to be simple, it will help ensure that the test will be performed more Thermo Scientific APEX User’s Guide Page 305...
- Page 306 Now that you have completed the electrical and mechanical set up for your gravity-feed application, please go to the “Getting Started” section on page 11 to learn how to operate your newly installed APEX detector. Page 306 Thermo Scientific APEX User’s Guide...
-
Page 307: Mechanical Set-Up For Pipeline Applications
1.5 times the smallest aperture height, measured outward from the center of the aperture. Moving metal should be allowed no closer to the aperture opening than 2.0 times the smallest aperture height, measured outward from the center Thermo Scientific APEX User’s Guide Page 307... - Page 308 Typical causes of intermittent electrical loops include loose bolts on the framework or on the detector’s mounting, corrosion of metal work, broken welds, open hinged doors, and broken or rubbing contacts. Page 308 Thermo Scientific APEX User’s Guide...
- Page 309 Now that you have completed the electrical and mechanical set up for your pipeline application, please go to the “Getting Started” section on page 11 to learn how to operate your newly installed APEX detector. Thermo Scientific APEX User’s Guide Page 309...
- Page 310 Page 310 Thermo Scientific APEX User’s Guide...
-
Page 311: Safety And Warranty Information
Following the commissioning of the equipment, any change made by the user to the software program will terminate all warranties with respect to the equipment and software program. All other trademarks are the property of Thermo Fisher Scientific Inc. and its subsidiaries. Thermo Scientific APEX User’s Guide Page 311... - Page 312 General Conditions of the License Thermo Fisher Scientific may terminate your license if you fail to comply with the terms and conditions of this license. In such event, you must destroy all your copies of the Page 312 Thermo Scientific APEX User’s Guide...
- Page 313 IEC 61242 Electrical Apparatus for Use in the Presence of Combustible Dust— Part 0 (General Requirements) • IEC 61241 Electrical Apparatus for Use in the Presence of Combustible Dust— Part 1 (Protection by Enclosures “tD”) Thermo Scientific APEX User’s Guide Page 313...
- Page 314 TO EVACUATE ANY AIR LEFT IN THE SYSTEM. THEN SWITCH OFF AND LOCK THE ELECTRICAL SUPPLY. Safe Disposal of the Detector See Safety in Transportation, Handling and Installation for procedures. There are no hazardous materials used on the metal detector head or system. Page 314 Thermo Scientific APEX User’s Guide...
- Page 315 The switch or circuit breaker shall be marked as the disconnecting device for the metal detector. DO NOT install the APEX in a position that makes it hard to use the AC mains isolator. Thermo Scientific APEX User’s Guide Page 315...
- Page 316 Thermo Fisher Scientific Field Service Engineer at the closest factory base. Thermo Fisher Scientific 501 90th Avenue NW Minneapolis, MN 55433 Phone: (800) 227-8891 Fax: (763) 783-2525 Page 316 Thermo Scientific APEX User’s Guide...
- Page 317 Please note that Thermo Fisher Scientific reserves the right to change and/or improve the product design and specifications without notice. Thermo Scientific APEX User’s Guide Page 317...
- Page 318 Added Appendix B describing the IntelliTrack XR (IXR) option. Revision J June 2010 2624 Added information about using the wide-band speed filter in the Revision K Nov. 2010 2714 Removed Patent reference & changed to IP69K Page 318 Thermo Scientific APEX User’s Guide...
-
Page 319: Appendix A-Modbus Communications Card
Appendix A—Modbus Communications Card Thermo Scientific APEX User’s Guide Page 319... - Page 320 Page 320 Thermo Scientific APEX User’s Guide...
-
Page 321: Overview
Use your network to remotely access APEX parameters. • Change products remotely. • Get real-time statistics—such as current reject count—from the APEX. • Back up critical APEX settings. These are described in more detail in the following sections. Thermo Scientific APEX User’s Guide Page 321... -
Page 322: Engineering Details
As a result, the Modbus uses different read and write registers for the same parameter. Page 322 Thermo Scientific APEX User’s Guide... -
Page 323: Expert Knowledge Is Required To Modify Settings
Parameters with the APEX Software” section of this appendix. If you have questions or need additional help, please contact Thermo Fisher Scientific— as described in the “Contacting Thermo Fisher Scientific” section at the end of the manual. Thermo Scientific APEX User’s Guide Page 323... - Page 324 Page 324 Thermo Scientific APEX User’s Guide...
-
Page 325: Configuring Network Parameters With The Apex Software
This section tells you how to use the APEX software to modify the communication parameters for a TCP/IP network. You can set the following parameters using the APEX communications menu. • Dynamic host-control protocol (on or off) • IP address • Subnet-mask address • Gateway address Thermo Scientific APEX User’s Guide Page 325... -
Page 326: Accessing The Tcp/Ip Communications Menu
3) Press the Go button and page 1 of the system and tools menu appears. System and Tools Page 1 4) Navigate to page 2 of the system and tools menu. System and Tools Page 2 Page 326 Thermo Scientific APEX User’s Guide... - Page 327 5) Navigate to the inputs and outputs menu. Inputs and Outputs 6) Press the Go button and the detailed inputs and outputs menu appears. Inputs and Outputs 7) Navigate to the communications menu. Communications (continued…) Thermo Scientific APEX User’s Guide Page 327...
- Page 328 MAC address. Parameters Description Editable? DHCP Dynamic host-control Yes—you can set DHCP to either “on” protocol or “off.” On is the default setting. IP address Subnet-mask address Gateway address MAC address Page 328 Thermo Scientific APEX User’s Guide...
-
Page 329: Changing The Dhcp Default Setting During Installation
To change the DHCP setting to “off” (and lock in your current IP, subnet-mask, and gateway addresses), do the following. 1) Make sure the DHCP function is highlighted. (The check mark indicates that DHCP is currently set to its default value, “on.”) Dynamic Host Control Protocol (continued…) Thermo Scientific APEX User’s Guide Page 329... -
Page 330: Manually Changing Communication Parameters
Changing the IP Address In order to change the IP address, DHCP must be set to “off.” 1) Make sure the IP address function is highlighted. IP Address (continued…) Page 330 Thermo Scientific APEX User’s Guide... -
Page 331: Changing The Subnet-Mask Address
2) Press the Go button, and an input screen appears. 3) Use the navigation buttons to enter the subnet-mask address, then press the Go button to close the input screen. The flashing asterisk indicates the subnet-mask address has been changed. Subnet Mask Thermo Scientific APEX User’s Guide Page 331... -
Page 332: Changing The Gateway Address
4) Go to the “Saving Your TCP/IP Settings” section—this is important! MAC Addresses Please note that the MAC address cannot be changed using the APEX software, because it is set directly by the hardware. Page 332 Thermo Scientific APEX User’s Guide... -
Page 333: Saving Your Tcp/Ip Settings
Notice that the flashing asterisks have disappeared, indicating that all your TCP/IP communication settings have been saved and are now active. 3) Press the Back button repeatedly to return to the Main Menu screen. Thermo Scientific APEX User’s Guide Page 333... -
Page 334: Changing Dhcp To "On
2) Press the Go button. The X changes to a check mark, indicating that DHCP is now “on” and the network will configure the IP, subnet-mask, and gateway addresses. Dynamic Host Control Protocol 3) Press the Back button to exit the function. Page 334 Thermo Scientific APEX User’s Guide... -
Page 335: Configuring An Rtu Network
1) Follow steps 1–7 in the “Accessing the TCP/IP Communications Functions” section above to reach the screen shown below. Communications 2) Press the Go button and the “Modbus RTU Configuration” menu appears. Modbus RTU Configuration Thermo Scientific APEX User’s Guide Page 335... -
Page 336: Changing The Slave Address
4) Press the Go button. The flashing asterisk tells you the slave address has been changed. Slave Address 5) If you are finished, go to the “Saving Your RTU Settings” section—this is important! Or continue the set-up as described below. Page 336 Thermo Scientific APEX User’s Guide... -
Page 337: Changing The Baud Rate
Modbus RTU Configuration 4) If you are finished, go to the “Saving Your RTU Settings” section—this is important! Or continue the set-up as described below. Thermo Scientific APEX User’s Guide Page 337... -
Page 338: Changing The Parity
3) Press the Back button to return to the RTU configuration screen. The flashing asterisk tells you the parity has been changed. Modbus RTU Configuration 4) Go to the “Saving Your RTU Settings” section—this is important! Page 338 Thermo Scientific APEX User’s Guide... -
Page 339: Saving Your Rtu Settings
2) Press the Go button to return to the RTU configuration screen. The flashing asterisks have disappeared, indicating that all your RTU communication settings have been saved. Modbus RTU Configuration 3) Press the Back button repeatedly to return to the Main Menu Thermo Scientific APEX User’s Guide Page 339... - Page 340 Page 340 Thermo Scientific APEX User’s Guide...
-
Page 341: Configuring The Modbus Hardware
Modbus RTU Communications Card that you want to configure as an RS-485 device—Go to page 345. • Modbus RTU Communications Card that you want to configure as an RS-232 device—Go to page 349. Thermo Scientific APEX User’s Guide Page 341... -
Page 342: Configuring The Tcp/Ip Card
2) Install the TCP/IP card on the APEX motherboard by connecting the card’s application connector to the detector’s COMMS1 connector. Use the APEX Communication Module Mounting Kit to secure the card to the APEX motherboard. 3) Reinstall the HMI CPU on the motherboard. Page 342 Thermo Scientific APEX User’s Guide... -
Page 343: Setting The Configuration Switches
PE via a filter circuit in the module. RD– Normally left unused. To insure signal integrity, these pins are tied together and terminated to the PE via a filter circuit in the module. (Front view) Thermo Scientific APEX User’s Guide Page 343... -
Page 344: Understanding The Status Leds
Red = Duplicate IP address detected Network The number of flashes equals status the number of connections made to the Modbus Activity The LED flashes each time a packet is received or transmitted Page 344 Thermo Scientific APEX User’s Guide... -
Page 345: Configuring The Rtu Rs-485 Card
2) Install the RS-485 card on the APEX motherboard by connecting the card’s application connector to the detector’s COMMS1 connector. Use the APEX Communication Module Mounting Kit to secure the card to the APEX motherboard. 3) Reinstall the HMI CPU on the motherboard. Thermo Scientific APEX User’s Guide Page 345... -
Page 346: Setting The Configuration Switches
Configuring a Non-Terminated Node To configure the Modbus card as a non-terminated node, or when using an external terminator, set the termination switch to the zero or “off” position. Page 346 Thermo Scientific APEX User’s Guide... -
Page 347: Pin Assignments For A Db-9 Connector
Here are the pin assignments for an RTU card equipped with a screw connector. Name Function RS232–TX Transmit signal Signal ground RS485 B (+) Two-wire TX/RX lines RS485 A (–) Two-wire TX/RX lines RS232–RX Receive signal Shield Cable shield Thermo Scientific APEX User’s Guide Page 347... -
Page 348: Understanding The Status Leds
DIP switches are in use and the settings are good. Solid green = DIP-switch settings have been modified by mailbox message. Solid red = DIP switches set to non-active status—that is, all are off or set to illegal values. Page 348 Thermo Scientific APEX User’s Guide... -
Page 349: Configuring The Rtu Rs-232 Card
2) Set DIP-switch number 5 in the parity block to the one (1) or “on” position (as diagrammed below), because this is the switch that actually sets the Modbus card to the RS-232 configuration. (If this switch is off, the card will be configured as an RS-485 card.) Thermo Scientific APEX User’s Guide Page 349... -
Page 350: Pin Assignments For A Db-9 Connector
See the RS-485 section, because the pin assignments are identical. Pin Assignments for a Screw Connector See the RS-485 section, because the pin assignments are identical. Understanding the Status LEDs See the RTU RS-485, because the way the LEDs operate is identical. Page 350 Thermo Scientific APEX User’s Guide... -
Page 351: Understanding Registers
Read input registers Write coil Write single register Force multiple coils Force multiple registers Mask write register Read/write registers Exception code Name 0x01 Illegal function 0x02 Illegal data address 0x03 Illegal data value Thermo Scientific APEX User’s Guide Page 351... -
Page 352: Read Data
Write registers will contain different values, but the Read register will always contain the current value being used by the APEX. Note that the “parameter-change acknowledge” coil will still be toggled, indicating that the APEX has processed it. Page 352 Thermo Scientific APEX User’s Guide... -
Page 353: Register Details For Commonly Used Apex Functions
To view the list of currently set-up products (and to access their product numbers), do the following. 1) Go to the APEX Main Menu to display the currently running product (in our example this is product 001, milk). Product Name (continued…) Thermo Scientific APEX User’s Guide Page 353... -
Page 354: Retrieving Statistical Information
(for example, the values for total reject count), the following rules apply. • The MSB is received first when reading the starting address of the value. • The least significant byte is received last when reading the highest address of the value. Page 354 Thermo Scientific APEX User’s Guide... -
Page 355: Backing Up Critical Apex Settings
808 bytes, as shown in the table below. NVRAM allocation Space used (bytes) DSP configuration HMI configuration Single-product configuration Total = See glossary for explanation of acronyms Thermo Scientific APEX User’s Guide Page 355... - Page 356 4) Write product number 002 to register 41045, and set parameter-change coil 16385 to one (1). 5) Write all product settings for product 002 from a data file to the corresponding registers. 6) Continue until all your products are restored. Page 356 Thermo Scientific APEX User’s Guide...
-
Page 357: Detailed List Of Modbus Registers
4 = Learning AuditCheck 5 = Performing AuditCheck 6 = Learning Quality Test 7 = Performing Quality Test 8 = Learning Reject Confirm Time 9 = Learning DSV Filter Frequency 10 = Calibrating Speed Sensor Thermo Scientific APEX User’s Guide Page 357... - Page 358 41058 16395 enum Phase Tracking 0 = Disabled 1 = Enabled 30048 41059 16396 string Product Name 18 chars in length 30057 41068 16397 enum Detection Type 0 = Amplitude 1 = Multi-Zone Thermo Scientific APEX User’s Guide Page 358...
- Page 359 0 = Disabled 1 = Enabled 30077 41088 16417 enum CLX Filter 0 = Disabled 256 = CLX Ratio of 1 512 = CLX Ratio of 2 768 = CLX Ratio of 3 Thermo Scientific APEX User’s Guide Page 359...
- Page 360 AuditCheck Learned Speed - Test 1 0.1 to 999.0 m/min 30104 float AuditCheck Learned Phase Angle - -45.00 to 135.00 degrees Test 2 30106 float AuditCheck Learned Speed - Test 2 0.1 to 999.0 m/min Thermo Scientific APEX User’s Guide Page 360...
- Page 361 AuditCheck Overhang Distance 0 to 5,000 mm 30132 41114 16443 bitmap Reject Duration Default Type Bit 0: Reject 1 (0) Time or (1) Distance Bit 1: Reject 2 (0) Time or (1) Distance Thermo Scientific APEX User’s Guide Page 361...
- Page 362 Bit 10: Excess Rejects Bit 11: Memory Corruption Bits 12- 15 unused 30138 41117 16446 bitmap Alarm Configuration Same as for Warning Configuration 30139 41118 16447 bitmap Fault Configuration Same as for Warning Configuration Thermo Scientific APEX User’s Guide Page 362...
- Page 363 Excess Span must also be updated 30161 41139 16459 unsigned short Excess Reject Span 1-200 Span must be less than Count Note in order to update Excess Reject Span Excess Count must also be updated Thermo Scientific APEX User’s Guide Page 363...
- Page 364 Time From Opto Break Until IXR Signal starts Value * 4 = time in ms. 30176 unsigned short X Capture Length Time From Opto Break Until IXR Signal starts Value * 4 = time in ms. Thermo Scientific APEX User’s Guide Page 364...
- Page 365 30177 enum APEX Model 0 = Model type not set 1 = APEX 100 2 = APEX 300 3 = APEX 500 4 = APEX 500 Upgrade 30178 enum Machine Type 0 = Conveyor 1 = Pipeline 2 = Drop Through...
- Page 366 (feet or meters). Product parameter. Any product-related parameter—such as product name, phase angle, and so on. Read-only register Read/write register For other abbreviations and acronyms, see the Glossary at the end of the manual. Thermo Scientific APEX User’s Guide Page 366...
-
Page 367: Appendix B-Intellitrack™ Xr
Appendix B— IntelliTrack™ XR Thermo Scientific APEX User’s Guide Page 367... - Page 368 Page 368 Thermo Scientific APEX User’s Guide...
-
Page 369: Overview
(Please note that if the APEX detects no gap between the packages, the IXR function will use the package length you entered, but false rejects may occur as a result.) Thermo Scientific APEX User’s Guide Page 369... -
Page 370: Discussion Of Product Requirements
If you encounter problems while setting up the IXR function, please see the “Troubleshooting” section in this appendix, or contact Thermo Fisher Scientific—as described in the “Contacting Thermo Fisher Scientific” section at the end of the manual. Page 370 Thermo Scientific APEX User’s Guide... -
Page 371: Setting Up Related Functions
2) Press the Go button and page 1 of the product menu appears. Product Calibrate and Name 3) Press the down-navigation button to highlight page 2 of the product menu. Product Shape and Flow Thermo Scientific APEX User’s Guide Page 371... -
Page 372: Keying In The "Detection No-Pack" Distance
Keying In the “Detection No-Pack” Distance The “detection no-pack” distance should also be set, as described below. 1) Follow steps 1–3 in the “Keying In the Pack Length” section above to reach this screen. Product Shape and Flow Page 372 Thermo Scientific APEX User’s Guide... - Page 373 “Keying In the Pack Length” section above. (We keyed in 12.4 centimeters, the same value we entered above for pack length.) Detection no-Pack Distance 5) Press the Go button to save your setting and exit the input screen. Thermo Scientific APEX User’s Guide Page 373...
-
Page 374: Keying In The In-Feed Photo-Eye Distance
4) Press the Go button and navigate to page 3 of the system and tools menu. System and Tools Page 3 5) Navigate to the photo-eye set-up menu. PE Distance and Head Width Page 374 Thermo Scientific APEX User’s Guide... - Page 375 9) Use the navigation buttons to input the distance from the photo-eye to the in-feed side of the detector head. (In our example, we would enter a distance in millimeters.) 10) Press the Go button to save your setting and exit the input screen. Thermo Scientific APEX User’s Guide Page 375...
-
Page 376: Enabling Photo-Eye Registration
1) Make sure the detector’s Main Menu is displayed. Product Name 2) Navigate to the reject-totals menu. Reject Totals 3) Press the Go button and navigate to page 2 of the rejects-totals menu. Reject Registration and Type (continued…) Page 376 Thermo Scientific APEX User’s Guide... - Page 377 5) Press the Go button repeatedly until the check mark is displayed next to the “detect the middle of the package” icon, as shown below. Middle Photo Registration 6) Press the Back button to save your setting and exit the menu. Thermo Scientific APEX User’s Guide Page 377...
-
Page 378: Enabling The Ixr Function
3) Press the Go button, and page 1 of the system and tools menu appears. System and Tools Page 1 4) Navigate to the IXR menu and make sure it is highlighted. IntelliTrack X R Menu (continued…) Page 378 Thermo Scientific APEX User’s Guide... - Page 379 IXR function is now enabled (because a checkmark is displayed next to the IXR icon). In addition, the screen shows additional IXR options that are now available. (These additional functions are described in the sections that follow.) Enable IXR (continued…) Thermo Scientific APEX User’s Guide Page 379...
-
Page 380: Calibrating The Ixr Function
X and R noise thresholds. To calibrate the X and R noise thresholds, do the following. 1) Make sure the Main Menu is displayed. Product Name (continued…) Page 380 Thermo Scientific APEX User’s Guide... - Page 381 3) Press the Go button and page 1 of the frequency and gain menu appears. Navigate to page 2, as shown below. Detection Level and Noise Threshold 4) Navigate to the “Calibrate Noise Thresholds” function and make sure it is highlighted, as shown below. Calibrate Noise Thresholds (continued…) Thermo Scientific APEX User’s Guide Page 381...
-
Page 382: Using The Auto-Calibration Function
When running the calibration procedure, please make sure that the gap between your packages—the pack gap—is equal-to-or-greater-than the width of the search head. (For example, if your search head is 30 cm wide, the gap between your packages should be Page 382 Thermo Scientific APEX User’s Guide... - Page 383 4) Make sure the conveyor is running at the speed you will use during normal production runs, and press the Go button to start the IXR calibration. The following screen appears. Performing Full Learn Thermo Scientific APEX User’s Guide Page 383...
- Page 384 8) When the auto-calibration procedure is complete, the Main Menu reappears. Currently (as shown in the screen below) the detect level is 554 for the X signal and 488 for the R signal. Product Name Page 384 Thermo Scientific APEX User’s Guide...
-
Page 385: Using The Ixr Calibration Function
“Using the Auto-Calibration Function” section on page 382. To start the IXR detect- level calibration, do the following. 1) Make sure the Main Menu is displayed. Product Name (continued…) Thermo Scientific APEX User’s Guide Page 385... - Page 386 3) Press the Go button and page 2 of the “Detection Level and Noise Threshold” menu appears. Detection level and Noise Threshold 4) Navigate to the calibrate-detect-level icon and make sure it is highlighted. Calibrate Detect Level 5) Press the Go button. Page 386 Thermo Scientific APEX User’s Guide...
-
Page 387: Ixr Tracking
If tracking is set to “Off” (as shown by an X next to the icon), press the Go button and a checkmark appears. 3) Press the Back button repeatedly to exit the menu and return to the Main Menu. Thermo Scientific APEX User’s Guide Page 387... -
Page 388: Understanding The Ixr Display
(as shown in the screen above), pressing the Go button takes you directly to the “Detection Level and Noise Threshold” menu (that is, page 2 of the frequency and gain menu, where these values can changed if needed). Page 388 Thermo Scientific APEX User’s Guide... - Page 389 (as shown in the screen below), do the following to change the detector’s display to a graphical format. 1) Make sure the Main Menu is displayed. Product Name (continued…) Thermo Scientific APEX User’s Guide Page 389...
- Page 390 X channel, and the lower part of the graph for the R channel, as shown below. Please note that the scales of the X and R channels may not be identical. Page 390 Thermo Scientific APEX User’s Guide...
-
Page 391: Troubleshooting
If the photo-eye distance is set to zero (an invalid setting for the IXR function), the following information box appears. Solution: Go to the “Keying In the In-Feed Photo-Eye Distance” section above for instructions about setting the appropriate photo-eye distance. Thermo Scientific APEX User’s Guide Page 391... - Page 392 Solution: Go to the “Frequency and Gain” menu and adjust these settings to a lower level. If the problem persists, please contact Thermo Fisher Scientific—as described in the “Contacting Thermo Fisher Scientific” section at the end of the manual. Page 392 Thermo Scientific APEX User’s Guide...
-
Page 393: Glossary
Any signal (excessive noise/contamination) that exceeds the detect level is tagged as contamination. However, when the detect level is properly set, metals—and only metals—will be tagged as contamination. DHCP Dynamic host-control protocol Thermo Scientific APEX User’s Guide Page 393... - Page 394 Human-machine interface Identity International Electrotechnical Commission Indicator lights The indicator lights in the control panel show the current status of the search head. There are three indicator lights—red, green, and yellow. Page 394 Thermo Scientific APEX User’s Guide...
- Page 395 NVRAM Non-volatile random-access memory In the Modbus registers, a product setting (for example, product 001). Thermo Scientific APEX User’s Guide Page 395...
- Page 396 Product-rejection Parameters you set to control how contaminated parameter products (or test samples) are rejected in your particular application and operating environment. Product signal compensation Power supply unit Quality assurance Page 396 Thermo Scientific APEX User’s Guide...
- Page 397 Speed filter–wide band Speed filter The speed filter is a narrow-band pass filter that rejects most background noise, but still allows a maximum metal signal from the search head to be processed by the detector. Thermo Scientific APEX User’s Guide Page 397...
- Page 398 Excessive reactive signal could indicate external noise (such as the presence of VFD, EMI, and vibration), ground loops, static, and so on is present in the area around the metal detector. Page 398 Thermo Scientific APEX User’s Guide...
-
Page 399: Contacting Thermo Fisher Scientific
• Email Please email us at Parts.W&I.Mpls@thermofisher.com • Street Address Please write to us for parts at the following address. Thermo Fisher Scientific Attn: Parts Department 501 90th Ave NW Minneapolis, MN 55433 Thermo Scientific APEX User’s Guide Page 399... - Page 400 Please complete the Return Material Authorization (RMA) form on page 266 of the manual. Then, fax it to us to get an RMA number. • Email Please email the Service Department at Service.W&I.Mpls@thermofisher.com and ask for an RMA number. Page 400 Thermo Scientific APEX User’s Guide...
- Page 401 +27 (0) 11-609-3101 +27 (0) 11-609-3110 fax Spain +34 914 845 965 +34 914 843 597 fax United Kingdom +44 (0) 1788-820300 +44 (0) 1788-820301 fax United States/Canada +1 (800) 227-8891 +1 (763) 780-1537 fax Thermo Scientific APEX User’s Guide Page 401...
- Page 402 Page 402 Thermo Scientific APEX User’s Guide...
-
Page 403: Supplemental Information
APEX 500 Rx Head and Electronics Outline and Mounting D07404M-B002 APEX 500 Rx Head, Electronics, and Reject Outline and D07404M-B006 Mounting APEX Conveyor Field-Wiring Diagram D07387M-W001 APEX Gravity-Feed and Pipeline Field-Wiring Diagram D07387M-W002 APEX 500 Rx Pneumatic Reject Field-Wiring Diagram D07387M-W004 Thermo Scientific APEX User’s Guide Page 403... - Page 404 This page intentionally left blank...
- Page 405 -Fuse (Output relays) 086214 -Test Spheres -Ferrous, Non-ferrous and 316 SST 1 of each type ______ SP2: Spare Parts Kit – Apex 100 -CONTROL PANEL ASSY, APEX 100 090586 -PSU TO CPU M/B CABLE 268264 -CPU M/B TO S/H BOARD CABLE...
-
Page 406: Control Panel
Edit Product Name been detected in the product. The Navigation Buttons These allow you to navigate around the detector’s menus and sub-menus and are used to increase or decrease numbers and Thermo Scientific APEX Quick-Start Guide REC-F-58E—Part #085555 Page 1... - Page 407 1) Make sure the Main Menu is displayed. 2) Highlight the pack-gap function. Pack Gap 2) Press the Go button and the full product calibration screen appears. 3) Navigate to page 2 of this menu. (continued…) Thermo Scientific APEX Quick-Start Guide Page 2 REC-F-58E—Part #085555...
- Page 408 10) To change these settings, press the Go button and an input screen appears. 11) Use the navigation buttons to select the (continued…) appropriate input (1–6) and polarity. Thermo Scientific APEX Quick-Start Guide REC-F-58E—Part #085555 Page 3...
- Page 409 1) Make sure the Main Menu is displayed. parameter, then go to step 3 above and key in a distance (mm or inches). 2) Highlight the rejects menu. 3) Press the Go button. (continued…) Thermo Scientific APEX Quick-Start Guide Page 4 REC-F-58E—Part #085555...
- Page 410 2) Press the Go button and the “Full Product Calibration” function is automatically high- 6) Key in an appropriate value (in seconds lighted. and hundredths of a second) for the Full Product Calibration reject-delay time. Thermo Scientific APEX Quick-Start Guide REC-F-58E—Part #085555 Page 5...
- Page 411 Full-Product Calibration See the instructions on page 5. 1) Make sure the Main Menu is displayed. 2) Navigate to the rejects menu. 3) Press the Go button. (continued…) Thermo Scientific APEX Quick-Start Guide Page 6 REC-F-58E—Part #085555...
- Page 412 2) Highlight the “Reject 1 Duration” function. See the instructions on page 2. Reject 1 Duration In-Feed Photo-Eye Distance See the instructions on page 3. 3) Press the Go button and an input screen appears. (continued…) Thermo Scientific APEX Quick-Start Guide REC-F-58E—Part #085555 Page 7...
- Page 413 2) Press the Go button and page 1 of the “Full Product Calibration” menu appears. 3) Highlight the auto-calibration function and start passing packages through the search head. Press the Go button and wait until the Main Menu reappears. Thermo Scientific APEX Quick-Start Guide Page 8 REC-F-58E—Part #085555...
- Page 414 This page intentionally left blank...
- Page 415 PART NUMBER: Scientific ("Thermo"). It may not be copied or reproduced in any (APEX 500 GRAPHICS SHOWN) 1338 ADDED APEX 100 1/31/07 manner without the expressed written consent of Thermo. This 810109/810107 document also is an unpublished work of Thermo. Thermo intends to and is maintaining the work as confidential information.
- Page 416 A + 220[8.66] SMALLEST APERTURE (HEAD WIDTH) DIMENSION mm [INCH] (A OR B) 110 4.33 mm [INCH] APEX 500 APEX 100 135[5.31] FOR 50 [1.97] 295 [11.61] 295 [11.61] B=50[1.97] ONLY 75 [2.95] 295 [11.61] 295 [11.61] 100 [3.94] 295 [11.61] 295 [11.61]...
- Page 417 28 1.11 THRU 284 11.18 2X 184 7.24 2X 50 1.97 3 .12 284 11.18 2X 10 .39 191 7.53 2X 304 11.97 63 2.49 TOLERANCE UNLESS SPECIFIED: ENGINEER: DATE: ALL DIMENSIONS ARE IN MILLIMETERS AND [INCHES] 5/11/06 DATE: DRAWN BY: 5/11/06 X.XX SD&P-KW...
- Page 418 CONVERSION COVER 283 11.1 (REPLACES EXISTING CONTROL PANEL) 145 5.7 DSP2/3/METAL ELIMINATOR CONTROL PANEL (REMOVED) INTEGRAL VERSION 1/2 NPT INPUT POWER TOLERANCE UNLESS SPECIFIED: ENGINEER: DATE: CONDUIT ADAPTER ALL DIMENSIONS ARE IN MILLIMETERS AND [INCHES] 2/15/07 NOTES: .8 [.03] ELECTRICAL ACCESS HOLES ARE SIZED FOR M20 CONDUIT FITTINGS OR CORD GRIPS (5 CORD GRIPS SUPPLIED). DATE: .3 [.01] DRAWN BY:...
- Page 419 AVAILABLE CABLE LENGTHS METERS FEET 13.1 16.4 19.7 26.2 32.8 39.4 49.2 11.18 65.6 82.0 98.4 7.24 MINITEK CABLE ADAPTER, M16 (SUPPLIED WITH NEW CABLE) 1.11 284 11.18 3 .12 .26 THRU 191 7.53 304 11.97 REMOTE VERSION TOLERANCE UNLESS SPECIFIED: ENGINEER: DATE: ALL DIMENSIONS ARE IN MILLIMETERS AND [INCHES]...
- Page 420 AVAILABLE CABLE LENGTHS METERS FEET 13.1 16.4 19.7 26.2 32.8 39.4 49.2 65.6 AUDIT CHECK 82.0 (OPTIONAL, 98.4 DIMENSIONS SHEET 2) ISOLATOR FOOT SUPPORT FRAME, TYPICAL 12.7[.50] THRU INSULATING BUSHING M10 WASHER M10 SCREW TOLERANCE UNLESS SPECIFIED: ENGINEER: DATE: ALL DIMENSIONS ARE IN MILLIMETERS AND [INCHES] 5/31/07 DATE: DRAWN BY:...
- Page 421 RECTANGULAR APERTURE HEADS: C (HEAD WIDTH, mm) A (APERTURE WIDTH, mm) B (APERTURE HEIGHT, mm) 2.95 100 [3.94] FOR B=50 ONLY 145 OR 250 145 OR 250 145 OR 250 145 OR 250 145 OR 250 145 OR 250 145 OR 250 145 OR 250 145 OR 250 145 OR 250 145 OR 250 145 OR 250 145 OR 250 145 OR 250 145 OR 250 145 OR 250 EPOXY LINED 145 OR 250 145 OR 250 145 OR 250 145 OR 250 145 OR 250 145 OR 250 145 OR 250...
- Page 422 RECTANGULAR APERTURE HEADS: C (HEAD WIDTH, mm) A (APERTURE WIDTH, mm) B (APERTURE HEIGHT, mm) 145 OR 250 145 OR 250 145 OR 250 145 OR 250 145 OR 250 155 6.09 145 OR 250 145 OR 250 145 OR 250 145 OR 250 145 OR 250 145 OR 250 145 OR 250 145 OR 250 145 OR 250 B + 242[9.53]...
- Page 423 RECTANGULAR APERTURE HEADS: C (HEAD WIDTH, mm) A (APERTURE WIDTH, mm) B (APERTURE HEIGHT, mm) 145 OR 250 145 OR 250 145 OR 250 145 OR 250 145 OR 250 145 OR 250 145 OR 250 145 OR 250 SQUARE APERTURE HEADS (HEAD WIDTH) A &...
- Page 424 THRU 1.11 11.18 7.24 1.97 11.18 10 .39 3 .12 191 7.53 11.97 REMOTE CONTROL PANEL TOLERANCE UNLESS SPECIFIED: ENGINEER: DATE: ALL DIMENSIONS ARE IN MILLIMETERS AND [INCHES] 5/31/07 DATE: DRAWN BY: 5/31/07 X.XX ANGLES DATE: CHECKED BY: 5/31/07 REMOVE ALL BURRS & UNNECESSARY SHARP EDGES APEX 300 OUTLINE AND MOUNTING This document is confidential and is the property of Thermo Fisher...
- Page 425 1.11 28.1 THRU 11.18 284 7.24 1.97 11.18 284.1 .12 3 AUDIT CHECK (OPTIONAL) 11.97 304.1 7.53 191.2 AVAILABLE CABLE LENGTHS FEET METERS NOTES: 13.1 CABLES LONGER THAN 98.4 FT [30m] AVAILABLE AS A SPECIAL ORDER (UP TO 295 FT [90m]). 16.4 19.7 PRODUCT TUBES AVAILABLE IN WHITE, BLACK ANTI-STATIC , OR WHITE WRAPPED WITH ANTI-STATIC...
- Page 426 I.D. 11.1 THRU, "N" EQUALLY SPACED ON B.C. B.C. ZERO VELOCITY OUTLET FLANGE DETAIL FIELD COMPRESSION FLANGES 30 [762] (SOME SYSTEMS, SEE TABLE) MAX. MAX. AUDIT CHECK (OPTIONAL) .41 10.3 PLASTIC INSULATING MOUNTING SPACER 1.00 25.4 (SUPPLIED) PLASTIC INSULATING SHOULDER WASHER (SUPPLIED) DETAIL A TOLERANCE UNLESS SPECIFIED:...
- Page 427 TAB CHART I.D. FIELD COMPRESSION B.C. (OVERALL METAL DETECTOR PRODUCT TUBE FLANGES (BOLT CIRCLE (FLANGE (REJECTER HEIGHT) (TUBE HEIGHT) HEIGHT) (# FLANGE APERTURE (mm) HOLES) inch C=145mm C=250mm inch inch inch inch inch inch inch inch inch inch inch 3.00 76.2 100 x 100 5.00...
- Page 428 PRODUCT TUBE METAL DETECTOR CENTER (SPOOL PIECE (VALVE WITH (OVERALL SYSTEM NOMINAL (TUBE LENGTH) APERTURE SUPPORT/ WITH GASKET) GASKET) TUBE LENGTH) SIZE SIZE TYPE CLAMP inch inch inch inch inch inch inch inch inch 30.87 784.1 32.00 812.8 15.47 392.9 PIPE 12.06 306.3...
- Page 429 .75 19.1 "A" .75 19.1 11.25 285.8 "C" .75 19.1 "B" .75 19.1 "S" 1/2 "T" REJECT VERIFIY "T" (OPTIONAL) "L" "H" 1.00 25.4 9.00 228.6 "V" FRL MOUNTING PLATE TOLERANCE UNLESS SPECIFIED: 11.00 279.4 ENGINEER: DATE: ALL DIMENSIONS ARE IN INCHES AND [MILLIMETERS] 4/23/08 .06 [1.5] DATE:...
Need help?
Do you have a question about the APEX 100 and is the answer not in the manual?
Questions and answers