Sign In
Upload
Manuals
Brands
Christie Manuals
Other
Roadster S+20K
Christie Roadster S+20K Manuals
Manuals and User Guides for Christie Roadster S+20K. We have
5
Christie Roadster S+20K manuals available for free PDF download: User Manual, Replacement Instructions Manual, Specifications
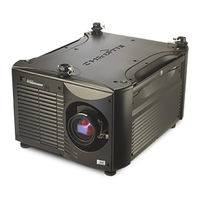
Christie Roadster S+20K User Manual (173 pages)
Roadster, Matrix WU, Mirage S+/HD/WU Series
Brand:
Christie
| Category:
Projector
| Size: 13.79 MB
Table of Contents
Table of Contents
5
Introduction
7
The Projectors
7
Main Features
8
Lamps / Light Output
8
Inputs
8
How the Projectors Work
9
Special Display Functions
9
Communications and Diagnostics
9
Components
10
Purchase Record and Warranty Registration
10
Installation & Setup
11
Quick Setup
11
Install a Projection Lens
11
Position the Projector
11
Connect the Line Cord
12
Turn on the Projector and Lamp
12
Specifications
12
Select a Source
13
Optimize the Display
13
Lens Adjustments
13
Image Adjustments
13
Installation Considerations
14
Lifting
14
Hoisting
14
Top Rigging Points
14
Hoisting Procedure
15
Bottom Rigging Points
15
Attach Safety Cables
16
Retract Feet
16
Attach Rigging Hardware
16
Using the Rigging Hardware
16
Stacking Procedure
17
Position the Projectors
17
Adjust the Feet
17
Align Holes in Mounts and Legs, and LOCK with Pin
19
Remove Safety Pins
19
Leg Nuts
20
Position the First Image (Fixed Projector)
20
Display the Grid Test Pattern
20
Align the Centerlines of the Grid
21
How to Move the Image
21
If the Center Lines Are Parallel but Misaligned
21
Align the Edges of the Grid
22
Secure All Stacking Wheels and Leg Nuts
22
Front Screen Installations
23
Rear Screen Installations
23
Audience Coverage with Flat Screen
23
Screen Aspect Ratio
24
Ambient Lighting
24
Other Considerations
25
Projector Position and Mounting
25
Throw Distance
25
Lens Offsets
26
Maximum Vertical Offset
27
Tilting the Projector
28
Ceiling Mount
28
Vertical and Horizontal Tilt Ranges
28
Rear Screen
28
RGB Signals
29
Input Panel
29
Connecting RGB Input
29
Connecting Ypbpr
30
Connecting Composite Video
30
DVI Digital Video
31
Dual SD/HD-SDI
31
Other Optional Inputs
31
Connecting Communications
32
Remote Keypads
32
Serial Port Connections
32
Connecting RS-232
32
Ethernet Communications
33
RS-422 Connection to a Computer
33
Connecting Ethernet
33
The GPIO Port
34
Serial Links
34
Connecting Multiple Projectors
34
RS-232 Serial Link Loop-Through at First Projector
35
Mixed Serial Network
35
Ethernet Networks
36
Setting the Projector’s Ip Address
36
Separating Networks
37
Subnet Mask and Default Gateway
37
Keeping Communications Separate (Default)
37
Power Connection
38
Joining All Networks
38
Operating Orientation
39
Leveling
39
Zoom, Focus, and Lens Offset
39
Keypad Protocols and Conversion
40
Zoom
40
Focus
40
Lens Offset
40
Ergonomic Keypad
41
Setting the Protocol
41
Opening the “Brick” Rental Staging – Standard IR Remote
41
Set the Jumpers
42
Shortcut Method
42
Converting a Rental Staging Keypad
42
To Change from Infrared to Wired
43
To Change from Wired to Infrared
43
Operation
45
Projector Basics
45
Overview
45
Basic Projector Components
45
Shutter and Iris
46
Eyebolts
46
Handle
46
Filter Panel
46
AC Power Input & Monitoring
47
Status Display
47
Status Display Window
47
Using the Keypads
48
LED Status Display
48
Built-In Keypad at Projector Rear
48
IR Remote
49
Remote Keypad
49
Wired Remote
50
Guide to Keypads
51
“Brick” Rental Staging – Standard IR Remote
51
Keypad Commands
52
Power ON/OFF
52
Auto Setup
52
Channel
53
Brightness
54
Contrast
54
Input Input
54
Gamma
55
Menu
55
OSD (On-Screen Display)
55
Pip
55
Shutter
56
Function Key
56
Projector
56
If Within a Presentation
56
Arrow Keys
57
Laser
57
Backlighting
57
Navigating the Menus
58
On-Line Help
58
Context-Sensitive Help
58
Time-Outs
59
Accessing General Help Topics
59
The Global Icon
59
The PIP Icon
59
Example of Pull-Down List
60
“Direct” Slidebars
60
Checkboxes
60
Pull-Down Lists
60
Navigate Within the Edit Window
61
Add or Delete a Character or Space
61
Editing Numerical Values
61
Using Inputs and Channels
61
Switching Inputs
62
Channel List
62
Using a Channel
63
Abbreviations for Signal Type
64
Signal Type
64
Functions Within the Channel Setup Menu
65
To Copy a Channel
65
To Delete a Channel
65
To Delete Multiple Channels
65
Editing a Channel Setup
66
Auto Source
66
Locked
66
Previous Channel
66
Adjusting the Image
67
Next Channel
67
Use Auto Setup
67
Size and Position Menu
67
Resize Presets
68
Select a Resize Presets
68
What Is the Resizing Default?
68
Vertical Stretch
69
Size
69
Pixel Track
70
Pixel Phase
70
H-Position
70
V-Position
70
Advanced Size and Position
71
Active Input Window
71
Blanking
71
Blanking of a PIP Image
71
Image Settings Menu
72
Detail
74
Noise Reduction
74
Color Space
74
Video Options
74
Enable Decoder Agc
75
Video Standard
75
Regions and Video Standards: Summary
75
Input Video Black
75
Color
76
Decoder Luma Delay
76
Input Levels
76
Auto Input Level
77
Blacklevels and Drives
77
Auto Color Enable
77
Clamp Location
78
Color Enable
78
Peak Detector
78
Advanced Image Settings
79
Gamma Table
79
Select Color Adjustment
80
Color Temperature
80
Optical Aperture
80
Aperture Manual Adjustment
80
Frame Delay
81
Frame Delay Monitor
81
Dark Interval
82
3D Stereo Sync Locking
82
3D Stereo Sync Select
82
3D Stereo Sync Delay
82
Frame Lock Enable
83
Mirage HD/WU Series
83
3D Sync Input
84
3D Sync Output
84
3D Source
85
Accuframe
86
Film Mode Threshold
86
Floating Inputs
87
Language
87
Image Orientation
87
Auto Power-Up
87
Adjusting System Parameters and Advanced Controls
87
Set Date & Time
88
Menu Preferences
88
Large Menu Font
88
Menu Location
88
Splash Screen Setup
89
Baud Rates
89
Network Routing
90
Using the “Network Routing” Option
90
Dhcp
91
Ip Address
91
Port
91
Artnet Interface
91
Artnet ADVANCED MODE
92
Artnet BASE CHANNEL
92
Device Name
92
Broadcast Key
93
Front IR / Back IR
93
Wired Keypad
93
Test Pattern
93
Keystone
94
Brightness Uniformity
94
Edge Blending
94
Color Adjustments by X/Y, and Color Saturation
95
Defining “User” Color Gamuts
95
CIE 1931 Chromaticity Diagram
96
Color Saturation
97
Black Level Blending
97
To Restore the Use of Christie TWIST
97
Default Color Adjustments
98
Intelligent Lens System
98
Test Pattern Grey Level
98
Freeze Image
99
Odd Pixel Adjustment
99
Using “Odd Pixel Adjustment”
99
Color Enable
99
Level Detector
100
Level Value
100
Aspect Ratio Overlay
100
Liteloc Calibration
100
Automatic ILS Lens Calibration
101
Working with PIP or Seamless Switching
102
Swap Main and PIP Image
103
PIP Enable
103
PIP Size and Position
103
Tips for Best Source Switching
104
PIP Border Width
104
PIP Border Color
104
Image Optimization
104
Numbers Select Main Image
105
Working with the Lamp
105
How Old Is the Lamp?
108
When to Replace the Lamp
108
Using Multiple Projectors
109
Matching Colors in Multiple Screens
109
Preliminary Calibration
109
3.10 Status Menu
109
Color Adjustment Procedure
110
Jot down a Set of ”Max Drives” X/Y Values
110
Copy X/Y Values into All Projectors
111
Using the Color Saturation Menu for Color Matching
112
Achieving Brightness
112
General Setup
113
Set Lamp Power
113
White Uniformity Slidebars
113
Judge by Eye or Use a Meter
113
Adjust Light Output in 8 Zones
115
Match Zones to Center Color Temperature
115
Canceling Brightness Uniformity
115
What Is a Blend?
116
How Are Blends Used?
116
Flat Blends Vs. Warped Blends
116
Optional Blinders
117
Main Functions
117
“Shape” Examples
117
Blend Midpoint
118
Show Blending Overlap
118
Other Functions
118
Edge Blending Procedure
118
Set Starting Points for Adjustment
119
Set Starting Points for each Projector
119
Set Blend Width
119
Black Level Blending Procedure
120
Remote Control of the Projector
121
Via Ascii Messaging
121
Via Web Interface
121
Error Conditions
122
User Errors
122
Invalid User Entry
122
No Signal
122
Bad Sync
123
Other Signal Error Messages
123
System Warnings
123
System Errors
123
System Error Codes
124
Maintenance
125
Warnings and Guidelines
125
Labels and Markings
125
Projector Maintenance Schedule
126
Projector Location
126
Projector Positioning for Proper Airflow
127
Lamp and Filter
127
Power Cord and Attachments
128
Ventilation
128
Servicing
129
Cleaning
129
Maintenance Guide
129
Air Flow Sensor
130
Remove Air Flow Sensor
130
Remove Input Panel
131
Remove Rear Cover
131
Remove Metal Panel
131
Clean Air Flow Sensor
131
How to Clean the Airflow Sensor
132
How to Re-Install the Airflow Sensor
132
Replacing Keypad Batteries
132
Lamp and Filter Replacement
133
Lamp and Filter Kits
133
Turn the Lamp off
134
Unplug the Projector
134
Open the Lamp Door
134
Remove Lamp Retaining Bar
134
Remove the Lamp Module
135
Insert the New Lamp Module
135
Remove Retaining Bar
135
Re-Install Lamp Retaining Bar
136
Close Lamp Door
136
Record the Serial Number of the New Lamp
136
Install Retaining Bar
136
Filter Replacement
137
Remove Filter Door
137
Replace Filter
137
Replacing the Projection Lens
138
Install the Filter Grille/Door
138
Rotate the Lens
139
Depressing Lens Release
139
Insert New Lens
139
Pull Lens out
139
Power up
140
Reposition the Projector for New Lens
140
Troubleshooting
141
Displays
141
Blank Screen, no Display of Image
141
Blacklevels Seem too High
141
The Display Is Jittery or Unstable
142
The Display Is Faint
142
Data Is Cropped from Edges
142
The Display Has Suddenly Frozen
142
Values in Color Saturation Slidebars Vary over Time
143
The Display Is Not Rectangular
143
The Display Is “Noisy”
143
Lamp Does Not Ignite
143
Ethernet
144
System Error Code 1F
144
System Error Code 1E
144
3D Sync Input
144
6.1 Specifications
145
Audible Noise
152
Operating Environment
152
Keypad Reference
155
Serial Communication Cables
157
From Projector to Computer
157
From Projector to Projector
157
System Integration
159
Configuring the GPIO
159
Query Command
160
Real Time Event
160
Optional Input Modules
161
Dual SD/HD-SDI Features
161
RGB500 Features
162
RGB400BA Features
162
RGB400 ALT Features
162
PC250 Analog Features
163
Serial Digital Input Module
163
SDI Features
164
Menu Tree
165
Advertisement
Christie Roadster S+20K User Manual (182 pages)
Roadster, Matrix WU, Mirage S+/HD/WU
Brand:
Christie
| Category:
Projector
| Size: 25.88 MB
Table of Contents
Table of Contents
5
Using this Manual
11
Safety Warnings and Guidelines
12
General Precautions
12
Labels and Markings
12
Typographical Notations
13
Purchase Record and Service Contacts
13
Projector Overview
14
How the Projector Works
14
Main Features
15
Lamps/Light Output
15
Inputs
15
List of Components
17
2: Installation and Setup
19
Projector Quick Setup and Installation
19
Quicksetup
19
Connect the Line Cord
20
Installation Considerations
22
Lifting, Hoisting, and Stacking
22
Hoisting Procedure
25
Stacking Procedure
26
Alignment Procedure
28
Installation Type
30
Screen Type
31
Screen Size
32
Screen Aspect Ratio
32
Ambient Lighting
32
Other Considerations
33
Projector Position and Mounting
33
Throw Distance
33
Vertical & Horizontal
34
Tilting the Projector
35
Mounting
36
Folded Optics
36
Connecting Sources
36
RGB Signals
37
Ypbpr (Component Video)
38
Composite Video
38
DVI Digital Video
39
Dual SD/HD-SDI
39
Other Optional Inputs
40
Connecting Communications
40
Remote Keypads
40
Serial Port Connections
40
Ethernet Communications
41
Connecting Multiple Projectors
43
Serial Links
43
Ethernet Networks
44
Separating Networks
46
Communicating to All Ports
46
Power Connection
47
Operating Orientation
47
Leveling
47
Zoom, Focus and Lens Offset
48
Lens Adjustments
48
Keypad and Remote Protocols and Conversion
49
Ergonomic Keypad
50
Standard IR Remote
50
Setting the Protocol
50
Projector Basics
53
Zoom
53
Lens Release
53
Focus
53
Lens Offset
53
Shutter and Iris
54
Eyebolts
54
Handles
54
Stacking Mounts / Stacking Legs
54
Adjustable Feet
54
Filter Panel
54
Lamp Door
54
Input Panel
54
AC Power Input and Monitoring
55
Status Display (Error Codes) and Status Display Window
56
Keypads / Sensors
56
Using the Keypads
56
Built-In Keypad
57
IR Remote
58
Wired Remote
59
Guide to Keypads
60
Keypad Commands
60
Navigating the Menus
65
On-Line Help
66
Time-Outs
67
Global Icons
67
PIP Icon
67
Using Slidebars and Other Commands
67
Editing Text
69
Editing Numerical Values
70
Using Inputs and Channels
70
Do I Select an Input or a Channel
70
Creating a New Channel (Automatic)
72
What Channels Are Defined so Far
72
Copying or Deleting Channels
74
Editing a Channel Setup
75
Adjusting the Image
76
Before You Begin
77
Size and Position Menu
77
Image Settings Menu
82
Adjusting System Parameters and Advanced Controls
96
System Configuration (General Settings)
97
System Configuration (Communication)
98
System Configuration (Geometry & Color) Submenu
103
System Configuration (Diagnostics / Calibration)
108
System Configuration (Optional Input Modules)
111
Working with PIP or Seamless Switching
111
Working with PIP
112
Working with Seamless Switching
113
Working with the Lamp
114
Lamp Menu
114
How Old Is My Lamp
117
When to Replace the Lamp
117
Status Menu
118
Using Multiple Projectors
118
Matching Colors in Multiple Screens
118
Achieving Brightness Uniformity
121
Edge Blending
124
Black Level Blending
129
Remote Control of the Projector
130
Error Conditions
130
User Errors
131
Input Signal Errors
131
System Warnings/Errors
132
Projector Location
135
Lamp and Filter Replacement
135
Power Cord and Attachments
136
Ventilation
136
Servicing
136
Cleaning
137
Replacing Keypad Batteries
138
Replacing the Lamp and Filter
138
How Old Is My Lamp
139
Lamp Replacement Procedure
139
Filter Replacement Procedure
143
Replacing the Projection Lens
144
Displays
147
Blank Screen, no Display of Image
147
Blacklevels Seem too High
147
Image Appears "Squeezed" or Vertically Stretched into Center of Screen
147
The Projector Is on but There Is no Display
147
The Display Is Jittery or Unstable
148
The Display Is Faint
148
The Upper Portion of the Display Is Waving, Tearing or Jittering
148
Portions of the Display Are Cut off or Wrap to the Opposite Edge
148
The Display Appears Compressed (Vertically Stretched)
148
Data Is Cropped from Edges
148
Display Quality Appears to Drift from Good to Bad, Bad to Good
148
The Display Has Suddenly Frozen
148
Colors in the Display Are Inaccurate
149
Values in Color Saturation Slidebars Vary over Time
149
The Display Is Not Rectangular
149
The Display Is "Noisy
149
Lamp
149
Lamp Does Not Ignite
149
Lamp Suddenly Turns off
149
Flicker, Shadows or Dimness
150
Liteloc™ Does Not Seem to Work
150
Ethernet
150
Sync Input
150
System Error Code 1E
150
System Error Code 1F
150
Display
151
Panel Resolution and Refresh Rate
151
Brightness (ANSI 9 Point Measurement, with Fully Open Optical Aperture)
151
Achievable Contrast Ratio
152
Colors and Gray Scale
152
Lens Offsets
152
Inputs
153
Analog: Rgb/Ypbpr (5 Bncs at INPUT 1)
153
Analog: Video (INPUTS 3 and 4)
153
Analog: Sync (INTERLACED or PROGRESSIVE SCAN Format)
154
DVI-I (INPUT 2, Standard with MIRAGE HD Model)
154
Dual SD/HD-SDI (INPUT Standard with ROADSTER Models)
154
Control
155
Remote Keypad
155
IR Remote Sensors
155
Ethernet
155
Serieal Input
155
Serial Input
156
GPIO Input
156
Power
156
General
156
Lamp (DC)
160
Audible Noise
161
Safety
161
EMC Emissions
161
EMC Immunity
161
Operating Environment
162
Non-Operating Environment
162
Size & Weight
162
Standard Components and Optional Components
163
Roadster Series
163
Mirage Series
163
Optional Accessories (Sold Separately)
164
Lenses HD
164
Accessories
164
Optional Input Modules
164
Introduction
169
Query Command
170
Real Time Event
170
Dual SD/HD-SDI Module (38-804656-XX
171
RGB500 Input Module 38-804606-XX
172
RGB400BA Input Module (38-804610-XX
172
RGB400 Active Loop-Thru (Input Module 38-804607-XX
173
PC250 Analog (Input Module 38-804609-XX
173
DVI Input Module (38-804635-XX
174
Serial Digital Input Module (38-804602-XX
174
Christie Roadster S+20K User Manual (198 pages)
Christie Roadster S+12K; Roadster HD12K; Roadster S+16K; Roadster HD18K; Roadster S+20K; Mirage HD12; Mirage S+14K; Mirage HD18 Data/video projector
Brand:
Christie
| Category:
Other
| Size: 10.69 MB
Table of Contents
Table of Contents
5
Introduction
7
The Projectors
7
Components
10
Purchase Record and Warranty Registration
10
Installation & Setup
11
Quick Setup
11
Installation Considerations
13
Projector Position and Mounting
25
Source Connections
28
Connecting Communications
31
Connecting Multiple Projectors
33
Power Connection
37
Operating Orientation
38
Leveling
38
Zoom, Focus, and Lens Offset
38
Keypad Protocols and Conversion
39
Basic
43
Operation
43
Overview
43
Projector Basics
43
Using the Keypads
46
Navigating the Menus
54
Using Inputs and Channels
58
Adjusting the Image
63
Working with PIP or Seamless Switching
96
Working with the Lamp
99
3.10 Status Menu
103
Using Multiple Projectors
103
Remote Control of the Projector
115
Error Conditions
116
Maintenance
119
Warnings and Guidelines
119
Cleaning
122
Replacing Keypad Batteries
123
Replacing the Lamp and Filter
123
Replacing the Lens
129
Troubleshooting
133
Displays
133
Lamp
135
Ethernet
136
Sync Input
136
Specifications
137
Remote Keypad
140
Glossary
147
Serial Communication Cables
157
Throw Distance
159
System Integration
188
Optional Input Modules
189
Advertisement
Christie Roadster S+20K Replacement Instructions Manual (8 pages)
Brand:
Christie
| Category:
Projector
| Size: 2.96 MB
Table of Contents
Lamp Replacement Procedure
2
Step 9 - Install the Air Filter
4
Filter Replacement Procedure
6
Step 3 - Replace Filter
7
Technical Support
8
Christie Roadster S+20K Specifications (4 pages)
Roadster Series
Brand:
Christie
| Category:
Projector
| Size: 0.63 MB
Advertisement
Related Products
Christie Roadster S+22K-J
Christie MIRAGE S2K
Christie Kc Mirage S+2-4-8K
Christie Vive Audio S218
Christie Vive S215
Christie Mirage S+2K
Christie Matrix S+2K-5K
Christie Vive Audio S218LP
Christie MIRAGE S4K
Christie SLC 45
Christie Categories
Projector
Monitor
Projector Accessories
Racks & Stands
Speakers
More Christie Manuals
Login
Sign In
OR
Sign in with Facebook
Sign in with Google
Upload manual
Upload from disk
Upload from URL