Juniper ACX1000 Configuration Manual
Junos os; acx series universal access router
Hide thumbs
Also See for ACX1000:
- User manual (216 pages) ,
- Hardware manual (204 pages) ,
- Quick start manual (27 pages)
Table of Contents
Advertisement
Quick Links
See also:
User Manual
Advertisement
Table of Contents
Troubleshooting

Related Manuals for Juniper ACX1000


Summary of Contents for Juniper ACX1000
- Page 1 ® Junos ACX Series Universal Access Router Configuration Guide Modified: 2017-08-31 Copyright © 2017, Juniper Networks, Inc.
- Page 2 END USER LICENSE AGREEMENT The Juniper Networks product that is the subject of this technical documentation consists of (or is intended for use with) Juniper Networks software. Use of such software is subject to the terms and conditions of the End User License Agreement (“EULA”) posted at http://www.juniper.net/support/eula/.
-
Page 3: Table Of Contents
Mapping ........... 28 ACX1000 and ACX1100 Routers Hardware and CLI Terminology Mapping ..30 ACX1000 and ACX1100 Routers Hardware and CLI Terminology Mapping . - Page 4 Autoinstallation Process on a New ACX Series Router in Hybrid Mode ..84 Configuring Autoinstallation of ACX Series Routers in Hybrid Mode ... 87 Copyright © 2017, Juniper Networks, Inc.
- Page 5 RPL Neighbor Node ..........115 Copyright © 2017, Juniper Networks, Inc.
- Page 6 Configuring Chassis Alarm Input ........160 Copyright © 2017, Juniper Networks, Inc.
- Page 7 Setting the SAToP Encapsulation Mode ......195 Copyright © 2017, Juniper Networks, Inc.
- Page 8 Clock Source Selection Algorithm ....... . . 227 Configuring External Clock Synchronization for ACX Series Routers ..228 viii Copyright © 2017, Juniper Networks, Inc.
- Page 9 Class to the ESMC Quality Level ....... 293 Example: Configuring Hybrid Mode and ESMC Quality Level Mapping ..295 Copyright © 2017, Juniper Networks, Inc.
- Page 10 Default Client/Server Interaction ........342 Dynamic Client/Server Interaction for DHCPv4 ..... . 342 Copyright © 2017, Juniper Networks, Inc.
- Page 11 Trusting Option 82 Information ........378 Specifying the Maximum Number of DHCP Clients Per Interface ... . 378 Copyright © 2017, Juniper Networks, Inc.
- Page 12 Tracing Spanning-Tree Operations ........421 Understanding BPDU Protection for Spanning-Tree Instance Interfaces ..423 Configuring BPDU Protection for Spanning-Tree Instance Interfaces ..424 Copyright © 2017, Juniper Networks, Inc.
- Page 13 Multicast-Router Interfaces and IGMP Snooping Proxy Mode ....476 Host-Side Interfaces and IGMP Snooping Proxy Mode ....477 Copyright © 2017, Juniper Networks, Inc. xiii...
- Page 14 Example: Configuring an LSQ Interface as an NxT1 Bundle Using MLPPP . . 523 Example: Configuring an MLPPP Bundle on ACX Series ....525 Copyright © 2017, Juniper Networks, Inc.
- Page 15 TTL Processing on Incoming MPLS Packets ......588 Pseudowire Overview for ACX Series Universal Access Routers ... . . 590 Copyright © 2017, Juniper Networks, Inc.
- Page 16 Configuring a Route to Be Tracked ........661 Copyright © 2017, Juniper Networks, Inc.
- Page 17 Auto-Bandwidth and PCE-Controlled LSP ..... . 705 TCP-MD5 Authentication for PCEP Sessions ..... 705 Copyright © 2017, Juniper Networks, Inc. xvii...
- Page 18 Configuring Layer 2 Circuits over Both RSVP and LDP LSPs ....779 Enabling the Layer 2 Circuit When the MTU Does Not Match ....780 xviii Copyright © 2017, Juniper Networks, Inc.
- Page 19 Understanding Layer 3 VPN Forwarding Through the Core ....826 Understanding Routing Instances for Layer 3 VPNs ..... . . 827 Copyright © 2017, Juniper Networks, Inc.
- Page 20 Access Routers ..........865 Configuring CoS on ACX Series Universal Access Routers ....866 Copyright © 2017, Juniper Networks, Inc.
- Page 21 Hybrid Mode ..........926 Copyright © 2017, Juniper Networks, Inc.
- Page 22 Types of IP and MAC Address Validation ......996 Configuring IP and MAC Address Validation for Static Interfaces ... . 997 xxii Copyright © 2017, Juniper Networks, Inc.
- Page 23 Service Filter Actions ..........1039 Copyright © 2017, Juniper Networks, Inc.
- Page 24 Security Associations ......... . 1088 xxiv Copyright © 2017, Juniper Networks, Inc.
- Page 25 Assigning the OAM Protocol to an EVC ......1115 Copyright © 2017, Juniper Networks, Inc.
- Page 26 Guidelines for Configuring ETH-SLM ........1146 xxvi Copyright © 2017, Juniper Networks, Inc.
- Page 27 Managed Objects for jnxSoamPmNotificationObj Table ....1226 Managed Objects for jnxSoamPmNotifications Table ....1227 Copyright © 2017, Juniper Networks, Inc. xxvii...
- Page 28 LDP BGP Interworking Platform Support ......1275 Configuring FEC 128 VPLS Mesh Groups for LDP BGP Interworking ..1275 xxviii Copyright © 2017, Juniper Networks, Inc.
- Page 29 Interface ..........1389 Configuring the Input as a Logical Interface and the Ouput as VLAN . . 1389 Copyright © 2017, Juniper Networks, Inc. xxix...
- Page 30 ........... . . 1436 Copyright © 2017, Juniper Networks, Inc.
- Page 31 (RFC 2544 Benchmarking) ........1485 Copyright © 2017, Juniper Networks, Inc.
- Page 32 (Enabling Globally) ........1543 xxxii Copyright © 2017, Juniper Networks, Inc.
- Page 33 ........... 1596 Copyright © 2017, Juniper Networks, Inc.
- Page 34 (RFC 2544 Benchmarking) ......1652 xxxiv Copyright © 2017, Juniper Networks, Inc.
- Page 35 (Services) ..........1710 Copyright © 2017, Juniper Networks, Inc.
- Page 36 ..........1759 xxxvi Copyright © 2017, Juniper Networks, Inc.
- Page 37 ......2006 Copyright © 2017, Juniper Networks, Inc. xxxvii...
- Page 38 ........2751 xxxviii Copyright © 2017, Juniper Networks, Inc.
- Page 39 ........2993 Copyright © 2017, Juniper Networks, Inc.
- Page 40 ......... . 3210 test services rpm rfc2544-benchmarking test ......3211 Copyright © 2017, Juniper Networks, Inc.
- Page 41 Figure 5: ACX500 Outdoor Router Interface Port Mapping ....30 Figure 6: ACX1000 Interface Port Mapping ....... 31 Figure 7: ACX1100 Interface Port Mapping .
- Page 42 Figure 52: Distribution of Routes from PE Routers to CE Routers ... . 826 Figure 53: Using MPLS LSPs to Tunnel Between PE Routers ....827 xlii Copyright © 2017, Juniper Networks, Inc.
- Page 43 Pseudowire ..........1376 Copyright © 2017, Juniper Networks, Inc.
- Page 44 ACX Series Universal Access Router Configuration Guide xliv Copyright © 2017, Juniper Networks, Inc.
-
Page 45: List Of Tables
Routers with PoE ..........29 Table 7: CLI Equivalents of Terms Used in Documentation for ACX1000 Router . - Page 46 Configuring MPLS and Pseudowires ....... . 587 xlvi Copyright © 2017, Juniper Networks, Inc.
- Page 47 Table 65: Service Filter Match Conditions for IPv4 Traffic ....1038 Table 66: Terminating Actions for Service Filters ......1039 Copyright © 2017, Juniper Networks, Inc. xlvii...
- Page 48 Table 102: jjnxSoamPmNotifications Table ......1228 xlviii Copyright © 2017, Juniper Networks, Inc.
- Page 49 Table 136: show chassis temperature-thresholds Output Fields ... . 2395 Table 137: show class-of-service interface Output Fields ....2422 Copyright © 2017, Juniper Networks, Inc. xlix...
- Page 50 Output Fields ..........2792 Copyright © 2017, Juniper Networks, Inc.
- Page 51 Table 224: show route instance Output Fields ......3072 Copyright © 2017, Juniper Networks, Inc.
- Page 52 Table 238: show validation session Output Fields ..... . . 3188 Table 239: show validation statistics Output Fields ..... . 3191 Copyright © 2017, Juniper Networks, Inc.
-
Page 53: About The Documentation
® To obtain the most current version of all Juniper Networks technical documentation, see the product documentation page on the Juniper Networks website at http://www.juniper.net/techpubs/ If the information in the latest release notes differs from the information in the documentation, follow the product Release Notes. -
Page 54: Merging A Full Example
For example, copy the following snippet to a file and name the file . Copy the file to the directory ex-script-snippet.conf ex-script-snippet.conf /var/tmp on your routing platform. commit { file ex-script-snippet.xsl; } Copyright © 2017, Juniper Networks, Inc. -
Page 55: Documentation Conventions
Alerts you to the risk of personal injury from a laser. Indicates helpful information. Best practice Alerts you to a recommended use or implementation. Table 2 on page lvi defines the text and syntax conventions used in this guide. Copyright © 2017, Juniper Networks, Inc. - Page 56 Indention and braces ( { } ) Identifies a level in the configuration [edit] hierarchy. routing-options { static { route default { ; (semicolon) Identifies a leaf statement at a nexthop address; configuration hierarchy level. retain; GUI Conventions Copyright © 2017, Juniper Networks, Inc.
-
Page 57: Documentation Feedback
We encourage you to provide feedback, comments, and suggestions so that we can improve the documentation. You can provide feedback by using either of the following methods: Online feedback rating system—On any page of the Juniper Networks TechLibrary site http://www.juniper.net/techpubs/index.html , simply click the stars to rate the content, and use the pop-up form to provide us with information about your experience. -
Page 58: Opening A Case With Jtac
Download the latest versions of software and review release notes: http://www.juniper.net/customers/csc/software/ Search technical bulletins for relevant hardware and software notifications: http://kb.juniper.net/InfoCenter/ Join and participate in the Juniper Networks Community Forum: http://www.juniper.net/company/communities/ Open a case online in the CSC Case Management tool: http://www.juniper.net/cm/... -
Page 59: Overview
PART 1 Overview ACX Series Universal Access Router Overview on page 3 Copyright © 2017, Juniper Networks, Inc. - Page 60 ACX Series Universal Access Router Configuration Guide Copyright © 2017, Juniper Networks, Inc.
-
Page 61: Acx Series Universal Access Router Overview
Routers) on page 22 ACX500 Routers Hardware and CLI Terminology Mapping on page 25 ACX1000 and ACX1100 Routers Hardware and CLI Terminology Mapping on page 30 ACX2000 and ACX2100 Routers Hardware and CLI Terminology Mapping on page 33 ACX2200 Routers Hardware and CLI Terminology Mapping on page 36... -
Page 62: Acx Series Router Architecture
As the cell site router, the ACX Series router connects the base station (BS) to the packet network. Several cell site routers can be connected in a ring or hub-and-spoke fashion to the upstream preaggregation and aggregation routers (MX Series routers). Copyright © 2017, Juniper Networks, Inc. -
Page 63: Junos Space
Junos Space Junos Space is a suite of comprehensive Web-based tools for operational management and administration of Juniper Networks routers, including the ACX Series and MX Series platforms. With the unified Junos Space network management system, network provisioning and operations can be streamlined. Juniper Networks has extended Junos Space with powerful new features designed to address the demanding requirements of mobile backhaul. - Page 64 OSPF 12.2 12.2R2 12.2 12.2R2 12.3x51 15.1X54 15.1X54 12.3X54 -D10 –D20 –D20 –D20 (Indoor) 12.3X54 –D25 (Outdoor) IS-IS 12.2 12.2R2 12.2 12.2R2 12.3x51 15.1X54 15.1X54 12.3X54 -D10 –D20 –D20 –D20 (Indoor) 12.3X54 –D25 (Outdoor) Copyright © 2017, Juniper Networks, Inc.
- Page 65 15.1X54 15.1X54 12.3X54 (OSPF, IS-IS) -D10 –D20 –D20 –D20 (Indoor) 12.3X54 –D25 (Outdoor) Maximum transmission unit 12.2 12.2R2 12.2 12.2R2 12.3x51 15.1X54 15.1X54 12.3X54 (MTU) 1518 -D10 –D20 –D20 –D20 (Indoor) 12.3X54 –D25 (Outdoor) Copyright © 2017, Juniper Networks, Inc.
- Page 66 12.2 12.2R2 12.2 12.2R2 12.3x51 15.1X54 15.1X54 12.3X54 -D10 –D20 –D20 –D20 (Indoor) 12.3X54 –D25 (Outdoor) Traffic engineering 12.2 12.2R2 12.2 12.2R2 12.3x51 15.1X54 15.1X54 12.3X54 -D10 –D20 –D20 –D20 (Indoor) 12.3X54 –D25 (Outdoor) Copyright © 2017, Juniper Networks, Inc.
- Page 67 – – – 15.1X54 15.1X54 – –D20 –D20 Ethernet Layer 2 Ethernet in the first mile 12.2 12.2R2 12.2 12.2R2 12.3x51 15.1X54 15.1X54 12.3X54 (EFM 802.3ah) -D10 –D20 –D20 –D20 (Indoor) 12.3X54 –D25 (Outdoor) Copyright © 2017, Juniper Networks, Inc.
- Page 68 12.2 12.2R2 12.3x51 15.1X54 15.1X54 12.3X54 ccc/any -D10 –D20 –D20 –D20 (Indoor) 12.3X54 –D25 (Outdoor) Policing—per logical 12.2 12.2R2 12.2 12.2R2 12.3x51 15.1X54 15.1X54 12.3X54 interface -D10 –D20 –D20 –D20 (Indoor) 12.3X54 –D25 (Outdoor) Copyright © 2017, Juniper Networks, Inc.
- Page 69 12.2 12.2R2 12.2 12.2R2 12.3x51 15.1X54 15.1X54 12.3X54 -D10 –D20 –D20 –D20 (Indoor) 12.3X54 –D25 (Outdoor) Priority queuing 12.2 12.2R2 12.2 12.2R2 12.3x51 15.1X54 15.1X54 12.3X54 -D10 –D20 –D20 –D20 (Indoor) 12.3X54 –D25 (Outdoor) Copyright © 2017, Juniper Networks, Inc.
- Page 70 12.2 12.2R2 12.2 12.2R2 12.3x51 15.1X54 15.1X54 12.3X54 -D10 –D20 –D20 –D20 (Indoor) 12.3X54 –D25 (Outdoor) Classification—IEEE 802.1p 12.2 12.2R2 12.2 12.2R2 12.3x51 15.1X54 15.1X54 12.3X54 -D10 –D20 –D20 –D20 (Indoor) 12.3X54 –D25 (Outdoor) Copyright © 2017, Juniper Networks, Inc.
- Page 71 Timing Timing-1588-v2, 12.2 12.2R2 12.2 12.2R2 12.3x51 – – 12.3X54 1588-2008–backup clock -D10 –D20 (Indoor) 12.3X54 –D25 (Outdoor) Synchronous Ethernet 12.2 12.2R2 12.2 12.2R2 12.3x51 – – 12.3X54 -D10 –D20 (Indoor) 12.3X54 –D25 (Outdoor) Copyright © 2017, Juniper Networks, Inc.
- Page 72 12.2 12.2R2 12.2 12.2R2 12.3x51 15.1X54 15.1X54 12.3X54 (NTP) -D10 –D20 –D20 –D20 (Indoor) 12.3X54 –D25 (Outdoor) SNMP 12.2 12.2R2 12.2 12.2R2 12.3x51 15.1X54 15.1X54 12.3X54 -D10 –D20 –D20 –D20 (Indoor) 12.3X54 –D25 (Outdoor) Copyright © 2017, Juniper Networks, Inc.
- Page 73 Layer 2 traceroute 12.2 12.2R2 12.2 12.2R2 12.3x51 15.1X54 15.1X54 12.3X54 -D10 –D20 –D20 –D20 (Indoor) 12.3X54 –D25 (Outdoor) 12.2 12.2R2 12.2 12.2R2 12.3x51 15.1X54 15.1X54 12.3X54 -D10 –D20 –D20 –D20 (Indoor) 12.3X54 –D25 (Outdoor) Copyright © 2017, Juniper Networks, Inc.
- Page 74 12.2R2 12.2 12.2R2 12.3x51 15.1X54 15.1X54 12.3X54 -D10 –D20 –D20 –D20 (Indoor) 12.3X54 –D25 (Outdoor) Drop packet stats 12.2 12.2R2 12.2 12.2R2 12.3x51 15.1X54 15.1X54 12.3X54 -D10 –D20 –D20 –D20 (Indoor) 12.3X54 –D25 (Outdoor) Copyright © 2017, Juniper Networks, Inc.
- Page 75 12.3x51 15.1X54 15.1X54 12.3X54 -D10 –D20 –D20 –D20 (Indoor) 12.3X54 –D25 (Outdoor) Control plane DOS 12.2 12.2R2 12.2 12.2R2 12.3x51 15.1X54 15.1X54 12.3X54 prevention -D10 –D20 –D20 –D20 (Indoor) 12.3X54 –D25 (Outdoor) High Availability Copyright © 2017, Juniper Networks, Inc.
- Page 76 12.2R2 12.2 12.2R2 12.3x51 – – 12.3X54 -D10 –D20 (Indoor) 12.3X54 –D25 (Outdoor) ATM PWE3 by means of 12.2 12.2R2 12.2 12.2R2 12.3x51 – – 12.3X54 dynamic labels -D10 –D20 (Indoor) 12.3X54 –D25 (Outdoor) Copyright © 2017, Juniper Networks, Inc.
- Page 77 12.3x51 – – 12.3X54 VP and VC -D10 –D20 (Indoor) 12.3X54 –D25 (Outdoor) Inverse multiplexing over 12.2 12.2R2 12.2 12.2R2 12.3x51 – – 12.3X54 ATM (IMA) -D10 –D20 (Indoor) 12.3X54 –D25 (Outdoor) ATM Encapsulation Copyright © 2017, Juniper Networks, Inc.
- Page 78 VC output shaping 12.2 12.2R2 12.2 12.2R2 12.3x51 – – 12.3X54 -D10 –D20 (Indoor) 12.3X54 –D25 (Outdoor) Early packet discard 12.2 12.2R2 12.2 12.2R2 12.3x51 – – 12.3X54 -D10 –D20 (Indoor) 12.3X54 –D25 (Outdoor) MIBs Copyright © 2017, Juniper Networks, Inc.
-
Page 79: Hardware Architecture Overview
ACX Series Universal Access Routers Documentation Hardware Architecture Overview Juniper Networks routing platforms are made up of two basic routing components: Routing Engine—The Routing Engine controls the routing updates and system management. Packet Forwarding Engine (PFE)—The Packet Forwarding Engine performs Layer 2 and Layer 3 packet switching, route lookups, and packet forwarding. -
Page 80: Hardware Overview (Acx Series, M Series, Mx Series, T Series, And Tx Matrix Routers)
Dual-Root Partitioning ACX Series Routers Overview on page 48 Documentation Hardware Overview (ACX Series, M Series, MX Series, T Series, and TX Matrix Routers) Figure 2 on page 23 shows examples of Routing Engines. Copyright © 2017, Juniper Networks, Inc. -
Page 81: System Memory
Junos OS Release 9.0 or a later release. To determine the amount of memory currently installed on your system, use the show chassis routing-engine command in the command-line interface (CLI). Copyright © 2017, Juniper Networks, Inc. -
Page 82: Storage Media
For more information about upgrading your M7i or M10i router, see the Customer Support Center JTAC Technical Bulletin PSN-2007-10-001: https://www.juniper.net/alerts/viewalert.jsp?txtAlertNumber=PSN-2007-10-001&actionBtn=Search ACX2000 routers are shipped with 2 GB of memory and ACX1000 routers with 1 GB of memory. Storage Media Except for the ACX Series, MX80 routers, and MX104 routers, the M Series, MX Series,... -
Page 83: Acx500 Routers Hardware And Cli Terminology Mapping
PIC 0 through Junos OS Operational PIC 1 for the equivalent Commands item on the router. 2x 1GE (SFP) PIC 0 Built-in uplink ports on ACX500 Universal Access the front panel of the Router Overview router Copyright © 2017, Juniper Networks, Inc. - Page 84 Power Built-in power supply Value of n is always 0. DC power supply ACX500 Power Overview supply (n) – Cooling System and Airflow in ACX500 Routers NOTE: ACX500 routers are fanless. Copyright © 2017, Juniper Networks, Inc.
-
Page 85: Acx500 Outdoor Routers Hardware And Cli Terminology Mapping
Built-in uplink ports on the ACX500 Universal Access front panel of the router Router Overview 3x 1GE (RJ-45) PIC 1 Built-in uplink ports on the ACX500 Universal Access front panel of the router Router Overview Copyright © 2017, Juniper Networks, Inc. -
Page 86: Mapping
ACX500 outdoor router with PoE documentation and the corresponding terms used in the Junos OS CLI. Figure 5 on page 30 shows the port locations of the interfaces. Copyright © 2017, Juniper Networks, Inc. - Page 87 Power Built-in power supply Value of n is always DC power supply ACX500 Power Overview supply (n) – Cooling System and Airflow in ACX500 Routers NOTE: ACX500 routers are fanless. Copyright © 2017, Juniper Networks, Inc.
-
Page 88: Acx1000 And Acx1100 Routers Hardware And Cli Terminology Mapping
ACX500 Router Models ACX1000 and ACX1100 Routers Hardware and CLI Terminology Mapping ACX1000 and ACX1100 Routers Hardware and CLI Terminology Mapping on page 30 ACX1100 Routers Hardware and CLI Terminology Mapping on page 31 ACX1000 and ACX1100 Routers Hardware and CLI Terminology Mapping... -
Page 89: Acx1100 Routers Hardware And Cli Terminology Mapping
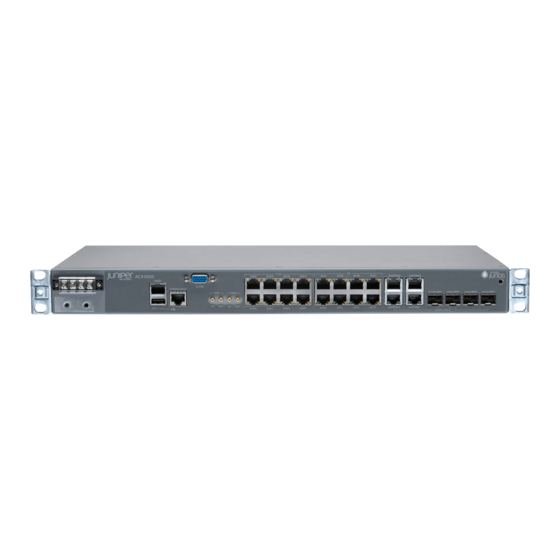
Chapter 1: ACX Series Universal Access Router Overview Table 7: CLI Equivalents of Terms Used in Documentation for ACX1000 Router (continued) Hardware Item (as Value (as displayed Description (as displayed in the in the CLI) displayed in the CLI) CLI) - Page 90 4x 1GE (RJ-45) Overview 4x 1GE (SFP) Xcvr (n) Abbreviated name of the n is a value Optical transceivers Uplink Ports on ACX1000 and transceiver equivalent to the ACX1100 Routers number of the port in which the transceiver is installed.
-
Page 91: Acx2000 And Acx2100 Routers Hardware And Cli Terminology Mapping
0/1/0 0/1/1 0/1/2 0/1/3 Related ACX1000 and ACX1100 Universal Access Router Overview Documentation ACX2000 and ACX2100 Routers Hardware and CLI Terminology Mapping ACX2000 Hardware and CLI Terminology Mapping on page 33 ACX2100 Hardware and CLI Terminology Mapping on page 35... -
Page 92: Figure 8: Acx2000 Interface Port Mapping
1PPS EXT REF CLK IN 0/0/0 0/0/1 0/0/2 0/0/3 0/0/4 0/0/5 0/0/6 0/0/7 0/1/0 0/1/1 0/1/2 0/1/3 POE 0/2/0 0/2/1 0/3/0 0/3/1 FPC 0, PIC 2 FPC 0, PIC 3 GE 0/2/0-0/2/1 XE 0/3/0-0/3/1 Copyright © 2017, Juniper Networks, Inc. -
Page 93: Acx2100 Hardware And Cli Terminology Mapping
ACX2100 Routers number of the port in which the transceiver is installed. Power Built-in power supply Value of n is always AC or DC power supply ACX2000 and ACX2100 Power supply (n) Overview Copyright © 2017, Juniper Networks, Inc. -
Page 94: Acx2200 Routers Hardware And Cli Terminology Mapping
Physical Interface of 0–3. have actual PIC Conventions Used in the Card (PIC) devices; see entries for Junos OS Operational PIC 0 through PIC 3 for Commands the equivalent item on the router Copyright © 2017, Juniper Networks, Inc. -
Page 95: Acx4000 Routers Hardware And Cli Terminology Mapping
ACX4000 router documentation and the corresponding terms used in the Junos OS command line interface (CLI). Figure 11 on page 39 shows the port locations of the interfaces. Copyright © 2017, Juniper Networks, Inc. - Page 96 PEM (n) Power supply Value of n is a value AC or DC power supply ACX4000 Power Overview in the range of 0–1. Copyright © 2017, Juniper Networks, Inc.
-
Page 97: Acx5000 Routers Hardware And Cli Terminology Mapping
Item (as displayed in Description (as Value (as displayed the CLI) displayed in the CLI) in the CLI) Item in Documentation Additional Information Chassis ACX5048 – Router chassis Chassis Physical Specifications for an ACX5000 Router Copyright © 2017, Juniper Networks, Inc. -
Page 98: Acx5096 Router Hardware And Cli Terminology Mapping
ACX5096 router documentation and the corresponding terms used in the Junos OS command line interface (CLI). Figure 13 on page 41 shows the port locations of the interfaces. Copyright © 2017, Juniper Networks, Inc. -
Page 99: Figure 13: Acx5096 Interface Port Mapping
Cooling System and Airflow in range of 0-2 for an ACX5000 Router ACX5096 Figure 13: ACX5096 Interface Port Mapping 1— Electrostatic Discharge (ESD) terminal 3— 40 Gigabit Ethernet ports (8) 2—10 Gigabit Ethernet ports (96) Copyright © 2017, Juniper Networks, Inc. - Page 100 ACX Series Universal Access Router Configuration Guide Related ACX5000 Universal Access Router Overview Documentation Copyright © 2017, Juniper Networks, Inc.
-
Page 101: Part 2 Installing And Upgrading Acx Series Routers
PART 2 Installing and Upgrading ACX Series Routers Installing and Upgrading Junos OS on page 45 Configuring Autoinstallation on page 75 Copyright © 2017, Juniper Networks, Inc. - Page 102 ACX Series Universal Access Router Configuration Guide Copyright © 2017, Juniper Networks, Inc.
-
Page 103: Installing And Upgrading Junos Os
Series, T Series, TX Matrix, TX Matrix Plus, and JCS 1200 Routers) Table 15 on page 46 specifies the storage media names by Routing Engine. The storage media device names are displayed when the router boots. Copyright © 2017, Juniper Networks, Inc. - Page 104 SSD1: ad1 SSD2: ad2 RE-S-1300-2048 (RE-S-1300) RE-S-1800x2 RE-S-1800x4 SSD1: ad1 (RE-S-1800) SSD2: ad2 RE-B-1800X1-4G-S SSD1: ad1 RE-1600-2048 (RE4) ad3 and ad4 RE-A-2000-4096 (RE-A-2000) RE-S-2000-4096 (RE-S-2000) RE-MX-104 da1 and da2 RE-DUO-C2600-16G (RE-DUO-2600) RE-DUO-C1800-8G- (RE-DUO-1800) RE-DUO-C1800-16G Copyright © 2017, Juniper Networks, Inc.
- Page 105 For more information about this command, see the CLI User Guide. storage Related Supported Routing Engines by Router Documentation Routing Engine Specifications RE-S-1300 Routing Engine Description RE-S-2000 Routing Engine Description RE-S-1800 Routing Engine Description for MX Series JCS1200 Routing Engine Description Copyright © 2017, Juniper Networks, Inc.
-
Page 106: Boot Sequence On Acx Series Routers
The following is the storage media available on the ACX Series router: USB media emergency boot device NOTE: The USB media device is not dual-root partitioned. Dual, internal NAND flash device (first daOs1, then daOs2) Copyright © 2017, Juniper Networks, Inc. -
Page 107: Important Features Of The Dual-Root Partitioning Scheme
Junos OS image. NOTE: ACX5048 and ACX5096 routers do not support dual-root partitioning. login: user Password: *********************************************************************** WARNING: THIS DEVICE HAS BOOTED FROM THE BACKUP JUNOS IMAGE Copyright © 2017, Juniper Networks, Inc. - Page 108 The process of restoring the alternate root by using the CLI command takes several minutes request system snapshot slice alternate to complete. If you terminate the operation before completion, the alternate root might not have all required contents to function properly. Copyright © 2017, Juniper Networks, Inc.
-
Page 109: Junos Os Release 12.2 Or Later Upgrades With Dual-Root Partitioning On Acx Series Routers
Installing Junos OS Upgrades from a Remote Server on ACX Series Routers on page 52 Example: Installing Junos OS and Configuring a Dual-Root Partition on ACX Series Routers Using the CLI on page 53 Copyright © 2017, Juniper Networks, Inc. -
Page 110: Installing Junos Os Using A Usb Storage Device On Acx Series Routers
Installing Junos OS Upgrades from a Remote Server on ACX Series Routers You can use the CLI to install Junos OS packages that are downloaded with FTP or HTTP from the specified location on internal media, such as the NAND Flash device. Copyright © 2017, Juniper Networks, Inc. -
Page 111: Example: Installing Junos Os And Configuring A Dual-Root Partition On Acx Series Routers Using The Cli
Download the Junos OS package. To install Junos OS upgrades from a remote server, enter the following command from operational mode: user@host>request system software add junos-juniper-12.2R1.9-domestic.tgz no-copy no-validate reboot The new Junos OS image is installed on the router and the device is rebooted. - Page 112 ACX Series router. The USB storage device is not dual-root partitioned. In this example, add the software package junos-juniper-12.2R1.9-domestic.tgz with the following options: option to install the software package. However, do not save the copies of no-copy the package files.
- Page 113 The following example displays the partition details on an ACX Series router with dual-root partitions: user@host% fdisk ******* Working on device /dev/da0 ******* parameters extracted from in-core disklabel are: cylinders=487 heads=255 sectors/track=63 (16065 blks/cyl) Copyright © 2017, Juniper Networks, Inc.
- Page 114 Installing Junos OS Using a USB Storage Device on ACX Series Routers on page 52 Installing Junos OS Upgrades from a Remote Server on ACX Series Routers on page 52 Installation and Upgrade Guide Copyright © 2017, Juniper Networks, Inc.
-
Page 115: Upgrading Software Packages
2014-10-15 00:44:31 BST Major CB 0 ESW PFE Port Fail 2014-10-15 00:42:42 BST Minor Backup RE Active To upgrade an individual Junos OS package: Download the software packages you need from the Juniper Networks Support Web site at http://www.juniper.net/support/ . For information about downloading software packages, see Downloading Software. - Page 116 If you are upgrading more than one package at the same time, add first. If you jbase are using this procedure to upgrade all packages at once, add them in the following order: user@host> request system software add /var/tmp/jbase-release-signed.tgz user@host> request system software add /var/tmp/jkernel-release-signed.tgz Copyright © 2017, Juniper Networks, Inc.
- Page 117 After you have upgraded or downgraded the software and are satisfied that the new software is successfully running, issue the command to back request system snapshot up the new software: user@host> request system snapshot Copyright © 2017, Juniper Networks, Inc.
-
Page 118: Loading And Committing The Configuration File
Load the file into the current configuration. You should override the existing file. user@host# load override /var/tmp/filename load complete Commit the file. user@host# commit commit complete Exit the CLI configuration mode. user@host# exit user@host> Back up Junos OS. Copyright © 2017, Juniper Networks, Inc. -
Page 119: Checking The Current Configuration And Candidate Software Compatibility
Related Preparing Your SRX Series Device for Junos OS Upgrades Documentation Downloading Software Packages from Juniper Networks Example: Installing Junos OS Upgrade Packages on SRX Series Devices Installing Junos OS Upgrade Packages on SRX Series Devices from a Remote Server... - Page 120 After the router reboots, you need to enter the bootloader password at the bootloader login prompt. To enable unattended boot mode, use the following command: [edit] user@host#set system unattended-boot Commit the changes: [edit] user@host#commit Copyright © 2017, Juniper Networks, Inc.
- Page 121 USB device, you need use the bootfrom USB CLI command at the bootloader prompt. Related Understanding System Snapshot on an ACX Series Router on page 64 Documentation Example: Taking a Snapshot of the Software and Configuration on page 65 Copyright © 2017, Juniper Networks, Inc.
-
Page 122: Understanding System Snapshot On An Acx Series Router
( ) and directories, which include the running Juniper Networks Juniper operating system /config (Junos OS) and the active configuration—and copy all of these files to another media, such as a universal serial bus (USB) storage device, the active slice of a dual-root partitioned router, or the alternate slice of a dual-root partitioned router. -
Page 123: Example: Taking A Snapshot Of The Software And Configuration
CAUTION: After you run the request system snapshot command, you cannot return to the previous version of the software, because the running and backup copies of the software are identical. Copyright © 2017, Juniper Networks, Inc. - Page 124 The following filesystems were archived: / /config After the USB storage device is formatted, the root ( ) and directories from /config the currently mounted NAND flash slice are copied to the USB storage device. Copyright © 2017, Juniper Networks, Inc.
- Page 125 Running newfs (46MB) on internal media /config partition (da0s1e)... Copying '/dev/da1s1a' to '/dev/da0s1a' .. (this may take a few minutes) Copying '/dev/da1s1e' to '/dev/da0s1e' .. (this may take a few minutes) The following filesystems were archived: / /config Copyright © 2017, Juniper Networks, Inc.
-
Page 126: Routers
ACX5000 Series routers. ISSU provides the following benefits: Eliminates network downtime during software image upgrades Reduces operating costs, while delivering higher service levels Allows fast implementation of new features In-Service Software Upgrade Process on page 69 Copyright © 2017, Juniper Networks, Inc. -
Page 127: In-Service Software Upgrade Process
Before you begin software installation using ISSU: NOTE: Before you perform an in-service software upgrade, if applicable, remove the command set system internet-options no-tcp-reset drop-all-tcp from the configuration, otherwise the upgrade will fail and an error message will be displayed. Copyright © 2017, Juniper Networks, Inc. - Page 128 Downgrade to an earlier version of Junos OS software. If you want to install an earlier version of Junos OS software, use the CLI command. request system software add Upgrade of Host OS software. Connectivity fault management (CFM). TWAMP, RPF, RFC2544, and clocksyncd daemon (timing functionality). Copyright © 2017, Juniper Networks, Inc.
-
Page 129: Upgrading The Software Using Issu
NOTE: To access the download site, you must have a service contract with Juniper Networks and an access account. If you need help obtaining an account, complete the registration form at the Juniper Networks website https://www.juniper.net/registration/Register.jsp Go to ACX Series section and select the ACX5000 Series platform software you want to download. - Page 130 Checking In-Service-Upgrade status Item Status Reason FPC 0 Online (ISSU) Send ISSU done to chassisd on backup RE Chassis ISSU Completed [Oct 24 00:35:18]:ISSU: IDLE Console and management sessions will be disconnected. Please login again. Copyright © 2017, Juniper Networks, Inc.
-
Page 131: Verifying A Unified Issu
Routing Engine. user@host> show chassis in-service-upgrade Item Status Reason FPC 0 Online Display the unified ISSU process messages by using the command. show log messages Related Documentation Copyright © 2017, Juniper Networks, Inc. - Page 132 ACX Series Universal Access Router Configuration Guide Copyright © 2017, Juniper Networks, Inc.
-
Page 133: Configuring Autoinstallation
Autoinstallation takes place automatically when you connect an Ethernet on a new Juniper Networks router to the network and power on the router. To simplify the process, you can explicitly enable autoinstallation on a router and specify a configuration server, an autoinstallation interface, and a protocol for IP address acquisition. -
Page 134: Supported Autoinstallation Interfaces And Protocols
If the DHCP server specifies the host-specific configuration file (boot file) hostname.conf , the router uses that filename in the TFTP server request. (In the filename, is the hostname of the new router.) The autoinstallation process hostname Copyright © 2017, Juniper Networks, Inc. -
Page 135: Before You Begin Autoinstallation On An Acx Series Universal Access Router
A default configuration file named router.conf with the minimum configuration necessary to enable you to telnet into the new router for further configuration. Copyright © 2017, Juniper Networks, Inc. -
Page 136: Autoinstallation Configuration Of Acx Series Universal Access Routers
However, to simplify the process, you can specify one or more interfaces, protocols, and configuration servers to be used for autoinstallation. To configure autoinstallation: Specify the URL address of one or more servers from which to obtain configuration files. [edit system] Copyright © 2017, Juniper Networks, Inc. -
Page 137: Verifying Autoinstallation On Acx Series Universal Access Routers
Configuration server of last committed file: 10.25.100.1 Interface: Name: ge-0/1/0 State: Configuration Acquisition Acquired: Address: 192.168.124.75 Hostname: host-ge-000 Hostname source: DNS Configuration filename: router-ge-000.conf Configuration filename server: 10.25.100.3 Address acquisition: Protocol: DHCP Client Acquired address: None Copyright © 2017, Juniper Networks, Inc. -
Page 138: Usb Autoinstallation On Acx Series Routers
FAT32, LBA-mapped 16-bit FAT, LBA-mapped An ACX Series router with the factory configuration. If other Junos OS configuration files exist on the router, the router cannot read the juniper-config.txt file from the Disk-on-Key device. Copyright © 2017, Juniper Networks, Inc. -
Page 139: Autoinstallation On Acx Series Routers In Hybrid Mode Overview
Power on the router by pressing the POWER button on the front panel. Wait for the router to start and access the Disk-on-Key device (observe the LEDs on the Disk-on-Key device). The router reads the juniper-config.txt file from the Disk-on-Key device and commits the configuration. Remove the Disk-on-Key device from the router. - Page 140 On the different ACX Series routers, autoinstallation is supported on the following Gigabit Ethernet ( ) and 10- Gigabit Ethernet ( ) interfaces: On ACX1000 routers, interfaces ge-0/1/0 through ge-0/1/7, and ge-0/2/0 through ge-0/2/3 On ACX1100 routers, interfaces ge-0/0/0 through ge-0/0/7, and ge-0/1/0 through ge-0/1/3...
-
Page 141: Prerequisites For Autoinstallation On Acx Series Routers In Hybrid Mode
Before you perform autoinstallation on a router in hybrid mode, complete the following tasks: Using a text editor on a PC or laptop, create the configuration file, named juniper-config.txt, as a sequence of configuration commands (“set” commands). To reuse configuration... -
Page 142: Autoinstallation Process On A New Acx Series Router In Hybrid Mode
TFTP, FTP, and HTTP are the supported protocols for downloading the configuration file from an external server URL on which the configuration file is stored. The following operations occur during autoinstallation in hybrid mode on ACX Series routers: Copyright © 2017, Juniper Networks, Inc. - Page 143 If a DHCP server responds, it provides the router with some or all of the following information: Copyright © 2017, Juniper Networks, Inc.
- Page 144 If the new router can determine its hostname, it sends a TFTP request for the hostname.conf file. f. If the new router is unable to map its IP address to a hostname, it sends TFTP requests for the default configuration file router.conf. Copyright © 2017, Juniper Networks, Inc.
-
Page 145: Configuring Autoinstallation Of Acx Series Routers In Hybrid Mode
<filename> to the PC or router as juniper-config.txt. Include the continue-network-mode statement at the [edit system autoinstallation] hierarchy level in the juniper-config.txt configuration file. The presence of the statement causes the router to consider it as a partial continue-network-mode Copyright © 2017, Juniper Networks, Inc. - Page 146 If an interface is not configured, then autoinstallation process is triggered on all the interfaces that are physically in link up state. Copy the juniper-config.txt file to an external USB storage device. Plug the external USB storage device to the router’s USB port.
- Page 147 Prerequisites for Autoinstallation on ACX Series Routers in Hybrid Mode on page 83 Autoinstallation Process on a New ACX Series Router in Hybrid Mode on page 84 autoinstallation on page 1442 show system autoinstallation status on page 3178 Copyright © 2017, Juniper Networks, Inc.
- Page 148 ACX Series Universal Access Router Configuration Guide Copyright © 2017, Juniper Networks, Inc.
-
Page 149: Part 3 Configuring Interfaces And Chassis On Acx Series Routers
Configuring E1 and T1 Interfaces on page 165 Configuring ATM Interfaces on page 173 Configuring SAToP Support on Interfaces on page 191 Configuring CESoPSN Support on Interfaces on page 205 Configuring Timing and Synchronization on page 223 Copyright © 2017, Juniper Networks, Inc. - Page 150 ACX Series Universal Access Router Configuration Guide Copyright © 2017, Juniper Networks, Inc.
-
Page 151: Configuring Interfaces And Chassis
Guidelines for Configuring Logical Tunnels on ACX Series Routers on page 137 Configuring an Interface in the VRF Domain to Receive Multicast Traffic on page 140 Understanding PoE on ACX Series Universal Access Routers on page 142 Copyright © 2017, Juniper Networks, Inc. -
Page 152: Understanding Interfaces On Acx Series Universal Access Routers
ACX5048 and ACX5096 routers do not support T1 or E1 ports and Inverse Multiplexing for ATM (IMA). Gigabit Ethernet ports: The ACX1000 router contains eight Gigabit Ethernet ports. The ACX1000 router also supports either four RJ45 (Cu) ports or installation of four Gigabit Ethernet small form-factor pluggable (SFP) transceivers. -
Page 153: T1 And E1 Time-Division Multiplexing (Tdm) Interfaces
] hierarchy level. NOTE: The ACX1000 router does not support the BITS interface. Inverse Multiplexing for ATM (IMA) Defined by the ATM Forum, IMA specification version 1.1 is a standardized technology used to transport ATM traffic over a bundle of T1 and E1 interfaces, also known as an IMA group. - Page 154 ACX Series Universal Access Router Configuration Guide Media type specification (ACX1000 router with Gigabit Ethernet SFP and RJ45 interfaces) Autonegotiation for RJ45 Gigabit Ethernet interfaces Event handling of SFP insertion and removal Explicit disabling of the physical interface Flow control...
-
Page 155: Configuring The Media Mtu On Acx Series Routers
MPLS MTU = physical interface MTU – encapsulation overhead – 12 If you configure an MTU value by including the statement at the [edit hierarchy level, interfaces interface-name unit logical-unit-number family mpls] the configured value is used. Copyright © 2017, Juniper Networks, Inc. -
Page 156: How To Configure The Media Mtu
Table 16: Encapsulation Overhead by Encapsulation Type Interface Encapsulation Encapsulation Overhead (Bytes) 802.1Q/Ethernet 802.3 802.1Q/Ethernet Subnetwork Access Protocol (SNAP) 802.1Q/Ethernet version 2 ATM Cell Relay ATM permanent virtual connection (PVC) Cisco HDLC Ethernet 802.3 Copyright © 2017, Juniper Networks, Inc. -
Page 157: Media Mtu Sizes By Interface Type For Acx Series Routers
Interface Type MTU (Bytes) (Bytes) MTU (Bytes) Gigabit Ethernet 1514 9192 1500 (IPv4), 1497 (ISO) 10-Gigabit Ethernet 1514 9192 1500 (IPv4), 1497 (ISO) Related Configuring Interface Encapsulation on Physical Interfaces Documentation Setting the Protocol MTU Copyright © 2017, Juniper Networks, Inc. -
Page 158: Understanding The Loopback Interface
NOTE: Starting with Junos OS Release 15.1X49-D10, the special loopback interface is no longer supported on SRX300, SRX320, SRX340, SRX345, and SRX550HM devices. Refer Special Interfaces for more details on special loopback interface. Copyright © 2017, Juniper Networks, Inc. -
Page 159: Configuring The Loopback Interface
If you configure the loopback interface, it is automatically used for unnumbered interfaces. If you do not configure the loopback interface, the router chooses the first interface to come online as the default. If you configure more than one address on the loopback Copyright © 2017, Juniper Networks, Inc. -
Page 160: Routes
[edit interfaces lo0 unit 0 family inet] user@host# set address 10.0.0.1 [edit interfaces lo0 unit 0 family inet] user@host# top [edit] user@host# show interfaces { lo0 { unit 0 { family inet { 10.0.0.1; 127.0.0.1; 172.16.0.1; Copyright © 2017, Juniper Networks, Inc. -
Page 161: Routes
[edit interfaces lo0 unit 0 family inet6] user@host# set address 3ffe::1:200:f8ff:fe75:50df/64 [edit interfaces lo0 unit 0 family inet6] user@host# top [edit] user@host# show interfaces { lo0 { unit 0 { family inet { 127.0.0.1/32; 192.16.0.1/24; family inet6 { Copyright © 2017, Juniper Networks, Inc. -
Page 162: Understanding Encapsulation On An Interface
(Logical Interface) on page 1507 Gigabit Ethernet Autonegotiation Overview Autonegotiation is enabled by default on all Gigabit Ethernet and Tri-Rate Ethernet copper interfaces. However, you can explicitly enable autonegotiation to configure remote fault options manually. Copyright © 2017, Juniper Networks, Inc. -
Page 163: Bert Support On Ct1 And Ce1 Interfaces
NOTE: User-defined BERT patterns are not supported. Related Configuring E1 BERT Properties on page 165 Documentation Configuring T1 BERT Properties on page 168 Copyright © 2017, Juniper Networks, Inc. -
Page 164: Channelized Oc3/Stm1 (Multi-Rate) Circuit Emulation Mic With Sfp
Each MIC can be separately configured in either T1 or E1 framing mode Each T1 port supports the following framing modes: Superframe (D4) Extended superframe (ESF) Each E1 port supports the following framing modes: G704 with CRC4 Copyright © 2017, Juniper Networks, Inc. -
Page 165: Synchronous Ethernet Overview On The Acx Series Universal Access Routers
10-Gigabit Ethernet SFP and SFP+ transceivers and is compliant with ITU-T Recommendation G.8261: Timing and synchronization aspects in packet networks and ITU-T Recommendation G8264: Distribution of timing through packet networks.Synchronous Ethernet is a physical layer frequency transfer technology modeled Copyright © 2017, Juniper Networks, Inc. -
Page 166: Tdm Cesopsn Overview
Packet-Switched Network (CESoPSN) is a method of encapsulating TDM signals into CESoPSN packets, and in the reverse direction, decapsulating CESoPSN packets back into TDM signals. This method is also termed as Interworking Function (IWF). The following Copyright © 2017, Juniper Networks, Inc. -
Page 167: Channelization Up To The Ds0 Level
Chapter 4: Configuring Interfaces and Chassis CESoPSN features are supported on Juniper Networks ACX Series Universal Access Routers: Channelization up to the DS0 Level on page 109 Protocol Support on page 109 Packet Latency on page 109 CESoPSN Encapsulation on page 109... -
Page 168: Cesopsn Options
(PSN) in which two PE routers (PE1 and PE2) provide one or more pseudowires to customer edge (CE) routers (CE1 and CE2), establishing a PSN tunnel to provide a data path for the pseudowire. Copyright © 2017, Juniper Networks, Inc. -
Page 169: Ethernet Ring Protection Switching Overview
The following standards provide detailed information on Ethernet ring protection switching: IEEE 802.1Q - 1998 IEEE 802.1D - 2004 IEEE 802.1Q - 2003 ITU-T Recommendation G.8032/Y.1344 version 1 and 2, Ethernet Ring protection switching ITU-T Y.1731, OAM functions and mechanisms for Ethernet-based networks Copyright © 2017, Juniper Networks, Inc. -
Page 170: Understanding Ethernet Ring Protection Switching Functionality
Node ID on page 117 Ring ID on page 117 Bridge Domains with the Ring Port (MX Series Routers Only) on page 117 Wait-to-Block Timer on page 117 Adding and Removing a Node on page 118 Copyright © 2017, Juniper Networks, Inc. -
Page 171: Acronyms
When a manual switch is issued on a node in the ring all nodes in the ring will move into the manual switch state. Copyright © 2017, Juniper Networks, Inc. -
Page 172: Default Logging Of Basic State Transitions On Ex Series Switches
Ethernet ring control module controls the ring port physical interface's default STP index to execute the FDB flush. Starting with Junos OS Release 14.2, the FDB flush depends on the RAPS messages received on the both the ports of the ring node. Copyright © 2017, Juniper Networks, Inc. -
Page 173: Traffic Blocking And Forwarding
CPU, R_APS multicast MAC address (01-19-a7-00-00-01) west ring port (STP index state does not apply) Juniper Networks switches and Juniper Networks routers use different methods to achieve these routes. The switches use forwarding database entries to direct the RAPS messages. The forwarding database entry (keyed by the RAPS multicast address and VLAN) has a composite next hop associated with it—the composite next hop associates the two ring... -
Page 174: Dedicated Signaling Control Channel
RAPS Message Termination The RAPS message starts from the originating node, travels through the entire ring, and terminates in the originating node unless a failure is present in the ring. The originating Copyright © 2017, Juniper Networks, Inc. -
Page 175: Revertive And Non-Revertive Modes
Wait-to-Block (WTB) timer is used when clearing force switch manual switch commands. As multiple commands are allowed to coexist in an Ethernet force switch ring, the WTB timer ensures that clearing of a single command does not force switch Copyright © 2017, Juniper Networks, Inc. -
Page 176: Adding And Removing A Node
Example: Configuring Ethernet Ring Protection Switching on EX Series Switches Configuring Ethernet Ring Protection Switching (CLI Procedure) Configuring Ethernet Ring Protection Switching The inheritance model follows: protection-group { ethernet-ring ring-name ( node-id mac-address; ring-protection-link-owner; Copyright © 2017, Juniper Networks, Inc. -
Page 177: Routers
Configuring a Three-Node Ring on page 120 Requirements This example uses the following hardware and software components: Router node 1 running Junos OS with two Gigabit Ethernet interfaces. Router node 2 running Junos OS with two Gigabit Ethernet interfaces. Copyright © 2017, Juniper Networks, Inc. -
Page 178: Figure 17: Example Of A Three-Node Ring Topology
1 { encapsulation vlan-bridge; vlan-id 1; unit 100 { encapsulation vlan-bridge; vlan-id 100; ge-1/2/4 { vlan-tagging; encapsulation flexible-ethernet-services; unit 1 { encapsulation vlan-bridge; vlan-id 1; unit 100 { encapsulation vlan-bridge; vlan-id 100; Copyright © 2017, Juniper Networks, Inc. - Page 179 { level 0; maintenance-association 100 { mep 1 { interface ge-1/0/1; remote-mep 2 { action-profile rmep-defaults; maintenance-domain d2 { level 0; maintenance-association 100 { mep 1 { interface ge-1/2/4; remote-mep 2 { action-profile rmep-defaults; Copyright © 2017, Juniper Networks, Inc.
- Page 180 { interface ge-1/2/1.100; interface ge-1/0/2.100; protocols { protection-group { ethernet-ring pg102 { ring-id 102; compatibility-version 2; node-id 00:01:01:00:00:01; east-interface { control-channel ge-1/0/2.1; west-interface { control-channel ge-1/2/1.1; data-channel vlan 100; protocols { Copyright © 2017, Juniper Networks, Inc.
- Page 181 { vlan-tagging; encapsulation flexible-ethernet-services; unit 1 { encapsulation vlan-bridge; vlan-id 1; unit 100 { encapsulation vlan-bridge; vlan-id 100; ge-1/0/3 { vlan-tagging; encapsulation flexible-ethernet-services; unit 1 { encapsulation vlan-bridge; vlan-id 1; unit 100 { Copyright © 2017, Juniper Networks, Inc.
- Page 182 { level 0; maintenance-association 100 { mep 1 { interface ge-1/0/4; remote-mep 2 { action-profile rmep-defaults; maintenance-domain d2 { level 0; maintenance-association 100 { mep 1 { interface ge-1/0/3; remote-mep 2 { action-profile rmep-defaults; Copyright © 2017, Juniper Networks, Inc.
- Page 183 NR-RB event happened: Normal Situation—Other Nodes For Node 2 and Node 3, the outputs should be the same: user@node2> show protection-group ethernet-ring aps Ethernet Ring Name Request/state No Flush Ring Protection Link Blocked pg102 Copyright © 2017, Juniper Networks, Inc.
- Page 184 Ethernet ring APS State Event Ring Protection Link Owner pg101 protected Restore Timer Quard Timer Operation state disabled disabled operational user@node1> show protection-group ethernet-ring statistics group-name pg101 Ethernet Ring statistics for PG pg101 RAPS sent Copyright © 2017, Juniper Networks, Inc.
-
Page 185: Example: Viewing Ethernet Ring Protection Status-Normal Ring Operation
Example: Viewing Ethernet Ring Protection Status—Normal Ring Operation Under normal operating conditions, when Ethernet ring protection is configured correctly, the ring protection link (RPL) owner (Router 1 in the configuration example) will see the following: Copyright © 2017, Juniper Networks, Inc. - Page 186 3) will see the following similar output: Router 2 and Router 3 Operational Commands (Normal Ring Operation) user@router2> show protection-group ethernet-ring aps Ethernet Ring Name Request/state No Flush Ring Protection Link Blocked pg102 Originator Remote Node ID 00:01:01:00:00:01 Copyright © 2017, Juniper Networks, Inc.
-
Page 187: Example: Viewing Ethernet Ring Protection Status-Ring Failure Condition
1 is the ring protection link (RPL) owner, and that there is a link failure between Router 2 and Router 3 in the configuration example. Router 1 Operational Commands (Ring Failure Condition) user@router1> show protection-group ethernet-ring aps Ethernet Ring Name Request/state No Flush Ring Protection Link Blocked pg101 Copyright © 2017, Juniper Networks, Inc. - Page 188 Ethernet Ring Name Request/state No Flush Ring Protection Link Blocked pg102 Originator Remote Node ID 00:00:00:00:00:00 Note the failure event (SF). Router 3 will see almost identical information. user@router2> show protection-group ethernet-ring interface Copyright © 2017, Juniper Networks, Inc.
-
Page 189: Guidelines For Ethernet Ring Protection Switching On Acx Series Routers
The RPL is controlled by a special node called an RPL owner. A ring with only one port is supported. In such a scenario, only one port is configured for a ring when two nodes are present. Use the statement to designate a port interface-none Copyright © 2017, Juniper Networks, Inc. - Page 190 The following parameters can impact the performance of the system based on your network configuration: Number of protocols (Layer 2, Layer 3, or MPLS) affected by a certain network failure Number of ring instances corresponding to the ring that is impacted by the failure Copyright © 2017, Juniper Networks, Inc.
- Page 191 (less than 100ms) might not occur. The maximum number of physical rings supported on different ACX Series routers is as follows: 4 physical rings on ACX1000, ACX1100, ACX2000, and ACX2100 routers 8 physical rings on ACX4000 routers 24 physical rings on ACX5048 and ACX5096 routers...
-
Page 192: Dual-Rate Sfp+ Optic Modules For Acx Series Routers
Product Number Description Finisar Part Number 740-051414 SFP+, 10GE-SR/GE-SX, MMF 300m, 850nm, 0~70C, 1.0W, FTLX8571D3BCV-J1 (0–70°) DDM, Beige Latch, 2xLC 740-051415 SFP+, 10GE-LR/GE-LX, SMF 10Km, 1310nm, -5~70C, 1.0W, FTLX1471D3BCV-J1 (-5–70°) DDM, Blue Latch, 2xLC Copyright © 2017, Juniper Networks, Inc. -
Page 193: Dual Rate Sfp+ Capabilities
| grep speed command: Link-level type: Ethernet, MTU: 9192, LAN-PHY mode, Link-mode: Full-duplex, Speed: 100mbps, BPDU Error: None, Link mode: Full-duplex, Flow control: Symmetric/Asymmetric, Remote fault: OK, Link partner Speed: 100 Mbps Copyright © 2017, Juniper Networks, Inc. -
Page 194: Configuring Logical Tunnel Interfaces
# peering logical system unit number dlci dlci-number; family (inet | inet6 | iso | mpls); You can include this statement at the following hierarchy levels: [edit interfaces] [edit logical-systems logical-system-name interfaces] Copyright © 2017, Juniper Networks, Inc. -
Page 195: Guidelines For Configuring Logical Tunnels On Acx Series Routers
You can use a logical tunnel interface to connect only bridge domains and pseudowires. Logical tunnel interfaces cannot interconnect the following links: Pesudowire and a routing instance (Pseudowire terminating on a VRF) Two routing instances VPLS instance and a routing instance Two VPLS instances Copyright © 2017, Juniper Networks, Inc. - Page 196 Eight forwarding classes (0-7) are mapped to the eight queues based on the global system configuration. The remainder of the scheduler configuration, buffer-size, transmit-rate, shaping-rate, priority and WRED or drop profiles maps can be configured on the lt- interface queues. Copyright © 2017, Juniper Networks, Inc.
- Page 197 0 { pic 0 { tunnel-services { port port-number; The following sample configuration allows you to encapsulate using vlan-ccc vlan-vpls LT interface in ACX5048 and ACX5096 routers: Copyright © 2017, Juniper Networks, Inc.
-
Page 198: Configuring An Interface In The Vrf Domain To Receive Multicast Traffic
The following is a example to configure a proxy logical interface in the global domain: Create an logical tunnel (lt-) interface. [edit] user@host# set chassis aggregated-devices ethernet device-count 1 user@host# set chassis fpc 0 pic 0 tunnel-services bandwidth 1g Copyright © 2017, Juniper Networks, Inc. -
Page 199: Associating The Proxy Logical Interface To A Logical Interface In A Vrf Domain
Limitations The following limitations need to be considered for receiving multicast traffic in a VRF domain: Maximum of 5 proxy associations of logical interfaces can be configured. VRF IPv6 multicast is not supported. Copyright © 2017, Juniper Networks, Inc. -
Page 200: Understanding Poe On Acx Series Universal Access Routers
Ethernet LAN cable. Juniper Networks provides PoE on ACX2000 Universal Access Routers that allows power delivery up to 65 W per PoE port. PoE ports transfer electrical power and data to remote devices over standard twisted-pair cables in an Ethernet network. -
Page 201: Poe Classes And Power Ratings
Table 21 on page 143 shows the PoE configuration options and their default settings for the PoE controller and for the PoE interfaces. Table 21: PoE Configuration Options and Default Settings Option Default Description PoE Controller Options Copyright © 2017, Juniper Networks, Inc. -
Page 202: Example: Configuring Poe On Acx2000 Routers
IP (VoIP) phones, wireless access points, and IP cameras. This example shows how to configure PoE to deliver power up to 65 W on ACX2000 interfaces: Requirements on page 145 Overview on page 145 Copyright © 2017, Juniper Networks, Inc. - Page 203 Maximum power available to PoE port 65 W PoE management mode high-power Direct connections to desktop PCs, file servers, integrated ge-0/1/0 through ge-0/1/2 printer/fax/copier machines (no PoE required) Unused ports (for future expansion) ge-0/1/4 through ge-0/1/6 Copyright © 2017, Juniper Networks, Inc.
- Page 204 19 Enable PoE. [edit] user@host# edit poe interface ge-0/1/3 Set the power port priority. [edit poe interface ge-0/1/3] user@host# set priority high Set the maximum PoE power for a port. Copyright © 2017, Juniper Networks, Inc.
- Page 205 PoE interface status: PoE interface : ge-0/1/3 Administrative status : Enabled Operational status : Powered-up Power limit on the interface : 65 W Priority : High Copyright © 2017, Juniper Networks, Inc.
- Page 206 Priority 130.0 W 14.2 W high-power Meaning command lists the global parameters configured on the router. show poe controller Related Understanding PoE on ACX Series Universal Access Routers on page 142 Documentation Copyright © 2017, Juniper Networks, Inc.
-
Page 207: Example: Disabling A Poe Interface On Acx2000 Routers
Disabled 32.0W 0.0W user@host> show poe interface ge-0/1/3 PoE interface status: PoE interface : ge-0/1/3 Administrative status : Disabled Operational status : Disabled Power limit on the interface : 32.0 W Priority : Low Copyright © 2017, Juniper Networks, Inc. -
Page 208: Configuring A Service Package To Be Used In Conjunction With Ptp
1714 Documentation Checklist for Monitoring Fast Ethernet and Gigabit Ethernet Interfaces Purpose To monitor Fast Ethernet and Gigabit Ethernet interfaces and begin the process of isolating interface problems when they occur. Copyright © 2017, Juniper Networks, Inc. -
Page 209: Checklist For Monitoring T1 Interfaces
2. Display the Status of a Specific T1 Interface show interfaces t1-fpc/pic/port 3. Display Extensive Status Information for a Specific T1 show interfaces t1-fpc/pic/port extensive Interface 4. Monitor Statistics for a T1 Interface monitor interface t1-fpc/pic/port Copyright © 2017, Juniper Networks, Inc. -
Page 210: Understanding Ethernet Link Aggregation On Acx Series Routers
On ACX5048 and ACX5096 routers, up to 64 AE interfaces can be created with each AE interface having up to 16 physical interfaces. ACX Series routers do not support statistics for aggregated Ethernet interface. However, statistics can be retrieved for member interface. Copyright © 2017, Juniper Networks, Inc. - Page 211 To delete an aggregated Ethernet interface: Delete the aggregated Ethernet configuration. This step changes the interface state to down and removes the configuration statements related to aex. [edit] Copyright © 2017, Juniper Networks, Inc.
-
Page 212: Load Balancing
If you want to hash based on layer 2 fields, then you need to configure multiservice If you want to hash based on layer 3 and layer 4 fields, then you need to configure family (inet | inet6) Copyright © 2017, Juniper Networks, Inc. -
Page 213: Lacp Monitoring
LACP mode. To restore the default behavior, include the statement at the lacp [edit interfaces interface-name aggregated-ether-options] hierarchy level, and specify the passive option: [edit interfaces interface-name aggregated-ether-options] lacp { passive; Copyright © 2017, Juniper Networks, Inc. -
Page 214: Link Protection
ID and source device ID. You can configure some of the fields that are used by the hashing algorithm. The hashing algorithm is used to make traffic-forwarding decisions for traffic entering a LAG bundle. Copyright © 2017, Juniper Networks, Inc. - Page 215 Source MAC and Destination MAC Source IP and Destination IP Source MAC Address Destination MAC Source MAC and Destination MAC MPLS MPLS label 1 and MPLS label 2 Source MAC Address Destination MAC Source MAC and Destination MAC Copyright © 2017, Juniper Networks, Inc.
-
Page 216: User-Defined Alarm Relay Overview
You can configure up to four alarm input relay ports (0 through 3) to operate as normally open or normally closed, and to trigger a red alarm condition or a yellow alarm condition or to ignore alarm conditions. Copyright © 2017, Juniper Networks, Inc. -
Page 217: Alarm Output
[edit chassis alarm] [edit chassis alarm] relay input port port-number { mode (close | open); trigger (ignore | red | yellow); output{ port port-number { input-relay input-relay; mode (close | open); temperature; Copyright © 2017, Juniper Networks, Inc. -
Page 218: Configuring Chassis Alarm Input
[edit chassis alarm relay input port port-number mode (close | open)] For example, to configure open mode: [edit chassis alarm relay input port 0] user@host# set mode open Configure the trigger to set off the alarm: Copyright © 2017, Juniper Networks, Inc. -
Page 219: Configuring Chassis Alarm Output
Configure the output port: [edit chassis alarm relay output port port-number] For example, to configure output port zero (0): user@host# edit chassis alarm relay output port 0 Configure the trigger to set off the alarm: Copyright © 2017, Juniper Networks, Inc. -
Page 220: Chassis Definitions For Router Model Mib For Acx Series Routers
Table 27: Router Models and Their sysObjectIds for ACX Series Routers Model SysObjectID jnxProductName ACX1000 1.3.6.1.4.1.2636.1.1.1.1.113 jnxProductNameACX1000 ACX2000 1.3.6.1.4.1.2636.1.1.1.1.114 jnxProductNameACX2000 ACX1100 1.3.6.1.4.1.2636.1.1.1.1.115 jnxProductNameACX1100 ACX2100 1.3.6.1.4.1.2636.1.1.1.1.116 jnxProductNameACX2100 ACX2200 1.3.6.1.4.1.2636.1.1.1.1.117 jnxProductNameACX2200 Copyright © 2017, Juniper Networks, Inc. - Page 221 Table 27: Router Models and Their sysObjectIds for ACX Series Routers (continued) Model SysObjectID jnxProductName ACX4000 1.3.6.1.4.1.2636.1.1.1.1.118 jnxProductNameACX4000 For a downloadable version of the Chassis Definitions for Router Model MIB, see http://www.juniper.net/techpubs/en_US/junos15.1/topics/reference/mibs/mib-jnx-chas-defines.txt. Related Chassis MIBs Documentation Chassis MIB Textual Conventions Chassis Traps Copyright © 2017, Juniper Networks, Inc.
- Page 222 ACX Series Universal Access Router Configuration Guide Copyright © 2017, Juniper Networks, Inc.
-
Page 223: Configuring E1 And T1 Interfaces
[edit interfaces ce1-fpc/pic/port] hierarchy level. NOTE: When configuring CE1 interfaces on the 16-port Channelized E1/T1 Circuit Emulation MIC (MIC-3D-16CHE1-T1-CE), you must include BERT configuration options at the hierarchy level. [edit interfaces ce1-fpc/pic/port] Copyright © 2017, Juniper Networks, Inc. - Page 224 For specific hierarchy information, see individual interface types. For information about running the BERT procedure, see the CLI Explorer Related Configuring T1 BERT Properties on page 168 Documentation Configuring Interface Diagnostics Tools to Test the Physical Layer Connections Copyright © 2017, Juniper Networks, Inc.
-
Page 225: Configuring E1 Loopback Capability
[ interface name] hierarchy level. With this edit interfaces configuration, the link stays up, so you can loop ping packets to a remote router. [edit interfaces interface-name] user@host# set no-keepalives user@host# set encapsulation cisco-hdlc Copyright © 2017, Juniper Networks, Inc. -
Page 226: Configuring T1 Bert Properties
(BERT) when the interface receives a request to run this test. You specify the duration of the test and the error rate to include in the bit stream by including the statements at the bert-period bert-error-rate [edit interfaces interface-name t1-options] hierarchy level: Copyright © 2017, Juniper Networks, Inc. - Page 227 16-port Channelized E1/T1 Circuit Emulation MIC (MIC-3D-16CHE1-T1-CE). For specific hierarchy information, see individual interface types. For information about running the BERT procedure, see the CLI Explorer Related Configuring E1 BERT Properties on page 165 Documentation Copyright © 2017, Juniper Networks, Inc.
-
Page 228: Configuring T1 Loopback Capability
For NxDS0 interfaces, [edit interfaces ct1-fpc/pic/port] payload and remote loopback are the same. If you configure one, the other is ignored. NxDS0 IQ interfaces do not support local loopback. Copyright © 2017, Juniper Networks, Inc. - Page 229 Related Configuring E1 Loopback Capability on page 167 Documentation Performing a Loopback Test on an Interface Copyright © 2017, Juniper Networks, Inc.
- Page 230 ACX Series Universal Access Router Configuration Guide Copyright © 2017, Juniper Networks, Inc.
-
Page 231: Configuring Atm Interfaces
Inverse Multiplexing for ATM (IMA) Overview on page 184 Configuring Inverse Multiplexing for ATM (IMA) on page 185 Pseudowire Overview for ACX Series Universal Access Routers on page 590 TDM Pseudowires Overview on page 600 Ethernet Pseudowire Overview on page 596 Copyright © 2017, Juniper Networks, Inc. -
Page 232: Understanding Atm Ima Configuration On Acx Series Router
16 onward. For example, if the count variable is set to 4, then the new ATM interfaces are created from at-x/y/16 through at-x/y/19. You can implement inverse multiplexing for ATM (IMA) on Juniper Networks ACX Series routers by configuring an IMA group and its options. The following sections explain the... -
Page 233: Ima Version
Active Asymmetrical configuration and operation are not supported. The mode can be configured through the CLI when an IMA group is created. To select the symmetry option, execute the set interface interface-name ima-group-options symmetry Copyright © 2017, Juniper Networks, Inc. -
Page 234: Minimum Active Links
When an IMA group is up, you can add links to or delete links from the group without dropping cells. To create an IMA link, you must: Configure the encapsulation as at the [edit interfaces interface-name encapsulation] hierarchy level. Copyright © 2017, Juniper Networks, Inc. -
Page 235: Ima Test Pattern Procedure
This is displayed in the group status and control field of an ICP cell. Table 29: IMA Group Alarms with IMA Standard Requirement Numbers Alarm IMA Standard Requirement Number Start-up-FE R-145 Config-Aborted R-146 Config-Aborted-FE R-147 Insufficient-Links R-148 Insufficient-Links-FE R-149 Blocked-FE R-150 Copyright © 2017, Juniper Networks, Inc. -
Page 236: Ima Link Alarms And Link Defects
IMA standard requirement numbers. Table 31: IMA Link Alarms with IMA Standard Requirement Numbers IMA Standard Requirement Alarm Number Description R-138 Loss of IMA frame LODS R-139 Link out of delay synchronization RFI-IMA R-140 Remote defect/failure Copyright © 2017, Juniper Networks, Inc. -
Page 237: Ima Group Statistics
Link fault IMA Group Statistics You can use the show interfaces command to display the following IMA group statistics: Near-end failure count Far-end failure count Receive end (R ) faulty cells due to address mismatch Copyright © 2017, Juniper Networks, Inc. -
Page 238: Ima Link Statistics
Near-end Tx failure – Far-end Rx SES R-109 Far-end Rx UAS R-111 Far-end Rx UUS R-115 Far-end defects – Far-end Rx failure – Tx ICP cells – Tx stuff O-16 Near-end Tx UUS R-112 Copyright © 2017, Juniper Networks, Inc. -
Page 239: Ima Clocking
In configuration mode, go to the hierarchy level: [edit chassis] [edit] user@host# edit chassis Configure the Flexible Port Concentrator (FPC) slot and the Physical Interface Card (PIC) slot as needed. [edit chassis] user@host# set fpc fpc-slot pic pic-slot Copyright © 2017, Juniper Networks, Inc. -
Page 240: Configuring Group Id For An Ima Link On A T1 Interface Or An E1 Interface
Configure the logical interface (unit) as 0 and set the encapsulation for this logical interface as either ATM cell relay for CCC or ATM VC for CCC. [edit interface interface-name] user@host# set unit 0 encapsulation (atm-ccc-cell-relay | atm-ccc-vc-mux) Copyright © 2017, Juniper Networks, Inc. -
Page 241: Configuring Ima Group Options
“Understanding ATM IMA Configuration on ACX Series Router” on page 174. Configure a test procedure to start and end the test pattern procedure. [edit interface interface-name ima-atm-options] user@host# set ima-test-start user@host# ima-test-stop user@host# interface interface-name Copyright © 2017, Juniper Networks, Inc. -
Page 242: Inverse Multiplexing For Atm (Ima) Overview
IMA group to create a higher-bandwidth logical link whose rate is approximately the sum of all the interfaces in the group. Related Configuring Inverse Multiplexing for ATM (IMA) on page 185 Documentation Copyright © 2017, Juniper Networks, Inc. -
Page 243: Configuring Inverse Multiplexing For Atm (Ima)
T1/E1 TDM MIC, the IMA group interface numbering starts with at-0/0/16 increments by 1 to , and so on. On the ACX1000 router with an 8-port built-in at-0/0/17 T1/E1 TDM MIC, the IMA group interface numbering starts with at-0/0/8... - Page 244 F5 loopback F5 AIS F5 RDI ATM OAM is supported on ACX1000, ACX2000, and ACX2200 routers, and on Channelized E1/T1 Circuit Emulation MICs on ACX4000 routers. The following methods of processing OAM cells that traverse through pseudowires with circuit cross-connect (CCC) encapsulation are supported: Virtual path (VP) pseudowires (CCC encapsulation)—In the case of ATM VP...
-
Page 245: Defining The Atm Oam F5 Loopback Cell Period
RDI cell on the same VC to notify the remote end of the error status. When an RDI cell is received on a VC, the router sets the logical interface status to down. When no AIS or Copyright © 2017, Juniper Networks, Inc. -
Page 246: Configuring The Atm Oam F5 Loopback Cell Threshold
Specify the number of microseconds for which the ATM cells must be bundled before the timer expires and the cells are transmitted in a single frame. [edit interfaces interface-name atm-options] user@host# set cell-bundle-timeout microseconds Copyright © 2017, Juniper Networks, Inc. -
Page 247: Configuring The Layer 2 Circuit Cell-Relay Cell Maximum Overview
CBR and real-time variable bit rate (RTVBR) cells are not bundled. They are always sent as single-cell packets. Cells with the same CLP bits are bundled together. This means all the cells in a bundle contain the same CLP value. Copyright © 2017, Juniper Networks, Inc. - Page 248 This effect might not be dramatic with a mix of traffic; it is most evident with steady traffic patterns, as generated by ATM test equipment programmed to emit regular sequences of CoS queue transitions. Copyright © 2017, Juniper Networks, Inc.
-
Page 249: Configuring Satop Support On Interfaces
The result of these steps is the pseudowire from PE1 to PE2. Topics include: Setting the T1/E1 Emulation Mode on page 192 Configuring One Full T1 or E1 Interface on Channelized T1 and E1 Interfaces on page 193 Copyright © 2017, Juniper Networks, Inc. -
Page 250: Setting The T1/E1 Emulation Mode
After a PIC is brought online and depending on the framing option used ( ), on the ACX2000 router, 16 CT1 or 16 CE1 interfaces are created, and on the ACX1000 router, 8 CT1 or 8 CE1 interfaces are created. -
Page 251: Configuring One Full T1 Or E1 Interface On Channelized T1 And E1 Interfaces
Interface flags: Point-To-Point SNMP-Traps Internal: 0x0 Link flags : None Hold-times : Up 0 ms, Down 0 ms CoS queues : 8 supported, 4 maximum usable queues Last flapped : 2012-04-03 06:27:55 PDT (00:13:32 ago) Copyright © 2017, Juniper Networks, Inc. - Page 252 Statistics last cleared: 2012-04-03 06:29:58 PDT (00:00:01 ago) Egress queues: 8 supported, 4 in use Queue counters: Queued packets Transmitted packets Dropped packets 0 best-effort 1 expedited-fo 2 assured-forw 3 network-cont Queue number: Mapped forwarding classes best-effort Copyright © 2017, Juniper Networks, Inc.
-
Page 253: Setting The Satop Encapsulation Mode
On the PE router, configure SAToP encapsulation on the physical interface: [edit interfaces (t1 | e1)–fpc/pic /port] user@host# set encapsulation satop For example: [edit interfaces t1-0/0/0 user@host# set encapsulation satop On the PE router, configure the logical interface: Copyright © 2017, Juniper Networks, Inc. -
Page 254: Configure The Layer 2 Circuit
Configuring SAToP Emulation on T1/E1 Interfaces on 12-Port Channelized T1/E1 Circuit Emulation PICs The following sections describes configuring SAToP on the 12-port Channelized T1/E1 Circuit Emulation PICs: Setting the Emulation Mode on page 197 Configuring SAToP Emulation on T1/E1 Interfaces on page 197 Copyright © 2017, Juniper Networks, Inc. -
Page 255: Setting The Emulation Mode
The below mentioned procedure can be used to configure T1 channels on circuit emulation PICs with SAToP encapsulation at the PE router. In the configuration mode, go to hierarchy [edit interfaces e1-fpc-slot/pic-slot/port] level. [edit] user@host# [edit interfaces e1 fpc-slot/pic-slot/port] Copyright © 2017, Juniper Networks, Inc. -
Page 256: Configuring Loopback For A T1 Interface Or An E1 Interface
[edit] user@host# edit satop-options In this hierarchy level, using the command you can configure the following SAToP options: excessive-packet-loss-rate —Set packet loss options. The options are groups , and sample-period threshold —Specify groups. groups Copyright © 2017, Juniper Networks, Inc. -
Page 257: Configuring The Pseudowire Interface
To configure the TDM pseudowire at the provider edge (PE) router, use the existing Layer 2 circuit infrastructure, as shown in the following procedure: In the configuration mode, go to [edit protocols l2circuit] hierarchy level. [edit] user@host# edit protocol l2circuit Copyright © 2017, Juniper Networks, Inc. - Page 258 For detailed information about configuring TDM pseudowire, see the Junos OS VPNs Library for Routing Devices. For detailed information about PICs, see the PIC Guide for your router. Copyright © 2017, Juniper Networks, Inc.
-
Page 259: Configuring Satop On 16-Port Channelized E1/T1 Circuit Emulation Mic
Circuit Emulation PICs with SONET and SDH ports require prior channelization down to T1 or E1 before you can configure them. Only T1/E1 channels support SAToP encapsulation or SAToP options. Copyright © 2017, Juniper Networks, Inc. -
Page 260: Configuring Ct1 Ports Down To T1 Channels
To configure a CE1 port down to a DS channel, replace ct1 with ce1 in the following procedure. In configuration mode, go to the [edit interfaces ct1-mpc-slot/mic-slot/port-number] hierarchy level. [edit] user@host# edit interfaces ct1-mpc-slot/mic-slot/port-number For example: [edit] user@host# edit interfaces ct1-1/0/0 Copyright © 2017, Juniper Networks, Inc. - Page 261 After you partition the DS interface, configure the SAToP options on it. See “Setting the SAToP Options” on page 198. Related Understanding Circuit Emulation Services and the Supported PIC Types Documentation Setting the SAToP Options on page 198 Copyright © 2017, Juniper Networks, Inc.
- Page 262 ACX Series Universal Access Router Configuration Guide Copyright © 2017, Juniper Networks, Inc.
-
Page 263: Configuring Cesopsn Support On Interfaces
Configure the encapsulation. [edit interfaces ds-fpc/pic/port:partition] user@host# set encapsulation cesopsn Configure the logical interface. [edit interfaces ds-fpc/pic/port:partition] user@host# set unit logical-unit-number For example: [edit interfaces ds-0/0/1:1] user@host# set unit 0 Copyright © 2017, Juniper Networks, Inc. -
Page 264: Configuring Cesopsn On Channelized Oc3/Stm1 (Multi-Rate) Circuit Emulation
For example: [edit] user@host# edit chassis fpc 1 pic 0 port 0 Set the speed as coc3-cstm1 coc12-cstm4 [edit chassis fpc slot pic slot port slot] user@host# set speed (coc3-cstm1 | coc12-cstm4) Copyright © 2017, Juniper Networks, Inc. -
Page 265: Configuring Sonet/Sdh Framing Mode At The Mic Level
Bit error rate test (BERT) patterns with all binary 1s (ones) received by CT1/CE1 interfaces on Circuit Emulation MICs configured for CESoPSN do not result in an alarm indication signal (AIS) defect. As a result, the CT1/CE1 interfaces remain up. Copyright © 2017, Juniper Networks, Inc. -
Page 266: Configuring Cesopsn Encapsulation On Ds Interfaces On Ct1 Channels
For example: [edit interfaces coc3-1/0/0] user@host# set partition 1 oc-slice 1 interface-type coc1 Enter the up command to go to the [edit interfaces] hierarchy level. [edit interfaces coc3-mpc-slot/mic-slot/port-number] user@host# up Copyright © 2017, Juniper Networks, Inc. -
Page 267: Configuring Ct1 Channels Down To Ds Interfaces
Configure the partition, the time slots, and the interface type. [edit interfaces ct1-mpc-slot/mic-slot/port-number:channel:channel] user@host# set partition partition-number timeslots timeslots interface-type ds For example: [edit interfaces ct1-1/0/0:1:1] user@host# set partition 1 timeslots 1-4 interface-type ds Copyright © 2017, Juniper Networks, Inc. -
Page 268: Configuring Cesopsn On Ds Interfaces
For example: [edit interfaces ds-1/0/0:1:1:1 ] user@host# set encapsulation cesopsn unit 0 To verify this configuration, use the command at the show [edit interfaces ds-1/0/0:1:1:1] hierarchy level. [edit interfaces ds-1/0/0:1:1:1] Copyright © 2017, Juniper Networks, Inc. -
Page 269: Configuring Cesopsn Encapsulation On Ds Interfaces On Ce1 Channels
For example: [edit interfaces cstm1-1/0/1] user@host# set no-partition interface-type cau4 Enter the command to go to the [edit interfaces] hierarchy level. [edit interfaces cstm1-mpc-slot/mic-slot/port-number] user@host# up For example: [edit interfaces cstm1-1/0/1] user@host# up Copyright © 2017, Juniper Networks, Inc. -
Page 270: Configuring Cstm4 Ports Down To Ce1 Channels
Configure the sublevel interface partition index and the range of SONET/SDH slices, and set the sublevel interface type as cau4 [edit interfaces cstm4-1/0/0] user@host# set partition partition-number oc-slice oc-slice interface-type cau4 Copyright © 2017, Juniper Networks, Inc. -
Page 271: Configuring Ce1 Channels Down To Ds Interfaces
To configure CE1 channels down to a DS interface, include the partition statement at the hierarchy level. [edit interfaces ce1-mpc-slot/mic-slot/port:channel] In configuration mode, go to the [edit interfaces ce1-mpc-slot/mic-slot/port:channel] hierarchy level. [edit] user@host# edit interfaces ce1-mpc-slot/mic-slot/port:channel [edit] user@host# edit interfaces ce1-1/0/0:1:1 Copyright © 2017, Juniper Networks, Inc. -
Page 272: Configuring Cesopsn On Ds Interfaces
For example: [edit] user@host# edit interfaces ds-1/0/0:1:1:1 Configure CESoPSN as the encapsulation type and then set the logical interface for the ds interface. [edit interfaces ds-1/0/0:1:1:1 ] user@host# set encapsulation cesopsn unit interface-unit-number Copyright © 2017, Juniper Networks, Inc. -
Page 273: Configuring Cesopsn Encapsulation On Ds Interfaces
Configure CESoPSN as the encapsulation type and set the logical interface for the DS interface. [edit interfaces ds-mpc-slot/mic-slot/port<:channel>] user@host# set encapsulation cesopsn unit logical-unit-number For example: [edit interfaces ds-1/0/0:1:1:1] user@host# set encapsulation cesopsn unit 0 Copyright © 2017, Juniper Networks, Inc. -
Page 274: Setting The Cesopsn Options
—Percentile designating the threshold of excessive packet loss rate threshold (1–100 percent). —An 8-bit hexadecimal pattern to replace TDM data in a lost packet idle-pattern (from 0 through 255). jitter-buffer-latency —Time delay in the jitter buffer (from 1 through 1000 milliseconds). Copyright © 2017, Juniper Networks, Inc. -
Page 275: Configuring The Pseudowire Interface
Layer 2 circuit, and the identifier for the Layer 2 circuit. [edit protocol l2circuit] user@host# set neighbor ip-address interface interface-name-fpc-slot/pic-slot/port.interface-unit-number virtual-circuit-id virtual-circuit-id For example: [edit protocol l2circuit] user@host# set neighbor 10.255.0.6 interface ds-1/0/0:1:1:1 virtual-circuit-id 1 Copyright © 2017, Juniper Networks, Inc. -
Page 276: Configuring Ce1 Channels Down To Ds Interfaces
To configure CE1 channels down to a DS interface, include the statement at the partition [edit interfaces ce1-fpc/pic/port] hierarchy level, as shown in the following example: [edit interfaces] user@host# show ce1-0/0/1 { partition 1 timeslots 1-4 interface-type ds; Copyright © 2017, Juniper Networks, Inc. - Page 277 [edit interfaces ds-fpc/pic/port:partition] user@host# set unit logical-unit-number; For example: [edit interfaces ds-0/0/1:1] user@host# set unit 0 When you are finished configuring CE1 channels down to a DS interface, enter the commit command from configuration mode. Copyright © 2017, Juniper Networks, Inc.
-
Page 278: Configuring Cesopsn On Channelized E1/T1 Circuit Emulation Mic
Bit error rate test (BERT) patterns with all binary 1s (ones) received by CT1/CE1 interfaces on Circuit Emulation MICs configured for CESoPSN do not result in an alarm indication signal (AIS) defect. As a result, the CT1/CE1 interfaces remain up. Copyright © 2017, Juniper Networks, Inc. -
Page 279: Configuring Ct1 Interface Down To Ds Channels
CT1 interface. The value of N is: 1 through 24 when a DS0 interface is configured from a CT1 interface. 1 through 31 when a DS0 interface is configured from a CE1 interface. Copyright © 2017, Juniper Networks, Inc. -
Page 280: Configuring Cesopsn On Ds Interfaces
To verify this configuration, use the command at the show [edit interfaces ds-1/0/0:1] hierarchy level. [edit interfaces ds-1/0/0:1] user@host# show encapsulation cesopsn; unit 0; Related 16-Port Channelized E1/T1 Circuit Emulation MIC Overview on page 106 Documentation Copyright © 2017, Juniper Networks, Inc. -
Page 281: Configuring Timing And Synchronization
Example: Configuring PTP over Ethernet for Multicast Master, Slave, and Dynamic Ports on page 281 Hybrid Mode on ACX Series Routers Overview on page 288 Guidelines for Configuring Hybrid Mode on ACX Series Routers on page 290 Copyright © 2017, Juniper Networks, Inc. -
Page 282: Automatic Clock Selection Overview
If both the configured QL and priority are equal, one of the sources is randomly selected. Absence of the quality-mode-enable statement at the ] hierarchy level means that QL is disabled. edit chassis synchronization Copyright © 2017, Juniper Networks, Inc. -
Page 283: Selection Mode For The Incoming Esmc Quality
The ACX series has an OCXO (Stratum 3E) type of oscillator. External clocking includes PPS, a choice of GPS-based clock recovery (10 MHz), or BITS-T1 or E1 line synchronization (1.544 MHz and 2.048 MHz). Copyright © 2017, Juniper Networks, Inc. -
Page 284: External Clock Synchronization Overview For Acx Series Routers
If an upstream clock with acceptable good quality is not available or if the system is configured in free-run mode, the system uses the internal oscillator. The following automatic clock selection features are supported for Synchronous Ethernet, T1 or E1 line timing sources, and external inputs: Copyright © 2017, Juniper Networks, Inc. -
Page 285: Clock Source Selection Algorithm
, QL must be configured for external clocks ( network-option option-1 bits whether or not QL is enabled. In the case of network-option option-2 , the default QL for the external clocks is QL_STU, whether or not QL is enabled. Copyright © 2017, Juniper Networks, Inc. -
Page 286: Configuring External Clock Synchronization For Acx Series Routers
The network type options set the frequency of the configured clock. When bits configured with option-1 on the ACX router, the Synchronous Ethernet equipment is optimized for 2048 Kbps, the speed of an E1 interface. When is configured with bits Copyright © 2017, Juniper Networks, Inc. - Page 287 { quality-mode-enable; Setting the selection mode The selection mode specifies whether the clock source selection algorithm should use the configured or received ESMC SSM quality level for clock selection. In both selection Copyright © 2017, Juniper Networks, Inc.
- Page 288 In non-revertive mode, the system continues to use the current clock source as long as it is valid. The default mode is revertive. To set the synchronization switchover mode, use the following command: set chassis synchronization switchover-mode (revertive | non-revertive) Copyright © 2017, Juniper Networks, Inc.
- Page 289 (option-1 | option-2) [edit chassis hierarchy level. synchronization] option is not supported on the ACX1000 router. bits Setting ESMC transmit interface The ESMC transmit interface is the interface on which ESMC transmit messages are permitted. To enable ESMC packet transmit, use the following command:...
- Page 290 The range is from through minutes. The default time is 5 minutes. To set the synchronization source wait-to-restore time, use the following command: Copyright © 2017, Juniper Networks, Inc.
- Page 291 (bits | gps | interfaces interface-name) request force-switch The following output shows the configuration of the request force-switch statement: [edit] user@host# show chassis synchronization { network-option option-1; source { bits { request force-switch; Copyright © 2017, Juniper Networks, Inc.
-
Page 292: Ieee 1588V2 Ptp Boundary Clock Overview
(BC-1) to the downstream node (BC-2). NOTE: This figure also applies to MX Series routers and QFX Series switches. Copyright © 2017, Juniper Networks, Inc. -
Page 293: Figure 21: Boundary Clocks In A Network
The boundary clock then generates PTP packets, which are sent over the master port to downstream clients. These packets are timestamped by the boundary clock by using its own time, which is synchronized to the selected upstream master. Copyright © 2017, Juniper Networks, Inc. -
Page 294: Clock Clients
Starting with Junos OS Release 17.3R1, IEEE 1588v2 boundary clock is supported on QFX10002 switches. Related IEEE 1588v2 Precision Timing Protocol (PTP) on ACX Series Universal Access Routers Documentation on page 237 Precision Time Protocol Overview Copyright © 2017, Juniper Networks, Inc. -
Page 295: Ieee 1588V2 Precision Timing Protocol (Ptp)
However, a boundary clock slave or an ordinary clock slave can receive time from a grandmaster clock. Clock source—A clock source is the PTP master clock to which the slave synchronizes. The clock source is included in the configuration of the slave clock. Copyright © 2017, Juniper Networks, Inc. -
Page 296: Ptp Over Ethernet On Acx Series Routers Overview
Ethernet rings. Consider a scenario in which the first ring contains aggregation routers (MX Series routers) and the second ring contains access routers (ACX Series routers). In such a network, Copyright © 2017, Juniper Networks, Inc. - Page 297 PTP BMCA and the states of other ports in the system. While an ACX Series router supports the PTP over Ethernet functionality, a Brilliant Grand Master such as an MX Series router or a TCA Series Timing Client does not support PTP Copyright © 2017, Juniper Networks, Inc.
-
Page 298: Guidelines For Configuring Ptp Over Ethernet
PTP, instead of transmission of packets through any network element that does not support PTP. This address is the default address for G.8275.1 (PTP Profile for time or phase distribution) and a node with this MAC address is a node that supports processing of PTP packets. Copyright © 2017, Juniper Networks, Inc. - Page 299 Master ports select the link-local flag based on each port. The following limitations apply to the maximum number of ports that you can configure when you use PTP over Ethernet: Copyright © 2017, Juniper Networks, Inc.
- Page 300 This control must be exercised with proper networking planning and design. Related PTP over Ethernet on ACX Series Routers Overview on page 238 Documentation Configuring PTP Multicast Master and Slave Ports for Ethernet Encapsulation on page 274 Copyright © 2017, Juniper Networks, Inc.
-
Page 301: Configuring Precision Time Protocol Clocking
[edit protocols ptp] user@host# set ipv4-dscp number Specify the master clock parameters. [edit protocols ptp] user@host# set master For details about configuring the master clock parameters, see “Configuring a PTP Master Boundary Clock” on page 244. Copyright © 2017, Juniper Networks, Inc. -
Page 302: Configuring A Ptp Master Boundary Clock
You cannot configure an ordinary master clock on a device. The master boundary clock synchronizes time through a boundary slave port. To configure a master boundary clock, you must include the boundary statement at the Copyright © 2017, Juniper Networks, Inc. -
Page 303: Configuring The Ptp Master Boundary Clock Parameters
(Optional) Specify the maximum log mean interval between announce messages—from through . The default value is 4. [edit protocols ptp master] user@host# set max-announce-interval max-announce-interval-value (Optional) Specify the maximum log mean interval between delay-response messages—from –7 through . The default value is Copyright © 2017, Juniper Networks, Inc. -
Page 304: Configuring A Ptp Master Boundary Clock Interface
To configure a PTP master boundary clock interface: Configure the interface on which to respond to downstream PTP slaves or clients. [edit protocols ptp master] user@host# edit interface interface-name Copyright © 2017, Juniper Networks, Inc. - Page 305 [edit protocols ptp master interface interface-name unicast-mode clock-client ip-address local-ip-address local-ip-address] user@host# set manual Specify the encapsulation type for PTP packet transport—IPv4. This statement is mandatory. [edit protocols ptp master interface interface-name unicast-mode] user@host# set transport ipv4 Copyright © 2017, Juniper Networks, Inc.
-
Page 306: Example: Configuring A Ptp Boundary Clock
192.1.1.2 local-ip-address 192.1.1.1 set protocols ptp master interface ge-1/0/0.0 unicast-mode transport ipv4 Copyright © 2017, Juniper Networks, Inc. - Page 307 IP address at the [ edit interfaces ] hierarchy level. interface-name Configure the encapsulation type for PTP packet transport. [edit protocols ptp master interface ge-1/0/0.0 unicast-mode] user@host# set transport ipv4 Copyright © 2017, Juniper Networks, Inc.
-
Page 308: Example: Configuring A Ptp Boundary Clock With Unicast Negotiation
The unicast negotiation applies to clock sources, which are configured on the slave or clock client. Clock clients, configured on the master, are not affected by unicast negotiation. NOTE: ACX5048 and ACX5096 routers do not support boundary clock. Copyright © 2017, Juniper Networks, Inc. - Page 309 ] hierarchy level. As soon as you configure a manual client, it edit protocols ptp starts receiving announce and synchronization packets. In this example, the clock client clock-client 7.7.7.7 local-ip-address 7.7.7.53 manual is the manual client and is configured on a second master clock interface. Copyright © 2017, Juniper Networks, Inc.
- Page 310 Configure the local slave interface from which the boundary master receives time and passes it on to the configured clock clients. [edit protocols ptp] user@host# edit slave interface ge-0/1/0.0 Configure the upstream unicast PTP master clock source parameters. Copyright © 2017, Juniper Networks, Inc.
- Page 311 [edit protocols ptp master] user@host# set interface ge-0/1/5.0 unicast-mode transport ipv4 user@host# set interface ge-0/1/5.0 unicast-mode clock-client 7.7.7.7 local-ip-address 7.7.7.53 manual Copyright © 2017, Juniper Networks, Inc.
-
Page 312: Configuring A Ptp Slave Clock
The slave port that you configure can be a Precision Time Protocol (PTP) boundary or ordinary clock, depending on the configuration of the statement at the [ clock-mode edit protocols ptp ] hierarchy level. An ordinary or boundary slave clock performs frequency Copyright © 2017, Juniper Networks, Inc. -
Page 313: Configuring The Ptp Slave Clock Parameters
(Optional) Specify the number of announce messages that a slave—configured on an ACX Series router—must miss before an announce timeout is declared—from 2 through 10. The default value is 3. [edit protocols ptp slave] user@host# set announce-timeout announce-timeout-value Copyright © 2017, Juniper Networks, Inc. - Page 314 After you have configured the PTP slave clock parameters, enter the command commit from configuration mode. To complete the configuration of the slave clock, complete “Configuring the PTP Slave Clock Interface” on page 257. Copyright © 2017, Juniper Networks, Inc.
-
Page 315: Configuring The Ptp Slave Clock Interface
Example: Configuring an Ordinary Slave Clock With Unicast-Negotiation This example shows the base configuration of a Precision Time Protocol (PTP) ordinary slave clock with unicast-negotiation on an ACX Series router. Copyright © 2017, Juniper Networks, Inc. - Page 316 Configuration To configure an ordinary slave clock with unicast-negotiation, perform these tasks: Configuring an ordinary slave clock with unicast-negotiation on page 259 Results on page 260 Copyright © 2017, Juniper Networks, Inc.
- Page 317 [edit protocols ptp slave interface ge-0/1/0.0] user@host# edit unicast-mode clock-source 10.10.10.50 local-ip-address 10.10.10.75 Configure the asymmetric path: [edit protocols ptp slave interface ge-0/1/0.0 unicast-mode clock-source 10.10.10.50 local-ip-address 10.10.10.75] user@host# set asymmetry -4500 Verify the configuration: Copyright © 2017, Juniper Networks, Inc.
- Page 318 7200; interface ge-0/1/0.0 { unicast-mode { transport ipv4; clock-source 10.10.10.50 local-ip-address 10.10.10.75 { asymmetry -4500; Related IEEE 1588v2 Precision Timing Protocol (PTP) on ACX Series Universal Access Routers Documentation on page 237 slave unicast-mode Copyright © 2017, Juniper Networks, Inc.
-
Page 319: Example: Configuring An Ordinary Slave Clock Without Unicast-Negotiation
To configure an ordinary slave clock without unicast-negotiation, perform these tasks: NOTE: ipv4-dscp statement is not supported on the QFX10002 switch. Configuring an ordinary slave clock without unicast-negotiation on page 262 Results on page 263 Copyright © 2017, Juniper Networks, Inc. - Page 320 12.1.1.4 local-ip-address 12.1.1.5 Verify the configuration: [edit protocols ptp slave interface ge-0/2/0.0] user@host# top [edit] user@host# edit protocols [edit protocols] user@host# show See the output for the show command in the Results section. Copyright © 2017, Juniper Networks, Inc.
- Page 321 46; slave { interface ge-0/2/0.0 { unicast-mode { transport ipv4; clock-source 12.1.1.4 local-ip-address 12.1.1.5; Related IEEE 1588v2 Precision Timing Protocol (PTP) on ACX Series Universal Access Routers Documentation on page 237 slave unicast-mode Copyright © 2017, Juniper Networks, Inc.
-
Page 322: Configuring Precision Time Protocol Over Integrated Routing And Bridging
[edit bridge-domains] bd-615 { vlan-id 615; interface ge-0/1/2.615; interface ge-0/2/0.615; interface ge-0/2/1.615; interface ge-0/0/3.615; Configure a routing instance for the bridge domain where physical interfaces are members of the bridge domain. [edit bridge-domains] bd-615 { Copyright © 2017, Juniper Networks, Inc. - Page 323 —View the configured bridge domain and the associated physical interfaces and IRB routing instance details. —View the PTP lock status details. show ptp lock-status detail Copyright © 2017, Juniper Networks, Inc.
- Page 324 Configuring a PTP Master Boundary Clock on page 244 Configuring a PTP Slave Clock on page 254 Example: Configuring a PTP Boundary Clock With Unicast Negotiation on page 250 Example: Configuring a PTP Boundary Clock on page 248 Copyright © 2017, Juniper Networks, Inc.
-
Page 325: Understanding Transparent Clocks In Precision Time Protocol
Chapter 9: Configuring Timing and Synchronization Understanding Transparent Clocks in Precision Time Protocol Copyright © 2017, Juniper Networks, Inc. - Page 326 ACX5048 and ACX5096 routers do not support PTP over IPv6 for transparent clocks. ACX5048 and ACX5096 routers do not support the following: Boundary clock Ordinary clock Transparent clock over MPLS switched path Transparent clock with more than two VLAN tags Copyright © 2017, Juniper Networks, Inc.
-
Page 327: Configuring Transparent Clock Mode For Precision Time Protocol
[edit] user@host# edit protocols ptp Specify transparent clock mode: [edit protocols ptp] user@host# set e2e-transparent Related Understanding Transparent Clocks in Precision Time Protocol on page 267 Documentation e2e-transparent on page 1505 show ptp global-information Copyright © 2017, Juniper Networks, Inc. -
Page 328: Configuring A Ptp Transparent Clock
[edit protocols ptp] user@host# set e2e-transparent Configuring PHY Timestamping The PHY timestamping refers to the timestamping of the IEEE 1588 event packets at the 1-Gigabit Ethernet and 10-Gigabit Ethernet PHY. Timestamping the packet in the PHY Copyright © 2017, Juniper Networks, Inc. -
Page 329: Enabling Phy Timestamping For Ordinary Clock Slave
Enabling PHY Timestamping for Ordinary Clock Slave The following procedure enables you to configure PHY timestamping for ordinary clock slave in ACX: Configure the clock mode as ordinary. [edit protocols ptp] user@host# set clock-mode ordinary Copyright © 2017, Juniper Networks, Inc. -
Page 330: Enabling Phy Timestamping For Boundary Clock
The following procedure enables you to configure PHY timestamping for grandmaster clock in ACX: NOTE: In ACX Series routers, the grandmaster functionality is supported only on ACX500 router. Configure the clock mode as ordinary. Copyright © 2017, Juniper Networks, Inc. -
Page 331: Configuring Phy Timestamping On Acx2200 Routers
Enabling PHY Timestamping for Boundary Clock on page 273 Enabling PHY Timestamping for Boundary Clock The following procedure enables you to configure PHY timestamping for boundary clock in ACX2200 routers: Configure the clock mode as boundary. [edit protocols ptp] user@host# set boundary Copyright © 2017, Juniper Networks, Inc. -
Page 332: G.703 2.048Mhz Signal Type For Bits Interfaces Overview
PTP over Ethernet uses multicast addresses for communication of PTP messages between the slave clock and the master clock. The slave clock automatically learns of master clocks in the network, is immediately able to Copyright © 2017, Juniper Networks, Inc. -
Page 333: Configuring The Ptp Over Ethernet Master Boundary Clock Parameters
“Configuring the PTP over Ethernet Master Boundary Clock Interface” on page 277 (Optional) Specify the maximum log mean interval between announce messages—from 0 through 4. The default value is 4. [edit protocols ptp master] Copyright © 2017, Juniper Networks, Inc. - Page 334 After you have configured the PTP master boundary clock parameters, enter the commit command from configuration mode. To complete the configuration of the master boundary clock, complete “Configuring the PTP over Ethernet Master Boundary Clock Interface” on page 277. Copyright © 2017, Juniper Networks, Inc.
-
Page 335: Configuring The Ptp Over Ethernet Master Boundary Clock Interface
A master interface functions as the master port and a slave interface functions as the slave port. Because PTP over Ethernet uses multicast addresses, a slave port can automatically Copyright © 2017, Juniper Networks, Inc. - Page 336 After you have configured the PTP slave clock parameters, enter the commit command in configuration mode. To complete the configuration of the slave clock, complete “Configuring the PTP over Ethernet Slave Clock Interface” on page 279 Copyright © 2017, Juniper Networks, Inc.
-
Page 337: Configuring The Ptp Over Ethernet Slave Clock Interface
Guidelines for Configuring PTP over Ethernet on page 240 Configuring PTP Dynamic Ports for Ethernet Encapsulation on page 280 Example: Configuring PTP over Ethernet for Multicast Master, Slave, and Dynamic Ports on page 281 Copyright © 2017, Juniper Networks, Inc. -
Page 338: Configuring Ptp Dynamic Ports For Ethernet Encapsulation
[edit protocols ptp stateful interface interface-name multicast-mode] user@host# set transport ieee-802.3 link-local After you have configured the PTP over Ethernet slave clock interface, enter the commit command from configuration mode. Copyright © 2017, Juniper Networks, Inc. -
Page 339: Example: Configuring Ptp Over Ethernet For Multicast Master, Slave, And Dynamic Ports
PTP over Ethernet and PTP over IPv4 encapsulation, and how to configure unicast and multicast mode of transmission of PTP traffic among the master and slave nodes. Requirements on page 282 Overview on page 282 Copyright © 2017, Juniper Networks, Inc. - Page 340 CLI at the [ ] hierarchy edit level: set interfaces ge-0/1/4 description “to base-station” set interfaces ge-0/1/4 unit 0 family inet address 7.1.1.37/24 Copyright © 2017, Juniper Networks, Inc.
- Page 341 Configure the slave interface, and enter edit mode for the interface. [edit interfaces] user@host#edit ge-0/2/0 Configure a description for the interface. [edit interfaces ge-0/2/0] user@host#set description to-MX2 Configure a logical unit and specify the protocol family. Copyright © 2017, Juniper Networks, Inc.
- Page 342 Configure the upstream unicast PTP master clock source parameters. [edit protocols ptp slave interface ge-0/2/0.0] user@host# edit unicast-mode Configure the encapsulation type for PTP packet transport. [edit protocols ptp slave interface ge-0/2/0.0 unicast-mode] user@host# set transport ipv4 Copyright © 2017, Juniper Networks, Inc.
- Page 343 If the show output does not display the intended configuration, repeat the configuration instructions in this example to correct it. [edit protocols ptp] user@host# show clock-mode boundary; domain 110; slave { interface ge-0/2/0.0 { Copyright © 2017, Juniper Networks, Inc.
- Page 344 For more information about the run show operational command, see show ptp clock in the ptp clock CLI Explorer Copyright © 2017, Juniper Networks, Inc.
- Page 345 Verifying the Number and Status of the PTP Ports Purpose Verify the number of PTP ports and their current status. Action In operational mode, enter the command to display the configured run show ptp port ports. Copyright © 2017, Juniper Networks, Inc.
-
Page 346: Hybrid Mode On Acx Series Routers Overview
Synchronous Ethernet supports hop-by-hop frequency transfer, where all interfaces on the trail must support Synchronous Ethernet. PTP (also known as IEEE 1588v2) synchronizes clocks between nodes in a network, thereby enabling the distribution Copyright © 2017, Juniper Networks, Inc. -
Page 347: Supporting Platforms
Supporting Platforms Hybrid mode is supported on the Juniper Networks ACX Series Universal Access Routers. The combined operation is possible only when the PTP client and the Synchronous Ethernet source are on the same device and are traceable to the same primary reference clock (also known as PRC). -
Page 348: Guidelines For Configuring Hybrid Mode On Acx Series Routers
You can configure the following frequency sources for hybrid node: Synchronous Ethernet 1G, 10G with/without ESMC BITS T1 Clock BITS E1 Clock 10 MHz Clock T1 Interface E1 Interface You can configure the following phase sources for hybrid node: Copyright © 2017, Juniper Networks, Inc. -
Page 349: Routers
When both primary and secondary frequency sources fail, system still works under hybrid mode ( In this case, chassis synchronization is in hybrid mode and PTP is in locked mode). Related Hybrid Mode on ACX Series Routers Overview on page 288 Documentation Copyright © 2017, Juniper Networks, Inc. -
Page 350: Configuring The Router In Hybrid Mode
Configure the esmc-transmit network-option options at the [edit chassis hierarchy level. synchronization Configure one or more interfaces at the [edit chassis synchronization] hierarchy level as Synchronous Ethernet sources as needed. Copyright © 2017, Juniper Networks, Inc. -
Page 351: Configuring Hybrid Mode With Mapping Of The Ptp Clock Class To The Esmc Quality Level
To configure hybrid mode options with a user-defined mapping of the PTP clock class to the ESMC quality level, perform the following steps: In configuration mode, go to the [edit protocols ptp slave] hierarchy level: [edit] Copyright © 2017, Juniper Networks, Inc. - Page 352 Guidelines for Configuring Hybrid Mode on ACX Series Routers on page 290 Documentation Hybrid Mode on ACX Series Routers Overview on page 288 Example: Configuring Hybrid Mode and ESMC Quality Level Mapping on page 295 Copyright © 2017, Juniper Networks, Inc.
-
Page 353: Example: Configuring Hybrid Mode And Esmc Quality Level Mapping
PTP clock class to the ESMC quality level or by configuring a user-defined mapping of the PTP clock class to the ESMC quality level. The following examples explain configuring hybrid mode with either of the modes in detail. Copyright © 2017, Juniper Networks, Inc. - Page 354 To configure hybrid mode on an ACX Series router with mapping of the PTP clock class Procedure to the ESMC quality level, perform the following steps: Configure the convert-clock-class-to-quality-level option on the slave at the [edit hierarchy level. protocols ptp slave] [edit protocols ptp slave] Copyright © 2017, Juniper Networks, Inc.
- Page 355 ESMC quality level to the clock class. [edit protocols ptp slave] user@host# set clock-class-to-quality-level-mapping quality-level prc clock-class Configure hybrid mode on the slave. Copyright © 2017, Juniper Networks, Inc.
- Page 356 Meaning The output displays the current configuration and current mode of operation of the slave. For information about the operational command, see show ptp run show ptp hybrid hybrid. Copyright © 2017, Juniper Networks, Inc.
- Page 357 : one-step Number of Slaves Number of Masters In operational mode, enter the run show ptp quality-level-mapping command to display the following output: user@host> run show ptp quality-level-mapping quality level ptp clock class SSU-A Copyright © 2017, Juniper Networks, Inc.
- Page 358 Guidelines for Configuring Hybrid Mode on ACX Series Routers on page 290 Documentation Hybrid Mode on ACX Series Routers Overview on page 288 Configuring Hybrid Mode and ESMC Quality Level Mapping on ACX Series Routers on page 292 Copyright © 2017, Juniper Networks, Inc.
-
Page 359: Understanding Timing Defects And Event Management On Acx Series
SyncE to BITS/external interface) jnxTimingEventSecRefChanged Events Denotes a change in secondary reference such as a change in logical interface jnxTimingEventQLChanged Events Denotes a change in quality level jnxTimingEventDpllStatus Events Denotes the DPLL status (SyncE, BITS, Hybrid) Copyright © 2017, Juniper Networks, Inc. - Page 360 <group-name> { categories { timing-events; The following is a sample configuration for SNMP timing in ACX Series routers: snmp { trap-options { source-address 10.216.66.139; trap-group timingGroup { version v2; destination-port 8999; categories { timing-events; Copyright © 2017, Juniper Networks, Inc.
-
Page 361: Understanding Snmp Mib For Timing On Acx Series
The PTP MIB and SyncE MIB timing objects are grouped under the jnxTimingNotfObjects SNMP MIB object. Table 35 on page 304 shows the list of SNMP MIB objects supported for SNMP get, get-next, and walk management on ACX Universal Access Routers. Copyright © 2017, Juniper Networks, Inc. - Page 362 , and show snmp mib get <MIB-timing-objects> show snmp mib walk jnxTimingNotfObjects commands for monitoring and troubleshooting purposes. The following are the sample show command outputs for reference: Copyright © 2017, Juniper Networks, Inc.
- Page 363 Clock source type : extern Clock Event : Clock failed Interface State : Up,pri show ptp lock-status detail user@host> show ptp lock-status detail Lock Status: Lock State : 1 (FREERUN) Phase offset : 0.000000000 sec Copyright © 2017, Juniper Networks, Inc.
-
Page 364: Global Positioning System (Gps) And The Acx Series Routers
ACX500 routers do not require an external GPS receiver because the GPS receiver is integrated into the system. Related External Clock Synchronization Overview for ACX Series Routers on page 226 Documentation Configuring External Clock Synchronization for ACX Series Routers on page 228 Copyright © 2017, Juniper Networks, Inc. -
Page 365: Integrated Global Navigation Satellite System (Gnss) On Acx500 Series
Use the command to check the status of the GNSS show chassis synchronization gnss receiver. For more information, see show chassis synchronization. Related show chassis synchronization on page 2386 Documentation source on page 1721 Copyright © 2017, Juniper Networks, Inc. -
Page 366: Assisted Partial Timing Support On Acx500 Routers Overview
PTPoE Configuration [edit protocols] ptp { clock-mode boundary; slave { interface <slave-ptp-ifl> { multicast-mode { transport ieee-802.3 [ link-local ] ; master { interface <master-ptp-ifl> { multicast-mode { transport ieee-802.3 [ link-local ] ; Copyright © 2017, Juniper Networks, Inc. - Page 367 , and show commands to monitor and troubleshoot show chassis synchronization gnss extensive the configurations. Related show chassis synchronization on page 2386 Documentation source on page 1721 Copyright © 2017, Juniper Networks, Inc.
- Page 368 ACX Series Universal Access Router Configuration Guide Copyright © 2017, Juniper Networks, Inc.
-
Page 369: Configuring Dhcp On Acx Series Routers
PART 4 Configuring DHCP on ACX Series Routers Configuring DHCP Client and DHCP Server on page 313 Configuring DHCP and DHCPv6 Relay Agent on page 367 Copyright © 2017, Juniper Networks, Inc. - Page 370 ACX Series Universal Access Router Configuration Guide Copyright © 2017, Juniper Networks, Inc.
-
Page 371: Configuring Dhcp Client And Dhcp Server
Events on page 338 Verifying and Managing the DHCP Maintain Subscribers Feature on page 339 Preserving Subscriber Binding Information on page 339 Configuring DHCP Local Server to Preserve Subscriber Binding Information on page 340 Copyright © 2017, Juniper Networks, Inc. - Page 372 Configuring a DHCP Client on page 360 DHCP Duplicate Client Differentiation Using Client Subinterface Overview on page 362 Guidelines for Configuring Support for DHCP Duplicate Clients on page 363 Configuring DHCP Duplicate Client Support on page 364 Copyright © 2017, Juniper Networks, Inc.
-
Page 373: Extended Dhcp Local Server Overview
IP address for the subscriber. Each DHCP local server that receives the discover packet then searches its address-assignment pool for the client address and configuration options. Each local Copyright © 2017, Juniper Networks, Inc. -
Page 374: Minimal Configuration For Clients
In one operation, you configure the extended DHCP local server on the router and specify how the extended DHCP local server determines which address-assignment pool to use. In Copyright © 2017, Juniper Networks, Inc. -
Page 375: Address-Assignment Pools Overview
DHCP option 82 value. Then, when a DHCP client request matches the specified option 82 value, an address from the specified range is assigned to the client. Copyright © 2017, Juniper Networks, Inc. -
Page 376: Configuring Address-Assignment Pools
“Configuring a Named Address Range for Dynamic Address Assignment” on page 320. (Optional) Create static address bindings. “Configuring Static Address Assignment” on page 320. (Optional) Configure attributes for DHCP clients. “Configuring DHCP Client-Specific Attributes” on page 325. Copyright © 2017, Juniper Networks, Inc. -
Page 377: Configuring An Address-Assignment Pool Name And Addresses
Configuring a Named Address Range for Dynamic Address Assignment on page 320 Configuring Static Address Assignment on page 320 DHCP Attributes for Address-Assignment Pools on page 321 Configuring How the Extended DHCP Local Server Determines Which Address-Assignment Pool to Use on page 322 Copyright © 2017, Juniper Networks, Inc. -
Page 378: Configuring A Named Address Range For Dynamic Address Assignment
The address is removed from the address-assignment pool so that it is not assigned to another client. When you reserve an address, you identify the client host and create a binding between the client MAC address and the assigned IP address. Copyright © 2017, Juniper Networks, Inc. -
Page 379: Dhcp Attributes For Address-Assignment Pools
Domain in which clients search for a DHCP server host. domain-name Grace period offered with the lease. – grace-period Maximum lease time allowed by the DHCP server. maximum-lease-time IP address of DNS server to which clients can send DNS name-server queries. Copyright © 2017, Juniper Networks, Inc. -
Page 380: Configuring How The Extended Dhcp Local Server Determines Which Address-Assignment Pool To Use
After the DHCP local server ip-address-first determines the address assignment pool to use, the server performs the matching based on the criteria you specified in the pool configuration. Copyright © 2017, Juniper Networks, Inc. - Page 381 To configure the matching order the extended DHCP local server uses to determine the address-assignment pool used for a client: Access the configuration. pool-match-order [edit system services dhcp-local-server] user@host# edit pool-match-order Copyright © 2017, Juniper Networks, Inc.
-
Page 382: Use Of Dhcp Option 50 To Request A Specific Ip Address
DHCP option 50 in DHCP DISCOVER messages to request a particular address. Related Extended DHCP Local Server Overview on page 315 Documentation DHCP Local Server Handling of Client Information Request Messages on page 335 Copyright © 2017, Juniper Networks, Inc. -
Page 383: Configuring Dhcp Client-Specific Attributes
Configuring an Address-Assignment Pool Name and Addresses on page 319 Configuring a Named Address Range for Dynamic Address Assignment on page 320 Configuring Static Address Assignment on page 320 DHCP Attributes for Address-Assignment Pools on page 321 Copyright © 2017, Juniper Networks, Inc. -
Page 384: Grouping Interfaces With Common Dhcp Configurations
Extended DHCP Local Server Overview on page 315 Documentation DHCP Local Server Handling of Client Information Request Messages on page 335 DHCP Duplicate Client Differentiation Using Client Subinterface Overview on page 362 Address-Assignment Pools Overview on page 317 Copyright © 2017, Juniper Networks, Inc. -
Page 385: Guidelines For Configuring Interface Ranges
Two groups cannot share interface space. For example, the following configuration is not allowed because the three stanzas share the same space and interfere with one another—interface is common to all three. ge-1/0/0.26 dhcp-relay group diamond interface ge-1/0/0.10 upto ge-1/0/0.30 dhcp-local-server group ruby interface ge-1/0/0.26 Copyright © 2017, Juniper Networks, Inc. -
Page 386: Group-Specific Dhcp Local Server Options
—Specify one or more interfaces, or a range of interfaces, that are within the interface specified group. —Override the default configuration settings for the extended DHCP local overrides server. For information, see Overriding Default DHCP Local Server Configuration Settings. Copyright © 2017, Juniper Networks, Inc. -
Page 387: Overriding Default Dhcp Local Server Configuration Settings
Global override: [edit system services dhcp-local-server] user@host# edit overrides Group level override: [edit system services dhcp-local-server] user@host# edit group boston overrides Per-interface override: [edit system services dhcp-local-server] user@host# edit group boston overrides interface ge-1/0/1.1 Copyright © 2017, Juniper Networks, Inc. -
Page 388: Deleting Dhcp Local Server Settings
You can delete override settings for DHCP local server globally or at a routing instance, for a named group, or for a specific interface within a named group. You can delete a specific override setting or all overrides. Copyright © 2017, Juniper Networks, Inc. -
Page 389: Specifying The Maximum Number Of Dhcp Clients Per Interface
[edit routing-instances routing-instance-name system services hierarchy level. dhcp-local-server overrides] Related Extended DHCP Local Server Overview on page 315 Documentation DHCP Local Server Handling of Client Information Request Messages on page 335 Copyright © 2017, Juniper Networks, Inc. -
Page 390: Disabling Arp Table Population
DSLAM). DHCP populates the ARP table with the same interface MAC address (for example, MAC X from a DSLAM interface) for each client: Table 38: ARP Table in Distrusted Environment IP Address MAC Address Client 1 IP Address MAC X Copyright © 2017, Juniper Networks, Inc. -
Page 391: Dhcp Auto Logout Overview
DHCP clients. DHCP can then assign the addresses to other clients. Without auto logout, an IP address is blocked for the entire lease period, and DHCP must wait until the address lease time expires before reusing the address. Copyright © 2017, Juniper Networks, Inc. -
Page 392: How Dhcp Identifies And Releases Clients
DHCP Local Server Handling of Client Information Request Messages on page 335 DHCP Duplicate Client Differentiation Using Client Subinterface Overview on page 362 Address-Assignment Pools Overview on page 317 Automatically Logging Out DHCP Clients on page 335 Copyright © 2017, Juniper Networks, Inc. -
Page 393: Automatically Logging Out Dhcp Clients
Dynamic Host Configuration Protocol (DHCP) clients that already have externally provided addresses might solicit further configuration information from a DHCP server by sending a DHCP information request that indicates what information is desired. By default, DHCP Copyright © 2017, Juniper Networks, Inc. -
Page 394: Enabling Processing Of Client Information Requests
To enable processing of DHCP client information request messages: Specify that you want to configure override options. [edit system services dhcp-local-server overrides] user@host# set process-inform Copyright © 2017, Juniper Networks, Inc. -
Page 395: Subscriber Binding Retention During Interface Delete Events
If the maintain subscribers feature is enabled on the router, you can explicitly delete a subscriber binding and log out the subscriber by either specifying a lease expiration timeout or by using the following command: clear dhcp server binding Copyright © 2017, Juniper Networks, Inc. -
Page 396: Configuring The Router To Maintain Dhcp Subscribers During Interface Delete
Configure the router to enable the maintain-subscriber feature when an interface-delete event occurs. [edit system services subscriber-management maintain-subscriber] user@host# set interface-delete In a routing instance, you can configure subscriber management at the [edit routing-instances routing-instance-name system services subscriber-management] hierarchy level. Copyright © 2017, Juniper Networks, Inc. -
Page 397: Verifying And Managing The Dhcp Maintain Subscribers Feature
By default, the file is named as . The statement under the jdhcpd_client_data persistent-storage [edit system processes dhcp-service] hierarchy level allows you to configure the frequency (between 1 to 48 Copyright © 2017, Juniper Networks, Inc. -
Page 398: Configuring Dhcp Local Server To Preserve Subscriber Binding Information
To configure the DHCP local server to store subscriber binding information: Specify that you want to configure the DHCP local server. [edit system services] user@host# edit dhcp-local-server Enable persistent storage. [edit system services dhcp-local-server] user@host# set persistent-storage automatic Copyright © 2017, Juniper Networks, Inc. -
Page 399: Understanding Dynamic Reconfiguration Of Extended Dhcp Local Server
Preserving Subscriber Binding Information on page 339 Understanding Dynamic Reconfiguration of Extended DHCP Local Server Clients Dynamic reconfiguration of clients enables the extended DHCP local server to initiate a client update without waiting for the client to initiate a request. Copyright © 2017, Juniper Networks, Inc. -
Page 400: Default Client/Server Interaction
To enable dynamic reconfiguration with default reconfiguration values for all DHCP clients, include the reconfigure statement at the [edit system services dhcp-local-server] hierarchy level for DHCPv4 clients. In a routing instance, include the reconfigure Copyright © 2017, Juniper Networks, Inc. - Page 401 Action Server receives a discover message from the client. Server drops packet and deletes client. Server receives a request, renew, rebind, or init-reboot DHCPv4—Server sends NAK message and message from the client. deletes client. Copyright © 2017, Juniper Networks, Inc.
-
Page 402: Configuring Dynamic Reconfiguration Of Dhcp Clients To Avoid Extended Outages Due To Server Configuration Changes
(Optional) Override the global configuration for a particular group of clients. [edit system services dhcp-local-server group-name] user@host# set reconfigure (Optional) Configure how the server attempts reconfiguration. “Configuring Dynamic Reconfiguration Attempts for DHCP Clients” on page 345. (Optional) Configure the response to a failed reconfiguration. Copyright © 2017, Juniper Networks, Inc. -
Page 403: Configuring Dynamic Reconfiguration Attempts For Dhcp Clients
(Optional) To configure DHCP local server reconfiguration behavior for all DHCP clients: Specify the number of reconfiguration attempts. [edit system services dhcp-local-server reconfigure] user@host# set attempts 5 Specify the interval between reconfiguration attempts. [edit system services dhcp-local-server reconfigure] user@host# set timeout 8 Copyright © 2017, Juniper Networks, Inc. -
Page 404: Configuring Deletion Of The Client When Dynamic Reconfiguration Fails
Understanding Dynamic Reconfiguration of Extended DHCP Local Server Clients on page 341 Configuring Dynamic Reconfiguration of DHCP Clients to Avoid Extended Outages Due to Server Configuration Changes on page 344 Configuring Dynamic Reconfiguration Attempts for DHCP Clients on page 345 Copyright © 2017, Juniper Networks, Inc. -
Page 405: Requesting Dhcp Local Server To Initiate Reconfiguration Of Client Bindings
Configuring Dynamic Reconfiguration of DHCP Clients to Avoid Extended Outages Due to Server Configuration Changes on page 344 Configuring Dynamic Reconfiguration Attempts for DHCP Clients on page 345 Configuring Deletion of the Client When Dynamic Reconfiguration Fails on page 346 Copyright © 2017, Juniper Networks, Inc. -
Page 406: Clearing Dhcp Bindings For Subscriber Access
The following examples show variations of the clear DHCP binding feature. The examples use the DHCP local server version of the commands. To clear all bindings: user@host> clear dhcp server binding all Copyright © 2017, Juniper Networks, Inc. -
Page 407: Verifying And Managing Dhcp Local Server Configuration
To ensure that DHCP bindings are removed, issue the clear command before you delete the DHCP server configuration. dhcp server binding Action To display the address bindings in the client table on the extended DHCP local server: Copyright © 2017, Juniper Networks, Inc. -
Page 408: Enabling Mac Address Filtering
125 TCAM entries without the presence of the FBF filter. In general, if the ACX Series router has N physical ports, then it can support (125–N) source MAC addresses at the system level. Copyright © 2017, Juniper Networks, Inc. -
Page 409: Tracing General Authentication Service Processes
By default, the name of the file that records trace output for general authentication service is authd . You can specify a different name by including the file statement at the hierarchy level: [edit system processes general-authentication-service] Copyright © 2017, Juniper Networks, Inc. -
Page 410: Configuring The Number And Size Of General Authentication Service Processes Log Files
To explicitly set the default behavior, in which the log file can only be read by the user who configured tracing: Configure the log file to be no-world-readable. [edit system processes general-authentication-service traceoptions] Copyright © 2017, Juniper Networks, Inc. -
Page 411: Configuring A Regular Expression For Lines To Be Logged
That is, you cannot specify different interface-level log files for different interfaces or groups of interfaces. By default, nothing is traced. When you enable the tracing operation, the default tracing behavior is as follows: Copyright © 2017, Juniper Networks, Inc. -
Page 412: Configuring The Extended Dhcp Log Filename
By default, the name of the file that records trace output is jdhcpd . You can specify a different name by including the option. DHCP local server supports the option for file file statement and the statement. traceoptions interface-traceoptions Copyright © 2017, Juniper Networks, Inc. -
Page 413: Configuring The Number And Size Of Extended Dhcp Log Files
By default, only the user who configures the tracing operation can access the log files. You can enable all users to read the log file and you can explicitly set the default behavior of the log file. Copyright © 2017, Juniper Networks, Inc. -
Page 414: Configuring A Regular Expression For Extended Dhcp Messages To Be
A smaller set of flags is supported for interface-level interface-traceoptions tracing than for global tracing. To configure the flags for the events to be logged: Specify the flags for global tracing operations. [edit system processes dhcp-service traceoptions] user@host# set flag flag Copyright © 2017, Juniper Networks, Inc. - Page 415 Specify the severity level for global tracing operations. [edit system processes dhcp-service traceoptions] user@host# set level severity Specify the severity level for per-interface tracing operations. [edit system processes dhcp-service interface-traceoptions] user@host# set level severity Copyright © 2017, Juniper Networks, Inc.
-
Page 416: Are Logged
“Configuring the Severity Level to Filter Which Extended DHCP Messages Are Logged” on page 357. Enable tracing on an interface or interface range. The following examples show a DHCP local server configuration. Copyright © 2017, Juniper Networks, Inc. -
Page 417: Understanding Dhcp Client Operation
Guidelines for Configuring Support for DHCP Duplicate Clients on page 363 Configuring DHCP Duplicate Client Support on page 364 Configuring DHCP Client-Specific Attributes on page 325 Enabling Processing of Client Information Requests on page 336 Configuring a DHCP Client on page 360 Copyright © 2017, Juniper Networks, Inc. -
Page 418: Configuring A Dhcp Client
[edit interfaces ge-0/0/1 unit 0 family inet dhcp-client] user@host# set client-identifier prefix [host-name logical-system-name routing-instance-name] Configure the DHCP client identifier prefix as the routing instance name. [edit interfaces ge-0/0/1 unit 0 family inet dhcp-client] Copyright © 2017, Juniper Networks, Inc. -
Page 419: Verifying And Managing Dhcp Client Configuration
To display the address bindings in the client table on the DHCP client: user@host> show dhcp client binding To display DHCP client statistics: user@host> show dhcp client statistics To clear the binding state of a DHCP client from the client table on the DHCP client: Copyright © 2017, Juniper Networks, Inc. -
Page 420: Dhcp Duplicate Client Differentiation Using Client Subinterface Overview
ID or MAC address, the DHCP server terminates the address lease for the existing client and returns the address to its original address pool. The DHCP server then assigns a new address and lease to the new client. Copyright © 2017, Juniper Networks, Inc. -
Page 421: Guidelines For Configuring Support For Dhcp Duplicate Clients
The giaddr inserted by DHCP relay is the same for duplicate clients on different subinterfaces. The DHCP local server uses option 82 when allocating the IP address. DHCP relay uses the echoed option 82 to learn the client subinterface and to construct the client key. Copyright © 2017, Juniper Networks, Inc. -
Page 422: Configuring Dhcp Duplicate Client Support
Guidelines for Configuring Support for DHCP Duplicate Clients on page 363 Understanding DHCP Client Operation on page 359 Configuring DHCP Client-Specific Attributes on page 325 Automatically Logging Out DHCP Clients on page 335 Enabling Processing of Client Information Requests on page 336 Copyright © 2017, Juniper Networks, Inc. - Page 423 Chapter 10: Configuring DHCP Client and DHCP Server Configuring a DHCP Client on page 360 Copyright © 2017, Juniper Networks, Inc.
- Page 424 ACX Series Universal Access Router Configuration Guide Copyright © 2017, Juniper Networks, Inc.
-
Page 425: Configuring Dhcp And Dhcpv6 Relay Agent
(CLI Procedure) on page 396 Configuring Named Server Groups on page 398 Configuring Active Server Groups to Apply a Common DHCP Relay Agent Configuration to Named Server Groups on page 398 Disabling DHCP Relay on page 399 Copyright © 2017, Juniper Networks, Inc. -
Page 426: Dhcp Relay Agent On Acx Series Routers
DHCP relay is supported on Integrated Routing and Bridging (IRB) interfaces. To verify and manage DHCP relay agent settings: you can use the following operational commands: clear dhcp relay binding clear dhcp relay statistics Copyright © 2017, Juniper Networks, Inc. - Page 427 60 support enables DHCP relay to direct client traffic to the specific DHCP server (the vendor-option server) that provides the service that the client requires. Otherwise, as another option, you can configure option 60 strings to direct traffic to the DHCP local server in the current virtual router. Copyright © 2017, Juniper Networks, Inc.
-
Page 428: Dhcpv6 Relay Agent On Acx Series Routers
Copyright © 2017, Juniper Networks, Inc. -
Page 429: Inserting The Dhcpv6 Interface Identifier Into Dhcpv6 Packets
To insert the DHCPv6 interface identifier (option 18) in DHCPv6 packets: Configure the DHCPv6 relay to include option 18. [edit forwarding-options dhcp-relay dhcpv6] user@host# edit relay-agent-interface-id (Optional) Specify the prefix to include in option 18. Copyright © 2017, Juniper Networks, Inc. -
Page 430: Configuring Group-Specific Dhcp Relay Options
DHCP relay agent takes with the traffic. For more information, see “Using DHCP Option Information to Selectively Process DHCP Client Traffic” on page 390. Copyright © 2017, Juniper Networks, Inc. -
Page 431: Overriding The Default Dhcp Relay Configuration Settings
[edit forwarding-options dhcp-relay hierarchy level. group group-name interface interface-name] To configure overrides for DHCPv6 relay at the global level, group level, or per-interface, use the corresponding statements at the [edit forwarding-options dhcp-relay dhcpv6] hierarchy level. Copyright © 2017, Juniper Networks, Inc. - Page 432 “Replacing the DHCP Relay Request and Release Packet Source Address” on page 376. (DHCPv4 only) Override the DHCP relay agent information option (option 82) in DHCP packets. “Overriding Option 82 Information” on page 377. Copyright © 2017, Juniper Networks, Inc.
- Page 433 (DHCPv6 only) Automatically log out existing client when new client solicits on same interface. See Automatically Logging Out DHCPv6 Clients. (DHCPv4 only) Disable the DHCP relay agent on specific interfaces. “Disabling DHCP Relay” on page 399. (DHCPv4 and DHCPv6) Disable automatic binding of stray DHCP requests. Copyright © 2017, Juniper Networks, Inc.
-
Page 434: Changing The Gateway Ip Address (Giaddr) Field To The Giaddr Of The Dhcp Relay Agent
You can configure the DHCP relay agent to replace request and release packets with the gateway IP address (giaddr) before forwarding the packet to the DHCP server. To replace the source address with giaddr: Specify that you want to configure override options. [edit forwarding-options dhcp-relay] user@host# edit overrides Copyright © 2017, Juniper Networks, Inc. -
Page 435: Overriding Option 82 Information
DHCP request packets. DHCP relay agent then instead uses the Layer 2 unicast transmission method to send DHCP Offer reply packets and DHCP ACK reply packets from the DHCP server to DHCP clients during the discovery process. Copyright © 2017, Juniper Networks, Inc. -
Page 436: Trusting Option 82 Information
DHCP Discover PDUs or DHCPv6 Solicit PDUs are accepted. When the number of clients subsequently drops below the limit, new clients are again accepted. Copyright © 2017, Juniper Networks, Inc. - Page 437 Chapter 11: Configuring DHCP and DHCPv6 Relay Agent NOTE: The maximum number of DHCP (and DHCPv6) local server clients or DHCP (and DHCPv6) relay clients can also be specified by Juniper Networks VSA 26-143 during client login. The VSA-specified value always takes precedence if the statement specifies a different number.
-
Page 438: Automatically Logging Out Dhcp Clients
New clients use the new setting. Related DHCP Auto Logout Overview Documentation How DHCP Relay Agent Uses Option 82 for Auto Logout Allowing Only One DHCP Client Per Interface Copyright © 2017, Juniper Networks, Inc. -
Page 439: Sending Release Messages When Clients Are Deleted
DHCP server. If the server responds with an ACK, the client is bound and the ACK is forwarded to the client. If the server responds with a NAK, the database entry is deleted Copyright © 2017, Juniper Networks, Inc. - Page 440 Specify the named group of which the interface is a member. [edit forwarding-options dhcp-relay] user@host# edit group boston Specify the interface on which you want to disable automatic binding. [edit forwarding-options dhcp-relay group boston] Copyright © 2017, Juniper Networks, Inc.
-
Page 441: Using Dhcp Relay Agent Option 82 Information
You can configure the option 82 support globally or for a named group of interfaces. To restore the default behavior, in which option 82 information is not inserted into DHCP packets, you use the delete relay-option-82 statement. Copyright © 2017, Juniper Networks, Inc. -
Page 442: Configuring Option 82 Information
For remote systems, the subunit is required and is used to differentiate an interface. For Fast Ethernet or Gigabit Ethernet interfaces that use VLANs: (fe | ge)-fpc/pic/port:vlan-id For Fast Ethernet or Gigabit Ethernet interfaces that use S-VLANs: (fe | ge)-fpc/pic/port:svlan-id-vlan-id Copyright © 2017, Juniper Networks, Inc. - Page 443 Configure the DHCP relay agent to insert the Agent Circuit ID suboption, the Agent Remote ID suboption, or both. To insert the Agent Circuit ID: [edit forwarding-options dhcp-relay relay-option-82] user@host# set circuit-id To insert the Agent Remote ID: Copyright © 2017, Juniper Networks, Inc.
-
Page 444: Including A Prefix In Dhcp Options
(/). If you include both the logical system name and the routing instance name in the prefix, these values are separated by a semicolon (;). Copyright © 2017, Juniper Networks, Inc. - Page 445 To configure the Agent Remote ID: [edit forwarding-options dhcp-relay relay-option-82] user@host# edit remote-id Specify that the prefix be included in the option 82 information. In this example, the prefix includes the hostname and logical system name. Copyright © 2017, Juniper Networks, Inc.
-
Page 446: Including A Textual Description In Dhcp Options
You can include the textual interface description in the following DHCP options: DHCPv4 option 82 Agent Circuit ID (suboption 1) DHCPv4 option 82 Agent Remote ID (suboption 2) DHCPv6 option 18 Relay Agent Interface-ID DHCPv6 option 37 Relay Agent Remote-ID Copyright © 2017, Juniper Networks, Inc. - Page 447 (DHCPv6) To configure the DHCPv6 option 18 or option 37 to include the textual interface description: Specify that you want to configure DHCPv6 relay agent support. [edit forwarding-options dhcp-relay] user@host# edit dhcpv6 Copyright © 2017, Juniper Networks, Inc.
-
Page 448: Using Dhcp Option Information To Selectively Process Dhcp Client Traffic
You can specify options 60 and 77 for DHCP relay agent, and options 15 and 16 for DHCPv6 relay agent. [edit forwarding-options dhcp-relay relay-option] user@host# set option-number option-number For example, to identify traffic that has DHCP option 60 information: Copyright © 2017, Juniper Networks, Inc. - Page 449 Related DHCP Options and Selective Traffic Processing Overview Documentation Example: Configuring DHCP Relay Agent Selective Traffic Processing Based on DHCP Option Strings Example: Configuring DHCP and DHCPv6 Relay Agent Group-Level Selective Traffic Processing Copyright © 2017, Juniper Networks, Inc.
-
Page 450: Understanding Dhcp Option 82 For Protecting Switching Devices Against
You can use DHCP option 82, also known as the DHCP relay agent information option, to help protect Juniper Networks EX Series Ethernet Switches and MX Series 3D Universal Edge Routers against attacks such as spoofing (forging) of IP addresses and MAC addresses, and DHCP IP address starvation. -
Page 451: Suboption Components Of Option 82
ID—Identifies the vendor of the host. If you specify the option but do vendor-id not enter a value, the default value Juniper is used. To specify a value, you type a character string. Copyright © 2017, Juniper Networks, Inc. -
Page 452: Switching Device Configurations That Support Option 82
This figure shows the relay agent and server on the same network, but they can also be on different networks–that is, the relay agent can be external. Copyright © 2017, Juniper Networks, Inc. -
Page 453: Dhcpv6 Options
Configuring DHCP Option 82 to Help Protect the Switching Devices Against Attacks Documentation (CLI Procedure) on page 396 Setting Up DHCP Option 82 on the Switch with No Relay Agent Between Clients and DHCP Server (CLI Procedure) Copyright © 2017, Juniper Networks, Inc. -
Page 454: Configuring Dhcp Option 82 To Help Protect The Switching Devices Against Attacks (Cli Procedure)
The remaining steps are optional. Configure the prefix for the circuit ID suboption to include the hostname or the routing instance name for the bridge domain: Copyright © 2017, Juniper Networks, Inc. - Page 455 Configure a vendor ID suboption: To use the default value (the default value is Juniper ), do not type a character string after the option keyword: vendor-id [edit bridge-domains bridge-domain-name forwarding-options dhcp-security option-82] user@device# set vendor-id Copyright © 2017, Juniper Networks, Inc.
-
Page 456: Configuring Named Server Groups
DHCP relay agent configuration to a named group of DHCP server addresses. Use the statement at the hierarchy levels to configure DHCPv6 support. [edit ... dhcpv6] To configure an active server group: Specify the name of the active server group. Copyright © 2017, Juniper Networks, Inc. -
Page 457: Disabling Dhcp Relay
[edit forwarding-options dhcp-relay] user@host# edit overrides Disable the DHCP relay agent. [edit forwarding-options dhcp-relay overrides] user@host# set disable-relay Related Extended DHCP Relay Agent Overview Documentation Deleting DHCP Local Server and DHCP Relay Override Settings Copyright © 2017, Juniper Networks, Inc. - Page 458 ACX Series Universal Access Router Configuration Guide Copyright © 2017, Juniper Networks, Inc.
-
Page 459: Configuring Protocols On Acx Series Routers
Configuring MPLS and Pseudowires on page 587 Configuring Virtual Router Redundancy Protocol (VRRP) on page 651 Configuring Multicast Listener Discovery and Protocol-Independent Multicast on page 669 Configuring Path Computation Element Protocol (PCEP) on page 691 Copyright © 2017, Juniper Networks, Inc. - Page 460 ACX Series Universal Access Router Configuration Guide Copyright © 2017, Juniper Networks, Inc.
-
Page 461: Configuring Layer 2 Control Protocol
Understanding Loop Protection for Spanning-Tree Instance Interfaces on page 426 Loop Protection for a Spanning-Tree Instance Interface on page 427 Configuring Loop Protection for a Spanning-Tree Instance Interface on page 428 Example: Enabling Loop Protection for Spanning-Tree Protocols on page 429 Copyright © 2017, Juniper Networks, Inc. -
Page 462: Layer 2 Control Protocol On Acx Series Routers
All regions are bound together using a Common Instance Spanning Tree (CIST), which is responsible for creating a loop-free topology across regions, whereas the Multiple Copyright © 2017, Juniper Networks, Inc. - Page 463 Spanning-Tree Instance Interface Cost on page 408 Spanning-Tree Instance Interface Point-to-Point Link Mode on page 409 Configuring a Spanning-Tree Instance Interface as an Edge Port for Faster Convergence on page 409 Spanning-Tree Protocol Trace Options on page 410 Copyright © 2017, Juniper Networks, Inc.
-
Page 464: Bridge Priority For Election Of Root Bridge And Designated Bridge
If the maximum age timer expires, the bridge detects that the link to the root bridge has failed and initiates a topology reconvergence. The maximum age timer should be longer than the configured hello timer. Related Configuring Rapid Spanning Tree Protocol Documentation Configuring Multiple Spanning Tree Protocol Copyright © 2017, Juniper Networks, Inc. -
Page 465: Hello Time For Root Bridge To Transmit Hello Bpdus
VLAN levels, the configuration at the VLAN level overrides the global configuration. Related Configuring Rapid Spanning Tree Protocol Documentation Configuring Multiple Spanning Tree Protocol Configuring VLAN Spanning Tree Protocol Copyright © 2017, Juniper Networks, Inc. -
Page 466: Spanning-Tree Instance Interface Priority
If the interface cost is not configured, the cost is determined by the speed of the interface. For example, a 100-Mbps link has a default path cost of 19, a 1000-Mbps link has a default path cost of 4, and a 10-Gbps link has a default path cost of 2. Copyright © 2017, Juniper Networks, Inc. -
Page 467: Spanning-Tree Instance Interface Point-To-Point Link Mode
The Junos OS supports automatic detection of edge ports as described in the RSTP standard. Layer 2 bridges do not expect to receive BPDUs for edge ports. If a BPDU is received for an edge port, the port becomes a non-edge port. Copyright © 2017, Juniper Networks, Inc. -
Page 468: Spanning-Tree Protocol Trace Options
Junos OS Routing Protocols Library. Related Configuring Rapid Spanning Tree Protocol Documentation Configuring Multiple Spanning Tree Protocol Configuring VLAN Spanning Tree Protocol Example: Tracing Spanning-Tree Protocol Operations traceoptions (Spanning Tree) Copyright © 2017, Juniper Networks, Inc. -
Page 469: Configuring Rapid Spanning-Tree Protocol
BPDU packet is received for an edge port, the port becomes a nonedge port Configure the bridge priority [edit ... protocols rstp] user@host# set bridge-priority bridge-priority For more information, see “Bridge Priority for Election of Root Bridge and Designated Bridge” on page 406. Copyright © 2017, Juniper Networks, Inc. - Page 470 Configuring Multiple Spanning-Tree Protocol on page 413 Configuring MST Instances on a Physical Interface on page 415 Disabling MSTP on page 417 Configuring VLAN Spanning-Tree Protocol on page 417 Tracing Spanning-Tree Operations on page 421 Copyright © 2017, Juniper Networks, Inc.
-
Page 471: Configuring Multiple Spanning-Tree Protocol
[edit ... protocols mstp interface interface-name] user@host# set edge Configure the bridge priority [edit ... protocols mstp] user@host# set bridge-priority bridge-priority For more information, see “Bridge Priority for Election of Root Bridge and Designated Bridge” on page 406. Copyright © 2017, Juniper Networks, Inc. - Page 472 (p2p | shared); edge; # Optional. bridge-priority bridge-priority; max-age seconds; hello-time seconds; forward-delay seconds; # Optional. configuration-name configuration-name; # MST region configuration name. revision-level revision-level; # MST revision number. max-hops hops; # MST maximum hops. Copyright © 2017, Juniper Networks, Inc.
-
Page 473: Configuring Mst Instances On A Physical Interface
(Optional) Configure the interface as an edge port: [edit ... protocols mstp msti msti-id interface interface-name] user@host# set edge Configure the bridge priority [edit ... protocols mstp msti msti-id] user@host# set bridge-priority bridge-priority Copyright © 2017, Juniper Networks, Inc. - Page 474 Layer 2 Control Protocol on ACX Series Routers on page 404 Documentation Configuring Multiple Spanning-Tree Protocol on page 413 Configuring Rapid Spanning-Tree Protocol on page 411 Disabling MSTP on page 417 Configuring VLAN Spanning-Tree Protocol on page 417 Tracing Spanning-Tree Operations on page 421 Copyright © 2017, Juniper Networks, Inc.
-
Page 475: Disabling Mstp
If VSTP has been forced to run as the original STP version, you can revert back to VSTP by first removing the statement from force-version the configuration and then entering the clear spanning-tree configuration mode command. protocol-migration Copyright © 2017, Juniper Networks, Inc. - Page 476 (Optional) By default, the bridge port remains in the listening and learning states for 15 seconds before transitioning to the forwarding state. You can specify a delay from through seconds instead: [edit ... protocols vstp vlan vlan-id] user@host# set forward-delay seconds Copyright © 2017, Juniper Networks, Inc.
- Page 477 Configuring Multiple Spanning-Tree Protocol on page 413 Configuring Rapid Spanning-Tree Protocol on page 411 Tracing Spanning-Tree Operations on page 421 Configuring MST Instances on a Physical Interface on page 415 Disabling MSTP on page 417 Copyright © 2017, Juniper Networks, Inc.
-
Page 478: Rstp Or Vstp Forced To Run As Ieee 802.1D Stp
RSTP or VSTP configuration: force-version user@host# delete force-version Include this statement under the RSTP or VSTP hierarchy level: [edit protocols rstp] [edit protocols vstp] [edit routing-instances routing-instance-name protocols rstp] [edit routing-instances routing-instance-name protocols vstp] Copyright © 2017, Juniper Networks, Inc. -
Page 479: Tracing Spanning-Tree Operations
[edit ... protocols (mstp | rstp | vstp)] user@host# edit traceoptions Configure the files that contain trace logging information: [edit ... protocols (mstp | rstp | vstp)] user@host# set file filename <files number> <size bytes> <world-readable | no-world-readable> Copyright © 2017, Juniper Networks, Inc. - Page 480 This flag may cause the CPU to become very busy. To disable an individual spanning-tree protocol-specific option, include the disable option with the statement. flag Verify the spanning-tree protocol-specific trace options. [edit] routing-options traceoptions { ...global-trace-options-configuration... Copyright © 2017, Juniper Networks, Inc.
-
Page 481: Understanding Bpdu Protection For Spanning-Tree Instance Interfaces
If a BPDU is received on a blocked interface, the interface is disabled and stops forwarding frames. By default, all BPDUs are accepted and processed on all interfaces. You can configure BPDU protection on interfaces with the following encapsulation types: ethernet-bridge ethernet-vpls extended-vlan-bridge vlan-vpls vlan-bridge extended-vlan-vpls Copyright © 2017, Juniper Networks, Inc. -
Page 482: Configuring Bpdu Protection For Spanning-Tree Instance Interfaces
{ # VLAN encapsulation on a Gigabit Ethernet. encapsulation (ethernet-bridge | ethernett-vpls | extended-vlan-bridge | extended-vlan-vpls | vlan-bridge| vlan-vpls); xe-fpc/pic/port { # VLAN encapsulation on 10-Gigabit Ethernet. encapsulation (ethernet-bridge | ethernett-vpls | extended-vlan-bridge | extended-vlan-vpls | vlan-bridge| vlan-vpls); Copyright © 2017, Juniper Networks, Inc. -
Page 483: Configuring Bpdu Protection On All Edge Ports
Enable edge port blocking for a particular spanning-tree protocol: [edit] user@host# set protocols (STP Type) (mstp | rstp | vstp) bpdu-block-on-edge Verify BPDU protection for edge ports: [edit] protocols (STP Type) { (mstp | rstp | vstp) { bpdu-block-on-edge; Copyright © 2017, Juniper Networks, Inc. -
Page 484: Understanding Loop Protection For Spanning-Tree Instance Interfaces
BPDUs. You can configure spanning-tree protocol loop protection to improve the stability of Layer 2 networks. We recommend you configure loop protection only on non-designated Copyright © 2017, Juniper Networks, Inc. -
Page 485: Loop Protection For A Spanning-Tree Instance Interface
Understanding Loop Protection for Spanning-Tree Instance Interfaces on page 426 Documentation Configuring Loop Protection for a Spanning-Tree Instance Interface on page 428 Example: Enabling Loop Protection for Spanning-Tree Protocols on page 429 bpdu-timeout-action on page 1452 interface (Spanning Tree) Copyright © 2017, Juniper Networks, Inc. -
Page 486: Configuring Loop Protection For A Spanning-Tree Instance Interface
{ bpdu-timeout-action (log | block); vlan vlan-id { interface interface-name { bpdu-timeout-action (log | block); To display the spanning-tree protocol loop protection characteristics on an interface, use the show spanning-tree interface operational command. Copyright © 2017, Juniper Networks, Inc. -
Page 487: Example: Enabling Loop Protection For Spanning-Tree Protocols
After the bridge stops receiving superior BPDUs on the port with root protect enabled and the received BPDUs time out, that port transitions back to the STP-designated port state. Copyright © 2017, Juniper Networks, Inc. -
Page 488: Root Protect For A Spanning-Tree Instance Interface
Verify the configuration of root protect for the spanning-tree instance interface: [edit ... protocols (mstp | rstp | vstp <vlan vlan-id>) interface interface-name] user@host# top user@host# show ... protocols (mstp | rstp | vstp <vlan vlan-id>) { interface interface-name { no-root-port; Copyright © 2017, Juniper Networks, Inc. -
Page 489: Lldp Overview
(LLDP PDUs) are sent inside Ethernet frames and identified by their destination Media Access Control (MAC) address ( 01:80:C2:00:00:0E ) and Ethertype ( 0x88CC Mandatory information supplied by LLDP is chassis ID, port ID, and a time-to-live value for this information. Copyright © 2017, Juniper Networks, Inc. -
Page 490: Configuring Lldp In Acx Series
—The default values is 4. The allowable range is from 2 through 10. hold-multiplier ptopo-configuration-maximum-hold-time —The default value is 300 seconds. The allowable range is from 1 through 2147483647 seconds. —The default values is 2 seconds. The allowable range is from 1 through transmit-delay 8192 seconds. Copyright © 2017, Juniper Networks, Inc. - Page 491 LLDP information. This capability is disabled by default. The allowable range is from 0 (disabled) through 3600 seconds. You adjust this parameter by including the lldp-configuration-notification-interval statement at the [edit protocols lldp] hierarchy level. Copyright © 2017, Juniper Networks, Inc.
-
Page 492: Lldp Operational Mode Commands
Display LLDP local information. show lldp local-information Display LLDP neighbor information. show lldp neighbors Display LLDP remote global statistics. show lldp remote-global-statistics Display LLDP statistics. show lldp statistics Related LLDP Overview on page 431 Documentation Copyright © 2017, Juniper Networks, Inc. - Page 493 Chapter 12: Configuring Layer 2 Control Protocol Configuring LLDP Tracing LLDP Operations Example: Configuring LLDP Copyright © 2017, Juniper Networks, Inc.
- Page 494 ACX Series Universal Access Router Configuration Guide Copyright © 2017, Juniper Networks, Inc.
-
Page 495: Configuring Layer 2 Protocol Tunneling
IEEE 802.3ah Operation, Administration, and Maintenance (OAM) link fault management (LFM) Ethernet local management interface (E-LMI) Link Aggregation Control Protocol (LACP) Link Layer Discovery Protocol (LLDP) Multiple MAC Registration Protocol (MMRP) Multiple VLAN Registration Protocol (MVRP) Copyright © 2017, Juniper Networks, Inc. - Page 496 Checking for a MAC Rewrite Error Condition Blocking Layer 2 Interface in ACX Series on page 442 Clearing a MAC Rewrite Error Condition Blocking a Spanning-Tree Instance Interface in ACX Series on page 442 Copyright © 2017, Juniper Networks, Inc.
-
Page 497: Enabling Layer 2 Protocol Tunneling On Acx Series
For single VLAN tagged interfaces, configure a logical interface with the native VLAN identifier. This configuration associates the untagged control packets with a logical interface. You cannot enable Layer 2 protocol tunneling for double identifier tagged interfaces. Copyright © 2017, Juniper Networks, Inc. -
Page 498: Configuring A Layer 2 Protocol To Be Tunneled In Acx Series
Enabling Layer 2 Protocol Tunneling on ACX Series on page 439 Configuring a Layer 2 Protocol Tunnel Interface in ACX Series on page 439 Configuring Layer 2 Protocol Tunneling on ACX Series on page 441 Copyright © 2017, Juniper Networks, Inc. -
Page 499: Configuring Layer 2 Protocol Tunneling On Acx Series
Checking for a MAC Rewrite Error Condition Blocking Layer 2 Interface in ACX Series on page 442 Clearing a MAC Rewrite Error Condition Blocking a Spanning-Tree Instance Interface in ACX Series on page 442 Copyright © 2017, Juniper Networks, Inc. -
Page 500: Checking For A Mac Rewrite Error Condition Blocking Layer 2 Interface In Acx Series
Configuring a Layer 2 Protocol Tunnel Interface in ACX Series on page 439 Configuring a Layer 2 Protocol to be Tunneled in ACX Series on page 440 Configuring Layer 2 Protocol Tunneling on ACX Series on page 441 Copyright © 2017, Juniper Networks, Inc. - Page 501 Chapter 13: Configuring Layer 2 Protocol Tunneling Checking for a MAC Rewrite Error Condition Blocking Layer 2 Interface in ACX Series on page 442 Copyright © 2017, Juniper Networks, Inc.
- Page 502 ACX Series Universal Access Router Configuration Guide Copyright © 2017, Juniper Networks, Inc.
-
Page 503: Configuring Internet Group Management Protocol
IP hosts use IGMP to report their multicast group memberships to any immediately neighboring multicast routing devices. Multicast routing devices use IGMP to learn, for each of their attached physical networks, which groups have members. Copyright © 2017, Juniper Networks, Inc. - Page 504 Starting in Junos OS Release 15.2, PIMv1 is not supported. IGMP is an integral part of IP and must be enabled on all routing devices and hosts that need to receive IP multicast traffic. Copyright © 2017, Juniper Networks, Inc.
-
Page 505: Enabling Igmp
IPv4 broadcast interfaces when you configure DVMRP. If IGMP is not running on an interface—either because PIM and DVMRP are not configured on the interface or because IGMP is explicitly disabled on the interface—you can explicitly enable IGMP. Copyright © 2017, Juniper Networks, Inc. -
Page 506: Configuring Igmp
IGMP is needed. Determine whether to configure multicast to use sparse, dense, or sparse-dense mode. Each mode has different configuration considerations. Determine the address of the RP if sparse or sparse-dense mode is used. Copyright © 2017, Juniper Networks, Inc. - Page 507 [edit logical-systems logical-system-name protocols] By default, IGMP is enabled on all interfaces on which you configure Protocol Independent Multicast (PIM), and on all broadcast interfaces on which you configure the Distance Vector Multicast Routing Protocol (DVMRP). Copyright © 2017, Juniper Networks, Inc.
-
Page 508: Disabling Igmp
The group membership timeout is calculated as the (robustness variable x query-interval) + (query-response-interval). If no reports are received for a particular group before the Copyright © 2017, Juniper Networks, Inc. -
Page 509: Modifying The Igmp Query Response Interval
+ (query-response-interval). If no reports are received for a particular group before the group membership timeout has expired, the routing device stops forwarding remotely originated multicast packets for that group onto the attached network. Copyright © 2017, Juniper Networks, Inc. -
Page 510: Specifying Immediate-Leave Host Removal For Igmp
If no receiver responds, the routing device removes all hosts on the interface from the multicast group. Immediate leave is disabled by default for both IGMP version 2 and IGMP version 3. Copyright © 2017, Juniper Networks, Inc. -
Page 511: Filtering Unwanted Igmp Reports At The Igmp Interface Level
On MX Series platforms, IGMPv2 and IGMPv3 can or cannot be configured together on the same interface, depending on the Junos OS release at your installation. Configuring both together can cause unexpected behavior in multicast traffic forwarding. Copyright © 2017, Juniper Networks, Inc. -
Page 512: Accepting Igmp Messages From Remote Subnetworks
NOTE: When you enable IGMP on an unnumbered Ethernet interface that uses a loopback address as a donor address, you must configure IGMP promiscuous mode to accept the IGMP packets received on this interface. Copyright © 2017, Juniper Networks, Inc. -
Page 513: Modifying The Igmp Last-Member Query Interval
The default last-member query interval is 1 second. You can configure a subsecond interval up to one digit to the right of the decimal point. The configurable range is 0.1 through 0.9, then in 1-second intervals 1 through 999,999. Copyright © 2017, Juniper Networks, Inc. -
Page 514: Modifying The Igmp Robustness Variable
The number of queries is equal to the value of the robustness variable. In IGMPv3, a change of interface state causes the system to immediately transmit a state-change report from that interface. In case the state-change report is missed by Copyright © 2017, Juniper Networks, Inc. -
Page 515: Limiting The Maximum Igmp Message Rate
To change the limit for the maximum number of IGMP packets the router can transmit in 1 second, include the statement and specify the maximum maximum-transmit-rate number of packets per second to be transmitted. Related maximum-transmit-rate (Protocols IGMP) Documentation Copyright © 2017, Juniper Networks, Inc. -
Page 516: Changing The Igmp Version
On MX Series platforms, IGMPv2 and IGMPv3 can or cannot be configured together on the same interface, depending on the Junos OS release at your installation. Configuring both together can cause unexpected behavior in multicast traffic forwarding. Copyright © 2017, Juniper Networks, Inc. -
Page 517: Enabling Igmp Static Group Membership
After you have committed the configuration and the source is sending traffic, use the command to verify that static group 233.252.0.1 has been created. show igmp group user@host> show igmp group Interface: fe-0/1/2 Group: 233.252.0.1 Source: 10.0.0.2 Last reported by: Local Timeout: 0 Type: Static Copyright © 2017, Juniper Networks, Inc. - Page 518 Source: 10.0.0.2 Last reported by: Local Timeout: 0 Type: Static Group: 233.252.0.2 Source: 10.0.0.2 Last reported by: Local Timeout: 0 Type: Static Group: 233.252.0.3 Source: 10.0.0.2 Last reported by: Local Timeout: 0 Type: Static Copyright © 2017, Juniper Networks, Inc.
- Page 519 Source: 10.0.0.2 Last reported by: Local Timeout: 0 Type: Static Group: 233.252.0.3 Source: 10.0.0.2 Last reported by: Local Timeout: 0 Type: Static Group: 233.252.0.5 Source: 10.0.0.2 Last reported by: Local Timeout: 0 Type: Static Copyright © 2017, Juniper Networks, Inc.
- Page 520 233.252.0.1 has been created show igmp group and that source 10.0.0.2 has been accepted. user@host> show igmp group Interface: fe-0/1/2 Group: 233.252.0.1 Source: 10.0.0.2 Last reported by: Local Timeout: 0 Type: Static Copyright © 2017, Juniper Networks, Inc.
- Page 521 Source: 10.0.0.2 Last reported by: Local Timeout: 0 Type: Static Group: 233.252.0.1 Source: 10.0.0.3 Last reported by: Local Timeout: 0 Type: Static Group: 233.252.0.1 Source: 10.0.0.4 Last reported by: Local Timeout: 0 Type: Static Copyright © 2017, Juniper Networks, Inc.
- Page 522 Source: 10.0.0.2 Last reported by: Local Timeout: 0 Type: Static Group: 233.252.0.1 Source: 10.0.0.4 Last reported by: Local Timeout: 0 Type: Static Group: 233.252.0.1 Source: 10.0.0.6 Last reported by: Local Timeout: 0 Type: Static Copyright © 2017, Juniper Networks, Inc.
- Page 523 Interface: fe-0/1/2 Group: 233.252.0.1 Group mode: Exclude Source: 10.0.0.2 Last reported by: Local Timeout: 0 Type: Static Related Enabling MLD Static Group Membership Documentation group (Protocols IGMP) group-count (Protocols IGMP) Copyright © 2017, Juniper Networks, Inc.
-
Page 524: Recording Igmp Join And Leave Events
Periodically archive the log file. This example rotates the file size when it reaches 100 KB and keeps three files. [edit system syslog file igmp-events] user@host# set archive size 100000 user@host# set archive files 3 Copyright © 2017, Juniper Networks, Inc. -
Page 525: Limiting The Number Of Igmp Multicast Group Joins On Logical Interfaces
You can dynamically limit multicast groups on IGMP logical interfaces using dynamic profiles. Starting in Junos OS Release 12.2, you can optionally configure a system log warning threshold for IGMP multicast group joins received on the logical interface. It is helpful to Copyright © 2017, Juniper Networks, Inc. - Page 526 To verify the show protocols igmp operation of IGMP on the interface, including the configured group limit and the optional warning threshold and interval between log messages, use the show igmp interface command. Copyright © 2017, Juniper Networks, Inc.
-
Page 527: Tracing Igmp Protocol Traffic
Trace all IGMP packets. packets Trace policy processing. policy Trace IGMP membership query messages, including query general and group-specific queries. report Trace membership report messages. route Trace routing information. state Trace state transitions. task Trace task processing. Copyright © 2017, Juniper Networks, Inc. - Page 528 [edit protocols igmp traceoptions] user@host# set flag group | match 233.252.0.2 View the trace file. user@host> file list /var/log user@host> file show /var/log/igmp-trace Related Understanding IGMP on page 445 Documentation Tracing and Logging Junos OS Operations mtrace Copyright © 2017, Juniper Networks, Inc.
-
Page 529: Disabling Igmp
[edit logical-systems logical-system-name protocols igmp interface interface-name] NOTE: ACX Series routers do not support [edit logical-systems hierarchy level. logical-system-name protocols] Related Understanding IGMP on page 445 Documentation Configuring IGMP on page 448 Enabling IGMP on page 447 Copyright © 2017, Juniper Networks, Inc. - Page 530 ACX Series Universal Access Router Configuration Guide Copyright © 2017, Juniper Networks, Inc.
-
Page 531: Configuring Internet Group Management Protocol Snooping
Configuring IGMP Snooping Trace Operations on page 486 Understanding IGMP Snooping Snooping is a general way for Layer 2 devices, such as Juniper Networks MX Series Ethernet Services Routers, to implement a series of procedures to “snoop” at the Layer 3 packet content to determine which actions are to be taken to process or forward a frame. - Page 532 IGMP snooping is supported on AE interfaces, however, it is not supported on AE interfaces in combination with IRB interfaces. Related Multicast Overview Documentation Understanding Multicast Snooping Example: Configuring IGMP Snooping on page 479 IGMP Snooping in MC-LAG Active-Active Mode Copyright © 2017, Juniper Networks, Inc.
-
Page 533: Igmp Snooping Interfaces And Forwarding
Leave—Any IGMP leave message received on any interface of the bridge. The Leave Group message reduces the time it takes for the multicast router to stop forwarding multicast traffic when there are no longer any members in the host group. Copyright © 2017, Juniper Networks, Inc. -
Page 534: Multicast-Router Interfaces And Igmp Snooping Proxy Mode
NOTE: For the hosts on all the multicast-router interfaces, it is the IGMP router, not the IGMP snooping proxy, that generates general and group-specific queries. Related Multicast Overview Documentation Understanding Multicast Snooping Copyright © 2017, Juniper Networks, Inc. -
Page 535: Host-Side Interfaces And Igmp Snooping Proxy Mode
To configure Internet Group Management Protocol (IGMP) snooping, include the igmp-snooping statement: igmp-snooping { immediate-leave; interface interface-name { group-limit limit; host-only-interface; immediate-leave; multicast-router-interface; static { group ip-address { source ip-address; proxy { source-address ip-address; query-interval seconds; query-last-member-interval seconds; Copyright © 2017, Juniper Networks, Inc. -
Page 536: Configuring Vlan-Specific Igmp Snooping Parameters
VLAN level. To configure IGMP snooping parameters at the VLAN level, include statement: vlan vlan vlan-id; immediate-leave; interface interface-name { group-limit limit; host-only-interface; multicast-router-interface; static { group ip-address { Copyright © 2017, Juniper Networks, Inc. -
Page 537: Example: Configuring Igmp Snooping
Configure the interfaces. See the Interfaces Feature Guide for Security Devices. Configure an interior gateway protocol. See the Junos OS Routing Protocols Library. Configure a multicast protocol. This feature works with the following multicast protocols: DVMRP PIM-DM Copyright © 2017, Juniper Networks, Inc. - Page 538 By default, the query interval is 125 seconds. You can configure any value in the range 1 through 1024 seconds. —Enables you to change the amount of time it takes a query-last-member-interval device to detect the loss of the last member of a group. Copyright © 2017, Juniper Networks, Inc.
- Page 539 B and C are multicast receivers. The router forwards IP multicast traffic only to those segments with registered receivers (hosts B and C). However, the Layer 2 devices flood the traffic to all hosts on all interfaces. Copyright © 2017, Juniper Networks, Inc.
-
Page 540: Figure 24: Networks Without Igmp Snooping Configured
ACX Series Universal Access Router Configuration Guide Figure 24: Networks Without IGMP Snooping Configured Figure 25 on page 483 shows the same networks with IGMP snooping configured. The Layer 2 devices forward multicast traffic to registered receivers only. Copyright © 2017, Juniper Networks, Inc. -
Page 541: Figure 25: Networks With Igmp Snooping Configured
225.100.100.100 set bridge-domains domain1 protocols igmp-snooping interface ge-0/0/2.1 multicast-router-interface Copyright © 2017, Juniper Networks, Inc. - Page 542 [edit bridge-domains domain1] user@host# set protocols igmp-snooping interface ge-0/0/2.1 multicast-router-interface Configure an interface to be an exclusively host-facing interface (to drop IGMP query messages). [edit bridge-domains domain1] user@host# set protocols igmp-snooping interface ge-0/0/1.1 host-only-interface Copyright © 2017, Juniper Networks, Inc.
- Page 543 50; interface ge-0/0/3.1 { static { group 225.100.100.100; interface ge-0/0/2.1 { multicast-router-interface; Verification To verify the configuration, run the following commands: show igmp snooping interface show igmp snooping membership show igmp snooping statistics Copyright © 2017, Juniper Networks, Inc.
-
Page 544: Configuring Igmp Snooping Trace Operations
Trace state transitions. state Trace routing protocol task processing. task Trace timer processing. timer You can configure tracing operations for IGMP snooping globally or in a routing instance. The following example shows the global configuration. Copyright © 2017, Juniper Networks, Inc. - Page 545 | match 192.168.0.1 View the trace file. user@host> file list /var/log user@host> file show /var/log/igmp-snoop-trace Related Tracing and Logging Junos OS Operations Documentation Configuring IGMP Snooping on page 477 Copyright © 2017, Juniper Networks, Inc.
- Page 546 ACX Series Universal Access Router Configuration Guide Copyright © 2017, Juniper Networks, Inc.
-
Page 547: Configuring Point-To-Point Protocol (Ppp)
Junos OS substantially supports the following RFCs, which define standards for Point-to-Point Protocol (PPP) interfaces. RFC 1332, The PPP Internet Protocol Control Protocol (IPCP) RFC 1334, PPP Authentication Protocols RFC 1661, The Point-to-Point Protocol (PPP) Related Accessing Standards Documents on the Internet Documentation Copyright © 2017, Juniper Networks, Inc. -
Page 548: Configuring Ppp Address And Control Field Compression
Link-level type: PPP, MTU: 4474, Clocking: Internal, SONET mode, Speed: OC3, Loopback: None, FCS: 16 Payload scrambler: Enabled Device flags : Present Running Interface flags: Point-To-Point SNMP-Traps 16384 : No-Keepalives ACFC PFC Link flags Copyright © 2017, Juniper Networks, Inc. -
Page 549: Configuring The Ppp Restart Timers
To configure the restart timer for the LCP component of a PPP session, include the statement, and specify the number of milliseconds: lcp-restart-timer lcp-restart-timer milliseconds; ncp-restart-timer milliseconds; You can include these statements at the following hierarchy levels: [edit interfaces interface-name unit logical-unit-number ppp-options] Copyright © 2017, Juniper Networks, Inc. -
Page 550: Configuring Ppp Chap Authentication
You can include this statement at the following hierarchy levels: [edit interfaces interface-name unit logical-unit-number ppp-options] [edit logical-systems logical-system-name interfaces interface-name unit logical-unit-number ppp-options] To monitor the configuration, issue the show interfaces interface-name extensive command. Copyright © 2017, Juniper Networks, Inc. -
Page 551: Configuring Dynamic Profiles For Ppp
Challenge Handshake Authentication Protocol (CHAP). When you enable CHAP on an interface, the interface can authenticate its peer and can be authenticated by its peer. By default, PPP CHAP is disabled. If CHAP is not explicitly enabled, the interface makes Copyright © 2017, Juniper Networks, Inc. -
Page 552: Configuring The Ppp Challenge Handshake Authentication Protocol
To configure the name the interface uses in CHAP challenge and response packets, include the statement at the local-name [edit interfaces interface-name ppp-options chap] hierarchy level: [edit interfaces interface-name ppp-options chap] user@host# set local-name name Copyright © 2017, Juniper Networks, Inc. -
Page 553: Displaying The Configured Ppp Challenge Handshake Authentication
"$ABC123"; # SECRET-DATA [edit interfaces so-1/2/0] encapsulation ppp; ppp-options { chap { access-profile pe-A-ppp-clients; default-chap-secret "$ABC123"; local-name "pe-A-so-1/1/1"; Run the show command at the [edit interfaces s0-1/1/2] hierarchy level. Copyright © 2017, Juniper Networks, Inc. -
Page 554: Configuring The Ppp Password Authentication Protocol On A Physical
PAP to operate in passive mode. In PAP passive mode, the interface sends the authenticate-request packets to the peer only if the interface receives the PAP option from the peer during LCP negotiation—in passive mode, the interface does not authenticate the peer. Copyright © 2017, Juniper Networks, Inc. -
Page 555: Interface
To configure the interface to authenticate with PAP in passive mode, include the statement at the hierarchy passive [edit interfaces interface-name ppp-options pap] level: [edit interfaces interface-name ppp-options pap] user@host# set passive Copyright © 2017, Juniper Networks, Inc. -
Page 556: Interface
[edit interfaces interface-name unit logical-unt-number ppp-options pap] user@host# set local-password password NOTE: By default, when PAP is enabled on an interface, the interface uses the router’s system hostname as the name sent in PAP request and response packets. Copyright © 2017, Juniper Networks, Inc. -
Page 557: Configuring The Ppp Authentication Protocol
CHAP secret keys. The identity of profile the peer contained in the CHAP challenge or response queries the profile for the secret key to use. client is the peer identity. Copyright © 2017, Juniper Networks, Inc. -
Page 558: Ppp Encapsulation On Acx Series Routers
PPP is supported on the following MICs on ACX Series routers: On ACX1000 routers with 8-port built-in T1/E1 TDM MICs. On ACX2000, ACX2100, ACX2200, and ACX4000 routers with 16-port built-in T1/E1 TDM MICs. -
Page 559: Configuring Interface Encapsulation On Physical Interfaces In Acx Series
1672 Configuring Interface Encapsulation on Physical Interfaces in ACX Series Point-to-Point Protocol (PPP) encapsulation is the default encapsulation type for physical interfaces. You need not configure encapsulation for any physical interfaces that support Copyright © 2017, Juniper Networks, Inc. -
Page 560: Configuring The Encapsulation On A Physical Interface
(TPID) tagging can use Ethernet CCC encapsulation. When you use this encapsulation type, you can configure the family only. TCC version ( )—Similar to CCC, but used for circuits with different media ethernet-tcc on either side of the connection. Copyright © 2017, Juniper Networks, Inc. - Page 561 This encapsulation type allows you to configure any combination of route, TCC, CCC, Layer 2 virtual private networks (VPNs), and VPLS encapsulations on a single physical port. If you configure flexible Ethernet services encapsulation on Copyright © 2017, Juniper Networks, Inc.
-
Page 562: Encapsulation Capabilities
VLAN IDs 512 through 1024 for VPLS VLANs. For Gigabit Ethernet interfaces and Gigabit Ethernet IQ and IQE PICs with SFPs (except the 10-port Gigabit Ethernet PIC and the built-in Gigabit Ethernet port on the M7i router), Copyright © 2017, Juniper Networks, Inc. -
Page 563: Example: Configuring The Encapsulation On A Physical Interface
[edit interfaces] so-7/0/0 { encapsulation ppp; unit 0 { point-to-point; family inet { address 192.168.1.113/32 { destination 192.168.1.114; family iso; family mpls; Related Configuring Interface Encapsulation on Logical Interfaces Documentation Copyright © 2017, Juniper Networks, Inc. - Page 564 ACX Series Universal Access Router Configuration Guide Copyright © 2017, Juniper Networks, Inc.
-
Page 565: Configuring Mlppp
You configure multilink bundles as logical units or channels on the link services interface. With MLPPP, multilink bundles are configured as logical units on the link service interface—for example, . MLPPP is supported on ACX1000, lsq-0/0/0.0 lsq-0/0/0.1 ACX2000, ACX2100 routers, and with Channelized OC3/STM1 (Multi-Rate) MICs with SFP and 16-port Channelized E1/T1 Circuit Emulation MIC on ACX4000 routers. - Page 566 Compressed Real-Time Transport Protocol (RTP) is not supported. HDLC address and control field compression (ACFC) and PPP protocol field compression (PFC) are not supported. Related Link and Multilink Services Overview Documentation Multilink Interfaces on Channelized MICs Overview Copyright © 2017, Juniper Networks, Inc.
-
Page 567: Routers
[edit interfaces t1-fpc/pic/port unit logical-unit-number family mlppp] bundle lsq-fpc/pic/port.logical-unit-number; To configure the link services LSQ interface properties, include the following statements at the hierarchy level: [edit interfaces lsq-fpc/pic/port unit logical-unit-number] [edit interfaces lsq-fpc/pic/port unit logical-unit-number] encapsulation multilink-ppp; Copyright © 2017, Juniper Networks, Inc. - Page 568 256 pps Output packets: 1061 256 pps IPv6 transit statistics: Input bytes Output bytes Input packets: Output packets: Frame exceptions: Oversized frames Errored input frames Input on disabled link/bundle Output for disabled link/bundle Queuing drops Copyright © 2017, Juniper Networks, Inc.
- Page 569 201812 208896 Output: 2168 192029 174080 IPV6 Transit Statistics Packets Bytes Network: Input : Output: Multilink class 0: Multilink: Input : 1075 483750 921600 Output: 1061 477450 921600 Network: Input : 1061 477450 921600 Copyright © 2017, Juniper Networks, Inc.
- Page 570 477450 921600 Non-fragments: Input : Output: LFI: Input : Output: Multilink class 0: Fragments: Input : 1076 484200 921600 Output: 1061 477450 921600 Non-fragments: Input : Output: Multilink class 1: Fragments: Input : Output: Copyright © 2017, Juniper Networks, Inc.
- Page 571 PPP packets, the ACX implementation of interleaving contains multilink PPP (also referred to as PPP Multilink, MLP, and MP) headers and fragments that are sent on all member links in a round-robin manner. PPP over MLPPP bundle interfaces Copyright © 2017, Juniper Networks, Inc.
-
Page 572: Configuring Encapsulation For Multilink And Link Services Logical Interfaces
MLFR encapsulated unit on a port, it triggers an interface encapsulation change on the port, which causes an interface flap on the other units within the port that are configured with generic Frame Relay. Related Link and Multilink Services Overview Documentation Copyright © 2017, Juniper Networks, Inc. -
Page 573: Logical Interfaces
Configuring the Drop Timeout Period on Multilink and Link Services Logical Interfaces Limiting Packet Payload Size on Multilink and Link Services Logical Interfaces Configuring MRRU on Multilink and Link Services Logical Interfaces on page 516 Copyright © 2017, Juniper Networks, Inc. -
Page 574: Configuring Mrru On Multilink And Link Services Logical Interfaces
, and mpls . If not configured, the default value of 1500 is used on all except for configurations, in which the value 1488 is used. mpls Copyright © 2017, Juniper Networks, Inc. -
Page 575: Interfaces
For MLFR FRF.15, the sequence header format is set to 24 bits by default. This is the only valid option. Related Link and Multilink Services Overview Documentation Configuring the Drop Timeout Period on Multilink and Link Services Logical Interfaces Limiting Packet Payload Size on Multilink and Link Services Logical Interfaces Copyright © 2017, Juniper Networks, Inc. -
Page 576: Configuring Multiclass Mlppp On Lsq Interfaces
With MCML, you can assign voice traffic to a high-priority class, and you can use multiple links. For more information about voice services support on link services IQ interfaces ( ), see Configuring Services Interfaces for Voice Services. Copyright © 2017, Juniper Networks, Inc. - Page 577 Configuring LSQ Interfaces as NxT1 or NxE1 Bundles Using MLPPP Configuring LSQ Interfaces for ATM2 IQ Interfaces Using MLPPP Configuring LSQ Interfaces for T3 Links Configured for Compressed RTP over MLPPP Link Services Configuration for Junos Interfaces Copyright © 2017, Juniper Networks, Inc.
-
Page 578: Configuring Lsq Interfaces As Nxt1 Or Nxe1 Bundles Using Mlppp On Acx Series
0 through 3, and assign this scheduler to the link services IQ interface ( ) and to each constituent link, as shown in “Example: Configuring an LSQ Interface as an NxT1 Bundle Using MLPPP” on page 523. Copyright © 2017, Juniper Networks, Inc. - Page 579 By default, traffic in all forwarding classes is multilink encapsulated. To configure packet fragmentation handling on a queue, include the statement at the hierarchy level: fragmentation-maps [edit class-of-service] fragmentation-maps { map-name { forwarding-class class-name { multilink-class number; Copyright © 2017, Juniper Networks, Inc.
- Page 580 MPLS labels, or four MPLS labels and the IP header. For UDP and TCP the software computes the hash based on the source and destination ports, as well as source and destination IP addresses. This guarantees that all packets Copyright © 2017, Juniper Networks, Inc.
-
Page 581: Example: Configuring An Lsq Interface As An Nxt1 Bundle Using Mlppp
If there are many flows, the load is usually balanced. The N different T1 interfaces link to another router, which can be from Juniper Networks or another vendor. The router at the far end gathers packets from all the T1 links. If a packet has an MLPPP header, the sequence number field is used to put the packet back into sequence number order. - Page 582 { loss-priority low code-point 001; forwarding-class network-control { loss-priority low code-point 000; scheduler-maps { sm { forwarding-class best-effort scheduler new; forwarding-class network-control scheduler new_nc; forwarding-class assured-forwarding scheduler new_af; forwarding-class expedited-forwarding scheduler new_ef; Copyright © 2017, Juniper Networks, Inc.
-
Page 583: Example: Configuring An Mlppp Bundle On Acx Series
3m; priority medium-high; Example: Configuring an MLPPP Bundle on ACX Series The following is a sample for configuring an MLPPP bundle on ACX Series routers: [edit] user@host# show interfaces lsq-1/1/0 { description LSQ-interface; per-unit-scheduler; Copyright © 2017, Juniper Networks, Inc. - Page 584 0 { family mlppp { bundle lsq-1/1/0.0; ct1-1/1/3 { enable; no-partition interface-type t1; t1-1/1/3 { encapsulation ppp; unit 0 { family mlppp { bundle lsq-1/1/0.0; ct1-1/1/4 { enable; no-partition interface-type t1; t1-1/1/4 { encapsulation ppp; Copyright © 2017, Juniper Networks, Inc.
- Page 585 Chapter 17: Configuring MLPPP unit 0 { family mlppp { bundle lsq-1/1/0.0; Copyright © 2017, Juniper Networks, Inc.
- Page 586 ACX Series Universal Access Router Configuration Guide Copyright © 2017, Juniper Networks, Inc.
-
Page 587: Configuring Routing Protocols
Understanding Remote LFA over LDP Tunnels in IS-IS Networks on page 564 Configuring Remote LFA Backup over LDP Tunnels in an IS-IS Network on page 566 Example: Configuring Remote LFA over LDP Tunnels in IS-IS Networks on page 568 Copyright © 2017, Juniper Networks, Inc. -
Page 588: Ipv6 Overview
IPv6 Addressing on page 531 IPv6 Packet Headers IPv6 headers are different from IPv4 headers. This section discusses the following topics that provide background information about IPv6 headers: Header Structure on page 531 Extension Headers on page 531 Copyright © 2017, Juniper Networks, Inc. -
Page 589: Header Structure
IPv6 also defines a new type of address called anycast. NOTE: You cannot configure a subnet zero IPv6 address because RFC 2461 reserves the subnet-zero address for anycast addresses, and Junos OS complies with the RFC. Copyright © 2017, Juniper Networks, Inc. -
Page 590: Address Representation
Site-local unicast addresses are used within a site or intranet. A site consists of multiple network links, and site-local addresses identify nodes inside the intranet. Site-local addresses cannot be used outside the site. Copyright © 2017, Juniper Networks, Inc. -
Page 591: Address Structure
MPLS-enabled IPv4 network. IPv6 information is sent over the MPLS core using MG-BGP with IPv4. The BGP Next Hop field conveys the IPv4 address of the router so that MPLS LSPs can be used without explicit tunnel configuration. Copyright © 2017, Juniper Networks, Inc. - Page 592 ICMPv6 information messages are used for sharing the information required to implement various test, diagnostic, and support functions that are critical to the operation of IPv6. There are a total of eight different ICMPv6 informational messages: Echo Request— Echo Reply— Copyright © 2017, Juniper Networks, Inc.
- Page 593 *[Static/5] 00:01:34 > to fec0:0:03:ffff via fe-0/1/0.0 Related IPv6 Overview on page 530 Documentation Understanding Dual Stacking of IPv4 and IPv6 Unicast Addresses IS-IS Overview on page 536 OSPF Overview on page 542 Copyright © 2017, Juniper Networks, Inc.
-
Page 594: Is-Is Overview
An IS-IS network is a single autonomous system (AS), also called a routing domain, that consists of end systems and intermediate systems. End systems are network entities that send and receive packets. Intermediate systems send and receive packets and relay Copyright © 2017, Juniper Networks, Inc. -
Page 595: Iso Network Addresses
Identifier (AFI), a domain ID, an area ID, a system identifier, and a selector. The simplest format omits the domain ID and is 10 octets long. For example, the NET address 49.0001.1921.6800.1001.00 consists of the following parts: 49—AFI 0001—Area ID Copyright © 2017, Juniper Networks, Inc. - Page 596 (TLV) tuple in IS-IS link-state PDUs. This enables intermediate systems in the routing domain to learn about the ISO system identifier of a particular intermediate system. Copyright © 2017, Juniper Networks, Inc.
-
Page 597: Is-Is Packets
Partial sequence number PDUs (PSNPs)—Sent multicast by a receiver when it detects that it is missing a link-state PDU (when its link-state PDU database is out of date). The receiver sends a PSNP to the system that transmitted the CSNP, effectively Copyright © 2017, Juniper Networks, Inc. -
Page 598: Persistent Route Reachability
Level 1 and Level 2 router (Router B). See Figure 26 on page 540. Figure 26: Install Default Route to Nearest Routing Device That Operates at Both Level 1 and Level 2 Copyright © 2017, Juniper Networks, Inc. -
Page 599: Understanding Is-Is Flood Group
To enable IS-IS flood group, include the flood-group flood-group-area-ID statement at the [edit protocols isis interface] hierarchy level. Related IS-IS Overview on page 536 Documentation Example: Configuring IS-IS Flood Group Copyright © 2017, Juniper Networks, Inc. -
Page 600: Ospf Overview
ACX Series Universal Access Router Configuration Guide OSPF Overview Copyright © 2017, Juniper Networks, Inc. - Page 601 AS. This externally derived data is kept separate from the OSPF link-state data. Each external route can be tagged by the advertising router, enabling the passing of additional information between routers on the boundaries of the AS. Copyright © 2017, Juniper Networks, Inc.
-
Page 602: Ospf Default Route Preference Values
The routing device then attempts to form adjacencies with some of its newly acquired neighbors. (On multiaccess networks, only the designated router and backup designated Copyright © 2017, Juniper Networks, Inc. -
Page 603: Ospf Three-Way Handshake
Router B can receive traffic from Router A. Router A then generates a final response packet to inform Router B that Router A can receive traffic from Router B. This three-way handshake ensures bidirectional connectivity. Copyright © 2017, Juniper Networks, Inc. -
Page 604: Ospf Version 3
Type 3 summary LSAs have been renamed inter-area-prefix-LSAs. Type 4 summary LSAs have been renamed inter-area-router-LSAs. Related Understanding OSPF Areas and Backbone Areas Documentation Understanding OSPF Configurations Example: Disabling OSPFv2 Compatibility with RFC 1583 Copyright © 2017, Juniper Networks, Inc. -
Page 605: Remote Lfa Over Ldp Tunnels In Ospf Networks Overview
PLR node. This backup route has two LDP labels. The top label is the OSPF route, which denotes the backup path from the PLR to the remote LFA route. The bottom label is the LDP MPLS label-switched path that denotes the route for reaching the ultimate Copyright © 2017, Juniper Networks, Inc. -
Page 606: Configuring Remote Lfa Backup Over Ldp Tunnels In An Ospf Network
Enable LDP on the loopback interface. Configure a loopback interface because an LDP targeted adjacency cannot be formed without a loopback interface. LDP targeted adjacency is essential for determining remote LFA backup paths. Copyright © 2017, Juniper Networks, Inc. - Page 607 [edit protocols ldp auto-targeted-session] user@host# set maximum-sessions 20 Related Remote LFA over LDP Tunnels in OSPF Networks Overview on page 547 Documentation Example: Configuring Remote LFA Over LDP Tunnels in OSPF Networks auto-targeted-session backup-spf-options no-eligible-remote-backup remote-backup-calculation Copyright © 2017, Juniper Networks, Inc.
-
Page 608: Example: Configuring Remote Lfa Over Ldp Tunnels In Ospf Networks
Device R6 with LDP next-hop routes as the backup route. Topology In the topology Figure 28 on page 551 shows the remote LFA over LDP tunnels in OSPF networks is configured on Device R6. Copyright © 2017, Juniper Networks, Inc. -
Page 609: Figure 28: Example Remote Lfa Over Ldp Tunnels
0.0.0.0 interface ge-0/0/0.0 set protocols ospf area 0.0.0.0 interface ge-0/0/1.0 set protocols ospf area 0.0.0.0 interface ge-0/0/2.0 Copyright © 2017, Juniper Networks, Inc. - Page 610 0 family mpls set protocols ospf area 0.0.0.0 interface all set protocols ospf area 0.0.0.0 interface fxp0.0 disable set policy-options policy-statement per-packet then load-balance per-packet set policy-options policy-statement per-packet then accept Copyright © 2017, Juniper Networks, Inc.
- Page 611 0 family mpls set routing-options router-id 6.6.6.6 set routing-options forwarding-table export per-packet set protocols ospf backup-spf-options remote-backup-calculation set protocols ospf traffic-engineering set protocols ospf area 0.0.0.0 interface ge-0/0/0.0 set protocols ospf area 0.0.0.0 interface ge-0/0/1.0 Copyright © 2017, Juniper Networks, Inc.
- Page 612 60 set protocols ldp interface ge-0/0/0.0 set protocols ldp interface lo0.0 set policy-options policy-statement per-packet then load-balance per-packet set policy-options policy-statement per-packet then accept set interfaces ge-0/0/0 unit 0 family inet address 90.1.1.2/24 Copyright © 2017, Juniper Networks, Inc.
- Page 613 [edit lo0 unit 0 family] user@R6# set address 7.7.7.7/32 user@R6# set mpls Configure the router ID. Apply the policy to the forwarding table of the local router with the export statement. [edit routing-options] user@R6# set router-id 7.7.7.7 Copyright © 2017, Juniper Networks, Inc.
- Page 614 If the output does not display the intended configuration, repeat the instructions in this example to correct the configuration. user@R6# show interfaces ge-0/0/0 { unit 0 { Copyright © 2017, Juniper Networks, Inc.
- Page 615 { topology default { backup-spf-options { remote-backup-calculation; backup-spf-options { remote-backup-calculation; inactive: per-prefix-calculation all; traffic-engineering; area 0.0.0.0 { interface ge-0/0/0.0 { link-protection; interface ge-0/0/1.0 { link-protection; interface ge-0/0/2.0 { link-protection; interface lo0.0; Copyright © 2017, Juniper Networks, Inc.
- Page 616 + = Active Route, - = Last Active, * = Both 6.6.6.6/32 *[OSPF/10] 02:21:07, metric 1 > to 60.1.1.1 via ge-0/0/0.0 to 80.1.1.1 via ge-0/0/2.0, Push 299872 inet.3: 7 destinations, 7 routes (7 active, 0 holddown, 0 hidden) Copyright © 2017, Juniper Networks, Inc.
- Page 617 Load balance label: Label 299792: None; Label 299872: None; Label element ptr: 0x9dc1ba0 Label parent element ptr: 0x9dc27a0 Label element references: 1 Label element child references: 0 Label element lsp id: 0 Session Id: 0x0 Copyright © 2017, Juniper Networks, Inc.
- Page 618 MTU discovery: disabled Nonstop routing state: Not in sync Next-hop addresses received: 4.4.4.4 30.1.1.2 40.1.1.1 128.92.25.37 Verifying the OSPF Routes Purpose Display all the LDP backup routes in the OSPF routing table of Device R6. Copyright © 2017, Juniper Networks, Inc.
- Page 619 Network 0 ge-0/0/2.0 80.1.1.1 Bkup LSP LDP->4.4.4.4 90.1.1.0/24 Intra Network 3 ge-0/0/2.0 80.1.1.1 Bkup LSP LDP->4.4.4.4 100.1.1.0/24 Intra Network 2 ge-0/0/2.0 80.1.1.1 Bkup LSP LDP->4.4.4.4 110.1.1.0/24 Intra Network 3 ge-0/0/2.0 80.1.1.1 Bkup LSP LDP->4.4.4.4 Copyright © 2017, Juniper Networks, Inc.
- Page 620 The output shows all the LDP backup routes in the OSPF routing table of Device R6. Verifying the Designated Backup Path Node Purpose Display the remote LFA next hop determined for a given destination. Copyright © 2017, Juniper Networks, Inc.
- Page 621 Eligible, Reason: Contributes backup next-hop Meaning The output indicates whether a specific interface or node has been designated as a remote backup path and why. Verifying the Backup Neighbors Purpose Display the backup neighbors for the Device R6 Copyright © 2017, Juniper Networks, Inc.
-
Page 622: Understanding Remote Lfa Over Ldp Tunnels In Is-Is Networks
However, a majority of network providers have already implemented LDP as the MPLS tunnel setup protocol and do not want to implement the RSVP-TE protocol merely for backup coverage. LDP automatically Copyright © 2017, Juniper Networks, Inc. - Page 623 Remote LFAs that are several hops away use extended hello messages to indicate willingness to establish a targeted LDP session. A remote LFA can reduce the threat Copyright © 2017, Juniper Networks, Inc.
-
Page 624: Configuring Remote Lfa Backup Over Ldp Tunnels In An Is-Is Network
To configure remote LFA backup over LDP tunnels in an IS-IS network: Enable remote LFA backup to determine the backup next hop using dynamic LDP label-switched path. [edit protocols isis backup-spf-options] user@host# set remote-backup-calculation Copyright © 2017, Juniper Networks, Inc. - Page 625 (LFA) is to increase backup coverage for IS-IS routes and provide protection especially for Layer 1 metro-rings. Related auto-targeted-session Documentation remote-backup-calculation no-eligible-remote-backup Example: Configuring Remote LFA over LDP Tunnels in IS-IS Networks Understanding Remote LFA over LDP Tunnels in IS-IS Networks on page 564 Copyright © 2017, Juniper Networks, Inc.
-
Page 626: Example: Configuring Remote Lfa Over Ldp Tunnels In Is-Is Networks
ACX5000 router. This example verifies that Junos OS updates the routing table of Device R1 with LDP next-hop routes as the backup route. Topology Figure 29 on page 569 shows the topology used in this example. Copyright © 2017, Juniper Networks, Inc. -
Page 627: Figure 29: Configuring Remote Lfa Over Ldp Tunnels In Is-Is Networks
10 family iso address 49.0001.1720.1600.1010.00 set protocols isis interface ge-1/0/0.1 set protocols isis interface ge-1/5/0.12 link-protection set protocols isis interface lo0.12 passive set protocols isis interface all level 2 metric 10 Copyright © 2017, Juniper Networks, Inc. - Page 628 5 family inet address 10.255.102.146/32 set interfaces lo0 unit 5 family iso address 49.0001.1720.1600.1050.00 set protocols isis interface ge-1/1/1.4 set protocols isis interface ge-1/2/0.5 set protocols isis interface lo0.5 passive Copyright © 2017, Juniper Networks, Inc.
- Page 629 2 metric 10 set protocols isis interface fxp0.0 disable set protocols isis spf-options delay 1000 set protocols mpls interface all Copyright © 2017, Juniper Networks, Inc.
- Page 630 For information about navigating the CLI, see Using the CLI Editor in Configuration Mode in the CLI User Guide. NOTE: Repeat this procedure except Step 4 and Step 5 for every Juniper Networks router in the IGP domain, modifying the appropriate interface names, addresses, and any other parameters.
- Page 631 Specify a time interval for which the targeted LDP sessions are kept up when the remote LFA goes down, and specify a maximum number of automatically, targeted LDP sessions to optimize the use of memory. [edit protocols ldp] user@R1# set auto-targeted-session user@R1# set auto-targeted-session teardown-delay 60 Copyright © 2017, Juniper Networks, Inc.
- Page 632 1 { description R1->R2; family inet { address 1.1.1.1/24; family iso; family mpls; ge-1/5/0 { unit 12 { description R1->R6; family inet { address 1.1.6.12/24; family iso; family mpls; lo0 { unit 10 { Copyright © 2017, Juniper Networks, Inc.
- Page 633 { passive; ldp { auto-targeted-session { teardown-delay 60; maximum-sessions 20; deaggregate; interface all; interface em0.0 { disable; user@R1# show policy-options policy-options { policy-statement ecmp { term 1 { then { load-balance per-packet; Copyright © 2017, Juniper Networks, Inc.
- Page 634 Next hop: 1.1.1.2 via ge-1/0/0 weight 0x101 uflags Remote neighbor path Label operation: Push 299824 Label TTL action: prop-ttl Load balance label: Label 299824: None; Session Id: 0x142 State:<Active Int> Age: 11:38:00 Metric: 30 Copyright © 2017, Juniper Networks, Inc.
- Page 635 IPV4 tp3-R6 10.255.102.166/32 20 int lt-1/2/0.12 IPV4 tp3-R6 lt-1/2/0.1 LDP->tp3-R4(10.255.102.156) 10.255.102.178/32 10 int lt-1/2/0.1 IPV4 tp3-R2 Meaning The output shows all the LDP backup routes in the IS-IS routing table of Device R1. Copyright © 2017, Juniper Networks, Inc.
- Page 636 Not eligible, IPV4, Reason: Primary next-hop link fate sharing Root: R2, Root Metric: 10, Metric: 20, Root Preference: 0x0 track-item: R6.00-00 track-item: R1.00-00 Not eligible, IPV4, Reason: Path loops Root: R4, Root Metric: 30, Metric: 20, Root Preference: 0x0 Copyright © 2017, Juniper Networks, Inc.
- Page 637 The output indicates whether a specific interface or node has been designated as a remote backup path and why. Related Understanding Remote LFA over LDP Tunnels in IS-IS Networks on page 564 Documentation auto-targeted-session no-eligible-remote-backup remote-backup-calculation Copyright © 2017, Juniper Networks, Inc.
- Page 638 ACX Series Universal Access Router Configuration Guide Copyright © 2017, Juniper Networks, Inc.
-
Page 639: Configuring Generic Routing Encapsulation
The payload packet is first encapsulated in a GRE packet, and then the GRE packet is encapsulated in a delivery protocol. The router performing the role of a tunnel remote router extracts the tunneled packet and forwards the packet to its destination. Copyright © 2017, Juniper Networks, Inc. -
Page 640: Gre Tunneling
The packet is routed based on the inner IP header. Number of Source and Destination Tunnels Allowed on a Router ACX routers support as many as 64 GRE tunnels between routers transmitting IPv4 or IPv6 payload packets over GRE. Copyright © 2017, Juniper Networks, Inc. -
Page 641: Configuration Limitations
{ disable; NOTE: This limitation is applicable for all routing protocols (such as OSPF, ISIS). Related Configuring Generic Routing Encapsulation Tunneling on ACX Series on page 584 Documentation Configuring Unicast Tunnels on page 585 Copyright © 2017, Juniper Networks, Inc. -
Page 642: Configuring Generic Routing Encapsulation Tunneling On Acx Series
Each logical interface you configure on the port can be configured as the source or as the endpoint of a GRE tunnel. To configure a tunnel port to use GRE: Copyright © 2017, Juniper Networks, Inc. -
Page 643: Configuring Unicast Tunnels
[edit interfaces] You can configure multiple logical units for each GRE interface, and you can configure only one tunnel per unit. You must specify the tunnel’s destination and source addresses. The remaining statements are optional. Copyright © 2017, Juniper Networks, Inc. - Page 644 For more information, see Examples: Configuring Unicast Tunnels and the MPLS Applications Feature Guide. Related Understanding Generic Routing Encapsulation on ACX Series on page 581 Documentation Configuring Generic Routing Encapsulation Tunneling on ACX Series on page 584 Copyright © 2017, Juniper Networks, Inc.
-
Page 645: Configuring Mpls And Pseudowires
The configuration of an ingress label edge router (LER) where IP packets are encapsulated within MPLS packets and forwarded to the MPLS domain, and as an Copyright © 2017, Juniper Networks, Inc. -
Page 646: Ttl Processing On Incoming Mpls Packets
On a transit LSR or an egress LER, MPLS pops one or more labels and can push one or more labels. The incoming TTL of the packet is determined by the configured TTL processing tunnel model. Copyright © 2017, Juniper Networks, Inc. - Page 647 If the incoming TTL is less than 2, the packet is dropped. If innermost packet is IP, an ICMP packet is built and sent. If the TTL does not expire and the packet needs to be sent out, the outgoing TTL is determined by the rules for outgoing MPLS packets. Copyright © 2017, Juniper Networks, Inc.
-
Page 648: Pseudowire Overview For Acx Series Universal Access Routers
T1 line, over an MPLS packet-switched network. The pseudowire is intended to provide only the minimum necessary functionality to emulate the wire with the required degree of faithfulness for the given service definition. Copyright © 2017, Juniper Networks, Inc. - Page 649 Configuring a CFM Action Profile to Specify CFM Actions for CFM Events Configuring Interfaces for Layer 2 Circuits TDM Pseudowires Overview on page 600 ATM Pseudowire Overview on page 173 Ethernet Pseudowire Overview on page 596 Copyright © 2017, Juniper Networks, Inc.
-
Page 650: Atm Pseudowire Overview
ACX Series router. This configuration is for one provider edge router. To complete the configuration of an ATM pseudowire, you need to repeat this configuration on an other provider edge router in the MPLS network. Copyright © 2017, Juniper Networks, Inc. - Page 651 Create a Gigabit Ethernet interface and enable MPLS on that interface. Create the loopback ( ) interface: [edit interfaces] user@host# set ge-0/2/0 unit 0 family inet address 20.1.1.2/24 user@host# set ge-0/2/0 unit 0 family mpls Copyright © 2017, Juniper Networks, Inc.
- Page 652 Uniquely identify a Layer 2 circuit for the ATM pseudowire: [edit protocols] user@host# set l2circuit neighbor 40.1.1.1 interface at-0/0/0.0 virtual-circuit-id 1 Results [edit] user@host# show interfaces { at-0/0/0 { atm-options { vpi 0; unit 0 { encapsulation atm-ccc-cell-relay; vci 0.64; ct1-0/0/0 { Copyright © 2017, Juniper Networks, Inc.
- Page 653 { interface ge-0/2/0.0; interface lo0.0; l2circuit { neighbor 40.1.1.1 { interface at-0/0/0.0 { virtual-circuit-id 1; Related Pseudowire Overview for ACX Series Universal Access Routers on page 590 Documentation ATM Pseudowire Overview on page 173 Copyright © 2017, Juniper Networks, Inc.
-
Page 654: Ethernet Pseudowire Overview
MPLS networks. Related Configuring IEEE 802.3ah OAM Link-Fault Management Documentation Pseudowire Overview for ACX Series Universal Access Routers on page 590 TDM Pseudowires Overview on page 600 ATM Pseudowire Overview on page 173 Copyright © 2017, Juniper Networks, Inc. -
Page 655: Example: Ethernet Pseudowire Base Configuration
To configure an Ethernet pseudowire with 802.1Q tagging for cross-connect logical interface encapsulation, include the vlan-ccc statement at the [ ] hierarchy level instead edit interfaces ge-0/1/1 unit 0 encapsulation of the statement shown in this example. ethernet-ccc Copyright © 2017, Juniper Networks, Inc. - Page 656 0.0.0.0 interface ge-0/2/0.0 user@host# set ospf area 0.0.0.0 interface lo0.0 passive Uniquely identify a Layer 2 circuit for the Ethernet pseudowire: [edit protocols] user@host# set l2circuit neighbor 40.1.1.1 interface ge-0/1/1.0 virtual-circuit-id 1 Copyright © 2017, Juniper Networks, Inc.
- Page 657 PE1-to-PE2 { to 40.1.1.1; interface ge-0/2/0.0; ospf { traffic-engineering; area 0.0.0.0 { interface ge-0/2/0.0; interface lo0.0 { passive; ldp { interface ge-0/2/0.0; interface lo0.0; l2circuit { neighbor 40.1.1.1 { interface ge-0/1/1.0 { virtual-circuit-id 1; Copyright © 2017, Juniper Networks, Inc.
-
Page 658: Tdm Pseudowires Overview
ACX Series router. This configuration is for one provider edge router. To complete the TDM pseudowire configuration, you need to repeat this configuration on an other provider edge router in the Multiprotocol Label Switched (MPLS) network. Copyright © 2017, Juniper Networks, Inc. - Page 659 On the logical T1 interface, set the Structure-Agnostic TDM over Packet (SAToP) encapsulation mode. [edit] user@host# edit interfaces [edit interfaces] user@host# set ct1-0/0/0 no-partition interface-type t1 user@host# set t1-0/0/0 encapsulation satop user@host# set t1-0/0/0 unit 0 Copyright © 2017, Juniper Networks, Inc.
- Page 660 Uniquely identify a Layer 2 circuit for the TDM pseudowire: [edit protocols] user@host# set l2circuit neighbor 40.1.1.1 interface t1-0/0/0.0 virtual-circuit-id 1 Results [edit] user@host# show chassis { fpc 0 { pic 0 { framing t1; Copyright © 2017, Juniper Networks, Inc.
- Page 661 PE1-to-PE2 { to 40.1.1.1; interface ge-0/2/0.0; ospf { traffic-engineering; area 0.0.0.0 { interface ge-0/2/0.0; interface lo0.0 { passive; ldp { interface ge-0/2/0.0; interface lo0.0; l2circuit { neighbor 40.1.1.1 { interface t1-0/0/0.0 { virtual-circuit-id 1; Copyright © 2017, Juniper Networks, Inc.
-
Page 662: Redundant Pseudowires For Layer 2 Circuits And Vpls
The pseudowire to the backup neighbor is completed only when the primary neighbor fails. The decision to switch between the two pseudowires is made by the device configured with the redundant pseudowires. The primary remote PE Copyright © 2017, Juniper Networks, Inc. -
Page 663: Pseudowire Failure Detection
Periodic pseudowire OAM procedure fails (Layer 2 circuit-based MPLS ping to the PE router fails) When you configure a redundant pseudowire between a CE device and a PE router, a periodic (once a minute) ping packet is forwarded through the active pseudowire to Copyright © 2017, Juniper Networks, Inc. -
Page 664: Configuring Redundant Pseudowires For Layer 2 Circuits And Vpls
Configuring a Revert Time for the Redundant Pseudowire on page 607 Configuring Pseudowire Redundancy on the PE Router You configure pseudowire redundancy on the PE router acting as the egress for the primary and standby pseudowires using the backup-neighbor statement. Copyright © 2017, Juniper Networks, Inc. -
Page 665: Configuring The Switchover Delay For The Pseudowires
With the option, specify a maximum reversion interval to add after the maximum delay. If a revert-time delay is defined but a maximum timer is not defined, revert-time VCs are restored upon the revert-timer's expiration. Copyright © 2017, Juniper Networks, Inc. -
Page 666: Configuring The Pseudowire Status Tlv
TLV. The pseudowire status TLV is configurable for each pseudowire connection and is disabled by default. The pseudowire status negotiation process assures that a PE router reverts back to the label withdraw method Copyright © 2017, Juniper Networks, Inc. -
Page 667: Example: Configuring The Pseudowire Status Tlv
CLI at the [ edit ] hierarchy level: edit protocols l2circuit set neighbor 10.255.64.26 set neighbor 10.255.64.26 interface xe-0/0/0 set neighbor 10.255.64.26 interface xe-0/0/0 pseudowire-status-tlv set neighbor 10.255.64.26 interface xe-0/0/0 virtual-circuit-id 1024 Copyright © 2017, Juniper Networks, Inc. - Page 668 [edit protocols l2circuit] user@host# set neighbor 10.255.64.26 interface xe-0/0/0 virtual-circuit-id 1024 Check your configuration by entering the show command. Results [edit protocols l2circuit] user@host# show neighbor 10.255.64.26 { interface xe-0-0-0 { virtual-circuit-id 1024; pseudowire-status-tlv; Copyright © 2017, Juniper Networks, Inc.
-
Page 669: Automatic Bandwidth Allocation For Lsps
(MBB) is ignored to prevent inaccurate results. The first sample after a bandwidth adjustment, or after a change in the LSP ID (regardless of path change), is also ignored. Copyright © 2017, Juniper Networks, Inc. -
Page 670: Configuring Automatic Bandwidth Allocation On Lsps
If an LSP has an automatic bandwidth configuration, you can disable automatic bandwidth adjustments on a particular path (either primary or secondary) by configuring a static bandwidth value and by disabling the CSPF computation (using the statement). no-cspf Copyright © 2017, Juniper Networks, Inc. -
Page 671: Configuring The Automatic Bandwidth Allocation Interval
90 seconds for the LSP adjustment interval adjust-interval statement at the [edit protocols mpls label-switched-path hierarchy level). See also label-switched-path-name auto-bandwidth] “Configuring Reporting of Automatic Bandwidth Allocation Statistics for LSPs” on page 619. Copyright © 2017, Juniper Networks, Inc. -
Page 672: Bandwidth
(Mbps) and that the percentage configured for the statement is 15 adjust-threshold percent. If the bandwidth demand increases to 110 Mbps, the bandwidth allocation is not adjusted. However, if the bandwidth demand increases to 120 Mbps (20 percent over Copyright © 2017, Juniper Networks, Inc. -
Page 673: Configuring A Limit On Bandwidth Overflow And Underflow
To specify a limit on the number of bandwidth overflow samples before triggering an automatic bandwidth allocation adjustment, configure the adjust-threshold-overflow-limit statement: adjust-threshold-overflow-limit number; Copyright © 2017, Juniper Networks, Inc. - Page 674 (for information about that statement, see “Configuring Passive Bandwidth Utilization Monitoring” on page 617). You cannot configure automatic bandwidth adjustments to occur more often than every 300 seconds. The statement is subject to the adjust-threshold-overflow-limit Copyright © 2017, Juniper Networks, Inc.
-
Page 675: Configuring Passive Bandwidth Utilization Monitoring
5 minutes (300 seconds). You might find it necessary to trigger a bandwidth allocation adjustment manually, for example in the following circumstances: When you are testing automatic bandwidth allocation in a network lab. Copyright © 2017, Juniper Networks, Inc. - Page 676 Routing Engine switchover. Related Configuring MPLS to Gather Statistics Documentation Configuring Reporting of Automatic Bandwidth Allocation Statistics for LSPs on page 619 request mpls lsp adjust-autobandwidth show mpls lsp show mpls lsp autobandwidth Copyright © 2017, Juniper Networks, Inc.
-
Page 677: Configuring Reporting Of Automatic Bandwidth Allocation Statistics For Lsps
[edit protocols mpls statistics] hierarchy level), you should configure a value of at least 90 seconds for the LSP adjustment interval ( statement at the adjust-interval [edit protocols mpls label-switched-path label-switched-path-name hierarchy level). auto-bandwidth] Copyright © 2017, Juniper Networks, Inc. - Page 678 1, nhid 0 to refcount 1Oct 30 17:16:27 Total 2 sessions: 2 success, 0 fail, 0 ignored (LSP ID 6, Tunnel ID 6741) 97 pkt 7981 Byte 1 pps 88 Bps Util 86.70% Reserved Bw 101 Bps Copyright © 2017, Juniper Networks, Inc.
- Page 679 (LSP ID 6, Tunnel ID 6741) 0 Byte 0 pps 0 Bps Util 0.00% Reserved Bw 101 Bps Oct 30 17:15:57.466858 E-D (LSP ID 5, Tunnel ID 6741) 0 Byte 0 pps 0 Bps Util 0.00% Reserved Bw Copyright © 2017, Juniper Networks, Inc.
- Page 680 101 Bps Oct 30 17:16:57.466870 LSP E-D (id 6, old id 6); sampled bytes 7981 > bytes recorded 5338 Related Configuring Automatic Bandwidth Allocation for LSPs on page 611 Documentation show mpls lsp autobandwidth Copyright © 2017, Juniper Networks, Inc.
-
Page 681: Understanding Pseudowire Redundancy Mobile Backhaul Scenarios
How It Works on page 625 Sample Topology Figure 31 on page 623 shows a sample topology. Figure 31: Pseudowire Redundancy Mobile Backhaul Sample Topology Metro MPLS Core MPLS ring cloud Layer 2 domain Layer 3 domain Copyright © 2017, Juniper Networks, Inc. -
Page 682: Benefits Of Pseudowire Redundancy Mobile Backhaul
Table 45 on page 624 includes a list of the pseudowire state flags. Table 45: Pseudowire Status Code for the Pseudowire Status TLV Flag Code L2CKT_PW_STATUS_PW_FWD 0x00000000 L2CKT_PW_STATUS_PW_NOT_FWD 0x00000001 L2CKT_PW_STATUS_AC_RX_FAULT 0x00000002 L2CKT_PW_STATUS_AC_TX_FAULT 0x00000004 Copyright © 2017, Juniper Networks, Inc. -
Page 683: How It Works
Figure 32: Pseudowire Redundancy Mobile Backhaul Solution LT ifl(y) INET 10.1.1.1.1/24 LT ifl(x) CCC (shared VIP) 10.1.1/24 Metro MPLS L3VPN Core MPLS ring cloud Primary virtual circuit Standby virtual circuit Copyright © 2017, Juniper Networks, Inc. - Page 684 (VIP). No VRRP hello messages are exchanged. Both PE devices assume mastership. Both primary and standby Layer 2 VCs are kept open to reduce traffic disruption in backup-to-primary transitions. The configuration statement allows hot-standby-vc-on manual activation. Copyright © 2017, Juniper Networks, Inc.
-
Page 685: Scenario
This example can be configured using the following software and hardware components: Junos OS Release 15.1X54–D60 or later ACX5000 routers as the access (A) routers MX Series routers acting as PE routers and transit label-switched routers T Series routers as the core routers Copyright © 2017, Juniper Networks, Inc. -
Page 686: Figure 33: Pseudowire Redundancy In A Mobile Backhaul Example Topology
10.32.0.102 10.20.0.102 192.168.0.103 Configuration CLI Quick To quickly configure this example, copy the following commands, paste them into a text Configuration file, remove any line breaks, change any details necessary to match your network Copyright © 2017, Juniper Networks, Inc. - Page 687 192.168.0.102 hot-standby set policy-options policy-statement pplb then load-balance per-packet Device PE1 set interfaces ge-0/1/1 unit 0 family inet address 10.21.0.101/24 set interfaces ge-0/1/1 unit 0 family iso set interfaces ge-0/1/1 unit 0 family mpls Copyright © 2017, Juniper Networks, Inc.
- Page 688 30 set policy-options policy-statement l3vpn_export term standby then community set l3vpn Copyright © 2017, Juniper Networks, Inc.
- Page 689 601 family inet filter output icmp_inet set interfaces lt-1/2/0 unit 601 family inet address 10.41.0.102/24 vrrp-group 0 virtual-address 10.41.0.1 set interfaces lt-1/2/0 unit 601 family inet address 10.41.0.102/24 vrrp-group 0 accept-data Copyright © 2017, Juniper Networks, Inc.
- Page 690 601 set firewall family inet filter icmp_inet interface-specific Copyright © 2017, Juniper Networks, Inc.
- Page 691 0 from protocol bgp set policy-options policy-statement l3vpn_ospf_import term 0 from community l3vpn set policy-options policy-statement l3vpn_ospf_import term 0 then accept set policy-options policy-statement ospf_export term 0 from community l3vpn Copyright © 2017, Juniper Networks, Inc.
- Page 692 0 family inet address 192.168.0.100/32 primary user@A1# set lo0 unit 0 family iso address 49.0002.0192.0168.0100.00 Configure the RSVP on the core-facing interfaces and on the loopback interface. RSVP is used in the Layer 3 domain. Copyright © 2017, Juniper Networks, Inc.
- Page 693 192.168.0.102 virtual-circuit-id 2 user@A1# set backup-neighbor 192.168.0.102 hot-standby To have the unilist next hop get pushed to other access routers, configure per-packet load balancing. [edit policy-options policy-statement pplb] user@A1# set then load-balance per-packet Copyright © 2017, Juniper Networks, Inc.
- Page 694 LT(y), defined with the IPv4 (inet) address family. LT(x) and LT(y) are paired. [edit interfaces] user@PE1# set lt-1/2/0 unit 600 encapsulation vlan-ccc user@PE1# set lt-1/2/0 unit 600 vlan-id 600 Copyright © 2017, Juniper Networks, Inc.
- Page 695 Configure RSVP on the core-facing interfaces and on the loopback interface. [edit protocols rsvp] user@PE1# set interface ge-0/1/1.0 Copyright © 2017, Juniper Networks, Inc.
- Page 696 [edit policy-options condition primary if-route-exists address-family ccc] user@PE1# set lt-1/2/0.600 user@PE1# set table mpls.0 user@PE1# set peer-unit 601 [edit policy-options condition standby if-route-exists address-family ccc] user@PE1# set lt-1/2/0.600 user@PE1# set table mpls.0 user@PE1# set standby user@PE1# set peer-unit 601 Copyright © 2017, Juniper Networks, Inc.
- Page 697 0 from source-address 10.0.0.0/8 user@PE1# set term 0 from protocol icmp user@PE1# set term 0 then count icmp_inet user@PE1# set term 0 then log user@PE1# set term 0 then accept user@PE1# set term 1 then accept Copyright © 2017, Juniper Networks, Inc.
- Page 698 Device A1 user@A1# show interfaces ge-1/3/0 { unit 0 { family inet { address 10.20.0.100/24; family iso; family mpls; ge-1/3/1 { unit 0 { family inet { address 10.10.0.100/24; family iso; family mpls; Copyright © 2017, Juniper Networks, Inc.
- Page 699 { interface ge-1/3/0.0; interface ge-1/3/1.0; interface lo0.0; ldp { interface ge-1/3/0.0; interface ge-1/3/1.0; interface lo0.0; l2circuit { neighbor 192.168.0.101 { interface ge-1/3/2.600 { virtual-circuit-id 1; pseudowire-status-tlv; backup-neighbor 192.168.0.102 { virtual-circuit-id 2; hot-standby; Copyright © 2017, Juniper Networks, Inc.
- Page 700 10.10.0.101/24; family iso; family mpls; lt-1/2/0 { unit 600 { encapsulation vlan-ccc; vlan-id 600; peer-unit 601; unit 601 { encapsulation vlan; vlan-id 600; peer-unit 600; family inet { filter { input icmp_inet; output icmp_inet; Copyright © 2017, Juniper Networks, Inc.
- Page 701 { interface-specific; term 0 { from { source-address { 10.41.0.101/32 except; 10.0.0.0/8; protocol icmp; then { count icmp_inet; log; accept; term 1 { then accept; user@PE1# show protocols rsvp { interface ge-0/1/1.0; interface ge-0/1/2.0; Copyright © 2017, Juniper Networks, Inc.
- Page 702 { neighbor 192.168.0.100 { interface lt-1/2/0.600 { virtual-circuit-id 1; pseudowire-status-tlv hot-standby-vc-on; user@PE1# show policy-options policy-statement l3vpn_export { term primary { from condition primary; then { local-preference add 300; community set l3vpn; accept; Copyright © 2017, Juniper Networks, Inc.
- Page 703 { if-route-exists { address-family { ccc { lt-1/2/0.600; table mpls.0; peer-unit 601; condition standby { if-route-exists { address-family { ccc { lt-1/2/0.600; table mpls.0; standby; peer-unit 601; user@PE1# show routing-options Copyright © 2017, Juniper Networks, Inc.
- Page 704 NC -- intf encaps not CCC/TCC TM -- TDM misconfiguration BK -- Backup Connection ST -- Standby Connection CB -- rcvd cell-bundle size bad SP -- Static Pseudowire LD -- local site signaled down RS -- remote site standby Copyright © 2017, Juniper Networks, Inc.
- Page 705 PW status code: 0x00000000, Neighbor PW status code: 0x00000000 Local interface: lt-1/2/0.600, Status: Up, Encapsulation: VLAN Connection History: Jan 24 11:06:36 2013 status update timer Jan 24 11:06:36 2013 PE route changed Jan 24 11:06:36 2013 Out lbl Update 299776 Copyright © 2017, Juniper Networks, Inc.
- Page 706 On the PE devices, verify the state of the different conditions defined as part of the Layer3 VPN's egress policy, where 10.41.0.0/24 corresponds to the logical tunnel (y) subnet. Action From operational mode, enter the command. show policy conditions detail user@PE1> show policy conditions detail Copyright © 2017, Juniper Networks, Inc.
- Page 707 10.41.0.0/24, generation 18 Condition tables: Table mpls.0, generation 0, dependencies 0, If-route-exists conditions: primary (static) standby (static) Table l3vpn.inet.0, generation 367, dependencies 2 Related Understanding Pseudowire Redundancy Mobile Backhaul Scenarios on page 623 Documentation Copyright © 2017, Juniper Networks, Inc.
- Page 708 ACX Series Universal Access Router Configuration Guide Copyright © 2017, Juniper Networks, Inc.
-
Page 709: Configuring Virtual Router Redundancy Protocol (Vrrp)
LAN to be routed without relying on a single router. Using VRRP, a backup router can take over a failed default router within a few seconds. This is done with minimum VRRP traffic and without any interaction with the hosts. Copyright © 2017, Juniper Networks, Inc. -
Page 710: Figure 34: Basic Vrrp For Ipv4 Family
ACX Series routers support VRRP version 3 for IPv6 addresses. ACX routers can support up to 64 VRRP group entries. These can be a combination of IPv4 or IPv6 families. If either of the family (IPv4 or IPv6) is solely configured for VRRP, Copyright © 2017, Juniper Networks, Inc. -
Page 711: Configuring Basic Vrrp Support
255, and you must configure preemption by including the statement. preempt If the virtual IP address you choose is not the same as the physical interface’s address, you must ensure that the virtual IP address does not appear anywhere else in the Copyright © 2017, Juniper Networks, Inc. - Page 712 VRRP routers. For example, if you have three routers in a VRRP group, it is recommended to assign the router priority as: Priority of master router as 254. Priority of backup router 1 as 200. Priority of backup router 2 as 150. Copyright © 2017, Juniper Networks, Inc.
-
Page 713: Configuring The Advertisement Interval For The Vrrp Master Router
[edit interfaces interface-name unit logical-unit-number family inet address address vrrp-group group-id] Modifying the Advertisement Interval in Milliseconds To modify the time, in milliseconds, between the sending of VRRP advertisement packets, include the fast-interval statement: fast-interval milliseconds; Copyright © 2017, Juniper Networks, Inc. -
Page 714: Configuring A Backup Router To Preempt The Master Router
Configuring Asymmetric Hold Time for VRRP Routers on page 657 Configuring an Interface to Accept Packets Destined for the Virtual IP Address on page 658 Example: Configuring VRRP on page 665 Configuring VRRP for IPv6 on page 667 Copyright © 2017, Juniper Networks, Inc. -
Page 715: Modifying The Preemption Hold-Time Value
However, when the tracked route or interface comes up again, or when the bandwidth for a tracked interface increases, the backup (original master) router waits for the hold Copyright © 2017, Juniper Networks, Inc. -
Page 716: Address
255, the master router, by default, accepts all packets addressed to the virtual IP address. In such cases, the configuration is not required. accept-data To configure an interface to accept all packets sent to the virtual IP address, include the statement: accept-data accept-data; Copyright © 2017, Juniper Networks, Inc. -
Page 717: Configuring A Logical Interface To Be Tracked
255 designates the master router). For each VRRP group, you can track up to 10 logical interfaces. To configure a logical interface to be tracked, include the following statements: track { interface interface-name { bandwidth-threshold bits-per-second priority-cost priority; priority-cost priority; Copyright © 2017, Juniper Networks, Inc. - Page 718 VRRP group priority. However, the interface priority cost and bandwidth threshold priority cost values for each VRRP group are not cumulative. The router uses only one priority cost to a tracked interface as indicated in Table 46 on page 661: Copyright © 2017, Juniper Networks, Inc.
-
Page 719: Configuring A Route To Be Tracked
VRRP group based on the reachability of the tracked route, triggering a new master router election. To configure a route to be tracked, include the following statements: track { priority-hold-time seconds; route prefix/prefix-length routing-instance instance-name priority-cost priority; Copyright © 2017, Juniper Networks, Inc. - Page 720 Configuring the Advertisement Interval for the VRRP Master Router on page 655 Configuring a Backup Router to Preempt the Master Router on page 656 Modifying the Preemption Hold-Time Value on page 657 Configuring Asymmetric Hold Time for VRRP Routers on page 657 Copyright © 2017, Juniper Networks, Inc.
-
Page 721: Configuring The Silent Period
In this example, the Master Down Event timer runs four times (12 seconds) by the time the 10-second startup silent period expires. If no VRRP PDU is received by the end of the fourth 3-second cycle, vrrp-group1 takes over mastership. Copyright © 2017, Juniper Networks, Inc. -
Page 722: Tracing Vrrp Operations
You can specify the following VRRP tracing flags: —Trace all VRRP operations. —Trace all database changes. database —Trace all general events. general —Trace all interface changes. interfaces —Trace all normal events. normal packets —Trace all packets sent and received. Copyright © 2017, Juniper Networks, Inc. -
Page 723: Example: Configuring Vrrp
{ address 192.168.1.20/24 { vrrp-group 27 { virtual-address 192.168.1.15; priority 254; On Router B [edit interfaces] ge-4/2/0 { unit 0 { family inet { address 192.168.1.24/24 { vrrp-group 27 { virtual-address 192.168.1.15; Copyright © 2017, Juniper Networks, Inc. - Page 724 [edit interfaces] ge-5/2/0 { gigether-options { source-filtering; source-address-filter { 00:00:5e:00:01:0a; # Virtual MAC address unit 0 { family inet { address 192.168.1.10/24 { vrrp-group 10; # VRRP group number virtual-address 192.168.1.10; priority 255; preempt; Copyright © 2017, Juniper Networks, Inc.
-
Page 725: Configuring Vrrp For Ipv6
4; On Router B [edit interfaces] ge-1/0/0 { unit 0 { family inet6 { address fe80::5:0:0:8/64; address fec0::5:0:0:8/64 { vrrp-inet6-group 3; # VRRP inet6 group number virtual-inet6-address fec0::5:0:0:7; virtual-link-local-address fe80::5:0:0:7; priority 100; preempt; Copyright © 2017, Juniper Networks, Inc. - Page 726 ACX Series Universal Access Router Configuration Guide [edit protocols] router-advertisement { interface ge-1/0/0.0 { prefix fec0::/64; max-advertisement-interval 4; Related Understanding VRRP Documentation Configuring VRRP Configuring VRRP Route Tracking Copyright © 2017, Juniper Networks, Inc.
-
Page 727: Configuring Multicast Listener Discovery And Protocol-Independent
2 is supported for source-specific multicast (SSM) include and exclude modes. In include mode, the receiver specifies the source or sources it is interested in receiving the multicast group traffic from. Exclude mode works the opposite of include mode. It Copyright © 2017, Juniper Networks, Inc. - Page 728 MLD version 1 is considered by default. version Related mld on page 1618 Documentation Enabling MLD on page 671 show mld group show mld interface show mld statistics clear mld membership clear mld statistics Copyright © 2017, Juniper Networks, Inc.
-
Page 729: Enabling Mld
[edit protocols mld] delete interface ge-0/0/0.0 disable Verify the configuration. [edit protocols mld] user@host# show interface fe-0/0/0.0; interface ge-0/0/0.0; Verify the operation of MLD by checking the output of the show mld interface command. Copyright © 2017, Juniper Networks, Inc. -
Page 730: Pim Overview
Junos OS supports bidirectional mode, sparse mode, dense mode, and sparse-dense mode. NOTE: ACX Series routers supports only sparse mode. Dense mode on ACX series is supported only for control multicast groups for auto-discovery of rendezvous point (auto-RP). Copyright © 2017, Juniper Networks, Inc. - Page 731 IP address and multicast group pair. If the routing device has no interested receivers for the data, and the outgoing interface list becomes empty, the routing device sends a PIM prune message upstream. Copyright © 2017, Juniper Networks, Inc.
-
Page 732: Basic Pim Network Components
PIM SSM can be seen as a subset of a special case of PIM sparse mode and requires no specialized equipment other than that used for PIM sparse mode (and IGMP version 3). Copyright © 2017, Juniper Networks, Inc. -
Page 733: Designated Router
(RPF) to create a path from a data source to the receiver requesting the data. When a receiver issues an explicit join request, an RPF check is triggered. A (* ,G) PIM join message is sent toward the RP from the receiver's designated router (DR). (By definition, Copyright © 2017, Juniper Networks, Inc. - Page 734 PIM table. However, after adding the active source into the PIM table, the RP router sends a register stop message. The RP router discovers the active source’s existence and no longer needs to receive advertisement of the source (which utilizes resources). Copyright © 2017, Juniper Networks, Inc.
-
Page 735: Rendezvous Point
The RP router is downstream from the source and forms one end of the shortest-path tree. As shown in Figure 35 on page 678, the RP router is upstream from the receiver and thus forms one end of the rendezvous-point tree. Copyright © 2017, Juniper Networks, Inc. -
Page 736: Rp Mapping Options
Understanding the PIM Bootstrap Router Understanding PIM Auto-RP PIM Configuration Statements To configure Protocol Independent Multicast (PIM), include the statement: disable; default-vpn-source { interface-name interface-name; assert-timeout seconds; dense-groups { addresses; dr-election-on-p2p; export; graceful-restart { disable; no-bidirectional-mode; restart-duration seconds; Copyright © 2017, Juniper Networks, Inc. - Page 737 { auto-rp { (discovery | mapping); (mapping-agent-election | no-mapping-agent-election); bootstrap { family (inet | inet6) { export [ policy-names ]; import [ policy-names ]; priority number; bootstrap-export [ policy-names ]; Copyright © 2017, Juniper Networks, Inc.
-
Page 738: Changing The Pim Version
PIM version 2 is the default for both rendezvous point (RP) mode (at the [edit protocols hierarchy level) and for interface mode (at the pim rp static address address] [edit protocols pim interface interface-name] hierarchy level). Copyright © 2017, Juniper Networks, Inc. -
Page 739: Modifying The Pim Hello Interval
225.1.1.1 0 Interface: lo0.0 Address: 10.255.245.91, IPv4, PIM v2, Mode: Sparse Hello Option Holdtime: 255 seconds Hello Option DR Priority: 1 Hello Option LAN Prune Delay: delay 500 ms override 2000 ms Join Suppression supported Copyright © 2017, Juniper Networks, Inc. -
Page 740: Pim On Aggregated Interfaces
Junos OS uses PIM version 2 for both rendezvous point (RP) mode (at the [edit protocols hierarchy level) and interface mode (at the pim rp static address address] [edit protocols pim interface interface-name] hierarchy level). All systems on a subnet must run the same version of PIM. Copyright © 2017, Juniper Networks, Inc. -
Page 741: Configuring Bfd For Pim In Acx Series
A pair of routing devices exchanges BFD packets. Hello packets are sent at a specified, regular interval. A neighbor failure is detected when the routing device stops receiving a reply after a specified interval. The BFD failure detection timers have Copyright © 2017, Juniper Networks, Inc. - Page 742 350 (Optional) Configure other BFD settings. As an alternative to setting the receive and transmit intervals separately, configure one interval for both. [edit protocols pim interface fe-1/0/0.0 family inet bfd-liveness-detection] user@host# set minimum-interval 350 Copyright © 2017, Juniper Networks, Inc.
-
Page 743: Configuring Pim Trace Options
Trace assert messages, which are used to resolve which assert of the parallel routers connected to a multiaccess LAN is responsible for forwarding packets to the LAN. Trace bootstrap, RP, and auto-RP messages. autorp Trace bidirectional PIM designated-forwarder (DF) bidirectional-df-election election events. Copyright © 2017, Juniper Networks, Inc. - Page 744 PIM packets of a particular type. To configure tracing operations for PIM: (Optional) Configure tracing at the [routing-options hierarchy level to trace all protocol packets. [edit routing-options traceoptions] Copyright © 2017, Juniper Networks, Inc.
-
Page 745: Disabling Pim
The hierarchy in which you configure PIM is critical. In general, the most specific configuration takes precedence. However, if PIM is disabled at the protocol level, then any disable statements with respect to an interface or family are ignored. Copyright © 2017, Juniper Networks, Inc. -
Page 746: Disabling The Pim Protocol
To disable the PIM protocol: Include the statement. disable user@host# set protocols pim disable (Optional) Verify your configuration settings before committing them by using the show protocols pim command. user@host# run show protocols pim Copyright © 2017, Juniper Networks, Inc. -
Page 747: Disabling Pim On An Interface
(Optional) Verify your configuration settings before committing them by using the show protocols pim command. user@host# run show protocols pim Copyright © 2017, Juniper Networks, Inc. -
Page 748: Disabling Pim For A Rendezvous Point
(Optional) Verify your configuration settings before committing them by using the command. show protocols pim user@host# run show protocols pim Copyright © 2017, Juniper Networks, Inc. -
Page 749: Configuring Path Computation Element Protocol (Pcep)
LSP status reports sent by the PCC to the PCE, and PCE updates for the external LSPs. Figure 36 on page 692 illustrates the role of PCEP in the client-side implementation of a stateful PCE architecture in an MPLS RSVP-TE enabled network. Copyright © 2017, Juniper Networks, Inc. -
Page 750: Overview
This section contains the following topics: Understanding MPLS RSVP-TE on page 693 Current MPLS RSVP-TE Limitations on page 694 Use of an External Path Computing Entity on page 695 Components of External Path Computing on page 696 Copyright © 2017, Juniper Networks, Inc. -
Page 751: Understanding Mpls Rsvp-Te
The set of packets that are assigned the same label value by a specific node belong to the same forwarding equivalence class (FEC), and effectively define the RSVP flow. When traffic is mapped onto an LSP in this way, the LSP is called an LSP tunnel. Copyright © 2017, Juniper Networks, Inc. -
Page 752: Current Mpls Rsvp-Te Limitations
LSPs that comply with the bandwidth requirements of the traffic engineering link. LSPs established based on dynamic or explicit path options in the order of preference—The ingress routers in an MPLS RSVP-TE network establish LSPs for Copyright © 2017, Juniper Networks, Inc. -
Page 753: Use Of An External Path Computing Entity
As a solution to the current limitations found in the MPLS RSVP-TE path computation, an external path computing entity with a global view of per-LSP, per-device demand in the network independent of available capacity is required. Copyright © 2017, Juniper Networks, Inc. -
Page 754: Components Of External Path Computing
Passive stateful PCE—Maintains synchronization with the PCC and learns the PCC LSP states to better optimize path calculations, but does not have control over them. Active stateful PCE—Actively modifies the PCC LSPs, in addition to learning about the PCC LSP states. Copyright © 2017, Juniper Networks, Inc. - Page 755 LSPs to the main PCE. The PCC elects, as the main PCE, a PCE with the lowest priority number, or the PCE that it connects to first in the absence of a priority number. Copyright © 2017, Juniper Networks, Inc.
-
Page 756: Interaction Between A Pce And A Pcc Using Pcep
Figure 38: PCC and RSVP-TE The PCE to PCC communication is enabled by the TCP-based PCEP. The PCC initiates the PCEP session and stays connected to a PCE for the duration of the PCEP session. Copyright © 2017, Juniper Networks, Inc. - Page 757 PCE. The PCC assigns the PCE-initiated LSP a unique LSP-ID, and automatically delegates the LSP to the PCE. A PCC cannot revoke the delegation for the PCE-initiated LSPs for an active PCEP session. Copyright © 2017, Juniper Networks, Inc.
- Page 758 The active stateful PCE then modifies one or more LSP attributes and sends an update to the PCC. The PCC uses the parameters it receives from the PCE to re-signal the LSP. Copyright © 2017, Juniper Networks, Inc.
-
Page 759: Lsp Behavior With External Computing
The PCC sends such LSP status reports to the PCE only when a reconfiguration has occurred or when there is a change in the ERO, RRO, or status of the PCE-controlled LSPs under external control. Copyright © 2017, Juniper Networks, Inc. -
Page 760: Configuration Statements Supported For External Computing
For more information about CLI-controlled LSPs and PCE-controlled LSPs, see “LSP Types” on page 701. Configuration Statements Supported for External Computing Table 47 on page 703 lists the MPLS and existing LSP configuration statements that apply to a PCE-controlled LSP. Copyright © 2017, Juniper Networks, Inc. -
Page 761: Pce-Controlled Lsp Protection
PCE-controlled LSPs: local cspf no cspf —A PCC uses the computation type only when the PCE sends in a local cspf local cspf Juniper Vendor TLV (enterprise number: 0x0a4c) of type 5. Copyright © 2017, Juniper Networks, Inc. -
Page 762: Pce Controlled Point-To-Multipoint Rsvp-Te Lsps
Junos OS Release 15.1F6 and 16.1: Static point-to-multipoint LSPs PCE-delegated and PCE-initiated point-to-multipoint LSPs Auto-bandwidth TE++ PCE request and reply message Creation of point-to-multipoint LSPs using templates Copyright © 2017, Juniper Networks, Inc. -
Page 763: Auto-Bandwidth And Pce-Controlled Lsp
The following configuration is executed on the PCC to establish a secure PCEP session with a PCE: Using MD5 authentication key: [edit protocols pcep pce pce-id] user@PCC# set authentication-key key Using predefined authentication keychain: [edit protocols pcep pce pce-id] user@PCC# set authentication-key-chain key-chain user@PCC# set authentication-algorithm md5 Copyright © 2017, Juniper Networks, Inc. -
Page 764: Impact Of Client-Side Pce Implementation On Network Performance
PCEs set up in a distributed PCE computation model, and can be prone to race conditions, scalability concerns, and so on. Path calculations incorporating total network state is highly complex, even if the PCE has detailed information on all paths, priorities, and layers. Copyright © 2017, Juniper Networks, Inc. -
Page 765: Configuring Pcep
Example: Configuring the Path Computation Element Protocol for MPLS RSVP-TE This example shows how to enable external path computing by a Path Computation Element (PCE) for traffic engineered label-switched paths (TE LSPs) on a Path Copyright © 2017, Juniper Networks, Inc. - Page 766 PCC running a previous release and a stateful PCE server that adheres to Internet draft draft-ietf-pce-stateful-pce-07. To enable external path computing by a PCE, include the statement lsp-external-controller on the PCC at the [edit mpls] [edit mpls lsp lsp-name] hierarchy levels. lsp-external-controller pccd; Copyright © 2017, Juniper Networks, Inc.
- Page 767 Setup time and convergence time (reroute, MBB) for exisiting LSPs is the same as in previous releases, in the absence of PCE-controlled LSPs. However, a small impact is seen in the presence of PCE-controlled LSPs. ERO computation time is expected to be significantly higher than local-CSPF. Copyright © 2017, Juniper Networks, Inc.
-
Page 768: Figure 40: Configuring Pcep For Mpls Rsvp-Te
In this example, the PCE-provided ERO for PCC-to-R2 is PCC-R3-R2. The bandwidth is 8m, and both the setup and hold priority values are 3. PCC-to-R2 Router PCC sends a PCRpt with the new RRO to the stateful PCE. Copyright © 2017, Juniper Networks, Inc. - Page 769 1 disable set protocols isis interface all set protocols isis interface fxp0.0 disable set protocols isis interface lo0.0 set system ports console log-out-on-disconnect set interfaces ge-2/0/3 unit 0 family inet address 20.31.2.2/24 Copyright © 2017, Juniper Networks, Inc.
- Page 770 1 disable set protocols isis interface all set protocols isis interface fxp0.0 disable set protocols isis interface lo0.0 Copyright © 2017, Juniper Networks, Inc.
- Page 771 For information about navigating the CLI, see Using the CLI Editor in Configuration Mode. To configure Router PCC: NOTE: Repeat this procedure for every Juniper Networks ingress router in the MPLS domain, after modifying the appropriate interface names, addresses, and any other parameters for each router. Configure the interfaces.
- Page 772 { unit 0 { family inet { address 20.31.4.1/24; family iso; family mpls; ge-1/1/1 { unit 0 { family inet { address 20.31.1.1/24; Copyright © 2017, Juniper Networks, Inc.
- Page 773 1 disable; interface all; interface fxp0.0 { disable; interface lo0.0; pcep { pce pce1 { destination-ipv4-address 10.209.57.166; destination-port 4189; pce-type active stateful; If you are done configuring the device, enter commit from configuration mode. Copyright © 2017, Juniper Networks, Inc.
- Page 774 PCEP PCE status session between the PCE and Router PCC. pce1 , the status of the PCEP session is PCE_STATE_UP , which indicates that the PCEP session has been established between the PCEP peers. Copyright © 2017, Juniper Networks, Inc.
- Page 775 8 Mar 11 05:00:20.581 EXTCTRL_LSP: Computation request/lsp status contains: bandwidth 10000000 priority - setup 4 hold 4 hops: 20.31.1.2 20.31.2.2 7 Mar 11 05:00:20.581 EXTCTRL LSP: Sent Path computation request and LSP status 6 Mar 11 05:00:20.581 EXTCTRL_LSP: Computation request/lsp status contains: Copyright © 2017, Juniper Networks, Inc.
- Page 776 Encoding type: Packet, Switching type: Packet, GPID: IPv4 *Primary to-R2-path State: Up Priorities: 4 4 (ActualPriorities 3 3) Bandwidth: 10Mbps (ActualBandwidth: 8Mbps) SmartOptimizeTimer: 180 No computed ERO. Received RRO (ProtectionFlag 1=Available 2=InUse 4=B/W 8=Node 10=SoftPreempt 20=Node-ID): 20.31.4.2 20.31.5.2 Copyright © 2017, Juniper Networks, Inc.
- Page 777 The output now displays the LSP parameters that were configured using the CLI along with the PCE-provided parameters used to establish the LSP as the actual values in use. Bandwidth—10Mbps (ActualBandwidth: 8Mbps) Priorities—4 4 (ActualPriorities 3 3) Copyright © 2017, Juniper Networks, Inc.
- Page 778 6 Mar 11 05:00:20.581 EXTCTRL_LSP: Computation request/lsp status contains: bandwidth 10000000 priority - setup 4 hold 4 hops: 20.31.1.2 20.31.2.2 5 Mar 11 05:00:20.580 EXTCTRL_LSP: Control status became external 4 Mar 11 05:00:03.716 EXTCTRL_LSP: Control status became local Copyright © 2017, Juniper Networks, Inc.
-
Page 779: Example: Configuring Path Computation Element Protocol For Mpls Rsvp-Te With Support Of Pce-Initiated Lsps
A TCP connection to two external stateful PCEs from the ingress router (PCC). Junos OS Release 16.1 or later running on the PCC. Before you begin: Configure the device interfaces. Configure MPLS and RSVP-TE (RSVP-Traffic Engineering). Configure OSPF or any other IGP protocol. Copyright © 2017, Juniper Networks, Inc. - Page 780 PCE-initiated LSPs from the failed PCE. When the LSP cleanup timer expires, and no other PCE has acquired control over the LSPs from the failed PCE, the PCC deletes all the LSPs provisioned by the failed PCE. Copyright © 2017, Juniper Networks, Inc.
-
Page 781: Figure 41: Example Pce-Initated Lsp For Mpls Rsvp-Te
When the PCEP session between PCC and PCE1 is terminated, PCC starts two timers for the PCE1-initiated LSP: delgation cleanup timeout and the LSP cleanup timer. During this time, PCE1 or PCE2 can acquire control of the PCE-initiated LSP. Copyright © 2017, Juniper Networks, Inc. - Page 782 0 family inet address 10.0.101.9/24 set interfaces ge-3/1/2 unit 0 family iso set interfaces ge-3/1/2 unit 0 family mpls set interfaces lo0 unit 0 family inet address 192.168.10.1/32 set protocols rsvp interface all Copyright © 2017, Juniper Networks, Inc.
- Page 783 For information about navigating the CLI, see Using the CLI Editor in Configuration Mode. To configure the PCC router: NOTE: Repeat this procedure for every Juniper Networks ingress router in the MPLS domain, after modifying the appropriate interface names, addresses, and any other parameters for each router. Configure the interfaces.
- Page 784 If the output does not display the intended configuration, repeat the instructions in this example to correct the configuration. user@PCC# show interfaces ge-0/1/1 { unit 0 { family inet { address 10.0.102.9/24; Copyright © 2017, Juniper Networks, Inc.
- Page 785 { disable; ospf { traffic-engineering; area 0.0.0.0 { interface all; interface fxp0.0 { disable; pce-group PCEGROUP { pce-type active stateful; lsp-provisioning; lsp-cleanup-timer 30; pce PCE1 { destination-ipv4-address 192.168.69.58; destination-port 4189; pce-group PCEGROUP; Copyright © 2017, Juniper Networks, Inc.
- Page 786 LSPs provisioned by the connected PCEs and delegated to them. PCE1 is the main active PCE and has one PCE-initiated LSP that has been automatically delegated to it by the PCC. Copyright © 2017, Juniper Networks, Inc.
- Page 787 Chapter 23: Configuring Path Computation Element Protocol (PCEP) Verifying PCE1 Status Purpose Verify the status of the main active stateful PCE. Copyright © 2017, Juniper Networks, Inc.
- Page 788 PCEP session between a PCE and PCC. For PCE1, the status of the PCEP session is , which indicates that the PCE_STATE_UP PCEP session has been established with the PCC. Copyright © 2017, Juniper Networks, Inc.
- Page 789 Support of the Path Computation Element Protocol for RSVP-TE Overview on page 692 Documentation Example: Configuring the Path Computation Element Protocol for MPLS RSVP-TE on page 707 Configuring Path Computation Element Protocol for MPLS RSVP-TE with Support of PCE-Initiated LSPs on page 732 Copyright © 2017, Juniper Networks, Inc.
-
Page 790: Configuring Path Computation Element Protocol For Mpls Rsvp-Te With Support Of Pce-Initiated Lsps
Specify the amount of time (in seconds) that the PCC must wait before returning control of LSPs to the routing protocol process after a PCEP session is disconnected. [edit protocols pcep pce pce-id] user@PCC# set delegation-cleanup-timeout seconds Copyright © 2017, Juniper Networks, Inc. - Page 791 Specify the amount of time (in seconds) that the PCC must wait for a reply before resending a request. [edit protocols pcep pce pce-id] user@PCC# set request-timer seconds The value can range from 0 through 65535 seconds. Copyright © 2017, Juniper Networks, Inc.
- Page 792 [edit protocols pcep pce PCE] user@PCC# up [edit protocols pcep] user@PCC# show message-rate-limit 50; max-provisioned-lsps 16000; pce PCE { destination-ipv4-address 192.168.69.58; destination-port 4189; lsp-provisioning; lsp-cleanup-timer 50; request-timer 50; max-unknown-requests 5; max-unknown-messages 5; delegation-cleanup-timeout 20; Copyright © 2017, Juniper Networks, Inc.
-
Page 793: Lsps
By default, PCE control of point-to-multipoint LSPs is not supported on a PCC. To add this capability, include the statement at the p2mp-lsp-report-capability [edit protocols hierarchy levels. pcep pce pce-name] [edit protocols pcep pce-group group-id] Copyright © 2017, Juniper Networks, Inc. -
Page 794: Figure 42: Example Pce-Controlled Point-To-Multipoint Lsps
CLI at the hierarchy [edit] level. set interfaces ge-0/0/0 unit 0 family inet address 1.2.4.1/30 set interfaces ge-0/0/0 unit 0 family mpls set interfaces ge-0/0/1 unit 0 family inet address 1.2.3.1/30 Copyright © 2017, Juniper Networks, Inc. - Page 795 0.0.0.0 interface lo0.0 set protocols ospf area 0.0.0.0 interface ge-0/0/6.0 set protocols ospf area 0.0.0.0 interface ge-0/0/5.0 set protocols ospf area 0.0.0.0 interface ge-0/0/2.0 set protocols ospf area 0.0.0.0 interface ge-0/0/1.0 Copyright © 2017, Juniper Networks, Inc.
- Page 796 Copyright © 2017, Juniper Networks, Inc.
- Page 797 0.0.0.0 interface ge-0/0/5.0 set protocols ospf area 0.0.0.0 interface ge-0/0/3.0 set protocols ospf area 0.0.0.0 interface ge-0/0/2.0 set protocols ospf area 0.0.0.0 interface lo0.0 passive set interfaces em0 unit 0 family inet address 10.102.180.215/19 Copyright © 2017, Juniper Networks, Inc.
- Page 798 0 family inet address 1.2.1.1/30 user@PCC# set ge-0/0/5 unit 0 family mpls user@PCC# set ge-0/0/6 unit 0 family inet address 1.2.0.1/30 user@PCC# set ge-0/0/6 unit 0 family mpls Configure the autonomous system number for Router PCC. Copyright © 2017, Juniper Networks, Inc.
- Page 799 LSP parameters. [edit protocols] user@PCC# set mpls path loose-path 1.2.3.2 loose user@PCC# set mpls path strict-path 1.2.3.2 strict user@PCC# set mpls path strict-path 2.3.3.2 strict user@PCC# set mpls path path-B user@PCC# set mpls path path-C Copyright © 2017, Juniper Networks, Inc.
- Page 800 0.0.0.0 interface ge-0/0/0.0 user@PCC# set ospf area 0.0.0.0 interface ge-0/0/3.0 Configure OSPF area 0 on the point-to-point interface of Router PCC. [edit protocols] user@PCC# set ospf area 0.0.0.0 interface ge-0/0/4.0 interface-type p2p Copyright © 2017, Juniper Networks, Inc.
- Page 801 { unit 0 { family inet { address 1.2.4.1/30; family mpls; ge-0/0/1 { unit 0 { family inet { address 1.2.3.1/30; family mpls; ge-0/0/2 { unit 0 { Copyright © 2017, Juniper Networks, Inc.
- Page 802 { address 1.2.0.1/30; family mpls; user@PCC# show protocols rsvp { interface all; interface fxp0.0 { disable; mpls { lsp-external-controller pccd { pce-controlled-lsp pcc_delegated_no_cspf_* { label-switched-path-template { lsp_template_no_cspf; pce-controlled-lsp pce_initiated_no_ero_no_cspf_* { label-switched-path-template { lsp_template_no_cspf; Copyright © 2017, Juniper Networks, Inc.
- Page 803 1.2.3.2 loose; path strict-path { 1.2.3.2 strict; 2.3.3.2 strict; path path-B; path path-C; interface all; interface ge-0/0/6.0 { admin-group violet; interface ge-0/0/5.0 { admin-group indigo; interface ge-0/0/2.0 { admin-group blue; interface ge-0/0/1.0 { admin-group green; Copyright © 2017, Juniper Networks, Inc.
- Page 804 0; delegation-cleanup-timeout 60; p2mp-lsp-report-capability; Verification Confirm that the configuration is working properly. Verifying LSP Configuration on the PCC on page 747 Verifying PCE Configuration on the PCC on page 750 Copyright © 2017, Juniper Networks, Inc.
- Page 805 Chapter 23: Configuring Path Computation Element Protocol (PCEP) Verifying LSP Configuration on the PCC Purpose Verify the LSP type and running state of the point-to-multipoint LSP. Copyright © 2017, Juniper Networks, Inc.
- Page 806 7 hold 0 44 Jul 12 14:49:27.858 EXTCTRL_LSP: Control status became external 43 Jul 12 14:49:03.746 EXTCTRL_LSP: Control status became local 42 Jul 12 14:46:52.367 EXTCTRL LSP: Sent Path computation request and LSP status Copyright © 2017, Juniper Networks, Inc.
- Page 807 12 Jul 12 14:43:13.008 EXTCTRL_LSP: Computation request/lsp status contains: signalled bw 0 req BW 0 admin group(exclude 0 include any 0 include all 0) priority setup 7 hold 0 11 Jul 12 14:42:43.343 EXTCTRL LSP: Sent Path computation request and LSP Copyright © 2017, Juniper Networks, Inc.
- Page 808 Transit LSP: 0 sessions Total 0 displayed, Up 0, Down 0 Meaning The output displays the lsp2-pcc LSP as the PCE-controlled LSP. Verifying PCE Configuration on the PCC Purpose Verify the PCE parameters configuration and PCE state. Copyright © 2017, Juniper Networks, Inc.
- Page 809 The output displays the active PCE that Router PCC is connected to, and the pce1 PCE parameters and state. Related Support of the Path Computation Element Protocol for RSVP-TE Overview on page 692 Documentation Copyright © 2017, Juniper Networks, Inc.
- Page 810 ACX Series Universal Access Router Configuration Guide Copyright © 2017, Juniper Networks, Inc.
-
Page 811: Configuring Layer 2 And Layer 3 Features On Acx Series Routers
Configuring Layer 2 and Layer 3 Features on ACX Series Routers Configuring Layer 2 Bridging and Q-in-Q Tunneling on page 755 Configuring Layer 2 and Layer 3 Services on page 773 Configuring Layer 3 VPNs on page 813 Copyright © 2017, Juniper Networks, Inc. - Page 812 ACX Series Universal Access Router Configuration Guide Copyright © 2017, Juniper Networks, Inc.
-
Page 813: Configuring Layer 2 Bridging And Q-In-Q Tunneling
IRB enables you to route packets to another routed interface or to another bridge domain that has a Layer 3 protocol configured NOTE: ACX Series routers do not support the creation of bridge domains by using access and trunk ports. Copyright © 2017, Juniper Networks, Inc. - Page 814 VLAN stack. —Remove the outer VLAN tag of the frame and replace the inner VLAN tag pop-swap of the frame. —Remove both the outer and inner VLAN tags of the frame. pop-pop Copyright © 2017, Juniper Networks, Inc.
- Page 815 VLAN tags of packets sent to the bridge domain are processed and translated, depending on your configuration. “–” means that the statement is not supported for the specified logical interface VLAN Copyright © 2017, Juniper Networks, Inc.
- Page 816 2000, push 300 swap 200 to 300, vlan-tags outer 2000 push 2000 inner 300 push 100, push 400 swap 200 to 400, vlan-tags outer 100 inner 400 push 100 – – vlan-id-range 10-100 Copyright © 2017, Juniper Networks, Inc.
-
Page 817: Layer 2 Learning And Forwarding For Bridge Domains Overview
Static MAC entries on logical interfaces Size of the MAC address table for the bridge domain Related Layer 2 Bridge Domains on ACX Series Overview on page 755 Documentation Q-in-Q Tunneling on ACX Series Overview on page 770 Copyright © 2017, Juniper Networks, Inc. -
Page 818: Configuring A Bridge Domain On Acx Series Routers
Related Layer 2 Bridge Domains on ACX Series Overview on page 755 Documentation Q-in-Q Tunneling on ACX Series Overview on page 770 Layer 2 Learning and Forwarding for Bridge Domains Overview on page 759 Copyright © 2017, Juniper Networks, Inc. -
Page 819: Configuring Integrated Routing And Bridging In Acx Series
You should define a family inet or inet6 filter and apply it as the input filter on an IRB logical interface under family inet. NOTE: is not supported for family inet6 filter on physical-interface-filter IRB logical interface. Copyright © 2017, Juniper Networks, Inc. - Page 820 For each bridge domain that you configure, specify a bridge-domain-name . You must also specify the value for the statement. bridge domain-type For the vlan-id statement, you can specify either a valid VLAN identifier or the none option. Copyright © 2017, Juniper Networks, Inc.
- Page 821 The following is a sample configuration for IRB over bridge domain: [edit] interfaces { ge-1/0/0 { encapsulation flexible-ethernet-services; flexible-vlan-tagging; unit 0 { encapsulation vlan-bridge; vlan-id 100; ge-1/0/1 { encapsulation flexible-ethernet-services; flexible-vlan-tagging; unit 0 { encapsulation vlan-bridge; vlan-id 100; Copyright © 2017, Juniper Networks, Inc.
-
Page 822: Configuring Vlan Identifiers For Bridge Domains In Acx Series
Related Layer 2 Bridge Domains on ACX Series Overview on page 755 Documentation Q-in-Q Tunneling on ACX Series Overview on page 770 Layer 2 Learning and Forwarding for Bridge Domains Overview on page 759 Copyright © 2017, Juniper Networks, Inc. -
Page 823: Disabling Mac Learning For Bridge Domains On Acx Series
Configuring Static MAC Addresses for Logical Interfaces in a Bridge Domain in ACX Series on page 766 Configuring the Size of the MAC Address Table for Bridge Domains in ACX Series on page 766 Copyright © 2017, Juniper Networks, Inc. -
Page 824: Acx Series
If the MAC table limit is reached, new addresses can no longer be added to the table. NOTE: Unused MAC addresses are removed from the MAC address table automatically. This frees space in the table thereby allowing new entries to be added. Copyright © 2017, Juniper Networks, Inc. -
Page 825: Configuring Mac Address Limits On A Logical Interface
Configuring MAC Address limit on page 768 Configuring MAC Address Limits for VLANs on page 768 Configuring MAC Address Limits for VPLS on page 768 CLI Commands to Configure MAC Address Limits on page 769 Copyright © 2017, Juniper Networks, Inc. -
Page 826: Configuring Mac Address Limit
] hierarchy level The following is an example to configure a limit for the number of MAC addresses learned on a logical interface in VPLS routing instance: [routing-instance] v1 { protocols { Copyright © 2017, Juniper Networks, Inc. -
Page 827: Cli Commands To Configure Mac Address Limits
VLAN. The limit is applied to a specific logical interface in the VLAN for which it is configured. set routing-instances routing-instance-name protocols vpls interface-mac-limit —Command to configure the MAC address limit for each logical interface in the limit Copyright © 2017, Juniper Networks, Inc. -
Page 828: Preventing Communication Among Customer Edge Devices As Acx Routers
Providers can segregate different customers’ VLAN traffic on a link (for example, if the customers use overlapping VLAN IDs) or bundle different customer VLANs into a single service VLAN. Service providers can use Q-in-Q tunneling to isolate Copyright © 2017, Juniper Networks, Inc. -
Page 829: Configuring Q-In-Q Tunneling On Acx Series
Q-in-Q tunneling adds a service VLAN tag before the customer’s 802.1Q VLAN tags. The Juniper Networks Junos operating system implementation of Q-in-Q tunneling supports the IEEE 802.1ad standard. In Q-in-Q tunneling, as a packet travels from a customer VLAN (C-VLAN) to a service provider's VLAN (S-VLAN), another 802.1Q tag for the appropriate S-VLAN is added... - Page 830 Configuring Static MAC Addresses for Logical Interfaces in a Bridge Domain in ACX Series on page 766 Configuring the Size of the MAC Address Table for Bridge Domains in ACX Series on page 766 Copyright © 2017, Juniper Networks, Inc.
-
Page 831: Configuring Layer 2 And Layer 3 Services
Sample Scenario of H-VPLS on ACX Series Routers for IPTV Services on page 800 Guidelines for Configuring Unicast RPF on ACX Series Routers on page 803 Configuring Unicast RPF on ACX Series Routers on page 804 Verifying Unicast RPF Status on page 808 Copyright © 2017, Juniper Networks, Inc. -
Page 832: Configuring Interfaces For Layer 2 Circuits Overview
(PE) router to the local customer edge (CE) router. This interface is tied to the Layer 2 circuit neighbor configured in “Configuring the Address for the Neighbor of the Layer 2 Circuit” on page 774. Copyright © 2017, Juniper Networks, Inc. -
Page 833: Configuring A Community For The Layer 2 Circuit
Configuring the Control Word for Layer 2 Circuits To emulate the virtual circuit (VC) encapsulation for Layer 2 circuits, a 4-byte control word is added between the Layer 2 protocol data unit (PDU) being transported and the Copyright © 2017, Juniper Networks, Inc. - Page 834 However, if you want to explicitly disable its use on a specific interface, include the no-control-word statement in the configuration. Related Configuring the Neighbor Interface for the Layer 2 Circuit on page 774 Documentation Configuring the Encapsulation Type for the Layer 2 Circuit Neighbor Interface on page 777 Copyright © 2017, Juniper Networks, Inc.
-
Page 835: Configuring The Encapsulation Type For The Layer 2 Circuit Neighbor Interface
An explicitly configured MTU is signaled to the remote PE device. The configured MTU is also compared to the MTU received from the remote PE device. If there is a conflict, the Layer 2 circuit is taken down. Copyright © 2017, Juniper Networks, Inc. -
Page 836: Configuring The Protect Interface
Release message with the group ID for the Layer 2 circuit associated with the FEC. You also configure a virtual circuit ID for each redundant pseudowire. A redundant pseudowire is identified by the backup neighbor address and the virtual circuit ID. Copyright © 2017, Juniper Networks, Inc. -
Page 837: Configuring The Interface Encapsulation Type For Layer 2 Circuits
LDP LSP. The PSN tunnel endpoint address is the destination address for the LSP on the remote router. To configure the address for the PSN tunnel endpoint, include the psn-tunnel-endpoint statement: psn-tunnel-endpoint address; Copyright © 2017, Juniper Networks, Inc. -
Page 838: Enabling The Layer 2 Circuit When The Mtu Does Not Match
[edit protocols hierarchy level or for the local l2circuit neighbor address interface interface-name] connection by including this statement at the [edit protocols l2circuit local-switching interface interface-name] hierarchy level. ignore-encapsulation-mismatch; Copyright © 2017, Juniper Networks, Inc. -
Page 839: Configuring Local Interface Switching In Layer 2 Circuits
Local interface switching requires you to configure at least two interfaces: Starting interface—Include the statement at the interface [edit protocols l2circuit local-switching] hierarchy level. Ending interface—Include the statement at the end-interface [edit protocols l2circuit local-switching interface interface-name] hierarchy level. Copyright © 2017, Juniper Networks, Inc. -
Page 840: Enabling Local Interface Switching When The Mtu Does Not Match
To configure the local switching interface to ignore the MTU configured for the physical interface, include the statement: ignore-mtu-mismatch ignore-mtu-mismatch; You can include this statement at the following hierarchy levels: [edit protocols l2circuit local-switching interface interface-name] Copyright © 2017, Juniper Networks, Inc. -
Page 841: Example: Configuring Layer 2 Circuit Switching Protection
PE routers. Failures are detected through the link down trap. NOTE: Non-stop routing (NSR) and graceful routing engine switchover (GRES) do not support Layer 2 circuit switching protection. Copyright © 2017, Juniper Networks, Inc. -
Page 842: Pe3 As The Protection Path
Configure the routing options on Router PE1. [edit routing-options] user@PE1# set forwarding-table export load-balance Copyright © 2017, Juniper Networks, Inc. -
Page 843: Accepting Route Updates With Unique Inner Vpn Labels In Layer 3 Vpns
Documentation Accepting Route Updates with Unique Inner VPN Labels in Layer 3 VPNs For Layer 3 VPNs configured on Juniper Networks routers, Junos OS normally allocates one inner VPN label for each customer edge (CE)-facing virtual routing and forwarding (VRF) interface of a provider edge (PE) router. However, other vendors allocate one VPN label for each route learned over the CE-facing interfaces of a PE router. -
Page 844: Accepting Up To One Million Layer 3 Vpn Route Updates
ACX Series Universal Access Router Configuration Guide number of routes with unique inner VPN labels that can be processed by a Juniper Networks router is increased substantially. Common route update elements associated with Layer 3 VPNs are combined, reducing the number of route updates and individual states the Juniper Networks router must maintain, and leading to enhanced scaling and convergence performance. -
Page 845: Accepting More Than One Million Layer 3 Vpn Route Updates
Accepting More Than One Million Layer 3 VPN Route Updates For Juniper Networks routers participating in a mixed vendor network with more than one million Layer 3 VPN labels, include the statement at the... - Page 846 VPN labels that can be processed by a Juniper Networks router. However, when configuring such very large-scale Layer 3 VPN scenarios, keep the following guidelines in mind: statement is supported only on MX Series routers containing only extended-space MPCs.
-
Page 847: Enabling Chained Composite Next Hops For Ipv6 Labeled Unicast
Device R1 is in AS 65000 and is connected to both Device R2 and Device R3, which are in AS 65001. Device R1 can be configured to load balance traffic across the two links. Copyright © 2017, Juniper Networks, Inc. -
Page 848: Configuring Per-Packet Load Balancing
[edit policy-options policy-statement policy-name term hierarchy level: term-name from] [edit policy-options policy-statement policy-name term term-name from] route-filter destination-prefix match-type { load-balance per-packet; Copyright © 2017, Juniper Networks, Inc. - Page 849 Protocol (UDP) packets. For Internet Control Message Protocol (ICMP) packets, the field location offset is the checksum field, which makes each ping packet a separate “flow.” There are other protocols that can be encapsulated in IP that may have a varying value Copyright © 2017, Juniper Networks, Inc.
-
Page 850: Per-Packet Load Balancing Examples
Perform per-packet load balancing for all routes: [edit] policy-options { policy-statement load-balancing-policy { then { load-balance per-packet; routing-options { forwarding-table { export load-balancing-policy; Perform per-packet load balancing only for a limited set of routes: Copyright © 2017, Juniper Networks, Inc. -
Page 851: Configuring Load Balancing Based On Mpls Labels On Acx Series Routers
No consideration is given to bandwidth or congestion levels. To load-balance based on the MPLS label information, configure the family mpls statement: [edit forwarding-options hash-key] family mpls all-labels; label-1; label-2; label-3; no-labels; Copyright © 2017, Juniper Networks, Inc. - Page 852 LSR as all the traffic specific to that session will carry the same set of MPLS labels. Load balancing on LSR AE interfaces can be achieved for a higher number of MPLS sessions, that is minimum of 10 sessions. This is applicable for CCC/VPLS/L3VPN. In Copyright © 2017, Juniper Networks, Inc.
- Page 853 Include the IPv4 or IPv6 address in the hash key. You must also configure either label-l no-labels Include only the Layer 3 IP information in the hash key. Excludes all of the bytes from the hash key. layer-3-only port-data Copyright © 2017, Juniper Networks, Inc.
- Page 854 [edit forwarding-options hash-key family mpls] [edit forwarding-options hash-key family mpls] label-1; label-2; label-3; Related Configuring Per-Packet Load Balancing on page 790 Documentation Configuring Load Balancing for Ethernet Pseudowires on page 797 Copyright © 2017, Juniper Networks, Inc.
-
Page 855: Configuring Load Balancing For Ethernet Pseudowires
[edit forwarding-options hash-key family mpls] You can configure load balancing for IPv4 traffic over Ethernet pseudowires to include only Layer 3 IP information in the hash key. To include only Layer 3 IP information, include Copyright © 2017, Juniper Networks, Inc. -
Page 856: Configuring Load Balancing Based On Mac Addresses
You can configure per-packet load balancing to optimize VPLS traffic flows across multiple paths. NOTE: Aggregated Ethernet member links will now use the physical MAC address as the source MAC address in 802.3ah OAM packets. NOTE: ACX Series routers do not support VPLS. Copyright © 2017, Juniper Networks, Inc. -
Page 857: Ecmp Flow-Based Forwarding On Acx Series Routers
. Then apply the routing policy to routes exported from the routing table to per-packet the forwarding table. To do this, include the configuration forwarding-table export statements at the [ edit routing-options ] hierarchy level. Copyright © 2017, Juniper Networks, Inc. -
Page 858: Sample Scenario Of H-Vpls On Acx Series Routers For Iptv Services
Connection to ACX1 to MX2 is through an active pseudowire with PIM deployed. PIM is used as the transport protocol in communication between ACX and MX routers. Unicast transmission is also configured. Connection of ACX1 to MX3 is through a backup Copyright © 2017, Juniper Networks, Inc. - Page 859 Aggregation routers have VPLS full-mesh connectivity between each other and ACX works as H-VPLS MTU. There is a PW set up between ACX and the aggregation router. LT interface does the stitching of the Bridge domain with the PW. Copyright © 2017, Juniper Networks, Inc.
-
Page 860: Guidelines For H-Vpls On Acx Routers
An IRB interface is used for only multicast data delivery from the default VRF context. Related PIM Overview on page 672 Documentation Understanding IGMP on page 445 Layer 2 Bridge Domains on ACX Series Overview on page 755 Copyright © 2017, Juniper Networks, Inc. -
Page 861: Guidelines For Configuring Unicast Rpf On Acx Series Routers
The uRPF fail filter applies only to interface-specific instances of the firewall filter. The uRPF fail filters do not support reject routing-instance actions. uRPF can be configured for family <inet | inet6> on IRB interfaces in ACX. Copyright © 2017, Juniper Networks, Inc. -
Page 862: Configuring Unicast Rpf On Acx Series Routers
For firewall filtering, you must allow the output tunnel packets through the firewall filter applied to input traffic on the interface that is the next-hop interface towards the tunnel destination. Copyright © 2017, Juniper Networks, Inc. -
Page 863: Interworking Of Unicast Rff With Different System Conditions
When unicast RPF is enabled on an interface, Bootstrap Protocol (BOOTP) packets and Dynamic Host Configuration Protocol (DHCP) packets are not accepted on the interface. To allow the interface to accept BOOTP packets and DHCP packets, you must apply a Copyright © 2017, Juniper Networks, Inc. -
Page 864: Configuring Unicast Rpf Loose Mode
The following sections describe how unicast RPF behaves when a default route uses an interface and when a default route does not use an interface: Unicast RPF Behavior with a Default Route on page 807 Unicast RPF Behavior Without a Default Route on page 807 Copyright © 2017, Juniper Networks, Inc. -
Page 865: Unicast Rpf Behavior With A Default Route
You can configure unicast RPF only on the interfaces you specify in the routing instance. This means the following: For Layer 3 VPNs, unicast RPF is supported on the CE router interface. Unicast RPF is not supported on core-facing interfaces. Copyright © 2017, Juniper Networks, Inc. -
Page 866: Example: Configuring Unicast Rpf On A Vpn
1770 Documentation Example: Configuring Unicast Reverse-Path-Forwarding Check Guidelines for Configuring Firewall Filters on page 1044 Verifying Unicast RPF Status Purpose Verify that unicast reverse-path forwarding (RPF) is enabled and is working on the interface. Copyright © 2017, Juniper Networks, Inc. - Page 867 Active alarms : LINK Active defects : LINK MAC statistics: Receive Transmit Total octets Total packets Unicast packets Broadcast packets Multicast packets CRC/Align errors FIFO errors MAC control frames MAC pause frames Oversized frames Copyright © 2017, Juniper Networks, Inc.
- Page 868 On EX3200 and EX4200 switches, unicast RPF is implicitly enabled on all switch interfaces, including aggregated Ethernet interfaces (also referred to as link aggregation groups or LAGs) and routed VLAN interfaces (RVIs) when you enable unicast RPF on a Copyright © 2017, Juniper Networks, Inc.
- Page 869 Documentation Example: Configuring Unicast RPF on an EX Series Switch Configuring Unicast RPF on ACX Series Routers on page 804 Configuring Unicast RPF (CLI Procedure) Disabling Unicast RPF (CLI Procedure) Troubleshooting Unicast RPF Copyright © 2017, Juniper Networks, Inc.
- Page 870 ACX Series Universal Access Router Configuration Guide Copyright © 2017, Juniper Networks, Inc.
-
Page 871: Configuring Layer 3 Vpns
A Layer 3 VPN is a set of sites that share common routing information and whose connectivity is controlled by a collection of policies. The sites that make up a Layer 3 VPN are connected over a provider’s existing public Internet backbone. Copyright © 2017, Juniper Networks, Inc. -
Page 872: Understanding Layer 3 Vpn Attributes
PE-CE connection. It is particularly useful if you are using BGP as the routing protocol between the PE and CE routers and if different sites in the VPN have been assigned the same autonomous system (AS) numbers. Copyright © 2017, Juniper Networks, Inc. -
Page 873: Understanding Vpn-Ipv4 Addresses And Route Distinguishers
Figure 46 on page 816 illustrates how private addresses of different private networks can overlap. Here, sites within VPN A and VPN B use the address spaces 10.1.0.0/16, 10.2.0.0/16, and 10.3.0.0/16 for their private networks. Copyright © 2017, Juniper Networks, Inc. -
Page 874: Figure 46: Overlapping Addresses Among Different Vpns
AS number (a 2-byte value) and as-number number as-number number is any 4-byte value. The AS number can be in the range 1 through 65,535. We recommend that you use an Internet Assigned Numbers Authority (IANA)-assigned, Copyright © 2017, Juniper Networks, Inc. - Page 875 PE routers. Similarly, Router PE1 adds the route distinguisher 10458:23:10.2/16 to routes received by the CE router at Site 1 in VPN B and forwards these routes to the other PE routers. Copyright © 2017, Juniper Networks, Inc.
-
Page 876: Understanding Virtual Routing And Forwarding Tables
VRF tables that are created on the PE routers. The three PE routers have connections to CE routers that are in two different VPNs, so each PE router creates two VRF tables, one for each VPN. Copyright © 2017, Juniper Networks, Inc. -
Page 877: Figure 48: Vrf Tables
You can configure the router so that if a next hop to a destination is not found in the VRF table, the router performs a lookup in the global routing table, which is used for Internet access. Copyright © 2017, Juniper Networks, Inc. - Page 878 Packet Forwarding Engine. This table is maintained in addition to the forwarding tables that correspond to the router’s routing tables. As inet.0 mpls.0 with the routing tables, the best routes from the inet.0 mpls.0 routing-instance-name.inet.0 routing table are placed into the forwarding table. Copyright © 2017, Juniper Networks, Inc.
- Page 879 PE routers (or to the route reflector if this is part of the VPN topology) to retrieve all VPN routes so they can be reevaluated to determine whether they should be kept or discarded. Related IGP Shortcuts and VPNs Documentation Copyright © 2017, Juniper Networks, Inc.
-
Page 880: Understanding Ipv4 Route Distribution In A Layer 3 Vpn
The connection between the CE and PE routers can be a remote connection (a WAN connection) or a direct connection (such as a Frame Relay or Ethernet connection). CE routers can communicate with PE routers using one of the following: OSPF Copyright © 2017, Juniper Networks, Inc. -
Page 881: Distribution Of Routes Between Pe Routers
VRF import policy for the VPN. If it matches, the route distinguisher is removed from the route, and it is placed into the VRF table (the routing-instance-name.inet.0 table) in IPv4 format. Copyright © 2017, Juniper Networks, Inc. -
Page 882: Figure 51: Distribution Of Routes Between Pe Routers
If the route does not match the export policy, it is not exported to the remote PE routers, but can still be used locally for routing—for example,if two CE routers in the same VPN are directly connected to the same PE router. Copyright © 2017, Juniper Networks, Inc. -
Page 883: Distribution Of Routes From Pe To Ce Routers
PE routers can communicate with CE routers using one of the following routing protocols: OSPF Static route Figure 52 on page 826 illustrates how the three PE routers announce their routes to their connected CE routers. Copyright © 2017, Juniper Networks, Inc. -
Page 884: Understanding Layer 3 Vpn Forwarding Through The Core
Figure 53 on page 827): Outer label—Label assigned to the address of the BGP next hop by the IGP next hop Inner label—Label that the BGP next hop assigned for the packet’s destination address Copyright © 2017, Juniper Networks, Inc. -
Page 885: Understanding Routing Instances For Layer 3 Vpns
CE router must be associated with a VRF table. You can associate more than one interface with the same VRF table if more than one CE router in a VPN is directly connected to the PE router. Copyright © 2017, Juniper Networks, Inc. -
Page 886: Configuring A Vpn Tunnel For Vrf Table Lookup
{ group group-name { peer-as as-number; neighbor ip-address; multihop ttl-value; (ospf | ospf3) { area area { interface interface-name; domain-id domain-id; domain-vpn-tag number; sham-link { local address; sham-link-remote address <metric number>; rip { rip-configuration; Copyright © 2017, Juniper Networks, Inc. - Page 887 { syslog (level level | upto level); rib routing-table-name { martians { destination-prefix match-type <allow>; multipath vpn-unequal-cost; static { defaults { static-options; route destination-prefix { next-hop [next-hops]; static-options; static { defaults { static-options; Copyright © 2017, Juniper Networks, Inc.
-
Page 888: Configuring Routing Between Pe And Ce Routers In Layer 3 Vpns
Configuring Routing Between PE and CE Routers in Layer 3 VPNs For the PE router to distribute VPN-related routes to and from connected CE routers, you must configure routing within the VPN routing instance. You can configure a routing Copyright © 2017, Juniper Networks, Inc. -
Page 889: Configuring Bgp Between The Pe And Ce Routers
You configure the local AS number using either the statement autonomous-system at the [edit routing-instances routing-instance-name routing-options] hierarchy level or the statement at any of the following hierarchy levels: local-as [edit routing-instances routing-instance-name protocols bgp] [edit routing-instances routing-instance-name protocols bgp group group-name] Copyright © 2017, Juniper Networks, Inc. -
Page 890: Configuring Ospf Between The Pe And Ce Routers
Configuring OSPF Version 3 Between the PE and CE Routers To configure OSPF version 3 as the routing protocol between a PE and CE router, include ospf3 statement: ospf3 { area area { interface interface-name; Copyright © 2017, Juniper Networks, Inc. -
Page 891: Configuring Ospf Sham Links For Layer 3 Vpns
Layer 3 VPN is preferred to a backup path over an intra-area link connecting the CE routers. Figure 55: OSPF Sham Link You should configure an OSPF sham link under the following circumstances: Copyright © 2017, Juniper Networks, Inc. -
Page 892: Configuring Ospf Sham Links
<metric number>; You can include this statement at the following hierarchy levels: [edit routing-instances routing-instance-name protocols ospf area area-id] [edit logical-systems logical-system-name routing-instances routing-instance-name protocols ospf area area-id] Copyright © 2017, Juniper Networks, Inc. -
Page 893: Ospf Sham Links Example
OSPF domain ID. However, for a Layer 3 VPN connecting multiple OSPF domains, configuring OSPF domain IDs can help you control LSA translation (for Type 3 and Type 5 LSAs) between the OSPF domains and back-door paths. Each VPN routing and forwarding Copyright © 2017, Juniper Networks, Inc. - Page 894 You can set a VPN tag for the OSPF external routes generated by the PE router to prevent looping. By default, this tag is automatically calculated and needs no configuration. However, you can configure the domain VPN tag for Type 5 LSAs explicitly by including domain-vpn-tag statement: no-domain-vpn-tag number; Copyright © 2017, Juniper Networks, Inc.
-
Page 895: Hub-And-Spoke Layer 3 Vpns And Ospf Domain Ids
When LSAs flooded by the hub CE router arrive at the hub PE router’s routing instance, the hub PE router, acting as an ABR, does not consider these LSAs in its OSPF route calculations, even though the LSAs do not have the DN bits set and the external LSAs Copyright © 2017, Juniper Networks, Inc. -
Page 896: Configuring Rip Between The Pe And Ce Routers
To specify an export policy for RIP, include the export statement: export [ policy-names ]; You can include this statement for RIP at the following hierarchy levels: [edit routing-instances routing-instance-name protocols rip group group-name] Copyright © 2017, Juniper Networks, Inc. - Page 897 For more information about how to configure routing tables and routing table groups, see Junos OS Routing Protocols Library. import-rib [ group-names ]; Copyright © 2017, Juniper Networks, Inc.
-
Page 898: Configuring Static Routes Between The Pe And Ce Routers
[edit logical-systems logical-system-name routing-instances routing-instance-name routing-options] NOTE: hierarchy level is not applicable in ACX [edit logical-systems] Series routers. For more information about configuring routing protocols and static routes, see Junos OS Routing Protocols Library. Copyright © 2017, Juniper Networks, Inc. -
Page 899: Limiting The Number Of Paths And Prefixes Accepted From Ce Routers In Layer 3 Vpns
BGP sessions may need to be cleared. A mandatory path or prefix limit, in addition to triggering a warning message, rejects any additional paths or prefixes once the limit is reached. Copyright © 2017, Juniper Networks, Inc. -
Page 900: Understanding Ipv6 Layer 3 Vpns
Internet. IPv6 is the successor to IPv4, and is based for the most part on IPv4. In the Juniper Networks implementation of IPv6, the service provider implements an MPLS-enabled IPv4 backbone to provide VPN service for IPv6 customers. The PE routers have both IPv4 and IPv6 capabilities. - Page 901 VPN routing table as well as a corresponding VPN forwarding table. For this instance type, there is a one-to-one mapping between an interface and a routing instance. Each VRF routing instance corresponds with a forwarding table. The Copyright © 2017, Juniper Networks, Inc.
-
Page 902: Configuring Layer 3 Vpns To Carry Ipv6 Traffic
The PE router must have the PE router to PE router BGP session configured with the family inet6-vpn statement. The CE router must be capable of receiving IPv6 traffic. You can configure BGP or static routes between the PE and CE routers. Copyright © 2017, Juniper Networks, Inc. -
Page 903: Configuring Ipv6 On The Pe Router
Configuring Static Routes on the PE Router on page 847 Configuring BGP on the PE Router to Handle IPv6 Routes To configure BGP in the Layer 3 VPN routing instance to handle IPv6 routes, include the statement: Copyright © 2017, Juniper Networks, Inc. -
Page 904: Configuring Bgp On The Pe Router For Ipv4 And Ipv6 Routes
Series routers. Configuring OSPF Version 3 on the PE Router To configure OSPF version 3 in the Layer 3 VPN routing instance to handle IPv6 routes, include the statement: ospf3 ospf3 { area area-id { Copyright © 2017, Juniper Networks, Inc. -
Page 905: Configuring Static Routes On The Pe Router
You need to configure IPv6 on the PE router interfaces to the CE routers and on the CE router interfaces to the PE routers. To configure the interface to handle IPv6 routes, include the statement: family inet6 family inet6 { address ipv6-address; Copyright © 2017, Juniper Networks, Inc. -
Page 906: Configuring Ebgp Multihop Sessions Between Pe And Ce Routers In Layer 3 Vpns
(TTL) value for the multihop session: multihop ttl-value; For the list of hierarchy levels at which you can configure this statement, see the summary section for this statement. Copyright © 2017, Juniper Networks, Inc. -
Page 907: Configuring Layer 3 Vpns To Carry Ibgp Traffic
This is the default behavior for BGP routes that are advertised to Layer 3 VPNs located in different domains. This functionality is described in the Internet draft draft-marques-ppvpn-ibgp-version.txt, RFC 2547bis Networks Using Internal BGP as PE-CE Protocol. Copyright © 2017, Juniper Networks, Inc. -
Page 908: Configuring A Label Allocation And Substitution Policy For Vpns
You can also configure a policy to generate labels on a per-route basis by specifying a label allocation policy. To specify a label allocation policy for the routing instance, configure the label statement and specify a label allocation policy using the option: allocation label { allocation label-allocation-policy; Copyright © 2017, Juniper Networks, Inc. - Page 909 Instead, the ASBR re-advertises a local virtual-tunnel or vrf-table-label label and forwards that transit traffic based on IP forwarding tables. The label substitution helps to conserve labels on Juniper Networks routers.
-
Page 910: Configuring Protocol-Independent Load Balancing In Layer 3 Vpns
When you include the multipath statement at the following hierarchy levels, protocol-independent load balancing is applied to the default routing table for that routing instance (routing-instance-name.inet.0): [edit routing-instances routing-instance-name routing-options] [edit logical-systems logical-system-name routing-instances routing-instance-name routing-options] Copyright © 2017, Juniper Networks, Inc. - Page 911 EBGP equal-cost multipath (ECMP), the paths using chained next hops are excluded. In a typical case, the excluded paths are the internal paths. Copyright © 2017, Juniper Networks, Inc.
-
Page 912: Configuring Load Balancing And Routing Policies
To ensure that VPN load-balancing functions as expected, do not include the from statement in the policy statement configuration. The policy statement should protocol be configured as follows: [edit policy-options policy-statement export-policy] then { load-balance per-packet; Copyright © 2017, Juniper Networks, Inc. -
Page 913: Configuring The Algorithm That Determines The Active Route To Evaluate As Numbers In As Paths For Vpn Routes
By using this function, the number of routes with unique inner VPN labels that can be processed by a Juniper Networks router is increased substantially. Common route update elements associated... -
Page 914: Accepting Up To One Million Layer 3 Vpn Route Updates
Enabling Chained Composite Next Hops for IPv6 Labeled Unicast Routes on page 859 Accepting Up to One Million Layer 3 VPN Route Updates For Juniper Networks routers participating in a mixed vendor network with up to one million Layer 3 VPN labels, include the... -
Page 915: Accepting More Than One Million Layer 3 Vpn Route Updates
Accepting More Than One Million Layer 3 VPN Route Updates For Juniper Networks routers participating in a mixed vendor network with more than one million Layer 3 VPN labels, include the statement at the... - Page 916 Using the statement can double the number of routes with unique inner extended-space VPN labels that can be processed by a Juniper Networks router. However, when configuring such very large-scale Layer 3 VPN scenarios, keep the following guidelines in mind: extended-space statement is supported only on MX Series routers containing only MPCs.
-
Page 917: Enabling Chained Composite Next Hops For Ipv6 Labeled Unicast
Configuring the Junos OS to Allocate More Memory for Routing Tables, Firewall Filters, and Layer 3 VPN Labels Network Services Mode Overview Configuring Junos OS to Run a Specific Network Services Mode in MX Series Routers Copyright © 2017, Juniper Networks, Inc. - Page 918 ACX Series Universal Access Router Configuration Guide Copyright © 2017, Juniper Networks, Inc.
-
Page 919: Configuring Class Of Service On Acx Series Routers
PART 7 Configuring Class of Service on ACX Series Routers Configuring Class of Service on page 863 Configuring Behavior Aggregate Classifiers on page 949 Copyright © 2017, Juniper Networks, Inc. - Page 920 ACX Series Universal Access Router Configuration Guide Copyright © 2017, Juniper Networks, Inc.
-
Page 921: Configuring Class Of Service
Understanding RED Drop Profiles Overview on page 907 Configuring RED Drop Profiles on page 907 Controlling Network Access Using Traffic Policing Overview on page 908 Configuring Policing on an ATM IMA Pseudowire on page 912 Copyright © 2017, Juniper Networks, Inc. -
Page 922: Cos On Acx Series Universal Access Routers Features Overview
Three weighted random early detection (WRED) curves for TCP and one WRED curve for non-TCP. There are two fill levels and two drop probabilities per WRED curve; the drop probability corresponding to the first fill must be zero. Copyright © 2017, Juniper Networks, Inc. -
Page 923: Understanding Cos Cli Configuration Statements On Acx Series Universal
The following CLI stanza is not applicable to ACX Series Universal Access Routers. [edit class-of-service interfaces interface-name] irb { unit logical-unit-number { classifiers { type (classifier-name | default); rewrite-rules { Copyright © 2017, Juniper Networks, Inc. -
Page 924: Configuring Cos On Acx Series Universal Access Routers
Configuring CoS on ACX Series Universal Access Routers on page 866 Configuring CoS on ACX Series Universal Access Routers Physical interface-based classifiers are supported at the [edit class-of-service interfaces interfaces-name] hierarchy level. EXP bits are located in each MPLS label and used to Copyright © 2017, Juniper Networks, Inc. - Page 925 [edit class-of-service interface interface-name unit unit-number] user@host# set rewrite-rule (dscp | inet-precedence ) (rewrite-name| default) user@host# set classifiers (dscp | inet-precedence ) classifier-name | default) Set the global system default. [edit ] user@host# edit class-of-service system-defaults classifiers exp classifier-name Copyright © 2017, Juniper Networks, Inc.
- Page 926 000001; exp exp-rewrite-core { forwarding-class be { loss-priority low code-point 111; forwarding-class be1 { loss-priority high code-point 110; forwarding-class ef { loss-priority low code-point 101; forwarding-class ef2 { loss-priority high code-point 100; Copyright © 2017, Juniper Networks, Inc.
- Page 927 { loss-priority low code-point 100010; forwarding-class ef2 { loss-priority high code-point 100011; forwarding-class af { loss-priority low code-point 100100; forwarding-class af1 { loss-priority high code-point 100101; forwarding-class nc { loss-priority low code-point 100110; Copyright © 2017, Juniper Networks, Inc.
- Page 928 CoS configuration at F1: class-of-service { interfaces { ge-1/0/1 { unit 0 { forwarding-class be; ge-1/0/2 { classifiers { dscp dscp-classf-core; rewrite-rules { dscp dscp-rewrite-core; unit 0 { rewrite-rules { exp exp-rewrite-core; system-defaults { classifiers { Copyright © 2017, Juniper Networks, Inc.
-
Page 929: Classifiers And Rewrite Rules At The Global, Physical And Logical Interface Levels Overview
At a global level, you can define EXP classification. At a physical interface level, you can define the following features: DSCP, DSCP-IPV6, and IPv4 precedence classifiers DSCP, DSCP-IPV6, and IPv4 precedence rewrites Copyright © 2017, Juniper Networks, Inc. -
Page 930: Levels
On ACX Series Universal Access Routers and EX Series switches, CoS supports classification and rewrite at the global and physical interface levels. To configure the global EXP classifier, include the following statements at the [edit class-of-service] system-defaults hierarchy level. [edit class-of-service] system-defaults classifiers exp classifier-name Copyright © 2017, Juniper Networks, Inc. - Page 931 0 { rewrite-rules { exp custom-exp; classifiers { dscp d1; ieee-802.1 ci; rewrite-rules { dscp default; ge-0/1/2 { classifiers { ieee-802.1 ci; rewrite-rules { ieee-802.1 ri; ge-0/1/3 { unit 0 { rewrite-rules { exp custom-exp2; Copyright © 2017, Juniper Networks, Inc.
-
Page 932: Understanding Schedulers Overview
{ drop profile-name { fill-level percentage drop-probability percentage; fill-level percentage drop-probability percentage; schedulers { scheduler-name { buffer-size (percent percentage | remainder | temporal microseconds | buffer-partition multicast percent percentage ); Copyright © 2017, Juniper Networks, Inc. - Page 933 It is recommended that the scheduling configurations are done a priori before live traffic. Related Understanding RED Drop Profiles Overview on page 907 Documentation Configuring RED Drop Profiles on page 907 Copyright © 2017, Juniper Networks, Inc.
-
Page 934: Configuring Shared And Dedicated Buffer Memory Pools
(percent percentage | multicast percentage); The following is a sample configuration for shared and dedicated buffers in ACX5048 and ACX5096 routers: [edit class-of-service] schedulers schd1{ buffer-size percent 80; buffer-partition { multicast { percent 30; Copyright © 2017, Juniper Networks, Inc. -
Page 935: Cos For Ppp And Mlppp Interfaces On Acx Series Routers
CoS configuration to ensure consistency across all routing devices in a CoS domain. You must also consider all the routing devices and other networking equipment in the CoS domain to ensure interoperability among all equipment. Copyright © 2017, Juniper Networks, Inc. -
Page 936: Limitations That Are Common For Cos On Ppp And Mlppp Interfaces
For the lower fill level, the minimum number of packets is 32. However, if you specify the fill-level to be 45 instead of 50, the lower fill level is 28. Because 64 - 28, which Copyright © 2017, Juniper Networks, Inc. -
Page 937: Limitations For Cos On Ppp Interfaces
All the policer limitations on ACX routers for Gigabit Ethernet interfaces are valid for PPP interfaces. This restriction includes ingress and egress policers. Because these limitations are chassis-wide, they are also effective for PPP interfaces. Copyright © 2017, Juniper Networks, Inc. -
Page 938: Limitations For Cos On Mlppp Interfaces
EXP rewrite rule is supported for egress logical interfaces. PPP encapsulation is supported on ACX1000, ACX2000, ACX2100, and ACX4000 routers. A maximum of 1000 logical interfaces can be supported on an ACX router . -
Page 939: Cos Functionalities For Ipv4 Over Ppp Interfaces
IP precedence value, or EXP bits. The default classifier is based on the IP precedence value. To configure the global EXP classifier, include the following statements at the [edit class-of-service system-defaults] hierarchy level. [edit class-of-service] system-defaults classifiers exp classifier-name Copyright © 2017, Juniper Networks, Inc. - Page 940 Buffer-size can be specific in percentage and temporal configuration. This size is turned into the number of packets per queue, with 256 bytes treated as the average packet size. The following settings can be configured at the queue level: Copyright © 2017, Juniper Networks, Inc.
-
Page 941: Cos Functionalities For Ipv4 Over Mlppp Interfaces
If no rewrite rules are applied, all MPLS labels that are pushed have a value of zero (0). The EXP value remains unchanged on MPLS labels that are swapped. CoS Functionalities for IPv4 Over MLPPP Interfaces The following CoS capabilities are supported on MLPPP interfaces for IPv4 traffic: Copyright © 2017, Juniper Networks, Inc. - Page 942 For rewrite rules, the EXP rule is supported. The following example illustrates an MLPPP CoS configuration set: [edit] class-of-service { classifiers { inet-precedence all-traffic-inet { forwarding-class assured-forwarding { loss-priority low code-points 101; forwarding-class expedited-forwarding { loss-priority low code-points 000; Copyright © 2017, Juniper Networks, Inc.
- Page 943 { transmit-rate 200000; buffer-size percent 5; priority strict-high; scheduler-maps { evdo-mlppp-cos-map { forwarding-class best-effort scheduler evdo-mlppp-best-effort; forwarding-class assured-forwarding scheduler evdo-mlppp-assured-forwarding; forwarding-class network-control scheduler evdo-mlppp-network-control; forwarding-class expedited-forwarding scheduler evdo-mlppp-expedited-forwarding; fragmentation-maps { frag-mlppp { Copyright © 2017, Juniper Networks, Inc.
- Page 944 { from { dscp ef; then { count signalling-counter; forwarding-class network-control; accept; term user-speech { from { dscp af31; then { policer user-speech-rate-limit; count user-speech-counter; forwarding-class network-control; accept; term ptt-mcs { from { Copyright © 2017, Juniper Networks, Inc.
-
Page 945: Cos For Nat Services On Acx Series Universal Access Routers
When the packet exits the router through a physical interface, the queuing, scheduling, and rewrite rules Copyright © 2017, Juniper Networks, Inc. - Page 946 Network Address Translation Rules Overview on page 1004 Configuring Service Sets for Network Address Translation on page 1030 Configuring Service Sets to Be Applied to Services Interfaces on page 1031 Configuring Queuing and Scheduling on Inline Services Interface on page 1040 Copyright © 2017, Juniper Networks, Inc.
-
Page 947: Configuring The Ieee 802.1P Field For Cos Host Outbound Traffic In Acx Series
For example, specify that a value of 010 is applied to all host outbound traffic: [edit class-of-service host-outbound-traffic ieee-802.1] user@host# set default 010 Related Configuring the IEEE 802.1p Field for CoS Host Outbound Traffic in ACX Series on Documentation page 889 Copyright © 2017, Juniper Networks, Inc. -
Page 948: Applying Egress Interface Rewrite Rules To The Ieee 802.1P Field For All Host Outbound Traffic On The Interface In Acx Series
[edit class-of-service] rewrite-rules { ieee-802.1 rewrite_foo { forwarding-class network-control { loss-priority low code-point 101; interfaces { ge-1/0/0 { unit 100 { rewrite-rules { ieee-802.1 rewrite_foo vlan-tag outer-and-inner; host-outbound-traffic { forwarding-class network-control; Copyright © 2017, Juniper Networks, Inc. -
Page 949: Header Fields
IP protocol, source port, destination port, and DSCP value. Multifield classifiers are used when a simple BA classifier is insufficient to classify a packet. Figure 56 on page 892 provides a high-level illustration of how a classifier works. Copyright © 2017, Juniper Networks, Inc. -
Page 950: Configuring Multifield Classifiers
If you configure both a behavior aggregate (BA) classifier and a multifield classifier, BA classification is performed first; then multifield classification is performed. If they conflict, any BA classification result is overridden by the multifield classifier. Copyright © 2017, Juniper Networks, Inc. - Page 951 [edit firewall family family-name filter filter-name] user@host# set term term-name then actions For multifield classifiers, you can perform the following actions: Set the value of the DSCP field of incoming packets. user@host# set term term-name then dscp code-point Copyright © 2017, Juniper Networks, Inc.
- Page 952 Specify the names of the firewall filters to apply to received packets. [edit interfaces interface-name unit unit-number] user@host# set filter input filter-name Repeat this step for the family protocol filter and the simple filter. Save your configuration. [edit] Copyright © 2017, Juniper Networks, Inc.
-
Page 953: Understanding Cos On Atm Ima Pseudowire Interfaces Overview
The consequence of configuring the discard-tag statement is usually a higher loss priority so that if those packets encounter downstream congestion, they are discarded first. Copyright © 2017, Juniper Networks, Inc. -
Page 954: Cell-Based Atm Shaping
On ACX Series routers, the fixed classifier is associated with the ingress interface. Packets are assigned on the basis of the type of fixed classification associated with the logical interface. To configure a fixed classifier, include the Copyright © 2017, Juniper Networks, Inc. -
Page 955: Configuring Fixed Classification On An Atm Ima Pseudowire
Specify the ATM IMA interface on which to include the forwarding class: [edit class-of-service] user@host# edit interfaces at-fpc/pic/port Configure the logical unit: [edit class-of-service interfaces at-fpc/pic/port] user@host# edit unit logical-unit-number Copyright © 2017, Juniper Networks, Inc. -
Page 956: Example: Configuring Fixed Classification On An Atm Ima Pseudowire
In this example, the configured forwarding class is applied to all packets received on fc-1 the ingress logical interface . The fixed classification classifies all traffic at-0/0/16 unit 0 on the logical interface unit zero (0) to queue-num 1 Copyright © 2017, Juniper Networks, Inc. - Page 957 [edit class-of-service] user@host# edit interfaces at-0/0/16 Configure the logical interface: [edit class-of-service interfaces at-0/0/16 ] user@host# edit unit 0 Apply the previously configured forwarding class to the logical interface: [edit class-of-service interfaces at-0/0/16 unit 0] Copyright © 2017, Juniper Networks, Inc.
- Page 958 Documentation Configuring Fixed Classification on an ATM IMA Pseudowire on page 897 Example: Configuring Policing on an ATM IMA Pseudowire on page 915 Example: Configuring Shaping on an ATM IMA Pseudowire on page 902 Copyright © 2017, Juniper Networks, Inc.
-
Page 959: Configuring Shaping On An Atm Ima Pseudowire
), non-real-time variable bit rate ( ), or real-time nrtvbr variable bit rate ( ). All service traffic categories must include the rtvbr peak-rate cdvt statements for the configuration to work. The peak-rate statement limits the Copyright © 2017, Juniper Networks, Inc. -
Page 960: Example: Configuring Shaping On An Atm Ima Pseudowire
Example: Configuring Shaping on an ATM IMA Pseudowire The following example shows the configuration of shaping on an ATM IMA pseudowire. On ACX Series routers, the ATM shaper is applied on the egress logical (unit) interface. Copyright © 2017, Juniper Networks, Inc. - Page 961 CLI at the [ ] hierarchy edit level: set class-of-service traffic-control-profiles profile-1 atm-service rtvbr set class-of-service traffic-control-profiles profile-1 peak-rate 5k set class-of-service traffic-control-profiles profile-1 sustained-rate 3k set class-of-service traffic-control-profiles profile-1 max-burst-size 400 Copyright © 2017, Juniper Networks, Inc.
- Page 962 Define the maximum number of cells that a burst of traffic can contain, from 1 through 4000 cells: [edit class-of-service traffic-control-profiles profile-1] user@host# set max-burst-size 400 Specify the second traffic control profile: [edit class-of-service traffic-control-profiles profile-2] user@host# edit traffic-control-profiles profile-2 Copyright © 2017, Juniper Networks, Inc.
- Page 963 [edit class-of-service traceoptions] user@host# set file cos Define the maximum size of the file: [edit class-of-service traceoptions] user@host# set file size 1000000000 Specify the tracing operation to perform: [edit class-of-service traceoptions] user@host# set flag all Copyright © 2017, Juniper Networks, Inc.
- Page 964 Documentation Configuring Shaping on an ATM IMA Pseudowire on page 901 Example: Configuring Fixed Classification on an ATM IMA Pseudowire on page 898 Example: Configuring Policing on an ATM IMA Pseudowire on page 915 Copyright © 2017, Juniper Networks, Inc.
-
Page 965: Understanding Red Drop Profiles Overview
Rather, packets are dropped after they reach the head of the queue. To configure a drop profile, include the statement at the drop-profiles [edit hierarchy level: class-of-service] [edit class-of-service] drop-profiles { profile-name { Copyright © 2017, Juniper Networks, Inc. -
Page 966: Controlling Network Access Using Traffic Policing Overview
Traffic policers are instantiated on a per-PIC basis. Traffic policing does not work when the traffic for one local policy decision function (L-PDF) subscriber is distributed over multiple Multiservices PICs in an AMS group. Copyright © 2017, Juniper Networks, Inc. -
Page 967: Traffic Limits
(bursting at full rate) or it is not. The black lines represent periods of data transmission and the white space represents periods of silence when the token bucket can replenish. Copyright © 2017, Juniper Networks, Inc. -
Page 968: Traffic Color Marking
Policer actions are implicit or explicit and vary by policer type. The term Implicit means that Junos assigns the loss-priority automatically. Table 52 on page 911 describes the policer actions. Copyright © 2017, Juniper Networks, Inc. -
Page 969: Forwarding Classes And Plp Levels
CoS default IP precedence classification at all logical interfaces or by any configured behavior aggregate (BA) classifier that is explicitly mapped to a logical interface. Copyright © 2017, Juniper Networks, Inc. -
Page 970: Policer Application To Traffic
On ACX Series routers, the ATM policer is attached to the ingress path of the ATM IMA interface, making it an input policer configured at the [ edit firewall ] hierarchy level. This input policer is then applied to an ATM IMA logical interface. The ATM IMA logical interface Copyright © 2017, Juniper Networks, Inc. -
Page 971: Configuring An Input Policer
Apply limits to the traffic flow by configuring the cell delay variation tolerance ( cdvt from 1 microsecond through 1,800,000,000 microseconds: Copyright © 2017, Juniper Networks, Inc. -
Page 972: Configuring The Atm Ima Interface
To create the ATM IMA interface on which to apply the ATM policer: In configuration mode, go to the hierarchy level: [edit interfaces] [edit] user@host# edit interfaces Define the ATM interface: [edit interfaces] user@host# edit at-fpc/pic/port Copyright © 2017, Juniper Networks, Inc. -
Page 973: Example: Configuring Policing On An Atm Ima Pseudowire
This example uses the following hardware and software components: ACX Series router Junos OS Release 12.2 or later A previously configured ATM IMA pseudowire. For steps to configure an ATM IMA pseudowire, see “Configuring Inverse Multiplexing for ATM (IMA)” on page 185. Copyright © 2017, Juniper Networks, Inc. - Page 974 900001 set firewall atm-policer policer-1 policing-action discard-tag set firewall atm-policer policer-2 logical-interface-policer set firewall atm-policer policer-2 atm-service nrtvbr set firewall atm-policer policer-2 peak-rate 1800 set firewall atm-policer policer-2 sustained-rate 1500 Copyright © 2017, Juniper Networks, Inc.
- Page 975 999991 user@host# set policing-action discard Specify the parameters for policer-3 [edit firewall atm-policer policer-3] user@host# set logical-interface-policer user@host# set atm-service cbr user@host# set peak-rate 2k user@host# set cdvt 999991 user@host# set policing-action count Copyright © 2017, Juniper Networks, Inc.
- Page 976 From configuration mode, confirm your configuration by entering the command. If show the output does not display the intended configuration, repeat the configuration instructions in this example to correct it. [edit firewall] user@host# show Copyright © 2017, Juniper Networks, Inc.
- Page 977 Documentation Configuring Policing on an ATM IMA Pseudowire on page 912 Example: Configuring Fixed Classification on an ATM IMA Pseudowire on page 898 Example: Configuring Shaping on an ATM IMA Pseudowire on page 902 Copyright © 2017, Juniper Networks, Inc.
-
Page 978: Hierarchical Policers On Acx Series Routers Overview
Color mode (CM) can contain only one of two possible values, color-blind or color-aware. In color-aware mode, the local router can assign a higher packet loss priority, but cannot assign a lower packet loss priority. In color-blind mode, the local Copyright © 2017, Juniper Networks, Inc. -
Page 979: Guidelines For Configuring Hierarchical Policers On Acx Routers
A maximum of approximately 62 policers when no other family-bridge filters with the count action for the firewall filter. Along with 62 policers, you can configure up to 62 family-bridge filters without the count action for the firewall filter. Copyright © 2017, Juniper Networks, Inc. - Page 980 Hierarchical Policer Modes on page 923 Processing of Hierarchical Policers on page 928 Actions Performed for Hierarchical Policers on page 929 Configuring Aggregate Parent and Child Policers on ACX Series Routers on page 931 Copyright © 2017, Juniper Networks, Inc.
-
Page 981: Hierarchical Policer Modes
When two flows, flow 1 and flow 2, transmit traffic at a rate that exceeds the configured PIR values, then the share of the parent PIR is adjusted to permit traffic for the child policers based on their priorities defined for the flows, while the bandwidth is maintained. Copyright © 2017, Juniper Networks, Inc. -
Page 982: Peak Mode
Consider a sample scenario in which the total maximum allowed rate (PIR) for a user is 100 Mbps. A total of four services or applications called expedited forwarding (EF), Gold, Silver and Bronze are defined for the peak or bandwidth-restriction mode of the policer Copyright © 2017, Juniper Networks, Inc. - Page 983 PIR for the member flows. The following table describes the different scenarios of color-coding for micro-flow and macro-flow policers and the resultant color or priority that is assigned: Micro-Color Macro-Color Result Green Green Green Green Green Copyright © 2017, Juniper Networks, Inc.
-
Page 984: Hybrid Mode
Flow-1 has 0 Mbps of green traffic and has less than or equal to 5 Mbps of yellow traffic. Flow-2 has 10 Mbps of green traffic and has greater than or equal to 10 Mbps of yellow traffic. Copyright © 2017, Juniper Networks, Inc. - Page 985 Result Green Green Green Green Green Yellow Green Yellow Yellow Green Related Hierarchical Policers on ACX Series Routers Overview on page 920 Documentation Guidelines for Configuring Hierarchical Policers on ACX Routers on page 921 Copyright © 2017, Juniper Networks, Inc.
-
Page 986: Processing Of Hierarchical Policers
Guidelines for Configuring Hierarchical Policers on ACX Routers on page 921 Hierarchical Policer Modes on page 923 Actions Performed for Hierarchical Policers on page 929 Configuring Aggregate Parent and Child Policers on ACX Series Routers on page 931 Copyright © 2017, Juniper Networks, Inc. -
Page 987: Actions Performed For Hierarchical Policers
Global—Shares the same parent policer across all the child policer instances in the system. Physical interface-specific—Shares the same parent policer across all the child policer instances of a certain physical interface. This mode is not supported on ACX routers. Copyright © 2017, Juniper Networks, Inc. - Page 988 IFL1. The third P1 contains P1, T3, F2, IFF2, applied to IFL1. The last P1 contains P1, T4, F2, IFF2, applied to IFL1. Related Hierarchical Policers on ACX Series Routers Overview on page 920 Documentation Guidelines for Configuring Hierarchical Policers on ACX Routers on page 921 Hierarchical Policer Modes on page 923 Copyright © 2017, Juniper Networks, Inc.
-
Page 989: Configuring Aggregate Parent And Child Policers On Acx Series Routers
Packet Forwarding Engine statement. aggregate-sharing-mode user@host# set policer mi_pol_2 if-exceeding bandwidth-limit 30m user@host# set policer mi_pol_2 if-exceeding burst-size-limit 30k user@host# set policer mi_pol_2 if-exceeding aggregate-policing policer mi_pol_x aggregate-sharing-mode peak; user@host# set policer mi_pol_2 then discard Copyright © 2017, Juniper Networks, Inc. - Page 990 RESULTS ------- STATUS = OK Related Hierarchical Policers on ACX Series Routers Overview on page 920 Documentation Guidelines for Configuring Hierarchical Policers on ACX Routers on page 921 Hierarchical Policer Modes on page 923 Copyright © 2017, Juniper Networks, Inc.
-
Page 991: Hierarchical Class Of Service Overview
Hierarchical schedulers are used to apply multiple levels of scheduling and shaping with each level applied to different classifications such as forwarding equivalence class, VLAN, and physical interface (port) as shown in Figure 58 on page 934. Copyright © 2017, Juniper Networks, Inc. -
Page 992: Figure 58: Hierarchical Scheduling Architecture
CoS Features of the Router Hardware, PIC, MIC, and MPC Interface Families How Schedulers Define Output Queue Properties Subscriber Access Network Overview CoS for Subscriber Access Overview Hierarchical Class of Service for Subscriber Management Overview Copyright © 2017, Juniper Networks, Inc. - Page 993 The fine-grained queuing MPCs and MICs have a certain granularity with respect to the shaping and delay buffer values. The values used are not necessarily exactly the values configured. To learn more about platform support for HCoS, use the Juniper Networks Feature Explorer http://pathfinder.juniper.net/feature-explorer/ ). In the Feature Explorer, search on hierarchical schedulers.
-
Page 994: Hierarchical Class Of Service In Acx5000
3 levels (physical interface, logical interface, and queues) of scheduling. You can enable hierarchical scheduling by including the hierarchical-scheduler command under the interfaces hierarchy as shown below: [edit] interfaces ge-0/0/1 { hierarchical-scheduler; Copyright © 2017, Juniper Networks, Inc. -
Page 995: Traffic Control Profiles
The following is a sample scheduler configuration: [edit class-of-service schedulers] sched-ifl0-q0 { priority low; transmit-rate 20m; buffer-size temporal 100ms; drop-profile loss-priority low dp-low; drop-profile loss-priority high dp-high; sched-ifl-q1 { priority strict-high; shaping-rate 20m; Copyright © 2017, Juniper Networks, Inc. -
Page 996: Drop Profiles
Although a shaping rate can be applied directly to the physical interface, hierarchical schedulers must use a traffic control profile to hold this parameter. [edit class-of-service interfaces] ge-1/0/0 { output-traffic-control-profile tcp-500m-shaping-rate; unit 0 { output-traffic-control-profile tcp-vlan0; Copyright © 2017, Juniper Networks, Inc. -
Page 997: Subscriber Services
{ description “NNI IFL”; unit 0 { family inet { address 100.1.1.1/24; family mpls; ge-0/0/1 { description “UNI IFL”; hierarchical-scheduler; flexible-vlan-tagging; unit 0 { vlan-id 100; family inet { address 20.20.0.1/24; unit 1 { Copyright © 2017, Juniper Networks, Inc. -
Page 998: Configuring Hierarchical Class Of Service For Layer 2 Vpn (Ethernet Pseudowires) Service
The following is a sample to configure the UNI logical interface on the PE router providing the Layer 2 VPN service based on Ethernet pseudowire: [edit interfaces] ge-0/0/1 { hierarchical-scheduler; vlan-tagging; unit 0 { encapsulation vlan-ccc; vlan-id 0; unit 1 { encapsulation vlan-ccc; vlan-id 1; Copyright © 2017, Juniper Networks, Inc. -
Page 999: Configuring Hierarchical Class Of Service For Vpls Service
0 { encapsulation vlan-vpls; vlan-id 0; unit 1 { encapsulation vlan-vpls; vlan-id 1; unit 2 { encapsulation vlan-vpls; vlan-id 2; unit 3 { encapsulation vlan-vpls; vlan-id 3; unit 4 { encapsulation vlan-vpls; vlan-id 4; Copyright © 2017, Juniper Networks, Inc. -
Page 1000: Verifying The Hierarchical Class Of Service Configurations
1119456 7321 pps Bytes 595127702 31122568 bps Transmitted: Packets 274601 1500 pps Bytes 140595712 6144000 bps Tail-dropped packets : Not Available RL-dropped packets 0 pps RL-dropped bytes 0 bps Total-dropped packets: 844855 5821 pps Copyright © 2017, Juniper Networks, Inc.
Need help?
Do you have a question about the ACX1000 and is the answer not in the manual?
Questions and answers