Table of Contents
Advertisement
Quick Links
ACX2000 and ACX2100 Universal Metro
Routers Quick Start
January 2015
Part Number: 530-062128
Revision 01
This document describes how to install the Juniper Networks
Router.
Contents
All manuals and user guides at all-guides.com
®
ACX2000 and ACX2100 Universal Metro
1
Advertisement
Table of Contents

Related Manuals for Juniper ACX Series


Summary of Contents for Juniper ACX Series
-
Page 1: Table Of Contents
Tools Required to Connect External Devices and Cables | 14 Connect the ACX Series Router to a Network for Out-of-Band Management | 14 Connect the ACX Series Router to a Management Console or Auxiliary Device | 15 Connect Network Interface Cables to the ACX Series Router | 15... - Page 2 All manuals and user guides at all-guides.com Configure System Attributes | 22 Commit the Configuration | 23 Safety Warnings | 25 Compliance Statements for NEBS | 26 Compliance Statements for EMC Requirements | 27 Canada | 27 European Community | 27 Israel | 27 Japan | 28 United States | 28...
-
Page 3: Acx2000 And Acx2100 Quick Start Description
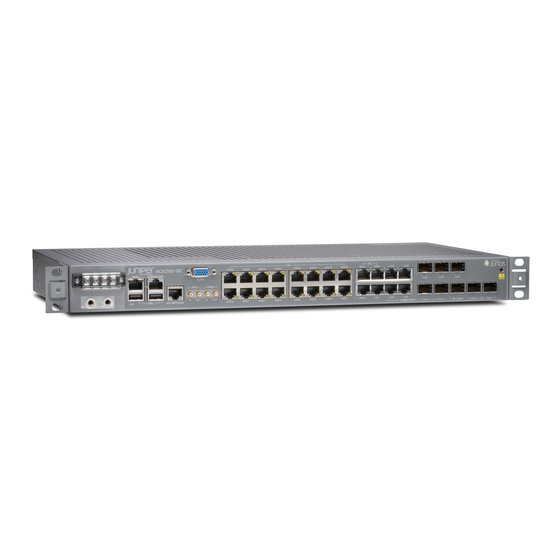
The ACX Universal Metro Routers are Ethernet-optimized mobile backhaul routers that provide both switching and carrier-class Ethernet routing. The ACX Series routers enable a wide range of business and residential applications and services, including microwave cell site aggregation, MSO mobile backhaul service cell site deployment, and service provider or operator cell site deployment. - Page 4 All manuals and user guides at all-guides.com Figure 1: Front Panel of the ACX2000 Router T1/E1 ACX2000 0/0/8 0/0/9 0/0/10 0/0/11 0/0/12 0/0/13 0/0/14 0/0/15 0/1/4 0/1/5 0/1/6 0/1/7 POE MGMT CONSOLE/AUX ALARM 1PPS 10MHz EXT REF CLK IN 0/0/0 0/0/1 0/0/2 0/0/3...
- Page 5 All manuals and user guides at all-guides.com Figure 3: Front Panel of the DC-Powered ACX2100 Router T1/E1 0/0/8 0/0/9 0/0/10 0/0/11 0/0/12 0/0/13 0/0/14 0/0/15 1/0/2 1/0/3 1/1/2 1/1/3 ACX2100 MGMT CONSOLE/AUX ALARM 1/1/2 1/1/3 1/2/1 1PPS 10MHz EXT REF CLK IN 0/0/0 0/0/1 0/0/2...
-
Page 6: Step 1: Prepare The Site For Installation
All manuals and user guides at all-guides.com Step 1: Prepare the Site for Installation Prepare your site for installation by observing the following guidelines: You can install the router in a four-post rack or cabinet or an open-frame rack. The rack rails must be spaced widely enough to accommodate the chassis's external dimensions: 1.7 in. (4.4 cm) high, 9.4 in. - Page 7 All manuals and user guides at all-guides.com Figure 4: ACX Series Rack Clearance and Chassis Dimensions 2.16" (5.5 cm) .75" (2 cm) clearance required clearance required 3" (7.6 cm) for the cables for free airflow 9.4" (24 cm) 19.2" 17.5"...
-
Page 8: Step 2: Install The Router
Tools Required to Install the Router in a Rack | 8 Install the Mounting Brackets | 8 Install the ACX Series Router in the Rack | 9 Tools Required to Install the Router in a Rack To install the router in a rack, you need the following tools:... -
Page 9: Install The Acx Series Router In The Rack
All manuals and user guides at all-guides.com Figure 5: Installing the Mounting Brackets to the Front of the ACX Series Router Figure 6: Installing the Mounting Brackets to the Rear of the ACX Series Router Install the ACX Series Router in the Rack The router can be installed horizontally in a rack or cabinet. - Page 10 All manuals and user guides at all-guides.com 4. Have the second person install a mounting screw into each of the open mounting holes aligned with the rack, starting from the bottom. 5. Visually inspect the alignment of the router. If the router is installed properly in the rack, all the mounting screws on one side of the rack should be aligned with the mounting screws on the opposite side, and the router should be level.
-
Page 11: Step 3: Ground The Acx2000 And Acx2100 Router
All manuals and user guides at all-guides.com Step 3: Ground the ACX2000 and ACX2100 Router IN THIS SECTION Tools Required to Ground the ACX Router | 11 Connect the Grounding Cable | 11 You must ground the router before connecting power. Tools Required to Ground the ACX Router To ground the router, you need the following tools: Phillips (+) screwdriver, number 2... - Page 12 All manuals and user guides at all-guides.com 4. Connect the grounding cable to a proper earth ground. 5. Detach the ESD grounding strap from the site ESD grounding point. 6. Wrap and fasten one end of the ESD grounding strap around your bare wrist, and connect the other end of the strap to the ESD point on the chassis.
- Page 13 All manuals and user guides at all-guides.com Figure 8: Grounding Points on the Router Grounding lug SAE 10-32 screw and washer — —...
-
Page 14: Step 4: Connect External Devices And Cables
Tools Required to Connect External Devices and Cables | 14 Connect the ACX Series Router to a Network for Out-of-Band Management | 14 Connect the ACX Series Router to a Management Console or Auxiliary Device | 15 Connect Network Interface Cables to the ACX Series Router | 15... -
Page 15: Connect The Acx Series Router To A Management Console Or Auxiliary Device
All manuals and user guides at all-guides.com Connect the ACX Series Router to a Management Console or Auxiliary Device 1. Turn off the power to the console or auxiliary device. 2. Plug the RJ-45 end of the serial cable (Figure 9 on page 14 shows the connector) into the CONSOLE/AUX port on the front panel. - Page 16 All manuals and user guides at all-guides.com CAUTION: Avoid bending a fiber-optic cable beyond its minimum bend radius. An arc smaller than a few inches in diameter can damage the cable and cause problems that are difficult to diagnose. CAUTION: Do not let fiber-optic cables hang free from the connector.
-
Page 17: Step 5: Connect Power To The Acx Series Router
All manuals and user guides at all-guides.com Step 5: Connect Power to the ACX Series Router IN THIS SECTION Connect AC Power to an AC-Powered ACX2100 Series Router | 17 Connect DC Power to a DC-Powered ACX2000 or ACX2100 Router | 18 Depending on your configuration, your router uses either AC or DC power supplies. -
Page 18: Connect Dc Power To A Dc-Powered Acx2000 Or Acx2100 Router
DC power source cables, minimum 14 AWG or as required by local code (not provided) Ring lugs, Molex 190700067 or equivalent (not provided) The DC power supply has four terminals on the front panel, covered by a clear plastic cover. Table 1: ACX Series DC Power System Input Voltage Nominal Voltage Specification Operating range: +18 to +30 VDC –48... - Page 19 All manuals and user guides at all-guides.com 3. Remove the clear plastic cover protecting the terminal on the faceplate. 4. Verify that the DC power cables are correctly labeled before making connections to the power supply. In a typical power distribution scheme where the return is connected to chassis ground at the battery plant, you can use a multimeter to verify the resistance of the –48V and return DC cables to chassis ground: For –48V and –60V:...
- Page 20 All manuals and user guides at all-guides.com CAUTION: The maximum torque rating of the terminal screws on the DC power supply is 9 lb-in. (1.02 Nm). The terminal screws may be damaged if excessive torque is applied. Use only a torque-controlled driver to tighten screws on the DC power supply terminals.
-
Page 21: Step 6: Perform Initial Software Configuration
All manuals and user guides at all-guides.com Step 6: Perform Initial Software Configuration IN THIS SECTION Enter Configuration Mode | 21 Configure User Accounts and Passwords | 22 Configure System Attributes | 22 Commit the Configuration | 23 This procedure connects the router to the network but does not enable it to forward traffic. For complete information about configuring the router to forward traffic, including examples, see the Junos OS configuration guides. -
Page 22: Configure User Accounts And Passwords
All manuals and user guides at all-guides.com Configure User Accounts and Passwords For information about using an encrypted password or an SSH public key string (DSA or RSA), see Configuring the Root Password and user. 1. Add a password to the root administration user account. Enter a cleartext password. [edit] root@host# set system root-authentication plain-text-password New password: password... -
Page 23: Commit The Configuration
All manuals and user guides at all-guides.com 3. Configure the IP address and prefix length for the router’s Ethernet interface. [edit] root@# set interfaces fxp0 unit 0 family inet address address/prefix-length 4. Configure the IP address of a backup router, which is used only while the routing protocol is not running. [edit] root@# set system backup-router address 5. - Page 24 All manuals and user guides at all-guides.com domain-name domain-name; backup-router address; root-authentication { authentication-method (password | public-key); name-server { address; interfaces { fxp0 { unit 0 { family inet { address address/prefix-length; 2. Commit the configuration to activate it on the router. [edit] root@# commit 3.
-
Page 25: Safety Warnings
For a complete list of warnings for this router, including translations, see the ACX2000 and ACX2100 Universal Access Routers Hardware Guide https://www.juniper.net/documentation/. WARNING: The intrabuilding port(s) of the router is suitable for connection to intrabuilding or unexposed wiring or cabling only. The intrabuilding port(s) of the router MUST NOT be metallically connected to interfaces that connect to the OSP or its wiring. -
Page 26: Compliance Statements For Nebs
All manuals and user guides at all-guides.com If the rack is provided with stabilizing devices, install the stabilizers before mounting or servicing the router in the rack. When removing or installing an electrical component, always place it component-side up on a flat antistatic surface or in an electrostatic bag. -
Page 27: Compliance Statements For Emc Requirements
All manuals and user guides at all-guides.com Compliance Statements for EMC Requirements IN THIS SECTION Canada | 27 European Community | 27 Israel | 27 Japan | 28 United States | 28 Canada CAN ICES-3 (A)/NMB-3(A) European Community This is a Class A product. In a domestic environment, this product might cause radio interference in which case the user might be required to take adequate measures. -
Page 28: Japan
All manuals and user guides at all-guides.com Japan The preceding translates as follows: This is a Class A product based on the standard of the Voluntary Control Council for Interference by Information Technology Equipment (VCCI). If this product is used near a radio or television receiver in a domestic environment, it might cause radio interference. -
Page 29: Junos Os Documentation And Release Notes
JTAC Hours of Operation —The JTAC centers have resources available 24 hours a day, 7 days a week, 365 days a year. Self-Help Online Tools and Resources For quick and easy problem resolution, Juniper Networks has designed an online self-service portal called the Customer Support Center (CSC) that provides you with the following features: Find CSC offerings: https://www.juniper.net/customers/support/... -
Page 30: Creating A Service Request With Jtac
Copyright © 2019 Juniper Networks, Inc. All rights reserved. Juniper Networks, the Juniper Networks logo, Juniper, and Junos are registered trademarks of Juniper Networks, Inc. and/or its affiliates in the United States and other countries. All other trademarks may be property of their respective owners.
Need help?
Do you have a question about the ACX Series and is the answer not in the manual?
Questions and answers