Juniper ACX2000 Quick Start Manual
Universal access routers
Hide thumbs
Also See for ACX2000:
- Hardware manual (190 pages) ,
- Quick start manual (30 pages) ,
- Configuration manual (3270 pages)
Table of Contents
Advertisement
Quick Links
ACX2000 Universal Access Routers
Quick Start
June 2012
Part Number: 530-042107
Revision 01
Contents
Copyright © 2016, Juniper Networks, Inc.
This document describes how to install the Juniper Networks ACX2000 Universal Access
Router.
ACX2000 Quick Start Description . . . . . . . . . . . . . . . . . . . . . . . . . . . . . . . . . . . . . . . 3
Step 1: Prepare the Site for ACX2000 Installation . . . . . . . . . . . . . . . . . . . . . . . . . . 4
Step 2: Install the Router . . . . . . . . . . . . . . . . . . . . . . . . . . . . . . . . . . . . . . . . . . . . . . 6
Tools Required to Install the Router in a Rack . . . . . . . . . . . . . . . . . . . . . . . . . . 6
Install the Mounting Brackets . . . . . . . . . . . . . . . . . . . . . . . . . . . . . . . . . . . . . . . 6
Install the ACX2000 Router in the Rack . . . . . . . . . . . . . . . . . . . . . . . . . . . . . . . 7
Step 3: Ground the ACX2000 Router . . . . . . . . . . . . . . . . . . . . . . . . . . . . . . . . . . . . 8
Tools Required to Ground the ACX2000 Router . . . . . . . . . . . . . . . . . . . . . . . . 8
Connect the Grounding Cable . . . . . . . . . . . . . . . . . . . . . . . . . . . . . . . . . . . . . . 8
Step 4: Connect External Devices and Cables . . . . . . . . . . . . . . . . . . . . . . . . . . . . . 10
Tools Required to Connect External Devices and Cables . . . . . . . . . . . . . . . . . 10
Management . . . . . . . . . . . . . . . . . . . . . . . . . . . . . . . . . . . . . . . . . . . . . . . 10
Device . . . . . . . . . . . . . . . . . . . . . . . . . . . . . . . . . . . . . . . . . . . . . . . . . . . . . . 11
Connect Network Interface Cables to the ACX2000 Router . . . . . . . . . . . . . . 11
Step 5: Connect Power to the ACX2000 Router . . . . . . . . . . . . . . . . . . . . . . . . . . . 12
Tools Required to Connect Power to the ACX2000 Router . . . . . . . . . . . . . . . 12
Connect Power Cables . . . . . . . . . . . . . . . . . . . . . . . . . . . . . . . . . . . . . . . . . . . . 12
Step 6: Perform Initial Software Configuration . . . . . . . . . . . . . . . . . . . . . . . . . . . . 15
Enter Configuration Mode . . . . . . . . . . . . . . . . . . . . . . . . . . . . . . . . . . . . . . . . . 15
Configure User Accounts and Passwords . . . . . . . . . . . . . . . . . . . . . . . . . . . . . 15
Configure System Attributes . . . . . . . . . . . . . . . . . . . . . . . . . . . . . . . . . . . . . . . 16
Commit the Configuration . . . . . . . . . . . . . . . . . . . . . . . . . . . . . . . . . . . . . . . . . 16
Safety Warnings . . . . . . . . . . . . . . . . . . . . . . . . . . . . . . . . . . . . . . . . . . . . . . . . . . . . 18
Compliance Statements for NEBS . . . . . . . . . . . . . . . . . . . . . . . . . . . . . . . . . . . . . . 19
1
Advertisement
Table of Contents

Related Manuals for Juniper ACX2000


Summary of Contents for Juniper ACX2000
-
Page 1: Table Of Contents
Install the Mounting Brackets ........6 Install the ACX2000 Router in the Rack ....... 7 Step 3: Ground the ACX2000 Router . - Page 2 ACX2000 Universal Access Routers Quick Start Compliance Statements for EMC Requirements for the ACX2000 Router ..19 Canada ............19 European Community .
-
Page 3: Acx2000 Quick Start Description
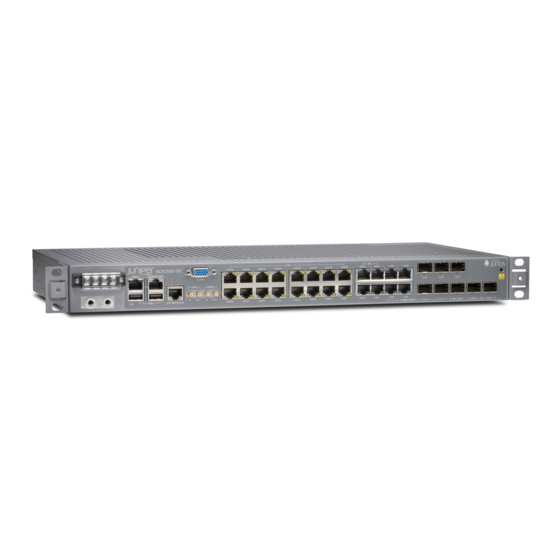
Engine takes care of both ingress and egress packet forwarding. The ACX2000 router is a compact gateway router that is one rack unit (U) tall. Several gateway routers can be stacked in a single floor-to-ceiling rack for increased port density per unit of floor space. -
Page 4: Step 1: Prepare The Site For Acx2000 Installation
19.2 in. (48.7 cm). Two people are required to install the ACX2000 router. The rack must be strong enough to support the weight of the fully configured router, up to 7 lb (3.2 kg). - Page 5 Step 1: Prepare the Site for ACX2000 Installation Figure 1: ACX2000 Rack Clearance and Chassis Dimensions 2.16" (5.5 cm) .75" (2 cm) clearance required clearance required 3" (7.6 cm) for the cables for free airflow 9.4" (24 cm) 19.2" 17.5"...
-
Page 6: Step 2: Install The Router
Tighten the four screws completely. Repeat the procedure for the other bracket. Figure 2: Install the Mounting Brackets to the Front of the ACX2000 Router Figure 3: Install the Mounting Brackets to the Rear of the ACX2000 Router Copyright © 2016, Juniper Networks, Inc. -
Page 7: Install The Acx2000 Router In The Rack
The router can be installed horizontally in a rack or cabinet. NOTE: For additional installation options, contact JTAC. Two people are required to install the ACX2000 router. The chassis weighs approximately 7 lb (3.2 kg). To install the chassis (see Figure 4 on page Ensure that the rack is in its permanent location and is secured to the building. -
Page 8: Step 3: Ground The Acx2000 Router
ACX2000 Universal Access Routers Quick Start Step 3: Ground the ACX2000 Router You must ground the router before connecting power. Tools Required to Ground the ACX2000 Router on page 8 Connect the Grounding Cable on page 8 Tools Required to Ground the ACX2000 Router... - Page 9 Connect the Grounding Cable Figure 5: Grounding Points on the ACX2000 Router 1— Grounding lug 2— SAE 10-32 screw and washer Copyright © 2016, Juniper Networks, Inc.
-
Page 10: Step 4: Connect External Devices And Cables
Grounding terminal Tools Required to Connect External Devices and Cables on page 10 Connect the ACX2000 Router to a Network for Out-of-Band Management on page 10 Connect the ACX2000 Gateway to a Management Console or Auxiliary Device on page 11... -
Page 11: Connect Network Interface Cables To The Acx2000 Router
Connect the ACX2000 Gateway to a Management Console or Auxiliary Device Plug the other end of the cable into the network device. Connect the ACX2000 Gateway to a Management Console or Auxiliary Device Turn off the power to the console or auxiliary device. -
Page 12: Step 5: Connect Power To The Acx2000 Router
Step 5: Connect Power to the ACX2000 Router WARNING: You must ground the router before connecting the power cables. Tools Required to Connect Power to the ACX2000 Router on page 12 Connect Power Cables on page 12 Tools Required to Connect Power to the ACX2000 Router... - Page 13 Observe the system LED on front of the router. If the DC power cable is correctly installed and functioning normally, the system LED lights green steadily. If the status LED indicates that the power supply is not functioning normally, repeat the installation and cabling procedures. Copyright © 2016, Juniper Networks, Inc.
- Page 14 ACX2000 Universal Access Routers Quick Start Figure 8: Connecting DC Power to the Router Copyright © 2016, Juniper Networks, Inc.
-
Page 15: Step 6: Perform Initial Software Configuration
Create a management console user account. [edit] root# set system login user user-name authentication plain-text-password New Password: password Retype new password: password Set the user account class to super-user [edit] root@# set system login user user-name class super-user Copyright © 2016, Juniper Networks, Inc. -
Page 16: Configure System Attributes
ACX2000 Universal Access Routers Quick Start Configure System Attributes Configure the name of the router. If the name includes spaces, enclose the name in quotation marks (“ ”). [edit] root@# set system host-name host-name Configure the router’s domain name. [edit] root@# set system domain-name domain-name Configure the IP address and prefix length for the router’s Ethernet interface. - Page 17 (Optional) Configure additional properties by adding the necessary configuration statements. Then commit the changes to activate them on the router. [edit] root@host# commit When you have finished configuring the router, exit configuration mode. [edit] root@host# exit root@host> Copyright © 2016, Juniper Networks, Inc.
-
Page 18: Safety Warnings
ACX2000 Universal Access Routers Quick Start Safety Warnings WARNING: See installation instructions before connecting the router. This is a summary of safety warnings. For a complete list of warnings for this router, including translations, see the ACX2000 and ACX2100 Universal Access Routers Hardware Guide http://www.juniper.net/techpubs/... -
Page 19: Compliance Statements For Nebs
Code (NEC) applies. The battery return connection is to be treated as an isolated DC return (i.e., DC-I), as defined in GR-1089-CORE. Compliance Statements for EMC Requirements for the ACX2000 Router Canada on page 19 European Community on page 19... - Page 20 ACX2000 Universal Access Routers Quick Start Figure 9: ACX2000 Declaration of Conformity Copyright © 2016, Juniper Networks, Inc.
-
Page 21: Junos Os Documentation And Release Notes
7 days a week, 365 days a year. Self-Help Online Tools and Resources For quick and easy problem resolution, Juniper Networks has designed an online self-service portal called the Customer Support Center (CSC) that provides you with the following features: Find CSC offerings: http://www.juniper.net/customers/support/... -
Page 22: Opening A Case With Jtac
Juniper Networks, Junos, Steel-Belted Radius, NetScreen, and ScreenOS are registered trademarks of Juniper Networks, Inc. in the United States and other countries. The Juniper Networks Logo, the Junos logo, and JunosE are trademarks of Juniper Networks, Inc. All other trademarks, service marks, registered trademarks, or registered service marks are the property of their respective owners.
Need help?
Do you have a question about the ACX2000 and is the answer not in the manual?
Questions and answers