Juniper ACX1000 Quick Start Manual
Universal metro routers
Hide thumbs
Also See for ACX1000:
- Configuration manual (3270 pages) ,
- User manual (216 pages) ,
- Hardware manual (204 pages)

Subscribe to Our Youtube Channel
Related Manuals for Juniper ACX1000


Summary of Contents for Juniper ACX1000
- Page 1 ACX1000 and ACX1100 Universal Metro Routers Quick Start Published RELEASE 2023-10-19...
-
Page 2: Table Of Contents
Step 5: Connect Power to the ACX Series Router Connect AC Power to an AC-Powered ACX1100 Router | 12 Connect DC Power to a DC-Powered ACX1000 or ACX1100 Router | 13 Step 6: Perform Initial Software Configuration Enter Configuration Mode | 16... - Page 3 Safety Warnings Compliance Statements for Data Center Compliance Statements for EMC Requirements...
-
Page 4: Acx1000 And Acx1100 Routers Quick Start Description
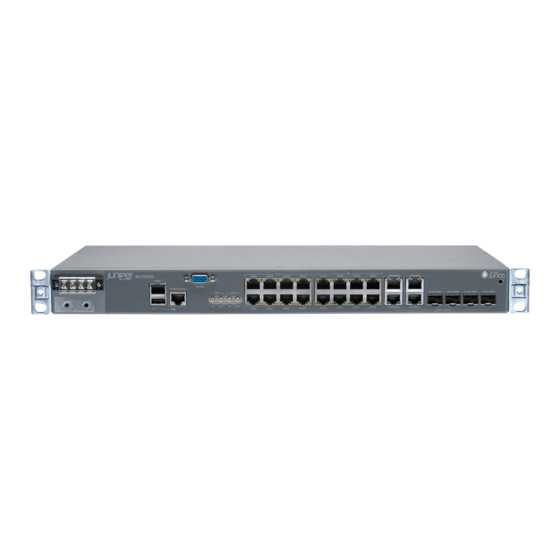
The ACX1000 and ACX1100 routers contain twelve Gigabit Ethernet ports, eight of which are RJ-45 ports. The ports labeled COMBO PORTS provide an additional four RJ-45 ports or four Gigabit Ethernet SFP ports. - Page 5 Figure 1: Front Panel of the ACX1000 Router DC terminals ESD point — — Management Ethernet port Combination Gigabit Ethernet RJ-45 and SFP — — ports Console or auxiliary port 1-PPS and 10-MHz GPS input and output — — Alarm input and output contacts System (SYS) LED —...
-
Page 6: Step 1: Prepare The Site For Installation
Figure 3: Front Panel of the DC-Powered ACX1100 Router DC terminals Combination Gigabit Ethernet SFP ports — — Management Ethernet port 1-PPS and 10-MHz input and output — — Alarm input and output contacts Console or auxiliary port — — Gigabit Ethernet (GE) ports USB port —... - Page 7 • Ensure that the cabinet allows the chassis hot exhaust air to exit from the cabinet without recirculating into the router. • When deploying the router in environments where the router may operate between 131° F (55° C) and 149° F (65° C), allow a 1 rack unit (U) gap above and below the router. •...
-
Page 8: Step 2: Install The Router
Step 2: Install the Router IN THIS SECTION Tools Required to Install the Router in a Rack | 5 Install the Mounting Brackets | 5 Install the ACX Series Router in the Rack | 6 Tools Required to Install the Router in a Rack To install the router in a rack, you need the following tools: •... -
Page 9: Install The Acx Series Router In The Rack
Figure 5: Installing the Mounting Brackets to the Front of the ACX Series Router Figure 6: Installing the Mounting Brackets to the Rear of the ACX Series Router Install the ACX Series Router in the Rack The router can be installed horizontally in a rack or cabinet. NOTE: For additional installation options, contact JTAC. -
Page 10: Step 3: Ground The Acx1000 And Acx1100 Router
Figure 7: Installing the Front-Mounted Router in the Rack Step 3: Ground the ACX1000 and ACX1100 Router IN THIS SECTION Tools Required to Ground the Router | 8 Connect the Grounding Cable | 8 You must ground the router before connecting to power. -
Page 11: Tools Required To Ground The Router
Tools Required to Ground the Router To ground the router, you need the following tools: • Phillips (+) screwdriver, number 2 • ESD grounding wrist strap • Two SAE 10-32 screws and paint piercing washers (not provided) • Grounding lug, Panduit LCD06-10A or equivalent (not provided) •... -
Page 12: Step 4: Connect External Devices And Cables
threaded into the grounding points. Applying installation torque to the screw when improperly threaded may result in damage to the terminal. CAUTION: The maximum torque rating of the grounding screws on the router is 4.34 lb-in (0.49 Nm). The grounding screws may be damaged if excessive torque is applied. Use only a torque-controlled driver to tighten screws. -
Page 13: Tools Required To Connect External Devices And Cables
Connect the ACX Series Router to a Network for Out-of-Band Management | 10 Connect the ACX Series Router to a Management Console or Auxiliary Device | 11 Connect Network Interface Cables to the ACX Series Router | 11 Figure 9: Ethernet Cable Connector Tools Required to Connect External Devices and Cables To connect external devices and cables to the router, you need the following tools: •... -
Page 14: Connect The Acx Series Router To A Management Console Or Auxiliary Device
Connect Network Interface Cables to the ACX Series Router 1. Have ready a length of the type of cable used by the network ports. For cable specifications, see the ACX1000 and ACX1100 Universal Access Routers Hardware Guide NOTE: Shielded cables are required for outside deployment. -
Page 15: Step 5: Connect Power To The Acx Series Router
IN THIS SECTION Connect AC Power to an AC-Powered ACX1100 Router | 12 Connect DC Power to a DC-Powered ACX1000 or ACX1100 Router | 13 Depending on your configuration, your router uses either AC or DC power supplies. Perform the appropriate procedures for each power supply in your router. -
Page 16: Connect Dc Power To A Dc-Powered Acx1000 Or Acx1100 Router
If the system LED is not lit, the power supply is not functioning normally. Repeat the cabling procedures. Connect DC Power to a DC-Powered ACX1000 or ACX1100 Router To connect power to the DC-powered router, you need the following tools: •... - Page 17 Operating range: –39 to –72 VDC Attach an electrostatic discharge (ESD) grounding strap to your bare wrist, and connect the strap to ACX1000 and one of the ESD points on the chassis. For more information about ESD, see the ACX1100 Universal Access Routers Hardware Guide Switch off the dedicated customer site circuit breakers.
- Page 18 CAUTION: Ensure that each power cable lug seats flush against the surface of the terminal block as you are tightening the screws. Ensure that each screw is properly threaded into the terminal. Applying installation torque to the screw when the screw is improperly threaded may result in damage to the terminal.
-
Page 19: Step 6: Perform Initial Software Configuration
Figure 10: Connecting DC Power to the Router Step 6: Perform Initial Software Configuration IN THIS SECTION Enter Configuration Mode | 16 Configure User Accounts and Passwords | 17 Configure System Attributes | 18 Commit the Configuration | 19 This procedure connects the router to the network but does not enable it to forward traffic. For complete information about configuring the router to forward traffic, including examples, see the Junos OS configuration guides. -
Page 20: Configure User Accounts And Passwords
3. Start the CLI. root# cli root@> 4. Enter configuration mode. cli> configure [edit] root@# Configure User Accounts and Passwords For information about using an encrypted password or an SSH public key string (DSA or RSA), see the Junos OS System Basics Configuration Guide 1. -
Page 21: Configure System Attributes
Configure System Attributes 1. Configure the name of the router. If the name includes spaces, enclose the name in quotation marks (“ ”). [edit] host-name root@# set system host-name 2. Configure the router’s domain name. [edit] root@# set system domain-name domain-name 3. -
Page 22: Commit The Configuration
7. Configure the telnet service at the [edit system services] hierarchy level. [edit] root@# set system services telnet Commit the Configuration 1. (Optional) Display the configuration to verify that it is correct. [edit] root@# show system { host-name ; host-name domain-name ;... - Page 23 Safety Warnings WARNING: See installation instructions before connecting the router. This is a summary of safety warnings. For a complete list of warnings for this router, including ACX1000 and ACX1100 Universal Access Routers Hardware Guide translations, see the https:/ /www.juniper.net/documentation/.
- Page 24 • Only trained and qualified personnel should install or replace the router. ACX1000 and ACX1100 Universal • Perform only the procedures described in this quick start or the Access Routers Hardware Guide . Other services should be performed by authorized service personnel only.
- Page 25 • The recommended maximum ambient temperature is 158° F (70° C). For safe operation take into consideration the internal temperature within the rack. • Note the hot surface warning label on the top rear of the chassis. Compliance Statements for Data Center •...
- Page 26 Canada CAN ICES-3 (A)/NMB-3(A) European Community This is a Class A product. In a domestic environment, this product might cause radio interference in which case the user might be required to take adequate measures. Israel Translation from Hebrew—Warning: This product is Class A. In residential environments, the product might cause radio interference, and in such a situation, the user might be required to take adequate measures.
- Page 27 Networks, Inc. in the United States and other countries. All other trademarks, service marks, registered marks, or registered service marks are the property of their respective owners. Juniper Networks assumes no responsibility for any inaccuracies in this document. Juniper Networks reserves the right to change, modify, transfer, or otherwise revise this publication without notice.
Need help?
Do you have a question about the ACX1000 and is the answer not in the manual?
Questions and answers