
Related Manuals for Agilent Technologies 1220 Infinity II LC


Summary of Contents for Agilent Technologies 1220 Infinity II LC
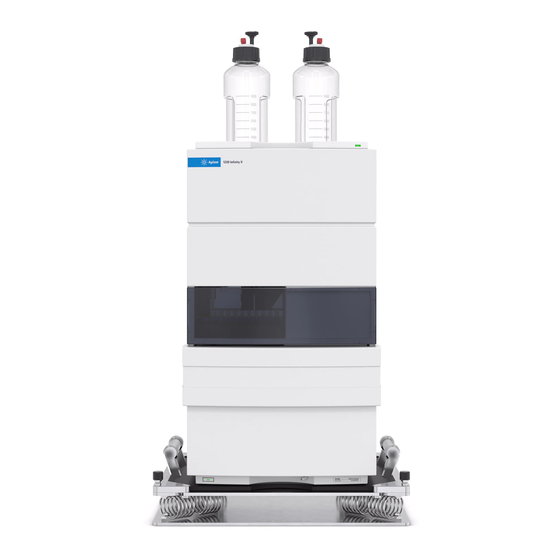
- Page 1 Agilent InfinityLab LC Series 1220 Infinity II LC System User Manual Agilent Technologies...
- Page 2 (June 1987) or any equivalent agency regu- lation or contract clause. Use, duplication or disclosure of Software is subject to Agi- lent Technologies’ standard commercial license terms, and non-DOD Departments and Agencies of the U.S. Government will 1220 Infinity II LC System User Manual...
- Page 3 • G4286B • G4288B/C • G4290B/C • G4294B 1 Introduction This chapter provides an overview of the Agilent 1220 Infinity II LC available configurations. 2 Site Requirements and Specifications This chapter provides information on environmental requirements, physical and performance specifications.
- Page 4 12 Parts for Maintenance and Repair This chapter provides information on parts for maintenance and repair. 13 Upgrading the 1220 Infinity II LC This chapter provides information for upgrading the LC system. 14 Identifying Cables This chapter provides information on cables used with the Agilent 1200 Infinity Series modules.
-
Page 5: Table Of Contents
Installing the Hardware Connecting and Configuring the Instrument to the Chromatographic Data System Connecting the Agilent 1220 Infinity II LC to the PC The Instrument Utility / Lab Advisor Software Configuration of the Instrument After an Upgrade Installation Priming the System and Performing the ‘Installation Check’... - Page 6 7 Column Oven Description Column Oven 8 Detector Description Detector Types Agilent 1220 Infinity II LC Variable Wavelength Detector (VWD) Agilent 1220 Infinity II LC Diode Array Detector (DAD) Match the Flow Cell to the Column 9 Test Functions and Calibration...
- Page 7 12 Parts for Maintenance and Repair 1220 Infinity II LC System Solvent Delivery System Injection System Column Oven Detector 13 Upgrading the 1220 Infinity II LC Oven Upgrade Install the (optional) External Tray Install the Active Inlet Valve 1220 Infinity II LC System User Manual...
- Page 8 Agilent 1200 module to PC 15 Appendix General Safety Information Solvent Information Radio Interference UV Radiation Sound Emission Waste Electrical and Electronic Equipment (WEEE) Directive (2002/96/EC) Declaration of Conformity for HOX2 Filter Agilent Technologies on Internet 1220 Infinity II LC System User Manual...
-
Page 9: Introduction
EMF counters for the pump EMF counters for the autosampler EMF counters for the variable wavelength detector EMF counters for the diode array detector This chapter provides an overview of the Agilent 1220 Infinity II LC available configurations. Agilent Technologies... -
Page 10: Agilent 1220 Infinity Ii Lc Configurations
Agilent 1220 Infinity II LC Configurations Available configurations of Agilent 1220 Infinity II LC The Agilent 1220 Infinity II LC is available in four different configurations. Possible components include isocratic pump, dual-channel gradient pump (with degasser), manual injector, autosampler, column oven and detector. -
Page 11: Agilent 1220 Infinity Ii Lc Vl Configurations
Agilent 1220 Infinity II LC VL Configurations Available configurations of Agilent 1220 Infinity II LC VL The Agilent 1220 Infinity II LC VL is available in two different configurations. Possible components include isocratic pump, dual-channel gradient pump (with degasser), manual injector, autosampler, column oven and detector. -
Page 12: Early Maintenance Feedback
The Agilent 1220 Infinity II LC pump provides a series of EMF counters for the pump head. Each counter increments with pump use, and can be assigned a maximum limit that provides visual feedback in the user interface when the limit is exceeded. - Page 13 The detector provides the following EMF counters: Deuterium lamp on-time This counter shows the total burn time of the deuterium lamp in hours. 1220 Infinity II LC System User Manual...
-
Page 14: Emf Counters For The Diode Array Detector
EMF limits, and then reset the EMF counters to zero. The next time the EMF counters exceed the new EMF limits, the EMF flag will be displayed, providing a reminder that maintenance needs to be scheduled. 1220 Infinity II LC System User Manual... -
Page 15: Site Requirements And Specifications
1220 Infinity II LC System User Manual Site Requirements and Specifications Site Requirements Power Considerations Power Cord Bench Space Environment Physical Specifications Performance Specifications Specification Conditions This chapter provides information on environmental requirements, physical and performance specifications. Agilent Technologies... -
Page 16: Site Requirements
A suitable environment is important to ensure optimal performance of the instrument. Power Considerations The Agilent 1220 Infinity II LC power supply has wide-ranging capabilities. Consequently, there is no voltage selector at the instrument. Instrument is partially energized when switched off... -
Page 17: Power Cord
EMC regulations. Bench Space The dimensions and weight of the Agilent 1220 Infinity II LC allow it to be placed on almost any desk or laboratory bench. It needs an additional 2.5 cm (1.0 in) of space on either side and approximately 8 cm (3.1 in) at the rear for... -
Page 18: Environment
Site Requirements and Specifications Site Requirements Environment Your Agilent 1220 Infinity II LC will work within specifications at ambient temperatures and relative humidity as described in the following sections. ASTM drift tests require a temperature change below 2 °C/hour (3.6 °F/hour) measured over one hour period. -
Page 19: Physical Specifications
Operating altitude Up to 2000 m (6562 ft) Non-operating altitude Up to 4600 m (15092 ft) For storing the module Safety standards: IEC, CSA, Installation category II, Pollution degree 2 For indoor use only. 1220 Infinity II LC System User Manual... -
Page 20: Performance Specifications
Site Requirements and Specifications Performance Specifications Performance Specifications Performance Specifications Agilent 1220 Infinity II LC Table 2 Performance Specifications Agilent 1220 Infinity II LC Type Specification Safety features Extensive diagnostics, error detection and display, leak detection, safe leak handling, leak output signal for shutdown of pumping system. - Page 21 Site Requirements and Specifications Performance Specifications Performance Specifications Agilent 1220 Infinity II LC Pump Table 3 Performance Specifications Agilent 1220 Infinity II LC Pump Type Specification Comments Hydraulic system Dual plunger in series pump with proprietary servo-controlled variable stroke drive, floating plungers and...
- Page 22 Site Requirements and Specifications Performance Specifications Performance Specifications Agilent 1220 Infinity II LC Pump VL Table 4 Performance Specifications Agilent 1220 Infinity II LC Pump VL Type Specification Comments Hydraulic system Dual plunger in series pump with proprietary servo-controlled variable...
- Page 23 Site Requirements and Specifications Performance Specifications Performance Specifications Agilent 1220 Infinity II LC Autosampler Table 5 Performance Specifications Agilent 1220 Infinity II LC Autosampler Type Specification Comments Injection range 0.1 – 100 µL in 0.1 µL increments Up to 1500 µL with multiple draw...
- Page 24 Site Requirements and Specifications Performance Specifications Performance Specifications Agilent 1220 Infinity II LC Column Oven Table 6 Performance Specifications Agilent 1220 Infinity II LC Column Oven Type Specification Comments Temperature 5 °C above ambient to 80 °C range 10 °C above ambient to 80 °C...
- Page 25 Site Requirements and Specifications Performance Specifications Performance Specifications Agilent 1220 Infinity II LC VWD Table 7 Performance Specifications Agilent 1220 Infinity II LC VWD Type Specification Comments Detection type Double-beam photometer Light source Deuterium lamp Maximum data 80 Hz rate...
- Page 26 Site Requirements and Specifications Performance Specifications Performance Specifications Agilent 1220 Infinity II LC DAD Table 8 Performance Specifications Agilent 1220 Infinity II LC DAD Type Specification Comments Detection type 1024-element diode array Light source Deuterium and tungsten lamps The UV-lamp is equipped with RFID tag that holds lamp typical information.
-
Page 27: Specification Conditions
Performance tests should be done with a completely warmed up optical unit (> two hours). ASTM measurements require that the detector should be turned on at least 24 hours before start of testing. 1220 Infinity II LC System User Manual... - Page 28 Time Constant (TC) versus Response Time (RT) According to ASTM E1657-98 “Standard Practice of Testing Variable-Wavelength Photometric Detectors Used in Liquid Chromatography” the time constant is converted to response time by multiplying by the factor 2.2. 1220 Infinity II LC System User Manual...
-
Page 29: Installation
Remove a Column Install the Restriction Capillary This chapter provides an overview on shipment content and installation. To install the Agilent 1220 Infinity II LC System, it is highly recommended to follow the N O T E installation instructions step by step. -
Page 30: Unpacking Your System
Unpacking Your System If the delivery packaging shows signs of external damage, please call your Agilent Technologies sales and service office immediately. Inform your service representative that the Agilent 1220 Infinity II LC may have been damaged during shipment. Signs of damage C AU T I O N ➔... - Page 31 Syringe adapter 9301-1377 Screw Cap Vial, clear, 6 mL 100/PK (delivered quantity is 0.010) 9301-1379 Screw caps for 6 mL vials 100/PK (delivered quantity is 0.010) 9301-1420 Solvent bottle, transparent G1311-60003 Bottle-head assembly 1220 Infinity II LC System User Manual...
- Page 32 Screw Cap Vial, clear, 6 mL 100/PK (delivered quantity is 0.010) 9301-1379 Screw caps for 6 mL vials 100/PK (delivered quantity is 0.010) 9301-1420 Solvent bottle, transparent 9301-1450 Solvent bottle, amber G1311-60003 Bottle-head assembly 1220 Infinity II LC System User Manual...
- Page 33 5023-0203 Cross-over network cable, shielded, 3 m (for point to point connection) 5062-8535 Waste accessory kit 9301-0411 Syringe, Plastic 9301-1337 Syringe adapter 9301-1420 Solvent bottle, transparent 9301-1450 Solvent bottle, amber G1311-60003 Bottle-head assembly 1220 Infinity II LC System User Manual...
- Page 34 Installation Unpacking Your System Optional Tool Kit for Agilent 1220 Infinity II LC Description G4296-68715 Tool kit complete 0100-1710 Mounting Tool for Tubing Connections 8710-0510 Wrench open 1/4 — 5/16 inch 8710-1924 Wrench open 14 mm 8720-0025 Wrench, 1/2 inch & 9/16 inch...
-
Page 35: Installing The Hardware
(Oven upgrade kit /Manual injector to ALS upgrade kit/ during installation) Isocratic to gradient upgrade kit) N O T E The Installation of the gradient system upgrade kit and ALS upgrade kit must be done from Agilent- trained service personnel only. 1220 Infinity II LC System User Manual... - Page 36 N O T E The installation of a Solvent Selection Valve (SSV) Option does not require the configuration of a new instrument type. The SSV needs to be configured in the CDS only. 1220 Infinity II LC System User Manual...
-
Page 37: Installing The Agilent 1220 Infinity Ii Lc
Installation Installing the Hardware Installing the Agilent 1220 Infinity II LC 1 Open the box and compare its content with the delivery checklist for completeness. 2 Place the instrument on top of the bench. 3 Remove both front covers (top and lower) by pressing the release buttons (on both sides). - Page 38 4 Remove the two transport foams. Figure 2 Remove the Transport Foam Figure 3 on page 39 shows the content of a fully equipped 1220 Infinity II LC system with removed front covers. (Module type shown G4290B) 1220 Infinity II LC System User Manual...
- Page 39 Additional options or upgrade kits should be installed prior to all solvent path installations. N O T E Configuring your Agilent 1220 Infinity II LC Module Information can be found in the “Configuration of the Instrument After an Upgrade Installation”...
- Page 40 12 Connect the network connection between the instrument and your PC. More details about how to establish a network connection to the instrument can be found N O T E “Connecting the Agilent 1220 Infinity II LC to the PC” on page 45 or “LAN Configuration”...
- Page 41 14 Before switching on the module check that all transport foams have been de-installed (see Figure 2 on page 38). Then switch on the module via the power push button. Figure 5 Leak and waste connections (example shows instrument with VWD) 1220 Infinity II LC System User Manual...
-
Page 42: Identifying The Connections Of The 1220 Infinity Ii Lc
MAC address label LAN connector RS232 serial and remote connectors CAN port Configuration dip switches (for boot mode selection) Fuses Power plug Figure 6 Connections of the Agilent 1220 Infinity II LC with VWD 1220 Infinity II LC System User Manual... - Page 43 Figure 7 on page 43 shows an overview of the possible connections on the 1220 Infinity II LC instrument with DAD. On the G4294B you must use the configuration dip switches on the DAD mainboard because this will be the communication host in this case.
-
Page 44: Connecting And Configuring The Instrument To The Chromatographic Data System
CDS. 2 Start your CDS. 3 At the instrument configuration screen enter the Instrument name (free of choice) and the Instrument type (Agilent Compact LC). 4 For configuring the module choose Auto Configuration. 1220 Infinity II LC System User Manual... -
Page 45: Connecting The Agilent 1220 Infinity Ii Lc To The Pc
Installation Connecting the Agilent 1220 Infinity II LC to the PC Connecting the Agilent 1220 Infinity II LC to the PC The instrument is delivered from factory with the default network configuration settings. (Configuration dip switches 7 & 8 set to ON). This enables you to quickly connect it via the crossover patch cable (part of the accessory kit) with your PC. - Page 46 The crossover cable is only for the direct connection between the module and the PC. If N O T E you want to connect your Agilent 1220 Infinity II LC via a hub to the network you should contact your local network administrator.
-
Page 47: The Instrument Utility / Lab Advisor Software
Instrument Utility / Lab Advisor software. Therefore please follow the steps that are described in “Configuration of the Instrument After an Upgrade Installation” on page 48 before you proceed. 1220 Infinity II LC System User Manual... -
Page 48: Configuration Of The Instrument After An Upgrade Installation
5 Now perform the Installation Check as described in “Priming the System and Performing the ‘Installation Check’” on page 49. 6 When starting the Chromatographic Data System use Auto Configuration to have your new hardware configuration configured to the CDS. 1220 Infinity II LC System User Manual... -
Page 49: Priming The System And Performing The 'Installation Check
Time: 5 min/channel • Set stroke: 100 μL 4 Perform the Installation Check from the Service and Diagnostics menu and print out the test result. 5 Create and print out a Status Report. 1220 Infinity II LC System User Manual... -
Page 50: Performing A 'Checkout Run
4 Start a single run. As result a single peak should be visible. 5 Print out the report. 6 Store all created and printed out reports in a binder. The instrument is installed. 1220 Infinity II LC System User Manual... -
Page 51: Remove The Restriction Capillary
Unscrew the restriction capillary from the flow cell capillary connection. . Unscrew the restriction capillary from the connection of Remove the restriction capillary from the column the capillary coming from sampler or heater. compartment. 1220 Infinity II LC System User Manual... - Page 52 Installation Remove the Restriction Capillary Install a column, see “Install a Column” on page 53. Close both front covers. 1220 Infinity II LC System User Manual...
-
Page 53: Install A Column
Description Ordered Column Preparations Remove the restriction capillary (if installed), see “Remove the Restriction Capillary” on page 51. Open both front covers. Connect the column inlet capillary to the injection valve (port 6). 1220 Infinity II LC System User Manual... - Page 54 Use a wrench to counter the column while tightening the Connect the column outlet capillary to the flow cell inlet capillary fittings on both sides of the column. at the detector. Close both front covers. Configure the column. 1220 Infinity II LC System User Manual...
-
Page 55: Remove A Column
Wrench open 1/4 — 5/16 inch Flexible wrench Open both front covers. Unscrew the fitting at the column outlet. Disconnect the column outlet capillary from the column. Unscrew the fitting at the column inlet. 1220 Infinity II LC System User Manual... - Page 56 Installation Remove a Column Disconnect the column inlet capillary from the column. Install the restriction capillary, see “Install the Restriction Capillary” on page 57. Close both front covers. 1220 Infinity II LC System User Manual...
-
Page 57: Install The Restriction Capillary
Open both front covers. Place the restriction capillary inside the column compartment. Connect the restriction capillary to the injector valve Connect the restriction capillary to the flow cell inlet of (port 6). the detector. 1220 Infinity II LC System User Manual... - Page 58 Installation Install the Restriction Capillary Close both front covers. 1220 Infinity II LC System User Manual...
- Page 59 1220 Infinity II LC System User Manual LAN Configuration To do first TCP/IP parameter configuration Configuration Switches Initialization mode selection Dynamic Host Configuration Protocol (DHCP) General Information (DHCP) Setup (DHCP) Link configuration selection Automatic Configuration with BootP About Agilent BootP Service...
-
Page 60: Lan Configuration To Do First
No other network device will have the same hardware address. The MAC address can be found on a label at the rear left side of the instrument next to the configuration switch. Figure 9 MAC label 1220 Infinity II LC System User Manual... - Page 61 PC network card using a crossover network cable (point-to-point) or • a hub or switch using a standard LAN cable. MAC label LAN port Instrument with DAD Instrument with VWD Figure 10 Location of LAN interface and MAC label 1220 Infinity II LC System User Manual...
-
Page 62: Tcp/Ip Parameter Configuration
TCP/IP parameters after power-on. The parameters may be derived from non-volatile memory or initialized with known default values. The initialization mode is selected by the configuration switch, see Table 11 page 64. 1220 Infinity II LC System User Manual... -
Page 63: Configuration Switches
For the G4294B, the Configuration switches on the DAD main board must be used for N O T E configuring the LAN access of the instrument. The switches on the main board must all be set to off. 1220 Infinity II LC System User Manual... -
Page 64: Initialization Mode Selection
When initialization mode Using Stored is selected, the parameters are taken from the non-volatile memory of the module. The TCP/IP connection will be established using these parameters. The parameters were configured previously by one of the described methods. Figure 11 Using Stored (Principle) 1220 Infinity II LC System User Manual... - Page 65 In the Using Default mode, the parameters stored in the memory of the module are not N O T E cleared automatically. If not changed by the user, they are still available, when switching back to the mode Using Stored. 1220 Infinity II LC System User Manual...
-
Page 66: Dynamic Host Configuration Protocol (Dhcp)
2 It may be necessary to fully qualify the hostname with the DNS suffix, e.g. 0030d3177321.country.company.com. 3 The DHCP server may reject the hostname proposed by the card and assign a name following local naming conventions. 1220 Infinity II LC System User Manual... -
Page 67: Setup (Dhcp)
0030d3177321. On the Instant Pilot the MAC address can be found under Details in the LAN section. Figure 14 LAN Setting on Instant Pilot 1220 Infinity II LC System User Manual... - Page 68 Lab Advisor, Firmware Update Tool) and use MAC address as host name, e.g. 0030d3177321. The LC system should become visible in the control software (see Note in section “General Information (DHCP)” on page 66). 1220 Infinity II LC System User Manual...
-
Page 69: Link Configuration Selection
Link Configuration speed and duplex mode determined by auto-negotiation manually set to 10 Mbps, half-duplex manually set to 10 Mbps, full-duplex manually set to 100 Mbps, half-duplex manually set to 100 Mbps, full-duplex 1220 Infinity II LC System User Manual... -
Page 70: Automatic Configuration With Bootp
BootP Service is installed on a server or PC on the LAN to provide central administration of IP addresses for Agilent instruments on a LAN. The BootP service must be running TCP/IP network protocol and cannot run a DHCP server. 1220 Infinity II LC System User Manual... -
Page 71: How Bootp Service Works
1 Log on as Administrator or other user with Administrator privileges. 2 Close all Windows programs. 3 Insert the Agilent ChemStation software DVD into the drive. If the setup program starts automatically, click Cancel to stop it. 1220 Infinity II LC System User Manual... - Page 72 BootP Settings screen 12 In the Default Settings part of the screen, if known, you can enter the subnet mask and gateway. Defaults can be used: • The default subnet mask is 255.255.255.0 1220 Infinity II LC System User Manual...
-
Page 73: Two Methods To Determine The Mac Address
3 Click OK to save the values or Cancel to discard them. The editing ends. 4 After each modification of the BootP settings (i.e. EditBootPSettings) a stop or start of the BootP service is required for the BootP service to accept 1220 Infinity II LC System User Manual... -
Page 74: Assigning Ip Addresses Using The Agilent Bootp Service
02/25/10 15:30:49 PM Status: BootP Request received at outermost layer Status: BootP Request received from hardware address: 0010835675AC Error: Hardware address not found in BootPTAB: 0010835675AC Status: BootP Request finished processing at outermost layer 1220 Infinity II LC System User Manual... - Page 75 3 Click Edit BootP Addresses... The Edit BootP Addresses screen appears. 4 Click Add... The Add BootP Entry screen appears. Figure 17 Enable BootP logging 1220 Infinity II LC System User Manual...
- Page 76 11 Use the PING utility to verify connectivity by opening a command window and typing: Ping 192.168.254.11 for example. The Tab File is located at C:\Documents and Settings\All Users\Application Data\Agilent\BootP\TabFile 1220 Infinity II LC System User Manual...
-
Page 77: Changing The Ip Address Of An Instrument Using The Agilent Bootp Service
1 Select Start > All Programs > Agilent BootP Service and select Edit BootP Settings. The BootP Settings screen appears. 2 When the BootP Settings screen is first opened, it shows the default settings from installation. 1220 Infinity II LC System User Manual... - Page 78 1 In the Windows control panel, select Administrative Tools > Services. The Services screen appears, see Figure 18 on page 77. 2 Right-click Agilent BootP Service and select Start. 3 Close the Services and Administrative Tools screens. 1220 Infinity II LC System User Manual...
-
Page 79: Storing The Settings Permanently With Bootp
8 Change the settings of the module’s Configuration Switch to “Using Stored” mode, see Table 11 on page 64. 9 Power cycle the module. The module can be accessed now via LAN without the Agilent Bootp Service. 1220 Infinity II LC System User Manual... -
Page 80: Manual Configuration
Therefore, manual configuration can be done at any time. A power cycle is mandatory to make the stored parameters become the active parameters, given that the initialization mode selection switches are allowing Figure 20 Manual Configuration (Principle) 1220 Infinity II LC System User Manual... -
Page 81: With Telnet
63). When the connection was established successfully, the module responds with the following: Figure 22 A connection to the module is made 3 Type ? and press enter to see the available commands. 1220 Infinity II LC System User Manual... - Page 82 Then press [Enter], where parameter refers to the configuration parameter you are defining, and value refers to the definitions you are assigning to that parameter. Each parameter entry is followed by a carriage return. 1220 Infinity II LC System User Manual...
- Page 83 Initialization mode is Using Stored active TCP/IP settings stored TCP/IP settings in non-volatile memory connected to PC with controller software (e.g. Agilent ChemStation), here not connected Figure 25 Telnet - Change IP settings 1220 Infinity II LC System User Manual...
- Page 84 If the Initialization Mode Switch is changed now to “Using Stored” mode, the instrument N O T E will take the stored settings when the module is re-booted. In the example above it would be 134.40.27.99. 1220 Infinity II LC System User Manual...
-
Page 85: Solvent Delivery System Description
1220 Infinity II LC System User Manual Solvent Delivery System Description Overview Degasser Principles of Operation Compressibility Compensation Variable Stroke Volume Using the Pump This chapter provides an overview on the operational principles of the solvent delivery system (pump and optional degasser). -
Page 86: Overview
The dual-channel gradient pump includes a built-in dual-channel online vacuum degasser. The isocratic pump of the Agilent 1220 Infinity II LC has no degasser. The pump assembly includes a pump head with an inlet valve and an outlet valve. -
Page 87: Degasser
0 mL/min. A constant vacuum of 75 Torr (100 mbar) is created in the vacuum chamber of the two channels. The solvent flows through a PTFE AF tube, with an internal volume of 1.5 mL/channel inside the vacuum chamber. 1220 Infinity II LC System User Manual... -
Page 88: Principles Of Operation
The outlet of the first plunger/chamber unit is connected through the outlet ball valve and the damping unit to the inlet of the second plunger/chamber unit. The outlet of the purge valve assembly is then connected to the chromatographic system. 1220 Infinity II LC System User Manual... - Page 89 The controller stores this plunger position in memory. After this initialization, the pump starts operation with the set 1220 Infinity II LC System User Manual...
- Page 90 For solvent compositions from the solvent bottles A and B, the controller divides the length of the intake stroke into certain fractions in which the gradient valve connects the specified solvent channel to the pump input. 1220 Infinity II LC System User Manual...
- Page 91 SST, gold, sapphire, ruby, ceramic, PTFE Outlet valve SST, gold, sapphire, ruby Adapter SST, gold Purge valve SST, gold, PTFE, ceramic, PEEK Damping unit Gold, SST Degasser chamber TFE/PDD copolymer, FEP, PEEK, PPS 1220 Infinity II LC System User Manual...
-
Page 92: Compressibility Compensation
This compensation volume is added to the normal stroke volume and compensates for the previously described loss of volume during the delivery stroke of the first plunger. 1220 Infinity II LC System User Manual... - Page 93 2 Before starting the optimization procedure, the flow must be stable. Use degassed solvent only. Check the tightness of the system with the pressure test. 3 Your pump must be connected to control software with which the pressure and %-ripple can be monitored. 1220 Infinity II LC System User Manual...
- Page 94 Table 19 Solvent Compressibility Solvent (pure) Compressibility (1·10 /bar) Acetone Acetonitrile Benzene Carbon tetrachloride Chloroform Cyclohexane Ethanol Ethyl acetate Heptane Hexane Isobutanol Isopropanol Methanol 1-Propanol Toluene Water 1220 Infinity II LC System User Manual...
-
Page 95: Variable Stroke Volume
When the stroke volume for the pump is set to AUTO mode, the stroke is optimized for the flow rate in use. A change to larger stroke volumes is possible but not recommended. 1220 Infinity II LC System User Manual... -
Page 96: Using The Pump
Using the Pump Using the Pump Hints for successful use of the Agilent 1220 Infinity II LC pump • When using salt solutions and organic solvents in the Agilent 1220 Infinity II LC pump, it is recommended to connect the salt solution to one of the lower gradient valve ports and the organic solvent to one of the upper gradient valve port. - Page 97 • Place a layer of argon on top of your solvent. • Avoid exposing the solvent bottle to direct sunlight. Never use the system without a solvent filter installed. N O T E 1220 Infinity II LC System User Manual...
- Page 98 Solvent Delivery System Description Using the Pump 1220 Infinity II LC System User Manual...
-
Page 99: Injection System Description
1220 Infinity II LC System User Manual Injection System Description Manual Injector The Injection Seal Injecting Sample Needles Autosampler Sampling Sequence Injection Sequence Sampling Unit Needle-Drive Analytical head Injection Valve Transport Assembly Supported Trays for the Autosampler Choice of Vials and Caps This chapter provides an overview of the operational principles of the injection systems: manual injector and autosampler. -
Page 100: Manual Injector
Manual Injector Manual Injector The Agilent 1220 Infinity II LC manual injector uses a Rheodyne, 6-port sample injection valve (5067-4202). Sample is loaded into the external 20 μL sample loop through the injection port at the front of the valve. The valve has a PEEK™... -
Page 101: Injecting Sample
The sample fills the loop, and excess sample is expelled through the vent tube connected to port 2. Figure 29 LOAD Position 1220 Infinity II LC System User Manual... -
Page 102: Needles
C AU T I O N ➔ Always use the correct needle size. Use needles with 0.028-inch outer diameter (22 gauge) × 2-inch long needle, without electro-taper, and with 90° point style (square tip). 1220 Infinity II LC System User Manual... -
Page 103: Autosampler
1220 Infinity II LC System User Manual... -
Page 104: Sampling Sequence
9 The gripper arm checks if the safety flap is in position. 10 The gripper arm replaces the vial. Simultaneously, the needle lowers into the seat. 11 The injection valve switches to the mainpass position. 1220 Infinity II LC System User Manual... -
Page 105: Injection Sequence
When the sample sequence begins, the valve unit switches to the bypass position. Solvent from the pump enters the valve unit at port 1, and flows directly to the column through port 6. 1220 Infinity II LC System User Manual... - Page 106 Next, the needle is raised, and the vial is positioned below the needle. The needle moves down into the vial, and the metering unit draws the sample into the sample loop. Figure 33 Drawing the Sample 1220 Infinity II LC System User Manual...
-
Page 107: Sampling Unit
The circular motion of the motor is converted to linear motion by the drive nut on the spindle assembly. The upper and lower needle positions are detected by reflection sensors on the sampling unit flex 1220 Infinity II LC System User Manual... -
Page 108: Analytical Head
(port 3 is not used). A lever/slider mechanism transfers the movement of the stepper motor to the injection valve. Two microswitches monitor switching of the valve (bypass and mainpass end positions). No valve adjustments are required after replacing internal components. 1220 Infinity II LC System User Manual... -
Page 109: Transport Assembly
Number of ports Switching time < 150 ms Transport Assembly The transport unit comprises an X-axis slide (left-right motion), a Z-axis arm (up-down motion), and a gripper assembly (rotation and vial-gripping). Figure 35 Transport Assembly 1220 Infinity II LC System User Manual... -
Page 110: Supported Trays For The Autosampler
The standard 100-vial tray has vial positions 1 to 100. However, when using two half-trays, the numbering convention is slightly different. The vial positions of the right-hand half tray begin at position 101 as follows: Left-hand 40-position tray: 1 – 40 1220 Infinity II LC System User Manual... -
Page 111: Choice Of Vials And Caps
Right-hand 15-position tray: 101 – 115 Choice of Vials and Caps For reliable operation, vials used with the Agilent 1220 Infinity II LC autosampler must not have tapered shoulders or caps that are wider than the body of the vial. The vials and caps shown with their part numbers in the tables below have been successfully tested using a minimum of 15000 injections with the Agilent 1220 Infinity II LC autosampler. - Page 112 Screw Cap Vial, 2 mL, amber glass, write-on spot, 100/pk 5183-2069 Screw Top Vial, 2 mL, amber glass, write-on spot, 1000/Pack 5183-2072 Screw Top Vial, 2 mL, amber glass, write-on spot, 100/Pack (silanized) 1220 Infinity II LC System User Manual...
- Page 113 Snap Cap, clear polypropylene, septum (clear PTFE/red rubber), 100/Pack 5182-3458 Snap Cap, blue polypropylene, septum (clear PTFE/red rubber), 100/Pack 5182-3457 Snap Cap, green polypropylene, septum (clear PTFE/red rubber), 100/Pack 5182-3459 Snap Cap, red polypropylene, septum (clear PTFE/red rubber), 100/Pack 1220 Infinity II LC System User Manual...
- Page 114 Screw Cap, red polypropylene, septum (clear PTFE/red rubber), 100/Pack 5182-0720 Screw Cap, blue polypropylene, septum (clear PTFE/silicone), 100/Pack 5182-0721 Screw Cap, green polypropylene, septum (clear PTFE/silicone), 100/Pack 5182-0722 Screw Cap, red polypropylene, septum (clear PTFE/silicone), 100/Pack 1220 Infinity II LC System User Manual...
-
Page 115: Column Oven Description
1220 Infinity II LC System User Manual Column Oven Description Column Oven This chapter provides an overview of the operational principles of the column oven. Agilent Technologies... -
Page 116: Column Oven
Never operate the column oven with open front cover, to ensure a correct column N O T E temperature always operate with closed front cover. The counterpart of the oven isolation is fixed at the inner side of the front cover. 1220 Infinity II LC System User Manual... - Page 117 1220 Infinity II LC System User Manual Detector Description Detector Types Agilent 1220 Infinity II LC Variable Wavelength Detector (VWD) Detector Agilent 1220 Infinity II LC Diode Array Detector (DAD) Introduction to the Detector Optical System Peak width (response time)
-
Page 118: Detector Description Detector Types
There are two different detector types available for the Agilent 1220 Infinity II LC System: • Variable Wavelength Detector (VWD, used in G4286B, G4288B/C, G4290B/C), optical unit of the G1314F VWD • Diode Array Detector (DAD, used in G4294B), optical unit of the G1315C 1220 Infinity II LC System User Manual... -
Page 119: Agilent 1220 Infinity Ii Lc Variable Wavelength Detector (Vwd)
Agilent 1220 Infinity II LC Variable Wavelength Detector (VWD) Detector The Agilent 1220 Infinity II LC variable wavelength detector is designed for highest optical performance, GLP compliance and easy maintenance, with: • Deuterium lamp for highest intensity and lowest detection limit over a wavelength range of 190 –... -
Page 120: Agilent 1220 Infinity Ii Lc Diode Array Detector (Dad)
Detector Description Agilent 1220 Infinity II LC Diode Array Detector (DAD) Agilent 1220 Infinity II LC Diode Array Detector (DAD) Introduction to the Detector The detector is designed for highest optical performance, GLP compliance and easy maintenance. It includes the following features: •... - Page 121 Detector Description Agilent 1220 Infinity II LC Diode Array Detector (DAD) deuterium lamp by means of a special rear-access lamp design which allows both light sources to be optically combined and share a common axis to the source lens. The achromat (source lens) forms a single, focused beam of light through the flow cell.
- Page 122 Detector Description Agilent 1220 Infinity II LC Diode Array Detector (DAD) Cell Support The cell support window assembly separates the holmium filter area from the Window flow cell area. Flow Cell The optical unit has a flow cell compartment for easy access to flow cells. A...
-
Page 123: Peak Width (Response Time)
Detector Description Agilent 1220 Infinity II LC Diode Array Detector (DAD) Peak width (response time) Response time describes how fast the detector signal follows a sudden change of absorbance in the flow cell. The detector uses digital filters to adapt response time to the width of the peaks in your chromatogram. -
Page 124: Sample And Reference Wavelength And Bandwidth
Detector Description Agilent 1220 Infinity II LC Diode Array Detector (DAD) Table 22 Peak Width — Response Time — Data Rate Peak Width [minutes] Response Time [seconds] Data Rate [Hz] <0.0025 0.025 >0.0025 0.05 >0.005 >0.01 >0.03 >0.05 >0.10 >0.20 1.25... - Page 125 Detector Description Agilent 1220 Infinity II LC Diode Array Detector (DAD) The signals comprises a series of data points over time, with the average absorbance in the sample wavelength band minus the average absorbance of the reference wavelength band. Signal A in the detector default method is set to sample 250,100, reference 360,100, that is, the average absorbance from 200 –...
- Page 126 Detector Description Agilent 1220 Infinity II LC Diode Array Detector (DAD) A wide bandwidth has the advantage of reducing noise by averaging over a wavelength range — compared to a 4 nm bandwidth, the baseline noise is reduced by a factor of approximately 2.5, whereas the signal is about 75 % of a 4 nm wide band.
-
Page 127: Slit Width
Detector Description Agilent 1220 Infinity II LC Diode Array Detector (DAD) Figure 40 Gradient Analysis of PTH-Amino Acids (1 pmol each), with and without Reference Slit Width The detector has a variable slit at the entrance of the spectrograph. This is an effective tool to adapt the detector to changing demand of different analytical problems. - Page 128 Detector Description Agilent 1220 Infinity II LC Diode Array Detector (DAD) Figure 41 Benzene at 1, 4 and 16 nm slit width (principle) A wide slit uses more of the light shining through the flow cell. This gives lower baseline noise as shown in Figure 42 on page 128.
-
Page 129: Optimizing Spectral Acquisition (Dad Only)
Detector Description Agilent 1220 Infinity II LC Diode Array Detector (DAD) Substances with fine structures and steep slopes like benzene are very rare. In most cases the width of absorbance bands in the spectrum is more like 30 nm as with anisic acid (Figure 38 on page 125). -
Page 130: Margin For Negative Absorbance
Detector Description Agilent 1220 Infinity II LC Diode Array Detector (DAD) step of 4 nm would be sufficient. However a step of 2 nm gives a more optimal display of the spectrum. Threshold Sets the peak detector. Only spectra from peaks higher than threshold will be stored when a peak-controlled storage mode is selected. - Page 131 Detector Description Agilent 1220 Infinity II LC Diode Array Detector (DAD) Figure 43 Wavelength Selection for Peak Suppression With a UV-visible detector based on a diode array and the correct choice of a reference wavelength setting, quantitative detection is possible. To suppress caffeine, the reference wavelength must be set to 282 nm.
- Page 132 Detector Description Agilent 1220 Infinity II LC Diode Array Detector (DAD) Figure 44 Peak Suppression Using Reference Wavelength Ratio Qualifiers for Selective Detection of Compound Classes Ratio qualifiers can be used where, in a complex sample, only one particular class needs to be analyzed — a parent drug and its metabolites in a biological sample, for example.
- Page 133 Detector Description Agilent 1220 Infinity II LC Diode Array Detector (DAD) Figure 45 Wavelength Selection for Ratio Qualifiers Signals at 250 nm Biphenyl o-Terphenyl No selectivity With ratio qualifier 249/224 nm = 3.520% Time (min) Figure 46 Selectivity by Ratio Qualifiers In a four-component mixture, only biphenyl was recorded.
-
Page 134: Spectrum Settings (Dad Only)
Detector Description Agilent 1220 Infinity II LC Diode Array Detector (DAD) Spectrum Settings (DAD only) To change the Spectra settings open. 1 To change the Spectra settings select Setup Detector Signals. 2 In the section Spectrum click on the drop-down list and chose a parameter. - Page 135 Detector Description Agilent 1220 Infinity II LC Diode Array Detector (DAD) Table 23 Spectrum Settings Apex + Baselines Spectra are taken at the apex and baselines of the peak. Apex + Slopes + Spectra are taken at the apex, baselines, upslope, and downslope of the Baselines peak.
-
Page 136: Match The Flow Cell To The Column
If more than one selection is appropriate, use the larger flow cell to get the best detection limit. Use the smaller flow cell for best peak resolution. Choosing a Flow Cell for the VWD Figure 48 Choosing a flow cell 1220 Infinity II LC System User Manual... - Page 137 (usually in g/l or mg/l), and is the path length of the cell used for the measurement. 1220 Infinity II LC System User Manual...
- Page 138 The correct response is: expected response * correction factor Details of the flow cells are shown in Table 24 on page 139 and Table 25 page 140. 1220 Infinity II LC System User Manual...
- Page 139 14 µL, 400 bar (G1314-60082) Be aware that there are additional tolerance of gasket thickness and its compression ratio, N O T E which are considered to be very small in comparison with the machining tolerance. 1220 Infinity II LC System User Manual...
- Page 140 G5615-68755) (G5615-60022) Be aware that there are additional tolerance of gasket thickness and its compression ratio, N O T E which are considered to be very small in comparison with the machining tolerance. 1220 Infinity II LC System User Manual...
-
Page 141: Test Functions And Calibration
1220 Infinity II LC System User Manual Test Functions and Calibration 1220 Infinity II LC System Installation Check Module Info Diagnostic Buffers State Info Solvent Delivery System Pump Leak Test Description Running the Leak Test Evaluating the Leak Test Results... - Page 142 Diagnosis Information on Agilent ChemStation D/A Converter (DAC) Test This chapter describes the tests, calibrations and tools that are available with the Instrument Utilities software or the Lab Advisor (Service and Diagnostics Section). 1220 Infinity II LC System User Manual...
-
Page 143: 1220 Infinity Ii Lc System
• All modules switch on successfully within the timeout period (120 s). • The pump achieves 200 bar after 5 min. • The oven reaches 2 K above its actual temperature. • The detector lamp ignites and the detector reaches a Ready state. 1220 Infinity II LC System User Manual... -
Page 144: Module Info
The text file is written in English. State Info The State Info tool displays the current status of all Agilent 1220 Infinity II LC modules; the status is continuously updated. Unless aborted, the tool runs continuously for 60 min. -
Page 145: Solvent Delivery System
The flow is changed to 153 μL/min, and plunger 2 continues to deliver for the rest of its stroke. Then plunger 1 continues to pump to complete the second half of the ramp. 1220 Infinity II LC System User Manual... - Page 146 When the system pressure reaches 390 bar, the flow is reduced to zero, and the pressure stabilizes just below 400 bar. One minute after reaching the maximum pressure, the pressure drop should not exceed 2 bar/min. 1220 Infinity II LC System User Manual...
-
Page 147: Running The Leak Test
Evaluating the Results describes the evaluation and interpretation of the leak test results N O T E (“Evaluating the Leak Test Results” on page 148). For detailed instructions refer to the Agilent Lab Advisor tool. N O T E 1220 Infinity II LC System User Manual... -
Page 148: Evaluating The Leak Test Results
Large leaks (visible) at the pump seals. Exchange the pump seals. Large leaks (visible) at active inlet valve, outlet Ensure the leaky components are installed valve, or purge valve. tightly. Exchange the component if required. 1220 Infinity II LC System User Manual... - Page 149 Tighten the active inlet valve (14 mm wrench). Do not overtighten! Loose pump head screws. Ensure the pump head screws are tight. Loose outlet valve. Ensure the sieve in the outlet valve is installed correctly. Tighten the outlet valve. 1220 Infinity II LC System User Manual...
- Page 150 Tighten the purge valve (14 mm wrench). Contaminated purge valve. Open and close purge valve to flush out contamination. Exchange the valve if still leaky. Loose pump head screws. Ensure the pump head screws are tight. 1220 Infinity II LC System User Manual...
-
Page 151: Pressure Too High Check
If the limit is exceeded, the pressure problem lies in the autosampler; otherwise, it lies somewhere in the rest of the flow path. 1220 Infinity II LC System User Manual... -
Page 152: Purge Pump
1 Prepare each channel with the appropriate purge solvents. 2 Select Purge Pump from the Tool Selection screen. 3 In the Purge Configuration dialog box, a If necessary, select the channel(s) that you want to purge. 1220 Infinity II LC System User Manual... -
Page 153: Degasser Exchange
To use the tool, do as follows: 1 Go to Instrument Control tab 2 Select G4281B pump module 3 Expand the pump function by clicking the small right arrow 4 In special commands you will find the tool 1220 Infinity II LC System User Manual... -
Page 154: Autosampler
Change Gripper The Change Gripper function moves the gripper to the front of the autosampler enabling easy access to the gripper release mechanism. 1220 Infinity II LC System User Manual... -
Page 155: Injector Steps
Command also switches the position. valve to bypass if it is not already in that position. Vial to Seat Moves the selected vial to the seat Command also lifts the position. needle to the upper position. 1220 Infinity II LC System User Manual... -
Page 156: Alignment Teaching
It requires that a 100-vial tray be inserted into the autosampler. The alignment procedure uses two tray positions as reference points; because the tray is rectangular, a two-point alignment is sufficient to correct all other 1220 Infinity II LC System User Manual... - Page 157 Starts the execution of the Enter procedure. Shown only at the start. Continue >> Jumps to the next step of the Enter procedure. Shown only during alignment. Restart Restarts the execution of the step. 1220 Infinity II LC System User Manual...
- Page 158 On completion of the calculation, the values for both X and theta are rounded to one decimal place. The correction values are stored permanently in the non-volatile memory of the sampler, and the sampler is initialized. 1220 Infinity II LC System User Manual...
-
Page 159: Gripper Verification
5 Select Put vial to verify that the gripper replaces the vial correctly. If there is a misalignment, the gripper must be realigned. 6 Repeat the procedure for the next vial position. 1220 Infinity II LC System User Manual... -
Page 160: Column Oven
Oven Test Evaluation At the end of the Oven Test, the slope of the temperature rise of the left and right channels are evaluated. The test passes if both slopes are >=4°C/min. 1220 Infinity II LC System User Manual... -
Page 161: Oven Calibration
For the measurement and calibration procedure, we recommend a measuring device that N O T E provides the necessary resolution and precision, for example, Hereaus Quat340 quartz surface-temperature measurement sensor. Contact your local Agilent Technologies support representative for ordering information. 1 Install the calibrated temperature measuring device. -
Page 162: Variable Wavelength Detector (Vwd)
Corrective action Absorbing solvent or air bubble in flow cell. Ensure the flow cell is filled with water, and free from air bubbles. Dirty or contaminated flow cell. Exchange the flow cell windows. 1220 Infinity II LC System User Manual... -
Page 163: Dark Current Test
Defective sample ADC board. Exchange the sample ADC board. Table 37 Reference circuit noise exceeds limit: Cause Corrective action Defective reference diode. Exchange the reference diode. Defective reference ADC board. Exchange the reference ADC board. 1220 Infinity II LC System User Manual... -
Page 164: Holmium Oxide Test
To eliminate effects due to absorbing solvents, the test should be done with water in the flow cell. On completion of the test, the results are displayed automatically. Holmium Oxide Test Report 1220 Infinity II LC System User Manual... -
Page 165: Intensity Test
(“VWD Cell Test Description” page 162) The test should not be performed using the micro flow cell, since the reduction in light N O T E intensity will cause the test to fail. 1220 Infinity II LC System User Manual... - Page 166 Intensity Test Report > 320000 cts 7123680 cts > 160000 cts 951488 cts 36384 cts > 6400 cts Evaluating the VWD Intensity Test Table 39 Limits Intensity Limits (counts) Highest >320000 Average >160000 Lowest >6400 1220 Infinity II LC System User Manual...
-
Page 167: Filter/Grating Motor Test
Exchange the filter motor assembly. Defective VWM board. Exchange the VWM board. Table 42 Grating Motor Test Cause Corrective action Defective filter motor assembly. Exchange the filter motor assembly. Defective VWM board. Exchange the VWM board. 1220 Infinity II LC System User Manual... -
Page 168: Detector Calibration
• after exchange of the optical unit or VWM board, • at a regular interval, at least once per year (for example, prior to an Operational Qualification/Performance Verification procedure), and • when chromatographic results indicate the detector may require recalibration. 1220 Infinity II LC System User Manual... -
Page 169: Test Chromatogram
3.2 min (Default settings) 4.00 sec 6.4 min 8.00 sec 12.8 min The test chromatogram has four main peaks with the following absorbances: Peak Absorbance (approx.) 38 mAU 100 mAU 290 mAU 20 mAU 1220 Infinity II LC System User Manual... -
Page 170: Spectral Scan
You specify the wavelength range in the from and to fields, and the resolution in the step field. Export Data Exports the selected data in csv format for use in other applications. 1220 Infinity II LC System User Manual... -
Page 171: Diode Array Detector (Dad)
Setup of the self test is done in the Self Test dialog box. Select either Single Test or Repetitive Tests. Check the ASTM Noise Test checkbox to include the noise test in the self test. 1220 Infinity II LC System User Manual... -
Page 172: Filter Test
The test passes successfully, if the two maxima resulting from the edge of the filter assembly (during filter movement) are seen, and the absorbance maximum of holmium oxide is within the limits. 1220 Infinity II LC System User Manual... - Page 173 Defective filter motor. representative. Holmium Oxide Maximum out of Limits Probable cause Suggested actions Install the holmium oxide filter. Holmium oxide filter not installed. Exchange the holmium oxide filter. Dirty or contaminated filter. 1220 Infinity II LC System User Manual...
-
Page 174: Slit Test
Old or non-Agilent lamp. Exchange the lamp if old or defective. Exchange the slit assembly. Defective slit assembly (stray light). Exchange the detector main board. Defective detector main board. Exchange the optical unit. Defective PDA/optical unit. 1220 Infinity II LC System User Manual... -
Page 175: Dark-Current Test
The leakage current (represented in counts) for each diode should fall within the limits (red bands) shown in the plot (see Figure 53 on page 176). Dark-Current Test Evaluation Limit: 0... 12000 counts Figure 53 Dark-Currrent Test Results (report) 1220 Infinity II LC System User Manual... -
Page 176: Intensity Test
The Agilent LabAdvisor, ChemStation and Instant Pilot evaluate four spectral ranges automatically, and display the limits for each range, the measured intensity counts, and passed or failed for each spectral range (see Figure 54 on page 178). 1220 Infinity II LC System User Manual... - Page 177 If the detector fails in the range 501 nm - 950 nm, check • is the VIS-lamp ON? If not, turn it on. • is VIS-lamp glass bulb blackended or broken? If yes, replace VIS-lamp. 1220 Infinity II LC System User Manual...
- Page 178 If the intervals of lamp replacements are getting shorter, the Agilent service should check the optical unit for contaminated components in the light path (coupling lens, source lens, cell support assembly and flow cell windows). 1220 Infinity II LC System User Manual...
- Page 179 The test is evaluated by the instrument, and the measured maxima are displayed automatically. The test fails if one or more of the maxima lies outside of the limits (see Figure 55 on page 181). 1220 Infinity II LC System User Manual...
-
Page 180: Holmium Oxide Test
Clean optical components with alcohol and lint-free cloth or Dirty or contaminated optical replace the parts (see “Intensity Test” on page 177). components (achromat, windows). Exchange the UV lamp. Old or non-Agilent lamp. 1220 Infinity II LC System User Manual... -
Page 181: Spectral Flatness Test
This test is part of the detector self test only, see “Self-test” on page 171. N O T E Figure 56 Spectral Flatness Test (Signals) Spectral Flatness Evaluation Test Evaluation Limit is < 0.002 AU 1220 Infinity II LC System User Manual... - Page 182 Suggested actions • Run the Intensity Test. Old or non-Agilent lamp. • Exchange the lamp if old or defective. Exchange the DAM board. Defective DAM board Exchange the optical unit. Defective PDA/optical unit. 1220 Infinity II LC System User Manual...
-
Page 183: Astm Noise Test
This test should be performed inititially with a new detector/flow cell. The values should N O T E be kept for later reference/comparison. 1220 Infinity II LC System User Manual... -
Page 184: Cell Test
Suggested actions Ensure the flow cell is filled with water, and Absorbing solvent or air bubble in flow cell. free from air bubbles. Exchange the flow cell windows. Dirty or contaminated flow cell. 1220 Infinity II LC System User Manual... -
Page 185: Using The Built-In Test Chromatogram
Tools selection. 3 Open the test chromatogram screen 4 Turn the Test Chromatogram on. 5 Change to the detector's Module Service Center and add the detector signal to the Signal Plot window. 1220 Infinity II LC System User Manual... - Page 186 Test Chromatogram with Agilent Lab Advisor 7 To stop the test chromatogram enter in the command line: STOP The test chromatogram is switched off automatically at the end of a run. N O T E 1220 Infinity II LC System User Manual...
-
Page 187: Wavelength Verification And Recalibration
• after a major repair, like processor board or optical unit exchange, see also “Replacing the Module’s Firmware” on page 325. After calibration, the holmium oxide test (see Figure 55 on page 181) provides verification of wavelength accuracy at three additional wavelengths. 1220 Infinity II LC System User Manual... -
Page 188: Diagnosis Information On Agilent Chemstation
Filter movements, filter moves reset log Flow Cell Available with ID-tag flow cells only. Product number, production date, pathlength, max pressure, serial number, volume, last cell test Micro Slit Slit movements, filter moves reset log 1220 Infinity II LC System User Manual... - Page 189 Test Functions and Calibration Diode Array Detector (DAD) Figure 60 Diagnosis screen in Agilent ChemStation (detailed view) 1220 Infinity II LC System User Manual...
- Page 190 Lamp must be on for at least 10 minutes. Connect integrator, chart recorder or data system to the detector analog output. Running the test with Agilent LabAdvisor 1 Run the D/A Converter (DAC) Test (for further information see Online-Help of user interface). Figure 61 D/A Converter (DAC) Test – Results 1220 Infinity II LC System User Manual...
-
Page 191: D/A Converter (Dac) Test
The noise on the step should be less than 3 μV. Probable cause Suggested actions Check or replace the cable. Bad cable or grounding problem between detector and external device. Please contact your Agilent service Defective detector main board. representative. 1220 Infinity II LC System User Manual... - Page 192 Test Functions and Calibration Diode Array Detector (DAD) 1220 Infinity II LC System User Manual...
-
Page 193: Error Information
1220 Infinity II LC System User Manual Error Information What are Error Messages? General Error Messages Compensation Sensor Open Compensation Sensor Short Fan Failed Leak Leak Sensor Open Leak Sensor Short Remote Timeout Shutdown Lost CAN Partner Timeout Pump Error Messages... - Page 194 UV Lamp Voltage VWD Detector Error Messages ADC Hardware Error Wavelength calibration setting failed Cutoff filter doesn't decrease the light intensity at 250 nm Filter Missing Grating or Filter Motor Errors Grating Missing 1220 Infinity II LC System User Manual...
- Page 195 DSP Not Running No Run Data Available In Device Instrument Logbook This chapter provides information on the error messages that might be displayed, and gives the possible causes and suggestions on their solutions. 1220 Infinity II LC System User Manual...
-
Page 196: What Are Error Messages
In all cases, error propagation is done via the CAN bus or via an APG/ERI remote cable (see documentation for the APG/ERI interface). 1220 Infinity II LC System User Manual... -
Page 197: General Error Messages
Defective power switch assembly representative. Please contact your Agilent service Defective main board. representative. Compensation Sensor Short Error ID: 0080 The ambient-compensation sensor (NTC) on the power switch board in the module has failed (open circuit). 1220 Infinity II LC System User Manual... -
Page 198: Fan Failed
Probable cause Suggested actions Please contact your Agilent service Fan cable disconnected. representative. Please contact your Agilent service Defective fan. representative. Please contact your Agilent service Defective main board. representative. 1220 Infinity II LC System User Manual... -
Page 199: Leak
Leak sensor not connected to the main representative. board. Please contact your Agilent service Defective leak sensor. representative. Please contact your Agilent service Leak sensor incorrectly routed, being representative. pinched by a metal component. 1220 Infinity II LC System User Manual... -
Page 200: Leak Sensor Short
Exchange the remote cable. Defective remote cable. Check the instrument for defects (refer to the Defective components in the instrument instrument’s documentation). showing the not-ready condition. 1220 Infinity II LC System User Manual... -
Page 201: Shutdown
The system processors continually monitor the system configuration. If one or more of the modules is no longer recognized as being connected to the system, the error message is generated. 1220 Infinity II LC System User Manual... -
Page 202: Timeout
Check the logbook for the occurrence and A not-ready condition was present during a source of a not-ready condition. Restart the sequence or multiple-injection run for a analysis where required. period longer than the timeout threshold. 1220 Infinity II LC System User Manual... -
Page 203: Pump Error Messages
During initialization, the first piston is moved to the mechanical stop. After reaching the mechanical stop, the piston reverses direction until the encoder index position is reached. If the time to reach the index position is too long, the error message is generated. 1220 Infinity II LC System User Manual... -
Page 204: Index Limit
The encoder index position in the module was not found during initialization. During initialization, the first piston is moved to the mechanical stop. After reaching the mechanical stop, the piston reverses direction until the encoder 1220 Infinity II LC System User Manual... -
Page 205: Initialization Failed
The pressure readings read by the pump ADC (analog-digital converter) are missing. The ADC reads the pressure signal of from the damper every 1ms. If the readings are missing for longer than 10 s, the error message is generated. 1220 Infinity II LC System User Manual... -
Page 206: Motor-Drive Power
Exchange the outlet valve. Blocked outlet valve. Remove the pump-head assembly. Ensure there High friction (partial mechanical blockage) is no mechanical blockage of the pump-head in the pump drive assembly. assembly or pump drive assembly. 1220 Infinity II LC System User Manual... -
Page 207: Pressure Above Upper Limit
Please contact your Agilent service Defective damper. representative. Please contact your Agilent service Defective main board. representative. Pressure Below Lower Limit Error ID: 2015, 2501 The system pressure has fallen below the lower pressure limit. 1220 Infinity II LC System User Manual... -
Page 208: Pressure Signal Missing
-120 mV across the damper connector. Probable cause Suggested actions Please contact your Agilent service Damper disconnected. representative. Please contact your Agilent service Defective damper. representative. 1220 Infinity II LC System User Manual... -
Page 209: Pump Configuration
Exchange the piston. Broken piston. Restart Without Cover Error ID: 2502 The module was restarted with the top cover and foam open. 1220 Infinity II LC System User Manual... -
Page 210: Servo Restart Failed
Exchange the (passive or active) inlet valve. Blocked (passive or active) inlet valve. Please contact your Agilent service Defective pump drive assembly. representative. Please contact your Agilent service Defective main board. representative. 1220 Infinity II LC System User Manual... -
Page 211: Stroke Length
Ensure the outlet valve is not blocked. Partial blockage of the flowpath in front of the damper. 1220 Infinity II LC System User Manual... -
Page 212: Temperature Out Of Range
One of the valves of the multi-channel gradient valve has failed to switch correctly. The processor monitors the valve voltage before and after each switching cycle. If the voltages are outside expected limits, the error message is generated. 1220 Infinity II LC System User Manual... -
Page 213: Mcgv Fuse
Please contact your Agilent service Defective connection cable (front panel to representative. main board). Please contact your Agilent service Defective main board. representative. Wait Timeout Error ID: 2053 1220 Infinity II LC System User Manual... -
Page 214: Solvent Zero Counter
Pump firmware version A.02.32 and higher allow to set solvent bottle fillings in the data system. If the volume level in the bottle falls below the specified value the error message appears when the feature is configured accordingly. 1220 Infinity II LC System User Manual... - Page 215 Error Information Pump Error Messages Probable cause Suggested actions Refill bottles and reset solvent counters. Volume in bottle below specified volume. Make sure the limits are set correctly. Incorrect setting. 1220 Infinity II LC System User Manual...
-
Page 216: Autosampler Error Messages
Probable cause Suggested actions Ensure unobstructed movement of the Mechanical obstruction. transport assembly. Please contact your Agilent service High friction in the transport assembly. representative. Please contact your Agilent service Defective motor assembly. representative. 1220 Infinity II LC System User Manual... -
Page 217: Initialization Failed
Please contact your Agilent service Defective transport assembly flex board. representative. Please contact your Agilent service Defective sampling unit motor. representative. Please contact your Agilent service Defective main board. representative. Initialization with Vial Error ID: 4028 1220 Infinity II LC System User Manual... -
Page 218: Invalid Vial Position
Tray recognition defective (dirty sample tray are clean (located at the rear of the sample or defective transport assembly flex board). tray). If this does not solve the problem, contact your Agilent service representative. 1220 Infinity II LC System User Manual... -
Page 219: Metering Home Failed
Suggested actions Install the sample vial in the correct position, or No vial in the position defined in the edit the method or sequence accordingly. method or sequence. Align gripper. Incorrect gripper alignment. 1220 Infinity II LC System User Manual... -
Page 220: Missing Wash Vial
109 for motor identification. • Motor 0 temperature: X-axis motor. Motor 1 temperature: Z-axis motor. Motor 2 temperature: Theta (gripper rotation) motor. Motor 3 temperature: Gripper motor (motor for gripper fingers). 1220 Infinity II LC System User Manual... -
Page 221: Needle Down Failed
The sensor detects the successful completion of the needle movement to the needle seat position. If the needle fails to reach the end point, or if the sensor fails to recognize the needle arm movement, the error message is generated. 1220 Infinity II LC System User Manual... -
Page 222: Needle Up Failed
Probable cause Suggested actions Please contact your Agilent service Defective or dirty position sensor. representative. Please contact your Agilent service Defective motor. representative. 1220 Infinity II LC System User Manual... -
Page 223: Safety Flap Missing
The switches detect the successful completion of the valve movement. If the valve fails to reach the bypass position, or if the microswitch does not close, the error message is generated. 1220 Infinity II LC System User Manual... -
Page 224: Valve To Mainpass Failed
The autosampler checks if a sample vial is stuck in the gripper by closing and opening the gripper fingers while monitoring the motor encoder. If the gripper fingers are unable to close, the error message is generated. 1220 Infinity II LC System User Manual... - Page 225 Error Information Autosampler Error Messages Probable cause Suggested actions Remove the vial using the Release Vial Vial still in gripper. function in the user interface. Reinitialize the autosampler. 1220 Infinity II LC System User Manual...
-
Page 226: General Detector Error Messages
0 means upper power limit hit (excessive ambient temperature drop). 1 means lower power limit hit (excessive ambient temperature increase). Probable cause Suggested actions Wait until temperature control equilibrates. Excessive ambient temperature change. 1220 Infinity II LC System User Manual... -
Page 227: Illegal Temperature Value From Sensor On Main Board
• Please contact your Agilent service representative. Verify that the ambient conditions are within Detector is exposed to illegal ambient the allowed range. conditions. UV Lamp Current Error ID: 7450 The UV lamp current is missing. 1220 Infinity II LC System User Manual... -
Page 228: Uv Lamp Voltage
Probable cause Suggested actions Exchange the UV lamp. Defective UV lamp or non-Agilent lamp. Please contact your Agilent service Defective detector main board. representative. Please contact your Agilent service Defective power supply. representative. 1220 Infinity II LC System User Manual... -
Page 229: Vwd Detector Error Messages
Lamp is OFF. Ensure the flow cell is installed correctly. Incorrect flow cell installation. Clean/replace flow cell windows or remove air Flow cell contamination or air bubbles. bubbles. Replace lamp. Intensity too low. 1220 Infinity II LC System User Manual... -
Page 230: Cutoff Filter Doesn't Decrease The Light Intensity At 250 Nm
Please contact your Agilent service Defective motor. representative. Please contact your Agilent service Defective/missing grating or filter. representative. Please contact your Agilent service Cable/connector defective. representative. Filter Missing Error ID: 7816 The filter motor is not detected. 1220 Infinity II LC System User Manual... -
Page 231: Grating Or Filter Motor Errors
Please contact your Agilent service Motor is not connected. representative. Please contact your Agilent service Defective motor. representative. Please contact your Agilent service Defective/missing grating or filter. representative. Please contact your Agilent service Cable/connector defective. representative. 1220 Infinity II LC System User Manual... -
Page 232: Grating Missing
Please contact your Agilent service Fan not running (permitting lamp on). representative. Please contact your Agilent service Defective main board. representative. Exchange the lamp. Defective or non-Agilent lamp. Please contact your Agilent service Defective power supply. representative. 1220 Infinity II LC System User Manual... -
Page 233: Wavelength Holmium Check Failed
If the lamp current does not rise above the lower limit within 2 – 5 s, the error message is generated. Probable cause Suggested actions Ensure the lamp is connected. Lamp disconnected. Exchange the lamp. Defective or non-Agilent lamp. 1220 Infinity II LC System User Manual... -
Page 234: Wavelength Test Failed
(656 nm) via the reference diode is performed. If the emission line is more than 3 nm away from 656 nm, the error message is generated. Probable cause Suggested actions Recalibrate the detector. Calibration incorrect. 1220 Infinity II LC System User Manual... -
Page 235: Dad Detector Error Messages
Visible Lamp Voltage The visible lamp voltage is missing. The processor continually monitors the voltage across the lamp during operation. If the lamp voltage falls below the lower limit, the error message is generated. 1220 Infinity II LC System User Manual... -
Page 236: Diode Current Leakage
The UV lamp failed to ignite. The processor monitors the UV lamp current during the ignition cycle. If the lamp current does not rise above the lower limit within 2 – 5 seconds, the error message is generated. 1220 Infinity II LC System User Manual... -
Page 237: Uv Heater Current
Ignition started without the top foam in representative. place. Exchange the UV lamp. Defective UV lamp or non-Agilent lamp. Please contact your Agilent service Defective detector main board. representative. Please contact your Agilent service Defective power supply. representative. 1220 Infinity II LC System User Manual... -
Page 238: Calibration Values Invalid
(cell windows, buffers etc.). Please contact your Agilent service Defective filter assembly. representative. Please contact your Agilent service Defective achromat assembly. representative. Please contact your Agilent service Defective PDA/optical unit. representative. 1220 Infinity II LC System User Manual... -
Page 239: Wavelength Recalibration Lost
Defective PDA/optical unit. representative. No Run Data Available In Device In a very rare case the capacity of the CompactFlash Card is not sufficient. This could happen for example when the interrupt of LAN communication 1220 Infinity II LC System User Manual... -
Page 240: Instrument Logbook
• Reduce data rate. Instrument Logbook Figure 63 Instrument Logbook The logbook does not indicate a communication loss (power fail). It just shows the N O T E recovering (Power on, Lamps on). 1220 Infinity II LC System User Manual... -
Page 241: Maintenance And Repair
1220 Infinity II LC System User Manual Maintenance and Repair PM Scope of Work and Checklist Cautions and Warnings Solvent Delivery System Introduction Checking and Cleaning the Solvent Filter Exchanging the Passive Inlet Valve Exchanging the Outlet Valve Exchanging the Purge Valve Frit or the Purge Valve... - Page 242 Cleaning or Exchanging the Holmium Oxide Filter Correcting Leaks Replacing Leak Handling System Parts Algae Growth in HPLC Systems Replacing the Module’s Firmware This chapter provides general information on maintenance and repair of the instrument. 1220 Infinity II LC System User Manual...
-
Page 243: Pm Scope Of Work And Checklist
To perform a preventive maintenance (PM), follow the PM Scope of Work and PM Checklist step by step. The PM Scope of Work and PM Checklist documents can be found in the on the DVD for the Lab Advisor Software. 1220 Infinity II LC System User Manual... -
Page 244: Cautions And Warnings
➔ The volume of substances should be reduced to the minimum required for the analysis. ➔ Do not operate the instrument in an explosive atmosphere. 1220 Infinity II LC System User Manual... - Page 245 C AU T I O N ➔ If you connect external equipment to the instrument, make sure that you only use accessory units tested and approved according to the safety standards appropriate for the type of external equipment. 1220 Infinity II LC System User Manual...
-
Page 246: Solvent Delivery System
Solvent Delivery System Solvent Delivery System Introduction The Agilent 1220 Infinity II LC pump is designed for easy repair. The procedures described in this section can be done with the pump in place in the rack. The most frequent repairs, such as exchanging the plunger seals or purge valve seal, can be done from the front of the pump. - Page 247 The power supply still uses some power, even if the switch on the front panel is turned off. ➔ To disconnect the Agilent 1220 Infinity II LC pump from line, unplug the power cord. Sharp metal edges WA R N I N G Sharp-edged parts of the equipment may cause injuries.
-
Page 248: Checking And Cleaning The Solvent Filter
Solvent Delivery System Checking and Cleaning the Solvent Filter Small particles can permanently block the capillaries and valves of the pump. WA R N I N G Damage to the Agilent 1220 Infinity II LC pump ➔ Always filter solvents. ➔... - Page 249 (65 %) for one hour. 2 Thoroughly flush the filter with LC grade water (remove all nitric acid, some columns can be damaged by concentrated nitric acid; check with pH indicator). 3 Reinstall the filter. 1220 Infinity II LC System User Manual...
-
Page 250: Exchanging The Passive Inlet Valve
Place the solvent bottles under the pump. Remove the upper front cover. Disconnect the solvent inlet tube from the inlet valve. N O T E Beware of leaking solvents due to hydrostatic pressure. 1220 Infinity II LC System User Manual... - Page 251 Insert the new valve into the pump head. Using the 14 mm wrench, turn the nut until it is hand-tight. Reconnect the adapter at the inlet valve (optional). Reconnect the solvent inlet tube to the adapter. 1220 Infinity II LC System User Manual...
- Page 252 Maintenance and Repair Solvent Delivery System Close the upper front cover. 1220 Infinity II LC System User Manual...
-
Page 253: Exchanging The Outlet Valve
Check that the new valve is assembled correctly and that Reinstall the outlet valve and tighten the valve. the gold seal is present (if the gold seal is deformed, it should be replaced). Reconnect the valve capillary. 1220 Infinity II LC System User Manual... -
Page 254: Exchanging The Purge Valve Frit Or The Purge Valve
Beware of leaking solvents due to hydrostatic pressure. N O T E 2 Using the 14 mm wrench, unscrew the purge valve and remove it. 3 Remove the seal cap from the purge valve. 1220 Infinity II LC System User Manual... - Page 255 The rubber o-ring might break. ➔ Anticipate the correct position of the connections before tightening the valve. 7 Insert the purge valve into the pump head and fix it with a 14 mm wrench. 1220 Infinity II LC System User Manual...
- Page 256 Maintenance and Repair Solvent Delivery System 8 Reconnect the outlet capillary and the waste tubing. 1220 Infinity II LC System User Manual...
-
Page 257: Removing The Pump Head Assembly
Starting the pump when the pump head is removed may damage the pump drive. ➔ Never start the pump when the pump head is removed. Remove the upper front cover. Using a 1/4 inch wrench disconnect the valve capillary from the outlet valve. 1220 Infinity II LC System User Manual... - Page 258 Beware of leaking solvents due to hydrostatic pressure. Remove the capillary at the bottom of the pump head. Using a 4 mm hexagonal key, stepwise loosen the two pump head screws. Remove the pump head from the pump drive. 1220 Infinity II LC System User Manual...
-
Page 259: Maintenance Of A Pump Head
Place the pump head on a flat surface. Loosen the lock While holding the lower half of the assembly (piston screw (two turns). housing), carefully pull the pump housing away from the piston housing. 1220 Infinity II LC System User Manual... - Page 260 2-propanol. Replace piston if scratched. Using the plastic side of the insert tool, insert new seals Place the support rings on the piston housing. Note the into the pump head. correct position of the pins. 1220 Infinity II LC System User Manual...
- Page 261 Place the pump housing onto the piston housing. Insert the pistons and carefully press them into the seals. Tighten the lock screw. Install the pump head, see “Reinstalling the Pump Head Assembly” on page 262. 1220 Infinity II LC System User Manual...
-
Page 262: Reinstalling The Pump Head Assembly
“Exchanging the Plungers” page 263. For the normal phase seal, the purge valve frit should be replaced, see “Exchanging the Purge Valve Frit or the Purge Valve” on page 254. 1220 Infinity II LC System User Manual... -
Page 263: Exchanging The Plungers
7 Turn off the pump and slowly open the purge valve to release the pressure from the system. 8 Disconnect the restriction capillary and reinstall the bottle containing the solvent for your application. 9 Rinse your system with the solvent used for your application. 1220 Infinity II LC System User Manual... -
Page 264: Exchanging The Dual-Channel Gradient Valve (Dcgv)
When using buffer solutions and organic solvents in the Agilent 1220 Infinity II LC Pump, it is recommended to connect the buffer solution to the lower port of the gradient valve and the organic solvent to the upper port. - Page 265 Place the new DCGV into position. Make sure that the Tighten the two holding screws. valve is positioned with the A-channel at the bottom-right position. Tighten the two holding screws and connect the cable to its connector. 1220 Infinity II LC System User Manual...
- Page 266 DCGV cover. Reconnect the tube from the inlet valve to the middle Connect the solvent tubes at channel A and B of the position of the DCGV. DCGV. 1220 Infinity II LC System User Manual...
-
Page 267: Manual Injector
1 Switch the valve to the INJECT position. 2 Use the pump to flush the sample loop and seal grooves. 3 Use the needle-port cleaner (supplied with the valve) and syringe to flush the needle port and vent capillary. 1220 Infinity II LC System User Manual... -
Page 268: Exchanging The Injection Valve Seal
Leaking injection valve Tools required Description Hex key, 9/64 inch (supplied in the tool kit) Parts required Description 5068-0082 Rotor seal, PEEK Loosen the three stator screws. Remove the stator head. Remove the stator ring. 1220 Infinity II LC System User Manual... - Page 269 Remove the rotor seal. Install the new rotor seal. Install the stator ring. Ensure the pin in the stator ring is Install the stator head onto the valve. aligned with the hole in the valve body. 1220 Infinity II LC System User Manual...
- Page 270 Maintenance and Repair Manual Injector Secure stator head in place with the stator screws. Tighten each screw alternately ¼-turn until the stator head is secure. 1220 Infinity II LC System User Manual...
-
Page 271: Autosampler
The autosampler is designed for easy repair. The most frequent repairs can be done from the front of the instrument with the instrument in place in the Agilent 1220 Infinity II LC. These repairs are described in following sections. Overview of procedures... - Page 272 Cleaning the autosampler Electrical shock hazard WA R N I N G Liquid dripping into the autosampler could cause shock hazard and damage to the autosampler. ➔ Drain all solvent lines before opening any fittings. 1220 Infinity II LC System User Manual...
- Page 273 Certain maintenance procedures require the needle arm, metering device, and gripper assembly to be moved to specific positions to enable easy access to components. The maintenance functions move these assemblies into the appropriate maintenance position. 1220 Infinity II LC System User Manual...
-
Page 274: Exchanging The Needle Assembly
Do not bend the safety flap away from its position, or attempt to remove the safety cover. ➔ Do not attempt to insert or remove a vial from the gripper when the gripper is positioned below the needle. 1220 Infinity II LC System User Manual... - Page 275 Select Needle Down to move the needle arm to its lowest position. The needle arm must be in its lowest position before installing the new needle, otherwise leaks at the needle seat will occur due to incorrect needle installation. 1220 Infinity II LC System User Manual...
- Page 276 Reconnect the sample-loop fitting to the needle fitting. then tighten the screw firmly (2). Use Needle Up to lift the needle to a position Ensure the needle is aligned with the seat. approximately 2 mm above the seat. 1220 Infinity II LC System User Manual...
- Page 277 Maintenance and Repair Autosampler Next Steps: On completion of this procedure: Install the front cover. Select End in the Tools function Change Needle. 1220 Infinity II LC System User Manual...
-
Page 278: Exchanging The Needle Seat Assembly
• Use the Needle Up command in the Change Needle function to lift the needle an additional 1 cm. Disconnect the seat-capillary fitting from the injection Use a small flat-head screwdriver to ease out the needle valve (port 5). seat. 1220 Infinity II LC System User Manual... - Page 279 Ensure the needle is aligned with the seat. If required, above the seat. bend the needle slightly until the needle is aligned correctly. Next Steps: On completion of this procedure: Install the front cover. Select End in the Tools function Change Needle. 1220 Infinity II LC System User Manual...
-
Page 280: Exchanging The Rotor Seal
The stator face is held in place by the stator head. When you remove the stator head, the stator face can fall out of the valve. ➔ Carefully handle the valve to prevent damage to the stator face 1220 Infinity II LC System User Manual... - Page 281 Remove all capillary fittings from the injection-valve Loosen each fixing bolt two turns at a time. Remove the ports. bolts from the head. Remove the stator head and stator ring. Remove the rotor seal and isolation seal. 1220 Infinity II LC System User Manual...
- Page 282 Install stator head. Tighten the bolts alternately two Reconnect the pump capillaries to the valve ports. turns at a time until the stator head is secure. 1220 Infinity II LC System User Manual...
- Page 283 Maintenance and Repair Autosampler Next Steps: Slide the waste tube into the waste holder in the leak tray. On completion of this procedure: Install the front cover. 1220 Infinity II LC System User Manual...
-
Page 284: Exchanging The Metering Seal
Remove the two capillaries from the metering-head Remove the two fixing bolts, and pull the head assembly assembly. away from the sampler. Notice that the closed side of the metering head faces upwards. 1220 Infinity II LC System User Manual... - Page 285 Use a small screwdriver to carefully remove the seal. Install the new seal. Press the seal firmly into position. Clean the chamber with lint-free cloth. Ensure all particular matter is removed. 1220 Infinity II LC System User Manual...
- Page 286 Install the fixing bolts. Tighten the bolts securely. Install the metering head assembly in the autosampler. Ensure the large hole in the metering head is facing downwards. 1220 Infinity II LC System User Manual...
- Page 287 Maintenance and Repair Autosampler Next Steps: Reinstall the capillaries. On completion of this procedure: Install the front cover. Select End in the Tools function in the LMD software Change piston. 1220 Infinity II LC System User Manual...
-
Page 288: Exchanging The Gripper Arm
Identify the slit below the gripper motor and the gripper Rotate the arm approximately 2.5 cm (1 inch) to the left arm release button. and insert the straightened paper clip into the slit. 1220 Infinity II LC System User Manual... - Page 289 Next Steps: On completion of this procedure: Install the front cover. Turn the power to the Instrument ON. 1220 Infinity II LC System User Manual...
-
Page 290: Variable Wavelength Detector (Vwd)
Repairing the flow cell If leaking or if intensity drops due to A pressure tightness test should be contaminated flow cell windows. done after repair. Drying the leak sensor If leak has occurred. Check for leaks. 1220 Infinity II LC System User Manual... -
Page 291: Exchanging The Deuterium Lamp
WA R N I N G If the detector has been in use, the lamp may be hot. ➔ If so, wait for lamp to cool down. Remove the lower front cover. Locate the heater fan cover. 1220 Infinity II LC System User Manual... - Page 292 N O T E Do not touch the glass bulb with your fingers. It may reduce the light output. Insert the lamp (RFID tag on top) (1.) and fix the screws Reconnect the connector. (2.). 1220 Infinity II LC System User Manual...
- Page 293 Reset the lamp counter as described in the Utilities software documentation. Turn the lamp ON. Give the lamp more than 10 min to warm-up. Perform Wavelength Calibration to check the correct positioning of the lamp. 1220 Infinity II LC System User Manual...
-
Page 294: Replace The Flow Cell / Cuvette Holder
Turn the lamp OFF. Remove the lower front cover. Disconnect the inlet capillary and outlet tubing from the flow cell. Unscrew the two thumb screws. Pull the flow cell out of its location. 1220 Infinity II LC System User Manual... - Page 295 Fix the two thumb screws parallel. Reconnect the inlet capillary. Close the lower front cover. Next Steps: Configure the flow cell. Perform a Wavelength Verification-Calibration to check the correct position of the flow cell/cuvette holder. 1220 Infinity II LC System User Manual...
-
Page 296: Repairing The Flow Cell
Window surfaces scratched by tweezers C AU T I O N Window surfaces can easily be scratched by using tweezers to remove the windows. ➔ Do not use tweezers to remove the windows 1220 Infinity II LC System User Manual... - Page 297 Use adhesive tape to remove the PEEK ring, the window and the gasket. d Repeat step 1 on page 297 through step 3 on page 297 for the other window. Keep the parts separate, otherwise they could get mixed up. 1220 Infinity II LC System User Manual...
- Page 298 9 Test the flow cell for leaks. If there are no leaks, insert the flow cell into the detector. 10 Perform Wavelength Calibration to check the correct positioning of the flow cell ( “Wavelength Verification/Calibration” on page 168). 11 Replace the lower front cover. 1220 Infinity II LC System User Manual...
-
Page 299: Using The Cuvette Holder
Cuvette Holder Cuvette with the “standard”, e.g. NIST certified holmium oxide sample Preparations Remove the normal flow cell. Have cuvette with standard available. Locate the cuvette holder on the desk. Unscrew the bracket. 1220 Infinity II LC System User Manual... - Page 300 Give the lamp more than 10 min to warm-up. Perform Wavelength Verification/Calibration to check the correct positioning of the lamp. Next Steps: Replace the bracket and fix the cuvette. Install the cuvette holder in the instrument. Perform your verification. 1220 Infinity II LC System User Manual...
-
Page 301: Correcting Leaks
1 Remove the lower front cover. 2 Use tissue to dry the leak sensor area. 3 Observe the capillary connections and the flow cell area for leaks and correct, if required. 4 Replace the front cover. 1220 Infinity II LC System User Manual... -
Page 302: Diode Array Detector (Dad)
A holmium or wavelength calibration Cleaning or exchange test should be performed after replacement. Leak sensor drying If leak has occurred. Check for leaks. Leak handling System If broken or corroded. Check for leaks. replacement 1220 Infinity II LC System User Manual... -
Page 303: Cleaning The Module
WA R N I N G hazard and damage the module ➔ Do not use an excessively damp cloth during cleaning. ➔ Drain all solvent lines before opening any connections in the flow path. 1220 Infinity II LC System User Manual... -
Page 304: Exchanging A Lamp
WA R N I N G If the detector has been in use, the lamp may be hot. ➔ If so, wait for lamp to cool down. Remove the lower front cover. Unplug the lamp connector as required. 1220 Infinity II LC System User Manual... - Page 305 Remove the Vis-lamp and place it on a clean place. Insert the deuterium lamp (RFID tag on the top side). N O T E Do not touch the glass bulb with your fingers. It may reduce the light output. 1220 Infinity II LC System User Manual...
- Page 306 Turn the lamp on and give the lamp 10 minutes to warm Perform a “Wavelength Verification and Recalibration” on page 188or a “Holmium Oxide Test” page 180 to check the correct positioning of the UV-lamp. Perform an “Intensity Test” on page 177. 1220 Infinity II LC System User Manual...
-
Page 307: Remove And Install A Flow Cell
Micro flow cell, 3 mm, 2 µL, 120 bar (12 MPa) G1315-60015 High pressure flow cell, 6 mm, 1.7 µL, 400 bar (40 MPa) Nano flow cell Preparations Turn the lamp(s) off. Remove the lower front cover. Open the flow cell door. 1220 Infinity II LC System User Manual... - Page 308 Remove the flow cell while pressing the flow cell holder. capillary (bottom) with the union. Insert the flow cell while pressing the flow cell holder. Insert the flow cell capillaries into the union holder (top is inlet, bottom is outlet). 1220 Infinity II LC System User Manual...
- Page 309 Reconnect the flow cell inlet capillary (top) to the union. Close the flow cell door. Close the lower front cover. Perform a Wavelength Verification and Calibration or a Holmium Oxide Test to check the correct positioning of the flow cell. 1220 Infinity II LC System User Manual...
-
Page 310: Maintenance Of The Flow Cell
Description For parts, see “Standard Flow Cell” on page 352. Preparations Turn the flow off. Remove the front cover. Remove the flow cell, see “Remove and Install a Flow Cell” on page 307. 1220 Infinity II LC System User Manual... - Page 311 If you removed all individual parts from the window assembly refer to the figures in “Standard Flow Cell” on page 352 for the correct orientation of the parts. 1220 Infinity II LC System User Manual...
- Page 312 Insert the flow cell. Replace the front cover Perform a “Wavelength Verification and Recalibration” on page 188 or a “Holmium Oxide Test” on page 180 to check the correct positioning of the flow cell. 1220 Infinity II LC System User Manual...
-
Page 313: Replacing Capillaries On A Standard Flow Cell
When retightening the fittings, make sure that they are carefully tightened (handtight plus 1/4 turn with a wrench). Otherwise damage of the flow cell body or blockage may result. 1220 Infinity II LC System User Manual... - Page 314 4-mm wrench for the fitting." To replace the inlet capillary, use a 4-mm wrench for the Unscrew the cell body from the heat exchanger and the fitting. heat exchanger from the clamp unit. 1220 Infinity II LC System User Manual...
- Page 315 Take the new inlet capillary and bend it 90° about 35 mm Bend the capillary again by 90° as shown below. from its end. 1220 Infinity II LC System User Manual...
- Page 316 Insert the fixing screw, so that the capillary cannot leave Carefully insert the I.D. tag into the new heat exchanger. the grove. Shown is the default orientation. See Note at the beginning of this section. 1220 Infinity II LC System User Manual...
- Page 317 Insert the flow cell. Replace the front cover. Perform a “Wavelength Verification and Recalibration” on page 188 or a “Holmium Oxide Test” on page 180 to check the correct positioning of the flow cell. 1220 Infinity II LC System User Manual...
-
Page 318: Cleaning Or Exchanging The Holmium Oxide Filter
A slight change in the absorbance might be possible. Other components within the light path (lenses, windows,...) are also changing their behavior over the time. 1220 Infinity II LC System User Manual... - Page 319 N O T E Do not scratch the holmium oxide filter. The holmium oxide filter can be cleaned with alcohol and a lint-free cloth. 1220 Infinity II LC System User Manual...
- Page 320 180 to check the proper function of the holmium oxide filter. Insert the flow cell, see “Remove and Install a Flow Cell” on page 307. Replace the front cover. Turn on the flow. 1220 Infinity II LC System User Manual...
-
Page 321: Correcting Leaks
1 Use tissue to dry the leak sensor area and the leak pan. 2 Observe the capillary connections and the flow cell area for leaks and correct, if required. Figure 66 Observing for Leaks 3 Replace the front cover. 1220 Infinity II LC System User Manual... -
Page 322: Replacing Leak Handling System Parts
3 Insert the leak funnel with the tubing in its position. 4 Insert the leak funnel into the leak funnel holder. Figure 67 Replacing Leak Handling System Parts 5 Replace the front cover. 1220 Infinity II LC System User Manual... -
Page 323: Algae Growth In Hplc Systems
• column filters to plug, resulting in high system pressure. • flow cell windows of detectors to become dirty, resulting in higher noise levels. Since the detector is the last module in the flow path, this problem is less common. 1220 Infinity II LC System User Manual... - Page 324 In contrast to other HPLC systems, such as HP 1090 and HP 1050 Series, which use helium degassing, algae have a better chance to grow in systems such as the Agilent 1220 Infinity II LC, where helium is not used for degassing (most algae need oxygen and light for growth).
-
Page 325: Replacing The Module's Firmware
Update Tool and the documentation from the Agilent web. • http://www.agilent.com/en-us/firmwareDownload?whid=69761 2 For loading the firmware into the module follow the instructions in the documentation. Module Specific Information There is no specific information for this module. 1220 Infinity II LC System User Manual... - Page 326 Maintenance and Repair Replacing the Module’s Firmware 1220 Infinity II LC System User Manual...
-
Page 327: Parts For Maintenance And Repair
1220 Infinity II LC System User Manual Parts for Maintenance and Repair 1220 Infinity II LC System System Parts Mainboard overview Fuses Solvent Delivery System Injection System Manual Injector Autosampler Column Oven Detector Variable Wavelength Detector (VWD) Diode Array Detector (DAD) This chapter provides information on parts for maintenance and repair. -
Page 328: 1220 Infinity Ii Lc System
System Parts System part numbers Description 0950-4997 Power supply G4280-65850 Agilent 1220 Infinity II LC main board G4280-65800 Agilent 1220 Infinity II LC VL main board G4280-68723 Cabinet kit G4280-60056 Side cover kit, walk-up G4280-60102 Front door, top G4280-60001 Front door, bottom... -
Page 329: Mainboard Overview
22. VWD heater sensor 23. VWD heater Power supply sensors 24. Power fail connector 25. Power switch control 26. Power and ground 21, 22, 23 Figure 68 Connectors of the Agilent 1220 Infinity II Instrument Mainboard 1220 Infinity II LC System User Manual... -
Page 330: Fuses
• Fuse F3 (processor core, +5 V, +15 V, -15 V supply on mainboard) • Fuse F4 (VWD incl. D2-lamp) • Fuse F5 (VWD heater, fan) 1 fuse netfilter Description 2110-1004 Fuse 10 A t 1220 Infinity II LC System User Manual... -
Page 331: Solvent Delivery System
Solvent Delivery System Pump Main Repair Parts Description G1311-60001 Pump drive G1311-60065 Damper Isocratic/Quaternary Pump 600 bar 79835-60005 Damper Quaternary Pump 400 bar G4280-60004 Dual-channel gradient valve 3160-1017 Fan 92 mm x 92 mm G4280-68708 1220 Infinity II LC System User Manual... - Page 332 Piston seal PTFE, carbon filled, black (pack of 2), default 0905-1420 PE seals (pack of 2) G1311-25200 Pump chamber housing G1312-60066 Passive inlet valve 1220/1260 G1312-60067 Outlet valve 1220/1260 5042-1303 Lock screw G4280-60061 Purge valve 0515-2118 Pump head screw (M5, 60 mm) 1220 Infinity II LC System User Manual...
- Page 333 Parts for Maintenance and Repair Solvent Delivery System Figure 69 Pump head assembly without seal wash option The Pump Head 1200 SL without Seal Wash (G1312-60056) includes items 1-7, 10 and 12. 1220 Infinity II LC System User Manual...
- Page 334 Parts for Maintenance and Repair Solvent Delivery System Figure 70 Pump head assembly without seal wash option The design of the seal wash gasket has changed, see below. N O T E 1220 Infinity II LC System User Manual...
- Page 335 The Pump head assembly with seal wash (G1312-60045) includes items 1-8, 11 and 13. Active seal wash is not supported for the 1220 Infinity II LC, only continuous seal wash. N O T E 1220 Infinity II LC System User Manual...
- Page 336 Parts for Maintenance and Repair Solvent Delivery System Figure 71 Pump Head with Seal Wash Option The design of the seal wash gasket has changed, see below. N O T E 1220 Infinity II LC System User Manual...
- Page 337 Purge Valve Assembly Item Description G4280-60061 Purge valve Valve body 01018-22707 PTFE frits (pack of 5) 5067-4728 Seal Cap Assembly Degasser Unit Description G4280-60070 Degassing unit G1311-60007 Vacuum Pump for Quaternary Pump Degasser 1220 Infinity II LC System User Manual...
- Page 338 Ferrules with lock ring (10/Pk) 5063-6599 Tube screw (10/Pk) Wire marker 5062-2483 Tube PTFE 1.5 mm x 5 m, 3 mm od 5062-8517 Frit adapter (pack of 4) 5041-2168 Solvent inlet filter, 20 µm pore size 1220 Infinity II LC System User Manual...
- Page 339 G4280-60034 Solvent tube, vacuum degasser to DCGV G4280-81300 Capillary, plunger 1 to damper G4280-81301 Capillary, damper to plunger 2 5067-5378 Connecting tube, DCGV to PIV 5062-2461 Waste tube, 5 m (reorder pack) 1220 Infinity II LC System User Manual...
-
Page 340: Injection System
5067-4202 Manual injection valve 600 bar, complete including loop and needle port 1535-4045 Isolation seal 5068-0082 Rotor seal, PEEK 0101-1417 Stator head 5067-1581 Needle port 5068-0018 Stator screws 8710-0060 Hex-key wrench, 9/64 inch 1220 Infinity II LC System User Manual... - Page 341 Sample loop 20 µL 0101-1238 Sample loop 50 µL 0101-1242 Sample loop 100 µL 0101-1227 Sample loop 200 µL 0101-1236 Sample loop 500 µL 0101-1235 Sample loop 1 mL 0101-1234 Sample loop 2 mL 1220 Infinity II LC System User Manual...
-
Page 342: Autosampler
Screw M4, 40 mm long 01078-23202 Adapter 5001-3739 Support Seal assembly 5063-6589 Metering seal (pack of 2) for 100 µL analytical head 01078-27710 Head body 0515-2118 Screw M5, 60 mm long, for mounting assembly 1220 Infinity II LC System User Manual... - Page 343 Parts for Maintenance and Repair Injection System 1220 Infinity II LC System User Manual...
- Page 344 Waste tube injection valve assy (120 mm) G1313-87101 Needle-seat assy (0.17 mm i.d. 2.3 µL) G1313-43204 Seat adapter G1313-44106 Safety flap G1313-68715 Flex board G1313-87201 Needle assembly G1313-68713 Clamp Kit (includes needle clamp and 2 x clamp screw) 1220 Infinity II LC System User Manual...
- Page 345 Parts for Maintenance and Repair Injection System 1220 Infinity II LC System User Manual...
- Page 346 Parts for Maintenance and Repair Injection System Injection Valve Assembly Item Description 0101-1422 Injection valve 0100-1852 Isolation seal 0101-1416 Rotor seal (PEEK) 0101-1417 Stator head 1535-4857 Stator screws 1220 Infinity II LC System User Manual...
-
Page 347: Column Oven
Parts for Maintenance and Repair Column Oven Column Oven Description G4280-60040 Complete column oven assembly G4280-60017 Heater door assembly 1220 Infinity II LC System User Manual... -
Page 348: Detector
Standard Flow Cell 10 mm / 14 µL Item Description G1314-60086 Standard flow cell, 10 mm, 14 µL, 40 bar 5062-8522 Capillary column - detector PEEK 600 mm lg, 0.17 mm i.d., 1/16 inch o.d. 1220 Infinity II LC System User Manual... - Page 349 Gasket #1 kit (OUT large hole, i.d. 2.4 mm) KAPTON, 2/pk G1314-65065 Ring #1 kit (OUT large hole, i.d. 2.4 mm) PEEK, 2/pk Figure 72 Standard Flow Cell 10 mm / 14 µL 1220 Infinity II LC System User Manual...
- Page 350 Complete optical unit assembly G4280-80004 G1314-60113 Heater Assembly G1314-81010 Heater Cable G1314-67000 Heater Interface Board Kit (includes 4 rivets) G1314-65802 VWD temp. sensor board G4280-81623 Cable Front end VWD Reference G4280-81619 Cable Front end VWD Sample 1220 Infinity II LC System User Manual...
- Page 351 Parts for Maintenance and Repair Detector Repairs to the optical unit require specialist knowledge. N O T E 1220 Infinity II LC System User Manual...
-
Page 352: Diode Array Detector (Dad)
Cell repair kit STD includes window screw kit, 4 mm hexagonal wrench and seal kit 79883-68703 Window screw kit, includes 2 quartz windows, 2 compression washers, 2 window holders, 2 window screws and 10 washers 1220 Infinity II LC System User Manual... - Page 353 Parts for Maintenance and Repair Detector Figure 73 Standard Flow Cell Parts Gaskets # 6 and #7 have different hole diameters. N O T E Figure 74 Orientation of Spring Washers 1220 Infinity II LC System User Manual...
- Page 354 Parts for Maintenance and Repair Detector Detector Lamps Description 2140-0820 Longlife Deuterium lamp “C“ (with black cover and RFID tag) G1103-60001 Tungsten lamp 1220 Infinity II LC System User Manual...
-
Page 355: Upgrading The 1220 Infinity Ii Lc
1220 Infinity II LC System User Manual Upgrading the 1220 Infinity II LC Oven Upgrade Install the (optional) External Tray Install the Active Inlet Valve This chapter provides information for upgrading the LC system. Agilent Technologies... -
Page 356: Oven Upgrade
(“Remove a Column” on page 55). Remove the leak drain tube. Press the knurled portion at either side of the column tray inwards (1) and remove the column tray (2). Leak drain tube 1220 Infinity II LC System User Manual... - Page 357 Click the oven insulation into place in the lower front cover, with the cutout in the oven insulation support at the bottom. Install the column and reconnect the capillaries (“Install Close the lower front cover. a Column” on page 53). 1220 Infinity II LC System User Manual...
- Page 358 Configure the oven in the Lab Advisor software. Power cycle the instrument and start your Chromatographic Data System. Use Auto configure and the instrument now should be registered under its new main assembly number. 1220 Infinity II LC System User Manual...
-
Page 359: Install The (Optional) External Tray
To prevent personal injury, be careful when getting in contact with sharp metal areas. Lift the two clips at the rear of the instrument to remove Remove the top cover. the top cover. 1220 Infinity II LC System User Manual... - Page 360 (3) and verify that the holders on the metal finally out (3). plate catch the side cover correctly. Detail View of the holder mechanism between side cover and bottom plate: 1220 Infinity II LC System User Manual...
- Page 361 Remove the two rubber plugs that are located at the fixing rods (attached to it) into the two holes on the left upper and the lower part of the tray base. side of the autosampler until you hear a click. 1220 Infinity II LC System User Manual...
- Page 362 Install the external tray into the autosampler tray base. Verify the position of the tray and correct it if necessary. It has to be flush with the inner side of the side cover. 1220 Infinity II LC System User Manual...
-
Page 363: Install The Active Inlet Valve
• Use an optional solvent shutoff valve or lift up solvent filters in solvent reservoirs to avoid leakages. Remove the upper front cover. Disconnect the solvent inlet tube from the inlet valve. N O T E Beware of leaking solvents due to hydrostatic pressure. 1220 Infinity II LC System User Manual... - Page 364 Tighten the active inlet valve using a 14 mm wrench Use the new solvent tubing provided in update kit to (approx. 10 Nm). connect the flow path between AIV and DCGV. 10 Nm 1220 Infinity II LC System User Manual...
- Page 365 Upgrading the 1220 Infinity II LC Install the Active Inlet Valve Connect the active inlet valve cable to the connector in Close the upper front cover. the Z-panel. 1220 Infinity II LC System User Manual...
- Page 366 Upgrading the 1220 Infinity II LC Install the Active Inlet Valve 1220 Infinity II LC System User Manual...
-
Page 367: Identifying Cables
1220 Infinity II LC System User Manual Identifying Cables Cable Overview Analog Cables Remote Cables BCD Cables CAN/LAN Cables Agilent 1200 module to PC This chapter provides information on cables used with the Agilent 1200 Infinity Series modules. Agilent Technologies... -
Page 368: Cable Overview
Identifying Cables Cable Overview Cable Overview Never use cables other than the ones supplied by Agilent Technologies to ensure proper N O T E functionality and compliance with safety or EMC regulations. Analog cables Description 35900-60750 Agilent module to 3394/6 integrators... - Page 369 It's also called "Null Modem Cable" with full handshaking where the wiring is made between pins 1-1, 2-3, 3-2, 4-6, 5-5, 6-4, 7-8, 8-7, 9-9. 5181-1561 RS-232 cable, 8 m 1220 Infinity II LC System User Manual...
-
Page 370: Analog Cables
The other end depends on the instrument to which connection is being made. Agilent Module to 3394/6 Integrators p/n 35900-60750 Pin 3394/6 Pin Agilent Signal Name module Not connected Shield Analog - Center Analog + 1220 Infinity II LC System User Manual... - Page 371 Pin BNC Pin Agilent Signal Name module Shield Shield Analog - Center Center Analog + Agilent Module to General Purpose p/n 01046-60105 Pin Agilent Signal Name module Not connected Black Analog - Analog + 1220 Infinity II LC System User Manual...
-
Page 372: Remote Cables
Identifying Cables Remote Cables Remote Cables One end of these cables provides a Agilent Technologies APG (Analytical Products Group) remote connector to be connected to Agilent modules. The other end depends on the instrument to be connected to. Agilent Module to 3396A Integrators... - Page 373 Start 4 - Blue Shut down 5 - Pink connected 6 - Yellow Power on High 7 - Red Ready High 8 - Green Stop 9 - Black Start request 13, 15 connected 1220 Infinity II LC System User Manual...
- Page 374 Wire Color Pin Agilent Signal Name Active module (TTL) White Digital ground Brown Prepare run Gray Start Blue Shut down Pink connected Yellow Power on High Ready High Green Stop Black Start request 1220 Infinity II LC System User Manual...
-
Page 375: Bcd Cables
BCD 0 Orange BCD 3 BCD 2 Brown BCD 1 Gray Digital ground Gray Gray/pink BCD 11 Red/blue BCD 10 White/green BCD 9 Brown/green BCD 8 not connected not connected + 5 V 1220 Infinity II LC System User Manual... - Page 376 Agilent Module to 3396 Integrators p/n 03396-60560 Pin 3396 Pin Agilent Signal Name BCD Digit module BCD 5 BCD 7 BCD 6 BCD 4 BCD0 BCD 3 BCD 2 BCD 1 Digital ground + 5 V 1220 Infinity II LC System User Manual...
-
Page 377: Can/Lan Cables
CAN cable, Agilent module to module, 1 m LAN Cables Description 5023-0203 Cross-over network cable, shielded, 3 m (for point to point connection) 5023-0202 Twisted pair network cable, shielded, 7 m (for point to point connection) 1220 Infinity II LC System User Manual... -
Page 378: Agilent 1200 Module To Pc
It's also called "Null Modem Cable" with full handshaking where the wiring is made between pins 1-1, 2-3, 3-2, 4-6, 5-5, 6-4, 7-8, 8-7, 9-9. 5181-1561 RS-232 cable, 8 m 1220 Infinity II LC System User Manual... -
Page 379: Appendix
1220 Infinity II LC System User Manual Appendix General Safety Information Solvent Information Radio Interference UV Radiation Sound Emission Waste Electrical and Electronic Equipment (WEEE) Directive (2002/96/EC) Declaration of Conformity for HOX2 Filter Agilent Technologies on Internet This chapter provides addition information on safety, legal and web. -
Page 380: General Safety Information
Any interruption of the protective earth grounding will cause a potential shock hazard that could result in serious personal injury. Whenever it is likely that the protection has been impaired, 1220 Infinity II LC System User Manual... - Page 381 When working with solvents, observe appropriate safety procedures (for example, goggles, safety gloves and protective clothing) as described in the material handling and safety data sheet by the solvent vendor, especially when toxic or hazardous solvents are used. 1220 Infinity II LC System User Manual...
- Page 382 C AU T I O N alerts you to situations that could cause loss of data, or damage of equipment. ➔ Do not proceed beyond a caution until you have fully understood and met the indicated conditions. 1220 Infinity II LC System User Manual...
-
Page 383: Solvent Information
• Halogenated solvents or mixtures which form radicals and/or acids, for example: → 2COCl 2CHCl + 2HCl This reaction, in which stainless steel probably acts as a catalyst, occurs quickly with dried chloroform if the drying process removes the stabilizing alcohol. 1220 Infinity II LC System User Manual... - Page 384 For example, a 1 % solution of acetic acid in methanol will attack steel. • Solutions containing strong complexing agents (for example, EDTA, ethylene diamine tetra-acetic acid). • Mixtures of carbon tetrachloride with 2-propanol or THF. 1220 Infinity II LC System User Manual...
-
Page 385: Radio Interference
Appendix Radio Interference Radio Interference Cables supplied by Agilent Technologies are screened to provide optimized protection against radio interference. All cables are in compliance with safety or EMC regulations. Test and Measurement If test and measurement equipment is operated with unscreened cables, or... -
Page 386: Uv Radiation
Typically the radiation values are much smaller than these limits: Table 50 UV radiation typical values Position Effective irradiance Lamp installed, 50 cm distance average 0.016 µW/cm Lamp installed, 50 cm distance maximum 0.14 µW/cm 1220 Infinity II LC System User Manual... -
Page 387: Sound Emission
This product has a sound pressure emission (at the operator position) < 70 dB. • Sound Pressure L < 70 dB (A) • At Operator Position • Normal Operation • According to ISO 7779:1988/EN 27779/1991 (Type Test) 1220 Infinity II LC System User Manual... -
Page 388: Waste Electrical And Electronic Equipment (Weee) Directive (2002/96/Ec)
Monitoring and Control Instrumentation product. Do not dispose of in domestic household waste N O T E To return unwanted products, contact your local Agilent office, or see http://www.agilent.com for more information. 1220 Infinity II LC System User Manual... -
Page 389: Declaration Of Conformity For Hox2 Filter
Appendix Declaration of Conformity for HOX2 Filter Declaration of Conformity for HOX2 Filter 1220 Infinity II LC System User Manual... -
Page 390: Agilent Technologies On Internet
Appendix Agilent Technologies on Internet Agilent Technologies on Internet For the latest information on products and services visit our worldwide web site on the Internet at: http://www.agilent.com Select Products/Chemical Analysis 1220 Infinity II LC System User Manual... - Page 391 ASTM analog composition range environmental conditions noise test (ChemStation only) compressibility compensation 21, 22, AUTO mode condensation automatic configuration with Bootp remote configurations autosampler RS-232 control EMF counters cables system introduction 1220 Infinity II LC System User Manual...
- Page 392 233, array 122, uv ignition failed illegal temperature value from sensor width uv lamp current at air inlet uv lamp voltage draw 1220 Infinity II LC System User Manual...
- Page 393 (parts) information automatic configuration with support windows on cuvette holder Bootp test on solvents cable types and data on UV radiation initialization mode selection flow path blockage 1220 Infinity II LC System User Manual...
- Page 394 LAN standard flow cell manual control parts identification needle drive 107, materials in contact with mobile cables phase needle into sample parts 1220 Infinity II LC System User Manual...
- Page 395 RFID tag power cords pump rotor seal slit test overview exchange slit width pump RS-232C solvent delivery system functional principle 1220 Infinity II LC System User Manual...
- Page 396 WEEE directive the cuvette holder stroke length weight UV lamp on stroke volume UV radiation suppression quantifying X-axis system configurations vacuum degasser valve bypass Z-axis TCP/IP parameter configuration valve failed 1220 Infinity II LC System User Manual...
- Page 397 Index 1220 Infinity II LC System User Manual...
- Page 398 • Installation • Agilent 1220 Infinity II LC Description • Test Functions and Calibration • Error Information • Maintenance • Parts for Maintenance • Upgrading the Agilent 1220 Infinity II LC • Appendix © Agilent Technologies 2016 Printed in Germany 09/2016...