Table of Contents
Advertisement
Quick Links
Advertisement
Table of Contents

Subscribe to Our Youtube Channel
Related Manuals for StorageTek SL150


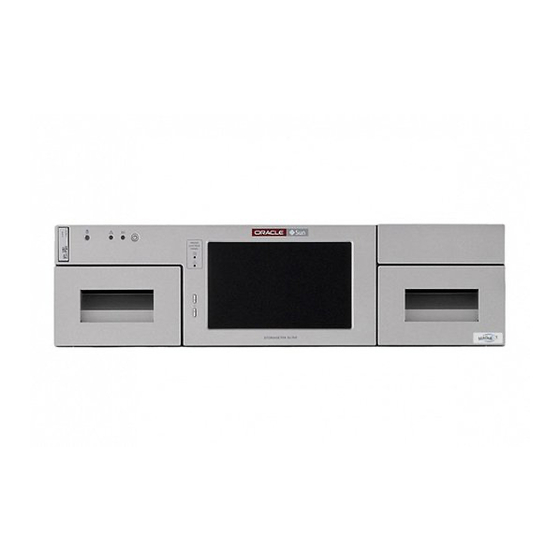
Summary of Contents for StorageTek SL150
- Page 1 S torageTek SL150 Modular Tape Library [ 1 ] Guide E22579-16 December 2018...
- Page 2 StorageTek SL150 Modular Tape Library Guide E22579-16 Copyright © 2018, Oracle and/or its affiliates. All rights reserved. This software and related documentation are provided under a license agreement containing restrictions on use and disclosure and are protected by intellectual property laws. Except as expressly permitted in your license agreement or allowed by law, you may not use, copy, reproduce, translate, broadcast, modify, license, transmit, distribute, exhibit, perform, publish, or display any part, in any form, or by any means.
-
Page 3: Table Of Contents
Power Over Ethernet (POE)......................1-9 IPv6 Network Address Support....................... 1-9 SAN Connection Zoning ........................1-9 Software that Supports the SL150 ......................1-9 About ACSLS (Automated Cartridge System Library Software) ..........1-9 About StorageTek Tape Analytics ....................1-10 About Service Delivery Platform 2 ....................1-11 SL150 Part Numbers for Ordering ..................... - Page 4 Electrostatic Discharge ........................2-3 Prepare the Rack ............................2-3 Unpack and Acclimate the Library ....................... 2-4 Install the Base Module .......................... 2-5 Unpack the Base Module Accessory Kit ..................2-5 Install the Base Module Back Rails ....................2-6 Install the Base Module Front Rails....................2-8 Install Base Module Front Rails Task 1: Connect the Front Rail to the Back Rail....
- Page 5 Configure Library Managed Encryption (LME)................4-6 Configure LME Task 1: Obtain Information from OKM............4-6 Configure LME Task 2: Configure the SL150 to Manage Encryption ......... 4-6 Configure LME Task 3: Verify the SL150 Agent is Enrolled ..........4-7 Review and Apply Configuration Changes ................... 4-7 Update Library and Drive Firmware ....................
- Page 6 Upgrade the Drive Firmware ......................4-9 Revert to the Previous Library Firmware..................4-9 Manage the Library’s SSL/TLS Certificate for HTTPS ..............4-10 Generate a Self-Signed Certificate ....................4-10 Install a Third-Party Signed Certificate ..................4-10 Install a Certificate Task 1: Verify the Library Has a Self-Signed Certificate....4-10 Install a Certificate Task 2: Export Certificate Signing Request (CSR) File .....
- Page 7 Close the Mailslot ........................... 6-11 Unassign the Mailslot ........................6-11 Unassign the Mailslot Using the Remote User Interface............ 6-11 Unassign the Mailslot Using the Local Operator Panel ............. 6-11 Move Tape Cartridges with the Remote Interface................6-11 7 Monitoring the Library View User and Host Activity .........................
- Page 8 Restart a Drive............................8-6 Update Drive Firmware........................... 8-6 9 Servicing the Library Place the Library Online and Offline....................9-1 Power On the Library ..........................9-2 Library Startup Sequence........................9-2 Power Off the Library..........................9-2 Controlled Power-Down from the Interface .................. 9-2 Forced Power-Down .........................
- Page 9 Remove a Power Supply Filler...................... 10-5 Install a Power Supply Filler ......................10-5 Front Control Panel Removal and Replacement ................10-5 Remove the Front Control Panel....................10-6 Replace the Front Control Panel ....................10-6 Module Controller Removal and Replacement................10-7 Remove the Module Controller.....................
- Page 10 A Slot Mapping and Cartridge Locations Cartridge Slot Addressing ........................A-1 Reserved Slots............................ A-1 Drive, Mailslot, Power Supply, and Robot Addressing ..............A-1 SCSI Element Addressing ........................A-2 Example Library Configurations and Slot Maps ................A-2 Glossary...
- Page 11 Expansion Module Back Rail and Clip Nut ................. 2-21 2–21 Expansion Module ID Label....................2-23 Hook and Loop Strap ......................2-23 2–22 SL150 Library Rear View ......................2-24 2–23 2–24 Power Supply ........................... 2-25 2–25 Tape Drive Tray ........................2-25 2–26...
- Page 12 List of Tables 1–1 Port Configuration Options...................... 1-4 Shipping (Packaged) Weights and Dimensions ..............1-6 1–2 Component (Unpackaged) Weights and Dimensions............1-6 1–3 1–4 Storage Slot, Mailslot, and Drive Counts for Different Configurations......1-7 2–1 Gas Limit Recommendations ....................2-2 7–1 SNMP Trap Levels ........................
-
Page 13: Preface
Class 1 Laser Product Notice The StorageTek SL150 Modular Tape Library contains a class-1 laser as defined by IEC 60825-1 Ed. 3 (2014) and EN 60825-1:2014. Use of controls or adjustments or performance of Warning: procedures other than those specified may result in hazardous radiation exposure. -
Page 15: About The Sl150 Library
SL150 Part Numbers for Ordering ■ The SL150 library has two module types: the Base Module and Expansion. Each module has two drive slots and stores up to 30 tapes in two 15-slot magazine (one on the left side and the other on the right side). Additionally, a four slot Mailslots resides in the base module for entering or ejecting tapes. -
Page 16: About The Base Module
4 - Tape drive tray 5 - Power supply 6 - Module controller About the Base Module A single base module is the smallest SL150 library configuration. The base module is a 3U rack mounted unit. It ships with: Front control panel ■... -
Page 17: About The Expansion Module
■ About Tape Drives The SL150 library supports the following tape drives. You can install a mix of HP and IBM drives of various generations within the library. HP LTO half-height generation 5 or 6 SAS or short wavelength FC interface ■... -
Page 18: About M8 Compatibility
Port 1 Settings Port 2 Settings LME enabled on Port 2 Configured normally. New address with different subnet and gateway than Port 1. Used for UI, SNMP, SMTP, SDP-2 traffic. Used for OKM traffic only. 1-4 StorageTek SL150 Modular Tape Library Guide... -
Page 19: About Tape Drives With Two Ports
Code versions earlier than 2.0 support two partitions, and a maximum of two ■ bridged drives located in the base module. Code version 2.01, and later, supports up to eight partitions and bridged drives ■ located in designated expansion modules. About the SL150 Library 1-5... -
Page 20: Library Weights And Dimensions
You must connect the bridged drive to an HBA supporting multiple LUNs (also referred to as LUN scanning). The SL150 Library uses a single SCSI ID and two logical unit numbers (LUN). LUN 0 controls the tape drive and LUN 1 which is configured as a SCSI medium changer device controls the robotics. -
Page 21: Library Power Requirements
Base Module plus one expansion module Base Module plus two expansion modules Base Module plus three expansion modules 1200 Base Module plus four expansion modules Base Module plus five expansion modules Base Module plus six expansion modules About the SL150 Library 1-7... -
Page 22: Networking And Host Communication
A SAS tape drive attached through a SAS-2 or SAS-3 HBA will work on the Solaris system using just the Solaris native commands such as dd or tar. However, this configuration is recommended for a stand-alone drive only. 1-8 StorageTek SL150 Modular Tape Library Guide... -
Page 23: Power Over Ethernet (Poe)
About ACSLS (Automated Cartridge System Library Software) ACSLS functions as the central service provider for all library operations, efficiently sharing library resources with any ACSLS-enabled application on any system, and allowing centralized library control across multiple StorageTek libraries. About the SL150 Library 1-9... -
Page 24: About Storagetek Tape Analytics
ACSLS version 8.3 (second patch) is required for library firmware version 2.25, and later, which supports new ASC and ASCQ reporting. Refer to the ACSLS documentation library for additional information regarding support for the SL150 Library and tape drives. See the Tape Storage section of OTN (http://docs.oracle.com/en/storage/#tab5). Note: ACSLS versions 8.2, 8.3, and 8.4 do not support the Expanded... -
Page 25: About Service Delivery Platform 2
Platform (SDP2)" on page 7-5. SL150 Part Numbers for Ordering The following table provides ordering part numbers for the SL150. All drives listed are half-height. Oracle recommends a maximum SAS cable length of six meters. Initial Order Part Upgrade Part... - Page 26 PWRCORD10187055-Z right angle IEC60320-1-C13 connector, 10A. 250 VAC Power Cable Argentina, 2.5 m, IRAM207 333A-25-10-AR Power Cable XATO, PWRCRD, 2.5 meter, Brazil C13 333A-25-10-BR Power Cable PWRCORD, CHINA, 2.5 meter, GB2099, 10A 333A-25-10-CN 1-12 StorageTek SL150 Modular Tape Library Guide...
-
Page 27: Configuration And Ordering Examples
SL150 Part Numbers for Ordering Initial Order Part Upgrade Part Part Type Description Number Number Power Cable PWRCORD, ISRAEL, 2.5 meter, SI-32, 10A 333A-25-10-IL Power Cable PWRCORD, INDIA, 2.5 meter, IS1293, 10A 333A-25-10-IN Power Cable PWRCORD, KOREA, 2.5 meter, KSC8305, 10A 333A-25-10-KR This multimode (50-micron) fiber-optic cables connect Fibre Channel devices. - Page 28 SL150 Part Numbers for Ordering Click the Show all Tape Storage products link, and click the StorageTek LTO Data Cartridges link. 1-14 StorageTek SL150 Modular Tape Library Guide...
-
Page 29: Installing The Library
Installing the Library These installation instructions use the Sun Rack II (a Note: standard Oracle 19-inch rack). If your rack is different, use the instructions as a basic guide but alter the steps accordingly. Library installation involves the following tasks: Verify the Site Meets Environmental Requirements ■... -
Page 30: Positive Pressurization And Ventilation - Hot Aisle Containment System (Hacs)
Positive Pressurization and Ventilation - Hot Aisle Containment System (HACS) If you will be installing the SL150 in an HACS environment, the system must maintain adequate air flow from the cold to hot aisle. Ensure that there is no turbulent air directed at the installed equipment which may reduce the cooling capability of the cold aisle supply air. -
Page 31: Electrostatic Discharge
Figure 2–1). The power supply outlets are on the right side of the SL150 library. Refer to the rack and power distribution unit documentation for instructions to install the PDU To provide access during installation of a library module, remove the front door ■... -
Page 32: Unpack And Acclimate The Library
Remove the accessory package at the end of the module, and set it aside. Remove the plastic covering the module. Grasp the module by the sides, lift it out of the carton, and set it down. Module is heavy. Use two persons when lifting it. Warning: 2-4 StorageTek SL150 Modular Tape Library Guide... -
Page 33: Install The Base Module
Install the Base Module Do not lift the Base Module by the front control panel, the Note: tape drive, or the tape drive filler. Acclimate the module to the environment. If the module is colder than the location and sufficient Note: humidity exists, condensation may occur. -
Page 34: Install The Base Module Back Rails
5 - Mounting Block Install the Base Module Back Rails Tools Required #2 Phillips screwdriver (not provided). Parts Required Back rails (1 left, 1 right) Two Mounting blocks Two 8–32 X 5/8 screws 2-6 StorageTek SL150 Modular Tape Library Guide... -
Page 35: Back Rail Position
Install the Base Module Figure 2–3 Back Rail Position Illustration Legend: 1 - Pins Figure 2–4 Back Rails Installed Locate where you will mount the base module within the rack, allowing space for expansion modules (use the rail installation template as necessary). The rails must reside with a single U boundary. -
Page 36: Install The Base Module Front Rails
Slide the front rail toward the back rail to engage the tabs of the front rail. Push the front rail into the rack until the front edge of the rail is approximately 60 mm (2.4 inches) from the rack stile. 2-8 StorageTek SL150 Modular Tape Library Guide... -
Page 37: Install Base Module Front Rails Task 2: Secure The Front Rail
Install the Base Module Figure 2–5 Front Rail Installation (Left Rail Shown) Illustration Legend: 1 - Back Rail 2 - Front Rail Install Base Module Front Rails Task 2: Secure the Front Rail Position the mounting block behind the rack stile in the second U of the three U span (see Figure 2–6). -
Page 38: Install Base Module Front Rails Task 3: Verify Proper Front Rail Installation
(see Figure 2–8, callout 4). Compress the other edge of the clip nut and seat it in the hole. A small flat blade screwdriver can simplify the compression. Repeat for each front rail. 2-10 StorageTek SL150 Modular Tape Library Guide... -
Page 39: Mount The Base Module
Install the Base Module Figure 2–8 Clip Nut Location for the Base Module Illustration Legend: 1 - First U 2 - Second U 3 - Third U 4 - Clip Nut in the Second Hole of the Third U Mount the Base Module Figure 2–9 Tab and Rail Engagement Illustration Legend: 1 - Front Tab... -
Page 40: Mount The Base Module Task 1: Engage The Base Module With The Rail
Push the tool slowly into the hole to release the latch located behind the touch screen, and hold the hex key in place. Pull the magazine a short distance out of the library. Remove the hex key and store it for future use. 2-12 StorageTek SL150 Modular Tape Library Guide... -
Page 41: Mount The Base Module Task 3: Remove The Cable Clip
Install the Expansion Module Support the bottom of the magazine with your other hand during removal. Pull the magazine out of the module, and set it aside. Mount the Base Module Task 3: Remove the Cable Clip Remove both cartridge magazines from the base module. Locate the tag in the right cartridge magazine opening. -
Page 42: Unpack The Expansion Module Accessory Kit
M6 16 mm screws (used with M6 threaded hole racks) Expansion interconnect cable with USB Type A connectors ■ Label set (Module 2 through Module 10) ■ Hook and loop strap ■ Pop-in rivet ■ Hex key ■ 2-14 StorageTek SL150 Modular Tape Library Guide... -
Page 43: Remove The Library Floor
Install the Expansion Module Figure 2–12 Expansion Module Accessory Package Hardware Illustration Legend: 1 - Back Rails 2 - Clip Nuts 3 - Screws (Assorted) 4 - Expansion Cable with USB Type A Connectors 5 - Module Labels 6 - Hook and Loop Strap 7 - Rivet 8 - Hex Key Remove the Library Floor... -
Page 44: Install Clip Nuts For The Expansion Module (For Square Hole Racks Only)
Insert a clip nut in the third hole down from the junction of the first U boundary on both the left and right rail stiles. Make sure the clip nuts are parallel (in the identical mounting hole). 2-16 StorageTek SL150 Modular Tape Library Guide... -
Page 45: Prepare The Expansion Module By Removing The Cartridge Magazines
Install the Expansion Module Figure 2–14 Expansion Module Installation Illustration Legend: 1 - First U 2 - Second U 3 - Module Flange 4 - Module Engagement 5 - Clip Nut Location (Second Hole of the Second U) Prepare the Expansion Module by Removing the Cartridge Magazines Remove the expansion module from the shipping container (see "Unpack and Acclimate the Library"... -
Page 46: Install The Floor In The Bottom Expansion Module
Push the floor in and engage the rear floor tab with the module slot (see Figure 2–16). Push the floor in and seat the floor clip in each magazine bay (see Figure 2–17). Turn the module over and verify the floor clips properly engage the chassis. 2-18 StorageTek SL150 Modular Tape Library Guide... -
Page 47: Mount The Expansion Module
Install the Expansion Module Figure 2–16 Library Floor Illustration Legend: 1 - Floor Slot 2 - Floor Tab Figure 2–17 Floor Secured Illustration Legend: 1 - Floor Clip 2 - Floor Mount the Expansion Module Two people must lift and install the expansion Warning: module. -
Page 48: Scratch Avoidance
Push the module in and seat the alignment tab in the slot of the left magazine bay (see Figure 2–19). Figure 2–18 Scratch Avoidance Illustration Legend: 1 - Flange (Short Section) 2 - Tall Metal Part with Sharp Edges 3 - Flange (Long Section) 2-20 StorageTek SL150 Modular Tape Library Guide... -
Page 49: Install The Rear Rails For The Expansion Module
Install the Expansion Module Figure 2–19 Alignment Tab Seated Illustration Legend: 1 - Tab Seated in Slot 2 - Slot in Magazine Bay Install the Rear Rails for the Expansion Module Slide the back rail under the expansion module tabs (see Figure 2–20). -
Page 50: Secure The Expansion Module To The Front Rack Stile
Peel the proper label from the label sheet. The sheet has labels for Module 2 through Module 10. Note: Orient the label properly, align the label with the scribe lines, and adhere the label to the chassis (see Figure 2–21). 2-22 StorageTek SL150 Modular Tape Library Guide... -
Page 51: Install The Hook And Loop Strap
Install the Expansion Module Figure 2–21 Expansion Module ID Label Illustration Legend: 1 - Module Label 2 - Horizontal Scribe Line 3 - Vertical Scribe Line Install the Hook and Loop Strap Insert the rivet into a hole in the hook and loop strap (see Figure 2–22). -
Page 52: Install Power Supplies And Tape Drives
Do not operate the library with open tape drive or Warning: power supply slots. Figure 2–23 SL150 Library Rear View Illustration Legend: 1 - Tape Drive Filler 2 - Power Supply Filler 2-24 StorageTek SL150 Modular Tape Library Guide... -
Page 53: Remove The Power Supply Filler
Install Power Supplies and Tape Drives Figure 2–24 Power Supply Illustration Legend: 1 - Power Supply Indicators 2 - Power Supply Latch Figure 2–25 Tape Drive Tray Illustration Legend: 1 - Drive Indicators 2 - Port Indicators (HP drives only) 3 - Encryption Indicators 4 - Thumbscrew (One on Each Side of the Tray) Remove the Power Supply Filler... -
Page 54: Insert A Power Supply Into The Slot
Remove the drive tray from the shipping carton. Handle the drive tray by the rear corners (close to the thumbscrews) and the bottom of the tray. Avoid contact with the top cover of the actual tape drive. 2-26 StorageTek SL150 Modular Tape Library Guide... -
Page 55: Cable The Library
Cable the Library Grasp the rear corners of the drive tray and guide the front of the drive tray into the library drive slot. Push the drive tray completely into the drive slot. Tighten the thumbscrews. Ensure there is no tray movement in any direction. Connect the interface cable to the port on the left side of the drive. -
Page 56: Cable The Library Task 2: Connect Cables To The Drive Assembly And Power Supply
Locate the NET MGT area of the base module (above the power supply and left of the Module Output ports). Insert the Ethernet cable plug in the top port, designated with a 1 on the chassis. 2-28 StorageTek SL150 Modular Tape Library Guide... -
Page 57: Cable The Library Task 4: Align And Dress The Cables And Cords
Unlock the Robot Attach a label to the cable indicating the network port to ensure proper connection after a service action. Cable the Library Task 4: Align and Dress the Cables and Cords Gather cable slack to the outside edge of the expansion module, if necessary. Wrap the hook and loop strap around the cables and cords. -
Page 58: Apply Power To The Library
Configure the Library Step 6 of 6: Review and Apply Initialization Settings ■ Configure the Library: Finish the New Configuration ■ Configure the Library: Login with the Default Admin After powering on the library for the first time, tap Start. 2-30 StorageTek SL150 Modular Tape Library Guide... -
Page 59: Configure The Library Step 1 Of 6: Change The Default Administrator Password
Configure the Library After Powering-on for the First Time Log in as the default admin user. Tap the keyboard button. Enter the default password: passw0rd Tap Done. Tap Log In. Configure the Library Step 1 of 6: Change the Default Administrator Password Figure Legend: 1 - New Password Field 2 - Keyboard Button... -
Page 60: Configure The Library Step 2 Of 6: Configure The Network Port 1
Netmask —Clear the default value. Enter the IPv4 Netmask in the format – XXX.XXX.XXX.XXX and then tap Next. – Gateway — Clear the default value. Enter the IPv4 Gateway value in the format XXX.XXX.XXX.XXX and then tap Done. 2-32 StorageTek SL150 Modular Tape Library Guide... -
Page 61: Configure The Library Step 3 Of 6: Set The Library Date And Time
Configure the Library After Powering-on for the First Time Verify the values are correct (you can change any incorrect value by tapping the keyboard button). Tap Next. Option 2: Configure Network Port 1 with an IPv6 Address Use the Configure IPv6 list to select DHCPv6, Stateless (SLAAC), or Static. –... -
Page 62: Configure The Library Step 4 Of 6: Set The Drive Element Addressing Mode)
SCSI element addresses may change. Also, only installed drives can be assigned to a partition. Tap Next. Configure the Library Step 5 of 6: Configure the Mailslot, Reserved Slots and Volume Label Format Configure the mailslot. 2-34 StorageTek SL150 Modular Tape Library Guide... -
Page 63: Configure The Library Step 6 Of 6: Review And Apply Initialization Settings
Expanded (19 slots) ■ Set the system reserved slots. System reserved slots are storage slots in the SL150 library typically used to house cleaning tapes or diagnostic tapes. Use the System Reserved Slots list to select the desired number of slots (see "Determine the Required Number of Reserved System... -
Page 64: Configure The Library: Finish The New Configuration
Full Self Test — a thorough test that moves a tape to every slot and to every ■ unoccupied drive compatible with the chosen diagnostic tape. A full test can take significant time depending on the number of modules in the library, so plan accordingly. 2-36 StorageTek SL150 Modular Tape Library Guide... -
Page 65: Stopping A Self-Test
Run a Self-Test Optionally, select Set the Library back Online to automatically bring the library online after the test (the library goes offline to perform the self test) Click OK to start the test. If the test fails, click Degraded to open a health table Note: identifying a failed or degraded component. - Page 66 Run a Self-Test 2-38 StorageTek SL150 Modular Tape Library Guide...
-
Page 67: Basic User Interface Operations
Basic User Interface Operations Using the Remote Interface ■ Using the Front Touch Screen ■ Log In to the Remote Interface ■ Configure Accessibility Settings ■ Log Out of the Remote Interface ■ Change Your Password ■ Interpret the Graphical Library Display ■... -
Page 68: Using The Front Touch Screen
Log In to the Remote Interface In a browser, enter the URL of the library. Enter your User ID and Password. Contact the library administrator if you do not have login credentials. Click Log In. 3-2 StorageTek SL150 Modular Tape Library Guide... -
Page 69: Configure Accessibility Settings
Click Log In to close the property sheet and log in to the library. Navigate the User Interface with a Keyboard You can navigate between the different parts of an SL150 user interface screen, menu, or list using the tab and arrow keys on the keyboard. You select interface elements by pressing the Return key on the keyboard. -
Page 70: Show, Hide, And Reorder Table Columns
Calc 3.4. You can also view these files in web browsers: simply rename the file using the .html file extension in place of .xls. Print a Table The Print option of a tabular display reformats the screen data as a new, print-friendly HTML document. 3-4 StorageTek SL150 Modular Tape Library Guide... -
Page 71: Set Automatic Screen Refresh
Set Automatic Screen Refresh Set Automatic Screen Refresh You can pause and resume automatic refreshes of the browser-based user interface. In the top-right of the remote interface, click Preferences. Select Pause Automatic Refresh or Resume Automatic Refresh from the drop-down menu. When auto-refresh is paused, you must use your web browser's reload/refresh control. - Page 72 Set Automatic Screen Refresh 3-6 StorageTek SL150 Modular Tape Library Guide...
-
Page 73: Configuring The Library
Configuring the Library This this section covers how to change the library configuration at any time after the initial installation configuration. For initial installation configuration, see "Configure the Library After Powering-on for the First Time" on page 2-30. Set the Time, Network Address, Library Settings, and Encryption ■... -
Page 74: Set The Time, Network Address, Library Settings, And Encryption
Stateless (SLAAC) — If DNS does not support IPv6 addresses, select Stateless ■ (SLAAC). With a stateless address, library interface clients can find the server at an address based on the unique MAC (media access control) address of the 4-2 StorageTek SL150 Modular Tape Library Guide... -
Page 75: Configure Network Interfaces Task 3: Configure Network Port 2 (Optional)
Set the Time, Network Address, Library Settings, and Encryption network interface card in the robot/controller assembly. A stateless address will not change unless the robot has to be replaced DHCPv6 — If a DHCPv6 server is available on your network, you can select ■... -
Page 76: Selecting A Drive Element Addressing Mode
If you control the library using a version of Oracle StorageTek ACSLS software ■ that does not support the Drive Element Addressing option. If you are upgrading an SL150 library that does not currently assign addresses to ■ empty drive bays. Entering Address Only Installed Drives retains the current addresses and assigns the next address in sequence to the new drive. -
Page 77: Partition The Library
Set the Time, Network Address, Library Settings, and Encryption Partition the Library Partitioning lets multiple host systems access library resources. Each partition behaves as an independent library, but all partitions share the reserved cells, the single robot, and the four-cartridge mailslot. Requirements: Maximum of 8 partitions (code versions before 2.0 only support two partitions) ■... -
Page 78: Partition The Library Task 4: Verify The Partitioning Configuration Changes
Configure LME Task 3: Verify the SL150 Agent is Enrolled ■ Configure LME Task 1: Obtain Information from OKM Have the OKM administrator use the OKM GUI to create an SL150 library agent and then record the following information to use in the SL150 configuration: Agent Name ■... -
Page 79: Configure Lme Task 3: Verify The Sl150 Agent Is Enrolled
Configure LME Task 3: Verify the SL150 Agent is Enrolled After confirming the changes within the Configuration Wizard, have the OKM administrator go to the OKM GUI and verify that the SL150 agent now shows "Enrolled: True". See the OKM documentation for more information. -
Page 80: Verify The Download
In the Patch Search Results table, click a row. A button bar displays. Click Read Me to confirm the firmware version. For drive firmware, make sure it is intended for the SL150 library. Note the firmware release level. Scan the drive firmware Read Me file for lines like the... -
Page 81: Upgrade The Drive Firmware
Update Library and Drive Firmware The upgrade dialog displays a progress meter and the estimated time required for the upgrade. Do not close this window until the installation process finishes. If a library firmware upgrade fails, create a service request. For more information, "Create a Service Request"... -
Page 82: Manage The Library's Ssl/Tls Certificate For Https
Submit the CSR to the third-party certifying authority (CA). Install a Certificate Task 3: Obtain Required Certificates Verify that you have obtained the following before importing: Primary certificate of the trust anchor CA (such as VeriSign's public primary root ■ 4-10 StorageTek SL150 Modular Tape Library Guide... -
Page 83: Install A Certificate Task 4: Import The Certificate File
Manage the Library’s SSL/TLS Certificate for HTTPS Intermediate certificate of the issuing SSL CA (optional). In cases where there is no ■ intermediate issuer, you can omit the intermediate certificate. This is highly site-specific, so check with your company’s security experts for requirements. Your newly issued SSL certificate ■... - Page 84 Manage the Library’s SSL/TLS Certificate for HTTPS 4-12 StorageTek SL150 Modular Tape Library Guide...
-
Page 85: Managing Users
Managing Users The library manages user access to the system based on user and role. This section outlines how to add and manage users. User Roles and Access ■ Add a User and Assign a Role ■ Remove a User ■... -
Page 86: Remove A User
Log into the remote interface with the administrator role. Select Users in the left menu. Select the user account by clicking on the corresponding table row. Click Reset Password Enter a new password. 5-2 StorageTek SL150 Modular Tape Library Guide... -
Page 87: Importing And Exporting Cartridges
Importing and Exporting Cartridges Viewing Tape Cartridge (Media) Health ■ Guidelines for Handling Tape Cartridges ■ Labeling Cartridges ■ Determine the Required Number of Reserved System Slots ■ Determine the Number of Cleaning Cartridges ■ Apply a Label to a Tape Cartridge ■... -
Page 88: Inspect A Tape Cartridge
■ Incorrect media type. The cartridge type must be supported by the drives in the ■ library. See "Labeling Cartridges" on page 6-3 to verify that the two digit media identifier is supported. 6-2 StorageTek SL150 Modular Tape Library Guide... -
Page 89: Clean The Tape Cartridge Exterior
Wipe all dust, dirt, and moisture from the cartridge with a lint-free cloth. Use Oracle StorageTek Tape Cleaner Wipes to clean the cartridge exterior. These wipes are saturated with isopropyl alcohol. Do not let any solution touch the tape or get inside the cartridge. -
Page 90: Tape Cartridge Types
Passes the third through eighth characters in the physical label: KL1020L5 is translated to 1020L5. Trim first character Passes the second through eighth characters in the physical label: KL1020L5 is translated to L1020L5. 6-4 StorageTek SL150 Modular Tape Library Guide... -
Page 91: Non-Standard Label Formats
LTO labeling format, a few use proprietary labeling schemes to track volumes. If you use such an application, you can, in most cases, configure the SL150 to automatically translate between the physical labels on your cartridges and the logical label format that the application uses internally. -
Page 92: Determine The Number Of Cleaning Cartridges
Peel the backing off the label. Apply the label within the slight indentation. The label must not overlap the edges of this indentation. Figure 6–1 Correct Label Orientation 1 - Write Protect Switch 2 - Cartridge label correctly applied (barcode side down/character side up) 6-6 StorageTek SL150 Modular Tape Library Guide... -
Page 93: Prepare Diagnostic, Cleaning, And Data Tape Cartridges
Load the Magazines (Bulk Loading) Prepare Diagnostic, Cleaning, and Data Tape Cartridges Before loading cartridges into the library you need to prepare the various tape cartridge types: diagnostic, cleaning, and data. Prepare a Diagnostic Tape Cartridge Diagnostic cartridges are specially labeled data cartridges used for testing library robotics and drives. -
Page 94: Load The Magazines Task 2: Load The Left Magazine In The Base Module
If using host-managed drive cleaning, place one or two LTO universal cleaning cartridges in unreserved, data slots. Reserved slots are optional, so the following figure could represent a valid configuration for host-managed cleaning. 6-8 StorageTek SL150 Modular Tape Library Guide... -
Page 95: Load The Magazines Task 3: Load The Remaining Magazines
When you need to import cartridges into a library or partition or export them from a library or partition, use the mailslot (also known as the cartridge access port or CAP in other StorageTek libraries). The standard mailslot holds up to four cartridges. The optional, expanded magazine holds up to nineteen. -
Page 96: Assign The Mailslot To A Partition
If your library is partitioned and controlled by two separate host applications, you must assign the mailslot to a partition before exporting or importing. For information on how SCSI hosts handle a shared mailslot, see the SL150 SCSI Reference Guide. Assign the Mailslot Using the Remote User Interface Select Library in the left menu. -
Page 97: Close The Mailslot
Move Tape Cartridges with the Remote Interface Always use the host application to move tapes when possible. Moving cartridges with the SL150 interface can cause host database inconsistencies that force audits. If the library is partitioned and you will be moving a tape to/from the mailslot, Assign the Mailslot to a Partition. - Page 98 To move the tape, click OK. If you did not check the Set the Library back Online ... checkbox, remember to bring the library back online once you are ready. 6-12 StorageTek SL150 Modular Tape Library Guide...
-
Page 99: Monitoring The Library
Monitoring the Library You can monitor library operations for component failures and operational problems. Careful monitoring and prompt corrective action will minimize library downtime and maximize the availability of your data. View User and Host Activity ■ View the Library State ■... -
Page 100: Determine The Possible Cause Of A Degraded Or Failed Library State
Management Protocol (SNMP). The library’s SNMP agent can automatically send traps to alert network management stations of faults and configuration changes. You can configure the library's SNMP agent to automatically send traps that alert up to six 7-2 StorageTek SL150 Modular Tape Library Guide... -
Page 101: Snmp Versions
Community Name — A 31-character, alphanumeric password or phrase. Do not use factory-set default community names or obvious strings like public and private. SNMP Traps The table below lists traps returned by the SL150. Table 7–1 SNMP Trap Levels Trap Level Description... -
Page 102: Enable Or Disable Snmp
SNMP agent on the library. You can add up to six trap recipients. You can add, modify, or delete an SNMP trap recipient: From the remote interface, select SNMP in the left menu. Click the SNMP Trap Recipients tab. 7-4 StorageTek SL150 Modular Tape Library Guide... -
Page 103: Send A Test Trap
Configure Email Notifications Click Add Trap Recipient , or select a recipient and then click Edit Trap Recipient or Delete Trap Recipient Host Address — IP address of the management host that will receive the traps ■ Trap Level — Comma-delimited list of the Trap Levels to send to this ■... -
Page 104: Enable Or Disable Email Notifications
Alert on Health and/or Change — When selected, recipient will be notified ■ when the library health changes. Send a Test Email Alert From the remote interface, select Email Alerts in the left menu. Select a recipient, and then click Send Test Email 7-6 StorageTek SL150 Modular Tape Library Guide... -
Page 105: Managing Tape Drives
Managing Tape Drives Viewing Current Drive State ■ Configure Drive Cleaning ■ Manage Expired Cleaning Cartridges ■ Restart a Drive ■ Update Drive Firmware ■ See Also: "Drive Tray Removal and Replacement" on page 10-2 ■ Viewing Current Drive State The current state of the drive is reported to the library. -
Page 106: Enable Library-Managed Drive Auto Cleaning
■ Configure Automatic Cleaning in Oracle Secure Backup During Drive Setup When you add tape drives to your Oracle Secure Backup configuration, select Yes from the Auto clean list. Enter the following information: 8-2 StorageTek SL150 Modular Tape Library Guide... -
Page 107: Set Up Netbackup For Reactive Cleaning Using The Administration Console
From the Administration Console, select Media and Device Management. Select Device Monitor, and then select Drives. In the Drive Status pane, select an SL150 drive and then open the Actions menu. Select the Set Cleaning Frequency parameter, and set the value to 0 (zero). This tells NetBackup to clean drives in response to Tape Alerts. -
Page 108: Set Up As-Needed Cleaning In Ibm Tivoli Storage Manager (Tsm)
In the NetWorker Administration interface, click on Devices, and select View, Diagnostic Mode. Select Devices from the navigation tree. In the Devices table, right-click on one of the SL150 tape drives, and select Properties from the context menu. In the Properties window, select the Advanced tab. -
Page 109: Use The Remote Interface To Clean A Degraded Drive
Manage Expired Cleaning Cartridges If a drive needs cleaning, note the drive address (module number and either Top or Bottom). Use the library user interface to clean the drive (see below). Use the Remote Interface to Clean a Degraded Drive Verify that a drive needs cleaning (see "Check for Drives that Require Cleaning"... -
Page 110: Replace Expired Cleaning Media Using The Host Application
In the remote interface, select Library in the left menu. Right-click the drive, and then select Restart Drive. Update Drive Firmware For instructions on obtaining and installing updated drive firmware, see "Update Library and Drive Firmware" on page 4-7. 8-6 StorageTek SL150 Modular Tape Library Guide... -
Page 111: Servicing The Library
"Replacing Components (CRUs & FRUs)" on page 10-1. WARNING: Oracle's StorageTek SL150 Modular Tape Library contains a Class-1 laser, as defined by IEC 60825-1 Ed. 2 (2007). Use of controls or adjustments or performance of procedures other than those specified herein may result in hazardous radiation exposure. -
Page 112: Power On The Library
Optionally, select Prepare the Robot for removal before the library powers down This parks the robot at the top of the library. Select this option if you are powering down for any of the following reasons: Removing or replacing the robot. ■ 9-2 StorageTek SL150 Modular Tape Library Guide... -
Page 113: Forced Power-Down
Power Off the Library Moving the rack or moving the library to a new rack. ■ Preparing the library for shipment. ■ If you selected this option, see "Lock the Robot" on page 9-3. Forced Power-Down Stop any host activity. Remove power from the library using one of the following methods: Use the forced (hard) shutdown method. -
Page 114: Lock The Thumbscrew-Type Robot Lock (Older Version)
During an audit the robot checks each cartridge slot, recording cartridge labels and locations to create a tape catalog. The library must audit whenever tapes are manually moved (meaning moved with human intervention) so that it can update the catalog. 9-4 StorageTek SL150 Modular Tape Library Guide... -
Page 115: Move The Library Rack
Move the Library Rack The library automatically performs an audit whenever it powers up or whenever you reinsert magazines. Normally, host applications request audits. However, you can audit the library from the remote interface, but you should avoid this, if possible, as it interrupts host operations. -
Page 116: Enable The Locate Light
■ Diagnose a Browser-Based User Interface Problem If you have problems with a browser, try a different browser. Check the SL150 firmware release notes for known incompatibilities. If you start to have problems with a browser that used to work, check for recent changes to the browser configuration: If scripting (Javascript) has been disabled, enable it. -
Page 117: Locate And Clear Obstructions, Such As Loose Or Protruding Cartridges
Troubleshoot the Library If the local operator panel is also not working, make sure that the library has power. Check the power cord connected to each power supply. Check the data-center power outlet. Check breakers. If the library is connected to power, check the LED Indicators on the library and its components: Power supplies —... - Page 118 If you find no damage, reseat the cartridge in its slot and make sure that it is moving freely. Reinstall the magazine in its bay and power up the library and "Check if Fault is Closed in the Health Log" on page 9-8. 9-8 StorageTek SL150 Modular Tape Library Guide...
-
Page 119: Save The Health Log To A File
Troubleshoot the Library If you cannot free the cartridge, go to "Get Parts and Technical Support" ■ page 9-11, and check for relevant knowledge articles. If you cannot find a resolution, open a service request. Locate and Clear Obstructions, Such as Loose or Protruding Cartridges If the Suspect Components and/or Recommended Action fields indicate that an obstruction is interfering with the robot or if the Fault Code is either 9109 or in the range 9102-9107, look for a mispositioned cartridge or obstruction in the library. -
Page 120: Restore The Factory Default Configuration
It should power down and restart. If either Locate button is released before the fast flash rate, Note: the reset process terminates. If the library does not power-on automatically, press the power button. 9-10 StorageTek SL150 Modular Tape Library Guide... -
Page 121: Get Parts And Technical Support
Select the Knowledge tab. In the Knowledge Base area, select the Search & Browse tab. In the Select a product or product line field, enter StorageTek SL150 Modular Tape Library. In the Go directly to the best match area, click the Information Center: StorageTek SL150 ... - Page 122 Get Parts and Technical Support 9-12 StorageTek SL150 Modular Tape Library Guide...
-
Page 123: Replacing Components (Crus & Frus)
Replacing Components (CRUs & FRUs) The robot, front control panel, and base module are critical Caution: to maintaining the product serial number and customer settings. When a replacement is needed, you may only replace one unique part during a single power down cycle. This chapter assumes you have isolated the issue and have replacement parts on hand. -
Page 124: Drive Tray Removal And Replacement
In the remote interface, select Library in the left menu. Right-click on the drive, and then select Remove Drive. At the back of the library, locate the drive tray with the blue LED indicator (upper left corner). 10-2 StorageTek SL150 Modular Tape Library Guide... -
Page 125: Replace The Drive Tray
Replace the Drive Tray Task 3: Verify the Library Recognized the New Drive Tray Confirm that the library recognizes the drive (Drives area of the SL150 remote interface). It can take some time for the indicators to show the drive is operational. -
Page 126: Remove A Drive Filler
Remove the power supply from the shipping carton. Grasp the supply by the handle and support the bottom with your other hand. Orient the power supply as shown in Figure 10–2 (oriented with LEDs on left). 10-4 StorageTek SL150 Modular Tape Library Guide... -
Page 127: Remove A Power Supply Filler
Front Control Panel Removal and Replacement Align the rear of the supply with the module slot. Push the supply fully into the module slot. Make sure the power supply is secured in the module slot. Connect the power cord to the power supply receptacle. Verify that the OK indicator is active on the power supply. -
Page 128: Remove The Front Control Panel
Disconnect the ribbon cable plug from the jack located on the circuit card. Set the panel CRU on the anti-static mat. Replace the Front Control Panel ESD damage. Do not touch any exposed electronic Caution: components, cables, or contacts. 10-6 StorageTek SL150 Modular Tape Library Guide... -
Page 129: Module Controller Removal And Replacement
Module Controller Removal and Replacement Remove the replacement front control panel from its packaging. Grasp the panel by the plastic housing and raise it to the base module. Attach the cable to the circuit card jack at the back of the panel. Make sure the connector is flush with the jack. -
Page 130: Replace The Module Controller
10-1). The robot must be parked in the base module, the robot lock engaged, and the thumbscrews loosened before attempting to remove the robot module. Remove the Robot ■ Manually Retract the Robot ■ 10-8 StorageTek SL150 Modular Tape Library Guide... -
Page 131: Remove The Robot
Robot Module Removal and Replacement Manually Disengage the Robot ■ Replace the Robot ■ The robot maintains the product serial number and Caution: customer settings. After installing the robot, you must power-cycle the library before installing any other component. Remove the Robot You must park and latch the robot before attempting to Caution: remove it. -
Page 132: Manually Retract The Robot
, "Remove the Robot Task 1: Park and Lock the Robot" continue through the last step of robot removal (see , "Remove the Robot Task 2: Slide Robot CRU Out of Base Module"). 10-10 StorageTek SL150 Modular Tape Library Guide... -
Page 133: Manually Disengage The Robot
Robot Module Removal and Replacement Figure 10–4 Bullwheel Gear and Robot Lock Illustration Legend: 1 - Bullwheel Gear 2 - Robot Lock (Improved Design) Manually Disengage the Robot Perform this procedure only if either the library power Caution: down (Step 1 of "Remove the Robot Task 1: Park and Lock the Robot") or "Manually Retract the Robot"... -
Page 134: Manually Disengage The Robot Task 3: Remove The Z Platform
For example, connect the output plug of the expansion cable to Port 2 on the robot CRU and the input plug of the cable to the Module 2 controller input port. 10-12 StorageTek SL150 Modular Tape Library Guide... -
Page 135: Expansion Module Chassis Removal And Replacement (Fru)
Expansion Module Chassis Removal and Replacement (FRU) The initial design of the expansion cable did not have plug Note: labels. Plug the Ethernet cables into the appropriate Net Mgt ports. Follow the power on procedures (see "Validate the Component Installation"). Expansion Module Chassis Removal and Replacement (FRU) The expansion module is a field-replaceable unit (FRU) and Note:... -
Page 136: Remove Expansion Task 2: Remove The Floor, Cables, And Cords
Set the module down and away from the front of the rack. Remove the Phillips screws and rear rails from the module. Leave the clip nut in place (see Figure 10–6). Repeat until you have removed all modules below the failed module. 10-14 StorageTek SL150 Modular Tape Library Guide... -
Page 137: Module
Expansion Module Chassis Removal and Replacement (FRU) Figure 10–6 Module Rear Rail Removal Illustration Legend: 1 - Rear Rail 2 - Clip Nut Remove Expansion Task 4: Remove Components from the Defective Module Remove the functional components as applicable: "Remove the Drive Tray" on page 10-2 ■... -
Page 138: Replace Expansion Task 3: Install The Remaining Expansion Modules
You must transfer the cartridge magazines, front control panel, tape drive(s), tape drive filler, power supply, power supply filler, and the robot from the defective base module to the FRU. Remove the Base Module Chassis ■ Replace the Base Module Chassis ■ 10-16 StorageTek SL150 Modular Tape Library Guide... -
Page 139: Remove The Base Module Chassis
Base Module (Module 1) Chassis Removal and Replacement Figure 10–7 Base Module FRU The robot, front control panel, and base module chassis are Caution: critical to maintaining the product serial number and customer settings. When a replacement is needed, you may replace only one unique device during a single power-down cycle. -
Page 140: Replace The Base Module Chassis
Install cartridge magazines in all modules (see "Load the Magazines Task 4: Locking the Magazines and Auditing the Library"). Align and dress the cables. Secure the cables in the hook and loop straps, if applicable. 10-18 StorageTek SL150 Modular Tape Library Guide... -
Page 141: Validate The Component Installation
Module Controller — Confirm that the library recognizes the module ■ controller (Modules area of the touch screen or Library area of the SL150 remote interface). Run the offline self tests from the remote interface (see "Run a Self-Test"... -
Page 142: Return Cru Components To Oracle
Dispose of all other CRUs or recycle them, as appropriate. Lock the Robot for Reshipment within Rack Use the following instructions if you are shipping the SL150 after installing it into a rack. Improper installation of the lock could cause catastrophic Caution: failure during shipment. - Page 143 Lock the Robot for Reshipment within Rack Open the shipping clip and install it over the 7 mm steel shaft behind the hand assembly (see image below). Illustration Legend: 1 - Opened Shipping Clip 2 - Instruction Tag Squeeze the clip to reduce the clamping force on the shaft and slide the clip toward the hand assembly (see image below).
- Page 144 Lock the Robot for Reshipment within Rack Replace the right magazine in the base module and verify the magazine is securely latched. 10-22 StorageTek SL150 Modular Tape Library Guide...
-
Page 145: A Slot Mapping And Cartridge Locations
Slot Mapping and Cartridge Locations Cartridge Slot Addressing ■ Drive, Mailslot, Power Supply, and Robot Addressing ■ SCSI Element Addressing ■ Example Library Configurations and Slot Maps ■ Cartridge Slot Addressing Library slots are identified by library-module, side, row, column, where: library-module is the module that contains the slot. -
Page 146: Scsi Element Addressing
1 - Module 1 (Base) 2 - Robot 3 - Power supplies 4 - Standard mailslots 5 - Left magazine front 6 - Right magazine front 7 - Storage slots 8 - Tape drives A-2 StorageTek SL150 Modular Tape Library Guide... -
Page 147: Non-Partitioned Two Module Library, Expanded Mailslot, And No Reserved Cells
Example Library Configurations and Slot Maps Figure A–2 Non-Partitioned Two Module Library, Expanded Mailslot, and No Reserved Cells Illustration Legend: 1 - Module 1 (Base) 2 - Robot 3 - Power supplies 4 - Tape drives 5 - Standard mailslot 6 - Mailslot expansion 7 - Right magazine front 8 - Left magazine front... -
Page 148: Non-Partitioned 15 Module Library, Standard Mailslot, And Three Reserved Cells
3 - Power supplies 4 - Standard mailslots 5 - Left magazine front 6 - Right magazine front 7 - Storage slots 8 - Reserved slots (Configurable) 9 - Tape drives 10 - Module 15 (Expansion) A-4 StorageTek SL150 Modular Tape Library Guide... - Page 149 Glossary This glossary defines terms and abbreviations in this publication. Some of the definitions are taken from other glossaries. The letters in the parentheses that follow some definitions indicate the source of the definition: (A) The American National Standard Dictionary for Information Systems, ANSI X3.172-1990, copyright 1990 by the American National Standards Institute (ANSI).
- Page 150 cartridge cartridge A storage device that consists of magnetic tape on a supply reel in a protective housing. The spine of the cartridge usually contains a label listing the volume identification number. Also called tape, tape cartridge, tape volume, or cassette. cell See slot.
- Page 151 gripper expanded mailsot An optional library configuration to increase the capacity of the Mailslot from four to 19 cartridges. A logical entity containing four slots in the Standard Mailslot plus 15 slots in the Base Module right magazine (the Mailslot Expansion). expansion cable A cable used to connect expansion modules to Module 1.
- Page 152 Graphical user interface. Software that allows the user to control the device through visual screens. hand The robotic mechanism that grabs tape cartridges and moves them between slots and the drive. It is a component of the arm. The hand has a reach mechanism that gets tape cartridges from slots or drives and puts them into slots or drives.
- Page 153 magnetic tape drive inventory The process of reading and storing in memory the bar code identification and location of all tape cartridges in a library. See internet protocol. See initial program load. LC connector A standard fiber-optic cable connector for Fibre Channel data transfer. Light emitting diode.
-
Page 154: Expansion Module
The standard mailslot is a plastic and metal assembly located in the upper right corner of the base chassis used to enter tapes into the library and to remove tapes from the library. Previous StorageTek libraries called this a CAP (Cartridge Access Port). mailslot expansion A term describing the Base Module right magazine (the magazine immediately below the Standard Mailslot) when the library has the expanded mailslot configuration. -
Page 155: Power Supply
online Pertaining to the operation of a functional unit when under the direct control of the computer. (T) operator panel A component of the front control panel consisting of a seven inch WVGA color touch screen. partition A segmented part of the library that acts to hosts as a separate and independent tape library. - Page 156 SCSI SCSI Small Computer System Interface. A standard interface and command set for transferring data between mass storage and other devices. The host computer uses SCSI commands to operate the device. Depending on the model, physical connection between the host computer and the tape drive will use a parallel SCSI, SAS, or Fibre Channel interface.
- Page 157 Z mechanism World Wide Name A unique identifier in a Fibre Channel or SAS storage network. The first three bytes are derived from an IEEE Organizationally Unique Identifier (OUI), which defines the manufacturer or vendor. The remaining five bytes are assigned by the vendor. WORM An acronym for Write Once Read Many times, a class of recording systems that allow recording and adding data, but not altering recorded data.
- Page 158 Z mechanism Glossary-10...
Need help?
Do you have a question about the SL150 and is the answer not in the manual?
Questions and answers