Sign In
Upload
Manuals
Brands
StorageTek Manuals
Storage
SL150
StorageTek SL150 Manuals
Manuals and User Guides for StorageTek SL150. We have
1
StorageTek SL150 manual available for free PDF download: Manual
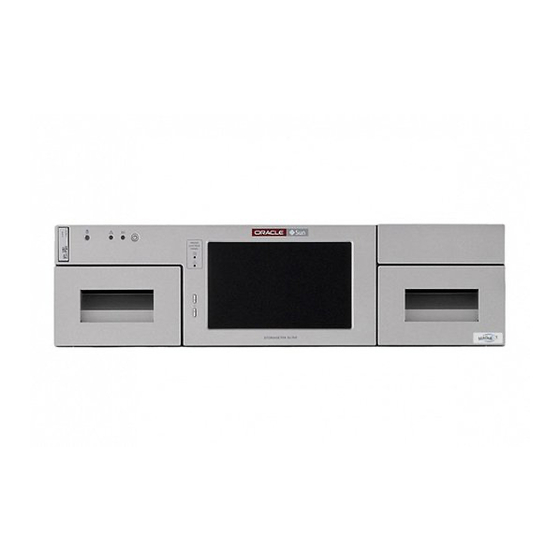
StorageTek SL150 Manual (158 pages)
Modular Tape Library
Brand:
StorageTek
| Category:
Storage
| Size: 12.34 MB
Table of Contents
Table of Contents
3
Preface
13
Documentation Accessibility
13
Class 1 Laser Product Notice
13
1 About the SL150 Library
15
Base Module and Two Expansion Modules (Front View)
15
About the Base Module
16
Base Module and Expansion Modules (Rear View)
16
About the Expansion Module
17
About the Mailslot
17
About the Robot
17
Port Configuration Options
18
About Bridged Tape Drives
19
About Tape Drives with Two Ports
19
About Tape Drives
17
About M8 Compatibility
18
About Library Managed Encryption (LME)
18
Behavior of Port 1 and Port 2
18
Library Weights and Dimensions
20
Component (Unpackaged) Weights and Dimensions
20
Library Power Requirements
21
Shipping (Packaged) Weights and Dimensions
20
Library Cartridge Capacity
21
Storage Slot, Mailslot, and Drive Counts for Different Configurations
21
Networking and Host Communication
22
SAS-2 and SAS-3 Configuration Issues
22
Power over Ethernet (POE)
23
Ipv6 Network Address Support
23
SAN Connection Zoning
23
Software that Supports the SL150
23
About ACSLS (Automated Cartridge System Library Software)
23
About Storagetek Tape Analytics
24
About Service Delivery Platform 2
25
SL150 Part Numbers for Ordering
25
Configuration and Ordering Examples
27
Ordering Media and Labels
27
2 Installing the Library
29
Verify the Site Meets Environmental Requirements
29
Airborne Contaminants Limits
29
Positive Pressurization and Ventilation - Hot Aisle Containment System (HACS)
30
Gas Limit Recommendations
30
Electrostatic Discharge
31
Prepare the Rack
31
Unpack and Acclimate the Library
32
Rear View of Sun Rack II (PDU on Right Side)
32
Install the Base Module
33
Unpack the Base Module Accessory Kit
33
Install the Base Module Back Rails
34
Base Module Accessory Package Mounting Hardware
34
Back Rail Position
35
Back Rails Installed
35
Install the Base Module Front Rails
36
Install Base Module Front Rails Task 1: Connect the Front Rail to the Back Rail
36
Install Base Module Front Rails Task 2: Secure the Front Rail
37
Front Rail Installation (Left Rail Shown)
37
Mounting Block for Front Rail (Right Rail Shown)
37
Install Base Module Front Rails Task 3: Verify Proper Front Rail Installation
38
Install Base Module Front Rails Task 4: Install the Clip Nuts (Square Hole Racks Only)
38
Rails Installed - Front View
38
Mount the Base Module
39
Clip Nut Location for the Base Module
39
Tab and Rail Engagement
39
Mount the Base Module Task 1: Engage the Base Module with the Rail
40
Mount the Base Module Task 2: Remove the Cartridge Magazine with the Hex Key
40
Mount the Base Module Task 3: Remove the Cable Clip
41
Mount the Base Module Task 4: Secure the Base Module to the Rack
41
Install the Expansion Module
41
Cable Clip Removal
41
Unpack the Expansion Module Accessory Kit
42
Remove the Library Floor
43
Expansion Module Accessory Package Hardware
43
Install Clip Nuts for the Expansion Module (for Square Hole Racks Only)
44
Library Floor Removal from the Base Module
44
Prepare the Expansion Module by Removing the Cartridge Magazines
45
Expansion Module Installation
45
Install the Floor in the Bottom Expansion Module
46
Magazine Latches
46
Mount the Expansion Module
47
Library Floor
47
Floor Secured
47
Scratch Avoidance
48
Install the Rear Rails for the Expansion Module
49
Alignment Tab Seated
49
Expansion Module Back Rail and Clip Nut
49
Secure the Expansion Module to the Front Rack Stile
50
Replace the Cartridge Magazines
50
Label the Modules
50
Install the Hook and Loop Strap
51
Expansion Module ID Label
51
Hook and Loop Strap
51
Install Power Supplies and Tape Drives
52
SL150 Library Rear View
52
Remove the Power Supply Filler
53
Tape Drive Tray
53
Insert a Power Supply into the Slot
54
Remove a Tape Drive Filler
54
Insert a Tape Drive Tray into the Slot
54
Cable the Library
55
Cable the Library Task 1: Cable the Expansion Modules
55
Base Module Output Ports (Ports 2 through 10)
55
Cable the Library Task 2: Connect Cables to the Drive Assembly and Power Supply
56
Cable the Library Task 3: Connect the Network Port
56
Module Controller Ports (Output Port Shown with Dust Cover)
56
Initial Cabling
56
Cable the Library Task 4: Align and Dress the Cables and Cords
57
Unlock the Robot
57
Unlock the Knob-Type Robot Lock (Newer Version)
57
Unlock the Thumbscrew-Type Robot Lock (Older Version)
57
Apply Power to the Library
58
Configure the Library after Powering-On for the First Time
58
Configure the Library: Login with the Default Admin
58
Configure the Library Step 1 of 6: Change the Default Administrator Password
59
Configure the Library Step 2 of 6: Configure the Network Port 1
60
Configure the Library Step 3 of 6: Set the Library Date and Time
61
Configure the Library Step 4 of 6: Set the Drive Element Addressing Mode)
62
Format
62
Configure the Library Step 6 of 6: Review and Apply Initialization Settings
63
Configure the Library: Finish the New Configuration
64
Run a Self-Test
64
Stopping a Self-Test
65
3 Basic User Interface Operations
67
Using the Remote Interface
67
Using the Front Touch Screen
68
Log in to the Remote Interface
68
Front Control Panel Home Screen
68
Configure Accessibility Settings
69
Log out of the Remote Interface
69
Change Your Password
69
Interpret the Graphical Library Display
69
Show, Hide, and Reorder Table Columns
70
Export a Table
70
Print a Table
70
Set Automatic Screen Refresh
71
4 Configuring the Library
73
Set the Time, Network Address, Library Settings, and Encryption
74
Configure the Network Interfaces
74
Configure Network Interfaces Task 1: Verify Job Activity and Launch the Wizard
74
Configure Network Interfaces Task 2: Configure Network Port 1
74
Configure Network Interfaces Task 3: Configure Network Port 2 (Optional)
75
Set the Library Date and Time
75
Configure Library Settings
75
Selecting a Drive Element Addressing Mode
76
Partition the Library
77
Partition the Library Task 1: Create a New Partition
77
Partition the Library Task 2: Assign Resources to the Partition
77
Partition the Library Task 3: Delete an Existing Partition
77
Partition the Library Task 4: Verify the Partitioning Configuration Changes
78
Configure Library Managed Encryption (LME)
78
Configure LME Task 1: Obtain Information from OKM
78
Configure LME Task 2: Configure the SL150 to Manage Encryption
78
Configure LME Task 3: Verify the SL150 Agent Is Enrolled
79
Review and Apply Configuration Changes
79
Update Library and Drive Firmware
79
Identify Current Firmware Versions
79
Download Firmware from My Oracle Support
79
Verify the Download
80
Upgrade the Library Firmware
80
Upgrade the Drive Firmware
81
Revert to the Previous Library Firmware
81
Manage the Library's SSL/TLS Certificate for HTTPS
82
Generate a Self-Signed Certificate
82
Install a Third-Party Signed Certificate
82
Install a Certificate Task 1: Verify the Library Has a Self-Signed Certificate
82
Install a Certificate Task 2: Export Certificate Signing Request (CSR) File
82
Install a Certificate Task 3: Obtain Required Certificates
82
Install a Certificate Task 4: Import the Certificate File
83
5 Managing Users
85
User Roles and Access
85
Add a User and Assign a Role
85
Remove a User
86
Change an Assigned Role
86
Reset Another User's Password
86
6 Importing and Exporting Cartridges
87
Viewing Tape Cartridge (Media) Health
87
Guidelines for Handling Tape Cartridges
87
Inspect a Tape Cartridge
88
Clean the Tape Cartridge Exterior
89
Store Tape Cartridges
89
Labeling Cartridges
89
Tape Media ID
89
Tape Cartridge Types
90
Label Format Types
90
Non-Standard Label Formats
91
Managing Unidentifiable, Unsupported, or Missing Labels
91
Translating between Physical and Logical Labels
91
Determine the Required Number of Reserved System Slots
91
Determine the Number of Cleaning Cartridges
92
Apply a Label to a Tape Cartridge
92
Correct Label Orientation
92
Prepare Diagnostic, Cleaning, and Data Tape Cartridges
93
Load the Magazines (Bulk Loading)
93
Load the Magazines Task 1: Unlock and Remove the Magazines
93
Load the Magazines Task 2: Load the Left Magazine in the Base Module
94
Load the Magazines Task 3: Load the Remaining Magazines
95
Load the Magazines Task 4: Locking the Magazines and Auditing the Library
95
Updating Media Health after a Bulk Load
95
Import and Export Cartridges Using the Mailslot
95
Assign the Mailslot to a Partition
96
Assign the Mailslot Using the Local Operator Panel
96
Assign the Mailslot Using the Remote User Interface
96
Import Tape Cartridges
96
Export Tape Cartridges
96
Open the Mailslot
96
Close the Mailslot
97
Unassign the Mailslot
97
Unassign the Mailslot Using the Local Operator Panel
97
Unassign the Mailslot Using the Remote User Interface
97
Move Tape Cartridges with the Remote Interface
97
7 Monitoring the Library
99
View User and Host Activity
99
View the Library State
99
Library LED Status Indicators
99
Determine the Possible Cause of a Degraded or Failed Library State
100
Configure Simple Network Management Protocol (SNMP)
100
SNMP Versions
101
SNMP Traps
101
SNMP Trap Levels
101
Configure an SNMP Trap Recipient
102
Configure an SNMP User
102
Enable or Disable SNMP
102
Download the Management Information Base (MIB)
103
Send a Test Trap
103
Enable or Disable the Service Delivery Platform (SDP2)
103
Configure Email Notifications
103
Enable or Disable Email Notifications
104
Configure Email Recipients
104
Send a Test Email Alert
104
8 Managing Tape Drives
105
Viewing Current Drive State
105
Configure Drive Cleaning
105
Enable Library-Managed Drive Auto Cleaning
106
Configure Host-Managed Drive Cleaning
106
Configure Automatic Cleaning in Oracle Secure Backup During Drive Setup
106
Set up Netbackup for Reactive Cleaning Using the Administration Console
107
Set up Netbackup for Reactive Cleaning Using the Commandline
107
Set up Symantec Backup Exec Drive Cleaning
107
Set up As-Needed Cleaning in IBM Tivoli Storage Manager (TSM)
108
Set up Commvault Drive Cleaning
108
Set up Tape-Alert Cleaning in EMC Networker
108
Manually Clean a Drive
108
Check for Drives that Require Cleaning
108
Use the Remote Interface to Clean a Degraded Drive
109
Manage Expired Cleaning Cartridges
109
Monitor Cleaning Cartridges Using the Remote Interface
109
Replace Expired Cleaning Media Using the Remote Interface
109
Replace Expired Cleaning Media Using the Host Application
110
Restart a Drive
110
Update Drive Firmware
110
9 Servicing the Library
111
Place the Library Online and Offline
111
Power on the Library
112
Library Startup Sequence
112
Power off the Library
112
Controlled Power-Down from the Interface
112
Forced Power-Down
113
Lock the Robot
113
Lock the Knob-Type Robot Lock (New Version)
113
Lock the Thumbscrew-Type Robot Lock (Older Version)
114
Restart the Library
114
Restarting the Library Following a Power Outage
114
Audit the Library
114
Move the Library Rack
115
Enable the Locate Light
116
Troubleshoot the Library
116
Diagnose a Browser-Based User Interface Problem
116
Diagnose a Library Problem
116
Diagnose a Problem if You Cannot Login to the Remote Interface
116
Locate and Remove a Cartridge Stuck in a Magazine Slot
116
Use the Health Table to Diagnose the Issue
116
Locate and Clear Obstructions, such as Loose or Protruding Cartridges
117
Run a Self-Test
119
Save the Health Log to a File
119
Restore the Factory Default Configuration
120
Get Parts and Technical Support
121
Check for Relevant Knowledge Articles
121
Get Firmware Updates
121
Create a Service Request
121
10 Replacing Components (Crus & Frus)
123
CRU Locations
123
Drive Tray Removal and Replacement
124
Remove the Drive Tray
124
Tape Drive Tray CRU (HP LTO-5)
124
Replace the Drive Tray
125
Replace the Drive Tray Task 1: Remove New Drive Tray from Package
125
Replace the Drive Tray Task 2: Replace the Drive Tray
125
Replace the Drive Tray Task 3: Verify the Library Recognized the New Drive Tray
125
Install a Drive Filler
126
Remove a Drive Filler
126
Power Supply Removal and Replacement
126
Power Supply CRU
126
Install a Power Supply Filler
127
Remove a Power Supply Filler
127
Front Control Panel Removal and Replacement
127
Remove the Power Supply
126
Replace the Power Supply
126
Rear View of the Front Control Panel
127
Remove the Front Control Panel
128
Replace the Front Control Panel
128
Module Controller Removal and Replacement
129
Remove the Module Controller
129
Replace the Module Controller
130
Robot Module Removal and Replacement
130
Remove the Robot
131
Remove the Robot Task 1: Park and Lock the Robot
131
Remove the Robot Task 2: Slide Robot CRU out of Base Module
131
Manually Retract the Robot
132
Manually Disengage the Robot
133
Manually Disengage the Robot Task 1: Cut Cables
133
Manually Disengage the Robot Task 2: Remove the Robot CRU
133
Bullwheel Gear and Robot Lock
133
Manually Disengage the Robot Task 3: Remove the Z Platform
134
Manually Disengage the Robot Task 4: Clean up
134
Replace the Robot
134
Replace the Robot Task 1: Reinsert the Robot CRU and Unlock the Robot
134
Replace the Robot Task 2: Cabling
134
Expansion Module Chassis Removal and Replacement (FRU)
135
Expansion Module FRU
135
Remove Expansion Task 2: Remove the Floor, Cables, and Cords
136
Remove Expansion Task 3: Remove Operational Expansion Modules below the Defective
136
Module
137
Remove Expansion Task 4: Remove Components from the Defective Module
137
Replace Expansion Task 1: Install the Chassis
137
Replace the Expansion FRU Chassis
137
Remove an Expansion Module
135
Remove Expansion Task 1: Power Down, Lock the Robot, and Remove Magazines
135
Module Rear Rail Removal
137
Replace Expansion Task 3: Install the Remaining Expansion Modules
138
Replace Expansion Task 4: Finishing Touches
138
Base Module (Module 1) Chassis Removal and Replacement
138
Base Module FRU
139
Replace Base Task 1: Install the Base Module FRU
140
Replace Base Task 2: Install the Base Module Crus and Expansion Modules
140
Replace Base Task 3: Reinstall Magazines and Dress the Cables
140
Replace the Base Module Chassis
140
Validate the Component Installation
141
Remove the Base Module Chassis
139
Remove Base Task 1: Lock the Robot and Remove Expansion Modules
139
Remove Base Task 2: Remove Module and Remove Parts for Reuse
139
Cable Attachment
141
Return CRU Components to Oracle
142
Lock the Robot for Reshipment Within Rack
142
Power down the Library and Verify Robot Position
142
Install the Shipping Clip
142
A Slot Mapping and Cartridge Locations
145
Cartridge Slot Addressing
145
Reserved Slots
145
Drive, Mailslot, Power Supply, and Robot Addressing
145
SCSI Element Addressing
146
Example Library Configurations and Slot Maps
146
Non-Partitioned One Module Library, Standard Mailslot, and no Reserved Cells
146
Starting Element Address and Maximum Number of Elements
146
Non-Partitioned Two Module Library, Expanded Mailslot, and no Reserved Cells
147
Non-Partitioned 15 Module Library, Standard Mailslot, and Three Reserved Cells
148
Expansion Module
154
Power Supply
155
Advertisement
Advertisement
Related Products
StorageTek SL8500
StorageTek StorageNet SCSI-3
StorageTek 4410
StorageTek 4411
StorageTek 4420
StorageTek 4430
StorageTek 700e
StorageTek 9310
StorageTek 9311
StorageTek 9320
StorageTek Categories
Storage
Network Hardware
Switch
Computer Hardware
Software
More StorageTek Manuals
Login
Sign In
OR
Sign in with Facebook
Sign in with Google
Upload manual
Upload from disk
Upload from URL