Table of Contents
Advertisement
Advertisement
Table of Contents

Related Manuals for Eaton Menvier 20


Summary of Contents for Eaton Menvier 20
- Page 1 Issue 7 Control unit software version 4.04...
- Page 2 Menvier30/40/100/300 © Eaton’s Security Business. 2014 IN NO EVENT WILL EATON’S SECURITY BUSINESS BE LIABLE FOR ANY SPECIAL, CONSEQUENTIAL , OR INDIRECT LOSS OR DAMAGE, INCIDENTAL DAMAGES, STATUTORY DAMAGES, EXEMPLARY DAMAGES, LOSS OF PROFITS, LOSS OF REVENUE, LOSS OF ANTICIPATED SAVINGS, LOSS OF BUSINESS OR OPPORTUNTIY, LOSS OF GOODWILL OR INJURY TO REPUTATION, LIQUIDATED DAMAGES OR LOSS OF USE, EVEN IF INFORMED OF THE POSSIBILITY OF SUCH DAMAGES.
-
Page 3: Table Of Contents
Menvier30/40/100/300 Contents 1. Introduction ............. 1 Setting and Unsetting ........... 3 Alarms and Reset ............... 3 Security Levels ..............3 Wards ................4 24 Hour Alarms ..............4 Communications ............4 Security Grade ............. 5 Controls and Displays ........... 5 Controls: ................ - Page 4 Menvier30/40/100/300 Adding Users ..............53 Deleting Users ..............56 Viewing the Log ............57 Testing the System ............ 59 Sirens & Sounders............59 Keypad ................62 Walk test ................ 63 Outputs ................65 Remotes and Two-way Keyfobs ......... 67 Radio Hold Up Alarms ............68 Proximity Tags ..............
-
Page 5: Compliance Statement
Menvier30/40/100/300 Compliance Statement The Menvier30: Is suitable for use in systems designed to comply with PD6662:2010 at Grade 2, and environmental class II. Is suitable for use in systems designed to comply with the requirements of EN50131-3 at Grade 2 and environmental class II. Complies with the requirements of EN50131-6:2008 at Grade 2 and environmental class II. - Page 6 Menvier30/40/100/300 This page is intentionally blank. Page vi...
-
Page 7: Introduction
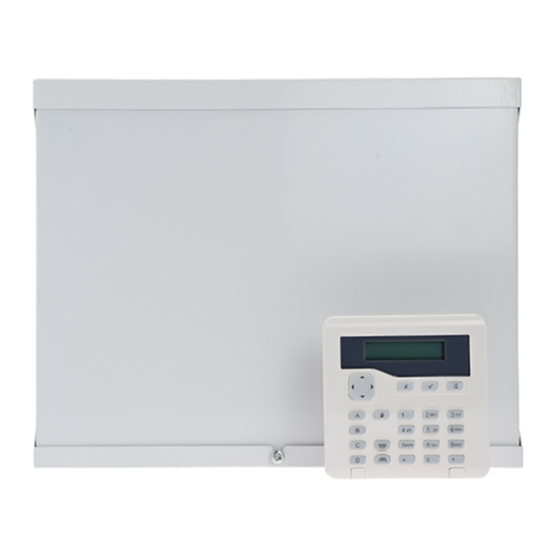
Menvier30/40/100/300 1. Introduction At the heart of an alarm systems is the control unit, its expanders and keypads. The control unit contains the main processing unit, the power supply and stand-by battery. The stand-by battery can keep the alarm system going for several hours if the mains supply fails. - Page 8 1. Introduction Menvier30/40/100/300 1. Two-button Hold Up Alarm with tilt switch. 2. Two button Hold Up Alarm. 3. Four button remote control. 4. Two-way remote control. 5. Keypad (i-kp01). 6. Keypad (KEY-K01, KEY-KP01 or KEY- KPZ01) 7. Wireless arming station. 8.
-
Page 9: Setting And Unsetting
Menvier30/40/100/300 1. Introduction This guide covers four types of control unit: the Menvier30, Menvier40, Menvier100 and Menvier300. A complete system using one of these control units comprises: Control unit Menvier3 Menvier4 Menvier1 Menvier3 Fixed detectors External Siren/Strobe Users Portable 4-button remote controls (one per user) Portable two-button hold up alarms (one per user) -
Page 10: Wards
1. Introduction Menvier30/40/100/300 Full Set, and includes all the detectors. There are three other security levels called Part Set B, C and D. For example, in a small shop Full Set might monitor the whole premises, while Part Set B might monitor just the store room. -
Page 11: Security Grade
Menvier30/40/100/300 1. Introduction you may receive a phone call from them requesting you to give them access to your alarm system. Security Grade For insurance purposes there are several different “Grades” of security system. Your system may be either Grade 2 or Grade 3. Ask your installer which Grade you have since a Grade 3 system operates slightly differently from a Grade 2 system. -
Page 12: Controls
1. Introduction Menvier30/40/100/300 4. Setting and unsetting keys. These can be programmed to either set/unset the system or operate an output. On a KEY-K01, KEY-KP01 or KEY-KPZ01 they glow to show the set unset status. 5. Hold Up Alarm (HUA) keys. (Also known as PA keys.) 6. -
Page 13: Displays
Menvier30/40/100/300 1. Introduction Displays The LCD display shows messages and prompts to help guide you through setting, unsetting, resetting and programming the system. When the system is idle (either while set or unset) the display shows the “standby screen”, comprising the time and date: ... -
Page 14: Users
1. Introduction Menvier30/40/100/300 Note that the installer can disable these LEDs in order to hide the state of the system (to comply with EN50131). If you wish to change the function of the ABCD keys (and consequently the LEDs) please consult the installer. Detectors or Zones? When talking about alarm systems, people tend to use the words “detectors”... -
Page 15: Identifying Users
Menvier30/40/100/300 1. Introduction Duress Code A duress code can only set or unset the system. When user employs a duress code the control unit notifies the alarm receiving centre. The Installer must program your system to provide this feature, and you must agree with your alarm installer and the ARC what action the ARC should take on receiving a duress message. -
Page 16: Access To The System
Eaton’s Security Business recommend that you change the default access code as soon as possible (see page 41). Codes 0000 (or 000000) to 9999 (or 999999) are available but Eaton’s Security Business recommends that you avoid easily memorised codes such a 0000, 999999 or 654321. -
Page 17: Proximity Tags
Menvier30/40/100/300 1. Introduction Proximity Tags A proximity tag is a small plastic token with a low powered radio transmitter inside. Each tag contains a unique identity code. (There are 4,294,967,296 ) different tag identity codes.) Inside the keypad is a sensor. When you present the tag within about 10mm of the front of the keypad, the control unit senses the presence of the tag and reads its identity code. -
Page 18: Twoway Key Fob
1. Introduction Menvier30/40/100/300 1. Full Set. 2. Part Set. 3. (Programmable, see page 91.) 4. Unset. 5. Transmit LED. Figure 3. Remote control Buttons. Each remote control has a unique electronic identity. When you assign a remote control to a user you teach the identity to the control unit. You may assign one (and only one) remote control to each user. -
Page 19: Radio Hold Up Alarms (Hua)
Menvier30/40/100/300 1. Introduction Unset Set LED Unset LED Query LED Part set LED Query Part Set (programmable) Figure 4. Two-Way Key Fob Buttons Operating the buttons To ensure that the fob does not accidentally operate while it is in your pocket, the buttons are deliberately slow to respond to pressure. - Page 20 1. Introduction Menvier30/40/100/300 Lock Figure 5. HUA Buttons HUA With A Two-Way Key Fob It is possible to start a Hold Up Alarm from a two-way key fob. However, the Installer must enable this within the control unit. (Note that doing so will mean that the system no longer complies with BS8243 or DD243.) Once the Installer has enabled this feature, a Master User must also turn this facility on, see page 103.
-
Page 21: Alarms
Menvier30/40/100/300 2. Alarms The table below shows the different kinds of alarms possible. Type of Signal Started by: Alarm Intruder Loud warbling tone Normal alarm or entry route zone from siren. activated when system is set. 24 hour zone activated at any time. Fire Pulsing tone from Fire zone activated at any time. - Page 22 2 Alarms Menvier30/40/100/300 In an alarm the sirens run for a limited time set by the installer (a maximum 15 minutes for intruder, Hold Up, and tamper alarms). If you return to the system while the sirens are running you can silence the siren as follows: ...
-
Page 23: If You Cannot Reset The System
Menvier30/40/100/300 2. Alarms If you return to the control unit after the sirens have stopped and key in your access code then the red LEDs around the navigation keys glow to tell you that an alarm has occurred. Press or and key in your user ... -
Page 24: Accidental Alarms
2 Alarms Menvier30/40/100/300 to call the alarm company, for example: The number displayed on the bottom line is a special code (“4321” is just an example). Note this code down, you will need it when you talk to the alarm company. -
Page 25: Acknowledging A Speech Message
Menvier30/40/100/300 2. Alarms Acknowledging a Speech Message If the control unit has Call Acknowledge enabled (ask your installer), then the person receiving speech messages from the alarm system can control the link by pressing buttons on their telephone key pad. The commands available are: Function ‘5’... -
Page 26: Technical Alarms
2 Alarms Menvier30/40/100/300 seconds, the rim of the navigation pad will glow green. In addition the keypad will stop beeping. OR: Press . The rim of the navigation pad will stay red and the system will show the text of the alert the next time you key in an access code. -
Page 27: Setting And Unsetting
Menvier30/40/100/300 3. Setting and Unsetting There are two main ways of setting and unsetting your alarm system: either from a keypad or from a remote control. This chapter is split into two halves, dealing with each of those methods in turn. In case you are not familiar with some of the terms used in this book: “Full Set”... -
Page 28: Setting
3. Setting and Unsetting Menvier30/40/100/300 Setting 1. Starting to Set Do this: The display shows: Make sure the system is idle. Secure all the windows and doors. (The top line may show the installer’s name.) Either key in your access code. ... - Page 29 Menvier30/40/100/300 3. Setting and Unsetting The bottom line of the display shows each item from the rest of the menu in turn. Press . Go to: 3. Finishing Setting on page 24. Ward based Systems Do this: The display shows: ↕...
- Page 30 3. Setting and Unsetting Menvier30/40/100/300 given the Ward a name, for example “Stores”. this will appear on the display instead of the ward number. ↕ Press or to select the change you want for the Ward. “U>P”...
- Page 31 Menvier30/40/100/300 3. Setting and Unsetting of the display shows the part of the system being set, the bottom line shows the remaining exit time (in seconds). If you hear an interrupted tone then there is a fault, for example an active detector. Leave by the designated exit door.
- Page 32 3. Setting and Unsetting Menvier30/40/100/300 line of the display shows the part of the system being set, the bottom line shows “Final Door Set”. Leave by the designated exit door. Remember to close the door. The system sets. Lock Set: ...
-
Page 33: If The System Will Not Set
Menvier30/40/100/300 3. Setting and Unsetting alarm system meets the appropriate standards. In addition, the installer may have programmed the system to briefly flash the strobe light on the external sounder when the system sets. Changing Your Mind If the system has not yet set and you want to stop setting then either press (unset key) or... -
Page 34: Other Reasons Why The System May Not Set
3. Setting and Unsetting Menvier30/40/100/300 SETTING FAULTS Z041 Back door Figure 6. Keypad Display Showing Active Zone Investigate the zone listed on the display and see if you can rectify the fault. If your system has been programmed to then you can “omit” the affected zone beforehand (see page 36 for instructions on how to omit zones before setting the system). -
Page 35: Unsetting The System Using A Keypad
Menvier30/40/100/300 3. Setting and Unsetting Override by: Message Meaning Grade 2 Grade 3 An expander or keypad has Installer Installer a fault, or the cabling between parts of the system has a fault. The AC supply has stopped User User for more than 10 seconds. -
Page 36: Using Radio Keypads And Remote Controls
3. Setting and Unsetting Menvier30/40/100/300 How Do I Know The System Is Unset? The keypad stops the entry tone and gives a double “beep”. The system is unset. The keypad display shows: followed by: On a part setting system, LEDs “A”... -
Page 37: Using A Proximity Tag With A Radio Keypad
Menvier30/40/100/300 3. Setting and Unsetting Complete setting using the method programmed by the Installer (see “3. Finishing Setting” on page 24). Unsetting Enter by the designated entry door. Key in a valid access code (or present your proximity tag). Press . Silencing an Alarm Key in a valid access code (or present your proximity tag). -
Page 38: Using A Remote Control
3. Setting and Unsetting Menvier30/40/100/300 Using a Remote Control Setting Note: You must ask your Administrator to provide a suitably programmed remote control, see page 91. Secure all your windows and doors. Make sure the system is in standby, and that you can hear the warning tones from the internal sounders. -
Page 39: Using A Two-Way Key Fob
Menvier30/40/100/300 3. Setting and Unsetting Try pressing A once more on your remote control. If the installer has programmed the system to do so then it will carry on and set, omitting the active detector. If the system will not set on the second press of button A then you will have to go to the keypad and set the system from there. -
Page 40: Unsetting The System
3. Setting and Unsetting Menvier30/40/100/300 Unsetting the System Press and The un-setting LED flashes red three times. hold: The system unsets. The unset LED glows green for three seconds. What Happens if the System Will Not Set Press and The setting LED flashes red three times. hold: The system tries to set. -
Page 41: Administration
Menvier30/40/100/300 4. Administration To make changes to the way your system works you must enter the Menu. Your degree of access to the Menu depends on what type of user you are: Master User, Admin User or Normal User. A Master User has access to all the options of the Menu. A Master User can add, change, or remove users in any ward, and has full access to the system options menu. -
Page 42: Editing Text
4. Administration Menvier30/40/100/300 The rest of this chapter describes each of the main options in the Menu. Editing Text For many of the items that you can program, the control unit lets you assign a 12 character name. To key in text for the name press each number key one or more times to obtain the letter you want (the letters of the alphabet appear on the keys in the same arrangement as on many mobile phones, see Figure 9.) - Page 43 Menvier30/40/100/300 4. Administration Make sure the display shows the standby screen. Press Key in your access code (or present a tag). Press . The bottom line of the display shows the first of a list of zones that you may omit.
-
Page 44: Shunt Groups
4. Administration Menvier30/40/100/300 Press to leave the Menu. The keypad gives a double “beep” confirmation tone. The control unit allows you to omit a zone for one setting/unsetting cycle. You will have to omit the zone again for the next setting/unsetting cycle. Shunt Groups A shunt group is a collection of zones that can be “shunted”. - Page 45 Menvier30/40/100/300 4. Administration standby screen. Press Key in your access code (or present a tag, see page 11)). Press . The display shows: Press . The display shows the first in a list ...
-
Page 46: Users
4. Administration Menvier30/40/100/300 shown). To deactivate that shunt group: Make sure the display shows the standby screen. Key in the shunt code (or present a tag). The display shows a message telling you which shunt group has ... -
Page 47: Editing Existing Users
Menvier30/40/100/300 4. Administration A Normal, Ward User or Easy Set User can: Edit their own user code, and delete or add their own proximity tag, remote or radio HUD. A Duress code user cannot have a proximity tag, remote or radio HUD, and has no access to the Menu. - Page 48 4. Administration Menvier30/40/100/300 in and the display will show that user immediately; for example “003”.) Press . The bottom line shows: 10. Press . The display shows the current name given to the user, and places a cursor at the beginning of the name.
- Page 49 Menvier30/40/100/300 4. Administration Press . The bottom line of the display shows the name or user number of the first in a list of the users already programmed into the control unit. In the example shown the name is “User 001”.
- Page 50 4. Administration Menvier30/40/100/300 Make sure the display shows the standby screen. Press Key in your access code (or present a tag). Press . Press . Press . ...
- Page 51 Menvier30/40/100/300 4. Administration 13. Press to change a “Yes” to a “No” or back again. See page 4 for a description of wards. See Note below for a quick way of assigning users to wards. 14. Press when you have finished ...
- Page 52 4. Administration Menvier30/40/100/300 If you are a Master or Admin User: (otherwise go to step 6) Press . Press . Press . Press or . until the bottom line of the display shows your own ...
- Page 53 Menvier30/40/100/300 4. Administration If a user forgets their code then a Master or Admin User must delete that user from the system (see page 56), and recreate a new user with a new code (see page 53). Proximity Tags No user can change or delete any other user’s proximity tag. (A Master User or Admin User can register a proximity tag for a new user when they first add the user to the system, see page 53.) Any user except a Duress, Guard or Set Only user can register a tag for themselves as follows:...
- Page 54 4. Administration Menvier30/40/100/300 If you are a Normal User, Ward User, or Easy Set User: Press . Press until the display shows: Press . Note: If you already have a prox tag allocated to you then the screen will display “Delete Prox Tag?”.
- Page 55 Menvier30/40/100/300 4. Administration Key in your access code (or present a tag). Press . If you are a Master or Admin User: (otherwise go to step 6) Press . Press . Press .
- Page 56 4. Administration Menvier30/40/100/300 See page 52. Press any button on the device that you wish to register. Hold the button down until you see the transmit LED flash. The keypad gives a double “beep” confirmation tone. The keypad display shows: ...
- Page 57 Menvier30/40/100/300 4. Administration (otherwise go to step 6) Press . Press . Press . Press or . until the bottom line of the display shows your own user name or number. ...
- Page 58 4. Administration Menvier30/40/100/300 register. Hold the buttons down until followed by: you see the transmit LED flash. The keypad gives a double “beep” confirmation tone. The keypad display shows: The control unit has learned the identity of the Hold Up Alarm and linked it with your access code.
-
Page 59: Adding Users
Menvier30/40/100/300 4. Administration of the display shows your own user name. Press . Press or until the bottom line shows the device you wish to delete, for example: Go on to step 8. If you are a Normal User, Ward User or Easy Set: ... - Page 60 4. Administration Menvier30/40/100/300 When adding a new user you can also assign to them a proximity tag, remote control and Hold Up Alarm transmitter. If you do not wish to assign these devices when you create the user, then each user must assign those devices to themselves at a later date by using the Users - Edit User option.
- Page 61 Menvier30/40/100/300 4. Administration In a ward based system the display shows: Note: If you are adding a Master User this display will not appear. The system allocates Master Users to all wards. Press or to scroll through the ...
-
Page 62: Deleting Users
4. Administration Menvier30/40/100/300 you want to assign to the user. 12. Press a button on a remote control (one that is not currently registered to any other user). If you do not have one press . Note: A Duress user cannot have a remote control or radio HUD. -
Page 63: Viewing The Log
Menvier30/40/100/300 4. Administration Press until you see: Press . The bottom line of the display shows the first user in a list of the users recognised by the system. Press or . until the bottom line of the display shows the user you ... - Page 64 4. Administration Menvier30/40/100/300 standby screen. Press Key in your access code (or present a tag). Press until you see:. Press . The display shows the most recent event recorded in the log. Press ...
-
Page 65: Testing The System
Menvier30/40/100/300 4. Administration Special User Numbers Control unit type Downloader Virtual keypad Note: The word “Web” will appear in the log entry if the installer logged on using the web browser. Testing the System If you think that your system is not working correctly then a Master User or Admin User can use the Test option to test various peripherals. - Page 66 4. Administration Menvier30/40/100/300 Press . The keypad gives a double “beep” confirmation tone. The keypad display shows: The control unit turns on the external radio sirens. Check that you can hear them. Press again to turn the sirens ...
- Page 67 Menvier30/40/100/300 4. Administration 12. Press . The display shows the next item in the list of tests. 13. Press . Press . The keypad gives a double “beep” confirmation tone. The keypad display shows: The control unit sounds a test tone on the loudspeakers.
-
Page 68: Keypad
4. Administration Menvier30/40/100/300 Press . The keypad gives a double “beep” confirmation tone. The keypad display shows: The control unit sounds a test tone on the keypad sounders. Check that you can hear them. Press again to turn the keypad ... -
Page 69: Walk Test
Menvier30/40/100/300 4. Administration by its name. Note that the LEDs around the navigation key and the four LEDs at the right should all be glowing red. Press each key once. The bottom line of the display shows the key you pressed. Press both radio HUD keys together to test. - Page 70 4. Administration Menvier30/40/100/300 Press until you see:. Press . The bottom line of the display shows: Press until you see: Press . The bottom line of the display shows: Press or to turn a chime tone on or off.
-
Page 71: Outputs
Menvier30/40/100/300 4. Administration Once you have selected the Walk Test option you want to use: The top line of the display shows you how many detectors remain to be tested. The bottom line of the display shows a list of all the detectors ready for testing. - Page 72 4. Administration Menvier30/40/100/300 Press . The display shows: Press until you see: Press . The bottom line of the display shows the first in a list of the outputs allocated for your use. If the output has a name programmed for it, that will appear on the bottom line instead of the...
-
Page 73: Remotes And Two-Way Keyfobs
Menvier30/40/100/300 4. Administration When you complete the test check that the output is back in the state it had before testing. For example, if the output was off before testing, make sure it is off after testing. Remotes and Two-way Keyfobs ... -
Page 74: Radio Hold Up Alarms
4. Administration Menvier30/40/100/300 been programmed.) The bottom line of the display shows the function of the button you pressed and the strength of the signal received by the system from the remote. If the signal strength is less than 4 you should contact your installer. - Page 75 Menvier30/40/100/300 4. Administration present a tag). Press until you see:. Press . The display shows: Press until you see: Press . The display asks you to press both buttons on the radio HUD you wish ...
-
Page 76: Proximity Tags
4. Administration Menvier30/40/100/300 Each time you activate a HUA the keypad gives a double “beep” confirmation tone. The display shows information for any radio HUD allocated to a user of the system, for example: Press to end the test. ... -
Page 77: Arc Reporting
Menvier30/40/100/300 4. Administration programmed for the user will appear in place of the user number.) Hold any other prox tags that you wish to test up against the keypad (one at a time). The keypad gives a double “beep” confirmation tone. The bottom line of the display shows the users owning each prox ... -
Page 78: Arc Reporting
4. Administration Menvier30/40/100/300 (there are only two). Press or to select the number you wish to call. Press . The keypad display shows the progress of the call. Check with the receiving centre that the test call arrived. -
Page 79: System Configuration
Menvier30/40/100/300 4. Administration receiving centre that the test call arrived. If the call fails the display will show “Call failed” followed by a reason. System Configuration The System Configuration option allows you to change some parts of the system to suit your particular needs. If you need more extensive changes to the operation of the system then you must contact your installer. -
Page 80: Allowing Remote Access
4. Administration Menvier30/40/100/300 making changes. The keypad gives a double “beep” confirmation tone. The keypad display shows: Allowing Remote Access It is possible for the Installer to gain access to the control unit of your alarm system remotely. They can do this from their PC either over the telephone network or through a network cable connected directly to the control unit. -
Page 81: Setting The Date And Time
Menvier30/40/100/300 4. Administration facility changes each time you press . Make sure the status is “ON” to allow access, and “OFF” to deny it. Press when you have finished making changes. The keypad gives a double “beep” confirmation tone. The keypad ... -
Page 82: Calendar Set
4. Administration Menvier30/40/100/300 of March will be 01/03/2010. Press . The top line of the display shows “Set the Time” and the bottom line of the display shows the current system time. The minutes are highlighted. 10. Key in the correct time. Use the 24- hour clock in the format hh/mm. - Page 83 Menvier30/40/100/300 4. Administration One or more days of the week An action (setting, part setting or unsetting). An exception (see below). A warning time, during which a warning tone can sound before the system sets. A warning tone, which the system can give during the warning time. Each exception marks a time period when certain events do not apply.
- Page 84 4. Administration Menvier30/40/100/300 Event Actions. In a part setting press or to select one of: Full Set, Part Set B (or C or D) and Unset. In a ward based system the keypad display shows a list of wards. Press or to scroll through each ward.
- Page 85 Menvier30/40/100/300 4. Administration Name. Key in a 12 character name. Give the exception a meaningful name that will remind you of its purpose when you are linking events to exceptions. Exception Start Time. Key in the start time in 24 hour format.
- Page 86 4. Administration Menvier30/40/100/300 Press or to see details of which wards are about to set. Press to allow the setting event to proceed. Press to defer setting for 30 minutes. Note that the user must belong to the ward(s) that is due to be set.
- Page 87 Menvier30/40/100/300 4. Administration 2. If you are unsetting a ward and setting the same ward again then you must program the setting event to occur at least 10 minutes after the unsetting event. Calendar Set Example Not available on the Menvier30. As an example, assume that you wish to set the alarm system every evening during the days Monday to Friday, and unset the alarm system every morning on Monday to Friday (leaving the system set over the...
- Page 88 4. Administration Menvier30/40/100/300 display shows: 12. Key in the start time. In the example we want to make the whole day of the bank holiday an exception, so start at one minute past midnight. 13. Press . The display shows: ...
- Page 89 Menvier30/40/100/300 4. Administration Next, you would program two events: event one sets the system in the evening on Monday to Friday, and event two unsets the system in the morning on Monday to Friday. To program the events: 20. Starting from where we finished ...
- Page 90 4. Administration Menvier30/40/100/300 29. Repeat steps 27 and 28 for all the days you want the event to occur In the example this is Monday through to Friday 30. Press . The keypad gives a double “beep” confirmation tone. The keypad ...
- Page 91 Menvier30/40/100/300 4. Administration 36. Press . The display shows: 37. Repeat steps 22 to 35, but this time program the setting time. For the example: The setting time has the name “Evening Set”, takes place at 18:15, applies on each of the five working days, Monday to Friday, and sets ward 2 to Full Set.
-
Page 92: Programming Outputs
4. Administration Menvier30/40/100/300 Programming Outputs During programming the installer may allocate some outputs so that they can be reprogrammed by an Administrator. This section describes how the Administrator can use those outputs. For each output you can, if you wish, set an “on” time and an “off” time so that the output will go on and off at fixed times each day. - Page 93 Menvier30/40/100/300 4. Administration Press or to display the output you wish to edit. Press . The bottom line of the display shows the first option that you can edit for the output: “Name”. 10. Press . The display shows the current ...
- Page 94 4. Administration Menvier30/40/100/300 again after a set time. You can program the length of time the output remains on. 15. Press or to select the option you wish to use. For example: 16. Press to confirm your choice. The keypad gives a double “beep”...
- Page 95 Menvier30/40/100/300 4. Administration First make sure that the output you wish to use is programmed as Latched = Yes (see steps 1 to 16 starting on page 86). 17. Press until the display shows: 18. Press . The display shows the time when ...
- Page 96 4. Administration Menvier30/40/100/300 “00:00”. To Program Days Of The Week for Latched Outputs In addition to specifying an On and Off time during the day for a latched output, you can also specify which day of the week that the output should operate on.
-
Page 97: Programming Remote Controls And Two-Way Keyfobs
Menvier30/40/100/300 4. Administration 30. Press when you have finished making changes. The keypad gives a double “beep” confirmation tone. The keypad display shows: 31. Press to leave the menu. Note: You can switch the output on and off from the Menu by selecting Outputs On/Off (see page 107). - Page 98 4. Administration Menvier30/40/100/300 Press . Press . EITHER Press the button on the remote control that you wish to program. Hold the button down until you see the transmit LED flash. The keypad gives a double “beep”...
- Page 99 Menvier30/40/100/300 4. Administration The display shows the first button on the remote control. Note: Only the “*” button (Part set) is available on a FOB-2W-4B. Press or to show the button you wish to re-program. Press to select the button. ...
- Page 100 4. Administration Menvier30/40/100/300 c) Press . The bottom line of the display now shows the first item in a list of setting or unsetting options that you can apply to the selected button. The setting options available are: Part Set All Part Sets All Wards that the user belongs to.
- Page 101 Menvier30/40/100/300 4. Administration change. d) Press to select between “No”, “Full” or “Part”. “No” = No effect. “Full” = Full Set “Part” = Part Set e) Press when you have finished making the changes you want. The keypad gives a double “beep”...
- Page 102 4. Administration Menvier30/40/100/300 Press . Press . Press or . until the bottom line of the display shows your own user name or number. Press . Press or . until the bottom line of ...
- Page 103 Menvier30/40/100/300 4. Administration Press when you have finished re- assigning the two-way keyfob to its wards. 10. Press repeatedly to leave the menu. Operate an Output To program a remote button to operate an output: Make sure the display shows the ...
- Page 104 4. Administration Menvier30/40/100/300 output. OR (if you do not have the remote in your possession) a) Press . The display presents a list of the registered remote controls and their users. Press or to show the ...
-
Page 105: Deleting Remote Controls
Menvier30/40/100/300 4. Administration output available. 13. Press . The keypad gives a double “beep” confirmation tone. The bottom line of the display shows the first in a list of three actions that you can give to the button: ... - Page 106 4. Administration Menvier30/40/100/300 Press until you see:. Press . Press until the display shows: Press . Press until the display shows: Press . The display shows: 10.
- Page 107 Menvier30/40/100/300 4. Administration 11. Press . The keypad gives a double “beep” confirmation tone. The keypad display shows: followed by: The control unit has deleted the remote from its memory. The remote can no longer be used on the system.
-
Page 108: Preventing Any Remote From Unsetting The System
4. Administration Menvier30/40/100/300 Press . The display shows: (Press if you decide you do NOT want to delete all remotes.) 10. Press . The keypad gives a double “beep” followed by confirmation tone. The keypad ... -
Page 109: Allowing A Fob-2W-4B Or 727R To Start A Hua
Menvier30/40/100/300 4. Administration Press . The display shows: 10. Press . or until the display shows: 11. Press The keypad gives a double “beep” confirmation tone. The keypad display shows: 12. Press repeatedly to leave the menu. -
Page 110: Starting A Call To Downloader
4. Administration Menvier30/40/100/300 Press until the display shows: Press . The display shows: 10. Press . or until the display shows: 11. Press The keypad gives a double “beep” confirmation tone. -
Page 111: Redirecting Speech Messages
Menvier30/40/100/300 4. Administration Make sure the display shows the standby screen. Press Key in your access code (or present a tag). Press until you see:. Press . Press until the display shows: ... - Page 112 4. Administration Menvier30/40/100/300 installer. You can use the About menu to check if you have a communication module fitted, see page 108. If you need to re-direct speech messages to new telephone numbers then: Make sure the display shows the ...
-
Page 113: Turning Outputs On/Off
Menvier30/40/100/300 4. Administration the telephone number, for example: (See page 36 for instructions on how to key in text.) 13. Press to store the changes you have made. The keypad gives a double “beep” confirmation tone. The keypad display shows: ... -
Page 114: What System Have I Got
4. Administration Menvier30/40/100/300 Press to change the state of the output. The keypad gives a double “beep” confirmation tone. The keypad display shows: Note: Outputs connected to radio output modules may take several seconds to change state. Press . -
Page 115: Seeing Which Communications Module Is Currently Installed
Menvier30/40/100/300 4. Administration Press repeatedly to leave the menu. Seeing Which Communications Module Is Currently Installed: Make sure the system is idle. Press Key in your access code (or present a tag). ... -
Page 116: List Of Menu Options
Menvier30/40/100/300 List of Menu Options Item Page Omit Zones Shunt Groups Users Add User Edit User (for each user:) Name Type (not U001) Wards (not in part setting system) Code Prox Tag Remote Hold Up Alarm Delete User View Log Test Siren &... -
Page 117: Alarm Functions At A Glance
Menvier30/40/100/300 Alarm Functions At a Glance Navigation: up, down, left, right HUA/PA keys Display shows: Time and date when system off (unset). First zone to alarm after alarm Read log here. Glowing = On (set) Off = Off (unset) Flashing = Part Set (part setting systems only) Key in access code Key in access code... -
Page 118: After An Alarm
Menvier30/40/100/300 After an Alarm N ORDER TO O THIS HE SYSTEM WILL EITHER: Switch off siren: Stop the siren. The Key in ACCESS CODE keypad display shows the OR present tag. first zone to alarm. Press . Reset the system: Keypad display shows time and date.
Need help?
Do you have a question about the Menvier 20 and is the answer not in the manual?
Questions and answers