Eaton i-on40 Installation Manual
Hide thumbs
Also See for i-on40:
- Quick user manual (4 pages) ,
- Administrator's and user manual (116 pages)
Table of Contents
Advertisement
Quick Links
Advertisement
Table of Contents

Subscribe to Our Youtube Channel
Related Manuals for Eaton i-on40


Summary of Contents for Eaton i-on40
- Page 1 Security System Installation Guide Issue 7...
-
Page 2: Terminology
© Eaton’s Security Business. 2014 IN NO EVENT WILL EATON’S SECURITY BUSINESS BE LIABLE FOR ANY SPECIAL, CONSEQUENTIAL , OR INDIRECT LOSS OR DAMAGE, INCIDENTAL DAMAGES, STATUTORY DAMAGES, EXEMPLARY DAMAGES, LOSS OF PROFITS, LOSS OF REVENUE, LOSS OF ANTICIPATED SAVINGS, LOSS OF BUSINESS OR OPPORTUNTIY, LOSS OF GOODWILL OR INJURY TO REPUTATION, LIQUIDATED DAMAGES OR LOSS OF USE, EVEN IF INFORMED OF THE POSSIBILITY OF SUCH DAMAGES. -
Page 3: Table Of Contents
Security ............. 26 CONTENTS Radio ..............26 Power Supply ........... 26 Terminology ............ ii EN50131-6 ratings: ........26 1. Introduction ............1 Electromagnetic Compatibility ......27 Communications ..........1 Outputs ............. 27 Level Setting or Partitioned System ....1 Fuses .............. - Page 4 This page is intentionally blank. Page iv...
-
Page 5: Introduction
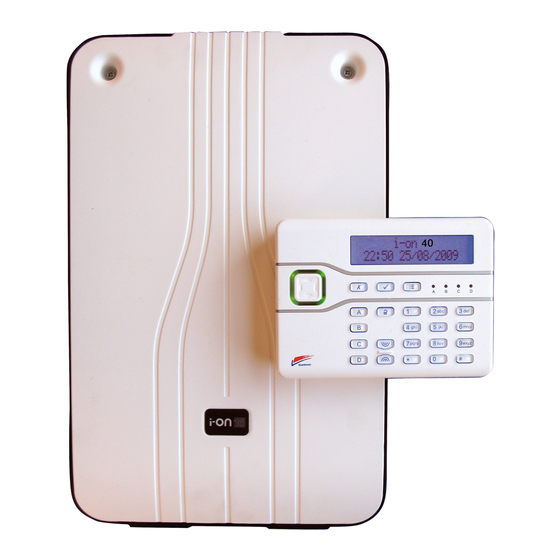
1. Introduction (ATS2) (PSTN) module that allows the control unit to report alarm The i-on40 is the control unit for a hybrid information using standard wired/wirefree alarm system intended for domestic protocols such as Fast Format, SIA and light commercial use. -
Page 6: Installer Programming Interface
Installer menu. Please see the i-on Web Server Setup Guide for more instructions. Note that Eaton’s Security Business recommends using Internet Explorer. Other browsers may not be fully compatible with the web browser interface. -
Page 7: Before You Begin
Radio Site Survey Inside metal enclosures. Next to electronic equipment, particularly You should conduct signal strength tests before installation. Eaton’s Security Business produce computers, photocopiers or other radio equipment, CAT 5 data lines or industrial the Scantronic 790r hand held signal strength mains equipment. -
Page 8: Control Unit Pcb
Before You Begin i-on40 Figure 1 Opening the Control Unit. WARNING: When connected to the mains with power applied mains voltages are present on the shrouded heads of the terminal screws of the mains connector (“8” in Figure 2). 1. Central fixing keyhole. -
Page 9: I-Kp01 Controls And Displays
Before You Begin To open the keypad first gently prise off the trim 5. 20VAC input (from transformer). on the front and remove the two screws. Next, 6. Battery connector. carefully lever the front of the keypad (containing 7. Kick Start pins. - Page 10 Before You Begin i-on40 4. Setting and unsetting keys. The ABCD keys have built-in status LEDs that can show the setting status of a part setting system. These LEDs can be disabled, see page 12. 5. Plastic caps covering screws (shown closed and open).
- Page 11 Before You Begin BRIGHT TERM 1. Jumpers for addressing and LED function: Z1 Z2 0V 12V D0 D1 LED 0V 12V A EXT READER 1a Addressing 1. Tamper switch. 1b LED functions and RS485 terminate 2. Sounder. 2. Sounder volume control.
-
Page 12: Power Availability
PCB, communicator and keypads is given in Technical Specifications on page 26. For example: in an alarm system with an i-on40 control unit, two i-kp01 keypads, and 15 wired PIRs the system takes the following total... -
Page 13: Installation
Note: If you are installing a keypad that was previously used on an i-onEX system, then make sure you default the keypad address BEFORE attaching it to the i-on40. See page 11 for detailed instructions. Siting the Keypad(s) Do site the keypad(s): Within the area protected by the alarm system. -
Page 14: Fitting Keypads
Installation i-on40 Fitting Keypads Use one pair for data bus A & B. Use the other pair for 12V & 0V. For optimum performance the Select which cable entry you are going to use and voltage at the keypad should be greater than 12V. -
Page 15: Keypad Addressing
Business recommends that you do this by deleting Termination the keypad from the i-onEX system using the The i-on40 data bus uses the RS485 interface. Installer Menu. However, if this is not possible Because of this the ends of the line in some... -
Page 16: Backlight Control For Key-K01/Kp01/Kpz01
BACKLIGHT BRIGHT Installation i-on40 BACKLIGHT BRIGHT glow briefly for five programming mode, seconds when a user The display shows the BACKLIGHT presses a key. current status. BRIGHT The key backlights BACKLIGHT glow all the time at BRIGHT To Switch ABCD LEDs ON or OFF normal intensity. - Page 17 Installation under the navigation key will glow for 20 seconds after the last press (this may be useful when the keypad is placed in bedrooms that should be completely dark at night). 4. Leave local programming mode and save your changes.
-
Page 18: Tone Volume - All Keypads
Installation i-on40 Figure 23 Opening External Prox Reader Figure 25 Connecting the External Prox Reader Figure 24 shows the details of the external prox Tone Volume – All Keypads reader backplate: To alter the volume of non-alarm tones from the... -
Page 19: Mains Connection
Installation Step 4. Connect Wired Zones Four Wire Closed Circuit Connections >1m >1m Tamper Zone2 Tamper Zone1 Figure 26 Mains Cabling Clearance Note: To avoid mains interference, the mains cable must enter the control unit through its own Alarm Zone 2 cable entry hole ( 9 in Fig 2) and must not be mixed with other cables. -
Page 20: Connecting Wired Zones On Key-Kpz01 Only)
Installation i-on40 Once the zones are enabled they occupy the zone numbers at the top of the numbering range, depending on the address of the keypad. Keypad zone Panel Panel Zone zone Keypad 1 Zone 1 39 Alarm Keypad 1 Zone 2... -
Page 21: Step 5. Connect Wired Peripherals
Strobe -ve Output on KEY-KPZ01 Trigger -ve The output on a KEY-KPZ01 is not available for use with an i-on40. Step 6. Fit a Plug-By Communicator The control unit can be connected to a separate communicator or speech dialler (for example, the Scantronic 8400, 8440, 660 or RedCare STU). -
Page 22: Step 7. Fit And Connect Battery
Line Fault input of the standard web browser. See the separate plug-by connector. The communicator must publication i-on40 Web Server Set Up Guide for provide +12Vdc to indicate a line fault (for instructions on how to set up your PC/laptop and example, if the Line Fault output at the the control unit. - Page 23 Installation an alarm tone. If you are working at the top of a ladder make sure that the sudden noise does not Note that the alert LEDs around or built-into startle you and cause a fall. the navigation key glow red. This is because 1.
-
Page 24: Step 9. Commission The System
Installation i-on40 Step 9. Commission the System After installing the control unit you should commission the alarm system as follows: 1. Use the Installer Menu (see Chapter 4) to teach the control unit the identity of its radio detectors and any other peripherals. See the installation instructions supplied with each detector or peripheral. -
Page 25: Programming
If you wish to leave the Installer Menu at any time. This section is summary of the Installer Menu on the i-on40. Please see the i-on Range 1. Press until the display shows the words Engineering Guide for a more detailed description. -
Page 26: Restoring Factory Defaults
Programming i-on40 The control unit loads the factory default access codes: User 1: 1234, Installer: 7890. (All other users have been deleted.) After a short pause the keypad display shows the time and date. The red LEDs glow to show an alert that the panel lid is open. -
Page 27: Installer Menu
Programming i-on40 Installer Menu System tampers Call Acknowledge 1 DETECTORS/ DEVICES 3 SETTING OPTIONS Confirmation (-UK) Detectors Full Set Confirmation Mode Call Mode Add/Del Detectors Name Basic Messages Zone 17...40 Exit mode DD243 Phone Book Delete all Settle time BS8243... - Page 28 Programming i-on40 Appears only in a Partitioned system (or when zones have a type other than “Not Used”. Appears when zone is given a type other than “Not Used”. Appears only when device learned in. Appears only in a Level Setting system.
-
Page 29: Maintenance
5. Maintenance The control unit should be inspected once per year. At each inspection: Check the control unit for obvious signs of damage to the case or its lid. Check the action of the back tamper. Check the condition of the control unit standby battery. -
Page 30: Technical Specification
(or prox tags) Product 40 zone hybrid endstation with in series. Blocked for a further Description remote keypads. 90s after each additional Eaton’s Security Business. Manufacturer incorrect code or prox tag, until Environmental Class II. next correct code or prox tag Operating Tested -10 to +55°C. -
Page 31: Electromagnetic Compatibility
Electrical Safety on page 6. Conforms to EN60950-1. Other If you wish to connect the i-on40 control unit to a PC using either the Ethernet or the USB port then make sure that the cables have the following specifications: Ethernet... -
Page 32: Compliance Statements
Technical Specification i-on40 Compliance Statements Compatible Equipment This product is suitable for use in systems designed to comply with PD 6662: 2010 at grade 705rEUR-00 Two button HUD (single 2 and environmental class II. channel, top button is This product complies with the requirements of disabled) EN50131-3 at grade 2 and environmental class II. -
Page 33: Communicators
Technical Specification function not compatible with Accessories BS8243 or DD243) 703rEUR-00 4-channel (2 zone) Communicators transmitter i-dig02 PSTN Communication (ARC 762rEUR-00 Two Channel Receiver only). 768rEUR-50 Eight Channel Receiver i-gsm02 GSM communications 770rEUR-00 Wireless Accessory Module module 771rEUR-00 Info Module... - Page 34 NOTES: Page 30...
- Page 35 NOTES: Page 31...
- Page 36 Product Support (UK) Tel: +44 (0) 1594 541978. Available between: 08:30 to 17:00 Monday to Friday. Product Support Fax: (01594) 545401 email: techsupport@coopersecurity.co.uk Part Number 12435160 21/1/2014 Page 32...
Need help?
Do you have a question about the i-on40 and is the answer not in the manual?
Questions and answers