Sign In
Upload
Manuals
Brands
Paradyne Manuals
Adapter
ACCULINK 3160
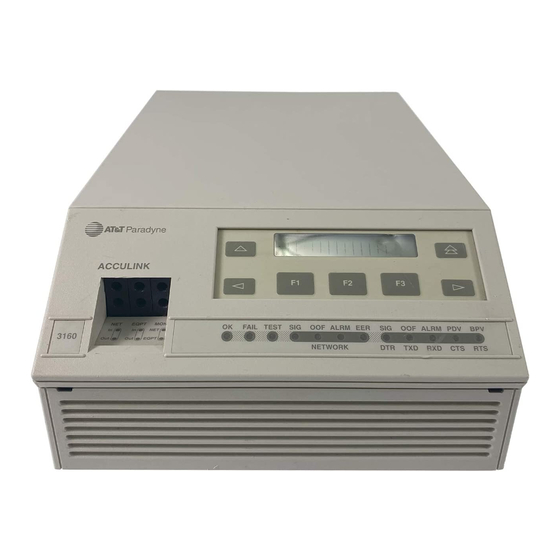
Paradyne ACCULINK 3160 Manuals
Manuals and User Guides for Paradyne ACCULINK 3160. We have
8
Paradyne ACCULINK 3160 manuals available for free PDF download: Operator's Manual, Quick Reference, Supplementary Manual, Quick Installation, Release Note
Paradyne ACCULINK 3160 Operator's Manual (316 pages)
Paradyne Acculink DSU/CSU Data Service Unit Models 3160-A4, 3161, 3164-A2, and 3165-A4 Operator's Guide
Brand:
Paradyne
| Category:
Network Hardware
| Size: 3.3 MB
Table of Contents
Table of Contents
7
About this Guide
15
Document Purpose and Intended Audience
15
Document Summary
15
Reference Documents
17
1 Introduction
19
T Overview
19
T Features
19
Overview
19
DTE Drop/Insert (DSX-1) Interface
20
Alarm Message Capability
20
Front Panel Emulation
20
Integral Modem
20
Async Terminal Interface Support
20
Telnet Access
20
SNMP Management Support
21
Physical Description
21
Standalone DSU/CSU Front Panel
21
Standalone DSU/CSU Rear Panel
23
2 Installation
27
T Overview
27
Application Examples
27
SNMP or Telnet Connection Examples
29
Important Instructions
30
Installation Steps
31
C Configuration Options
31
Optional Power Sources (Model 3164 Only)
32
Installing the +24 VDC Power Supply
32
Installing the Single -48 VDC Power Supply
33
Installing the Redundant -48 VDC Power Supply
34
Cabling Examples
35
Power-On Self-Test
36
3 Using the Front Panel
39
T Overview
39
Front Panel
39
Test Jacks
39
Lcd
40
Keypad
41
Test Jacks
42
Leds
43
Displaying Unit Identity
48
T Selecting the DTE Drop/Insert or Data Port for LED Display
50
Displaying LED Conditions
51
Resetting the DSU/CSU
53
Download Operations
53
4 Configuration
55
T Overview
55
T Setting Customer Identification
55
T Changing Configuration Options
55
Overview
55
Setting Customer Identification
56
Changing Configuration Options
57
TDTE Interface Configuration Options
58
Displaying/Editing Configuration Options
59
Saving Edit Changes
60
Selecting/Copying to a Specific Port
61
Configuring the 10Baset Port (Models 3160 and 3165)
63
Setting the 10Baset Port IP Address
64
Setting the 10Baset Port Subnet Mask
65
Setting the Default Gateway Address
66
T Configuring the COM Port or Modem Port for SNMP or
67
Telnet Access
67
Selecting the Port
68
Setting the IP Address
69
Selecting the Link Layer Protocol
71
Specifying the Community Name(S) and Access Type(S)
73
Configuring SNMP Traps
75
Enabling SNMP Trap Messages
75
Selecting the Number of Trap Managers
76
Configuring a Destination for SNMP Traps
77
Configuring Ds0 Channels
78
Displaying DS0 Channel Assignments
85
Allocating Data Ports
87
Block or ACAMI Assignment Method
89
Individual Channel Assignment Method
90
Allocating DS0 Channels from the DTE Drop/Insert Interface
91
Clearing DS0 Channel Allocation
93
Providing Backup Capability
94
Selecting the Timing Source
94
Configuring for Network Timing
96
Configuring for External Timing
97
Enabling the COM Port for Carrier-Mounted Dsu/Csus
98
Deactivating the Alarm Relay for Carrier-Mounted Dsu/Csus
101
5 Security
103
T Overview
103
T Establishing Access Security on a Port
103
T Setting a Password
103
Establishing Access Security on a Port
104
Setting a Password
105
Entering a Password to Gain Access
106
Acquiring/Releasing the User Interface
107
Acquiring the Active User Interface
107
Releasing the Active User Interface
108
Enabling/Disabling the Front Panel
109
User Interface Access Security for Standalone Dsu/Csus
111
Changing User Interface Access Security
112
6 Using the Integral Modem
113
Using the Integral Modem in Standalone Dsu/Csus
113
Entering Numbers in the Phone Directories
114
Initiating a Call for Front Panel Pass-Through Operation
116
T Initiating a Call for PC, ASCII Terminal/Printer, or
118
SNMP Operation
118
Disconnecting the Modem Connection
119
7 Monitoring and Troubleshooting
121
T Overview
121
T Self-Test Health Messages
121
Device Health and Status Messages
121
T Performance Reports
121
Ethernet Statistics (Models 3160 and 3165)
121
T Alarms
121
SNMP Traps
134
Troubleshooting
136
8 Testing
139
T Overview
139
Test Jacks
140
Test Jack Configuration (Model 3160 and 3164 Dsu/Csus)
142
Test Commands
143
Remote Loopback Tests
143
Sending a Line Loopback up or down
144
Sending a V.54/ANSI FT1 Activation/Deactivation
145
Local Loopback Tests
146
Line Loopback (LLB)
146
Payload Loopback (PLB)
146
DTE Loopback (DLB)
146
Repeater Loopback (RLB)
146
Data Channel Loopback (DCLB)
146
Data Terminal Loopback (DTLB)
146
Aborting Loopbacks
153
Test Patterns
154
Sending Test Patterns
155
Monitoring Test Patterns
157
Aborting Test Patterns
158
Lamp Test
159
Starting a Lamp Test
159
Aborting a Lamp Test
160
Displaying DSU/CSU Test Status
161
Technical Specifications
165
Port Configuration Options
169
Network Interface Configuration Options
174
Channel Configuration Options
176
General Configuration Options
182
User Interface Configuration Options
184
Alarm Configuration Options
195
Management Configuration Options
199
D Configuration Worksheets
209
Configuration Worksheets
209
Pin Assignments
223
T Overview
223
T1 Network Interface
223
DTE Drop/Insert Interface
225
10 Baset Connector
226
MODEM Port Interface
227
AUX Port Interface (Model 3164 Only)
228
COM Port Interface
229
EIA-530-A Port Interface Connector
231
EIA-530-A-To-RS-449 Cable Interface
232
EIA-530-A-To-V.35 Cable Interface
234
EIA-530-A-To-X.21 Cable Interface
236
Serial Crossover Cable
237
Power Input Connector
238
Optional DC Power Cable (Model 3164 Only)
238
External Clock Interface
239
System Group, MIB II
242
Interface Group, MIB II
244
IP Group, MIB II
250
ICMP Group, MIB II
253
TCP Group, MIB II
253
UDP Group, MIB II
253
Transmission Group, MIB II
253
SNMP Group, MIB II
254
T Ds1/E1 Mib (Rfc 1406)
254
Near End Group, DS1/E1 MIB
254
Far End Group, DS1/E1 MIB
258
DS1 Fractional Group, DS1/E1 MIB
259
General Port Table, RS-232-Like MIB
260
Asynchronous Port Table, RS-232-Like MIB
262
Synchronous Port Table, RS-232-Like MIB
263
Input Signal Table, RS-232-Like MIB
263
Output Signal Table, RS-232-Like MIB
264
Generic Interface Test Table, Generic Interface MIB
265
T Enterprise MIB
267
T Correlation between Menu Commands and SNMP Objects
268
Installing Front Panel Emulation Software
281
Starting Front Panel Emulation
283
Before Using the Ati
285
Initiating an Ati Session
286
Ending an Ati Session
287
Menu Organization
288
Using Ati Screens
289
Displaying or Editing Configuration Options
293
Saving Edit Changes
295
Equipment List
299
Advertisement
Paradyne ACCULINK 3160 Operator's Manual (211 pages)
DATA SERVICE UNIT/CHANNEL SERVICE UNIT (INCLUDES TERMINAL USER INTERFACE)
Brand:
Paradyne
| Category:
Network Hardware
| Size: 2.63 MB
Table of Contents
Table of Contents
8
Important Safety Instructions
3
Government Requirements and Equipment Return
5
Preface
14
Objectives and Reader Assumptions
14
Related Documents
14
Reference Documents
14
Introduction
15
Overview
15
Features
16
User Interface
16
Alarm Interface
16
Front Panel Access Control Feature
17
Front Panel Emulation
17
ACCULINK 316X DSU/CSU Physical Description
18
Standalone Model 3160/3164 Dsu/Csus
18
DSU/CSU Front Panel
19
DSU/CSU Rear Panel
20
DSU/CSU Faceplate
22
Auxiliary Backplane Connectors
22
Auxiliary Backplane
23
Installation
24
Overview
24
Planning
24
Example Point-To-Point Configuration
25
Example Shared Access to Network-Based Services Configuration
25
Multiport T1 DSU/CSU in a Fractional T1 Network Configuration
26
Central-Site T1 Termination Configuration
26
Serial Connection to SNMP
27
Serial Connection through a Router to SNMP
27
Box Contents
28
Important Safety Instructions
28
Quick Start Procedure
28
Optional Power Selection
29
VDC Power Supply Pinouts
29
VDC Single Source Power Supply Pinouts
30
VDC Redundant Source Power Supply Pinouts
31
Power-Up Self-Test
32
Selecting a Model 3161 DSU/CSU
33
DSU/CSU Identity
33
Health and Status Results Screen
33
Establishing Access Security on a Port
35
Setting/Changing a Password
35
Setting the Password Option
35
Password Configuration Screen
36
3160/3164 DSU/CSU Cabling
37
DSU/CSU Cabling Configurations
38
Factory Default Configuration Options
39
Installing Front Panel Emulation Software
39
Enabling/Disabling the Front Panel
40
3 Operation
43
DSU/CSU Front Panel
45
Operating the Front Panel
45
Model 3161 DSU/CSU Faceplate
46
Shared Diagnostic Control Panel (SDCP)
46
Lcd
47
Context-Sensitive Menu
47
Device Health and Status Messages
47
Keypad
47
Other Displays
47
Leds
48
System Leds
49
NETWORK Interface Leds
50
DSX-1 Drop/Insert Port Leds
51
Data Port Leds
52
Displaying LED Conditions on the Front Panel
53
LED Status Screen
54
Selecting the DSX-1 or a Port for LED Display
54
Front Panel Emulation Screen Model 3161 DSU/CSU
55
Front Panel Emulation on a PC
55
DSU/CSU Test Jacks
56
Front Panel Emulation Screen Models 3160/3164 Dsu/Csus
55
LED Display Selection Screen
55
Front Panel Emulation Screen Icons
56
Test Jacks
56
DSU/CSU Test Jacks
57
Configuring the DSU/CSU
58
Test Jack Block Diagram
57
Test Jack Functions
58
Configuration Option Areas
58
Configuration Options
58
Configuration Branch for the Front Panel
59
Configuration Procedures
59
Configuration Branch for the Async Terminal
60
Displaying/Editing Configuration Options
60
Load from Screen
61
Save to Screen
61
Saving Edit Changes
62
Save Edit Screen
63
Selecting/Copying to a Specific Port
63
Selecting a Specific Port
63
Port Options Configuration Worksheets
64
To Copy to One or All Ports
65
SNMP System Options Screen
66
Configuring the 3160/3164 DSU/CSU for SNMP Management
66
Selecting the Port
66
Edit User Screen
68
Setting the IP Address
68
Selecting the Link Layer Protocol
70
Communication Port Options Screen
70
Specifying the Community Name(S) and Access Type(S)
71
SNMP Traps
73
Enterprise-Specific Trap Definitions
73
Selecting the Number of Trap Managers
74
Configuring an IP Address for SNMP Trap Manager
75
Trap Options Screen
75
Configuring DS0 Channels
76
Example Channel Allocation
77
Example Interface Tables
78
DS0 Channels Containing RBS Information Worksheet
79
Example Port Channel Configuration Tables (Ports 1 and 2) Worksheet
80
Example Port Channel Configuration Tables (Ports 3 and 4) Worksheet
81
Display Channel Symbols
82
Displaying DS0 Channel Assignments
82
Display Channels Screen
83
Allocating Data Ports
84
Block Channel Assignment Method Example
85
ACAMI Channel Assignment Method Example
86
Individual Channel Assignment Method Example
87
Interface
87
DTE Assignment Screen
89
DTE Voice Assignment Screen
89
Clearing DS0 Channel Allocation
90
Timing
91
Common Clocking Configurations
91
Configuring for Network Timing Example
92
Configuring for External Timing Example
93
Selecting the Shared Communication Port
94
Checking the Status of the DSU/CSU
95
Async Terminal Status Branch
95
Device Health and Status
95
Status Branch
95
Health and Status Messages
96
Displaying Device Health and Status
97
Self-Test Health
97
Displaying Self-Test Results
98
Self- Test Health Messages
98
Performance Report
99
Performance Registers
99
Carrier (Telco) and User Register Organization
100
Displaying User Performance Registers
101
Telco Performance Report Screen
102
User Performance Report Screen
102
Clearing User Performance Registers
102
Controlling the DSU/CSU
103
Control Branch
103
Control Branch for the Async Terminal
103
Acquiring the Active Physical Interface
104
Releasing the Active Physical Interface
104
Initiating a Call for Front Panel Pass-Through Operation
105
Using the Integral Modem
105
Initiating a Call for PC, ASCII Terminal/Printer, Async Terminal, or SNMP Operation
106
Entering a Password to Gain Access
107
Call Setup Screen
107
Disconnecting the Modem Connection
108
Disconnecting Using Front Panel Keys
108
Disconnecting Using the Disconnect Command
108
Disconnect Screen
109
Entering Numbers in the Phone Directories
109
Valid Phone Number Characters
110
Starting Front Panel Emulation
111
Deactivating the Alarm Relay
111
Using the Async Terminal Feature
112
Async Terminal Interface Configuration Options
112
Setting Interface Options
112
Password Access Screen
113
Activating Interface Option Changes
113
Async Terminal Menus and Screens
113
Entering a Password
113
Initiating an Async Terminal Session
113
Menu Screen Selections
114
Async Terminal Top-Level Menu Screen
114
Edit and Display Screens
114
Function Representations for Edit Screens
115
Terminating a Session
116
Hard-Key Representations for Edit Screens
115
Function Representations for Display Screens
116
Maintenance
117
Overview
117
Troubleshooting
117
SNMP Trap Per Interface
118
Test Commands
119
Test Branch
119
Test Branch for Async Terminal
119
Remote Loopback Tests
120
Sending a Line Loopback up or down
120
Local Loopback Tests
121
Valid Loopback Combinations
122
Starting a Line Loopback
122
Starting a Dte Loopback
123
Starting a Payload Loopback
123
Starting a Repeater Loopback
124
Starting a Data Channel Loopback
125
Starting a Data Terminal Loopback
126
Aborting Loopbacks
127
Dte-Initiated Loopbacks
127
Sending Test Patterns
128
Test Patterns
128
Valid Send Test Pattern Combinations
129
Monitoring Test Patterns
129
Aborting Test Patterns
130
Lamp Test
130
Starting a Lamp Test
130
Aborting a Lamp Test
131
Test Status Messages
132
Displaying Dsu/Csu Test Status
132
Downloading Software
133
Resetting the DSU/CSU
133
Front Panel Menu
135
Technical Specifications
138
Configuration Options
142
C-3 Network Interface Configuration Options
148
C-6 General Configuration Options
153
C-8 Alarm Configuration Options
158
Pin Assignments
165
D-1 T1 Network Interface Connector (J4)
166
D-2 T1 Network Interface Connector (DA15P)
167
D-3 (DSX-1) DTE Interface Connector (J3)
168
D-4 Integral Modem Service Port Connector (J5)
169
D-5 Extended Management Port Connector (J7)
170
D-6 COM Port Connector (J6)
172
D-7 EIA-530A Port Interface Connector
173
D-8 RS449 Port Interface Connector
174
D-9 V.35 Port Interface Connectors
176
D-10 DC Power Connector
178
D-11 External Clock Connector
179
D-12 Slide Latch Connector
180
Snmp Mib Objects
181
Management Information Base (MIB) II (RFC 1213
182
SNMP MIB Objects
183
System Group - "Syscontact" Object (System 4
183
System Group - "Sysdescr" Object (System 1
183
System Group - "Syslocation" Object (System 6
183
System Group - "Sysname" Object (System 5
183
System Group - "Sysobjectid" Object (System 2
183
System Group - "Sysservices" Object (System 7
183
System Group - "Sysuptime" Object (System 3
183
System Group, MIB II
183
Interface Group, MIB II
184
Interface Group - "Ifdescr" Object (Ifentry 2
184
Interface Group - "Iftype" Object (Ifentry 3)
184
Interface Group - "Ifspeed" Object (Ifentry 5
184
Interface Group - "Ifadminstatus" Object (Ifentry 7
185
Interface Group - Input Counters (Objects Ifentry 10 to Ifentry 15
185
Interface Group - Output Counters (Objects Ifentry 16 to Ifentry 21
186
IP Group, MIB II
186
IP Group - "Ipforwarding" Object (Ip 1)
186
IP Group - "Iproutingtable" Object (Ip 21)
186
IP Group - "Ipnettomediatable" Object (Ip 22)
186
ICMP Group, MIB II
186
UDP Group, MIB II
186
Transmission Group, MIB II
186
SNMP Group, MIB II
187
Ds1/E1 Mib (Rfc 1406
187
Near End Group, DS1/E1 MIB
187
Near End Group - "Dsx1Timeelapsed" Object (Dsx1Configentry 3
187
Near End Group - "Dsx1Validintervals" Object (Dsx1Configentry4
187
Near End Group - "Dsx1Linetype" Object (Dsx1Configentry 5
187
Near End Group - "Dsx1Linecoding" Object (Dsx1Configentry 6
187
Near End Group - "Dsx1Sendcode" Object (Dsx1Configentry 7
188
Near End Group - "Dsx1Circuitidentifier" Object (Dsx1Configentry 8
188
Near End Group - "Dsx1Loopbackconfig" Object (Dsx1Configentry 9
188
Near End Group - ~Dsx1Linestatus" Object (Dsx1Configentry 10
188
Near End Group - "Dsx1Signalmode" Object (Dsx1Configentry 11
188
Near End Group - "Dsx1Transmit"Clocksource" Object Dsx1Configentry 12
189
Near End Group - "Dsx1Fdl" Object (Dsx1Configentry 13
189
Near End Group - the DS1 Current Table Objects (Dsx1Current Entry
189
Near End Group - the DS1 Interval Tble Objects (Dsx1Intervalentry
189
Near End Group - the DS1 Total Table Objects (Dsxtotalentry
190
Far End Group, DS1/E1 MIB
190
The DS1 Fractional Group, DS1/E1 MIB
190
Troubleshooting Table
195
Configuration Worksheets
197
Equipment List
205
Paradyne ACCULINK 3160 Operator's Manual (296 pages)
Paradyne Acculink DSU/CSU Models 3160-A2, 3161-B3, 3164-A2, and 3165-A2 Operator's Guide
Brand:
Paradyne
| Category:
Network Hardware
| Size: 1.72 MB
Table of Contents
Table of Contents
7
About this Guide
13
H Document Purpose and Intended Audience
13
H Document Summary
13
H Product-Related Documents
14
Reference Documents
15
1 Introduction
17
H Overview
17
H Features
17
DTE Drop/Insert (DSX-1) Interface
18
Alarm Message Capability
18
Front Panel Emulation
18
Integral Modem
18
Async Terminal Interface Support
18
Telnet Access
18
SNMP Management Support
19
H Physical Description
19
Standalone DSU/CSU Front Panel
19
Standalone DSU/CSU Rear Panel
21
2 Installation
25
H Overview
25
Application Examples
25
H SNMP or Telnet Connection Examples
27
H Important Instructions
29
H Optional Power Sources
29
Installing the +24 VDC Power Supply
29
Installing the Single -48 VDC Power Supply
30
Installing the Redundant -48 VDC Power Supply
31
Cabling Examples
32
H Power-Up Self-Test
33
3 Operation
35
H Overview
35
Using the Front Panel
35
Lcd
36
Keypad
37
Test Jacks
38
Leds
39
Displaying Unit Identity
43
Setting Customer Identification
45
H Selecting the DTE Drop/Insert or Data Port for LED Display
46
Displaying Led Conditions
47
Changing Configuration Options
48
Displaying/Editing Configuration Options
50
Saving Edit Changes
51
Selecting/Copying to a Specific Port
52
Selecting the Port
54
Setting the IP Address
55
Selecting the Link Layer Protocol
57
Specifying the Community Name(S) and Access Type(S)
58
H Configuring SNMP Traps
60
Enabling SNMP Trap Messages
60
Selecting the Number of Trap Managers
61
Configuring a Destination for SNMP Traps
62
Configuring DS0 Channels
63
Displaying DS0 Channel Assignments
70
Allocating Data Ports
72
Block or ACAMI Assignment Method
74
Individual Channel Assignment Method
75
Allocating DS0 Channels from the DTE Drop/Insert Interface to the Network Interface
76
Clearing DS0 Channel Allocation
78
Providing Backup Capability
79
Selecting the Timing Source
79
Configuring for Network Timing
81
Configuring for External Timing
81
Establishing Access Security on a Port
82
Setting a Password
83
Entering a Password to Gain Access
84
H Acquiring/Releasing the User Interface
85
Acquiring the Active User Interface
86
Releasing the Active User Interface
87
H Enabling/Disabling the Front Panel
88
H Using the Integral Modem in Standalone Dsu/Csus
89
Entering Numbers in the Phone Directories
89
Initiating a Call for Front Panel Pass-Through Operation
91
Initiating a Call for PC, ASCII Terminal/Printer, or SNMP Operation
93
Disconnecting the Modem Connection
94
H Enabling the Communication Port for Carrier-Mounted Dsu/Csus
95
H Deactivating the Alarm Relay for Carrier-Mounted Dsu/Csus
98
H Resetting the DSU/CSU
99
Download Operations
99
H User Interface Access Security for Standalone Dsu/Csus
101
Changing User Interface Access Security
102
4 Maintenance
103
H Self-Test Health
103
Device Health and Status
105
Performance Reports
107
H Alarms
113
SNMP Traps
114
Troubleshooting
116
Test Jacks
119
Test Commands
121
Remote Loopback Tests
121
Sending a Line Loopback up or down
122
Sending a V.54/ANSI FT1 Activation/Deactivation
123
Local Loopback Tests
124
Starting a Line Loopback
125
Starting a Payload Loopback
126
Starting a DTE Loopback
127
Starting a Repeater Loopback
128
Starting a Data Channel Loopback
129
Starting a Data Terminal Loopback
130
Aborting Loopbacks
131
Test Patterns
132
Sending Test Patterns
133
Monitoring Test Patterns
135
Aborting Test Patterns
136
H Lamp Test
137
Starting a Lamp Test
137
Aborting a Lamp Test
138
H Displaying DSU/CSU Test Status
139
Front Panel Menu
141
Technical Specifications
143
Configuration Options
145
HDTE Interface Configuration Options
145
H Port Configuration Options
145
H Network Interface Configuration Options
145
H Channel Configuration Options
145
H General Configuration Options
145
H User Interface Configuration Options
145
H Alarm Configuration Options
145
H Management Configuration Options
146
Network Interface Configuration Options
152
General Configuration Options
160
Configuration Worksheets
185
Pin Assignments
197
H Overview
197
H T1 Network Interface
197
H MODEM Port Interface
200
Aux Port Interface
201
Com Port Interface
202
H EIA-530-A-To-RS-449 Cable Interface
205
H EIA-530-A-To-V.35 Cable Interface
207
H EIA-530-A-To-X.21 Cable Interface
207
Power Input Connector
211
External Clock Interface
212
SNMP MIB Objects
213
H Overview
213
H Mib II (Rfc 1213
214
System Group, MIB II
214
Interface Group, MIB II
216
IP Group, MIB II
222
ICMP Group, MIB II
225
TCP Group, MIB II
225
UDP Group, MIB II
225
Transmission Group, MIB II
225
SNMP Group, MIB II
226
H Ds1/E1 Mib (Rfc 1406
226
Near End Group, DS1/E1 MIB
226
Far End Group, DS1/E1 MIB
230
DS1 Fractional Group, DS1/E1 MIB
231
H RS-232-Like MIB (RFC 1317
231
General Port Table, RS-232-Like MIB
232
Asynchronous Port Table, RS-232-Like MIB
234
Synchronous Port Table, RS-232-Like MIB
235
Input Signal Table, RS-232-Like MIB
235
Output Signal Table, RS-232-Like MIB
236
H Generic-Interface MIB Extensions (RFC 1229
236
Generic Interface Test Table, Generic Interface MIB
237
Starting Front Panel Emulation
253
Before Using the Asynchronous Terminal
255
Initiating an Asynchronous Terminal Session
256
Ending an Asynchronous Terminal Session
257
Menu Organization
258
Using Asynchronous Terminal Screens
259
Displaying or Editing Configuration Options
263
Saving Edit Changes
265
Configuration Worksheets for the Asynchronous Terminal Interface
269
Equipment List
279
Advertisement
Paradyne ACCULINK 3160 Quick Reference (32 pages)
Zhone Acculink 3160 DSU-CSU Combo: Quick Reference
Brand:
Paradyne
| Category:
Network Hardware
| Size: 0.16 MB
Table of Contents
Warranty, Sales, Service, and Training Information
2
Document Feedback
2
Quick Reference
3
Installation Procedure
4
Configuration Procedures
6
Displaying/Editing Configuration Options
6
Saving Edit Changes
6
Allocating Data Ports
8
Block or ACAMI Assignment Method
9
Individual Channel Assignment Method
9
Allocating DS0 Channels from the DTE Drop/Insert Interface to the Network Interface
10
Configuration Options
11
Important Safety Instructions
27
Government Requirements and Equipment Return
29
Notice to Users of the Canadian Telephone Network
31
Paradyne ACCULINK 3160 Quick Reference (24 pages)
Zhone Acculink 3160 DSU-CSU Combo: Reference Guide
Brand:
Paradyne
| Category:
Network Hardware
| Size: 0.27 MB
Table of Contents
Quick Reference
3
Quick Start Procedure
4
Configuration Options
6
Important Safety Instructions
20
EMI Warnings
21
Government Requirements and Equipment Return
21
Paradyne ACCULINK 3160 Supplementary Manual (5 pages)
ACCULINK 31xx Series Device
Brand:
Paradyne
| Category:
Adapter
| Size: 0.08 MB
Paradyne ACCULINK 3160 Quick Installation (2 pages)
SNMP LAN Adapter for Ethernet
Brand:
Paradyne
| Category:
Adapter
| Size: 0.05 MB
Paradyne ACCULINK 3160 Release Note (1 page)
T1 FRONT PANEL EMULATION SOFTWARE PACKAGE
Brand:
Paradyne
| Category:
Software
| Size: 0.01 MB
Advertisement
Related Products
Paradyne ACCULINK 3161
Paradyne Compshere 3000 Series
Paradyne ACCULINK 3150
Paradyne ACCULINK CSU 3150-A4
Paradyne ACCULINK CSU 3151
Paradyne 3160-A3
Paradyne 3160-A4
Paradyne Acculink 3160 DSU
Paradyne Acculink 3160 CSU
Paradyne ACCULINK 3160-A3 DSU
Paradyne Categories
Network Hardware
Modem
Network Router
Adapter
Network Card
More Paradyne Manuals
Login
Sign In
OR
Sign in with Facebook
Sign in with Google
Upload manual
Upload from disk
Upload from URL