Sign In
Upload
Manuals
Brands
HID Manuals
Printer
FARGO HDP5000
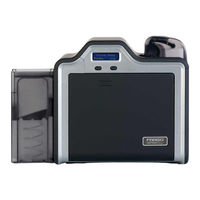
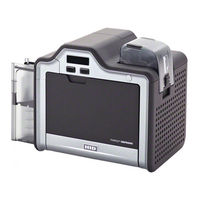
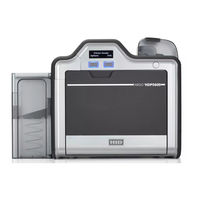
HID FARGO HDP5000 Manuals
Manuals and User Guides for HID FARGO HDP5000. We have
5
HID FARGO HDP5000 manuals available for free PDF download: User Manual, Installation Manual
HID FARGO HDP5000 User Manual (373 pages)
High Definition Card Printer/Encoder
Brand:
HID
| Category:
Printer
| Size: 7.76 MB
Table of Contents
HDP5000 High Definition Card Printer/Encoder User Guide (Rev. 1.8)
1
Table of Contents
4
Section 1: Printer Overview
10
HDP5000 Process Flow (in Table Format)
10
Reviewing the HDP5000 Boot-Up Sequence
10
Reviewing the HDP5000 Sequence of Operations
11
Reviewing the Lamination Module Boot-Up Sequence
14
Reviewing the Lamination Module Sequence of Operations
14
Section 2: Specifications
15
Safety Messages (Review Carefully)
15
Regulatory Compliances
16
Agency Listings
17
United States
17
Canada
17
Environmental Protection (China-Rohs)
17
Traditional Chinese RF Emissions and Safety Statements
18
Simplified Chinese
19
Technical Specifications
20
Functional Specifications
29
Printer Components: Resin Thermal Transfer to USB Interface Port
30
Printer Components: LCD and Softkey Control Pad
31
Printer Components: Print Ribbons
33
Printer Components: Blank Cards
34
Printer Components: Card Input and Output Hoppers
35
Printer Components: Card Output Hopper and Reject Hopper
35
Printer Components: Transfer Roller
36
Reviewing the Overlaminates
37
Reviewing the Thermal Transfer Film and Polyguard Overlaminates
37
Reviewing the CR-80 Patch Size
38
Reviewing the Overlaminate Design
38
Section 3: Setup and Installation Procedures
39
Inspection - HDP5000
39
Unpacking the Printer
39
Unpacking the Printer
40
Choosing a Good Location
41
About Moisture Condensation
41
Printer Media Loading Procedures
42
Loading the Print Ribbon
42
Loading the Clear HDP Transfer Film
45
Inserting the Card Cleaning Roller
48
Loading the Overlaminate
50
Loading the Blank Cards
53
Connecting Power to HDP5000 Printer and Lamination Module
55
Printer Driver Installation Procedures
57
Printer Driver Update Procedure
65
Installing Printer Driver Updates
65
Section 4: Printer Driver Operations
67
Safety Messages (Review Carefully)
67
HDP500 Printer Driver Options
68
Reviewing Printer Drivers
68
Using the Card Tab
68
Selecting the Card Size
69
Selecting the Card Type
70
Setting the Orientation
73
Specifying the Number of Copies
74
Selecting the Diagnostics Button
75
Printing a Test Print Image
76
Selecting the about Button
78
Selecting the Toolbox Button
79
Using the Device Options Tab
80
Detecting Supplies at Print Time Function
81
Adjusting the Ribbon Type
84
Adjusting the Film Type
86
Using the Dual Sided Group Functions
87
Using the Dual Sided - Print both Sides Option
88
Using the Print both Sides - Split 1 Set of Ribbon Panels Option
89
Using the Print both Sides - Print Back Image on Front of Card Option
90
Using the Dual Sided - Print Back Side Only Option
91
Using the Options Group
92
Using the Rotate Front 180 Degrees or Rotate Back 180 Degrees Options
93
Using the Disable Printing Option
94
Using the Dual Pass and Invert F-Panel Image Options
95
Using the Image Color Tab
96
Using the Image Quality - Color Matching Dropdown
97
Adjusting for the Resin Dither
101
Using the Advanced Image Color Window
102
Using the Image Transfer Tab
107
Adjusting the Image Position Controls
108
Adjusting the Transfer Dwell Time and Temperature
110
Using the Default Button
112
Using the Magnetic Encoding Tab
113
Using the Encoding Mode Dropdown List
114
Selecting the Coercivity/Magnetic Track
120
Reviewing the Shift Data Left Function
121
Using the Character Size Buttons
122
Using the ASCII Offset Dropdown List
123
Using the Bit Density Dropdown List
124
Using the LRC Generation Dropdown List
125
Using the Character Parity Mode Dropdown List
126
Reviewing the ISO Track Locations
127
Sending the Track Information
128
Reviewing the Sample String
129
Reviewing the ASCII Code and Character Table
130
Using the Default Button
131
Using the Lamination Tab (HDP5000-LC)
132
Selecting the Lamination Position
133
Adjusting the Lamination Speed - Transfer Dwell Time
134
Selecting the Lamination Side Dropdown Menu
135
Selecting the Lamination Type
136
Selecting the Defaults Button
138
Using the K Panel Resin Tab
139
Using the Click and Drag Capability
140
Selecting "Inches or MM" Radio Button
140
Using the Add and Delete Buttons
140
Selecting the Full Card
141
Selecting the Defined Area(S)
142
Selecting the Undefined Area(S)
143
Defining the Area to Activate the Card Grid
144
Selecting the Print YMC under the K and Print K Only Options
145
Using the Printer Supplies Tab
147
Reviewing Information on the Supplies Tab
148
Section 5: Accessory Procedures
149
Using the Security Lock Slot on the HDP5000
149
Installation and Removal Procedures Flipper Module Accessory
151
Installing the Flipper Module Accessory
152
Section 6: General Troubleshooting
154
Troubleshooting - LCD and Printer Error Message Tables
154
How to Use the LCD Error Message Table (Example Provided)
155
Troubleshooting with the LCD Error Message Table
156
Troubleshooting with the Printer Error Message Table
173
Communications Errors
187
Resolving the Communication Errors
187
Printing a Test Image Using the Workbench Diagnostic
189
Reviewing the Alignment Self Test Card
190
Reviewing the Magnetic Self Test
191
Reviewing the YMCK Self Test
191
Reviewing the Color Bars Self Test
192
Reviewing the Device Settings Self Test
193
Reviewing the Resin Self Test
194
Section 7: Ethernet Option Section
195
Introduction
195
Technical Specification - Ethernet Option
195
Functional Specification - Ethernet Option
196
Network Services - Overview
197
Reviewing the Print Server
197
Reviewing the Web Page Server
197
Reviewing the Network Management Interface
197
Reviewing the Telnet Server
197
Network Management Interface
198
Telnet Command Line Interface
198
Initiating a Telnet Session
198
Reviewing the Telnet Command Table
199
Ethernet Web Pages - Standard Procedures
205
Reviewing Web Page Security
205
Logging in
205
Accessing the Home Page
207
Reviewing the Home Page
208
Reviewing the Home Page Categories and Fields (Table)
209
Configuring the Network Settings
209
Accessing the Network Settings Page
210
Reviewing the Interface
211
Reviewing the Current Settings
211
Switching to the Automatic IP Address Mode
212
Changing to the Static IP Address Mode
213
Using the Clear Changes Button
215
Using the Media Information Page
216
Using the TCP/IP Page
217
Using the Printer Page
219
Using the System Log Page
221
Changing the Log Name
222
Selecting the Log Type
223
Selecting the Log Destination
224
Setting up Email Event Logging
225
Specifying UDP Event Logging
226
Specifying TCP Event Logging
228
Using the Administration Pages
230
Using the System Information Page
230
Changing the Root Password
232
Using the Reboot Pages
233
Rebooting the Printer
233
Upgrading the Main Firmware
234
Using the Print Path Page
238
Using the Help Page
240
Additional Ethernet Procedures
240
Accessing the Ethernet Status Leds
240
Reviewing the HDP5000 LED Table
240
Upgrading the Main Firmware with the Fargo Workbench Printer Utility
241
Restoring the Factory Settings for Ethernet
243
Resetting the HDP5000 Settings
243
Changing the HDP5000 LCD Network Settings
243
Accessing the Network Setup Menu
243
Changing the DHCP Setting
244
Changing the ANEG Setting
245
Saving Addresses
246
Resetting Passwords
246
Accessing the HDP5000 IP Address
247
Ethernet Printer Troubleshooting Procedures
248
Troubleshooting Procedures
248
Verifying the Printer Connection
249
Verifying the Printer IP Address
249
Verifying that Your PC Can Access the Printer Using the Ping Command
250
Printing a Test Page
251
Reviewing Frequently-Asked Questions-Ethernet
252
Glossary of Terms
258
Section 8: Card Lamination Module
261
Printer Unit: Reviewing the Card Lamination Module
261
Reviewing the Card Lamination Module
262
Installing the Card Lamination Module
263
Introduction
263
Inspecting the Card Lamination Module
263
Unpacking the Card Lamination Module
263
Choosing a Proper Location
263
Preventing Moisture Condensation
264
Installing the Lamination Module Accessory
264
Adjusting the Lamination Placement on the Card
266
Adjusting the Card Flattener
268
Section 9: Printer Adjustments
269
Printing on Alternate Card Stocks
269
Selecting the Right Cards and Optimizing the HDP Print Process
269
Conducting the Tape Adhesion Test
270
Conducting the Tape Adhesion Test
271
Section 10: Toolbox
272
Accessing the Toolbox
272
Selecting the Configuration Tab
273
Using the Configuration Tab
274
Using the Optional Printer Features Group Box
274
Using the Event Monitoring Group Box
275
Reviewing the Ribbon Low Message
275
Reviewing the Laminate Low Message
275
Using the Film Low Message
276
Selecting the Set Language for Printer LCD Display Group Box
276
Selecting the Calibrate Laminator Tab
277
Selecting the Calibrate Film Tab
278
Selecting the Calibrate Ribbon Tab
279
Selecting the Clean Printer Tab
280
Using the Clean Printer Group Box
282
Selecting the Advanced Settings Tab
282
Using the Image Darkness Option
284
Using the Print Top of Form Option
285
Using the Print Left of Form Option
287
Using the Mag Top of Form Option
288
Using the Print Flip Angle Option
289
Using the Print Flip Level Option
289
Using the Encoder Flip Angle Option
290
Setting the Printhead Resistance
290
Using the Transfer TOF Adjustment Option
290
Using the Transfer Temp Offset Option
292
Using the Ribbon Print Takeup Tension Option
292
Using the Film Print Takeup Tension Option
292
Using the Ribbon Print Supply Tension Option
293
Using the Film Supply Transfer Tension Option
294
Using the Film Takeup Transfer Tension Option
294
Using the Resin Heat Adjust Option
295
Using the Sleep Time Option
295
Using the Standby Time Option
295
Using the Blush Point Option
295
Using the LCD Contrast Option
295
Using the Cleaning Rate Option
295
Using the EAT Disable Option
296
Using the Film Print Cooling Level Option
296
Using the Film Transfer Cooling Level Option
296
Using the Enable Ribbon Wrinkle Compensation Option
296
Using the Holo Transfer Offset Option
296
Using the Standby Temp Option
296
Using the Mag Hi-Co Voltage Offset Option
297
Using the Mag Lo-Co Voltage Offset Option
297
Using the Mag Flipper Angle Offset Option
297
Using the Lamination Top of Form Option
297
Using the Lamination End of Form Option
297
Using the Lamination Bottom Takeup Option
297
Using the Lamination Top Takeup Option
297
Using the Lamination Card Backup Option
298
Using the Lamination Card Length Option
298
Reviewing the no Printer Connected Error Message
298
Reviewing the Value Outside the Range Error Message
298
Section 11: Cleaning
299
Using the Required Supplies
299
Accessing the Clean Printer Tab
300
Cleaning the Printer Platen Roller and Card Feed Rollers
300
Cleaning Inside the Printer
303
Cleaning Outside the Printer
303
Cleaning the Printhead
304
Replacing the Card Cleaning Roller
305
Cleaning the Magnetic Encoder
306
Cleaning the Magnetic Encoder When Installed in the Flipper
307
Replacing or Cleaning the FAN Foam Filter
308
Section 12: Fargo Workbench Printer Utility
309
Reviewing the Card Tab and Diagnostic Button
309
Section 13: Fluorescent Panel Usage
310
Configuring Fluorescent Data (F-Panel for YMCFK Ribbon) Using the Workbench
312
Configuring Fluorescent Data (F-Panel for YMCFK Ribbon) Using the Application
322
Section 14: Inhibit Panel Usage
325
Using Inhibit Panel (Via the Fargo Workbench Printer Utility)
325
Using Inhibit Panel with an Application
328
Generating Text Objects
328
Rendering Print Jobs
329
Rendering Print Jobs
330
Using the Test Print
337
Using the Test Print
338
Troubleshooting the Inhibit Panel
339
Section 15: Packing the Card Printer
340
Section 16: Firmware Updates
341
Performing the Firmware Updates
341
Section 17: HID Global Technical Support
347
Contacting Technical Support
347
Reading the Serial Numbers on the Printer
348
Finding out When a Fargo Card Printer was Manufactured
348
Section 18: Glossary of Terms
349
Advertisement
HID FARGO HDP5000 User Manual (101 pages)
High Definition Card Printer/Encoder
Brand:
HID
| Category:
Printer
| Size: 4.17 MB
Table of Contents
Revision History
2
Table of Contents
3
1 Specifications
5
Regulatory Compliance
5
Safety Messages (Review Carefully)
7
Technical Specifications
9
2 Setup and Installation Procedures
13
Inspection - Card Printer
13
3 Printer Driver Operations
14
Using the Card Tab
14
Figure 1 - Card
14
Selecting the Card Type
15
Printing a Test Print Image
16
Selecting the Diagnostics Button
16
Setting the Orientation
16
Specifying the Number of Copies
16
Selecting the Configuration Tab
17
Reviewing the Ribbon Low Message
18
Reviewing the Laminate Low Message
18
Selecting the Calibrate Laminator Tab
19
Selecting the Calibrate Film Tab
20
Selecting the Calibrate Ribbon Tab
20
Selecting the Clean Printer Tab
21
Figure 2 - Clean Printer
21
Selecting the Advanced Settings Tab
22
Figure 3 - Advanced Settings
23
Figure 4 - Print Left of Form
24
Figure 5 - Image Darkness
25
Figure 6 - Print Top of Form
26
Figure 7 - Mag Top of Form
27
Figure 8 - Transfer Top of Form
28
Figure 9 - Transfer End of Form
28
Figure 10 - Ribbon Print Supply Tension
29
Figure 11 - Film Print Takeup Tension
30
Figure 12 - Film Takeup Transfer Tension
31
Figure 13 - Film Print Supply Tension
31
Standby Time
32
Transfer Cooling Delay
33
Transfer Image Length
33
Figure 14 - Unable to Read Settings Message
34
Figure 15 - Value Outside Range Message
34
Using the Device Options Tab
35
Figure 16 - Device Options
35
Detecting Supplies at Print Time Function
36
Adjusting the Ribbon Type
37
Using the Dual Sided Group Functions
38
Figure 17 - Options
39
Using the Disable Printing Option
40
Using the Encrypt Job Data
41
Using the Use Substitute Panel Data
42
Using the Image Color Tab
44
Figure 18 - Image Color
44
Adjusting for the Resin Dither
45
Using the Advanced Image Color Window
46
Using the Image Transfer Tab
47
Figure 19 - Image Transfer
47
Adjusting the Image Position Controls
48
Adjusting the Transfer Dwell Time and Temperature
49
Using the Magnetic Encoding Tab
50
Figure 20 - Magnetic Encoding
50
Reviewing the Shift Data Left Function
52
Using the Character Size Buttons
52
Using the Ascii Offset Dropdown List
53
Using the Bit Density Dropdown List
53
Using the Lrc Generation Dropdown List
53
Reviewing the Iso Track Locations
54
Using the Character Parity Mode Dropdown List
54
Reviewing the Sample String
55
Sending the Track Information
55
Reviewing the Ascii Code and Character Table
56
Using the Lamination Tab
57
Figure 21 - Lamination
57
Selecting the Defaults Button
58
Selecting the Lamination Position
58
Selecting the Lamination Side Dropdown Menu
58
Selecting the Lamination Type
58
Using the K Panel Resin Tab
59
Figure 22 - K Panel Resin
59
Selecting the Full Card
60
Using the Add and Delete Buttons
60
Using the Click and Drag Capability
60
Defining the Area to Activate the Card Grid
61
Selecting the Print Ymc under the K and Print K Only Options
61
Using the Inhibit Panel Tab
62
Figure 23 - Inhibit Panel
62
Using the Printer Supplies Tab
64
Figure 24 - Printer Supplies
64
4 General Troubleshooting
65
Troubleshooting - LCD and Printer Error Message Tables
65
Figure 25 - Unable to Feed Card
65
Communications Errors
80
5 Card Lamination Module
82
Printer Unit: Reviewing the Card Lamination Module
82
Figure 26 - Adjusting Lamination Module
82
6 Printer Adjustments
83
Printing on Alternate Card Stocks
83
7 Workbench Printer Utility
84
Access the Workbench Printer Utility
84
8 Fluorescent Panel Usage
85
Configuring Fluorescent Data Using Workbench
85
Configuring Fluorescent Data (F-Panel for YMCFK Ribbon)
89
9 Inhibit Panel Usage
91
Using Inhibit Panel (Workbench Printer Utility)
91
Generating Text Objects
92
Rendering Print Jobs
92
Using the Test Print
96
Troubleshooting the Inhibit Panel
96
10 Firmware Updates
97
Performing the Firmware Updates
97
11 Appendix A: Hdpii Plus
99
Accessory Procedures - Using the Security Lock Slot
99
HID FARGO HDP5000 User Manual (108 pages)
Brand:
HID
| Category:
Printer
| Size: 4.59 MB
Table of Contents
Table of Contents
3
Chapter 1: Specifications
7
Regulatory Compliance
7
Agency Listings
7
United States
8
Canada
8
Taiwan
8
Japan
9
Korea
9
Safety Messages
9
Safety Messages - United States
9
Safety Messages - French Canada
10
Safety Messages - Taiwan
11
Safety Messages - China
12
Technical Specifications
13
Chapter 2: Setup and Installation Procedures
17
Inspection - Card Printer
17
Chapter 3: Printer Driver Operations
19
Card Tab
19
General Card Information
21
Card Design
21
Card Surface
21
Card Coverage
21
Ultracard Stock
22
Custom
22
Conducting the Tape Adhesion Test
23
Printing on Alternate Card Stocks
24
Device Options Tab
25
Image Color Tab
28
Advanced Image Color
30
February 2016 L000950, Version:
31
Image Transfer Tab
32
Magnetic Encoding Tab
34
ISO Track Locations
36
Sending the Track Information
36
Lamination Tab
38
K-Panel Resin Tab
40
Click and Drag Capability
42
Five Areas Added Example
42
Inhibit Panel Tab
43
Supplies Tab
45
Chapter 4: Toolbox
47
Overview
47
Configuration Tab
48
Calibrate Laminator Tab
49
Calibrate Film Tab
50
Calibrate Ribbon Tab
50
Clean Printer Tab
51
Advanced Settings Tab
52
Settings Information
53
Value Outside the Range Error Message
62
Chapter 5: Troubleshooting
63
Troubleshooting - LCD and Printer Error Message Tables
63
How to Use the LCD Error Message Table
64
Troubleshooting - LCD and Printer Error Message Tables
65
Troubleshooting with the LCD Error Message Table
65
Troubleshooting the Printer Error Message Table
73
Resolving Communication Errors
80
Chapter 6: Card Lamination Module
81
Printer Unit: Reviewing the Card Lamination Module
81
Adjusting the Lamination Placement on the Card
81
Chapter 7: Workbench Printer Utility
83
Access the Workbench Printer Utility
83
Chapter 8: Fluorescent Panel Usage
85
Configuring Fluorescent Data (F-Panel for YMCFK Ribbon) Using Workbench
86
February 2016 L000950, Version:
89
Configuring Fluorescent Data (F-Panel for YMCFK Ribbon) Using the Application
93
Creating Fluorescent Text
93
Chapter 9: Inhibit Panel Usage
95
Configuring Inhibit Panel (I-Panel for YMCKI Ribbon) Using Workbench
96
Using Inhibit Panel with an Application
98
Generating Text Objects
98
Create Bitmap Image
98
Print Size
98
Troubleshooting the Inhibit Panel
99
Chapter 10: Firmware Upgrades
101
Upgrade Information
101
Appendix A: Hdpii Plus
103
Accessory Procedures: Using the Security Lock Slot
103
A.2 Cleaning the Magnetic Encoder: Hdpii Output Module
104
Revision History
107
Advertisement
HID FARGO HDP5000 Installation Manual (24 pages)
Card Printer/Encoder
Brand:
HID
| Category:
Printer
| Size: 14.2 MB
Table of Contents
Table of Contents
2
Part List
3
Printer Installation
4
Dual-Sided Printing Module
11
Lamination Module
14
Printer Driver Installation
19
HID FARGO HDP5000 User Manual (20 pages)
High Definition Card Printer/Encoder
Brand:
HID
| Category:
Printer
| Size: 0.8 MB
Advertisement
Related Products
HID Fargo HDP8500
HID HDPii
HID FARGO HDP5600
HID HDPii Plus
HID FARGO HDP 6600
HID HDP 600ii
HID HDP 5000
HID Fargo DTC4250e
HID Fargo DTC1000Me
HID Fargo DTC1250
HID Categories
Card Reader
Printer
Controller
Control Unit
Rfid Systems
More HID Manuals
Login
Sign In
OR
Sign in with Facebook
Sign in with Google
Upload manual
Upload from disk
Upload from URL