Table of Contents
Advertisement
Quick Links
Advertisement
Chapters
Table of Contents

Related Manuals for Seiko RP-F10 Series


Summary of Contents for Seiko RP-F10 Series
- Page 1 RP-F10 SERIES THERMAL PRINTER TECHNICAL REFERENCE Rev.01...
- Page 2 Copyright © 2019 by Seiko Instruments Inc. All rights reserved. Seiko Instruments Inc. (hereinafter referred to as "SII") has prepared this manual for use by SII personnel, licensees, and customers. The information contained herein is the property of SII and shall not be reproduced in whole or in part without the prior written approval of SII.
- Page 3 PREFACE This technical reference describes about RP-F10 SERIES THERMAL PRINTER (hereinafter referred to as "printer"). See "RP-F10 SERIES THERMAL PRINTER USER'S GUIDE" for operation. [Product name] RP-F10-x 27J1-x (1) : Model F: RP-F10 series (2) : Case color W : White...
- Page 4 [Contents] CHAPTER 1 : TERMS USED IN THIS MANUAL • This chapter describes the basic terms that are frequently used in this manual. CHAPTER 2 : SPECIFICATIONS • This chapter describes specifications of the printer and the thermal paper. CHAPTER 3 : INTERFACE •...
-
Page 5: Table Of Contents
TABLE OF CONTENTS CHAPTER 1 TERMS USED IN THIS MANUAL CHAPTER 2 SPECIFICATIONS PRINTER SPECIFICATIONS ................2-1 2.1.1 Sale Destinations ................. 2-4 2.1.2 Precautions for Use ................2-5 2.1.3 Dimensions ..................2-7 2.1.4 Label ....................2-9 2.1.5 Thermal Paper Specifications ............2-10 2.1.6 Print Area .................. - Page 6 CHAPTER 5 LED INDICATION AND SWITCH FUNCTION PRINTER STATUS LED INDICATION ..............5-1 ERROR AND RECOVERY PROCEDURE ............5-3 SWITCH....................... 5-4 5.3.1 POWER Switch ................... 5-4 5.3.2 FEED Switch ..................5-4 CHAPTER 6 COMMAND FUNCTIONS CHARACTER CODES AND COMMANDS ............6-1 6.1.1 JIS Code System .................
- Page 7 FIGURES Figure 1-1 Relationship Between Input Buffer and Line Buffer ..........1-1 Figure 1-2 Line Spacing ......................1-2 Figure 1-3 Character Spacing ....................1-2 Figure 2-1 Operating Temperature and Humidity Range............2-5 Figure 2-2 RP-F10 Dimensions ..................... 2-7 Figure 2-3 RP-F10 Installation Position .................
- Page 8 Figure A-16 Cyrillic (Code Page1251) ..................A-9 Figure A-17 Greek (Code Page1253) ..................A-9 Figure A-18 Turkish (Code Page1254) ................... A-10 Figure A-19 International Character Set ................. A-11 Figure A-20 Special Character Set..................A-12 Figure A-21 NEC Special Character Set ................A-12 Figure A-22 NEC Selection of IBM Extended Character Set ..........
- Page 9 TABLES Table 2-1 Printer Specifications.................... 2-1 Table 2-2 Sale Destinations ....................2-4 Table 2-3 Thermal Paper Specifications ................2-10 Table 2-4 Specified Thermal Paper Model ................. 2-10 Table 2-5 Cutter Specifications ..................2-12 Table 2-6 Power Supply Specifications ................2-13 Table 2-7 Specified AC Adapter Specifications (PW-G2421-W1) ........
- Page 10 Table 4-17 Thermal Paper Selection (MS7-1 to 8)..............4-14 Table 4-18 General Setting 13 (MS13) ................. 4-15 Table 4-19 International Character Set ................. 4-16 Table 4-20 International Character Selection (MS15) ............4-16 Table 4-21 Character Code Table ..................4-17 Table 4-22 Character Code Table Setting (MS16) ..............
-
Page 11: Figure 1-1 Relationship Between Input Buffer And Line Buffer
CHAPTER 1 TERMS USED IN THIS MANUAL This chapter describes the terms used in this manual. • INPUT BUFFER AND LINE BUFFER When the RP-F10 (hereinafter referred to as "printer") receives data (character codes and commands) from the host devices, it stores the data in the printer input buffer. The input buffer has a capacity of 4096 bytes. -
Page 12: Figure 1-2 Line Spacing
• Line Spacing Line spacing is the space between the lines of printed characters (See Figure 1-2). A B C X Y Z Figure 1-2 Line Spacing The printer uses a line thermal print mechanism, therefore, a paper feed step is necessary before printing characters or bit images. - Page 13 number does not exceed the specified maximum number of simultaneously activated dots when 1 dot-line is printed. • Notation in the Technical Reference Hexadecimal: the character 'H' which indicates hexadecimal is added behind a number. Example: 0AH Character: a character is enclosed with single quotation marks. Example: 'G'...
-
Page 14: Chapter 2 Specifications
CHAPTER 2 SPECIFICATIONS 2.1 PRINTER SPECIFICATIONS Table 2-1 Printer Specifications (1/3) Specifications Item Paper Width 80mm Paper Width 58mm Printing method Thermal printing Dot density 8 dots/mm 576 dots/line 432 dots/line Number of effective dots (512 dots/line (360 dots/line Printing width max. 72 mm (64 mm 54 mm (45 mm Temperature... - Page 15 (2/3) Specifications Item Paper Width 80mm Paper Width 58mm 1-byte character font A 24 dots × 12 dots 1-byte character font B 16 dots × 8 dots Character size 2-byte character font A 24 dots × 24 dots 2-byte character font B 16 dots ×...
- Page 16 (3/3) Specifications Item Paper Width 80mm Paper Width 58mm Drawer drive output DC24.0 V, 1.0 A max., 2 circuits Drawer kick port Drawer switch input 1 circuit 3 color LED Operation switch POWER Switch, FEED Switch Abrasion resistance 150 km or more Activation pulse 150 million pulses or more resistance...
-
Page 17: Sale Destinations
2.1.1 Sale Destinations Sale destinations for the printer and the specified accessories are listed below. Table 2-2 Sale Destinations : Sale Destinations RP-F10 Country/Region AC Adapter AC Cable (Bluetooth Model) (Other Models) CB-JP07-20A Japan CB-JP08-20A EU(except UK), ... -
Page 18: Precautions For Use
2.1.2 Precautions for Use • When the two-dimensional barcode or ladder barcode is printed at high speed, it may reduce the barcode's reading accuracy. In that case, print after switching the print speed to Middle (Quality). Use Memory Switch or "Set Print Speed" command (GS 's') to change the print speed. •... - Page 19 • For other precautions, see "2 SAFETY PRECAUTIONS" and "3 OPERATING PRECAUTIONS" in "RP-F10 SERIES THERMAL PRINTER USER'S GUIDE" which is combined with the printer.
-
Page 20: Dimensions
2.1.3 Dimensions USB + USB host model Ethernet + USB host model Bluetooth + USB host model Unit: mm Figure 2-2 RP-F10 Dimensions... -
Page 21: Figure 2-3 Rp-F10 Installation Position
• Installation position It is possible to use the printer in top eject or front eject according to the installation position. Top eject Front eject Figure 2-3 RP-F10 Installation Position... -
Page 22: Label
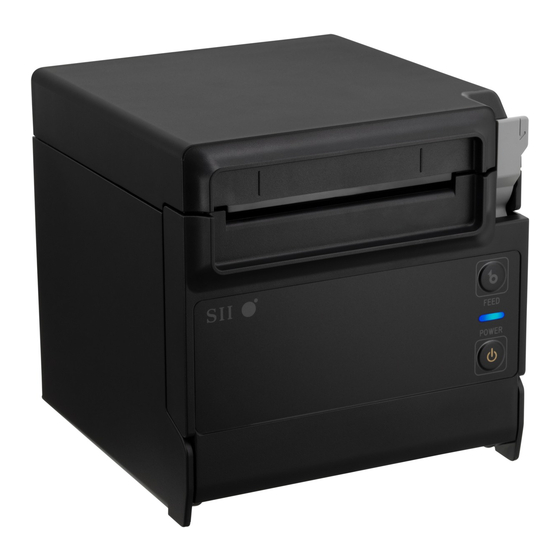
2.1.4 Label (1) RP-F10 Series Standard Model Case Color: Black Case Color: White (2) RP-F10 Series Bluetooth Model Case Color: Black Case Color: White... -
Page 23: Thermal Paper Specifications
2.1.5 Thermal Paper Specifications Table 2-3 Thermal Paper Specifications Item Specifications Paper type Paper roll Paper width mm or 58 Paper thickness 53 to 75 μm Paper roll outside diameter max. 83 mm Paper roll width max. 80.5 mm Inside diameter of core: 12.0 mm Paper roll core Outside diameter of core: 18.0 mm Printing surface... -
Page 24: Print Area
2.1.6 Print Area Ath dot 1st dot 1st dot Ath dot 0.125mm 0.125 mm MS4-5 (Number of Effective Dots Selection): 1 Specifications Symbol Name Paper Width: 80mm Paper Width: 58mm Printable dots per line 576 dots 432 dots Left margin 4 ±1 mm 2 ±1 mm Print area... -
Page 25: Cutter Specifications
2.2 CUTTER SPECIFICATIONS (1) Cutter Specifications Table 2-5 Cutter Specifications Item Specifications Paper cutting method Slide cutting Cutting frequency 1 cut / 2 sec max. (2) Cut Position Cut position Cut position Printing surface Back feed margin Paper feed direction Paper feed direction... -
Page 26: Power Supply Specifications
2.3 POWER SUPPLY SPECIFICATIONS (1) Power Supply Connector Specifications Printer side connector: TCS7960-5320177 (HOSIDEN) equivalent Cable side connector: TCP8927-631167 (HOSIDEN) equivalent Function +24.0 V N.C. Shell Figure 2-6 Power Supply Connector (View from Joint Surface) (NOTE) Insert the DC plug into the power connector on the printer correctly. When the DC plug is inserted forcibly in wrong direction, it may cause damage. -
Page 27: Drawer Kick Port Specifications
2.4 DRAWER KICK PORT SPECIFICATIONS (1) Drawer Kick Port Specifications Table 2-8 Drawer Kick Port Specifications Item Specifications Output voltage 24.0 V Output current 1.0 A max. Number of drive circuits 2 circuits Drawer switch input 1 port Drawer switch drive voltage 3.3 V Drawer switch drive current 0.11 mA... -
Page 28: Communication Cable Specifications
2.5 COMMUNICATION CABLE SPECIFICATIONS 2.5.1 Specified USB Cable Specifications Table 2-9 Specified USB Cable Specifications Item Specifications Product name IFC-U02-2 USB cable Color Black Length Approx. 1800 mm Cable Outside diameter Approx.φ4.0 mm Plug C1 Type Series "A" plug Plug C2 Type Series "B"... -
Page 29: Specified Powered Usb Cable Specifications
2.5.2 Specified Powered USB Cable Specifications Table 2-11 Specified Powered USB Cable Specifications Item Specifications Product name IFC-V01-1 Powered USB cable Color Black Cable Length Approx. 1800 mm Plug C1 Type Powered USB 24.0 V Plug C2 Type Series "B" plug Plug C3 Type Power Mini DIN 3 pin... -
Page 30: Chapter 3 Interface
CHAPTER 3 INTERFACE This chapter describes specifications of each interface required for connecting host devices and peripheral devices with the printer. The amount of the input buffer in the printer is 4096 bytes. The amount of the output buffer is 256 bytes. 3.1 USB + USB HOST MODEL The USB + USB host model provides both USB and USB host interfaces, and it can be used in the following ways:... -
Page 31: Figure 3-1 Connector
(2) Pin Assignment Table 3-2 Pin Assignment of USB Interface Terminal Terminal Input/Output Function Name Direction Vbus USB power supply Input/Output USB data Input/Output USB data Signal ground Shell Frame ground (NOTE) Use a USB cable that conforms to the Full speed when you prepare a cable separately. -
Page 32: Figure 3-2 Screen Of [Usb] Tab In Sii Communication Settings Utility For Windows
Use "SII Communication Setting Utility for Windows", or Communication Settings Utility in "Communication Software Package for RP Series Printer". See "SII Communication Setting Utility for Windows User's Guide" for RP-F10 series, or "RP Series Communication Software User's Guide" for details. -
Page 33: Figure 3-3 Screen Of [Driver Type] Tab In Communication Settings Utility
(7) USB Device Class It is possible to set the USB Device Class to either "Printer Class" or "Vendor Class". To set the USB Device Class, there are the following 2 ways: • Using the utility Use Communication Settings Utility in "Communication Software Package for RP Series Printer" to set the Driver Type. -
Page 34: Usb Host Interface
3.1.2 USB Host Interface (1) General Specifications Table 3-3 General Specifications of USB Host Interface Item Specifications Ver. 2.0 USB version Printer device class 1.1 Communication speed Full speed (12 Mbps) Communication protocol Bulk transfer Supported peripheral device DSP-A01-K1/DSP-A01-W1 (NOTE) Do not connect USB host other than our specified peripheral device. (2) Pin Assignment Table 3-4 Pin Assignment of USB Host Interface Terminal... - Page 35 (4) Data Reception USB host data reception uses a bulk-in transfer method. The printer requests the bulk-in packet periodically to connected peripheral device and receives the data from peripheral device. The received data is stored temporarily in the output buffer, and it is sent through USB interface in response to the bulk-in packet request from the host device.
-
Page 36: Ethernet + Usb Host Model
3.2 ETHERNET + USB HOST MODEL 3.2.1 Ethernet Interface (1) General Specifications Table 3-5 General Specifications of Ethernet Interface Item Specifications Communication standards 10BASE-T, 100BASE-TX Communication protocol Basic protocol IPv4, ARP, ICMP, UDP, TCP Print protocol LPR, TCP Socket Port (2) Pin Assignment Table 3-6 Pin Assignment of Ethernet Interface Terminal... -
Page 37: Table 3-7 Network Communication System
(NOTE) • Do not insert a customer display connector cable, drawer kick out connector cable, and general public line to the 10BASE-T/100BASE-TX LAN connector. • Be sure to connect the aerially wired LAN cable outside to this product via surge-proof devices. Otherwise, induced lightning may damage devices. (4) LED Indications of each LED installed on both sides in the bottom of the connector mean the following: Table 3-7 Network Communication System... -
Page 38: Table 3-10 Print Communication Protocol (Tcp Socket Port)
TCP Socket Port: Transfers print data and printer status through the bidirectional direct socket communication. Table 3-10 Print Communication Protocol (TCP Socket Port) Port type Direct print TCP communication port Port No. 9100 Port communication direction Bidirectional Maximum number of 14 (It changes depending on the connection situation of other concurrent connections protocols such as LPR.) -
Page 39: Bluetooth + Usb Host Model
3.3 BLUETOOTH + USB HOST MODEL 3.3.1 Bluetooth Interface (1) General Specifications Table 3-14 General Specifications of Bluetooth Interface Item Specifications Bluetooth version Ver. 3.0 Transmission power class Class 2 Authentication SSP, PIN code Profile SPP, iAP2 PIN code 0000 (at the shipping) Device name RP-F10 (at the shipping) *: Changeable by "Set Communication Default Value"... -
Page 40: Precautions For Use Bluetooth
Refer to the following for the pairing procedure when using our utility software. • NFC using: Set the Bluetooth function and NFC function of host device to on, and start our utility software. Tap the “Printer selection” column of software and slide to “NFC SEARCH”. Turn on the printer, and bring the NFC antenna of host device closer to the position of N mark on the printer. -
Page 41: Chapter 4 Function Settings
CHAPTER 4 FUNCTION SETTINGS 4.1 FUNCTION SETTING METHOD In this printer, initial states of selectable items such as communication system after power on and thermal paper type can be preset. Preset these functions before using the printer. Details for settings of the software switches are described below. -
Page 42: Changing Memory Switch
4.1.1 Changing Memory Switch (1) Change Procedures There are following 4 ways to change the MS. • Using the memory switch setting tool As shown in the figure below, utilize the memory switch setting utility from the printer driver property. For details, see "SII Printer Setting Utility for Windows User's Guide"... -
Page 43: Figure 4-2 Mode Selection Message
(2) How to Set the Function Using Switches To set functions using the switches, follow the procedures below. Load thermal paper in the printer. Ensure that no error occurs, and then turn off the printer. Hold the FEED Switch down and press the POWER Switch, then release the POWER Switch first. Keep pressing the FEED Switch until the test print is completed. -
Page 44: Figure 4-4 Function Selection Message (Example: Selected Ms1)
HINT • For “11: I/F Setting”, the items to be set are different for each interface. • USB Interface [Function selection of I/F Setting] 0 : Return to MS selection. 1 : LAN Factory Default Setting Press the FEED switch an equal number of times to the selected number. -
Page 45: Figure 4-5 Setting Value Selection Message (Example: Selected Standby Led)
A message for selecting the setting value of the selected function is printed as a sample shown in Figure 4-5. Press the FEED Switch the number of times corresponding to the selected setting value number, and then press the POWER Switch. [Standby LED] 0 : Return to function selection. -
Page 46: Function Settings (Ms)
4.2 FUNCTION SETTINGS (MS) Details of each function are described below. The value shown in the shaded cell (in bold) in the table is set at the shipping. (NOTE) Be sure to configure the setting or the value as instructed when "Fixed" is stated in the table. -
Page 47: Table 4-3 General Setting 2 (Ms2)
General Setting 2 (MS2) Sets the external buzzer of when an error occurs. • Buzzer Count Selection (MS2-1 to 2) The beeping times can be selected. • Buzzer Pattern Selection (MS2-3 to 4) The buzzer pattern can be selected. • Buzzer Volume Selection (MS2-5) The buzzer volume can be selected. -
Page 48: Table 4-6 General Setting 3 (Ms3)
General Setting 3 (MS3) Sets the external buzzer of when cut process completes. • Buzzer Count Selection (MS3-1 to 2) The beeping times can be selected. • Buzzer Pattern Selection (MS3-3 to 4) The buzzer pattern can be selected. • Buzzer Volume Selection (MS3-5) The buzzer volume can be selected. -
Page 49: Table 4-9 General Setting 4 (Ms4)
General Setting 4 (MS4) Selects the printer drive method. • Number of Dots Selection for Fixed Division and Dynamic Division (MS4-1 to 2) Fixed 2-division is set automatically when the fixed division is selected. The maximum number of simultaneously activated dots can be selected when the dynamic division is selected. -
Page 50: Table 4-11 Maximum Print Speed Selection (Ms4-7 To 8)
Table 4-10 Number of Dots Selection for Fixed Division and Dynamic Division (MS4-1 to 2) Number of Dots Selection for Fixed MS4-2 MS4-1 Division and Dynamic Division Fixed 2-division / dynamic 96 dots (2 div. / 96 dots) Fixed 2-division / dynamic 144 dots (2 div. - Page 51 General Setting 5 (MS5) Sets various responses, data processing, and operations. • Automatic Status Response Selection (MS5-1) Enables or disables the automatic status response function. • Initialized Response Selection (MS5-2) Enables or disables the initialized response function. • Data Discard Selection When Error Occurs (MS5-3) Enables or disables data discarding of when an error occurs or in the return-waiting state.
-
Page 52: Table 4-12 General Setting 5 (Ms5)
• Cutting Mode Selection After Paper Setting (MS5-8) When Initialization Performance Selection After Paper Setting is enabled, whether to perform cutting operation by full cut or partial cut in the paper set initialization operation can be selected. Table 4-12 General Setting 5 (MS5) Value Function Automatic Status Response... -
Page 53: Table 4-14 General Setting 6 (Ms6)
General Setting 6 (MS6) • Print Density Selection (MS6-1 to 8) The print density can be selected. Table 4-14 General Setting 6 (MS6) Value Function Print Density Selection 6-1 to 8 See Table 4-15 (Print Density) Table 4-15 Print Density Selection (MS6-1 to 8) Print Density MS6-8 MS6-7... -
Page 54: Table 4-16 General Setting 7 (Ms7)
General Setting 7 (MS7) • Thermal Paper Selection (MS7-1 to 8) The thermal paper to use can be selected. Table 4-16 General Setting 7 (MS7) Value Function Thermal Paper Selection 7-1 to 8 See Table 4-17 (Thermal Paper) Table 4-17 Thermal Paper Selection (MS7-1 to 8) Thermal Paper MS7-8 MS7-7... -
Page 55: Table 4-18 General Setting 13 (Ms13)
General Setting 13 (MS13) Selects the Kanji code system and 180° reverse function. • Kanji Code System Selection (MS13-1) The initial Kanji code system can be set to the JIS code or Shift-JIS code system. • 180° Reverse Function Selection (MS13-2) The character print direction and start point in the initial page mode can be set. -
Page 56: Table 4-19 International Character Set
11. International Character Selection (MS15) A value corresponding to the international character set can be selected. Table 4-19 International Character Set Country Country Norway France 10 Denmark II Germany 11 Spain II United Kingdom 12 Latin America Denmark I 13 Prohibition Sweden 14 Prohibition Italy... -
Page 57: Table 4-21 Character Code Table
12. Character Code Table Setting (MS16) A value corresponding to the character code table number can be selected. The character code table number is the number shown in Table 4-21. Table 4-21 Character Code Table Character Code Character Set Table No. USA, Standard Europe (Code Page437) Katakana Multilingual (Code Page850) -
Page 58: Table 4-23 General Setting 17 (Ms17)
13. General Setting 17 (MS17) • Paper Saving Setting (MS17-1 to 2) Space between lines and line spacing can be reduced without decreasing the size of character or graphic. Mode1: Space between lines and line spacing are decreased to 0 dots. Mode2: Space between lines and line spacing are decreased to 2 dots. -
Page 59: Table 4-25 General Setting 18 (Ms18)
14. General Setting 18 (MS18) Sets the external buzzer to beep with “Generate Pulse” command (ESC ‘p’) and “Generate Pulse in Real Time” command (DLE DC4 fn). • Buzzer Count Selection (MS18-1 to 2) The beeping times can be selected. •... -
Page 60: Table 4-28 Bluetooth Setting (Ms39)
16. Bluetooth Setting (MS39) MS39 is enabled only when executing data input/output by Bluetooth. • iOS Auto Connection Selection (MS39-1) Once this function is enabled and when iOS device connection is disconnected, the printer tries to reconnect to the iOS device last connected. Use this function when using the printer exclusively with a specific iOS device. -
Page 61: Test Print
4.3 TEST PRINT The printer can perform a test print. In the test print, the firmware version, the MS setting values, etc. are printed. Load thermal paper in the printer. Ensure that no error occurs, and then turn off the printer. Hold the FEED Switch down and press the POWER Switch, then release the POWER Switch first. -
Page 62: Led Indication And Switch Function
CHAPTER 5 LED INDICATION AND SWITCH FUNCTION 5.1 PRINTER STATUS LED INDICATION This printer shows its status with a LED. The printer statuses are shown in Table 5-1. Table 5-1 Printer Status Printer Status LED (Color) (Lighting Pattern) Power off Power on (print-ready) Blue Printing... -
Page 63: Table 5-2 Led Blink Pattern
Table 5-2 LED Blink Pattern Status Pattern 0.2s Blink-1 0.8s 0.1s Blink-2 0.7s 0.1s 0.1s Blink-3 0.1s... -
Page 64: Error And Recovery Procedure
5.2 ERROR AND RECOVERY PROCEDURE When an error occurs, the printer stops printing operation. However, the data receiving is enabled. The table below shows errors and their recovery procedures. Table 5-3 Error and Recovery Procedure Error Detail Recovery Procedure Priority The printer becomes this state The return-waiting state is after releasing out-of-paper error,... -
Page 65: Switch
5.3 SWITCH There are 2 switches, the POWER Switch and the FEED Switch on this printer. 5.3.1 POWER Switch The printer can be turned on/off by POWER Switch. To turn on the printer, hold down the POWER Switch until the LED lights up. To turn off the printer, hold down the POWER Switch until the LED turns off. -
Page 66: Chapter 6 Command Functions
CHAPTER 6 COMMAND FUNCTIONS 6.1 CHARACTER CODES AND COMMANDS The character code range and user-defined character codes differ between when Kanji mode is selected with the "Specify Kanji Mode" command (FS '&') after selecting JIS code system with the "Select Kanji Code System"... - Page 67 (2) Character code of 2-byte code system character 2-byte character is specified with 2 bytes character code. (a) The 1st byte 00H: 1-byte code system character area Specify the character code of 1-byte code system character with the 2nd byte. 21H to 76H: 2-byte character area 77H: User-defined character area...
-
Page 68: Shift-Jis Code System
6.1.2 Shift-JIS Code System When Shift-JIS code system is selected with the "Select Kanji Code System" command (FS 'C'), Kanji characters can be printed with 2 bytes character code without entering the "Specify Kanji Mode" command (FS '&'). A command functions either as a character code of 1-byte code system character or the 2nd byte of character code of 2-byte code system character. -
Page 69: Flash Memory
6.2 FLASH MEMORY The FLASH memory of the printer allows user-defined characters, downloaded characters, optional fonts, macro function, NV graphics function, downloaded bit image function, User page 1-byte fonts, and User page international characters to be used. The FLASH memory consists of the following areas. System area: Stores data for controlling system. -
Page 70: Table 6-1 Memory Area After Initialization
Table 6-1 Memory Area After Initialization Capacity (Bytes) User-defined characters 9784 Downloaded characters 6184 Optional fonts Macros NV graphics Downloaded bit images User page 1-byte fonts User page international characters For user-defined characters and downloaded characters, the memory area is allocated at the shipping and initialization of the user area. -
Page 71: Table 6-2 Number Of Bytes Of Memory Control Information For Each Function
(2) Memory control information When allocating the area or registering to use each function, the memory control information is always added to the beginning of the allocated area. The number of bytes of memory control information depends on each function. The number of bytes of memory control information for each function is listed in Table 6-2. -
Page 72: Table 6-3 Commands Involving Allocation Or Release Of Memory Area
(3) Precautions for the macro function The macro function cannot include the commands that involve allocating or releasing the memory area listed in Table 6-3 in macros. Table 6-3 Commands Involving Allocation or Release of Memory Area Command Command Name DC2 'P' Register Optional Font DC2 'Q'... - Page 73 (4) Memory management 1. Usage status of the user area in the FLASH memory The user area in the FLASH memory has the following 3 usage states: In use • In use state • Used state Used • Unused state Unused The memory area other than allocated for user-defined character and downloaded character is in "Unused state"...
- Page 74 When data registration and release are repeated, the memory state turns to the [4] state in the figure. In order to use the "Used state" area again, execute the "Defragment User Area" command (DC2 '*' '1'). When the unused state area is less than the amount of data to be registered next time, issuing a registration command automatically executes the user area defragmentation.
-
Page 75: Standard Mode And
6.3 STANDARD MODE AND PAGE MODE In the printer, the print mode can be selected from the standard mode to print the received data sequentially or the page mode to print after receiving 1 page data. 6.3.1 Standard Mode Standard mode is a mode in which the received data is printed sequentially. Printing is executed when 1 line buffer is filled up with character data (1 line full print), or the printing conditions are satisfied by the "Line Feed"... -
Page 76: Table 6-5 Printing Procedure For Printing Multiple Pages In Page Mode
Table 6-5 Printing Procedure for Printing Multiple Pages in Page Mode Step Command Operation Remarks Needs to be in standard mode and at ESC 'L' Selects the page mode. the beginning of the line. If not set, the maximum print area will ESC 'W' Sets the print area. -
Page 77: Figure 6-1 Mapping Of Character And Image Data
The character and image data are mapped as shown in Figure 6-1. Double height character Downloaded bit image NV graphics Barcode Two-dimensional Bit image Graphics barcode data stored in print Reference Buffer point HRI character Reference Reference Reference Reference Reference Reference point point... -
Page 78: Table 6-6 Maximum Print Area In Page Mode
6. Setting of print area in page Table 6-6 shows the maximum print area of the printer. Table 6-6 Maximum Print Area in Page Mode Maximum Width Maximum Length Paper Width (X Direction) (Y Direction) 58 mm 432 dots 2400 dots 80 mm 576 dots 6-13... -
Page 79: Response Data
6.4 RESPONSE DATA All of upper 4 bits in response data sent from the printer to the host device are identifiers. Table 6-7 shows the meanings to the identifiers. Table 6-7 Response Identifiers Identifier Function Start or end of multi-byte string 2xH to 7xH ASCII characters Execution response... - Page 80 (5) Progress situation response Various progress situations are sent with lower 4 bits at 16 steps. (6) Initialized response The printer sends 1 byte data to inform that initialization has completed. And lower 4 bits shows the factor of the initialization. B0H: Initialization by the power on or "Hardware Reset"...
-
Page 81: Command Description
6.5 COMMAND DESCRIPTION This chapter describes the commands in each function. × × × × × × Command The name of the command Code Indicates the hexadecimal code ( H). Definition Range Shows the parameter and the settable data range. Default Describes the default value for the command involving parameter. -
Page 82: Printing Command
6.5.1 Printing Command Line Feed Code Function [In standard mode] Prints the data in the line buffer and performs line feed based on the set line spacing. [In page mode] Moves the mapping start position to the beginning of the next line based on the set line spacing. -
Page 83: Esc 'J' N Print And Feed Forward
ESC 'J' n Print and Feed Forward Code 1BH 4AH n Definition Range 0 ≤ n ≤ 255 Function [In standard mode] Feeds the paper by predefined distance. When there is data in the line buffer, the printer prints 1 line and then feeds the paper. The paper feed length is [n ×... -
Page 84: Esc 'D' N Print And N Lines Feed Forward
ESC 'd' n Print and n Lines Feed Forward Code 1BH 64H n Definition Range 0 ≤ n ≤ 255 Function [In standard mode] Feeds the paper n lines. The paper feed length is [n × the set line spacing]. When there is data in the line buffer, the printer prints 1 line and then feeds the paper. -
Page 85: Line Spacing
6.5.2 Line Spacing ESC '2' Set 1/6 Inch Line Spacing Code 1BH 32H Function Specifies the line spacing per line as 1/6 inches (34 dots). Notes The line spacing can be independently set in the standard mode and the page mode. This command is not affected by the basic calculation pitch. -
Page 86: Character Set
6.5.3 Character Set ESC SP n Set Character Right Spacing Code 1BH 20H n Definition Range 0 ≤ n ≤ 255 Default n = 0 Function Sets the amount of space to the right of a character. The amount of the right space is [n × basic calculation pitch] inches. Notes This command does not affect 2-byte characters. - Page 87 ESC '!' n Specify Print Mode Code 1BH 21H n Definition Range 0 ≤ n ≤ 255 Default n = 0 Function Specifies print modes in batch. Value Function Font A selected Font B selected Character font (24 × 12) (16 ×...
-
Page 88: Gs '!' N Specify Character Size
ESC 'M' n Select Character Font Code 1BH 4DH n Definition Range n = 0, 1, 48, 49 Default n = 0 Function Selects a character font. Function 0, 48 Select font A (24 × 12) 1, 49 Select font B (16 × 8) Notes The character font can also be selected by the "Specify Print Mode"... -
Page 89: Esc '-' N Esc '-' N Specify/Cancel Underline
Notes The command is valid for all characters (including Kanji) except HRI characters. However, the scale of the optional font is up to double width or double height. Specifying the optional font in triple or larger size will result in printing in double size. When either the vertical scale or horizontal scale is out of the definition range, this command is ignored. -
Page 90: Esc 'G' N Specify/Cancel Double Strike Print
Notes Only the LSB is valid for n. This command affects both 1-byte characters and 2-byte characters. But it does not affect optional fonts. Related Commands ESC '!' ESC 'G' n Specify/Cancel Double Strike Print Code 1BH 47H n Definition Range 0 ≤... -
Page 91: Esc '{' N Specify/Cancel Inversion (Flip) Print
ESC '{' n Specify/Cancel Inversion (Flip) Print Code 1BH 7BH n Definition Range 0 ≤ n ≤ 255 Default n = 0 Function Specifies or cancels inversion (flip) printing. When n = <*******0>B, inversion (flip) printing is canceled. When n = <*******1>B, inversion (flip) printing is specified. Notes Only the LSB is valid for n. - Page 92 ESC 'R' n Select International Character Set Code 1BH 52H n Definition Range 0 ≤ nl ≤ 17 Default n = 0 Function Selects an international character set from the following table. Country Country Norway France Denmark II Germany Spain II United Kingdom Latin America Denmark I...
-
Page 93: Character Set
Character Set USA, Standard Europe (Code Page437) Katakana Multilingual (Code Page850) Portuguese (Code Page860) Canadian-French (Code Page863) Nordic (Code Page865) Turkish (Code Page857) Greek (Code Page737) Latin (Code Page1252) Russian (Code Page866) Eastern Europe (Code Page852) Euro (Code Page858) Cyrillic (Code Page855) Arabic (Code Page864) Central European (Code Page1250) Cyrillic (Code Page1251) - Page 94 Function Response Format Reserved Reserved Reserved Checksum (2 bytes) HEX code Reserved Reserved ID (64 bytes) Character string Registered international Character string character When 7 is specified for c, the printer sends the abbreviation of the registered international character in a character string. When 2 or more international characters are registered, the country names are separated by a ',' (comma).
-
Page 95: Esc '&' Y S E [X [D]K]N
ESC '&' y s e [x [d]k]n Register Downloaded Character Code 1BH 26H y s e [x [d]k]n Definition Range y = 3 (Font A (24 × 12) selected) y = 2 (Font B (16 × 8) selected) 20H ≤ s ≤ e ≤ 7EH 0 ≤... -
Page 96: Esc '%' N Specify/Cancel Downloaded Character Set
ESC '%' n Specify/Cancel Downloaded Character Set Code 1BH 25H n Definition Range 0 ≤ n ≤ 255 Default n = 0 Function Specifies or cancels the downloaded character. When n = <*******0>B, the downloaded character is canceled. When n = <*******1>B, the downloaded character is specified. Notes Only the LSB is valid for n. -
Page 97: Dc2 'O' N Specify/Cancel Optional Font
DC2 'O' n Specify/Cancel Optional Font Code 12H 4FH n Definition Range 0 ≤ n ≤ 255 Default n = 0 (Optional font printing canceled) Function Specifies and cancels the optional font. When n = <*******0>B, optional font printing is canceled. When n = <*******1>B, optional font printing is specified. -
Page 98: Dc2 'Q' Release Optional Font Area
For the font data of 1 character, vertical 8 dots are input as 1 byte data in the order shown in the following figure. The following figure is the case of x = y = 20. e.g. 20 dots × 20 dots x = 20 dots y = 20 dots *The gray area is disregarded. -
Page 99: Print Position
6.5.4 Print Position ESC 'L' Select Page Mode Code 1BH 4CH Function Switches from standard mode to page mode. Notes This command is valid only when input at the beginning of the line. This command is not valid when input in page mode. The printer returns to the standard mode after printing by the "Print and Return to Standard Mode"... -
Page 100: Gs 'P' X Y Set Basic Calculation Pitch
ESC SP Set Character Right Spacing FS 'S' Set Kanji Spacing ESC '3' Set Line Spacing ESC '2' Set 1/6 Inch Line Spacing Related Commands ESC 'L' GS 'P' x y Set Basic Calculation Pitch Code 1DH 50H x y Definition Range 0 ≤... -
Page 101: Ht Horizontal Tab
Horizontal Tab Code Function Shifts the print position to the next horizontal tab position. Notes This command is ignored when the next horizontal tab position is not set. The print position is shifted to [print area width + 1] when the next horizontal tab position is beyond the print area. -
Page 102: Esc 'A' N Alignment
ESC 'a' n Alignment Code 1BH 61H n Definition Range 0 ≤ n ≤ 2, 48 ≤ n ≤ 50 Default n = 0 Function Aligns all print data on 1 line to the specified position. Alignment 0, 48 Aligned left 1, 49 Centered 2, 50... -
Page 103: Gs 'W' Nl Nh Set Print Area Width
When the set print area width is less than the minimum width of 1 internal character (the width of the font size selected by character font selection) at mapping of the data other than characters (bit image, etc.), the following processing is performed only for that line. (1) Within the printable area, the print area is extended to the right side up to the equivalent of the minimum width of 1 internal character. -
Page 104: Set Print Area In
ESC 'T' n Select Print Direction in Page Mode Code 1BH 54H n Definition Range 0 ≤ n ≤ 3, 48 ≤ n ≤ 51 Default MS13-2 (180° Reverse Function Selection) is set to Disable: n = 0 MS13-2 (180° Reverse Function Selection) is set to Enable: n = 2 Function Specifies the print direction and starting point of characters in page mode. - Page 105 ESC 'W' xL xH yL yH dxL dxH dyL dyH Set Print Area in Page Mode Code 1BH 57H xL xH yL yH dxL dxH dyL dyH Definition Range 0 ≤ xL, xH, yL, yH, dxL, dxH, dyL, dyH ≤ 255 Default Printable area of the thermal paper Function Sets the position and size of the print area.
-
Page 106: Esc '$' Nl Nh Specify Absolute Position
ESC '$' nl nh Specify Absolute Position Code 1BH 24H nl nh Definition Range 0 ≤ nl ≤ 255, 0 ≤ nh ≤ 255 Function Specifies the print position based on the left margin position. The next print position is [(nh × 256 + nl) × basic calculation pitch] inches from the left margin position. -
Page 107: Gs '$' Nl Nh Specify Absolute Vertical Position In
Related Commands ESC '$', GS 'P' GS '$' nl nh Specify Absolute Vertical Position in Page Mode Code 1DH 24H nl nh Definition Range 0 ≤ nl ≤ 255, 0 ≤ nh ≤ 255 Function Specifies the absolute position of starting data mapping of characters in the vertical direction based on the starting point when the page mode is specified. -
Page 108: Gs '\' Nl Nh Specify Relative Vertical Position In
GS '\' nl nh Specify Relative Vertical Position in Page Mode Code 1DH 5CH nl nh Definition Range 0 ≤ nl ≤ 255, 0 ≤ nh ≤ 255 Function Specifies the relative position of starting data mapping of characters in the vertical direction based on the current position when the page mode is specified. -
Page 109: Image
6.5.5 Image ESC '*' m nl nh [d]k Print Bit Image Mode Code 1BH 2AH m nl nh [d]k Definition Range m = 0, 1, 32, 33 0 ≤ nl ≤ 255, 0 ≤ nh ≤ 3, 0 ≤ d ≤ 255 Function Stores a bit image of the number of dots specified by nl and nh in the line buffer in the mode specified by m. -
Page 110: Gs '*' X Y [D]K Register Downloaded Bit Image
<Data input order> 8 dots image 24 dots image d1 d4 d7 d2 d3 d4 GS '*' x y [d]k Register Downloaded Bit Image Code 1DH 2AH x y [d]k Definition Range 1 ≤ x ≤ 255, 1 ≤ y ≤ 255, 0 ≤ d ≤ 255, 8 ≤ k ≤ 65524 (Deleted when x = 0 or y = 0) Function Registers the downloaded bit image of dots specified by x and y. -
Page 111: Gs '/' M Print Downloaded Bit Image
<Row scan mode> <Column scan mode> X=x × 8 X=x × 8 d(x+1) d(x+2) d(x × 2) d(x × y × 8) (1)GS '/' m Print Downloaded Bit Image (2)GS '/' m n Select Downloaded Bit Image Code (1)1DH 2FH m (2)1DH 2FH m n Definition Range (1)0 ≤... -
Page 112: Gs 'V' '0' M Xl Xh Yl Yh [D]K
When downloaded bit image, character data, bit image mode printing, and barcode are mixed on the same line in page mode, the bottom edge of the downloaded bit image is aligned with the followings: Character data: Bottom edge of the character Bit image: Bottom edge of the bit image Barcode:... - Page 113 Notes In the standard mode, this command is valid only when there is no print data in the line buffer. All print modes (character size, bold printing, double strike printing, inversion (flip) printing, underline, reverse printing, etc.) have no effect on raster bit images. When the print area width set by the "Set Left Margin"...
-
Page 114: Dc2 'I' N Select Bit Image Scan Method
DC2 'I' n Select Bit Image Scan Method Code 12H 49H n Definition Range 0 ≤ n ≤ 255 Default n = 0 (Column scan) Function Specifies whether to transfer bit image registration with column scan or row scan data. When n = <*******0>B, column scan is specified. - Page 115 GS '(' 'L' pL pH '0' fn Send NV Graphics Memory Capacity Code 1DH 28H 4CH pL pH 30H fn Definition Range pL = 2, pH = 0 fn = 0, 48 Function In response to the request of this command, the printer sends the number of bytes of total capacity in NV graphics area by 4 bytes in a HEX code format.
-
Page 116: Send Registered Nv Graphics Key Code List
GS '(' 'L' pL pH '0' fn 'K' 'C' Send Registered NV Graphics Key Code List Code 1DH 28H 4CH pL pH 30H fn 4BH 43H Definition Range pL = 4, pH = 0 fn = 64 Function In response to the request of this command, the printer sends the key code list of the registered NV graphics by character string. -
Page 117: Delete Specified Nv Graphics Data
GS '(' 'L' pL pH '0' fn kc1 kc2 Delete Specified NV Graphics Data Code 1DH 28H 4CH pL pH 30H fn kc1 kc2 Definition Range pL = 4, pH = 0 fn = 66 32 ≤ kc1 ≤ 126, 32 ≤ kc2 ≤ 126 Function Deletes the NV graphics data specified by key code. -
Page 118: Select Specified Nv Graphics Data
GS '(' 'L' pL pH '0' fn kc1 kc2 x y z Select Specified NV Graphics Data Code 1DH 28H 4CH pL pH 30H fn kc1 kc2 x y z Definition Range pL = 7, pH = 0 fn = 70 32 ≤... -
Page 119: Store Graphics Data In Print Buffer
Notes By this command, the number of data bytes + memory control information bytes is used in the user area of the FLASH memory. When the remaining capacity of the user area is less than the memory usage m, this command is ignored. -
Page 120: Specify Watermark Print Position
Notes In the standard mode, this command is valid only when there is no print data in the line buffer. This command only stores graphics data in the print buffer in the standard mode. Actual printing is performed by the "Print Graphics Data Stored in Print Buffer" command (GS '(' 'L'), line feeds, or sending characters. -
Page 121: Print Position
w: horizontal print area y: vertical print area n: watermark print position paper Notes This command is valid only in the standard mode. This command is valid only when input at the beginning of the line. Otherwise it is ignored. When the horizontal or vertical size is smaller than the size of NV graphics data corresponding to the key code, the data is not printed. -
Page 122: Macro
6.5.6 Macro GS ':' Start/End Macro Definition Code 1DH 3AH Function Specifies start or end of macro definition. The macro is not registered at the shipping. Notes Macro definition is to register a macro in the user area by this command, and the "Execute Macro"... -
Page 123: Gs '^' R T M Execute Macro
GS '^' r t m Execute Macro Code 1DH 5EH r t m Definition Range 0 ≤ r ≤ 255, 0 ≤ t ≤ 255 m = 0, 1 Function Executes macro definition contents. Macro execution count Wait time during macro execution m: Macro execution mode m = 0: The printer executes r times consecutively at the time interval specified by t. -
Page 124: Barcode
6.5.7 Barcode GS 'H' n Select HRI Character Print Position Code 1DH 48H n Definition Range 0 ≤ n ≤ 3, 48 ≤ n ≤ 51 Default n = 0 Function Selects the HRI character print position at barcode printing. Print Position 0, 48 Not printed... -
Page 125: Set Barcode Height
GS 'h' n Set Barcode Height Code 1DH 68H n Definition Range 1 ≤ n ≤ 255 Default n = 162 Function Sets the barcode height to n dots. Notes When the value less than the GS1 Databar standard is specified, it is automatically adjusted to the minimum height of each GS1 Databar. -
Page 126: Select Barcode Print Direction
GS 'j' n Select Barcode Print Direction Code 1DH 6AH n Definition Range 0 ≤ n ≤ 3 Default n = 0 Function Selects the barcode print direction. Rotation Direction No rotation Rotation of 90° to right Rotation of 180° to right Rotation of 270°... -
Page 127: Print Barcode
The width of the element is determined as follows depending on the barcode width setting. Wide Element (mm) Narrow Element (mm) N:W = 1:2 N:W = 1:2.5 N:W = 1:3 0.250 (2 dots) 0.500 (4 dots) 0.625 (5 dots) 0.750 (6 dots) 0.375 (3 dots) 0.750 (6 dots) 1.000 (8 dots) - Page 128 Function Selects the barcode system and prints the barcode. Barcode System Number of Barcode Data Bytes Remarks UPC-A 11 ≤ k ≤ 12 Same barcode system as m = 65 UPC-E 11 ≤ k ≤ 12 Same barcode system as m = 66 JAN13 (EAN13) 12 ≤...
- Page 129 When GS1 Databar Omni-directional, GS1 Databar Truncated, or GS1 Databar Limited is specified, '01' at the beginning is automatically added by the printer. And the check digit is automatically calculated by the printer. Paper feeding length is equivalent to the barcode height (including HRI character when HRI character printing is specified) regardless of the line spacing set by the "Set 1/6 Inch Line Spacing"...
- Page 130 [Barcode print in standard mode] HRI character Left margin Barcode HRI character [Barcode print in page mode] HRI character Barcode HRI character Baseline Base line When the rotation direction is set to 90° or 270° by the "Select Barcode Print Direction" command (GS 'j' n) in the standard mode, and when the mapping start position is specified to "lower left"...
- Page 131 JAN8: Enter 7 characters using numbers from '0' to '9'. Alternatively, enter additional 1 check digit. The check digit is automatically calculated inside the printer as well. CODE39: Enter any number of characters using ' ', '$', '%', '+', '-', '.', '/', '0' to '9', and 'A' to 'Z'. ITF: Enter any even number of characters using numbers from '0' to '9'.
- Page 132 CODE128 Code Set Data Data Data Input Input Input CodeSet A CodeSet B CodeSet C CodeSet A CodeSet B CodeSet C CodeSet A CodeSet B CodeSet C " " & & FNC3 FNC3 FNC2 FNC2 SHIFT SHIFT CODE C CODE C <...
- Page 133 GS1 Databar Expanded: Enter any number of characters using ' ', '!', '"', '%', '&', ''', '(', ')', '*', '+', ',', '-', '.', '/', ':', ';', '<', '=', '>', '?', '_', '0' to '9', 'A' to 'Z', and 'a' to 'z'. Enter '{1' for FNC1. Be sure to input the check digit because it is not automatically calculated by the printer.
-
Page 134: Two-Dimensional Barcode
6.5.8 Two-dimensional Barcode GS 'n' n Set Nominal Narrow Element Width Code 1DH 6EH n Definition Range 2 ≤ n ≤ 8 (number of dots) Default n = 3 Function Sets the nominal narrow element width. Related Commands GS 'p' GS 'o' n Set PDF Module Height Code... -
Page 135: Set Qr Code, Data Matrix Module Size
DC2 ';' n Set QR Code, Data Matrix Module Size Code 12H 3BH n Definition Range 2 ≤ n ≤ 16 Default n = 6 Function Specifies the module size of QR Code, Data Matrix, GS1 Databar Stacked, GS1 Databar Stacked Omni-directional, and GS1 Databar Expanded Stacked. -
Page 136: Print Data Matrix
In the standard mode, when there is data in the line buffer, this command is ignored. In the standard mode, alignment and inversion (flip) printing are valid. Quiet zones are not secured. Set the quiet zone in accordance with the standard of each barcode system. -
Page 137: Gs 'P' 4 0 N [D]N Print Gs1 Databar Stacked
Function Prints MaxiCode data on the basis of the specified contents. Service class In mode 2 and mode 3, specify sc in 3-digit numerals. Country code In mode 2 and mode 3, specify cc in 3-digit numerals. Postal code In mode 2, specify the postal code in 9-digit numerals. In order to specify less than 9 digits, specify data other than numerals for the remaining digits. -
Page 138: Gs 'P' 4 1 H N [D]N Print Gs1 Databar Stacked Omni-Directional
GS 'p' 4 1 h n [d]n Print GS1 Databar Stacked Omni-directional Code 1DH 70H 04H 01H h n [d]n Definition Range 33 ≤ h ≤ 255, n = 13, 48 ≤ d ≤ 57 Function Prints GS1 Databar Stacked Omni-directional data on the basis of the specified contents. n: Number of data bytes h: Height of GS1 Databar Stacked Omni-directional in modules d: Input data of GS1 Databar... -
Page 139: Set Qr Code Module Size
Function Selects the QR Code model. Model Model 1 Model 2 Notes This command is ignored when any value out of the definition range is specified. This setting does not affect GS ‘p’ 1. Related Commands GS '(' 'k', GS 'p' 1 GS '(' 'k' pL pH cn fn n1 n2 Set QR Code Module Size Code... -
Page 140: Store Qr Code Data
GS '(' 'k' pL pH cn fn m [d]k Store QR Code Data Code 1DH 28H 6BH pL pH cn fn m [d] k Definition Range 4 ≤ (pL+pH×256) ≤ 7092 cn = 49 fn = 80 m = 48 0 ≤... -
Page 141: Kanji
6.5.9 Kanji FS '&' Specify Kanji Mode Code 1CH 26H Function Specifies the Kanji mode. Notes When the Kanji code system is the Shift-JIS code system, inputting this command executes only the internal flag operation of the printer. In this case, printing is not affected. The Kanji code is processed in order of the 1st byte and the 2nd byte. -
Page 142: Specify/Cancel Kanji Underline
Underline is applied to the entire character width including the right and left spaces of the character. However, no underline is applied to the portion skipped by the "Horizontal Tab" command (HT) or others and to 90° right rotated characters. The underline width is the thickness set by the "Specify/Cancel Kanji Underline"... -
Page 143: Fs 'C' N Select Kanji Code System
FS 'C' n Select Kanji Code System Code 1CH 43H n Definition Range n = 0, 1, 48, 49 Default MS13-1 (Kanji Code System Selection) is JIS code: n = 0 MS13-1 (Kanji Code System Selection) is Shift-JIS code: n = 1 Function Selects the Kanji code system. -
Page 144: Fs 'W' N Specify/Cancel Kanji Quadruple-Size
Related Commands GS 'P' Width 漢 Height Left space Right space FS 'W' n Specify/Cancel Kanji Quadruple-Size Code 1CH 57H n Definition Range 0 ≤ n ≤ 255 Default n = 0 Function Specifies or cancels the quadrupled character of Kanji. When n = <*******0>B, the quadrupled character is canceled. -
Page 145: Send 2-Byte Font Id
Function Selects Kanji font. Function 0, 48 Select font A (24 × 24) 1, 49 Select font B (16 × 16) Notes The Kanji font can also be selected by the "Specify Kanji Print Mode" command (FS '!'), but the command processed command last is valid. Related Commands FS '!’... -
Page 146: Release/Allocate User-Defined Character Area
k = 72 (when font A 24 × 24 is selected) k = 32 (when font B 16 × 16 is selected) Function Registers the user-defined character pattern of Kanji to the character code specified by c1 and When the character code is specified in which the user-defined character has already been registered, the character is overwritten. -
Page 147: Auxiliary Functions
6.5.10 Auxiliary Functions ESC '=' n Select Peripheral Device Code 1BH 3DH n Definition Range 0 ≤ n ≤ 255 Default n = 1 Function Selects the peripheral device for which data from the host computer is valid. Value Function Printer Disable Enable... -
Page 148: Gs 'C' '0' N M Set Counter Print Mode
GS 'C' '0' n m Set Counter Print Mode Code 1DH 43H 30H n m Definition Range 0 ≤ n ≤ 5 0 ≤ m ≤ 2, 48 ≤ m ≤ 50 Default n = 0, m = 0 Function Sets the print mode of consecutive counter. n: Number of digits to print When n = 0, only the actual number of digits of the counter value is printed. -
Page 149: Gs 'C' '2' Nl Nh Set Counter Value
Related Commands GS 'C' 'O', GS 'C' '2', GS 'c' GS 'C' '2' nl nh Set Counter Value Code 1DH 43H 32H nl nh Definition Range 0 ≤ nl ≤ 255, 0 ≤ nh ≤ 255 Default nl = 1, nh = 0 Function Sets the consecutive counter value. -
Page 150: Send Printer Id
Table [Model name] Model name Value RP-F10 SII RP-F10 Series. Notes The printer ID is sent according to the response format. Because this command is executed when retrieved from the input buffer, a delay may occur between command reception and printer ID transmission depending on the input buffer status. -
Page 151: Gs 'V' M (2)Gs 'V' M N
(1)GS 'V' m (2)GS 'V' m n Cut Paper Code (1)1DH 56H m (2)1DH 56H m n Definition Range (1)m = 0, 1 , 48, 49 (2)m = 65, 66, 0 ≤ n ≤ 255 Function Feeds the thermal paper to the specified paper cut position and cuts the paper at the position. Function 0, 48 Full cut 1, 49 Partial cut... -
Page 152: Stamp & Cut
GS 'Y' n Stamp & Cut Code 1DH 59H n Definition Range 0 ≤ n ≤ 255 Function Prints the NV graphics registered with the key code '0' '0' at the center within the set printable area width, and then cuts the thermal paper. When n = <*******0>B, the thermal paper is cut by full cutting. -
Page 153: Dle Dc4 Fn M T Generate Pulse In Real Time
Notes Only the LSB is valid for m When n1 = 0, the drawer is not driven. Related Commands DC2 'w', DC2 'l' DLE DC4 fn m t Generate Pulse in Real Time Code 10H 14H fn m t Definition Range fn = l 0 ≤... -
Page 154: Save Maintenance Counter
Notes Note that frequent use of this command will shorten the life of the FLASH memory. The FLASH memory can be rewritten approximately 100000 times. The printer may turn to BUSY status while writing data to the FLASH memory with this command processing. -
Page 155: Dc2 '*' '1' N Defragment User Area
Notes The maintenance counter value is sent by 4 bytes in a HEX code format. The number of data bytes to be sent is 2 bytes of header and footer + 4 × 2 = 10 bytes. The number of thermal head activation times is not counted for the paper feed with the FEED Switch. -
Page 156: Dc2 'R' N Initialize User Area
DC2 'R' n Initialize User Area Code 12H 52H n Definition Range n = 1 Function Initializes the user area (FLASH memory). Notes All user-defined characters, downloaded characters, optional fonts, downloaded bit images, macros, NV graphics, User page 1-byte fonts, and User page international characters are cleared and returned to the initial state. -
Page 157: Change Function Settings
DC2 'w' f [d]k NUL Change Function Settings Code 12H 77H f [d]k 00H Definition Range 0 ≤ d ≤ 255 0 ≤ f ≤ 255 (See the following functions.) k = 40 (f = 00H, f = 80H), k = 1 (other than left value) Function Sets the MS. -
Page 158: Dc2 'L' N Send Function Settings
DC2 'l' n Send Function Settings Code 12H 6CH n Definition Range n = 0 Function In response to the request of this command, the printer sends the MS setting. Notes Sends the values of all MS currently set. See "Chapter 4 Function Settings" for the meaning of MS. The response is sent by 40 bytes in a HEX code format. -
Page 159: Send Status Data
Function Enables or disables the panel switch (FEED Switch). When n = <*******0>B, the panel switch is enabled. When n = <*******1>B, the panel switch is disabled. Notes Only the LSB is valid for n. This command affects the FEED Switch operation. Even when the panel switch is disabled by this command, the FEED Switch operation by "Execute Macro"... - Page 160 Printer Status 3 (n = 2) Value Function FEED Switch status Reserved Fixed to 0 Paper feed status Stop Operating Return-waiting status Identifier Fixed to 0 Identifier Fixed to 1 Identifier Fixed to 0 Identifier Fixed to 1 Option Sensor Status (n = 3) Value Function Reserved...
- Page 161 Reserved (n = 5 to 7) Value Function Reserved Fixed to 1 Reserved Fixed to 1 Reserved Fixed to 1 Reserved Fixed to 1 Identifier Fixed to 0 Identifier Fixed to 1 Identifier Fixed to 0 Identifier Fixed to 1 Paper Sensor Status (n = 8) Value Function...
-
Page 162: Enable/Disable Automatic Status Back
Reserved (n = 10 to 11) Value Function Reserved Fixed to 0 Reserved Fixed to 0 Reserved Fixed to 0 Reserved Fixed to 0 Identifier Fixed to 0 Identifier Fixed to 1 Identifier Fixed to 0 Identifier Fixed to 1 Notes A delay may occur between command reception and status transmission depending on the input buffer status because this command is executed at the time of retrieving from the input... - Page 163 Notes When any one of the status items is enabled, the status data at the time of executing this command is sent. After that, the status data is sent each time the state of the enabled status item changes. At this time, since each status item shows the current state, the state may change even with the status item for which ASB is not enabled.
- Page 164 (3) The 3rd Byte (Printer Status 3) Value Function FEED Switch status Reserved Fixed to 0 Paper feed status Stop Operating Return-waiting status Identifier Fixed to 1 Identifier Fixed to 0 Identifier Fixed to 1 Identifier Fixed to 1 (4) The 4th Byte (Option Sensor Status) Value Function Reserved...
-
Page 165: Send Error History
(6) The 6th Byte to the 8th Byte (Reserved) Value Function Reserved Fixed to 1 Reserved Fixed to 1 Reserved Fixed to 1 Reserved Fixed to 1 Identifier Fixed to 1 Identifier Fixed to 0 Identifier Fixed to 1 Identifier Fixed to 1 Related Commands GS 'r', DC2 'w', DC2 'l' See "6.4 RESPONSE DATA". -
Page 166: Dc3 '(' 'R' 'E' 'S' 'E' 'T' Dc3 'R' 'E' 'S' 'E' 'T' ')
Notes This is a realtime command. This command is executed only at an error. This command is executed only when Data Discard Selection When Error Occurs is enabled. The operation of this command differs depending on the Function Setting MS13-3 (Realtime Command Selection). -
Page 167: Dc2 '%' N Specify Number Of Dots Of Dynamic Division
DC2 '%' n Specify Number of Dots of Dynamic Division Code 12H 25H n Definition Range 12 ≤ n ≤ 36 Function Specifies the thermal head driving method to dynamic division and specifies the maximum number of simultaneously activated dots. n: Maximum number of simultaneously activated dots (Specified by n ×... -
Page 168: Set Print Speed
GS 's' n Set Print Speed Code 1DH 73H n Definition Range 0 ≤ n ≤ 3 Function Sets the print speed. Speed Setting High Middle (Quality) Reserved Middle (Silent) High: Drives at the maximum print speed of 250 mm/s. Middle (Quality): Decreases the maximum print speed for printing image to 200 mm/s to improve the print quality. -
Page 169: Set Iserialnumber
DC2 'u' 1 [d]k NUL Set iSerialNumber Code 12H 75H 01H [d]k 00H Definition Range d: 1-byte alphanumeric character 1 ≤ k ≤ 8 Function Sets any character string to iSerialNumber. The character string can be set with 1 to 10 characters. '0' to '9' (30H to 39H), 'A' to 'Z' (41H to 5AH) and 'a' to 'z' (61H to 7AH) can be specified for d. -
Page 170: Del Dc4 Fn A N R T1 T2
The Bluetooth PIN code setting is completed when the number of setting data bytes exceeds 16 bytes or NULL is detected in the setting data. When the number of setting data bytes exceeds 16 bytes, the 17th character is considered as NULL character, and the following data is processed as character code. -
Page 171: Send Status Data In Real Time
Notes This command is ignored if it is executed during an automatic beeping when an arror occurs or when cut process completes. DEL EOT n Send Status Data in Real Time Code 10H 04H n Definition Range 0 ≤ n ≤ 11 Function In response to the request of this command, the printer sends the specified status data. - Page 172 Printer Status 3 (n = 2) Value Function FEED Switch status Reserved Fixed to 0 Paper feed status Stop Operating Return-waiting status Identifier Fixed to 0 Identifier Fixed to 1 Identifier Fixed to 0 Identifier Fixed to 1 Option Sensor Status (n = 3) Value Function Reserved...
- Page 173 Reserved (n = 5 to 7) Value Function Reserved Fixed to 1 Reserved Fixed to 1 Reserved Fixed to 1 Reserved Fixed to 1 Identifier Fixed to 0 Identifier Fixed to 1 Identifier Fixed to 0 Identifier Fixed to 1 Paper Sensor Status (n = 8) Value Function...
- Page 174 Reserved (n = 10 to 11) Value Function Reserved Fixed to 0 Reserved Fixed to 0 Reserved Fixed to 0 Reserved Fixed to 0 Identifier Fixed to 0 Identifier Fixed to 1 Identifier Fixed to 0 Identifier Fixed to 1 Notes This is a realtime command.
-
Page 175: Ruled Line
6.5.11 Ruled Line DC3 '#' n Select Ruled Line Overlapping Mode Code 13H 23H n Definition Range 0 ≤ n ≤ 255 Default Ruled line OR overlapping mode Function Specifies OR or XOR for the overlapping mode of ruled line with character and image data. When n = <*******0>B, the OR overlapping mode is specified. -
Page 176: Dc3 '-' Set Ruled Line Off
DC3 '-' Set Ruled Line OFF Code 13H 2DH Default Ruled line OFF Function Sets the ruled line to OFF. Notes After this command, ruled line is not printed. Related Commands DC3 '+' DC3 'A' Select Ruled Line A Code 13H 41H Default Ruled line buffer A selected... -
Page 177: Dc3 'D' Nl Nh Set Ruled Line (Unit: Dot)
DC3 'D' nl nh Set Ruled Line (Unit: Dot) Code 13H 44H nl nh Definition Range 0 ≤ nl ≤ 255, 0 ≤ nh ≤ 255 Default All ruled lines cleared Function Sets the bit of the [nh × 256 + nl]th dot of the selected ruled line buffer to 1. Notes The position of the dot is counted by regarding the dot on the left edge of the screen as position 0. -
Page 178: Dc3 'P' Print Ruled Line 1 Dot-Line
DC3 'P' Print Ruled Line 1 Dot-Line Code 13H 50H Function Prints the image of the selected ruled line buffer in 1 dot-line when ruled line is ON. Notes When there is data in the line buffer, the data is printed and the thermal paper is fed for distance of space between lines, then the ruled line is printed in 1 dot-line. -
Page 179: Download Mode
6.5.12 Download Mode DC2 DC2 Select Download Mode Code 12H 12H Function Switches to download mode. To return from download mode to print mode, turn the power off and on again or execute the "Reset Download Mode" command ('@'). In the download mode, only the commands listed below are valid. Reset Download Mode ('@') Rewrite 1-Byte Font ('S' 'W') Register 1-Byte Font International Character ('S' 'R') -
Page 180: Register 1-Byte Font International Character
Font Size Number of Font Data Bytes (k2) 24-dot font 10752 byte 16-dot font 3584 byte Font data format <1-byte character> <24- dot font 24×12> <16- dot font 16×8> 12 dots 8 dots 16 dots 24 dots Notes This command is valid only during download mode. The memory usage m is calculated by the formula below. -
Page 181: Delete 1-Byte Font
Font Size Number of Font Data Bytes (k) 24-dot font 576 byte 16-dot font 192 byte Country Country Norway France Denmark II Germany Spain II United Kingdom Latin America Denmark I Prohibition Sweden Prohibition Italy Prohibition Spain I Prohibition Japan Arabia Font data format <1-byte character>... -
Page 182: Command List
6.6 COMMAND LIST 6.5.1 PrintingCommand ........................6-17 Line Feed ......................6-17 Print and Return to Standard Mode..............6-17 Carriage Return ....................6-17 ESC FF Print Data in Page Mode ..................6-17 ESC 'J' n Print and Feed Forward ..................6-18 ESC 'j' n Print and Feed Backward ................... - Page 183 (2)GS '/' m n Select Downloaded Bit Image................6-46 GS 'v' '0' m xL xH yL yH [d]k Print Raster Bit Image ..................6-47 DC2 'I' n Select Bit Image Scan Method ................6-49 DC2 '=' n Select Image LSB/MSB ..................6-49 GS '(' 'L' pL pH '0' fn Send NV Graphics Memory Capacity ..............
- Page 184 Store QR Code Data ..................6-75 GS '(' 'k' pL pH cn fn m Encode and Print QR Codel Data ............... 6-75 6.5.9 Kanji ............................6-76 FS '&' Specify Kanji Mode .................... 6-76 FS '.' Cancel Kanji Mode ..................... 6-76 FS '!' n Specify Kanji Print Mode ..................
- Page 185 Stop External Buzzer ..................6-105 ESC '(' 'A' 1 pL pH fn n c Set External Buzzer ..................6-105 DEL EOT n Send Status Data in Real Time ................6-106 6.5.11 Ruled Line ..........................6-110 DC3 '#' n Select Ruled Line Overlapping Mode ..............6-110 DC3 '(' Specify Ruled Line Command ................
-
Page 186: Chapter 7 Initialization
CHAPTER 7 INITIALIZATION 7.1 INITIALIZATION There are the following processes for initialization: (1) Initialization of settings • "Initialize Printer" command (ESC '@') (2) Initialization by software resetting • Resetting of USB class request • "Reset Download Modet" command ('@') • "Printer Reset" command (DC3 '(' 'r' 'e' 's' 'e' 't' DC3 'r' 'e' 's' 'e' 't' ')') (3) Initialization by hardware resetting •... -
Page 187: Initialization Of Settings
• INITIALIZATION OF SETTINGS The items shown in Table 7-1 are initialized by the command below. • "Initialize Printer" command (ESC '@') Table 7-1 Setting Value After Initialization Item Setting Value Command Character right space amount ESC SP Bold printing Cancel ESC '!', ESC 'E' Double strike printing... - Page 188 Item Setting Value Command Barcode N:W ratio 1:2.5 DC2 ':' Nominal narrow element width 3 dots GS 'n' PDF module height 10 dots GS 'o' QR Code, Data Matrix module size 6 dots DC2 ';' Left margin 0 (beginning of line) GS 'L' Printing area Printable area...
-
Page 189: Initialization By Software Resetting
7.2 INITIALIZATION BY SOFTWARE RESETTING Initialization is performed by the following commands or operation. • Resetting of USB class request (Valid only by printer driver) • "Reset Download Mode" command ('@') (Valid only in download mode) • "Printer Reset" command (DC3 '(' 'r' 'e' 's' 'e' 't' DC3 'r' 'e' 's' 'e' 't' ')') By this initialization, in addition to the items in "7.2 INITIALIZATION OF SETTINGS", the items in Table 7-2 are initialized. -
Page 190: Appendix A Character Sets (Character Code Table)
APPENDIX A CHARACTER SETS (CHARACTER CODE TABLE) A.1 CHARACTER CODE TABLE (CODEPAGE) The codepage when the international character selection is set to USA is shown below. The printing result of a specific character code differs depending on the international character set to be set. For specific character codes, See "A.2 INTERNATIONAL CHARACTER SET". -
Page 191: Figure A-2 Katakana
Figure A-2 Katakana Figure A-3 Multilingual (Code Page850) -
Page 192: Figure A-4 Portuguese (Code Page860
Figure A-4 Portuguese (Code Page860) Figure A-5 Canadian-French (Code Page863) -
Page 193: Figure A-6 Nordic (Code Page865
Figure A-6 Nordic (Code Page865) Figure A-7 Turkish (Code Page857) -
Page 194: Figure A-8 Greek (Code Page737
Figure A-8 Greek (Code Page737) Figure A-9 Latin (Code Page1252) -
Page 195: Figure A-11 Eastern Europe (Code Page852
Figure A-10 Turkish (Code Page866) Figure A-11 Eastern Europe (Code Page852) -
Page 196: Figure A-12 Euro (Code Page858
Figure A-12 Euro (Code Page858) Figure A-13 Cyrillic (Code Page855) -
Page 197: Figure A-14 Arabic (Code Page864
Figure A-14 Arabic (Code Page864) Figure A-15 Central European (Code Page1250) -
Page 198: Figure A-16 Cyrillic (Code Page1251
Figure A-16 Cyrillic (Code Page1251) Figure A-17 Greek (Code Page1253) -
Page 199: Figure A-18 Turkish (Code Page1254
Figure A-18 Turkish (Code Page1254) A-10... -
Page 200: International Character Set
A.2 INTERNATIONAL CHARACTER SET The printing result of a specific character code differs depending on the international character set to be set. Specific character codes and their printing results are shown below. Figure A-19 International Character Set A-11... -
Page 201: 2-Byte Character
A.3 2-BYTE CHARACTER Kanji defined in the JIS 1st and 2nd levels in 1997, NEC selection of IBM extended characters, and IBM extended characters can be printed. In addition, special characters and NEC special characters are assigned to the Kanji code of the non-Kanji area. -
Page 202: Figure A-22 Nec Selection Of Ibm Extended Character Set
Figure A-22 NEC Selection of IBM Extended Character Set A-13... -
Page 203: Figure A-23 Ibm Extended Character Set
Figure A-23 IBM Extended Character Set A-14...
Need help?
Do you have a question about the RP-F10 Series and is the answer not in the manual?
Questions and answers