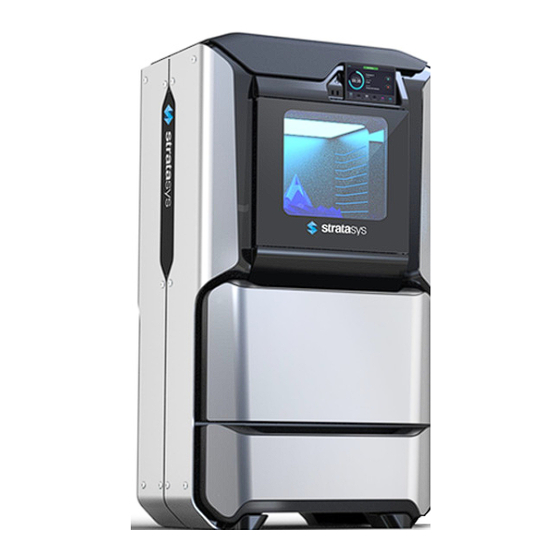
Stratasys F170 User Manual
F123 series shared office 3d printers
Hide thumbs
Also See for F170:
- Operation and maintenance manual (91 pages) ,
- Site preparation manual (22 pages)
Table of Contents
Advertisement
Quick Links
Advertisement
Table of Contents

Related Manuals for Stratasys F170


Summary of Contents for Stratasys F170
- Page 1 F123 Series Shared Office 3D Printers USER GUIDE Part No. 401691-0001_REV_D...
- Page 2 This document is protected by copyright. All rights reserved. Its use, disclosure, and possession are restricted by an agreement with Stratasys per software copyright. No part of this document may be photocopied, reproduced or translated into another language without the prior written consent of Stratasys, Inc.
- Page 3 ABOUT THE F123 SERIES PRINTERS The Stratasys F123 Series 3D printers incorporate the latest in innovative technology to provide you with precise prototypes from a CAD design. Stratasys’ Fused Deposition Modeling (FDM) technology provides prototype parts, including internal features, that can be used to field-test form, fit, and function.
- Page 4 ABOUT THIS GUIDE This guide is your introduction to building prototypes and end-use parts using a Stratasys 3D production, rapid prototype system. It is designed as a learning and reference tool that explains system operation in an easy to understand, step-by-step, process.
-
Page 5: Table Of Contents
TABLE OF CONTENTS 1 SERVICE AND SUPPORT ..............1 SERVICE............................ 1 SOFTWARE SUPPORT......................1 SAFETY INSTRUCTIONS ......................2 Hazard Types ..............................2 Product Safety Signs ............................2 Product Safety Label Locations ......................... 3 Potential Safety Hazard Areas........................... 5 Door Locks................................. 6 General Safety Practices ........................... - Page 6 Oven Door ............................... 23 Oven Light ............................... 25 Platen ................................26 Tip Wipe Assemblies ............................27 Purge Chute ..............................28 MATERIAL BAY DRAWER COMPONENTS ................29 Material Bays..............................29 Material Drive Controller..........................30 Storage Drawer ............................... 31 GANTRY ..........................32 Print Heads..............................
- Page 7 WORKING WITH THE TOOLS PAGE ..................76 Tools Page Menu ............................77 Navigation Overview............................78 Settings................................79 Calibration ............................... 89 Maintenance ..............................91 Network ................................95 Power ................................101 Light................................104 5 OPERATING THE PRINTER ............105 BASIC USER OPERATIONS ....................105 Powering ON the Printer..........................
- Page 8 Head Odometer Status..........................136 Materials Status............................. 136 Temperature Status............................138 Software Version ............................139 6 CALIBRATION AND ADJUSTMENTS ..........140 TIP CALIBRATION......................... 141 Automatic Tip Calibration ..........................142 Manual Tip Calibration........................... 144 TOUCHSCREEN CALIBRATION................... 154 XY GANTRY CALIBRATION....................156 Z ZERO CALIBRATION ......................156 TIP WIPE HEIGHT ADJUSTMENT..................
- Page 9 3.3/5/12 VDC ATX Power Supply........................175 Oven Thermistor............................176 Material Bays..............................177 Replacing a Head ............................180 Head Ribbon Cables ............................. 181 Touchscreen Display ............................. 184 Right and Left Side Oven Blowers......................... 186 Oven Door Gasket............................188 Z Drive Belt..............................189 Y Bellows...............................
-
Page 10: Service And Support
This chapter provides information on service and support for the F123 Series as well as safety information and safety label locations. SERVICE If you have a problem with your printer that is not covered in this guide, please contact Stratasys Customer Support. Contact information is available from the Stratasys website at: http://www.stratasys.com/customer- support/contact-customer-support. -
Page 11: Safety Instructions
Stratasys makes every effort to ensure that our printers are safe and reliable at all times. However, there will be times when you must access areas of the printer where potentially high voltages, hot temperatures, and/or moving mechanical components could cause severe injury. -
Page 12: Product Safety Label Locations
Crushed Hand: The crushed hand sign indicates that a hazard exists where you could get your hand crushed between two objects. One or more objects move in the area that you are working. PRODUCT SAFETY LABEL LOCATIONS Figure 1-1: Oven safety label locations... - Page 13 Figure 1-2: Rear panel safety label locations Figure 1-3: Electrical panel safety label locations...
-
Page 14: Potential Safety Hazard Areas
POTENTIAL SAFETY HAZARD AREAS The following components and areas of the printer are highlighted as potential safety hazards that may cause system failure or reliability problems if proper safety procedures are not followed. OVEN Warning: Always wear safety gloves and long sleeves when working inside the oven. -
Page 15: Door Locks
DOOR LOCKS Interlock switches are used to communicate the status of the oven door and the top cover to the printer. For safety reasons, the oven door and top cover must be closed before the X, Y, and Z motors will operate. GENERAL SAFETY PRACTICES Abide by these general safety practices when working with this printer. -
Page 16: Printer Setup
2 PRINTER SETUP This chapter describes basic setup of the F123 Series. GENERAL INFORMATION WELCOME KIT CONTENTS The printer’s Welcome Kit contains the Welcome Insert document and common tools you will need to maintain the printer. Use the following figures and tables to identify the contents of the Welcome Kit. Figure 2-1: Welcome Kit Contents - Documents and Cables US Cable... - Page 17 Figure 2-2: Welcome Kit Contents - Tools Table 2-2: Key for Figure 2-2 Leather Printer components may be extremely hot. To prevent burns or other injuries, these gloves should Safety be worn any time you see the gloves safety sign throughout this document. See “Product Safety Gloves Signs”...
- Page 18 Figure 2-3: Welcome Kit Contents - Cleaning Supplies & Storage Materials Table 2-3: Key for Figure 2-4 Touchscreen From repeated use, the touchscreen may become dirty and occasionally need to be cleaned. Cleaning Kit Only use suitable LCD cleaning agents when cleaning the touchscreen. See “Cleaning the Touchscreen Display”...
- Page 19 Figure 2-4: Additional Components - Startup Materials The following items are not located within the Welcome Kit. Instead, they can be found within the oven chamber and the storage drawer. The items found within the oven chamber must be removed before powering the printer Table 2-4: Key for Figure 2-4 Substrate (x16)
-
Page 20: Basic Setup
BASIC SETUP Follow the Site Preparation Guide to ensure that your facility is effectively and safely prepared for printer installation. Do not proceed with the following sections until the “Unpacking the Printer” section of the Site Preparation Guide has been completed. When installation is complete, perform the following setup tasks. Verify that the startup materials have been removed from the oven chamber. -
Page 21: Identifying Your Printer
This tag also lists all patent numbers associated with the printer, some FCC compliance information, voltage warnings, and the Stratasys web address. Both tags are located on the back side of the printer near the bottom, and are typically placed near the printer’s power connection. -
Page 22: Making The Network Connection
MAKING THE NETWORK CONNECTION Processed job files can be transferred from GrabCAD Print to the F123 Series printer through your facility’s Ethernet network. An RJ45 network connector is located on the right, rear corner of the printer (as viewed from the rear). -
Page 23: Configuring The Network
CONFIGURING THE NETWORK This section is provided in case you need to change your network settings. Within the Network page you can set your printer’s address type to Static, Dynamic (DHCP), or Wi-Fi; Dynamic is selected by default. • Static address - you must enter an IP address, subnet mask, and gateway address for the printer (provided by the system administrator). - Page 24 • If the Static option is enabled, you must manually configure the IP Address, Subnet Mask, and Gateway Address fields.To configure this information simply touch a field on the screen to select it and then use the keypad displayed to enter address information. Touch anywhere on the screen outside of the keypad to exit and close the keypad.
- Page 25 • If the Dynamic option is enabled, no additional configuration is necessary as a network server or PC will automatically generate an IP address for the printer. A different IP address may be generated from time to time by the server or PC; the generated IP address will be displayed within the IP Address field of the Network page, and corresponding Subnet Mask and Gateway Address information will also be displayed.
- Page 26 Figure 2-12: Scan for Wireless Network A list of available networks will be displayed; select the wireless network you’d like to connect to by pressing anywhere within the row. A page will be displayed containing the details of the selected Wi-Fi network. Within this page use the keyboard to enter the password and/or username required to connect to the network.
- Page 27 When finished, touch anywhere on the screen outside of the keypad to exit and close the keypad. Scroll to the bottom of the page and press the Connect button to save the network configuration. Figure 2-14: Connect Button Press the Back button to exit the page and return to the Network page. The name of the selected wireless network will be displayed within the Available Networks row.
-
Page 28: Installing Grabcad Print
INSTALLING GRABCAD PRINT Install the GrabCAD Print software on a facility workstation. Navigate to http://help.grabcad.com/article/197- sign-up-download-and-install and follow the on-screen instructions. CONNECTING TO THE F123 SERIES PRINTER Add the F123 Series printer to the GrabCAD Print application. Navigate to http://help.grabcad.com/article/198- connect-your-printers and follow the on-screen instructions. -
Page 29: System Components
3 SYSTEM COMPONENTS This chapter describes the components of the F123 Series. Information regarding the materials and tips that can be used by the printer is also included in this chapter. PRINTER OVERVIEW ACCESS DOORS AND PANELS Warning: Do not energize when the rear panel is not secured in place. This printer has been designed to allow easy access to the most frequently accessed areas on the system. - Page 30 Figure 3-2: Access Doors and Panels - Rear View Rear Panel TOP COVER Allows access to the gantry and head assemblies. OVEN DOOR Allows access to the platen, tip wipe assemblies, purge area, and completed parts for removal. The printer’s camera is also housed within the oven door.
-
Page 31: Interface Panel
INTERFACE PANEL The interface panel houses the printer’s touchscreen user interface, power button, and USB ports. Figure 3-3: Interface Panel Touchscreen User Interface Power Button Front USB Ports, 1 Additional in Rear TOUCHSCREEN USER INTERFACE Allows for user control of the printer. From the User Interface you can access various screens to select jobs for building, control jobs in the process of being built, change materials, perform calibrations, and configure your printer’s settings and maintenance options. -
Page 32: Oven Components
OVEN COMPONENTS The oven consists of the oven door and everything that you see through the oven door window, including the platen, tip wipe assemblies, purge chute, and oven heaters. The printer’s camera is housed within the frame of the oven door. Figure 3-4: Oven Components Oven... - Page 33 CAMERA The printer’s camera is housed within the frame of the oven door and provides remote monitoring capabilities while a part is building. Using the GrabCAD Print application installed on your workstation PC, you can view the part as it is building allowing you to remotely monitor part build quality. Pictures are automatically taken at a set interval via GrabCAD Print.
-
Page 34: Oven Light
OVEN LIGHT A single light pipe is mounted on the front upper edge of the oven and is used to illuminate the oven chamber (Figure 3-6). The light pipe consists of nine high-temperature LEDs; each LED is rated at 1-watt. The oven light is powered by 12 VDC. -
Page 35: Platen
PLATEN The steel platen provides the level surface on which parts are built. A substrate is securely affixed to the platen using the substrate ejection handle. After placing a substrate on the platen lifting up on the handle will lock the substrate into its build position;... -
Page 36: Tip Wipe Assemblies
TIP WIPE ASSEMBLIES Two tip wipe assemblies are located in the rear of the oven, one for model and one for support. Each assembly consists of a flicker and a brush. The tip wipe assemblies keep the printer’s tips and tip shields free of purged material debris and material buildup.The tip wipe assemblies are mounted behind the purge chute and extend through the purge chute via two slots cut into the chute’s exterior. -
Page 37: Purge Chute
PURGE CHUTE The purge chute is located in the back of the oven. Purged material debris is guided down from the tip wipe assemblies to the bottom of the oven chamber via the purge chute. Material debris exits the purge chute via an opening at the bottom of the chute and then accumulates in the bottom of the oven chamber. -
Page 38: Material Bay Drawer Components
The F270 and F370 printers have four operating material bays - two model and two support. The two left-most bays hold model material while the two right-most bays hold support material. The F170 printer has two operating material bays - one model and one support. The left bay holds model material while the right bay holds support material. -
Page 39: Material Drive Controller
MATERIAL DRIVE CONTROLLER Each individual material bay has a material drive controller. The material drive controller feeds filament from a material bay to the head. The material drive controller is located on the back side of the material bay and contains a small 12 VDC motor which drives filament up to the head. -
Page 40: Storage Drawer
STORAGE DRAWER Directly below the material bay drawer is a storage drawer which can be used to store spare parts or tools, as needed. Figure 3-13: Storage Drawer Storage Drawer... -
Page 41: Gantry
GANTRY To access the gantry or the heads, you must first open the top cover. The top cover utilizes a mechanical locking mechanism. The top cover remains locked while the printer is building and automatically unlocks when the oven door is opened. The printer cannot resume building if the top cover and/or oven door are open. The gantry moves the head in the X and Y directions when building a part. -
Page 42: Print Heads
PRINT HEADS The F123 printer utilizes two print head assemblies, one for model and one for support. Once a head has been used for model or support, it can only be used for that designated material (model or support) thereafter. The heads are designed for use with a range of modeling materials. -
Page 43: Modeling Materials
Table 3-2 lists color availability by model material type. Table 3-1: Available Materials Printer Model Available Materials F170 ABS, ASA, PLA F270 ABS, ASA, PLA F370 ABS, ASA, PLA, PC-ABS Table 3-2:... -
Page 44: Material Spool Memory Chip
Each material spool has an axle with a memory chip; this memory chip recognizes the spool’s material type and tracks the spool’s volume. The F123 Series utilizes a different memory chip than other Stratasys materials and as a result, only F123 Series compatible spools can be used to build parts on the printer. -
Page 45: Tips And Slice Height
TIPS AND SLICE HEIGHT The F123 Series utilizes a T14 tip for all model and support materials. Tips are a component of the associated head assembly and cannot be changed individually. Instead, the entire head assembly is replaced as a single unit. -
Page 46: Software
GrabCAD PRINT SOFTWARE The printer builds parts by processing an original CAD or STL file into a Stratasys CMB file which is then downloaded to the printer. GrabCAD Print is the software used to process files and then transfer them to the printer to be built. -
Page 47: User Interface
4 USER INTERFACE This chapter provides an overview of the F123 Series User Interface (UI). Specific printer operation information and procedures can be found in “5 Operating the Printer” on page 105. You must power ON the printer prior to using the touchscreen, see “Powering ON the Printer”... -
Page 48: Navigation Menu
NAVIGATION MENU The Navigation Menu provides one-touch access to the Build, Queue, Materials, and Tools functions of the printer (see Figure 4-1 for details). The User Interface is broken up into several pages of related functionality. Selecting a button from the Navigation Menu will open the button's corresponding page, allowing you to perform tasks within that page. -
Page 49: Display Area
DISPLAY AREA The Display Area contains the body portion of each page of the User Interface; this is where you can select from available functions and view current status. After selecting a button from the Navigation Menu, the Display Area will refresh and the main page corresponding to the selected button will be displayed. -
Page 50: Loading A File
Figure 4-4: Notification Details LOADING A FILE Note: A job file must be loaded onto the printer and selected for building before the job’s details will be displayed within the Build page. The Print Job Information Panel is empty upon initial startup and the Build Status Display reflects its idle state. When there are no job files are available within the Job Queue, the Load File button will be displayed within the Build page. - Page 51 • If you send two or more job files to the printer via network transfer using GrabCAD Print, the job details of the first file sent will automatically be displayed within the Build Status Display once the job file is received by the printer, as jobs are built in the order they’re sent to the printer. The Load File button will be hidden from view once the first job file is received by the printer via network transfer.
- Page 52 The Load File page will display the contents of the USB flash drive. Locate the desired job and select it by touching its row on the screen; doing so will open its Job Details page. Note: If both USB ports contain a flash drive individual folder graphics will be displayed on the screen representing each flash drive and its contents.
- Page 53 Pressing the Print button within the Build page will initiate the build. Build progress will be displayed within the Build Status Display, see “Build Status Display” on page 46 for details. Figure 4-8: Build Page with Job Information...
-
Page 54: Viewing Print Job Information
VIEWING PRINT JOB INFORMATION Information pertaining to a selected job is displayed within the right half of the Build page, within the Print Job Information Panel. This information is static and represents the details of the job file. Figure 4-9: Print Job Information Panel Information displayed within this panel is divided into the two sections: The top-most section displays a visual representation of what the selected job will look like after it is successfully... -
Page 55: Build Status Display
BUILD STATUS DISPLAY The Build Status Display section of the Build page is composed of a two-part graphic. The center portion provides information on a selected and/or building job while the outer progress ring corresponds with the build information displayed; the information displayed will vary depending on the state of the printer. Figure 4-10: Build Status Display Overview Build... - Page 56 BUILDING Note: A job file must be loaded onto the printer and selected for building before build information will be displayed within the Build Status Display. See “Loading a File” on page 41 for details. After pressing the Print button to start a build, "PREPARING" is briefly displayed within the Build Status Display, and the outer progress ring will fill, in gray, in a clockwise direction.
-
Page 57: Print Job Controls
PRINT JOB CONTROLS A button is displayed within the Build page, just beneath the Build Status Display. This button is used to start, pause, or abort a build, depending on the status of the printer. The Print button option will become selectable after you’ve performed the steps necessary to load a file (see “Loading a File”... - Page 58 PAUSE BUTTON The Pause button allows you to pause an active build. The Pause button can appear in the following states: Table 4-3: Print Job Controls - Pause Button States Button State Description Printer is actively building. Selecting the Pause button in this state will pause the build.
-
Page 59: Working With The Queue Page
WORKING WITH THE QUEUE PAGE The Queue page contains the list of files (jobs) which have been downloaded to the printer and are queued for building; this list is referred to as the Job Queue. By default, jobs are added to the Job Queue in the order they were sent to the printer via GrabCAD Print and/or transferred from a USB flash drive. -
Page 60: Adding A Job To The Job Queue
ADDING A JOB TO THE JOB QUEUE The Job Queue is empty by default. To populate the Job Queue you must first load individual job files to the Job Queue using one of two methods: Network transfer via the GrabCAD Print application on your workstation PC. See “GrabCAD Print Method”... - Page 61 Press the Load File button in the upper-right corner of the touchscreen. Figure 4-15: Load File Button Location The Load File page will be displayed; press the USB button within this page. Figure 4-16: Load File Page - USB Option...
- Page 62 The Load File page will display the contents of the USB flash drive. Locate the desired job and select it by touching its row on the screen; doing so will open its Job Details page. Note: If any USB port contain a flash drive, individual folder graphics will be displayed on the screen representing each flash drive and its contents.
- Page 63 The file will load into the Job Queue. Once loading is complete the file will be added to the Job Queue list. Figure 4-19: File Loading to Job Queue Figure 4-20: File In Job Queue...
-
Page 64: Editing The Job Queue
EDITING THE JOB QUEUE By default, jobs are built in the order in which they appear within the Job Queue. To build a specific job, that job must be listed as the first item in the Job Queue. Pressing the Edit button within the Queue page will open the Edit Queue page. - Page 65 JOB QUEUE CONTROLS After opening the Edit Queue page three Job Queue Control buttons will be displayed within each row of the Job Queue list (one set of buttons per entry in the list). These buttons will allow you to rearrange the jobs in the Job Queue as needed.
-
Page 66: Viewing Job Details
VIEWING JOB DETAILS To view additional details regarding a particular job in the Job Queue, select the desired job by touching its row on the screen. Doing so will open its Job Details page; this page displays the following: • Duration: amount of time required to complete the build. - Page 67 The left portion of the Job Details page displays a visual representation of what the part will look like once the build is complete. Pressing the Zoom In button within the upper-right corner of this portion of the page will hide the job details information and instead zoom in on the representation of the completed part (as shown in Figure 4-23).
-
Page 68: About The Sample Queue
ABOUT THE SAMPLE QUEUE The printer comes with several sample job files permanently installed on its hard drive. These files are accessible via the Sample Queue. This queue is composed of a few sample part files as well as a variety of other files that are helpful for testing the printer. -
Page 69: Working With The Materials Page
WORKING WITH THE MATERIALS PAGE The Materials page displays a detailed representation of the printer’s current materials configuration. Within this page you can view the printer’s current materials configuration including material types and colors, view material spool volumes and load statuses, load and unload materials, view current and set point head temperatures, and perform a variety of head related maintenance functions. -
Page 70: Head Status Icons
HEAD STATUS ICONS The two Head Status Icons within the Materials page display load status information as well as the current temperature as compared to the set point temperature of each of the printer’s heads.The right-most icon pertains to the printer’s support head while the left-most icon pertains to the printer’s model head. Touching one of these icons on the screen, unless otherwise indicated in Table 4-6, will open that head’s Head Details page. - Page 71 Icon State Description Yellow coloring and an associated notification badge indicates a head related warning (see “Head Warnings” on page 216). Additional information regarding the warning and possible correction information is displayed by opening the associated Warning (head unloaded) head’s Head Details page (see “Viewing Head Details”...
-
Page 72: Viewing Head Details
VIEWING HEAD DETAILS To view additional details regarding the printer’s model or support head, select the desired head by touching its Head Status Icon on the screen. Doing so will open its Head Details page. If the head is in a warning or error state additional information pertaining to the warning/error will be displayed within the page (see “Head Warnings”... - Page 73 HEAD MAINTENANCE Pressing the Maintenance button within the Head Details page will open the Head Maintenance page. The buttons within this page will allow you perform a variety of head maintenance functions. The buttons displayed in the menu within the right half of the screen will vary depending on whether the Enable button has been pressed.
- Page 74 PURGE Pressing the Purge button instructs the printer to perform a long purge. After pressing this button, the head will move to the purge position and will heat to a predetermined set point temperature. Once the head reaches this set point, material will be purged from the tip for about 10 seconds. When changing to or from colored material it is beneficial to perform multiple purges as this will remove all material remaining within the liquefier tips and/or tubes to ensure that color mixing doesn’t occur.
-
Page 75: Material Status Icons
Either two or four icons will be displayed depending on your printer’s configuration. Each icon displays a number corresponding to the material bay (1-4 for F270 and F370 models and 1-2 for F170 models), colored bars indicating the color of the material currently installed in that bay, the name of the material currently installed in that bay, and a percentage indicating the current volume of material on that material spool. - Page 76 Icon State Description Indicates that the material spool is invalid. Invalid materials are materials not licensed or not compatible with the associated head type. Material from the invalid spool cannot be loaded. User action required to remove the invalid material spool and replace it with a valid spool “Removing Material Spools”...
- Page 77 Please note that this state differs from the unusable state as the icon is solid red in this state and the bars within the center of the icon are not visible. Contact Customer Support or your regional Stratasys office if you experience this icon state (see “Getting Help” on page 204 for contact information).
-
Page 78: Viewing Material Details
VIEWING MATERIAL DETAILS To view additional details regarding a particular material, select the desired material by touching its Material Status Icon on the screen. Doing so will open its Material Details page. If the material bay/spool is in a warning or error state additional information pertaining to the warning/error will be displayed within the page (see “Load/ Unload Errors”... -
Page 79: Material Load Controls
MATERIAL LOAD CONTROLS The Material Load Control buttons are used to load and unload material to the liquefier within the head, as well as cancel a material load or unload in process. The Material Load Control buttons are displayed in the lower- right portion of the Material Details page;... - Page 80 Table 4-8: Material Load Control Buttons - Load Button States Button State Description The Load button is only selectable once a material spool’s filament has contacted the filament present switch in the material drive but is not yet loaded to the head, given that another spool’s material is not already loaded to the head.
- Page 81 FILAMENT PATHWAY STATES The pathway between the Material Status Icon and corresponding Head Status Icon will take on a variety of colors and display various graphics, depending on the load state of the associated material spool’s filament. For printers with two model bays and two support bays (F270 and F370 models), only one material can be loaded to or unloaded from the corresponding head at a time.
- Page 82 Icon State Description Indicates that filament from the corresponding material spool is in the process of being unloaded from the head. A yellow notification badge will also be displayed within the center of the corresponding Material Status Icon. The pathway between the Material Status Icon and the Head Status Icon will fill, in yellow, in the direction that the material spool’s filament is traveling (away from the head).
- Page 83 As materials are loaded and unloaded, the pathway between the Material Status Icon and the Head Status Icon will become colored, and will fill in the direction that the material spool’s filament is traveling (towards the head or away from the head). Figure 4-31 depicts the functionality displayed when a spool’s filament is being loaded to the head, while...
- Page 84 Figure 4-32: Material Load Progress - Unloading MATERIAL LOAD/UNLOAD CANCELLATION The Cancel button will only be displayed within the Material Details page for a material that is in the process of being loaded/unloaded. This button allows you to cancel a material load or unload already in process. Depending on your printer’s configuration, a warning may be generated after selecting the Cancel button.
-
Page 85: Working With The Tools Page
WORKING WITH THE TOOLS PAGE The options within the Tools page are organized into 6 categories: Settings, Calibration, Maintenance, Network, Power, and Light. The Display Area of the Tools page contains a button corresponding to each of these categories. With the exception of the Light button, pressing the button corresponding to each of these categories will open an individual page containing printer information that can be viewed as well as printer settings and preferences which can be configured for that particular category. -
Page 86: Tools Page Menu
TOOLS PAGE MENU The Display Area of the Tools page contains 6 buttons. With the exception of the Light button, pressing each of these buttons will open an individual page containing printer information that can be viewed as well as printer settings and preferences which can be configured. -
Page 87: Navigation Overview
NAVIGATION OVERVIEW After selecting one of the buttons within the Tools page the touchscreen will refresh to display the details of the page selected (i.e. selecting the Settings button will open the Settings page). Depending on the options available for configuration within the selected page, the Display Area of the page may contain more options than can be displayed at one time. -
Page 88: Settings
SETTINGS The Settings page allows you to turn a variety of printer settings on/off (including part placement, standby mode, etc.), configure the language and units the printer/UI is configured for, and adjust the brightness of the touchscreen display. To access the Settings page, press the Settings button within the Tools page; a screen similar to the following will be displayed. - Page 89 Pressing anywhere within the row will open the Wait For Part page. Opening this page will automatically put the printer into a state where it will wait to receive a job file to build immediately. After putting the printer into this state, you must send the processed job file to the printer via GrabCAD Print.
- Page 90 To configure this setting, press anywhere within the row; the Keep Previous Job page will be displayed. Use the radio buttons within the page to turn the setting On and Off as needed; On is selected by default. Figure 4-40: Configure Keep Previous Job PART PLACEMENT The Part Placement setting gives you the ability to select a job’s placement on a substrate.
- Page 91 Figure 4-42: Part Placement Dialog FIRST LAYER MATERIAL The First Layer Material row displays the material type to be used for the first build layer, Model or Default. Figure 4-43: First Layer Material...
- Page 92 To configure this setting, press anywhere within the row; the First Layer Material page will be displayed. Use the radio buttons within this page to select between Model and the Default material, which could be either model or support material. Figure 4-44: Configure First Layer Material UNITS...
- Page 93 STANDBY MODE The Standby Mode setting gives you the ability to put the printer into an energy saving state after the completion of a build. When the Energy Saver radio button is selected (i.e. Standby Mode is turned On) the printer’s oven will automatically shut off 2 hours after the completion of a build, thus saving energy.
- Page 94 Additionally, the first time the printer is powered ON, a dialog will be displayed asking you to select your desired language. Once you’ve set your desired language following initial power up, this selection will be retained and can only be changed by navigating to the Language page and adjusting your language selection. Figure 4-50: Configure Language...
- Page 95 SCREEN BRIGHTNESS The Screen Brightness setting allows you to adjust the brightness of the touchscreen display.This setting is displayed as a percentage with 100% percent representing the greatest amount of brightness available. Figure 4-51: Screen Brightness To configure this setting, press anywhere within the row; the Screen Brightness page will be displayed. Within this page use the slider graphic to adjust brightness as needed.
- Page 96 To configure this setting, press anywhere within the row; the UPnP page will be displayed. Use the radio buttons within the page to turn the setting On and Off as needed; On is selected by default. Figure 4-54: Configure UPnP WIFI The Wifi setting gives you control over the printer’s Wi-Fi capabilities.
- Page 97 To configure this setting, press anywhere within the row; the Wifi page will be displayed. Use the radio buttons within the page to turn the setting On and Off as needed; On is selected by default. Figure 4-56: Configure Wifi CAMERA The Camera setting gives you control over the printer’s camera.
-
Page 98: Calibration
CALIBRATION Note: This section provides an overview of the Calibration page and its features, but does not go into detail regarding calibration procedures. See “6 Calibration and Adjustments” on page 140 for detailed calibration procedure information and instructions. The Calibration page allows you to perform a variety of calibration procedures on the printer, including: •... - Page 99 The Tip Calibration page contains an option for performing an Automatic Tip Calibration as well as a Manual Tip Calibration. Pressing the Start button associated with either of these options will allow you to perform that particular calibration procedure. Each calibration procedure is delivered in the form of a wizard which will guide you through the process of performing the calibration procedure.
-
Page 100: Maintenance
MAINTENANCE Note: This section provides an overview of the Maintenance page and its features, but does not go into detail regarding printer maintenance procedures. “7 Maintenance” on page 158 for detailed maintenance information. From this page you can perform a variety of maintenance procedures on the printer, and view diagnostic/printer state information. - Page 101 GANTRY/STAGE Position information for the X, Y and Z axes is displayed within the Gantry/Stage row. Pressing anywhere within the Gantry/Stage row will open the Gantry/Stage page. Figure 4-64: X, Y, Z Position The single directional arrow button within the Gantry: section allows you to move the head in the X and Y axis. Pressing the Front Arrow button moves the head assembly to the front of the gantry.
- Page 102 CHAMBER The Chamber row displays the current temperature as compared to the set point temperature of the oven chamber. Figure 4-66: Chamber Temperature UPDATE SOFTWARE The Update Software row displays the version of Controller Software installed on the printer. Figure 4-67: Update Software Pressing anywhere within the Update Software row will open a page allowing you to upgrade the printer’s Controller Software version (see...
- Page 103 The files displayed are read-only. Figure 4-71: Open Source Licenses SYSTEM TYPE The System Type row displays the printer’s model type information (F170, F270, or F370). Figure 4-72: System Type...
-
Page 104: Network
NETWORK Note: Your printer was configured for your network as a part of its initial installation and setup (see “Configuring the Network” on page 14). The information within this section is provided to help you understand the functionality of the Network portion of the Settings page. Within the Network page you can configure your printer’s network connection, options include Static, Dynamic (default), or Wi-Fi. - Page 105 Figure 4-74: Select Connection Type Depending on the Connection Type selected (Wired or Wireless) the second row displayed within the Network page will vary. • If the Wired connection type is selected, the Network Mode row will be displayed. • If the Wireless connection type is selected, the Available Networks row will be displayed.
- Page 106 If the Wired connection type is selected, the Network Mode row will be displayed (see Figure 4-75 on page 96 as a reference). Pressing anywhere within this row will allow you to select between a Static or Dynamic network mode; Dynamic is selected by default. Use the Static and Dynamic radio buttons to select a network mode. After selecting a network mode press the Back button to exit and return to the Network page;...
- Page 107 DYNAMIC NETWORK CONFIGURATION When the Dynamic (DHCP) wired network option is enabled a network server or PC will generate an IP address for the printer. A different IP address may be generated from time to time by the server or PC. The generated IP address will be displayed within the IP Address field, and corresponding Subnet Mask, Gateway Address, and MAC Address information will also be displayed.
- Page 108 STATIC NETWORK CONFIGURATION When the Static wired network option is enabled you must manually configure the IP Address, Subnet Mask, and Gateway Address fields for the printer (provided by the system administrator). Use the keypad to configure this information; simply touch a field on the screen to select it and then use the keypad displayed to enter network information.
- Page 109 WI-FI NETWORK CONFIGURATION When the wireless network option is enabled you can scan for and connect to the printer via your local Wi-Fi network (see Figure 4-78 on page 97). Depending on the network’s security requirements you may need to enter a password and/or username in order to connect to the network.
-
Page 110: Power
POWER Within the Power page you can restart or shutdown the printer. It is recommended that you use the Shutdown option within this page to power the printer Off, rather than simply pressing the Power ON/OFF button located on the front of the printer. To access the Power page, press the Power button within the Tools page;... - Page 111 RESTART Pressing anywhere within the Restart row will open a dialog allowing you to manually restart the printer. Figure 4-84: Restart Pressing the Yes button within this dialog will cause the printer to restart automatically. Press the Back button to exit the page and return to the Power page.
- Page 112 SHUTDOWN Pressing anywhere within the Shutdown row will open a dialog allowing you to power the printer down. Figure 4-86: Shutdown Pressing the Yes button within this dialog will cause the printer to power down. Press the Back button to exit the page and return to the Power page.
-
Page 113: Light
LIGHT The Light button is the only option within the Tools page that does not open a new page after being pressed. Instead, the Light button allows you to turn the oven light ON and OFF. An indicator within the upper-left corner of the button displays the current state of the oven light (ON or OFF). -
Page 114: Operating The Printer
5 OPERATING THE PRINTER This chapter explains basic steps in operating the F123 Series BASIC USER OPERATIONS POWERING ON THE PRINTER To power the printer ON: Connect the male end of the supplied power cord directly into a grounded electrical outlet. Connect the female end of the power cord directly into the socket located on the back of the printer (see Figure 2-7... - Page 115 The printer will begin to boot. The touchscreen will turn on and begin initializing. The first time the printer is powered ON a dialog will be displayed asking you to select your desired language. Select the radio button corresponding to your desired language by touching its row on the screen, then confirm your selection.
-
Page 116: Powering Off The Printer
POWERING OFF THE PRINTER To power the printer OFF: Ensure that the printer is stopped (idle) and is not building. Press the Power button located on the front of the printer (see Figure 5-1 for button location). A dialog will be displayed asking you to confirm the power OFF; press Yes to power OFF. Figure 5-4: Power OFF Confirmation After a couple of minutes the printer will shutdown. -
Page 117: Loading Material
The F270 and F370 utilize four material bays - two model and two support, while the F170 utilizes two material bays - one model and one support. In order to build, at least one model and one support spool must be installed. -
Page 118: Material Spool Installation
Filament Tail Capture Locations Memory Chip The material spool is ready to be installed into the material bay. Follow the steps within “Material Spool Installation” on page 109 to install the material spool and load material to the head. MATERIAL SPOOL INSTALLATION Once you’ve properly prepared a material spool, you can begin the process of loading material. - Page 119 Open the material bay drawer. Insert the material spool you’d like to load into its appropriate slot within the material bay. • Pull up on the latch securing the lid corresponding to the material bay you’d like to load, this will unlock the lid.
- Page 120 Material Spool Filament Opening Once filament is detected by the filament present switch press the Load button within the Material Details page. Figure 5-8: Load Button Note: Only one material can be loaded at a time. Press the Back button within the Material Details page to exit and return to the Materials page. Material begins to load to the liquefier tip within the head.
- Page 121 Once the material load is complete, close the lid corresponding to the loaded material bay and then close the material bay drawer. You are now ready to select a job to build, see “Basic Job Build Tasks” on page 120 for information on selecting and starting a job.
-
Page 122: Unloading Material
UNLOADING MATERIAL Caution: If the printer remains idle for more than 72 hours, leaving material in the filament tubes could result in a part quality issues due to wet filament. failed build. To prevent this: 1) Remove filament from the tubes. 2) Unload filament and cut six feet of material from the spool. -
Page 123: Removing Material Spools
Press the Unload button within the Material Details page. Figure 5-10: Unload Button Note: Only one material can be unloaded at a time. Material begins to unload from the head. The unload process will take several minutes; please be patient. •... -
Page 124: Material Auto Changeover
Pull up on the latch securing the lid corresponding to the material bay containing the material spool you’d like to remove; open the lid to expose the material spool. Slowly turn the material spool to remove filament from the drive mechanism. Filament will be re-wound onto the spool. -
Page 125: Handling/Storing Materials
Like other thermoplastics, the filament can absorb moisture when exposed to ambient humidity. Stratasys material spools are designed to minimize moisture exposure while unopened and opened. When a spool’s filament absorbs moisture a finished part's surface quality, seam quality, and overall part aesthetics can be affected. -
Page 126: Head Replacement
HEAD REPLACEMENT When a head reaches 1500 build hours (odometer limit), a warning will be displayed on the User Interface and the head’s Head Status Icon will be highlighted in red on the Materials page. You can continue using a head which has exceeded its odometer limit, but it is highly recommended that you change the head as part quality will be unpredictable. - Page 127 Head Ribbon Cable Material Tube Head Release Pull the head assembly out of its position within the gantry and remove it from the printer. Figure 5-12: Remove Head Insert a new head assembly into the vacant location within the printer. Lock the head into place using the head release lever.
-
Page 128: Replacing A Pla Head
Close the top cover. An Automatic Tip Calibration will automatically be performed prior to the start of the next build following a head replacement, see “Automatic Tip Calibration” on page 142 for details. Please note that the printer must be powered ON before calibration can occur. Note: If a head was replaced while the printer was powered OFF, an Automatic Tip Calibration does not occur after closing the top cover, you must manually initiate the calibration. -
Page 129: Basic Job Build Tasks
BASIC JOB BUILD TASKS BEFORE A BUILD To build a job, you must first download job files to the printer and then load individual job files to the Job Queue using one of two methods: Network transfer via the GrabCAD Print application on your workstation PC. This is the preferred method for adding jobs to the Job Queue. - Page 130 Note: Never print in the same location more than once on a substrate when building a job. Using substrates not provided by Stratasys may impact part quality and printer reliability. Make sure that the tip wipe assembly’s brushes as well as the printer’s tips are clean and that the...
-
Page 131: Selecting A Job To Build
SELECTING A JOB TO BUILD Populate the Job Queue as described within “Before a Build” on page 120. Select the Queue button within the Navigation Menu; the Queue page will open to display the Job Queue. Within the Job Queue list, locate the job you’d like to build and select it by touching its row on the screen;... -
Page 132: Information Available During A Build
INFORMATION AVAILABLE DURING A BUILD During a build, information pertaining to that build is displayed within two areas of the Build page: The Print Job Information Panel displays the details of a job, as submitted to the printer from the workstation PC. -
Page 133: Build Warnings
Figure 5-14: Print Job Status Overview Build Progress Ring Build Status Information BUILD WARNINGS If the printer detects an issue that may affect a build, it will be indicated within the Notifications Display portion of Build Page. A yellow or red notification badge icon will be displayed, depending on the severity of the warning/error, along with text indicating the reason(s) for the warning. -
Page 134: Pausing A Build
PAUSING A BUILD During a build the Pause button within the Build page becomes selectable (see “Pause Button” on page 49 details). The printer can pause automatically, or be manually paused using this button: • An automatic pause occurs when a material spool runs out of material, a failure is detected, etc. •... -
Page 135: Aborting A Build
ABORTING A BUILD When the printer is building, you have the option of directly aborting the build. To do so: The Abort button within the Build page will be selectable (see “Abort Button” on page 49 details), press the Abort button. A dialog will be displayed allowing you to confirm or cancel the abort;... - Page 136 An abort command will be sent to the printer and the confirmation dialog will close. The Z stage will move to its end of travel. Once the Z stage reaches its end of travel the Build page will refresh and display a confirmation of the aborted build; "CANCELLED" will be displayed within the Build Status Display (see Figure 5-17).
-
Page 137: After A Build Is Complete
AFTER A BUILD IS COMPLETE After the completion of a build, the printer performs the following actions: • The Z stage is lowered and the head assembly is parked. • "DONE" is displayed within the Build Status Display (Figure 5-18). The Print Job Control buttons will be hidden and instead "Print successful"... - Page 138 REMOVING A PART FROM THE PRINTER Warning: Wear proper safety equipment when handling items inside the oven as surfaces within the oven can be very hot. To remove a part from the printer: Open the oven door. Push down on the substrate ejection handle to release the substrate. Caution: Do not attempt to remove a part from the substrate while the substrate is on the platen.
-
Page 139: Changing Printer Defaults
CHANGING PRINTER DEFAULTS Several factory presets can be changed via the options within the Tools page. To access this page, press the Tools button within the Navigation Menu. The options within the Tools page are organized into 6 categories: Settings, Calibration, Maintenance, Network, Power, and Light. -
Page 140: Part Build Location
PART BUILD LOCATION The Part Placement setting determines whether or not you can select a job’s placement on a substrate prior to starting the build (see “Part Placement” on page 81). To configure this setting, press anywhere within the Part Placement row; the Part Placement page will be displayed. -
Page 141: Display Units
Figure 5-21: Part Placement Dialog DISPLAY UNITS By default the UI is configured to display English units (inches). However, you can adjust this setting as needed to have the UI display metric units. The Units setting determines the type of units that the printer is configured for, English or Metric. To configure this setting, press anywhere within the Units row;... -
Page 143: Oven Temperature Control
OVEN TEMPERATURE CONTROL Oven modeling temperature is determined by the material type (model and support) loaded within the printer. It is controlled by the printer’s software and cannot be modified; however, you do have control of some oven temperature functions. The Standby Mode setting gives the ability to put the printer into an energy saving state after the completion of a build (see “Standby Mode”... -
Page 144: Display Language
DISPLAY LANGUAGE By default the text within the UI is displayed in English. However, you can adjust this setting as needed to have the UI exhibit a different language. In addition to English the display language can be set to Spanish, French, German, Italian, Russian, Chinese, and Japanese. -
Page 145: Printer Status
Material Status Icons depending on printer model. For F170 printers two icons will be displayed. The left icon pertains to the printer’s model material • while the right icon pertains to the printer’s support material. The number displayed within the top of the icon indicates which material bay the material spool is installed/inserted into (1 or 2). - Page 146 Figure 5-26: Materials Status Locations Icons and filament pathways will take on a variety of colors and highlighted states, depending on their status (see Table 4-7 on page 66 for detailed status explanations). Coloring pertains to both model and support Material Status Icons: •...
-
Page 147: Temperature Status
TEMPERATURE STATUS OVEN TEMPERATURE The oven’s temperature can be viewed via the Maintenance page. To locate this information: Press the Tools button within the Navigation Menu; the Tools page will be displayed. Press the Maintenance button within the Tools page; the Maintenance page will be displayed. Locate the Chamber row within the page. -
Page 148: Software Version
SOFTWARE VERSION Version information for the software used to control the printer (Controller Software) can be accessed via the Maintenance page: Note: Controller Software is installed on a flash device located on the Controller board and should not be confused with GrabCAD Print software, which is installed on the workstation PC. -
Page 149: Calibration And Adjustments
6 CALIBRATION AND ADJUSTMENTS This chapter describes basic calibration and adjustment procedures for the F123 Series. The buttons/pages described within this chapter are accessible via the Calibration page. To open the Calibration page, press the Tools button within the Navigation Menu; the Tools page will be displayed (see “Working with the Tools Page”... -
Page 150: Tip Calibration
TIP CALIBRATION The printer’s calibration status will be displayed within the Tip Calibration row. Calibrated or Not Calibrated will be displayed depending on the printer’s Calibration status. Pressing anywhere within the Tip Calibration row will open a page allowing you to select from a variety of tip calibration options. -
Page 151: Automatic Tip Calibration
AUTOMATIC TIP CALIBRATION Tip offset values are the distance between the model and support tips in the X, Y and Z directions. Accurate tip offset values ensure that support toolpaths are accurately located in reference to model toolpaths. Inaccurate tip offset values can cause part quality issues, such as support material embedded in a part or improperly supported parts. - Page 152 The printer will perform an Automatic Tip Calibration. This process includes heating up or cooling down the oven to reach the required calibration temperature. Completion times will vary depending on the material used and the initial chamber temperature. The status and time remaining will continually update on the screen.
-
Page 153: Manual Tip Calibration
The main Tip Calibration page will display again. Proceed with the Manual Tip Calibration as described in “Manual Tip Calibration” on page 144 Figure 6-7: Automatic Tip Calibration Option MANUAL TIP CALIBRATION Tip offset values are the distance between the model and support tips in the X, Y and Z directions. Accurate tip offset values ensure that support toolpaths are accurately located in reference to model toolpaths. - Page 154 Place a new substrate onto the platen and lock the substrate into its build position by lifting up on the substrate ejection handle. Caution: Always wear gloves when installing the substrate. Hand oils on the substrate surface will result in poor part adhesion. Navigate to Tools >...
- Page 155 If your printer’s part placement setting is On (see “Part Placement” on page 81), the Part Placement page will display. The calibration part location is fixed and can not be moved. Press the Print button (pressing the Clear button will clear the display, removing all "ghost box"...
- Page 156 Note: The Apply button will become active when you modify an offset value by dragging the sliding scale icons or pressing the up and down adjustment buttons. Determine the XY Offset Adjustment needed for your printer. Using a magnifier (included in the Welcome Kit), view the relationship between the support calibration toolpath and the alignment indicators to determine the X and Y axis calibration.
- Page 157 Figure 6-11: Calibration Part Support toolpath is most centered between the alignment indicators at the 4, indicating an adjustment of X1 = 0.004 Calibration Part centered at 0 Support toolpath, most centered at 4 Alignment indicators Within the Manual Tip Calibration page, slide all four of the scale icons on the screen to match where the support toolpath is most centered between the alignment indicators.
- Page 158 Figure 6-12: XY Offset - No Adjustment Required Sliding scale icons • If either of the Delta X or Delta Y values are outside the range of -0.002 to +0.002 in., the printer requires an adjustment. The following figure shows the Delta X value of 0.0050 in and the Delta Y value of -0.0030 in.
- Page 159 • After entering your adjustment value(s) press the Apply button within the Manual Tip Calibration page (see Figure 6-9 for button location). Your calibration adjustment(s) will be saved. If you continue to change the adjustment values, you must press the Apply button again to save the changes.
- Page 160 Determine the Z Offset Adjustment. Peel the support layer from the inner square of the calibration part. Measure the thickness of the support layer on each side of the square with a caliper or micrometer. Measure in the center of each side; measuring near the corners will result in inaccurate values.
- Page 161 • Use the Down button to enter the value obtained in step C if this value is less than the tip’s slice height. For example, if you measured an average of 0.0080 in. (0.2032 mm) for a tip with a slice height of 0.010 in.
- Page 162 If a Z offset adjustment is required you will need to rebuild the calibration part. To do so: • After entering your Z offset adjustment press the Apply button within the Manual Tip Calibration page (see Figure 6-9 for button location). Your calibration adjustment(s) will be saved. If you continue to change the adjustment values, you must press the Apply button again to save the changes.
-
Page 163: Touchscreen Calibration
TOUCHSCREEN CALIBRATION Caution: A stylus pen should be used when performing this calibration to ensure precise calibration. Do not use your fingertip to perform this calibration. If a stylus pen is not available, a pencil eraser may be used. You have the option of recalibrating the printer’s touchscreen display. Extreme care must be taken when performing this calibration as an improperly calibrated touchscreen can lead to button accuracy issues. - Page 164 A dialog is displayed with instructions for recalibrating the touchscreen. Using a stylus, touch the screen in the center of the calibration point displayed. Repeat this process for the remaining calibration points (1 point for each of the 4 corners of the screen). Note: The graphic displayed within the center of the dialog represents the time remaining before the touchscreen calibration times out.
-
Page 165: Xy Gantry Calibration
XY GANTRY CALIBRATION The printer is designed to automatically perform an XY Gantry Calibration as part of its initialization and startup process. This calibration moves the gantry to ensure it can travel properly throughout the build envelope and determines the gantry’s reference in relation to the platen. -
Page 166: Tip Wipe Height Adjustment
TIP WIPE HEIGHT ADJUSTMENT Required Tools • 3 mm hex wrench Adjusting Tip Wipe Height Gloves: Always wear gloves when performing maintenance within the oven enclosure or other high temperature areas. Power OFF the printer. See “Powering Off” on page 169. -
Page 167: Maintenance
7 MAINTENANCE This chapter describes various maintenance tasks that will routinely need to be performed on the F123 Series. UPDATING CONTROLLER SOFTWARE Controller Software can be updated manually by navigating to an update file on your workstation PC using the Insight software application or automatically using push notifications sent via GrabCAD Print. - Page 168 Figure 7-1: Printer In Software Upgrade Mode Note: All recent calibration data (i.e. tip offset values) as well as printer settings and configurations are automatically retained during the software upgrade process. Files sent to the Job Queue via Ethernet or Wi-Fi connection or transferred to the printer from a USB flash drive are not retained.
- Page 169 Control Center will begin establishing a connection with the printer. Once a connection is established, the workstation PC’s file explorer will open. Browse to the location of the .upg software upgrade file. Select the .upg file to be downloaded and then click Open. Control Center will begin sending software to the printer.
- Page 170 The touchscreen will refresh to indicate that the printer is verifying the upgrade file. Note: The verification process will take several minutes; please be patient. Figure 7-5: Verifying Software Upgrade Once the verification process is complete, the printer will automatically reboot and begin installing the upgrade file.
-
Page 171: Exporting System Configuration (.Cfg) File
EXPORTING SYSTEM CONFIGURATION (.CFG) FILE If your system is receiving fault determination codes, you may need to export a configuration (.cfg) file from your system to send to Customer Support. GrabCAD PRINT METHOD For detailed instructions on exporting a system configuration file navigate to http://help.grabcad.com/article/196- printer-firmware-management and follow the procedure for “Exporting the printer configuration”. -
Page 172: Maintenance Schedule
F123 Series. Detailed instructions for each task make up the rest of this chapter. Table 7-2 lists part numbers for various replacement consumable items. Use the part numbers listed in this table when ordering replacement parts from Stratasys or your regional Stratasys office. Table 7-1: Maintenance Schedule Weekly... -
Page 173: Weekly Maintenance
WEEKLY MAINTENANCE CLEANING THE OVEN CHAMBER Warning: Always wear safety gloves and long sleeves when cleaning the oven chamber. Components are hot and may have sharp edges. The purge chute is designed to guide purged material debris from the tip wipe assemblies to the bottom of the oven chamber for disposal. -
Page 174: Monthly Maintenance
MONTHLY MAINTENANCE CLEAN/INSPECT TIP WIPE ASSEMBLIES The tip wipe assemblies should be cleaned once a month. While cleaning the assemblies, inspect the flicker/ brush assemblies for wear and replace as necessary when wear is detected. Once material is purged from a tip, the flicker portion of the tip wipe assembly passes across the tip’s opening, cutting purged material off in small segments. - Page 175 Repeat step 3 to remove the support side tip wipe assembly. Note: If the head is positioned above the purge area it may impede your ability to remove the tip wipe assemblies. Open the top cover and manually move the head away from the purge area.
-
Page 176: As Needed Maintenance
AS NEEDED MAINTENANCE CLEANING THE EXTERIOR SURFACE OF THE PRINTER The printer’s exterior surfaces (doors and panels) may accumulate dust and periodically require cleaning. Exterior doors and panels, with the exception of the touchscreen display, can be cleaned using a slightly damp microfiber cloth (supplied in the Welcome Kit). -
Page 177: Cleaning The Oven Door Glass Surfaces
CLEANING THE OVEN DOOR GLASS SURFACES Required Tools • 2.5 mm hex wrench Accessing the Oven Door Glass Power off the printer. See “Powering Off” on page 169. Allow the oven to cool. Open the oven door. Using a 2.5 mm hex wrench, remove the inside door panel mounting screws (11). See Figure 7- Figure 7-9: Inside door panel mounting screw locations... -
Page 178: Customer Replaceable Units
CUSTOMER REPLACEABLE UNITS The following service procedures outline the replacement instructions for the customer replaceable units of the F123 Series printers. POWERING OFF Warning: Make sure AC power is removed from the printer. Powering OFF the Printer Depress the Power button (see Figure 5-1 on page 105 for button location). -
Page 179: Rear Panel
REAR PANEL Required Tools 3 mm hex wrench • Removing the Rear Panel Removal of the rear panel requires the removal of the AC power cord. Do not install the AC power cord with the back panel removed. Power OFF the printer, see “Powering Off”... -
Page 180: Right And Left Side Panels
RIGHT AND LEFT SIDE PANELS Required Tools 5 mm hex wrench • Removing the Side Panels Power OFF the printer, see “Powering Off” on page 169. Remove the rear panel. See “Removing the Rear Panel” on page 170. Using a 5 mm hex wrench, remove the side panel mounting screws (6 on each panel). Figure 7-12. - Page 181 Rear side panels only: The rear side panels are held in place by a standoff that is retained inside the printer frame. Slide the panel away from the printer to disengage the retaining standoff. Figure 7-13. Figure 7-13: Rear Side Panel Retaining Standoff Detail Retaining Standoff Remove the side panel from the printer.
-
Page 182: Front Top Cover
FRONT TOP COVER Required Tools 2 mm hex wrench • Removing the Front Top Cover Power OFF the printer. See “Powering Off” on page 169. Open the oven door to release the front top cover latch. Open the front top cover. Using a 2 mm hex wrench, remove the hinge mounting screws (4) from the crossbar. -
Page 183: Rear Top Cover
REAR TOP COVER Required Tools 2.5 mm hex wrench • Removing the Rear Top Cover Power OFF the printer. See “Powering Off” on page 169. Open the oven door to release the top cover latch. Open the front top cover. Using a 2.5 mm hex wrench, remove the screws (2) that secure the rear top cover to the cross bar. -
Page 184: 3.3/5/12 Vdc Atx Power Supply
3.3/5/12 VDC ATX POWER SUPPLY Required Tools 3mm hex wrench • Removing the 3.3/5/12 VDC ATX Power Supply Power OFF the printer, see “Powering Off” on page 169. Remove the rear panel, see “Removing the Rear Panel” on page 170. Disconnect the input power cable from the power supply. -
Page 185: Oven Thermistor
OVEN THERMISTOR Required Tools 3 mm hex wrench • Removing the Oven Thermistor Power OFF the printer. See “Powering Off” on page 169. Remove the rear panel. See “Removing the Rear Panel” on page 170. Remove the right rear side panel. See “Right and Left Side Panels”... -
Page 186: Material Bays
MATERIAL BAYS Required Tools 2.5 mm hex wrench • 3 mm hex wrench • Removing the Material Bay Unload material. See “Unloading Material” on page 113. Open the material bay drawer. Unlatch and open the material bay lid. Remove the existing material spool from the material bay. Place the used material spool into an airtight bag and seal it. - Page 187 Open the material bay drawer. Using a 3mm hex wrench, remove the screws (3) that secure the rear tool tray. Remove the rear tool tray. Figure 7-19: Rear tool tray Using a 2.5mm hex wrench, remove the material bay mounting screws (2). See Figure 7-20.
- Page 188 Installing the Material Bay Gently install the material bay to the open drawer. See Figure 7-20. Using a 2.5mm hex wrench, fasten the mounting screws securing the material bay to the top of the drawer. See Figure 7-20. Close the material bay drawer. From the back of the printer, connect the cable to the material drive controller board connector.
-
Page 189: Replacing A Head
REPLACING A HEAD When a head reaches 1500 build hours (odometer limit), a warning will be displayed on the User Interface and the head’s Head Status Icon will be highlighted in red on the Materials page. You can continue using a head which has exceeded its odometer limit, but it is highly recommended that you change the head as part quality will be unpredictable. -
Page 190: Head Ribbon Cables
HEAD RIBBON CABLES Required Tools 3 mm hex wrench • Removing the Head Ribbon Cables Note: Make sure to disconnect the head ribbon cables while the printer is powered ON to ensure that auto-calibration occurs after re-installation. With the printer powered ON, open the top cover. Move the X bridge to the front of the gantry enclosure. - Page 191 Using a 3 mm hex wrench, remove the front ribbon cable bracket mounting screws (3) on the back of the toggle assembly. Retain the screws for re-installation. See Figure 7-23. Figure 7-23: Front Ribbon Cable Bracket Mounting Screw Locations Lift and disengage the rear ribbon cable bracket from the back, top of the printer frame. Figure 7-24.
- Page 192 Remove the head ribbon cables and cable brackets from the printer. See Figure 7-25. Figure 7-25: Head Ribbon Cables and Brackets Installing the Head Ribbon Cables Install the rear ribbon cable bracket to cutouts at the back, top of the printer frame. Figure 7-24.
-
Page 193: Touchscreen Display
TOUCHSCREEN DISPLAY Required Tools • 3 mm hex wrench Removing the Touchscreen Display Caution: The connectors and cables of the touchscreen display are fragile. Excessive force may cause damage to connector pins or wiring. Power OFF the printer. See “Powering Off” on page 169. - Page 194 Installing the Touchscreen Display Reconnect the touch extender cable and the display cable to the back of the touchscreen display. Note: Orient the shiny side of the connector away from the display. The flat display cable connector is fragile. Simultaneously push both corners of the connector straight in, without rocking back and forth.
-
Page 195: Right And Left Side Oven Blowers
RIGHT AND LEFT SIDE OVEN BLOWERS Required Tools 2.5 mm hex wrench • 3 mm hex wrench • Removing the Oven Blower Power OFF the printer. See “Powering Off” on page 169. Remove the rear panel. See “Removing the Rear Panel” on page 170. - Page 196 Using a 3 mm hex wrench, remove the mounting screws (5) that secure the blower assembly to the oven frame, see Figure 7-29. Remove the blower assembly from the printer. See Figure 7-29. Note: Right side oven blower shown only. The left side blower procedure is identical to the right.
-
Page 197: Oven Door Gasket
OVEN DOOR GASKET Required Tools Screwdriver or similar instrument • Removing the Oven Door Gasket Power OFF the printer. See “Powering Off” on page 169. Open the oven door. Extract the gasket pins out of the holes around the entrance to the oven enclosure. Figure 7-30. -
Page 198: Z Drive Belt
Z DRIVE BELT Required Tools • 3 mm hex wrench • Small flat head screwdriver Removing the Z Drive Belt Power OFF the Printer. See “Powering Off” on page 169. Remove the rear top cover. See “Removing the Rear Top Cover” on page 174. - Page 199 Installing the Z Drive Belt Using a small flat head screwdriver, relax the belt tension by gently prying the Z motor tension bracket away from the compression spring. See Figure 7-32. Install the Z drive belt to the Z motor pulley. Install the Z drive belt to the Z axis lead screw pulley.
-
Page 200: Y Bellows
Y BELLOWS Required Tools 3 mm hex wrench • Removing the Y Bellows Power OFF the printer. Open the front top cover. Note: Move the X bridge as necessary to access Y bellows mounting clips and screws. Remove the front Y bellows assembly. See Figure 7-33. - Page 201 Installing the Y Bellows Transfer the Y bellows retainers to the new Y bellows. Move the X bridge to the front of the gantry enclosure. Install the front and rear clips (8) that secure the front Y bellows assembly to the X bridge and oven frame.
-
Page 202: Oven Light
OVEN LIGHT Required Tools • 3 mm hex wrench • Small flathead screwdriver Removing the Oven Light Power OFF the printer. See “Powering Off” on page 169. Open the oven door. Remove the top gasket pins on both sides of the oven light above the oven enclosure. Temporarily displace the top of the oven door gasket to access the oven light. - Page 203 Installing the Oven Light Connect the loose cable connector to the oven light. Orient the cable with the green wire toward the center of the light. See Figure 7-35. Figure 7-35: Oven Light Cable Detail Note green wire Tuck the excess cable into the bezel opening and push the oven light into its mounting position. If necessary, pull the cable from inside the gantry to remove slack.
-
Page 204: Oven Door Camera
OVEN DOOR CAMERA Required Tools 3 mm hex wrench • Removing the Oven Door Camera Note: Do not touch the camera lens. If necessary, wipe the camera lens with a clean microfiber cloth. Power OFF the printer. See “Powering Off” on page 169. - Page 205 Carefully remove the camera from the mounting bracket. Retain the mounting bracket. Figure 7-37. Figure 7-37: Camera Detail Installing the Oven Door Camera Note: Do not touch the camera lens. If necessary, wipe the camera lens with a clean microfiber cloth. Install the camera to the mounting bracket.
-
Page 206: Oven Door Latch
OVEN DOOR LATCH Required Tools • 2.5 mm hex wrench • 4 mm socket wrench Removing the Oven Door Latch Power off the printer. See “Powering Off” on page 169. Open the oven door. Using a 2.5 mm hex wrench, remove the inside door panel mounting screws (11). See Figure 7- Pivot and remove the inside door panel from the door assembly. - Page 207 Disconnect the door latch assembly solenoid cable connector. Disconnect the door latch assembly sensor cable connectors (2). Using a 4 mm socket wrench, remove the door latch assembly mounting nuts (2). See Figure 7- Remove the door latch assembly from the oven door. See Figure 7-39.
- Page 208 Installing the Oven Door Latch Using a 2.5 mm hex wrench, install the sensor bracket mounting screws (2) to secure the sensor mounting bracket to the oven door latch assembly. See Figure 7-40. Using a 4 mm socket wrench, install the door latch assembly mounting nuts (2) to secure the door latch assembly inside the oven door assembly.
-
Page 209: Y Blocks
Y BLOCKS Required Tools 3 mm hex wrench • Removal Procedure Note: Y block removal is the same for both Y blocks. Removal of the model material Y block is depicted in this procedure. Unload material. Power OFF the printer, see “Powering Off”... - Page 210 Using a 3 mm hex wrench, remove the Y block mounting screws (2). See Figure 7-43. Remove the Y block. Figure 7-43: Y Block Mounting Screw Locations Installing the Y Blocks Align Y block with the mounts and use a 3 mm hex wrench to reinstall the mounting screws (2). Figure 7-43.
-
Page 211: Top Cover Interlock Sensor And Actuator
TOP COVER INTERLOCK SENSOR AND ACTUATOR Required Tools 2 mm hex wrench • 2.5 mm hex wrench • Removing Top Cover Interlock Sensor Power OFF the printer. See “Powering Off” on page 169. Open the front top cover. Disconnect the top cover sensor cable at the quick disconnect. Remove the three cable ties that secure the cable to the sensor mounting bracket. - Page 212 Installing the Top Cover Interlock Sensor Use a 2 mm hex wrench to reinstall the mounting screws (2) that secure the interlock sensor to the mounting bracket. See Figure 7-44. Reconnect the top cover sensor cable at the quick disconnect connector. Install three cable ties to secure the sensor cable to the mounting bracket.
-
Page 213: Troubleshooting
If you have a problem with your printer or the printer’s materials that is not covered in this guide, or if you need to order replacement parts, please contact Customer Support for your region. Contact information is available from the Stratasys website at: http://www.stratasys.com/customer-support/contact-customer-support. If needed, you can write to Customer Support North America at: Stratasys, Inc. -
Page 214: Warnings And Errors
WARNINGS AND ERRORS If the printer detects an issue that may affect a build, it will be indicated within the Notifications Display portion of Build Page. A yellow or red notification badge icon will be displayed, depending on the severity of the warning/error, along with text indicating the reason(s) for the warning. - Page 215 Order new support head • The support head has reached 1350 build hours, and is near its odometer limit. Build hours are available within the head’s Head Details page (see “Viewing Head Details” on page 63). • Correct condition - you are still able to build using this head, but part quality may be affected. Once the head’s odometer limit is reached, you will be prompted to change the head (see “Head Replacement”...
-
Page 216: Errors Preventing A Build From Starting
Replacement” on page 117 for details). If the error persists there is likely a problem with either the head or the head cable; please contact Stratasys Customer Support or your regional Stratasys office for further assistance (see “Getting Help” on page 204 for contact information). - Page 217 117 for details). If the error persists there is likely a problem with either the head or the head cable; please contact Stratasys Customer Support or your regional Stratasys office for further assistance (see “Getting Help” on page 204 for contact information).
- Page 218 End of model filament detected • Indicates that filament from the material spool has not been detected by the filament present switch in the material drive. • Correct condition - slowly turn the material spool and feed filament into the drive mechanism. Filament needs to be advanced approximately 2 inches (50.8 mm) to reach the filament present switch.
-
Page 219: Load/Unload Errors
“Removing Material Spools” on page 114). Reload the material spool (see “Loading Material” on page 108). If the error persists, contact Stratasys Customer Support or your regional Stratasys office (see “Getting Help” on page 204 for contact information). Insert spool •... - Page 220 Cannot load support in to model head • Indicates that you have installed a support spool into the wrong location within the material bay. • Correct condition - Remove the support spool from its current location within the material bay and insert it into a support material bay.
-
Page 221: Build Pause Warnings
(see “Service” on page 1 for contact information). • If material cannot move freely, contact Stratasys Customer Support or your regional Stratasys office (see “Getting Help” on page 204 for contact information). Out of model material •... - Page 222 “Loading Material” on page 108). If the error is not resolved, check the job log for any zero volume jobs and reboot the printer. If the error persists, contact Stratasys Customer Support or your regional Stratasys office (see “Getting Help” on page 204 for contact information).
-
Page 223: Build Abort Errors
142). If • calibration fails, perform a manual tip calibration (“Manual Tip Calibration” on page 144). If calibration fails again, contact Stratasys Customer Support or your regional Stratasys office (see “Getting Help” on page 204 for contact information). Active spool removed •... - Page 224 • Correct condition - attempt to restart the build, see “Basic Job Build Tasks” on page 120 instructions. If the error persists, contact Stratasys Customer Support or your regional Stratasys office (see “Getting Help” on page 204 for contact information).
-
Page 225: Head Warnings
117 for details). If the error persists there is likely a problem with either the head or the head cable; please contact Stratasys Customer Support or your regional Stratasys office for further assistance (see “Getting Help” on page 204 for contact information). -
Page 226: Finding A Remedy
Incorrect material spool type The F123 Series utilizes a different material spool memory installed. chip than other Stratasys printers. As a result, only F123 Series material spools can be used to build parts on the printer. Ensure that an F123 Series material spool is installed. - Page 227 Condition Possible Cause Remedy Oven not maintaining Heater failure. Contact Customer Support or your regional Stratasys office temperatures (see “Getting Help” on page 204 for contact information). Oven door open. Close the oven door; the heater turns off while the door is open.
-
Page 228: Supplementary Info
Caution: Pursuant to Part 15.21 of the FCC Rules, any changes or modifications to this equipment not expressly approved by Stratasys, ltd. may cause harmful interference and void the FCC authorization to operate this equipment. -
Page 229: Canada Electromagnetic Compatibility (Emc)
Radio Interference Regulations of the Canadian Department of Communications. MSDS (MATERIAL SAFETY DATA SHEET) You can obtain current Material Safety Data Sheets for the material used in the printer is available at: http://www.stratasys.com/materials/material-safety-data-sheets. DISPOSAL OF WASTE EQUIPMENT BY USERS IN PRIVATE HOUSEHOLDS IN THE EUROPEAN UNION This symbol on the product or on its packaging indicates that this product must not be disposed of with your other household waste. - Page 230 Customers, resellers, and Stratasys employees are encouraged to send comments about our documentation and training to c-support@stratasys.com. We greatly value your comments, review all of them, and use them to improve subsequent releases of the documentation. In your email message please include the document title, part number (located on the front cover), and page number.
Need help?
Do you have a question about the F170 and is the answer not in the manual?
Questions and answers