Table of Contents
Advertisement
Advertisement
Table of Contents

Subscribe to Our Youtube Channel
Related Manuals for Stratasys FDM Titan


Summary of Contents for Stratasys FDM Titan
- Page 1 FDM Titan ™ User Guide Version 1.9...
- Page 2 If further information is required, Stratasys Inc. should be consulted. STRATASYS INC. MAKES NO WARRANTY OF ANY KIND WITH REGARD TO THIS MATERIAL, INCLUDING, BUT NOT LIMITED TO, THE IMPLIED WARRANTIES OF MERCHANTABILITY AND FITNESS FOR A PARTICULAR PURPOSE.
-
Page 3: About The Fdm Titan
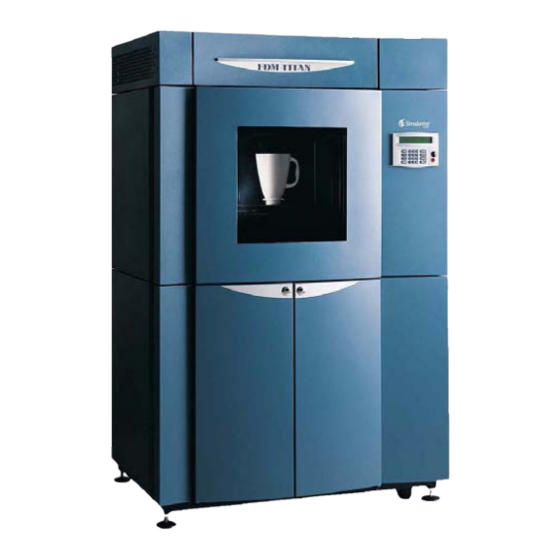
FDM Titan User Guide About the FDM Titan Welcome to the FDM Titan™. This system incorporates the latest in innovative technologies to provide you with precise prototypes from a CAD design. The machine’s high-capacity oven, with a build envelope of 16 x 14 x 16 in. (406 x 355 x 406 mm), accommodates the building of large parts or numerous smaller parts. -
Page 4: About This Guide
FDM Titan User Guide About This Guide This guide is your introduction to building prototypes using a Stratasys rapid prototype system. Typically learning about a high-tech machine can be a long, difficult process. But with this guide, you can make that learning process much easier. This guide was designed as a learning and reference tool that explains system operation in an easy to understand, step-by-step, process. -
Page 5: Table Of Contents
About This Guide ....................iii How to Use This Guide..................iii Conventions Used in This Guide ..............iii Service & Support FDM Titan Service ..................1 - 1 Software Support ..................1 - 1 Consumable Orders..................1 - 1 Safety Instructions ..................1 - 2 Hazard Classifications................1 - 2... - Page 6 FDM Titan User Guide Head Assembly .................... 3 - 5 Liquefier Tips and Slice Heights ............... 3 - 5 Head Buttons for Unplugging Tips ............3 - 7 Z Stage & Oven Components ..............3 - 8 Opening the Oven Door................3 - 8 Oven Lights....................
- Page 7 FDM Titan User Guide Powering Down the Machine ................5 - 4 Building a Job ....................5 - 5 Before Building a Job ................5 - 5 Selecting a Job to Build................5 - 6 Warnings Before Job is Built ..............5 - 7 Information Available While Building ............5 - 7 Information Available If a Job Fails While Building ........5 - 7...
- Page 8 FDM Titan User Guide Flag Button Shortcut ..................6 - 7 Sending the Part to the Machine..............6 - 7 Insight Status....................6 - 8 Managing Parts in the Job Queue ............6 - 8 Monitoring the Part Build ................6 - 9 Viewing Information about Built Parts ............
- Page 9 FDM Titan User Guide Getting Help....................9 - 1 Finding a Remedy..................9 - 2 Index Appendix A: PPSF Materials User Guide Introduction to PPSF..................A - 1 Terminology ....................A - 1 Hazard Classifications ................. A - 2 Pre-Processing .................... A - 2 Setting up PPSF in Insight (Version 3.5 or Later) ........
- Page 10 FDM Titan User Guide Appendix B: UI Menu Structure...
-
Page 11: Service & Support
Chapter 1 Service & Support FDM Titan Service If you have a problem with your FDM Titan™ that is not covered in this user guide, please contact Stratasys Customer Support: • Call (800) 801-6491 (7:00 a.m. to 5:00 p.m. C.T.) •... -
Page 12: Safety Instructions
FDM Titan User Guide Safety Instructions Hazard Classifications Stratasys recommends that all services be performed by qualified personnel. All personnel working on or around this machine should be knowledgeable of what the following hazard classifications mean throughout this guide. CAUTION: Indicates a potentially hazardous situation which, if not avoided, may result in minor or moderate injury. -
Page 13: Specific Safety Practices
FDM Titan User Guide Service & Support Hot Surface Sign. The hot surface sign indicates the presence of devices with high temperatures. Always use extra care when working around heated components. Always wear the safety gloves and safety sleeves provided in the Titan Startup Kit. -
Page 14: Guard Door Interlocks
Service & Support FDM Titan User Guide Note: These servo motors are disabled when the front door or top hood is opened. WARNING: Never wear a tie, loose clothing, or dangling jewelry. You risk the possibility of severe injury. The XY pinch hazard between the timing belts and pulleys is minimized by locking the hood while building and disabling the motors when the top hood is open. -
Page 15: Setup & Installation
FDM Titan User Guide Setup & Installation Chapter 2 Setup & Installation Preparing Your Facility for Installation Follow the T-Class Site Preparation Guide to ensure that your facility is effectively and safely prepared for the system to be installed. Identifying Your Machine Use the following two tags to identify your machine: •... -
Page 16: Making The Power Cable Connection
High voltage is applied to the machine via a Delta connection. Stratasys recommends that the power cable connection be made by a licensed electrician. The main breaker must be off until a Stratasys Service Technician has verified the connection. This machine is only provided with a Delta connection. -
Page 17: Thermal Cut-Out Fuses
FDM Titan User Guide Setup & Installation • The LED display shows the UPS status. On/Off (Hold in for 2 seconds to activate) Load Level Indicators Mode Indicator Lights On Button Off Button Reset Button UPS 5125 The UPS also has the purpose of cooling the system when power is lost or turned off. -
Page 18: Initial Network Configuration (Ip Address)
Setup & Installation FDM Titan User Guide Initial Network Configuration (IP Address) Before operating the machine, you must enter the IP, Netmask, and Gateway addresses. 1. Power up the machine, as shown on page 5-3. 2. From the Ready screen, select Maintenance and press ENTER. -
Page 19: Upgrading Software Or Downloading A Code
FDM Titan User Guide Setup & Installation Upgrading Software or Downloading a Code The system’s software and unique code can be downloaded from an Insight workstation. Only Insight v4.0 and later supports the code download process. 1. Verify that the machine is idle. - Page 20 Navigate to the location of the upgrade file. Upgrade files (UPG) are downloaded into the ‘Stratasys’ folder on your workstation. Note: The default location for the ‘Stratasys’ folder is directly below the ‘Program Files’ directory. This location may be different on your workstation depending upon choices made during previous software installations.
- Page 21 FDM Titan User Guide Setup & Installation 4. To download a code: • In the Insight administration application, select the system to upgrade. • Click on the Setup button. • Enter the code (case-sensitive) in the Setup code field. •...
-
Page 22: Moving The Machine
Setup & Installation FDM Titan User Guide The screen will now read: >Install New Setup Code.. <E> Press <ESCAPE> key to cancel • Press ENTER. The system configures and the system powers up. Moving the Machine If you need to move the machine to a different location, use the following steps to correctly move the machine. - Page 23 FDM Titan User Guide Setup & Installation WARNING: Do not use the head service handle. Damage to the head could occur. • Close the side doors by replacing the button-head torx screws. 7. Raise the leveling feet (near each caster) by loosening the locknut on each foot.
- Page 24 Setup & Installation FDM Titan User Guide 2 - 10...
-
Page 25: Machine Components
FDM Titan User Guide Machine Components Chapter 3 Machine Components Accessing Machine Components This machine has been designed with easy access to the most frequently accessed areas on the machine. The areas you will need to open to access machine components are: •... - Page 26 Machine Components FDM Titan User Guide Top Hood. Where the XY Gantry resides and allows access to the head assembly as well as four cooling fans to cool the upper area of the XY Gantry and head area. The two fans on the left draw cool air into the machine and the two fans on the right draw warm air out of the machine.
- Page 27 Left Side Door (Upper). Allows access to the left side Z stage components. There are three button-head torx screws that you must remove before opening the door. WARNING: The access panels on the rear of the machine should only be removed by a Stratasys Service Technician. 3 - 3...
-
Page 28: Opening The Hood
Machine Components FDM Titan User Guide Opening the Hood You can open the hood, located on the top of the machine, to access the XY Gantry, Z stage, and the Head. The hood has a mechanical switch and a continuous solenoid. -
Page 29: Head Assembly
FDM Titan User Guide Machine Components Head Assembly The Headworks head assembly has been designed for various materials. The board inside the head provides direct heater and thermocouple control. The head extrudes modeling material and support material with two identical liquefiers. The support liquefier moves up and down via a solenoid. - Page 30 Machine Components FDM Titan User Guide • Tips are a replaceable consumable item. To order tips, see “Consumable Orders” on page 1-1. To change tips, see “Changing Material Type or Tips” on page 4-14. • When changing tips you will be guided through resetting the tip odometers.
-
Page 31: Head Buttons For Unplugging Tips
FDM Titan User Guide Machine Components Table 3-2: Slice Height Model Tip Slice Height 0.005 in. (0.127 mm) 0.007 in. (0.178 mm) 0.010 in. (0.254 mm) 0.013 in. (0.330 mm) Tip Identification Standard HeadWorks tip 3.045” (77.34 mm) T12 WW tip has... -
Page 32: Z Stage & Oven Components
Machine Components FDM Titan User Guide Z Stage & Oven Components The Z stage assembly moves the platen, located in the oven, up or down. This is done with two belt driven lead screws, which you can access by opening the upper doors on each side of the machine. -
Page 33: Oven Lights
FDM Titan User Guide Machine Components There are two methods to open the oven door. The first and main method is to use the Operator Panel command Unlock Door. This command is only available while the machine is paused or in an idle state. Therefore you do not have access to this command while the gantry is moving. -
Page 34: The Platen
Machine Components FDM Titan User Guide The Platen The platen is the surface on which parts are built. A plastic build sheet is held to the 17” x 15” aluminum platen by the vacuum source. The platen has a waffle pattern machined into the top surface. - Page 35 FDM Titan User Guide Machine Components 3. Select Move Relative and press ENTER. Move Head to Service Location <E> Move Head to Center-Front Location<E> Move Z Stage to Bottom <E> >Move Relative.. 4. Select Set Distance and press ENTER. This toggles between 0.001, 0.010, 0.100 and 1.000 inches (0.01, 0.10 and 1.0 and 10 mm).
-
Page 36: Lowering The Z Stage
Machine Components FDM Titan User Guide Lowering the Z Stage 1. From the Operator Control Panel, select Operator Control and press ENTER. Build Job.. |*Tips: Model T16 Support T16 >Operator Control.. Modeler Status.. Maintenance.. 2. Select Move Head/Stage and press ENTER. -
Page 37: Material & Canisters
FDM Titan User Guide Material & Canisters Chapter 4 Material & Canisters Materials Used in the Titan The Titan system is capable of using high strength polycarbonate material (PC and medical grade PC-ISO); ABS, ABSi and PC-ABS - used with WaterWorks supports;... -
Page 38: Canister Bay Components
The two bays on the left hold modeling material and two bays on the right hold support material. Stratasys recommends that you install a canister in all four canister bays to ensure maximum efficiency for the air drying system. If necessary, an empty canister may be installed in an inactive bay. -
Page 39: Canister Drive Levers
FDM Titan User Guide Material & Canisters Canister Drive Levers Each individual canister has a drive lever that is used to activate the material drive block. The drive block feeds the filament from the canisters to the liquefiers. A drive block is located above each canister. The... -
Page 40: Waste Basket
Material & Canisters FDM Titan User Guide Waste Basket The waste basket catches all the material that has been purged or wiped from the liquefiers. The basket can be pulled out and emptied as needed. Waste Basket Location Canister Auto Changeover Auto Changeover allows you to leave a long part build unattended. -
Page 41: Smart Canister
FDM Titan User Guide Material & Canisters Smart Canister The Smart Canister gives you the information Encoded Chip necessary to manage material resources and (SmartSpool maximize part build strategies for long, Circuit) unattended part builds. Each canister contains an encoded chip that tracks and reports the status of the material. -
Page 42: Changing Canisters
Material & Canisters FDM Titan User Guide Changing Canisters Installing a Canister To install a new canister (see figure on page 4-9): 1a. If the canister is new (or locking plug is still installed), peel back the foil tape on the side of the canister. - Page 43 FDM Titan User Guide Material & Canisters 4b. Drop the filament drive mechanism down onto the canister by pulling out the spring plunger. Verify that the filament drive is aligned with the filament exit and completely sealed. The LED is off at this point. After about five seconds, the smart spool chip is read and the drive block motor starts turning.
- Page 44 The gasket should be replaced if storing a partially full spool. 6c. Close the thumbwheel door. Do not discard the box or packing material. The box can be used to ship the empty canister back to Stratasys for recycling. 4 - 8...
- Page 45 FDM Titan User Guide Material & Canisters Cut filament below bend Remove plastic cap Peel back (square cut) foil tape Close Door Carefully 2a: Rest canister in bay Open door re-seal foil tape (do not push fully in yet) 4a: Push canister fully into bay...
-
Page 46: Removing An Empty Canister
Material & Canisters FDM Titan User Guide Removing an Empty Canister You can remove an empty canister from the bay after it has run out of material or when filament has been unloaded from the liquefiers. To remove an empty canister: 1. -
Page 47: Loading Material Filament To The Liquefiers
FDM Titan User Guide Material & Canisters Loading Material Filament to the Liquefiers If you are changing to a different material type or changing tips, follow “Changing Material Type or Tips” on page 4-14. Loading is done automatically through that process. -
Page 48: Unloading Material Filament From The Liquefiers
Material & Canisters FDM Titan User Guide • The canister drive motor starts to feed filament to the liquefier tips, which takes two to four minutes. • When the filament gets to the drive wheels in the head, it is forced into the liquefier tip and purges. -
Page 49: Purging Blue Material From Liquefier
FDM Titan User Guide Material & Canisters 4. Select the material to unload and press ENTER: M1L:PPSF 92.0 (Ready) >M2L:PC 91.6 <E> (Loaded) S1L:PC_S 92.3 (Ready) S2L:PPSF_S 41.4 (Ready) • The head heats up to material temperature and the canister LED flashes green. -
Page 50: Changing Material Type Or Tips
Material & Canisters FDM Titan User Guide Changing Material Type or Tips When changing the modeler from one type of material to another (e.g. PC to ABS), or when changing tips, several steps must be taken to ensure that the system runs properly. - Page 51 FDM Titan User Guide Material & Canisters 8. Choose Select Materials/Tips. Unload Model and Support.. <E> *2. Insert new canisters (if required) *3. Install tips >Select Materials/Tips.. Note: If you are changing to a different type of material, you must change the tips.
- Page 52 Material & Canisters FDM Titan User Guide 10. The top menu line on the screen shows the model and support material loaded along with the status of each canister, shown inside the brackets. Select Review Materials to Load.. to choose which filament you want to load.
- Page 53 FDM Titan User Guide Material & Canisters • Press ENTER for the odometer for each tip. If you are changing to a used tip of a different size, you can enter the extruded volume or wipe count of the used tip with the number keys and (.) keys before pressing ENTER. If any parts remain on the build sheet, you must unlock the door and remove the parts before continuing.
- Page 54 Material & Canisters FDM Titan User Guide Table 4-2: Oven Stabilization Times (in hours) Material Type Being Installed Current Oven Temp. ABS & ABSI PC-ABS PC & PC-ISO PPSF Room temp. ABS/ABSI & Auto Cool-Down PC-ABS PC & PC-ISO PPSF...
-
Page 55: Recovering From A Head Plug
FDM Titan User Guide Material & Canisters • Builds the Calibration Job *Job: Calibration Job (Building) *Build Time: 0:04 hr of 0:08 hr 0.1 in3 PC_S >Modeler Status.. 0.010 of 0.050 in If the Calibration Job fails, you can manually build the calibration job shown on page 7-1. - Page 56 Material & Canisters FDM Titan User Guide 7. Select Load/Unload Mtl.. and press ENTER. Unlock Door <E> | Calibrate.. >Load/Unload Mtl.. | Temp Control.. Change Tips/Mtl.. | Move Head/Stage.. 8. Select Unplug Tips.. and press ENTER. Load Material.. Unload Material..
-
Page 57: Moving The Head To The Head Service Bracket (Service Location)
FDM Titan User Guide Material & Canisters Moving the Head to the Head Service Bracket (Service Location) 1. From the Main Menu select Operator Control and press ENTER. Build Job.. |*Tips: Model T16 >Operator Control.. Support T16 Modeler Status.. Maintenance.. - Page 58 Material & Canisters FDM Titan User Guide 4 - 22...
-
Page 59: Operating The Machine
FDM Titan User Guide Operating the Machine Chapter 5 Operating the Machine Using the Operator Control Panel The Operator Control Panel consists of a four-line by 40 character display located on the front right panel. A keypad is located just below the display. The Operator Control Panel is easy to use and is menu driven. -
Page 60: Keypad Button Descriptions
Operating the Machine FDM Titan User Guide Keypad Button Descriptions The Operator Control Panel has the following keypad buttons. Button Description Menu This button returns back one menu, unless stated otherwise. It also returns you out of the Help system. -
Page 61: Screen Symbols
FDM Titan User Guide Operating the Machine Screen Symbols The following screen symbols are used in the menu lines shown on the screen. Symbol Description <E> Tells you to push ENTER to execute the command line. The cursor “>” must be on the same line. -
Page 62: Powering Down The Machine
Operating the Machine FDM Titan User Guide 3. Verify that the air pressure gauge, located above the waste basket in the canister bay, reads between 36-40 psi. 4. Select AutoHome XYZ and press ENTER. The machine will find the home position for the X, Y, and Z motions. This must be done before any parts can be built. -
Page 63: Building A Job
FDM Titan User Guide Operating the Machine Building a Job Before Building a Job Before you build a job, you must first send the file to the machine from Insight. Jobs are sent in a CMB format and placed in the queue on the machine’s hard drive. The header of the .CMB file contains basic job information (material type and amount, tip... -
Page 64: Selecting A Job To Build
Operating the Machine FDM Titan User Guide Selecting a Job to Build 1. From the Main Menu select Build Job and press ENTER. >Build Job.. |*Tips: Model T16 Operator Control.. Support T16 Modeler Status.. Maintenance.. 2. Select from one of the following: •... -
Page 65: Warnings Before Job Is Built
FDM Titan User Guide Operating the Machine 3. Select the part to build and press ENTER. For more information on the job queue, see “Working with the Job Queues” on page 5-10. Building a Sample Job in the Queue (Show Sample Job Queue) 1. -
Page 66: Pausing Or Aborting A Job
Operating the Machine FDM Titan User Guide Pausing or Aborting a Job You can only pause the machine while building a job, in the following two ways: • Automatically (canister runs out of material, failure detected, etc.) • Manually from the operator panel Note: If an Automatic pause occurs, press the HELP key to view the cause. -
Page 67: Manually Removing Support Material
FDM Titan User Guide Operating the Machine 2. Remove the part from the machine. • Open the oven door. • Remove the build sheet from the platen. • Carefully peel the part off of the build sheet. If the part does not peel easily, use the metal scraper included in your Startup Kit to carefully pry off the part. -
Page 68: Working With The Job Queues
Operating the Machine FDM Titan User Guide Working with the Job Queues The job queue contains files downloaded from Insight. The sample job queue contains files that are helpful for testing the machine. To view the jobs in the queues: 1. -
Page 69: Using The Maintenance Menu
FDM Titan User Guide Operating the Machine • Press the (.) key to toggle between (jobs for cfg) and (all jobs). Jobs for cfg displays jobs appropriate for the installed materials and tips. All jobs displays all sample jobs regardless of installed materials and tips. -
Page 70: User Placement On Platen
Operating the Machine FDM Titan User Guide User Placement on Platen If User Placement is set to NO (default), the part will build in the center of the platen. If User Placement is set to YES, you can change the position of the front-left hand corner of the part’s bounding box. -
Page 71: Displaying Machine Status
FDM Titan User Guide Operating the Machine Displaying Machine Status The user interface shows you the following statuses of the machine. • Temperature Status • Odometer Status • Material Status • Machine Software Version Finding the Temperature Status To find the current temperature and the setpoint temperature for the oven and both liquefiers: 1. -
Page 72: Finding The Material Status
Operating the Machine FDM Titan User Guide To view the tip odometers: 1. From the Main Menu select Modeler Status and press ENTER. Build Job.. |*Tips: Model T16 Operator Control.. Support T16 >Modeler Status.. Maintenance.. 2. Select Tip Status and press ENTER. The current status of the tips is displayed. -
Page 73: Finding Your Machine's Software Version
FDM Titan User Guide Operating the Machine Finding Your Machine’s Software Version 1. From the Main Menu select Modeler Status and press ENTER. Build Job.. |*Tips: Model T16 Operator Control.. Support T16 >Modeler Status.. Maintenance.. 2. Select Machine State and press ENTER to see the current software version. -
Page 74: Checking Air Pressure And Vacuum
Changing the Build Sheet Always use a new build sheet when building a job: Note: Using build sheets not provided by Stratasys may impact part quality and machine reliability. Note: The build sheet is intended to be discarded after one part build. DO NOT FLIP OVER A USED BUILD SHEET TO PLACE ON THE PLATEN. -
Page 75: Setting The Oven Temperature
FDM Titan User Guide Operating the Machine CAUTION: Use extreme care when cleaning the platen. If using a brush, brush away from the vacuum port in the center of the platform. If debris falls into the vacuum port, it can cause a loss of vacuum, resulting in poor adhesion of the build sheet during building. - Page 76 Operating the Machine FDM Titan User Guide 2. Select Temp Control and press ENTER. Unlock Door <E> |>Temp Control.. Load/Unload Mtl.. | Move Head/Stage.. Change Tips/Mtl.. Calibrate.. 3. Select one of the temperature parameters (as shown below) and press ENTER.
-
Page 77: Operating Insight
Chapter 6 Operating Insight Starting Insight To start Insight, select Start>Programs>Stratasys>InsightVxx>Insight. You can also double-click on the Insight shortcut desktop, if it was installed. Opening a .STL File in Insight To open the file for the part you wish to build: 1. -
Page 78: Selecting Modeler Setup Settings
Operating Insight FDM Titan User Guide Selecting Modeler Setup Settings Configure Your Modeler The first step in preprocessing is to configure your modeler. 1. Click the Modeler button located in the Modeler Setup window (right side of screen) of the Operations Panel. The Configure Modeler dialog box opens. You can also access the Modeler Setup window by selecting Modelers>Setup. - Page 79 FDM Titan User Guide Operating Insight 5. To reduce curl on large, thick, ABS T12 or T16 parts, click the options icon. Select Brick Mode from the pop-up. 6. Do one of the following: • Click the green check button to save the settings. This closes the dialog box.
-
Page 80: Part Build Parameters
Operating Insight FDM Titan User Guide Part Build Parameters The second step in preprocessing a model is to choose the part build parameters. The part build style will determine the type of fill pattern used to build the part. The part interior style will determine whether the interior of the part is solid or not. -
Page 81: Orientating The Part In The Build Envelope
3. Select the rotation parameters in the STL Rotate Operation window. Slicing the Part Before you send the part file to the FDM Titan, it must be sliced into the layers that the machine will extrude to construct the part. -
Page 82: Building Supports And A Base For The Part
Click the “Toolpath” button Saving the Toolpath (.CMB file) Now that the part file is sliced and ready to send to the FDM Titan, it must be saved as a .CMB file, which can be received by the machine. 1. Click File>Save As>Toolpath. -
Page 83: Flag Button Shortcut
You are now ready to send the file to the machine. This requires that you use the “Status” software. 1. Click Start>Programs>Stratasys>Insight Vxx>Status, or from the Insight menu, pick Modeler>Status. This opens the Status software. 2. Click “Yes” to establish the initial connection. -
Page 84: Insight Status
Operating Insight FDM Titan User Guide Insight Status Managing Parts in the Job Queue The job queue is a storage location on the machine used to store information about parts that must be built. You can manage the building of these parts from the queue window. -
Page 85: Monitoring The Part Build
FDM Titan User Guide Operating Insight • Obtain detailed information about a job that may have a conflict with material or tip size being used. These jobs are flagged at the beginning of the line. In addition, if the job is packed, the information button will display the list of individual job names in the pack. -
Page 86: Viewing Information About Built Parts
Operating Insight FDM Titan User Guide Viewing Information about Built Parts The system software keeps track of the details from past jobs that have been built. These details can be viewed in the Build Log. To access the Build Log: 1. -
Page 87: Setting Up Remote Notification
FDM Titan User Guide Operating Insight Setting Up Remote Notification You can be notified when the current job or calibration is interrupted or complete. To set up remote notification: 1. From the Status Window select the Setup Remote Notification button. - Page 88 Operating Insight FDM Titan User Guide 6 - 12...
-
Page 89: Calibrating Liquefier Tips
FDM Vantage User Guide Calibrating Liquefier Tips Chapter 7 Calibrating Liquefier Tips Automatic Calibration Note: The system automatically performs the following calibrations after the tips are changed or after a material type change. If the Automatic Calibrations fail, then the same calibrations must be run manually - starting with “Z Stage Zero with Shim Calibration”... - Page 90 Calibrating Liquefier Tips FDM Vantage User Guide B. Proper calibration allows the system to toggle material tips and place the current tip at the precise coordinate necessary to continue accurate part build. 3. XY Offset and Z Calibration Note: The XY offset is the distance the support tip must move along the X and Y axes to align with the model tip.
- Page 91 FDM Vantage User Guide Calibrating Liquefier Tips Tip Offset Adjustment Indicators X - Y Support Calibration Toolpath X - Y Alignment Indicators Example: Best Centered Position Z Calibration Box This example requires an adjustment to Y of - .002 in. The X axis requires no adjustment.
- Page 92 Calibrating Liquefier Tips FDM Vantage User Guide D. Determine the Z Calibration Adjustment Note: Do not measure for Z Calibration until the Calibration Model shows the XY Offset to be 0 for the X and Y axis. 1) Peel the Support layer from the Z Calibration box. 2) Measure the thickness of the Support layer with a caliper or micrometer.
-
Page 93: Manual Calibration
FDM Vantage User Guide Calibrating Liquefier Tips E. Enter the XY Offset and Z Calibration Adjustment Values 1) From the Main Menu select Operator Control and press Enter. Build Job.. |*Tips: Model T16 >Operator Control.. Support T16 Modeler Status.. Maintenance.. 2) Select Calibrate and press Enter. - Page 94 Calibrating Liquefier Tips FDM Vantage User Guide B. Run Z Stage Zero with Shim Calibration 1) From the Main Menu select Operator Control and press Enter. Build Job.. |*Tips: Model T16 >Operator Control.. Support T16 Modeler Status.. Maintenance.. 2) Select Calibrate and press Enter. Unlock Door <E>...
- Page 95 FDM Vantage User Guide Calibrating Liquefier Tips WARNING: USE CARE WHEN WORKING INSIDE THE OVEN. BURNS DUE TO HIGH OPERATING TEMPERATURE (AS HIGH AS 250° C) CAN OCCUR. 7) Unlock and open the oven door. 8) Place the zero calibration shim between the tip and the build sheet (Figure 7-4:).
- Page 96 Calibrating Liquefier Tips FDM Vantage User Guide 10) Raise (3 on the operator panel number pad) the platen until there is a light drag on the calibration shim - if necessary, lower the platen (9 on the operator panel number pad) to achieve the appropriate amount of drag. Note: Use the calibration shim as a feeler gauge, slide the shim fore and aft as the platen is raised .
- Page 97 FDM Vantage User Guide Calibrating Liquefier Tips 3) Select Set Z Stage Zero and press Enter. >Set Z Stage Zero.. | Calibration Job <E> AutoCal Tips <E> Tip Offset Value.. AutoHome XYZ <E> 4) Select Auto Z Zero Calibrate and press Enter. Set Z Zero with Shim <E>...
- Page 98 Calibrating Liquefier Tips FDM Vantage User Guide 4) The system automatically calibrates the tips in the X, Y, and Z directions. Calibration time varies from 15 to 20 minutes. While running, the display will show: * Tip to Tip Calibration Activity * * Press <ESCAPE>...
-
Page 99: Maintaining The Machine
FDM Titan User Guide Maintaining the Machine Chapter 8 Maintaining the Machine Maintenance Schedule The following maintenance tasks must be performed on a regular basis in order to maintain optimal machine operation. Detailed instructions on each task follow the table. -
Page 100: Daily Maintenance Tasks
The upper waste chute can be pulled out from the oven and should checked between each part build making sure there is no blockage. Stratasys does not recommend cleaning the waste chute Upper waste chute during a part build. If necessary, quickly close the oven door... -
Page 101: Weekly Maintenance Tasks
FDM Titan User Guide Maintaining the Machine 7. Reinstall the tip wipe assembly, cleaning if necessary, and insert the upper chute back into the brackets along the oven wall. Make sure the assembly is locked in the oven wall mounts to avoid damaging tips or other oven components. -
Page 102: Inspecting The Purge Ledge
Maintaining the Machine FDM Titan User Guide 2. Remove the tip wipe assembly from the purge bucket by removing the two screws and pulling the pull ring. 3. Loosen and remove all three brush retaining screws. 4. Note the silicone wiper orientation prior to removal. -
Page 103: Lubricating The Z Stage Lead Screws And Guide Rods
FDM Titan User Guide Maintaining the Machine Lubricating the Z stage Lead Screws and Guide Rods To lubricate the Z lead screws and guide rods: 1. Move the Z stage to the bottom position: • From the Main Menu select Operator Control and press ENTER. -
Page 104: Cleaning The Cone Sensor
Maintaining the Machine FDM Titan User Guide 3. Unscrew the vacuum filter jar and clean out any debris with a clean cloth. 4. Replace the filter. 5. Reinstall the vacuum filter jar. 6. Reinstall the panel and tighten the four screws. -
Page 105: Cleaning Exterior Machine Surfaces
FDM Titan User Guide Maintaining the Machine 2. Grasp the handle on the purge bucket and pull up and left to remove it from the oven. 3. Using safety gloves, pull out the key ring from the purge bucket to remove the wiper assembly. - Page 106 Maintaining the Machine FDM Titan User Guide WARNING: DO NOT continue until the six-minute cooling cycle has completed. This can be verified by examining the UPS status LEDs through the back panel grill. DO NOT attempt to replace the light bulbs if ANY UPS LED are still lit! 2.
-
Page 107: Troubleshooting
FDM Titan User Guide Troubleshooting Chapter 9 Troubleshooting Getting Help If you have problems with your machine or materials, that are not covered in this user guide or in the T-Class Quick Reference Card, or if you need to order replacement parts, please contact Customer Support by using one of the following methods. -
Page 108: Finding A Remedy
Troubleshooting FDM Titan User Guide Finding a Remedy Condition Possible Cause Remedy Canister will not Anti-rotation plug not Remove plug. load removed from canister Rubber thumbwheel insert Remove thumbwheel insert. not removed from thumbwheel door Empty canister Replace canister. (zero volume) - Page 109 FDM Titan User Guide Troubleshooting Condition Possible Cause Remedy Loss of extrusion Filament stuck in canister Remove canister from machine (Head will not and pull out about 8 feet (2 extrude material) meters) of material out. Ensure filament pulls out freely.
- Page 110 Troubleshooting FDM Titan User Guide Condition Possible Cause Remedy Low Vacuum The build sheet is not Move the sheet until it overlaps (Vacuum gauge properly installed the platen equally on all sides. does not read -15 or There is filament debris on...
- Page 111 FDM Titan User Guide Troubleshooting Condition Possible Cause Remedy Oven not Heater failure Call Customer Support. maintaining Oven door open. Close the oven door; the heater temperatures turns off while the door is open. Oven door not sealing with Call Customer Support.
- Page 112 Troubleshooting FDM Titan User Guide 9 - 6...
-
Page 113: Index
FDM Vantage User Guide Index Index Symbols .CMB File ....4-5 Canister Bay .STL File Air Pressure Gauge ..4-2 Opening . - Page 114 Index FDM Vantage User Guide Control Panel ....5-1 Head Creating Toolpaths ... .6-6 Assembly ....3-4 Crushed Hand Sign .
- Page 115 FDM Vantage User Guide Index Loading ....4-11 Modeling ....9-4 PC-ISO .
- Page 116 Storing Canisters ... . . 4-5 Flatness Diagnostic ..8-6 Stratasys Location ....3-8 Mailing Address .
- Page 117 FDM Vantage User Guide Index X Carriage Assembly ...3-4 XY Gantry ....1-3 Assembly .
- Page 118 Index FDM Vantage User Guide Index - 6...
-
Page 119: Appendix A: Ppsf Materials User Guide
FDM Titan User Guide Appendix A: PPSF Materials User Guide Appendix A: PPSF Materials User Guide Introduction to PPSF Polyphenylsulfone (PPSF) is an engineering grade thermoplastic with superior mechanical, thermal, and chemical properties. With an HDT of 189° C (372° F), you can perform a wider range of tests at higher temperatures, giving you more accurate information. -
Page 120: Hazard Classifications
Appendix A: PPSF Materials User Guide FDM Titan User Guide Hazard Classifications Stratasys recommends that only qualified personnel handle PPSF and PPSF_S. The following hazard classifications are used in this guide and should be understood by those who handle the material. -
Page 121: Titan Operation With Ppsf
Appendix A: PPSF Materials User Guide Titan Operation with PPSF Follow the FDM Titan User Guide on all Titan operations including: safety instructions, loading materials, changing material type, changing liquefier tips, etc. WARNING: Always wear protective safety gloves and follow safety... -
Page 122: Removing Ppsf_S Supports
You can remove supports from one part while the others are heating up. The difficulty of support removal is based on the following: part size, amount of supports, support style, and support temperature. Stratasys recommends removing the supports in the following order: 1. Base 2. -
Page 123: Using The Support Removal Toolkit Items
FDM Titan User Guide Appendix A: PPSF Materials User Guide 4. Around small features 5. Angle support faces 6. Large mass sections Note: If the support structures become brittle or hard to remove, reheat the part in the oven. Using the Support Removal Toolkit Items The Support Removal Toolkit contains several tools that are specifically designed to remove FDM supports. -
Page 124: Support Removal Tool Kit
Appendix A: PPSF Materials User Guide FDM Titan User Guide Support Removal Tool Kit Item Description and Usage Safety Gloves The safety gloves are leather and heat resistant, shielding hands from minor cuts while removing supports. Safety glasses with Safety glasses must be worn for your safety while removing hanging cord supports in case of flying particles from the supports. - Page 125 FDM Titan User Guide Appendix A: PPSF Materials User Guide Item Description and Usage Straight Chisel The straight chisel removes the support faces from the part and is the most versatile tool. Tips 1. Hold the straight chisel bevel down in the palm of your hand.
- Page 126 Appendix A: PPSF Materials User Guide FDM Titan User Guide Item Description and Usage Gouge The gouge removes supports in holes and concave parts. The gouge reduces the chances of cutting into the part and gives you a closer cut.
-
Page 127: Reheating A Ppsf Part
FDM Titan User Guide Appendix A: PPSF Materials User Guide Item Description and Usage The Awl removes supports from the support face and in areas that are too small for the straight chisel to reach. Tips 1. Carefully cut through the support face with the awl. Work out from this entry point being careful not to cut into the part. -
Page 128: Reheating With The Titan Oven
Reheating with a Hot Air Gun If you choose to use a hot air gun, Stratasys recommends using an electronically controlled hot air gun with an adjustable temperature and air flow. -
Page 129: Ppsf Properties
FDM Titan User Guide Appendix A: PPSF Materials User Guide PPSF Properties Mechanical Properties English Units SI Units Test Method Tensile strength 8,000 psi 55 MPa ASTM D638 Tensile modulus 300,000 psi 2068 MPa ASTM D638 Tensile Elongation ASTM D638... -
Page 130: Special Properties
Appendix A: PPSF Materials User Guide FDM Titan User Guide Special Properties Sterilization Although Stratasys has not done any testing on the sterilization of PPSF, other companies have used PPSF for sterilization. PPSF can be used in the following: • Steam autoclave •... -
Page 131: Drilling And Sanding
FDM Titan User Guide Appendix A: PPSF Materials User Guide Sealing/Adhesive Data Weldon 3 American Seal All Devcon 5 Satellite City Standard, Minute #HS-4 P/S Fuel Epoxy Hot Stuff Tank Sealant, Instant Glue PQR 15 Application Brush or dip Brush or dip... - Page 132 Appendix A: PPSF Materials User Guide FDM Titan User Guide A - 14...
- Page 133 FDM Titan User Guide Appendix B: UI Menu Structure Appendix B: UI Menu Structure 1 - Main Menu Build Job.. |*Tips: Model T16 >Operator Control.. Support T16 Modeler Status.. Maintenance.. 2 - Build Job.. >Build Next Job: “Name of Job” <E>...
- Page 134 Appendix B: UI Menu Structure FDM Titan User Guide 1 - Main Menu Build Job.. |*Tips: Model T16 >Operator Control.. Support T16 Modeler Status.. Maintenance.. 2 - Operator Control Unlock Door <E> | Calibrate.. >Load/Unload Mtl.. | Temp Control.. Change Tips/Mtl..
- Page 135 FDM Titan User Guide Appendix B: UI Menu Structure 4 - Unplug Tips.. ***** Head Purge Buttons Activated ***** MODEL (1) Support (2) ** Model Warming to 145° C (now 85° C) ** ** Supp Warming to 145° C (now 85° C) ** 3 - Change Tips/Matl..
- Page 136 Appendix B: UI Menu Structure FDM Titan User Guide 6 - Select Calibration Part Position.. (if user placement on) Locate Part Start.. Demo Bounding Box <E> >Load and Calibrate.. The following screens display automatically: * Waiting h:mm to stabilize ** Actual 100°C Setpoint: 225°C...
- Page 137 FDM Titan User Guide Appendix B: UI Menu Structure 5 - Set Z Zero with Shim.. *Positioning. Please Wait... Unlock Door <E> Set Distance= 0.100 <E> >Set Z Stage= <E> 0.010) *Move Z Stage: +Z<9> -Z<3> 5 - Modify Current Z Zero..
- Page 138 Appendix B: UI Menu Structure FDM Titan User Guide 1 - Main Menu Build Job.. |*Tips: Model T16 Operator Control.. Support T16 >Modeler Status.. Maintenance.. 2 - Modeler Status.. >Temperatures.. Material Status.. Tip Status.. Machine State 3 - Temperatures.. Current Setpoint * Oven: 78°...
- Page 139 FDM Titan User Guide Appendix B: UI Menu Structure 4 - Sensor States.. Door State: -Closed- Hood State: -Closed- Sense Head Switch1: -OFF- Sense Head Switch2: -OFF- Filament at Model Head: -NOT Sensed- Filament at Support Head: -NOT Sensed- Cone Sensor: -OFF-...
- Page 140 Appendix B: UI Menu Structure FDM Titan User Guide 1 - Main Menu Build Job.. |*Tips: Model T16 Operator Control.. Support T16 Modeler Status.. >Maintenance.. 2 - Maintenance.. >Modeler Default.. Administration.. Reboot Machine.. Measure Flatness <E> 3 - Modeler Default..
- Page 141 FDM Titan User Guide Appendix B: UI Menu Structure 3 - Reboot Machine.. !! Hit the 1 key to Reboot Now !! or press <MENU> key B - 9...
- Page 142 Appendix B: UI Menu Structure FDM Titan User Guide B - 10...
Need help?
Do you have a question about the FDM Titan and is the answer not in the manual?
Questions and answers