
Subscribe to Our Youtube Channel
Related Manuals for Stratasys F120


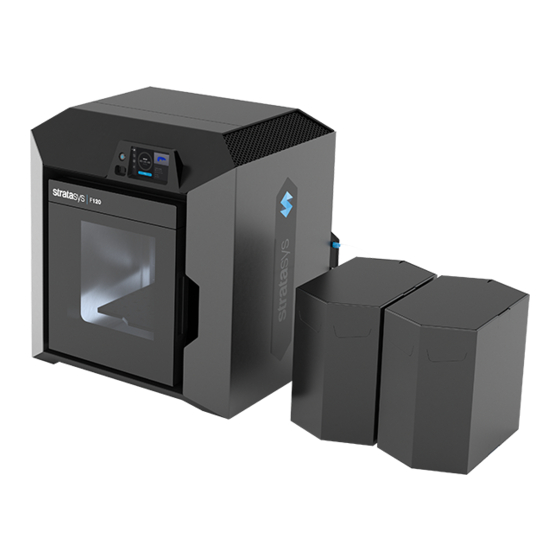
Summary of Contents for Stratasys F120
- Page 1 Site Preparation Guide F120 Shared Office 3D Printing System Part No. 405680-0001_REV_B...
- Page 2 No part of this document may be photocopied, reproduced, or translated into any human or computer language in any form, nor stored in a database or retrieval system, without prior permission in writing from Stratasys. This document may be printed for internal use only. All copies, shall contain a full copy of this copyright notice.
-
Page 3: Table Of Contents
Contents Revision Log ....................iv Safety......................iv Safe Environment........................ iv About the F120 Printer................... 1 Components ........................1 Highlights..........................1 How to Use This Guide......................1 Site Prep Tasks ....................2 Selecting the Site ........................ 2 Physical Specifications and Space Requirements .............. 2 Environmental Requirements .................... -
Page 4: Revision Log
Stratasys equipment and are not to be considered as comprehensive on matters of safety. Although the F120 printers are designed to be safe and reliable, access to areas of the printer are potentially dangerous and should be approached with caution. -
Page 5: About The F120 Printer
Direct Digital Manufacturing (DDM) allows for the creation of customized end-use parts straight from 3D CAD data. The F120 printer features a servo/belt driven XY gantry with multiple modeling material capability. -
Page 6: Site Prep Tasks
500 pounds (227 kg). Caution: Due to the physical size and weight of the F120 printer, it is recommended to use a forklift when positioning the printer. If a table is used to support the printer, the recommended height is 30 inches ± 3 inches (76 cm ±... - Page 7 Site Preparation Guide Site Prep Tasks Figure 1: F120 Center of Mass The center of mass dimensions shown are taken from the bottom center of the front left foot. Page 3...
- Page 8 Site Preparation Guide Site Prep Tasks Minimum Operational Clearances Sufficient rear and side clearances allow for proper air circulation, while sufficient front clearance allows enough room for the oven door and drawers to be opened. Right Side Clearance (Includes additional space for Minimum 20 inches (50.8 cm) material coil boxes) Left Side Clearance...
-
Page 9: Environmental Requirements
Site Preparation Guide Site Prep Tasks Environmental Requirements • The F120 printer can be used in any controlled environment. • Air quality conditions with excessive solid particulates (conductive or non-conductive) may result in system damage. • Air quality conditions in which airborne oils are allowed to accumulate on or within the printer can damage the plastic components. -
Page 10: Electrical Requirements
A LAN connection is not required however, as the printer is also capable of file transfer via a Wi-Fi connection or a USB flash drive plugged into either of the printer’s USB ports. See the F120 User Guide for detailed information and instructions on transferring files to the printer. Page 6... -
Page 11: Receiving The Printer
Receiving the Printer Receiving the Printer Inspect Crate for Damage Before opening the shipping crate, inspect the crate for signs of exterior damage. Report evidence of excessive damage to Stratasys and the shipping company. Preparing For Installation Required Tools and Equipment •... -
Page 12: Unpacking And Positioning The Printer
Site Preparation Guide Preparing For Installation Unpacking and Positioning the Printer Make sure that there is at least 70 inches (178 cm) of clearance for the printer before you begin the process of unpacking the printer. 1. Inspect the Tilt Indicators (2) and ShockWatch indicator affixed to the exterior of the cardboard box. - Page 13 Site Preparation Guide Preparing For Installation 3. Lift and remove the protective cardboard container panel encasing the printer (Figure Figure 4: Removing the cardboard Shipping Bands Protective Cardboard Container Panel 4. Carefully cut the shipping bands that secure the printer to the pallet (Figure 4).
- Page 14 7. Remove the protective film from the touchscreen and the logos on the printer’s exterior. 8. Inspect the printer’s exterior for dents and scratches. Immediately report any damage to Stratasys and the shipping company. 9. Using a forklift, carefully raise the printer vertically and remove the shipping base...
- Page 15 Position the printer to allow at least three feet of clearance on all sides until the installation process is complete, see “Physical Specifications and Space . Refer to Chapter 2 of the F120 User Guide for final setup Requirements” (page 2) instructions.
-
Page 16: Site Preparation Checklist
Site Preparation Guide Site Preparation Checklist Site Preparation Checklist Electrical Installation Requirements A dedicated outlet of 100-132, 200-240 VAC~15-7A 50/60 Hz has been installed. The grounded electrical outlet is within 2 meters (80 inches) of the printer. The grounded electrical outlet is able to accept either a Euro or US power cord plug. If utilizing a LAN connection, the LAN connection is within 4 meters (14 feet) of the printer. - Page 17 _____ c-support@stratasys.com Copyright © 2019 - 2020 Stratasys. All rights reserved. Part No. 405680-0001_REV_B THE 3D PRINTING SOLUTIONS COMPANY...
Need help?
Do you have a question about the F120 and is the answer not in the manual?
Questions and answers