Lightware MMX4x2-HT200 Manuals
Manuals and User Guides for Lightware MMX4x2-HT200. We have 4 Lightware MMX4x2-HT200 manuals available for free PDF download: User Manual, Quick Start Manual

Lightware MMX4x2-HT200 User Manual (172 pages)
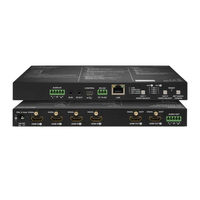
Standalone Multimedia Matrix Switcher
Brand: Lightware
|
Category: Matrix Switcher
|
Size: 14 MB
Table of Contents
-
Features12
-
Mmx4X2-HT20015
-
Mmx4X2-HDMI16
-
Control Lock20
-
Installation21
-
IR Connector24
-
Connector24
-
Wake-On-Lan31
-
Recognizer34
-
IR Interface35
-
Ethernet Tab39
-
Serial Tab40
-
USB Tab40
-
Presets Tab42
-
Port Tiles42
-
CEC Tool47
-
EDID Menu50
-
Control Menu52
-
Ethernet53
-
Gpio55
-
Infra55
-
Macros57
-
Variables58
-
Usbswitch59
-
Status64
-
Network64
-
Front Panel65
-
Backup65
-
System65
-
Compile Time73
-
Overview83
-
Escaping85
-
Signature85
-
Subscription85
-
Control Lock87
-
Value Assignment109
-
HTTP Messaging116
-
Protocol Setting120
-
Stopbits Setting120
-
Parity Setting120
-
Databit Setting121
-
Operation Mode121
-
Message Sending121
-
Further Commands125
Advertisement
Lightware MMX4x2-HT200 User Manual (135 pages)
Standalone Multimedia Matrix Switcher
Brand: Lightware
|
Category: Matrix Switcher
|
Size: 12 MB
Table of Contents
-
Features10
-
Mmx4X2-HT20012
-
Mmx4X2-HDMI13
-
Control Lock17
-
Installation18
-
IR Connector21
-
Connector21
-
Recognizer29
-
IR Interface30
-
Presets Tab37
-
Port Tiles37
-
CEC Tool42
-
EDID Menu45
-
Control Menu47
-
Ethernet48
-
Gpio48
-
Infra49
-
Usbswitch50
-
Status54
-
Network54
-
Backup54
-
System55
-
Compile Time62
-
Lock Output64
-
Mute Output64
-
Overview70
-
Escaping72
-
Signature72
-
Subscription72
-
Control Lock73
-
EDID Management104

Lightware MMX4x2-HT200 User Manual (98 pages)
Standalone Multimedia Matrix Switcher MMX4x2 series
Table of Contents
-
Features8
-
Front View11
-
Rear View12
-
IR Connector13
-
Connector13
-
Port Diagram13
-
IR Interface17
-
Operation19
-
Status Leds19
-
Control Lock21
-
HDCP Leds21
-
Port Tiles26
-
EDID Menu30
-
Control Menu33
-
Ethernet33
-
Infra34
-
Status38
-
Network39
-
Backup39
-
System39
-
Compile Time43
-
Mute Output44
-
Lock Output44
-
Overview49
-
Escaping51
-
LW3 Commands52
-
Get Command52
-
Set Command53
-
Invocation53
-
Manual54
-
Signature54
-
Subscription54
-
Control Lock56
Advertisement

Lightware MMX4x2-HT200 Quick Start Manual (2 pages)
Brand: Lightware
|
Category: Matrix Switcher
|
Size: 4 MB