
Lightware MMX8x4-HT Series Manuals
Manuals and User Guides for Lightware MMX8x4-HT Series. We have 2 Lightware MMX8x4-HT Series manuals available for free PDF download: User Manual
Lightware MMX8x4-HT Series User Manual (163 pages)
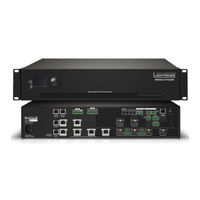
Multiport Matrix Switcher
Brand: Lightware
|
Category: Matrix Switcher
|
Size: 23 MB
Table of Contents
-
Front View15
-
Rear View16
-
Status Leds19
-
Ports Menu21
-
EDID Menu22
-
Health Menu22
-
Control Lock23
-
Output Lock24
-
Control Lock25
-
Installation27
-
Connector29
-
IR Connector30
-
Powering on33
-
USB Control50
-
Video Tab56
-
Audio Tab63
-
Scenes65
-
Presets Tab71
-
EDID Menu72
-
Control Menu74
-
Tab74
-
Ethernet75
-
Infra Tab75
-
Relay Tab76
-
GPIO Tab76
-
System80
-
Backup80
-
Status80
-
Network Tab80
-
Compile Time88
-
Overview96
-
Escaping97
-
Signature97
-
Subscription97
-
Control Lock99
-
Poe Enable105
-
Test Pattern106
-
EDID Management106
-
Audio Presets118
-
Delete a Preset119
-
Audio Scenes119
-
Protocol Setting120
-
USB Host Select123
-
Device 5V Enable124
-
Host 5V Sense124
-
Hotplug Detect128
-
Remote129
-
Firmware Upgrade135
-
Introduction136
-
Preparation136
-
Troubleshooting140
-
Use Case Studies141
-
Technologies144
-
EDID Management145
-
HDCP Management146
-
Appendix148
-
Specification149
-
Port Numbering154
-
Mmx8X4-HT400MC154
-
Mmx8X8-HDMI-4K-A155
-
Mmx8X4-HT420M156
Advertisement

Lightware MMX8x4-HT Series User Manual (125 pages)
Multiport Matrix Switcher
Brand: Lightware
|
Category: Matrix Switcher
|
Size: 34 MB
Table of Contents
-
-
Front View14
-
Rear View15
-
Connector16
-
IR Connector16
-
-
4 Operation
30-
Powering on30
-
Status Leds30
-
Ports Menu31
-
EDID Menu32
-
Health Menu32
-
Control Lock33
-
Output Lock34
-
Control Lock35
-
Take Mode36
-
-
-
Video Tab40
-
Audio Tab46
-
Scenes47
-
Presets Tab52
-
EDID Menu53
-
Control Menu55
-
Tab55
-
Ethernet56
-
Infra Tab56
-
GPIO Tab57
-
Relay Tab57
-
Status60
-
Network Tab61
-
Backup61
-
System61
-
-
Compile Time65
-
-
Overview70
-
Escaping71
-
Signature72
-
Subscription72
-
Control Lock73
-
Poe Enable80
-
Test Pattern80
-
Audio Scenes90
-
Remote97
-
-
10 Technologies
111 -
11 Appendix
114-
Specification114
-
Port Numbering119
-
Mmx8X4-HT400MC119
-
Mmx8X8-HDMI-4K-A119
-
Mmx8X4-HT420M120
-