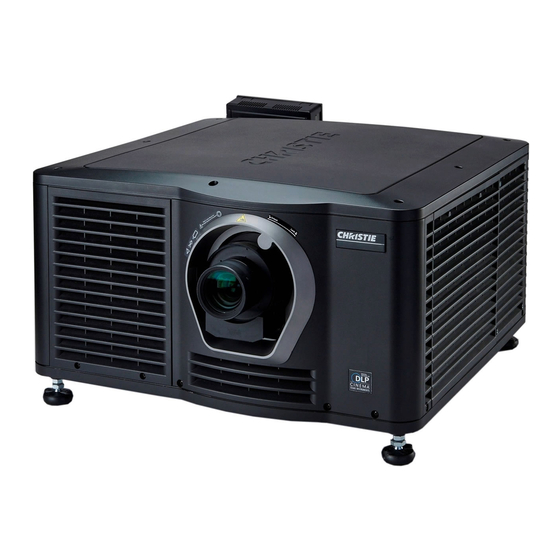
Sign In
Upload
Manuals
Brands
Christie Manuals
Projector
CP2215
Christie CP2215 Manuals
Manuals and User Guides for Christie CP2215. We have
8
Christie CP2215 manuals available for free PDF download: User Manual, Service Manual, Quick Start Manual, Technical Bulletin, Brochure & Specs, Manual
Christie CP2215 User Manual (104 pages)
Brand:
Christie
| Category:
Projector
| Size: 9.79 MB
Table of Contents
Table of Contents
3
Installation and Setup
9
Safety Precautions
9
Ac/Power Precautions
10
Power Cords and Attachments
10
Lamp Precautions
11
Projector Components - Front
11
Projector Components - Rear
12
Position the Projector
12
Adjust Tilt and Level the Projector
13
Install the Touch Panel Controller
13
Connect the Exhaust Duct
14
Install the Lens
15
Install the Lamp
16
Connect Devices to the Projector
18
Projector Connections and Status Leds
18
Connect the Projector to a Computer
20
Connect Devices to the 3D Terminal
20
Connect Devices to the GPIO Port
20
Connect Devices to the Scci Port
21
Connect Power
22
Turn the Projector on
23
Log on to the Projector
23
Activate Marriage
24
Add the Projector to a Network
24
Add the Lamp Information to the Lamp History
25
Turn the Lamp on
25
Align the Lamp with Lamploc
25
Adjust the Image to Fit Your Screen
26
Play Content
27
Unencrypted Content
27
Encrypted Content
27
Adjust the Image
29
Correct Keystone Effect
29
Correct Vignetting
29
Adjust Vertical Boresight Angle
30
Adjust Horizontal Boresight
31
Adjust DMD Convergence
33
Align the Fold Mirror
33
Color Calibration
34
Screen Masking
34
Calibrate Screen Brightness (Fl)
35
Access the Projector and Run Diagnostics
37
The Touch Panel Controller
37
The Main Screen
37
Log on to the Projector
38
LED Status Indicators
38
View the Status of Projector Components
39
Respond to Alarms
40
Run the Projector Interrogator
40
View SMPTE Errors
41
Clear SMPTE Errors
41
Retrieve System Logs
41
Run a Server Test
41
Turn the Projector off
42
Manage the DLP
43
Reset the DLP
43
Run a DLP Self Test
43
Download an ICP Certificate
43
Download an LD Certificate
43
Disable the ICP Signature Test
44
Indicate an LD Is Installed
44
Work with Channels
45
Create a New Channel
45
Field Description
46
Activate a Channel
47
Restore Default Channel Settings
47
Change the Channel Icon
48
Add or Remove Preferred Channels from the Preferred Channels Pane
48
Manage Lamp Information
49
Create a New Lamp File
49
Modify an Existing Lamp File
49
Enable or Disable Liteloc on a Lamp File
50
Adjust Lamp Power
50
Change the Lamp Power Percentage
50
View Lamp Information
50
Receive an Alarm When a Lamp Reaches Its Expiry Date
50
Add a Lamp to the Lamp History
51
Verify Current Lamp Intensity
51
Manage Projector Setting Files
53
Create a Source File
53
Modify a Source File
53
Create a Screen File
53
Modify a Screen File
54
Create a MCGD File
54
Modify a MCGD File
55
Create a TCGD File
55
Modify a TCGD File
55
Create a New ILS File
56
Edit an Existing ILS File
56
Enable Automatic ILS Adjustment on a Channel
56
Reset ILS File Settings
57
Add a Lens Serial Number
57
Enable Automatic ILS on a Lens
57
Reset the Lens Position on Projector Startup
57
Complete a Full Lens Calibration
57
Reset the ILS and the Lens Position
58
Work with the Scheduler
59
Schedule the Projector to Turn on or off
59
Edit a Scheduled Event
59
Delete a Scheduled Event
60
Delete All Scheduled Events
60
Turn the Scheduler off
60
View and Modify Projector Settings
61
Set Projector and TPC Preferences
61
Adjust Projector Time Settings
61
Modify Projector Communication Settings
62
Add a Network Device
62
Access a Network Device
63
Calibrate the Internal Light Meter
63
View the Microsoft Windows Task Manager
63
View the Microsoft Windows Computer Management Console
63
View Microsoft Windows Explorer
64
View the Microsoft Network Connections Window
64
View Projector Information
64
Record the Lens Serial Number
64
Manage User Accounts
65
User Access Permissions
65
Add a User Account
65
Change a User Account Password or Permissions
65
Delete a User Account
66
Backup, Restore, and Upgrade Projector Files
67
Add an Upgrade File
67
Remove an Upgrade File
67
Install an Upgrade
67
Back up Projector Settings and Information
68
Restore a File
68
Restore Factory Default Settings
68
Move Files to the Projector
69
Delete Projector Files
69
Test Patterns
71
Add or Remove Test Patterns from the Preferred Test Patterns Pane
71
Turn a Test Pattern on or off
71
Display a Full Screen Test Pattern
71
View 3D Content
73
Display Requirements
73
3D Sync Terminal PIN Map
73
Hardware Setup
74
Create a High Frame Rate 3D File
74
Edit the Default 3D Lamp File
76
Define a Measured Color Gamut Data File
76
Edit the 3D Flat 1998 X 1080 Channel
76
Edit the 3D Scope 2048 X 858 Channel
77
Display 3D Diagnostic Test Patterns
78
Verify 3D Cinema Content
78
Troubleshooting
79
Projector Functionality
79
Lamp Functionality
80
Display Issues
80
Maintenance
83
Inspect Ventilation
83
Check the Coolant Level
83
Clean the Radiator Filter
84
Inspect the Lamp
85
Inspect and Clean Optics
85
Clean the Lens
86
Replace the Lamp
86
Remove the Existing Lamp
87
Install the New Lamp
88
Inspect the Card Cage Filter
90
Cleaning a Washable Filter
90
Replace the Lens
91
Specifications
93
Display
93
Panel Resolution and Refresh Rate
93
Achievable Brightness (Measured at Screen Center)
93
Achievable Contrast Ratio
93
Color and Gray Scale
93
White Point
94
Gamma
94
Control Signal Compatibility
94
Ethernet Port
94
Rs232-Pib
94
Rs232-Icp
95
GPIO Terminal
95
SCCI Terminal
95
3D Terminal
96
USB 1 Terminal
96
USB 2 Terminal
96
MALM Terminal
96
Touch Panel Controller
97
Power Requirements
97
AC Input (A)
97
UPS AC Input (B)
97
Lamp
98
Physical Specifications
98
Regulatory
99
Safety
99
Electro-Magnetic Compatibility
99
Environmental
99
Certification Approvals
99
Environment
100
Operating Environment
100
Non-Operating Environment
100
Accessories
101
Standard (Sold with Product)
101
Advertisement
Christie CP2215 User Manual (104 pages)
Brand:
Christie
| Category:
Projector
| Size: 10.44 MB
Table of Contents
Table of Contents
3
Installation and Setup
9
Safety Precautions
9
Ac/Power Precautions
10
Power Cords and Attachments
10
Lamp Precautions
11
Projector Components - Front
11
Projector Components - Rear
12
Position the Projector
12
Adjust Tilt and Level the Projector
13
Install the Touch Panel Controller
13
Connect the Exhaust Duct
14
Install the Lens
15
Install the Lamp
16
Connect Devices to the Projector
18
Projector Connections and Status Leds
18
Connect the Projector to a Computer
20
Connect Devices to the 3D Terminal
20
Connect Devices to the GPIO Port
20
Connect Devices to the Scci Port
21
Connect Power
22
Turn the Projector on
23
Log on to the Projector
23
Activate Marriage
24
Add the Projector to a Network
24
Add the Lamp Information to the Lamp History
25
Turn the Lamp on
25
Align the Lamp with Lamploc
25
Adjust the Image to Fit Your Screen
26
Play Content
27
Unencrypted Content
27
Encrypted Content
27
Adjust the Image
29
Correct Keystone Effect
29
Correct Vignetting
29
Adjust Vertical Boresight Angle
30
Adjust Horizontal Boresight
31
Adjust DMD Convergence
33
Align the Fold Mirror
33
Color Calibration
34
Screen Masking
34
Calibrate Screen Brightness (Fl)
35
Access the Projector and Run Diagnostics
37
The Touch Panel Controller
37
The Main Screen
37
Log on to the Projector
38
LED Status Indicators
38
View the Status of Projector Components
39
Respond to Alarms
40
Run the Projector Interrogator
40
View SMPTE Errors
41
Clear SMPTE Errors
41
Retrieve System Logs
41
Run a Server Test
41
Turn the Projector off
42
Manage the DLP
43
Reset the DLP
43
Run a DLP Self Test
43
Download an ICP Certificate
43
Download an LD Certificate
43
Disable the ICP Signature Test
44
Indicate an LD Is Installed
44
Work with Channels
45
Create a New Channel
45
Activate a Channel
47
Restore Default Channel Settings
47
Change the Channel Icon
48
Add or Remove Preferred Channels from the Preferred Channels Pane
48
Manage Lamp Information
49
Create a New Lamp File
49
Modify an Existing Lamp File
49
Enable or Disable Liteloc on a Lamp File
50
Adjust Lamp Power
50
Change the Lamp Power Percentage
50
View Lamp Information
50
Receive an Alarm When a Lamp Reaches Its Expiry Date
50
Add a Lamp to the Lamp History
51
Verify Current Lamp Intensity
51
Manage Projector Setting Files
53
Create a Source File
53
Modify a Source File
53
Create a Screen File
53
Modify a Screen File
54
Create a MCGD File
54
Modify a MCGD File
55
Create a TCGD File
55
Modify a TCGD File
55
Create a New ILS File
56
Edit an Existing ILS File
56
Enable Automatic ILS Adjustment on a Channel
56
Reset ILS File Settings
57
Add a Lens Serial Number
57
Enable Automatic ILS on a Lens
57
Reset the Lens Position on Projector Startup
57
Complete a Full Lens Calibration
57
Reset the ILS and the Lens Position
58
Work with the Scheduler
59
Schedule the Projector to Turn on or off
59
Edit a Scheduled Event
59
Delete a Scheduled Event
60
Delete All Scheduled Events
60
Turn the Scheduler off
60
View and Modify Projector Settings
61
Set Projector and TPC Preferences
61
Adjust Projector Time Settings
61
Modify Projector Communication Settings
62
Add a Network Device
62
Access a Network Device
63
Calibrate the Internal Light Meter
63
View the Microsoft Windows Task Manager
63
View the Microsoft Windows Computer Management Console
63
View Microsoft Windows Explorer
64
View the Microsoft Network Connections Window
64
View Projector Information
64
Record the Lens Serial Number
64
Manage User Accounts
65
User Access Permissions
65
Add a User Account
65
Change a User Account Password or Permissions
65
Delete a User Account
66
Backup, Restore, and Upgrade Projector Files
67
Add an Upgrade File
67
Remove an Upgrade File
67
Install an Upgrade
67
Back up Projector Settings and Information
68
Restore a File
68
Restore Factory Default Settings
68
Move Files to the Projector
69
Delete Projector Files
69
Test Patterns
71
Add or Remove Test Patterns from the Preferred Test Patterns Pane
71
Turn a Test Pattern on or off
71
Display a Full Screen Test Pattern
71
View 3D Content
73
Display Requirements
73
3D Sync Terminal PIN Map
73
Hardware Setup
74
Create a High Frame Rate 3D File
74
Edit the Default 3D Lamp File
76
Define a Measured Color Gamut Data File
76
Edit the 3D Flat 1998 X 1080 Channel
76
Edit the 3D Scope 2048 X 858 Channel
77
Display 3D Diagnostic Test Patterns
78
Verify 3D Cinema Content
78
Troubleshooting
79
Projector Functionality
79
Lamp Functionality
80
Display Issues
80
Maintenance
83
Inspect Ventilation
83
Check the Coolant Level
83
Clean the Radiator Filter
84
Inspect the Lamp
85
Inspect and Clean Optics
85
Clean the Lens
86
Replace the Lamp
86
Remove the Existing Lamp
87
Install the New Lamp
88
Inspect the Card Cage Filter
90
Cleaning a Washable Filter
90
Replace the Lens
91
Specifications
93
Display
93
Panel Resolution and Refresh Rate
93
Achievable Brightness (Measured at Screen Center)
93
Achievable Contrast Ratio
93
Color and Gray Scale
93
White Point
94
Gamma
94
Control Signal Compatibility
94
Ethernet Port
94
Rs232-Pib
94
Rs232-Icp
95
GPIO Terminal
95
SCCI Terminal
95
3D Terminal
96
USB 1 Terminal
96
USB 2 Terminal
96
MALM Terminal
96
Touch Panel Controller
97
Power Requirements
97
AC Input (A)
97
UPS AC Input (B)
97
Lamp
98
Physical Specifications
98
Regulatory
99
Safety
99
Electro-Magnetic Compatibility
99
Environmental
99
Certification Approvals
99
Environment
100
Operating Environment
100
Non-Operating Environment
100
Accessories
101
Standard (Sold with Product)
101
Christie CP2215 Service Manual (86 pages)
Brand:
Christie
| Category:
Projector
| Size: 3.07 MB
Table of Contents
Table of Contents
5
Introduction
9
Safety Information
9
Projector Skins
9
Lamp
9
Lamp Power Supply
10
Power Supplies
10
UV Light
11
High Temperatures
11
Power Cord
11
Lead Dress
12
Ground/Earth Connections
12
Cleaning
12
Security Roles
12
Technical Support
13
Adjust the Image
15
Rotate the Integrator Rod
15
Align the Fold Mirror
16
Adjust Vertical Boresight Angle
18
Adjust Horizontal Boresight
19
Yellow Notch Filter Color Calibration
21
Align the Lamp with Lamploc
25
Adjust DMD Convergence
25
Manually Override the Shutter
26
Parts and Module Replacement
27
Inspect the Card Cage Filter
27
Remove the Service Panel
28
Clean a Washable Filter
29
Remove the Top Lid
30
Remove the Front Skin
30
Remove the Touch Panel Controller
31
Remove the High Security and Light Engine Lid
32
Remove the Card Cage Skin
33
Remove the Rear Skin
34
Remove the Exhaust Panel Skin
34
Remove the Safety Shield
35
Replace the Lamp
36
Remove the Existing Lamp
36
Install the New Lamp
38
Add the Lamp to the Lamp History
38
Remove the Lens
39
Replace the Standby Power Supply
39
Remove the Low Voltage Power Supply
40
Remove the Projector Feet
40
Remove the Lamp Door Interlock
41
Replace the Lamp Power Supply
41
Remove the Lamp Adjust Assembly
42
Remove the Reflector Assembly
42
Replace the UV Filter
43
Replace the Light Engine
44
Replace the Douser Assembly
45
Remove the Integrated Motor Control Board
46
Remove the Environmental Board
47
Remove the Lens Mount
47
Remove the AC Line Filters
48
110V AC Line Filter
48
Card Cage
49
Remove the Card Cage
49
Remove the Projector Intelligence Board
50
Remove the Integrated Cinema Processor
52
Remove the Backplane
53
Replace the Marriage Interlock Switch
54
Fans
54
Remove the Cathode and Anode Blowers (Fans 1 and 2)
54
Remove the Radiator Fan (Fan 3)
55
Remove the Light Engine Fan (Fan 4)
55
Remove the Fan Pack (Fans 5, 6, 7, and 8)
56
Remove the Radiator Filter
57
Remove the Liquid Cooling Assembly
57
Integrator Assembly
57
Remove the Contrast Aperture Plate
58
Remove the Light Sensor Module
59
Remove the Cold Mirror
59
Remove Fold Mirror 1
60
Remove Fold Mirror 2
61
Remove the Yellow Notch Filter (YNF)
61
Remove the Illumination Optic System
62
Cleaning Projector Optics
63
Safety Precautions
63
Recommended Service Kit
63
Clean Projector Optics
64
Prepare the Projector for Service
64
Clean the Light Engine Prism
64
Clean the UV Filter
65
Clean the Projection Lens
66
Clean the Reflector
67
Clean the Integrator
67
Manage Projector Files
69
Add an Upgrade File
69
Remove an Upgrade File
69
Install an Upgrade
69
Back up Projector Settings and Information
70
Restore a File
70
Restore Factory Default Settings
70
Move Files to the Projector
70
Delete Projector Files
71
Troubleshooting
73
Projector Functionality
73
Lamp Functionality
74
Display Issues
74
Available Replacement Parts and Modules
77
Lamp and Filter Assemblies
77
Light Engine
77
Lamp Power Supply, Igniter, and Power Supplies
77
Optical Assemblies
78
PCB Assemblies
78
Fan Assemblies
78
Miscellaneous
78
Optional Accessories
79
Optional Lenses
79
Interconnections
81
Exploded Views
83
Internal View
84
Advertisement
Christie CP2215 Quick Start Manual (38 pages)
projection systems
Brand:
Christie
| Category:
Projector
| Size: 7.27 MB
Table of Contents
Table of Contents
3
Installation and Setup
5
Safety Precautions
5
Ac/Power Precautions
6
Power Cords and Attachments
6
Lamp Precautions
7
Projector Components - Front
7
Projector Components - Rear
8
Position the Projector
8
Adjust Tilt and Level the Projector
9
Install the Touch Panel Controller
9
Connect the Exhaust Duct
10
Install the Lens
11
Install the Lamp
12
Connect Devices to the Projector
14
Projector Connections and Status Leds
14
Connect the Projector to a Computer
16
Connect Devices to the 3D Terminal
16
Connect Devices to the GPIO Port
16
Connect Devices to the Scci Port
17
Connect Power
18
Turn the Projector on
19
Log on to the Projector
19
Activate Marriage
20
Add the Projector to a Network
20
Add the Lamp Information to the Lamp History
21
Turn the Lamp on
21
Align the Lamp with Lamploc
21
Adjust the Image to Fit Your Screen
22
Play Content
23
Unencrypted Content
23
Encrypted Content
23
Maintenance
24
Inspect Ventilation
24
Check the Coolant Level
24
Clean the Radiator Filter
25
Inspect the Lamp
26
Inspect and Clean Optics
26
Clean the Lens
27
Replace the Lamp
27
Remove the Existing Lamp
28
Install the New Lamp
29
Inspect the Card Cage Filter
31
Cleaning a Washable Filter
31
Replace the Lens
32
Specifications
33
Power Requirements
33
AC Input (A)
33
UPS AC Input (B)
33
Lamp
34
Physical Specifications
34
Regulatory
35
Safety
35
Electro-Magnetic Compatibility
35
Environmental
35
Certification Approvals
35
Environment
36
Operating Environment
36
Non-Operating Environment
36
Accessories
37
Standard (Sold with Product)
37
Optional Accessories
37
Christie CP2215 Technical Bulletin (8 pages)
Brand:
Christie
| Category:
Projector
| Size: 0.13 MB
Table of Contents
Recommended Supplies
2
Preparing the Projector for Service
3
Cleaning the Light Engine Prism
3
Cleaning the UV Filter
3
Cleaning the Projection Lens
4
Cleaning the Reflector
5
Cleaning the Integrator
6
Supporting Documentation
7
Technical Support
7
Christie CP2215 Technical Bulletin (6 pages)
Replacing the ICP Battery
Brand:
Christie
| Category:
Projector
| Size: 0.89 MB
Table of Contents
Backup Projector Settings and Information
2
Prepare the Projector for Service
2
Activate Marriage
4
Technical Support
6
Christie CP2215 Brochure & Specs (2 pages)
Digital cinema projection
Brand:
Christie
| Category:
Projector
| Size: 0.45 MB
Christie CP2215 Manual (2 pages)
Preparing Projectors for Initial Use
Brand:
Christie
| Category:
Projector
| Size: 0.14 MB
Advertisement
Related Products
Christie Solaria CP2210
Christie CP2230
Christie CP2220
Christie CP2208
Christie CP2208-LP
Christie CP2000-MR
Christie CP2000-M
Christie CP2000-SB
Christie CP2000-XB
Christie CP2309-RGB
Christie Categories
Projector
Monitor
Projector Accessories
Racks & Stands
Speakers
More Christie Manuals
Login
Sign In
OR
Sign in with Facebook
Sign in with Google
Upload manual
Upload from disk
Upload from URL