Sign In
Upload
Manuals
Brands
Christie Manuals
Projector
CP2220
Christie CP2220 Manuals
Manuals and User Guides for Christie CP2220. We have
10
Christie CP2220 manuals available for free PDF download: User Manual, Setup Manual, Installation And Setup Manual, Instruction Sheet, Technical Bulletin, Manual
Christie CP2220 User Manual (212 pages)
Brand:
Christie
| Category:
Projector
| Size: 15.84 MB
Table of Contents
Table of Contents
5
Using this Manual
11
Typographical Notations
11
Safety Warnings and Guidelines
12
Labels and Marking
12
General Precautions
12
AC / Power Precautions
13
Lamp Precautions
13
Wear Protective Clothing
13
Cool the Lamp Completely
14
Purchase Record and Service Contacts
14
Projector Overview
15
Key Features
15
How the Projector Works
16
Projector Components - Overview
16
Air Filter Cover and Air Filter
17
Manual Douser Override
17
Exhaust Duct and Vane Switch
17
Adjustable Feet
17
Lamp Door and Lamps
17
LED Status Indicators
17
Motorized Auxiliary Lens Mount (Optional)
17
Projection Lens
18
Connector
18
Security Locks
18
Source and Communication Panel
18
Touch Panel Controller (TPC)
19
List of Components
19
2: Installation and Setup
21
Site Requirements
21
Physical Operating Environment
21
External Exhaust Ducting
21
Permanent Power Connection
21
Tools Required for Installation
21
General Installation Safety and Warning Guidelines
22
Installation Instructions
23
Connecting Sources
33
Connecting for Communications
35
Maximizing Light Output
36
Calibrating Screen Brightness (Fl)
36
Basic Image Alignment
37
Basic Optical Alignment Procedure
37
Offset and Boresight Alignment
37
Adjust Offset
38
Adjusting Left/Right Boresight
38
Adjust Top/Bottom Boresight
40
Add Anamorphic Lens
41
Wide Converter Lens
41
Fold Mirror and Convergence Adjustments
41
DMD Convergence
41
Fold Mirror Adjustment
42
Calibrating the System
43
Color Calibration
43
Electronic Screen Masking
43
Powering Up/Powering down the Projector
45
Powering up the Projector
45
Powering down the Projector
46
Projector Power States
46
Using the Touch Panel Controller (TPC)
46
Main Panel
47
Aux Lens
49
Lens Adjust
49
Test Patterns
50
Navigating the User Interface
51
Title Bar
51
Menu Button
51
On Screen Keyboard
52
User Access and Rights
52
TPC Windows
54
Status Window
54
Alarm Window
58
Projector LED Status Indicators
59
Diagnostics Window
60
Diagnostics: Interrogator Window
60
Diagnostics: SMPTE Errors Window
61
Diagnostics: System Logs Window
62
Diagnostics: DLP Management Window
63
Network Devices
64
Channel Setup Windows
65
Channel Setup: Config 1 Window
66
Channel Setup: Config 2 Window
68
Channel Setup: 3D Control Window
69
Advanced Setup Window
72
Advanced Setup: Lamp Power / Liteloc™ Setup Window
73
Advanced Setup: Lamp History Window
75
Add Lamp Window
76
Advanced Setup: Lamploc™ Setup Window
77
Advanced Setup: ILS File Setup Window
78
Advanced Setup: Lens Setup Window
80
Advanced Setup: Source File Setup Window
81
Advanced Setup: Screen File Setup Window
84
Advanced Setup: MCGD File Setup Window
87
Advanced Setup: TCGD File Setup Window
88
Administrator Setup Window
90
Administrator Setup: Preferred Channel Setup Window
90
Administrator Setup: Preferred Test Pattern Setup Window
91
Administrator Setup: Preferences Window
93
Administrator Setup: Content Devices Configuration
94
Administrator Setup: Time Setup Window
95
Administrator Setup: Communications Configuration Window
96
Subnet Mask
97
Administrator Setup: Network Devices Setup Window
98
Administrator Setup: GPIO Setup Window
99
Administrator Setup: Foot Lamberts Calibration Window
100
Administrator Setup: User Accounts Window
103
To Add a New User
104
Administrator Setup: Upgrade Window
105
Steps to Install an Upgrade Package
105
Service Setup
109
Service Setup: File Management Window
109
To Restore Backup Files
110
Service Setup: LD Marriage Window
110
Service Setup: System Access Window
114
Service Setup: IMB Marriage Window
115
Administrator Setup: System Access Window
116
About Window
117
Help Window
118
Working with the Lamp
119
Adjusting Lamp Power
119
Using the Lamp Change Wizard
121
Adjusting Lamp Position (Lamploc™)
123
Automatically Adjusting the Lamp Position Using Lamploc
124
Calibrating Screen Brightness (Fl)
125
Age of a Lamp
125
Working with the Lenses
126
Lens Mount Functions
127
Zoom
127
Focus
127
Offsets
127
Working with 3D
127
Hardware Requirements for 3D Cinema Setups
128
Hardware Setup
129
Installation for 3D Servers with Ycxcz Interface
130
Procedure Overview
130
Lamp Instructions
130
Measured Color Gamut Data (MCGD) Instructions
130
Channel Setup Instructions
131
System Test Pattern
134
Verify 3D Cinema Content
137
Troubleshooting
137
Cinema Operation
138
Image Formats
138
Projector Variables: Using an Anamorphic Lens
138
Projector Variables: Using a Wide Converter Lens
139
Theatre Variables: Masking
139
Non-Cinema Operation
140
Selecting a Source
140
AC / Power Precautions
141
Lamp Precautions
141
Wear Protective Clothing
142
Cool the Lamp Completely
142
Maintaining Proper Cooling
142
Ventilation
142
Light Engine Air Filter
142
Liquid Cooling Air Filter
143
Liquid Cooler
143
Filling the Coolant Reservoir
143
Exhaust Duct and Lamp Fan Interlocks
143
Maintenance and Cleaning
144
Lamp
144
Optical
144
Cleaning the Lens
145
Cleaning the Lamp Reflector
145
Other Components
146
Lamp Blower
146
Igniter
146
Airflow Interlocks
146
Laminar Airflow Device (LAD)
146
Lamp Replacement
147
Rotating the Lamp
150
Air Filter Replacement
150
Light Engine Air Filter
150
Liquid Cooling Air Filter Replacement
151
Lens Replacement
151
Power
153
Projector Does Not Power on
153
Lamp
154
Lamp Does Not Ignite
154
Lamp Suddenly Goes off
154
Flicker, Shadows or Dimness
155
Lamploc™ Does Not Seem to Work
155
Liteloc™ Does Not Seem to Work
155
Tpc
156
Ethernet
156
Displays
156
Blank Screen, no Display of Cinema Image
156
Severe Motion Artifacts
156
Image Appears Vertically Stretched or 'Squeezed' into Center of Screen
157
No Image, Just Pink Snow
157
Colors in the Display Are Inaccurate
157
Display Is Not Rectangular
157
Display Is "Noisy
157
Display Has Suddenly Frozen
158
Data Is Cropped from Edges
158
The Projector Is ON, but There Is no Display
158
The Display Is Jittery or Unstable
158
The Display Is Faint
158
The Upper Portion of the Display Is Waving, Tearing or Jittering
158
Portions of the Display Are Cut off or Warped to the Opposite Edge
159
Display Appears Compressed (Vertically Stretched)
159
Display Quality Appears to Drift from Good to Bad, Bad to Good
159
Display
161
Panel Resolution and Refresh Rate
161
Achievable Brightness (Measured at Screen Center)
161
Achievable Contrast Ratio
161
Color and Gray Scale
161
White Point
161
Gamma
161
Source Signal Compatibility
162
Cinema Inputs
162
Non-Cinema DVI Inputs (for Alternate Content)
164
Control Signal Compatibility
165
Ethernet Port
165
Rs232-Pib
165
Rs232-Icp
165
GPIO Port
165
Simple Contact Closure Interface (SCCI) Port
165
Port
166
USB 1 Port
166
USB 2 Port
166
MALM (Located on Auxiliary Input Panel)
166
Touch Panel Controller
166
Tpc-660E
166
Tpc-650H
167
Power Requirements
167
AC Input
167
UPS AC Input
167
Lamp
167
Physical Specifications
168
Regulatory
168
Safety
168
Electro-Magnetic Compatibility
168
Emissions
168
Immunity
168
Environmental
169
Environment
169
Operating Environment
169
Accessories
169
Standard (Sold with Product)
169
Accessories (Sold Separately)
169
A: Intelligent Lens System
171
Intelligent Lens System
171
Lens Mount Functions
173
Reset the ILS
174
Calibrate the ILS
174
Offset and Boresight Alignment
175
Adjust Offset
175
Adjust Left/Right Boresight
176
Adjust Top/Bottom Boresight
177
Advertisement
Christie CP2220 User Manual (174 pages)
Brand:
Christie
| Category:
Projector
| Size: 17.96 MB
Table of Contents
Table of Contents
5
1 : Introduction
11
General Precautions
11
Labels and Marking
11
Lamp Precautions
12
Power Warnings
12
Contacting Your Dealer
13
2 : Installation and Setup
15
Site Requirements
15
Tools Required for Installation
15
Projector Components
16
Adjustable Feet
16
Projection Lens
17
Input Panel
17
Installation Safety and Warning Guidelines
19
Position the Projector
19
Adjust Tilt and Level the Projector
20
Install the Touch Panel Controller (TPC)
21
Connect External Exhaust Ducting
22
Determine the Projector Exhaust CFM Value
22
Install the Primary Lens
23
Install the Optional Anamorphic Lens
23
Install the Optional Wide Converter Lens
24
Install the Lamp
24
Connect the Projector to AC Power with a Permanent Connection
25
Connect the Projector to AC Power with a Pluggable Type B Connection
27
Configure the Optional Uninterrupted Power Supply
28
Connect Sources and Turn the Projector on
29
3 : Connect Devices to the Projector
31
Connect a Computer or Server
33
Connecting Devices to the SCCI Port
34
Connecting Devices to the GPIO Port
35
Connecting Devices to the 3D Connector
37
4 : Adjust the Image
39
Maximize Light Output
39
Calibrate Screen Brightness (Fl)
39
Basic Image Alignment
39
Adjust Offset
40
Adjust Offset with an ILS
40
Adjust Left and Right Boresight
40
Adjust Top and Bottom Boresight
42
Adjust Top and Bottom Boresight with an ILS
43
Adjust DMD Convergence
43
Fold Mirror Adjustment
44
Calibrating the System
45
Color Calibration
45
CP2220 User Manual I
45
Electronic Screen Masking
45
Working with 3D
45
Display Requirements
45
Hardware Setup
46
Install a 3D Server with an Ycxcz Interface
46
Edit the Default 3D Lamp File
47
Define a Measured Color Gamut Data File
47
Edit the 3D Flat 1998 X 1080 Channel
47
Edit the 3D Scope 2048 X 858 Channel
48
Display 3D Diagnostic Test Patterns
48
Verify 3D Cinema Content
52
Troubleshooting
52
5 : Operation
55
Turn the Projector on
55
Turn the Projector off
55
Projector Power States
55
Projector LED Status Indicators
56
Work with the Lamp
56
Adjust Lamp Power
56
Change the Lamp Power Percentage
56
Use Lamploc to Adjust the Lamp Position
56
Manually Adjust the Lamp Position
57
View Lamp Information
57
Receive an Alarm When a Lamp Reaches Its Expiry Date
57
Receive an Alarm When a Lamp Needs to be Rotated
57
Lamp Expiry Hours
58
Minimum and Maximum Lamp Power Ratings
58
Work with Lenses
58
Access the ILS
59
Enable ILS on a Channel
59
Alter the Active ILS Settings
59
Maintain Lens Position Regardless of Selected Channel
59
Reset the ILS
59
Calibrate the ILS
60
Present Movies
60
Connecting Sources
60
Using an Anamorphic Lens
60
Using a Wide Converter Lens
60
Masking
61
Displaying Non-Cinema Content
61
Selecting a Source
61
6 : Projector Menus
63
The Touch Panel Controller (TPC)
63
Main Screen
64
Open the on Screen Keyboard
66
User Access and Rights
67
Status Window
68
Alarm Window
73
Interrogator Window
73
SMPTE Errors Window
75
System Logs Window
76
DLP Management Window
77
Network Devices
78
Channel Setup Windows
79
Active Channel
79
Config 1 Window
80
Config 2 Window
81
Control Window
82
Advanced Setup Windows
85
Lamp Power / Liteloc™ Setup Window
85
Lamp History Window
87
Add Lamp Window
88
Lamploc™ Setup Window
89
ILS File Setup Window
91
Lens Setup Window
92
Source File Setup Window
93
Screen File Setup Window
94
MCGD File Setup Window
95
TCGD File Setup Window
96
Administrator Setup Windows
97
System Access Window
97
Preferred Channel Setup Window
98
Preferred Test Pattern Setup Window
99
Preferences Window
100
Content Devices Configuration Window
101
Time Setup Window
102
Scheduler Window
103
Communications Configuration Window
105
Network Devices Setup Window
106
GPIO Setup Window
107
Foot Lamberts Calibration Window
108
User Accounts Window
109
Upgrade Window
111
Service Setup Windows
112
File Management Window
113
Marriage Window
114
System Access Window
115
Fan Monitoring Configuration Window
116
Digital Convergence Window
117
IMB Marriage Window
118
About Window
119
Help Window
120
7 : Maintenance
121
Inspect Ventilation
121
Fill the Coolant Reservoir
121
Inspect the Lamp
122
Inspect and Clean Optics
122
Clean the Lens
122
Clean the Lamp Reflector
123
Inspect and Clean the Lamp Blower
123
Replace the Lamp
123
Rotate the Lamp
126
Replace the Light Engine Air Filter
126
Replace the Liquid Cooling Air Filter
127
Replace the Lens
127
8 Troubleshooting
129
Projector Does Not Turn on
129
Lamp Does Not Ignite
129
Lamp Suddenly Turns off
130
Flicker, Shadows, or Dimness
130
Lamploc™ Not Working
130
Liteloc™ Not Working
130
Tpc
130
Cannot Establish Communication with the Projector
131
Blank Screen, no Display of Cinema Image
131
Severe Motion Artifacts
131
Image Appears Vertically Stretched or Squeezed into Center of Screen
131
No Image, Just Pink Snow
131
Inaccurate Display Colors
131
Display Is Not Rectangular
132
Display Is Noisy
132
Display Has Suddenly Frozen
132
Data Is Cropped from Edges
132
The Projector Is On, but There Is no Display
132
The Display Is Jittery or Unstable
133
The Display Is Faint
133
Portions of the Display Are Cut off or Warped to the Opposite Edge
133
Display Appears Compressed (Vertically Stretched)
133
Inconsistent Picture Quality
133
Display
135
Panel Resolution and Refresh Rate
135
Achievable Brightness (Measured at Screen Center
135
Achievable Contrast Ratio
135
Color and Gray Scale
135
White Point
135
Gamma
135
Source Signal Compatibility
136
Cinema Inputs
136
Non-Cinema DVI Inputs (for Alternate Content
138
Control Signal Compatibility
139
Ethernet Port
139
Rs232-Pib
139
Rs232-Icp
139
GPIO Port
139
Simple Contact Closure Interface (SCCI) Port
139
Port
140
USB 1 Port
140
USB 2 Port
140
MALM (Located on Auxiliary Input Panel
140
Touch Panel Controller
140
Tpc-660E
140
Tpc-650H
141
Power Requirements
141
AC Input
141
UPS AC Input
141
Lamp
141
Physical Specifications
142
Regulatory
142
Safety
142
Electro-Magnetic Compatibility
142
Environment
143
Operating Environment
143
Non-Operating Environment
143
Accessories
143
Standard (Sold with Product
143
Accessories (Sold Separately
143
Function Codes
145
Christie CP2220 User Manual (174 pages)
Brand:
Christie
| Category:
Projector
| Size: 11.6 MB
Table of Contents
Table of Contents
7
1 : Introduction
13
General Precautions
13
Labels and Marking
13
Lamp Precautions
14
Power Warnings
14
Contacting Your Dealer
15
2 : Installation and Setup
17
Site Requirements
17
Tools Required for Installation
17
Cinema Projector Components
18
Projection Lens
19
Installation Safety and Warning Guidelines
20
Position the Cinema Projector
21
Adjust Tilt and Level the Cinema Projector
21
Install the Touch Panel Controller
22
Connect External Exhaust Ducting
22
Determine the Cinema Projector Exhaust CFM Value
23
Install the Primary Lens
23
Install the Optional Anamorphic Lens
24
Install the Optional Wide Converter Lens
25
Install the Lamp
25
Connect the Cinema Projector to AC Power with a Permanent Connection
26
Connect the Cinema Projector to AC Power with a Pluggable Type B Connection
28
Configure the Optional Uninterrupted Power Supply
28
Connect Sources and Turn the Cinema Projector on
29
3 : Connect Devices to the Cinema Projector
31
Connect a a Communications Device
32
Connecting Devices to the SCCI Port
33
Connecting Devices to the GPIO Port
34
Connecting Devices to the 3D Connector
36
4 : Adjust the Image
37
Maximize Light Output
37
Calibrate Screen Brightness (Fl)
37
Basic Image Alignment
37
Adjust Offset
38
Adjust Offset with an ILS
38
Adjust Left and Right Boresight
38
Adjust Top and Bottom Boresight
40
Adjust Top and Bottom Boresight with an ILS
41
Adjust DMD Convergence
41
Fold Mirror Adjustment
42
Calibrating the System
43
Color Calibration
43
CP2220 User Manual I
43
Electronic Screen Masking
43
Working with 3D
43
Display Requirements
43
Hardware Setup
44
Install a 3D Server with an Ycxcz Interface
44
Edit the Default 3D Lamp File
45
Define a Measured Color Gamut Data File
45
Edit the 3D Flat 1998 X 1080 Channel
45
Edit the 3D Scope 2048 X 858 Channel
46
Display 3D Diagnostic Test Patterns
46
Verify 3D Cinema Content
50
Troubleshooting
50
5 : Operation
53
Turn the Cinema Projector on
53
Turn the Cinema Projector off
53
Cinema Projector Power States
53
Cinema Projector LED Status Indicators
54
Work with the Lamp
54
Adjust Lamp Power
54
Change the Lamp Power Percentage
54
Use Lamploc to Adjust the Lamp Position
54
Manually Adjust the Lamp Position
55
View Lamp Information
55
Receive an Alarm When a Lamp Reaches Its Expiry Date
55
Receive an Alarm When a Lamp Needs to be Rotated
55
Lamp Expiry Hours
56
Minimum and Maximum Lamp Power Ratings
56
Work with Lenses
56
Access the ILS
57
Enable ILS on a Channel
57
Alter the Active ILS Settings
57
Maintain Lens Position Regardless of Selected Channel
57
Reset the ILS
57
Calibrate the ILS
58
Present Movies
58
Connecting Sources
58
Using an Anamorphic Lens
58
Using a Wide Converter Lens
58
Masking
59
Displaying Non-Cinema Content
59
Selecting a Source
59
6 : Cinema Projector Menus
61
The Touch Panel Controller (TPC)
61
Main Screen
62
Open the on Screen Keyboard
64
User Access and Rights
65
Status Window
66
Alarm Window
71
Interrogator Window
71
SMPTE Errors Window
73
System Logs Window
74
DLP Management Window
75
Network Devices
76
Channel Setup Windows
77
Config 1 Window
78
Config 2 Window
79
Control Window
80
Advanced Setup Windows
83
Lamp Power / Liteloc™ Setup Window
83
Lamp History Window
85
Add Lamp Window
86
Lamploc™ Setup Window
87
ILS File Setup Window
89
Lens Setup Window
90
Source File Setup Window
91
Screen File Setup Window
92
MCGD File Setup Window
93
TCGD File Setup Window
94
Administrator Setup Windows
95
System Access Window
95
Preferred Channel Setup Window
96
Preferred Test Pattern Setup Window
97
Preferences Window
98
Content Devices Configuration Window
99
Time Setup Window
100
Scheduler Window
101
Communications Configuration Window
103
Network Devices Setup Window
104
GPIO Setup Window
105
Foot Lamberts Calibration Window
106
User Accounts Window
107
Upgrade Window
109
Service Setup Windows
110
File Management Window
111
Marriage Window
112
System Access Window
113
Fan Monitoring Configuration Window
114
Digital Convergence Window
115
IMB Marriage Window
116
About Window
117
Help Window
118
7 : Maintenance
119
Inspect Ventilation
119
Fill the Coolant Reservoir
119
Inspect the Lamp
120
Inspect and Clean Optics
120
Clean the Lens
120
Clean the Lamp Reflector
121
Inspect and Clean the Lamp Blower
121
Replace the Lamp
121
Rotate the Lamp
124
Replace the Light Engine Air Filter
124
Replace the Liquid Cooling Air Filter
125
Replace the Lens
125
8 : Troubleshooting
127
Cinema Projector Does Not Turn on
127
Lamp Does Not Ignite
127
Lamp Suddenly Turns off
128
Flicker, Shadows, or Dimness
128
Lamploc™ Not Working
128
Liteloc™ Not Working
128
Tpc
128
Cannot Establish Communication with the Cinema Projector
129
Blank Screen, no Display of Cinema Image
129
Severe Motion Artifacts
129
Image Appears Vertically Stretched or Squeezed into Center of Screen
129
No Image, Just Pink Snow
129
Inaccurate Display Colors
129
Display Is Not Rectangular
130
Display Is Noisy
130
Display Has Suddenly Frozen
130
Data Is Cropped from Edges
130
The Cinema Projector Is On, but There Is no Display
130
The Display Is Jittery or Unstable
131
The Display Is Faint
131
Portions of the Display Are Cut off or Warped to the Opposite Edge
131
Display Appears Compressed (Vertically Stretched)
131
Inconsistent Picture Quality
131
Display
133
Panel Resolution and Refresh Rate
133
Achievable Brightness (Measured at Screen Center
133
Achievable Contrast Ratio
133
Color and Gray Scale
133
White Point
133
Gamma
133
Source Signal Compatibility
134
Cinema Inputs
134
Non-Cinema DVI Inputs (for Alternate Content
136
Control Signal Compatibility
137
Ethernet Port
137
Rs232-Pib
137
Rs232-Icp
137
GPIO Port
137
Simple Contact Closure Interface (SCCI) Port
137
Port
138
USB 1 Port
138
USB 2 Port
138
MALM (Located on Auxiliary Input Panel
138
Touch Panel Controller
138
Tpc-660E
138
Tpc-650H
139
Power Requirements
139
AC Input
139
UPS AC Input
139
Lamp
139
Physical Specifications
140
Regulatory
140
Safety
140
Electro-Magnetic Compatibility
140
Environment
141
Operating Environment
141
Non-Operating Environment
141
Accessories
141
Standard (Sold with Product
141
Accessories (Sold Separately
141
Function Codes
143
Advertisement
Christie CP2220 Setup Manual (70 pages)
Cinema Projector
Brand:
Christie
| Category:
Projector
| Size: 4.4 MB
Table of Contents
Table of Contents
7
1 : Introduction
11
General Precautions
11
Labels and Marking
11
Lamp Precautions
12
Power Warnings
12
Contacting Your Dealer
13
2 : Installation and Setup
15
Site Requirements
15
Tools Required for Installation
15
Cinema Projector Components
16
Projection Lens
17
Input Panel
17
Installation Safety and Warning Guidelines
19
Position the Cinema Projector
19
Adjust Tilt and Level the Cinema Projector
20
Install the Touch Panel Controller (TPC)
21
Connect External Exhaust Ducting
22
Determine the Cinema Projector Exhaust CFM Value
22
Install the Primary Lens
23
Install the Optional Anamorphic Lens
23
Install the Optional Wide Converter Lens
24
Install the Lamp
24
Connect the Cinema Projector to AC Power with a Permanent Connection
25
Connect the Cinema Projector to AC Power with a Pluggable Type B Connection
27
Configure the Optional Uninterrupted Power Supply
28
Connect Sources and Turn the Cinema Projector on
29
3 : Connect Devices to the Cinema Projector
31
Connect a Communication Device
32
Connect Devices to the SCCI Port
33
Connect Devices to the GPIO Port
34
Connect Devices to the 3D Connector
35
4 : Adjust the Image
37
Maximize Light Output
37
Calibrate Screen Brightness (Fl)
37
Basic Image Alignment
37
Adjust Offset
38
Adjust Offset with an ILS
38
Adjust Left and Right Boresight
38
Adjust Top and Bottom Boresight
40
Adjust Top and Bottom Boresight with an ILS
41
Adjust DMD Convergence
41
Fold Mirror Adjustment
42
Calibrate the System
43
Color Calibration
43
CP2220 Setup Guide I
43
Electronic Screen Masking
43
Work with 3D
43
Display Requirements
43
Hardware Setup
44
Install a 3D Server with an Ycxcz Interface
44
Edit the Default 3D Lamp File
45
Define a Measured Color Gamut Data File
45
Edit the 3D Flat 1998 X 1080 Channel
45
Edit the 3D Scope 2048 X 858 Channel
46
Display 3D Diagnostic Test Patterns
46
Verify 3D Cinema Content
50
Troubleshooting
50
Turn the Cinema Projector on
53
Turn the Cinema Projector off
53
The Touch Panel Controller (TPC)
53
Inspect Ventilation
55
Fill the Coolant Reservoir
55
Inspect the Lamp
56
Inspect and Clean Optics
56
Clean the Lens
56
Clean the Lamp Reflector
57
Inspect and Clean the Lamp Blower
57
Replace the Lamp
57
Rotate the Lamp
60
Replace the Light Engine Air Filter
61
Replace the Liquid Cooling Air Filter
61
Replace the Lens
61
Cinema Projector Does Not Turn on
63
Lamp Does Not Ignite
63
Lamp Suddenly Turns off
64
Flicker, Shadows, or Dimness
64
Lamploc™ Not Working
64
Liteloc™ Not Working
64
Tpc
64
Cannot Establish Communication with the Cinema Projector
65
Blank Screen, no Display of Cinema Image
65
Severe Motion Artifacts
65
Image Appears Vertically Stretched or Squeezed into Center of Screen
65
No Image, Just Pink Snow
65
Display Is Not Rectangular
66
The Display Is Jittery or Unstable
67
Christie CP2220 Installation And Setup Manual (19 pages)
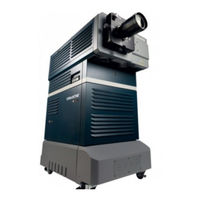
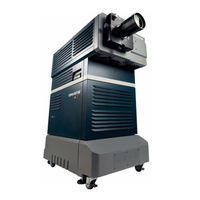
Christie Rack Mount Pedestal
Brand:
Christie
| Category:
Racks & Stands
| Size: 28.29 MB
Table of Contents
Table of Contents
3
Introduction
4
Affected Products
4
Key Features
4
What Is in the Box
4
Pedestal Components
5
Pedestal Component Mounting Options
6
Technical Support
6
Installation and Setup
7
Initalling the Pedestal Feet and Casters
7
Adjusting the Pedestal Height
8
Positioning the Pedestal
11
Leveling the Pedestal
11
Installing the Foot Brackets
11
Installing the Projector Foot Locks
13
Configuring the Rack for Side-Mounting
13
Troubleshooting
16
Projector Feet Do Not Extend or Contract
16
How Do I Install the Lamp Power Supply
16
Specifications
17
Supported Projectors
17
Physical Specifications
18
Christie CP2220 Technical Bulletin (8 pages)
Brand:
Christie
| Category:
Projector
| Size: 0.13 MB
Table of Contents
Recommended Supplies
2
Preparing the Projector for Service
3
Cleaning the Light Engine Prism
3
Cleaning the UV Filter
3
Cleaning the Projection Lens
4
Cleaning the Reflector
5
Cleaning the Integrator
6
Supporting Documentation
7
Technical Support
7
Christie CP2220 Technical Bulletin (6 pages)
Replacing the ICP Battery
Brand:
Christie
| Category:
Projector
| Size: 0.89 MB
Table of Contents
Backup Projector Settings and Information
2
Prepare the Projector for Service
2
Activate Marriage
4
Technical Support
6
Christie CP2220 Instruction Sheet (9 pages)
Coolant Refill
Brand:
Christie
| Category:
Projector
| Size: 6.9 MB
Christie CP2220 Instruction Sheet (6 pages)
Widen a Cathode Clamp
Brand:
Christie
| Category:
Projector
| Size: 2.16 MB
Christie CP2220 Manual (2 pages)
Preparing Projectors for Initial Use
Brand:
Christie
| Category:
Projector
| Size: 0.14 MB
Advertisement
Related Products
Christie CP2215
Christie Solaria CP2210
Christie CP2230
Christie CP2208
Christie CP2208-LP
Christie CP2000-S
Christie CP2000-Z
Christie CP2409-RBe
Christie CP2415-Xe
Christie CP2306-RGBe
Christie Categories
Projector
Monitor
Projector Accessories
Racks & Stands
Speakers
More Christie Manuals
Login
Sign In
OR
Sign in with Facebook
Sign in with Google
Upload manual
Upload from disk
Upload from URL