Sign In
Upload
Manuals
Brands
Christie Manuals
Projector
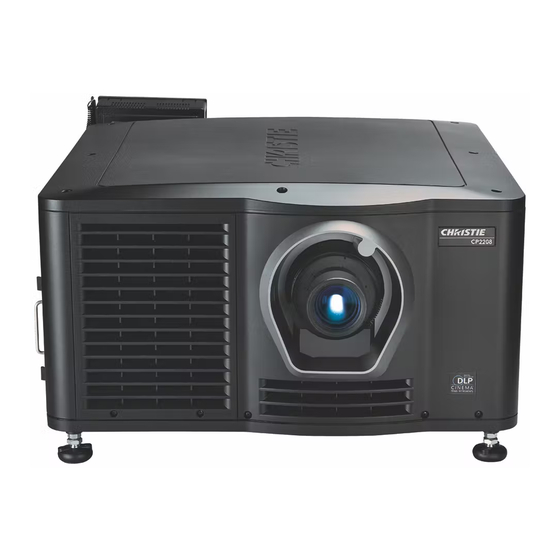
CP2208-LP
Christie CP2208-LP Manuals
Manuals and User Guides for Christie CP2208-LP. We have
3
Christie CP2208-LP manuals available for free PDF download: Service Manual, User Manual, Installation And Setup Manual
Christie CP2208-LP User Manual (66 pages)
Brand:
Christie
| Category:
Projector
| Size: 0 MB
Table of Contents
Table of Contents
3
Safety Precautions
8
Product Labels
8
General Hazards
8
Mandatory Action
9
Electrical Labels
9
Additional Hazard Labels
9
Laser Label
9
Important Safeguards
10
General Safety Precautions
10
Ac/Power Precautions
10
Light Intensity Hazard Distance
11
Projection Lens
12
Introduction
13
Projector Components (Front)
13
Projector Components (Rear)
14
Accessing the Projector and Running Diagnostics
15
The Touch Panel Controller
15
Logging on to the Projector
17
Viewing the Status of Projector Components
17
Running the Projector Interrogator
18
Retrieving System Logs
18
Running a Server Test
18
Responding to Alarms
19
Turning the Projector off
19
Managing the Digital Light Processing
20
Stopping Digital Light Processing Communication
20
Resetting the Digital Light Processing
20
Running a Digital Light Processing Self Test
20
Downloading an Integrated Cinema Processor Certificate
21
Disabling the Integrated Cinema Processor Signature Test
21
Managing the Light Source Information
22
Creating a New Light Source File
22
Modifying an Existing Light Source File
23
Enabling or Disabling Liteloc on a Light Source File
23
Adjusting Light Source Power
23
Verifying the Light Source Sensor Readings
24
Working with Channels
25
Creating a New Channel
25
Activating a Channel
28
Restoring Default Channel Settings
28
Changing the Channel Icon
28
Adding or Removing Preferred Channels
28
Managing Projector Setting Files
29
Creating a Source File
29
Modifying a Source File
29
Creating a Screen File
30
Modifying a Screen File
30
Creating a Measured Color Gamut Data File
30
Modifying a Measured Color Gamut Data File
31
Creating a Target Color Gamut Data File
31
Modifying a Target Color Gamut Data File
31
Creating a New Intelligent Lens System File
31
Editing an Existing Intelligent Lens System File
32
Enabling Automatic Intelligent Lens System Adjustments on a Channel
32
Resetting Intelligent Lens System File Settings
32
Adding a Lens Serial Number
33
Enabling an Automatic Intelligent Lens System on a Lens
33
Resetting the Lens Position on Projector Startup
33
Completing a Full Lens Calibration
33
Resetting the Intelligent Lens System and the Lens Position
34
Scheduling Events
35
Scheduling the Projector to Turn on or off
35
Editing a Scheduled Event
35
Deleting a Scheduled Event
36
Deleting All Scheduled Events
36
Turning off the Scheduler
36
Viewing and Modifying Projector Settings
37
Setting Projector and Touch Panel Controller Preferences
37
Adjusting Projector Time Settings
38
Adding or Modifying Projector Communication Settings
38
Adding a Network Device
39
Accessing a Network Device
39
Calibrating the Internal Light Meter
39
Viewing Processes and Programs Running on the Projector
39
Viewing Local or Remote Computer Settings
40
Viewing the Files on the Projector
40
Viewing and Modify Network Connections
40
Viewing Projector Information
40
Managing User Accounts
41
Interpreting User Access Permissions
41
Adding a User Account
41
Changing a User Account Password or Permissions
42
Deleting a User Account
42
Backing Up, Restoring, and Upgrading Projector Files
43
Adding an Upgrade File
43
Removing an Upgrade File
43
Installing an Upgrade File
43
Backing up Projector Settings and Information
44
Restoring a File
44
Restoring Factory Default Settings
44
Moving Files to the Projector
45
Deleting Projector Files
45
Test Patterns
46
Adding or Removing Preferred Test Patterns
46
Turning a Test Pattern on or off
46
Displaying a Full Screen Test Pattern
46
Viewing 3D Content
47
Display Requirements
47
3D Sync Terminal Pin Map
47
Setting up Hardware
49
Creating a High Frame Rate 3D File
49
Editing the Default 3D Light File
50
Defining a Measured Color Gamut Data File
50
Editing the 3D Flat 1998 X 1080 Channel
51
Editing the 3D Scope 2048 X 858 Channel
51
Displaying 3D Diagnostic Test Patterns
52
Verifying 3D Cinema Content
53
Troubleshooting 3D
53
Reversed 3D Effect (Pseudo 3D)
53
Image Is too Dark
53
No 3D Effect
54
Ghosting / Cross-Talk
54
Motion Artifacts
54
Disturbing Flashing in One Eye
54
Troubleshooting
55
Projector Functionality
55
Projector Does Not Turn on
55
Cannot Establish Communication with Projector
55
Display Issues
56
Flicker, Shadows, or Dimness
56
Blank Screen with no Display of Cinema Image
56
Severe Motion Artifacts
56
Image Is Vertically Stretched or Squeezed
56
Inaccurate Display Colors
57
Display Is Not Rectangular
57
Display Is Noisy
57
Display Has Suddenly Frozen
57
Projector Does Not Display Alternate Content
58
Display Is Unstable
58
Portions of the Display Are Cut off
58
Inconsistent Picture Quality
58
Touch Panel Controller Issues
59
Touch Panel Controller Fails to Initialize
59
Button Presses on the Touch Panel Controller Are Not Registering Correctly
59
Specifications
60
Physical Specifications
60
Power Specifications
60
Environmental Specifications
61
Display Specifications
61
Control Signal Compatibility
62
Touch Panel Controller Specifications
63
Accessories
63
Regulatory
64
Safety
64
Approvals
64
Electro-Magnetic Compatibility
64
Advertisement
Christie CP2208-LP Service Manual (94 pages)
Brand:
Christie
| Category:
Projector
| Size: 29 MB
Table of Contents
Table of Contents
3
Introduction
7
Projector Components (Front)
7
Projector Components (Rear)
8
Service Guidelines
9
Ordering Parts
9
Replacing Modules
9
Interconnections and Line Drawings
9
Servicing Live Equipment
9
Important Safeguards
11
General Safety Precautions
11
Ac/Power Precautions
12
Light Intensity Hazard Distance
12
Product Labels
13
General Hazards
13
Mandatory Action
14
Electrical Labels
14
Additional Hazard Labels
15
Laser Label
15
Service Setups
16
Turning the Projector on
16
Turning the Projector off
16
Adjusting the Fold Mirror
16
Calibrating the Yellow Notch Filter Color
17
Adjusting DMD Convergence
21
Preparing for Convergence
21
Evaluating the Convergence
22
Adjusting the Forematter Board Convergence
23
Evaluating the Convergence Adjustments
25
Manually Overriding the Shutter
25
Activating Marriage
26
Projector Connections
27
Parts and Module Replacement
29
Tools Required for Service
29
Index of Parts and Modules
29
Projector Covers and Feet
32
Removing the Top Skin
32
Removing the Service Door
33
Removing the Front Skin
33
Removing the Touch Panel Controller
35
Removing the Card Cage Skin
36
Removing the Rear Skin
37
Removing the Exhaust Panel Skin
38
Removing the High Security, Rear, and Light Engine Covers
40
Replacing a Projector's Foot
41
Filtration
42
Inspecting the Card Cage Filter
42
Inspecting the Light Engine Compartment Filter
43
Inspecting the Rear Radiator Filter
44
Cleaning a Washable Filter
45
Ventilation and Cooling
47
Replacing the Power Factor Correction and Power Supply Fans (Fans 1 and 2)
47
Replacing the Light Engine Intake Fan (Fan 3)
48
Replacing the Light Engine Blower Fan (Fan 4)
49
Replacing the Card Cage Fan Pack (Fans 5, 6, 7, and 8)
50
Replacing the Low Voltage Power Supply Fan (Fan 9)
51
Replacing the Radiator Fans
52
Replacing the Replacing the PW Heat Pipe Fans (H-PIPE TOP and H-PIPE BOT)
53
Replacing the PH Heat Sink Fans (PH HSINK TOP and PH HSINK BOT)
54
Replacing the PSU Fans (PSU EX R and PSU EX L)
54
Replacing the Liquid Cooling Module
55
Electronics
56
Replacing the Projector Intelligence Board
56
Replacing the Integrated Media Block
58
Replacing the Integrated Cinema Processor
59
Replacing the Backplane
60
Replacing the Remote Temperature Sensor Modules
61
Replacing the Light Sensor Module
61
Replacing the Bridge Board
61
Replacing the Fuse Boards
62
Replacing the Marriage Interlock Switch
62
Replacing the Laser Driver Board
63
Replacing the Integrated Motor Control Board
63
Replacing the Card Cage
63
Adjusting Boresight
65
Replacing the High Security Door Interlock Switch
67
Optics
68
Inspecting and Cleaning Optics
68
Recommended Service Kit
68
Cleaning the Lens
68
Replacing Fold Mirror One
69
Replacing Fold Mirror Two
70
Replacing the Light Module
70
Aligning the Light Module
72
Replacing the Shutter Assembly
76
Replacing the Light Engine Assembly
76
Replacing the Lens
78
Replacing the Lens Mount
79
Replacing the Yellow Notch Filter
79
Replacing the Illumination Optic System
80
Replacing the Contrast Aperture
80
Power Supplies
82
Replacing the Low Voltage Power Supply
82
Replacing the Standby Power Supply
82
Replacing the AC Input Assembly
83
Replacing the Power Factor Correction Unit
85
Replacing the Power Supply Unit
86
Test Patterns
87
Adding or Removing Preferred Test Patterns
87
Turning a Test Pattern on or off
87
Displaying a Full Screen Test Pattern
87
Specifications
89
Physical Specifications
89
Power Specifications
89
Environmental Specifications
90
Display Specifications
90
Control Signal Compatibility
91
Touch Panel Controller Specifications
92
Regulatory
92
Safety
92
Approvals
92
Electro-Magnetic Compatibility
93
Christie CP2208-LP Installation And Setup Manual (38 pages)
Brand:
Christie
| Category:
Projector
| Size: 1 MB
Table of Contents
Table of Contents
3
Safety Precautions
5
Product Labels
5
General Hazards
5
Mandatory Action
6
Electrical Labels
6
Additional Hazard Labels
6
Laser Labels
6
Important Safeguards
7
General Safety Precautions
7
Ac/Power Precautions
8
Light Intensity Hazard Distance
8
Introduction
11
Projector Components (Front)
11
Projector Components (Rear)
12
Installing and Setting up
13
Preparing the Installation Site
13
Lifting and Positioning the Projector
13
Adjusting Tilt and Leveling the Projector
14
Installing the Touch Panel Controller
15
Installing the Lens
16
Connecting Power
18
Turning the Projector on
19
Logging on to the Projector
19
Activating Marriage
20
Completing a Full Lens Calibration
21
Adjusting the Image
22
Adjusting the Image to Fit the Screen
22
Correcting Vignetting
23
Correcting the Keystone Effect
23
Adjusting Horizontal Keystone
23
Adjusting Vertical Keystone
23
Adjusting Boresight
24
Calibrating Screen Brightness (Fl)
26
Creating a New Light Source File
26
Connecting Devices to the Projector and Establishing Communication
28
Projector Connections
28
Connecting the Projector to a Computer
30
Adding or Modifying Projector Communication Settings
30
Playing Content
31
Test Patterns
32
Adding or Removing Preferred Test Patterns
32
Turning a Test Pattern on or off
32
Displaying a Full Screen Test Pattern
32
Specifications
33
Physical Specifications
33
Power Specifications
33
Environmental Specifications
34
Display Specifications
34
Control Signal Compatibility
35
Touch Panel Controller Specifications
36
Accessories
36
Regulatory
37
Safety
37
Electro-Magnetic Compatibility
37
Environmental
37
Advertisement
Advertisement
Related Products
Christie CP2215
Christie Solaria CP2210
Christie CP2230
Christie CP2220
Christie CP2208
Christie CP2000
Christie CP2320-RGB
Christie CP2315-RGB
Christie CP2308-G
Christie CP2308
Christie Categories
Projector
Monitor
Projector Accessories
Speakers
Racks & Stands
More Christie Manuals
Login
Sign In
OR
Sign in with Facebook
Sign in with Google
Upload manual
Upload from disk
Upload from URL